
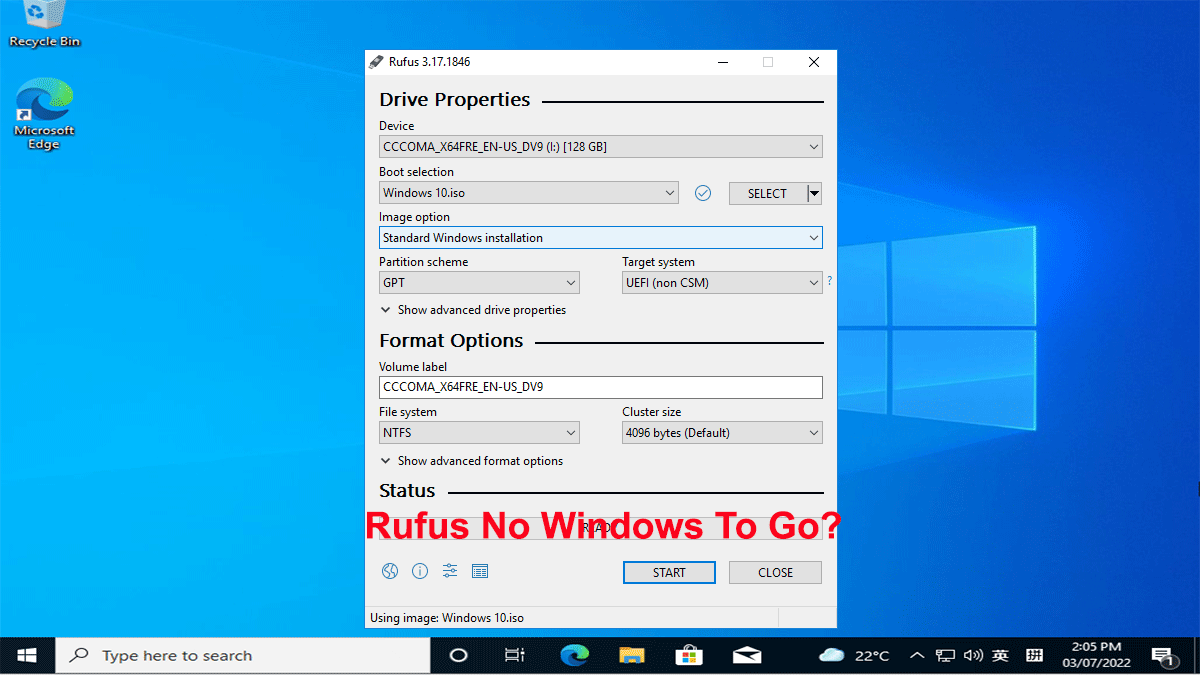
As we all know, Rufus is a popular and free applet for creating bootable USB drives. It includes a useful Windows To Go option that helps create a Windows To Go USB drive so you can carry your Windows system through a USB drive and run it anywhere.
However, some users have reported that the Windows To Go option is missing in Rufus. This problem might be caused by program bugs, system compatibility, or other reasons. So, what if Rufus has no Windows To Go option? This article provides several tips to help solve this problem.
Normally, once you import a Windows ISO file into Rufus, the Windows To Go option will appear on the Rufus page immediately. If Rufus Windows To Go is missing, the following tips may help.
Tip 1: Update or redownload Rufus
When a software program does not work as expected or lacks an important option, the first solution you can try is to update or reinstall it. Every once in a while, the authors of Rufus release new versions of this utility to fix bugs or deficiencies in older versions, and to add new features. So, just go to the Rufus official website to re-download the latest version of Rufus.
Tip 2: Rufus Windows To Go does not work with Windows 7
The missing Windows To Go option in Rufus may also be caused by an incompatible Windows system. Rufus Windows To Go is not actually available when Rufus runs in Windows 7 or earlier. Therefore, to use the Windows To Go option, make sure you run Rufus in Windows 8/8.1/10/11.
Tip 3: Use an official ISO image
If you import an unofficial Windows ISO image file into Rufus, Rufus may not display the Windows To Go option. So, make sure your Windows ISO is from Microsoft.
What if Rufus still has no Windows To Go option
What if you have tried all the above tips, but there is still no Windows To Go option in Rufus? Don’t worry. Just turn to another Windows To Go creator, such as iSumsoft SYSOnUSB.
Like Rufus, iSumsoft SYSOnUSB can also create a Windows To Go drive from a Windows ISO file easily. It is easy-to-use, fast, works for any version of Windows 11/10/8/8.1/7 and Windows Server, and supports any USB drives. iSumsoft SYSOnUSB is the best alternative when Rufus has no Windows To Go option. Here is how it works.
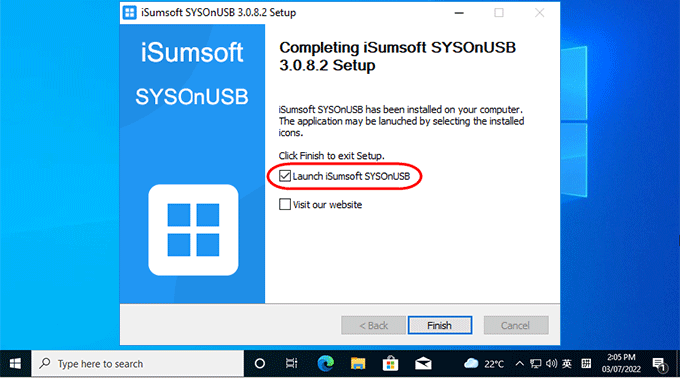
Step 1: Run iSumsoft SYSOnUSB.
Like Rufus, iSumsoft SYSOnUSB is a small application with only a few megabytes. So, it only takes a few seconds to download it to your computer. After downloading, run the downloaded .exe file, and then simply follow the pop-up setup wizard to install iSumsoft SYSOnUSB onto your computer. When the installation is complete, launch this software.
Step 2: Select your USB drive.
Insert a USB drive into your computer, and then select the USB drive from the drop-down menu in the upper right corner of the software page.
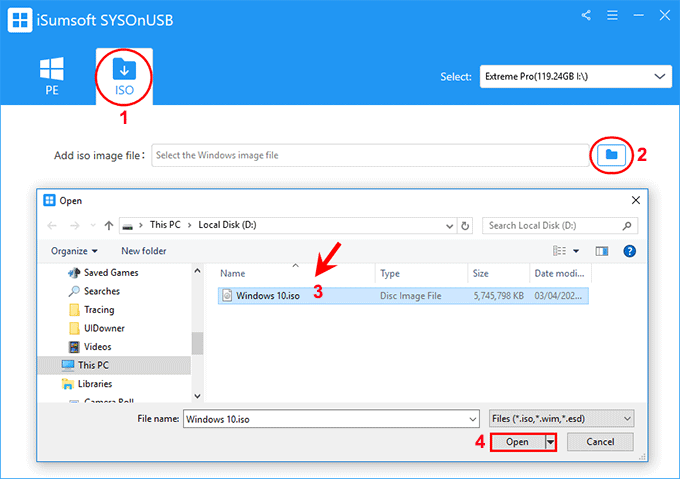
Step 3: Import your Windows ISO.
Choose the ISO option and under this option, click the file icon on the right. When the Open dialog opens, navigate to the Windows ISO file on your computer, select the ISO file, and then click Open. The Windows ISO will be imported to the software.
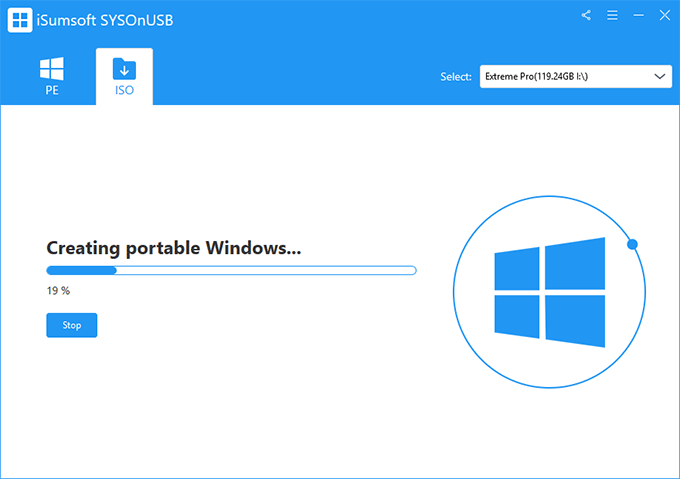
Step 4: Start creating Windows To Go.
Select the Windows version you want to install onto the USB drive, and then click Next.
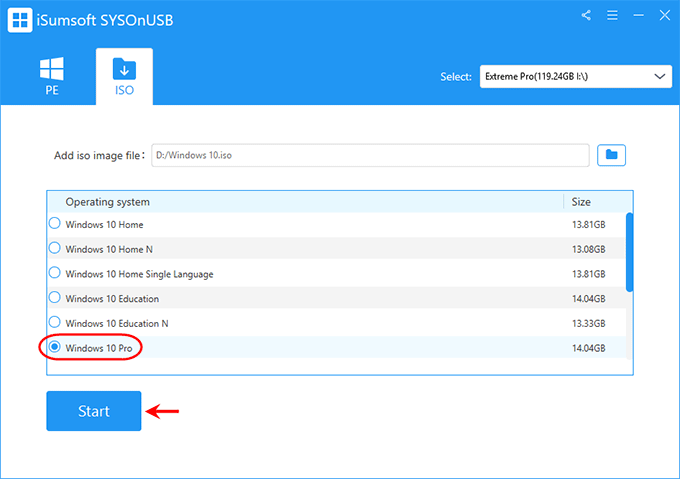
The software will immediately start creating Windows To Go (portable version of Windows) on the USB drive. This will take a while.
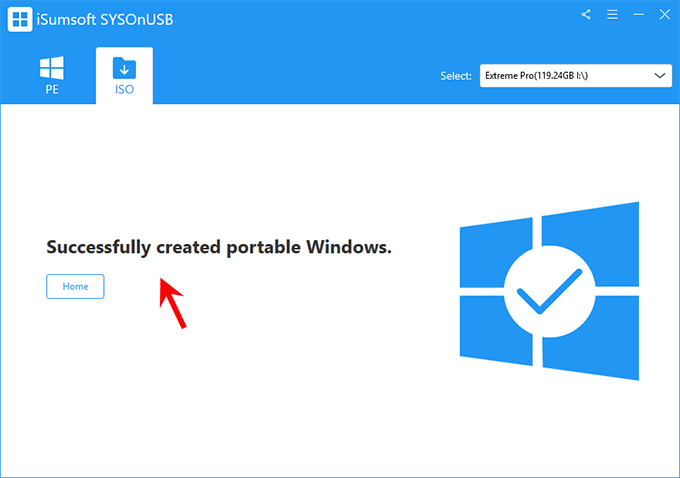
When the software page shows the “Successfully created portable Windows” message, the Windows To Go USB drive has been successfully created. You can then boot your current computer or any other computer from the USB drive and a clean version of Windows will run directly from the USB drive.
Updated by
Linda
on Jul 20, 2023
| Home > Windows System To Go
Translation:
Updated by Jean on Jul 20, 2023 | Home > Windows System To Go
Rufus is a free and user-friendly utility that facilitates the formatting and creation of bootable USB flash drives, along with offering various other features. One such significant feature is Windows To Go, which enables the creation of portable USB drives, allowing you to carry your personalized system and use it on any computer. However, this feature has been removed in Rufus version 2.3 and later releases. If you’re looking for an alternative or a perfect solution, continue reading.
Rufus Windows To Go Alternative — OS2Go工具
OS2Go Tools is an excellent alternative if you discover that Rufus lacks the Windows To Go feature. It is fully compatible with the most widely used Windows systems, ranging from Windows 7 to the latest Windows 11. The software is user-friendly and can be utilized with minimal effort. All you need is a sufficiently large USB drive; no advanced technical knowledge is necessary.
Compared to hard drives, a portable USB drive is a cheaper and more affordable option. Another advantage of using OS2Go tools is that they support non-certified USB drives as well. In contrast, Microsoft’s Windows To Go feature requires a certified USB drive to take advantage of its benefits. After creating a portable USB drive with OS2Go, you can even use it on a Mac computer to run a Windows system without BootCamp. If you’re interested in this software, you can start with a trial and purchase it if you find it satisfactory.
Step 1. Install OS2Go on your Windows computer. It will show the used space on your system drive. Insert a USB drive with a capacity larger than the system drive’s used space. Select the target USB drive and click Next to proceed.

Step 2. OS2Go will warn you that the following action will erase all data on your drive. Make sure you’ve backed up all important data. Click Continue to proceed.

Step 3. Adjust disk layout. The default disk layout on the target drive will be identical to the source drive. You can also edit the layout to suit your requirements. Check the option provided if you’re using a Solid State Drive as the Windows boot drive. Then, click Proceed.

Step 4. OS2Go will then begin creating the portable USB drive. This process may take some time, depending on your operating system and network conditions. Once the progress reaches 100%, the USB drive should be bootable.

Step 5. Insert the portable Windows USB and start your computer. Press the necessary key (F2, DEL, F10…) to access the BIOS. Select to boot from the USB drive.
Note: Please ensure that the boot mode (either UEFI or Legacy) of the portable USB and your target computer are identical, or else you might not be able to boot from it.
Create a Windows To Go drive using Rufus
If the Rufus version you’re using includes the Windows To Go option, you can still utilize it to create a portable USB drive. However, with Rufus, bear in mind that it only supports Windows 8/8.1/10, and you’ll require a certified USB drive for this purpose. Here are the steps to create a portable Windows To Go drive using Rufus:
Step 1. Connect your USB flash drive to the computer. If it’s not a new one, ensure that you have backed up all the data.
Step 2. Select your USB drive from the Device dropdown menu.
Step 3. Next, select the partition scheme you need. Both MBR and GPT are available, choose the appropriate one based on the partition style of your computer.
Step 4. The File system and Cluster size will be filled in by default. Typically, you don’t need to modify these settings, but you can customize them if necessary.
Step 5. Click the browse icon next to the «Create a bootable disk using» option to navigate to your Windows ISO file, and then select it.
Step 6. Click the Start button after selecting the Windows To Go option.
Conclusion
This article focuses on the absence of the Windows To Go option in Rufus and how to resolve it using an alternative tool, OS2Go. Follow the steps outlined above if you encounter the same issue. Ensure that your USB drive meets all the aforementioned requirements before proceeding to use it.
Skip to content
Navigation Menu
Provide feedback
Saved searches
Use saved searches to filter your results more quickly
Sign up
Description
I’m trying to make a bootable Windows To Go drive (GPT), but I’m facing the following problems:
- I can only choose Windows To Go when I use Rufus 2.2 (2.2 and 2.2p) I also tried newer versions. Normal and portable, but still only 2.2 gives me the option to make Windows To Go. I also tried different ISO’s of Windows 8.1 and 10. 32bit, 64bit, Pro, English, Dutch. etc. All are official ISO’s from Microsoft.
- When I try to make this Windows To Go with Rufus 2.2, I’m getting the error Error: ISO image extraction failure. I found this could be cause by an antivirus program, but even when I disable it I still get this error. See logs in attachment
I need this because I have a Surface Pro 3 (i7 8GB) with a defective SSD. I can run Ubuntu from a MicroSD card but I’m not able to install Windows to the MicroSD or USB flash drive. So I’m hoping I can boot Windows To Go from SD or USB flash drive.
edit: I can’t attach files so I’ll upload them somewhere else. I’ll edit this post a.s.a.p.
The two files:
https://goo.gl/eWfVGC
https://goo.gl/H5ISrS
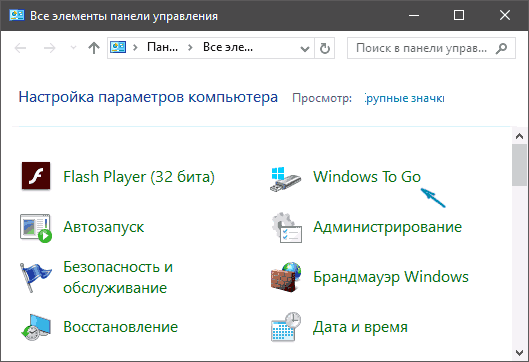
Можно ли запустить Windows 10 с USB накопителя — флешки или внешнего жесткого диска, не устанавливая ее на компьютер? Можно: например, в Enterprise версии в панели управления можно найти пункт для создания накопителя Windows To Go, который как раз делает такую флешку. Но можно обойтись и обычной Домашней или Профессиональной версией Windows 10, о чем и пойдет речь в этой инструкции. Если же вас интересовал простой установочный накопитель, то про него здесь: Создание загрузочной флешки Windows 10.
Для того, чтобы установить Windows 10 на флешку и запускать с нее, вам пригодится сам накопитель (не менее 16 Гб, в некоторых из описанных способов этого оказалось мало и потребовалась флешка на 32 Гб) и очень желательно, чтобы это был накопитель с поддержкой USB 3.0, подключенный к соответствующему порту (я экспериментировал с USB 2 и, откровенно говоря, намучился в ожиданиях сначала записи, а потом запуска). Для создания подойдет образ, скаченный с официального сайта: Как скачать ISO Windows 10 с сайта Microsoft (впрочем, с большинством других тоже проблем быть не должно).
Создание накопителя Windows To Go в Dism++
Одна из самых простых программ для создания USB накопителя для запуска с него Windows 10 — Dism++. К тому же программа на русском языке и в ней есть множество дополнительных функций, которые могут пригодиться в этой ОС.
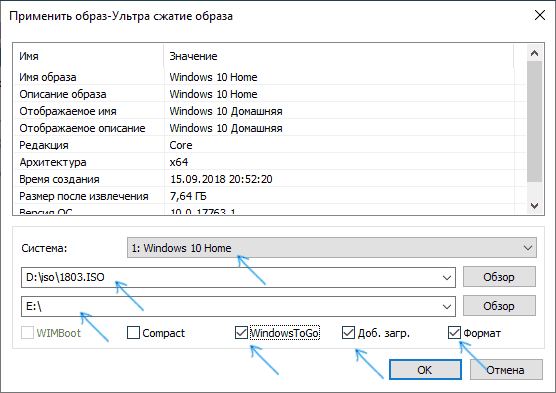
Программа позволяет подготовить накопитель для запуска системы из образа ISO, WIM или ESD с возможностью выбора нужной редакции ОС. Важный момент, который следует иметь в виду: поддерживается только загрузка UEFI.
Сам процесс установки Windows на флешку подробно описан в инструкции Создание загрузочной флешки Windows To Go в Dism++.
Установка Windows 10 на флешку в WinToUSB Free
Из всех опробованных мною способов сделать флешку, с которой можно запускать Windows 10 без установки, самым быстрым оказался способ с использованием бесплатной версии программы WinToUSB. Созданный в результате накопитель был работоспособен и проверен на двух разных компьютерах (правда, только в режиме Legacy, но судя по структуре папок должен работать и с UEFI загрузкой).
После запуска программы, в главном окне (слева) вы можете выбрать из какого источника будет создаваться накопитель: этом может быть образ ISO, WIM или ESD, компакт-диск с системой или уже установленная система на жестком диске.
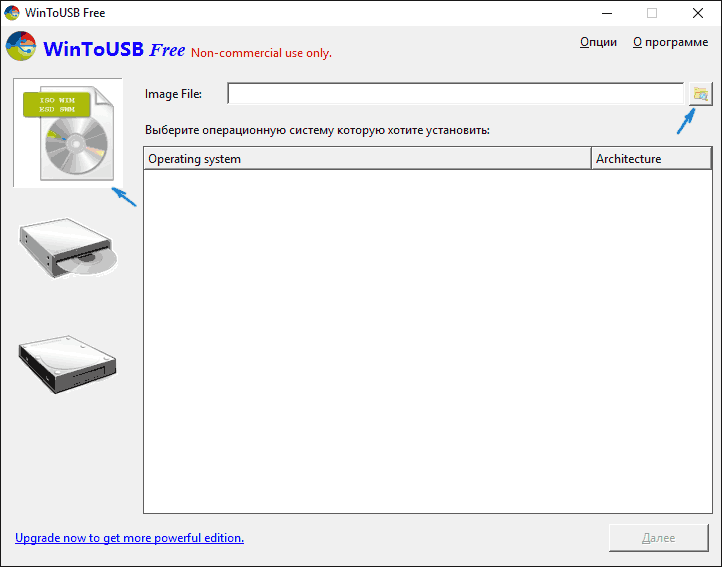
В моем случае я использовал ISO образ, загруженный с сайта Microsoft. Для выбора образа нажимаем кнопку «Обзор» и указываем его расположение. В следующем окне WinToUSB покажет, что содержится на образе (проверит, все ли с ним в порядке). Нажимаем «Далее».
Следующий этап — выбрать накопитель. Если это флешка, она будет автоматически отформатирована (внешний жесткий диск не будет).
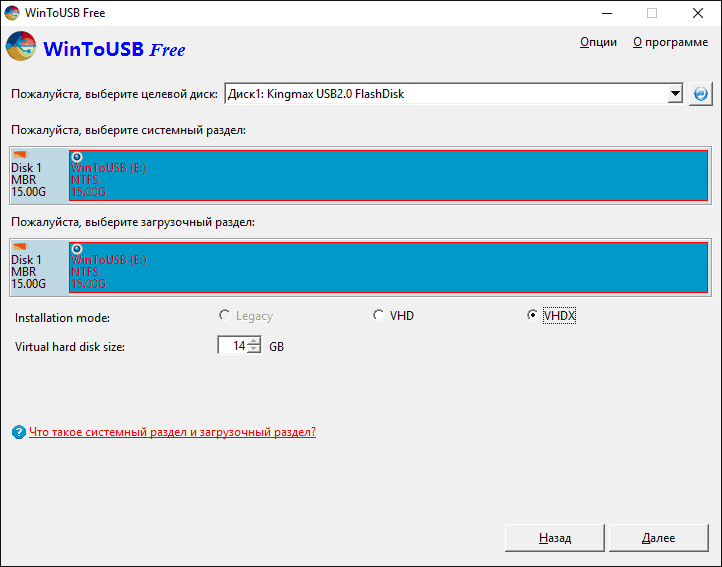
Последний этап — указать системный раздел и раздел с загрузчиком на USB накопителе. Для флешки это будет один и тот же раздел (а на внешнем жестком диске вы можете подготовить отдельные). Кроме этого, здесь же выбирается тип установки: на виртуальный жесткий диск vhd или vhdx (который помещается на накопитель) или Legacy (для флешки недоступно). Я использовал VHDX. Нажмите «Далее». Если вы увидите сообщение об ошибке «Недостаточно места», увеличьте размер виртуального жесткого диска в поле «Virtual hard disk drive».
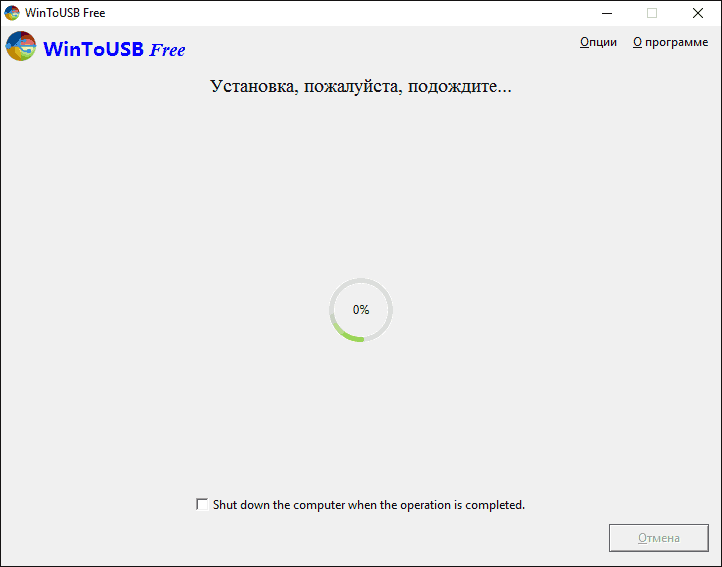
Последний этап — дождаться завершения установки Windows 10 на флешку (может происходить довольно долго). По окончании, вы можете загрузиться с нее, выставив загрузку с флешки или с помощью Boot Menu вашего компьютера или ноутбука.
При первом запуске, происходит настройка системы, выбор тех же параметров, что и при чистой установке системы, создание локального пользователя. В дальнейшем, если подключать флешку для запуска Windows 10 на другом компьютере, происходит только инициализация устройств.
В целом, система в результате работала сносно: интернет по Wi-Fi работал, активация также сработала (я использовал пробную Enterprise на 90 дней), скорость по USB 2.0 оставляла желать лучшего (особенно в окне «Мой компьютер» при инициализации подключенных накопителей).
Важное примечание: по умолчанию, при запуске Windows 10 с флешки, локальные жесткие диски и SSD не видны, их нужно подключить с помощью «Управление дисками». Нажмите Win+R, введите diskmgmt.msc, в управлении дисками, кликните правой кнопкой мыши по отключенным накопителям и подключите их, если есть необходимость в их использовании.
Скачать программу WinToUSB Free можно с официальной страницы: http://www.easyuefi.com/wintousb/
Флешка Windows To Go в Rufus
Еще одна простая и бесплатная программа, позволяющая легко сделать загрузочную флешку для запуска Windows 10 с нее (также в программе можно сделать и установочный накопитель) — Rufus, о которой я уже не раз писал, см. Лучшие программы для создания загрузочной флешки.
Сделать такой USB накопитель в Rufus еще проще:
- Выбираем накопитель.
- Выбираем схему разделов и тип интерфейса (MBR или GPT, UEFI или BIOS).
- Файловую систему флешки (NTFS в данном случае).
- Ставим отметку «Создать загрузочный диск», выбираем ISO образ с Windows
- Отмечаем пункт «Windows To Go» вместо «Стандартная установка Windows».
- Нажимаем «Старт» и ждем. В моем тесте появилось сообщение, что диск неподдерживаемый, но в результате все работало исправно.


В результате получаем такой же, как и в предыдущем случае накопитель, за исключением того, что Windows 10 установлена просто на флешку, а не в файл виртуального диска на ней.
Работает она тем же образом: в моем тесте запуск на двух ноутбуках прошел успешно, хоть и пришлось подождать на этапах установки устройств и настройки. Подробнее про Создание загрузочной флешки в Rufus.
Используем командную строку для записи Live USB с Windows 10
Имеется также способ сделать флешку, с которой можно запустить ОС и без программ, используя только инструменты командной строки и встроенные утилиты Windows 10.
Отмечу, что в моих экспериментах USB, сделанный таким образом, не заработал, зависая при запуске. Из того, что нашел — причиной могло послужить то, что у меня «съемный накопитель», в то время, как для его работоспособности требуется, чтобы флешка определялась как фиксированный диск.
Данный способ состоит из подготовки: загрузить образ с Windows 10 и извлечь из него файл install.wim или install.esd (файлы Install.wim присутствуют в образах, загружаемых с Microsoft Techbench) и следующих шагов (будет использован способ с wim файлом):
- diskpart
- list disk (узнаем номер диска, соответствующий флешке)
- select disk N (где N — номер диска из предыдущего шага)
- clean (очистка диска, все данные с флешки будут удалены)
- create partition primary
- format fs=ntfs quick
- active
- exit
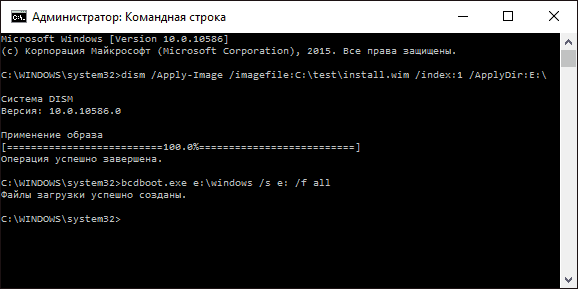
- dism /Apply-Image /imagefile:путь_к_файлу_install.wim /index:1 /ApplyDir:E:\ (в этой команде последняя E — буква флешки. В процессе выполнения команды может показаться, что она зависла, это не так).
- bcdboot.exe E:\Windows /s E: /f all (здесь E — это так же буква флешки. Команда устанавливает загрузчик на нее).
После этого можно закрыть командную строку и попробовать загрузиться с созданного накопителя с Windows 10. Вместо команды DISM можно использовать команду imagex.exe /apply install.wim 1 E:\ (где E — буква флешки, а Imagex.exe изначально нужно скачать в составе Microsoft AIK). При этом, по наблюдениям, вариант с Imagex требует больше времени, чем с помощью Dism.exe.
Дополнительные способы
И еще несколько способов записать флешку, с которой можно запустить Windows 10 без установки на компьютер, возможно, кому-то из читателей пригодиться.
- Вы можете установить пробную версию Windows 10 Enterprise в виртуальную машину, например, VirtualBox. Настроить подключение USB0 накопителей в ней, а потом запустить из панели управления создание Windows To Go официальным способом. Ограничение: функция работает для ограниченного числа «сертифицированных» флешек.

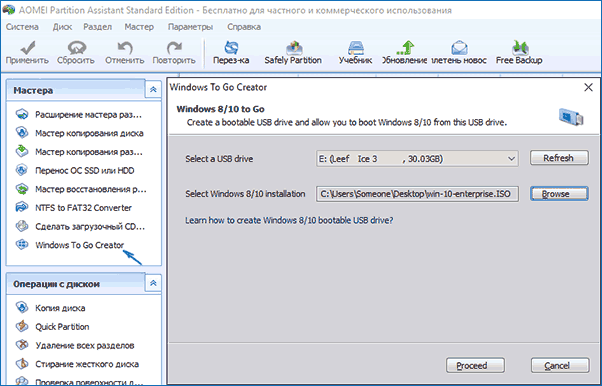
- В Aomei Partition Assistant Standard есть функция Windows To Go Creator, создающая загрузочную флешку с Windows так же, как это было описано для предыдущих программ. Проверено — работает без проблем в бесплатной версии. Подробнее о программе и где ее скачать я писал в статье про то, Как увеличить диск C за счет диска D.

- Существует платная программа FlashBoot, в которой бесплатно доступно создание флешки для запуска Windows 10 на UEFI и Legacy системах. Подробно об использовании: Установка Windows 10 на флешку в программе FlashBoot.
Надеюсь, статья окажется полезной для кого-то из читателей. Хотя, на мой взгляд практической пользы от такой флешки не так уж и много. Если требуется запускать операционную систему без установки на компьютер, лучше использовать что-то менее громоздкое, чем Windows 10.
One of the new features available in the recent versions of Rufus is the ability to create Windows To Go drives with a few mouse clicks. For those who haven’t heard about Windows To Go before this, the feature allows you to install and run Windows 10/11 from a USB drive.
In short, you do not need to install Windows 10/11 on an internal hard drive (HDD) or SSD. The feature literally allows users to carry their Windows operating system on a USB drive. Users can connect the Windows To Go USB drive to any PC and boot from the USB drive to start using their Windows installation on the USB drive.
As all Windows 10/11 users likely know, the Windows To Go feature was first introduced with Windows 8, although there were third-party solutions to install Windows to USB drive even before the release of Windows 8. The Windows To Go Creator feature was present in Windows 10 for a long period of time. Besides that, the feature was exclusive to Enterprise and Education editions.
With the Windows 10 May 2020 Update (version 2004), Microsoft has removed the Windows To Go feature from Windows 10. This means that none of the editions of Windows 10 now offer a built-in tool to create a Windows To Go drive. From here on, you will have to use tools like Rufus to prepare Windows To Go even if you are running Enterprise edition.
Although Windows 10 and 11 no longer offer a built-in tool to prepare a Windows To Go drive, you can use Rufus software to create a Windows To Go drive.
Things to remember while preparing Windows To Go drive
# The Windows To Go feature of Rufus is available only when you are running the software on Windows 11 or Windows 10 versions. This means that you need a PC running Windows 10 or Windows 11 in order to prepare a Windows To Go drive using Rufus.
# The size of the USB drive that you want to use as a Windows To Go drive must be at least 16 GB. We recommend you use a USB drive with a capacity of 32GB, though.
# We recommend you use a Windows To Go certified USB drive for optimal performance. Standard USB flash drives are not ideal for installing Windows, meaning that the Windows OS installed on your standard USB flash drive will be very slow compared to the one installed on certified drives.
# Rufus supports all editions of Windows 10 and Windows 11.
Windows To Go option missing in Rufus?
It seems that Rufus 2.3 and later versions do not offer the ability to create a Windows To Go drive when using Windows 10 ISO downloaded using the Media Creation Tool.
So, if you want to create Windows To Go with Rufus, please directly download Windows 10 ISO from Microsoft within in your web browser without using the Media Creation Tool or download via MSDN or TechNet (subscription is required).
And if you have already downloaded Windows 10 ISO using the Media Creation Tool, try using the other free tools in the market. Refer to our five free tools to create Windows 10 To Go USB drive for all the tools.
Preparing Windows 1o/11 To Go with Rufus
Follow the given below instructions to create your Windows To Go drive using Rufus software.
Step 1: The first step is to visit this page of Rufus and download the latest available version of the software. When you are on the download page, please click on the normal Rufus instead of the portable version.
Step 2: Connect your USB flash drive that you want to use as a Windows To Go drive and backup all data from the drive to any other location as the drive needs to be erased completely, and all data will be deleted while doing so.
Step 3: Launch Rufus software on a PC running Windows 10 or Windows 11.
Step 4: Select your USB drive from the Device drop-down menu.

Step 5: Next, click the Select button next to the Boot Selection field and then select your Windows 10/11 ISO image file. If you have not downloaded it yet, refer to our how-to download Windows 10 ISO or how-to download Windows 11 ISO image guides.
Step 6: Next, from the Image Option drop-down, select the Windows To Go option.
Step 7: Next, select the partition scheme from the available two options. If you’re going to use the Windows To Go drive with the MBR partition scheme, select MBR. If not, select GPT (for the GPT partition scheme).
Step 8: Select the File system as NTFS, as FAT32 can’t be used to create Windows To Go. You can safely skip the Cluster size section.
Step 9: Finally, click the Start button.
Step 10: When you are asked to select the edition of Windows 10/11, please select the edition that you wish to install on the USB drive.

Step 11: Next, you will get the following dialog where you can customize the installation. We do not recommend you change the default selections unless you know what you are doing. Click OK.

Step 12: Now, you will get a dialog with a warning that all data on the USB drive will be erased. Click the OK button to let Rufus wipe the USB drive and prepare the Windows To Go drive.

The software might take about forty-five to sixty minutes to prepare the Windows To Go drive. Once the job is done, you’ll see the “Ready” message. You can now restart your computer to test your newly prepared Windows To Go drive. Good luck!

Do let us know if you have any difficulties in following the guide or experiencing any issues by leaving comments.
Our how-to use Rufus to download Windows 10 ISO guide might also interest you.