
Меню «Пуск» Windows — это ключевая функция операционной системы, обеспечивающая быстрый доступ к приложениям, параметрам и файлам. Он включает в себя мощную функцию поиска и позволяет закреплять избранные приложения, папки и веб-сайты для удобного доступа. Параметры настройки позволяют упорядочить контакты по группам и изменить макет меню «Пуск» в соответствии со своими предпочтениями.
Области меню «Пуск»
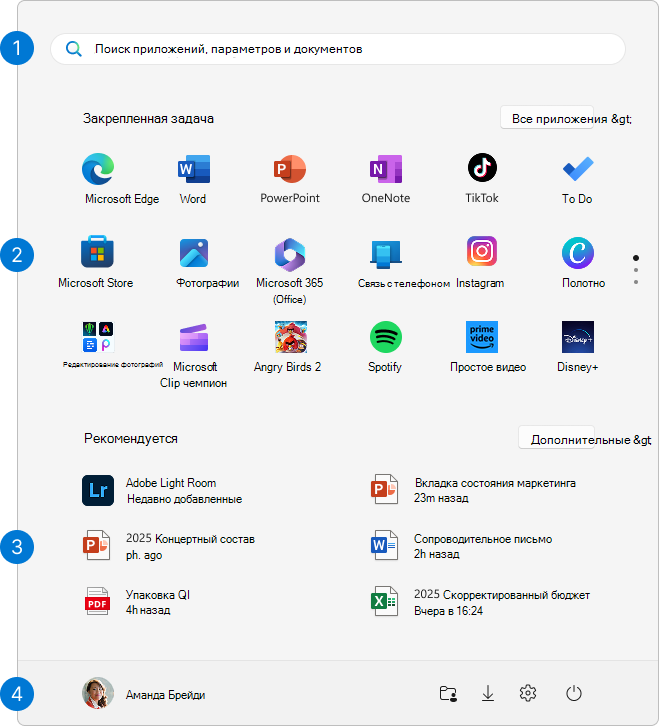
Меню «Пуск» состоит из четырех main областей:
-
Поиск: быстрый поиск приложений, файлов и параметров путем ввода ключевых слов
-
Закрепление: закрепленные приложения, файлы, папки и веб-сайты в формате сетки для удобного доступа. Список всех установленных приложений в алфавитном порядке
-
Рекомендации. Недавно добавленные и часто используемые приложения, а также недавно открытые файлы
-
Учетная запись: значок профиля для параметров учетной записи, переключения учетных записей или выхода. Вы также можете добавить ярлыки для удобного доступа к общим папкам. Кнопка питания позволяет заблокировать, спящий режим, завершить работу или перезапустить устройство.
Настройка меню «Пуск»
Ниже приведены распространенные настройки для меню «Пуск». Разверните каждый раздел, чтобы узнать больше.
Существует несколько способов закрепить приложения или сочетания клавиш в меню «Пуск». Например:
-
В поле Поиск на панели задач или в меню Пуск введите имя приложения, которое нужно закрепить. Щелкните приложение правой кнопкой мыши и выберите Закрепить на начальном экране.
-
В Обозреватель щелкните правой кнопкой мыши папку и выберите Закрепить на начальном экране.
-
Для веб-сайтов откройте Edge и перейдите на веб-сайт, который вы хотите закрепить. Затем выберите меню «Дополнительные параметры» > «Другие средства» > «Закрепить на начальном экране«.
Открепить элемент из меню «Пуск»
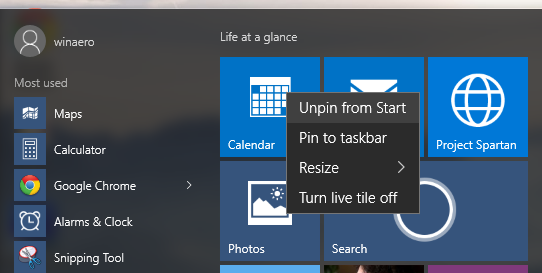
Чтобы удалить закрепленное приложение или ярлык из меню «Пуск», щелкните его правой кнопкой мыши и выберите команду Открепить на начальном экране .
Всякий раз, когда вы хотите изменить порядок контактов в меню «Пуск», перетащите значок из текущего положения в другое.
Упорядочение контактов по папкам
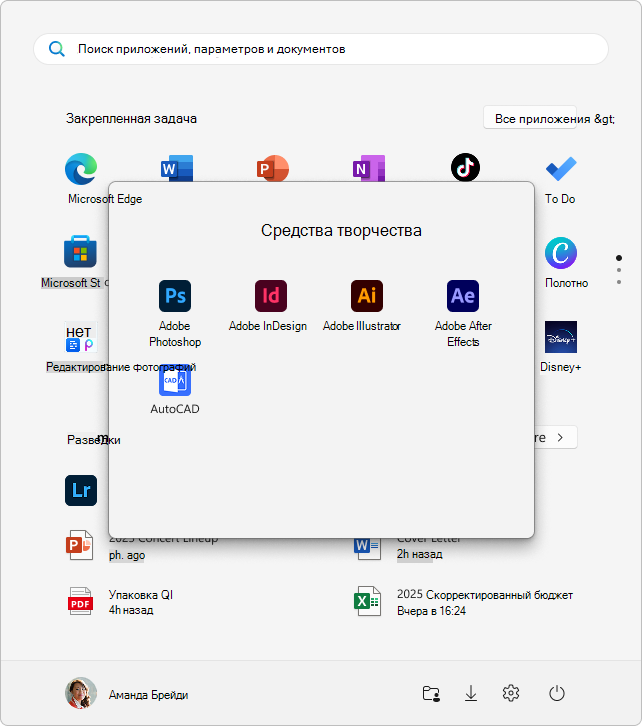
Группирование контактов по папкам в меню «Пуск» помогает упорядочить приложения, уменьшает нагрузку и упрощает быстрый поиск связанных приложений и доступ к ним. Это также позволяет улучшить управление пространством и персонализацию, предоставляя меню «Пуск» более чистый и эффективный макет.
-
Чтобы создать папку, перетащите один закрепленный элемент на другой, чтобы создать папку. Папка будет создана автоматически, и вы можете переименовать ее.
-
Чтобы добавить дополнительные контакты в папку, перетащите их в нее.
-
Чтобы удалить закрепление из папки, откройте папку и перетащите значок из нее.
-
После того как осталось только одно закрепление, папка удаляется из меню «Пуск»
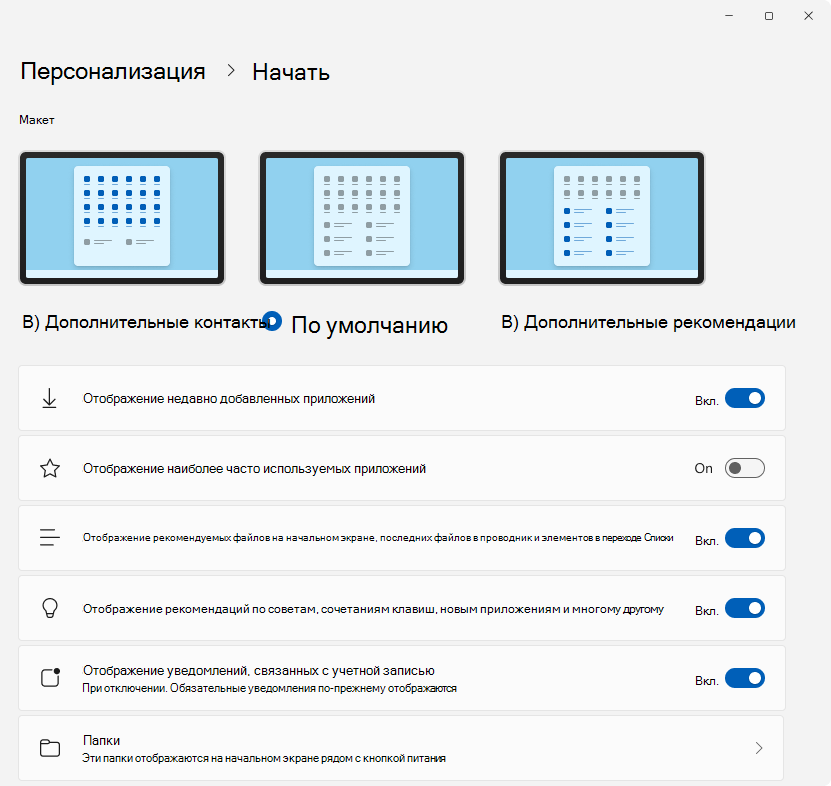
Вы можете настроить макет меню «Пуск», чтобы отобразить больше контактов, больше рекомендаций или сохранить макет по умолчанию.
-
Выберите «Пуск» щелкните правой кнопкой мыши в нижней части меню «Пуск» и выберите Пункт Параметры запуска или используйте следующее сочетание клавиш:
Начало
-
Выберите один из параметров макета:
-
Дополнительные пин-коды: приоритеты, показывающие больше закрепленных приложений
-
Дополнительные рекомендации. Этот макет ориентирован на отображение дополнительных рекомендуемых элементов, таких как недавно добавленные приложения и файлы.
-
По умолчанию: баланс между закрепленными приложениями и рекомендуемыми элементами

-
-
Включение или отключение других параметров макета, включая
-
Отображение недавно добавленных приложений
-
Отображение наиболее часто используемых приложений
-
Отображение рекомендуемых файлов на начальном экране, последних файлов в проводник и элементов в переходе Списки
-
Показывать рекомендации по советам, ярлыкам, новым приложениям и т. д.
-
Вы можете выбрать папки, которые отображаются рядом с кнопкой питания в меню Пуск. Эти папки могут включать общие расположения, такие как Документы, Загрузки, Музыка, Изображения, Видео, Сеть и Личная папка.
Просто переключите переключатели для папок, которые нужно добавить. Эта настройка позволяет быстро получать доступ к часто используемым папкам непосредственно из меню «Пуск», улучшая рабочий процесс и повышая эффективность навигации.
-
Выберите «Пуск» щелкните правой кнопкой мыши в нижней части меню «Пуск» и выберите Пункт Параметры запуска или используйте следующее сочетание клавиш:
Начало
-
Выберите Папки , а затем установите переключатель в поле Все папки, которые должны отображаться рядом с кнопкой Питания.
Как правило, меню «Пуск» находится по центру, но можно изменить выравнивание на стороне панели задач.
-
Щелкните правой кнопкой мыши панель задач и выберите Пункт Параметры панели задач или используйте следующее сочетание клавиш:
Панель задач
-
Разверните узел Поведение панели задач и выберите нужный вариант выравнивания панели задач.
Дополнительные сведения см. в статье Настройка панели задач в Windows.
Нужна дополнительная помощь?
Нужны дополнительные параметры?
Изучите преимущества подписки, просмотрите учебные курсы, узнайте, как защитить свое устройство и т. д.
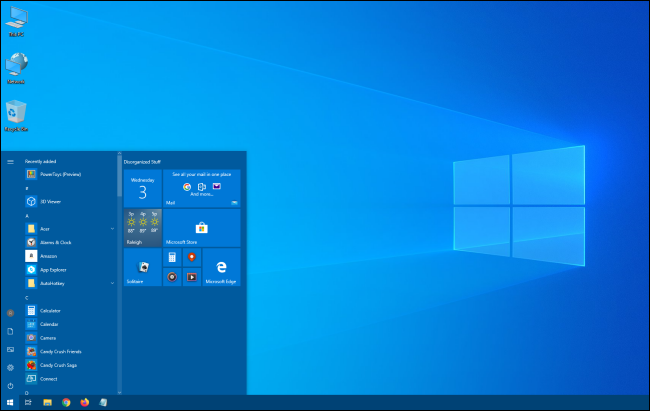
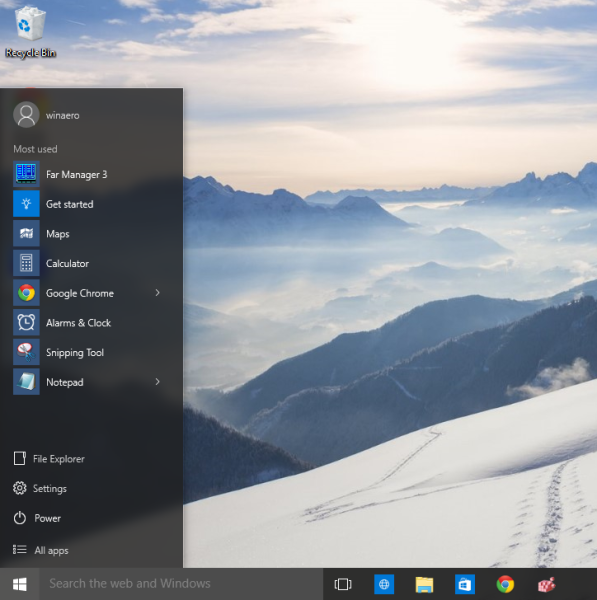
Всем привет! А вы знали, что можно изменить размер меню «Пуск», а то и вообще развернуть на весь экран?
Чтобы развернуть «Пуск» на весь экран, нажимаем кнопку «Пуск» (Start), заходим в меню Settings > Personalization > Start, активируем опцию Use Start full screen.
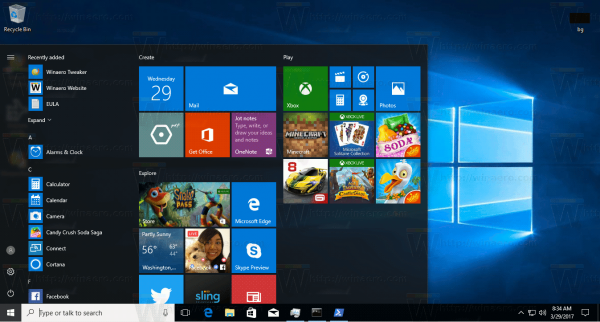
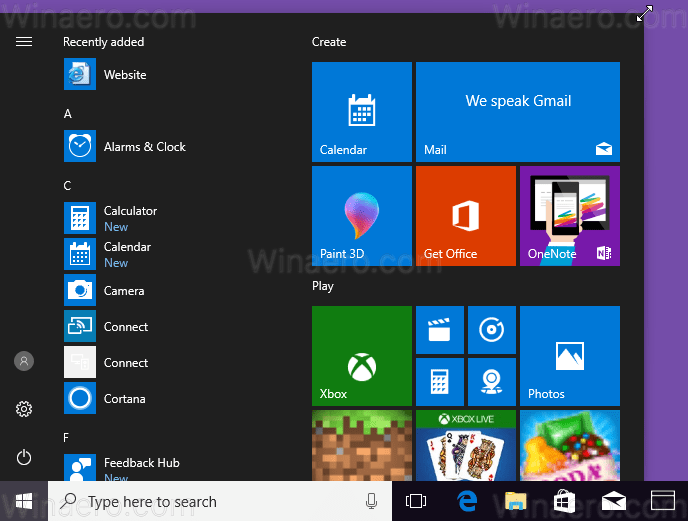
В следующий раз при открывании меню «Пуск» оно заполнит весь рабочий стол. В левом верхнем углу есть две кнопки для выбора предпочтительного режима отображения: All apps и Pinned tiles.
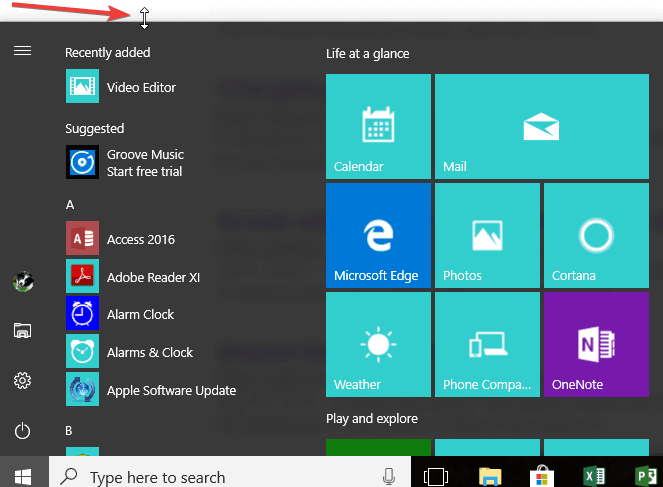
Если вам не нужен полноэкранный вариант, но вы хотите изменить ширину или высоту меню «Пуск», это легко сделать простым перетаскиванием правой или верхней границы с помощью мышки.
Если вы пропустили предыдущий пост из серии Советы по Windows 10, можете ознакомиться с ним сейчас.
https://blogs.windows.com/russia/2017/09/06/sovety-po-windows-10-microsoft-word/
Sign in to your How-To Geek account
Does your Start menu feel too big or too small? If so, you can easily resize the Start menu in Windows 10 until it’s just right, which can give you more room to pin your favorite items—or reveal more of the Desktop. Here’s how to do it.
First, launch the Start menu by either clicking on the «Start» button on the taskbar or pressing the Windows key.
Once the Start menu is open, position your mouse cursor on its edge. Your mouse cursor will change into the resize cursor, which looks like a short line with an arrow head on each end.
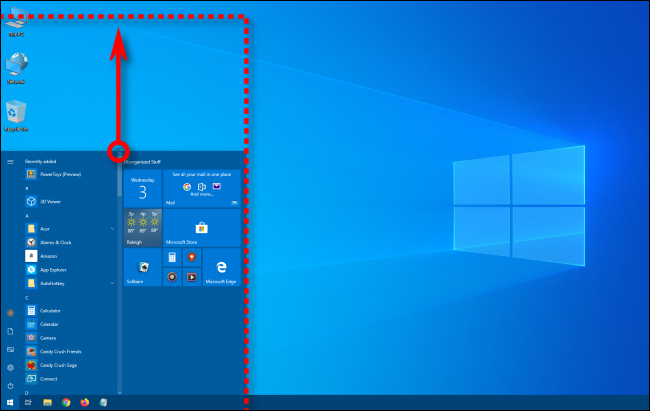
To change the height of the Start menu, position your cursor on the top edge of the Start menu, then hold down the left mouse button and drag your mouse up or down.
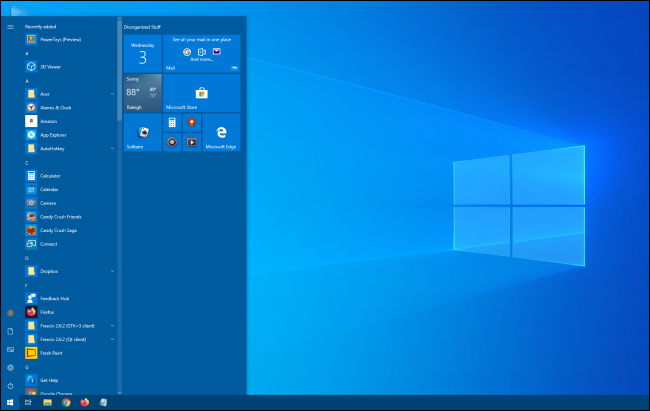
The Start menu will change size as you drag the mouse. When you find the height you like, release the mouse button, and the Start menu will stay that way.
You can also change the width of the Start menu the same way: Grab its right edge with the resize cursor and drag your mouse to make it larger or smaller. When resized horizontally, the Start menu will snap to multiples of your tile size.

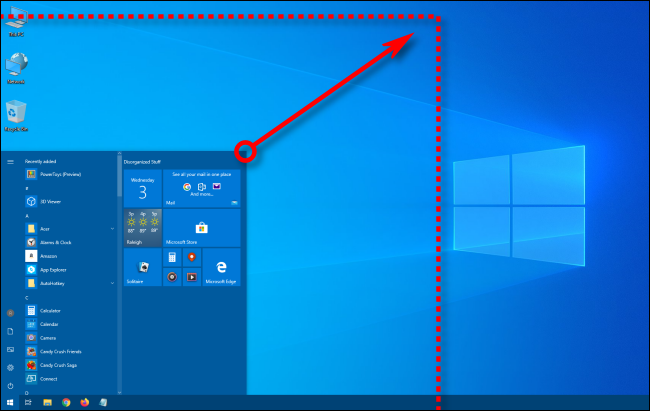
Or you can adjust both height and width at the same time by clicking on the Start menu’s upper-right corner and dragging your mouse inward or outward diagonally.
If you make the Start menu larger, you’ll have plenty of room for live tiles and shortcuts to your favorite apps, websites, and documents. You can even make the menu cover most of the screen if you’d like.

Or if you feel like your Start menu takes up too much space, you can make it tiny. That way, it doesn’t cover up as much of your Desktop when it appears.
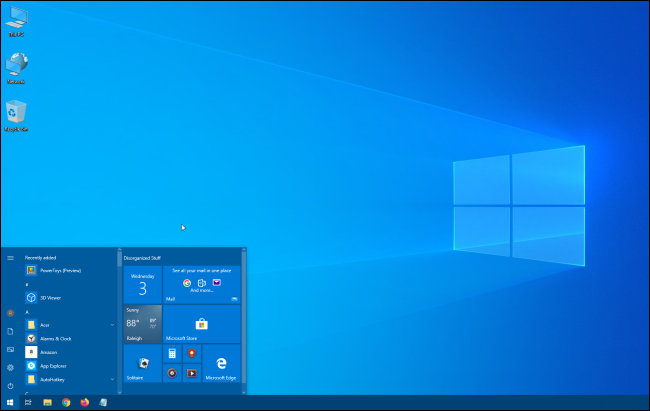
The choice of size is completely yours. It’s just one more way to personalize your system and get the most comfortable Windows 10 experience.
And by the way, the Start menu isn’t the only thing you can resize in Windows 10. You can also change the height of the taskbar just as easily. Have fun resizing!
Readers help support Windows Report. We may get a commission if you buy through our links.
Read our disclosure page to find out how can you help Windows Report sustain the editorial team. Read more
Windows 10 is a great OS that is very customizable so that users can make it their own. Although not one of the most popular modifications you can make, resizing the Start menu is handy customization that you can perform very easily.
Read on to find out how to resize your Windows 10’s Start menu in just a few moves.
1. Use your mouse
-
1. Press the Windows key on your keyboard or click on the Start button on your taskbar.
-
2. The Search menu window will open on the screen.
-
3. Hover over the Start Menu’s borders with your mouse pointer until the double-sided arrow icon appears.

-
4. Click on the edge of the window and drag it up, down or sideways, to change its size.
-
5. When you finish, simply release your mouse. The changes to the Start menu will be automatically saved.
If you’re looking to resize your Windows 10’s Start menu, you need not look any further. You can make all the modifications directly from its window, by using your mouse.
The Start menu can be resized in any way you want, and all you need to do is drag its edges to the desired location.
- 10 Best Windows 10/11 Desktop Customization Software [2022]
- How to customize right click on Windows 10
- How to Set Custom Resolution on Windows 10 [Expert Guide]
- Quick Guide to Change Windows 10’s Start Menu to Classic
2. Tweak your Registry
There is another very easy tweak in the system and you can fix the Start menu resizable feature in Windows 10 in just five minutes of your time.
For this solution, you will have to do some Registry modifications, as follows:
- Press and hold the buttons Windows and R.
- You should have the Run window in front of you.
- Write in the run dialog box the following: regedit
- Press the Enter button on the keyboard.
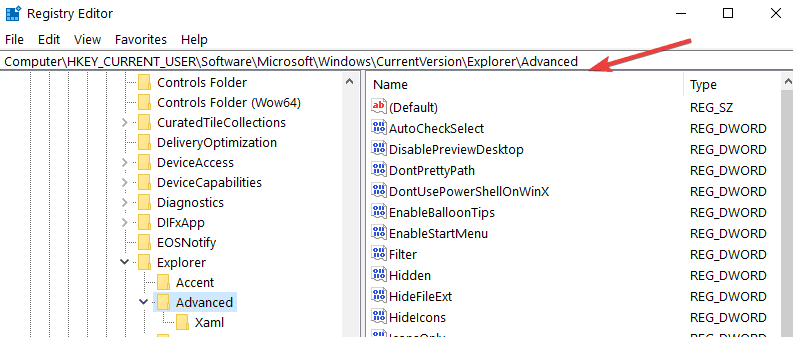
- The Registry Editor window should be on the screen.
- On the left side panel left click to open the HKCU folder.
- In the HKCU folder left click to open the Software folder.
- In the Software folder, left click on the Microsoft folder to open it.
- In the Microsoft folder, left click on the Windows folder to expand it.
- In the Windows folder, search for the CurrentVersion folder and open it.
- From the CurrentVersion folder open the Explorer folder.
- Now within the Explorer folder search for the Advanced folder and open it.

- On the right-side panel right-click on an open space.
- Left-click or tap on the New feature.
- Now from the sub-menu left click or tap on the DWORD (32-bit) Value
- Name the DWORD as follows: EnableXamlStartMenu without the quotes.
- Set the value for this DWORD to 0.
- Close the Registry Editor Windows.
- Reboot your Windows 10 computer
- After the device starts check to see if your resizable Start menu is there.
If you can’t edit the Registry in order to apply this solution, check out our dedicated article to find out what to do.
As a safety precaution, it is always a good idea to back up all your files and folders that you may need in case you get potential errors in the system.
Also, for these changes to the registry editor, you will need to log in with your administrator account in order to be able to add a new DWORD to the system.
At some point in time, it was impossible to resize the Start menu in Windows 10 with the traditional method previously mentioned.
In a previous update of Windows 10, Microsoft disabled the resizable feature of the Start menu most users loved about the Windows operating systems.
Therefore, editing the Registry was the only available solution. It can still be used in case you are using an older Windows 10 version and haven’t updated it.
That’s all you have to do to configure your resizable Start menu in Windows 10. Feel free to use your preferred method.
If you encountered any issues along the way in this tutorial, you can post a comment in the section below and I will help you as soon as possible.
Ivan Jenic
Windows Hardware Expert
Passionate about all elements related to Windows and combined with his innate curiosity, Ivan has delved deep into understanding this operating system, with a specialization in drivers and driver troubleshooting.
When he’s not tackling diverse driver-related problems, Ivan enjoys watching good movies and spending time hiking with his family and friends.
Skip to content
As you may already know, Windows 10 comes with a refined user interface of the Start menu. It allows resizing of its area with tiles. It is also possible to change its height or width only. Let’s see how it can be done.
To resize the Start Menu in Windows 10, click the Start button on the taskbar or press the Win key on your keyboard. The Start menu will be opened.
To change height of the Start menu, move your mouse pointed to the top edge of the Start menu, click and hold the left button and drag it up or down.
The same can be done to change the Start menu width. Drag the right edge of the Start menu pane to change its size.
Starting with Windows 10 Build 16215, you can perform diagonal resize of the Start menu. The Start menu pane can be resized diagonally.
Tip: You can make your Start menu very narrow and reduce its size to a single column.
- Unpin every tile you have pinned on the right side of Start menu. Just right click each tile and pick the item «Unpin from Start» from its context menu.

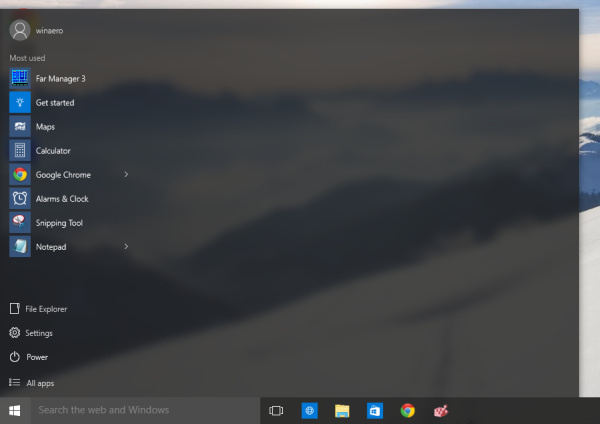
- Once you do this for all tiles, your Start menu will look as follows:

Now click and drag the right edge of the remaining empty space to the left.
- You will get something like this:

Now adjust the height of the Start menu by dragging the top edge towards the bottom.

- Now, customize the items in the bottom left area of the Start menu as described in the article «How to customize the Start menu in Windows 10».

If you prefer the full screen Start menu instead, you can do the following.
- Open Settings.
- Go to Personalization — Start.

- On the right, find and enable the option Use Start full screen.
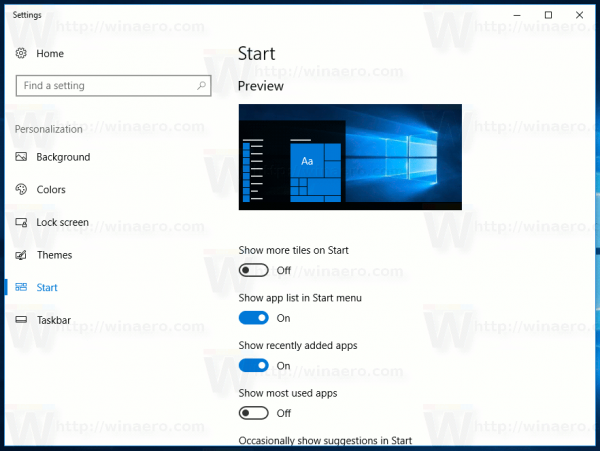

This will enable the full-screen Start menu in Windows 10.
That’s it.
Support us
Winaero greatly relies on your support. You can help the site keep bringing you interesting and useful content and software by using these options:
If you like this article, please share it using the buttons below. It won’t take a lot from you, but it will help us grow. Thanks for your support!