
Все способы:
- Способ 1: «Параметры»
- Способ 2: Изменение групповых политик
- Способ 3: Редактирование параметров реестра
- Способ 4: «Командная строка»
- Способ 5: «Планировщик заданий»
- Вопросы и ответы: 0
Способ 1: «Параметры»
Отключить автоматическую перезагрузку через «Параметры» полностью не получится, но можно изменить период активности, в течение которого перезапускать систему не нужно. Например, в качестве разрешенного можно установить для этого ночное время, когда компьютером никто не пользуется, поскольку после загрузки обновлений Windows рекомендуется выполнить перезапуск для их установки.
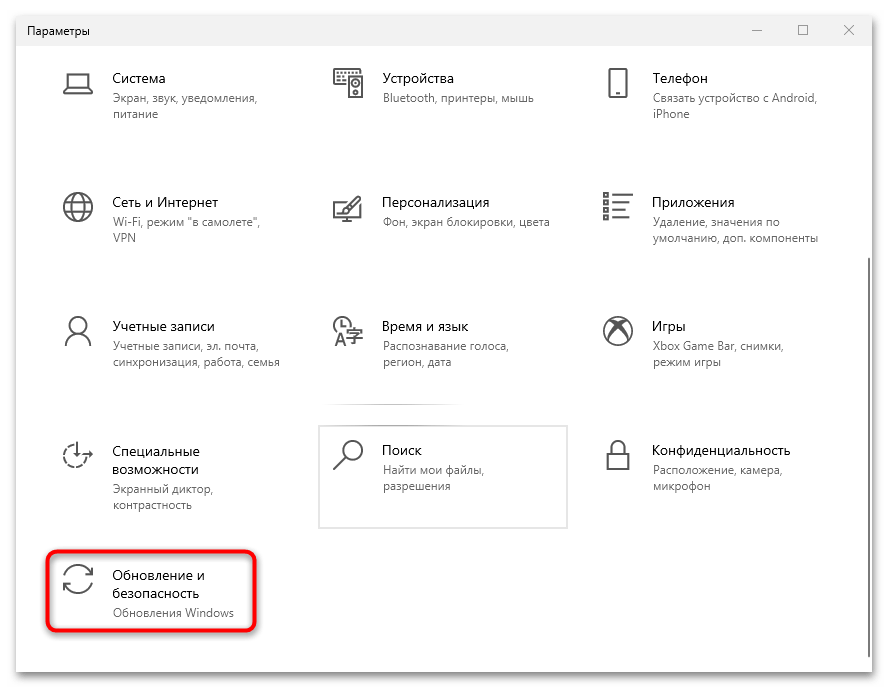
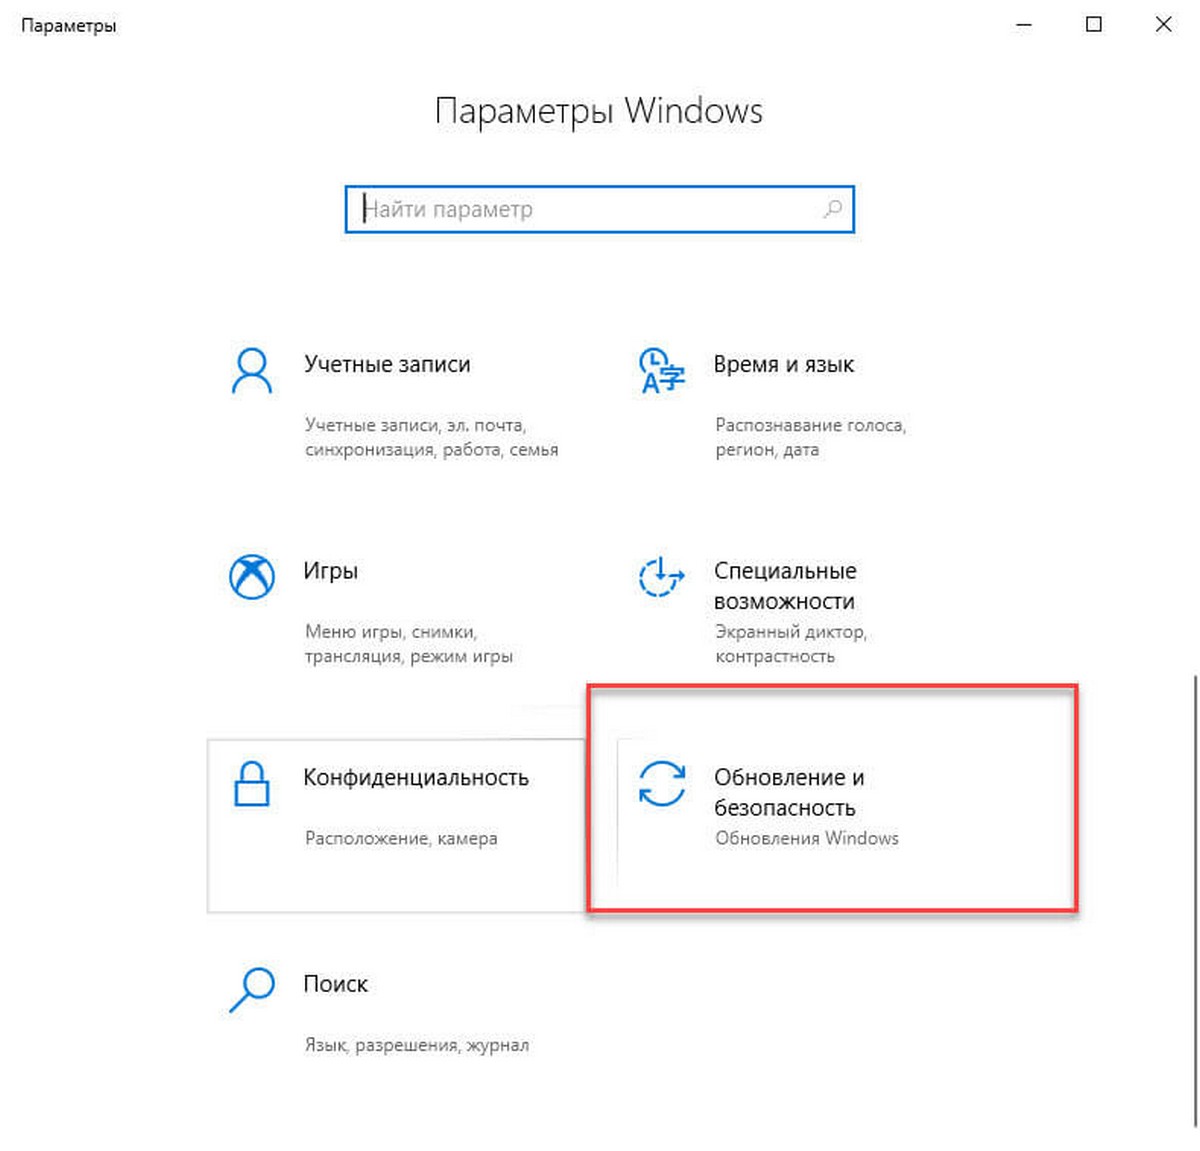
- Перейдите в «Параметры» Windows 10. Самый простой метод сделать это – выбрать соответствующий пункт в главном меню, кликнув по иконке системы.
- Выберите раздел «Обновление и безопасность».
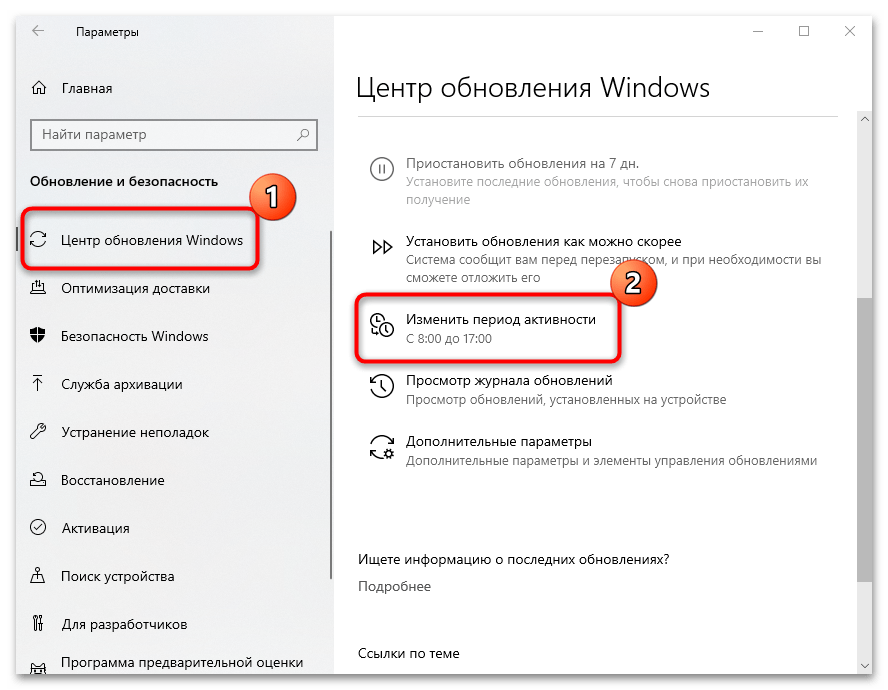
- На вкладке «Центр обновления Windows» щелкните по строчке «Изменить период активности».
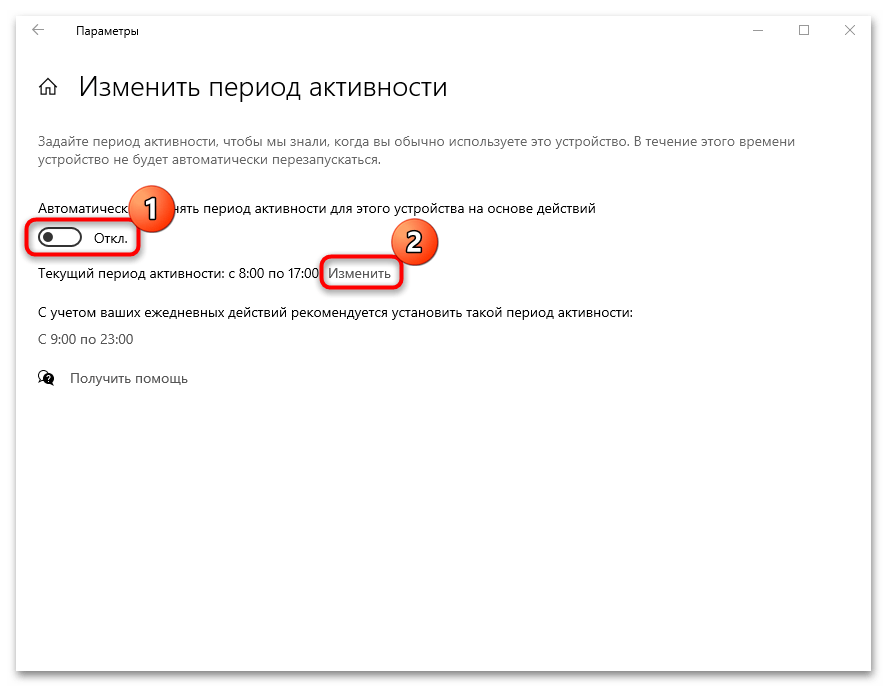
- Если функция автоматического определения периода активности активна, отключите ее с помощью тумблера. Появится новая опция, позволяющая вручную выставить значения. Нажмите на кнопку «Изменить» у строки «Текущий период активности».
- Выставьте время, когда компьютер активно используется, чтобы запретить автоматическую перезагрузку в этот период. Максимальный диапазон – 18 часов. Нажмите на кнопку «Сохранить».

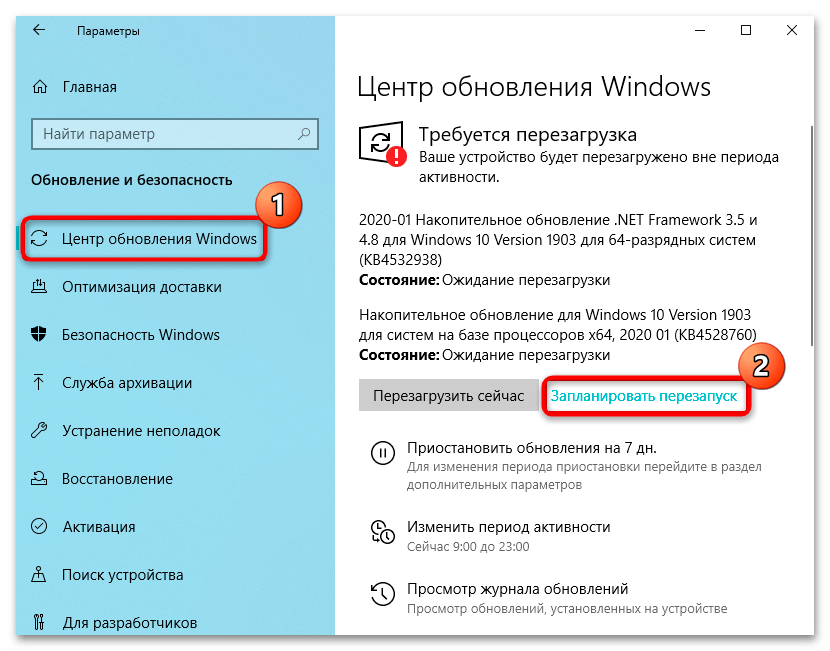
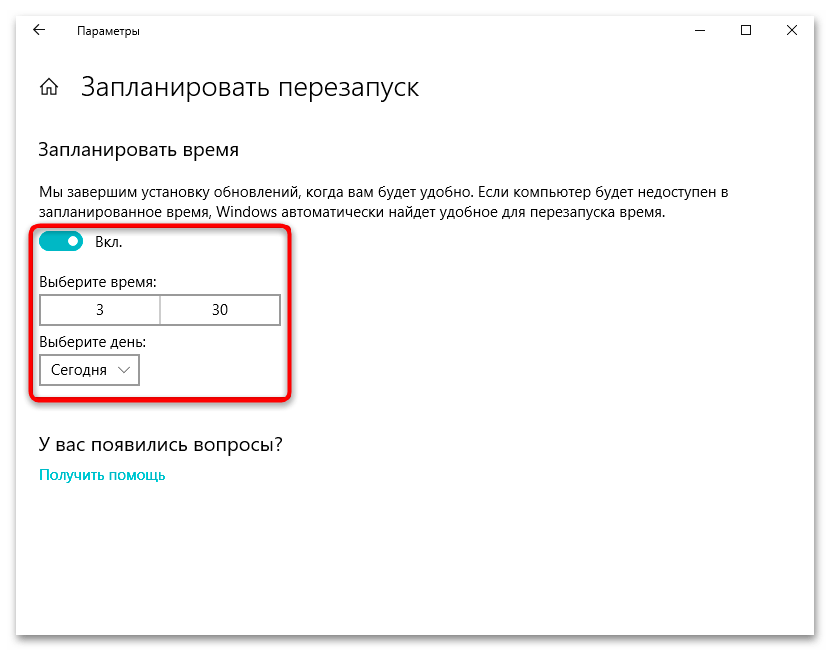
Когда обновления уже загружены, пользователь может изменить время, когда система будет перезапущена. Вернитесь в раздел «Обновление и безопасность» и нажмите на строку «Запланировать перезапуск», если она имеется.
В новом окне можно указать, когда необходимо выполнить перезагрузку компьютера. Если выбор времени и даты недоступен, активируйте функцию с помощью тумблера.
Способ 2: Изменение групповых политик
В операционной системе от Microsoft есть возможность полностью отключить автоматическую перезагрузку, используя редактор групповых политик. При этом, если есть пользователи, которые вошли в локальную сеть, то компьютер не будет перезапускаться.
Этот метод подойдет, только если используется Windows 10 Pro или Enterprise. Пользователям редакции Home следует обратиться к альтернативе — Способу 3.
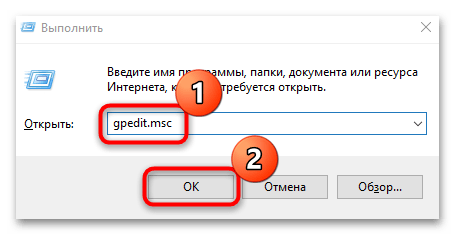
- Запустите штатное средство «Редактор локальной групповой политики». Для этого одновременно зажмите клавиши «Win + R», чтобы вызывать диалоговое окно «Выполнить», затем впишите команду
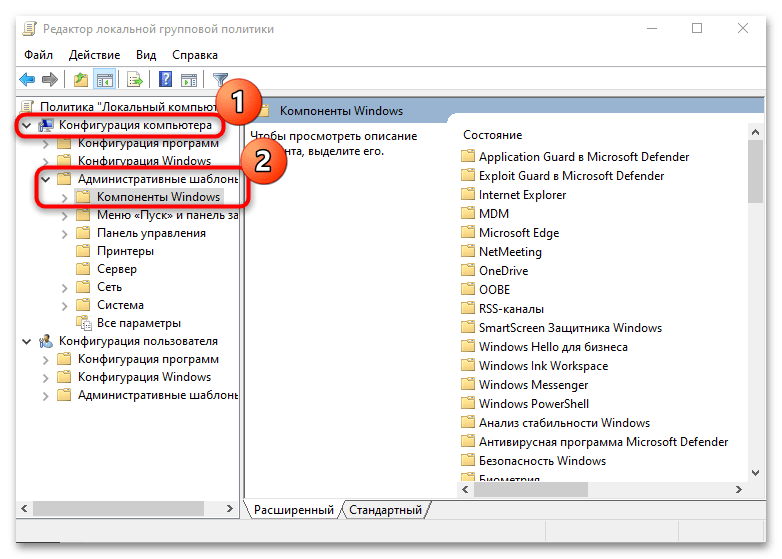
gpedit.mscи кликните по кнопке «ОК». - В новом окне слева раскройте меню «Конфигурация компьютера», затем – «Административные шаблоны». В списке разверните «Компоненты Windows».
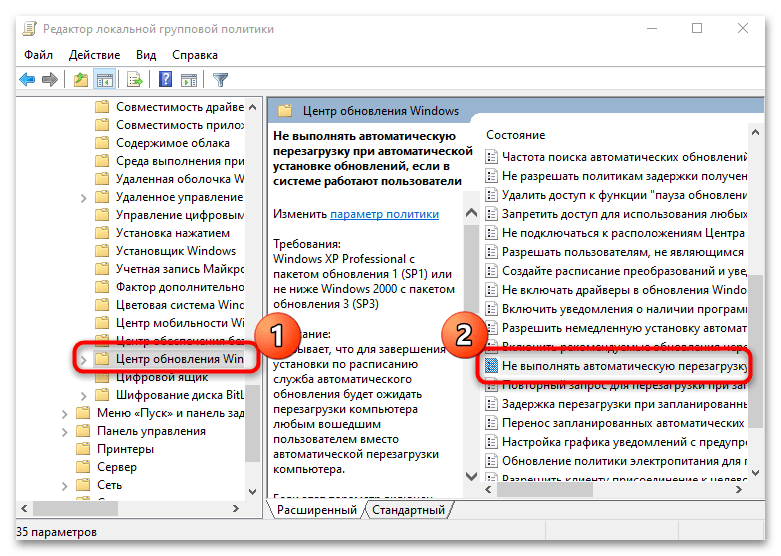
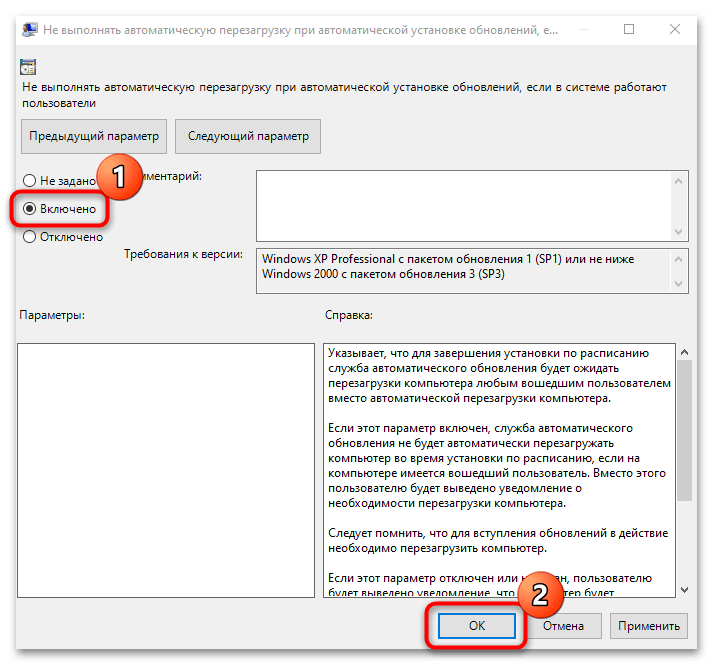
- Отыщите пункт «Центр обновления Windows» и кликните по нему левой кнопкой мыши. В правой части окна найдите строчку «Не выполнять автоматическую перезагрузку при автоматической установке обновлений, если в системе работают пользователи» и дважды щелкните по ней левой кнопкой мыши.
- Отобразится новое окошко, где нужно включить параметр, отметив соответствующий пункт. Нажмите на кнопку подтверждения.
Способ 3: Редактирование параметров реестра
Для версии Windows 10 Home («Домашняя»), где групповые политики отсутствуют, потребуется вносить изменения в «Редакторе реестра», чтобы отключить автоматическую перезагрузку системы. То есть метод является прямым аналогом Способа 2.
- Запустите «Редактор реестра» любым способом, например найдя его в «Пуске» по названию. В разделе слева перейдите по пути среди каталогов:
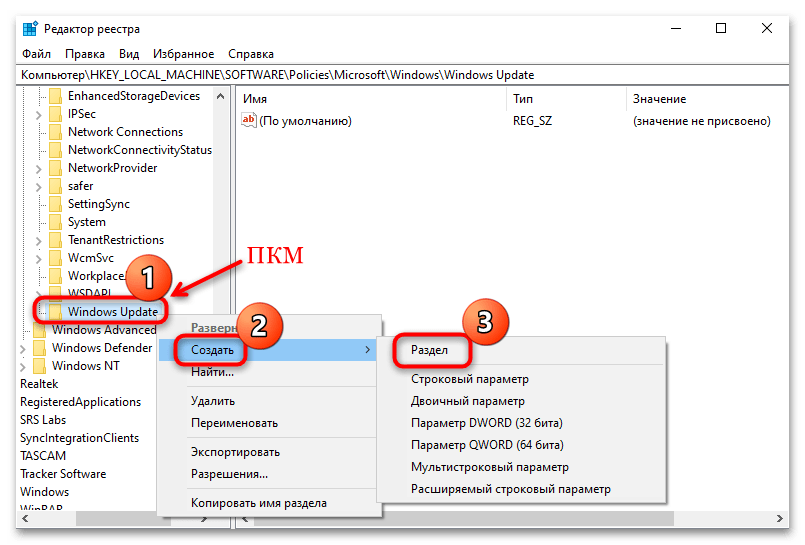
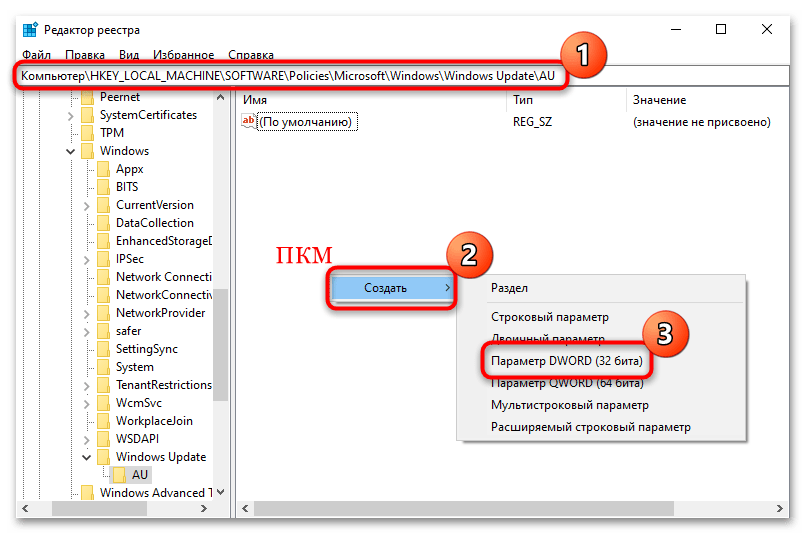
HKEY_LOCAL_MACHINE\SOFTWARE\Policies\Microsoft\Windows\WindowsUpdate\AU. При отсутствии папки «AU» создайте ее вручную внутри каталога «WindowsUpdate», щелкнув по его названию правой кнопкой мыши, наведя курсор на пункт «Создать» и выбрав «Раздел». Переименуйте стандартное имя каталога на «AU». - В главном окне справа щелкните по свободной области правой кнопкой мыши и создайте параметр «DWORD (32 бита)».
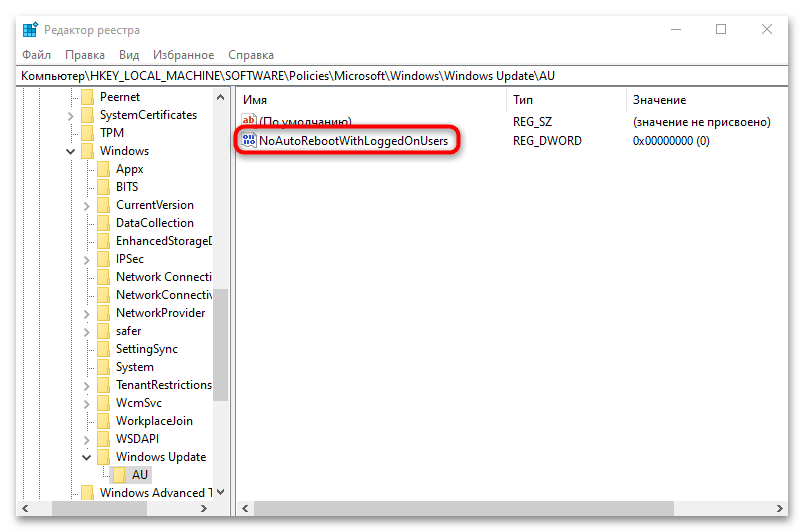
- Задайте новому параметру имя – «NoAutoRebootWithLoggedOnUsers» и дважды щелкните по нему левой кнопкой мыши.
- В строке «Значение» пропишите цифру «1». Сохраните изменения, нажав на кнопку «ОК».
Если в папке «AU» уже есть параметр под таким названием, то просто поменяйте его значение на «1», дважды щелкнув по названию, чтобы вызвать окно с настройками.
Способ 4: «Командная строка»
При использовании этого способа результат будет такой же, как и в предыдущем: через «Командную строку» можно вручную поменять значение параметра в «Редакторе реестра», использовав специальную команду. Соответственно, он подойдет в первую очередь для Windows 10 Home, где редактирование групповых политик невозможно.
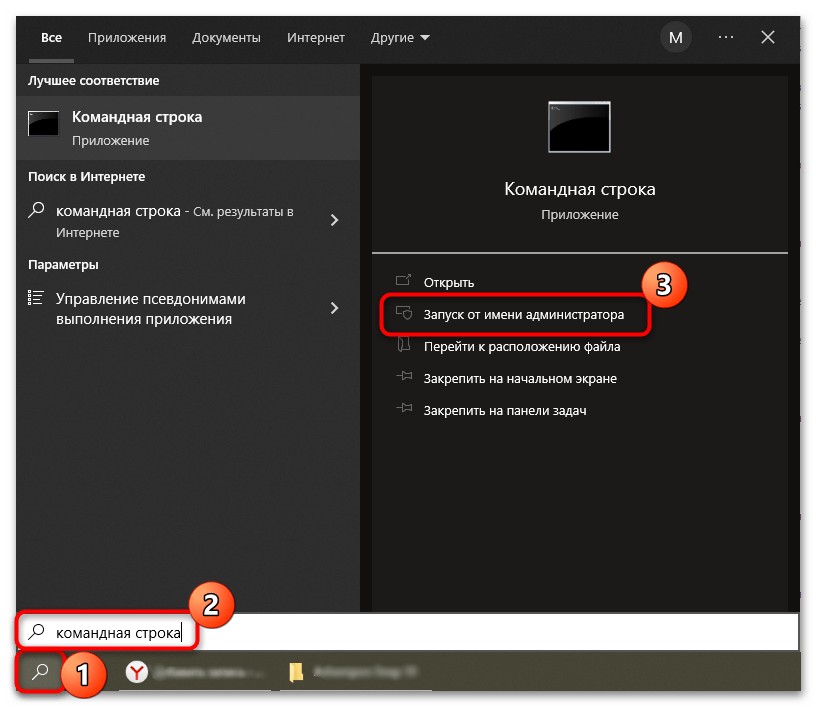
- Откройте «Командную строку» от имени администратора, вызвав «Пуск», вписав название приложения и нажав по соответствующей ссылке.
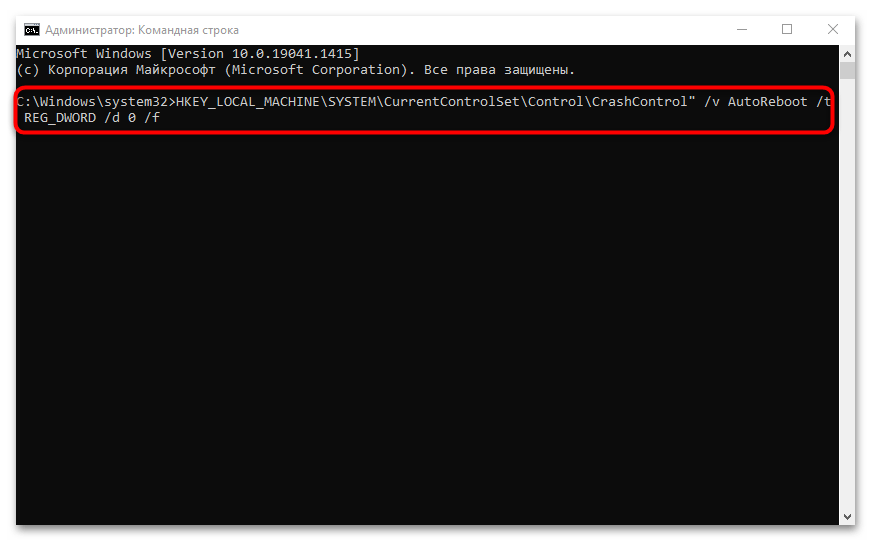
- Для изменения ключа параметра автоматического перезапуска скопируйте и вставьте
reg add "HKEY_LOCAL_MACHINE\SYSTEM\CurrentControlSet\Control\CrashControl" /v AutoReboot /t REG_DWORD /d 0 /f, затем нажмите клавишу «Enter».
Способ 5: «Планировщик заданий»
«Планировщик заданий» в Виндовс 10 позволяет автоматизировать процессы на компьютере: например, сделать так, чтобы определенные приложения запускались при включении системы. С его помощью также можно и полностью отключить автоматическую перезагрузку после обновлений:
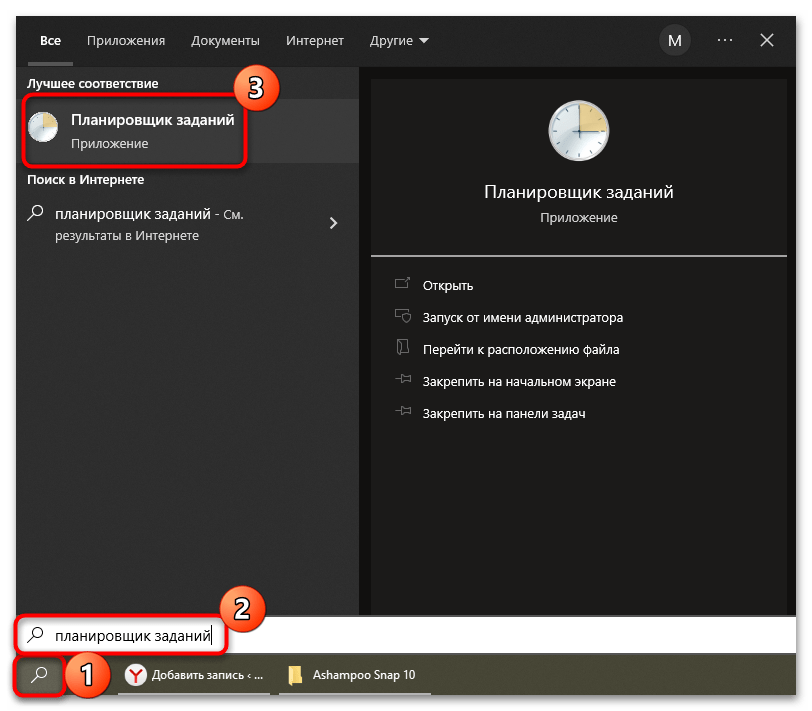
- «Планировщик заданий» запускается через главное меню: достаточно найти его через поиск в «Пуске».
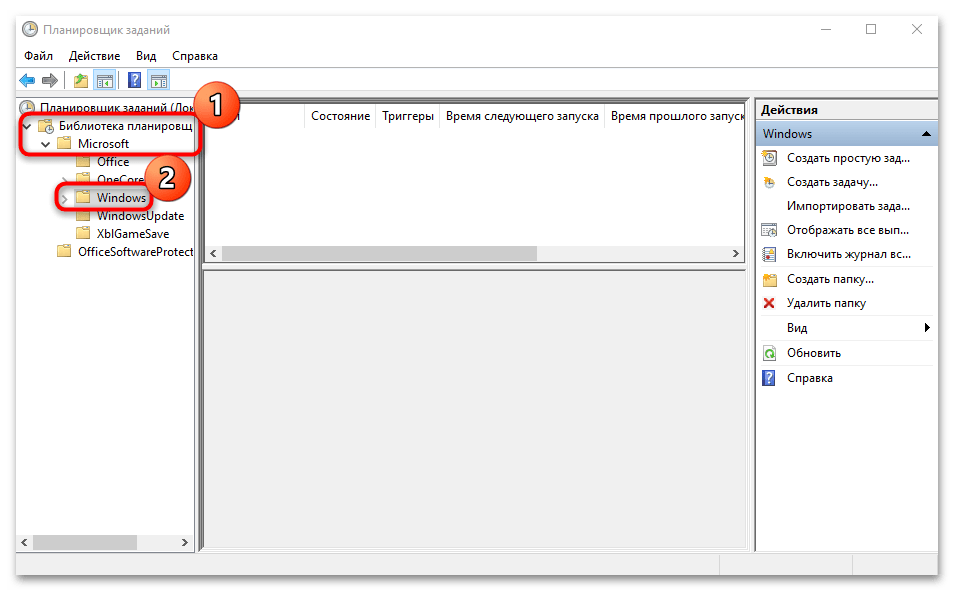
- Раскройте ветку «Библиотека планировщика заданий», затем разверните меню «Microsoft» и потом «Windows».
- В появившемся списке отыщите каталог «UpdateOrchestrator» и кликните по нему. В главном окне щелкните правой кнопкой мыши по пункту «Reboot» и выберите из контекстного меню опцию «Отключить».
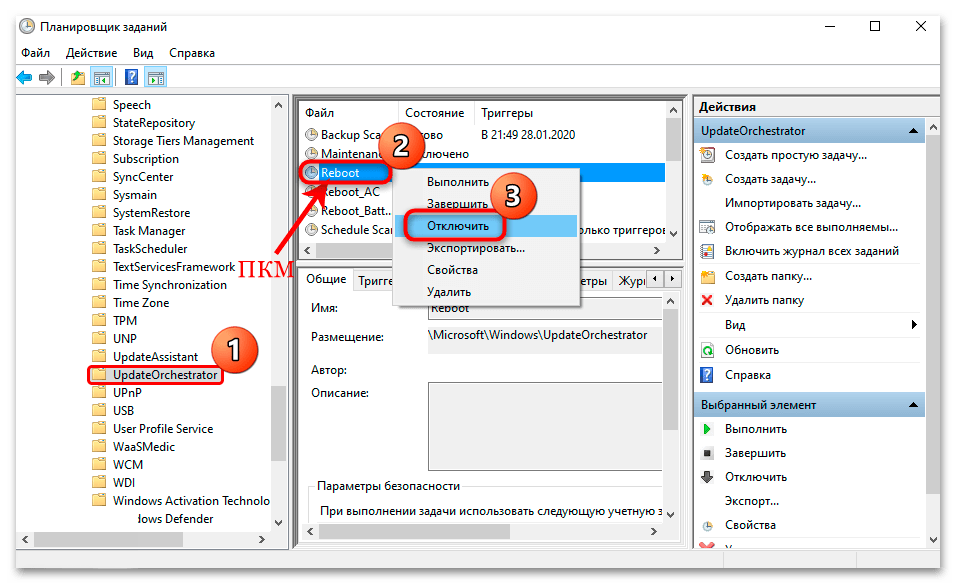
После этого обновления будут устанавливаться после ручной перезагрузки компьютера или завершения работы.
Наша группа в TelegramПолезные советы и помощь
Время на прочтение2 мин
Количество просмотров93K
Всем привет. Удивительно, но ответ на этот вопрос (точнее, «как сделать всё так, чтобы было как раньше») слабо освещён в рунете. Да и в целом готовое решение ещё нужно поискать.
Однако проблема требует решения т.к. система восстанавливает после перезагрузки далеко не все приложения.
Итак:
- Идём в настройку политик. Это будет работать даже на локальной машине без домена.
Для запуска редактора политик выполняем: Пуск → Выполнить (или Win+R) → gpedit.msc - Слева в дереве выбираем: Конфигурация компьютера (Computer Configuration), Административные шаблоны (Administrative Templates), Компоненты Windows (Windows Components), Центр обновления Windows (Windows Update).
- Здесь нас интересуют два параметра:
- Не выполнять автоматическую перезагрузку при автоматической установке обновлений, если в системе работают полльзователи (No auto-restart with logged on users for scheduled automatic updates installations) Фух, включаем. (Enabled). Ура, перезагрузки больше не будет (если есть активные сеансы).
- Также обратить внимание на параметр Настройка автоматического обновления (Configure Automatic Updates). Если перевести его в состояние Отключено (Disabled), то система перестанет тайком загружать и устанавливать обновления.
Если вы хотите, чтобы система самопроизвольно не перезагружалась никогда (даже в отсутсвие активных сеансов), то так и нужно сделать.
После отключения перезагрузки система будет периодически выдавать вам милое окошко с просьбой перезагрузить компьютер (как это и было раньше):

Кстати, это окно даже лучше: оно позволяет отложить перезагрузку «до вечера», что означает напоминание лишь раз в сутки, а не каждые 4 часа, как было раньше.
PS: Как верно заметили в комментариях, редактор политик доступен только на версиях круче Professional. На младших версиях потребуется внести изменения напрямую в реестр.
.reg-файл отключения автоматической перезагрузки.
Теги:
- инструкция
- windows 10
- windows update
- перезагрузка
- обновления системы
- бесит
+36
Комментарии293
В Windows 10 включает в себя новую функцию, которая позволяет пользователю настроить «Период активности» (активные часы), когда вы обычно используете компьютер или телефон. В этот период Обновления не будут устанавливаться и при необходимости в перезагрузке, для завершения установки, система не будет автоматически перезагружать ваше устройство. Начиная с Windows 10 build 18282, Windows может автоматически настраивать «Период активности» для вас на основе активности вашего устройства.
Если пользователь устанавливает активные часы, например, с 10:00 до 15:00, Центр обновления Windows не будет беспокоить пользователя в течение этого периода. Только с 15:00 до 10:00 ваша система будет выполнять регулярное обслуживание, загрузку и установку обновлений.
Как изменить «Период активности» в Windows 10
Функция «Период активности» имеет допустимый диапазон до 18 часов между временем начала и окончания.
Чтобы изменить «Период активности», выполните следующие действия:
Шаг 1: Откройте приложение «Параметры Windows» нажав на значок шестеренки в меню «Пуск».
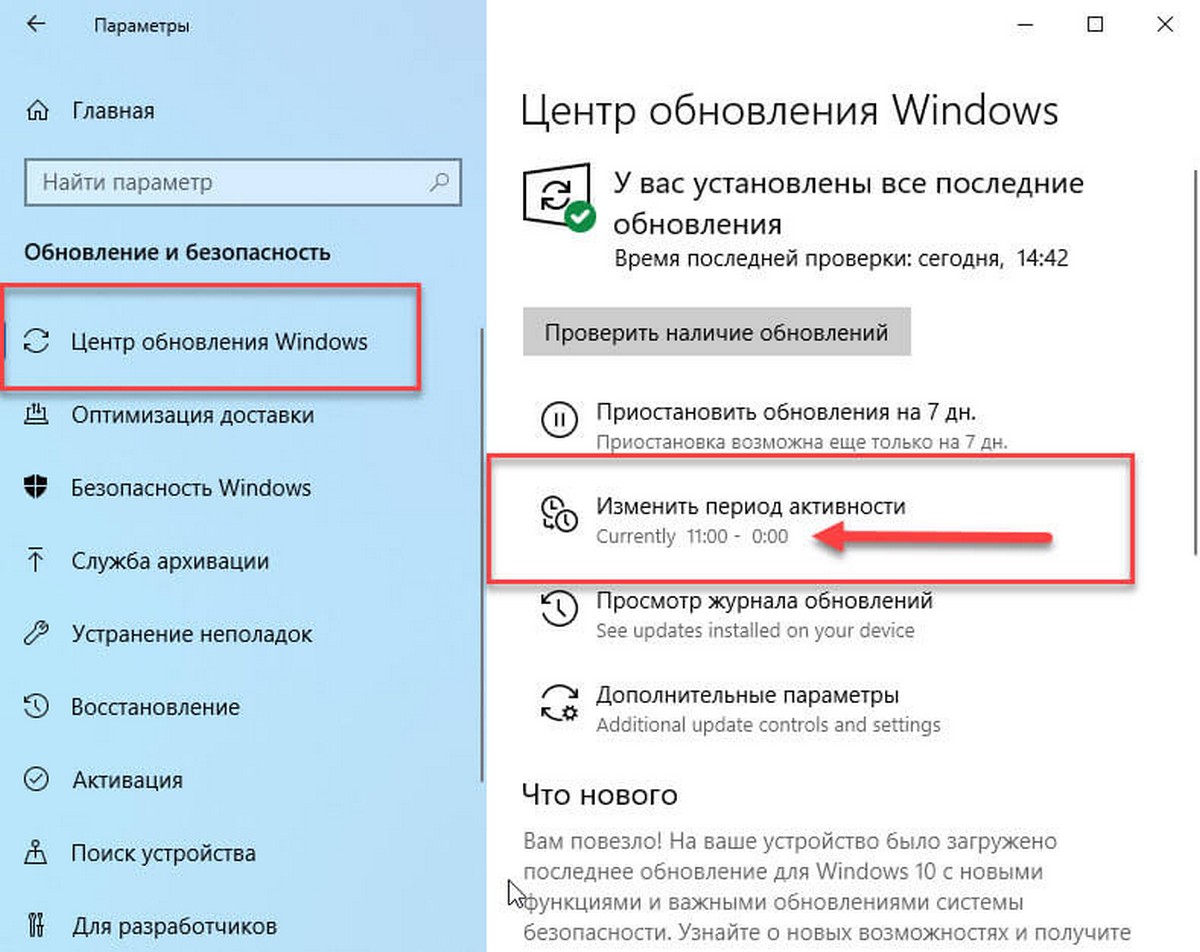
Шаг 2: Перейдите в группу настроек «Обновление и безопасность» → «Центр обновления Windows».
Шаг 3: Там вы увидите ссылку «Изменить период активности»: Нажмите на нее.

На экране появится следующее диалоговое окно:
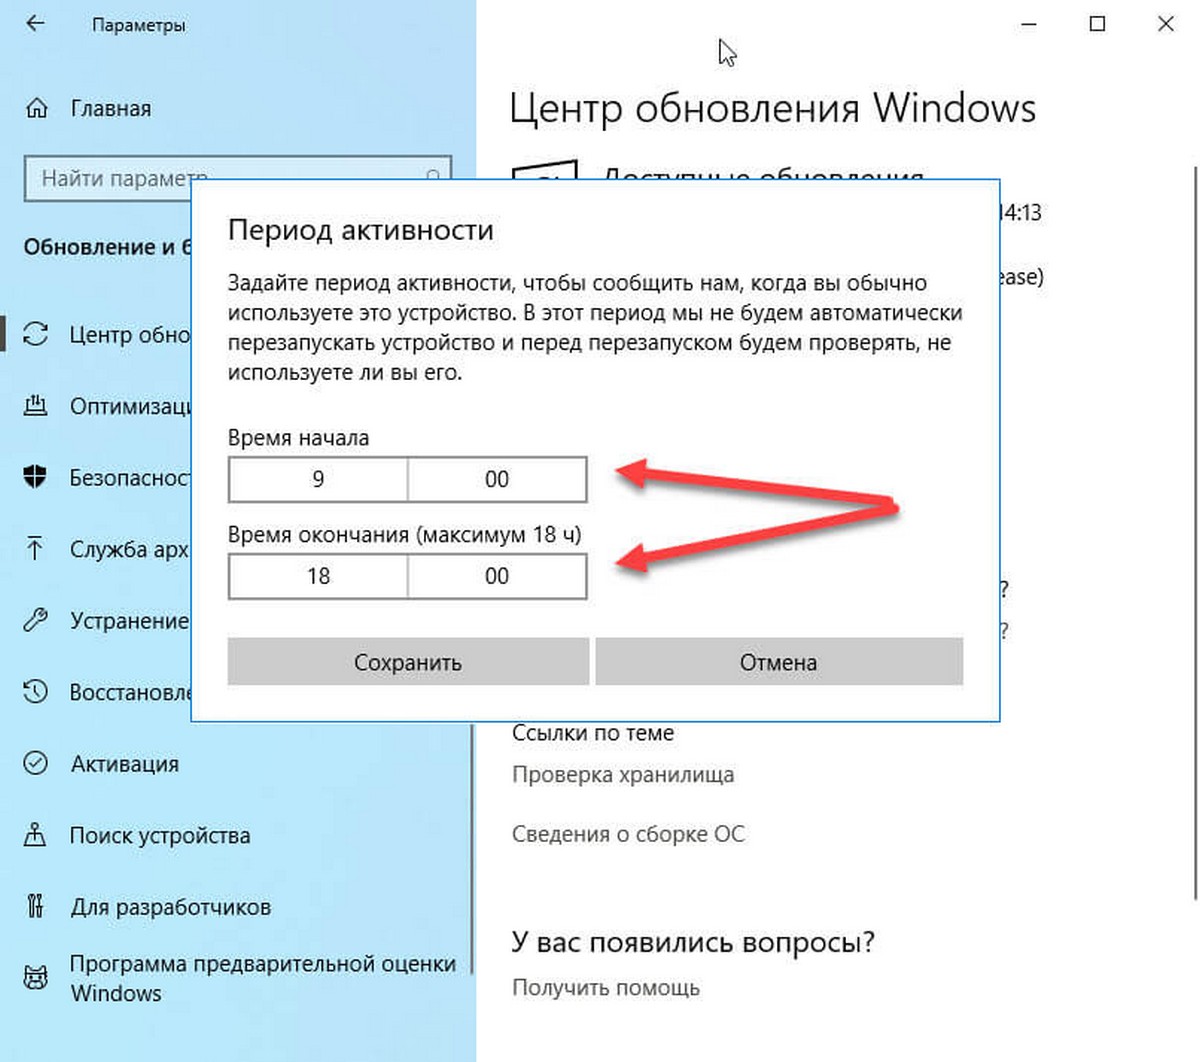
Задайте период активности, когда вы обычно используете это устройство. В этот период система не будет автоматически перезагружать устройство и перед перезапуском будем проверять, не используете ли вы его.
Шаг 4: Установите нужное время для «Время начала». Подтвердив выбор, установив новую конфигурацию. После выбора нового значения нажмите галочку, чтобы применить изменения:
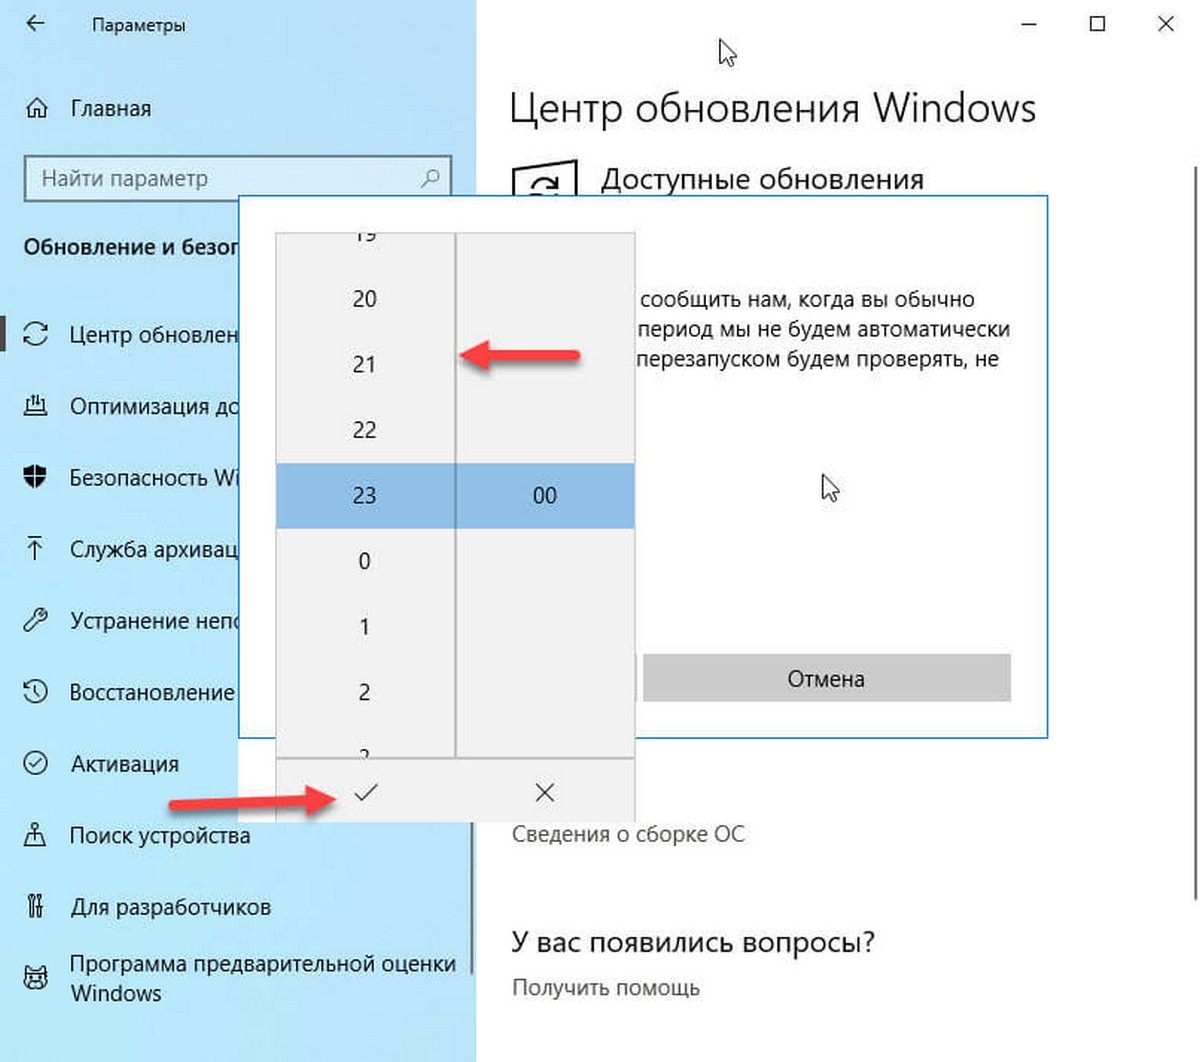
Шаг 5: Повторите то же для параметра «Время окончания» и нажмите кнопку «Сохранить».
Вот и все. Используя эти простые шаги, вы можете легко настраивать желаемый Период активности.
Как отключить «Период активности».
Сделайте следующее.
Шаг 1: Закройте приложение «Параметры» (если оно открыто).
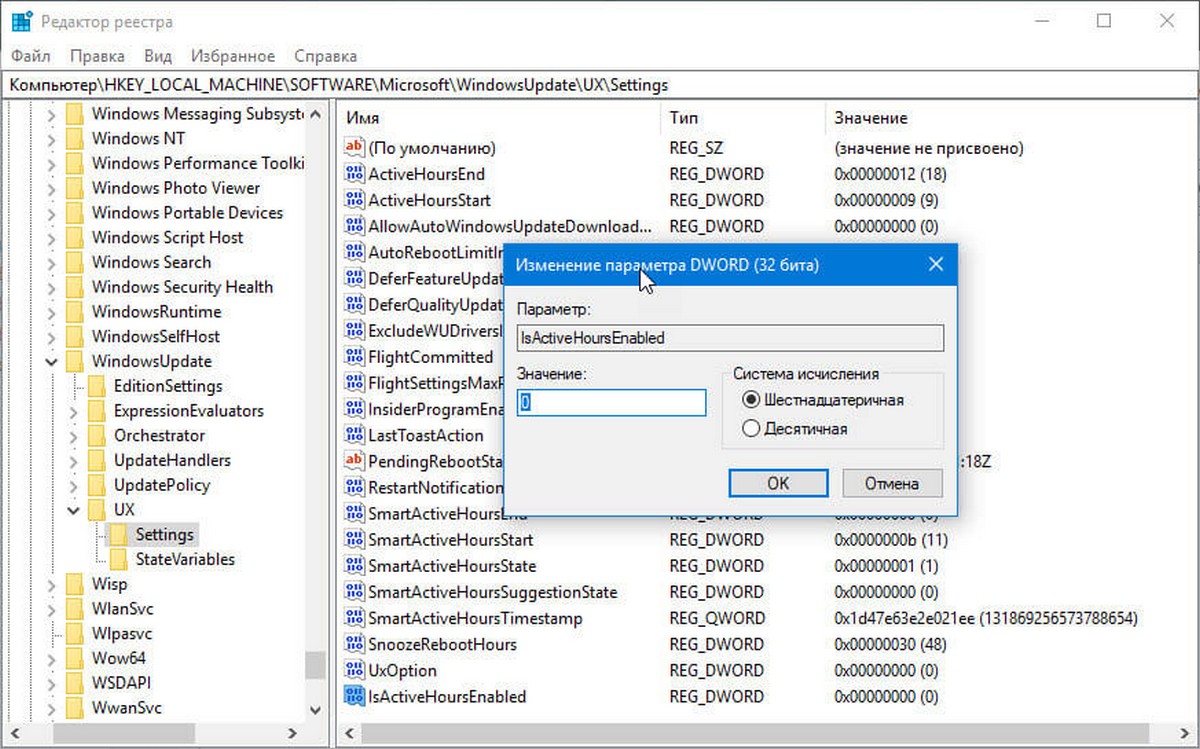
Шаг 2: Откройте редактор реестра.
Шаг 3: Перейдите к следующему разделу реестра:
HKEY_LOCAL_MACHINE\SOFTWARE\Microsoft\WindowsUpdate\UX\Settings
Шаг 4: Создайте новый параметр DWORD (32 бита), с именем IsActiveHoursEnabled, и установите его значение как: 0. Даже если вы используете 64-разрядную Windows, вам все равно нужно создать параметр DWORD (32 бита).
Шаг 5: Откройте приложение «Параметры» и проверьте, есть ли у вас активные часы.
Параметр IsActiveHoursEnabled принимает следующие значения:
- 1 — Включить Период активности
- 0 — Отключить Период активности
Чтобы восстановить значения по умолчанию, просто удалите параметр IsActiveHoursEnabled.
Автоматическая настройка Периода активности в Windows 10.
Windows 10 Build 18282 представляет функцию «Автоматическая настройка Периода активности» (Intelligent Active Hours). Вы можете включить ее, чтобы Windows автоматически настраивала «Период активности» для вас на основе активности вашего устройства. При включенном режиме Intelligent Active Hours система не будет автоматически перезагружать ваше устройство если вы им пользуетесь.
Чтобы включить «автоматическую настройку Периода активности» в Windows 10 , выполните следующие действия.
Шаг 1: Откройте приложение «Параметры».
Шаг 2: Перейдите в группу настроек «Обновление и безопасность» → «Центр обновления Windows».
Шаг 3: Кликните ссылку «Изменить период активности».
Шаг 4: На следующей странице включите параметр «Автоматически настраивать активные часы для меня на основе моего ежедневного использования» передвинув переключатель в положение «Вкл.». Смотрите скриншот ниже:Windows 10 Включить интеллектуальные активные часы
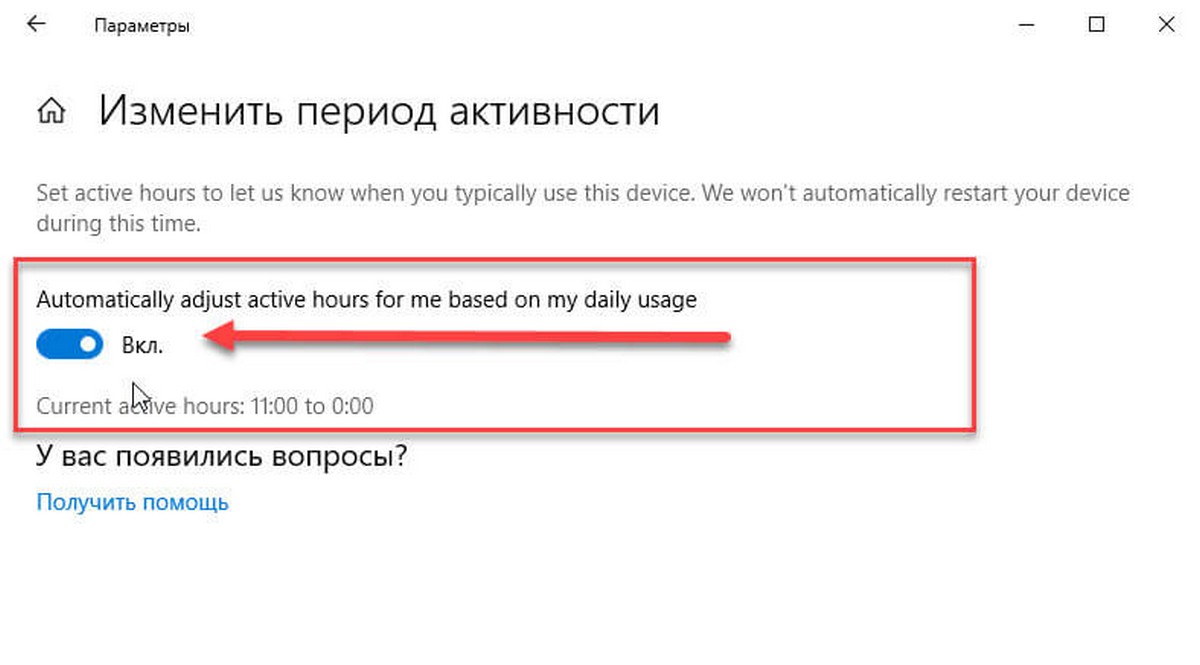
Теперь функция включена.
Кроме того, вы можете включить ее с помощью настройки реестра.
Включить параметр «Автоматически настраивать период активности» с помощью настройки реестра.
Прежде чем продолжить, убедитесь, что ваша учетная запись пользователя имеет права администратора. Теперь следуйте приведенным ниже инструкциям.
Шаг 1: Загрузите следующий архив: Загрузите ZIP-архив.
Шаг 2: Извлеките его содержимое в любую папку. Вы можете разместить файлы непосредственно на рабочем столе.
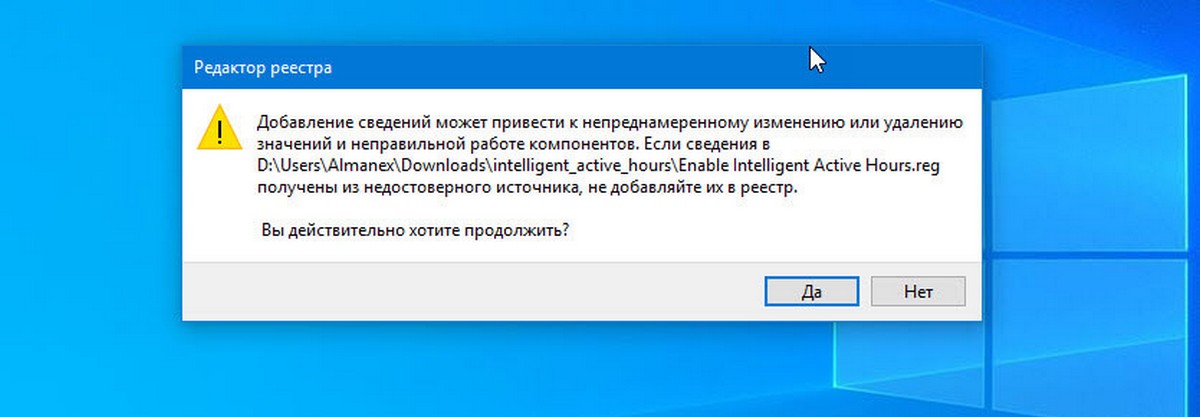
Шаг 3: Дважды кликните файл Enable Intelligent Active Hours.reg, чтобы включить функцию.
Чтобы удалить запись из контекстного меню, используйте второй предоставленный файл «Disable Intelligent Active Hours.reg».
Все!
Как это работает.
Данные Файлы изменяют ветвь реестра.
HKEY_LOCAL_MACHINE\SOFTWARE\ Microsoft\ WindowsUpdate\ UX\ Settings
В первом случае, создается новый параметр DWORD (32 бита) с именем SmartActiveHoursState и значением равным 1, это включает функцию. Значение 2 отключит функцию «Автоматический период активности».
According to different situations, the answers to how to fix your PC ran into a problem vary. Here’s quick navigation for all solutions, you can directly jump to the part you’re interested in:
| Cases | Step-by-step Troubleshooting |
|---|---|
| Case1. You can boot Windows |
Fix 1. Boot into safe mode, then boot normally…Full steps Fix 2. Check and repair disk errors with CHKDSK…Full steps Fix 3. Leave enough space for system drive…Full steps Fix 4. Check system log in Event Viewer…Full steps |
| Case2. You can’t boot Windows |
Fix 1. Perform System Restore with point…Full steps Fix 2. Perform System Image Recovery…Full steps Fix 3. Restore Registry configuration with CMD…Full steps |
| Case3. Stuck in Windows loop |
Fix 1. Perform Startup Repair to fix the issue…Full steps Fix 2. Perform System Image Recovery…Full steps Fix 3. Restore the Registry in Command Prompt…Full steps Fix 4. Enter Safe Mode to uninstall software…Full steps |
Applies to: Fix «Your PC ran into a problem and needs to restart» issue on the latest Windows 10 20H2 October Update, Windows 10 2004, Windows 10 1909/1903/1809/1803/1709, and more. If you know little about computers and can’t fix system startup errors, you can use EaseUS Data Recovery Services. The technical team can help you solve system startup errors, including system failure, BSOD, unbootable devices, etc.
Consult with EaseUS data recovery experts for one-on-one manual recovery service. We could offer the following services after FREE diagnosis:
- Fix Windows boot issues, including BSOD
- Fix Windows error and configure Windows environment
- Restore the system when it fails to boot
- Optimize Windows computer to make it run quickly
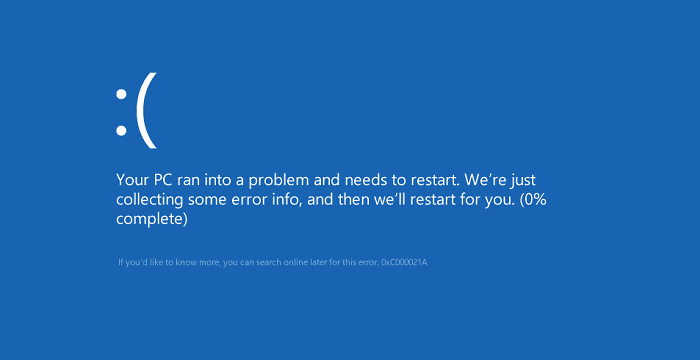
Some Windows users have encountered a situation where their operating system crashes unexpectedly and displays the dreaded blue screen of death. There are various underlying causes that can result in a crash, and the system will report different error messages and information. Among the blue screens, ‘Your PC ran into a problem and needs to restart’ happens most frequently.
Symptoms
The error «Your PC ran into a problem and needs to restart. We’re just collecting some error info, and then we’ll restart for you» may occur during the Windows startup process or during normal use.
- It always comes with a stop/error code like:
- WHEA UNCORRECTABLE
- KERNEL_SECURITY_CHECK_ERROR
- FAULTY_HARDWARE-CORRUPTED_PAGE
- DPC_WATCHDOG_VIOLATION
- Stop code: 0xC0000021A
- INACCESSIBLE_BOOT_DEVICE
- CRITICAL_PROCESS_DIED
- BAD_SYSTEM_CONFIG_INFO
Causes
Each stop/error code indicates the possible causes of the issue. However, there are various error messages (100+) related to «Your PC ran into a problem and needs to restart». Thus, there are so many reasons why you encounter the error. But I narrow them down to the following factors:
- Changes in registry
- Corrupted system files
- Problematic driver
- Virus/malware infection
- Loose hard drive connection
- Improper shutdown of the system
These causes may also lead to other blue screen errors like DPC Watchdog violation, Automatic Repair loop, and more.
- Recover inaccessible files from unboot computers.
- Recover files from formatted hard drive, emptied recycle bin, memory card, flash drive, digital camera, and camcorders
- Support data recovery for sudden deletion, formatting, hard drive corruption, virus attack, system crash under different situations
11 Fixes for Your PC Ran Into a Problem and Needs a Restart in Windows 11/10/8/8.1
If you are faced with the error, there is a slim chance that your computer will work properly after a restart. In more common situations, your PC will restart and prepare an automatic repair, which generally doesn’t work and will show you «Your PC did not start correctly». Or you are just stuck at the «Your PC ran into a problem and needs to restart» loop. Specify your situation and carry out the corresponding fixes to have a try.
- Notice:
- You’d better visit this page with another device instead of your computer since some of the solutions below require you to restart your computer. Besides, whether you can boot your computer or not, if the error code says «INACCESSIBLE BOOT DEVICE», do check your hard drive connection and remove the peripherals that are attached to your computer.
Situation 1. You Can Boot Windows
Even if you can still boot your computer, you need to apply some troubleshooting steps to prevent such an error from happening again. But you are the lucky ones that can fix the error much more easily with a bootable computer.
Method 1. Boot into Safe Mode and then Boot Normally
Safe Mode is a diagnostic mode of Windows. It starts your PC with the minimal necessary programs and services. In Safe Mode, you can fix some system-related problems by uninstalling incompatible software/driver, deleting problematic files, removing viruses, and more. Even if you do nothing, booting into Safe Mode is useful to repair some system errors by helping the storage system to be reaccessed.
On a functional computer, you can enter Safe Mode via Settings:
Step 1. In Windows 10, click «Start» > «Settings» > «Update & Security» > «Recovery».
Step 2. In the «Advanced startup» section, choose «Restart now».
Step 3. After the restart, choose «Troubleshoot» > «Advanced Options» > «Startup Settings» > «Restart».
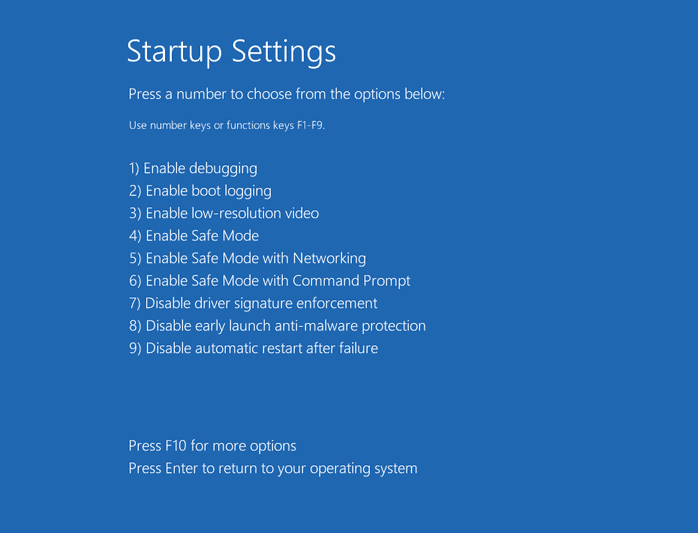
Step 4. Now you will see the «Startup Settings» screen. You can choose one of the three Safe Mode options: «Enable Safe Mode», «Enable Safe Mode with Networking», or «Enable Safe Mode with Command Prompt».
Step 5. Restart your computer and see whether it boots properly.
Method 2. Check the Disk
Check the disk is identical to running the CHKDSK command, which is used to fix disk errors like bad sectors and file system errors. If «Your PC ran into a problem and needs to restart» appears with «INACCESSIBLE_BOOT_DEVICE», it may be caused by the file system errors on your hard drive. That’s why checking the disk is necessary.
Step 1. Go to «This PC». Right-click your drive and choose «Properties».
Step 2. Go to the «Tools» tab and click «Check» > «Scan drive».
Method 3. Leave Enough Space for System Drive
The Windows operating system and some applications installed need sufficient free space to function properly. If your system drive, generally a C drive, is almost out of space, you should consider extending the system partition to create more space for your OS.
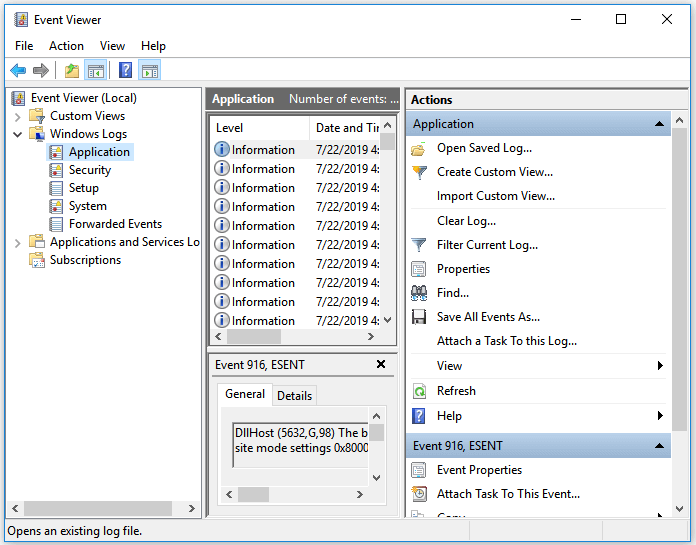
Method 4. Check System Log in Event Viewer
Checking the system log in Event viewer is helpful to find the culprit of the «Your PC ran into a system» error in Windows 11/10/8/8.1, especially for a problematic device or driver.
Step 1. Click «Start» and enter the event viewer.
Step 2. Right-click «Event Viewer» and choose «Run as administrator».
Step 3. Expand «Windows Logs» and choose «System».
Step 4. Check the errors that occurred simultaneously with the blue screen and fix the error according to the information.
Of course, there are other ways to try, including updating the device driver in Device Manager and running hardware diagnostics provided using the Windows built-in feature. If the solutions above fail, continue to carry out these methods to cope with the problem.
Related reading: How to Fix Windows 10 Error Code 0xc00000e When Boot Computer
Situation 2. You Can’t Boot Windows and See «Your PC did not start correctly»
In some cases, your PC will restart and prepare a startup repair automatically after the error message appears, resulting in the «Your PC did not start correctly» screen. Here you can see two options: Restart and Advanced options.
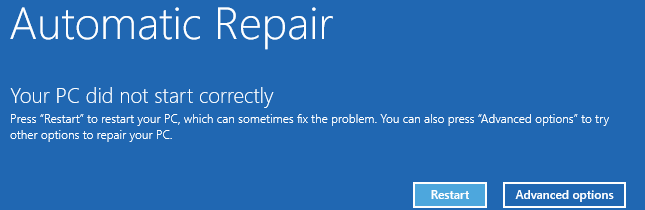
If you click «Restart», it’s almost inevitable the computer will come with the same error screen. Thus, you should choose «Advanced options» instead. Afterwards, continue to choose «Troubleshoot» > «Advanced options».
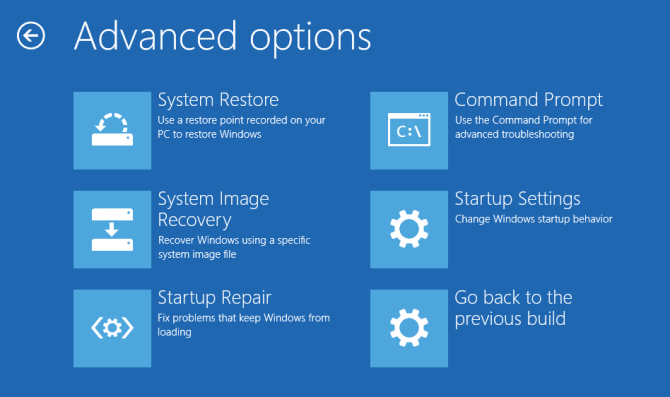
Here you will see five or six options, depending on your Windows version, including System Restore, System Image Recovery, Command Prompt, Startup Settings, and Go back to the previous build. Here is a brief explanation:
- If you have created a restore point, then using the System Restore feature will bring your computer back to a functional state. If not, this option is useless.
- Similarly, if you have created a system image, you can perform a System Image Recovery to bring your system back to life. If not, it’s just not the option for you.
- In this case, the computer had tried a Startup Repair and failed. Therefore, it’s unnecessary to try it again.
- In Command Prompt, you can use command lines to execute operations.
- In Startup Settings, you can enter Safe Mode, disable automatic restart after failure, and more.
- The «Go back to the previous build» will bring your computer back to an earlier version.
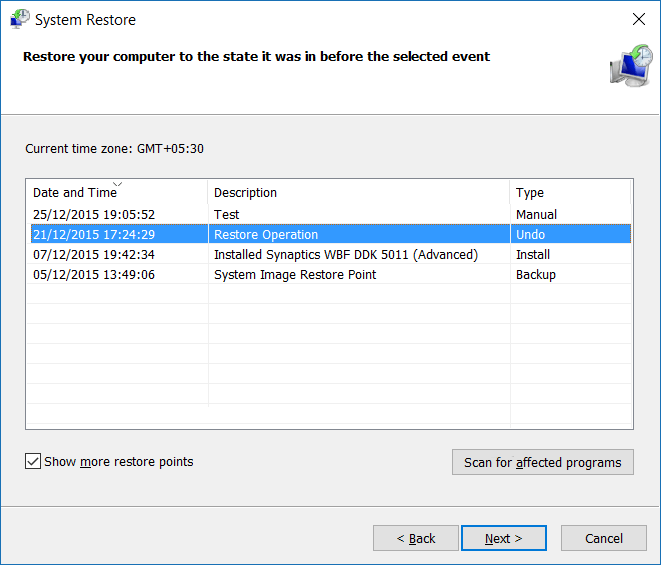
Method 1. Perform System Restore
If you have a system restore point available, you can perform a system restore:
Step 1. In the Windows Boot Options menu, select «Troubleshoot» > «Advanced Options» > «System Restore».
Step 2. Choose a previous working state (data) to restore your computer.
Step 3. Wait until Windows restores your system. Then restart the computer.
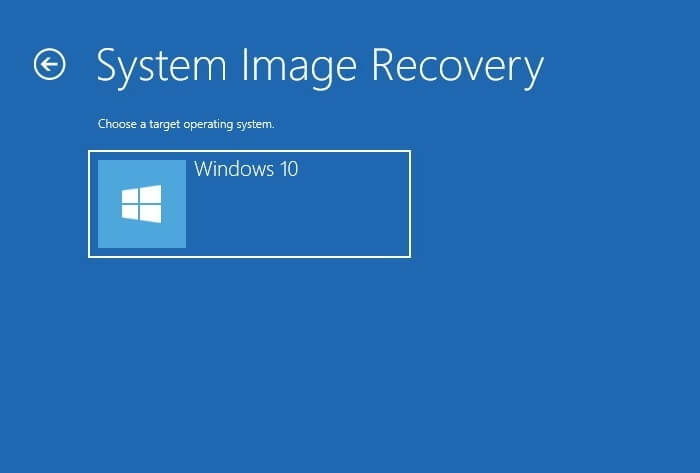
Method 2. Perform System Image Recovery
Alternatively, you can perform a system image recovery if you have created a system image before the issue arise.
Step 1. Connect the external hard drive that contains the system image to your computer.
Step 2. In the Windows Boot Options menu, select «Troubleshoot» > «Advanced Options» > «System Image Recovery».
Step 3. Choose the system image you want to recover.
Step 4. In the Re-image your computer wizard, select the system image, and click «Next».
Step 5. Follow the wizard to format the disks and restore the system.
Step 6. Restart your computer.
Method 3. Restore Registry Configuration
Don’t have any restore point or system image? No worry. Based on the details above, here I recommend you select «Command Prompt» to restore the registry.
The registry is a database that contains the configuration data for the Windows operating system and most of the applications. That is why changes in the registry may influence the functionality of your computer or programs. Registry files may get deleted accidentally by yourself or by some program. And that could result in serious problems just like «Your PC ran into a problem and needs to restart». Luckily, the changes can be reverted with the registry backup files, which you can complete via Command Prompt.
Step 1. Choose «Command Prompt» among the options.
Step 2. Select the account and enter the password.
Step 3. In Command Prompt, enter the following command in order:
- C:
- CD Windows\System32
- CD config
- DIR
- CD regback
- DIR CD..
- REN default default1
- ren sam sam1
- ren security security1
- ren software software1
- ren system to system1
- CD regback
- copy * c:\windows\system32\config
Step 4. Type exit. In the «Choose an option» screen, choose «Turn off your PC» and then start your computer.
Simply speaking, the commands above serve the purpose of replacing the existing system32 config files, which might have been changed incorrectly, with the ones in the backup folder. This method will certainly work if the «Your PC ran into a problem» error is caused by registry changes.
If restoring the registry comes in vain, you can choose «Startup Settings» and enter Safe Mode to try more solutions.
Situation 3. You Are Stuck in the «Your PC ran into a problem» Loop
Unlike either of the two cases above, you have no options available to choose from. All you have is the repeated restart and error circle. In a situation like this, you can either recover data from the corrupted OS or fix the problem with the Windows installation CD/DVD. If you don’t have an installation disc, you can create a Windows installation media as a substitute. With the Windows installation media, you can repair your computer via the Advanced options which you have no access to currently.
Preparation: Steps to access the Advanced options via the Windows installation media:
Step 1. Create a Windows installation media according to the official guide supplied by Microsoft.
Step 2. Connect the bootable media to your computer and boot your computer from the device.
Step 3. Wait for the installation files to load.
Step 4. In the Windows Setup window, choose «Next».
Step 5. Click «Repair your computer» in the Setup window and choose «Troubleshoot» > «Advanced options».
In situation 2, I have explained what these Advanced options can do. To fix the «Your PC ran into a problem and needs to restart» in Windows 10/11, you can apply the following solutions in order.
Method 1. Perform Startup Repair
Startup Repair enables you to fix certain system problems that might prevent Windows from booting up. It is always a good option when there is a boot failure on the computer.
Method 2. Perform System Recovery/System Image Recovery
The precondition to use such options is that you have a restore point or system image available. If not, switch to other workable ways.
Method 3. Restore the Registry in Command Prompt
Did you change the registry on your computer recently? If you did, enter Command Prompt and follow the steps detailed in situation 2 to bring the registry to an earlier working state.
Method 4. Enter Safe Mode
As mentioned above, Safe Mode is a diagnostic mode that allows you to perform some troubleshooting steps. In Safe Mode (with Command Prompt), you can do a lot of things to cope with the issue, like:
- Uninstall incompatible software
- Update driver
- Remove virus/malware
- Run System File Checker tool
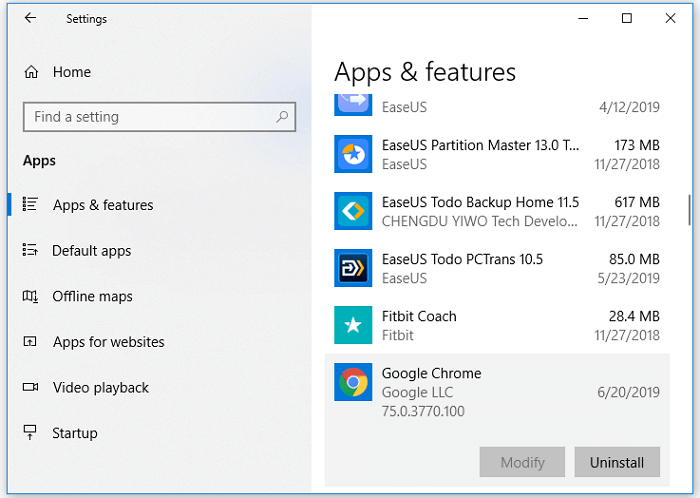
To uninstall problematic software:
Step 1. Go to «Start» > «Settings» > «Apps» > «Apps & features».
Step 2. Click the target software and click «Uninstall».
To update the hard drive/motherboard driver: Since your computer cannot boot properly, you need to update the hard drive driver or motherboard with a CD or USB that contains the driver. You can download the driver from the manufacturer’s website.
To remove the virus: Use the anti-virus software or Windows defender to finish the task. I will show you how to run Windows Defender.
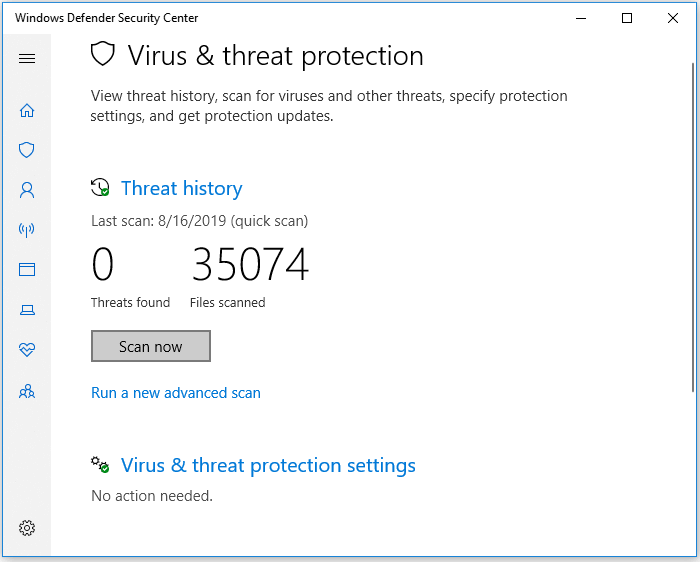
Step 1. Go to «Settings» > «Update & Security» > «Windows Security».
Step 2. Click «Virus & threat protection».
Step 3. In the «Threat history» section, click «Scan now» to scan for viruses on your computer.
To run the System File Checker tool:
It’s no doubt that missing or damaged system files will cause problems on the computer, either minor or serious. The BSOD «Your PC ran into a problem and needs to restart» may also result from system file errors. Fortunately, the Windows System File Checker tool is able to check and repair missing or damaged system files. In Command Prompt, enter sfc /scannow to start repairing the system files.
Extra Tip: Recover Data after Fixing «Your PC ran into a problem»
If you have, unfortunately, lost some files after taking the methods to troubleshoot the ‘Your PC ran into a problem and needs to restart’ error in Windows 10/11, try the EaseUS Data Recovery Wizard — EaseUS data recovery software to retrieve them. This software can recover files due to deletion, format, system crash, and more. Once data loss is found, launch the software and rescue your files as soon as possible.
Step 1. Select a drive and start scanning
Launch EaseUS Data Recovery Wizard and hover over the partition where you lost data. This could be an internal hard disk, external disk, USB, or SD card. Then, click «Search for Lost Data».

Step 2. Check and preview scanned files
Use the file format filter on the left or upper right corner to narrow the scan results until you find the files you need. Then, you can click the «Preview» button or double-click a file to preview its content, if you’d like.

Step 3. Recover lost data to a secure location
Click the checkbox next to the file and click «Recover» to restore the lost data to your local storage or Cloud drive. We recommend that you do not store the recovered data on the disk where you lost it earlier.

Let’s Move and Get Rid of the Problem
The «Your PC ran into a problem and needs to restart» problem is annoying. But with the workable solutions provided here, you should feel relieved because there are still ways to rescue your computer. If you are clear about what leads to your current situation, you can solve the problem in a more direct way. If not, specify your situation and carry out the potential fixes to remove the error.
Hope you can solve the «Your PC ran into a problem and needs to restart» successfully.
После установки обновлений в редких случаях Windows может начать постоянно требовать перезагрузить компьютер. Причем сколько бы раз вы его не перезагружали, в Windows Update постоянно будет висеть надпись ‘
Требуется перезагрузка, ожидание перезагрузки
‘ (
Restart required, pending restart
).
Такая проблема связана со сбоем при установке какого-то пакета обновления, которое не смогло внести изменения в образ системы и осталось в промежуточном состоянии.
Откройте консоль PowerShell с правами администратора и проверьте, есть ли пакеты (обновления), которые требуют перезагрузки компьютера (со статусом
Pending Reboot
). Выполните команду:
dism /online /get-packages /format:table | Select-String "Pending"
или такую команду PowerShell (имеет более читаемый вывод)
Get-WindowsPackage -Online | Where-Object { $_.PackageState -like '*Pending*' }

В этом примере видно, что пакет обновлений требует выполнить перезагрузку для внесения изменений в системе. Если после перезагрузки компьютера, статус компонентов не изменится и так же будет требовать перезагрузки, значит нужно отменить отложенную установку такого обновления.
Перезагрузите компьютер в среде восстановления Windows, выполнив команду
shutdown /f /r /o /t 0
(или загрузитесь с любого LiveCD, диска восстановления DaRT, или установочного образа Windows).
Для отмены запланированных обновлений со статусом Pending, нужно выполнить следующую команду (подразумеваем, что диску в Windows назначена буква C):
DISM /image:C:\ /ScratchDir:C: /cleanup-image /RevertPendingActions
Это отменит отложенные действия предыдущих операций обслуживания Windows.
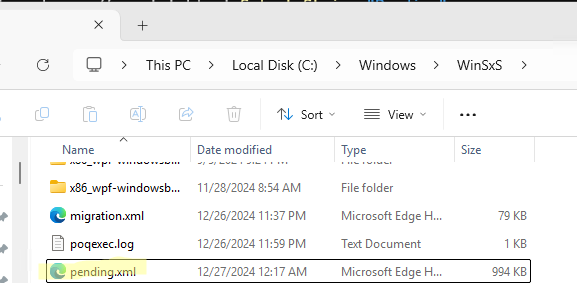
Если команда DISM не помогла, отмените обновления, ожидающие установки. Для этого удалить файл pending.xml.
del C:\Windows\WinSxS\pending.xml
del C:\Windows\WinSxS\cleanup.xml
(файл может отсутствовать)
del C:\Windows\SoftwareDistribution\Download\*.*
(очистить кэш скачанных обновлений)
Затем запустите
regedit
и загрузите с диска куст реестра
C:\WINDOWS\system32\config\Software
.
Перейдите в загруженную ветку реестра
HKLM\SYSTEM\CurrentControlSet\Control\Session Manager
и удалите параметр PendingFileRenameOperations
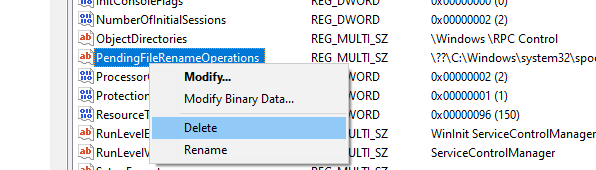
Сохраните изменения в файле, выгрузив куст реестра File -> Unload hive.
Перезагрузите компьютер, и проверьте, что из списка пропали обновления, ожидающие установки.
После этого обязательно проверьте целостность образа Windows и исправьте системные файлы командами:
DISM /Online /Cleanup-Image /RestoreHealth
sfc /scannow