
Since Windows 10 build 1803 from April 2018, the XPS Viewer is no longer included by default in that build of the operating system and has to be installed manually.
Usually this is done by browsing to the applications and feature pane but sometimes cannot be found and installed this way. The quickest and most efficient way is using the command line.
1. Open the Command Prompt (or PowerShell) with elevated privileges :
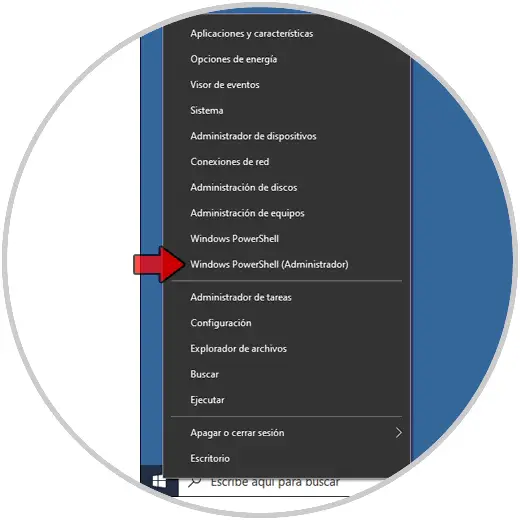
Right click on the Windows button, then “Command Prompt (Admin)” or “Windows PowerShell (Admin)”
2. Enter the following command to request the installation of the XPS Viewer component :
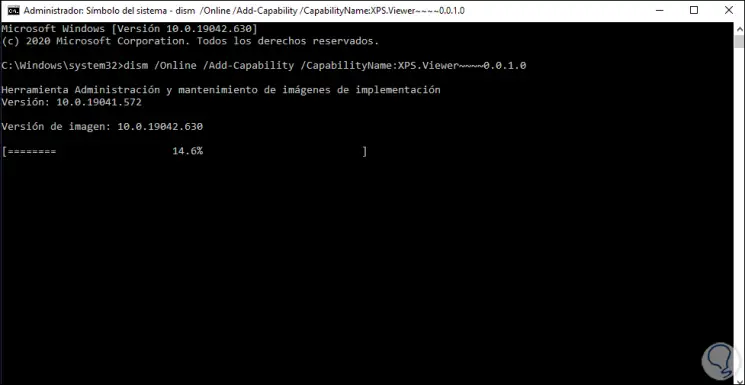
dism /Online /Add-Capability /CapabilityName:XPS.Viewer~~~~0.0.1.0
The possibility and ease that computers offer write, correct, sort and share written documents it is simply amazing and convenient, managing to generate a clean and error-free structure that can be handled by anyone in a format that can be modified to one’s liking.
However, there are many ways to view the different types of documents, but a new creation that emerged based on Microsoft in 2008 was the XPS format, which aims to be a competition to the famous PDF format and tries to be a universal viewer of any type of document, which allows you to transform your documents into a printed format that cannot be edited
How to install XPS Viewer using DISM command?
If you are one of those who like to try new software or like to catch up with the new trends, you can try the XPS viewer that Microsoft offers and that we can easily install on our Windows system, for this we will only have to follow the following steps:
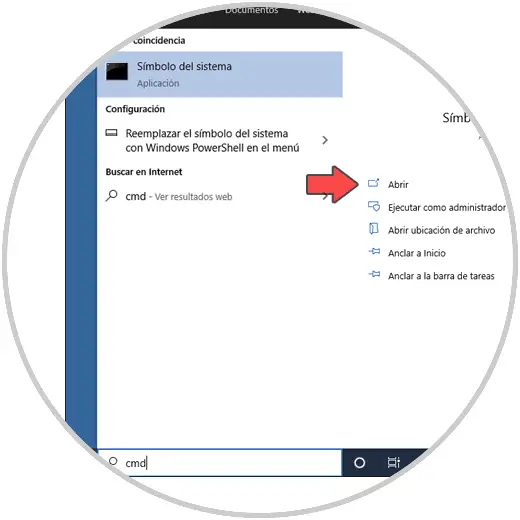
- We will go to the taskbar of our desktop and we will write in the search bar CMD, then we will enter the command window that opens.
- In this window we insert the following code: dism / online / Add-Capablity / CapablityName: XPS.Viewer ~~~~ 0.0.1.0
- Then, we will press Enter.
Once this is done, the XPS viewer will be automatically installed in our operating system and we will be able to view, convert, edit or create any XPS document without the need for Microsoft Office.

What is the way to download XPS Viewer from Windows Update instead of WSUS?
In case we cannot install XPS from the Windows CMD, we also have the option to use the Windows Update service, which offers us another alternative that will allow us to install the XPS viewer on our computer, for which we will just have to follow the steps below:
- We will press the button Windows together with R and we will enter the command gpedit.msc in the window that opens.
- Then, we will proceed to go to Computer Configuration, log in to Administrative models and finally System.
- In the panel that appears on the right, we will click on Specify the settings for installation and repair of optional components.
- We will change the status to enabled and check the box named Download repair content and optional features directly from Windows Update instead of Windows Server Update Services (WSUS).
How can I troubleshoot the installation of the XPS Viewer?
It may happen that, at the time of installation, various problems arise that make the installation of the XPS viewer impossible. While it is not common for these to manifest, here are some solutions you can try for ensure the installation of the XPS viewer on your computer:
Uninstall and reinstall Microsoft XPS Document Writer
If an installation error occurs, it is likely associated with a download error or a bug generated during installation, so you will need to uninstall the application and reapply some of the installation processes.

How to configure the XPS file once installed?
Once our XPS viewer is installed, we believe it would be necessary to make changes so that it suits our tastes, but being a viewer doesn’t have great options to edit.
The main options that will allow us to access the program window will be to open an XPS file, create an XPS file, print an XPS file and index an XPS file and other features such as converting XPS files to Word that we can find better explained in Microsoft support.
Если Вы не можете открыть файл XPS в операционной системе Microsoft Windows, необходимо выполнить следующие действия согласно инструкции приложенной ниже темы:
Установка с помощью командной строки
Можно установить приложение (компонент Windows) с помощью командной строки.
Запускать командную строку нужно с правами администратора (как это сделать?)
1. Запускаем командную строку, в поле командной строки

5. Вставляем следующею команду (DISM /Online /Add-Capability /CapabilityName:XPS.Viewer~~~~0.0.1.0) без скобок как показано на скриншоте снизу (вставляем в командную строку с помощью комбинаций клавиш Ctrl+V)

6. После успешной вставки команды нажимаем клавишу Enter на клавиатуре

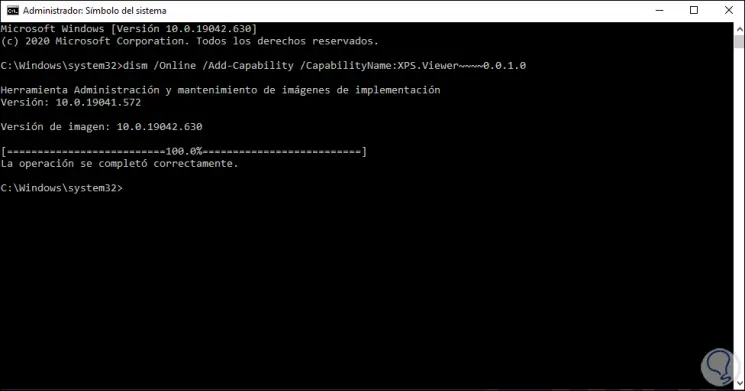
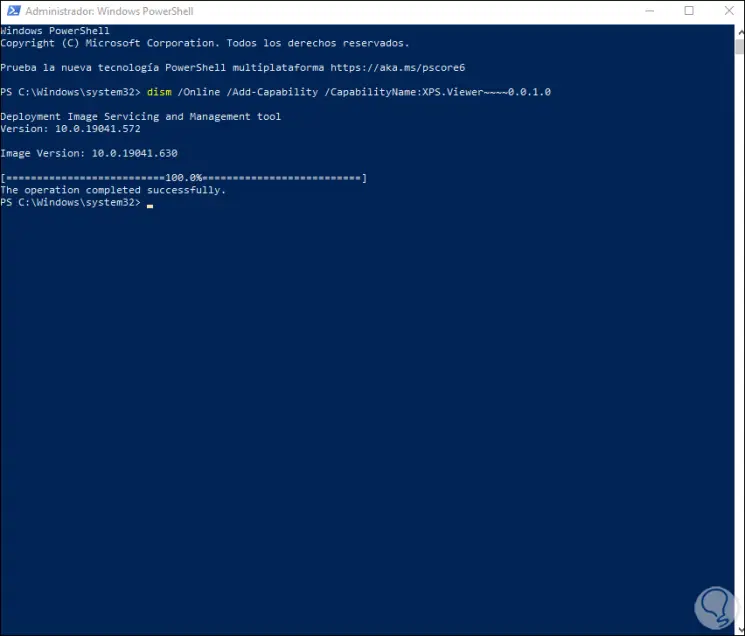
7. Ждем пока завершится команда, после Вы увидите 100%, команда успешно выполнена, как показано на скриншоте снизу

8. Перезагружаем компьютер, после перезагрузки находим необходимый файл XPS и как видим теперь он открываться стандартным средством Windows
Последнее редактирование модератором:
1. How to install the XPS viewer from CMD
2. How to install the XPS viewer from PowerShell
In the computer we get used to handling, managing and sharing a number of different documents , since through them we store different information and data in a simple and orderly way..
There are files with different types of extensions, each one created to allow the user to manage and work focused on a special segment, as well as with the XLSX extensions we can work with Excel files, DOCX for text files.
There is an extension that is XPS which we can find at some point when using Windows 10. This by default cannot be opened with a browser as a PDF file . XPS files are files that are XML-based with access and read properties. Windows 10 does not have an application for this type of files and for this we must install the XPS viewer, this can be installed through CMD or from PowerShell..
Let’s see how to use these two methods to install the XPS viewer in Windows 10.
To stay up to date, remember to subscribe to our YouTube channel! SUBSCRIBE
1. How to install the XPS viewer from CMD
We access the CMD console as administrators:
Once the console is open, we execute the following:
dism / Online / Add-Capability /CapabilityName:XPS.Viewer~~~~0.0.1.0
We press Enter and wait for the installation process to start:
At the end we will see the following:
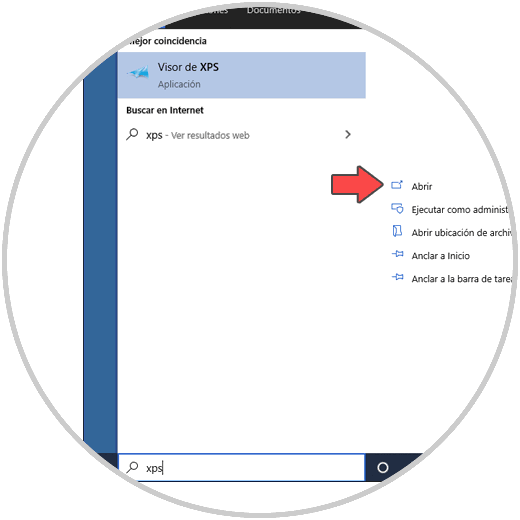
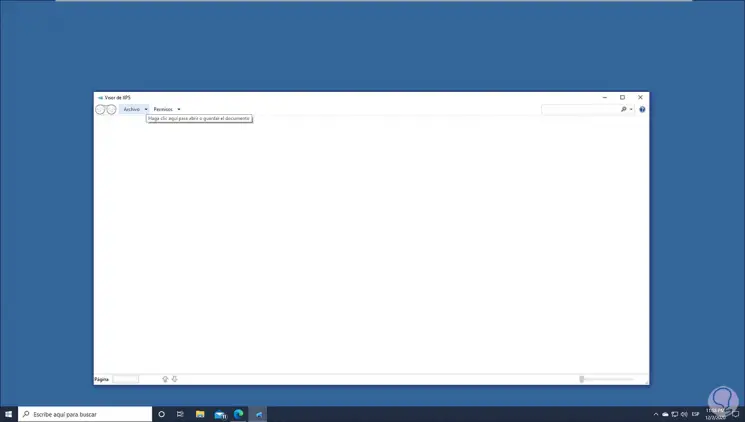
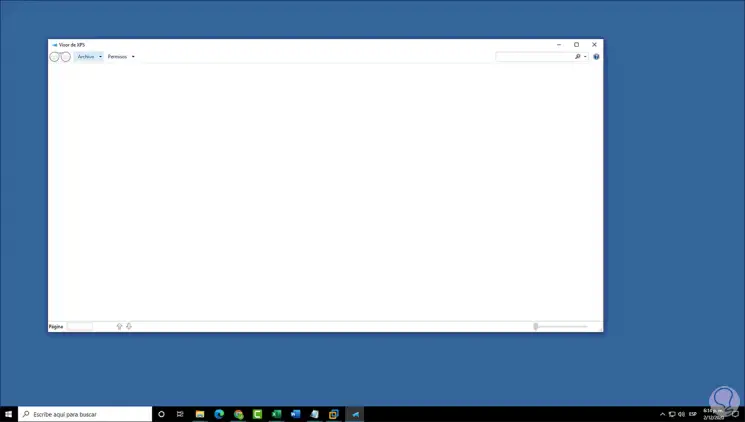
Now we can access the XPS viewer from the Start menu:
Step 5
The appearance of this will be as follows:
So it is ideal to install the XPS viewer from CMD..
2. How to install the XPS viewer from PowerShell
We access PowerShell as administrators:
Step 2
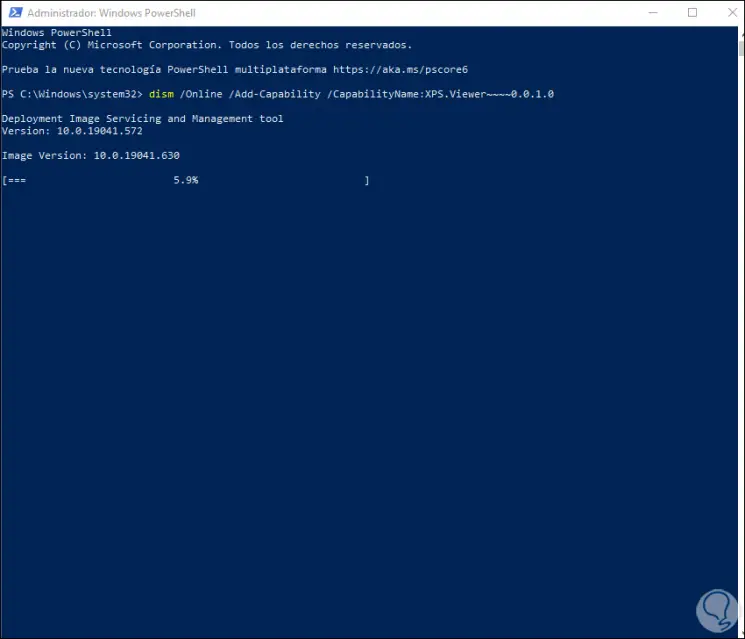
In the PowerShell console we enter:
dism / Online / Add-Capability /CapabilityName:XPS.Viewer~~~~0.0.1.0
We press Enter to start the process:
At the end we will see this:
Step 4
It will now be possible to access the XPS viewer from Home:
With either of these two methods we can install the XPS viewer in Windows 10.
In the world of printing, Printing Digital Language (PDL) is something that describes appearance of printed page at higher level as compared to its bitmap output. XML Paper Specification (XPS) is basically open specification for PDL. We all know that Extensible Markup Language (XML) is used an encoding for documents in machine as well as human-readable format. The XPS documents have .xps filename extension. You can easily open and modify XPS files using XPS Viewer, a free application in Windows operating system.
Till Windows 10 V1709, XPS Viewer came pre-installed. However, if you’ve made clean install of Windows 10 V1803 or later, the XPS Viewer is not available as pre-installed application. However, the XPS Viewer is available as an optional feature, so you need to add or install it manually. You can try either of below mentioned methods to add XPS Viewer to your Windows 10.
Page Contents
How To Install XPS Viewer In Windows 10
Method 1 – Using Settings App
1. Right click Start Button or press + X keys and select Settings.
2. In the Settings app, navigate to Apps > Apps & features.
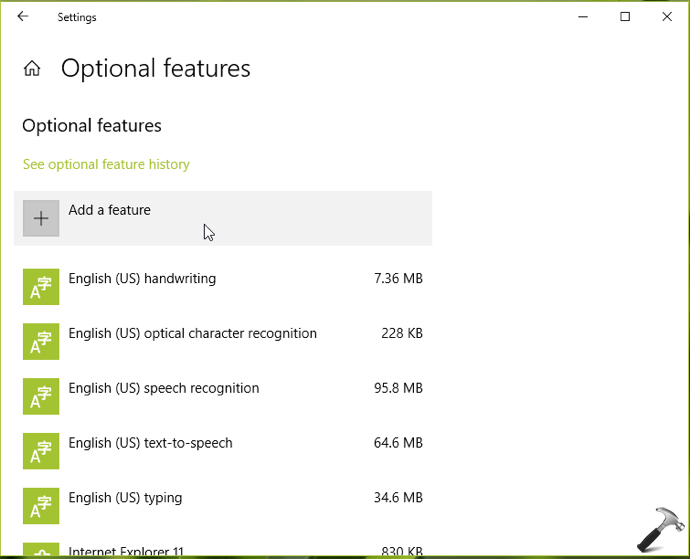
3. Now in right pane of Apps & features, click on Optional features link.

4. Next, under Optional features, click Add a feature.
5. Now under Add a feature, scroll down and you’ll find XPS Viewer listed there, click on it and then hit Install button to add XPS Viewer to your system.
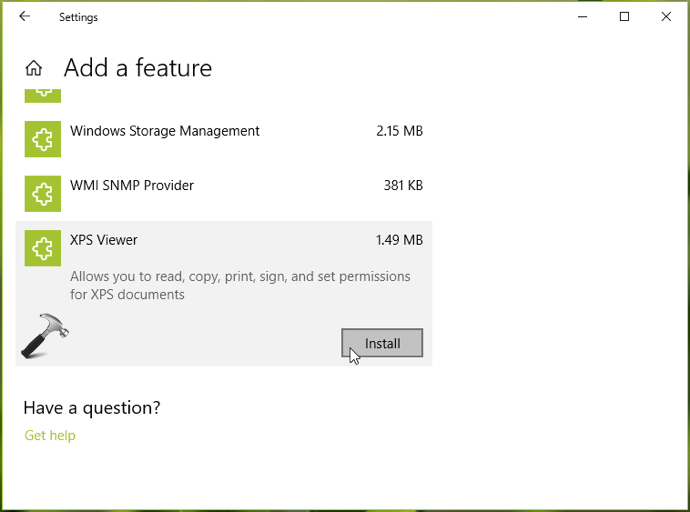
XPS Viewer should now be installed to your Windows 10.
If this method doesn’t works for you, try adding XPS Viewer using Command Prompt, as mentioned in Method 2.
Method 2 – Using Command Prompt
1. Right click Start Button or press + X keys and select Command Prompt (Admin).
2. In the Command Prompt window, type following command and press Enter key:
DISM /Online /Add-Capability /CapabilityName:XPS.Viewer~~~~0.0.1.0
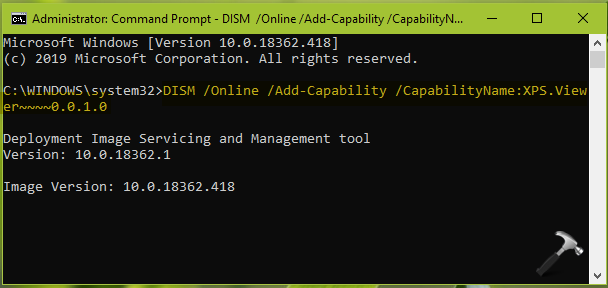
3. Once the command executed and you see The operation completed successfully message, XPS Viewer should be added to your system. You can then close Command Prompt and return to Desktop.
That’s it!
Related: Cannot Install XPS Viewer In Windows 10.