
[ see also: Install guide for installing LAMP stack ]
Jump List:
[ WordPress Easy Install ] | [ PHP-FPM notes ] | [ MySQL / MariaDB password ] | [ NGINX dot conf ]
Prepare Your System
Welcome to your complete step-by-step guide to install NGINX, PHP, and MySQL on Linux (aka. the LEMP stack). This tutorial assumes you’re going to use a Debian based Linux system, whether it’s a Windows Subsystem for Linux (WSL) installation, or an actual Linux Distribution running outside of Windows. Common Linux distros based on Debian (at least which use the apt package manager for .deb packages) are Ubuntu, Mint, MX Linux, Kali, and many many others. Technically, you can’t install NGINX on Windows, but with WSL you can!
I like the terminal-based text editor, Micro. so I’ve included it in the preliminary installation steps. I’ve also included cURL (a command line utility for accessing information from a variety of URL’s / protocols. CURL tutorial here: find it with [CTRL+F > "cURL"] ). Most likely, cURL is already installed on your system. As if you elected me to sign a Bill in Congress, I threw in net-tools as well because I like the ifconfig command. It’s no longer installed by default, and I often forget. Now I won’t!
Perhaps you won’t prefer Micro over Nano as a terminal based text editor. Nevertheless, installing Micro is just a suggestion. There are a lot of options! Be your own judge about the terminal based text editors. To show numbered lines in Nano like Micro has bey default, enter the key combination [ Alt+N ].
To be fair, most Linux users use VIM. I don’t like VIM for the offset keyboard home keys. Decisions.
One major difference between Nano and Micro which you’ll notice straight away is that the “exit” keys are different. Nano usus [ Ctrl+X ] to “exit”, whereas micro is [ Ctrl+Q ] to “quit”. Also, to “save as” in micro, you’ll need to first [ Ctrl+E ] (as in “E” for “execute”), and type: save “new file name”.
Note: under WSL (Windows Subsystem for Linux), text selections behave differently such that content you expected to copy to the clipboard might not be copied (e.g. on my system at least, micro isn’t as friendly with copy/ paste operations to/ from Windows apps to/ from WSL apps. I use Nano if I want to copy/ paste stuff). In Micro, start with [ Ctrl+E ] and type “help commands” (sans quotes). When finished browsing Micro “help”, type [ Ctrl+E ] again for the command line, and type “quit” to focus the cursor back in the text editor area.
As always, before making changes to your system’s software, start by updating your package lists:
sudo apt update
sudo apt upgrade -f
sudo apt install micro
sudo apt install curl
sudo apt install net-tools
sudo apt install xutils-dev #see incld tool cleanlinks
Line-by-line above :: All-One-Line below
sudo apt --fix-missing update && sudo apt --fix-broken upgrade -y && sudo apt install -y micro curl net-tools xutils-dev
Install the “M” of LEMP: the WWW / HTTP Server-side RDBMS = Free MySQL / MariaDB
sudo apt install mariadb-client mariadb-server mariadb-common dbconfig-common | tee ~/LXMP_install_mysql.txt
sudo service mariadb start
sudo mysql -u root
Line-by-line above :: All-One-Line below
sudo apt install -y mariadb-client mariadb-server mariadb-common dbconfig-common | tee ~/LXMP_install_mysql.txt \ && sudo service mariadb start \ && sudo mysql -u root
MySQL Root Password
TIP: Do NOT create the root password at this step ONLY IF you are certain you want to use the package manager (eg. sudo apt install ) to install phpMyAdmin for graphical, web-based database administration under this, your complete LEMP installation.
The reason to NOT create a root password here, if your intention is to use phpMyAdmin is as follows:
- dbconfig-common will generate a phpMyAdmin friendly, secure password during the package manager install of phpMyAdmin
- dbconfig-common will create the password and install phpMyAdmin without fail, ONLY IF the root password has NOT yet been created.
- The above is in my experience, for a seamless phpMyAdmin install using apt.
- This is not to say that phpMyAdmin can NOT be installed if a ROOT password is created according to instructions in the next step.
- page down a bit to the install phpMyAdmin step of this guide, for more insight.
- dbconfig-common will create the password and install phpMyAdmin without fail, ONLY IF the root password has NOT yet been created.
IF you DO NOT PLAN TO install phpMyAdmin, the please proceed with the next step, and create the ROOT password for MySQL / MariaDB now!
Verify MySQL / MariaDB is installed and functioning: Set MySQL root Password
Based on the previous command above, as advised during the MySQL / MariaDB install, that command was: sudo mysql -u root where the rdbms is executed using the -u root command, it will launch the db admin on command line, without the need to enter a password [because this is] upon very first launch as system admin on a new install such as this guide is intended.
If everything worked correctly, your shell prompt will change to the MySQL prompt, like so:
MySQL >
The commands shown next will create the create the root user, grant privileges, and set the root password. If you do not plan to use apt and dbconfig to install phpMyAdmin, you can execute the SQL commands now while the MySQL/ MariaDB prompt is active. After executing the SQL then exiting from the database prompt, you’ll continue on the BASH command line and complete the LEMP stack / NGINX PHP MySQL HTTP web server installation by configuring a few things for your new NGINX and PHP installation.
If you followed the steps above to install mysql/ mariadb, you should now be at the command line prompt:
MySQL>
SET PASSWORD FOR 'root'@'localhost' = PASSWORD('*M*y*P*a*s*s*');
In addition to setting the password for the ROOT user, it’s recommended to create a secondary user and assign a password for it. Maybe you have a username that you typically use for development purposes (e.g. a user you tend to place in your wp-config.php file during development to connect to your db server). Create the second MySQL/ MariaDB user with the following command:
GRANT ALL ON *.* TO 'USER02'@'%' IDENTIFIED BY '*U*S*R*2*pw*';
FLUSH PRIVILEGES;
exit;
Remember: when issuing commands for MySQL User admin where the server name is required (e.g. as above, user is identified by 'root'@'localhost'), if you suspect you’ll need to admin something other than ‘localhost’, but you’re not sure and wish to try being universal, you might instead use 'root'@'%' where % is a wildcard meant to match any server name.
Install NGINX and PHP
Install NGINX and PHP (including a few PHP extension libraries which may be supported by your WordPress version). All of that can be done by executing the following one-line entry from the BASH command line. Take note of the PHP version numbers scrolling up your screen during installation (e.g. 7.4, 8.2, 8.3). You’ll need that number in a moment, after the following command completes for you:
sudo apt install -y nginx php-fpm php-curl php-imagick php-zip php-xml php-mysqli php-pdo php-gd php-mbstring php-xdebug php | tee ~/LXMP_install_nginx-php.txt && php -v | tee -a ~/LXMP_install_nginx-php.txt
Configure new NGINX server_name
Go to NGINX config folder and enable sites:
NGINX stores site-specific configuration files, similar to the way Apache uses separate files for VHOST configurations. The folder names are even the same (e.g. sites-available; sites-enabled). Here, we use a shortcut to save 2 seconds on typing (the asterisk) the path to “/etc/nginx/sites-available“.
cd /etc/nginx/sites-av*
ls -laX
user@system:/etc/nginx/sites-available$ ls -laX
total 12
-rw-r--r-- 1 root root 2412 May 16 15:35 default
drwxr-xr-x 2 root root 4096 May 16 15:24 .
drwxr-xr-x 8 root root 4096 May 16 15:24 ..
Open the NGINX default site file in your text editor. Note that it has a section at the bottom which is commented out. Basically you need to duplicate this file to a new my-site-details file and edit to suit your system folder structure:
sudo micro default
# Add index.php to the list if you are using PHP
        index index.html index.htm index.nginx-debian.html;
        server_name _;
        location / {
                # First attempt to serve request as file, then
                # as directory, then fall back to displaying a 404.
                try_files $uri $uri/ =404;
        }
        # pass PHP scripts to FastCGI server
        #
        #location ~ .php$ {
        #       include snippets/fastcgi-php.conf;
        #
        #       # With php-fpm (or other unix sockets):
        #       fastcgi_pass unix:/run/php/php7.4-fpm.sock;
        #       # With php-cgi (or other tcp sockets):
        #       fastcgi_pass 127.0.0.1:9000;
        #}
        # deny access to .htaccess files, if Apache's document root
        # concurs with nginx's one
        #
        #location ~ /.ht {
        #       deny all;
        #}
}
# Virtual Host configuration for example.com
#
# You can move that to a different file under sites-available/ and symlink that
# to sites-enabled/ to enable it.
#
#server {
#       listen 80;
#       listen [::]:80;
#
#       server_name example.com;
#
#       root /var/www/example.com;
#       index index.html;
#
#       location / {
#               try_files $uri $uri/ =404;
#       }
#}
While the following is essentially a matter of removing the comments from the top part of the ./sites-available/default file, we recommend you invest some time to develop an understanding of the structure of this file.
Hint: the location paths are relative to the path designated in this example at the line “root /var/www/html;”, and the lines with “location ~” tell NGINX how to handle paths containing matches to the expression which precedes the opening brace.
I might summarize in Plain English for my example above, the following syntax translates to, “anything may precede \.php or \.phtml [at the location, / which ends that part of the statement ]”
“location ~ .(php|phtml)$ /“
As in regular expressions, the “$” translates to, “…and the search ends here; we’re finished “looking” for matches on this line.” If there is a match to .php or .phtml, allow the server connection and continue to the PHP-FPM.
The following site configuration file is copied directly from the Debian distro installed on my Windows Subsystem for Linux (WSL):
server {

        listen 80;

        server_name mx23ahs;

        root /var/www/html;

        index index.php index.phtml index.html index.htm;

        location / {
                try_files $uri $uri/ =404;
        }

        location ~ .(php|phtml)$ {
             fastcgi_pass unix:/run/php/php8.2-fpm.sock;
             include snippets/fastcgi-php.conf;
        }

        # HANDLE APACHE .htaccess FILES etc
        location ~ /.ht {
                deny all;
        }

      # UNCOMMENT TO ALLOW LARGE UPLOADS SUCH AS WORDPRESS .SQL INTO PHPMYADMIN
     # client_max_body_size 100M;

        # UNCOMMENT TO AUTO INDEX CONTAINERS MISSING INDEX FILES LIKE index.html index.php etc
        # autoindex on;
       # autoindex_exact_size off;
       # autoindex_format html;
      # autoindex_localtime on;
}
Ensure the line with php/php8.2-fpm.sock corresponds to your correct installed PHP version. Above it shows php 8.2, but you might have installed a different version. The line you need to look for starts with fastcgi_pass . If you’re uncertain about your installed php version, just go to your terminal and type:
php -v
I saved my edited file name thinking about “WSL Debian”, so “wsldebian” for the name of the NGINX configuration file works for me. Yours will likely be different.
user@system:/etc/nginx/sites-available$ ls -laX
total 16
-rw-r--r-- 1 root root 1296 May 16 16:33 default
-rw-r--r-- 1 root root  348 May 16 16:33 wsldebian
drwxr-xr-x 2 root root 4096 May 16 15:39 .
drwxr-xr-x 8 root root 4096 May 16 15:24 ..
Use the dot-dot-slash + wildcard syntax to quickly switch the current working directory from ./sites-available to ./sites-enabled:
cd ../sites-en*
user@system:/etc/nginx/sites-enabled$ ls -laX
total 8
lrwxrwxrwx 1 root root 34 May 16 15:24 default -> /etc/nginx/sites-available/default
drwxr-xr-x 2 root root 4096 May 16 16:45 .
drwxr-xr-x 8 root root 4096 May 16 15:24 ..
Note the symbolic link which exists as part of the default NGINX configuration. Now we create a new symbolic link to point to our new custom file. The “create symbolic link” syntax looks like this: ln -s source_file symbolic_link. So, in my case, I include the full file path to the ./sites-available folder where the actual file exists as the first argument. Then second argument (the link name) doesn’t need the folder paths because it’s just the name of the link itself and I want the new symbolic link to be in the ./sites-enabled folder so NGINX automatically recognizes it as a VHOST i want to enable, like so:
sudo ln -s /etc/nginx/sites-available/wsldebian wsldebian
Important: Don’t copy/ paste and execute the symbolic link code above, unless you plan to name your server configuration file the same as mine (i.e. wsldebian). You need to use whatever filename you created in the previous step, otherwise the ln -s command will fail or link to a nonexistent file.
If you followed the guide correctly so far, the ./sites-enabled directory listing should now show the complete link to the nginx server conf file you just created. The new link should look just like the “default” link which should exist from the NGINX installation:
user@system:/etc/nginx/sites-enabled$ ls -laX
total 8
lrwxrwxrwx 1 root root 34 May 16 15:24 default -> /etc/nginx/sites-available/default
lrwxrwxrwx 1 root root 36 May 16 16:45 wsldebian -> /etc/nginx/sites-available/wsldebian
drwxr-xr-x 2 root root 4096 May 16 16:45 .
drwxr-xr-x 8 root root 4096 May 16 15:24 ..
One more stop for the NGINX virtual host configuration files. Let’s do away with the reference to the “default” site. Since it’s in the sites-enabled folder by way of a symlink (symbolic link), we’ll just break that link.
sudo unlink default
Unlike Apache, NGINX simply scans the ./sites-enabled folder for server configuration files in the ./sites-enabled folder , so you don’t have run a command (e.g. like a2ensite) as in Apache. Just restart NGINX and the new site should be enabled.
You may have to add some lines to the /etc/nginx/nginx.conf file for file upload size, auto index, file extension information, etc. but this should get you started.
Install phpMyAdmin (optional)
sudo apt install phpmyadmin -f | tee ~/LXMP_install_phpmyadmin.txt
#
# i prompted to choose between Apache or lighttpd, ignore and choose neither (hit next).
# When prompted for a phpmyadmin password, hit [enter] to let the system choose it randomly with dbconfig which you installed with MariaDB above
Important: Here we are asking the terminal to request a password as part of the command to execute mysql (or mariadb) itself. A root password has not yet been set. This approach sets the password for root (as was passed by mysql -u root) with whatever I entered at the prompt. Even though the password has been set to what was entered on the command line, let’s go ahead and use the mysql command to specify the password for posterity.
mysql -u root -p
# if MySQL / MariaDB prompt appears then you know you have successfully set the password.
# now enter the following at the MySQL prompt while logged in as root:
MySQL [(MariaDB)]> SET PASSWORD FOR 'root'@'localhost' = PASSWORD('*M*y*P*a*s*s*');
MySQL [(MariaDB)]> GRANT ALL ON *.* TO '_your_new_user_'@'%' IDENTIFIED BY '*U*s*e*r*-*P*a*s*s';
MySQL [(MariaDB)]> FLUSH PRIVILEGES;
MySQL [(MariaDB)]> exit
The MySQL/ MariaDB commands above set the password for the MySQL root user and creates a user “your_new_user” and sets the password for that user with the “IDENTIFIED BY” syntax. You should be familiar with these basic MySQL terminal commands.
TIP: If encounter an error that you can’t log in to MySQL/ MariaDB (e.g. the db prompt doesn’t appear), you might have to start over. Issuing a command to completely remove mysql and the associated configuration files allows you to do that. You don’t have to purge it the installation! Try the following commands:
sudo service mariadb stop
mysqld_safe --skip-grant-tables &
mysql -u root
use mysql;
update user set password=PASSWORD("*YOUR*DESIRED*ROOT*PASSWORD*") where User='root';
flush privileges;
exit
service mariadb restart
Try the instructions above first. If it fails, try the “purge” option of the package manager, like so:
sudo apt purge mysql-common
Configure PHP-FPM
NGINX Won’t Serve PHP Files
If you made it this far, and have tried viewing files on your new NGINX localhost server only to be met with a 502 Error, Bad Gateway, 404, 403 or other HTTP error, you might need to do a little bit of research.
Regardless of your success at this point, you really should read the official NGINX documentation about the “PHP FastCGI” configuration. If you’re having problems, you definitely need to read it!
If you’re having any issues with serving specific file types such as .phtml or other less popular PHP framework based file extension, you’ll need to locate the php fpm configuration specific file, /etc/php/[version.number]/fpm/pool.d/www.conf
(e.g. /etc/php/8.2/fpm/pool.d/www.conf | | /etc/php/7.4/fpm/pool.d/www.conf)
sudo micro /etc/php/8.2/fpm/pool.d/www.conf
Where you might need to uncomment or modify the following line of the www.conf file:
security.limit_extensions = .php .phtml .phar .html .htm
Reference the NGINX bible.
Still having difficulty viewing pages under your new NGINX server? This off-site link might provide useful insight as well if you continue to encounter “Access Denied” errors related to NGINX and PHP-FPM. The example provided there, based on an Apache reference might help you o examine the syntax used in the configuration files more closely.
Finally, have a look in the Notes section here for more details including a link to an .htaccess to NGINX conversion tool. Gain some insight there for how you might wish to modify your ./sites-available files to best suit your needs. I haven’t investigated it personally, but you might what to check out Winginx.
Install WordPress with NGINX (Debian/ Ubuntu)
We are ready to do this! Now, “Go on! Get!”
One of the great things about Linux is the ability to do just about anything from the BASH Command Line. In most cases, this means you can simply copy/ paste instructions (like the ones found here) onto your own command line, execute the commands, and the result should be the same as the author experienced while writing the tutorial. That said, you should be able to simply copy the following into your terminal to install WordPress.
This is the easiest and fastest way to install WordPress:
sudo mkdir -p /var/www/html/wpcurl --verbose
sudo chown www-data: /var/www/html/wpcurl --verbose
sudo chmod 755 -R /var/www/html/wpcurl --verbose
cd /var/www/html/wpcurl
curl https://wordpress.org/latest.tar.gz | sudo -u www-data tar zx -C /var/www/html/wpcurl
sudo mv ./wordpress/* . --verbose ## this line moves everything into the wpcurl directory
Note: the cURL operation is combined with a tar operation to extract the downloaded archive. In this illustrated example, the tar archive extraction creates a folder (“wordpress”, the same folder that’s inside of the archive retrieved by cURL) at “/var/www/html/wpcurl/wordpress“. The final line ( sudo mv … ) moves the files into the directory which was created in the first line. You can safely delete the ./wordpress directory. However, if you want to keep the directory structure as is after the cURL download / tar extraction operations (e.g. ./wpcurl/wordpress ), simply omit the last line which begins with sudo mv .
The only other required operation at this point is the creation of a database so WordPress knows what to work with during the famous 5-minute installation. If you recall, part of the WordPress installation requires you have a database name, and database user with the correct permissions as WP writes the info into the wp-config.php file which becomes part of your core installation under the WordPress base URL.
If you didn’t install phpMyAdmin yet still need a simple way to manage MySQL / MariaDB , try Adminer. Adminer requires no more installation than to copy a single file into the root of your HTTP server directory (.e.g /var/www/html/adminer.php).
Whatchu do
This post shows how to install WordPress on Windows 10 WSL (Windows Subsystem for Linux) with Nginx HTTP server on Ubuntu 18.04 | 20.04.
WordPress is the most popular blogging tool on the web and is used by millions of people around the world to create beautiful websites and blogs. It uses a Content Management System (CMS) allowing users to control their content in a simple and easy to use interface. It is completely customizable by the use of themes and plugins.
For more details about WordPress, please check its official website.
With the help of WSL, you can easily install full Linux operating system in your Windows 10 system. You just need to enable WSL (Windows Subsystem for Linux) in your Windows, install a Linux OS, install and run WordPress.
Simply follow below steps to install WordPress on Windows 10 WSL with Nginx :
Step 1 : Enable WSL in Windows 10
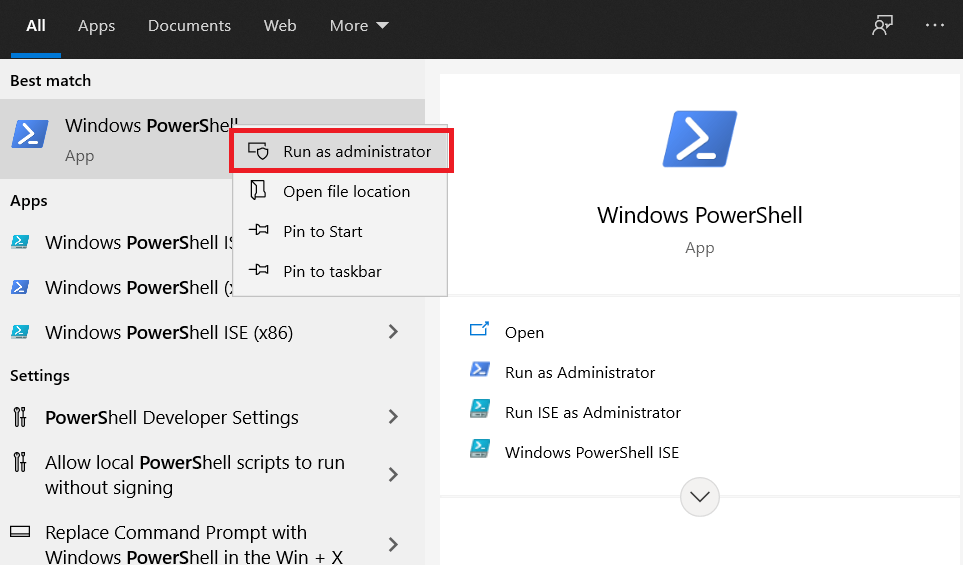
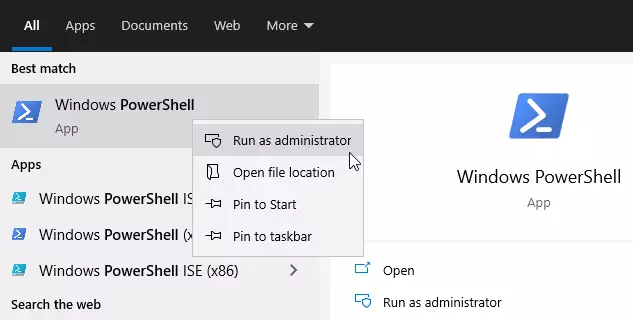
First of all, you will need to enable WSL in your Windows system. To enable it, simply open PowerShell terminal as administrator.
Click on Start icon -> search for PowerShell -> right-click Windows PowerShell app -> choose to run as administrator.
Next, run the command below in the Windows PowerShell console as show below:
dism.exe /online /enable-feature /featurename:Microsoft-Windows-Subsystem-Linux /all /norestartThe command above will display a successful message similar as below:
Deployment Image Servicing and Management tool
Version: 10.0.19041.844

Image Version: 10.0.19042.985

Enabling feature(s)
[==========================100.0%==========================]
The operation completed successfully.
Step 2 : Enable Virtual Machine Platform
Run the commands below from the same PowerShell console to enable the Virtual Machine platform in your Windows system:
dism.exe /online /enable-feature /featurename:VirtualMachinePlatform /all /norestartIf you have Windows 10 version lower than 2004 in your system, use the commands below:
Enable-WindowsOptionalFeature -Online -FeatureName VirtualMachinePlatform -NoRestartNext, restart your computer for changes to apply. If you forget to start then the below command doesn’t work.
After restart of your computer, launch the PowerShell as administrator again and run the commands below to set WSL 2 as the default version of WSL:
wsl --set-default-version 2Step 3 : Install Ubuntu in Windows 10
At this stage, WSL 2 is installed and ready to be used. So now you can easily install Linux operating system in your Windows 10 system.
Click the below button to download and install Ubuntu 20.04 LTS from Microsoft Windows store.

Click on the Get button to Download and Install Ubuntu. After installing Ubuntu, launch it from WSL environment.
After launching, it will install and prompt to create your account as show below :
Installing, this may take a few minutes...
Please create a default UNIX user account. The username does not need to match your Windows username.
For more information visit: https://aka.ms/wslusers
Enter new UNIX username: studiesonline
New password:
Retype new password:
passwd: password updated successfully
Installation successful!
To run a command as administrator (user "root"), use "sudo <command>".
See "man sudo_root" for details.

Welcome to Ubuntu 20.04.2 LTS (GNU/Linux 4.4.0-19041-Microsoft x86_64)

 * Documentation:  https://help.ubuntu.com
 * Management:     https://landscape.canonical.com
 * Support:        https://ubuntu.com/advantage
Use some troubleshooting commands when you get issues above. Run the below troubleshooting commands and launch Ubuntu again:
wsl --set-default-version 1
bcdedit /set hypervisorlaunchtype auto start
Step 4 : Install Nginx HTTP Server
To install Nginx HTTP on your Ubuntu server, run the commands below.
sudo apt update
sudo apt install nginx
Next, run the commands below to stop and start Nginx services:
sudo service nginx stop
sudo service nginx start
For check if Nginx server is installed or not, simply open your browser and type server IP or hostname.
If browser show result similar like below then Nginx is installed and working properly.
http://localhost
Step 5 : Install MariaDB Server
You will also need a database server to run WordPress and store its content. MariaDB database server is an open source, fast and secure database server that you can use with WordPress.
To install MariaDB database server, simply run the commands below:
sudo apt update
sudo apt install mariadb-server mariadb-client
Next, run the commands below to stop, start and enable MariaDB service to always start up with the server boots:
sudo service mysql stop
sudo service mysql start
Now, run the commands below to secure MariaDB server by creating a root password and disallowing remote root access.
sudo mysql_secure_installationWhen you run the above command, it will prompted to answer the questions as show below:
- Enter current password for root (enter for none): Just press the Enter
- Set root password? [Y/n]: Y
- New password: Enter password
- Re-enter new password: Repeat password
- Remove anonymous users? [Y/n]: Y
- Disallow root login remotely? [Y/n]: Y
- Remove test database and access to it? [Y/n]: Y
- Reload privilege tables now? [Y/n]: Y
For check if MariaDB is installed and working, run the command below:
sudo mysql -u root -pWhen prompted, type the root password.
Step 6 : Install PHP and Related Modules
WordPress is completely based on PHP programming language, so PHP is must required to run WordPress. To install PHP and related modules, run the command below:
sudo apt install php-fpm php-common php-mysql php-gmp php-curl php-intl php-mbstring php-xmlrpc php-gd php-xml php-cli php-zipAfter installing the PHP and its related modules, run the command below to open PHP default config file and configure some basic settings:
sudo nano /etc/php/7.4/fpm/php.iniChange the below setting in the configuration file and save it:
file_uploads = On
allow_url_fopen = On
short_open_tag = On
memory_limit = 256M
cgi.fix_pathinfo = 0
upload_max_filesize = 100M
max_execution_time = 360
date.timezone = America/Chicago
These above lines are good settings to configure for most WordPress sites.
Next, runt the command below to stop and start PHP7.4 services:
sudo service php7.4-fpm stop
sudo service php7.4-fpm start
Step 7 : Create WordPress Database
To create WordPress database, first you will need to create a blank WordPress database. Simply run the command below to logon to MariaDB database server:
sudo mysql -u root -pNext, create a database named wpdb using command below:
CREATE DATABASE wpdb;Now, run the command below to create a database user named wpdbuser :
CREATE USER 'wpdbuser'@'localhost' IDENTIFIED BY 'your_new_password';Grant the newly created database user to the database by using command below:
GRANT ALL ON wpdb.* TO 'wpdbuser'@'localhost' WITH GRANT OPTION;Next, save your changes and exit:
FLUSH PRIVILEGES;
EXIT;
Step 8 : Download WordPress
Run the commands below to download the latest version of WordPress:
cd /tmp
wget https://wordpress.org/latest.tar.gz
tar -xvzf latest.tar.gz
sudo mv wordpress /var/www/wordpress
After that, you will need to allow www-data user to own the WordPress directory by using command below:
sudo chown -R www-data:www-data /var/www/wordpress/
sudo chmod -R 755 /var/www/wordpress/
Step 9 : Configure Nginx For WordPress Site
To configure Nginx for WordPress site, create a new configuration file named wordpress in the /etc/nginx/sites-available/ directory by running the commands below:
sudo nano /etc/nginx/sites-available/wordpressAfter create configuration file, copy and paste the below content into the configuration file and save it. Replace the highlighted line with your own domain name :
server {
    listen 80;
    listen [::]:80;
    root /var/www/wordpress;
    index  index.php index.html index.htm;
    server_name  example.com www.example.com;

    client_max_body_size 100M;
    autoindex off;

    location / {
        try_files $uri $uri/ /index.php?$args;
    }

    location ~ \.php$ {
         include snippets/fastcgi-php.conf;
         fastcgi_pass unix:/var/run/php/php7.4-fpm.sock;
         fastcgi_param SCRIPT_FILENAME $document_root$fastcgi_script_name;
         include fastcgi_params;
    }
}
Save the file and exit.
Next, run the command below to enable the new site:
sudo ln -s /etc/nginx/sites-available/wordpress /etc/nginx/sites-enabled/Restart the Nginx using command below:
sudo service nginx restartStep 10 : Launch WordPress
At this stage, WordPress is installed and ready to use. To launch it, open your favorite web browser and browse to the server domain name http://example.com.
http://example.comIt will open the WordPress setup wizard screen.
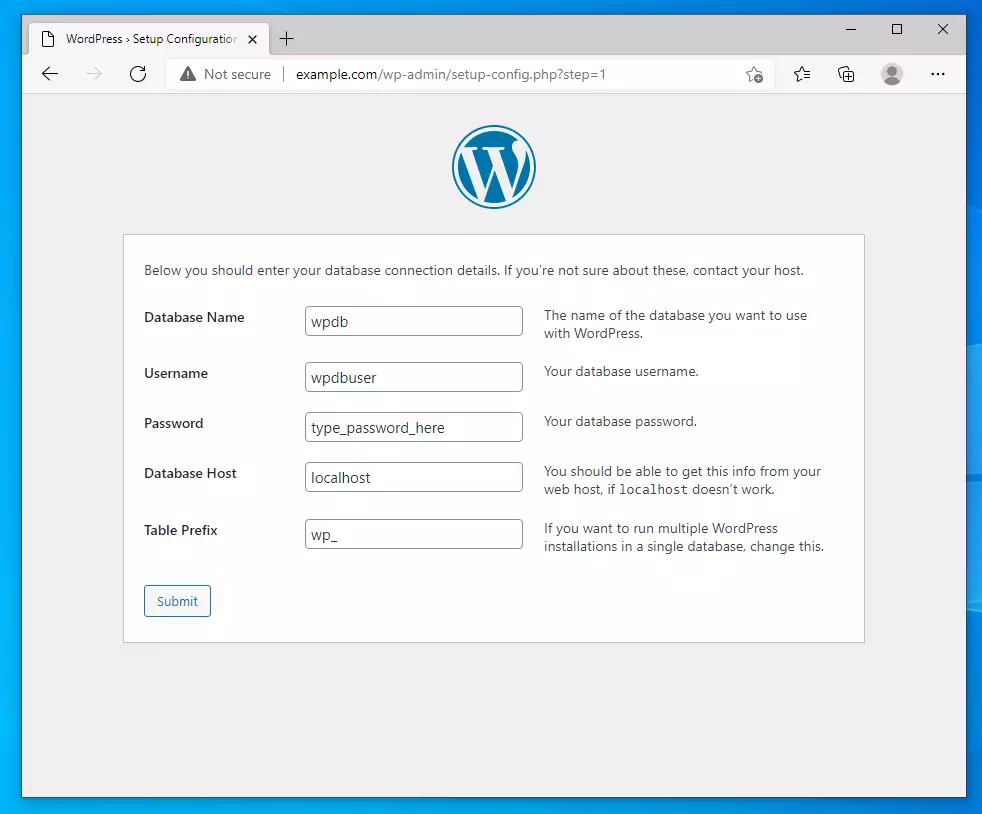
Next, provide the database information that created in above steps:
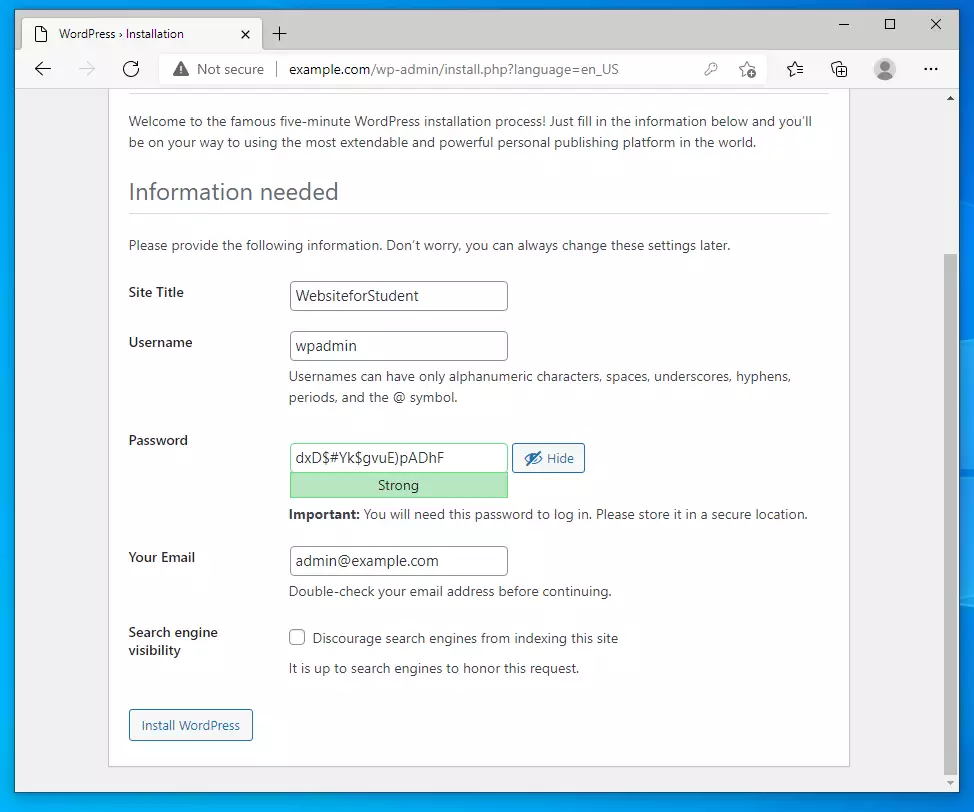
Next, create a WordPress admin account, then click on Install WordPress button to continue:
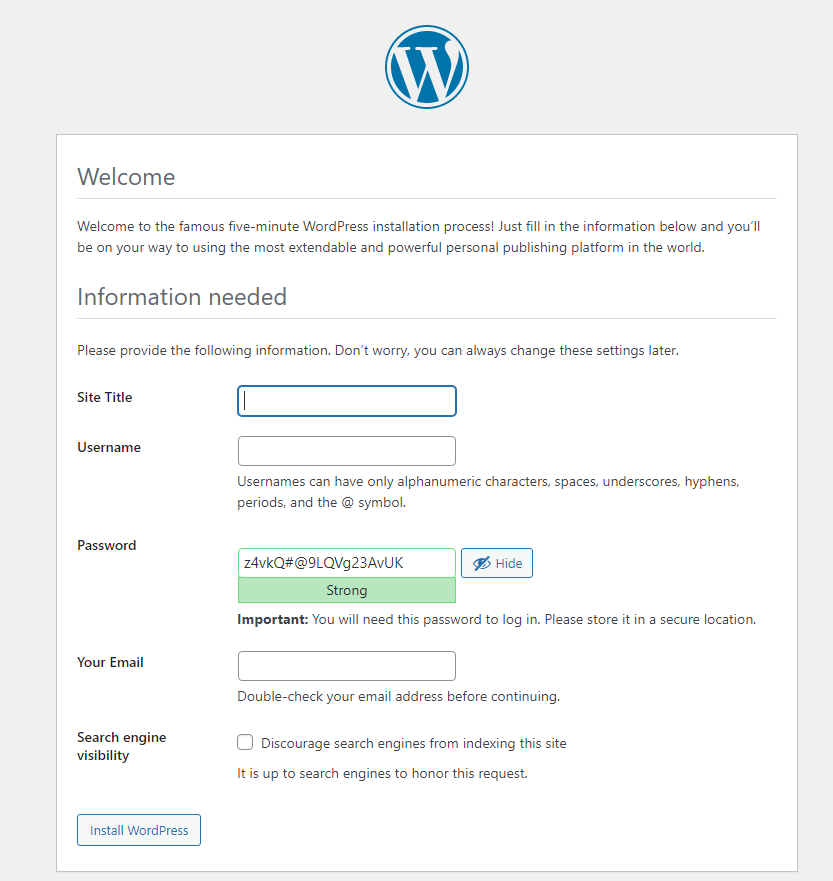
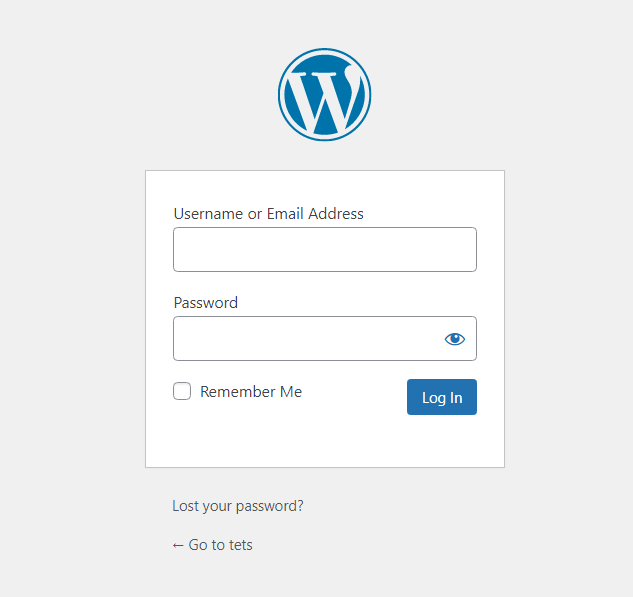
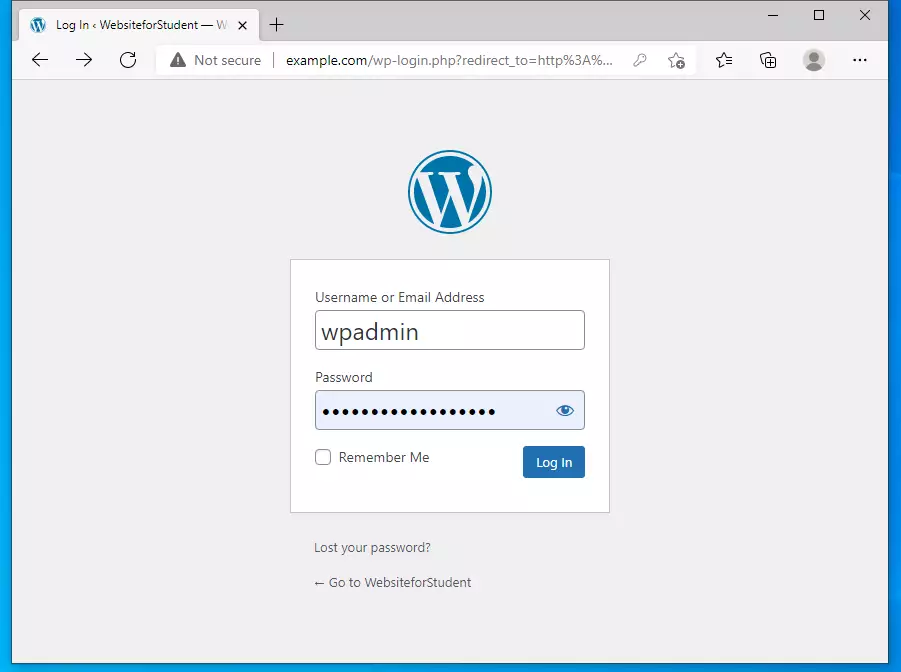
Finally, login with admin account created above:
That’s all
If you face any error and issue in above steps , please use comment box below to report.
If our tutorials helped you, please consider buying us a coffee. We appreciate your support!
Thank you for your support.
In this tutorial, we will show you how to install WordPress on Windows 10 WSL. For those of you who didn’t know, WordPress is the most popular content management system. You can host about anything on WordPress- from simple portfolio websites, company landing pages, and blogs to full-fledged eCommerce websites. It guarantees flexibility, robustness, and security, which are key for the success of any website.
This article assumes you have at least basic knowledge of Linux, know how to use the shell, and most importantly, you host your site on your own VPS. The installation is quite simple and assumes you are running in the root account, if not you may need to add ‘sudo‘ to the commands to get root privileges. I will show you the step-by-step installation of WSL 2 on Windows 10. You can follow the same instructions for Ubuntu 18.04, 16.04, and any other Debian-based distribution like Linux Mint.
Requirements
- Windows 10 May 2020 (2004), Windows 10 May 2019 (1903), or Windows 10 November 2019 (1909) or later.
- A computer with Hyper-V Virtualization support.
Step 1. Enable the Windows Subsystem for Linux 2.
You must first enable the “Windows Subsystem for Linux” optional feature before installing any Linux distributions on Windows. Now run the following command below to enable it:
Open PowerShell as Administrator and run:
dism.exe /online /enable-feature /featurename:Microsoft-Windows-Subsystem-Linux /all /norestart
Step 2. Enable Virtual Machine Feature.
Before installing WSL 2, you must enable the Virtual Machine Platform optional feature. Your machine will require virtualization capabilities to use this feature.
To enable Virtual Machine Platform on Windows 10 (2004) open PowerShell as Administrator and run:
dism.exe /online /enable-feature /featurename:VirtualMachinePlatform /all /norestart
Step 3. Set WSL 2 as your default version.
We set WSL 2 as default. Now open PowerShell as Administrator and run this command to set WSL 2 as the default version of WSL:
wsl --set-default-version 2
Step 4. Installing Ubuntu Linux Distribution.
With WSL and the necessary virtualization tech all in place, all that is left for you to do is pick and install a Linux distro from the Microsoft Store. Several different distros are available, including OpenSUSE, Pengwin, Fedora Remix, and Alpine Linux.
To install Ubuntu on Windows 10 open the Microsoft Store app, search for “Ubuntu 20.04”, and hit the “Get” button:
- Ubuntu 20.04 LTS

Step 5. Installing Nginx on Windows WSL.
To install Nginx HTTP on your Ubuntu server, run the commands below:
sudo apt update
sudo apt install nginx
After successfully installed, run the commands below to stop and start Nginx services:
sudo service nginx stop
sudo service nginx start
Next, verify that the webserver is running and accessible by accessing your server’s IP address:
http://localhost

Step 6. Installing MariaDB on Windows WSL.
Run the following command to install MariaDB:
sudo apt install mariadb-server mariadb-client
Once is done, run the commands below to stop, start and enable the MariaDB service to always start up with the server boots:
sudo service mysql stop
sudo service mysql start
By default, MariaDB is not hardened. You can secure MariaDB using the mysql_secure_installation script. You should read and below each step carefully which will set a root password, remove anonymous users, disallow remote root login, and remove the test database and access to secure MariaDB.
mysql_secure_installation
Configure it like this:
- Set root password? [Y/n] y
- Remove anonymous users? [Y/n] y
- Disallow root login remotely? [Y/n] y
- Remove test database and access to it? [Y/n] y
- Reload privilege tables now? [Y/n] y
Log in to the database console using the commands below:
mysql -u root -p
Next, create a WordPress database:
CREATE DATABASE wpdb;
CREATE USER 'wpdbuser'@'localhost' IDENTIFIED BY 'your_strong_passwd';
GRANT ALL ON wpdb.* TO 'wpdbuser'@'localhost' WITH GRANT OPTION;
FLUSH PRIVILEGES;
EXIT;
Step 7. Installing PHP on Windows 10 WSL.
Now run the commands below to install PHP and modules to support WordPress:
sudo apt install php-fpm php-common php-mysql php-gmp php-curl php-intl php-mbstring php-xmlrpc php-gd php-xml php-cli php-zip
Next, run the command below to stop and start PHP7.4 services:
sudo service php7.4-fpm stop
sudo service php7.4-fpm start
Step 8. Installing WordPress on Windows 10 WSL.
Run the commands below to download the latest version of WordPress from the official website:
wget https://wordpress.org/latest.tar.gz
tar -xvzf latest.tar.gz
sudo mv wordpress /var/www/wordpress
We will change the permissions directory:
sudo chown -R www-data:www-data /var/www/wordpress/
sudo chmod -R 755 /var/www/wordpress/
WordPress configurations are saved inside the wp-config.php file. A new WordPress installation comes with a sample config file that we can copy to the wp-config.php file. Enter the following command to copy this file:
mv /var/www/wordpress/wp-config-sample.php /var/www/wordpress/wp-config.php
Next, open the wp-config.php file in the nano editor using the following command:
nano /var/www/wordpress/wp-config.php
Add the following line:
define(‘DB_NAME’, ‘wpdb’);
define(DB_USER’, ‘wpdbuser’);
define(DB_PASSWORD’, ‘your-strong-password’);
Step 9. Configure Nginx VirtualHost.
To configure Nginx for WordPress site, create a new configuration file named WordPress in the /etc/nginx/sites-available/ directory by running the commands below:
sudo nano /etc/nginx/sites-available/wordpress
Add the following line:
server {
    listen 80;
    listen [::]:80;
    root /var/www/wordpress;
    index  index.php index.html index.htm;
    server_name  your-domain.com www.your-domain.com;

    client_max_body_size 100M;
    autoindex off;

    location / {
        try_files $uri $uri/ /index.php?$args;
    }

    location ~ \.php$ {
         include snippets/fastcgi-php.conf;
         fastcgi_pass unix:/var/run/php/php7.4-fpm.sock;
         fastcgi_param SCRIPT_FILENAME $document_root$fastcgi_script_name;
         include fastcgi_params;
    }
}
Save the file and exit, Also restart Nginx services:
sudo ln -s /etc/nginx/sites-available/wordpress /etc/nginx/sites-enabled/
sudo service nginx restart
Step 10. Accessing WordPress Web Interface.
Once successfully complete installation, open your favorite web browser and browse to the server domain name:
http://your-domain.com
Congratulations! You have successfully installed WordPress on WSL 2. Thanks for using this tutorial for installing the latest stable version of the WordPress on Windows Subsystem for Linux 2 (WSL 2) on the Ubuntu 20.04 LTS (Focal Fossa) system. For additional help or useful information, we recommend you check the official Ubuntu website.
VPS Manage Service Offer
If you don’t have time to do all of this stuff, or if this is not your area of expertise, we offer a service to do “VPS Manage Service Offer”, starting from $10 (Paypal payment). Please contact us to get the best deal!
This brief tutorial shows students and new users how to install WordPress on Windows 10 WSL (Windows Subsystem for Linux) 2 with Nginx HTTP server on Ubuntu 20.04 | 18.04.
WordPress is the most popular content management system today. It’s an open-source platform and works great in Linux systems, including Ubuntu.
You might want to install WordPress on Windows WSL for several reasons. For one, it allows you to use the popular content management system on a Windows machine, which might be your preferred operating system.
Additionally, WSL 2 is an improvement over the original version, offering better performance and system call compatibility. Installing WordPress on WSL allows you to use the Nginx HTTP server, MariaDB database server, and PHP to create a complete web development environment.
If you have a machine that meets the requirements above to run WSL 2, continue below.
To get started with running WordPress on Windows with WSL, follow the steps below:
Enable WSL in Windows
To enable WSL in Windows, you must open the PowerShell terminal as an administrator. Click on Start, then begin typing PowerShell.
Next, right-click the Windows PowerShell app and choose to run as administrator.
When the console opens, run the commands below:
dism.exe /online /enable-feature /featurename:Microsoft-Windows-Subsystem-Linux /all /norestart
After installing, you should get a success message similar to the lines below:
Deployment Image Servicing and Management tool
Version: 10.0.19041.844

Image Version: 10.0.19042.844

Enabling feature(s)
[==========================100.0%==========================]
The operation completed successfully.
Enable Virtual Machine Platform
WSL 2 requires Windows 10 Virtual Machine Platform to be enabled. This is not Hyper-V. To allow the VM to use the platform feature in Windows, run the commands below from the same PowerShell administrator’s console.
dism.exe /online /enable-feature /featurename:VirtualMachinePlatform /all /norestart
If you’re using Windows 10 version lower than 2004, then use the commands below:
Enable-WindowsOptionalFeature -Online -FeatureName VirtualMachinePlatform -NoRestart
When you’re done running the commands above, restart your computer for all the configuration changes to apply. If you don’t restart, the below command might not be recognized.
After restarting your computer, log back in and launch PowerShell as administrator. Then, run the commands below to configure WSL 2 as the default version of WSL.
wsl --set-default-version 2
Install Ubuntu on Windows 11
Now that WSL 2 is installed and ready to be used, open the link below to download and install a copy of Ubuntu 20.04 from the Windows store.
Get Ubuntu 20.04 LTS – Microsoft Store
Ubuntu 20.04 LTS on Windows allows you to use Ubuntu Terminal and run Ubuntu command line utilities, including bash, ssh, git, apt, and many more.
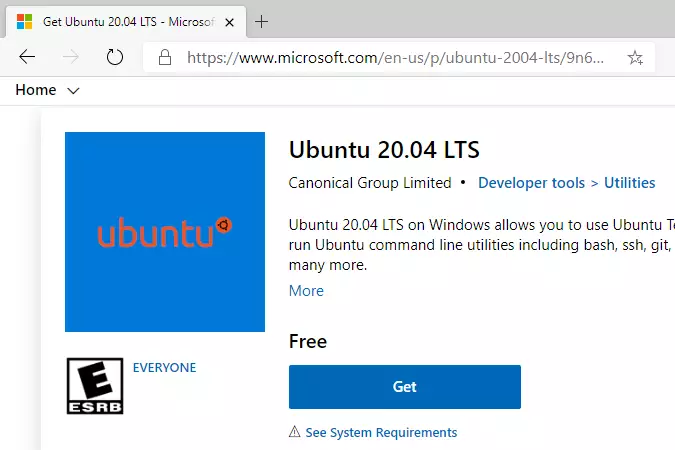
Click the Get button and install. After installing Ubuntu, you’ll want the option to launch Ubuntu from the Windows WSL environment.
After launching, Ubuntu should install and prompt you to create your account.
Installing, this may take a few minutes.
Please create a default UNIX user account. The username does not need to match your Windows username.
For more information visit: https://aka.ms/wslusers
Enter new UNIX username: richard
New password:
Retype new password:
passwd: password updated successfully
Installation successful!
To run a command as administrator (user "root"), use "sudo <command>".
See "man sudo_root" for details.

Welcome to Ubuntu 20.04.2 LTS (GNU/Linux 4.4.0-19041-Microsoft x86_64)

 * Documentation:  https://help.ubuntu.com
 * Management:     https://landscape.canonical.com
 * Support:        https://ubuntu.com/advantage

  System information as of Mon Apr 12 17:57:37 CDT 2021

  System load:    0.52      Processes:             7
  Usage of /home: unknown   Users logged in:       0
  Memory usage:   26%       IPv4 address for eth0: 10.0.2.15
  Swap usage:     0%

1 update can be installed immediately.
0 of these updates are security updates.
To see these additional updates run: apt list --upgradable
That should do it!
Some troubleshooting commands to run when you run into the issues above. These run below and try to relaunch the Ubuntu image.
wsl --set-default-version 1
bcdedit /set hypervisorlaunchtype auto start
Now that the Windows 10 WSL environment is ready install Nginx, MariaDB, and PHP and configure WordPress to run.
Install Nginx HTTP Server
WordPress requires a web server to function, and Nginx is one of the most popular open-source web servers available today.
To install Nginx on Ubuntu, run the commands below:
sudo apt update
sudo apt install nginx
After installing Nginx, the commands below can be used to stop and start Nginx services.
sudo service nginx stop
sudo service nginx start
To test whether Nginx is installed and functioning, open your web browser and browse to the server’s IP address or hostname.
http://localhost
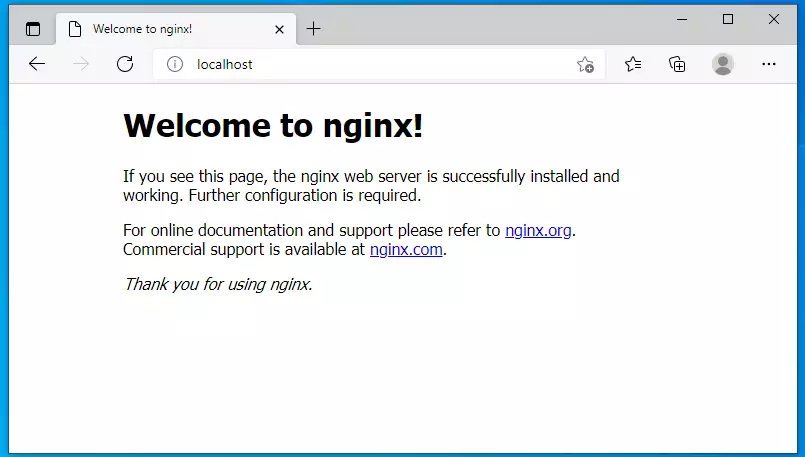
If you see the above page in your browser, Nginx works as expected.
Install MariaDB Server
You’ll also need a database server to run WordPress. A database server is where WordPress content gets stored.
A truly open-source database server that you can use with WordPress is the MariaDB database server. It is fast, secure, and the default server for almost all Linux servers.
To install MariaDB, run the commands below:
sudo apt install mariadb-server mariadb-client
After installing MariaDB, the commands below can stop and start the service and enable it to start when the server boots.
sudo service mysql stop
sudo service mysql start
Next, run the commands below to secure the database server with a root password if you were not prompted to do so during the installation.
sudo mysql_secure_installation
When prompted, answer the questions below by following the guide.
- Enter current password for root (enter for none): Just press the Enter
- Set root password? [Y/n]: Y
- New password: Enter password
- Re-enter new password: Repeat password
- Remove anonymous users? [Y/n]: Y
- Disallow root login remotely? [Y/n]: Y
- Remove test database and access to it? [Y/n]: Y
- Reload privilege tables now? [Y/n]: Y
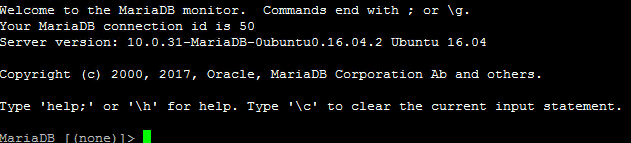
To verify and validate that MariaDB is installed and working, log in to the database console using the commands below:
sudo mysql -u root -p
Type the root password when prompted.

The server was successfully installed if you see a similar screen.
Install PHP and Related Modules
WordPress is a PHP-based application, and PHP is required to run it. Run the commands below to install PHP and related modules to support WordPress.
sudo apt install php-fpm php-common php-mysql php-gmp php-curl php-intl php-mbstring php-xmlrpc php-gd php-xml php-cli php-zip
After installing PHP, configure some basic settings required for WordPress to function correctly.
PHP 7.4 was installed for this tutorial. Based on your environment, another version of PHP might be installed. So verify that.
sudo nano /etc/php/7.4/fpm/php.ini
Below are good settings to configure for most WordPress websites.
file_uploads = On
allow_url_fopen = On
short_open_tag = On
memory_limit = 256M
cgi.fix_pathinfo = 0
upload_max_filesize = 100M
max_execution_time = 360
date.timezone = America/Chicago
That should get PHP 7.4 installed with some basic settings to allow WordPress to function.
After setting up PHP, the command below can be used to stop and start PHP7.4 services.
sudo service php7.4-fpm stop
sudo service php7.4-fpm start
Create WordPress Database
When all the servers are installed above, it’s time to begin setting up the WordPress environment. First, run the steps below to create a blank WordPress database.
Login to the MariaDB database console using the commands below:
sudo mysql -u root -p
Then, create a database called wpdb
CREATE DATABASE wpdb;
Next, create a database user called wpdbuser and set a password
CREATE USER 'wpdbuser'@'localhost' IDENTIFIED BY 'new_password_here';
Then, grant the user full access to the database.
GRANT ALL ON wpdb.* TO 'wpdbuser'@'localhost' WITH GRANT OPTION;
Finally, save your changes and exit.
FLUSH PRIVILEGES;
EXIT;
Download WordPress
At this point, WordPress is ready to be downloaded and installed. Use the commands below to download the latest version of WordPress.
cd /tmp
wget https://wordpress.org/latest.tar.gz
tar -xvzf latest.tar.gz
sudo mv wordpress /var/www/wordpress
Then, run the command below to allow the www-data user to own the WordPress directory.
sudo chown -R www-data:www-data /var/www/wordpress/
sudo chmod -R 755 /var/www/wordpress/
Configure the Nginx Server block.
Below is where you configure the Nginx VirtualHost file for your WordPress site. This file defines how client requests are handled and processed.
Run the commands below to create a new VirtualHost file called WordPress in the /etc/Nginx/sites-available/ directory.
sudo nano /etc/nginx/sites-available/wordpress
Below is a perfect configuration setting for most WordPress sites on the Nginx server. This configuration should work great.
Copy the content below and save it into the file created above.
server {
    listen 80;
    listen [::]:80;
    root /var/www/wordpress;
    index  index.php index.html index.htm;
    server_name  example.com www.example.com;

    client_max_body_size 100M;
    autoindex off;

    location / {
        try_files $uri $uri/ /index.php?$args;
    }

    location ~ \.php$ {
         include snippets/fastcgi-php.conf;
         fastcgi_pass unix:/var/run/php/php7.4-fpm.sock;
         fastcgi_param SCRIPT_FILENAME $document_root$fastcgi_script_name;
         include fastcgi_params;
    }
}
Save the file and exit.
After saving the file above, run the commands below to enable the new site, then restart the Nginx server.
sudo ln -s /etc/nginx/sites-available/wordpress /etc/nginx/sites-enabled/
sudo service nginx restart
At this stage, WordPress is ready and can be launched by going to the server’s IP or hostname.
http://example.com
That should bring up the WordPress setup wizard.
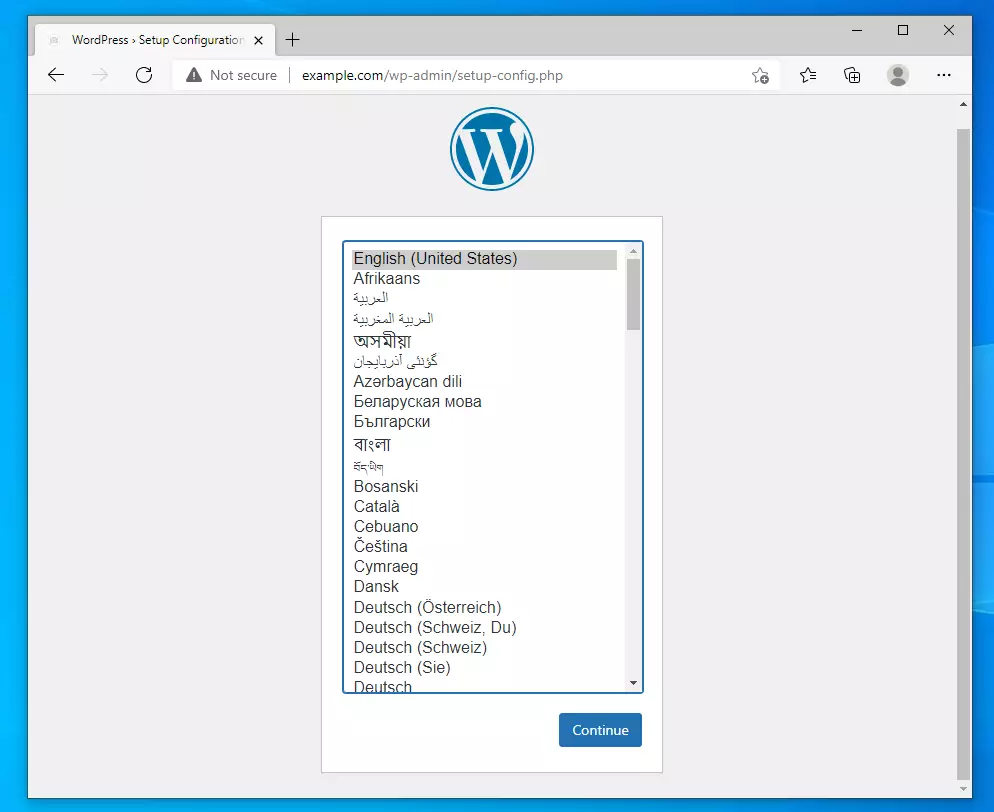
Type in the database connection and continue.
Create a WordPress admin account and password, then click Install WordPress.
Log in with the account above, and you’re done.
That’s it!
Conclusion:
This post showed you how to install WordPress on Windows 10 with Ubuntu. If you find any error above, please use the comment form below to report.
Want to install WordPress on Windows for local development? Installing WordPress on Windows 11 is an excellent way to create a local WordPress environment for building, testing, and managing WordPress websites before going live.
Whether you’re a developer working on WordPress development projects, a designer testing themes, or a beginner experimenting with site-building, setting up WordPress offline lets you work freely without needing web hosting.
In this guide, we’ll walk you through some easy ways to install WordPress offline on Windows 11. Let’s get started!
Why Do You Need to Install WordPress Locally?
Installing WordPress locally is an excellent way for beginners to learn and experiment with the platform without the need for a hosting service. It fosters a risk-free environment for exploring WordPress functionalities and customization options.

Local installations also allow developers to test themes, plugins, and code changes in a controlled environment before deploying them to a live website. This helps in identifying and fixing issues without affecting the online site.
Additionally, working on a local server is faster than relying on a remote server. This speeds up the development process, allowing for quicker iterations and improvements.
A few benefits of installing WordPress locally on your Windows 11 are:
- If you want to handle all of your resources locally, installing content management systems like WordPress on Windows 11 is a good idea.
- With a local WordPress installation, you can work on your website without needing an internet connection, providing flexibility and convenience.
- Local environments reduce the risk associated with testing on live sites. Developers can experiment without exposing vulnerabilities to potential threats on the internet.
So, how do you install WordPress on Windows locally?
Learn More: How to Set Up a WordPress Development Environment
Step-By-Step Guide to Install WordPress Locally on Windows 11
Follow this step-by-step guide to install WordPress on Windows 11 seamlessly:
Take Professional WordPress Development Help!
Option 1: Install WordPress on Windows Using WSL
Here are the steps for installing WordPress on Windows using WSL:

Step 1: Installing WSL
The first step in installing WordPress on Windows 11 is downloading and installing WSL (Windows Subsystem for Linux).
- In the taskbar, tap the magnifier and type cmd. Choose that. This will bring up the console, where you should type the command: install WSL (There is a space following the WSL).
- Now, wait for WSL to be installed.
- Once the installation process is complete and WSL is safely loaded on your device, you will receive a notification. Post that, restart your computer! This completes the WSL installation procedure.
If you want to update WSL, repeat the instructions above, but use the command wsl–update rather than wsl–install.
You’ll also need to download a Linux distribution after WSL is installed.
Run the command wsl–list online to get a list of accessible Distros. Decide which Distro would be ideal for you after reviewing the available options.
Run the following command using the exact instructions as before:
wsl –install –d Distro name to installFollowing the installation of the Linux distribution, we will install a web server such as Nginx. The steps below will show you how to set up Nginx in Ubuntu (a Linux Distro).
Step 2: Install NGINX
Because WordPress requires a web server to run, you’ll need to download one like Nginx.

After installing Nginx, you’ll need to run two instructions to enable the start and stop services.
- sudo service nginx start
- sudo service nginx stop
Now you must determine whether the downloaded Nginx is operational. Enter the following into any browser: http://localhost.com/
Your server is up and running if the website Welcome to Nginx appears.
Step 3: Install a DB Server
WordPress content is saved in a database server, therefore, you’ll need to set one up. We’ll go over how to download the Maria DB server in this part. It is most Linux servers default server, and it is fast and easy to use with WordPress.
To begin, run the following command:
sudo apt install mariadb-serverRun the following command to secure the database using a root password:
sudo mysql_secure_installationStep 4: Install PHP
It is mandatory to take this step. Due to the PHP-based nature of WordPress, Windows 11 does require the installation of PHP.
It’s a very simple process. Install PHP by running the following command:
sudo apt install php-fpm php-common php-mysql php-gmp php-curl php-intl php-mbstring php-xmlrpc php-gd php-xml php-cli php-zipThis command will install PHP 7.4 in this case. Run the following command to ensure the version is 7.4:
sudo nano /etc/php/7.4/fpm/PHP.Step 5: Install WordPress
After installing the servers and PHP, it’s a pretty straightforward process to install and start WordPress.
To begin, use the following instructions to install WordPress:
wget cd /tmp

tar -xvzf latest.tar.gz

sudo mv wordpress /var/www/wordpress
Customize WordPress work with Nginx VirtualHost. Afterward, enter the server’s hostname into your browser. Follow the on-screen instructions to install WordPress. The site is now yours to customize.
Check Out: Install WordPress Locally on Mac
Need Help Installing WordPress on Windows 11?
Our WordPress support team is here to help. From setup to troubleshooting, we handle it all so you can focus on building your site.
- See How We Can Help
Option 2: Use Xampp to Install WordPress Easily on Windows 11

Step 1: Installing XAMPP on a Windows Computer
Firstly, you need to download XAMPP and install it on your computer.
- Once the download is finished, it is necessary to run the newly-downloaded file for the XAMPP installer to start.
- If there is an antivirus program running, you may get a pop-up message like this:

- Just click Yes and continue installing it.
- You may also obtain a User Account Control (UAC) prompt. If it does, click OK to continue.
After you have read all the pre-install messages and warnings, you should see the following message to start the installation process. Click next.
The next screen will request you to choose which components to install. To use WordPress with XAMPP and the required components, you will have to choose:

Any other component is optional. Once you choose the desired components, click on the Next button.
Now, you need to select the folder where you want to install XAMPP. You can either create or use an existing folder inside the C: directory. We’ll leave the default route, which we recommend you do.
XAMPP is now ready to install all the files you have indicated above.
Step 2: Starting the Installation Process
Click ‘Next’ to start the installation process. It might take a few minutes to finish depending on the number of packages you choose to install.
Once the installation process is done, start the XAMPP Control Panel right away by selecting the “Do you want to start Control Panel now?” checkbox and clicking on Finish.
If you want/need to start XAMPP differently for any reason, go to the XAMPP folder inside your chosen installation directory and open the “XAMPP Control Panel” file.
When the Control Panel first opens, choose your preferred language. Once you’ve chosen your preference, click on the Save button. You should now see the XAMPP Control Panel screen.
To review if everything is functioning correctly, you can click on the start buttons of Apache and MySQL. If everything is configured correctly, both components should run without any issues.
However, if they don’t start, there might be a problem with a program like Skype or something similar that uses the same ports as the XAMPP modules. In this case, you should close the conflicting applications and restart XAMPP.
Tip: Modify your PHP resources in XAMPP and free up more power on your local server. This is especially necessary when installing a premium theme on your local installation.
First, turn on XAMPP, click the Config button for the Apache server, and choose to open the php.ini file from the dropdown menu.
After that, you’ll see all the relevant settings for the PHP resources in that file in your default text editor. All you need to do is change the following resources to the indicated values:

When the new values are added, just save the changes and restart your XAMPP by stopping Apache and MySQL and restarting them.
Once all components are working correctly, open your preferred browser and visit http://localhost/.
Step 3: Downloading the WordPress files
Now, it’s time for you to add WordPress to the local host site we just created. To do so, you must first download the latest version of WordPress from the official website.
- Once you finish the download, navigate to the folder where you installed XAMPP (in our case, that was the default installation path, C:xampp). From there, find and open the htdocs folder:

- Create a WordPress folder for your website in htdocs. The name of this folder will become the subname used to access your WordPress site.
For example, if you name the folder as the new site, you will access your site by visiting http://localhost/newsite within your desired browser.
Once you create the folder, you need to open it, and inside it, extract the WordPress.zip file that you downloaded earlier.
Step 4: Creating a Database for WordPress
Now, create a MySQL database for your local WordPress site.
- To do this, launch phpMyAdmin from your XAMPP control panel by clicking the Administration button for the MySQL component:

- The phpMyAdmin browser page will open in your default browser. Simply click on the New link to create a database for your WordPress site.
- Enter a name for your database.
- In the second field, select the Collation option. Now click Create. You can name your database as per your choice; just remember your name as you will need it in future steps.
Once all this is done, restart the simulated web server. Navigate to the XAMPP Control Panel and click on the Stop button for Apache and MySQL. Then press Start again to make the changes visible.
Step 5: Installing WordPress Locally
Now that you have installed XAMPP, copied the WordPress files, and created a database, navigating to http://localhost/newsite within your preferred browser should bring up the WordPress installation wizard.

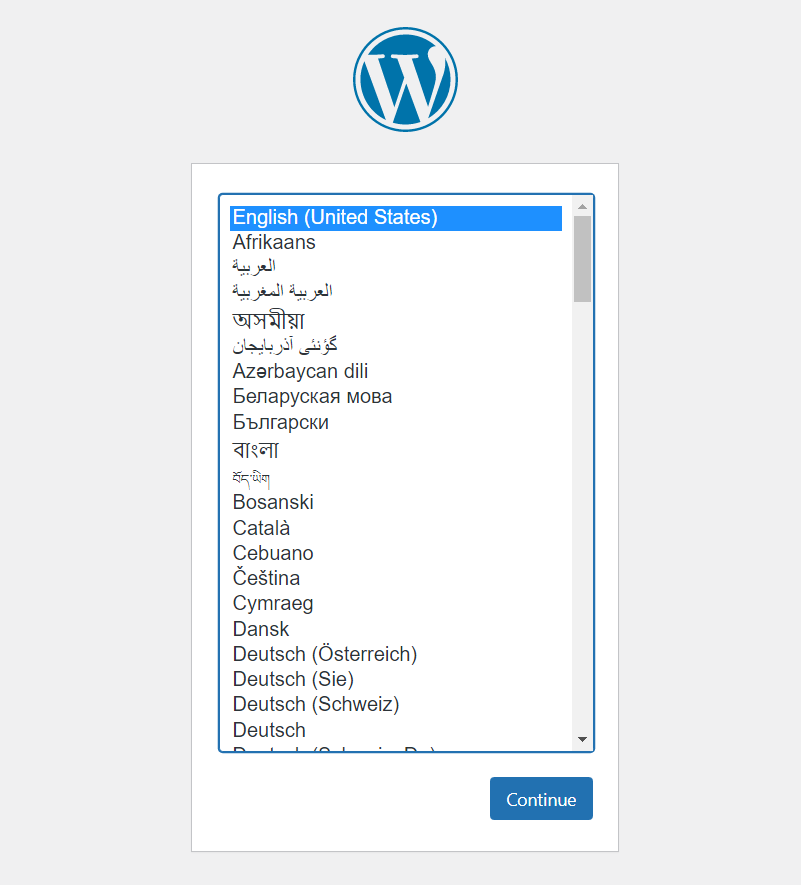
- Choose the preferred language and click Continue.
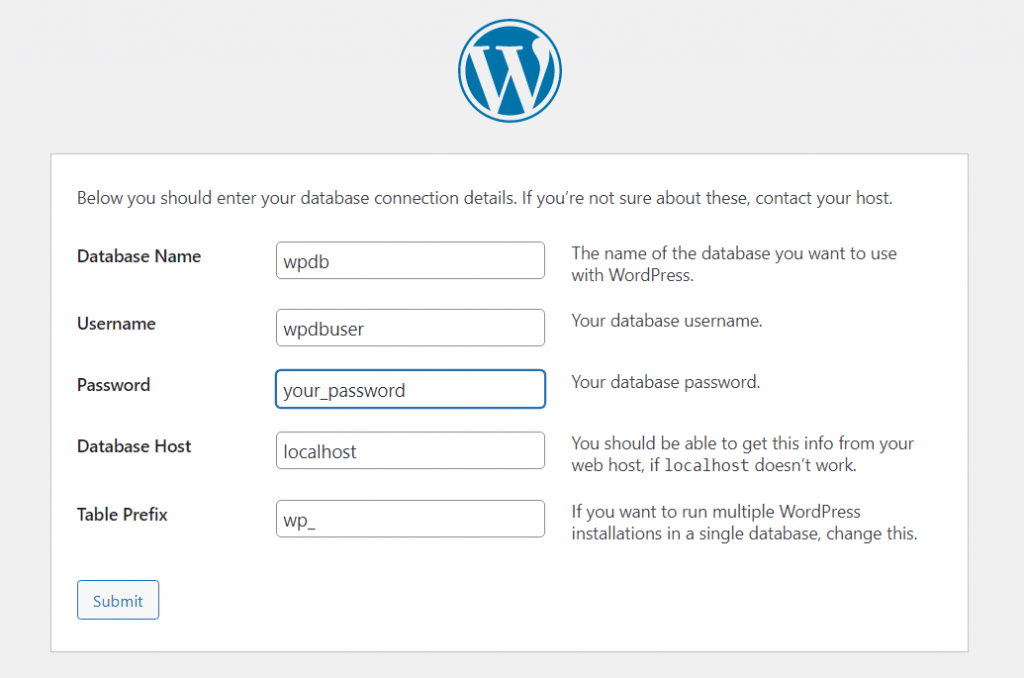
- The next screen will ask you to remember the database information you created earlier. Continue to the following setup by clicking on the ‘Let’s go’ button.
Below, you need to enter the following information accurately and then click Submit:

Fill in the fields with your site details, such as your site title, email address, etc. When you’re done, click “Install WordPress.”
Wonderful! Now, you are ready to work with XAMPP and WordPress locally to develop your site. We hope you will find this tutorial helpful if you also need to install WordPress on XAMPP in the future.
Read More: Types of WordPress Hosting
Option 3: Use a Dedicated App like InstantWP
It’s a lot easier to install WordPress locally with a dedicated app. We are going to use InstantWP here. Follow these steps:
- Download the InstantWP software and run the downloaded InstantWp.exe file on your Windows.
- Create a folder on your PC to store the server files and Instant WordPress.
- Click on the Next button to start the installation process.
- Once the installation has been completed, click the InstantWP icon inside the folder to open your control panel.

In the end, click on the WordPress Admin button to start the InstantWP. Now, you will see a browser window where you log in to your WordPress server.
Keep Reading: How to Use Search and Replace in WordPress
Option 4: Use InstaWP WordPress Sandbox
Sandbox method has to be one of the fastest options to test a WordPress site online if you have less time. Folks at InstaWP will help you launch a WordPress site in seconds. They provide WordPress Sandbox functionality, and with a free account, it gives you the ability to test a site for 48 hours.

After that, you have the option to migrate it to another hosting provider or on your local machine or get their paid plans. It also has built-in editors for the databases and code, and you can monitor logs on the same platform. You can give it a try.
Check Out: Fastest WordPress Hosting Companies
Option 5: Install WordPress on Windows 11 with LocalWP
LocalWP is a user-friendly tool for installing WordPress on your Windows computer. It simplifies the process and allows you to manage multiple WordPress sites easily on your Windows machine.
- Download and Install LocalWP: Go to the LocalWP website and download the installer. Follow the on-screen instructions to install the software.

- Create a New Site: Open LocalWP and click the “Create a new site” button. Fill in the site name, choose the environment (e.g., Preferred, Custom), and click “Continue.”
- Set Up WordPress: Choose the version of WordPress you want to install or leave it as default. Set your admin username and password. Click “Add Site” to complete the setup.
- Access Your Site: Once the installation is complete, click “View Site” to access your newly installed WordPress site.
Further Reading: Best WordPress Accessibility Plugins
How to Effectively Optimize Your Local WordPress Installation?
Making your local WordPress site run faster involves a few simple steps to clean things up and streamline operations. By implementing these optimizations, you’ll notice snappier page loads and improved overall performance. Here are the key things to do:
- Remove any plugins you don’t need or use, as they can slow things down. Also, go through your installed plugins and disable unnecessary ones.
- Increase the amount of memory allocated to WordPress by adding a line of code to your wp-config.php file: define(‘WP_MEMORY_LIMIT’, ‘256M’)
- Use a simple, lightweight theme designed for performance rather than fancy visuals. By choosing an efficient theme, you can minimize bloat.
- Install and configure a caching plugin like WP Super Cache, W3 Total Cache, or WP Rocket. Caching allows WordPress to store and quickly serve commonly accessed content.
- Optimize your images by compressing them through tools like TinyPNG, ShortPixel, or Imagify before uploading. This reduces image file sizes without quality loss.
Following these tips will go a long way toward optimizing your local WordPress installation for maximum performance potential.
Also Know: Fix WordPress “Another Update is Currently in Progress” Easily
Got WordPress Running on Windows 11? Let’s Build Something Amazing!
Our skilled WordPress development team can turn your ideas into a high-performing, custom website.
- Explore Our Service Now
Troubleshooting Some Most Common Errors of Local Installation
Here is a troubleshooting guide to help you resolve the five most common errors more efficiently.
404 Page Not Found Error
This error occurs when a visitor tries to access a page or resource that doesn’t exist on your WordPress site.
Troubleshooting:
- Check your permalink settings and ensure they are set to “Post name” or a custom structure that matches your site’s URL structure.
- Verify that the URLs of your pages and posts are correct and do not contain any typos or unnecessary characters.
- You can flush your WordPress permalink settings by visiting the “Permalink” settings page and clicking the “Save Changes” button without making any modifications.
Error Establishing a Database Connection
This error prevents WordPress from connecting to the MySQL/MariaDB database, making accessing or managing your site’s content impossible.
Troubleshooting:
- Open the wp-config.php file and double-check your database credentials (name, username, and password) to ensure they match the database you created.
- Verify that the database exists and that the user has the correct permissions to access it.
- If you’re using a hosting service, contact their support team to verify your database credentials.
Failed to Connect to FTP Server
This error occurs when WordPress cannot connect with the File Transfer Protocol (FTP) server during specific processes, such as plugin or theme installations or updates.
Troubleshooting:
- Verify that your FTP credentials (hostname, username, and password) are correct by trying to connect to the FTP server using an FTP client.
- Check if your hosting provider has specific FTP connection requirements or settings.
- If you’re using a hosting service, contact their support team for assistance in troubleshooting the FTP connection issue.
HTTP Error When Uploading Images
This error can occur when uploading images or other media files to your WordPress site, often due to file size or PHP memory limitations.
Troubleshooting:
- Increase the PHP memory limit by adding the following line to your wp-config.php file: define(‘WP_MEMORY_LIMIT’, ‘256M’);
- Increase the maximum file size limit in your php.ini file by modifying the following settings: upload_max_filesize and post_max_size.
- If you’re using a hosting service, contact their support team for assistance in increasing these limits on the server.
White Screen of Death
This issue appears as a blank white screen when accessing your WordPress site or the admin area, often caused by a plugin, theme conflict, or a PHP error.
Troubleshooting:
- Try disabling all plugins by renaming the /wp-content/plugins/ directory to something like /wp-content/plugins-disabled/.
- Switch to a default WordPress theme (e.g., Twenty Twenty-Three) by selecting it from the Appearance > Themes section in the admin area.
- If the issue persists, check your WordPress error logs or enable WordPress debugging to identify the cause of the error.
Final Reading: Best Malware Security Scanners
To Sum Up
Hopefully, this post has helped you understand how to install WordPress on Windows 11 locally.
One of the most impressive aspects of WordPress is the ability to create the same website on your computer using the same plugins. This opportunity gives you greater room to develop and maintain your website.
Installing WordPress locally on Windows is beneficial! You can replicate the live site to make modifications until you’re happy with it. A WordPress localhost website also comes in handy when you’re having site problems, need to discover bugs, alter your site, etc.
Refer to our blogs if you are eager to know more related articles on WordPress best practices, troubleshooting techniques, and other tips.
Install WordPress on Windows FAQs
How do I download and install WordPress locally?
To download and install WordPress locally on your Windows machine, you can use XAMPP or a similar local server environment.
Is WordPress compatible with Windows 11?
Yes, WordPress is compatible with Windows 11. WordPress is a web-based platform, and it can be installed on various web servers, including those running on Windows operating systems. You can set up WordPress on a Windows 11 environment using server software like XAMPP or WampServer.
What are the system requirements for running WordPress locally on Windows 11?
The system requirements for running WordPress locally on Windows 11 are generally the same as those for the web server software you choose to use. For example, if you’re using XAMPP, you’ll need to meet the minimum requirements for Apache, MySQL, and PHP, which are components included in XAMPP. Additionally, you’ll need sufficient disk space and RAM to run the local server and WordPress smoothly.
Can I use a different database management system instead of MySQL/MariaDB?
While MySQL or MariaDB are the recommended database management systems for WordPress, you can also use other database systems like PostgreSQL or SQLite. However, you may need to install additional plugins or make configuration changes to ensure WordPress works correctly with the alternative database system.
How do I migrate my locally developed WordPress site to a live server?
To migrate your locally developed WordPress site to a live server, you can use various methods, such as:
- Manually transferring the WordPress files and database via FTP or SSH.
- Using a plugin like All-in-One WP Migration or Duplicator to create a backup of your local site and restore it on the live server.
- Utilizing version control systems like Git to track changes and deploy your site to the live server.
What is the best way to install WordPress?
The best way is to set up a local WordPress development environment on your local computer or use a reliable web host. For beginners, tools like MAMP, XAMPP, or Local make it easy to set up a local WordPress install. Look for the Install WordPress button after setting up the server.
Is WordPress no longer free?
No, but WordPress still offers a free version. You can download the core software as a zip file from WordPress.org and run it on your local development environment or any web host. However, some themes, plugins, and services may be paid.
Is WordPress compatible with Windows?
Yes, WordPress works perfectly on Windows. You can run it on a local website using tools like MAMP or XAMPP. Just ensure you configure the wp config file correctly and connect to your database host.
How to set up WordPress in Windows 11?
You can set up WordPress in Windows 11 easily by following the steps mentioned below:
- Use it as a staging site for testing before going live.
- Download MAMP and install it.
- Launch the MAMP control panel and start the servers.
- Place the WordPress zip file in the document root folder and extract it.
- Open phpMyAdmin and create a database in the Create Database section.
- Run the installer via browser and follow prompts, including the wp config setup.
- After seeing the success message, your WordPress website is ready.