
Доброй ночи. На улице стемнело, поэтому мы начинаем установку операционной системы Windows Server 2016 на аппаратный сервер Supermicro SYS-1029P-WTRT. В качестве носителя будет использоваться RAID1 массив из двух NVMe дисков, собранных на аппаратном RAID контроллере Avago MegaRAID 9460-8i.
Тестовый стенд:
- Сервер Supermicro SYS-1029P-WTRT. Два процессора Intel Xeon Silver. 256 Гб оперативки.
- Два диска Micron MTFDHBE7T6TDF — 7.68 TB NVMe.
- Avago MegaRAID 9460-8i — 12Gb/s SAS/SATA/NVMe контроллер. Два NVMe диска собраны в аппаратный RAID1 массив.
- Сетевуха — двухпортовый SFP+ адаптер Supermicro AOC-STGN-i2S.
Задача на сегодня простая: установить операционную систему и накатить драйвера для всех устройств.
Установка Windows Server 2016
Заходим в IPMI сервера Supermicro и запускаем KVM консоль.
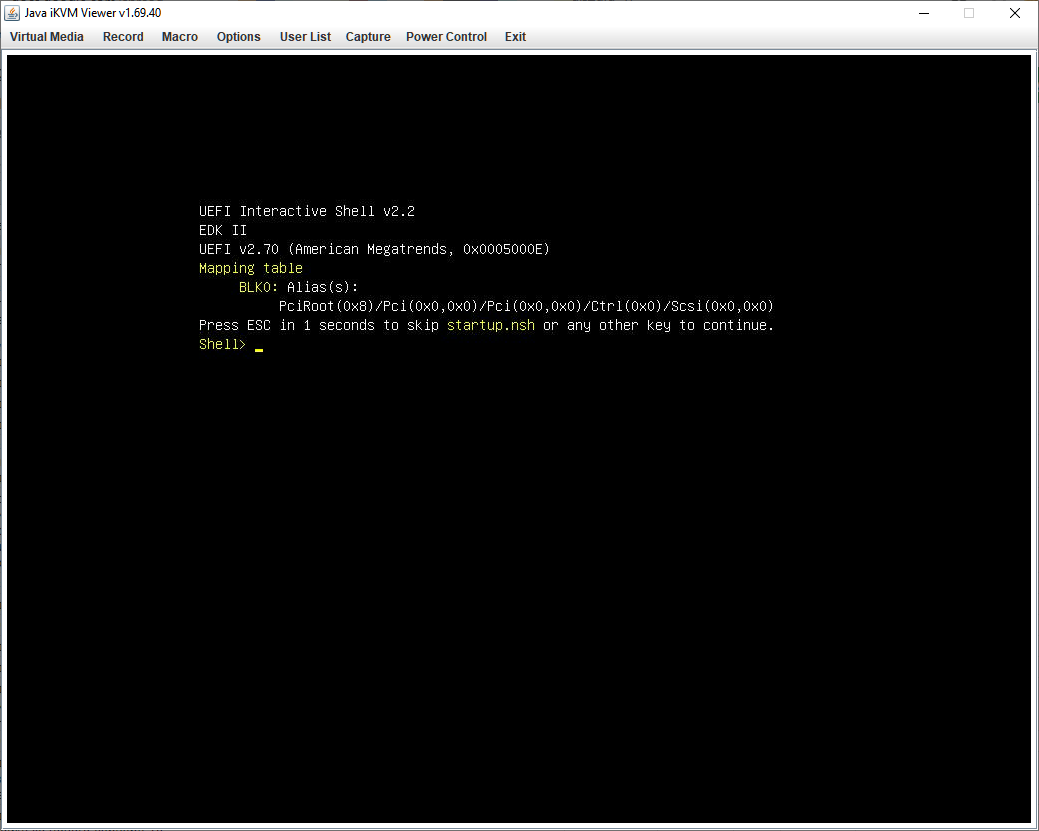
На сервере ничего не установлено, загружена оболочка UEFI Shell.
Монтируем образ с инсталлятором Windows Server 2016.
Перезагружаем сервер.
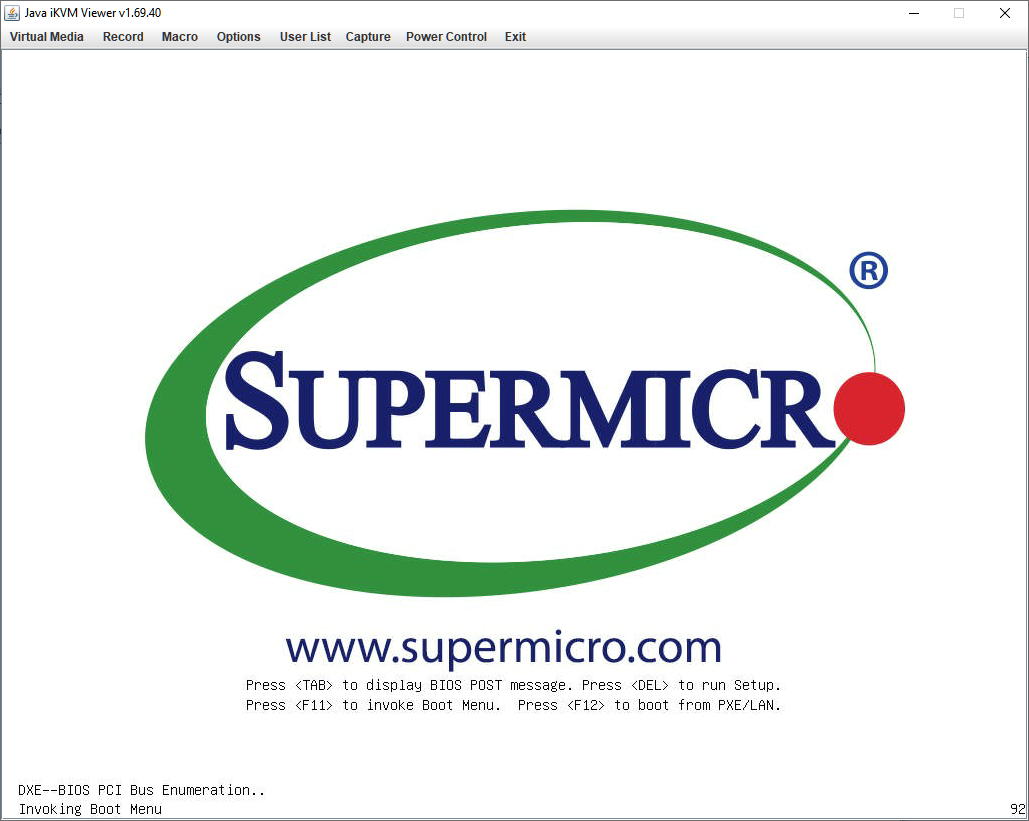
Для вызова загрузочного меню нажимаем F11.
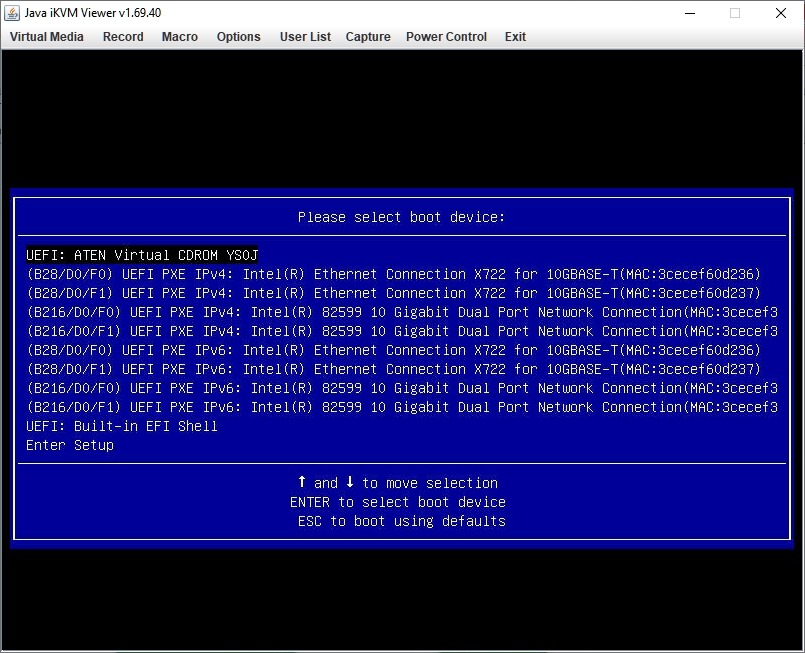
Оффтопик: в меню загрузки видно, что на сервере имеется два десятигигабитных SFP+ порта от установленного адаптера и два десятигигабитных Ethernet порта встроенного чипсета Intel C622.
Для загрузки инсталлятора с примонтированного ISO образа выбираем UEFI: ATEN Virtual CDROM YSOJ.
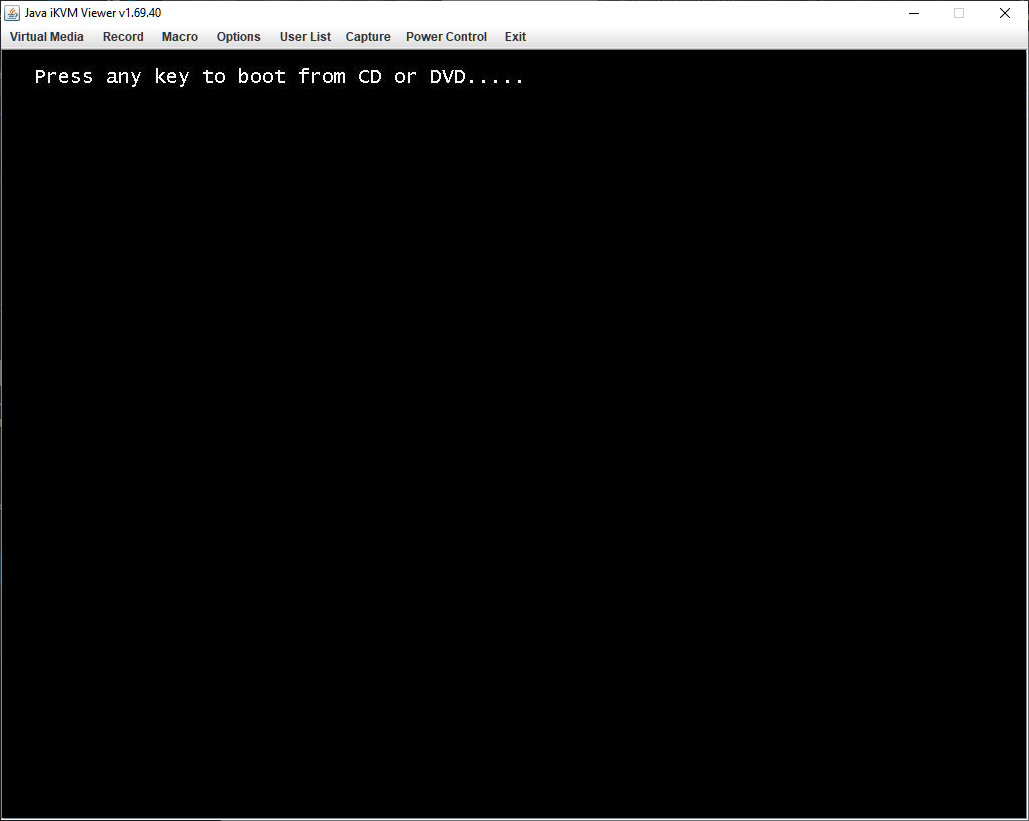
Для запуска инсталлятора нажимаем любую клавишу.
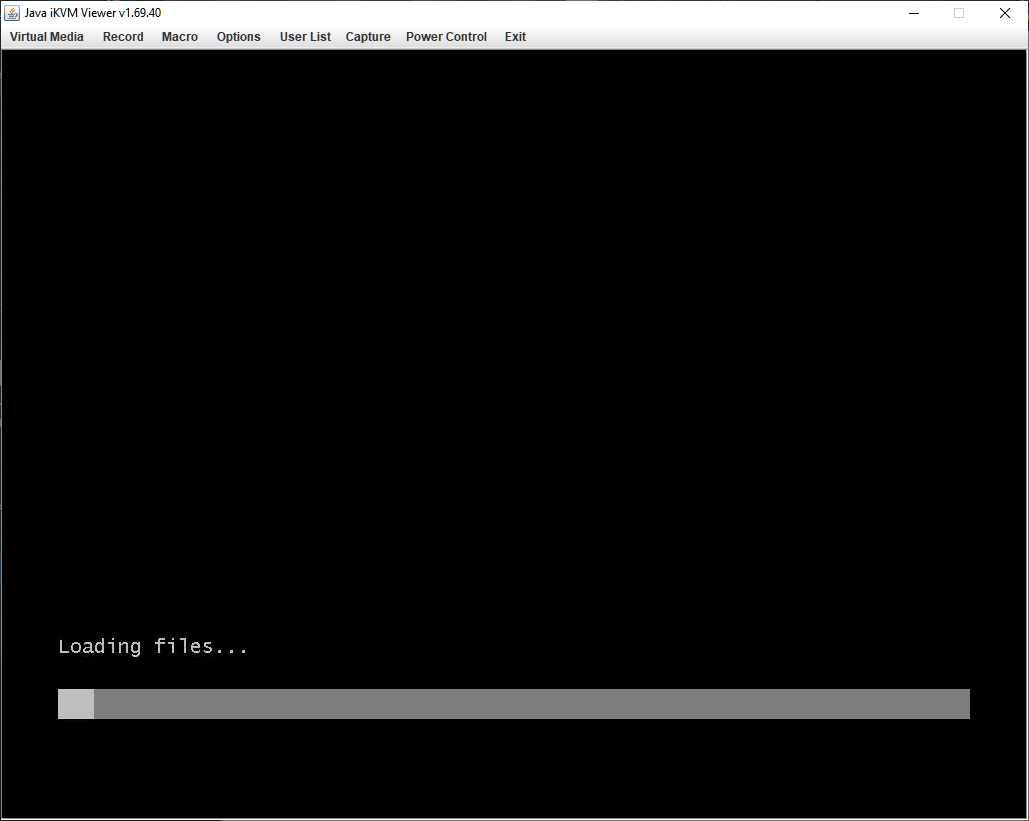
Запускается инсталлятор Windows Server 2016.
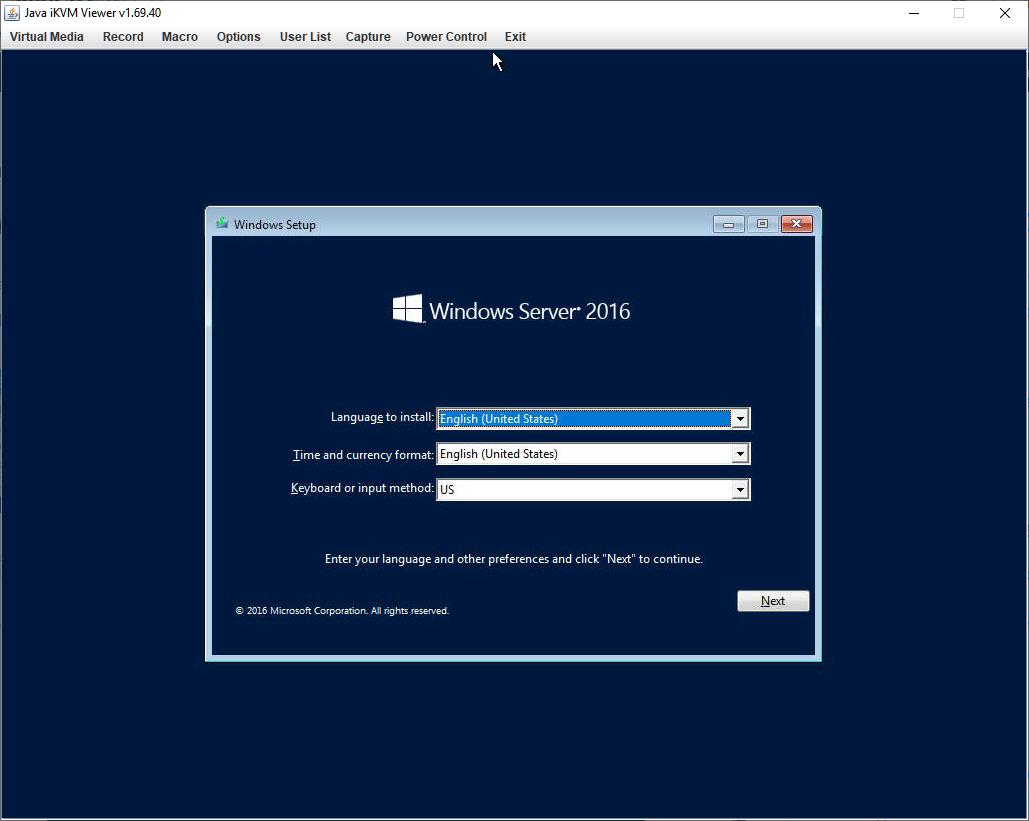
Выбираем язык, формат времени, раскладку клавиатуру. Я оставляю всё по умолчанию. Next.
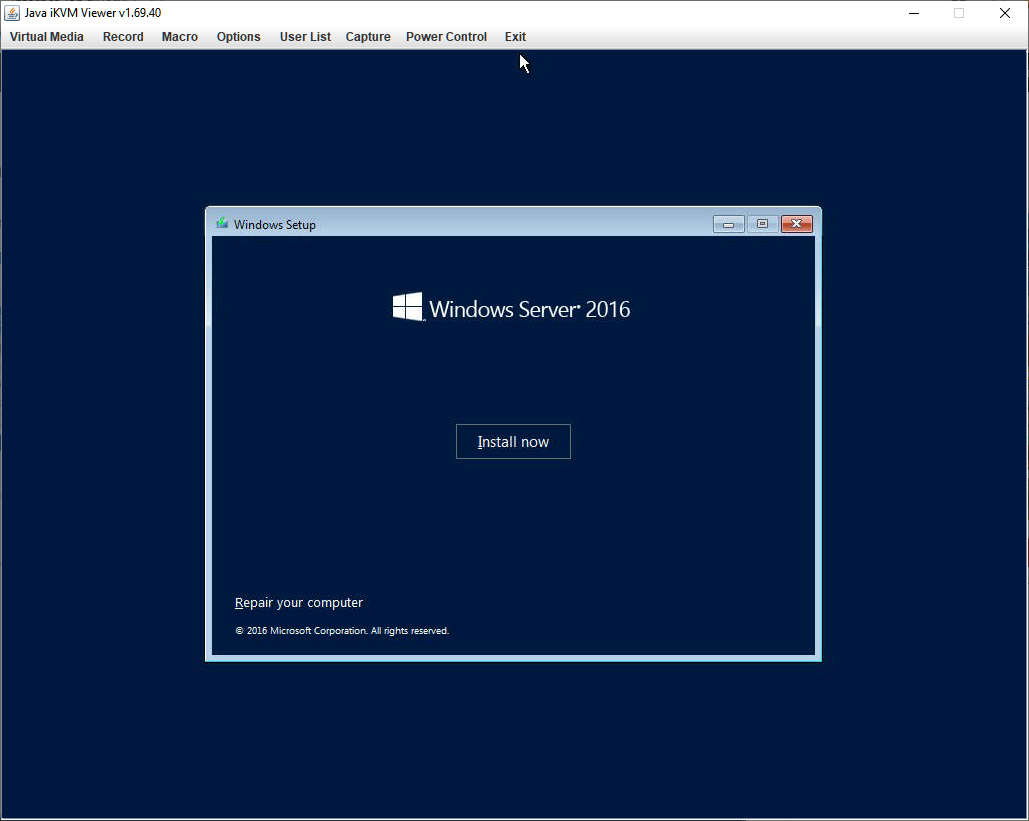
Install now.
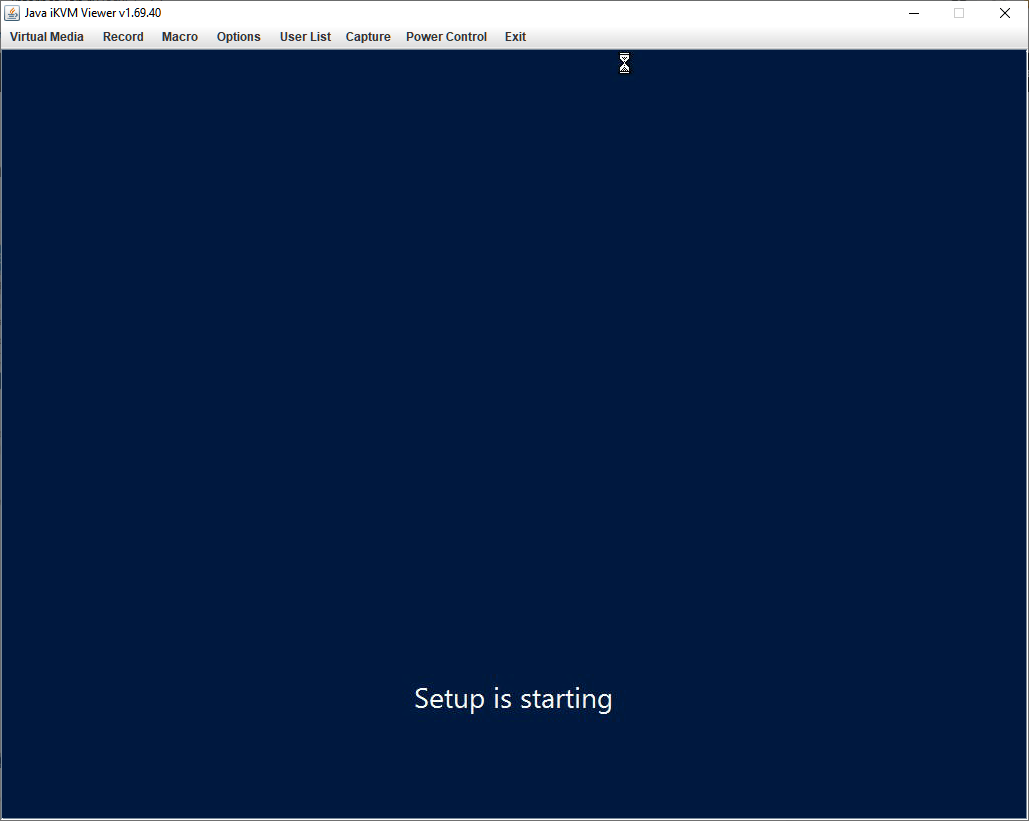
Setup is starting. Расслабляемся и откидываемся на спинку кресла.
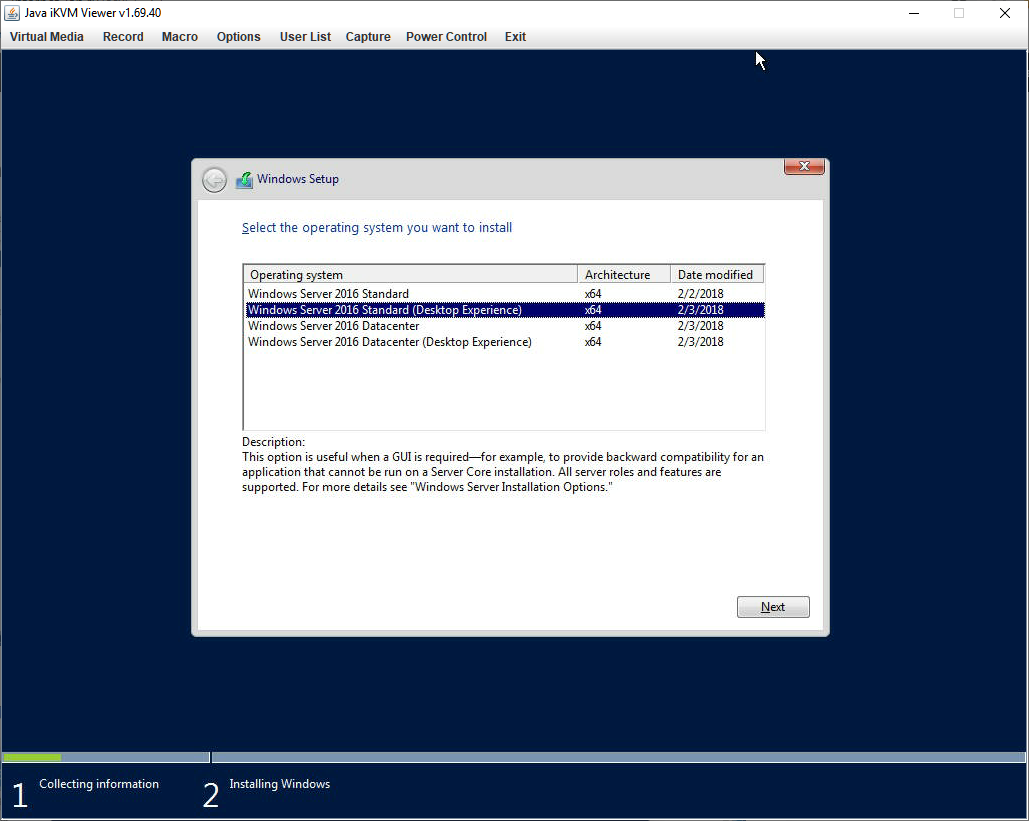
Выбираем тип установки.
- Standard без GUI
- Standard с GUI
- Datacenter без GUI
- Datacenter с GUI
Я выбираю Windows Server 2016 Standard (Desktop Experience). Next.
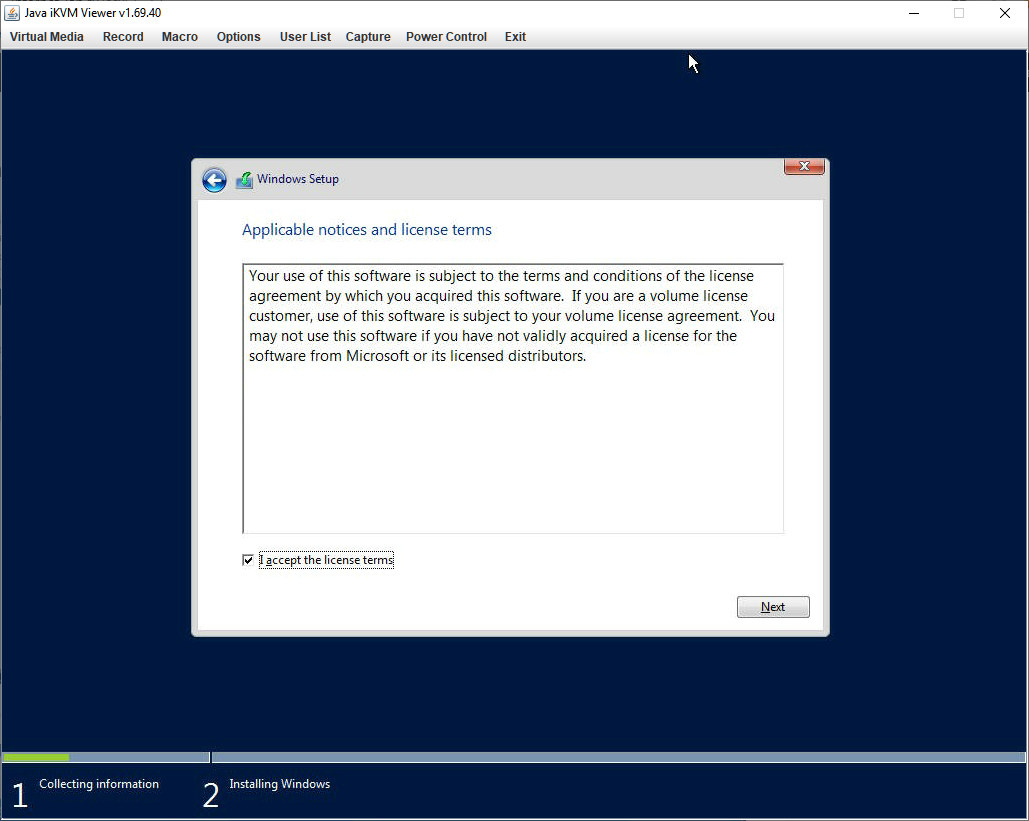
Принимаем лицензионное соглашение. Next.
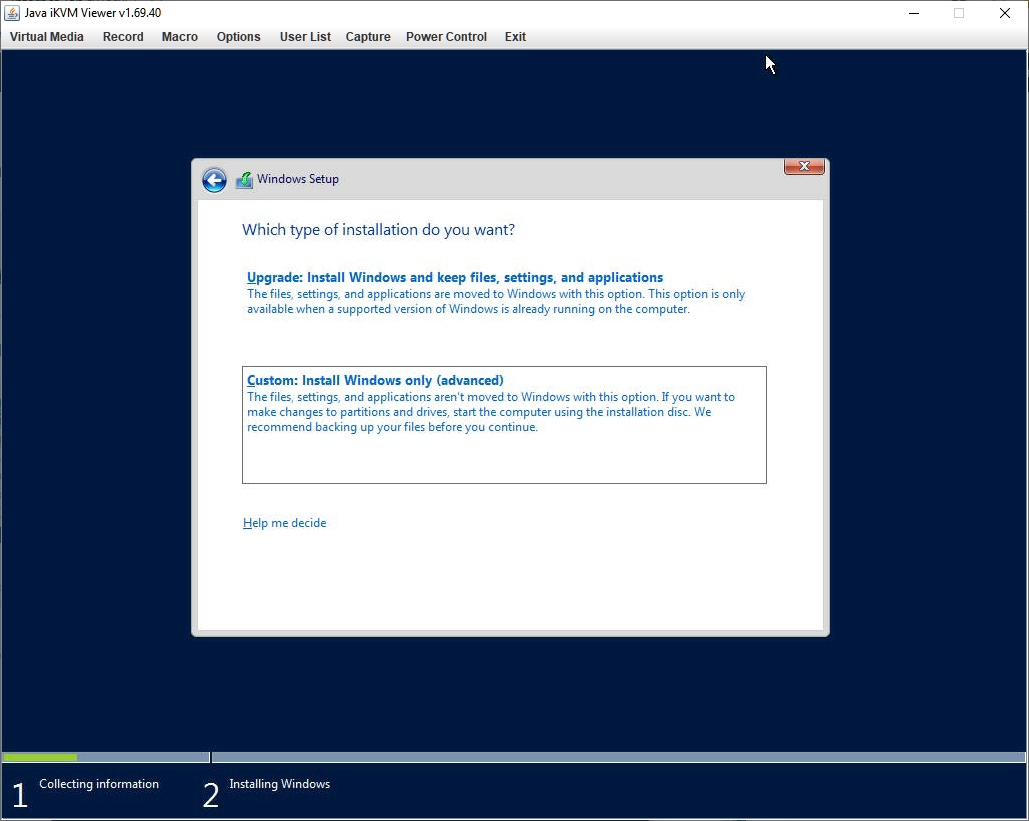
Выбираем Custom: Install Windows only (advanced).
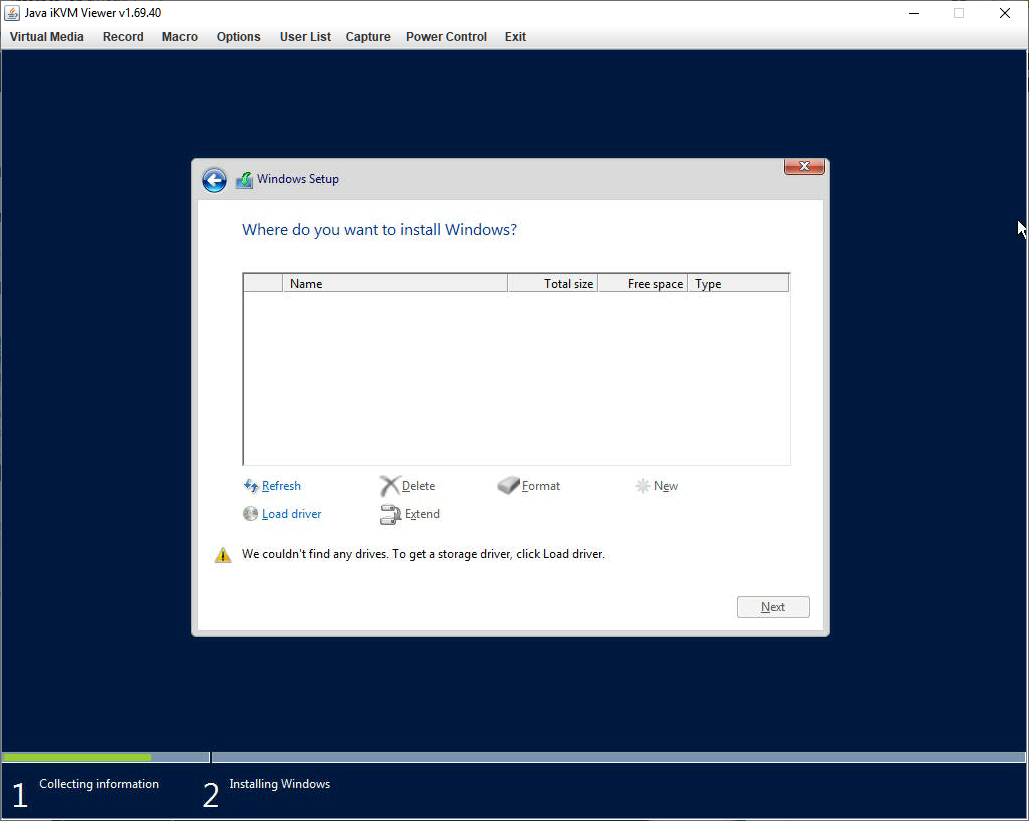
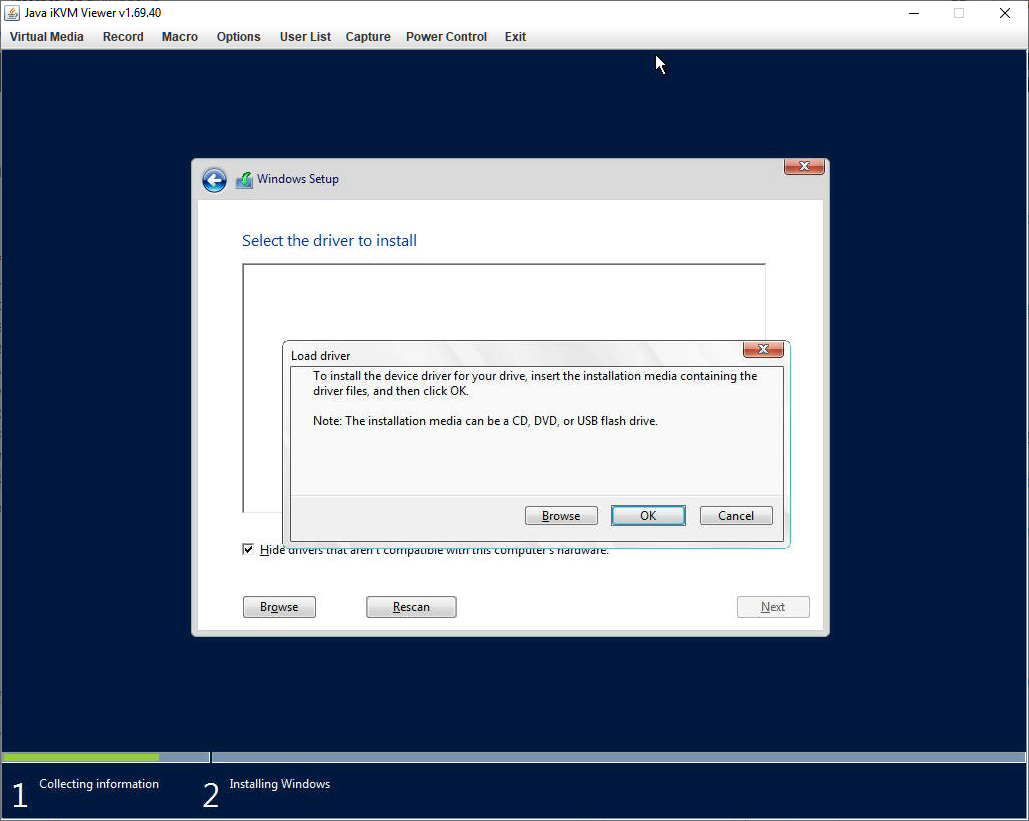
Упс. We couldn’t find any drives. To get storage driver, click Load driver. Инсталлятор не понимает что за RAID контроллер у нас и предлагает скормить ему драйвер.
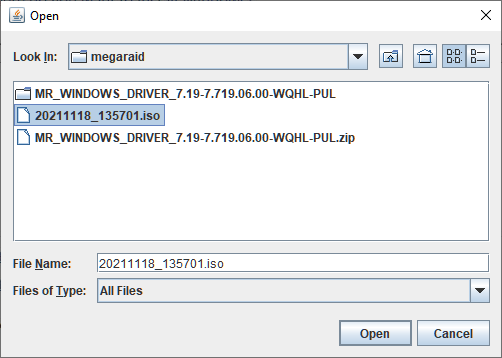
Отвлекаемся от окна установки. Нам нужно сделать ISO образ с драйверами для RAID контроллера MegaRAID 9460-8i. Для начала скачаем драйвера.

На сайте производителя находим последний драйвер для Windows, принимаем соглашение и скачиваем.

Распаковываем папку с драйверами.
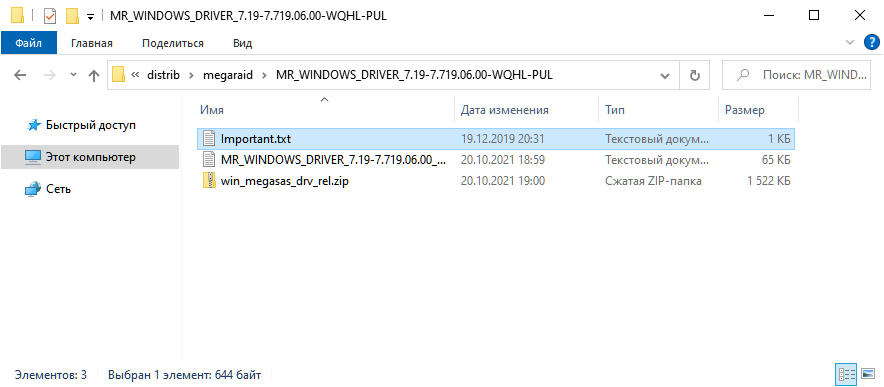
Нас интересует ZIP файл внутри, но он запаролен.
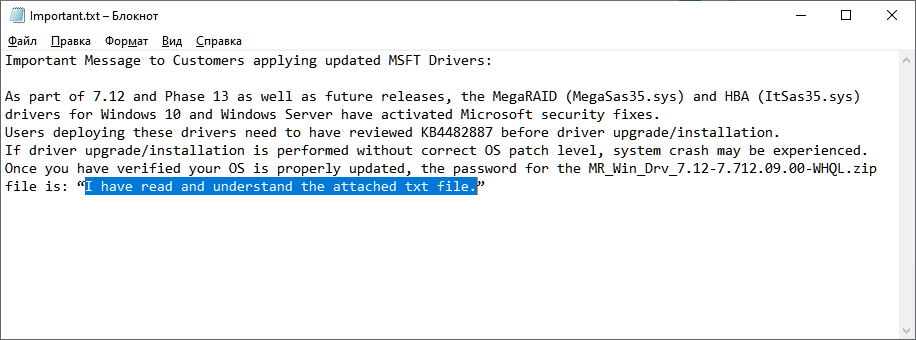
Пароль указан в Important.txt.
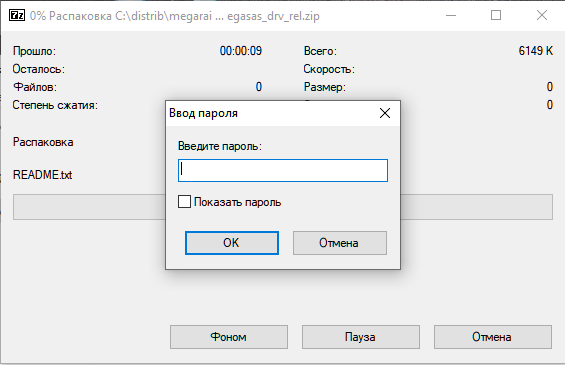
Вводим пароль, архив распаковывается.
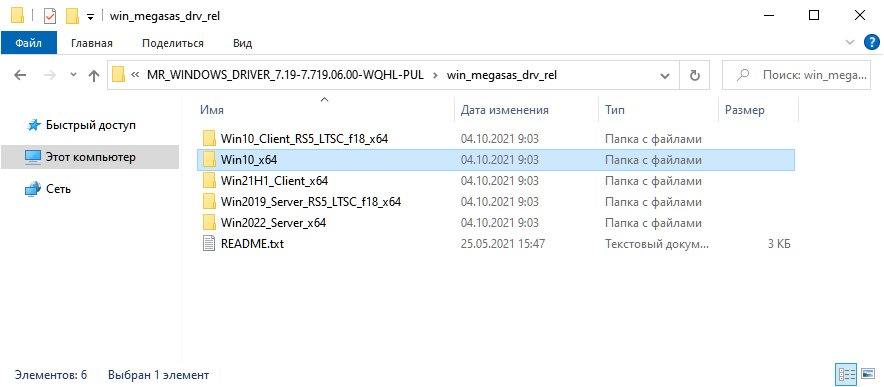
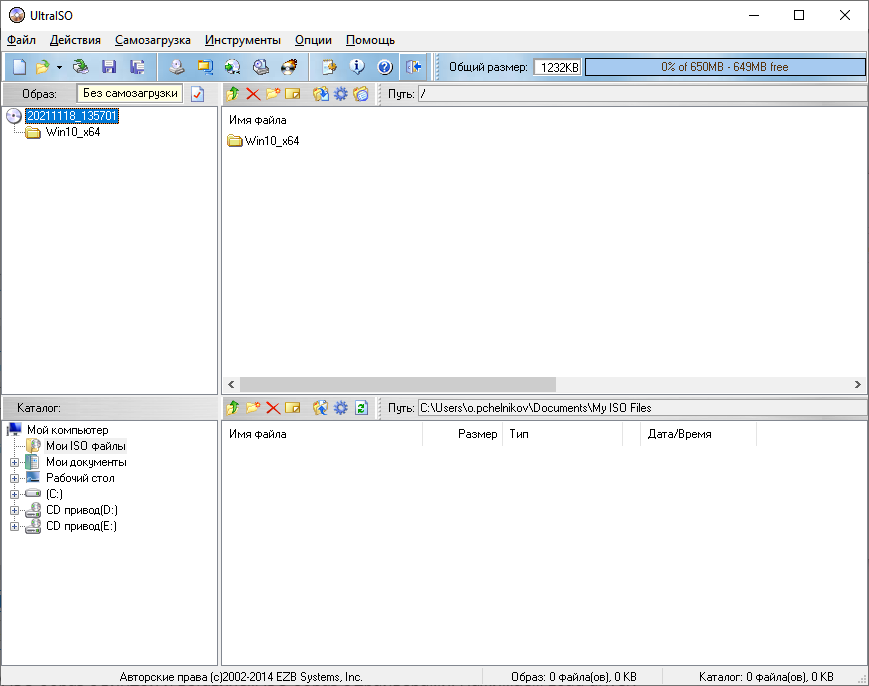
Драйвера для Windows Server 2016 лежат в папке Win10_x64. Эту папку с помощью UltraISO сохраняем в ISO образ.
UltraISO — создать ISO образ с файлами
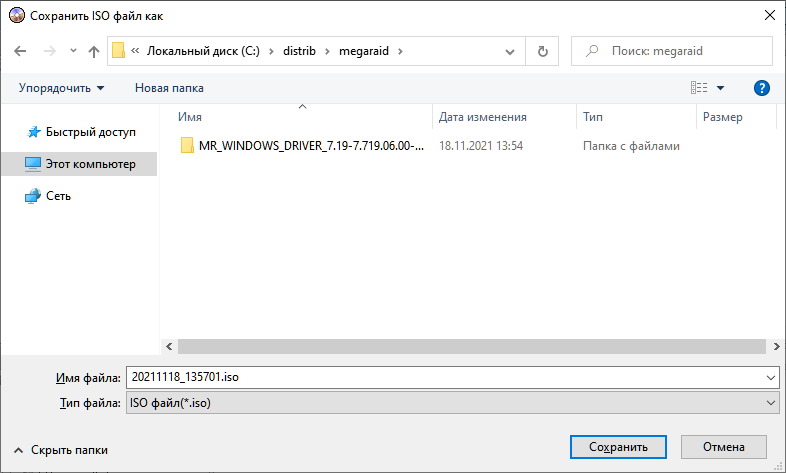
ISO образ с драйверами для контроллера готов.
Демонтируем образ с инсталлятором Windows Server 2016 из KVM.
Монтируем образ с драйверами контроллера.
Возвращаемся к окну установки и нажимаем ссылку Load driver.
Browse. Лезем внутрь смонтированного диска и выбираем папку Win10_x64.
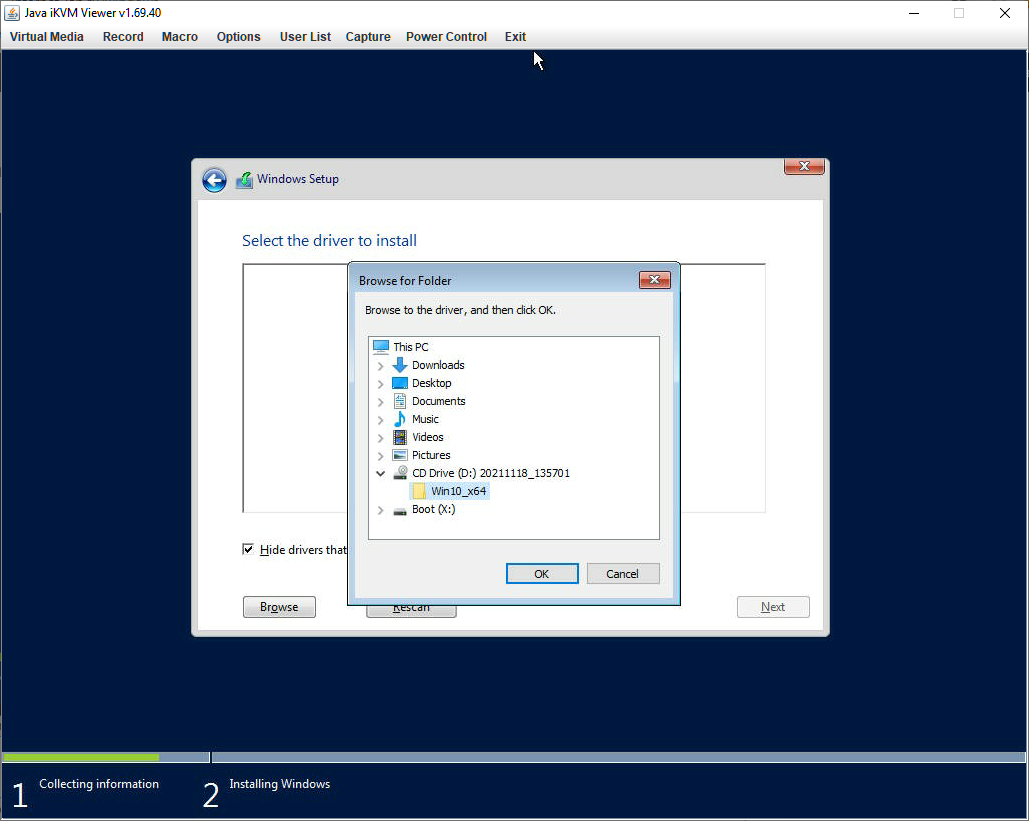
OK. Находятся драйвера.
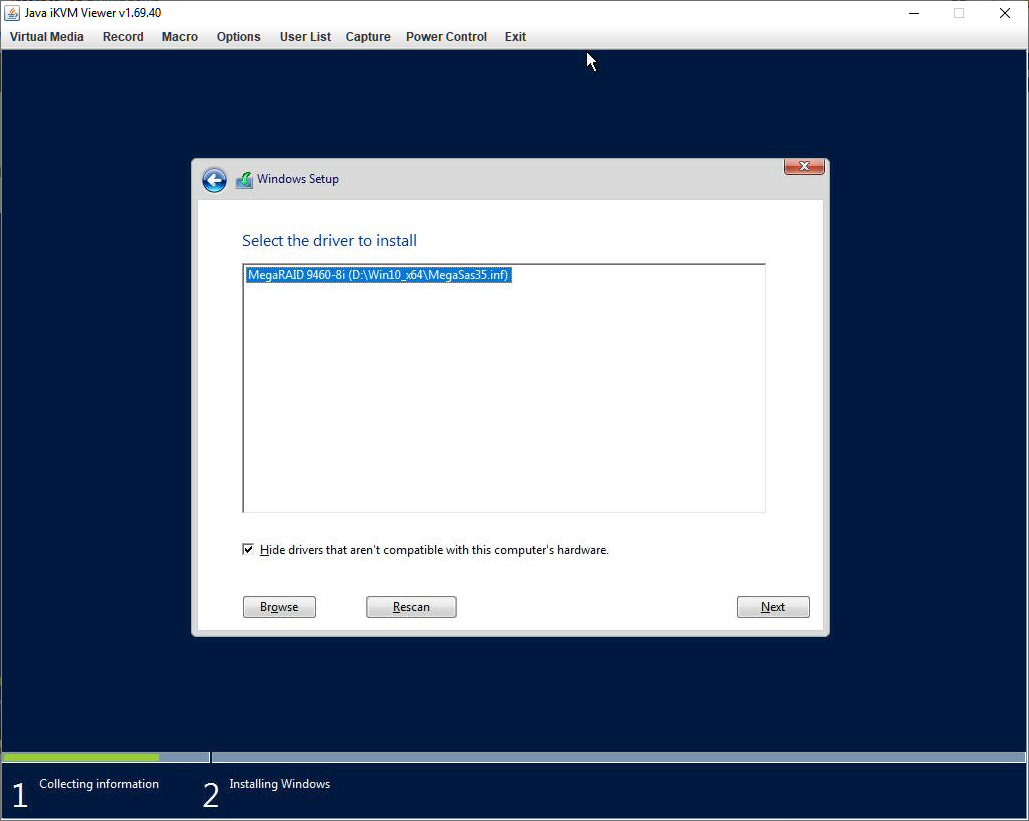
Выбираем драйвер от нашего контроллера MegaRAID 9460-8i. Next.

Отлично. Массив увиделся. Выбираем его, и… внизу Windows can’t be installed on this drive. Ну конечно, извлекаем образ с драйверами и монтируем установочный образ с Windows.

Теперь порядок. Next.
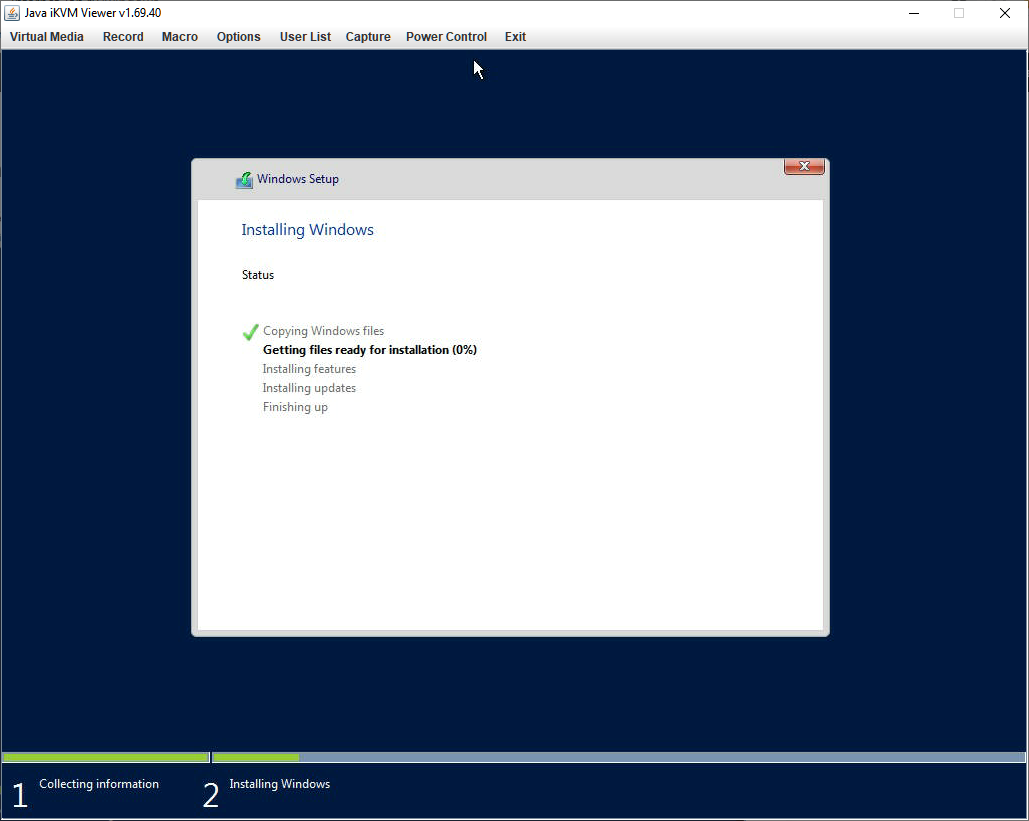
Пошла установка. Сервер перезагрузится.

Указываем пароль администратора. Finish.
ОС Windows Server 2016 установлена.
Установка обновлений Windows
Выполняем вход в операционную систему.
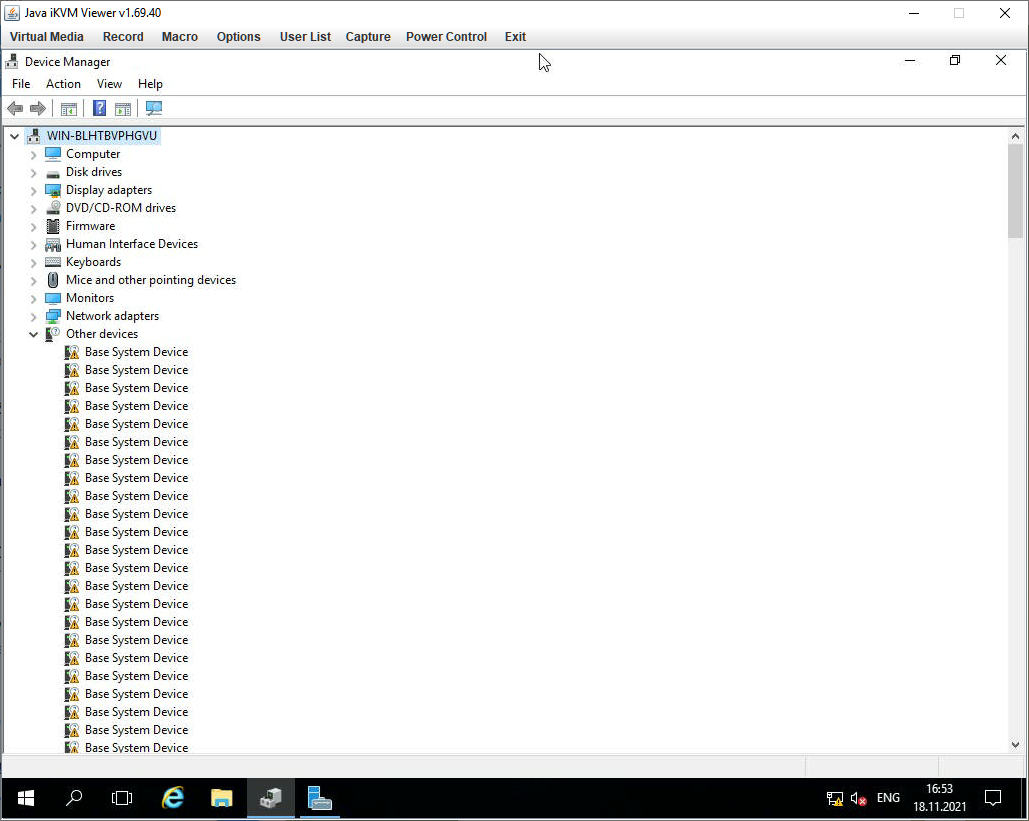
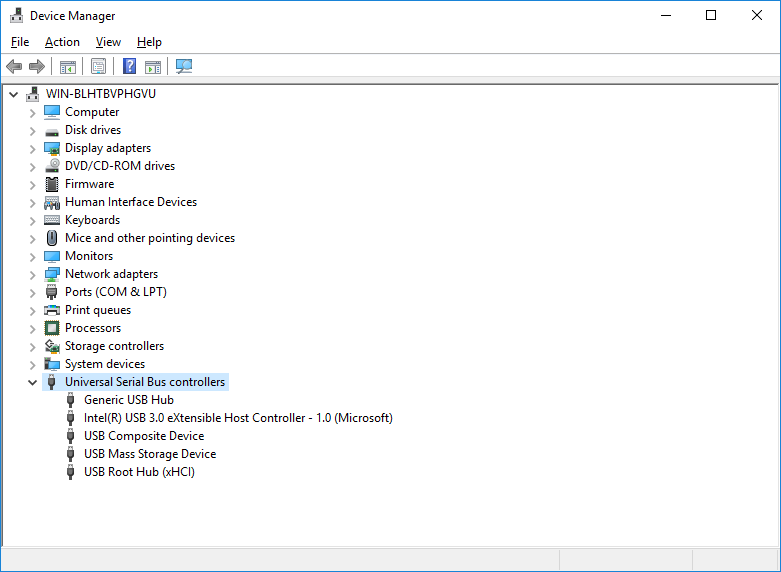
Сервер аппаратный, поэтому в диспетчере устройств вот такая неприглядная картина. Много нераспознанного оборудования.
Мне повезло, сетевой SFP+ адаптер Supermicro AOC-STGN-i2S корректно распознался, поэтому я быстренько настроил сеть и Интернет. Это позволило активировать Windows и запустить установку обновлений.
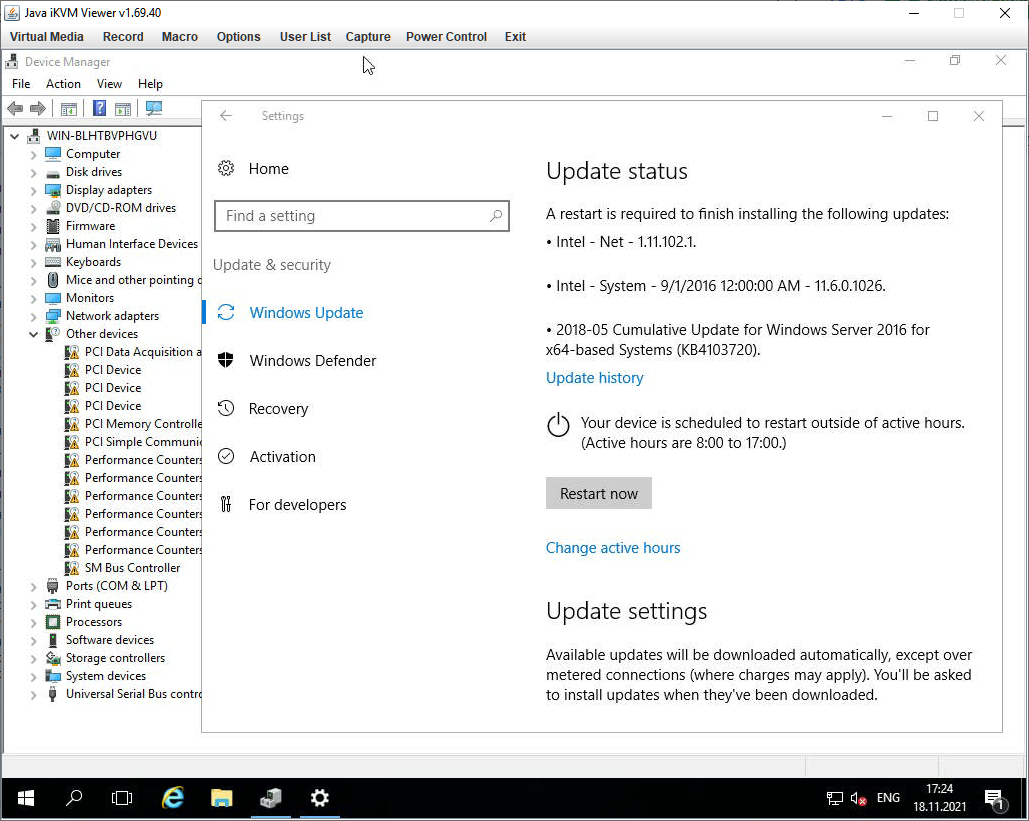
После установки обновлений список неизвестных устройств значительно сократился.
Установка драйверов для сервера Supermicro SYS-1029P-WTRT
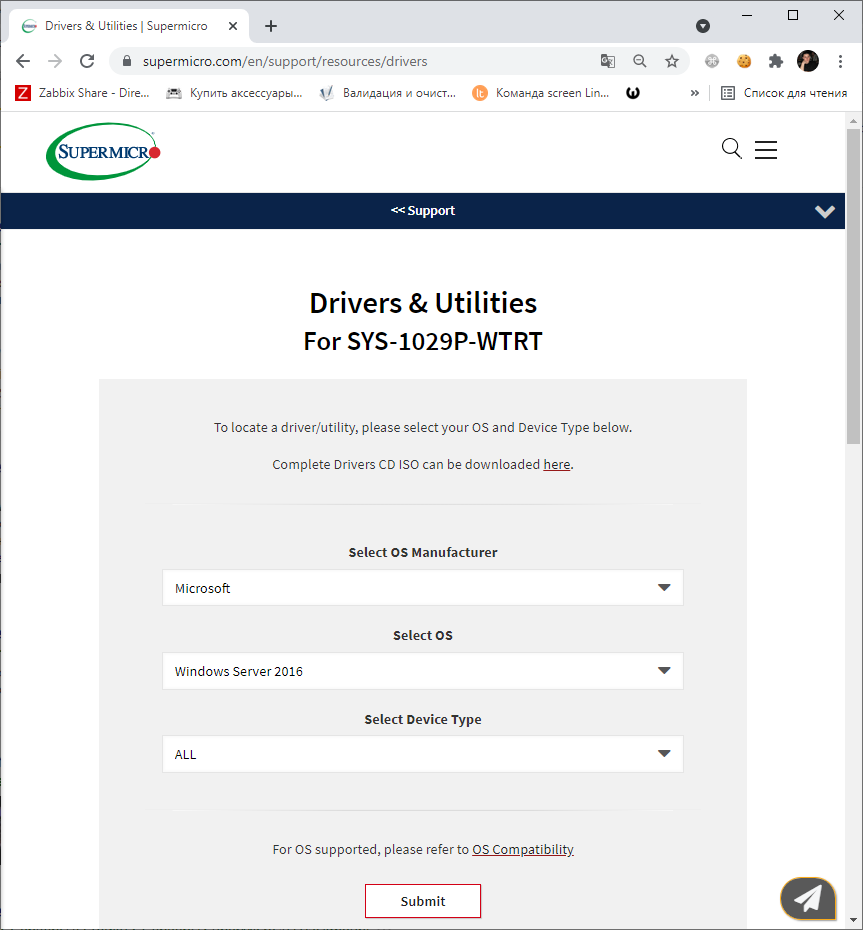
Воспользуемся поиском драйверов на сайте производителя сервера.
Нашлось довольно много всего.
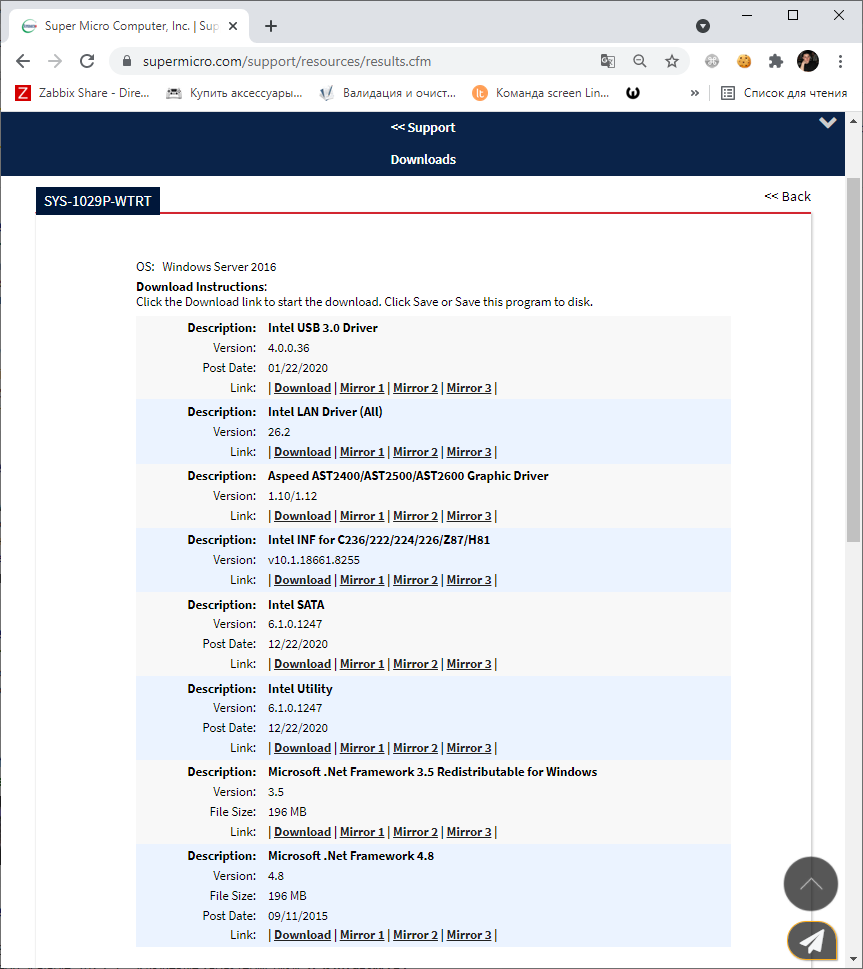
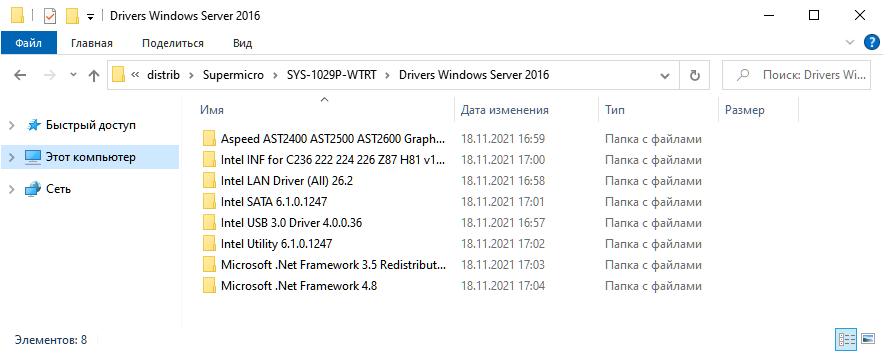
Скачиваю всё.
По очереди начинаю устанавливать драйвера. Что-то не пригодилось, типа Intel Virtual RAID on CPU.
Драйвера установлены.
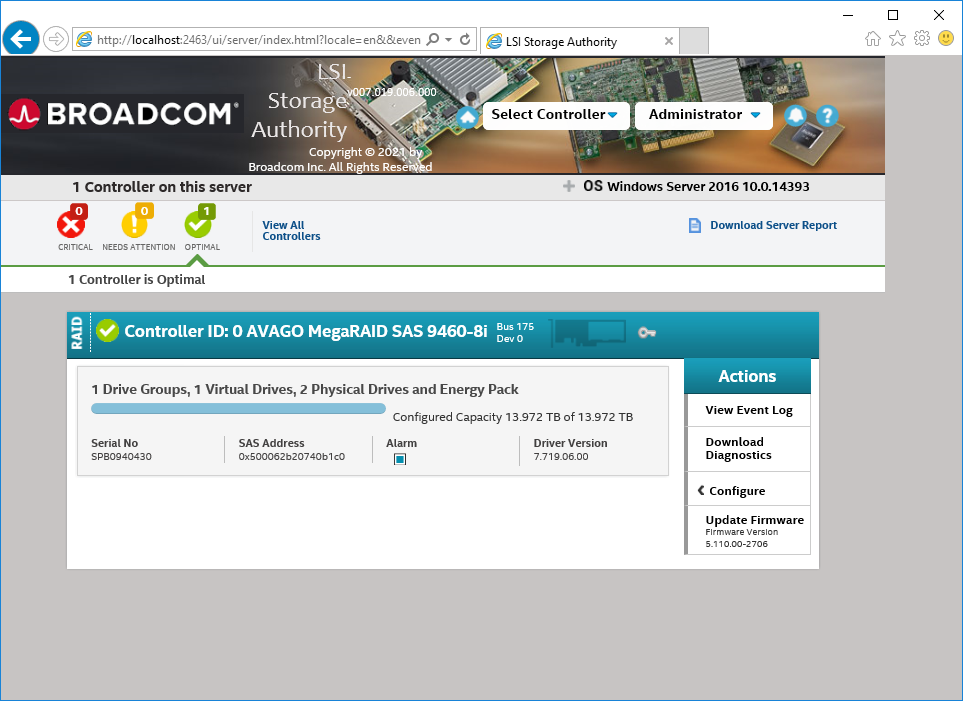
Дополнительно скачиваю и устанавливаю пакет LSI Storage Authority.
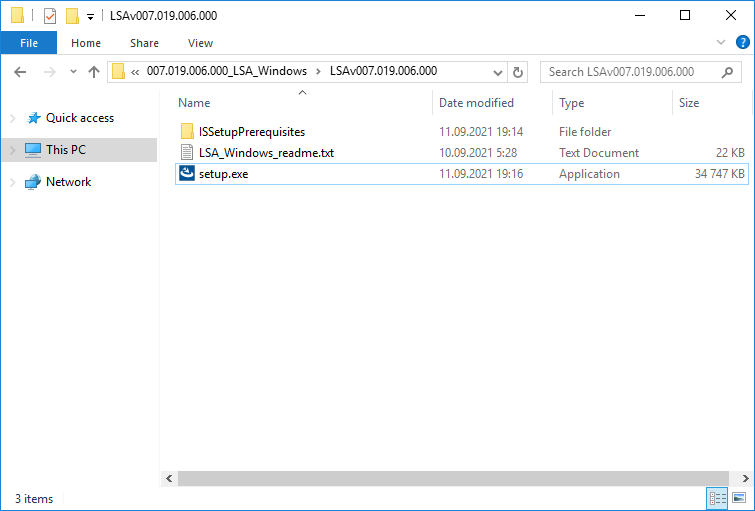
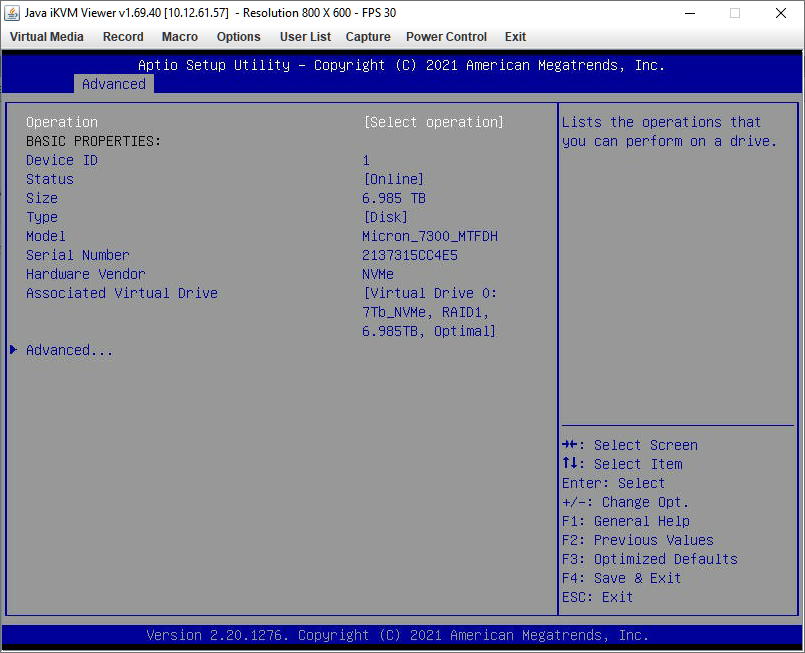
Он позволяет получить доступ к просмотру физических дисков RAID контроллера.
Ссылки
Управление RAID контроллером LSI (Broadcom, Avago) с помощью StorCLI в Windows Server
Заключение
Мы установили операционную систему Windows Server 2016 на аппаратный сервер Supermicro SYS-1029P-WTRT. В качестве носителя использован RAID1 массив из двух NVMe дисков, собранных на аппаратном RAID контроллере Avago MegaRAID 9460-8i.
Дополнительно установили драйвера для всех устройств.
Сегодня будем разбирать, как производится установка Windows Server 2016 Std на Supermicro X11DPU (Motherboard: SYS-6029U-TR4) + VROC RAID 1 из двух дисков M.2, раз нет технической возможности использовать на текущий комплектующих ESXi 7 связку RAID 1 & RAID 10. А после уже следующей заметкой разберем установку Hyper-V.
На заметку: через BIOS для материнской платы проверяю, что во вкладке Boot параметр Boot Mode select стоит в значении UEFI.
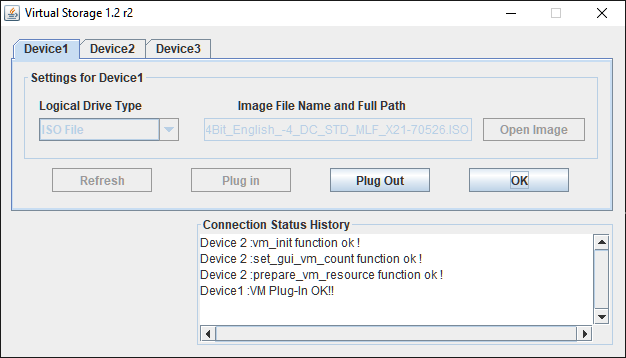
Шаг №1: Монтирую установочный образ SW_DVD9_Win_Server_STD_CORE_2016_64Bit_English_-4_DC_STD_MLF_X21-70526.ISO и произвожу установку операционной системы на сервер Supermicro X11DPU (Motherboard: SYS-6029U-TR4)
Шаг №2: Прохожу стандартные этапы ответов мастера:
Language to install: English (United States)Time and currency format: English (United States)Keyboard or input method: US
и нажимаю Next
а вообще не лишним будет нажать Shift + F10 откроется консоль командной строки и для всех дисков выполнить clean
нажимаю Install now
Select the operating system you want to install: выбираю "Windows Server 2016 Standard (Desktop Experience)"
и нажимаю Next
I accept the license terms: отмечаю галочкой
и нажимаю Next
Custom: Install Windows only (advanced): выбираю
как вижу, установщик Windows не видит VROC RAID массивы
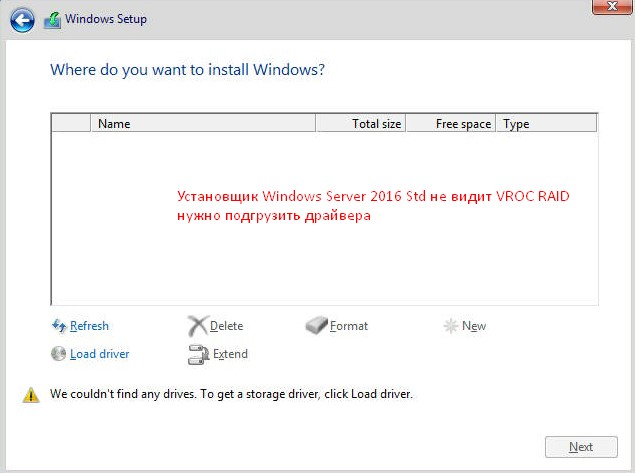
нужно подгрузить соответствующие драйвера
С официального сайта по материнской плате скачиваю "https://www.supermicro.com/en/products/system/2u/6029/sys-6029u-tr4.cfm" - Drivers & Utilities
Select os Manufacturer: MicrosoftSelect OS: Windows Server 2016Select Device Type: All
и нажимаю "Submit", нахожу по описанию "Intel SATA" и через Download скачиваю архив ('https://www.supermicro.com/wdl/driver/SATA/Intel_PCH_RAID_RSTE/Windows/6.1.0.1247/Win.zip')
Description: Intel SATAVersion: 6.1.0.1247Post Date: 12/22/2020

Распаковываю архив, устанавливаю на рабочую станцию приложение UltraISO и указав каталог распаковки Win сохраняю как iso, это нужно чтобы через IPMI подмонтировать еще один образ и уже на этапе выбора дисков нажать "Load driver" - Browse и выбираем
привод (у меня это логический диск E:) - Win - VROC_6.1.0.1247_F6-drivers - VROC_f6_iaVROC_win8_64
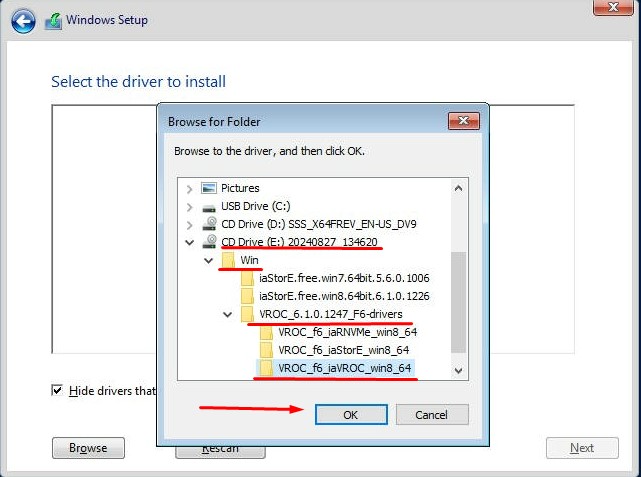
и нажимаем ОК, вижу, что теперь установщик Windows видит контроллер RAID
Select the driver to install: выбираю Intel® Volume Management Device NVMe RAID Controller
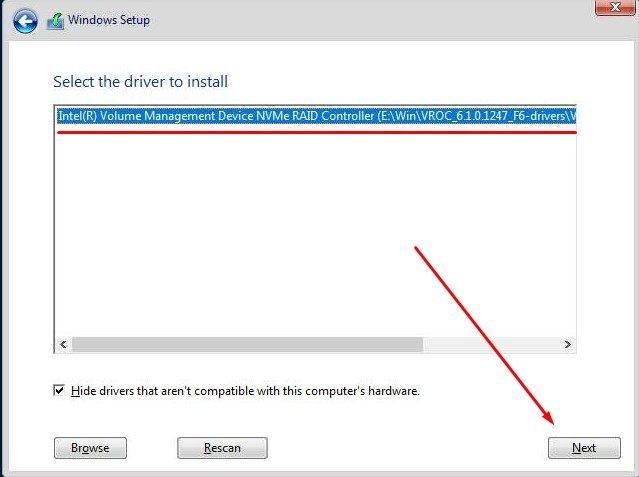
и нажимаю Next
теперь вижу RAID массивы
Drive 1 Unallocated Space: 849.5GB
Drive 2 Unallocated Space: 3398.1GB
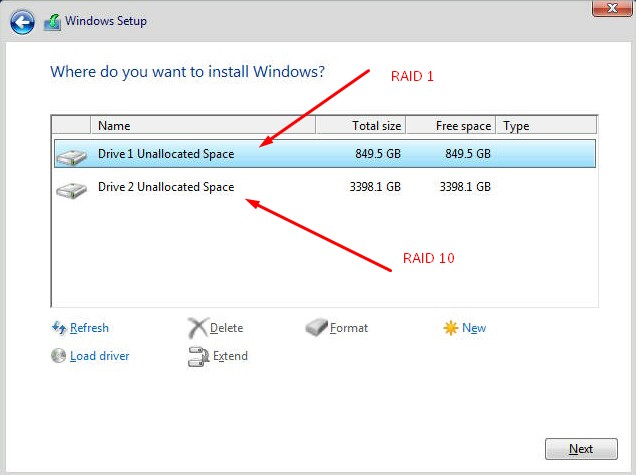
выбираю Drive 1 и нажимаю Next именно на него я буду устанавливать Windows Server 2016 Std
начинается процесс установки, но может так случится что процесс не начинается, и вы видите
Windows could not prepare the computer to boot into the phase of installation. To install Windows, restart the installation.
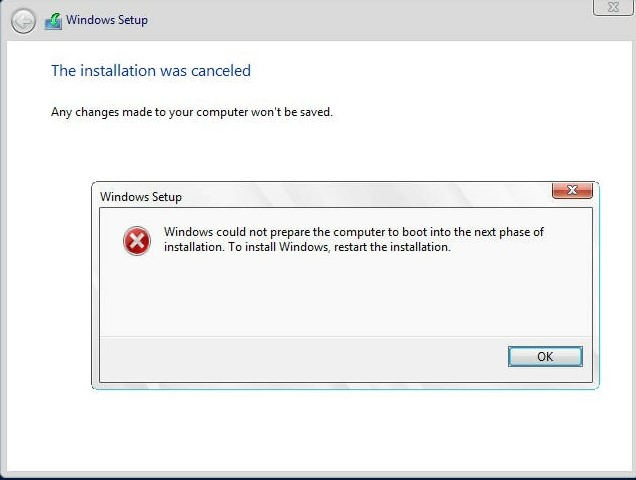
в этом случае, нажимаем ОК, затем Shift + F10
X:\Sources\набираем diskpartDISKPART> list disk
На заметку: С учетом того что подгрузили драйвер для VROC видим RAID массивы, т.е. они отображаются как диски в выводе команды list disk
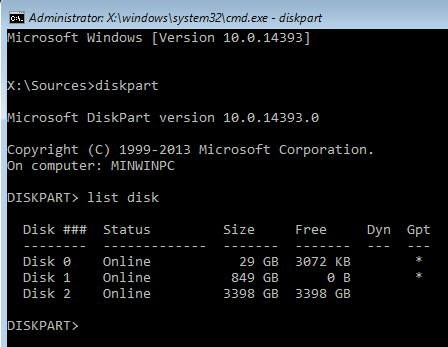
и видим все диски с учетом подгруженного драйвера и переходим в каждый из них, как
DISKPART> select disk 0
и выполняем команду
DISKPART> clean
в ответ получаем DiskPart succeeded in cleaning the disk.
и выходим из консоли командной строки
DISKPART> exit
Leaving DiskPart…
X:\Sources> exit
и возвращаемся к мастеру установки операционной системы

Ожидаю…
Назначаю пароль на учетную запись Administrator
Password: 712mbddr@
и система установилась успешно
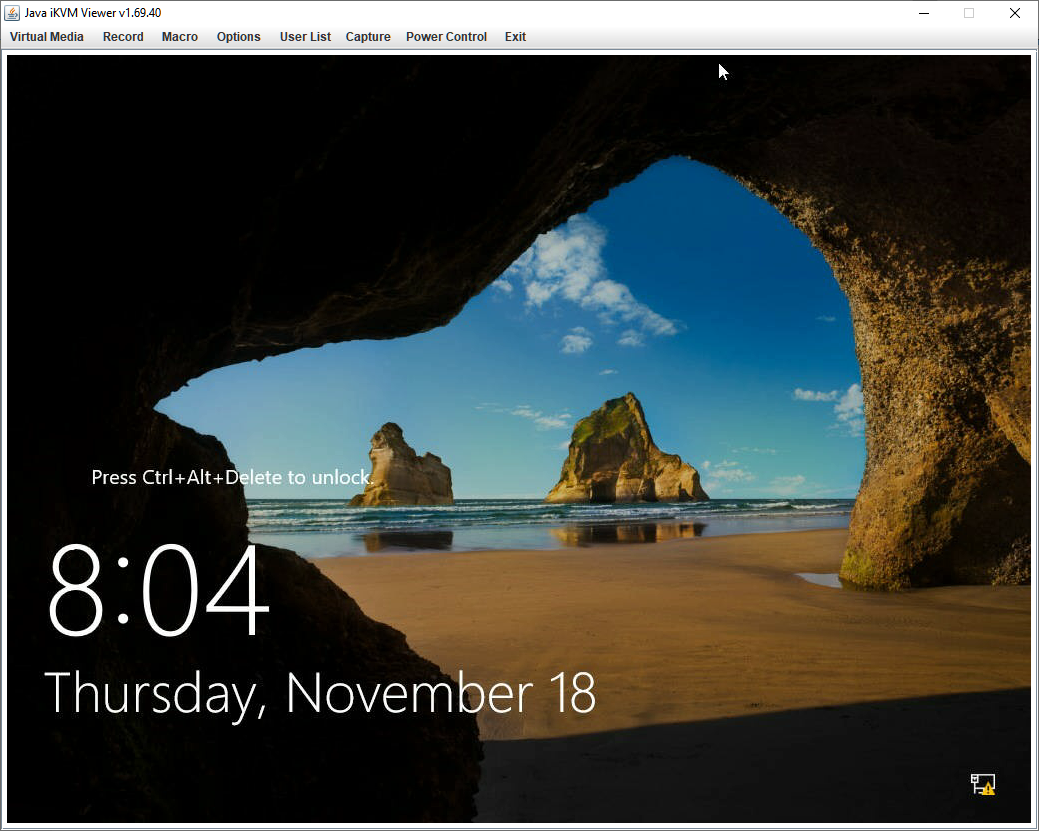
Т.к. я через консоль IPMI подключен к серверу и произвожу установку то на экране нажимаю Ctrl + Shift + F6 (это эквивалентно нажатию Ctrl + Alt + Del), после авторизуюсь
Смотрю какие драйвера на устройства мне нужно установить:
System Interrupt ControllerSM Bus ControllerPerformance CountersPCI Simple Communications ControllerPCI Memory ControllerPCI DevicePCI Data Acquisition and Signal Processing ControllerBase System Device
исходя из этого я также скачиваю, но уже все драйвера, закидываю в папку Server2016Drivers и через UltraISO формирую iso файл которые также через IPMI монтирую в систему для последующей установки драйверов из образа.
Когда драйвера установлены операционная система Windows видит RAID1 & RAID10
На заметку: Отправив систему в перезагрузку, проверяю что все драйвера на устройства установлены и делаю себе экспорт всех установленных драйверов в папку, командой:
Win + X - Command Prompt (Admin)
if not exist c:\drivers mkdir c:\driverspowershell -command "export-windowsdriver -online -destination c:\drivers"
Итого, как вижу, что Windows может работать с VROC RAID, хоть так, значит будут использовать виртуализацию на базе Hyper-V.
На этом заметка завершена, с уважением автор блога Олло Александр aka ekzorchik.
Introduction
I’m pleased to present you with the result of a massive installation and documentation effort by a TinkerTry fan. This voluntary article was authored by Greater Detroit’s Steve Shanks, who is currently a Senior Consultant at The Speedware Company. He volunteered to help speed folks right through finding 10GbE drivers, implementing RAID, configuring drive monitoring and more, all carefully documented as he deployed his beloved SuperServer Bundle 2. TinkerTry doesn’t normally feature guest posts, but knew you’d really appreciate this rare exception, along with his related Migrating to Windows Server 2012 R2 on a TinkerTry’d Supermicro SuperServer Bundle 2 8-Core Xeon D with built-in Intel RSTe RAID, by Steve Shanks.
Having performed a successful migration from and replacement of one of his existing VM hosts to the SuperServer Bundle 2, Steve purchased a second SuperServer Bundle 2 and has done the same for his other existing VM host. Smaller footprint, quieter running and less power consumption. Mission accomplished!
Warning: This article is published on a at-your-own-risk basis, with no free support or guarantees implied, see also the usual detailed Disclaimer below. If you own a TinkerTry’d Bundle, you have a known-good Bundle, and you may want to leave your questions below for best-effort community assistance. I have not «TinkerTry’d» (tested) the exact configuration detailed in this article.
Note that Xeon D easily allows you to do nesting testing, running Hyper-V and VMware on one system, concurrently. Maximum flexibility and versatility for the IT Professional and amateur enthusiast alike. For even better speeds, you can dual-boot Hyper-V and VMware. That said, unlike peanut butter and chocolate, you’ll want to keep your hypervisor’s boot devices AND datastores (NTFS and VMFS) completely separate. Also note that the Intel RST/RSTe hardware/software combo has its detractors, and isn’t support by any VMware ESXi version.
Aug 11 2017 Update — Don’t miss the addendum below, where jrp gives us some updates and fresh perspectives, many of which arrives since this article originally came out.
— Paul Braren, TinkerTry.com
Overview
Now that you have received your brand new Supermicro Bundle-2 (or -1 or -3), what are you going to do with it?
Windows Server 2016 is available for a free download from Microsoft with a 180-day evaluation period. Everything is fully functional.
This article shows how to install Windows Server 2016 Evaluation on a Supermicro 8-Core Bundle 2. It will show how to configure RAID in the hardware, how to install the monitoring software onto Windows and then will show the installation of the Hyper-V role followed by the successful creation of a new virtual machine running a copy of Windows Server 2012 R2.
Contents
Windows Server Evaluations
Configuring the BIOS and RAID
- Download the Manual
- Standard Settings to Change
- RAID Related BIOS Changes
- RAID Configuration
Create Boot Media for Windows Server 2016 Evaluation
- Download Windows Server 2016 Evaluation
- Initialize the USB Drive
- Make the USB Drive Bootable
- Copy the Operating System Image to the USB Drive
- UEFI Bootable Drive
Installing the Windows Server 2016
- Booting the Installation Media
- Installation
- Network Discovery and Time Zone Setup
- Driver and Software Loading
- Disk Provisioning
- Network Provisioning
- Remote Access Provisioning
- Windows Updates
Hyper-V
- Hyper-V Role Installation and Provisioning
- Hyper-V Manager
- Virtual Machine Creation
- Virtual Machine Operating System Installation
Automatic RAID Rebuild after a Power Failure
Final Thoughts
Windows Server Evaluations
All Windows Server versions are available as a free download for evaluation purposes. The Hyper-V standalone version is available as an evaluation with unlimited duration. Full server versions typically carry a 180 expiration. At the end of that evaluation, it is generally not possible to upgrade to a paid version. [Jan 28 2017 clarification added below]
- Windows Server 2012 R2 — 180 days
- Hyper-V 2012 R2 — Unlimited
- Windows Server 2016 — 180 days
- Hyper-V 2016 — Unlimited
In order to receive the free evaluation, it is necessary to have a Microsoft login (or to register as a new user) and then fill in a form. Otherwise, there are no special conditions.
Configuring the BIOS and RAID
Download the Manual
A link to the manual can be found here: https://www.supermicro.com/products/motherboard/Xeon/D/X10SDV-TLN4F.cfm
Standard Settings to Change
In the video of the installation, there are very few suggested changes to the BIOS from those values configured on the delivered system. Just make those changes plus identify to the BIOS any SSDs.
| Menu Section | Setting | Default | New Value | Comments |
|---|---|---|---|---|
| Advanced/Boot Feature | Boot NumLock State | On | Off | Personal preference. |
| Advanced/Power Configuration | Restore on AC Power Loss | Last State | Last State | You may also use Power-On which will turn on the server even if it was off before. |
| Advanced/SATA Configuration | Port n SATA device type | Hard Disk Drive | Solid State Drive | Do this for all SSDs. |
| Boot Settings | Boot Mode Select | DUAL | UEFI |
In addition to the changes recommended in the installation video, there are RAID-specific ones:
| Menu Section | Setting | Default | New Value | Comments |
|---|---|---|---|---|
| Advanced/SATA Configuration | Configure SATA as | AHCI | RAID | Needed for further RAID configuration. You must reboot after setting this to get the RAID configuration utility to appear on this menu. |
| Advanced/SATA Configuration | SATA RAID Option ROM/UEFI Driver | Legacy | EFI | |
| Advanced/Intel RSTe SATA Controller* | Create RAID volumes with the utility exposed on this menu section. See below. |
* Change “Configure SATA as” to “RAID”, save settings and reboot for this option to be shown
RAID Configuration
During startup, press DEL to get to the setup menu:

Initially, all drives are shown as non-RAID. Select Create RAID Volume to start the configuration:

Name the volume to be created:

Define the RAID level to use. Change the default RAID0 to RAID1 (or whatever your choice is):

Select the drives that are to be incorporated into this RAID array:


Finally select Create Volume to create the RAID volume:

The newly created volume is shown with a normal status and the selected disks are no longer listed as non-RAID:

Repeat the process for the other RAID volumes desired. Here a total of THREE volumes will be created:


When the setup is exited, the EFI boot shell will be invoked in the absence of any other bootable media:

Download Windows Server 2016 Evaluation
The steps for this are found at https://www.microsoft.com/en-us/evalcenter/evaluate-windows-server-2016
Initialize the USB Drive
The Bundle-2 arrives with a 32gb USB 3.0 thumb drive. It is an ideal vehicle on which to install the operating system.
First create a bootable USB drive. There are two types that you can use:
- Legacy – set the BIOS boot mode to LEGACY or DUAL
- UEFI – set the BIOS boot mode to DUAL or UEFI
The initial steps for both are the same. This link provides a useful tutorial of how to create the legacy version:
Here are the steps executed on the Supermicro system to initialize the drive using DISKPART on an elevated CMD session:
- Select the USB drive (here drive 1):
List diskSelect disk 1List disk
- Initialize the drive:
clean - Create a primary partition:
create partition primary - Select the partition:
select partition 1 - Mark it active:
active - Format as a NTFS drive. This is necessary since there are files on the installation that are more than 4gb:
format fs=ntfs quick label="WIN2016"

Make the USB Drive Bootable
The first step is to mount the downloaded image. This can be achieved in a number of ways depending on the O.S. running on your laptop or computer.

Once mounted, in an elevated CMD session:
- Change the active drive to the O.S. image drive (
D:in this instance):D: - Change the active directory to the
Bootfolder:cd boot - Copy the boot media to the USD:
bootsect /nt60 F:

Copy the Operating System Image to the USB Drive
In an elevated CMD session:
xcopy d:\*.* f:\ /E /H /F
With appropriate substitutions for your image drive (D: in this instance) and your USB drive (F: in this instance).
All files copied will be listed.

The copy will stall for a while at the large (> 4gb) install.wim file. This is normal.

When completed, the USB thumb drive is now a bootable installation drive on a legacy setup.

UEFI Bootable Drive
For a UEFI bootable drive, there is an addition step. An example of doing this can be found here:
https://www.thomas-krenn.com/en/wiki/Creating_Windows_UEFI_Boot-Stick_in_Windows
Installing the Windows Server 2016
Booting the Installation Media
Bootable USB Drive
If you created the bootable USB drive, then insert that into one of the USB ports at the front of the Supermicro server.
Using either the HTML5 or the iKVM viewer, power up the server and press F11 to get the boot menu. From there, select the “SanDisk” entry (or other name if you have a different hardware model) which is the USB drive.
The installation will then commence.
Attaching the Windows Server 2016 Image as a CDROM
If you prefer not to use the USB and simply mount the ISO image as a virtual media item, then you must use the Java iKVM viewer to get the CDROM share as the HTML5 version does not currently support CDROM sharing.
After selecting Virtual Media menu, mount this into device 1:

Later on you can unmount it using the Plug Out option.
Next restart and press F11 to get to “Boot Menu”. Select Virtual CDROM

Press any key to start the boot from the CDROM:

The installation will then commence.
Installation
The installation will go through loading file and then present the start of the installation process:

Make your choices:

Press Install Now:

Setup will commence:

Pick the Windows Server 2016 Standard Edition (Desktop Experience) because you will want to have a GUI for this article’s demonstration:

Accept the EULA:

Pick Custom: Install Windows only (advanced) since this is a fresh install:

If you want to sub-divide the install drive, you would select New, specify a size and then Apply to create a partition. Or, to have the setup create a partition using the whole of the drive, just press Next.

The standard install process now proceeds.

Now there will be a reboot…

And another automatic reboot after which the administrator password needs to be created:

This completes the initial installation of Windows Server 2016 with a great view of some of the Twelve Apostles which are found along the Great Ocean Road that runs along the coast of the State of Victoria in Australia, south of Melbourne. This day the Southern Ocean is particularly calm:

Network Discovery and Time Zone Setup
Logon to allow for network discovery and to set the time zone:

Select “Yes” for network discovery.
Next set the time zone:

Driver and Software Loading
Download the Motherboard Driver CD
A link to the driver CD can be found here: https://www.supermicro.com/products/motherboard/Xeon/D/X10SDV-TLN4F.cfm
Download the driver CD. If there is one beef I have about this system is that there is no driver CD included. Yes, there is no drive on the system to read it, but normally one has plenty of these available.
The link leads to a choice of an ISO or an archive RAR file. Download your preference. If you download the archive, then extract the ISO from it. The ISO is what you need.


Mount the Motherboard Driver CD
Motherboard driver and software must now be loaded. Use the iKVM viewer since the HTLM5 viewer does not support virtual media.
Mount the driver CD ISO through the Virtual Media menu which will then appear as a DVD:

Run the Motherboard Driver CD Setup
The installation autorun and setup programs will not run under Windows Server 2016, They need to run in Windows 8 compatibility mode. Here is how..
- Copy the Driver CD to the hard drive.
- Navigate to the AutoRun program and Right click, select properties and the compatibility:

- Set the compatibility to Windows 8 and click OK.


Now run the AUTORUN as administrator:

Install Intel Rapid Storage Technology Enterprise Software
Install the Intel Rapid Storage Technology enterprise software from the menu:


There is an issue with driver names and versioning that needs to be dealt with. The drivers on the CD for RAID are the ones to use. Thus, you will agree to replace the “newer” v 13.2.0.1022 drivers by pressing Yes:

The setup then proceeds:

You will see a warning. Accept by pressing Next:

Accept the license agreement:

Read the Readme file if you wish:

The install will now proceed after pressing next:

When the install is complete, press next:

And restart the server:

When the server restarts, login and run the newly installed IRSTe software:

The RAID application displays all arrays in good working order:

Intel Chipset Software Installation
After the reboot, rerun the AutoRun as administrator and this time install the Intel ChipSet Inf files:

Confirm the installation, press Next:

Accept the EULA:

Read the README if you desire and then start the installation, pressing Install:


Restart the server when the installation is complete:

Review Driver Status
Unlike the Windows Server 2012 installation, there is no need to install the 10G Ethernet drivers separately as these are loaded in Windows Server 2016 by default. Everything is in order in the Device Manager:

Install Supermicro SuperDoctor 5 (SD5) Software
Install the Supermicro SuperDoctor 5 (SD5), using ALL default values:


Accept the EULA:

Use the default installation location:

Choose the built-in Java runtime environment:

No need for SNMP support:

Agree to use the default key stores:

Use the default ports:


Accept the summary to start the installation:


Completion of the initial installation:

SD5 will now run. Configure IE11 or not at your pleasure:

Select the link to start the software and login using the default user/password of ADMIN/ADMIN:


Everything should be in good status, except for the RAID arrays which need SmartmonTools to be installed:

To install SmartmonTools, select the button just above the hard drive display:

Install the Smartmontools, accept the license:

Press OK at the «Installing» dialog box:

And dismiss the successful installation message:

Now restart the server and there is now a SuperDoctor 5 Web icon on the desktop. Access the SD5 software using this icon:

Now all of the devices are shown in good condition including the hard drives:

SD5 also shows that any Ethernet ports connected to the network (just one in this article at this point) have DHCP-allocated addresses and are working:

Disk Provisioning
So far just the one drive is provisioned which is the drive on which Windows is installed. In order to provision the others, run Computer Management.

Select Disk Management and initialize any drives that require it:

Allocate partitions to suit your purpose:

An example would be a new simple volume or two on each disk. Right-click on an uninitialized volume and select New Simple Volume:

This starts a wizard. Press Next:

Allocate the size that you want (which defaults to all of the space on the volume). Here a portion of the drive (1000gb, entered as 1024000) is selected:

Allocate a drive number:

Format and name the volume:

The wizard displays a summary. Press Next to execute the action:

The new volume is now named and formatted with a drive letter assigned:

Complete the process for all other drives and volumes:

Now rename the installation (C:) partition if so desired:


All disk provisioning is now completed:

Network Provisioning
Depending on what the server was connected to, the network that was installed may be marked as public or private.
Check network setting and make private if desired:

For this install, the network is already private

Network is already private. The name can be changed in local group policy:

The name of the network is Network:

Right-click the network name and select properties. There you can specify a name:

If the network were not private (or just not the desired setting), the location tab on that properties dialog can be used to change it:

And the name is changed (and the location too if that were changed):

Remote Access Provisioning
Since this server is not going to be connected to a monitor, a keyboard or a mouse, and not always controlled through the iKVM viewer, then remote access to the server is needed.
Enable Remote access to the server, so that iKVM is no longer necessary. This is done in Control Panel/System & Security:

It is disabled upon installation:

Select Allow..., accept the warning about the firewall changes that will be made and then, depending on your needs, uncheck the Allow connections only from... option:


In order to be able to see the machine name and for the server to respond to PING requests (if you so desire but not necessary to connect remotely), firewall rules need to be enabled:

Now the server and its name are visible to ping requests.
An optional step is to rename the ethernet ports to something more useful. This is done in Network and Sharing Center. Before:

After (naming the bottom port on the backplane as -1 for each):

Windows Updates
This is a good time to perform all Windows updates. For the purpose of this article, this step is omitted.
Hyper-V
Hyper-V Role Installation and Provisioning
Hyper-V is the hypervisor for Windows. It is controlled by the Hyper-V role which needs to be installed on the server.
From the Server Manager Dashboard, select Add Roles & Features:

This is a Role-based or feature-based installation. That should be your selection:

Pick this server and press Next:

The roles available are displayed. Check Hyper-V:

This will list all of the features to be added. Press Next:

That is the only role to be added. Press Next:

There are no features to add. Press Next:

Hyper-V Role configuration now occurs. Press Next:

Virtual switch provisioning is the first step. For virtual switches, refer to the Windows 2012 install for more details on virtual networks. For this article, select all but one of the adapters (at this time, only 2 ports are connected to a switch and only those two are shown):

Windows Server live migrations are beyond the scope of this article. See https://technet.microsoft.com/en-us/library/hh831435(v=ws.11).aspx for more details. Do not enable live migrations:

Accept the defaults for the stores or change them to your own. Here are the defaults:

And here are some that remove the locations from the O.S. drive. The advantage of moving these off of the installation drive are several-fold:
- Virtual hard drives being on a different drive do not compete with the host O.S.
- Moving the virtual machine configuration off simplifies their backup.
- Potential for O.S. change without concern for the VMs

Confirm the summary of the Hyper-V provisioning by pressing Install:

Installation now proceeds:
When completed, a warning that a restart is needed is displayed. Close the dialog:

And restart the server:

There will be a series of reboots before the installation is completed.
Hyper-V Manager
Hyper-V Manageris the tool that is used to configure Hyper-V and to create virtual machines (VMs). It is available through the tools menu of the Server Manager Dashboard:

Select the server (there is only one for this demonstration) and the status of all VMs will be displayed. As this is an initial setup, there are no VMs on this server:

Virtual Machine Creation
A new VM can be created through the Hyper-V Manager. From the Actions panel, for this server, select New and then Virtual Machine:

Press Next to dismiss the splash screen:

Name the VM and leave the default location for its configuration:

Pick a generation for the virtual hard drive. This choice is beyond the scope of this article. For more information see https://technet.microsoft.com/en-us/windows-server-docs/compute/hyper-v/plan/should-i-create-a-generation-1-or-2-virtual-machine-in-hyper-v. Here the selection is Generation 1:

Pick the amount of memory for this VM. No need for dynamic memory for this demonstration. Information on dynamic memory (possibly for low use VMs) is found here https://technet.microsoft.com/en-us/library/hh831766(v=ws.11).aspx. Press Next:

Pick a virtual network switch to use. There is more information on virtual switches in the companion Windows 2012R2 case study:

Pick a size for the virtual hard drive and a location (which are both left at their defaults here):

An O.S. can be installed now or later. Later is picked here:

The summary is next. Note that the number of processors for this VM has not been specified at this point. Select Finish to continue:

The VM is now shown in the Hyper-V Manager display. The status is off:

In the Actions panel, select the VM’s settings to change the number of processors:

Select Processors and then select the number. The Core-8 has 16 processors in total! The Core-12 has 24!!! Press OK to confirm the changes:

Virtual Machine Operating System Installation
To install a guest O.S. on the server is much the same as a physical server:
- Put an installation CD/DVD into a drive.
- Turn on the machine.
- After the installation is booted, proceed as per a physical machine.
Before this, though, you need to connect to the VM. This is done through the Hyper-V Manager. Either double click the server in the main panel, or select Connect from the Actions panel for this VM:

At this point, an installation image needs to be attached in a virtual DVD drive. This is done through the Media menu item. Select Insert Disk:

Here a Windows Server 2012 R2 image is selected:

Once the DVD is attached, start the VM by selecting Start from the Action menu:

The VM will boot from the DVD and start the O.S. installation:

In the Hyper-V manager, the running VM can be seen. Note at this point in the status of the VM at the bottom of the main panel that there is no heartbeat seen. That will not occur until the install is completed:

Take all of the normal steps that would be done for a physical install in order to complete the installation of the O.S. in the VM:

At this point with prior Windows Server versions, you would insert the Integration Services Diskette and update the integration services. That is no longer necessary for Windows Server 2016.
This VM is now up and running and the heartbeat is now active:

The process can be repeated to create further VMs. There is no practical limit to the number of VMs. That would be governed by the hardware resources available. From a licensing perspective, the license exists at the VM level, meaning that you need a license (in whatever form) for the guest O.S. You do not need a license for the VM itself.
So for example, if you have a free Linux distro, you could install it 100 times on the server. The Windows Server 2016 license does not restrict this.
Automatic RAID Rebuild after a Power Failure
What happens if you accidentally pull the power plug from the wall? Likely, the RAID status will change. Here there are two of the RAID volumes automatically rebuilding themselves after a power failure. Likely the third which is highlighted as normal did not need a rebuild because there is no data on the volume and so no active I/O activity on the power failure.
The empty SATA_Array_0000 is show as normal status. The other two arrays are rebuilding:

SATA_Array_002 is rebuilt and normal:

And the final status with SATA_Array_001 rebuilt and normal:

Final Thoughts
Phew! The End.
From: Steve Shanks
Sent: Monday, January 23, 2017 11:36 PM
To: Paul BrarenI thought that I should probably give you explicitly full rights to what I sent you. You have my permission to use and publish the contents in part or whole in any way you want, with or without attribution. There, that should be broad enough!
Send me a ping when you have published it. I have a friend I want to show, someone I want to show how easy it is to do this and to get off of his myriad of physical servers.
Jan 28 2017 Update
In response to «At the end of that evaluation, it is generally not possible to upgrade to a paid version.» above, special thanks to redditor jcotton42 for his response on /r/sysadmin:
- Install Windows Server 2016 Hyper-V on a Supermicro SuperServer with built-in Intel RSTe RAID
Jan 27 2017
This is wrong, you can go to paid using dism:
dism /Online /Get-TargetEditionsto discover the editions you can upgrade to, thendism /Online /Set-Edition:<edition> /ProductKey:<key> /AcceptEulathen reboot
See more here: https://technet.microsoft.com/en-us/library/jj574204(v=ws.11).aspx
Somebody out there tested this lately on a Server 2016 evaluation? Please drop a response below, so others will know.
Jan 28 2017 Update #2
Steve Shanks:
Yes, that is a mistake. Here is the 2016 information: https://technet.microsoft.com/en-us/windows-server-docs/get-started/supported-upgrade-paths which says in part «For releases of Windows Server 2016 prior to 14393.0.161119-1705.RS1_REFRESH, you can only perform conversion from evaluation to retail with Windows Server 2016 that has been installed by using the Desktop Experience option (not the Server Core option). Starting with version 14393.0.161119-1705.RS1_REFRESH and later releases, you can convert evaluation editions to retail regardless of the installation option used.»
Aug 11 2017 Update
Great set of comments typed up by jrp below today, wanted to share them here, to be sure everybody sees them!
Thanks for all your work on this site.
In my case, I was able to install Windows Server 2016 without any additional drivers. (An automatic update from Microsoft clears all the yellow exclamation marks.)
SuperDoctor is not strictly required as you can get at the settings from IPMI (using the IPMI View App). This avoids having to run Java, etc, on a server.
I would not run the CD drivers; there are more up to date ones available from SuperMicro (links on the motherboard’s page).
To get a better viewing experience from the IPMI console, install the ASPEED 2400 video drivers on the operating system that you are using on the box (in this case Server 2016).
Intel now put all their NIC drivers into one giant archive, so you can update to their latest drivers. I’ve no idea how much difference it makes.
I would not run the intel raid drivers, but install Server 2016 (and 2012 and 2012r2) in pure UEFI / AHCI mode and use Storage Spaces (the built-in feature for managing pools, volumes and «virtual disks»). This is much more flexible than RAID: you can chop the space from your pool of disks up into «virtual drives» with varying levels of redundancy and performance, including using SSDs as cache… It works with the Microsoft AHCI drivers. SuperMicro also provide some updated RSTe (AHCI) drivers, but I have not tried them. (There’s a whose series of videos’ worth of material in setting this up!)
- The orange SATA0 port on the board is an interesting one that would be worth an article. You can add a «DOM» (ie, a thumb drive, from which you can run your VMWare installation, etc.) However, if you use a SATA flavoured SSD in your PCI-E slot a m.2 the port is shared with it, if I have understood correctly.
Hope this helps.
Just some editor’s notes, related articles at TinkerTry that address two of jrp’s many good points:
-
How to enable higher Windows VGA resolutions on both your monitor and your Supermicro Remote Console
Mar 23 2016 - Supermicro SuperServer 5028D-TN4T accessories and aspirations
Jun 29 20151 M.2 drive socket (M.2 PCI-E 3.0 x4, M Key 2242/2280) OR 1 SATA DOM (yellow SATA port on motherboard) (BIOS doesn’t allow both, if the M.2 is AHCI device like some Samsung SM951 SSDs. Modern NVMe drives like the Samsung 950 PRO M.2 NVMe are not AHCI.)
See also at TinkerTry
Xeon D Home Datacenter
-
Order a TinkerTry’d Supermicro SuperServer Bundle — powerful and efficient home virtualization lab solutions
- Intel Core i7 Skull Canyon NUC6i7KYK spec comparison with all current Xeon D-1500 Supermicro SuperServers suited for home labs | TinkerTry.com/compare
Hyper-V
- Windows Server 8 Beta Hyper-V runs fine on ESXi 5.0 Patch 02
Windows 10
- Detailed assembly and configuration instructions for Supermicro SuperServer Workstation Windows 10 Pro bundle
VMware vSphere
-
How to easily install VMware ESXi 6.0 on an Intel Xeon D Supermicro SuperServer
-
VMware ESXi 6.5 runs well on Xeon D Supermicro ServerServers, here’s what you need to know
- Windows Server 2016 ISO now available for download, Microsoft offering free datacenter licenses to VMware users

See also
- Everything You Need To Know About State Of The Art SSD Drives NVMe PCIe M2 with Paul Braren and ITProGuru
Mar 2016 by Microsoft’s Dan Stolts, at ITProGuru

This installation and intial configuration is guided by Microsoft’s Dan Stolts. Read more/comment at https://TinkerTry.com/how-to-install-hyper-v-2016-on-supermicro-superserver-xeon-d
Windows Server 2016 Technical Preview 5 (beta) was used for this video, but the GA product is likely to look the same.
source
windows server 2016
For windows server 2019 installation please follow below steps
- Disable SMT in BIOS (BIOS >> Advanced >> CPU Configuration >> SMT Control >> Disabled)
- Enable IOMMU in BIOS (BIOS>>Advanced>>NB Configuration >>IOMMU>>Enable)
- Install windows server 2019
- Install latest windows update for your windows server or connect to internet then run windows update to download update automatically.
- Make sure patch KB4512534 has been installed. Reboot the system and go to BIOS
- Switch Local APIC to x2APIC (BIOS >> Advanced >> CPU Configuration >> Local APIC Mode >> x2APIC).
- Enable SMT
- Then you can use all logic cores under windows server OS.
For windows server 2016 installation please follow below steps
- Disable SMT in BIOS (BIOS >> Advanced >> CPU Configuration >> SMT Control >> Disabled)
- Switch Local APIC to xAPIC (BIOS >> Advanced >> CPU Configuration >> Local APIC Mode >> xAPIC)
- Install windows server 2016
- Install latest windows update for your windows server or connect to internet then run windows update to download update automatically.
- After all update install complete, reboot the system.
- Amount of logic cores are more than 255 cores, please do not enable SMT since windows server 2016 do not support logic cores more than 255 cores.
If you hang at POST procedure and it show “DXE—ACPI Initialization”. Please reboot and go to BIOS settings, to disable SMT and switch local APIC to “xAPIC”
For AMD EPYC 7xx2/ windows server OS installation instructions, you can also access below link for reference.
For the Aplus product OS support, please mainly refer to our OS support page as below.