
For the past two weeks, I’ve been trying to install a fresh copy of the Windows 10 Anniversary Update ISO that Microsoft advises you use to install Windows on a Mac with Bootcamp. And so far, I have been unsuccessful.
For the record for the past year or so, my late-2013 27″ iMac has had Windows 10 installed and had been working fine until a couple of weeks ago when a game I was running crashed. Soon after that, Windows started to run really slowly to the point where I needed to force a shutdown and try to repair Windows, but to no avail. At the point, the slowness seemed to be affecting my computer’s OS X side as well. I eventually ended up doing a fresh install of OS X through the Internet Recovery.
Most of the time, Boot Camp Assistant seems to do its job, making the USB2 flash drive ready for Windows installation and partitioning out space for Windows on my 3TB fusion drive. Once my iMac restarts, it, I assume, loads into the EFI installation of Windows 10. I skip the Windows key question because I don’t have one at the moment, but I don’t think that matters too much, assuming I’ll be able to purchase a key later and activate the OS once it’s loaded. Unfortunately, I haven’t been able to get the installation to get all the way to actually loading Windows, making an account and logging in. Most of the time, after close to two hours sometimes, the installer gets stuck on «Getting Ready» or loops back to the screen where you can customize settings after waiting 30+ minutes in the «Just a moment …» screen after picking the customizable options.
I’ve removed and have tried to reinstall Windows 10 with Bootcamp at least 15 times so far, and I’ve noticed the installation process goes really slow every time. I’ve tried the normal Bootcamp way that Apple advises by just clicking the format button on the Bootcamp pation, and I’ve tried deleting the Bootcamp partition in the Windows installer and just choosing the unallocated space for the installation. I’ve also tried formatting the partition using diskpart in the command line during the installation. Nothing seems to speed up the install. I’ve also tried installing through the non-EFI way through the USB, but get an error because the GPT of the Fusion Drive. I’ve also been pretty vigilant about resetting the PRAM each time, but I feel I may have forgotten to do that between some attempted reinstalls.
I’m currently reinstalling OS X yet again. Once that’s done I’m going to reset the PRAM and SMC and then try to use Boot Camp Assistant one more time, following the instructions listed on Apple’s site here. I have a feeling the same thing will happen where the install will slow to a crawl and get stuck at the usual spots (Getting Ready or looping around the customize settings portion).
I don’t think the issue is my hard drive. Disk Utility doesn’t output any errors when I do first aid on it, Sierra seems to work just fine on it.
Should I try to find an original Windows 10 ISO somewhere? It looks like it’s not available anywhere here, which is what Apple’s Boot Camp guide links you to. I only see the Creators and Anniversary updates as downloadable ISOs for Macs. I only ask because I think I’ve seen some Boot Camp guides mention that you shouldn’t install Windows 10 update versions, but I have a feeling that’s outdated because Windows is suggesting to install Anniversary Update, and there’s no option to download an OG Windows 10 ISO.
I seem to remember when I successfully installed Windows 10 the first time, I installed through the non-EFI way, but that would require an MBR drive, I think. My Fusion Drive is GUID. And I don’t think there’s a way to make one partition on a drive MBR while leaving the other partitions as GPT. And I could just be confusing myself and probably did it through EFI.
I’ve tried and tried and am starting to run out of things I can think of to try to get Windows 10 back up and running on my iMac. Any help, tips or suggestions would be greatly appreciated!
Ken Thompson has an automobile which he helped design. Unlike most automobiles, it has neither speedometer, nor gas gauge, nor any of the numerous idiot lights which plague the modern driver. Rather, if the driver makes any mistake, a giant “?” lights up in the center of the dashboard. “The experienced driver”, he says, “will usually know what’s wrong.”
(Source: BSD Unix Fortune Program)
I recently managed to install a current Windows 10 distribution onto an older iMac that I had in storage. I wanted to set up this machine to run some specific Windows software for which it was well suited, and that let me make good use of an otherwise idle machine.
The iMac has a then-fastest-around 2.9Ghz CPU and features the (then) latest and greatest storage innovation, the ‘Fusion Drive’. This is a small SSD blended with a 1Tb Hard Drive. The Fusion Drive was designed to leverage fast-but-expensive SSD’s with slow-but-cheap hard drives, before SSD’s got so cheap that the hard drive became almost irrelevant.
My intention was install Windows 10 using Bootcamp, with an arbitrary 50/50 split of the 1.1Tb Fusion Drive.
At the start of the fateful weekend concerned, I recall thinking ‘how hard can this be?’ because I’d installed Windows using Bootcamp on my current-generation MacBook Pro (with a big SSD) with zero issues at all.
Turns out the answer is: ‘Very Hard’.
I had to get past multiple ‘I should give up because there is no apparent way around this, and the error message gives me no help at all’ situations, spread across what became an entire weekend of trial-and-effort and repeated fruitless attempts at things that took ages, punctuated with just enough ‘ah hah’ moments and clues found via Google to keep me doing it…!
I didn’t find the entire list of challenges I faced in any single web site, so I have decided to write my discoveries down here, in an ‘integrated’ manner. Each of these issues represents some hours of repeated head-banging attempts to get past it that I hope to save you, dear reader, from repeating.
I am assuming in the below that you know how to do a Windows installation using Bootcamp (or are prepared to work that out elsewhere). This isn’t a guide to doing that – its a guide to why the process failed – and failed, and failed, and failed – for me.
Each item below starts with a headline that frames the fix – so if you mostly just want to get it done – just dance across those headlines for a fast path to a working result.
You really need to be running Mojave (Mac OS X 10.14)
I fired up Bootcamp under the OS on the machine at the time – Mac OX 10.13 – and it said it could install windows 7 or later. Well, I wanted to install the latest release of Windows 10, and that’s ‘later’, right?
Wrong.
On this model of Mac you need to use an appropriately large (16GB or more) USB stick. Bootcamp writes the Windows 10 install ISO you’ve downloaded by now (you have, right?) onto that USB stick and turns that into a bootable Windows install drive (including throwing the ‘Bootcamp’ driver set onto it, to be installed into the Windows image once the base install is done).
Well, I plugged in a 16Gb USB stick (actually, I tried several sticks ranging from 8Gb to 32Gb, fruitlessly). In each case, after scratching around for ages, Bootcamp failed with an error message say that my USB stick wasn’t large enough.
Some Google searching turned up the key information here – that Windows 10’s recent ISO’s are large enough that they cross an internal 4GB size boundary that in turn leads to Bootcamp not being able to cope with it properly.
The answer looked to be easy – upgrade to Mojave.
Ok, annoying but straightforward. Cue the download and install process, and come back in several hours…
You also need to update Mojave to the very latest version
Turns out that the build of Mojave one downloads from the App Store isn’t the very latest version (Why isn’t the very latest version? Beats me!).
Bootcamp on the base release of Mojave says it can install Windows 10 or later (not ‘Windows 7 or later’). Yay – that suggests the bug has been sorted out – after all, it mentions Windows 10!
Sorry, but no. Same failure mode, after the same long delay to find out. Argh!
More Googling – turns out the bug didn’t get triggered until some very recent Windows 10 builds, and the base Mojave build still had that (latent) bug when it was released.
Next step is, thus, a Mac OS update pass to move up to the very latest Mojave build, including a version of Bootcamp with the issue resolved in it. This is in fact documented on the Apple support site (if you own 20:20 hindsight).
You may need to back up, wipe and restore your entire Mac OS Drive before Bootcamp’s Partitioning phase will succeed
This one was painful.
After Bootcamp managed to set up my USB stick properly, and managed to download and copy on the Bootcamp windows drivers in as well, it then failed to partition the drive successfully (the last step before it triggers the Windows installation to commence).
As usual, the error message was useless:

Your disk could not be partitioned ; An error occurred while partitioning the disk. Please run Disk Utility to check and fix the error.
The problem here is that I did run Disk Utility to check and fix the error, and no error was fixed!
The Disk First Aid run came up clean – said my disk was fine.
I tried booting from “Recovery Mode” and running Disk First Aid again – nope, still no error found or fixed.
Time to dive deeper – open up the display of detailed information (the little triangle that can be used to pop a window of debug text) during the underlying fsck…
…One tiny clue turns up – a succession of warnings in the midst of the checking process, a warning (not a failure) involving something about ‘overflows’. Turns out that Disk First Aid (‘fsck’, really), within Disk Utility doesn’t fix these issues – it just declares the disk to be ok and finishes happily despite them.
Disk Utility can even partition the drive just fine – but the Partition function in Bootcamp itself … fails.
The fix turns out to be annoyingly radical: Do a full system backup, and then do a full system restore.
So – break out a spare USB hard drive to direct-connect (less angst and potentially higher I/O rate than doing it over the network). Use Time Machine to back up the whole machine to that local storage, then boot in recovery mode and restore the system from that drive again.
This takes… along time. All day and half the night.
However – it helped! When I tried yet once more, after this radical step… now the Bootcamp partition step works – hazzah!
And then Windows 10 starts to install itself at last – hazzah!
In the windows installer, you may need to format the partition designated for Windows
Once windows starts to install process, it reaches a point where it displays all drive partitions and asks you to just pick the one to install Windows onto.
Merely selecting the right partition (the one helpfully labelled BOOTCAMP) doesn’t work. It fails, saying the partition is in the wrong format.
It seems that some inexplicable reason Bootcamp has left the intended Windows partition in the wrong state as far as the Windows installer is concerned.
The fix is to bravely select the partition concerned (again: its helpfully labelled BOOTCAMP)… and hit the ‘Format’ button to reformat it. Then you can re-select it – and the installation now starts to work – yay!
Use a directly attached USB keyboard when the wireless Apple Keyboard stops working
This one is self-explanatory. My Apple wireless keyboard didn’t work in Windows.
I thought I’d just need to load the Bootcamp drivers to fix that but – not so fast! (see the next issue, below).
Meantime I just switched to a wired keyboard – ironically the one I found in my storage room was a genuine Microsoft branded one with lots of useful extra function keys on it.
I’ve been perfectly happy to just stay with that – especially noting the next issue.
Remove/Rename a magic driver file to avoid Bootcamp support causing a Windows “WDF Violation” Blue-Screen-Of-Death a minute or so after Windows boots
Well, with Windows ‘up’, I installed the Bootcamp mac hardware support drivers. This is important for all sorts of reasons (including WiFi not working until you do).
I did that by selecting the (still mounted/attached) USB installer stick and running ‘Setup’.
The installation of drivers worked fine.
What didn’t come out fine was the unintended consequence.
Once the Bootcamp hardware support was installed, Windows started crashing a minute or so after each boot up, with a “WDF Violation”.
You can log in and start working – just – and then ‘bang!’ – sad/dead windows:

After everything else (and one and a half days of this stuff) – this was really frustrating.
Cue yet more googling – and at least this one seemed to be an ‘understood’ issue.
It appears to the the case that the wrong version of a crucial driver file (keyboard support related, by the looks of it) is loaded in by Bootcamp, but when installing onto this particular generation of iMacs.
Yay.
The fix – after I found it – involves booting Windows in diagnostic mode and disabling that driver file.
Even getting into that diagnostic mode is a challenge… it turns out that you don’t reboot holding down the shift key for ‘safe mode’ in Windows any more – that would too easy…
…Instead, now you boot up and then select restart… and while doing that restart, you hold down the shift key. You then wind up with the opportunity, during the reboot, to access diagnostic functions.
Sure, that’s obvious… not.
Anyway – once booted in diagnostic mode, select to bring up a ‘DOS’ command window.
Now select drive C: and then locate and rename (or delete) the errant driver file concerned (C:\Windows\System32\Drivers\MACHALDRIVER.SYS) as per this screen shot:

One trap to watch out for: Make sure you’ve changed to drive C:, and that you’re not still on drive ‘X:’ looking for that file.
That drive – which you start out on when bringing up the command window – contains a whole separate copy of Windows…without the bootcamp files on it. So you think you’re searching in the right filesystem – after all, Windows is on it… but you aren’t.
I guess that’s a consequence of using the Diagnostic mode, but it fooled me for a while, as I was trying to find the errant driver file there (on drive ‘X:’) at first…and failing to do so.
Now reboot and – yay – no more WDF blue-screen-of-death failures.
… but also, no bluetooth keyboard support.
No problem to me – I really prefer the direct-attach larger keyboard I found with all the Microsoft specific buttons on it anyway, for this task.
Contrary to warnings on the web sites that had helpfully pointed out the incorrect/broken MACHALDRIVER.SYS file issue, I have had no practical issues with volume control or similar things as a consequence of disabling that file.
For me, it all seems to work fine without this file in my life at all.
Success!
At this point, I have a working Windows 10 installation on my machine.
I have subsequently installed the software I wanted to run in the first place and its all working just fine.
I do hope someone else finds this useful – and that if you do go down this road, that you have a smoother ride than I did! 🙂

У многих владельцев Mac часто возникает необходимость в операционной системе Windows. Одним она нужна для запуска любимых игр, вторым – для работы специализированного ПО, а третьим просто для разнообразия.
Мы решили напомнить, как правильно и быстро произвести установку Windows 10 на Mac, чтобы не связываться с виртуальными машинами и подобными решениями, которые не позволяют стабильно работать в Windows и выжимать максимум из возможностей компьютера.
На какие компьютеры Mac можно установить Windows 10
Официально 64-разрядную Windows 10 Home или Pro при помощи утилиты Boot Camp можно установить на следующие модели:
- MacBook Pro/Air (2012 и новее)
- MacBook (2015 и новее)
- iMac/Mac mini (2012 и новее)
- iMac Pro (2017)
- Mac Pro (конец 2013 г.)
Существует лишь одно ограничение: при использовании macOS Mojave не получится установить ОС Windows через Boot Camp на iMac с жестким диском емкостью 3 ТБ.
Это обусловлено особенностями совмещения разных файловых систем APFS и NTFS на накопителях такой емкости. Подробнее об этом можно узнать на сайте Apple.
Остальные модели без проблем поддерживают установку Windows 10 прямо из коробки.
Что нам понадобится
1. Свободное место на накопителе. Минимальный объем для установки 64 ГБ, а рекомендуемый – 128 ГБ.
На практике можно обойтись и меньшим объемом, но всегда есть вероятность нехватки пространства для нормальной работы системы или установки необходимого ПО.
2. Для настольных компьютеров потребуется клавиатура и манипулятор, чтобы постоянно не переподключать их в разных ОС. Это может быть как проводное решение, так и сторонние модели, которые имеют несколько каналов для сопряжения с несколькими девайсами.
3. USB-накопитель на 16 Гб или более емкий. Такой диск не потребуется владельцам компьютеров 2015 года выпуска либо более новым.
4. Образ установочного диска Microsoft Windows (ISO) или установочный носитель данной операционной системой. Скачать образ можно на сайте Microsoft.
5. Пользоваться Windows 10 можно бесплатно в течение 30 дней с момента установки. После этого понадобится купить ключ активации. Сделать это можно в практически любом российском магазине, либо в интернете. На официальном сайте Microsoft он стоит приличные $199 или 13 тыс. рублей.
Средняя цена ключа в России – около 3 тыс. рублей, хотя попадаются предложения и дешевле на свой страх и риск.
Как установить Windows 10 по шагам
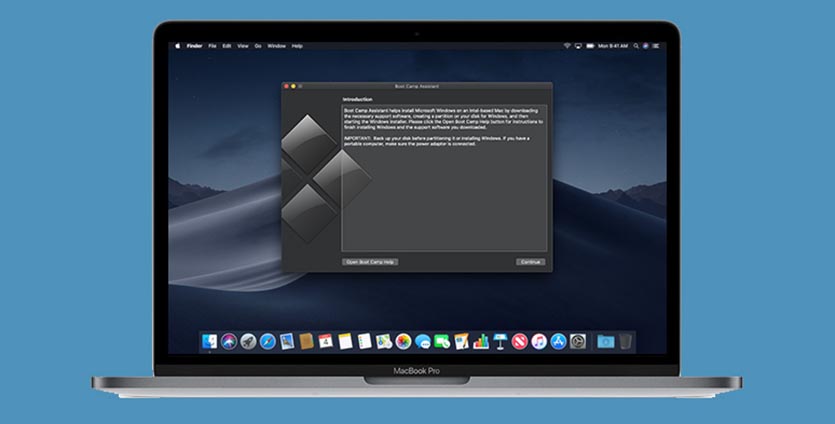
1. Запустите утилиту Boot Camp через поиск Spotlight, Finder или Launchpad.
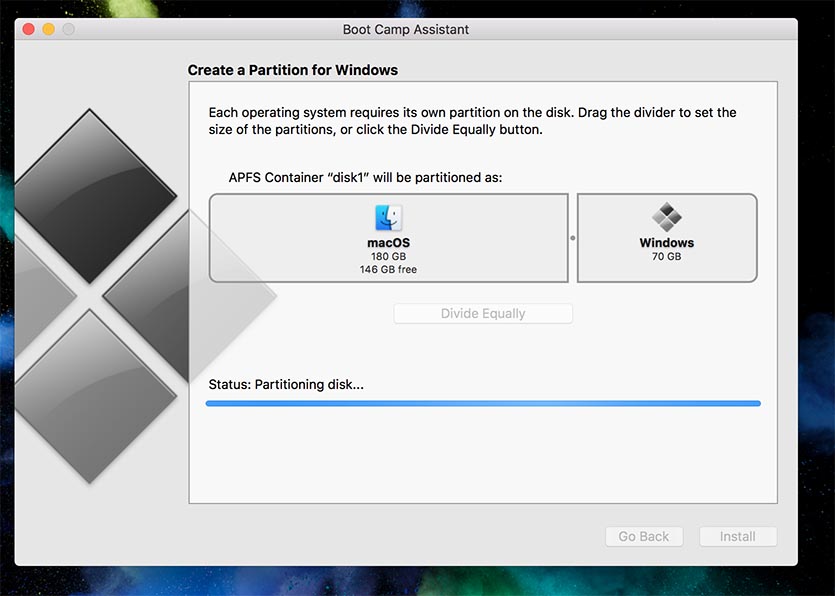
2. Укажите программе путь к загруженному образу и выберите, сколько места на установленном накопителе выделить для установки Windows.
Хорошенько подумайте на данном этапе, ведь изменить используемый раздел без переустановки Widows не получится. Если планируете играть в игры или запускать тяжелые приложения, лучше сразу выделите больше места.
3. Дождитесь загрузки необходимых драйверов и данных из сети. После скачивания и перезагрузки компьютера начнется установка Windows 10.
4. Мастер установки попросит произвести базовые настройки и указать раздел, на который следует поставить Windows. Он уже будут назван BOOTCAMP.
5. После окончания установки потребуется произвести окончательную настройку параметров системы.
6. Оказавшись на рабочем столе Windows потребуется запустить утилиту Boot Camp. Она будет храниться на системном диске либо на съемном накопителе, который был создан на этапе подготовки.
7. После установки всех компонентов и перезагрузки Windows нужно подключиться к сети через Wi-Fi или по кабелю и запустить Apple Software Update из панели Пуск.
8. В программе следует указать все доступные обновления. Установить из и перезапустить компьютер.
Как запускать macOS или Windows
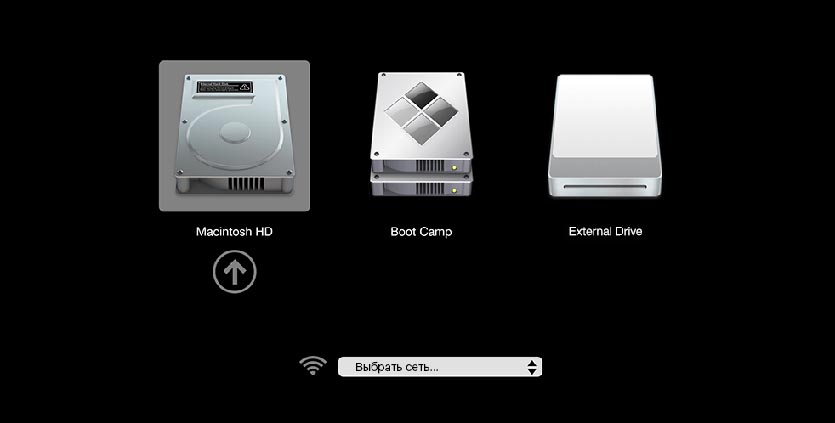
Теперь при запуске компьютера автоматически будет стартовать операционная система macOS, а при удержании клавиши Alt/Option увидите меню с выбором раздела для загрузки.
Для быстрого перехода из Windows в macOS можно воспользоваться утилитой в трее (правом нижнем углу), которая позволяет в одно нажатие перезапустить компьютер с другой ОС.
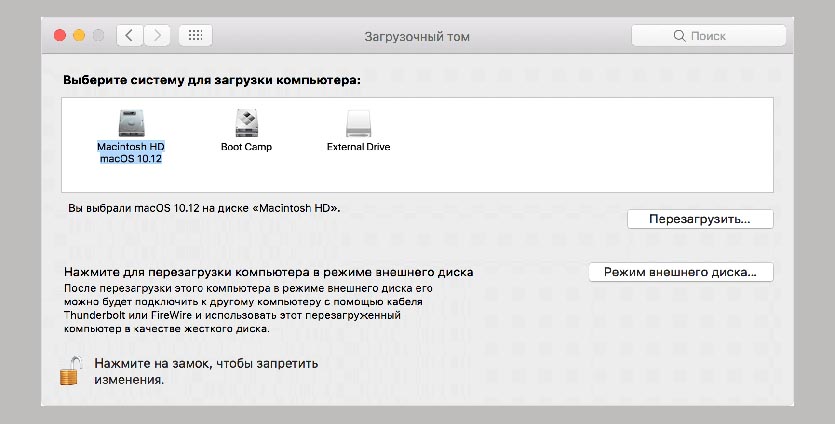
Для обратного перехода следует перейти в Системные настройки – Загрузочный том, ввести пароль разблокировки настроек и выбрать раздел с Windows для загрузки.
Как удалить Windows с Mac
Для удаления достаточно запустить Дисковую утилиту и стереть в ней раздел, который был отведен для Boot Camp с Windows. Затем расширьте основной раздел за счет освободившегося пространства.
Желаем удачи!
(45 голосов, общий рейтинг: 4.51 из 5)
iPhones.ru
Делаем все быстро и без ошибок.
Артём Суровцев
@artyomsurovtsev
Люблю технологии и все, что с ними связано. Верю, что величайшие открытия человечества еще впереди!
This post was published 12 years ago. Some material it contains may no longer be applicable.
Installing Windows on a Machine without a Optical Drive is a pain, because its no longer possible to boot from the Installation DVD. USB is no good workaround, because USB boot is also permitted somehow.
The case is getting more complicated when you have a FusionDrive setup as I have: I replaced my Optical Drive with a second harddisk (SSD) and formed one Volume out of it as a FusionDrive.
After Google’ing for many hours, i found a solution which actually worked on my setup.
http://huguesval.com/blog/2012/02/installing-windows-7-on-a-mac-without-superdrive-with-virtualbox/
Some Additions:
- Even If you have an MacBook Pro 2011: Do Part 1 Step 3! I didn’t do it and after rebooting I got a blue screen
- To trick the Boot-Camp Assistant creating the partition for you, it also works mounting the Windows Installation ISO with Toast or Daemon Tools
- The correct installation order is: FIRST create your fusion drive, then let the BootCamp Assisstant build the Windows Partition
- Don’t try the solution with replacing the MBR with the one created in the VM: It does not work on a FusionDrive setup
- To avoid the complicated removal of the “system reserved” partition as stated in the manual, do this: When you install Windows in the VM, format the drive. A message will popup informing you that it may create some more partitions blabla. Click ok and you will see it actually created 2 partitions. Now manually remove the small 100 MB Partition and install on the other one. It will work and boot correctly.
- WinClone is no longer free available as some stupid company bought it and did some minor updates to it. But maybe you find it somewhere. If you use the latest version, it will ask you if it should delete the cache files while creating the image. I clicked yes. On restore, I had it replace the booting-information.
Finally it worked. When I boot my mac holding ALT the boot device selection menu shows up. It displays my Mac drive two times as well as the windows drive two times. Anyone know a solution out there how to fix that?
Warning: Following this process verbatim will wipe all data off your Mac. Do a Time Machine backup before starting.
Update: Using ‘Internet Recovery’ will normally fix anything that goes wrong with this process and will return your Mac to factory default
Update: Various people asked about variants on this process, for example when you have a 3TB HDD but no SSD – check the comments for the responses
This howto is for people who receive the Boot Camp Assistant error “Boot Camp does not support installing Windows on this Mac.” – “Boot Camp does not currently support installing Windows on a Mac with a 3 TB hard drive.”
The problem with installing Boot Camp on a 3TB Mac is due to the way the Boot Camp Assistant works, and the way the Mac EFI boots up Windows. The BCA normally makes some space at the end of the “disk” (either Fusion or normal) by shrinking the HFS+ partition, and then creates a FAT32 partition at the end you can install Windows into. The problem is that when the EFI boots up a Windows operating system it exposes an MBR-style partition to Windows by mapping the GUID partitions into the MBR space. The two issues with this are first that the FAT32 partition at the end would be in the 5th position (and MBR only supports four partitions) and second that the FAT32 partition ends beyond the 2TB boundary, which is also not possible with MBR.
My solution was to delete all the existing partitions, repartition the 3TB drive so that the FAT32 one is at position 3 (so that’s good for the MBR) and starts and ends within the 2TB limit, and then to recreate the Fusion Drive using the rest of the disk.
Here is the process:
Ideally, create a Mountain Lion 10.8.2 USB install drive (http://osxdaily.com/2012/02/17/make-bootable-os-x-10-8-mountain-lion-usb-install-drive/)
However for some reason I wasn’t able to get this to boot, kept getting that ‘no entry’ symbol. So actually I used the ‘OS X Recovery Disk Assistant’ (http://support.apple.com/kb/DL1433) in the end and installed the Mac OS over the Internet.
Create a Windows 8 USB install drive (http://www.microsoftstore.com/store/msstore/html/pbPage.Help_Win7_usbdvd_dwnTool) Note that if you have a problem booting from the stick with a BOOT/BCD error make sure you completely reinitialized the stick using Disk Utility’s “Erase” function to create a single FAT32 partition, then try the Win7 USB/DVD tool again.
Get Apple’s boot camp drivers (http://www.cafe-encounter.net/p682/download-bootcamp-drivers), extract and copy to the Windows USB stick
Plug MacOS install/recovery stick into iMac. Reboot iMac, hold down Cmd-R to boot from the Recovery USB drive
Open Terminal from the Utilities menu.
To delete the existing fusion drive, find the Logical Volume Group and Logical Volume GUIDs
-bash-3.2# diskutil coreStorage list
CoreStorage logical volume groups (1 found)
+-- Logical Volume Group 80387D15-BBD1-4DC9-9DF3-585CFA84E8E9
    =========================================================
    +-< Physical Volume 68C6107F-BEFD-4227-8791-AA52DB3D239E
    |   ----------------------------------------------------
    +-< Physical Volume 9C805962-1088-45E6-B036-4D5E5FF273CA
    |   ----------------------------------------------------
    +-> Logical Volume Family FE6CD53B-0664-4135-906D-56EC2BB745EC
        ----------------------------------------------------------
        +-> Logical Volume 9B2981DC-980A-43F1-80DF-89DF6052A339
            ---------------------------------------------------
Using the info above (simplified here), delete the Logical Volume:
-bash-3.2# diskutil coreStorage deleteVolume 9B2981DC-980A-43F1-80DF-89DF6052A339
Started CoreStorage operation on disk3 Macintosh HD
Unmounting disk3
Removing Logical Volume from Logical Volume Group
Finished CoreStorage operation on disk3 Macintosh HD
and the Logical Volume Group:
-bash-3.2# diskutil coreStorage delete 80387D15-BBD1-4DC9-9DF3-585CFA84E8E9
Started CoreStorage operation
Destroying Logical Volume Group
Erasing disk0s2
Initialized /dev/rdisk0s2 as a 113 GB HFS Plus volume with a 16384k journal
Mounting disk
Erasing disk1s2
Initialized /dev/rdisk1s2 as a 3 TB HFS Plus volume with a 229376k journal
Mounting disk
Finished CoreStorage operation
To repartition for 512GB Boot Camp: (partition list does not include recovery hd, the installer will create this for us)
-bash-3.2# diskutil partitionDisk disk1 2 GPTFormat fat32 BOOTCAMP 512G jhfs+ coreStorage R
Started partitioning on disk1
Unmounting disk
Creating the partition map
Waiting for the disks to reappear
Formatting disk1s2 as MS-DOS (FAT32) with name BOOTCAMP
4096 bytes per physical sector
/dev/rdisk1s2: 999755328 sectors in 15621177 FAT32 clusters (32768 bytes/cluster)
bps=512 spc=64 res=32 nft=2 mid=0xf8 spt=32 hds=255 hid=411648 drv=0x80 bsec=999999488 bspf=122048 rdcl=2 infs=1 bkbs=6
Mounting disk
Formatting disk1s3 as Mac OS Extended (Journaled) with name coreStorage
Initialized /dev/rdisk1s3 as a 2 TB HFS Plus volume with a 196608k journal
Mounting disk
Finished partitioning on disk1
/dev/disk1
   #:                       TYPE NAME                    SIZE       IDENTIFIER
   0:      GUID_partition_scheme                        *3.0 TB     disk1
   1:                        EFI                         209.7 MB   disk1s1
   2:       Microsoft Basic Data BOOTCAMP                512.0 GB   disk1s2
   3:                  Apple_HFS coreStorage             2.5 TB     disk1s3
Recreate the Volume Group:
-bash-3.2# diskutil coreStorage create "Fusion Drive" disk0 disk1s3
Started CoreStorage operation
Unmounting disk0
Repartitioning disk0
Unmounting disk
Creating the partition map
Rediscovering disk0
Adding disk0s2 to Logical Volume Group
Unmounting disk1s3
Touching partition type on disk1s3
Adding disk1s3 to Logical Volume Group
Creating Core Storage Logical Volume Group
Switching disk0s2 to Core Storage
Switching disk1s3 to Core Storage
Waiting for Logical Volume Group to appear
Discovered new Logical Volume Group "2E019D11-B34D-4332-B176-249CE449CB29"
Core Storage LVG UUID: 2E019D11-B34D-4332-B176-249CE449CB29
Finished CoreStorage operation
Recreate the Logical Volume using the GUID displayed from the previous command:
-bash-3.2# diskutil coreStorage createVolume 2E019D11-B34D-4332-B176-249CE449CB29 jhfs+ "Macintosh HD" 100%
Started CoreStorage operation
Waiting for Logical Volume to appear
Formatting file system for Logical Volume
Initialized /dev/rdisk3 as a 2 TB HFS Plus volume with a 204800k journal
Mounting disk
Core Storage LV UUID: 209B3BC4-AE74-4258-9ED0-BA16D06DFC62
Core Storage disk: disk3
Finished CoreStorage operation
Exit Terminal, choose to Reinstall OS X, install on Macintosh HD.
After install completed and verified, replace the Mac OS install USB stick with the Windows one, reboot, hold Alt whilst booting and select ‘Windows’. (These are Windows 8 instructions, but 7 is similar)
Click ‘Next’ on the first screen asking you about localization settings, and on the next screen choose “Repair your computer” (if you proceed straight to Setup, it’ll claim your partition isn’t suitable for installation).
Open a Command Prompt either by selecting “Troubleshoot” and then “Advanced Options” and then “Command Prompt”, or by doing Shift-Function-F10.
X:\Sources>diskpart

Microsoft DiskPart version 6.2.9200

Copyright (C) 1999-2012 Microsoft Corporation.
On computer: MININT-H3JEAN1

DISKPART> list volume

  Volume ###  Ltr  Label        Fs     Type        Size     Status     Info
  ----------  ---  -----------  -----  ----------  -------  ---------  --------
  Volume 0     D   BOOTCAMP     FAT32  Partition    476 GB  Healthy
  Volume 1         EFI          FAT32  Partition    200 MB  Healthy    Hidden
  Volume 2     C                NTFS   Removable     14 GB  Healthy
We want to switch around C and D, then format C and make it ‘Active’.
DISKPART> select volume 2

Volume 2 is the selected volume.

DISKPART> assign letter=e

DiskPart successfully assigned the drive letter or mount point.

DISKPART> select volume 0

Volume 0 is the selected volume.

DISKPART> assign letter=c

DiskPart successfully assigned the drive letter or mount point.

DISKPART> format fs=ntfs label="BOOTCAMP" quick

  100 percent completed

DiskPart successfully formatted the volume.

DISKPART> active

DiskPart marked the current partition as active.
At this point exit out, reboot, and go back into the installer. Now setup will let you install Windows on the “BOOTCAMP” partition.
After Setup completes you can install the Boot Camp drivers pack from the USB stick.
That’s it. You can boot into Windows by holding ‘Alt’ on startup, just like normal.