
Download Article
Easily install Windows after Ubuntu and set up dual boot
Download Article
- Create a Windows Partition
- Create Windows Install Media
- Install Windows
- Set Up a Boot Manager
- Video
- Tips
|
|
|
|
|
This wikiHow guide teaches you how to install Windows on a PC that’s already running Ubuntu Linux. If you’re already running Ubuntu, you can create a bootable Windows install drive from an ISO using Ventoy, then boot from the drive to install Windows. Once installed, you can install rEFInd and Easy UEFI to switch between operating systems (dual boot) easily.
Installing Windows After Ubuntu
- First, you’ll need to boot from the Ubuntu live installation media to shrink your Ubuntu partition and create one for Windows.
- Boot back into regular Ubuntu, download an ISO of Windows 10 or 11 from Microsoft, and use Ventoy to create bootable Windows install media.
- Once you install Windows, install the rEFInd boot manager to set up dual boot.
-

You’ll want to do this because you can’t unmount and allocate hard drive space to Windows while Ubuntu is running. This live installation media is the bootable installation drive you created to install Ubuntu.[1]
- Make sure your BIOS/UEFI settings are set to boot from a USB flash drive first.
- If you don’t already have a bootable installation drive, you can download the ISO file for Ubuntu from https://ubuntu.com/download/desktop, and create a bootable USB drive from the ISO using Balena Etcher.
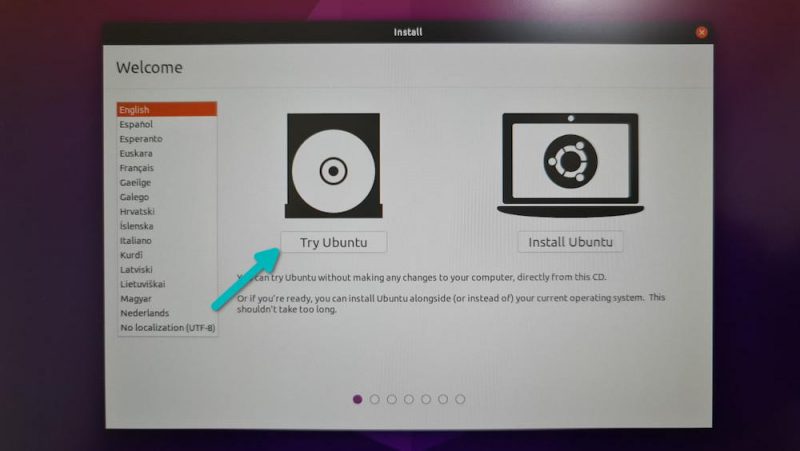
- After booting from the installation drive, select the option to Try Ubuntu. You don’t need to install Ubuntu since it’s already installed.
-
Even if you already have Gparted installed, you may need to install it in the Ubuntu Live environment. You’ll use Gparted to partition your hard drive and allocate space for Windows. To install Gparted:
- Press Ctrl + Alt + T to open the Terminal.
- Type sudo apt update and press Enter to update the software repository.
- Type sudo apt install gparted and press Enter.
Advertisement
-
You’ll use this tool to create a new partition for Windows. Type sudo gparted and press Enter to open Gparted. You’ll see a list of all drives and partitions.
-
This allows you to create a new partition that you will use to install Windows.
- The partition that contains your Ubuntu installation will most likely have an «ext4» file system format.
-
You should allocate at least 20 GB (20000 MB) for Windows 10 or 64 GB (64000 MB) for Windows 11. If you plan to install apps and use Windows regularly, you’ll probably want to increase that amount.[2]
-
You’ll see this green checkmark icon in the top toolbar. Once you do this, you’ll see your unallocated space.
-
Now you have created a new part partition to install Windows on, remove the USB drive you booted from, and reboot your PC.


Advertisement
-
You’ll need a blank USB drive with at least 8 GB of space to create a Windows installation disk. Any data on the USB drive will be erased during this process.[3]
- Windows 11: Go to https://www.microsoft.com/software-download/windows11. In the «Download Windows 11 Disk Image (ISO) for X64 devices» section, select a Windows 11 version, then click Download Now to save the image.
- Windows 10: Go to https://www.microsoft.com/en-us/software-download/windows10. Under the «Windows 10 2023» header, select a Windows 10 edition and click Confirm. Select a language, then click the download link for the version of Windows you want to install.
-
You will use Ventoy to create an installation drive for Windows. Use the following steps to download Ventoy:
- Go to https://github.com/ventoy/Ventoy/releases in your web browser.
- Scroll down and click ventoy-[version number]-linux.tar.gz below «Assets.»
-
Here’s how:
- Open a Terminal and use cd Downloads to enter your Downloads directory.
- Type tar -xzvf ventoy-[version number]-linux.tar.gz to unpack Ventoy. Be sure to replace «[version number]» with the actual version number.
-
Warning: Any data on the USB drive will be erased during this process. Be sure to back up any files on the USB drive before you begin. To run Ventoy, you’ll need to run a script that isn’t executable yet. Here’s what you’ll need to do:
- Type cd Ventoy.x86_64 and press Enter to change directories to the untarred Ventoy directory.
- Type chmod +x VentoyGUI.x86_64 to make the script executable.
- Type sudo ./VentoyGUI.x86_64 to run the GUI.
-
First, if your USB drive isn’t already selected from the menu (it should be by default), select it now. Then, click Install to create two partitions on the USB drive. One partition will be hidden and is used to make the drive bootable.
-
Now that you have created a blank bootable USB drive, you only need to copy the Windows ISO file to the drive, and Ventoy will do the rest. Use the Files app to navigate to where you downloaded the Windows ISO (probably your Downloads folder), and drag it over (or copy and paste it) to your USB drive. You will only see one partition available on the drive. The USB drive is now bootable.


Advertisement
-
Make sure your BIOS/UEFI settings are set to boot from a USB flash drive first. Insert the Windows installation drive and restart your computer. Allow your computer to boot from the Windows Installation media.
- If prompted to select a boot device, select your USB drive.
-
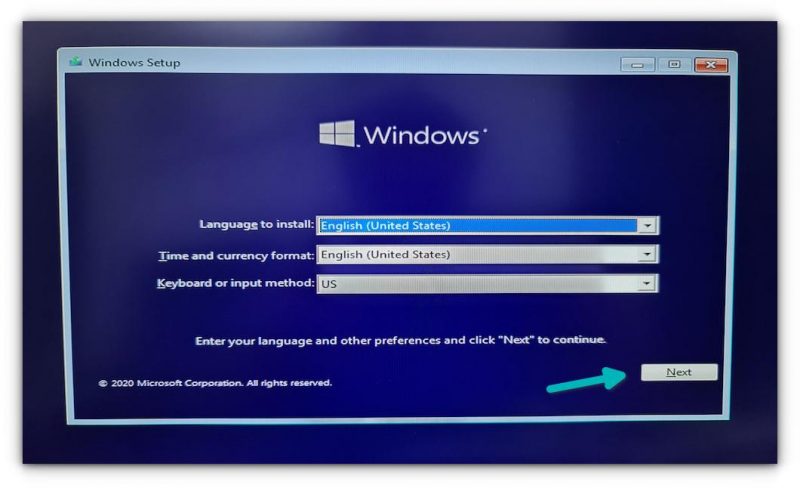
The first menu of the Windows installation menu asks you to select your language, date, and currency format, as well as keyboard layout. Use the drop-down menus to select your preferences and click Next.
-
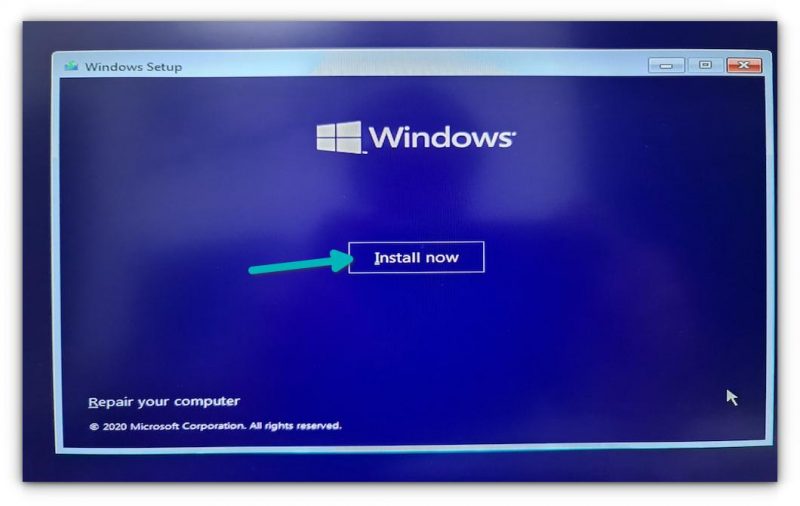
On the next page, click Install now, click the checkbox to agree to the terms and conditions, and then click Next.
-
It’s the second option on the window. A list of partitions will appear.
-
This is the partition you just created. Windows will now install on the selected partition. It should be unallocated space.
-
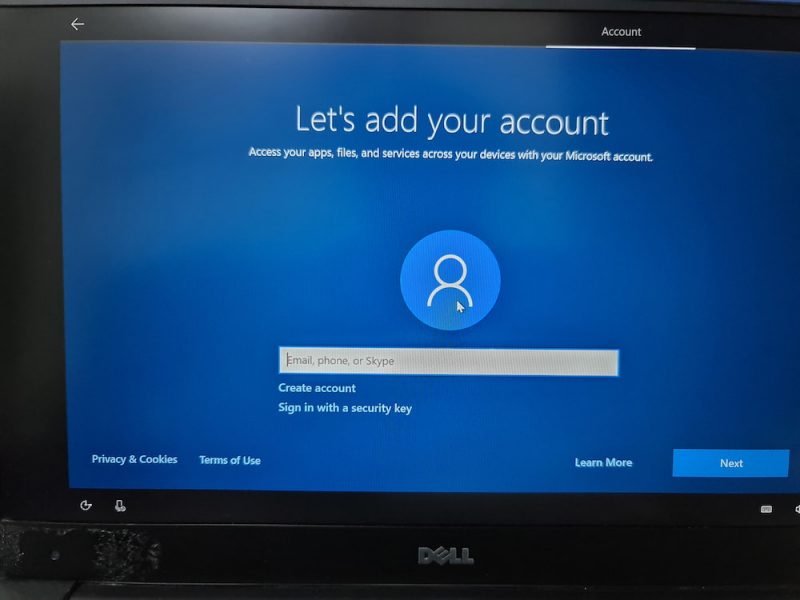
During the Windows setup, you will be asked to select your country, connect to Wi-Fi, and sign in to your Microsoft account (Windows 11 only). Follow the prompts to complete the installation. Once you are finished installing Windows, your PC will boot directly into Windows.


Advertisement
-
rEFInd is a tool you can use to dual-boot Windows and Ubuntu. Currently, Ubuntu is installed on a separate partition that isn’t accessible to the Windows boot manager, and rEFInd will fix that for you.
- To do download rEFInd, go to https://sourceforge.net/projects/refind/ and click the large green Download button. This will download rEFInd as a zip file.
- You should complete these steps in Windows, not Ubuntu.
-
After downloading the zip file, open your Downloads folder and extract the contents of the rEFInd zip file.
-
To do this, type cmd into the Windows search bar, right-click Command Prompt, and select Run as administrator. Click Yes to confirm.
-
This is the primary drive that contains the various boot systems. Here’s how:
- Type diskpart and press Enter to start Diskpart.
- Type list disk and press Enter to list your disk drives.
- Type select disk # and press Enter to select your primary disk drive. Replace «#» with the actual disk number (probably «disk 0»).
- Type list partition and press Enter to list the disk partitions.
- Type select partition # and press Enter to select the drive with your system partition. Replace «#» with the actual drive number.
- Type assign letter=[drive letter] and press Enter to assign the drive a letter. Replace «[drive letter]» with the letter you want to assign the drive (i.e., «x»).
-
Press Windows key + E to open File Explorer and open the «rEFInd-bin» folder you extracted (probably in your Downloads folder). Select and copy the «refind» folder from within.
-
Even though the System partition shows up in File Explorer, you will probably be denied access if you try to access it directly. To get around this, you can access it via Task Manager. Use the following steps to do so:
- Right-click the taskbar at the bottom of the screen.
- Click Task Manager.
- Click Run new task at the top.
- Click Browse.
- Click This PC in the menu to the left.
- Open the System drive—it’s the one that has the drive letter you assigned it.
-
Just right-click the System drive and select Paste to do so.
-
Easy UEFI is a tool you can use to add rEFInd to your system’s boot options. You can add rEFInd to your system boot options using the free trial version of Easy UEFI. Use the following steps to download it:
- Go to https://www.easyuefi.com/index-us.html in a web browser.
- Click Free Trial.
- Open the Easy UEFI trial installation file in your Downloads folder.
- Follow the prompts to complete the installation.
-
It’s the first option in the Easy UEFI app.
-
It’s the calendar icon with a «+» in the middle column.
-
You can do so using the drop-down menu next to «Type» in the upper-left corner.
-
Use the field labeled «Description» to add a description (i.e., «rEFInd Boot Manager.).
-
Click the radio option in the system partition in the bar graph. The system partition is usually about 1 GB and formatted in a «FAT32» file format.
-
- Click Browse next to «Path file.»
- Click the plus icon next to the drive icon to expand the system drive.
- Open the «EFI» folder.
- Open the «refind» folder.
- Select the «refind_x64.efi» file.
- Click OK.
-
This should add rEFInd to your boot order.
-
To do so, click rEFInd Boot Manager to select it, click the green arrow pointing up to move it to the top of the boot order, then click Done. You can now close Easy UEFI.
-
When your computer boots up, it should boot into the rEFInd boot menu. You can now choose whether to boot into Ubuntu or Windows.


Advertisement
Ask a Question
200 characters left
Include your email address to get a message when this question is answered.
Submit
Advertisement
Quick Summary
Video
-
You must have a license to install Windows. If you don’t already have a Windows license, you won’t be able to activate Windows once installed.
Tips from our Readers
The advice in this section is based on the lived experiences of wikiHow readers like you. If you have a helpful tip you’d like to share on wikiHow, please submit it in the field below.
- If you want to set up dual boot with minimal installation, use os-prober on Linux rather than Windows.
Thanks for submitting a tip for review!
Advertisement
About This Article
Thanks to all authors for creating a page that has been read 570,923 times.
Is this article up to date?

When it comes to dual boot, the general idea is that you have a system preinstalled with Windows and then you install Linux alongside Windows. On the boot, you select whether you want to use Windows or Linux.
How about the opposite situation? What if you have a system that has only Linux installed on it and you want to install Windows alongside Linux in dual boot mode?
In this tutorial, I’ll show you exactly how you can install Windows after Ubuntu Linux in dual boot.
Dual booting Windows on an existing Ubuntu Linux system
I tested this tutorial on an Ubuntu system with UEFI and GPT partitioning scheme. In theory, the same steps should be applicable to most Linux distributions, if not all.
Requirements
Here’s all the stuff you need to carry out the procedure safely and easily:
- A bootable Windows 10 USB stick (USB key, Pen Drive) of at least 8 GB in size
- A live Ubuntu USB stick (USB key, Pen Drive) of at least 4 GB in size
- A computer with UEFI boot and only Ubuntu Linux installed on it
- Internet connection is needed for creating the bootable Windows and live Linux disk
- A way to back up your important data on an external disk (optional yet recommended)
You may also manage this tutorial with just one USB key. You create the live Linux USB first, make the partition for Windows using this live Linux USB, and then use the same USB key as a bootable Windows USB.
I highly recommend that you read the entire tutorial first before you start following the steps.
Step 0: Make a backup of important data
Here’s the thing. You are going to play with disk partitions and boot settings. If you mess it up, you’ll lose the data.
Having a back up on an external disk will give you a safety net. In the worst case, if things go wrong, you can install either of Windows or Linux and copy the data back on your system.
How do you make a backup? The simplest method is to have an external USB or SSD disk and copy files from Documents, Music, Pictures and other folders where you have kept your files.
Step 1: Create a bootable Windows USB
If you have access to a Windows system, you can follow the instructions on the Microsoft website to create a bootable Windows media.
If you only have a Linux system, creating a bootable Windows USB could be tricky. Thankfully, a handy open source tool called Ventoy helps a lot in this case.
I have written in detailed about creating bootable Windows 10 USB on Linux. Please refer to the guide for detailed instructions. I’ll mention the crucial parts here.
Plug in your USB with at least 8 GB of size and format it. Now, download the ISO of Microsoft Windows.
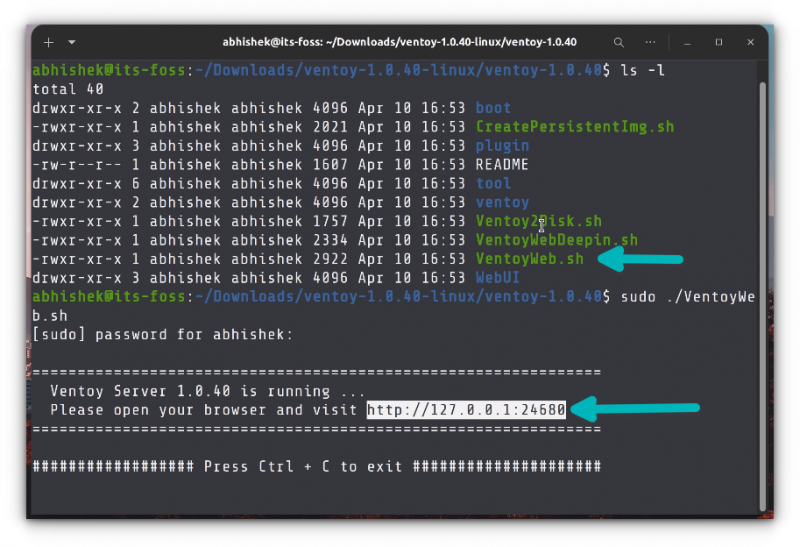
Next, download the latest Ventoy release. Extract the folder and run the VentoyWeb.sh script with sudo. It will give you the URL when you run it. Copy this URL and paste it in a browser.
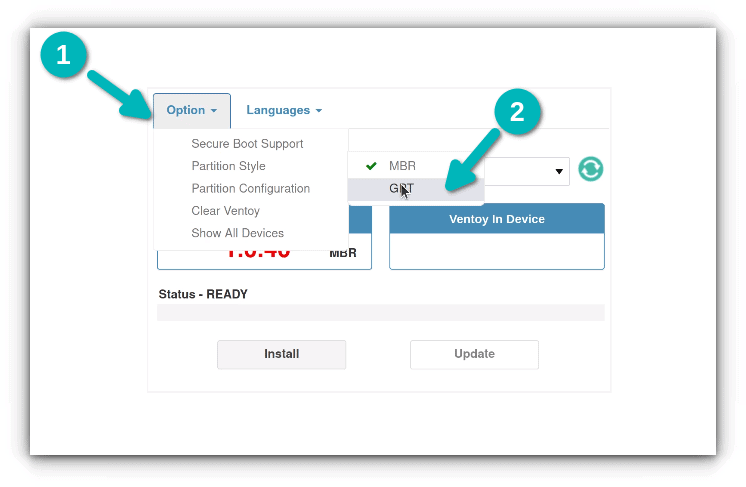
It will open a web page with Ventoy running in it. Go for UEFI installation and hit the install button.
Once installed, you’ll see two partitions on the USB disk: VTOYEFI and Ventoy. You need to copy the download Windows ISO image to Ventoy partition.
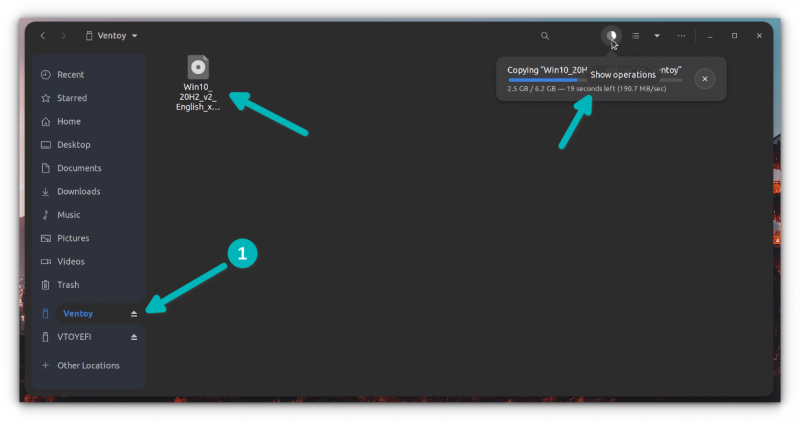
Once the copying finishes, DO NOT RUSH to plug out the USB just yet. Click on the unmount option from the file manager.
Okay. So now that you have a bootable Windows USB, it will be a good idea to test it out and see if works.
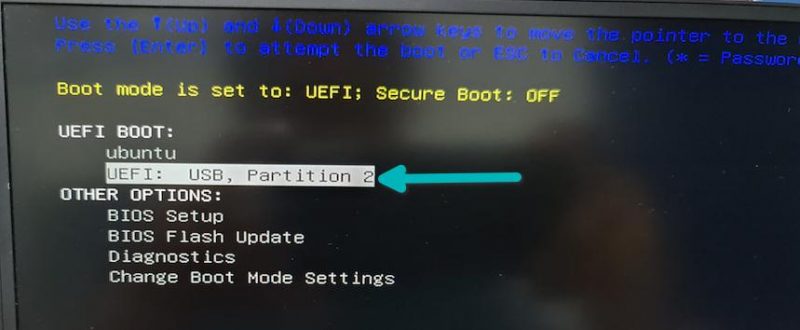
How do you do that? Plug in the Windows USB, reboot your system. When the system is turning on again and showing the logo of your system’s manufacturer, press F2/F10/F12 keys to access the BIOS settings.
When you are in the BIOS, choose to boot from the USB. In some cases, you may have to disable secure boot from the BIOS settings.
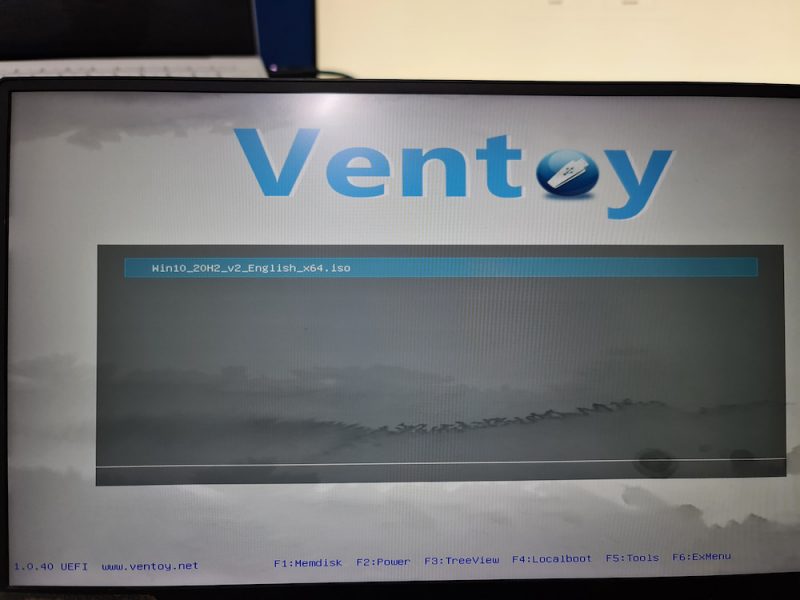
If the bootable Windows USB creation was a success, you should see Ventoy screen and select to boot into Win10.
After this, you’ll see some screen about Windows installation. Don’t go with the installation part yet. Close it and power down your system and then boot into Linux again.
This check was necessary because you need to have a working bootable Windows USB. Without that, there will be no point in following the rest of the tutorial.
Remove the bootable Windows USB at this stage.
Step 2: Create a live Ubuntu Linux USB
You may wonder why you need a live Ubuntu USB here when you already have Linux installed properly.
The reason is that you need to modify the existing partition and make some free space where you’ll be installing Windows. But you cannot modify an already mounted partition in Linux. When you are using Linux, your disk is mounted. You won’t be able to modify it and create a new partition in it.
This is why you need a live Linux USB. You boot from the live USB and make the necessary partition on the disk from the live session.
Now that you know the reason, let’s go on with creating live Ubuntu USB. First, download the ISO image of Ubuntu from its website. Any version of Ubuntu will work.
Now, plug in the USB with at least 4 GB in size.
On Ubuntu, you can find the Startup Disk Creator tool. You may also use Etcher on Linux. The choice is yours. Here, I’ll use Startup Disk Creator.

The process is really simple. Your plugged in USB should be recognized. It should also automatically find the Ubuntu ISO. If not, you can always browse to it. With that set, just hit the “Make Startup Disk” button.

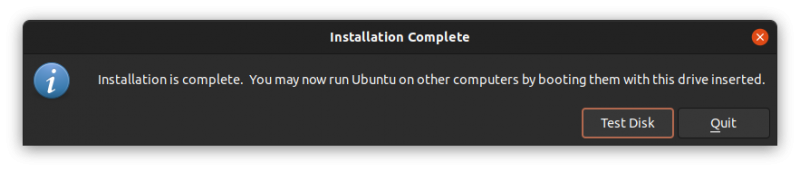
It should take a few minutes to create the live Ubuntu USB. You can hit the Quit button below.
Step 3: Boot from live USB and make free space for Windows
Alright. Now you boot from the live Linux USB.
Restart the system. When it is powering on and displaying the manufacturer’s logo, press F2/F10/F12 keys to access the BIOS settings. In here, go to the boot order and boot from the Linux USB.
When you see this screen, go for Try Ubuntu.
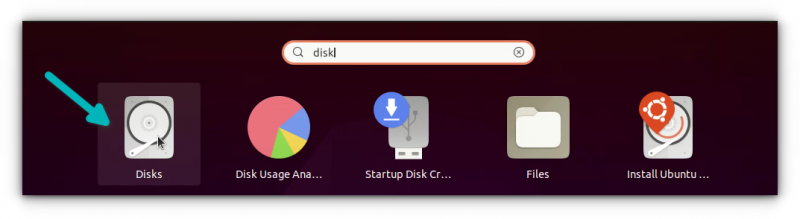
Now that you are in the live session, open the Disk application. It is already installed.
In the Disks application, carefully select the main hard disk/SSD of your computer. This is where you have Linux installed. As you can see in the picture below, I have ESP partition (for UEFI boot settings) and a single Linux partition. This is the partition that needs to be resized to make free space for Windows.
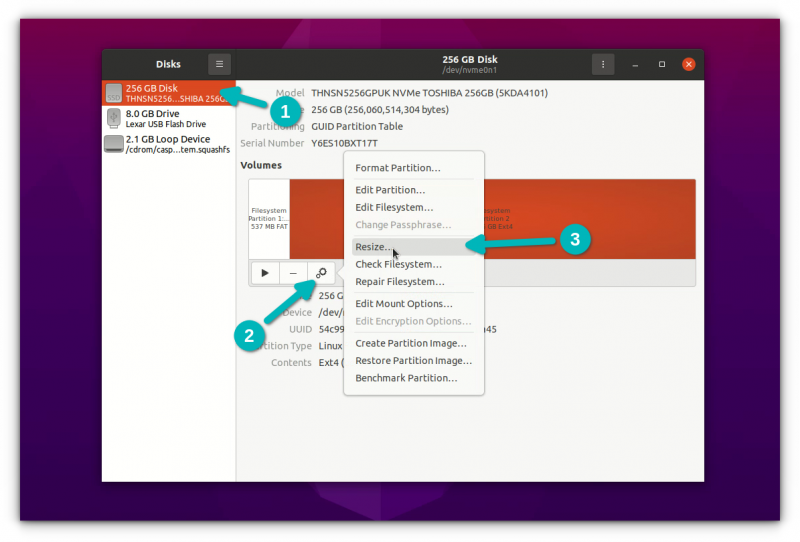
If you have a root, swap and home partition setup, you should resize the home partition.
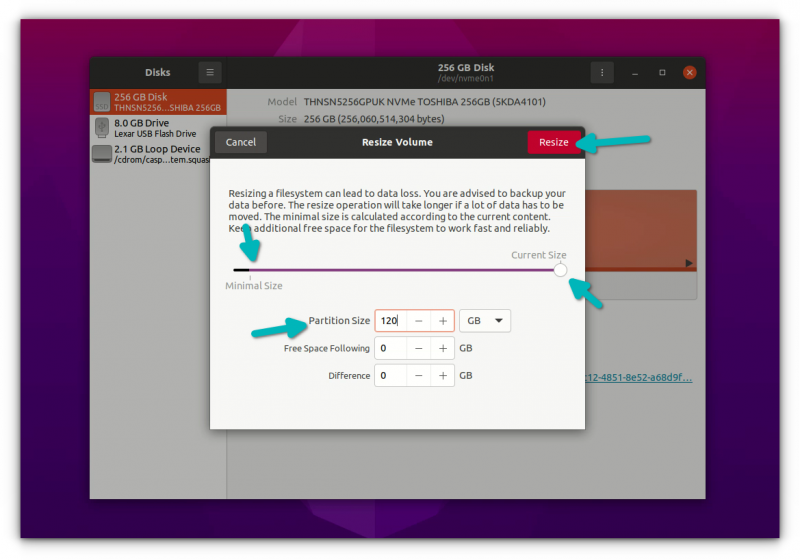
In the resizing, it will show a minimal size. You cannot shrink the disk below this point. You’ll be leaving some extra space for Linux usage, of course.
Note that the “partition size” is for Linux partition. In the picture below, I reduced the Linux partition to 120 GB from 256 GB. This gives a 136 GB of free space for Windows installation.
When you hit the resize button, it could take up to a couple of minutes to complete the resizing process.
As you can see in the picture below, now I have three partitions on my system. One is 500 MB of ESP partition (for UEFI boot), 120 GB of Ext4 partition for Linux and 136 GB of free space.
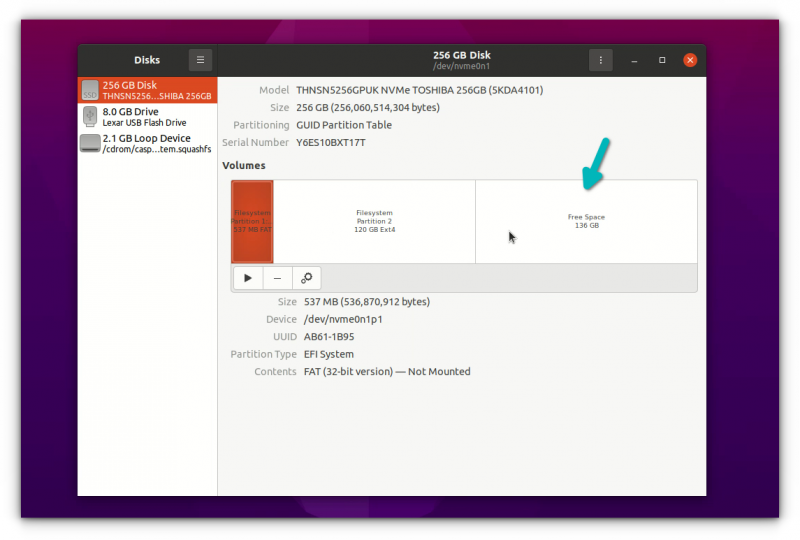
You now have dedicated free space where you are going to put Windows. Shut down your system now.
Step 4: Boot from Windows USB and start installing Windows
Plug in your bootable Windows UBS. Once again, restart your system, access the BIOS settings and boot from the USB. By now, you know how to do this. You already did this in step 1 while checking the bootable Windows USB.
You should see the Ventoy screen if you created the bootable Windows USB with it. Hit enter.
You should see the Windows logo. After a few seconds, you’ll see the option to choose the language, time and keyboard.
The next screen will give you the option to start the installation. Hit “Install Now”.
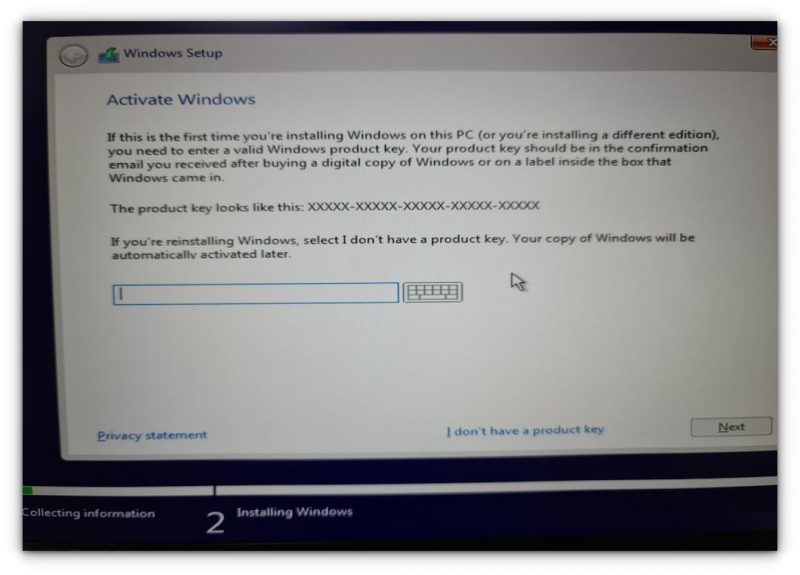
In the next few screens, it will ask for the Windows license key. If you don’t have it, skip it. You can activate Windows later as well. You’ll be asked to choose a Windows version and accept the end user license.
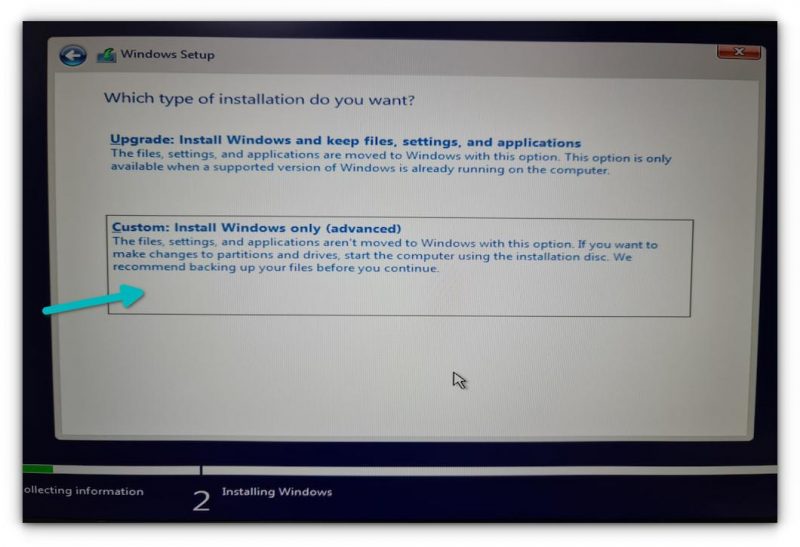
In the next screen, go with the Custom install option.
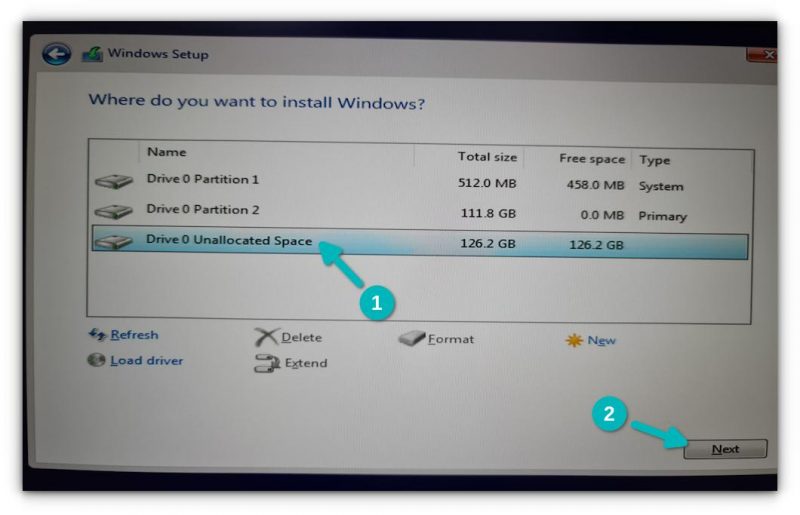
Now you’ll come to the partition screen. Select the free space (unallocated space) you had created in the step 3 and hit the Next button.
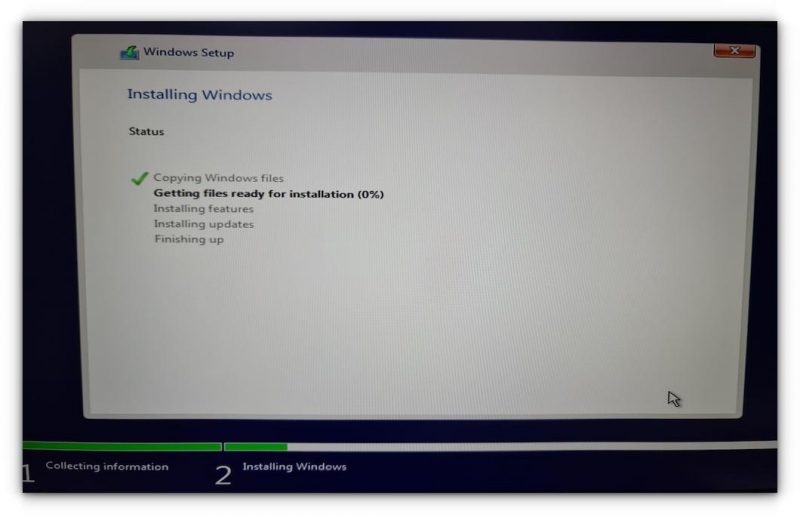
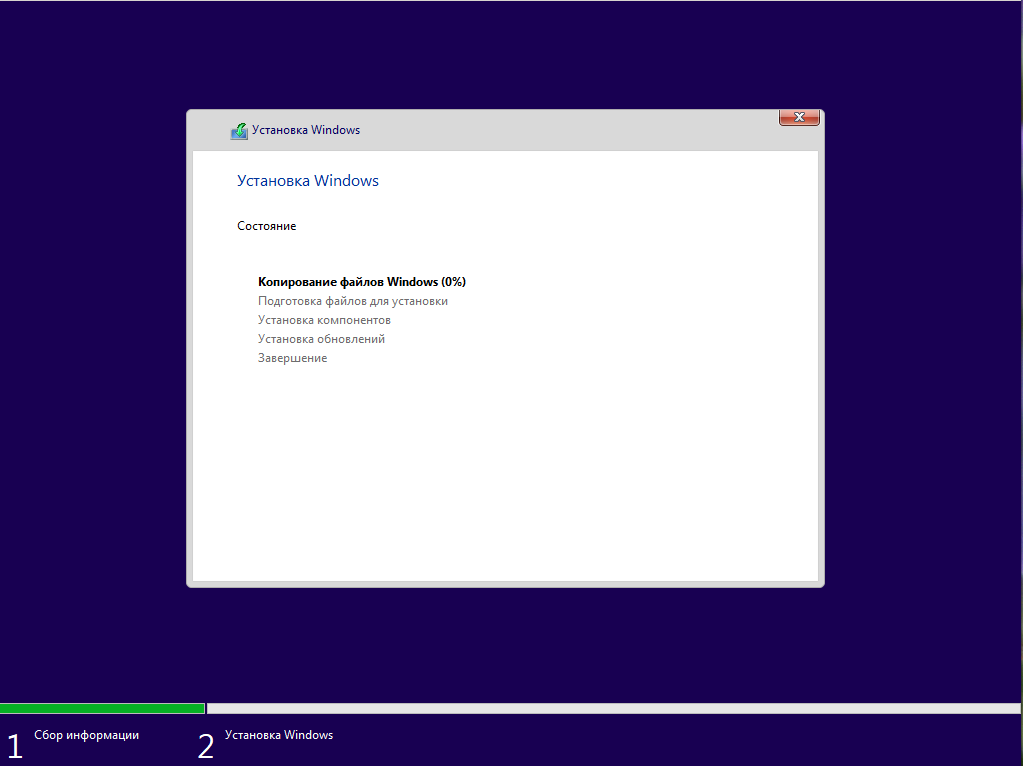
It will take a couple of minutes in copying the files and install Windows.
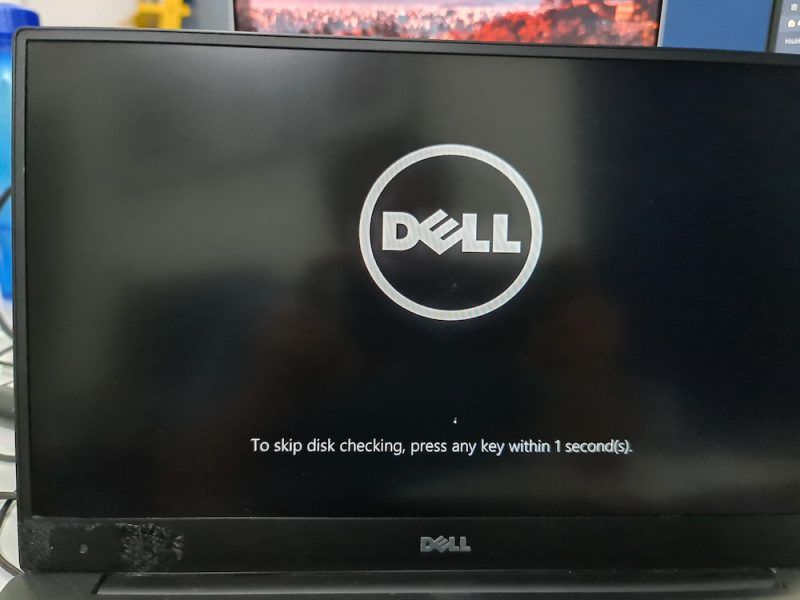
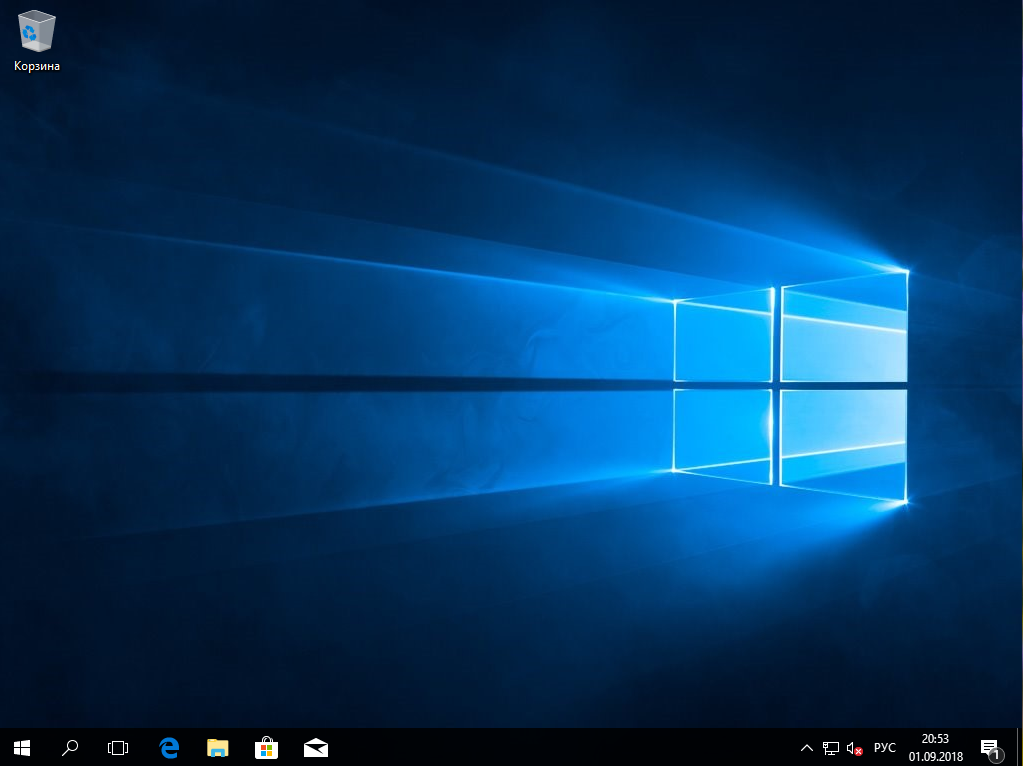
After that, your system will restart automatically and this time it will boot into Windows directly.
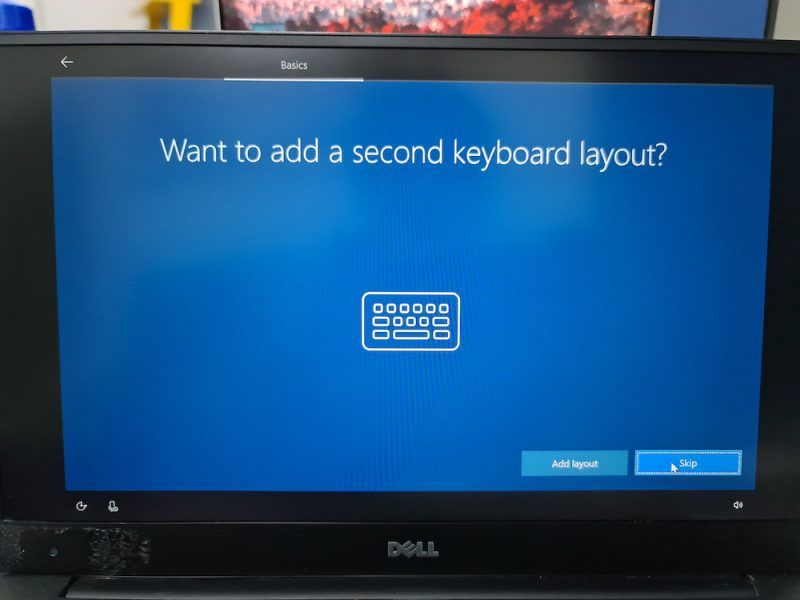
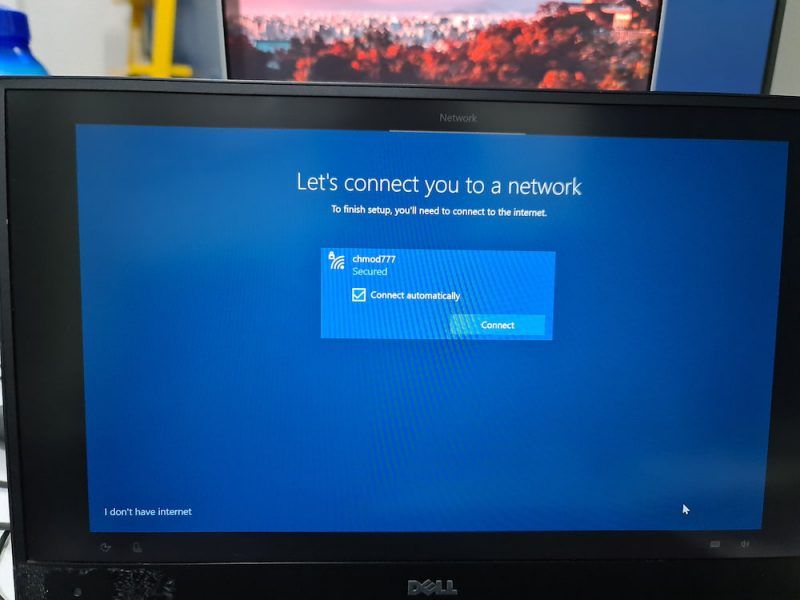
Windows installation is not over entirely. On the next boot, you’ll be asked to configure Windows for your usage and this is super annoying but super easy to follow.
I am not going in detail for this part because I know you can handle the configuration part, which is waiting and hitting next button most of the time. I am sharing a few screenshots just for the reference, though.


Once you have installed Windows successfully, chances are that you’ll be booting into Windows by default. You need to get the Grub dual boot screen back.
Step 5: Get the Grub bootloader back
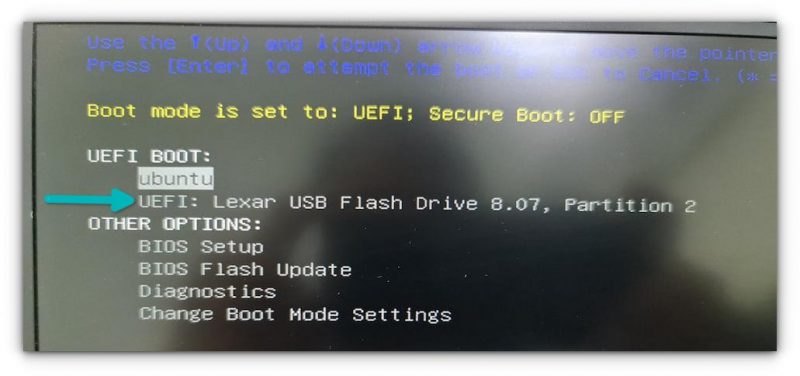
Once again, restart your system and when it is powering on, go to BIOS settings. From the boot sequence or boot order, move Ubuntu up the order. You may have to use arrow keys or F5 or F6 and the screen may look different for different system.
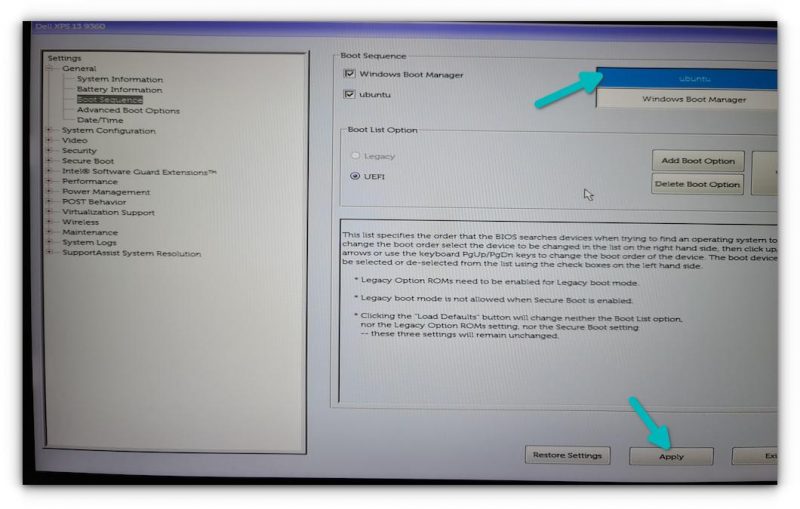
Save and exit and this time you should be booting into Ubuntu. The battle is not over yet. The grub bootloader might not be aware of the presence of Windows. This is why it is a good idea to update grub in Ubuntu.
All you have to do is to open a terminal and use the following command:
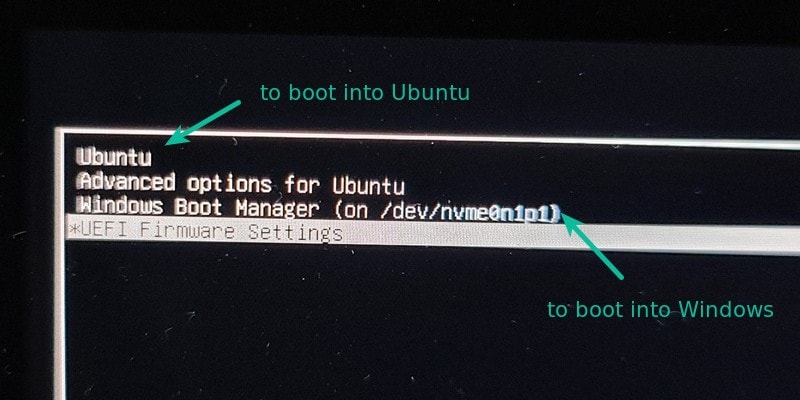
sudo update-grubRestart your system once again. You should be greeted with the familiar grub boot screen that gives you the option to choose between booting into Ubuntu and Windows.
🔨 Troubleshooting tip: Don’t see Windows Boot Manager in Grub?
Install os-prober (usually installed already) and then edit the /etc/default/grub file to add GRUB_DISABLE_OS_PROBER=false to this file. Save this file, update grub and Grub should see Windows option in the grub screen now.
Did you succeed?
And that brings us to the end of this long journey. It takes some time and effort, but if you want to install Windows after installing Ubuntu, this can surely be done.
If you still have questions, please let me know in the comment section and I’ll try to answer you.
As you know, the most common, and probably the most recommended way of dual booting Ubuntu and Windows is to install Windows first and then Ubuntu. But what if you want to install Windows second on a computer with Ubuntu/Linux already installed?
This guide assumes that you have Ubuntu already installed on your system, and will guide you through installing Windows 7/8/8.1/10 when you have a working Ubuntu/Linux partition.
The problem here is that the Windows installer tends to overwrite Grub bootloader or whatever making only the Windows installation bootable. But the good news is that your Linux partition is untouched, including the original bootloader and the other Grub configurations. So restoring or recovering Grub is just a matter of running a few commands on the terminal.
Install Windows on a Separate Partition
If your Ubuntu installation occupies the entire hard drive, to be able to create free space for the Windows installation, you may have to shrink an existing partition using a disk utility like GParted. GParted comes preinstalled on Ubuntu LiveCD.
Boot into a Windows installation media and complete the installation
Once installed, because of Microsoft’s false assumption that there are no non-Microsoft operating systems you’ll be taken straight into Windows.
Restore / Reinstall Grub 2 with a Ubuntu Live Media
- Now boot into a Ubuntu Live/USB or CD.
- Open a terminal. (Ctrl + Alt + t)
- Use a command like lsblk, blkid or GParted to identify your Linux root, and boot partitions. You may or may not have a separate boot partition.
-
Find Linux Partitions
 $ lsblk -f
 NAME                  FSTYPE     MOUNTPOINT
 sda
 ├─sda1                ext4       /boot
 ├─sda2                ext4       /
 ├─sda3                ntfs
In my case,
/dev/sda1is the Linux boot partition/dev/sda2is the Linux root partition/dev/sda3is the Windows partition -
Setup a Chroot Environment
Now we’ll be repairing our old grub bootloader in a chroot environment.
Mount your root filesystem under
/mntsudo mount /dev/sda2 /mnt/If you’re using BTRFS (New Linux B-Tree File System) instead of EXT4, the above command should change to
sudo mount -t btrfs -o subvol=@ /dev/sda2 /mnt/Run
ls /mntto verify that the correct partition is mounted. It should list the content of your root.$ ls /mnt bin dev home lib64 media opt root sbin sys usr vmlinuz boot etc initrd.img lost+found mnt proc run srv tmp var vmlinuz.oldMount the boot partition. (SKIP if you don’t have a separate boot partition)
sudo mount /dev/sda1 /mnt/bootIf you have an EFI partition you should mount that also. It is basically a small FAT32 partition around 100mb. Please refer to the section on how to reinstall Grub in an EFI system.
Bind these directories, so grub can detect other operating systems, like so.
 sudo mount --bind /dev /mnt/dev
 sudo mount --bind /dev/pts /mnt/dev/pts
 sudo mount --bind /proc /mnt/proc
 sudo mount --bind /sys /mnt/sys
Let’s chroot into our existing Ubuntu/Linux system on the hard disk.
-
Reinstall Grub.
 grub-install /dev/sda (specify the disk `/dev/sdX`, not `/dev/sdaX`)
 grub-install --recheck /dev/sda
 exit
Once you’ve successfully reinstalled Grub, restart the computer. On next reboot Grub will be the default bootloader and you’ll be presented with a list of operating systems to choose from (Ubuntu and Windows, of course).
Reinstalling Grub in an EFI Based System
Reinstalling Grub bootloader in a UEFI based computer is no different from installing Grub on a legacy BIOS system. Here we also mount the EFI partition before chrooting, as we’d do with the boot partition.
Case #2
$ lsblk -f
NAME                  FSTYPE     MOUNTPOINT
sda
├─sda1                ext4       /boot/efi
├─sda2                ext4       /
├─sda3                ntfs
Here /dev/sda1 is the EFI partition and /dev/sda2 is the root.
sudo mount /dev/sda2 /mnt/
Mount EFI partition under ‘/mnt/boot/efi’
sudo mount /dev/sda1 /mnt/boot/efi
Forgetting to do so will result in errors being thrown while trying to execute grub-install: “/boot/efi does not appear to be the EFI partition”
As shown previously, bind the /dev, /dev/pts, /proc, and /sys directories.
Finally,
sudo chroot /mnt
grub-install
exit
In some rare occasions, Grub might not detect Windows. In that case just login to Ubuntu (installed one on the disk, not the bootable Live USB/CD) and execute,
sudo os-prober
sudo update-grub
sudo reboot
Happy Dual-Booting!
This tutorial is going to show you an easy way to create a Windows 10 bootable USB on Linux. I use Ubuntu 20.04 as an example. The method applies to any Linux distribution. I use Windows to do online banking because my bank doesn’t support Linux and sometimes play games that can’t run on Linux.
What you need
- A computer running Linux
- A USB flash drive at least 8GB
- Windows 10 ISO
Download Windows 10 ISO
First, you should download Windows 10 ISO from Microsoft official download link. Note that you might not be able to download the ISO from this link on a Windows computer. This download link is visible to users on Linux computer. Once downloaded, follow the instructions below.
Note: It’s recommended to download the Windows 10 April 2018 update ISO, because the October Update ISO contains a file that is larger than 4GB, which can not be copied to a FAT32 partition.

Update: Microsoft doesn’t allow you to download the Windows 10 April 2018 Update ISO from their website anymore. You can download the ISO via this link: Win10 1803 English x64 ISO
Creating a Windows 10 Bootable USB for UEFI Firmware
This method works for UEFI firmware and is very simple. You create a GUID partition table on your USB stick, create a FAT32 file system on it, and then mount Windows 10 ISO image and copy those Windows 10 files to your USB stick and you are done. The following is a step-by-step guide.
First, install GParted partition editor on your Linux distribution. Ubuntu users run the following command.
sudo apt install gparted
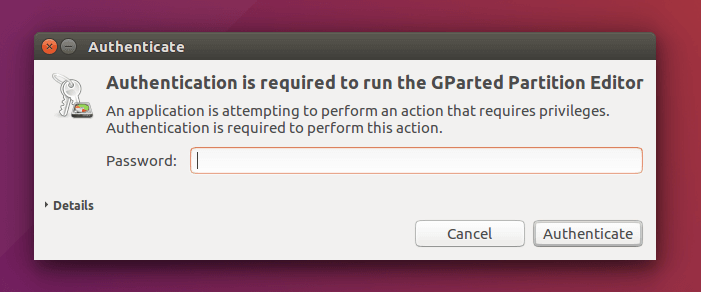
Then insert your USB stick to your computer. Make sure you back up important files in your USB stick if there’s any. Next, launch Gparted. You will need to enter your password in order to use GParted.
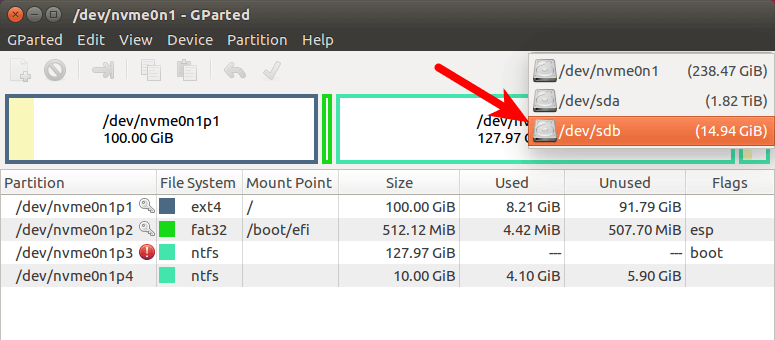
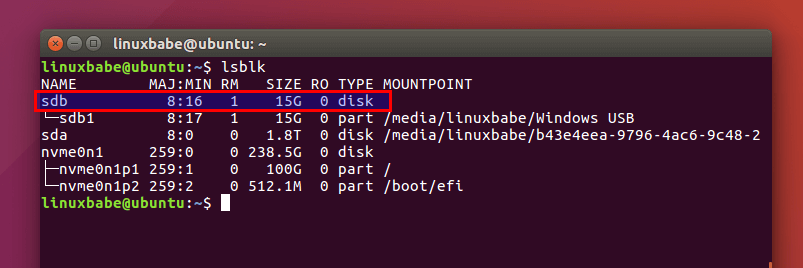
Select your USB stick from the drop-down menu on the upper-right corner. My USB stick is /dev/sdb. Yours may be different.
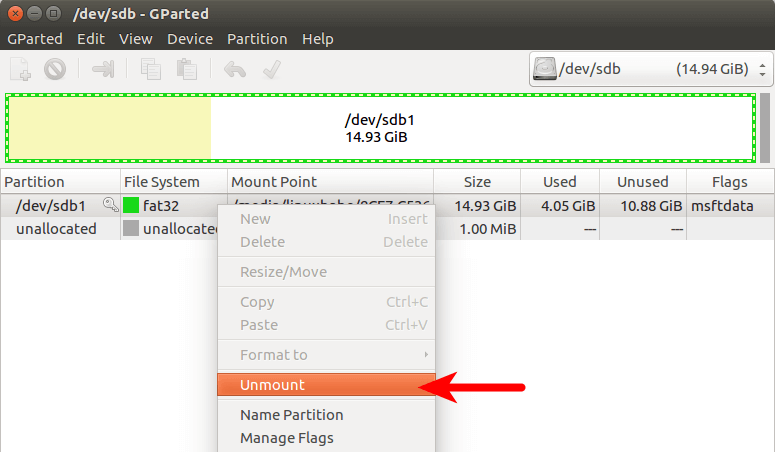
If there’s a key icon after the partition name, that means the partition is mounted. Make sure all partitions on your USB stick are unmounted. To unmount a partition, simply right-click on it and select unmount.
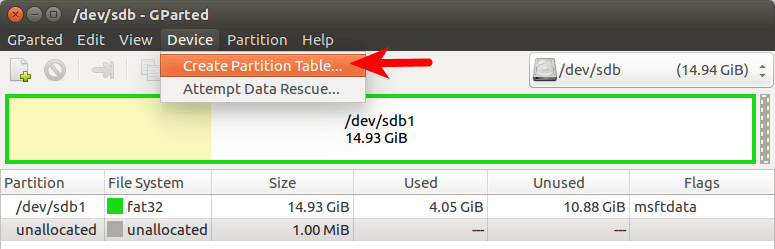
Next, on the menu bar, select Device > Create partition table.
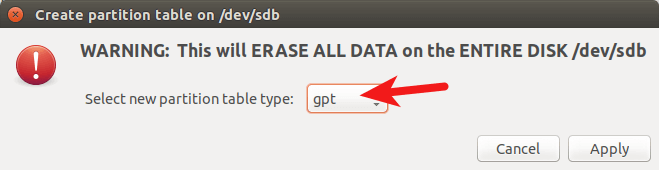
Choose GPT as the partition table type and click Apply.
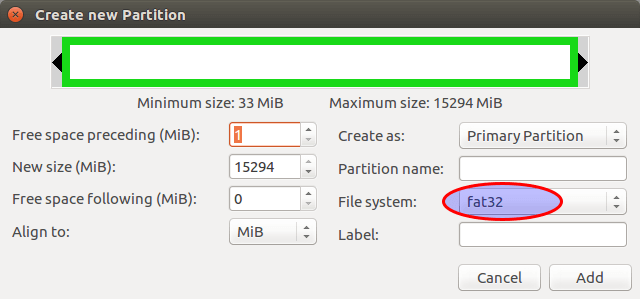
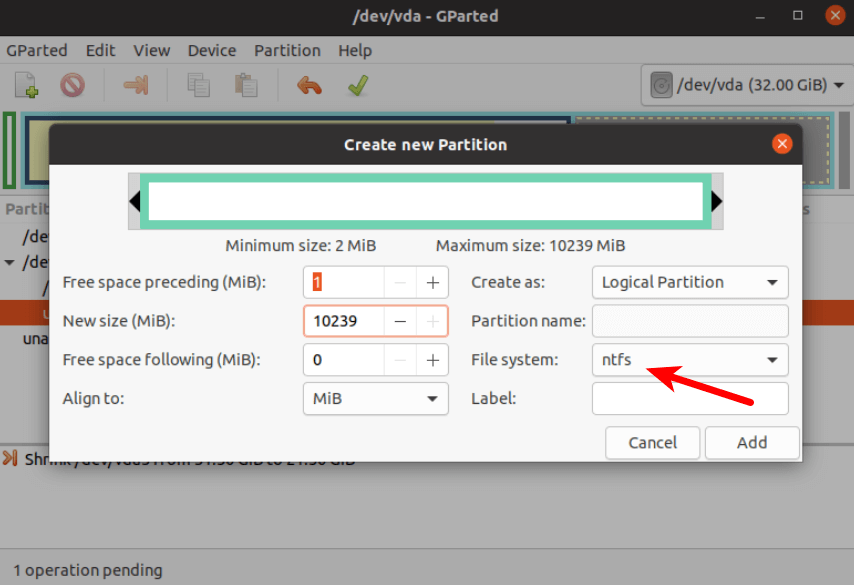
Then right-click on the unallocated space and select New to create a new partition.

Change file system type from ext4 to fat32 and click Add.
Note: The install.wim file in Windows 10 October 2018 update ISO is 4.1G, so if you downloaded this ISO image, you need to change ext4 to ntfs. If you downloaded Windows 10 April 2018 Update ISO, which contains a 3.9G size install.wim file, you can change ext4 to fat32
Update: It is my observation that my NTFS formatted USB stick isn’t bootable on my old laptop, which was bought in 2012. However, it is bootable on my desktop computer, which was bought in 2017. It has a graphical UEFI firware (I can use my mouse to configure firmware settings).
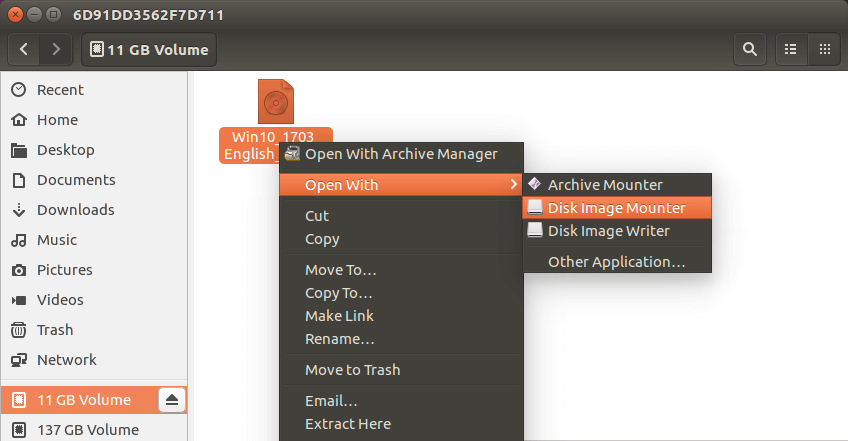
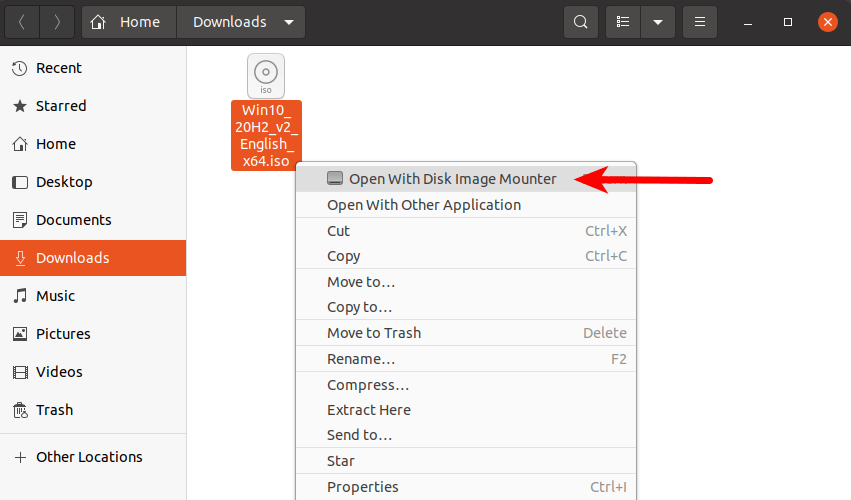
Next, click the green check button on the toolbar to apply this operation. Once that’s done, close GParted (This is important), then find your Windows 10 ISO in file manager. Open it with disk image mounter.
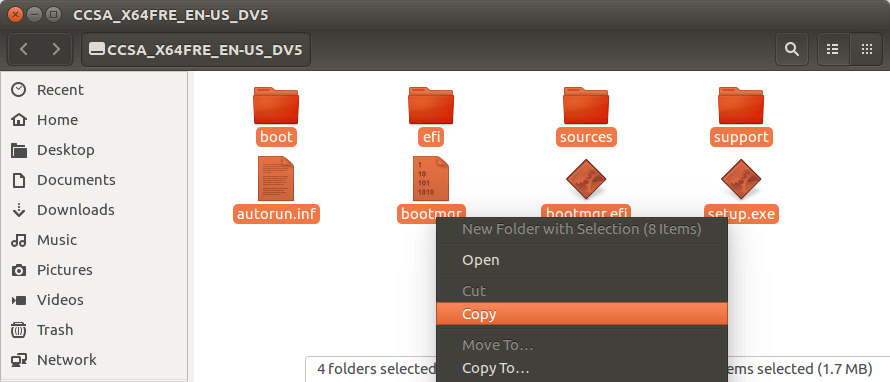
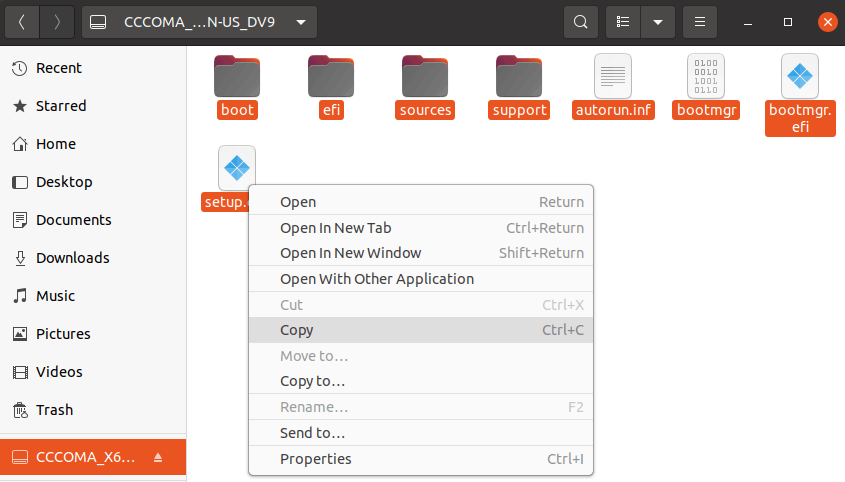
Open the mounted file system. Select all files and folders and copy them to your USB stick.
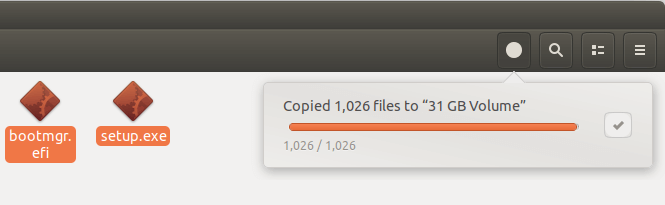
Sometimes the file manager on Ubuntu hangs and it seems that the copy operation has stopped. Actually it’s working, just be patient. When you see a check mark, it means the copy operation has finished.
If your file manager doesn’t have the Disk image mounter in the context menu, then you can use the following commands to mount. The first command will create a mount point for Windows 10 ISO and the second command will mount Windows 10 ISO under that mount point.
sudo mkdir /mnt/windows10/

sudo mount -t auto -o loop /path/to/window-10-iso /mnt/windows10/
Now in your file manager, go to /mnt/windows10/ and copy all files and folders to your USB stick.
Once the file and folders are copied, your windows 10 bootable USB is created! You can shut down your computer, boot it from this USB stick and install Windows 10 in UEFI mode. Keep in mind that you may need to disable compatibility support module (CSM) in the firmware in order to boot in UEFI mode. You may also need to remove USB stick from your computer and insert it back in order for the firmware to detect the boot loader on your USB stick.
Boot Windows 10 ISO Installer without USB (BIOS & UEFI)
Ever wondered if you can boot Windows 10 ISO installer without a USB flash drive? Yes, you can do it with GRUB2, which is the standard boot loader on Linux.
GRUB2 can not boot Windows 10 ISO directly. You need to create a separate NTFS partition on your hard disk or SSD with a partition editor like GParted and extract the Windows 10 ISO to that partition. Download the Windows 10 ISO file. The latest Windows 10 ISO file is 5.8G. The new NTFS partition should be at least 7G and it should not be used to store any other files.
Then find your Windows 10 ISO in file manager. Open it with disk image mounter.
Open the mounted file system. Select all files and folders and copy them to the NTFS partition.
Sometimes the file manager on Ubuntu hangs and it seems that the copy operation has stopped. Actually, it’s working. Just be patient. When you see a checkmark, it means the copy operation has finished.
Next, open up a terminal window and edit the /etc/grub.d/40_custom file with a text editor such as Nano.
sudo nano /etc/grub.d/40_custom
In this file, we can add custom entries to the GRUB boot menu. In this case, we want to add an entry to boot the Windows 10 installer. If your computer still uses the traditional BIOS firmware, then add the following lines in this file.
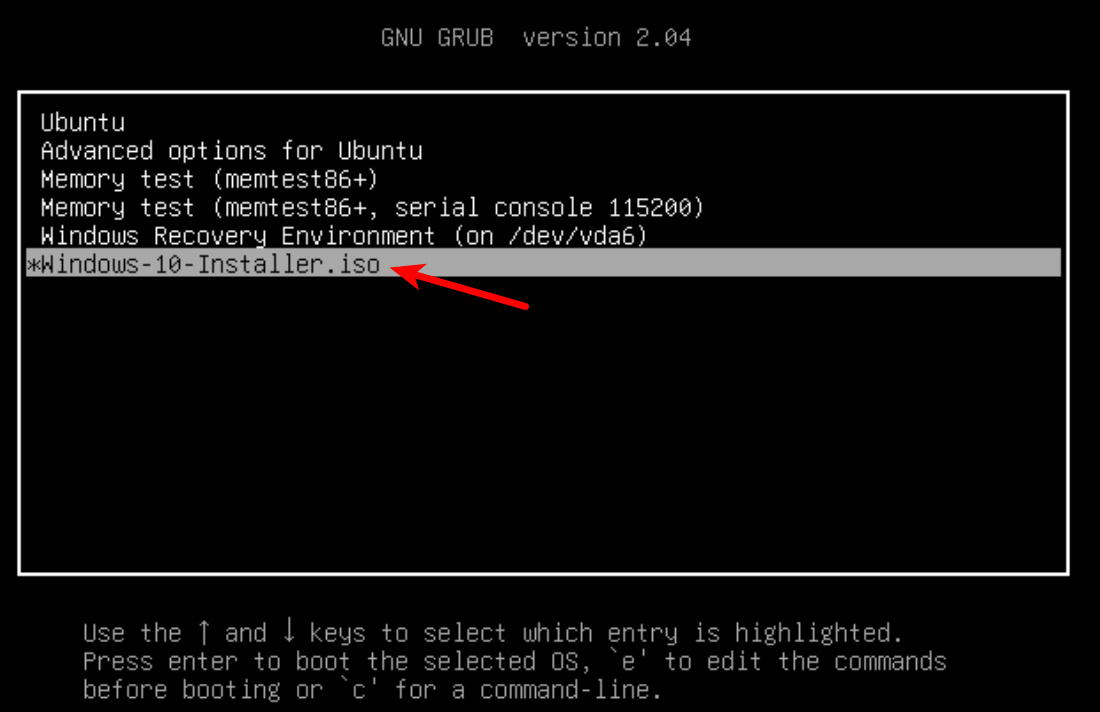
menuentry "Windows-10-Installer.iso" {
  set root=(hd0,6)
  insmod part_msdos
  insmod ntfs
  insmod ntldr
  #uncomment the following line if your computer has multiple hard drives.
  #drivemap -s (hd0) ${root}
  ntldr /bootmgr
}
My NTFS partition is the 6th partition on my first disk, so I use (hd0,6) as the root. You can run sudo parted -l command to check your NTFS partition number. If your computer has multiple hard drives, use the drivemap command to set the partition (hd0,6) as the first hard disk, so Windows will be able to boot.
If your computer uses UEFI firmware, then add the following text in this file.
menuentry "Windows-10-Installer.iso" {
  set root=(hd0,6)
  insmod part_gpt
  insmod ntfs
  insmod chain
  chainloader /efi/boot/bootx64.efi
}
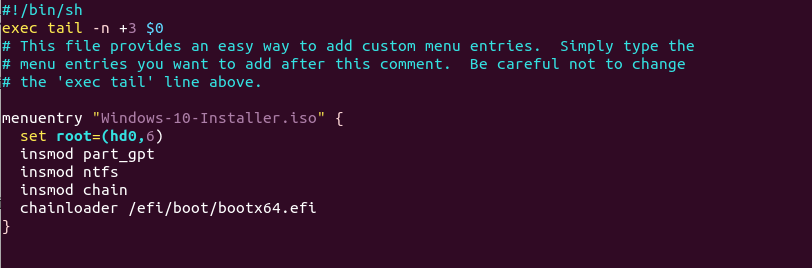
Save and close the file. (Press Ctrl+O, then press Enter to save a file in Nano text editor. Press Ctrl+X to exit.)
Then update GRUB boot menu.
sudo grub-mkconfig -o /boot/grub/grub.cfg
or
sudo grub2-mkconfig -o /boot/grub2/grub.cfg
Next, set GRUB to boot the Windows 10 installer for the next boot with the following command.
sudo grub-reboot Windows-10-Installer.iso
or
sudo grub2-reboot Windows-10-Installer.iso
Unplug all your external USB storage devices, then reboot your computer. GRUB will choose the Windows 10 installer.
GRUB2 can also boot Linux ISO files stored on the hard drive, so you don’t need to create Linux live USB.
- How to Boot ISO Files From GRUB2 Boot Loader
Creating a Windows 10 Bootable USB for Legacy BIOS Using WoeUSB
WoeUSB is a fork of WinUSB. Both of them are open-source software (licensed in GPL) for making Windows bootable USB sticks on Linux platform, but the latter hasn’t been updated since 2012. You may be wondering why it’s named WoeUSB. The author said it’s a GNU convention to abbreviate software that support Windows to “woe”.
To install WoeUSB on Ubuntu 14.04/16.04/17.04, you can use the following PPA. Simply open up a terminal window and run the following commands one by one. Other Linux distro users can compile this software by following the instructions on the Github project page.
sudo add-apt-repository ppa:nilarimogard/webupd8

sudo apt update

sudo apt install woeusb
This PPA contains many other software. If you don’t need them, you can now remove this PPA from your system.
sudo add-apt-repository --remove ppa:nilarimogard/webupd8

sudo apt update
You can launch WoeUSB from Unity Dash or your application menu.
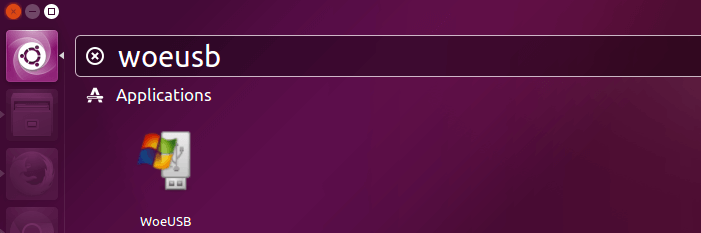
You can also start it from command line with:
woeusbgui
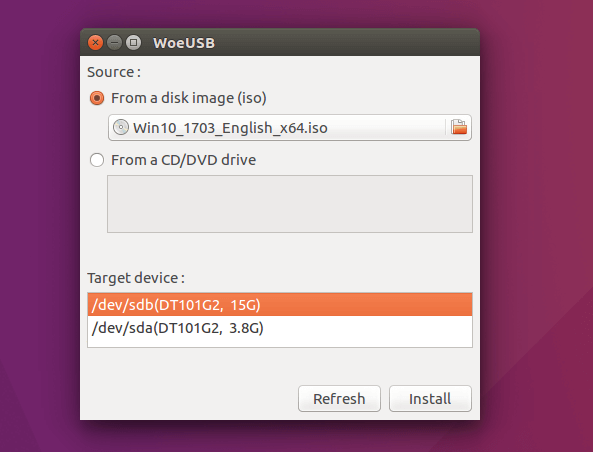
It’s very easy to use the WoeUSB GUI. Select Windows ISO image and your target USB device. Make sure your data on the USB device is backed up before hitting the Install button.
Then wait for the installation to complete.
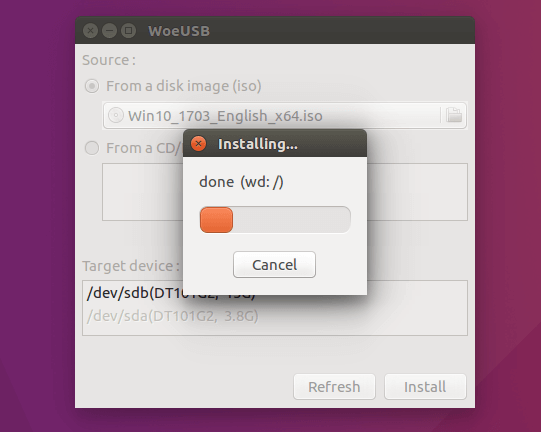
Once done, you can use the bootable USB to install Windows 10 on your computer.
How to Use WoeUSB From the Command Line
First, find the device name of your USB stick using the following command.
lsblk
Mine is /dev/sdb. Make sure your USB is unmounted with the following command. Replace /dev/sdb1 with your own partition name.
sudo umount /dev/sdb1
Then create a bootable Windows 10 USB like below. Red texts shoudl be adapted to your own ISO file name and USB device name. The -v (--verbose) option will give more detailed output.
sudo woeusb -v --device windows-10.iso /dev/sdb
In my test, the Windows 10 USB created with WoeUSB can boot in both legacy and UEFI mode on my old computer. On my new computer, it can boot in legacy mode but failed in UEFI mode. I don’t know the exact reason, but it’s probably because of bug in this software.
That’s it! I hope this tutorial helped you create windows 10 bootable USB on Ubuntu or any Linux distribution. As always, if you found this post useful, then subscribe to our free newsletter to get new tutorials.
Rate this tutorial
[Total: 116 Average: 4.3]
Раньше я писал статью о том, как установить Linux после Windows, это довольно простая задача. Но многие пользователи удаляют Windows, ставят Linux, а потом понимают, что им снова нужна Windows. Вот только установить Windows на компьютер, где уже расположился Linux, немного сложнее.
При установке Linux автоматически определяются загрузчики других операционных систем, и добавляются в меню загрузки. Таким образом, вам не надо ничего дополнительно настраивать, чтобы запустить свою Windows. Но если вы устанавливаете Windows поверх Linux, то будет использован загрузчик Windows, и получить доступ к Linux без дополнительных настроек вы не сможете. Однако эта проблема вполне решаемая, и в сегодняшней статье мы поговорим, как правильно инсталлировать Windows после Linux.
Содержание статьи
- Установка Windows после Linux
- Выводы
1. Разметка диска в Linux
Для установки Windows 10 после Linux вам нужно свободное пространство на диске, как минимум 50 гигабайт, а то и больше, если хотите устанавливать туда много игр и программ. Современные версии Windows хотят создавать два раздела:
- Системный;
- Раздел с данными для восстановления;
Но тут надо учитывать один момент, если у вас используется таблица разделов MBR, то основных разделов может быть только четыре. И если у вас уже есть корневой раздел, домашний и swap для Linux, то раздел восстановления получается пятым, а это уже проблема, поэтому нужно создать расширенный раздел и уже там размечать разделы для Windows. Если вы ставите эту ОС на другой жёсткий диск, то никаких проблем нет, но я предполагаю что обе системы устанавливаются именно на один диск.
Во-первых, нам необходимо загрузиться с LiveCD, поскольку надо уменьшить размер либо корневого раздела, либо домашнего, а эти диски примонтированы. Самый простой способ это сделать — загрузиться с Live системы.
Загружаем наш диск, например Ubuntu, и запускаем Gparted:
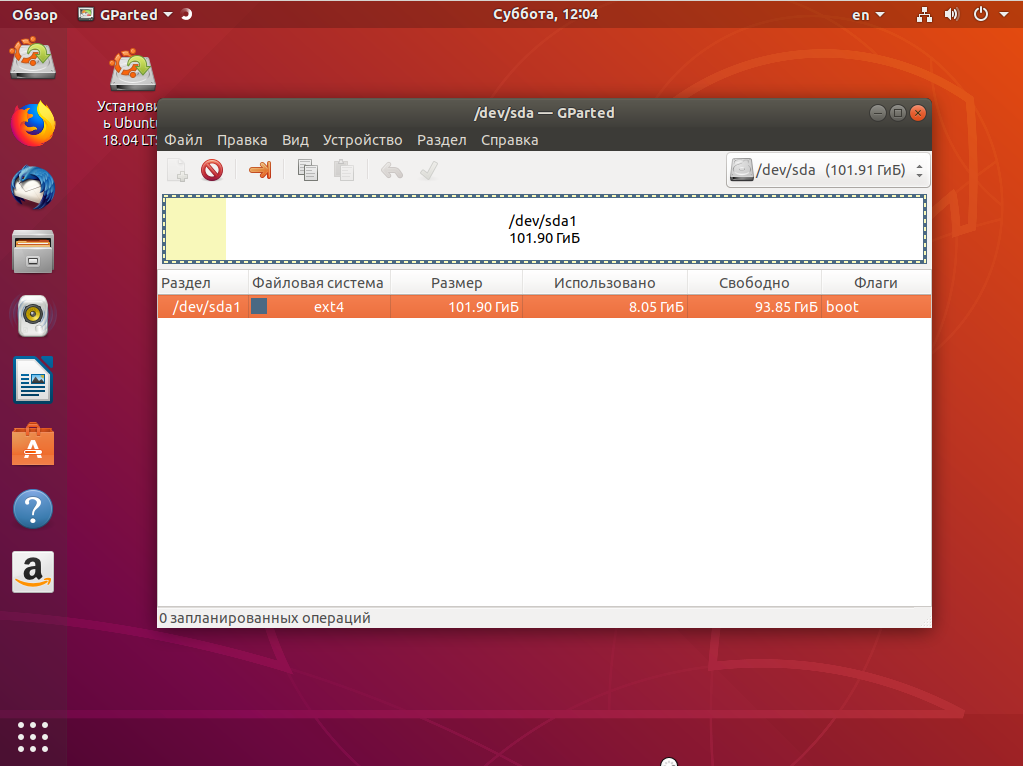
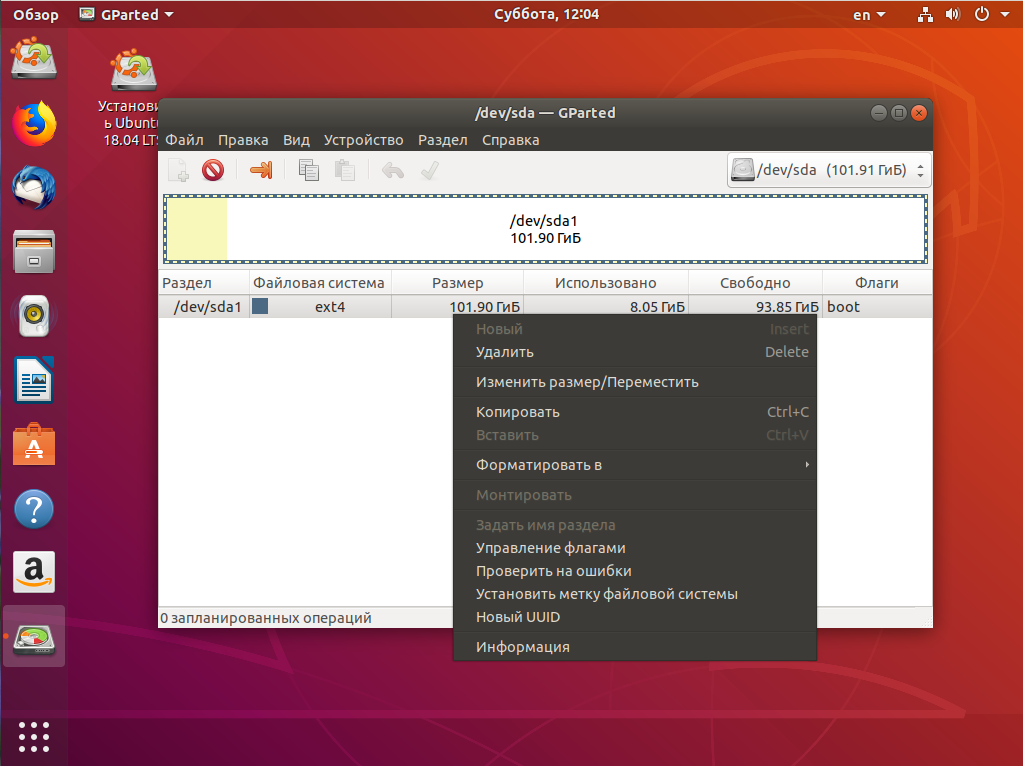
Затем нужно уменьшить раздел. Для этого выберите нужный и кликните Изменить или переместить:
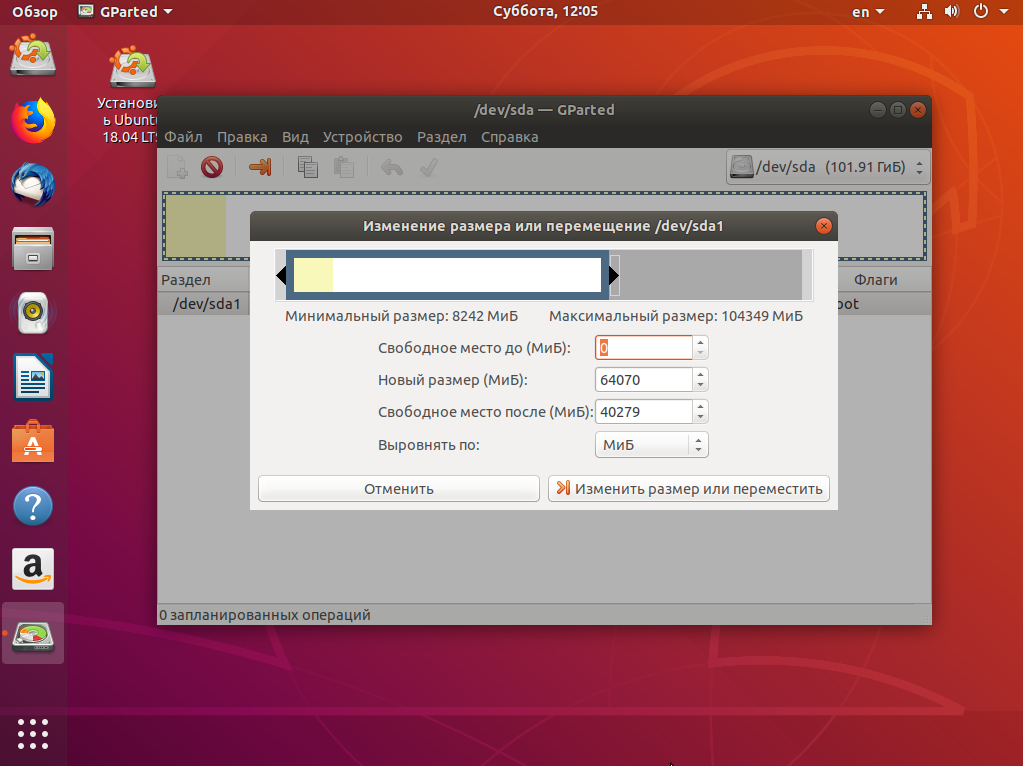
Затем уменьшите раздел так, чтобы после него оставалось 40-50 гигабайт:
Далее выберите свободное пространство и щёлкните в контекстном меню пункт Новый:
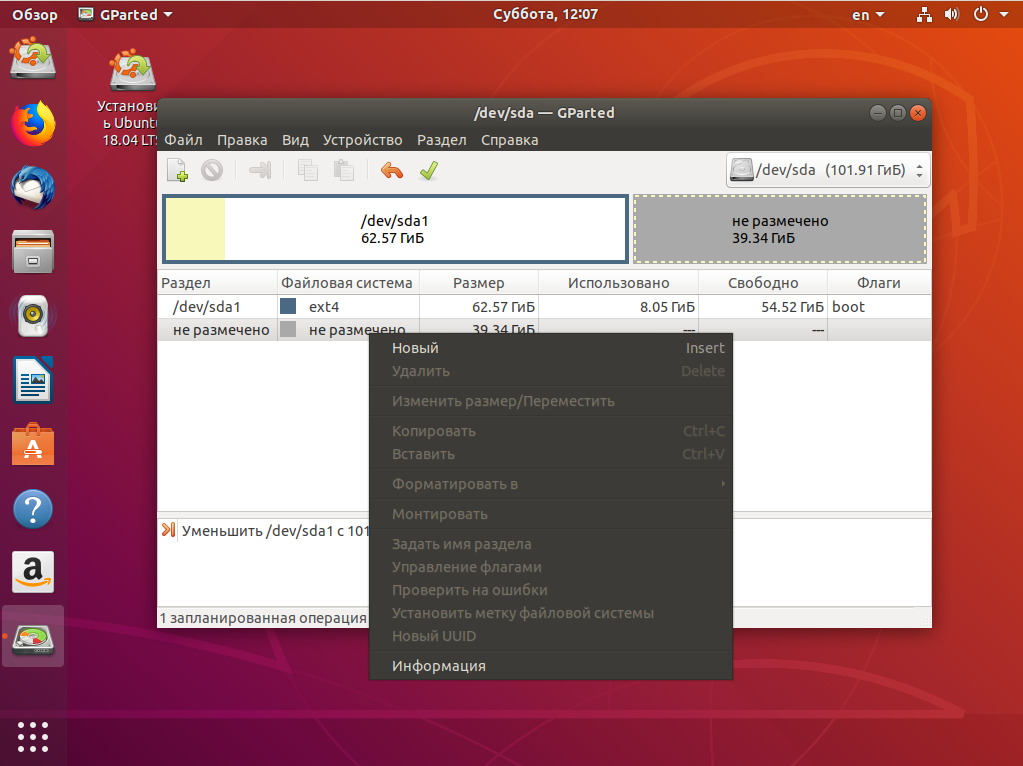
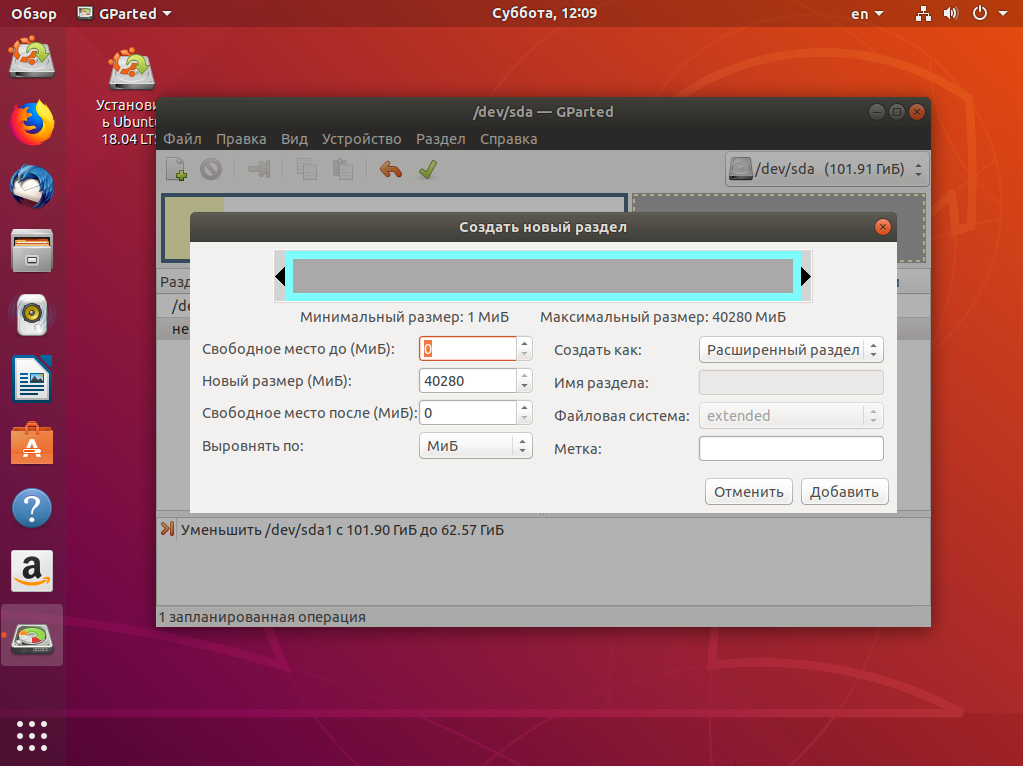
Помните, я выше писал, что с таблицей разделов MBR можно создавать только четыре основных раздела. Поэтому из свободного пространства создаём расширенный раздел. Выберите в поле Создать как -> Расширенный раздел:
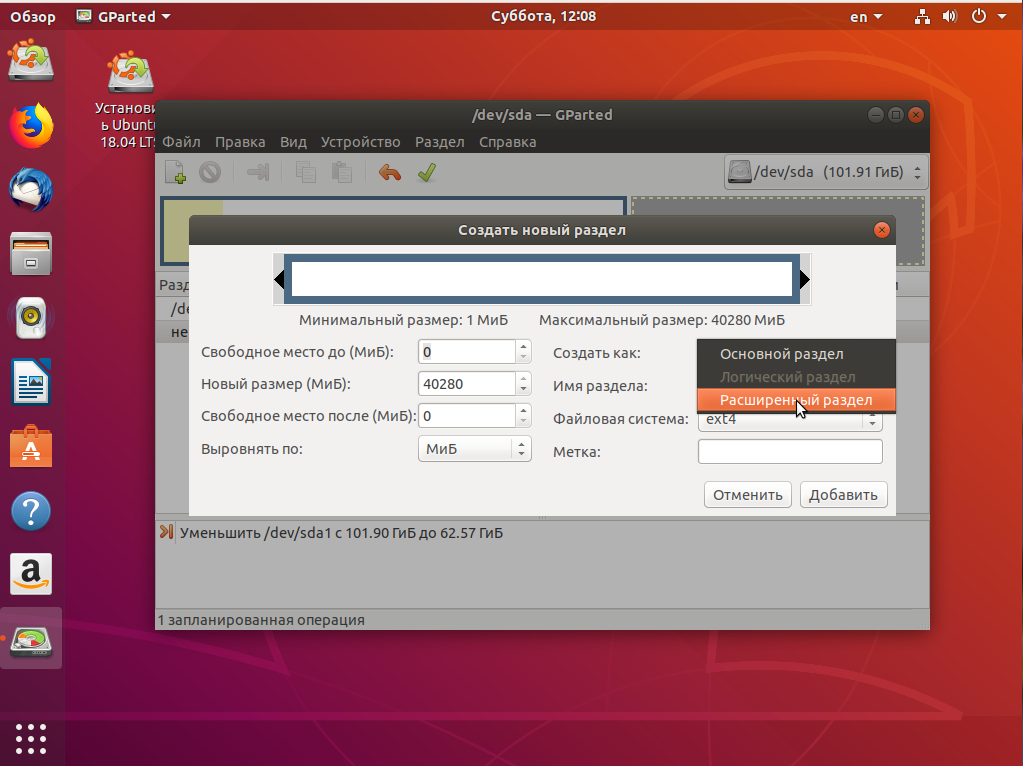
Выберите всё доступное место, а потом нажмите Ок:
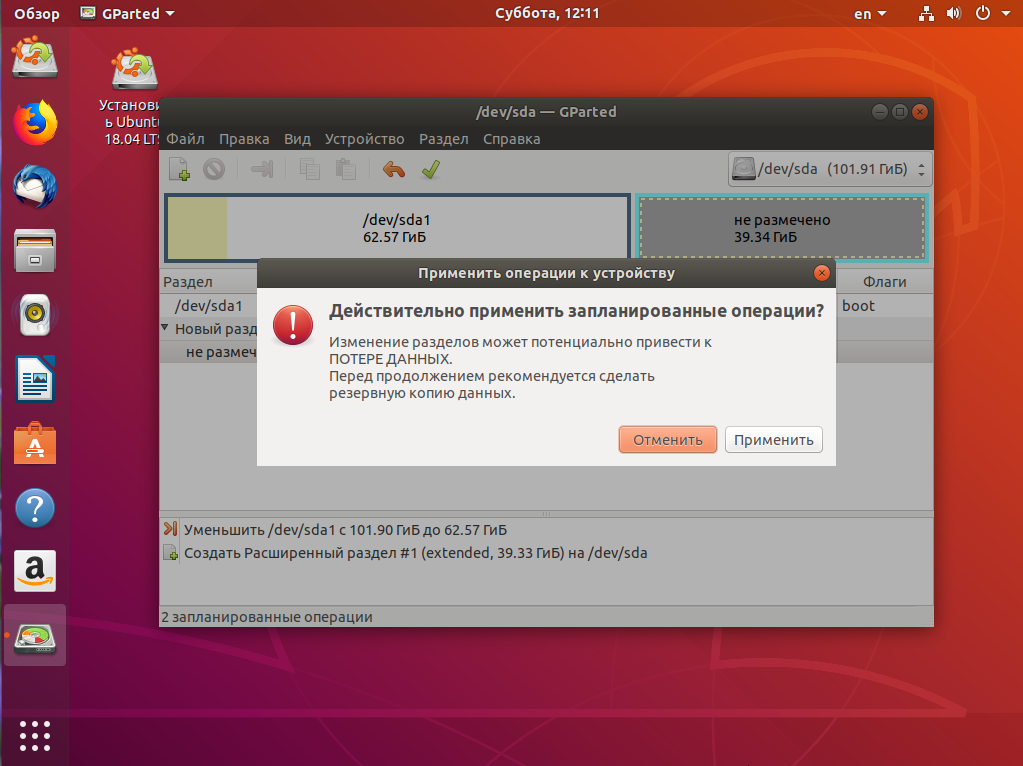
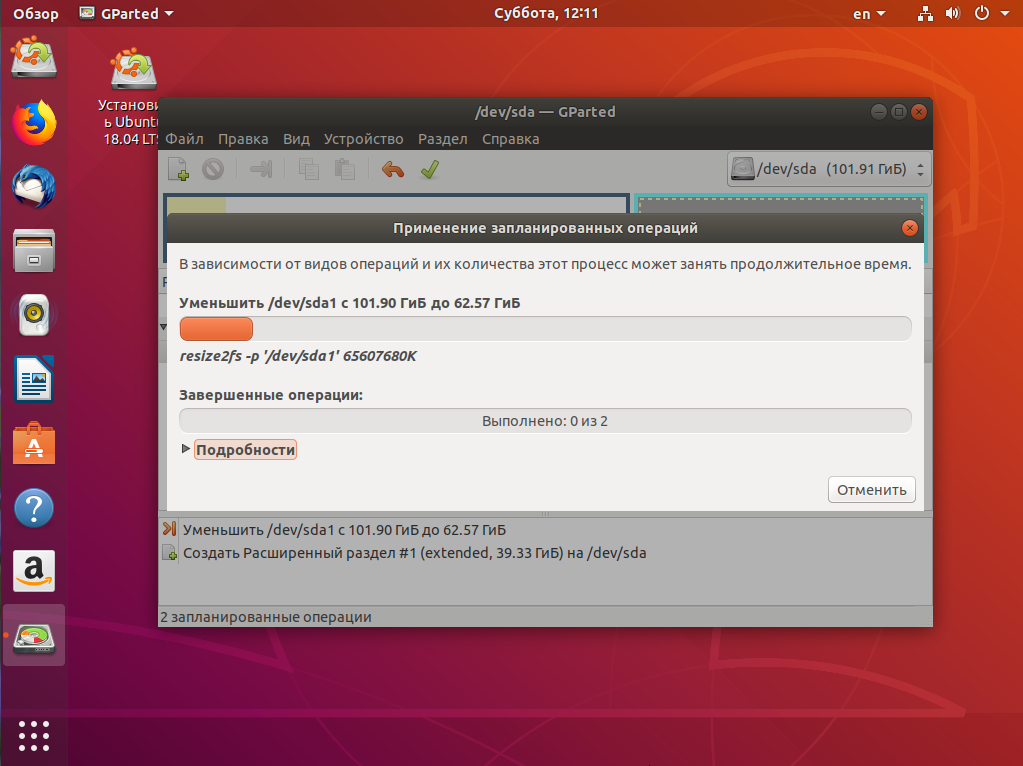
На этом в Gparted всё. Далее нам необходимо нажать зелёную галочку или Правка -> Применить изменения, а потом дождаться завершения всех операций.

2. Разметка диска в Windows
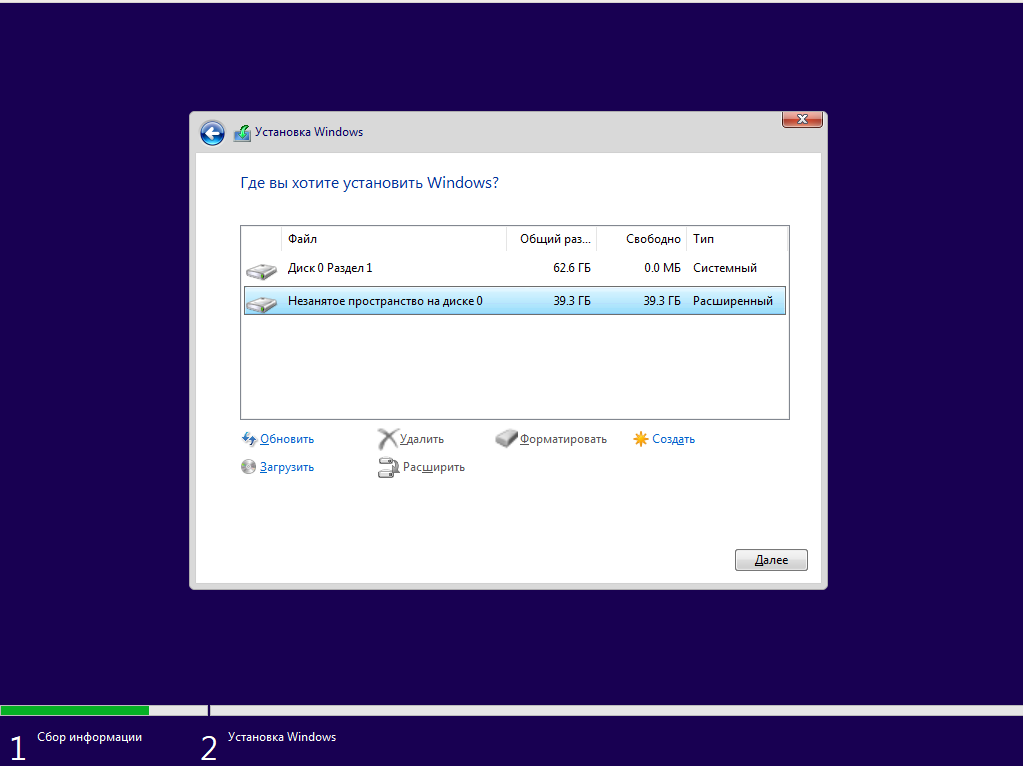
Теперь надо разобраться, как поставить Windows после Linux. Я не буду рассматривать все шаги установщика Windows. Вы их и так знаете. На шаге выбора раздела для установки кликните по свободному месту, которое подготовили раньше. Система не будет показывать расширенных разделов и других дополнительных параметров диска, только размер, это для неё нормально.
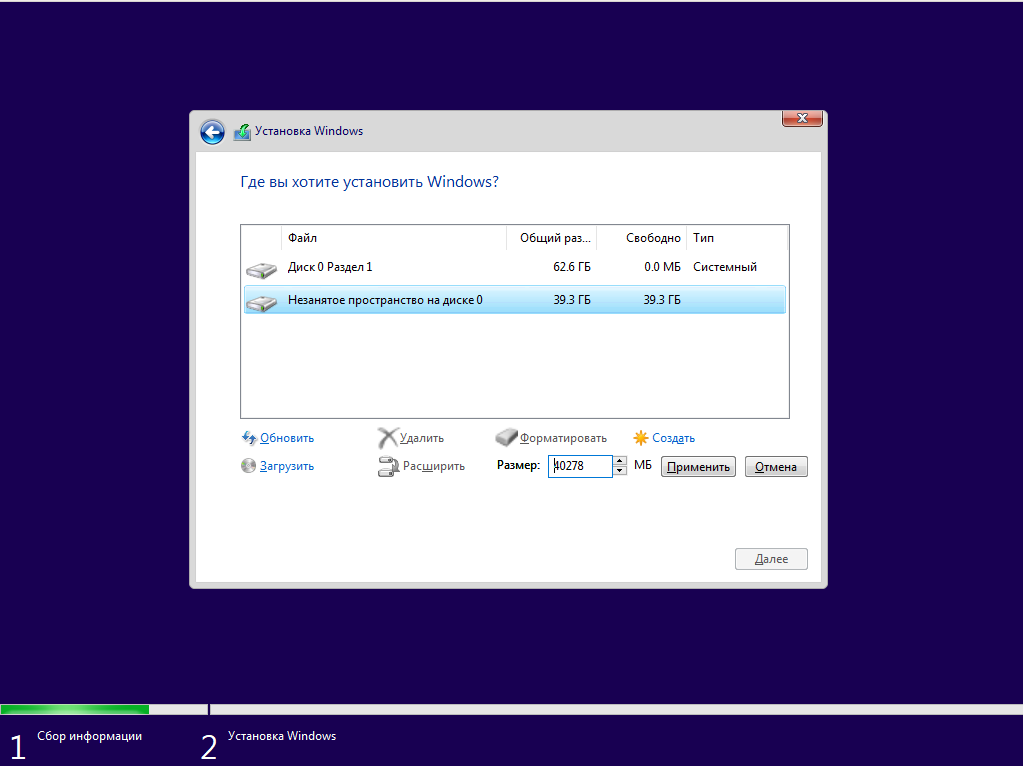
Затем нажмите кнопку Создать и выберите размер раздела. Можно согласиться с тем, что предлагает установщик:
Затем согласитесь на создание дополнительных разделов для системных файлов:
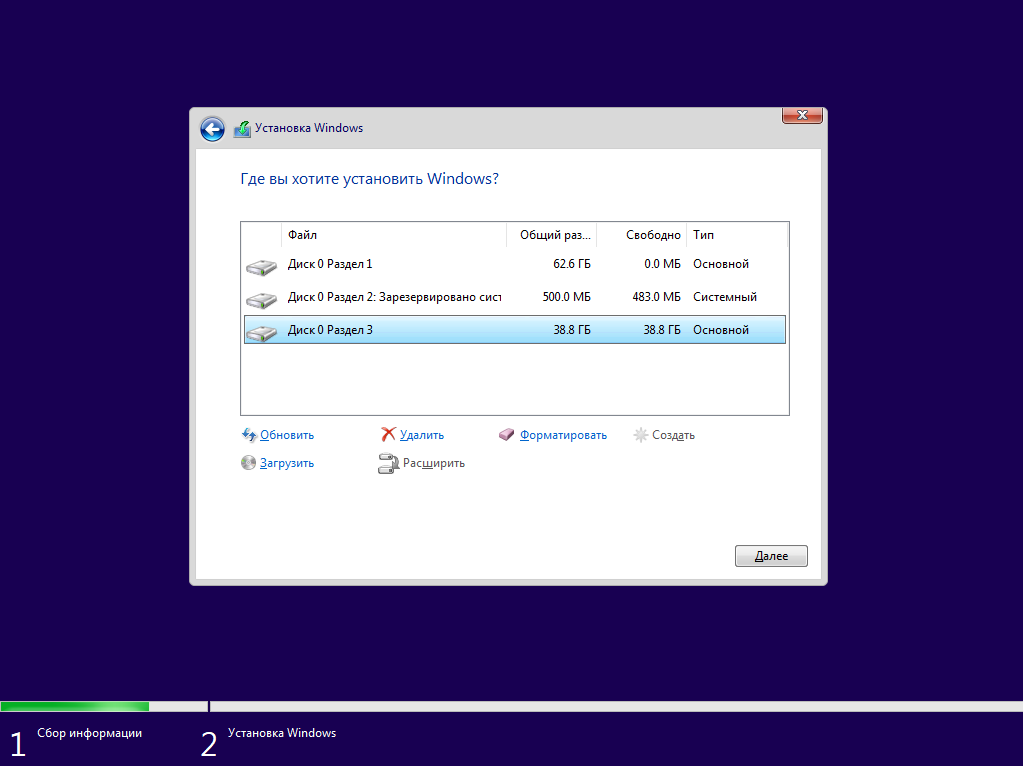
Дальше выбирайте только что созданный системный размер и нажимайте Далее. Осталось дождаться завершения установки.
3. Восстановление загрузчика Linux
После того, как вы окажетесь на рабочем столе Windows, работа с Windows будет завершена, и вам надо снова загрузиться с LiveCD Ubuntu или дистрибутива Linux, который у вас установлен. Дальше мы будем выполнять действия, описанные в статье о восстановлении загрузчика Grub.
Сначала нам нужно примонтировать корневой раздел с Linux, в моём случае это /dev/sda1:
sudo mount /dev/sda1 /mnt
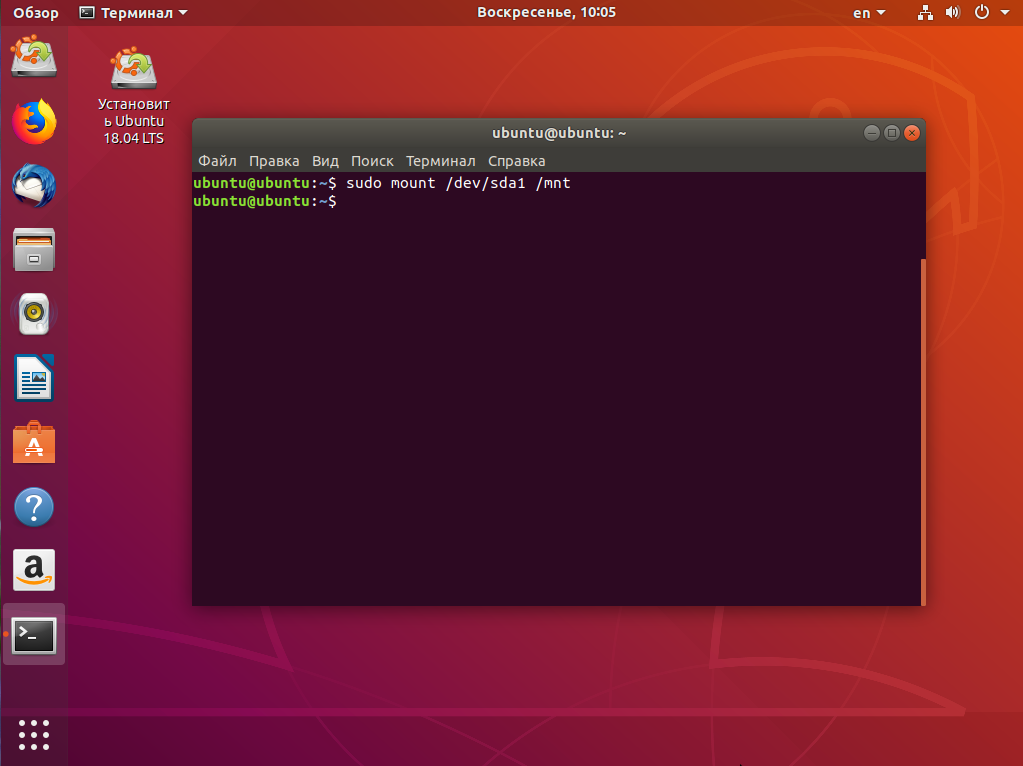
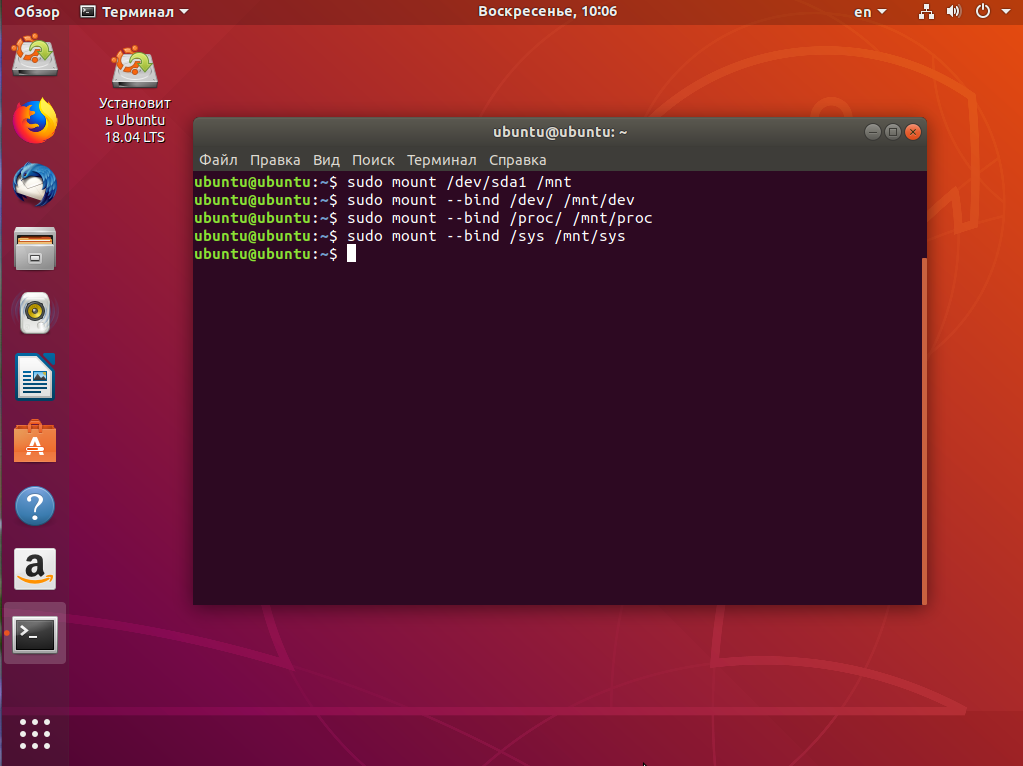
Если раздел /boot у вас также существует отдельно, его тоже надо примортировать. Затем подключаем подсистемы взаимодействия с ядром в папку /mnt, куда мы раньше примонтировали корень:
sudo mount --bind /dev/ /mnt/dev/
sudo mount --bind /proc/ /mnt/proc/
sudo mount --bind /sys/ /mnt/sys/
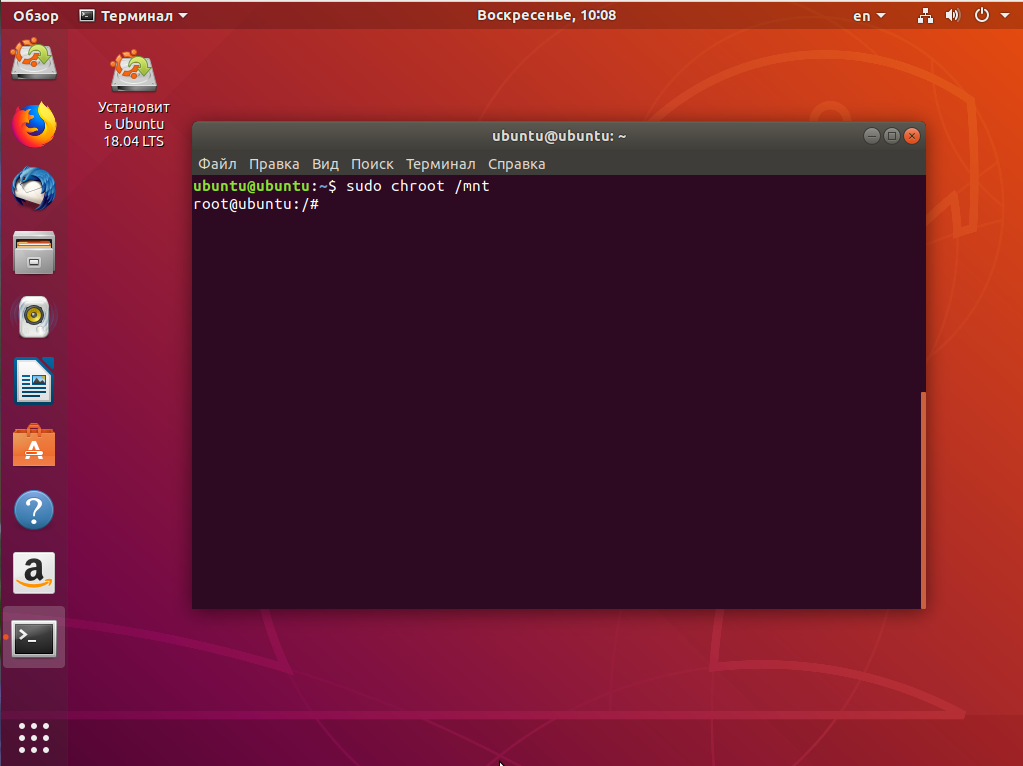
И переходим в окружение нашего установленного ранее Linux с помощью команды chroot:
sudo chroot /mnt/
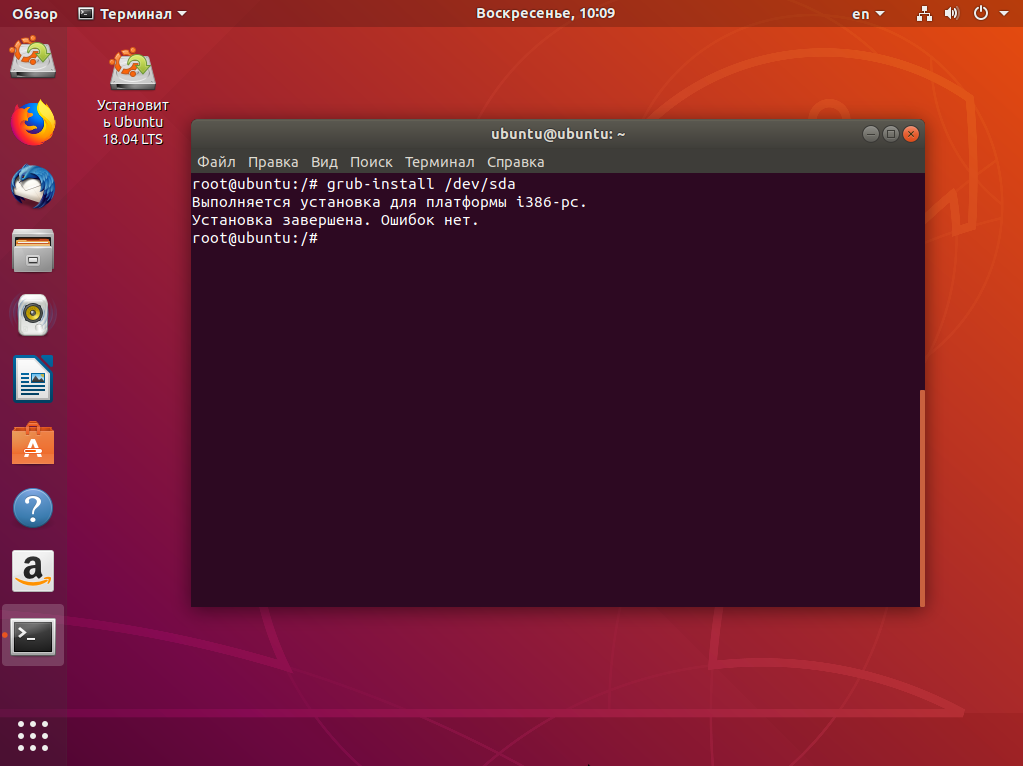
Далее мы можем заняться восстановлением загрузчика. Сначала установим его на диск:
grub-install /dev/sda
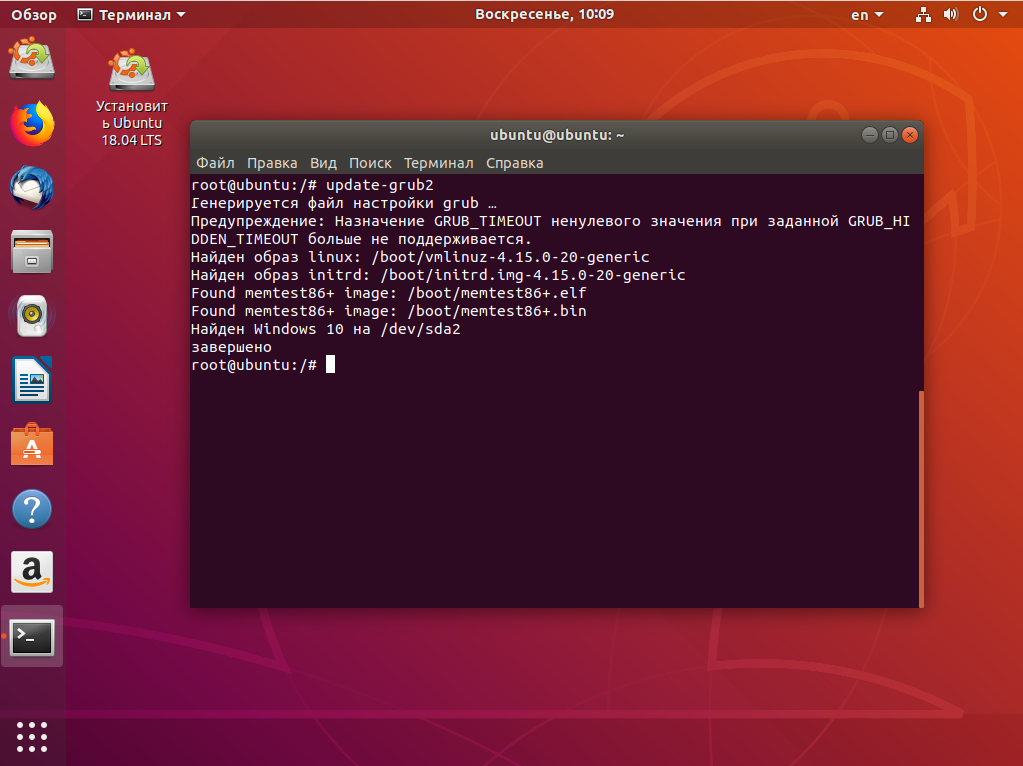
Затем создадим новый конфигурационный файл, в котором уже будет наша только что установленная Windows:
update-grub2
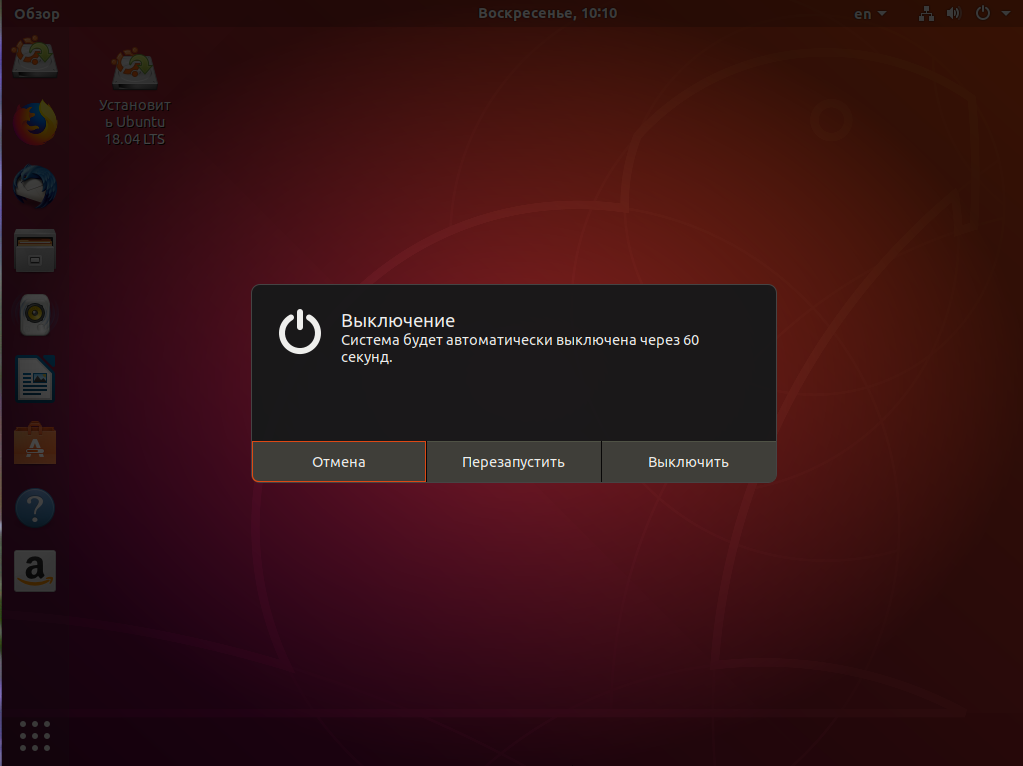
Дальше осталось перезагрузить компьютер:
Теперь в качестве загрузчика будет использоваться Grub2 и в списке операционных систем отобразится Ubuntu и Windows, чего мы и добивались:
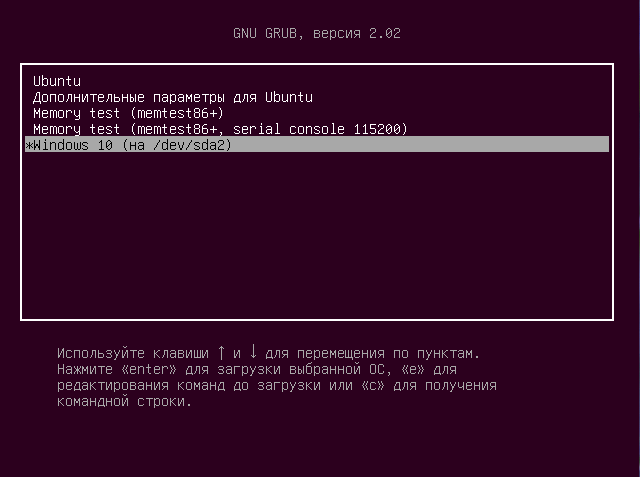
Выводы
В этой статье мы рассмотрели, как выполняется установка Windows после Linux. Это довольно нетипичная ситуация, но для многих пользователей информация может быть полезной. А вы используете Windows рядом с Linux? Напишите в комментариях!
Статья распространяется под лицензией Creative Commons ShareAlike 4.0 при копировании материала ссылка на источник обязательна.