
Applies ToWindows 10
Вы можете наслаждаться Windows 10 на вашем Apple Mac с помощью Boot Camp Assistant. После установки он позволит вам легко переключаться между macOS и Windows простым перезапуском вашего Mac.
Для получения подробной информации и инструкции по установке, следуйте инструкциям на https://support.apple.com/HT201468. Если вам нужна дополнительная помощь, пожалуйста, свяжитесь с поддержкой Apple, нажав на ссылку в нижней части этой веб-страницы.
Нужна дополнительная помощь?
Нужны дополнительные параметры?
Изучите преимущества подписки, просмотрите учебные курсы, узнайте, как защитить свое устройство и т. д.
Boot Camp Assistant is a built-in Mac that has a variety of uses, but for the purposes of this guide, it will be used to install Windows 10 on an Intel-based Mac. M1 Macs don’t have this app, so, if you want to install Windows on an M1 Mac, you will need to use a virtualization program, such as Parallels.
Before we show you how to install Windows 10 on your Intel-based Mac using Boot Camp Assistant, there are several important notes that we must make.
- First and foremost, note that the Boot Camp Assistant would install Windows in a separate partition, so your macOS will not be deleted.
- Next, even though your macOS partition and the data in it won’t be touched, it’s still highly advisable to not take any chances and first back up your data before proceeding if there are any important files stored on your Mac that haven’t been backed up yet.
- Thirdly, before starting the installation, make sure that there’s enough free space on your Mac so that the machine’s drive would be able to accommodate the new operating system. As already noted, once the installation finishes, both macOS and Windows would be installed on your Mac in separate partitions. The Windows 10 installation takes up 64 GB of space, but it’s strongly recommended having at least 200 GB of free space before you begin the installation process, as some space empty buffer space would need to be left for both your macOS partition and your Windows partition. Also, if you are installing Windows on your Mac for the purposes of installing and playing Windows games, you will also need to account for the space that the game you want would take on your Mac.
Now, without further ado, let us show you the process of installing Windows 10 on Mac through the use of the Boot Camp Assistant app.
Windows 10 with Boot Camp Tutorial
Tutorial Overview
- Downloading the Windows 10 ISO file
- Preparing for the Installation
- Starting the installation of Windows 10
- Customizing Windows 10 and installing necessary updates
Downloading the Windows 10 ISO file
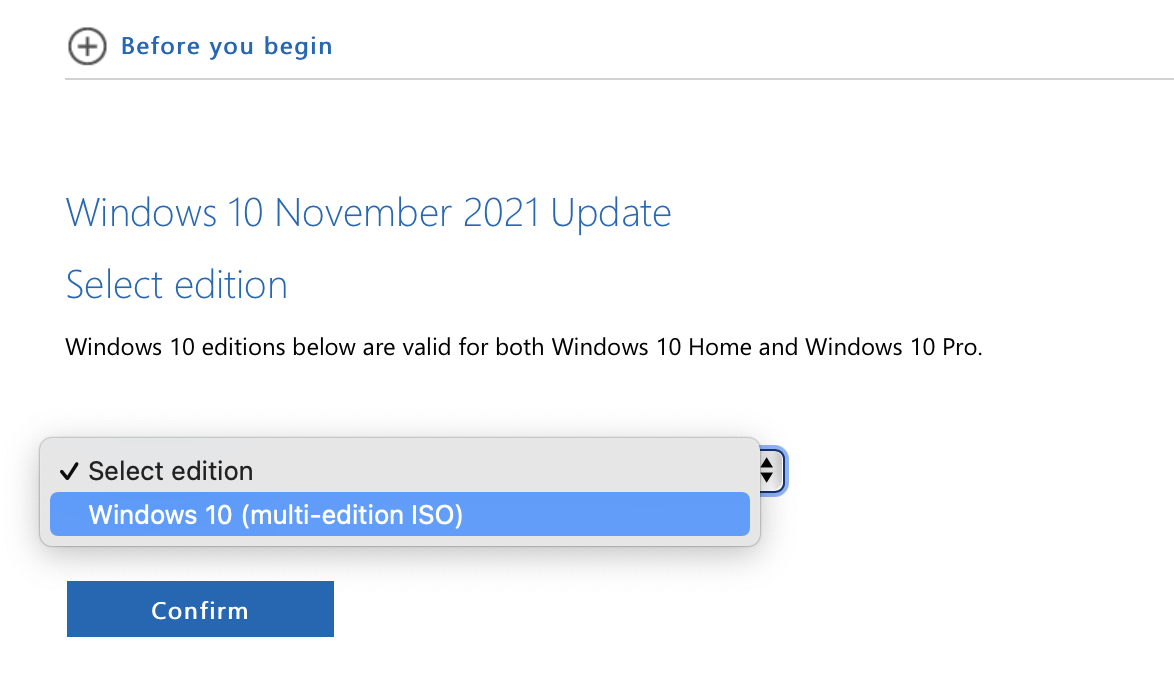
- First, you will need to acquire the Windows 10 ISO file – you can download it from this Microsoft page. Once you go to it, choose a Windows edition (there’s usually only one option, if there are more than one options, choose the Home edition) and confirm your selection.

- Next, select a language, Confirm, then click on the 64-bit Download and begin downloading the file. Since this is a big file, depending on how good your Internet is, you may need to wait for a while before the download completes.


Preparing for the Installation
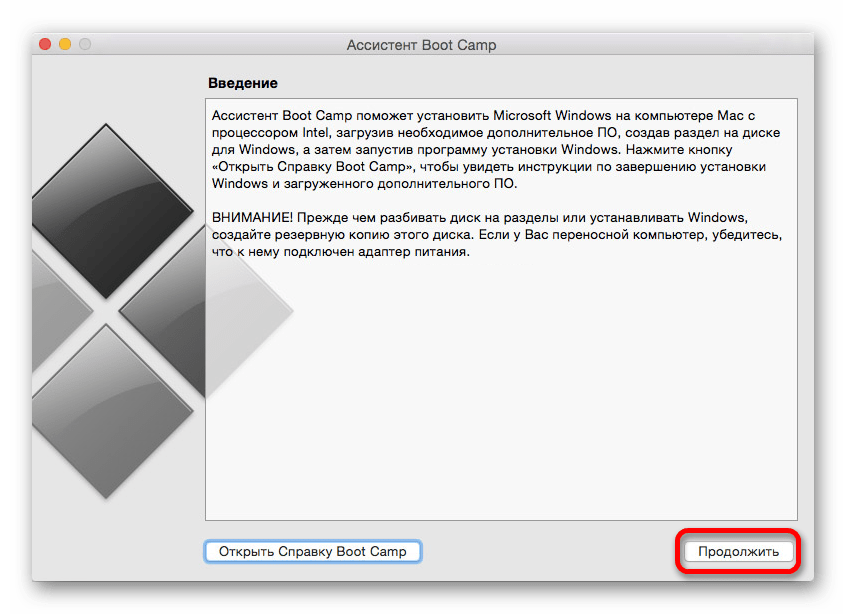
- After the ISO file is downloaded on your Mac, go to your Application folder, open Utilities, and start the Boot Camp Assistant app.

- Click Continue in Boot Camp Assistant, and then click the Choose button (you may need to click Choose twice).

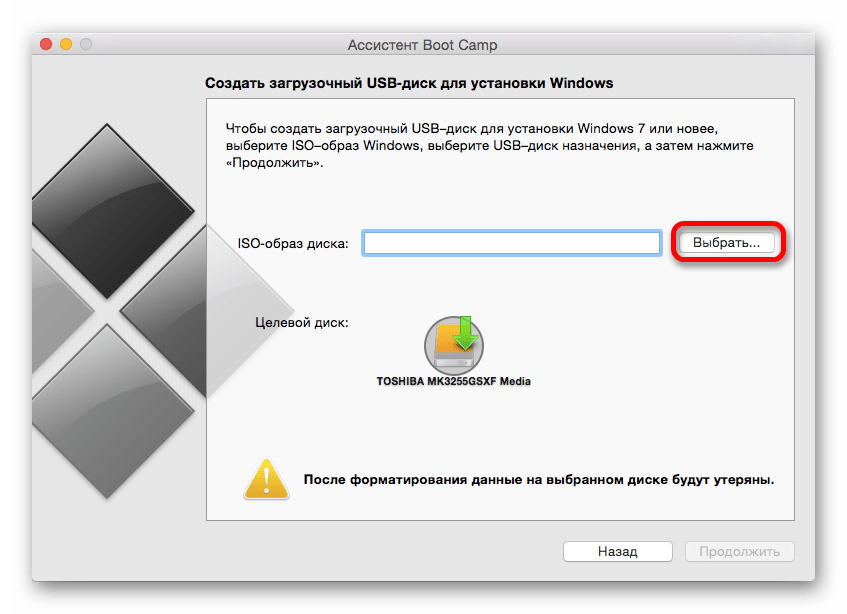
- Next, in the newly-opened window, navigate to the directory where the downloaded ISO file is stored, select the file, and click Open.

- Next, you must change the storage space distribution between the two partitions – to do that, drag the dot between them to the left or right. Be sure to leave at least 50 GB of free space to the macOS partition, and give no less than 100-120 GB to the Windows 10 one. Again, as we said earlier, if you intend to install any games in the Windows partition, allocate more space to it based on how big the game is.

- Once all preparations have been made, click Install, wait for the initial loading process to complete, then type in your password to restart your Mac and begin the installation.
Starting the installation of Windows 10
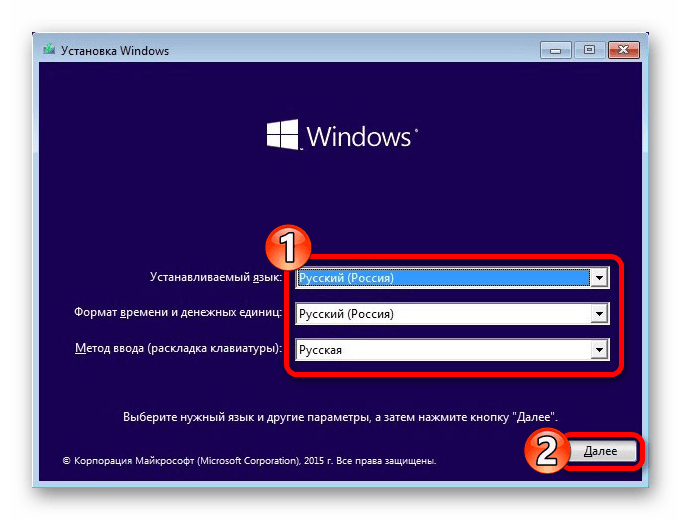
- Once the Mac restarts, and you get to a Windows logo screen, specify your location and the language you prefer, and click Next.
- After that, you should be asked to enter a Windows product key – if you don’t have one, you can still continue by selecting the I don’t have a product key/Skip button. If you do have a key, enter it and click Next.
- If you clicked I don’t have a product key/Skip, you will next be asked to pick between Windows 10 Home and Windows 10 Pro. Your choice here should be inconsequential for the most part, and should only come into relevance if you later decide to purchase a Windows 10 product key. Still, we recommend picking the Home version unless you have an actual reason to prefer the Pro version, in which case you should, of course, go for it.

- After that, all that’s left to do is to Agree to the Terms and Conditions of installing and using Windows 10 and then click Next/Install to launch the installation. While Windows 10 is being installed on your Mac, be sure that if you are using a MacBook, the machine stays plugged in the entire time so as to prevent its battery from running dry. It is very important to not shut down your Mac and to not allow it to shut down during the installation (which could take a while to complete).

Customizing Windows 10 and installing necessary updates
- Once Windows 10 installs on your Mac, the machine will restart once more and will this time boot into the Windows 10 setup screen. There, you can choose to personally customize the settings of the new OS – something we strongly recommend. There’s also the option to use the default settings, but it’s best to refrain from that if you have a couple of minutes to spare to customize everything yourself.
- After the customization, you must create a Windows account – simply type a username and a password and continue.
- Next, you will be asked to set up Cortana – the Windows virtual assistant. This step can be skipped entirely, so feel free to move on.
- Now your Mac should finally load into Windows 10, but there are a few remaining things to take care of. First, there should be a Boot Camp Assistant on your screen – click Next in it and follow the prompts to let it install drivers that your Mac needs to function properly with Windows 10. After completing the installation, agree to restart your Mac.
- This final step is optional, yet we strongly recommend performing it if you want to get the best possible Windows 10 experience on your Mac – there are two things that need to be done here:
- Search in the Start Menu (bottom-left) for Apple Update, open the item that gets found, see if there are any pending updates, install them, and restart your Mac.
- Again, from the Start Menu, go to Settings > Update & Security, select Windows Update, and install any updates that may be available there. After that, perform one final restart of your Mac.
After completing all of those steps, your Mac should be ready for use with Windows 10 and you can use its Windows partition to play games as if you were using a Windows PC.
Ways to switch between macOS and Windows 10
The simplest way to switch between partitions is to restart your Mac – when it starts booting back up, you should be asked to choose which partition to boot into (macOS or Windows).
Another way to restart your Mac into Windows while you are in macOS is to go to Apple Menu > System Preferences > Startup Disk, unlock the options in that window by pressing the padlock and entering your password, then click the Windows BootCamp option, and confirm the action.
If you want to go from Windows to macOS, click the tilted/slanted square in the bottom-right, and select Restart in macOS. If you don’t see the square icon, click the small upward arrow, and it should be revealed in the box with other icons that show up.
Download Article
A complete step-by-step guide for installing Windows 10 on your Mac
Download Article
- Downloading the Installation File
- Configuration
- Set-Up
- Installing Boot Camp Drivers
- Q&A
- Tips
- Warnings
|
|
|
|
|
|
This wikiHow teaches you how to install Windows 10 on your Mac using Boot Camp. Before you can install Windows 10 on your Mac, you must first download the Windows 10 installation file from Microsoft’s website.
How to Download Windows 10 on Your Mac
- Make sure your Mac is updated to OS X 10.10 (Yosemite) or later.
- Go to the Microsoft installer page and select the edition of Windows 10 you’d like to download.
- Select your preferred language and click 64-bit download to begin downloading the Windows 10 ISO file.
- Open Finder, click the Go menu item in the upper left-hand corner, and find the Boot Camp Assistant icon. It looks like a grey hard drive.
- Double-click the icon, click continue when prompted, then click choose.
- Select and open your Windows 10 ISO file.
- Insert an 8gb or higher sized flash drive and click install.
-

To do so, click the Apple menu

, then click About This Mac. Your Mac must meet the following requirements:
- OS X 10.10 (Yosemite) and later
- One of the following Mac models:
- MacBook Pro (2012 and up)
- MacBook Air (2012 and up)
- MacBook (2015 and up)
- iMac (2012 and up)
- Mac Mini (2012 and up)
-
Enter https://www.microsoft.com/en-us/software-download/windows10 in your preferred browser. Make sure you perform this process on your Mac so that you receive the correct files when downloading. It will look like:
Advertisement
-
Scroll down, click the Select edition drop-down box, click a Windows 10 version, and then click Confirm.
- If you don’t know which version to select, just click Windows 10.


Advertisement
-
Click the Choose one drop-down box, click your preferred language, and click Confirm.
-
It’s in the middle of the page. Doing so will prompt the Windows 10 ISO file to download to your Mac; once it finishes, you can proceed with installing Windows 10.


Advertisement
-
It’s the blue, face-shaped icon in the Dock.
-
This option is on the left side of the menu bar that’s at the top of your Mac’s screen.
-
It’s in the Go drop-down menu.
-
This icon looks like a grey hard drive.
-
It’s in the bottom-right corner of the Boot Camp Assistant window.
-
This option is in the upper-right side of the window.
-
Click it in the pop-up window to select it. You may have to navigate to the file’s location (e.g., Downloads) first.
-
It’s in the bottom-right corner of the window. Doing so will select the ISO file as the Windows 10 installation.
-
it must be at least 8GB in size, so that bootcamp can install windows on that drive for use on current the Mac. if you do not insert a USB flash drive, you will see the message to insert one..’
-
Click and drag the Windows 10 partition icon, which is on the right side of the window, left to increase the amount of hard drive space or right to decrease the hard drive space.
- If you’re satisfied with the amount of space reserved for Windows 10 and your Mac’s default operating system, skip this step.
-
Just re-do this section of steps until it gives you the results we are expecting.
-
It’s in the bottom-right corner of the window. Doing so will begin installing Windows 10 support software.
-
This will reboot your Mac into the Windows 10 installation process.


Advertisement
-
You’ll select this information from the drop-down boxes in the middle of the window.
-
If you don’t have a product key, just click I don’t have a product key.
-
You can usually select Windows 10 Home or Windows 10 Pro.
-
It’s in the bottom-right corner of the window.
-
The installation process will resume; once it completes, your Mac will reboot into the Windows 10 setup window.
-
You can click either Customize or Use Express settings.
- Customize will allow you to go through and enable or disable specific features of Windows 10’s personalization.
- Use Express settings automatically enables all personalization features for Windows 10. You can disable these later if you like.
-
Depending on your selected setup option, this process will vary.
-
This entails adding a name for the primary user, as well as adding a password if you like.
-
Cortana is Windows 10’s version of Siri; you can click Use Cortana to set up your Cortana preferences, or click Not now to bypass the setup for now.
- If you do decide to set up Cortana, you’ll do so before proceeding to the next step.
-
Once it does, the only thing left to do is finish installing the drivers needed to run Windows 10 on your Mac.


Advertisement
-
This button is in the bottom-right corner of the Boot Camp window.
-
Do so begins the drivers’ installation process.
-
This setup process installs drivers to help Windows 10 work with your Mac’s hardware (e.g., the touch bar on newer Macs), so you may see several pop-up windows with different drivers to install.
-
It’s at the bottom of the window. This will restart your computer, thereby completing the installation process. You have successfully installed Windows 10 on your Mac.
- To switch between macOS and Windows 10, restart your computer and hold down the ⌥ Option key, then select your preferred operating system from the Startup Manager.


Advertisement
Add New Question
-
Question
Can I switch back to macOS?
Yes. To switch between macOS and Windows 10, restart your computer and hold down the Option key, then select your preferred operating system from the Startup Manager.
Ask a Question
200 characters left
Include your email address to get a message when this question is answered.
Submit
Advertisement
-
The Windows 10 Pro version is built around features that advanced users will benefit from. Unless you have extensive experience with Windows, you can probably get by with the Windows 10 Home version.
-
Back up the Mac device to an external hard drive to prevent data loss.
-
If your current USB flash drive has data, back up that drive as well. The bootcamp program will wipe all data off that flash drive.
Thanks for submitting a tip for review!
Advertisement
-
If your Mac only barely meets the minimum requirements to host Windows 10, consider upgrading to a newer Mac first. Maybe think about getting a Windows 10 computer as well.
Advertisement
About This Article
Article SummaryX
1. Go to https://www.microsoft.com/en-us/software-download/windows10.
2. Download the Windows install file.
3. Install and launch Boot Camp.
4. Open the Windows ISO in Boot Camp.
5. Insert a USB flash drive.
6. Create a Windows 10 partition.
7. Click Install.
8. Follow the Windows installer instructions.
Did this summary help you?
Thanks to all authors for creating a page that has been read 65,540 times.
Is this article up to date?
Некоторые пользователи Mac хотели бы попробовать Windows 10. У них есть такая возможность, благодаря встроенной программе BootCamp.
Устанавливаем Windows 10 с помощью BootCamp
Используя BootCamp, вы не потеряете производительность. К тому же, сам процесс установки лёгкий и не имеет рисков. Но учтите, что у вас должна быть OS X не меньше 10.9.3, 30 Гб свободного пространства, свободная флешка и образ с Виндовс 10. Также не забудьте сделать резервную копию с помощью «Time Machine».
- Найдите требуемую системную программу в директории «Программы» — «Утилиты».
- Кликните «Продолжить», чтобы перейти к следующему шагу.
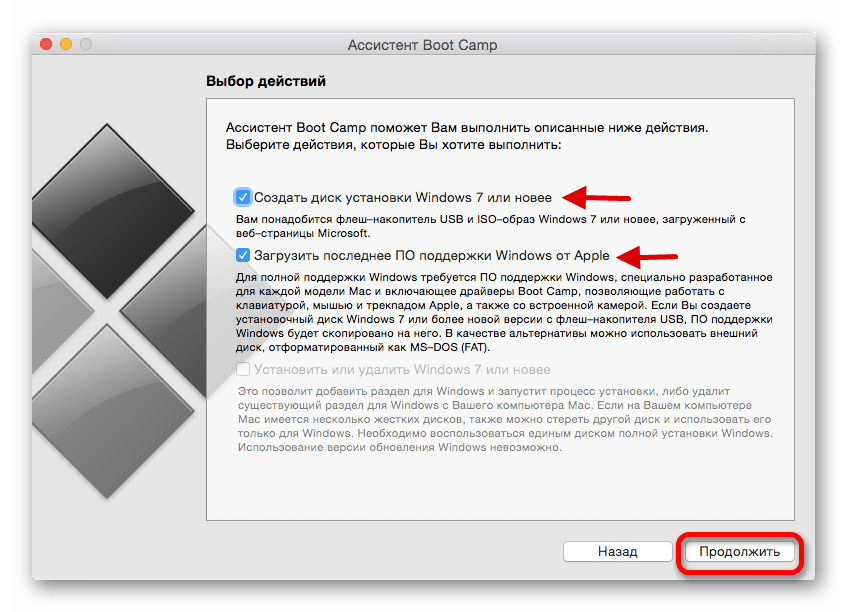
- Отметьте пункт «Создать диск установки…». Если у вас нет драйверов, то отметьте и пункт «Загрузить последнее ПО…».
- Вставьте флеш-накопитель, и выберите образ операционной системы.
- Согласитесь с форматированием флешки.
- Дождитесь завершения процесса.
- Теперь вам будет предложено создать раздел для Виндовс 10. Для этого выделите как минимум 30 гигабайт.
- Перезагрузите устройство.
- Далее появится окно, в котором вы должны будете настроить язык, регион и т.п.
- Выберите ранее созданный раздел и продолжите.
- Подождите окончания установки.
- После перезагрузки установите необходимые драйвера с накопителя.

Чтобы вызвать меню выбора систем, зажмите Alt (Option) на клавиатуре.
Теперь вы знаете, что с помощью BootCamp можно легко установить Windows 10 на Mac.
Наша группа в TelegramПолезные советы и помощь
Какой бы прекрасной и самодостаточной системой macOS не была, некоторым ее пользователям требуется время от времени поработать в Windows. Кто-то хочет поиграть, а кому-то надо поработать в специализированных программах, аналогов которых для Mac просто нет. Да и просто желание разнообразить рабочую среду понять можно – так интересно посмотреть на эволюцию Windows и ее новые возможности.

♥ ПО ТЕМЕ: Что лучше – Windows или Mac? 12 весомых причин купить именно компьютер Apple.
Оказывается, приобретать отдельный компьютер для Windows вовсе не обязательно – эту операционную систему можно установить и на Mac, причем параллельно с основной. Инструмент Boot Camp позволяет разместить полноценную вторую операционную систему, выгодно отличаясь от решений виртуализации с их ограничениями.
♥ ПО ТЕМЕ: Какой ресурс аккумулятора MacBook и как узнать количество циклов перезарядки.
Содержание статьи
- Что такое Boot Camp?
- На какие Mac можно установить Windows 10 через Boot Camp?
- Сколько места нужно для установки Windows 10 на Mac?
- Будет ли работать Magic Mouse и Magic Keyboard в Windows 10?
- Нужна ли USB-флешка для создания загрузочного диска Windows 10?
- Откуда скачать установочный ISO-образ Windows 10?
- У меня нет кода активации Windows, можно ли установить систему без него?
- Что будет, если не активировать установленную Windows 10 на Mac позднее?
- Как установить Windows 10 на Mac
- Как запускать и переключаться между Windows 10 и macOS на компьютере с Boot Camp
- Как удалить Windows с компьютера Mac?
Boot Camp — это стандартное предустановленное в macOS приложение, позволяющее легально произвести установку Windows на компьютер Mac, а также осуществлять переключение между ОС при загрузке. Boot Camp для Mac позволит и быстро развернуть Windows, и обеспечить стабильную работу этой системы, дав ей максимум аппаратных ресурсов компьютера.
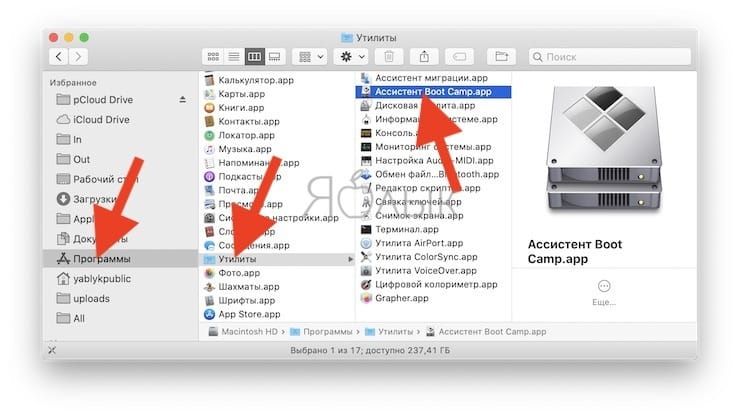
Найти приложение Ассистент Boot Camp на macOS можно по пути Программы → Утилиты или в окне Launchpad в папке Другие.
♥ ПО ТЕМЕ: Все жесты трекпада в MacBook и на внешнем Magic Trackpad + возможности Force Touch.
На какие Mac можно установить Windows 10 через Boot Camp?
Список моделей, на которые при помощи утилиты Ассистент Boot Camp есть возможность установить на Mac 64-разрядную Windows 10 редакций Home или Pro:
- iMac 2012 года или более новые версии;
- iMac Pro 2013 года или более новые версии;
- iMac / Mac mini 2012 года или более новые версии;
- MacBook Pro / Air 2012 года или более новые версии;
- MacBook 2015 года и более новые версии.
На компьютерах должны быть установлены последние обновления macOS и присутствовать программа «Ассистент Boot Camp». Именно она и отвечает за последующую установку Windows 10.
Обратите внимание, что на macOS Mojave, установленной на iMac с жестким диском на 3 ТБ, нет возможности установить Windows при помощи Boot Camp. Это связано с характерным размещением отличных друг от друга файловых систем APFS и NTFS на дисках конкретно этой емкости. На остальные же указанные выше модели вполне может быть установлена Windows 10.
♥ ПО ТЕМЕ: Локатор («Найти друзей» и «Найти Mac») на macOS: как пользоваться.
Сколько места нужно для установки Windows 10 на Mac?
Загрузочный диск Mac должен иметь не менее 64 ГБ свободного места. А для наилучшей работы места должно быть вообще не менее 128 ГБ. Именно столько потребует автоматическая установка обновлений Windows. Если вы имеете дело с iMac Pro или Mac Pro с объемом оперативной памяти (RAM) в 128 ГБ, то и на загрузочном диске потребуется высвободить минимум столько же места.
♥ ПО ТЕМЕ: Второй 4К- или 5К монитор для Mac: как выбрать и правильно подключить?
Будет ли работать Magic Mouse и Magic Keyboard в Windows?
Да, беспроводные мышь и клавиатура Apple будут отлично работать в среде Windows, но на всякий случай перед установкой приготовьте отдельные проводные USB-мышь и USB-клавиатуру. Во время установки Windows они могут понадобиться (хотя бы нажать кнопку Далее, как на скриншоте ниже), так как Magic Mouse и Magic Keyboard определятся в системе только на этапе завершения установки, тогда как на начальном этапе потребуются действия пользователя, а устройства ввода могут не работать.

♥ ПО ТЕМЕ: Как конвертировать фото в форматы jpg, png, gif, tiff, bmp на Mac.
Нужна ли USB-флешка для создания загрузочного диска Windows?
Наличие USB-флешки объемом не менее 16 ГБ необходимо для установки Windows на старые компьютеры Mac (выпущенные в 2015 году и ранее).
♥ ПО ТЕМЕ: Как на Mac набрать символ доллара $, рубля ₽, евро € и т.д.
Откуда скачать установочный ISO-образ Windows 10?
Образ 64-разрядной версии Windows 10 Pro или Домашняя (Home) в формате ISO можно вполне легально и бесплатно скачать с сайта Microsoft. Для этого:
1. Перейдите по ссылке, в выпадающем списке Выбор выпуска выберите Windows 10 и нажмите кнопку Подтвердить.
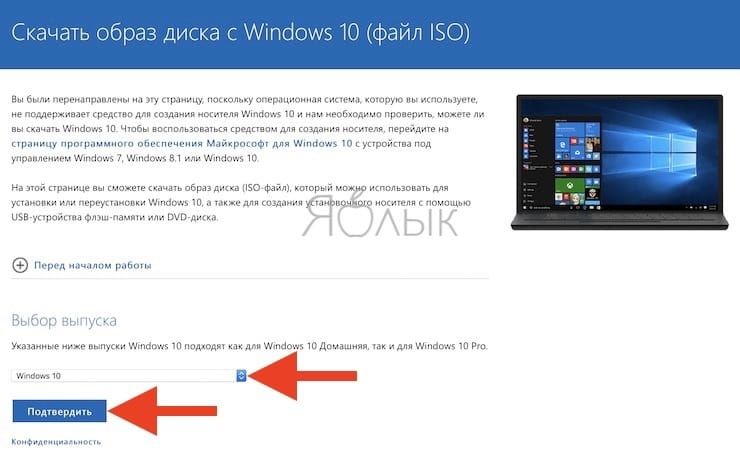
2. В выпадающем списке Выберите язык продукта выберите язык системы и нажмите кнопку Подтвердить.
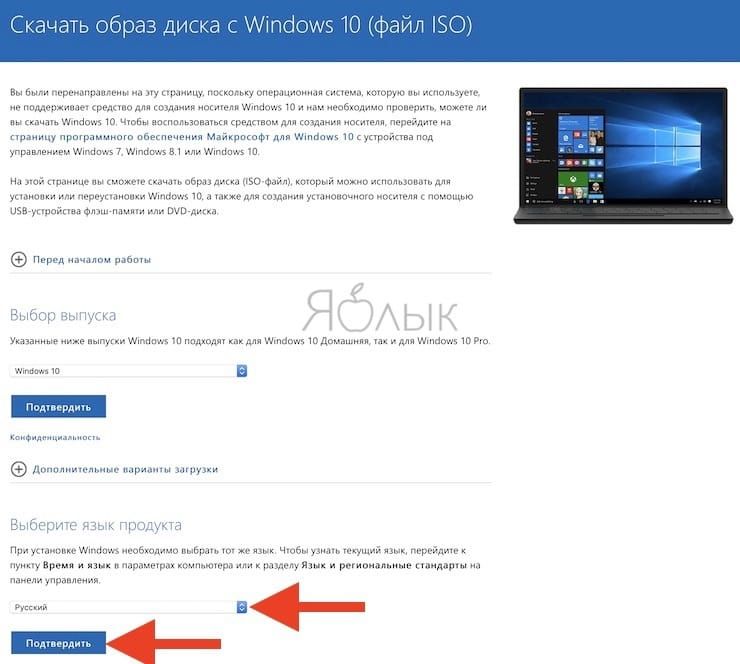
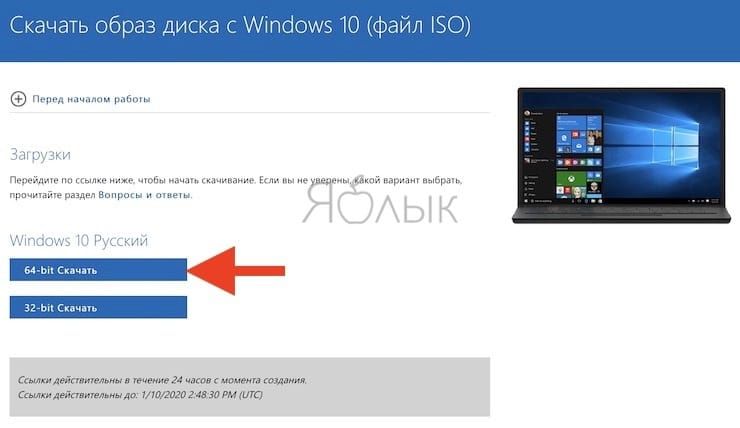
3. Нажмите на появившуюся кнопку-ссылку 64-bit Скачать. Ссылка будет доступна в течение 24 часов с момента создания.
♥ ПО ТЕМЕ: Закладки и «Избранное» в браузере Safari на Мас: Полное руководство.
У меня нет кода активации Windows, можно ли установить систему без него?
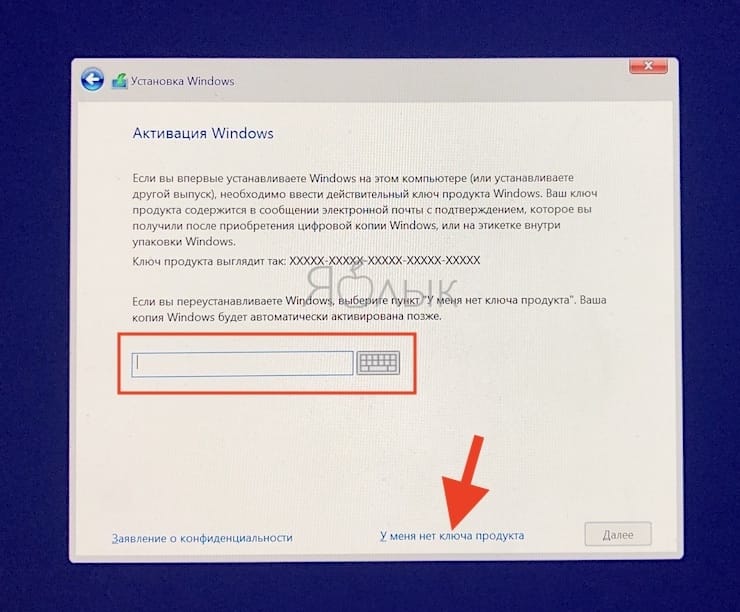
Во время установки Windows на Mac пользователю будет предложено ввести код активации. Эту процедуру можно пропустить, она необязательна и не станет препятствием для дальнейшей установки.
Не спешите искать место, где можно купить ключ активации Windows, возможно, версия без активации вас вполне устроит.
Если в процессе установки оригинальной Windows 10 вы не ввели ключ активации (выбрали пункт «У меня нет ключа продукта»), то в итоге, вы все равно получите полностью работоспособную официальную систему Windows с незначительными ограничениями, касающимися параметров персонализации (изменение тем, параметров цвета, обоев и т.д.).
♥ ПО ТЕМЕ: «Горячие клавиши» для macOS, которые должен знать каждый.
Что будет, если не активировать установленную Windows 10 на Mac позднее?
Неактивированная версия Windows 10 на Mac сможет работать без ограничений по времени. Другими словами, без ввода кода активации Windows, система продолжит корректно работать без блокировок и через месяц, через год, пять и т.д.
Кроме невозможности персонализации, в параметрах системы будет указано, что Windows 10 не активирована. Также через месяц использования Windows в правой нижней части рабочего стола появится напоминание о том, что система не активирована. Повторимся, что никаких блокировок текущего сеанса работы в неактивированной версии Windows 10 не предусмотрено.
Это сообщение легко убрать при помощи изменения параметра PaintDesktopVersion в разделе реестра HKEY_CURRENT_USER\Control Panel\Desktop c 1 на 0 и последующей перезагрузкой компьютера.
При желании, вы можете приобрести код активации Windows 10 позже. Для этого, перейдите по пути: «Параметры» → «Обновление и безопасность» → «Активация» и нажмите «Перейти в магазин». На этой странице можно купить лицензионный код активации Windows 10 Home или Windows 10 Pro при помощи банковской карты. После покупки, вернитесь в «Параметры», нажмите кнопку «Изменить ключ продукта» и введите полученный лицензионный код активации Windows.
Обратите внимание, что купить код активации Windows 10 можно не только у Microsoft, но и множества реселлеров. В этом случае, как правило, лицензия обойдется значительно дешевле.
♥ ПО ТЕМЕ: Чистая установка macOS, или как переустановить (восстановить заводские настройки) Mac.
Как установить Windows 10 на Mac

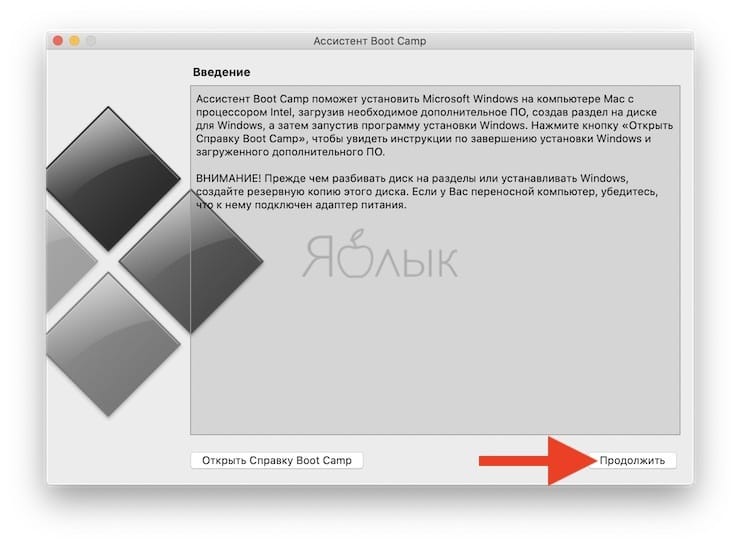
1. Чтобы установить Windows, вам понадобится утилита «Ассистент Boot Camp». Она входит в число стандартных приложений macOS.
Запустите утилиту, перейдя по пути Программы → Утилиты или воспользуйтесь окном Launchpad, в котором перейдите в папку Другие.
2. Скачайте образ ISO Windows 10 с сайта Microsoft.
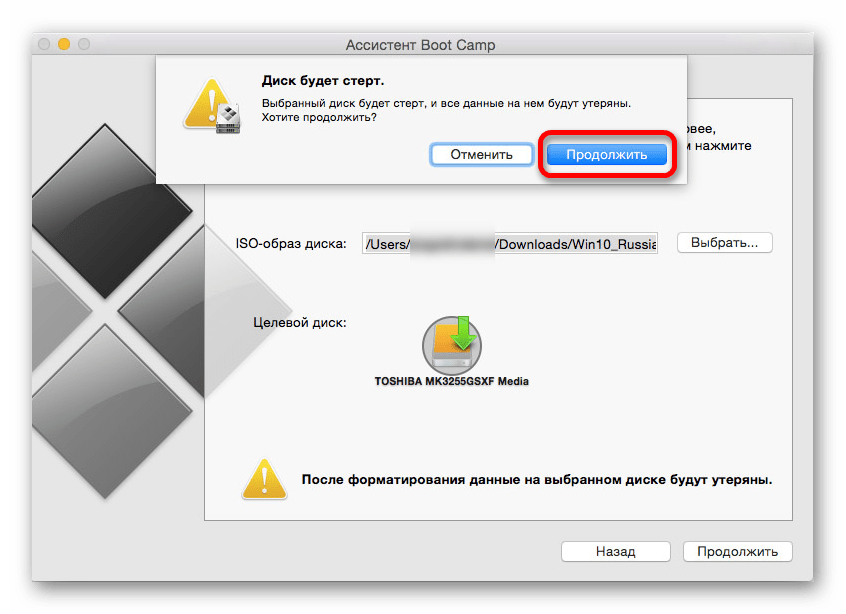
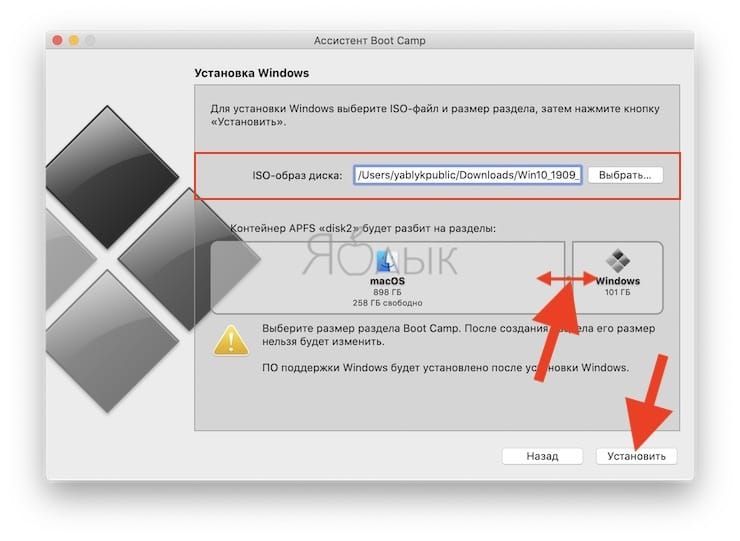
3. Нажмите кнопку Продолжить и укажите место, где хранится загруженный образ Windows.
4. Задайте размер выделенного под Windows места на диске, не менее 64 ГБ (рекомендуется 128 ГБ). На этом шаге требуется проявить определенную осторожность – изменить этот раздел в дальнейшем уже не получится. Если система нужна не просто ради ознакомления, а для установки в нее «тяжелых» игр и приложений, то лучше заранее предоставить ей побольше места.
5. Если «Ассистент Boot Camp» попросит вставить подготовленный USB-накопитель, то установите его в USB-порт вашего Mac. Этот носитель поможет создать загрузочный диск с Windows.
Для Mac с OS X El Capitan 10.11 или более новой версии macOS, для установки Windows флеш-накопитель USB не требуется.
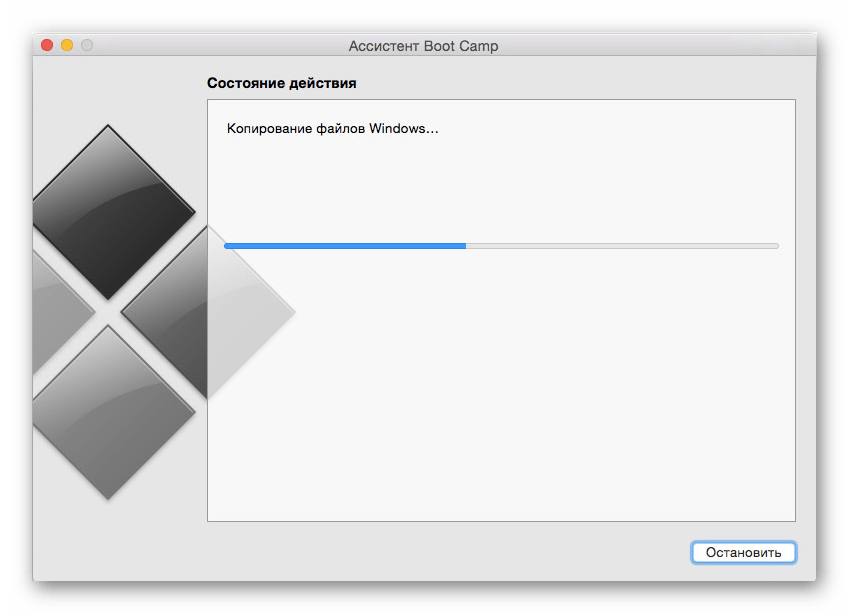
6. Дождитесь окончания загрузки из Интернета необходимых драйверов и пакетов. По окончании работы программы «Ассистент Boot Camp» компьютер осуществит перезагрузку. После этого и начнется непосредственно устанавливаться Windows.
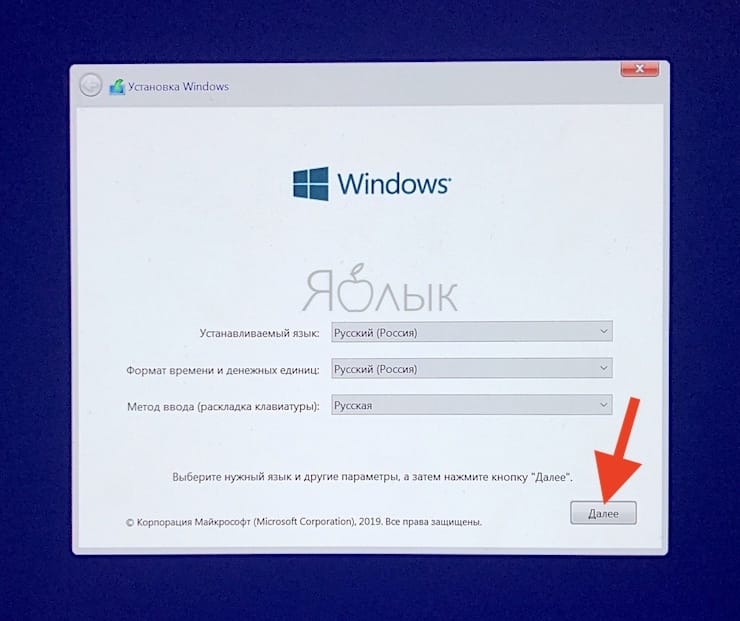
7. В самом начале процесса вы попадете в окно установки, в котором необходимо будет выбрать раздел для установки новой системы. Следует выбрать раздел BOOTCAMP. Обычно установщик уже сам автоматически выбирает этот раздел и осуществляет его форматирование.
8. Отключите от Mac все внешние USB-устройства, нажмите Далее для продолжения установки Windows.
9. После первого запуска Windows автоматически откроется установщик Boot Camp, который необходим для установки требуемых для работы системы дополнительных драйверов. Если установщик по каким-то причинам не стартовал, то запустите его вручную. Для этого:
а) в Проводнике Windows откройте временно созданный диск OSXRESERVED, который обычно обозначается буквой D.
б) Откройте папку BootCamp и запустите файл Setup.
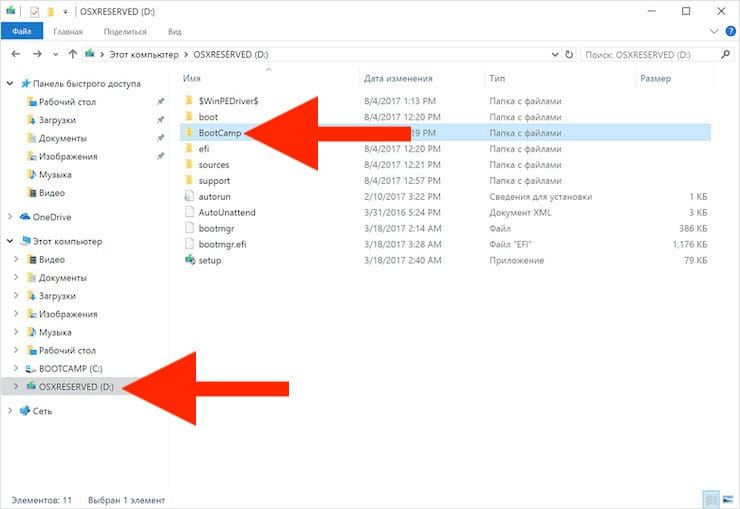
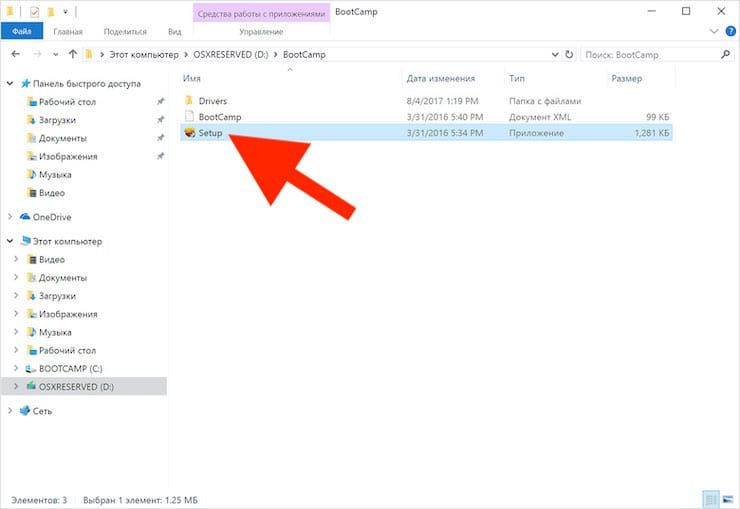
в) Разрешите программе Boot Camp внести изменения, нажатием кнопки «Да», а затем нажмите «Исправить», чтобы начать установку.
г) Перезагрузите компьютер.
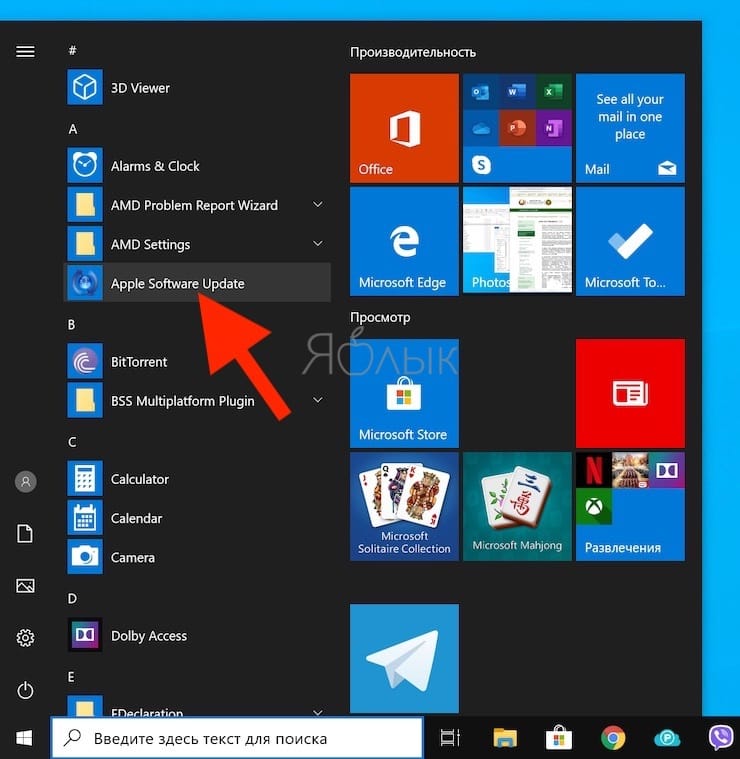
10. После завершения установки всех требуемых программ перегрузите Windows, а потом подключитесь к сети Интернет с помощью Ethernet-кабеля или Wi-Fi. Откройте панель «Пуск» найдите там утилиту Apple Software Update, запустите ее.
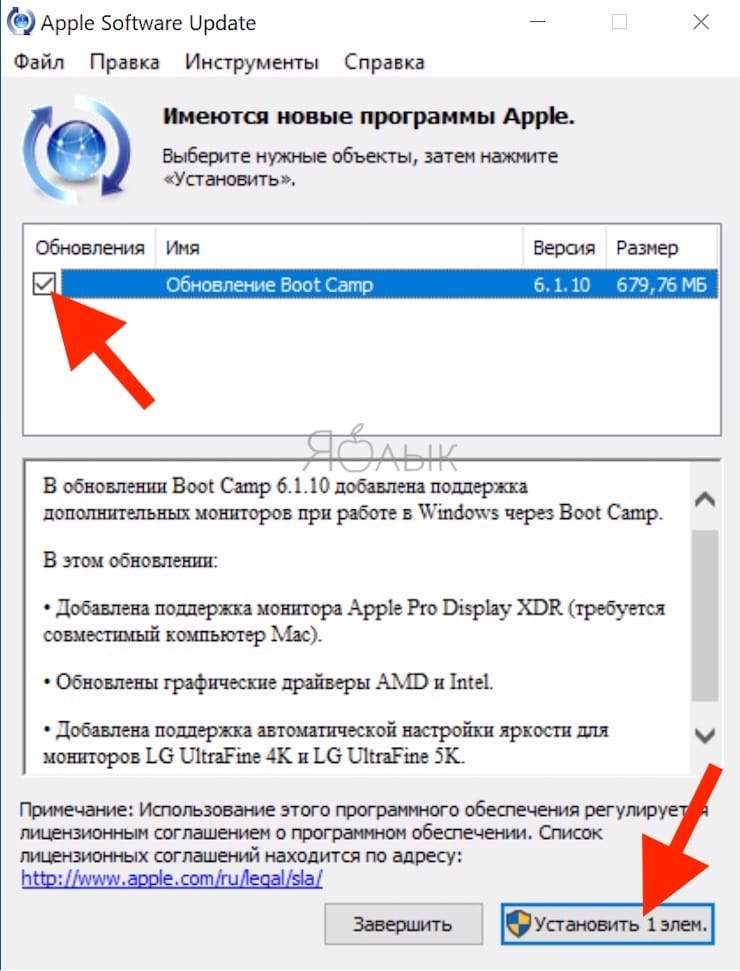
11. В этой программе выберите все доступные обновления, установите их и снова перегрузите компьютер.
♥ ПО ТЕМЕ: «Непрерывность» (Continuity): как начать работать на iPhone или iPad, а продолжить на Mac и наоборот.
Как запускать и переключаться между Windows 10 и macOS на компьютере с Boot Camp
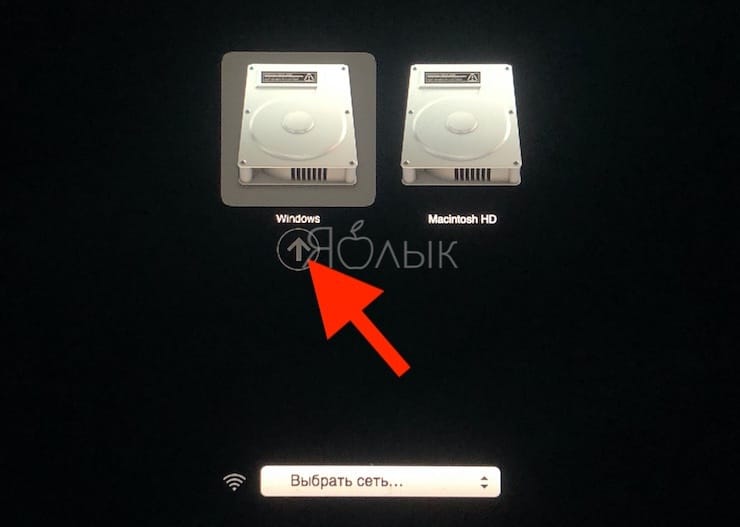
Итак, на вашем компьютере теперь имеется не только macOS, но и Windows 10. Осталось лишь понять – как запускать ту или иную операционную систему. По умолчанию, при включении компьютера загружаться будет macOS, как это и было раньше. Выбрать загрузку другой системы можно с помощью специального меню. Для его появления во время запуска системы (например, после перезагрузки или включения) нажмите и удерживайте в таком состоянии клавишу ⌥Option (Alt).
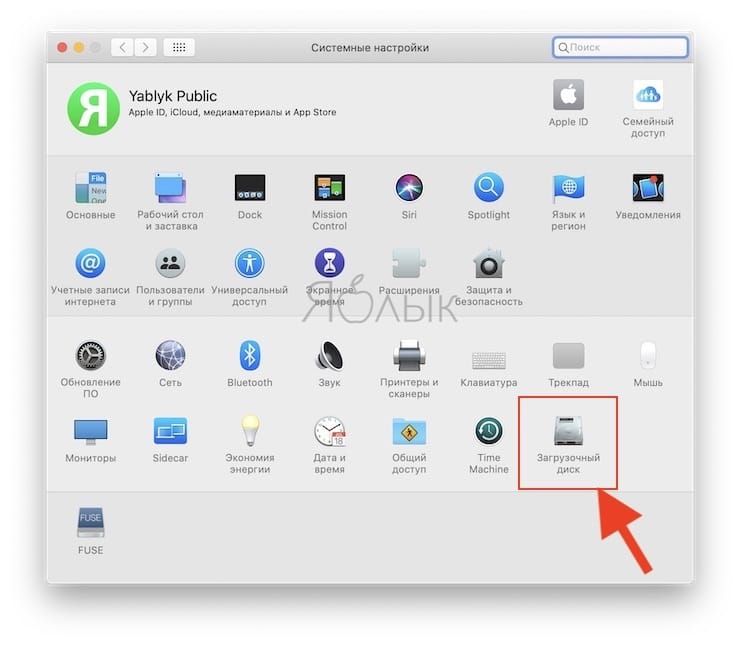
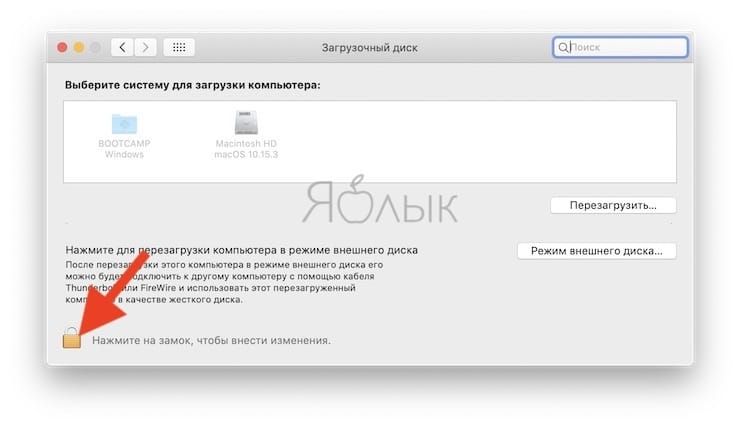
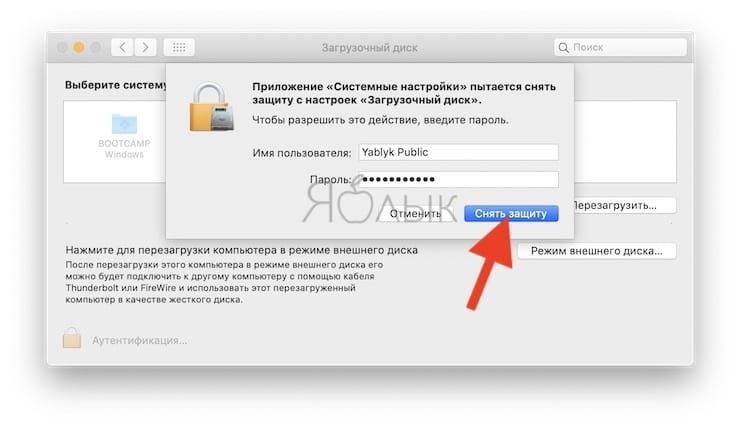
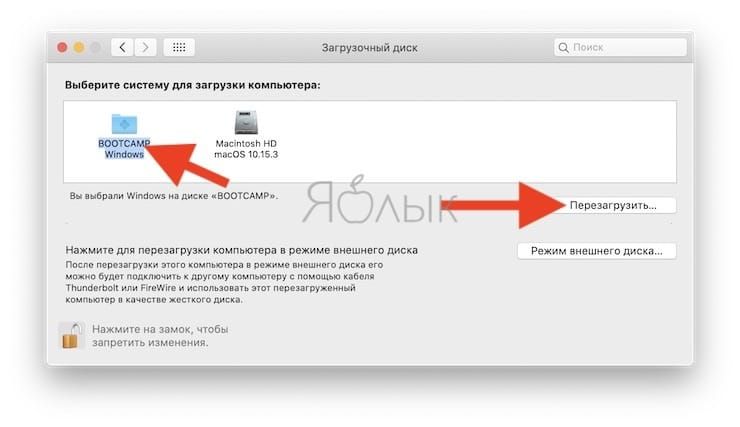
Альтернативный метод: Перейдите по пути Системные настройки → Загрузочный диск, нажмите на значок замка в левом нижнем углу окна и введите пароль администратора для получения доступа к настройкам, сделайте активным для загрузки тот раздел, куда установлена Windows (обычно BOOTCAMP) и нажмите кнопку Перезагрузить.
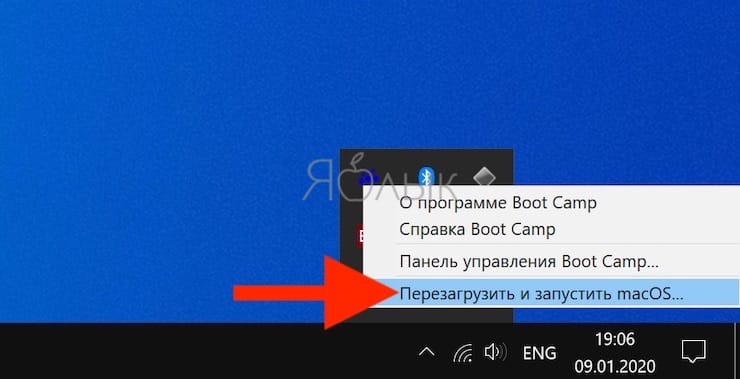
Для того чтобы быстро перейти из Windows в macOS поможет расположенная в трее утилита Boot Camp.

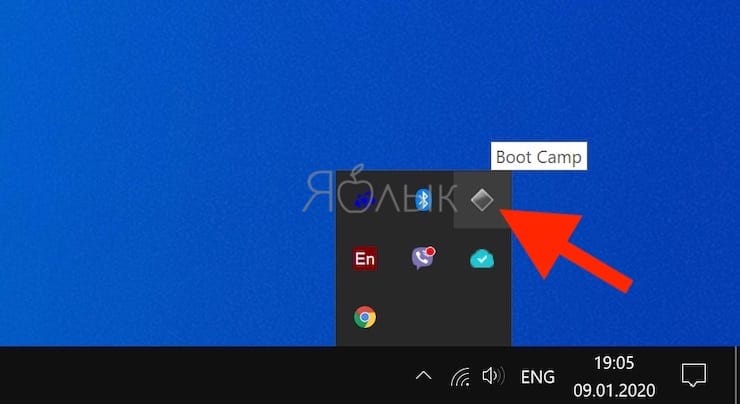
Нажмите на нее и выберите вариант Перезагрузить и запустить macOS.
♥ ПО ТЕМЕ: Как узнать дату последней чистой установки macOS на вашем Mac.
Как удалить Windows с компьютера Mac?
Удалить Windows намного проще, чем установить.
1. Отсоедините все подключенные внешние устройства от Mac.
2. Откройте приложение «Ассистент Boot Camp» и нажмите Продолжить.
3. В появившемся окне нажмите Восстановить.
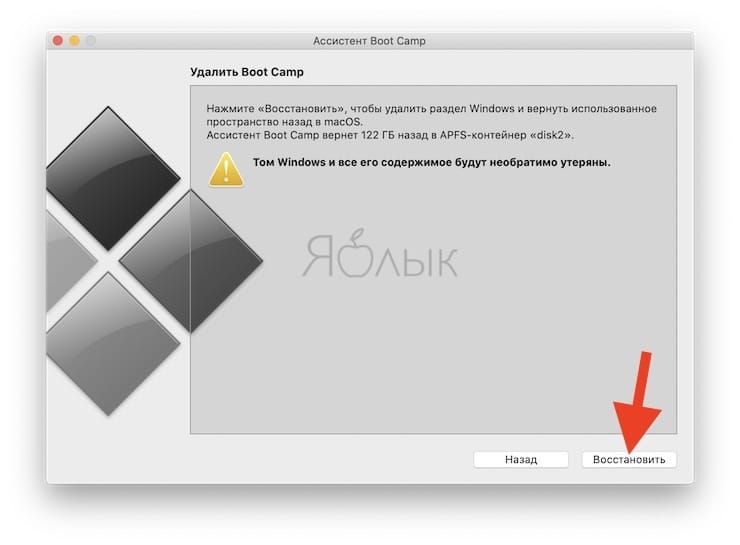
«Ассистент Boot Camp» вернет назад место, используемое под Windows, в macOS. При этом все данные с тома Windows будут безвозвратно удалены.
Смотрите также:
- Как проверить скорость накопителей SSD, HDD или USB-флешки на Mac (macOS).
- Как создать расписание режимов сна и автоматического включения Mac.
- Как поставить пароль на папку в macOS (Mac) без установки сторонних приложений.