
В этом видео вы узнаете, как устанавливать программу VirtualBox на операционную систему Windows 10.
Содержание курса — Основы компьютерной грамотности: https://drive.google.com/file/d/1qyOmKa89iFmTBnHlFbx4flshN4SuhdRY/view?usp=drive_link
Ссылка на покупку курса «Основы компьютерной грамотности»: https://www.it-black.ru/basics-of-computer-literacy
VirtualBox — это средство, позволяющее создавать на ПК виртуальную машину со своей собственной операционной системой.
Виртуальные машины используются для тестирования ПО на разных платформах: Microsoft Windows, Linux, macOS. Без виртуализации разработчикам пришлось бы держать под рукой отдельную ЭВМ под каждую ОС.
Всем виртуальным машинам выделяется пространство на физическом диске. Их операционные системы называются гостевыми, а ОС физического ПК — хостовой.
VirtualBox распространяется бесплатно и устанавливается на компьютеры под управлением операционных систем Windows, macOS и Linux.
Создадим виртуальную машину, работающую на Debian — ОС на базе Linux, которая используется для работы на ПК и серверах.
Из этой статьи вы узнаете:
- Как установить VirtualBox
- Как создать виртуальную машину
- Как её настроить
- Как правильно её запустить
Запуск и настройка программы проста и не требует специальных знаний. Для скачивания переходим по ссылке. Это не самая последняя версия VirtualBox, но для удобства мы будем работать с ней.
На странице находится список дистрибутивов для загрузки на ПК под управлением разных ОС. Мы будем устанавливать программу на ПК под управлением Windows — следовательно, выбираем версию Windows hosts. Она первая в списке.
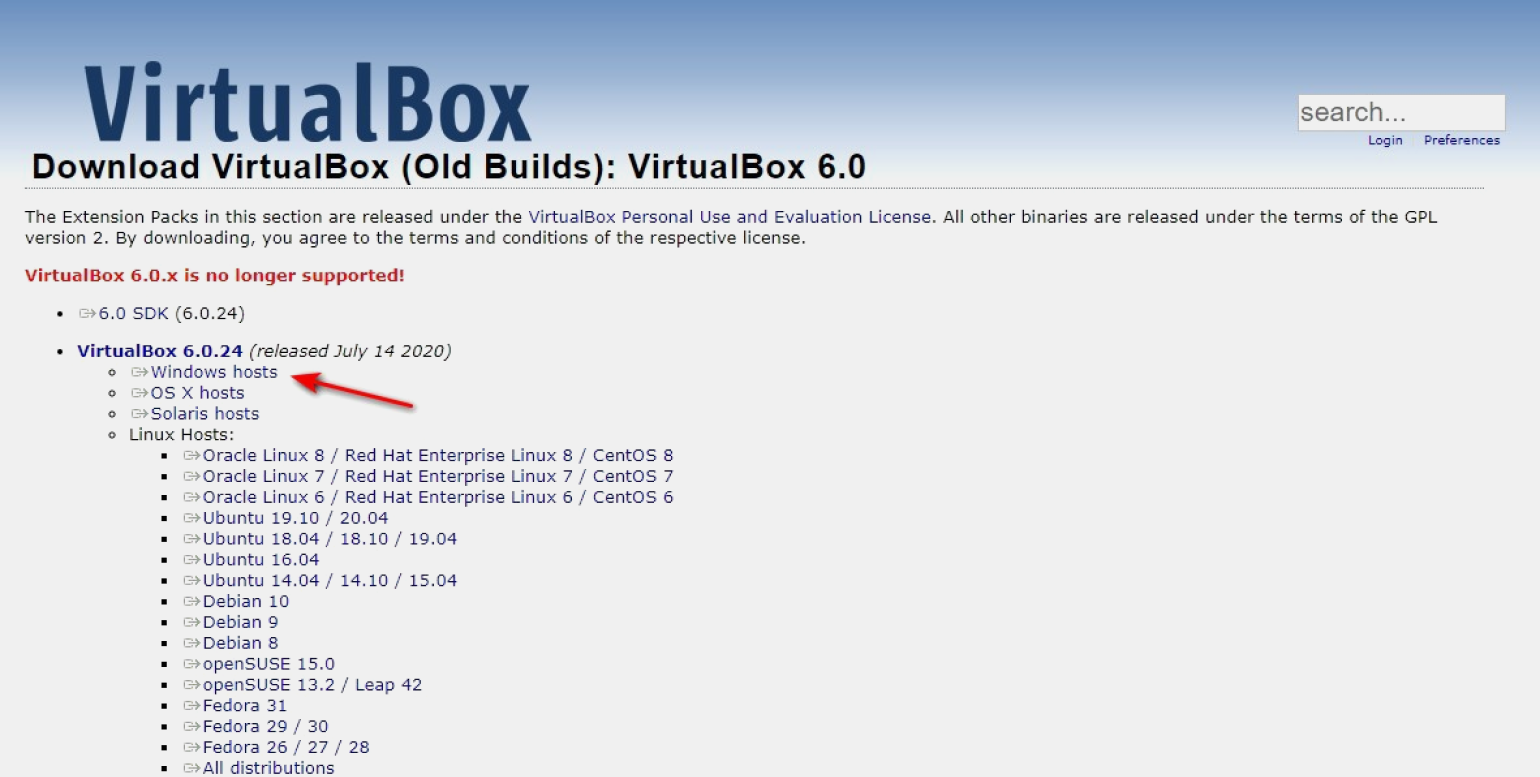
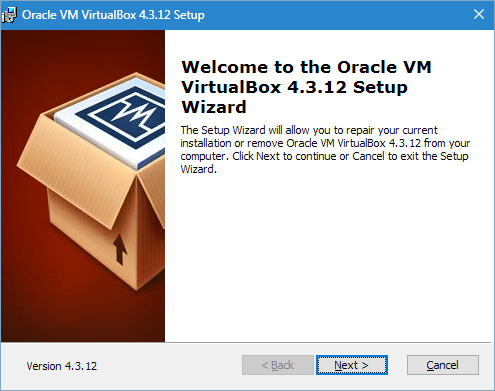
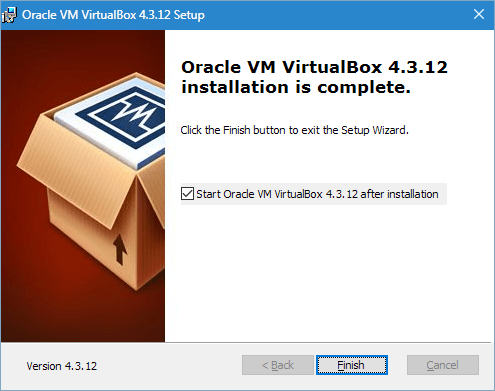
Скачиваем её на свой ПК. По завершении процесса появляется приветствие:
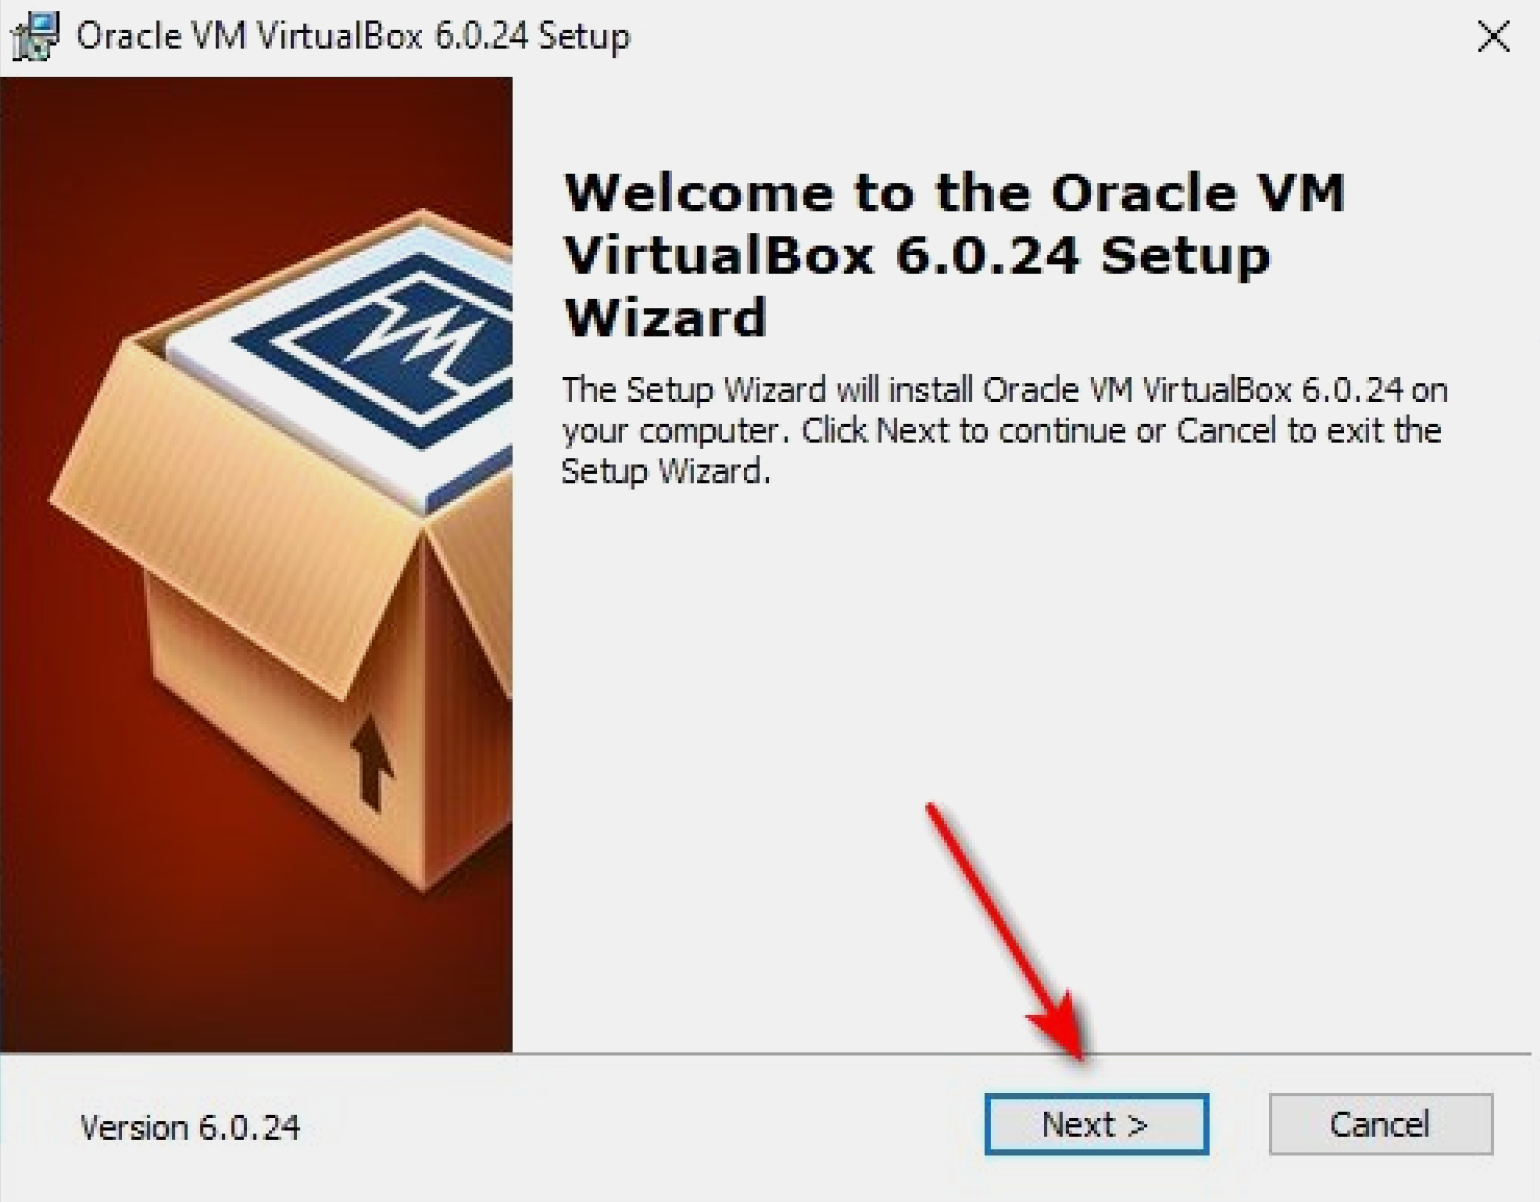
Приступаем к установке VirtualBox. В процессе могут выплывать разные предупреждения. Игнорируем их и нажимаем Next. В финале нам откроется главный экран программы с приветствием на русском языке:
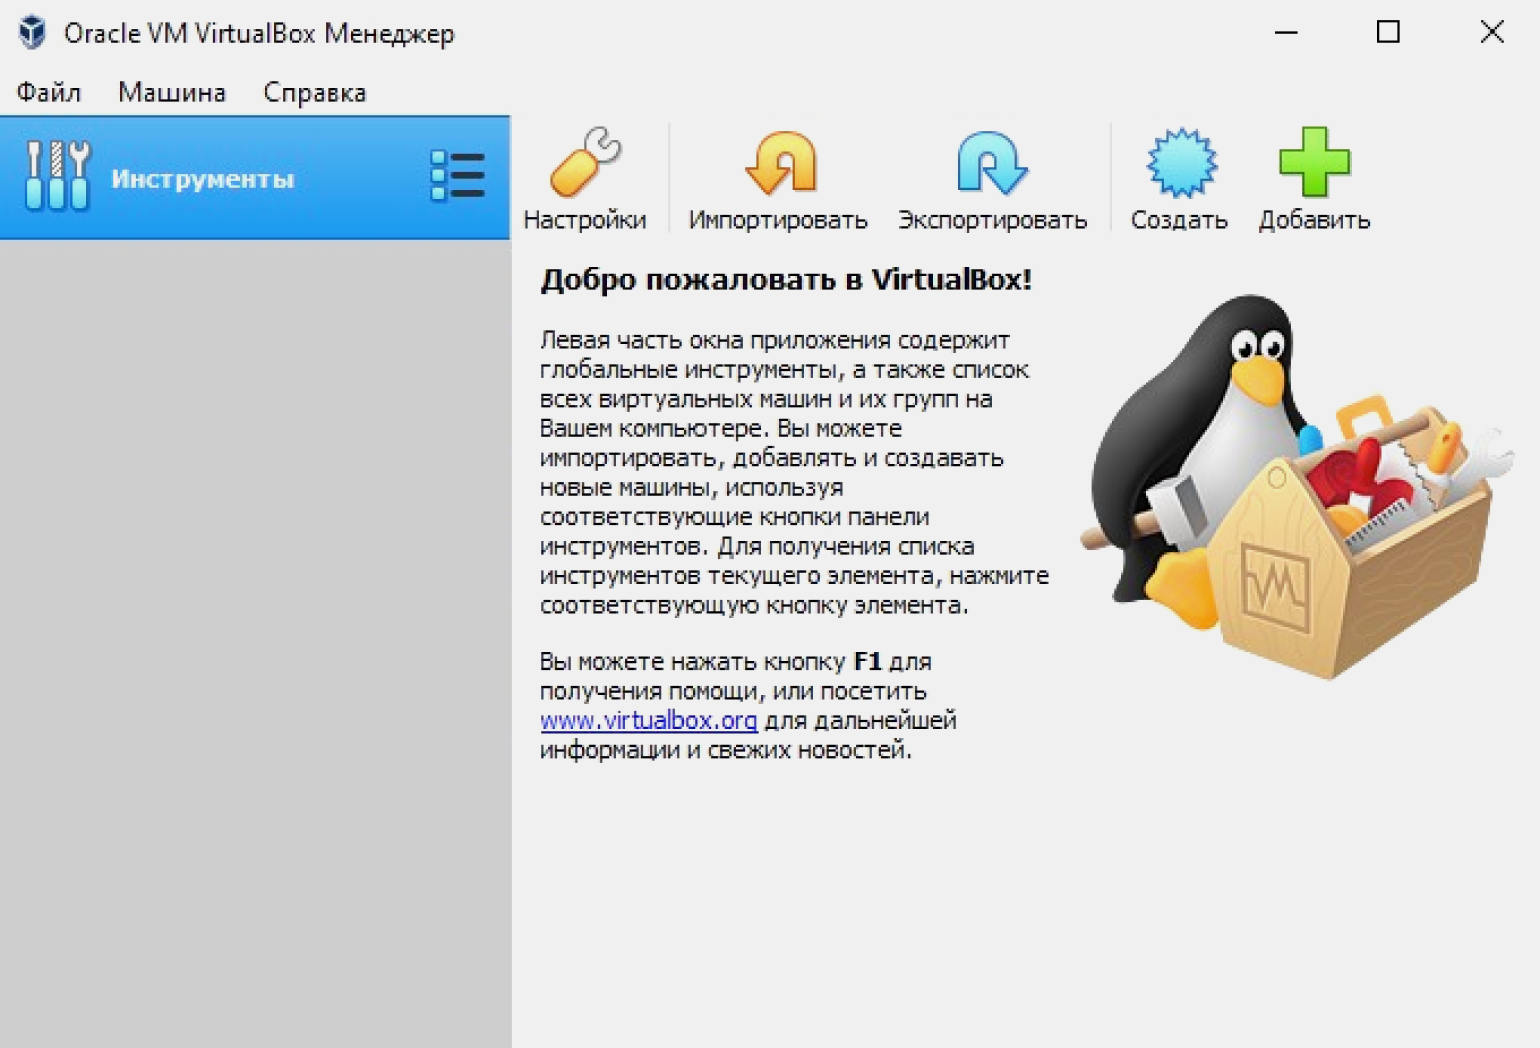
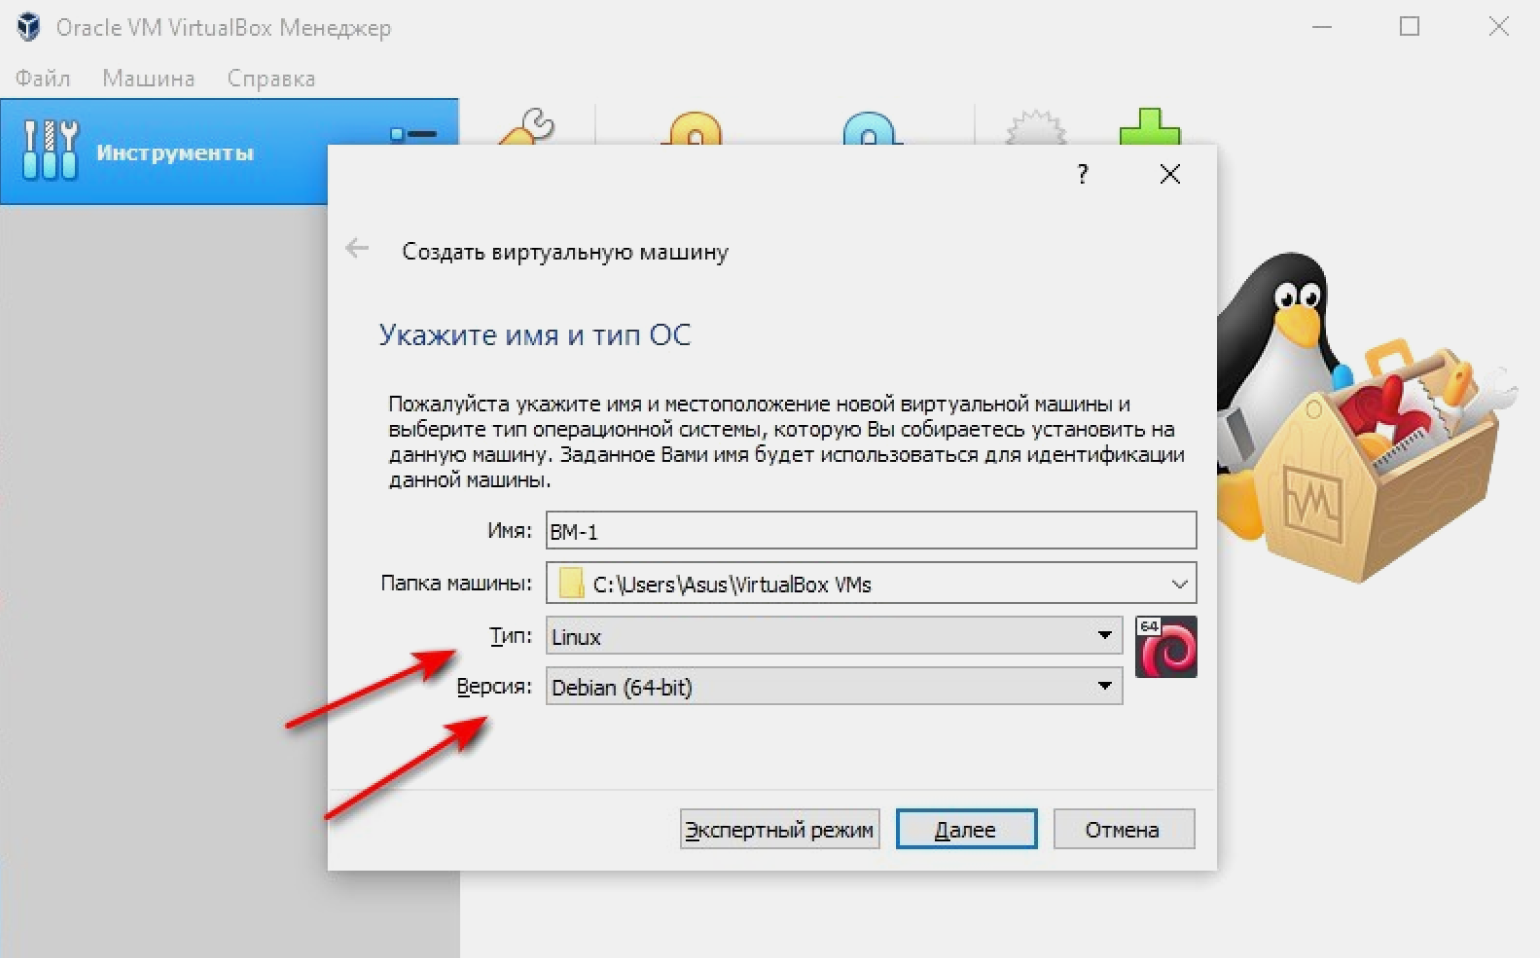
Вверху страницы нажимаем кнопку «Создать». В появившемся окне программа предлагает дать машине имя и выбрать ОС. По умолчанию задан VirtualBox под управлением Windows.
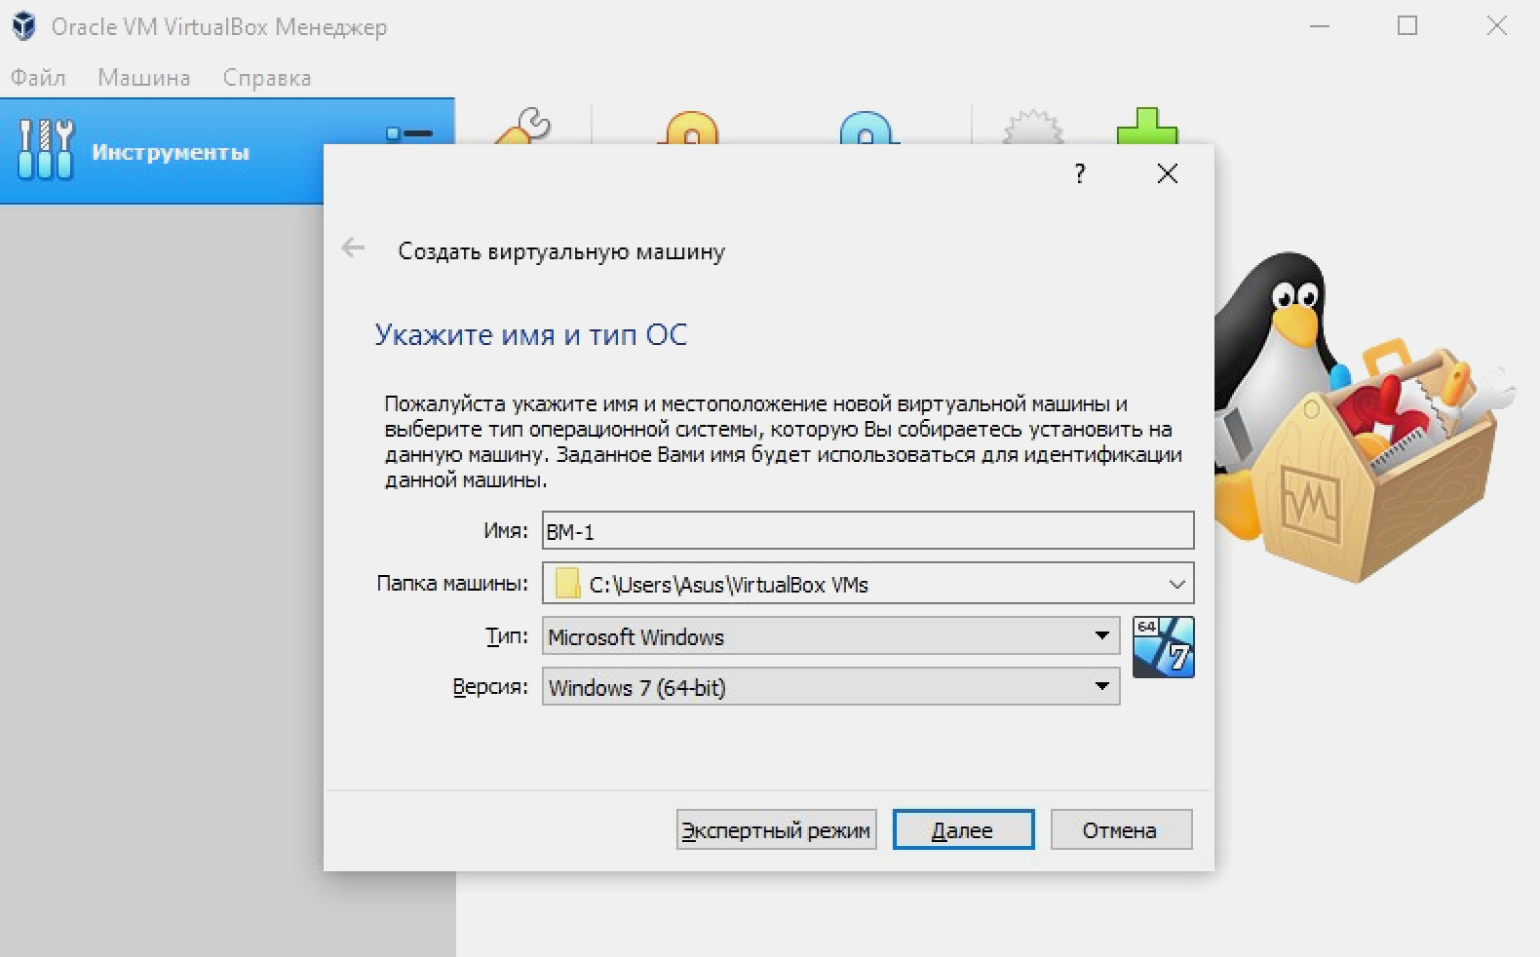
Назовём нашу виртуальную машину ВМ-1. Так как она будет управляться ОС на базе Linux, в выпадающем окне «Тип» выбираем Linux. Затем, в окне «Версия», — Debian (x64-bit).
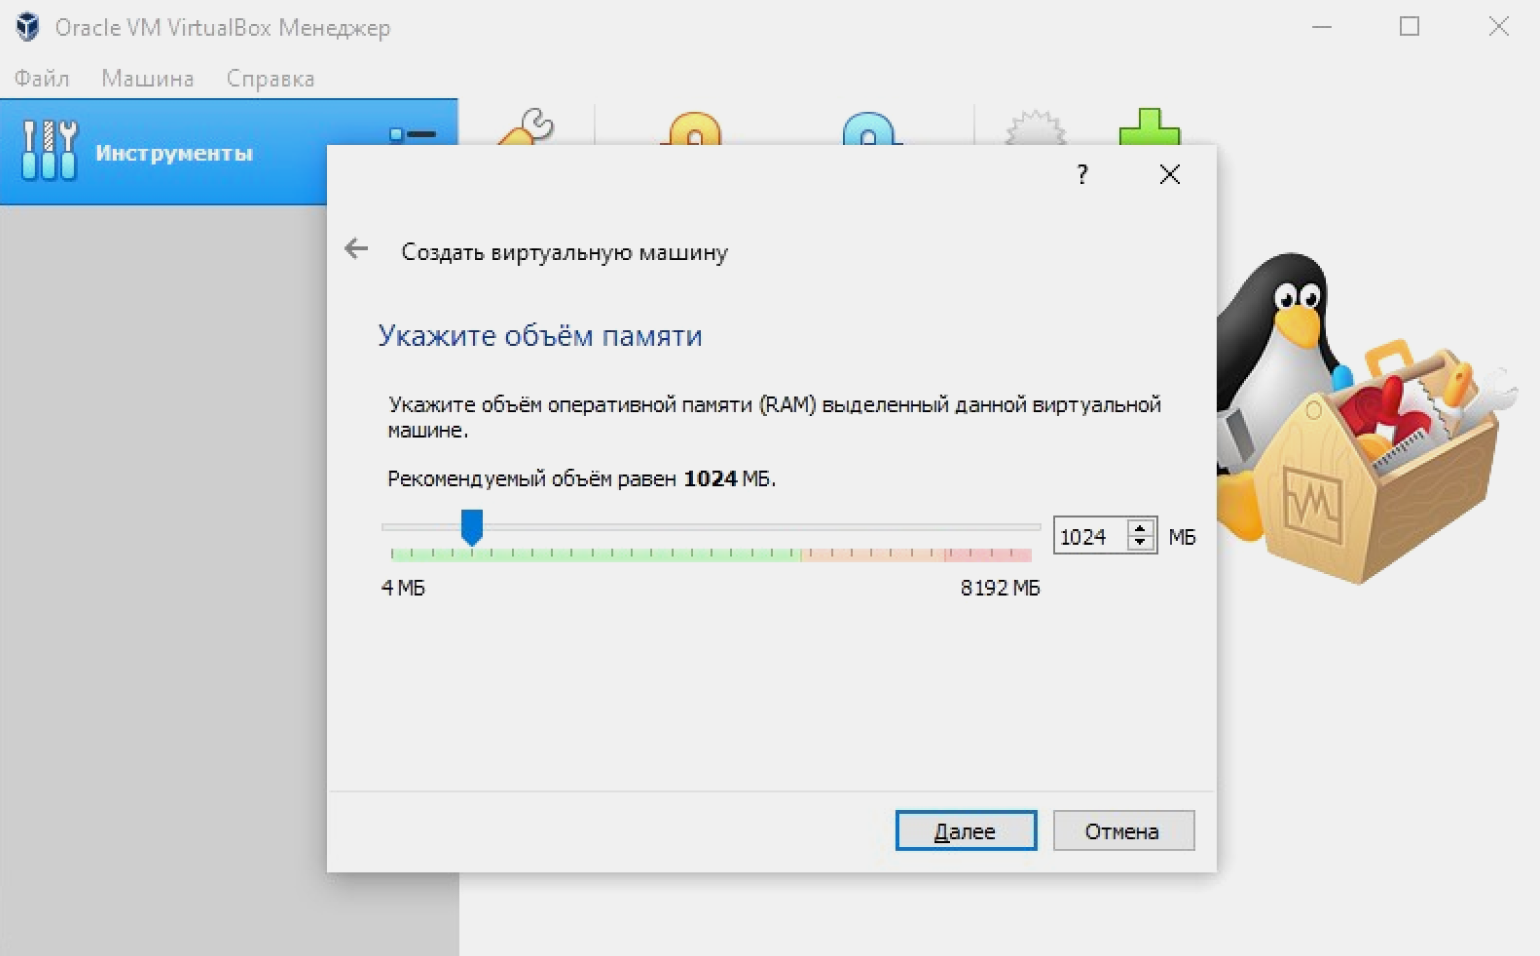
Указываем объём памяти, который мы выделим нашей ВМ-1: оставляем заданный по умолчанию или вводим своё значение.
Объём памяти напрямую влияет на работу виртуальной машины. Лучше всего придерживаться простого правила: выделять не более половины RAM физического ПК. Также можно отталкиваться от рекомендации VirtualBox, которая отмечает зелёным фоном рекомендуемый объём памяти.
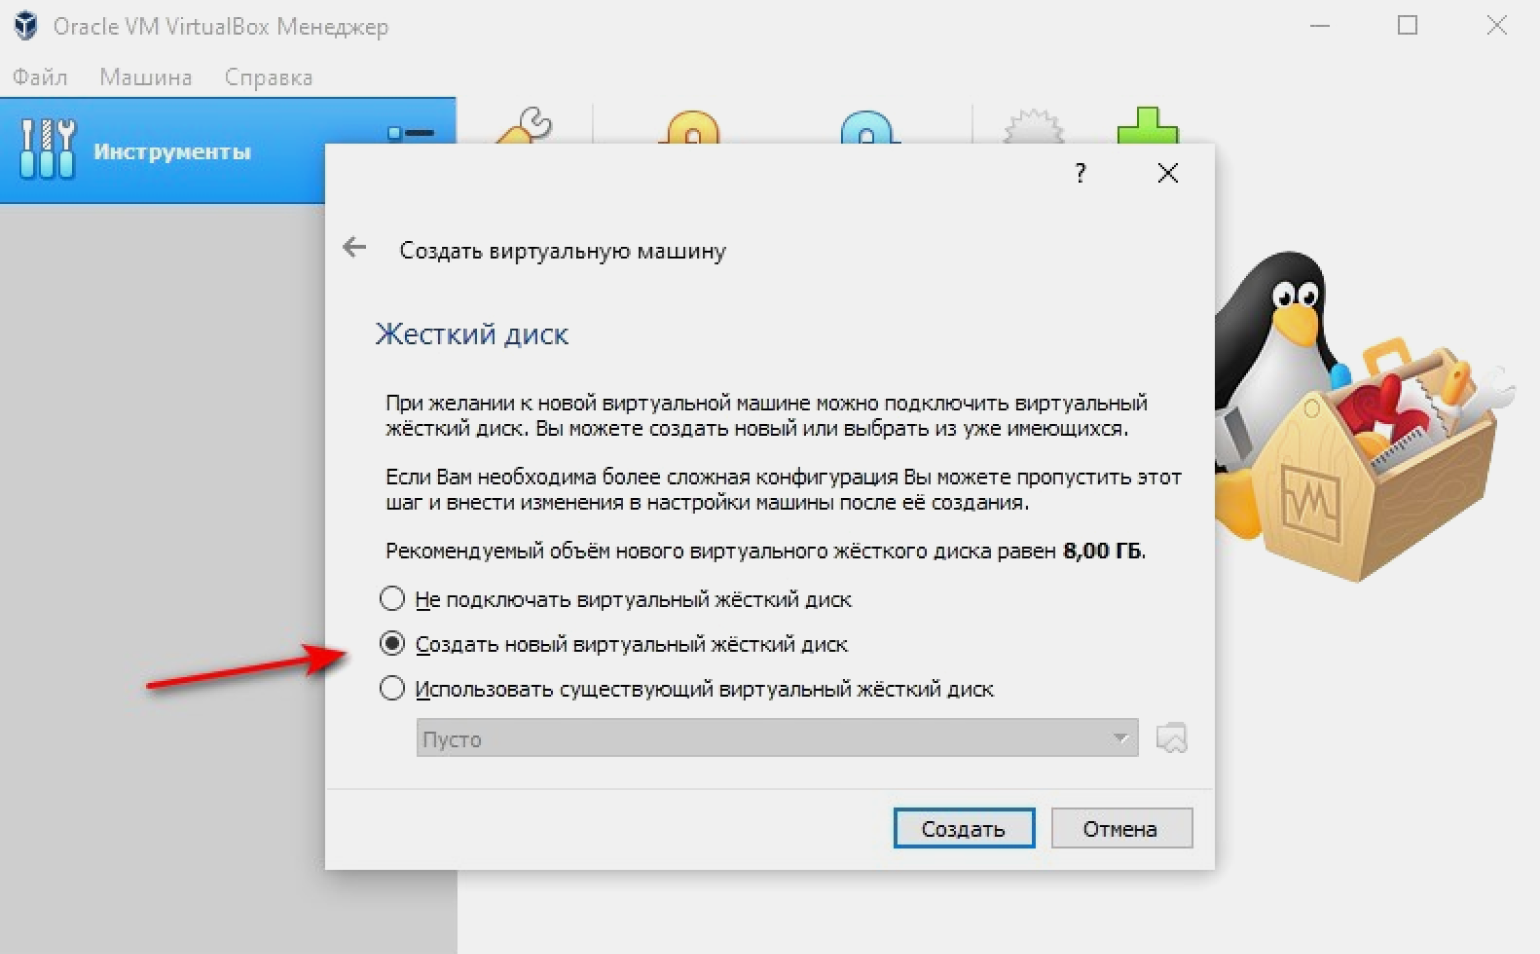
Создаём виртуальный жёсткий диск. По умолчанию программа предлагает новый диск с рекомендуемым объёмом. Принимаем параметры или задаём свои.
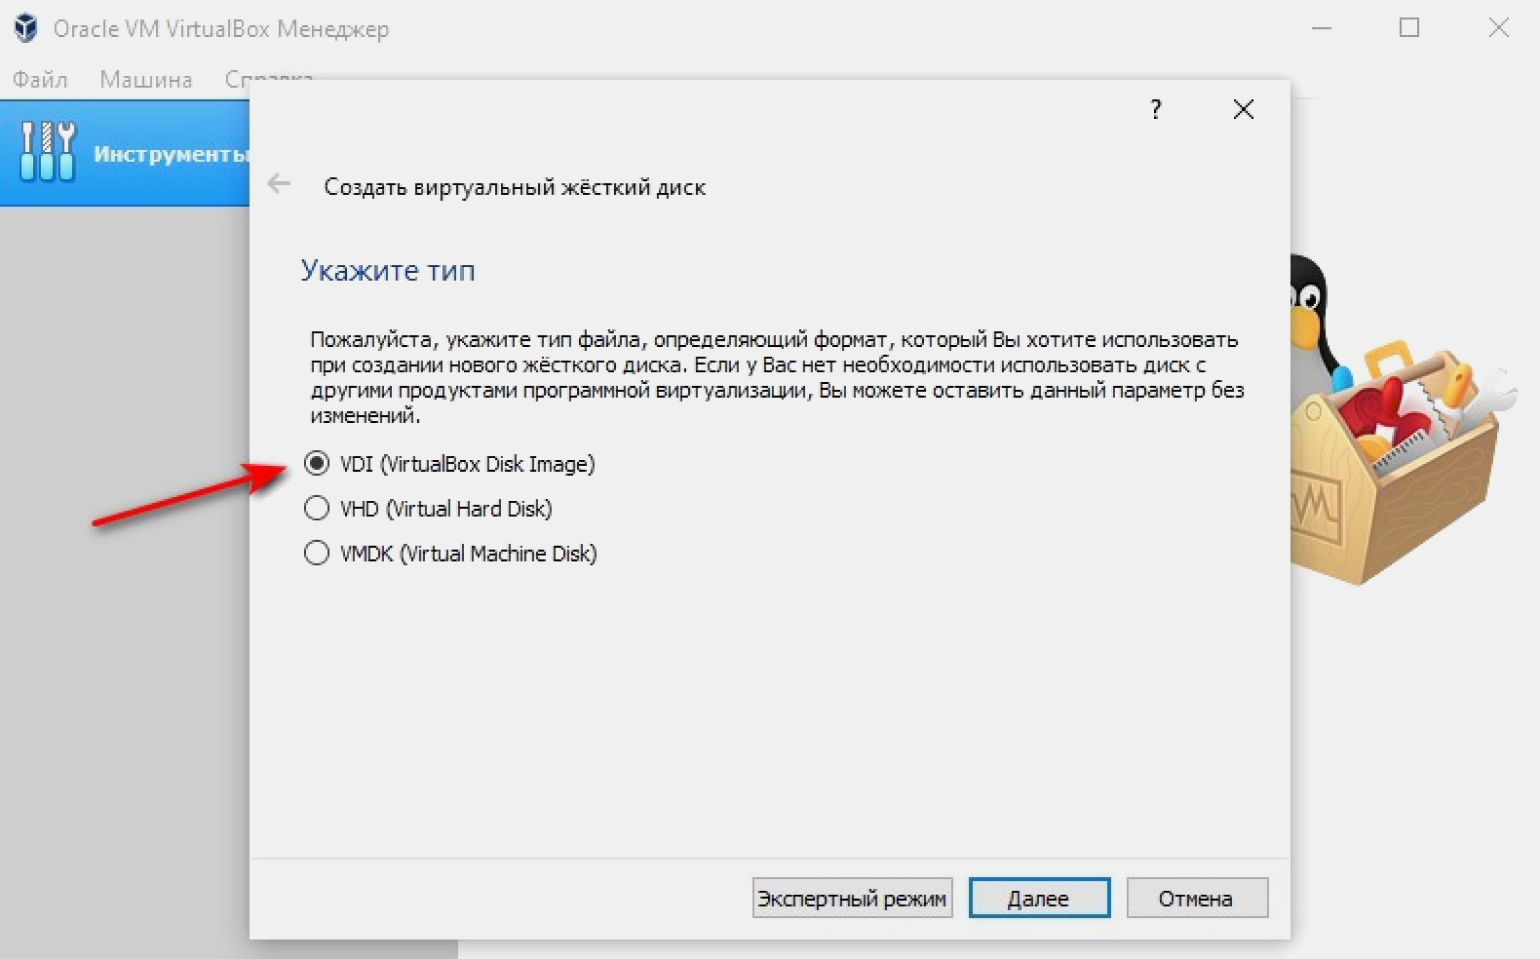
Выбираем тип файла жёсткого диска. По умолчанию VirtualBox предлагает VDI. Ок, соглашаемся. VHD и VMDK — это форматы, предназначенные для виртуальных машин на базе аналогов VirtualBox: VMWare и Virtual PC. Использование VHD и VMDK приведёт к снижению производительности нашей виртуальной машины.
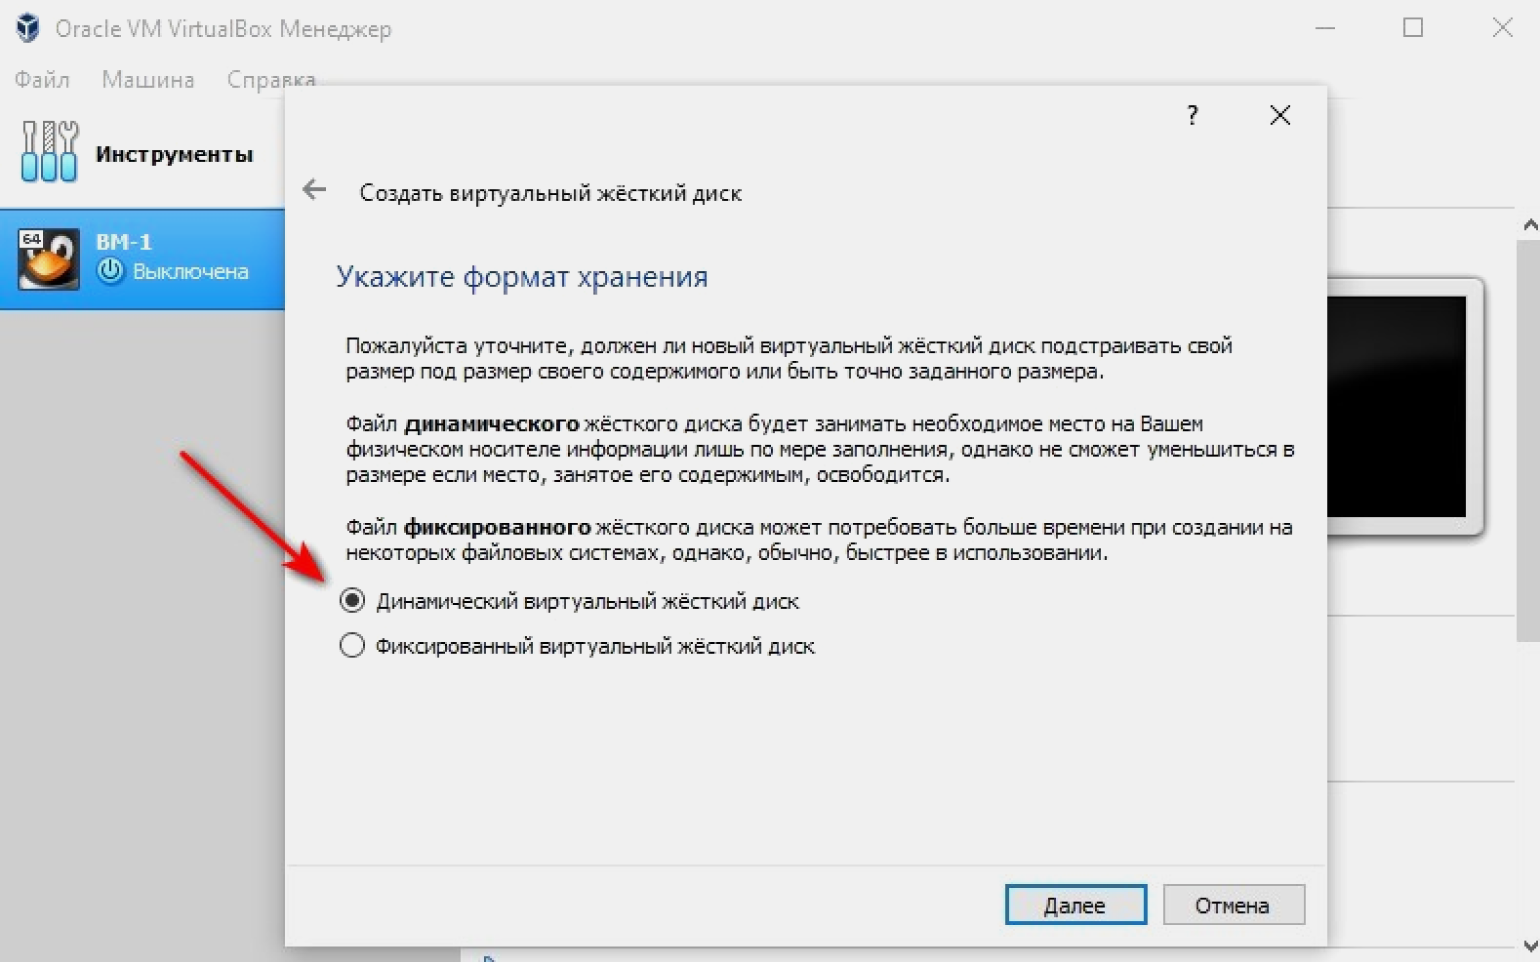
Указываем формат хранения: динамический или фиксированный. Для большинства задач подходит динамический: его размер будет увеличиваться или уменьшаться в зависимости от содержимого. Для задач, где нужна максимальная производительность (например, обработка видео) подходит фиксированный формат.
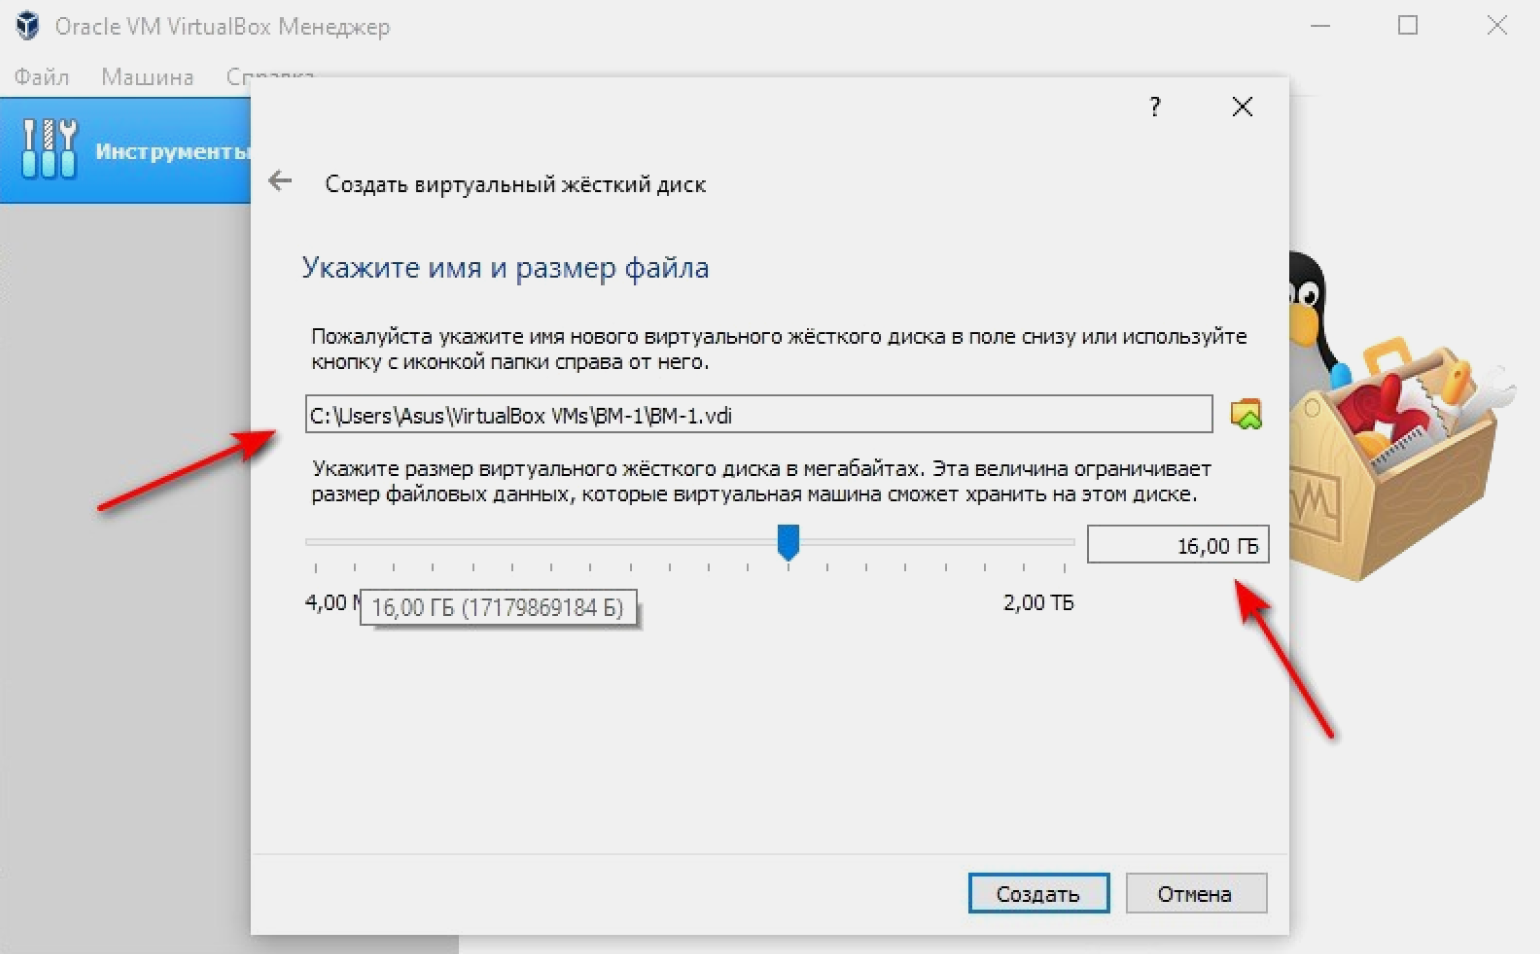
Выбираем размер диска. В нашем случае это 16 ГБ. При желании в VirtualBox можно задать больший объём. Именуем новый диск так, как предлагает программа.
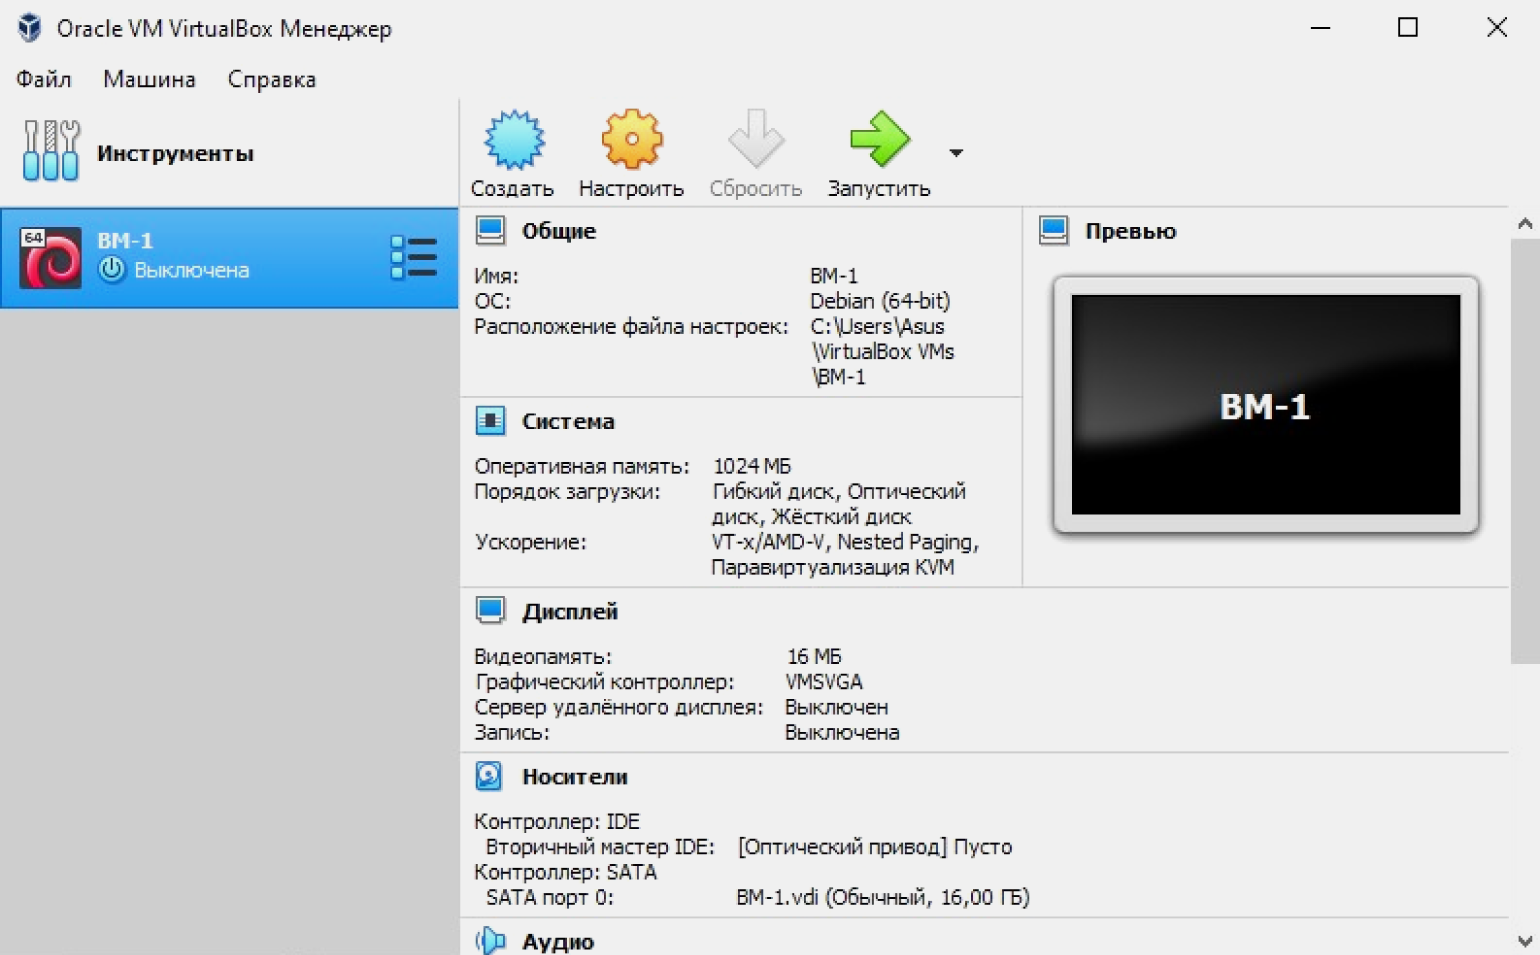
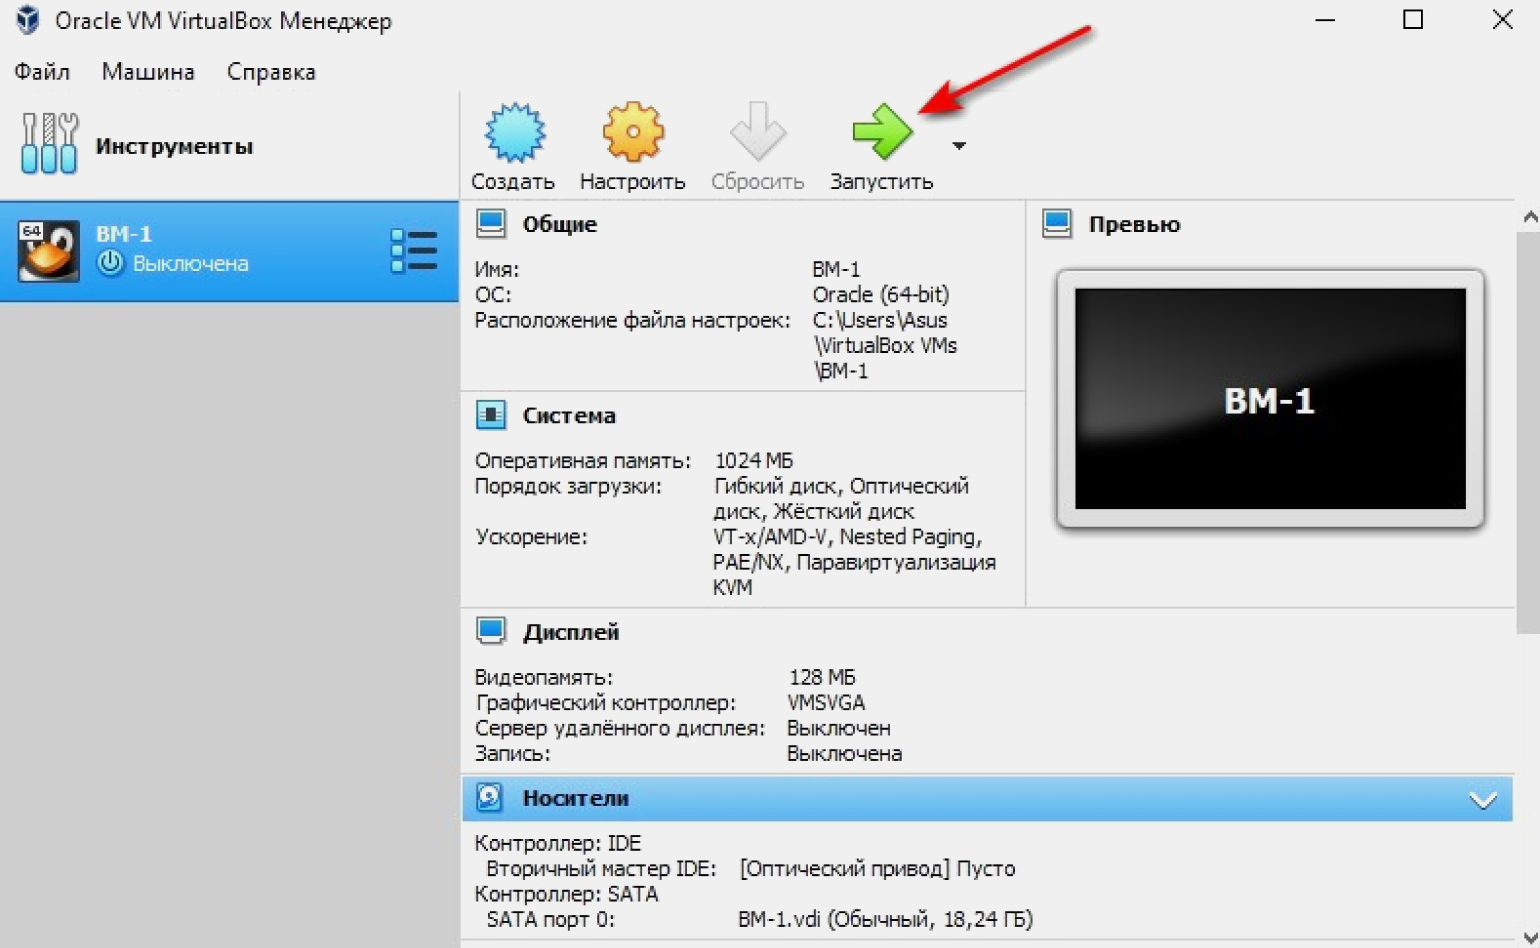
Мы создали виртуальную машину. На экране указаны её параметры: название, операционная система, оперативная и видеопамять.
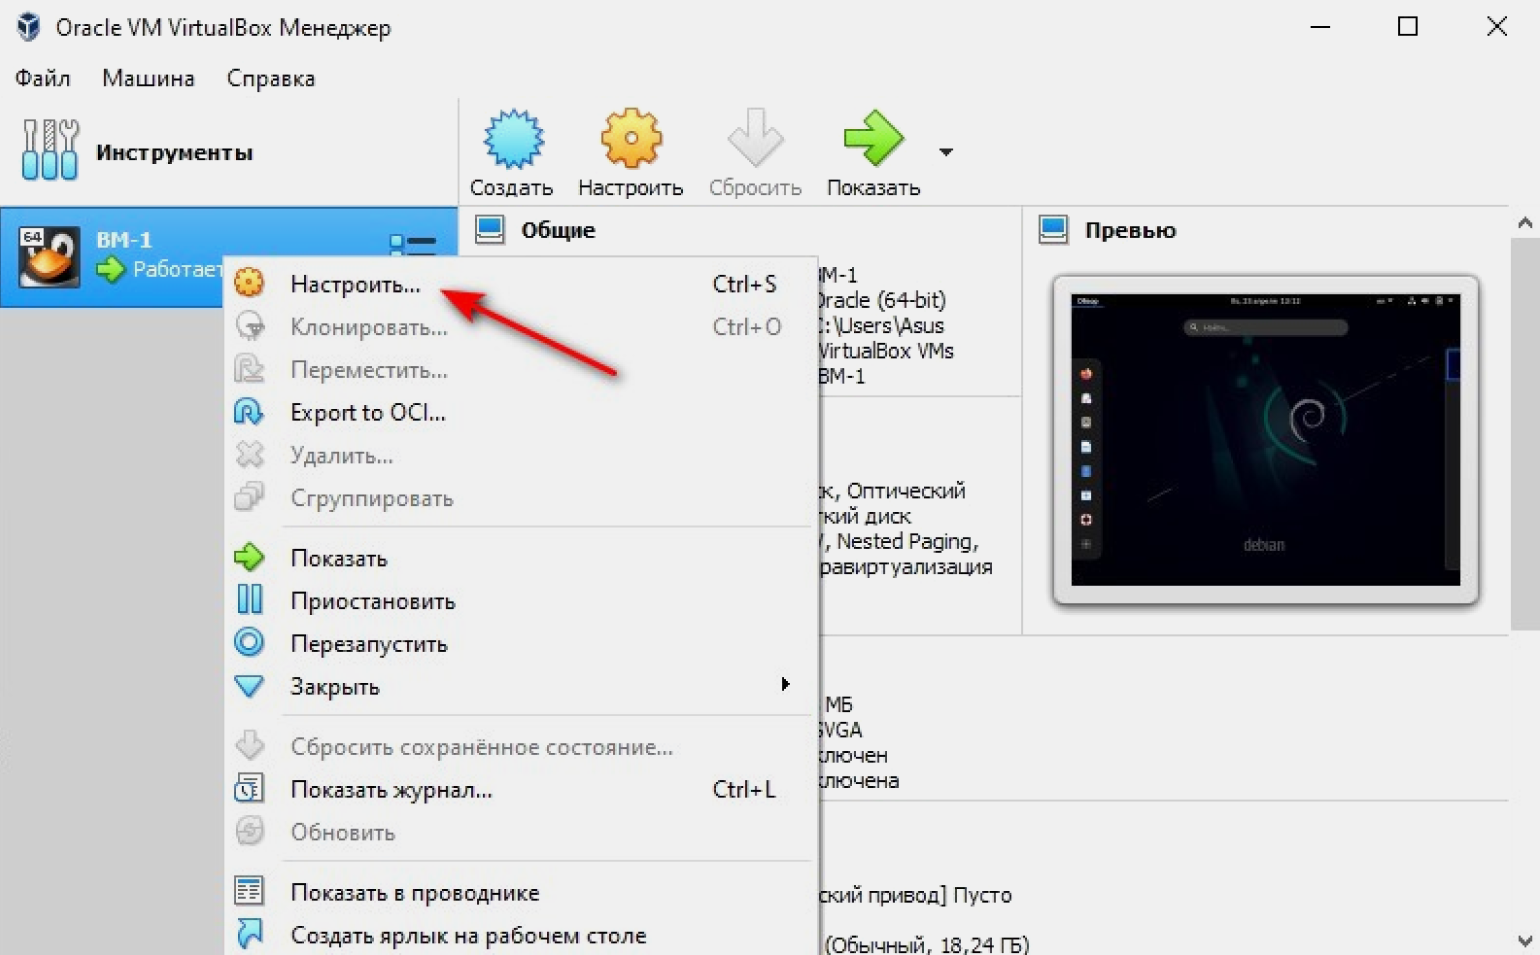
Сейчас у нашей машины параметры, заданные по умолчанию. Если мы хотим их изменить, наводим мышку на виртуальную машину ВМ-1 слева на экране, кликаем по ней правой кнопкой и в выпадающем меню выбираем «Настроить».
Выбираем вкладку «Система», затем — «Процессор». Сразу в VirtualBox значения заданы по умолчанию, при желании меняем их на другие. Например, увеличиваем количество задействованных процессоров. Помните, что не стоит устанавливать значения за пределами рекомендуемой зелёной зоны. Как видно на скриншоте, это два ядра из имеющихся четырёх. Если установить больше, это негативно скажется на работе нашего ПК.
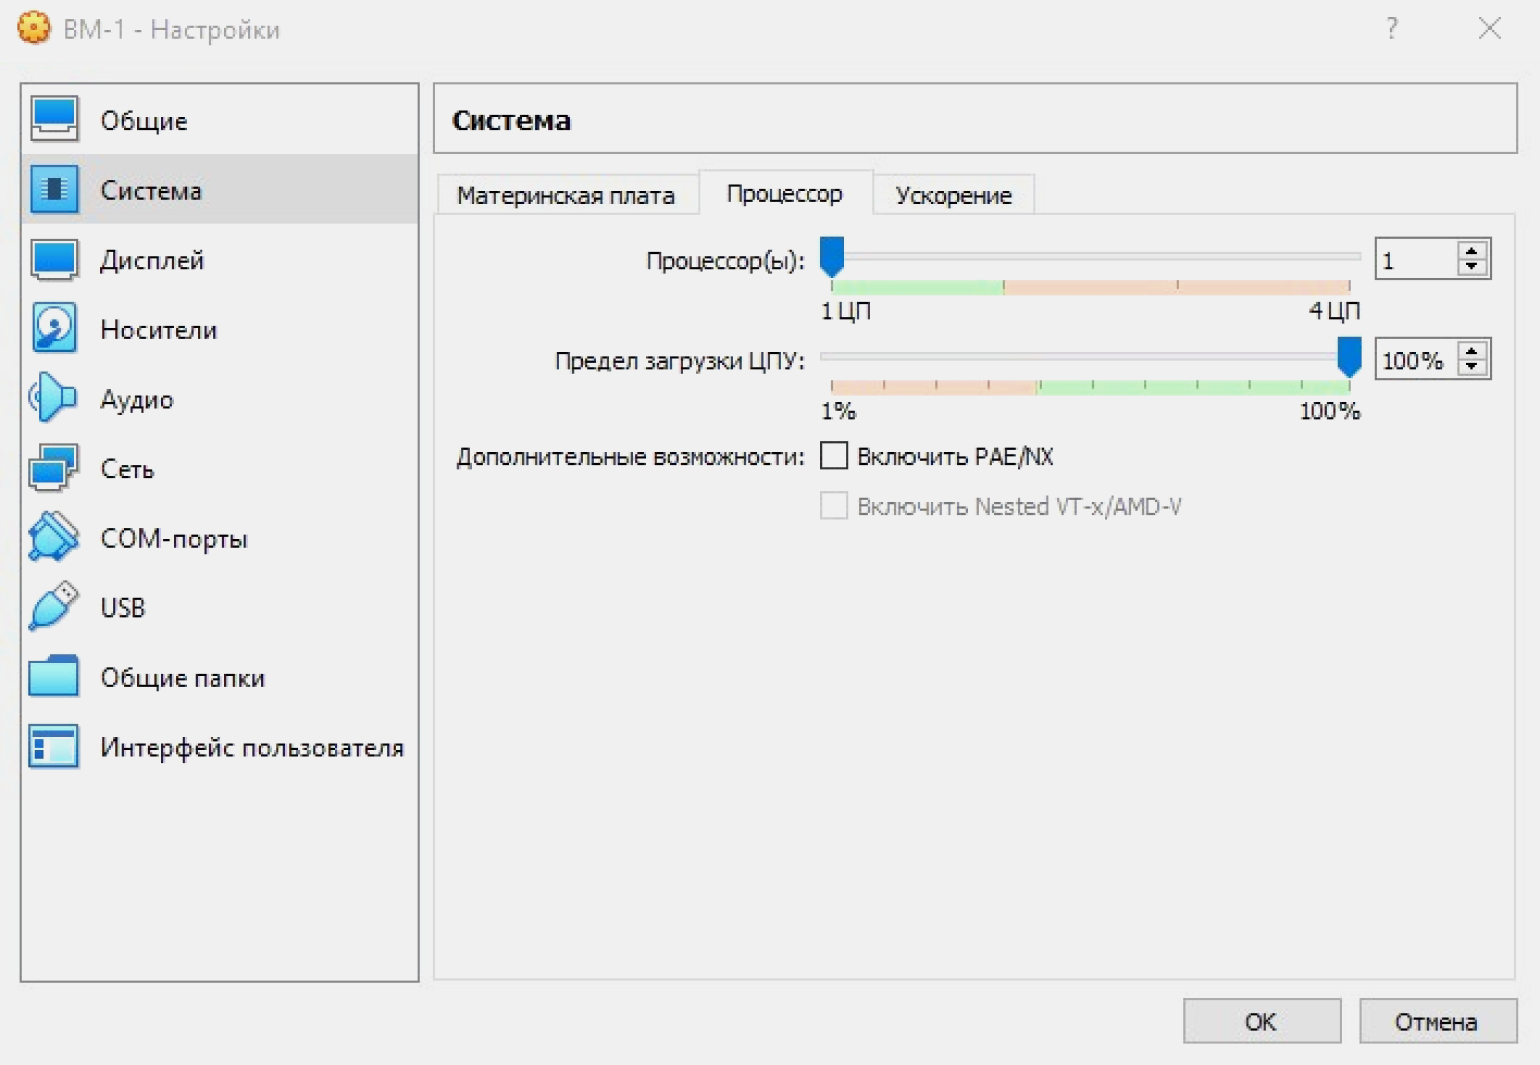
Во вкладке «Ускорение» настраиваем режим виртуализации и дополнительные параметры для ускорения работы. Они подбираются автоматически и зависят от выбранной гостевой ОС. Ничего не меняем, оставляем параметры по умолчанию.
Вариант «Минимальный» выбирают для гостевых систем macOS. «Hyper-V» — для Windows, а «KVM» — для Linux. Вариант «Отсутствует» выбираем, когда мы хотим скрыть от гостевой ОС, что она работает на виртуальной машине, а не на физическом ПК. «Совместимый» создан для поддержки виртуальных машин, созданных на устаревших версиях VirtualBox.
Функция «Включить PAE/NX» предназначена для поддержки 4 и более ГБ ОЗУ в 32-битных системах. Мы работаем в 64-битной системе, поэтому для нас это неактуально.
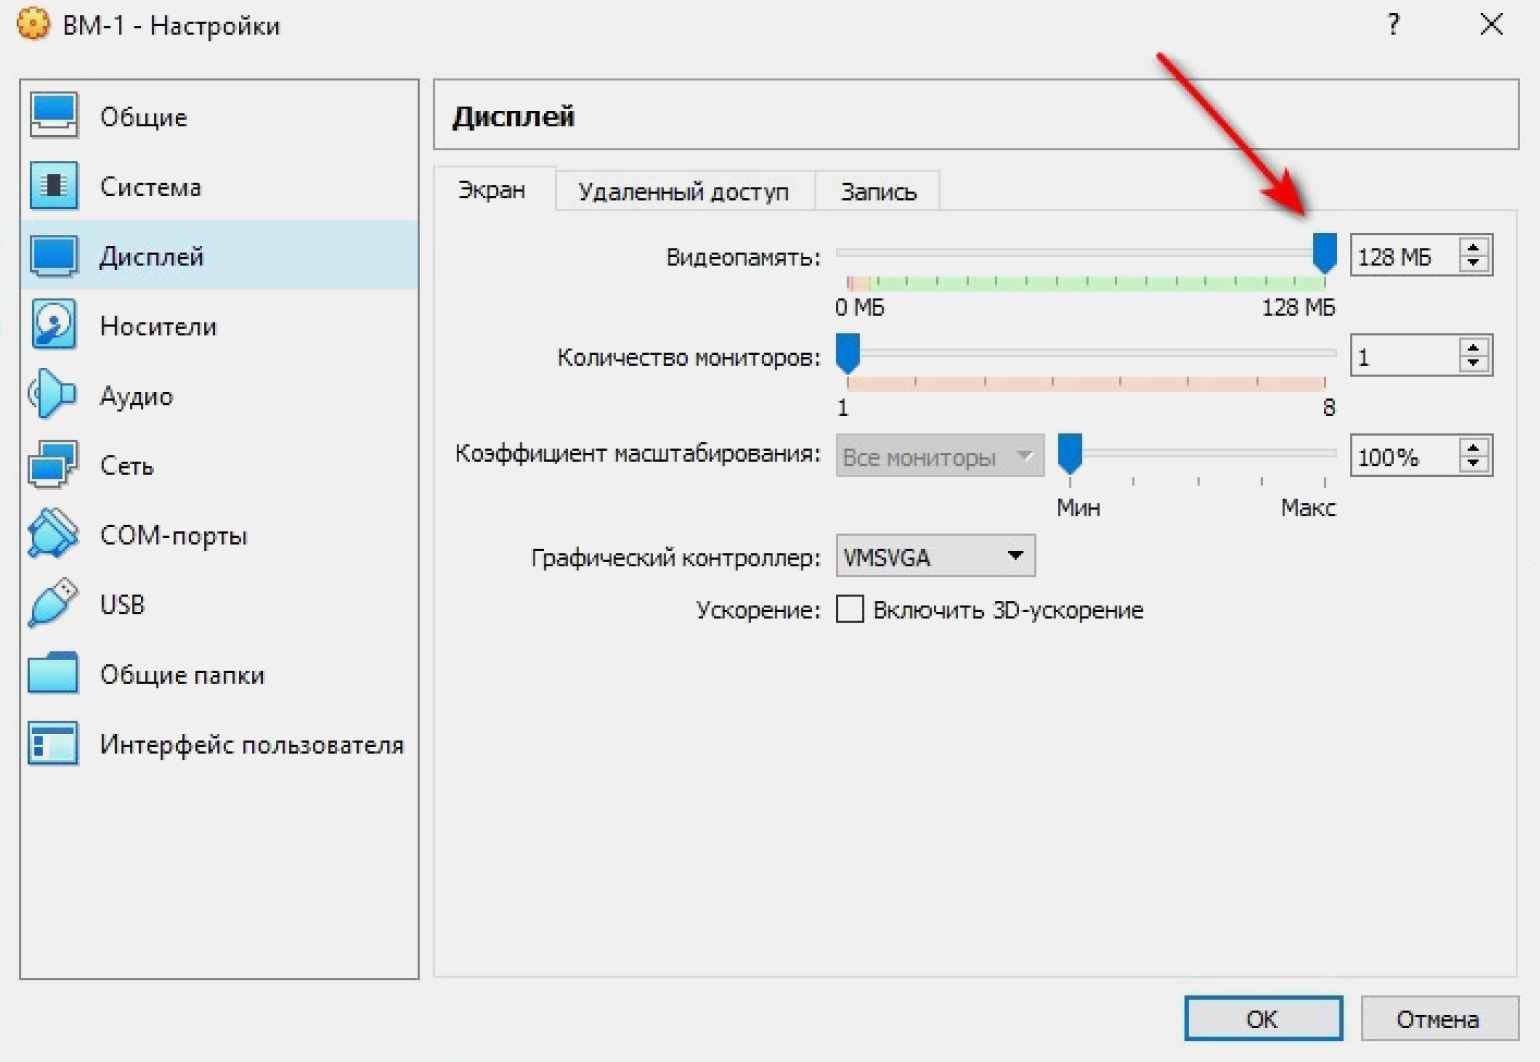
Из вкладки «Система» переходим во вкладку «Дисплей», чтобы установить параметры видеопамяти. Она определяет объём ресурсов, выделенный для виртуального графического адаптера гостевой ОС. Адаптер, в свою очередь, отвечает за обработку графических операций и вывод изображения на экран. Если выделенный объём ресурсов недостаточен, производительность может снизиться. У нашей виртуальной машины значение видеопамяти по умолчанию задано 16 МБ. Это немного, поэтому лучше сразу указать его максимальное рекомендуемое значение. В нашем случае это 128 МБ.
Для подключения к интернету VirtualBox по умолчанию использует сеть NAT. Этот вариант хорошо работает в большинстве ситуаций. Машине присваивается один и тот же IP-адрес, и она полагает, что находится в своей изолированной сети. Важно, что это будет работать, даже если ПК перемещается из одной сети в другую. Например, ноутбук меняет местоположение и подключения вместе со своим владельцем.
Если мы захотим создать связь между ВМ и ПК, выбираем и настраиваем тип подключения «Сетевой мост».
Когда нужна сеть из нескольких виртуальных машин, выбираем и настраиваем «Виртуальный адаптер хоста». Доступа к интернету не будет, но зато машины смогут взаимодействовать между собой. Подробно типы подключений рассматривать не будем — это тема отдельной статьи.
Ко всем настройкам всегда можно вернуться и изменить их согласно изменившимся задачам.
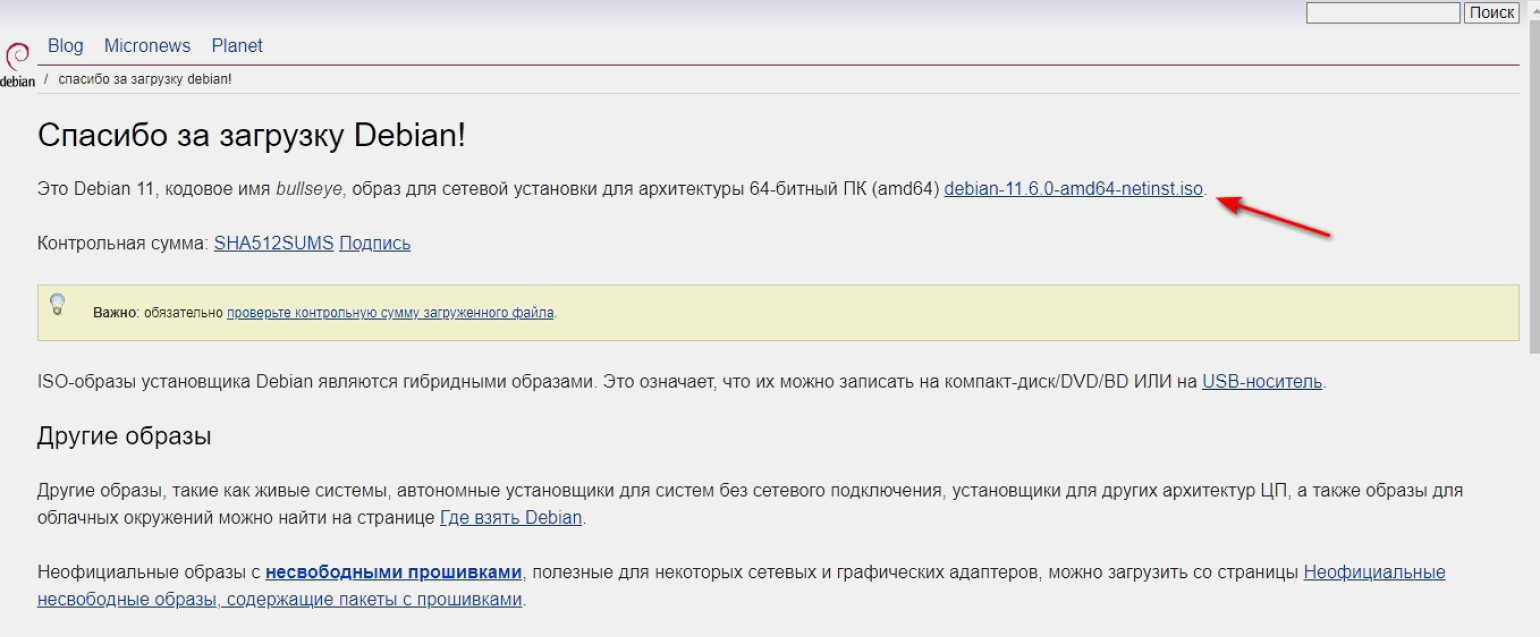
Пора установить в VirtualBox ОС. Скачиваем образ Debian 11.6 на флешку или прямо на ПК с официального сайта. Несмотря на предупреждение, контрольную сумму можно не проверять.
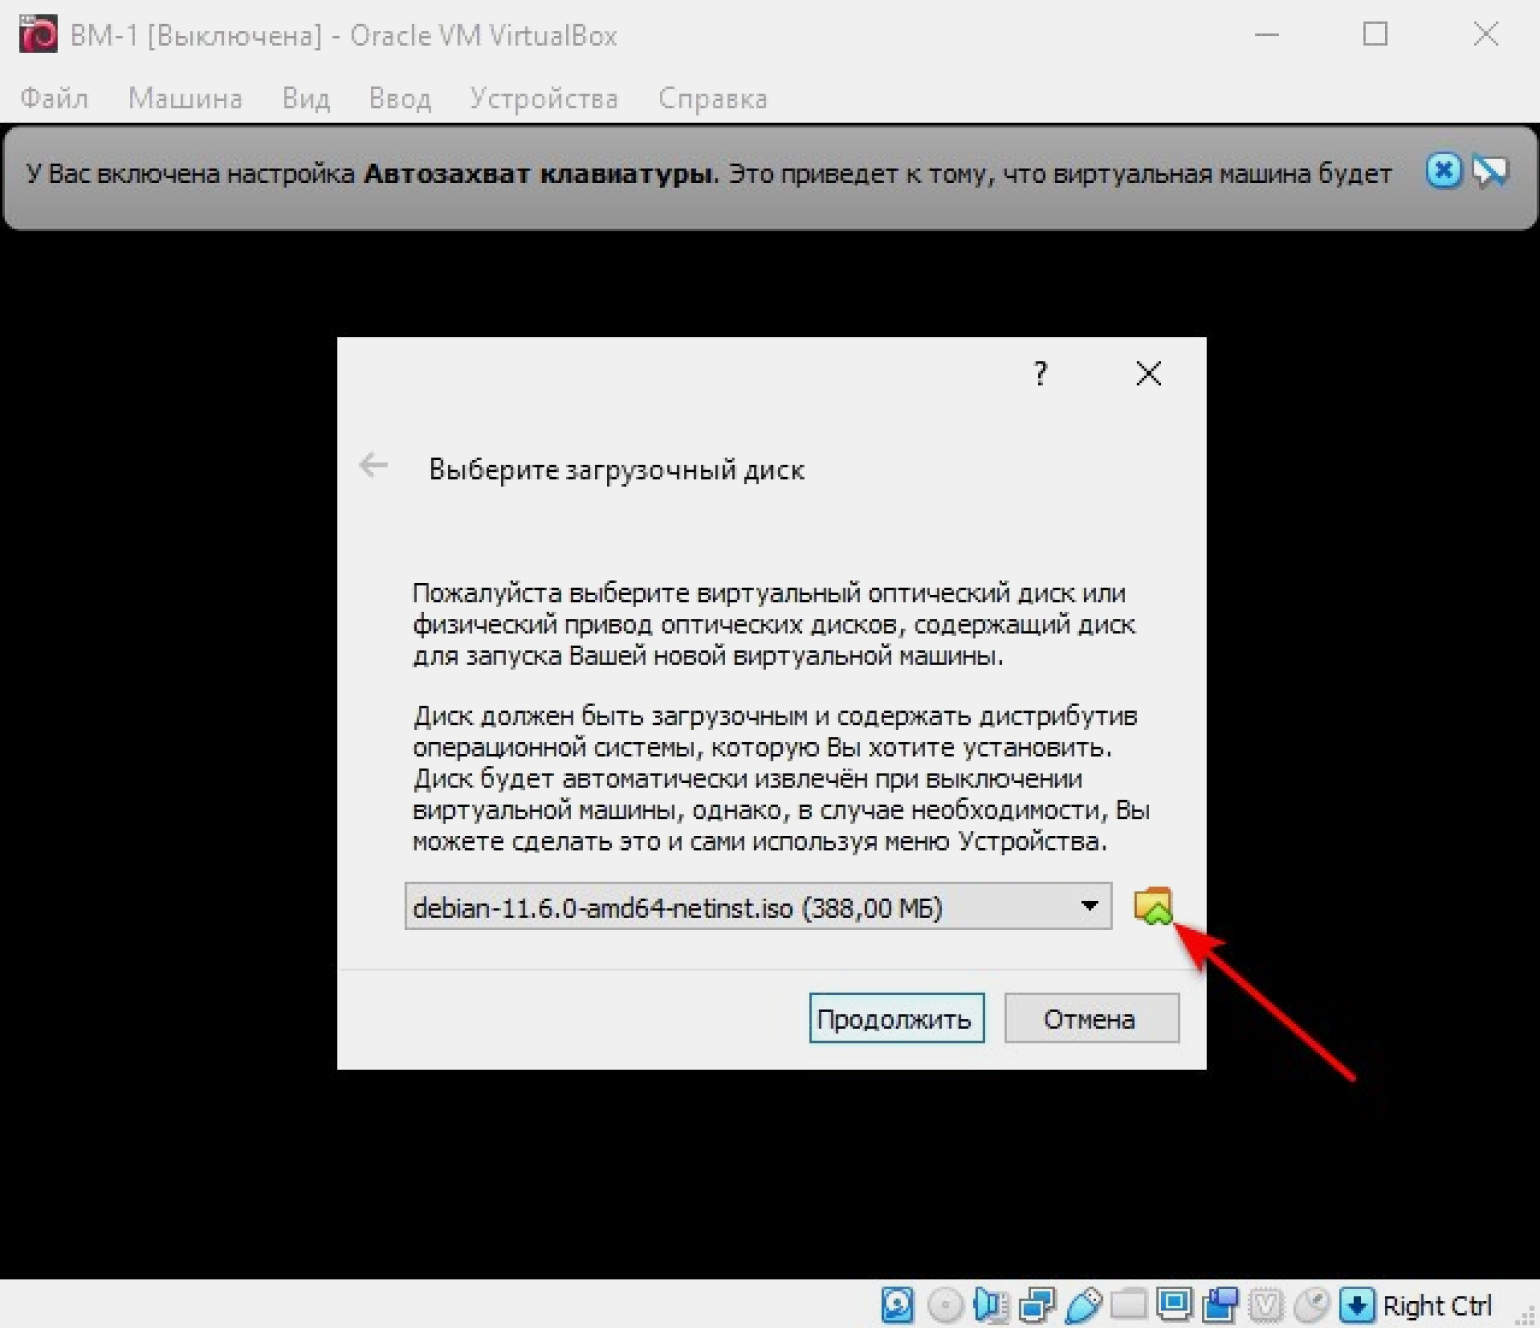
Нажимаем кнопку «Запустить» в интерфейсе VirtualBox.
Нажимаем на значок папки либо в выпадающем окне находим и выбираем папку с образом Debian и продолжаем.
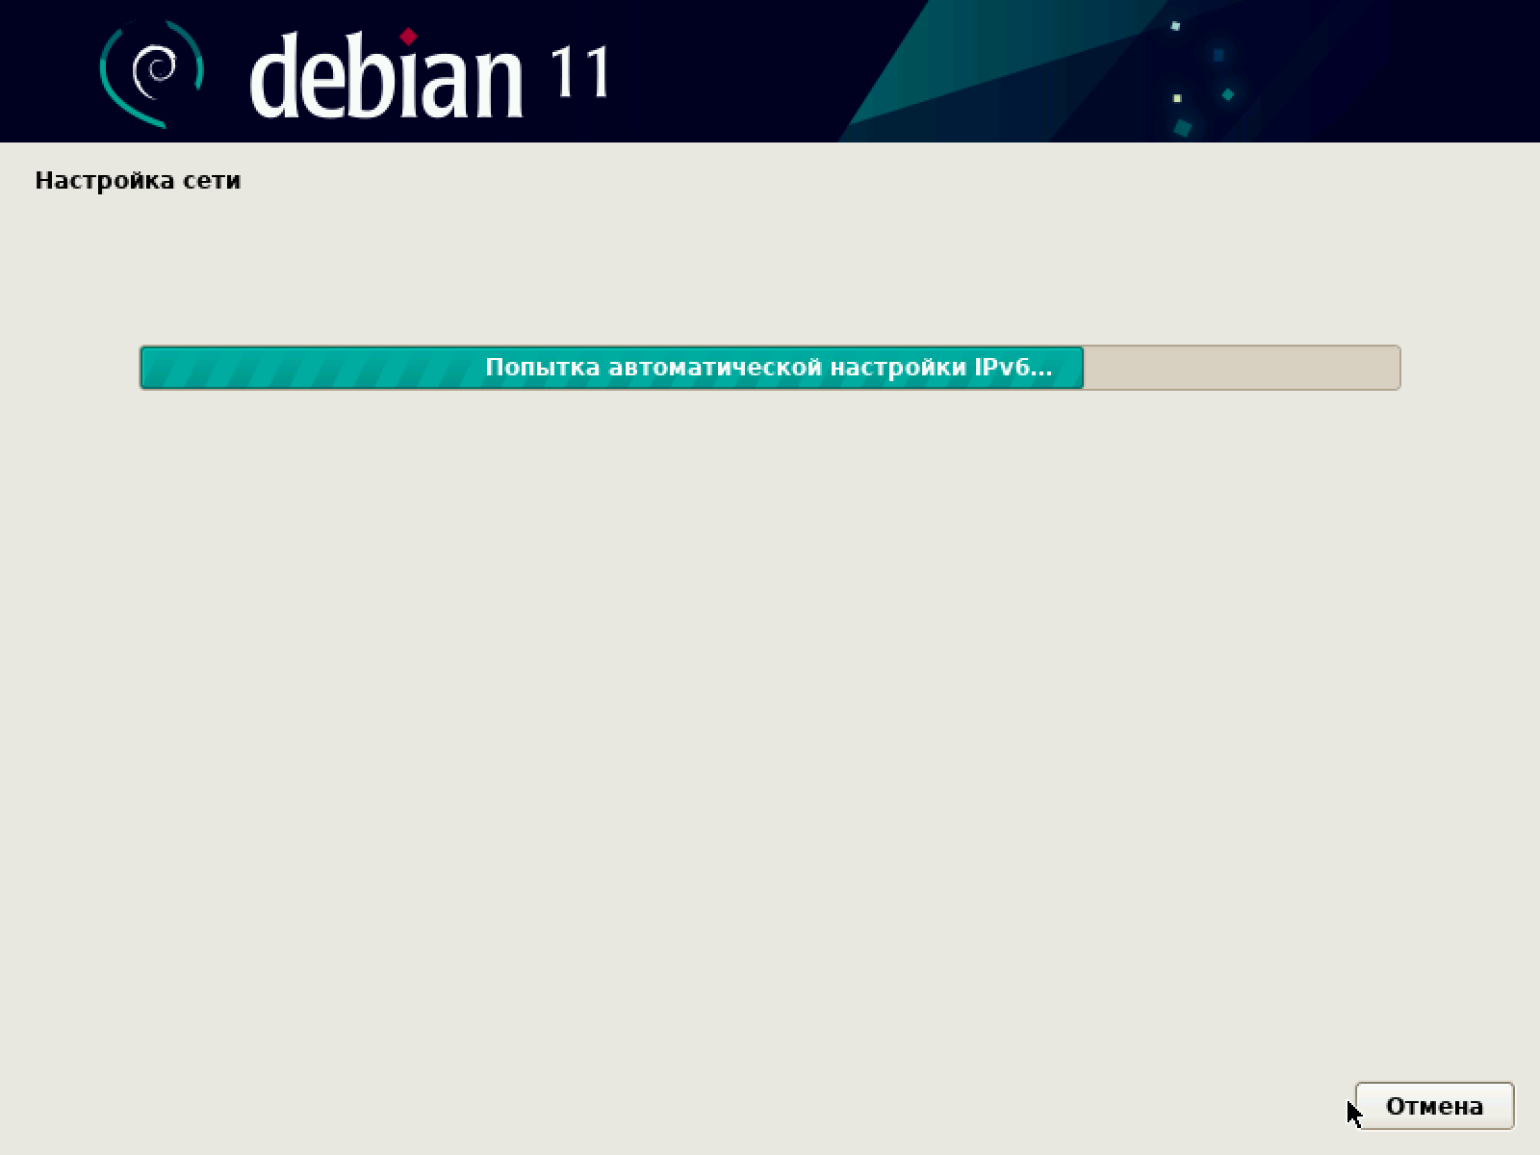
Выбираем «Сетевой интерфейс» и ждём, пока произойдёт настройка сети. В процессе время от времени будут появляться всплывающие окна. Не вникая в их содержание, просто нажимаем «Далее» или «Продолжить».
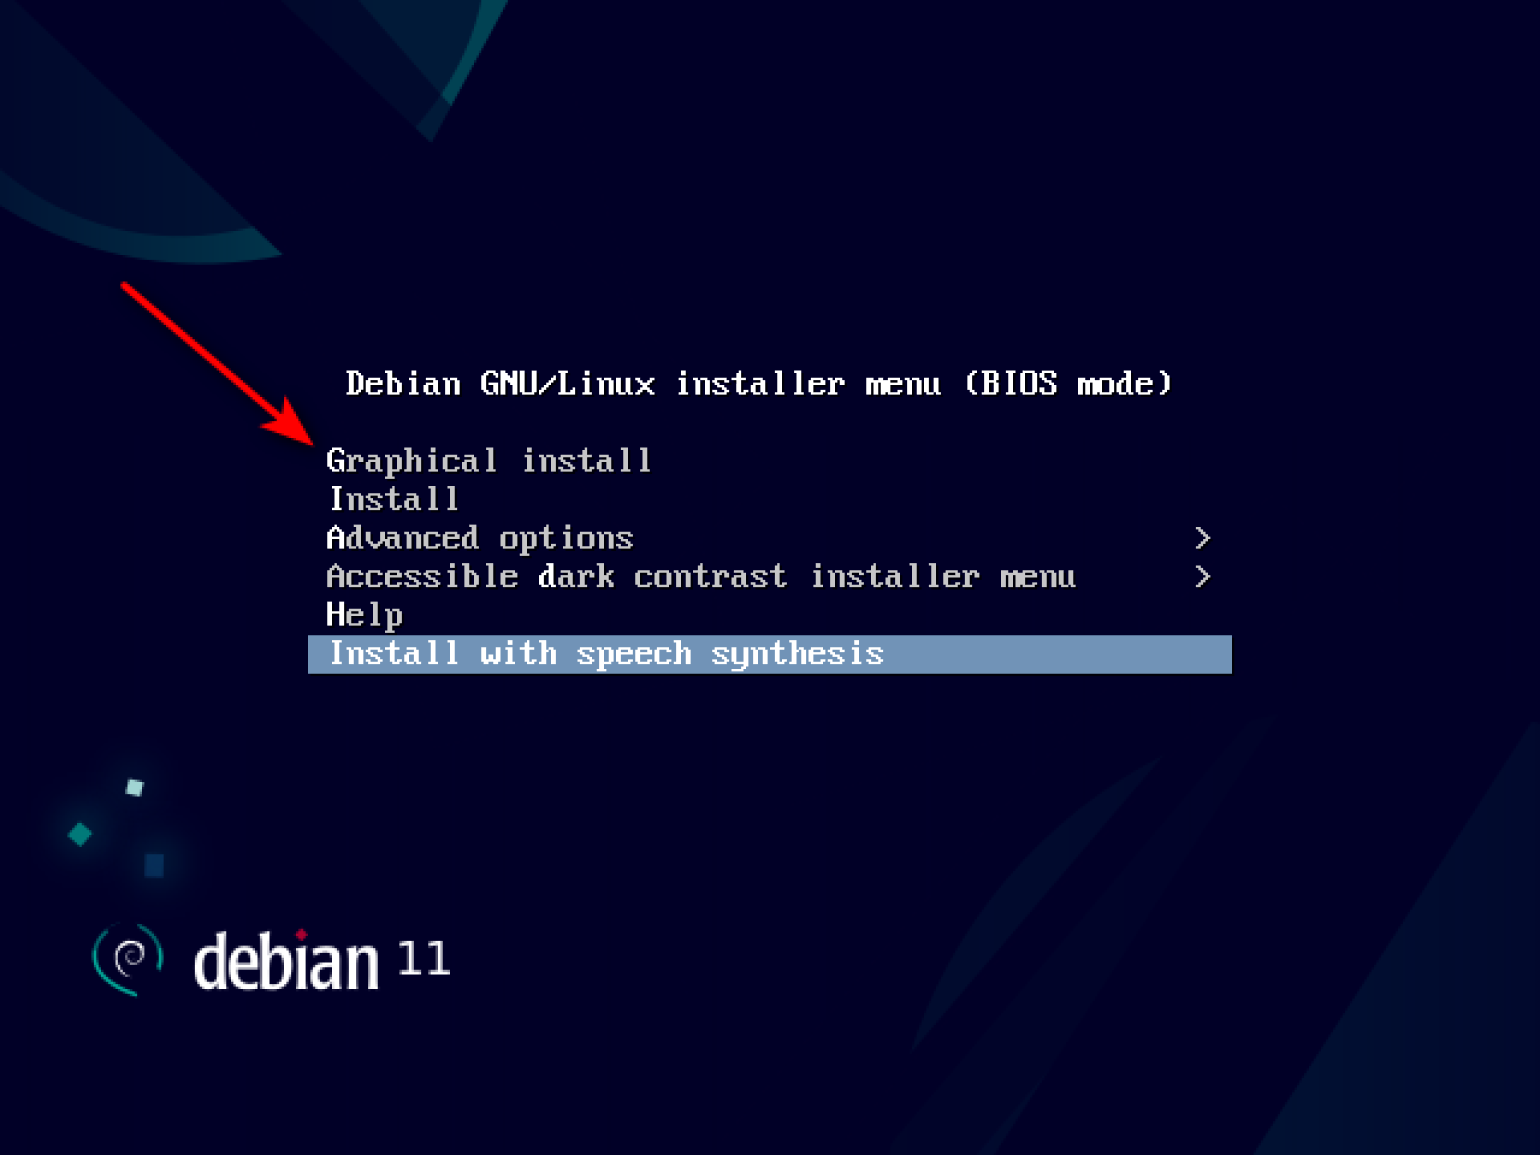
После завершения настройки VirtualBox на экране появится меню со списком способов инсталляции. Выбираем первый — Graphical Install.
После инсталляции программа предлагает выбрать язык. Выбираем русский или оставляем предложенный английский.
Затем система предлагает выбрать местонахождение. Выбираем РФ или другую страну, в которой находимся.

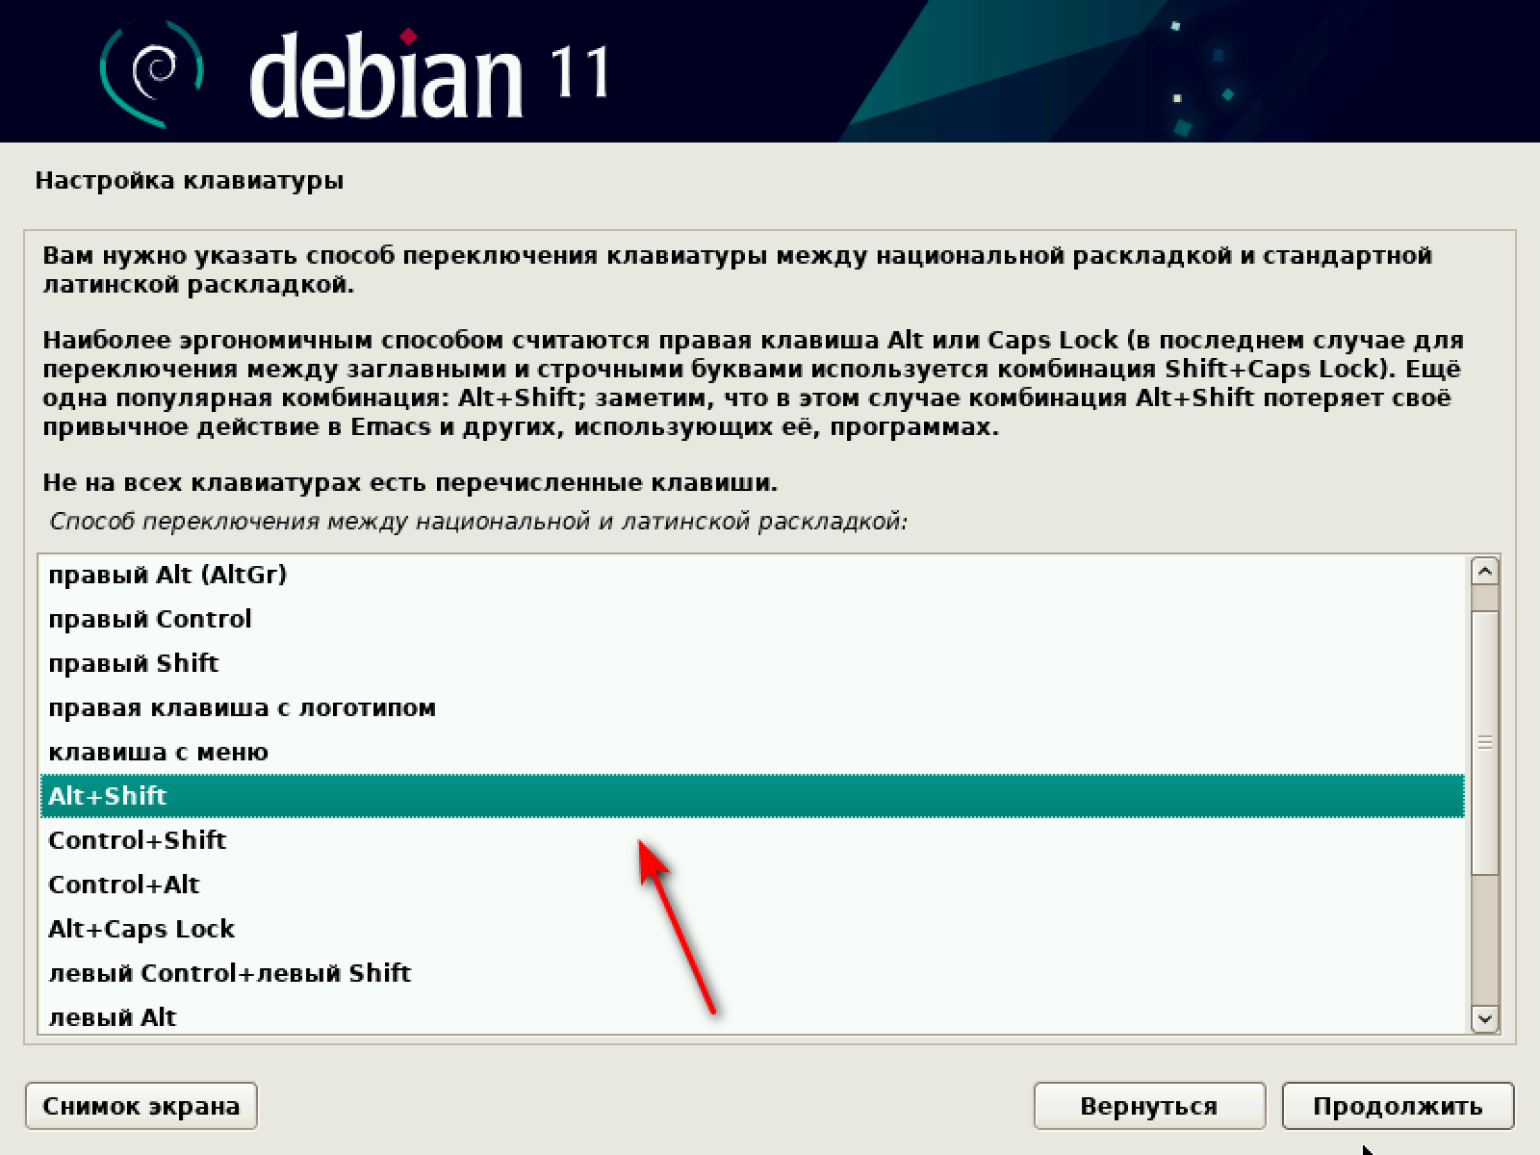
Переходим к настройке клавиатуры. Первым делом устанавливаем язык клавиатуры — русский или другой на выбор из списка.

Затем выбираем способ переключения языков с русского на английский и обратно. По умолчанию стоит Alt + Shift.
После этого система самостоятельно загружает компоненты с установочного носителя и настраивает сеть.
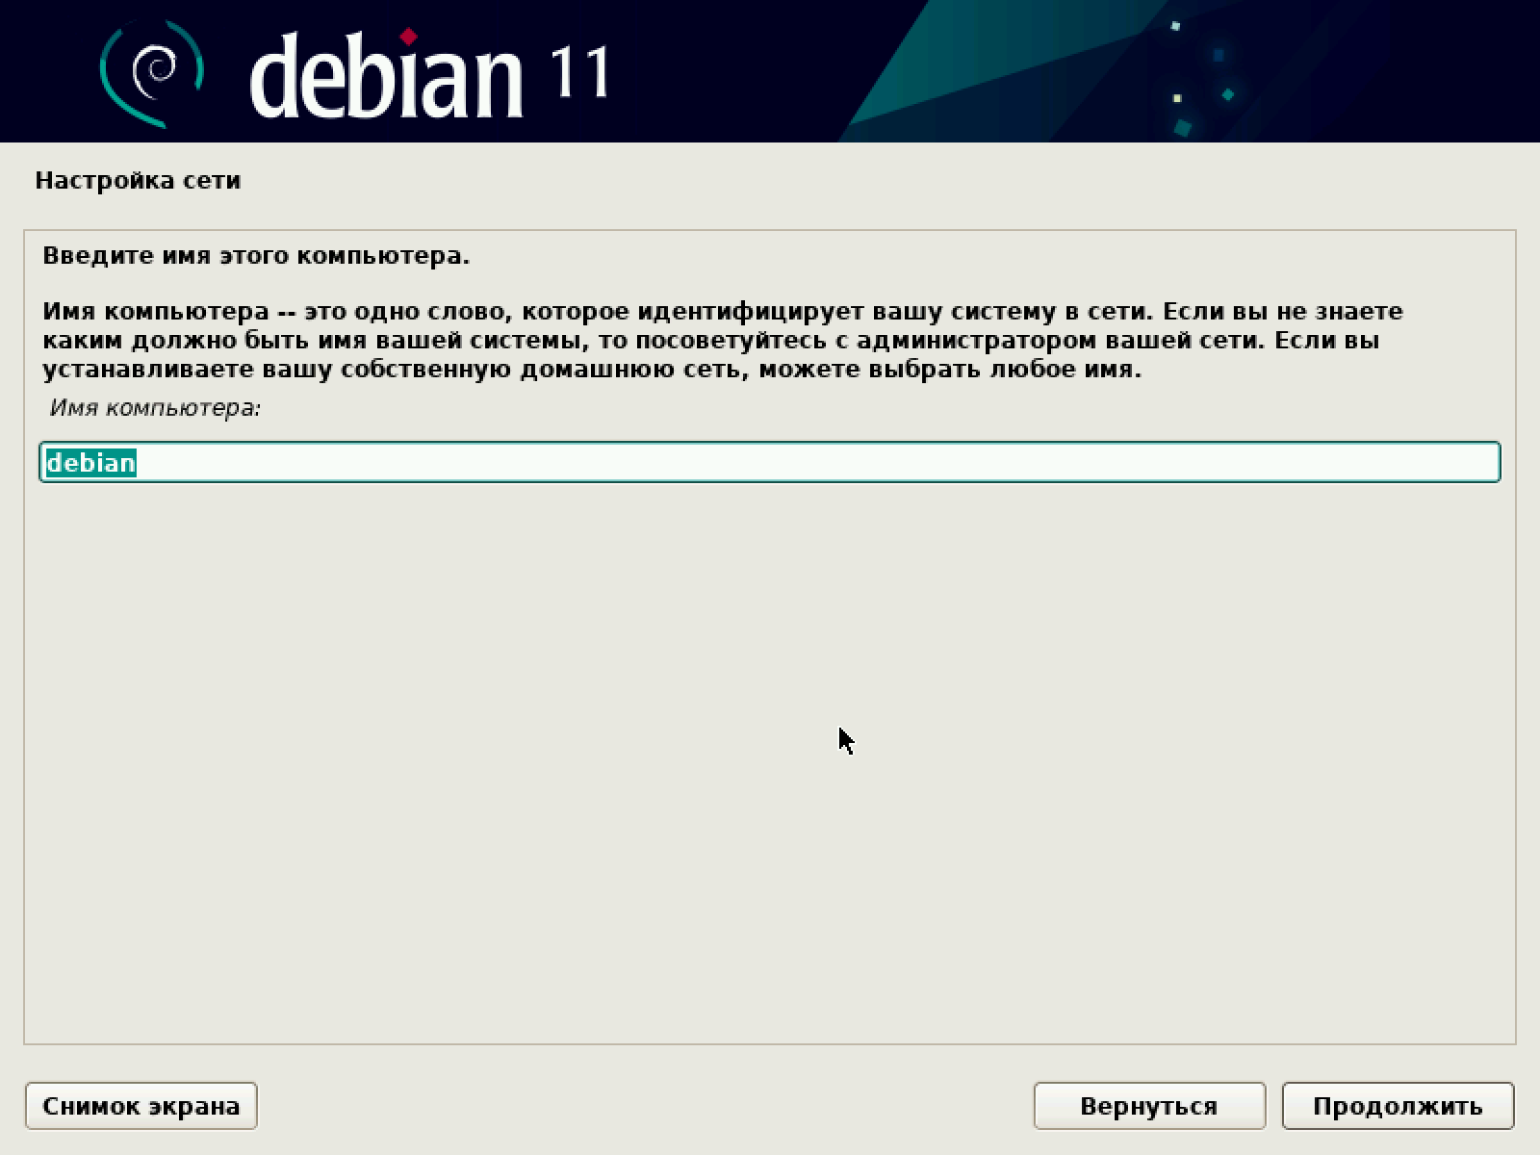
Пора дать нашей машине имя, под которым она будет известна в сети. По умолчанию предлагается назвать её debian. Сохраняем имя или вводим свой вариант.
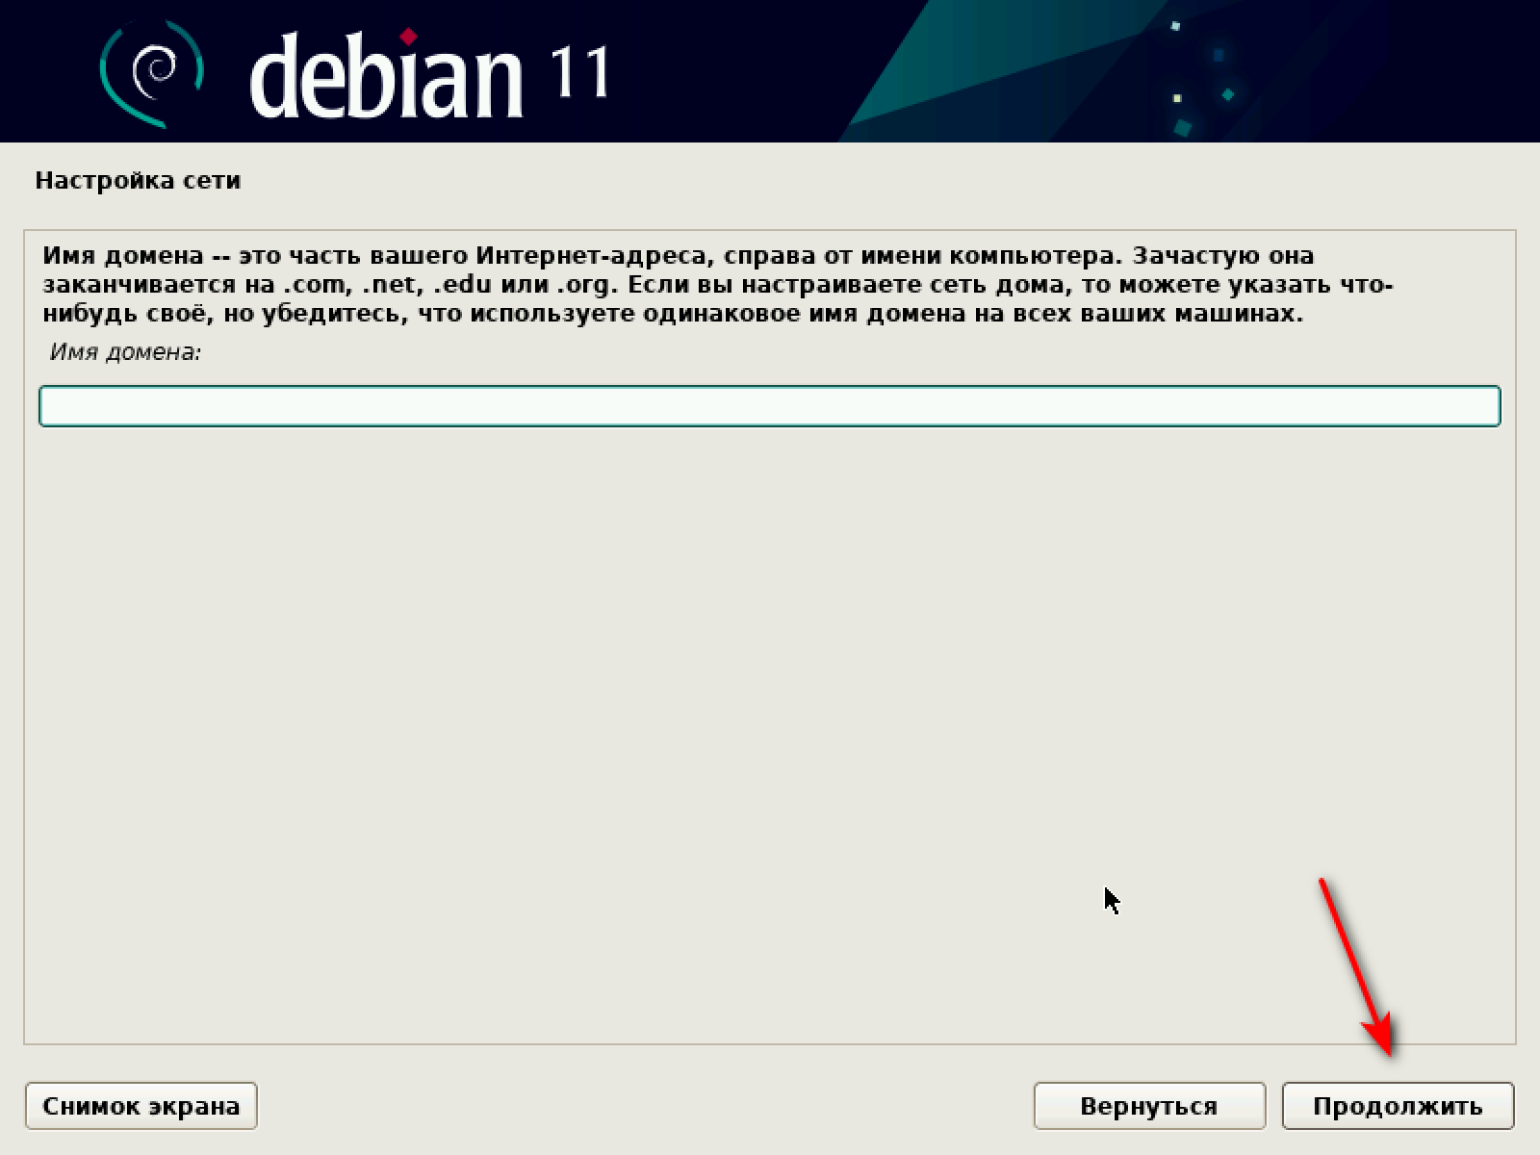
Затем система предлагает задать имя домена. Делать это необязательно, ведь мы устанавливаем ОС на виртуальную машину и домена у нас нет. Оставляем поле пустым.
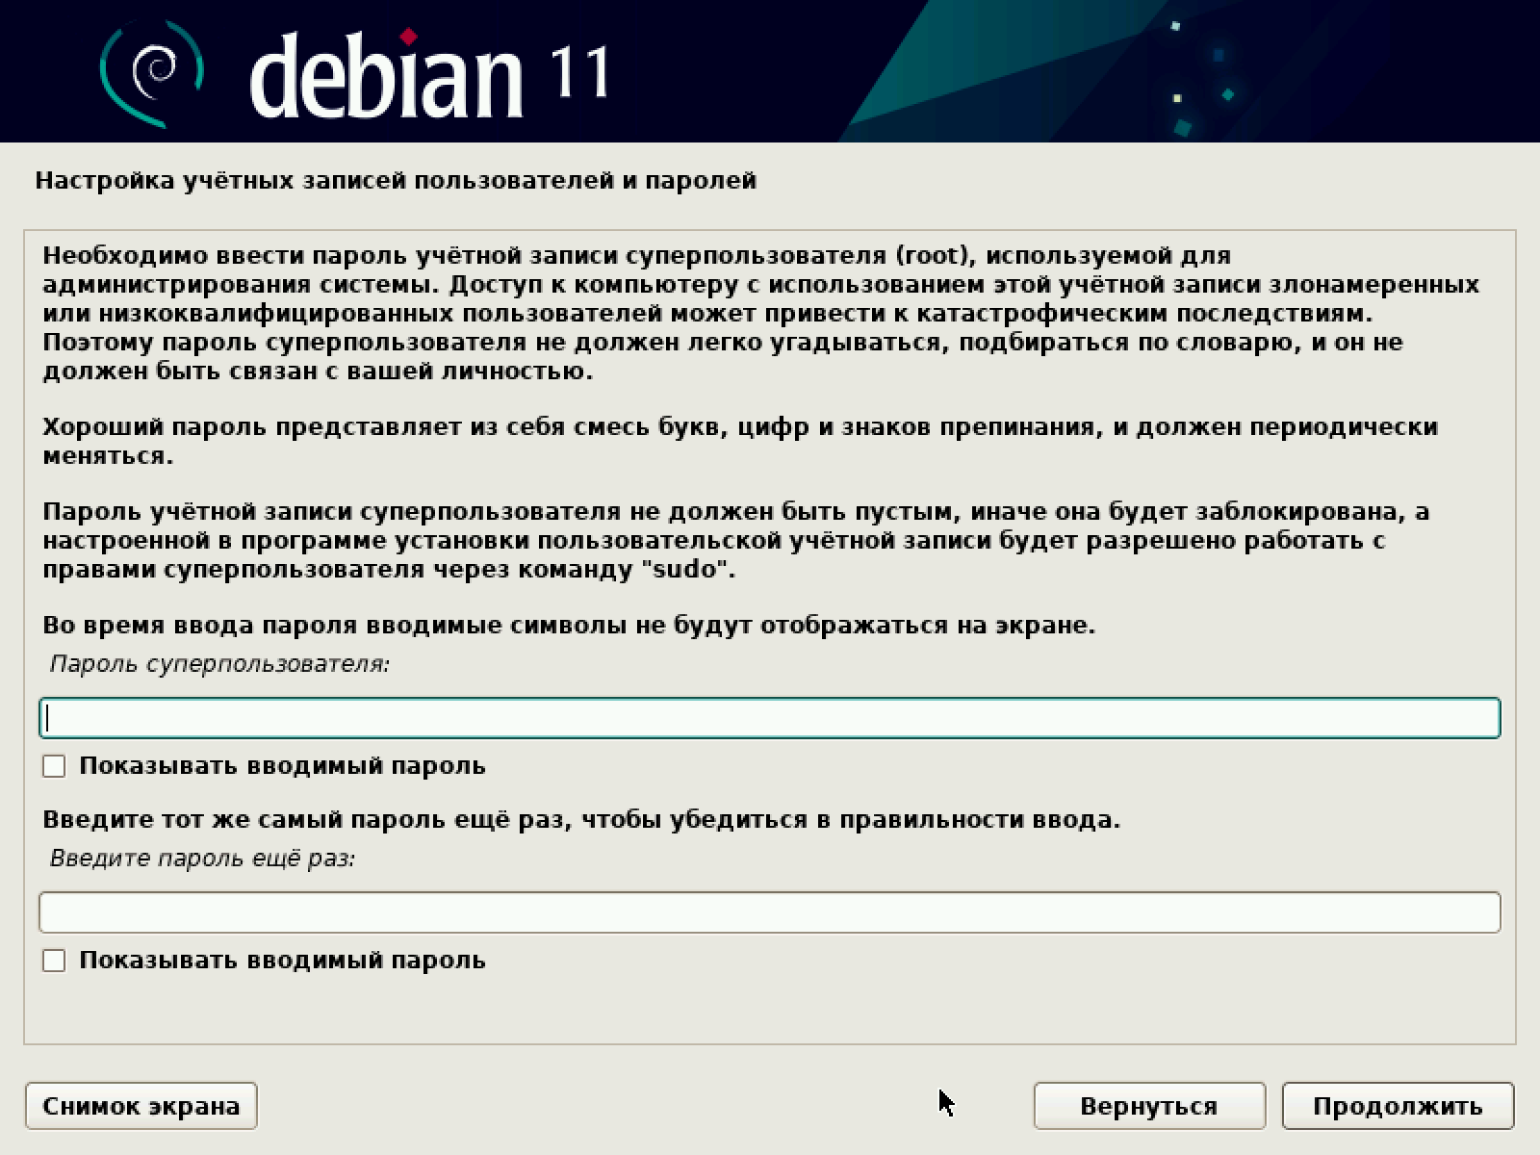
Переходим к установке паролей. В Debian есть два типа пользователей:
- Суперпользователь с правами администратора.
- Пользователь.
Для нас разница между пользователями не важна, так как VirtualBox находится на нашем частном компьютере. Однако доступ лучше всё же разграничить, чтобы случайно ничего не сломать.
Задаём пароль суперпользователя.
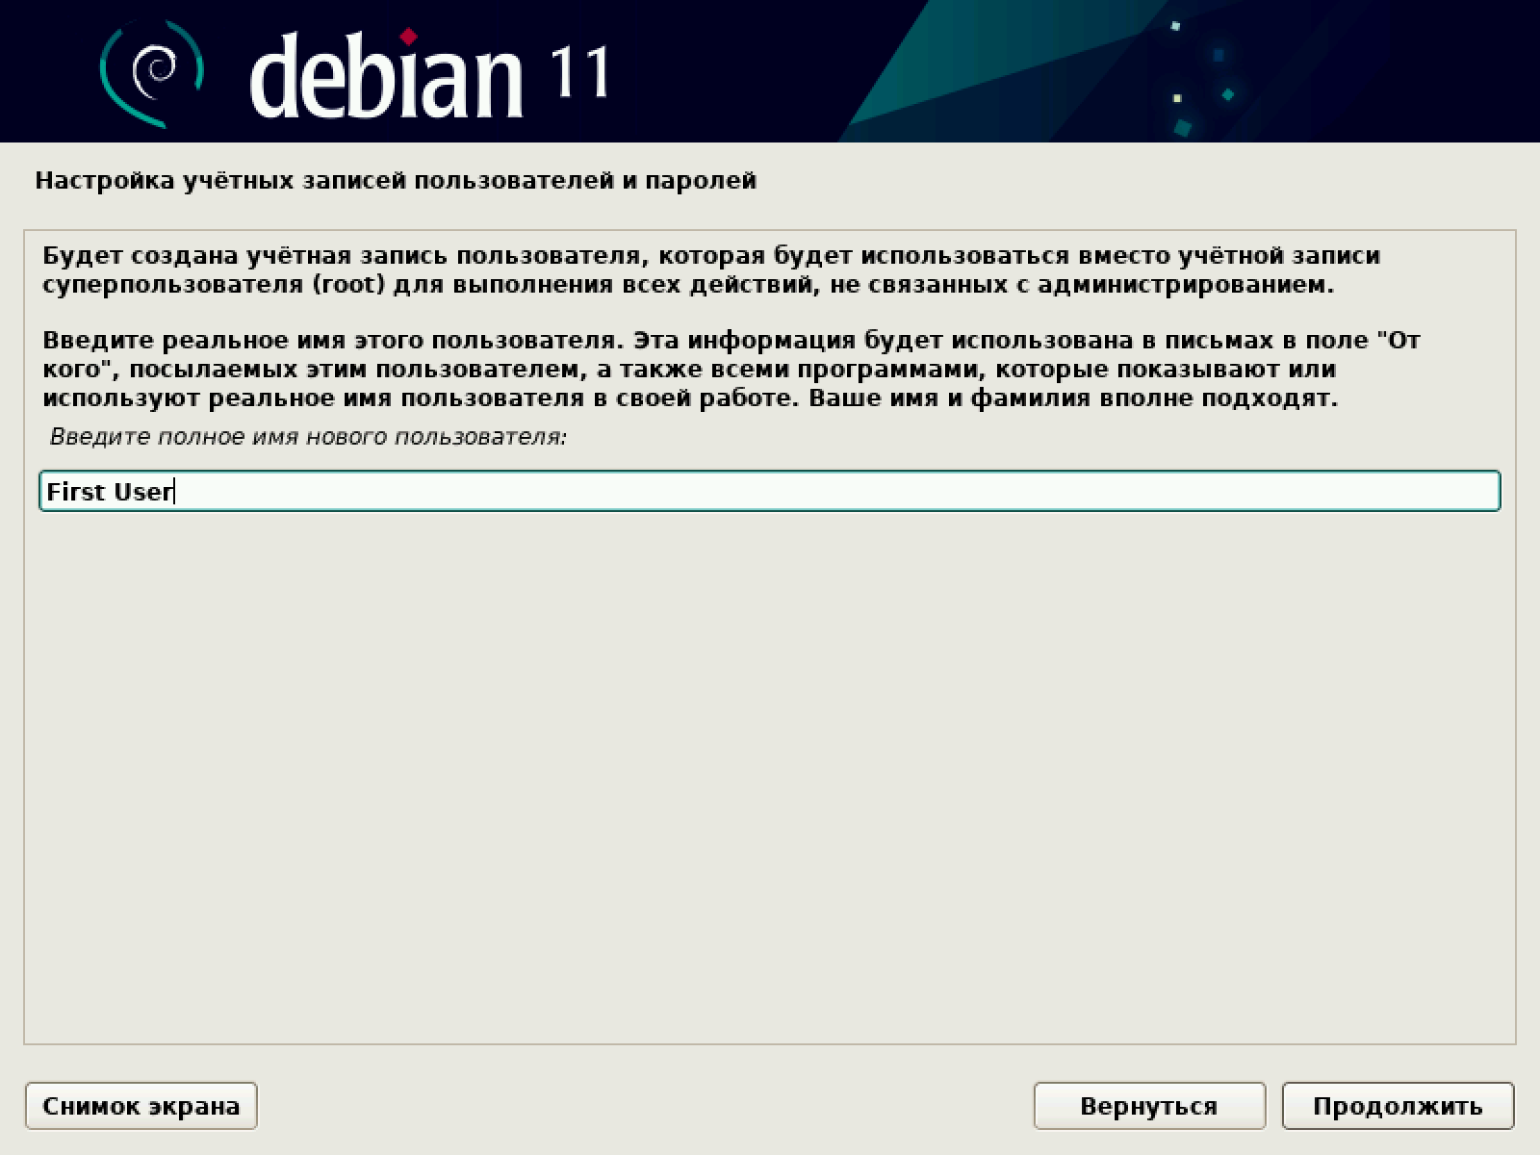
Переходим к настройке учётных записей обычного пользователя. Сначала даём ему имя. У нас это First User, но можно придумать свой вариант.
Теперь придумываем имя пользователя, под которым он будет известен в системе, например user, а затем задаём для него пароль.
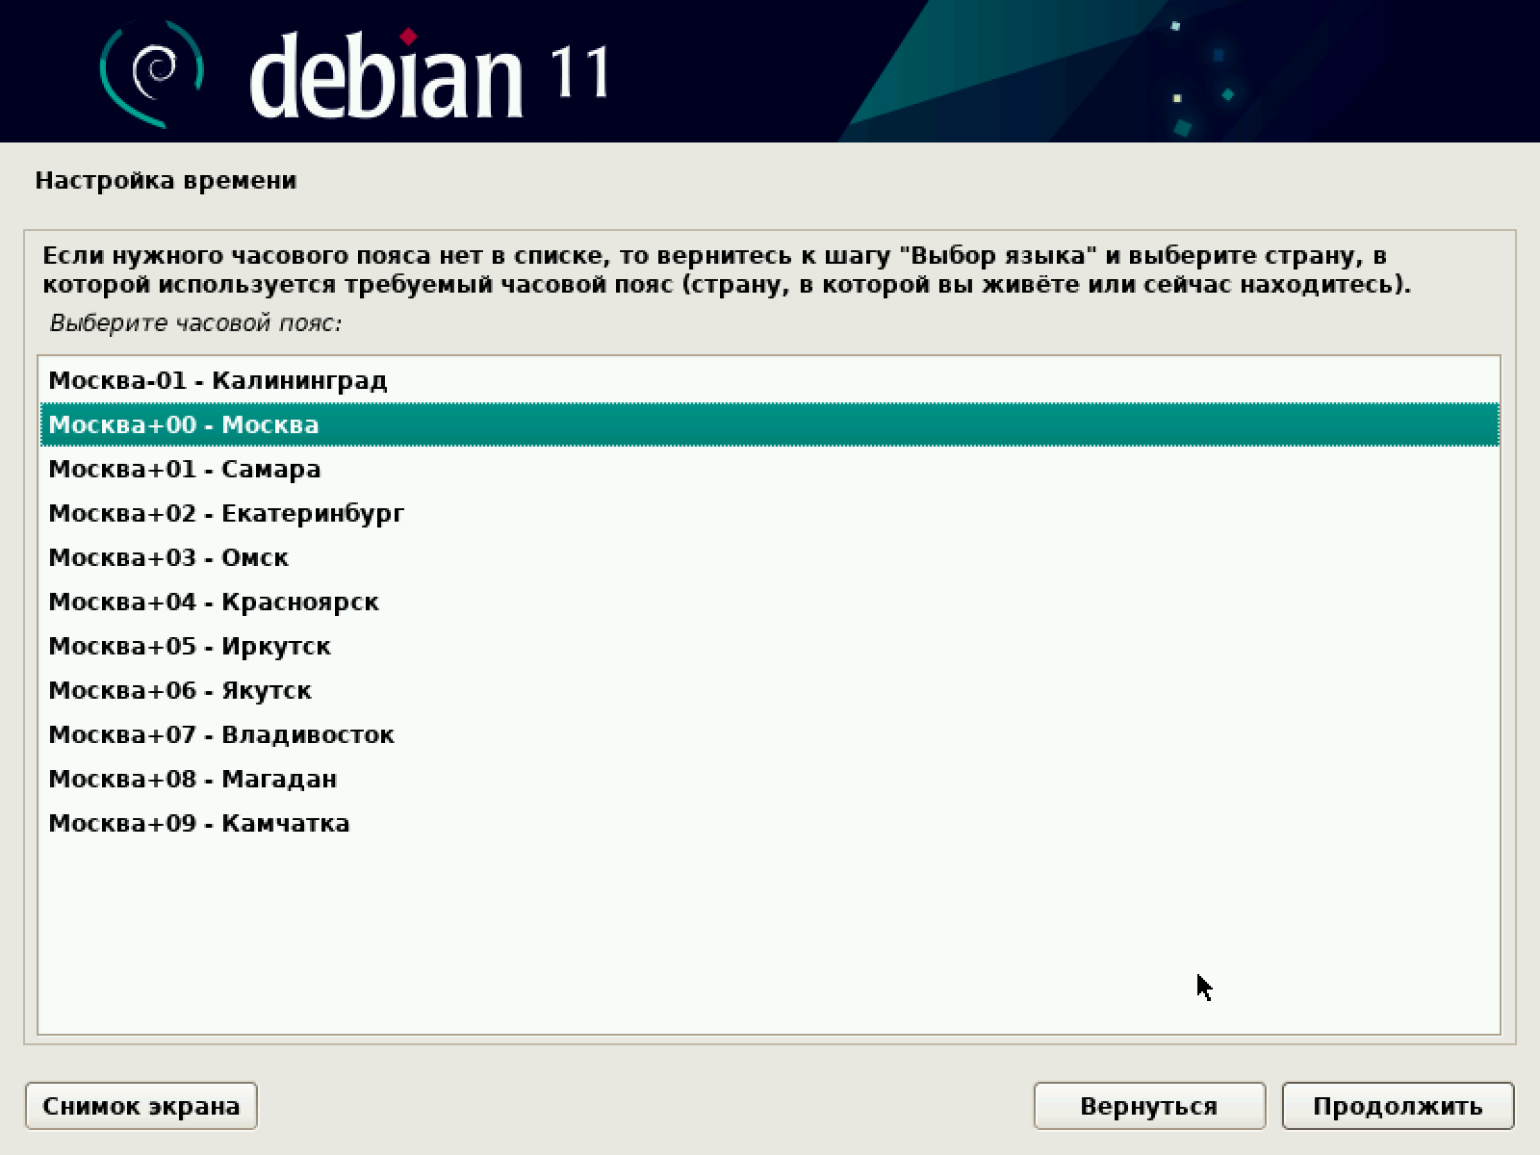
После установки паролей нам нужно выбрать время, которое будет отображаться при работе нашей машины. Устанавливаем свой часовой пояс.
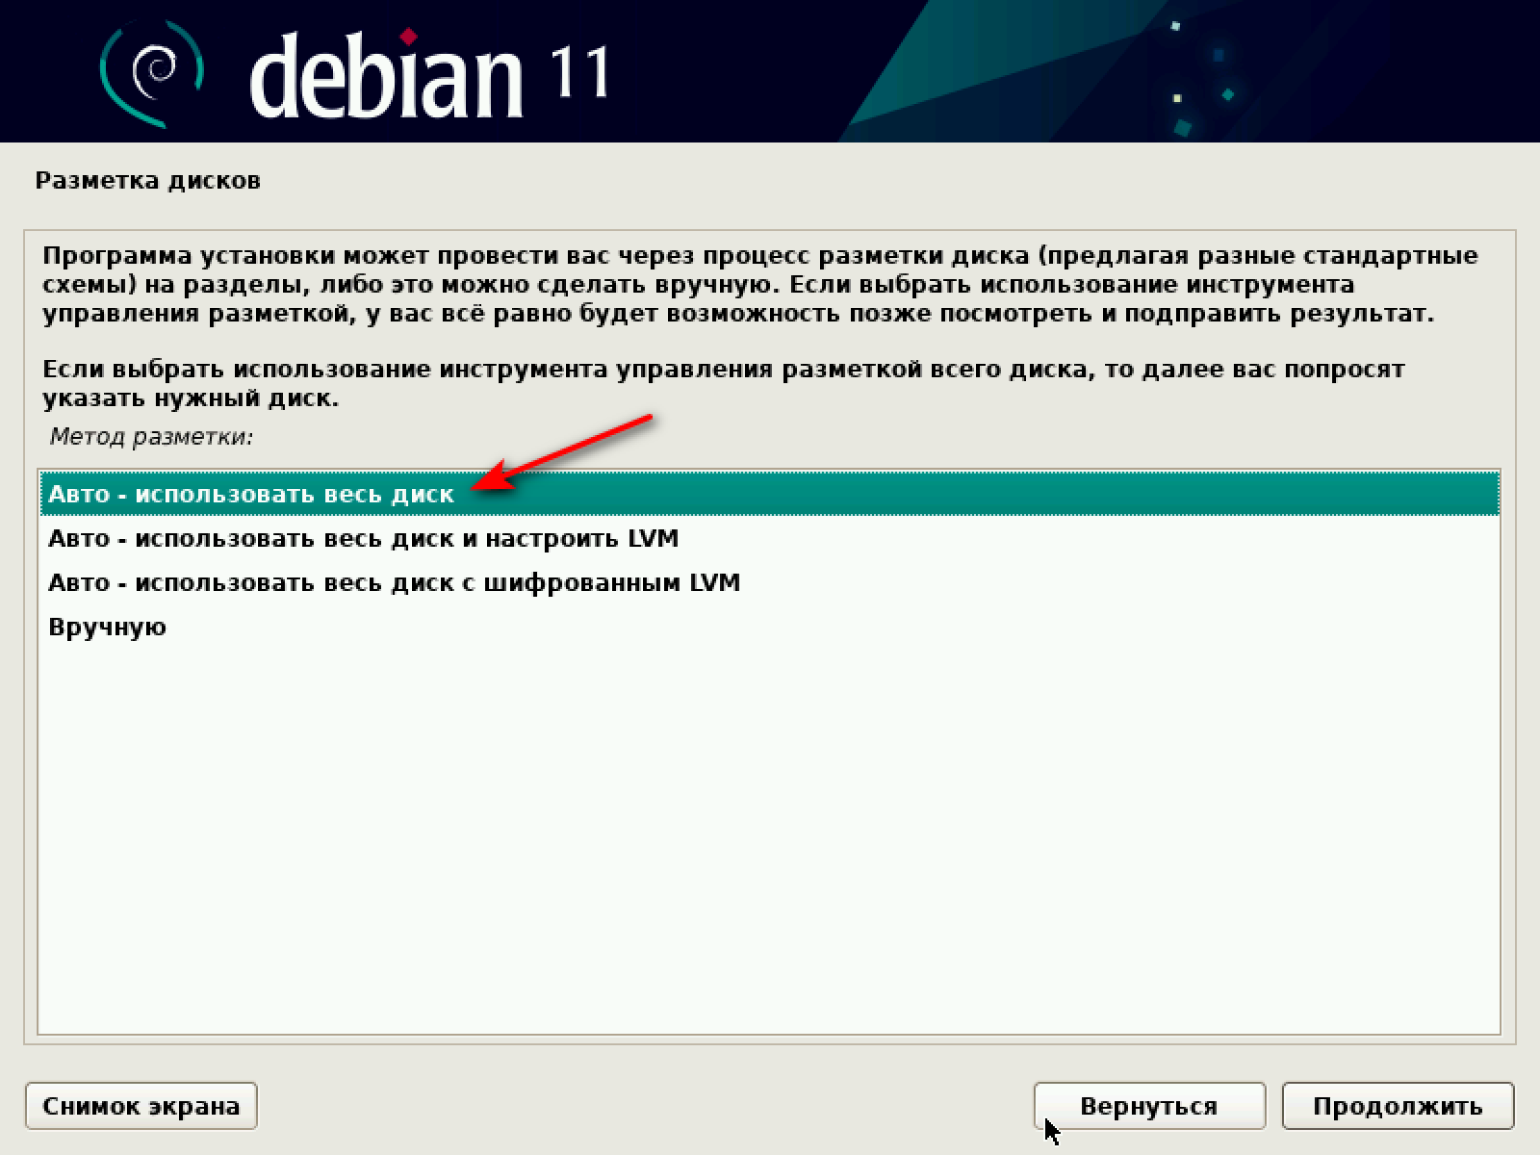
Переходим к разметке дисков. Система предлагает несколько опций на выбор. Наша цель — потестировать виртуальную машину, поэтому выбираем первый вариант: «Авто — использовать весь диск».
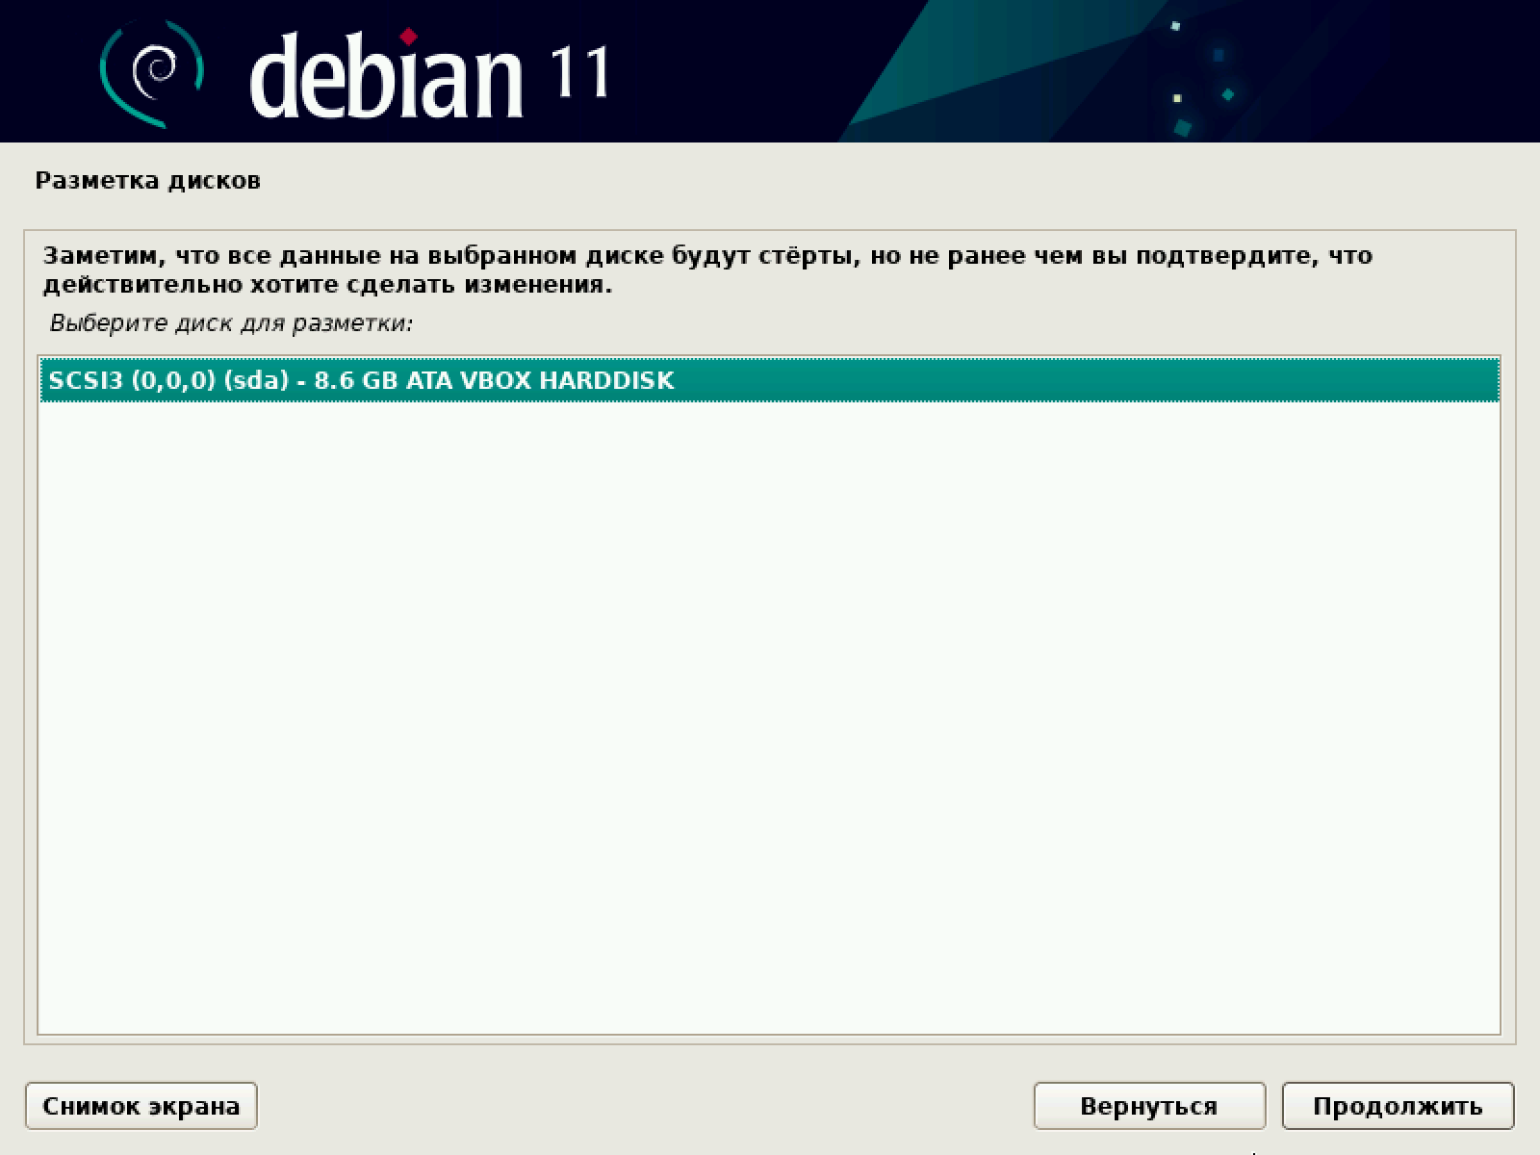
Появляется предупреждение о стирании всех данных на диске. Подтверждаем.
Выбираем схему разметки. По умолчанию система рекомендует первый вариант — «Все файлы в одном разделе (рекомендуется новичкам)». Соглашаемся и продолжаем.

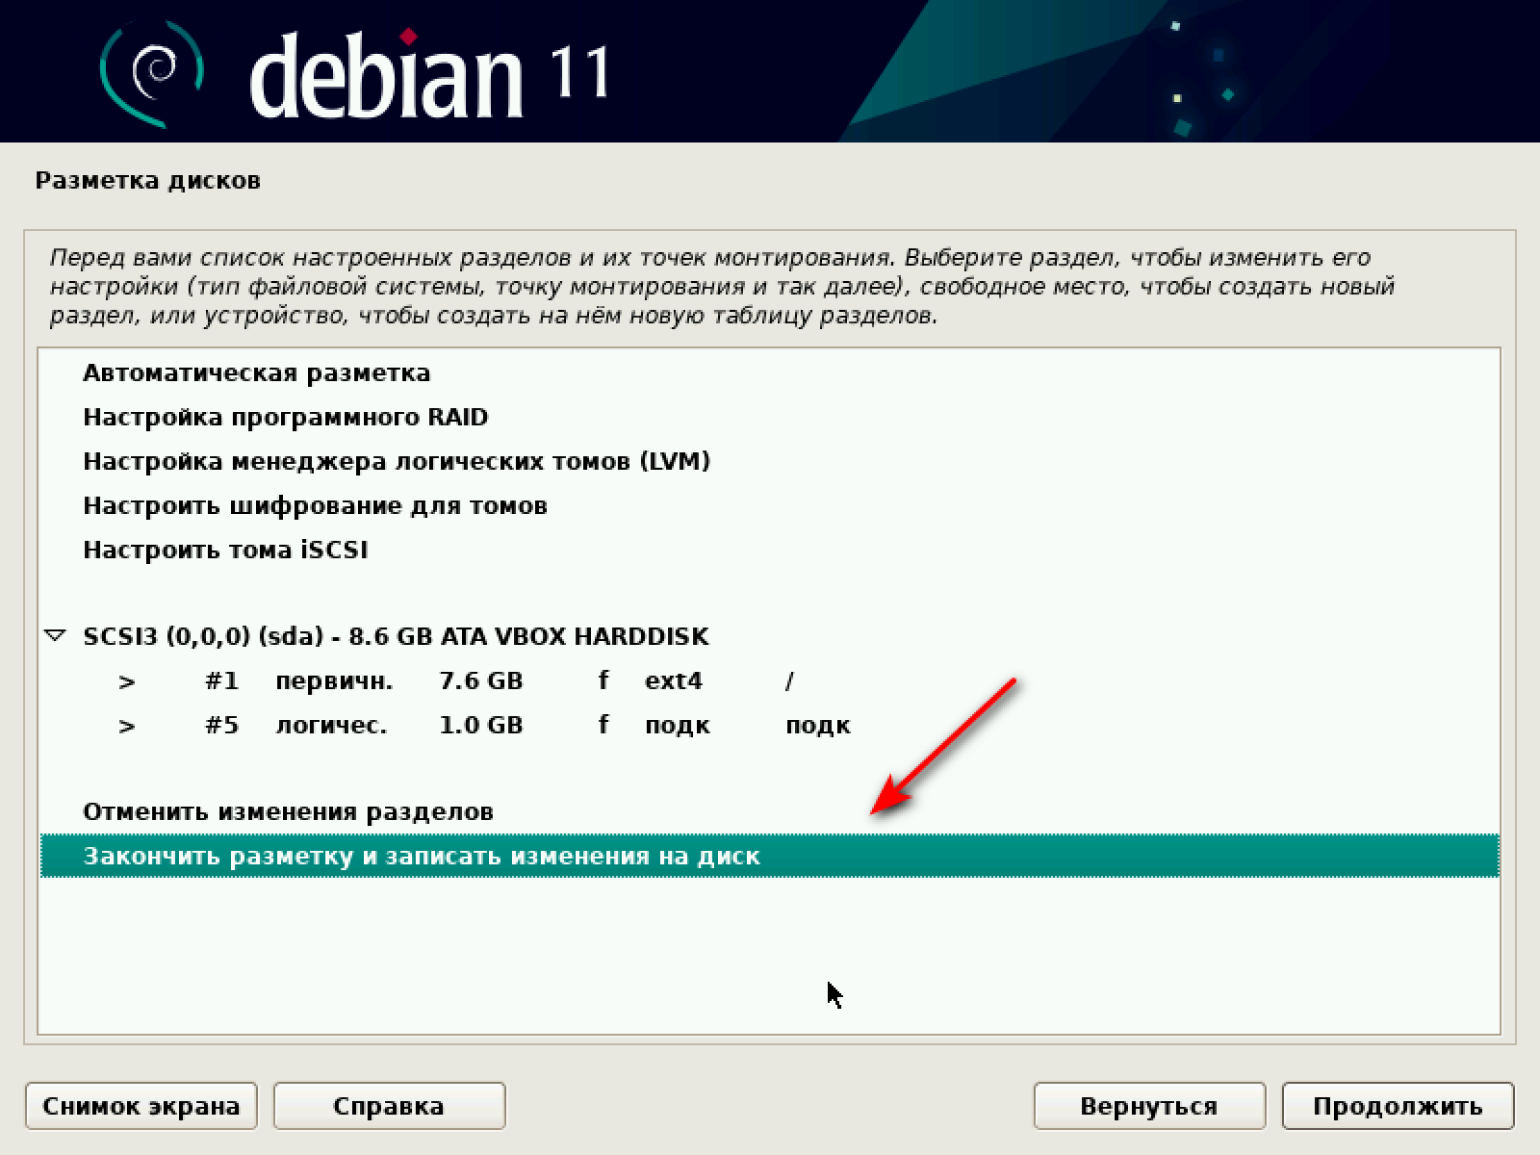
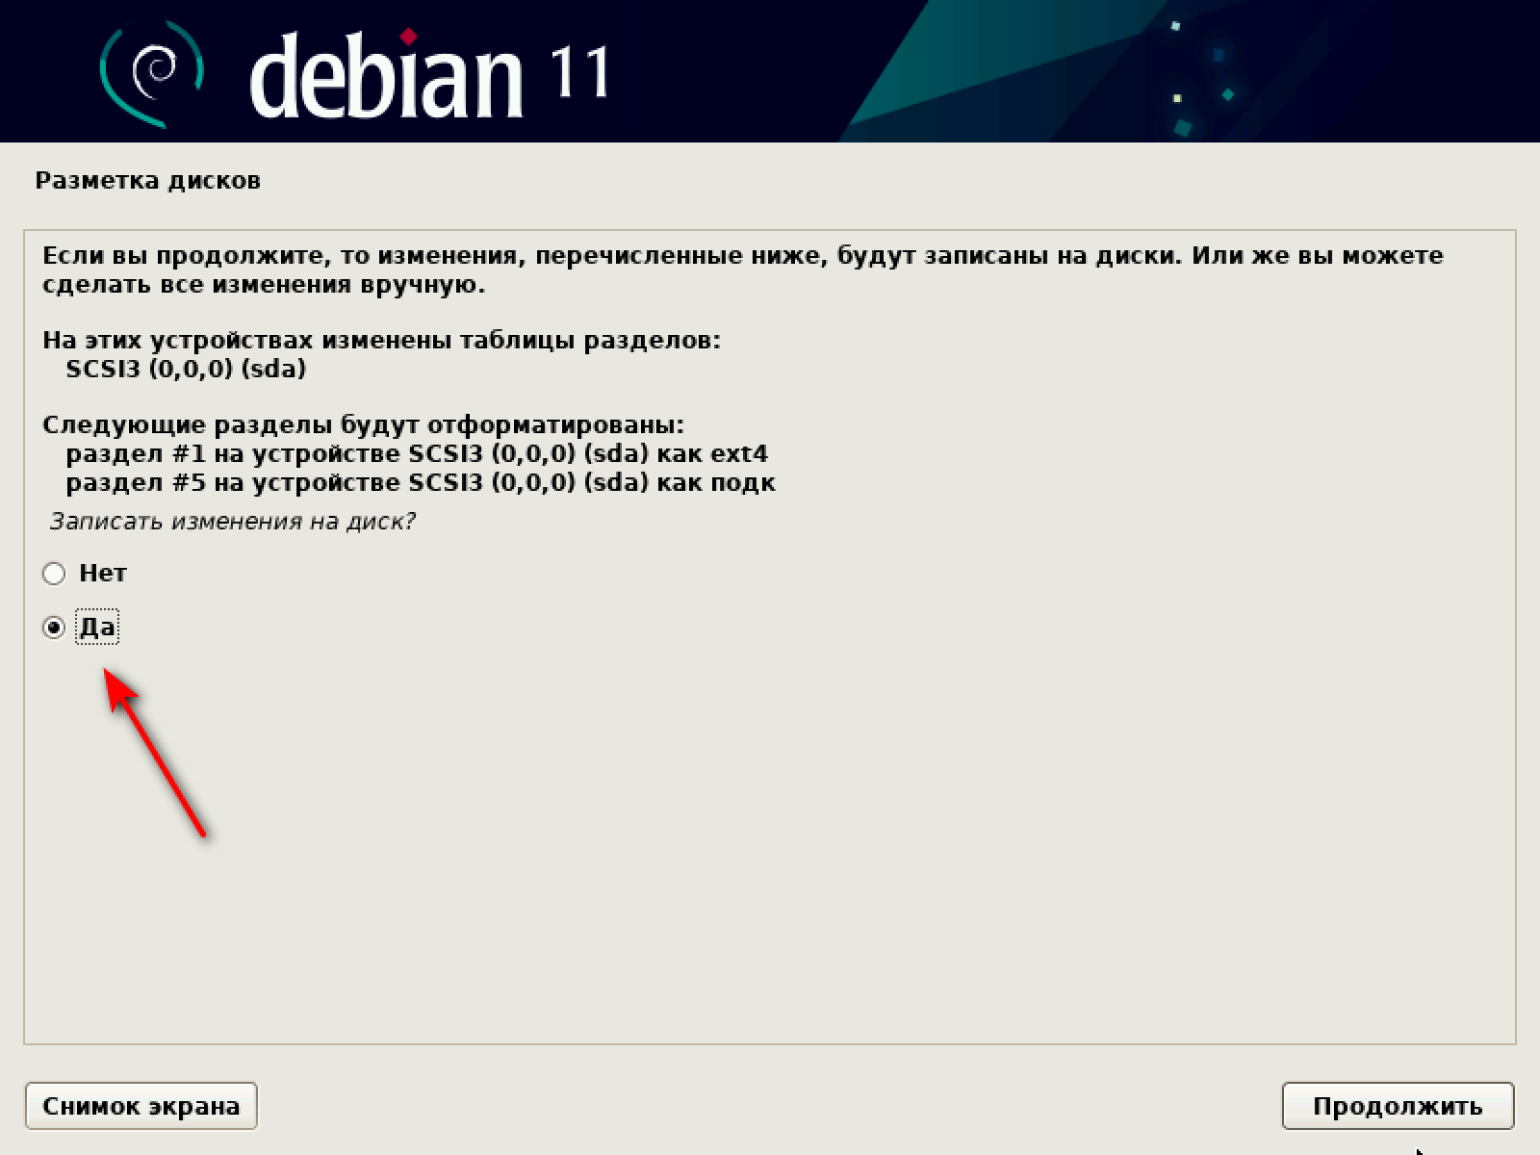
В появившемся окне ничего не меняем, только подтверждаем завершение разметки и запись изменений на диск.
В конце процедуры разметки в отдельном окне подтверждаем сохранение изменений на диске. Ставим «Да» и нажимаем «Продолжить».
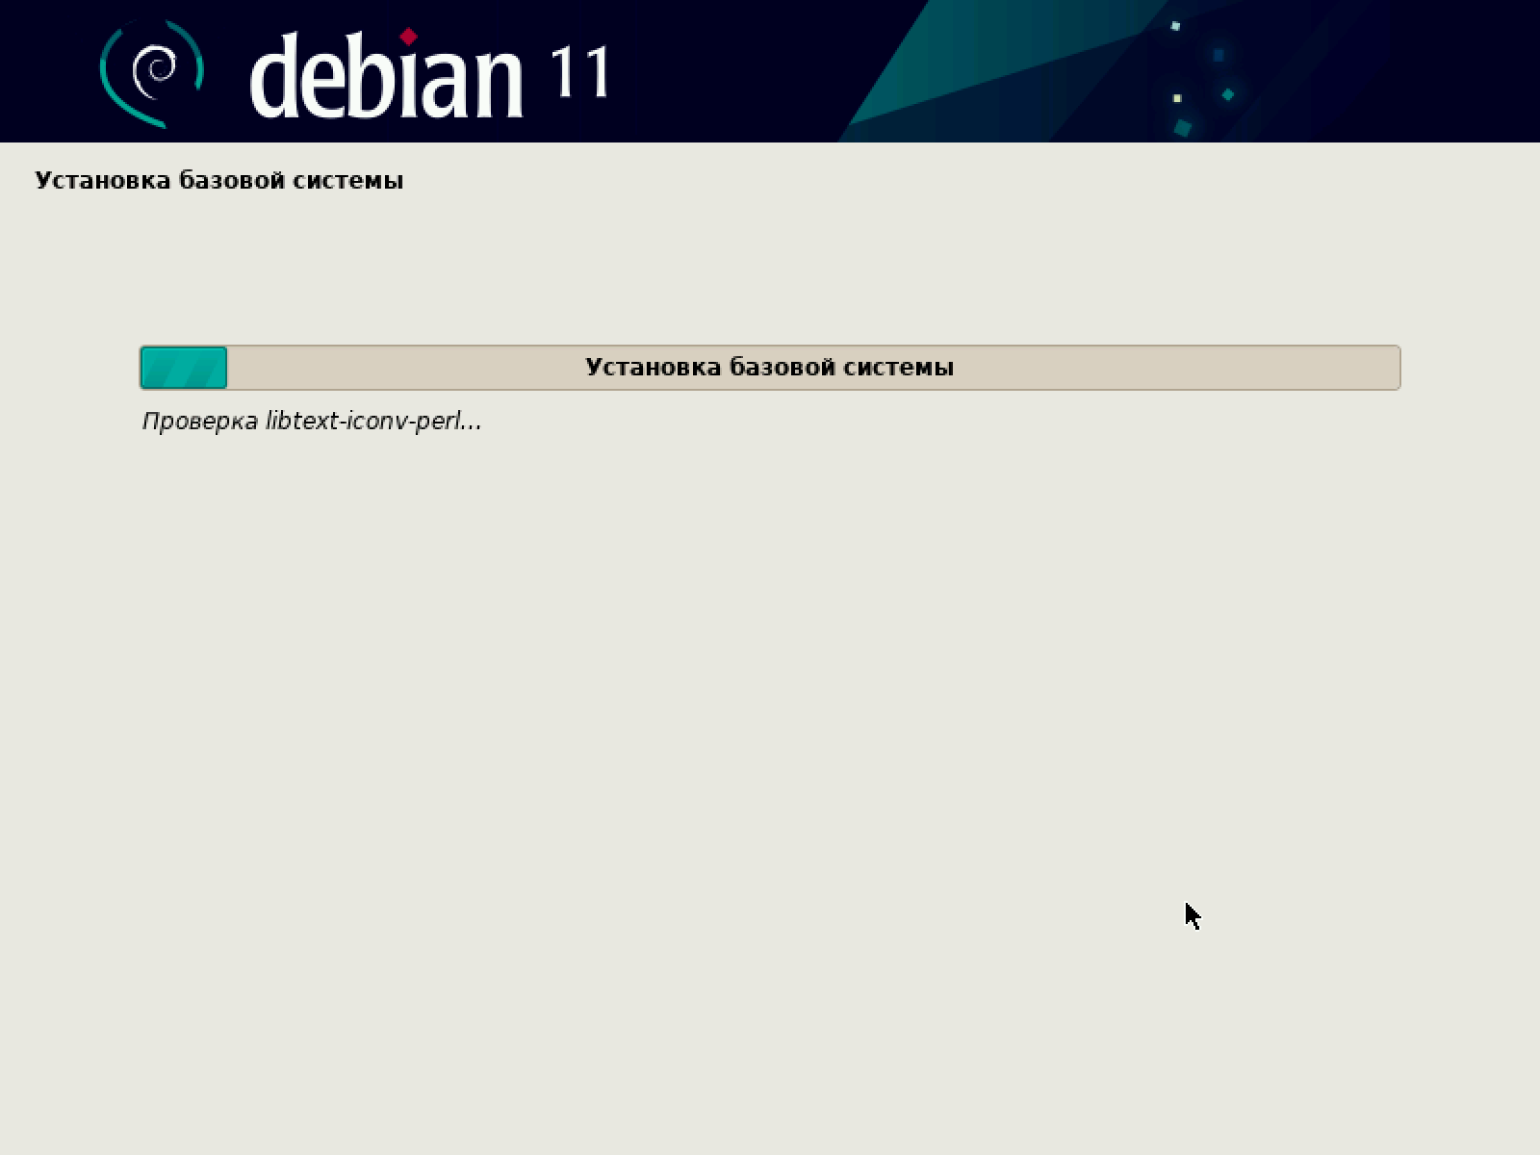
Начинается установка базовой системы.
В процессе установки система может сообщить о найденной метке и предложить просканировать другой диск. Этого делать не надо — оставляем «Нет» и нажимаем «Продолжить».

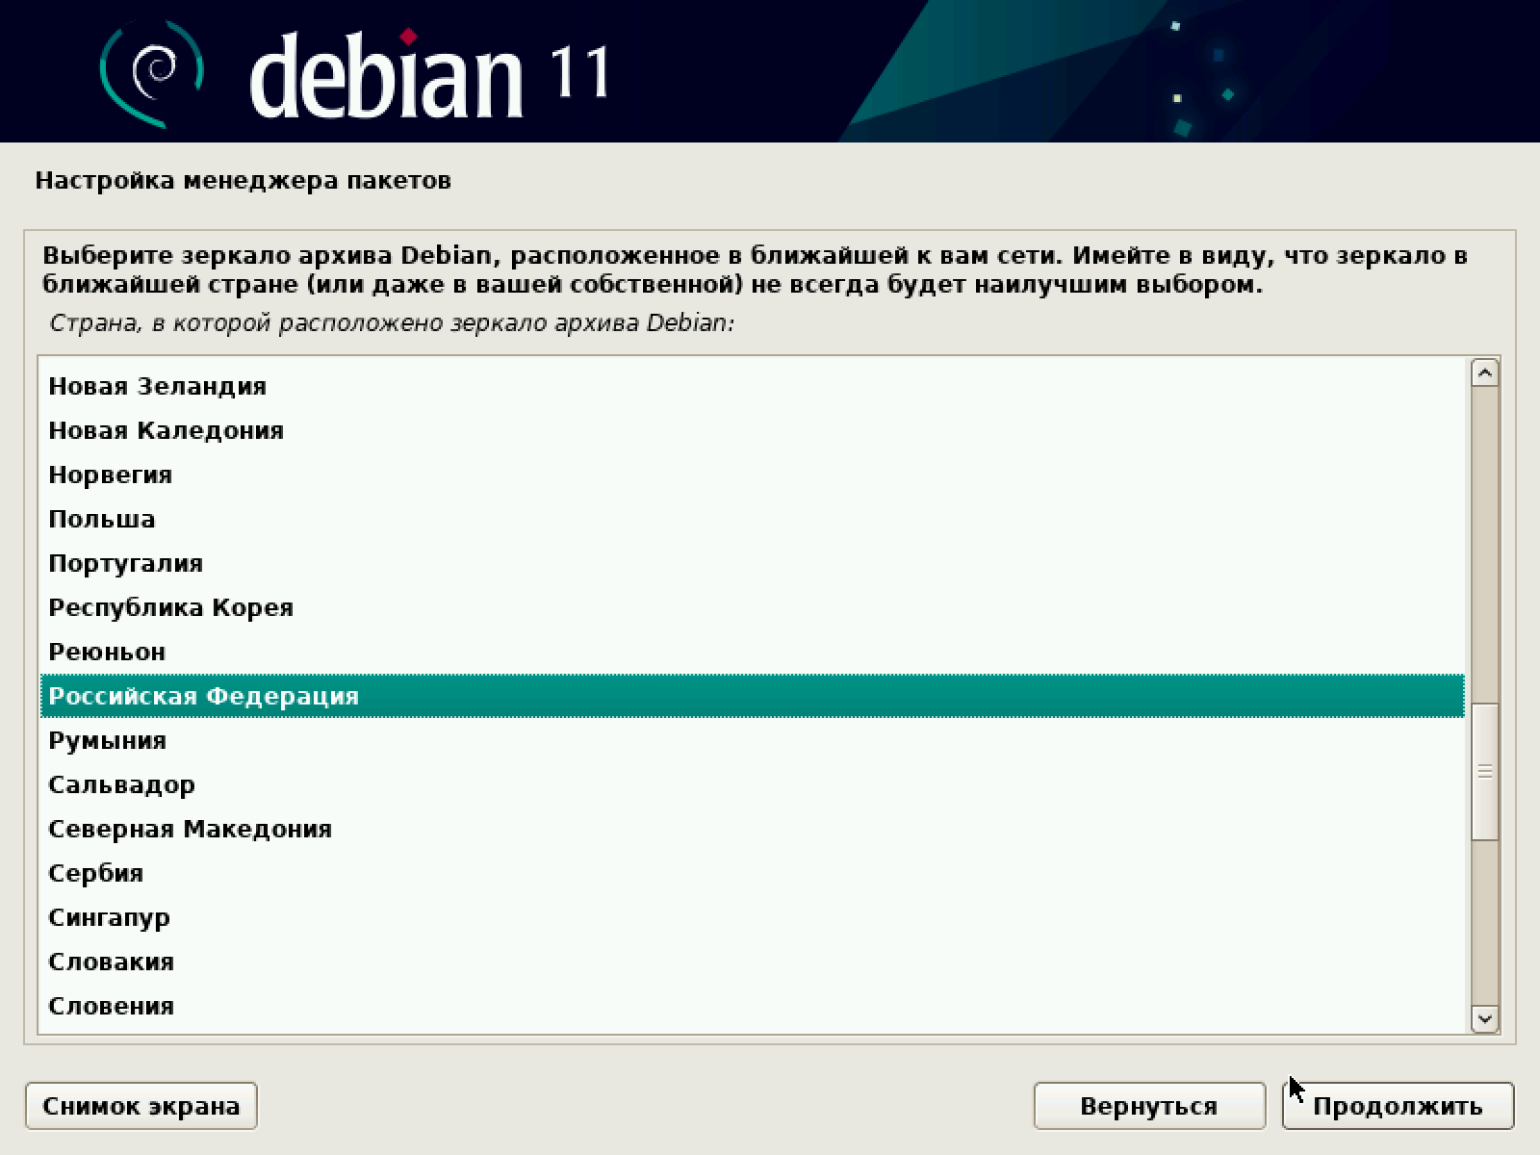
По окончании установки система предлагает выбрать зеркало архива. Страну выбираем на своё усмотрение.
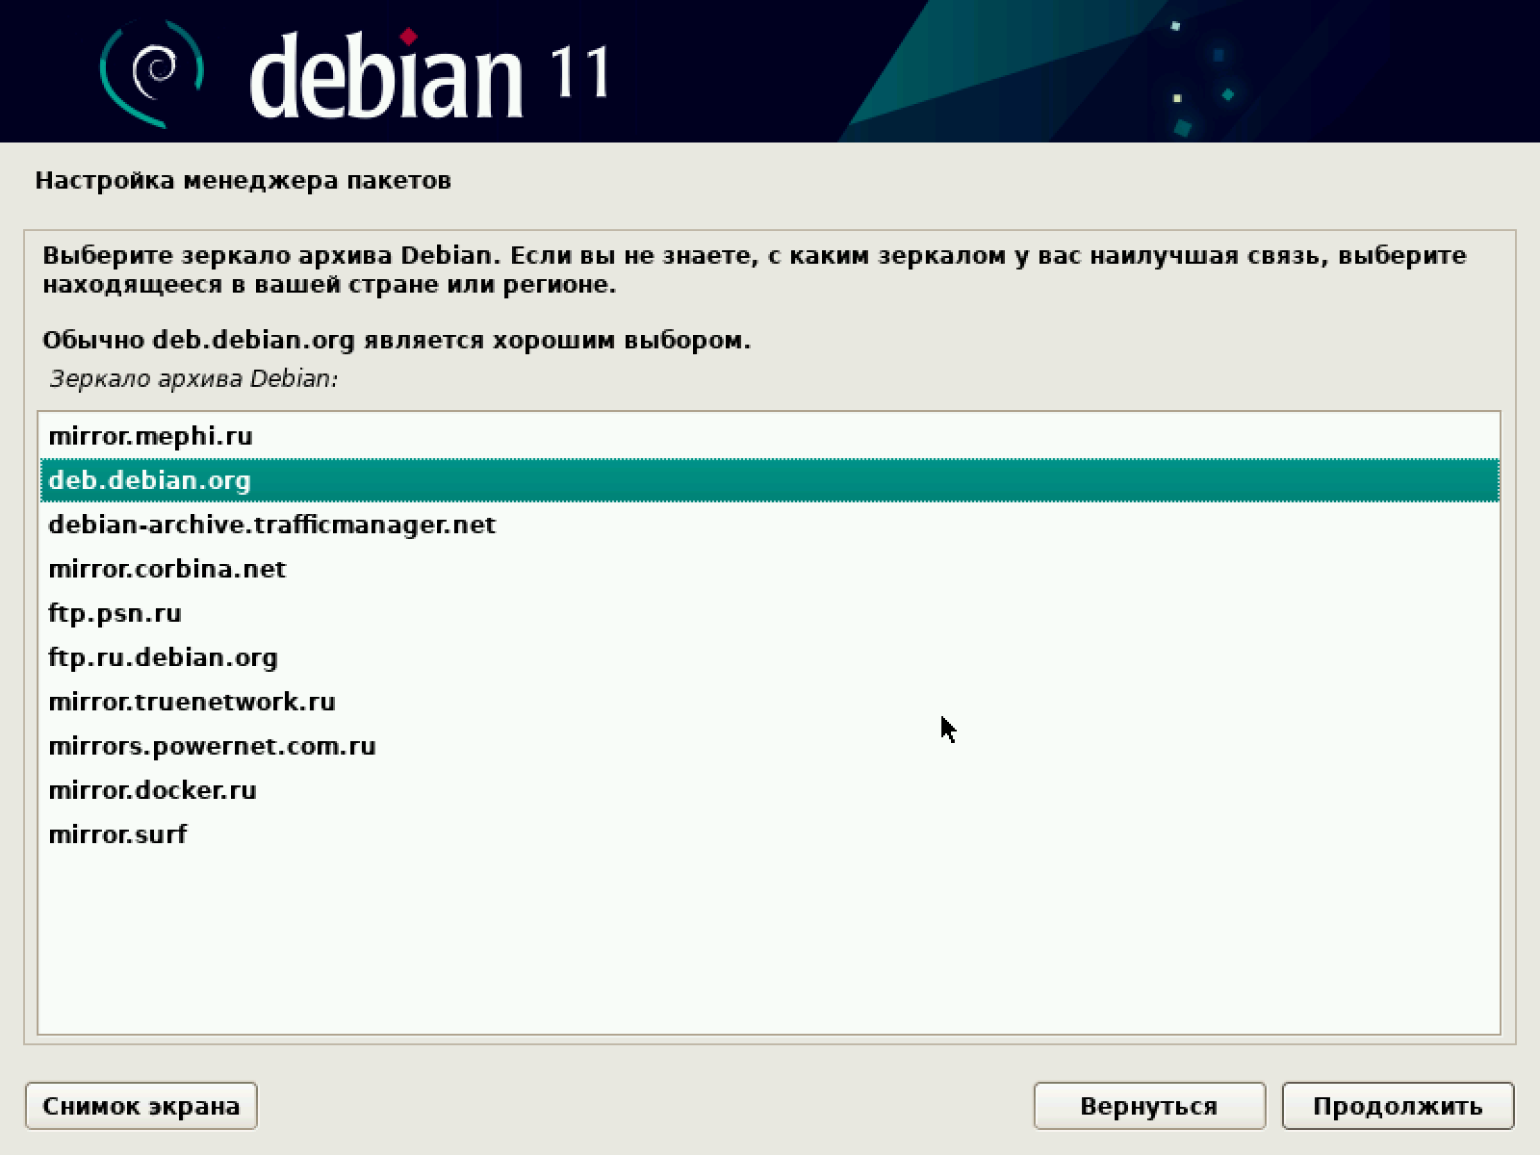
В списке зеркал архива оставляем предложенный по умолчанию deb.debian.org.
Если отказаться от выбора зеркала, будет загружена система с минимальными настройками. Она содержит только базовые компоненты и не имеет предустановленного графического интерфейса пользователя. Работа с такой системой требует хороших навыков администрирования и не подходит для новичков.
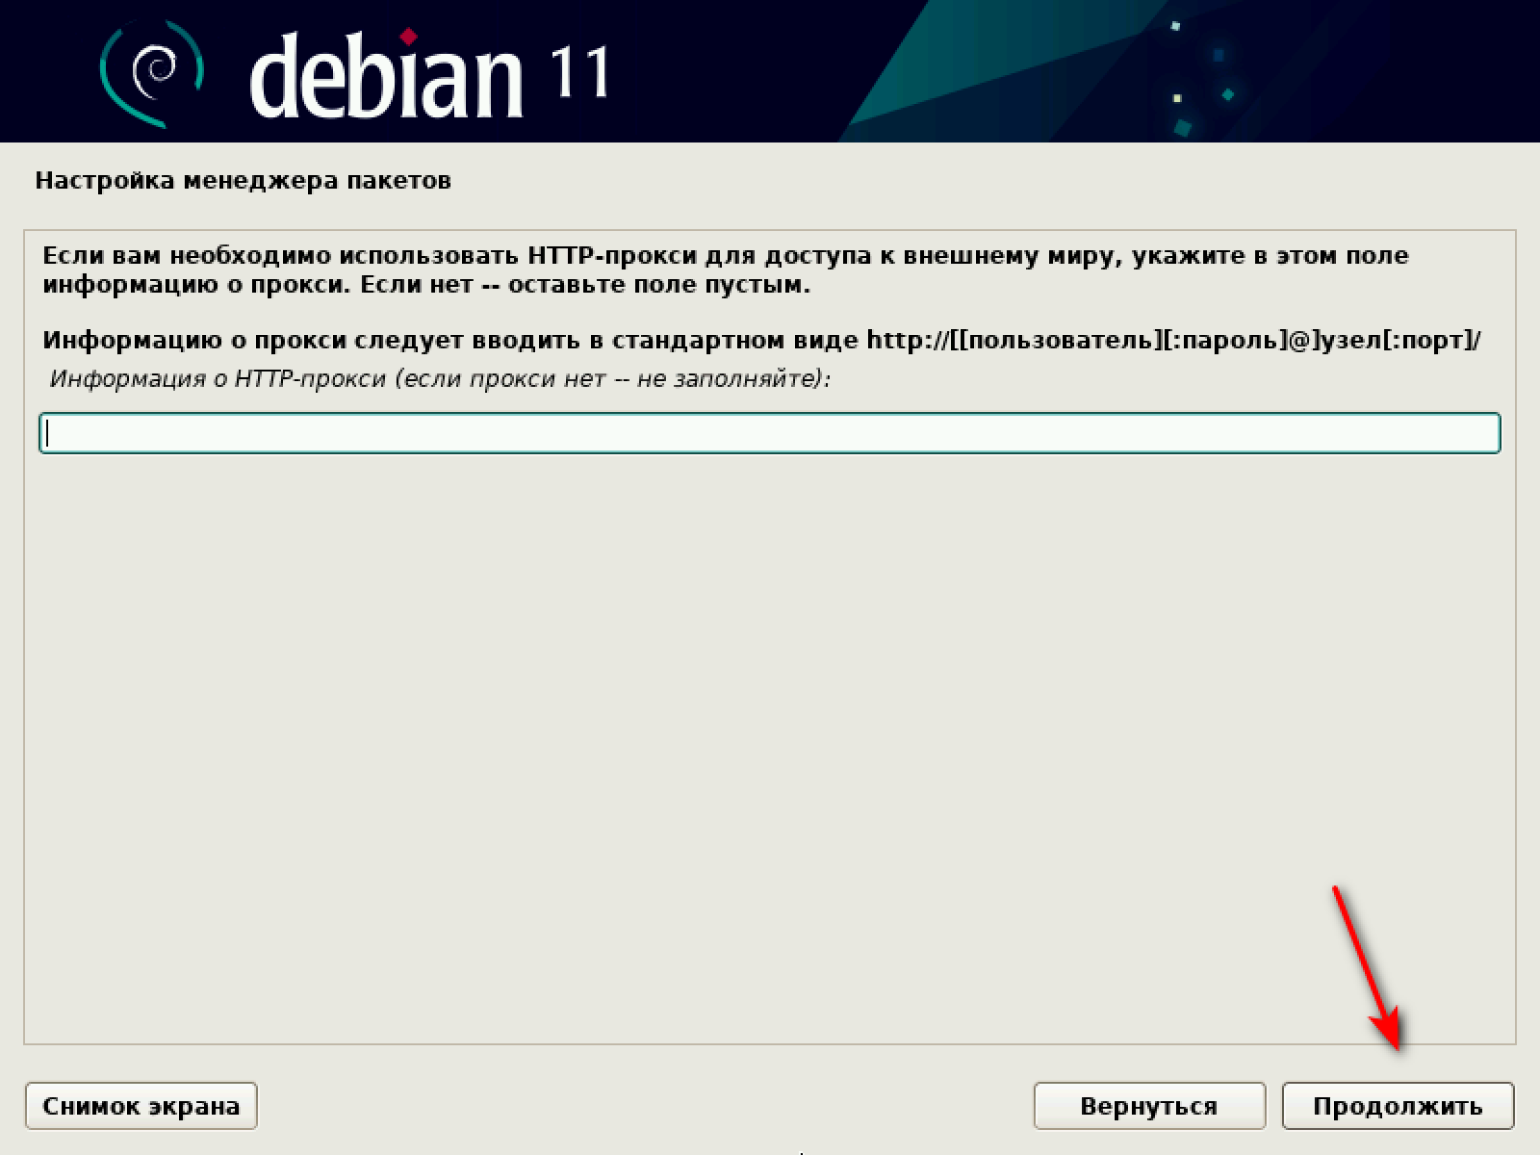
Система предлагает ввести информацию об HTTP-прокси. Оставляем поле пустым и продолжаем.
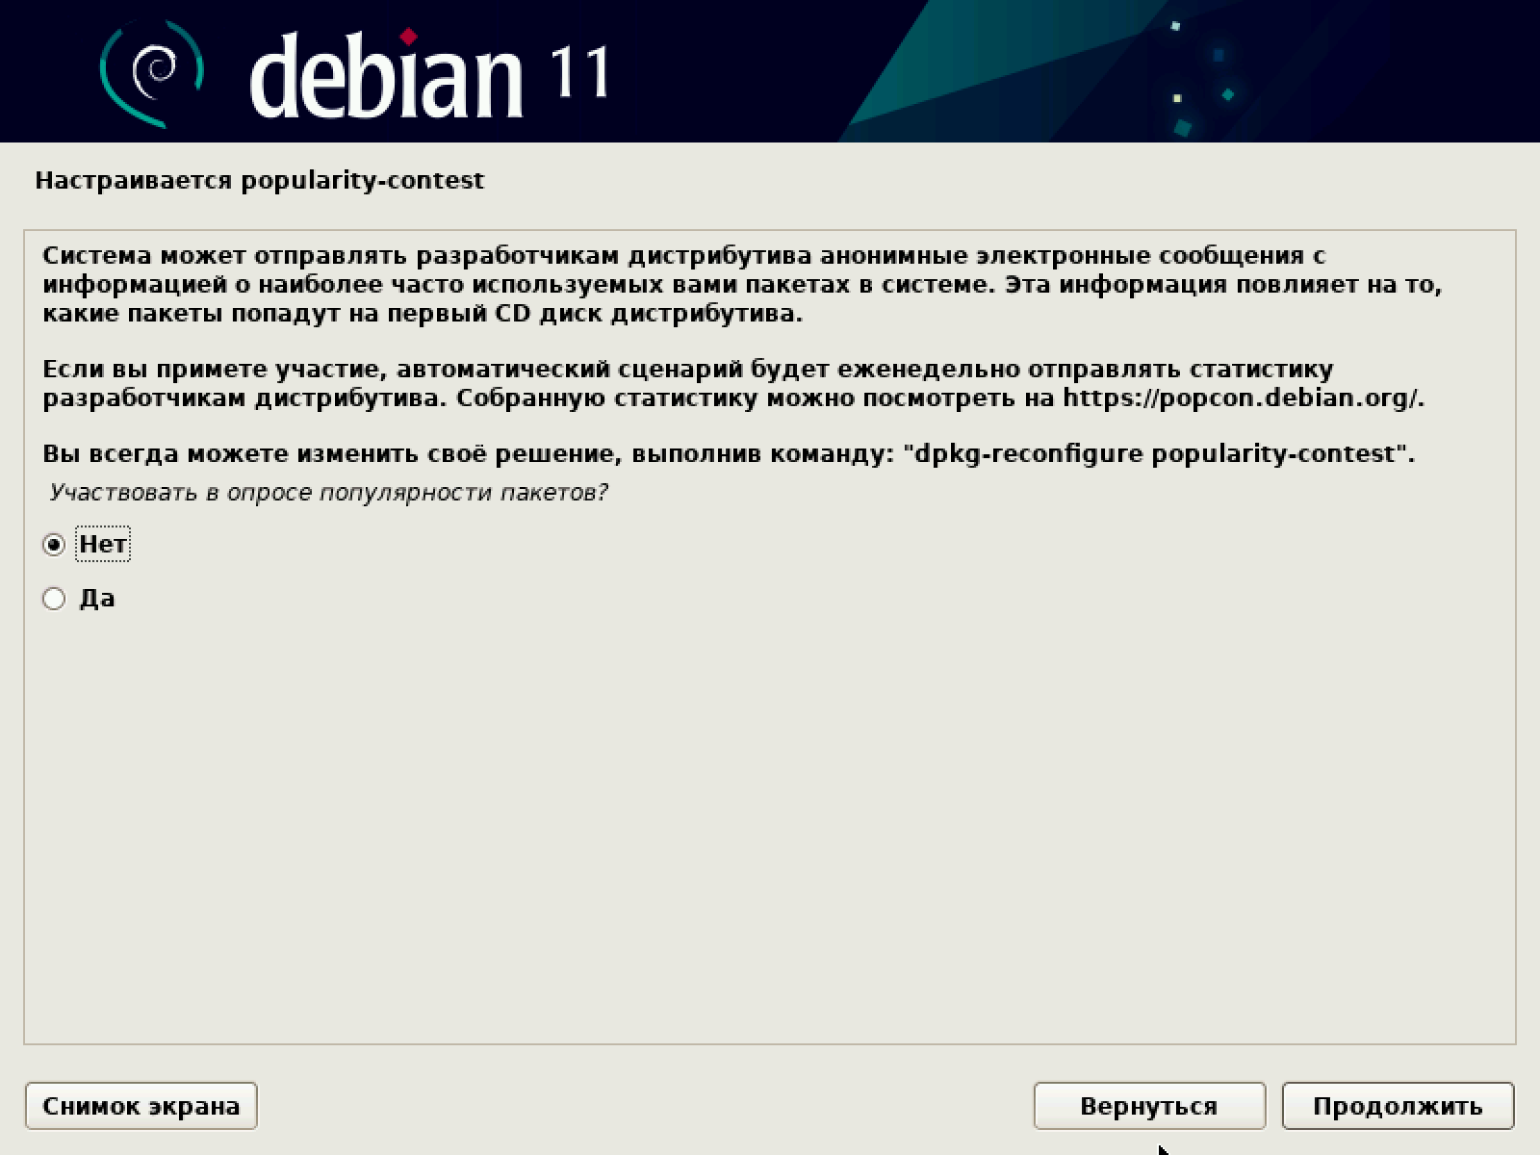
Система предлагает настроить менеджер пакетов. Нам это не нужно, поэтому просто идём дальше к установке базового пакета. По завершении установки система предложит отправлять разработчикам дистрибутива анонимные сообщения со статистикой используемых пакетов. Это ни на что не влияет, поэтому соглашаемся или отказываемся.
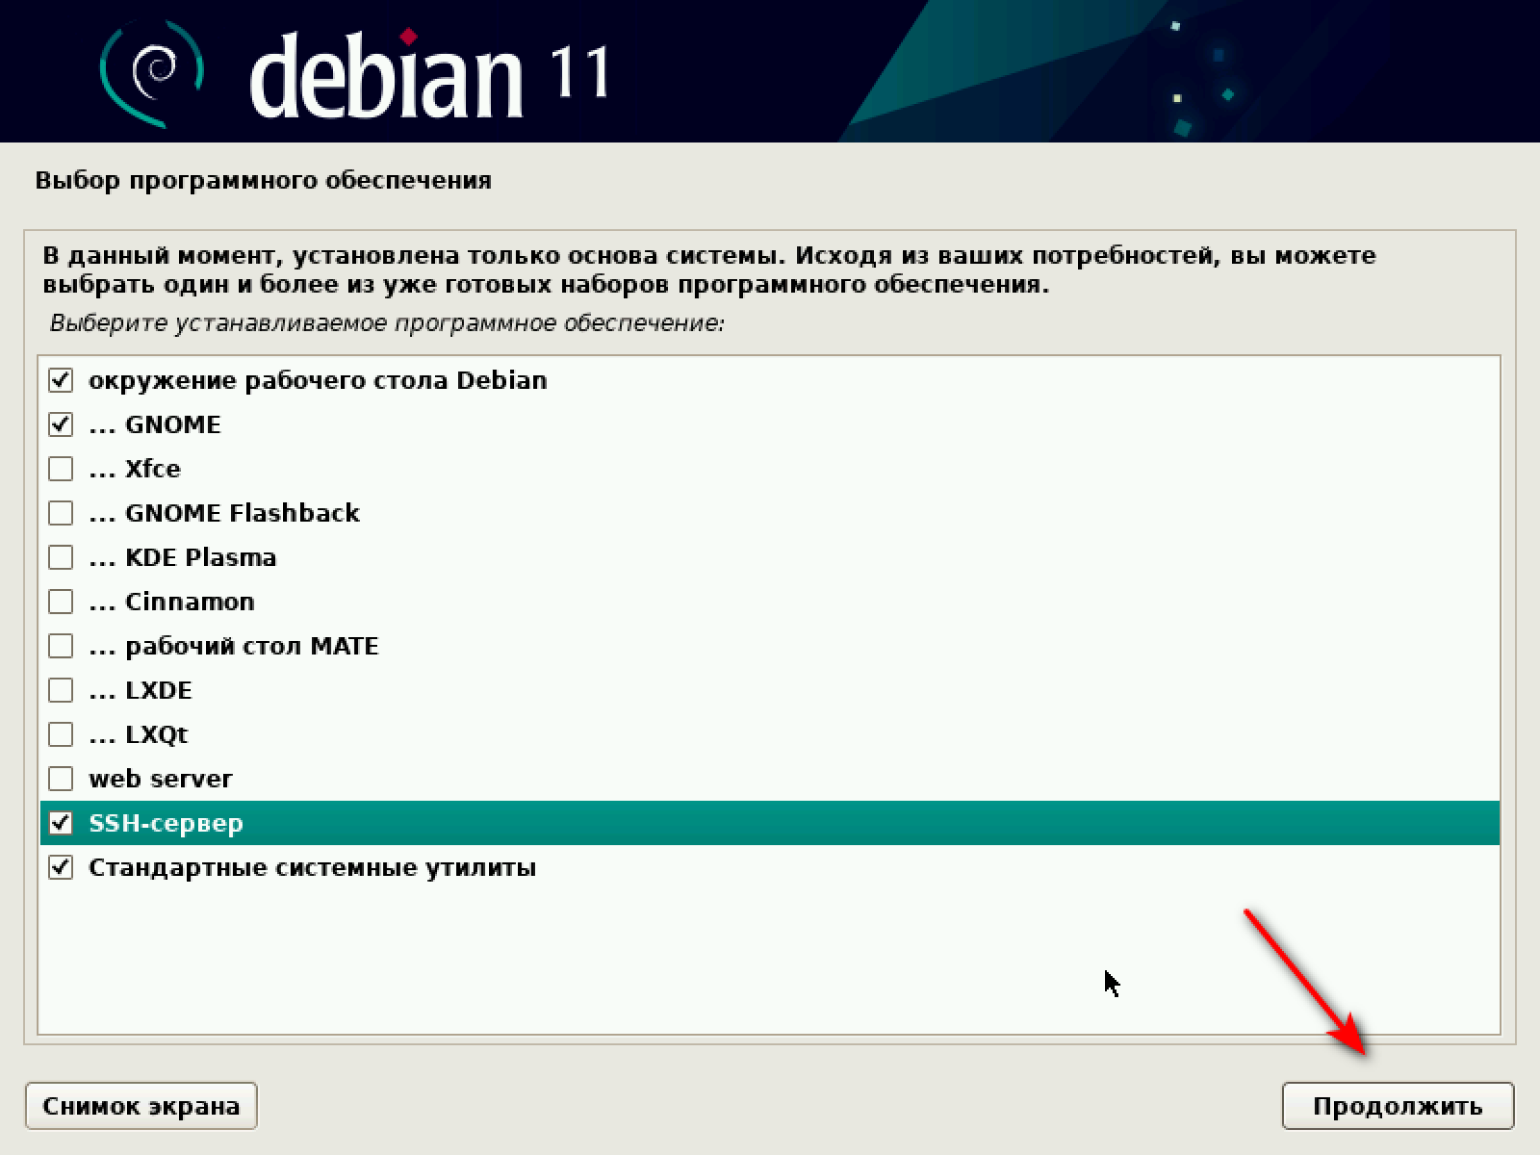
Переходим к выбору ПО. Система предлагает установить один из вариантов окружения рабочего стола. Мы установим GNOME. Он и KDE Plasma — два наиболее популярных варианта рабочего стола. У него минималистичный дизайн с фокусом на удобство использования. Интерфейс напоминает macOS.
KDE Plasma имеет более насыщенный интерфейс с различными панелями инструментов и меню. Интерфейс напоминает Windows.
Если есть желание разобраться, то можно установить на разные машины GNOME и KDE Plasma, сравнить и выбрать рабочий стол на свой вкус.
Мы установим GNOME, поэтому выбираем комбинацию, как на скриншоте, и продолжаем.
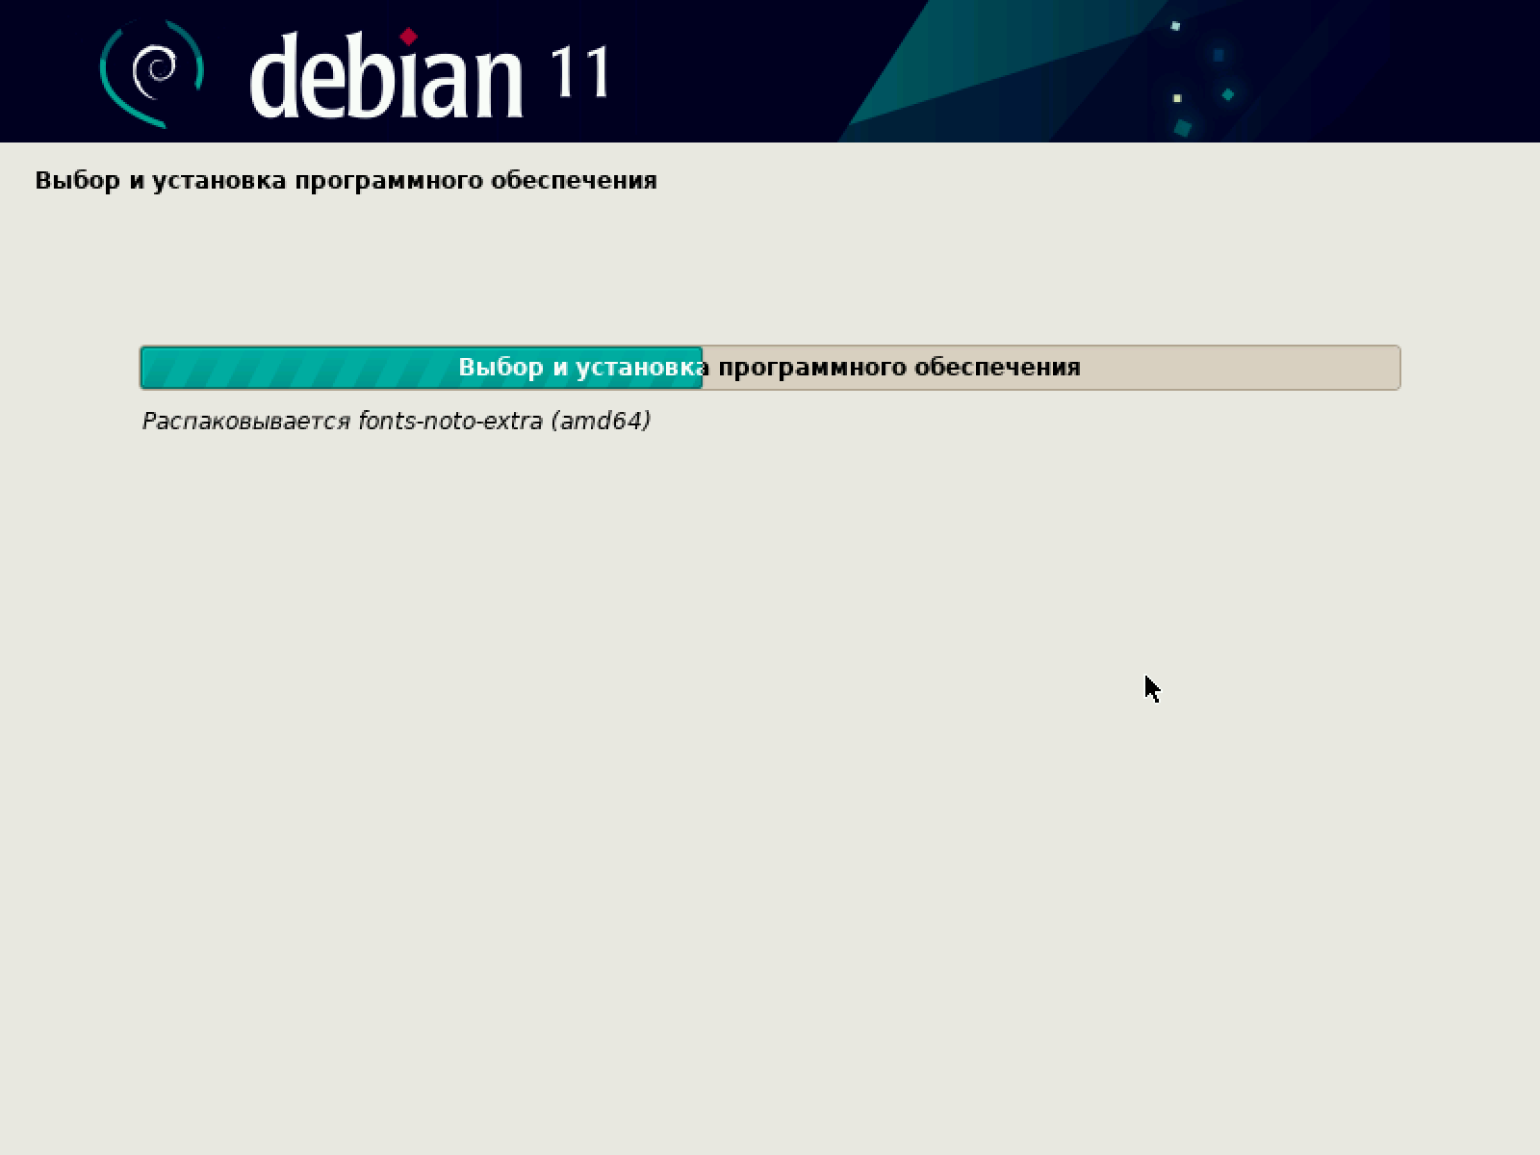
Установка в среднем занимает 10–15 минут.
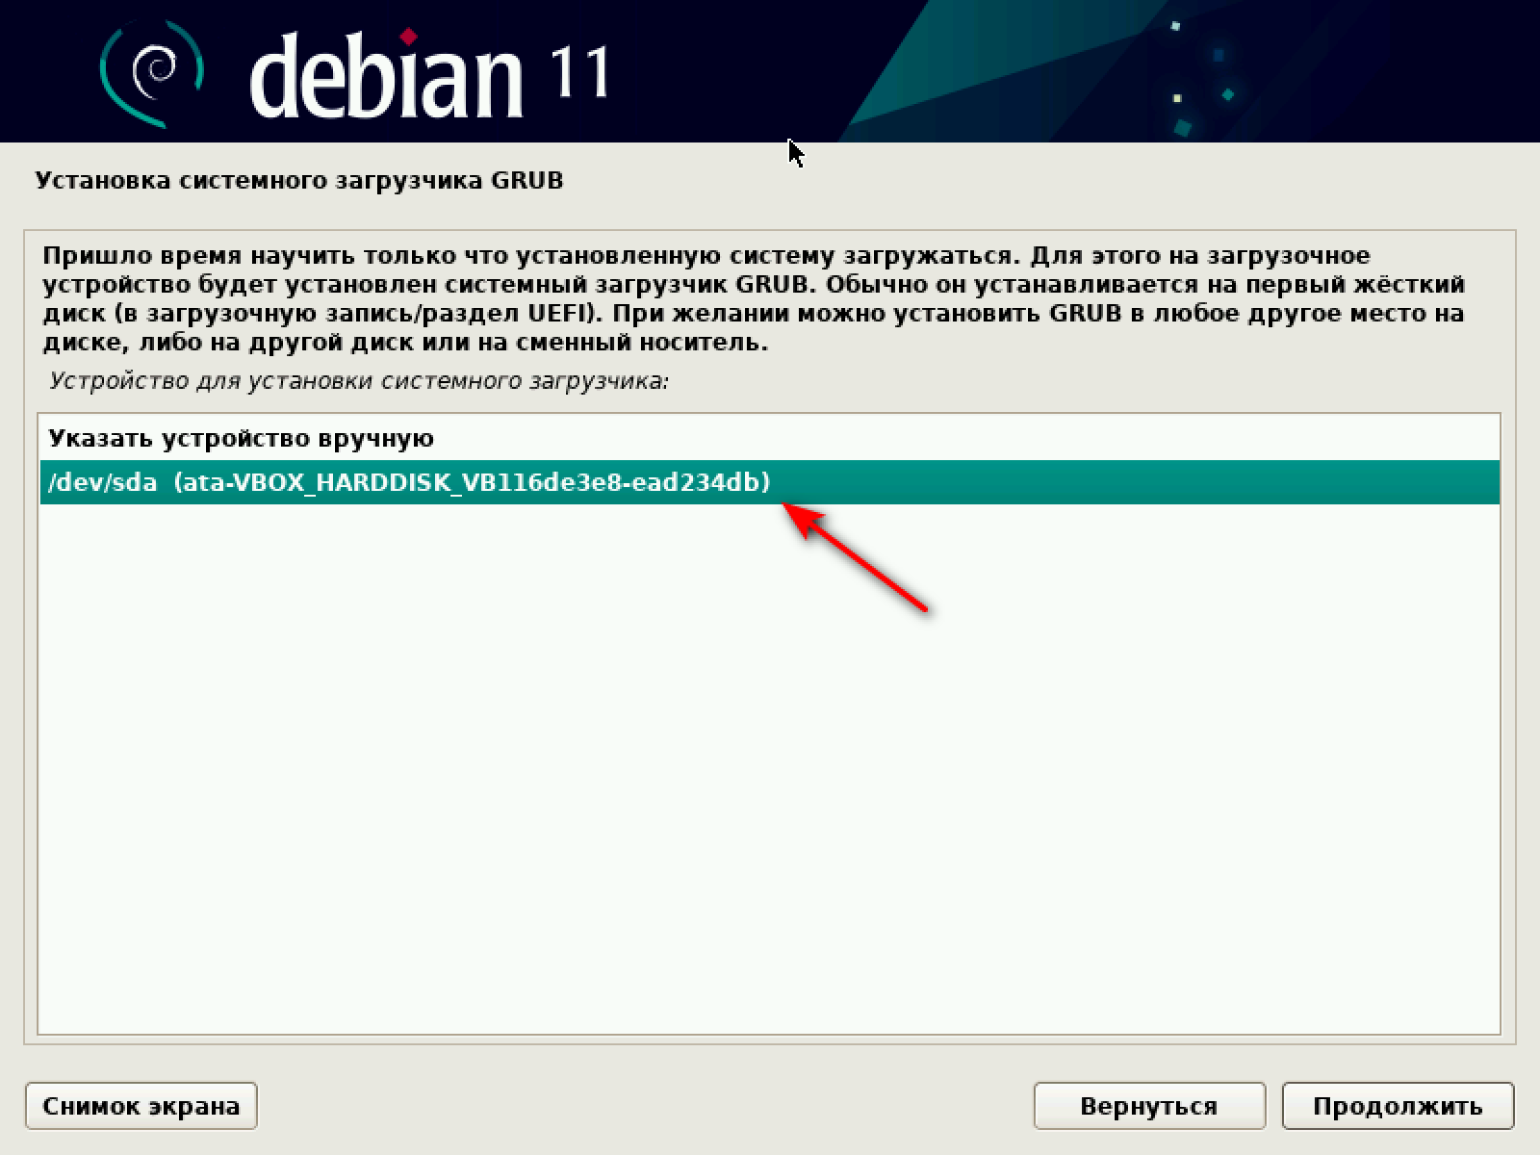
По завершении установки ПО система предлагает установить загрузчик GRUB.
Выбираем «Да» и продолжаем.

Теперь нам надо выбирать устройство, куда мы установим наш загрузчик. Под устройством система подразумевает виртуальный диск с образом ОС Debian. У нас есть диск по умолчанию, его и выбираем.
По завершении установки загрузчика появляется экран с предложением извлечь установочные носители, чтобы загрузить систему. Нажимаем «Продолжить».
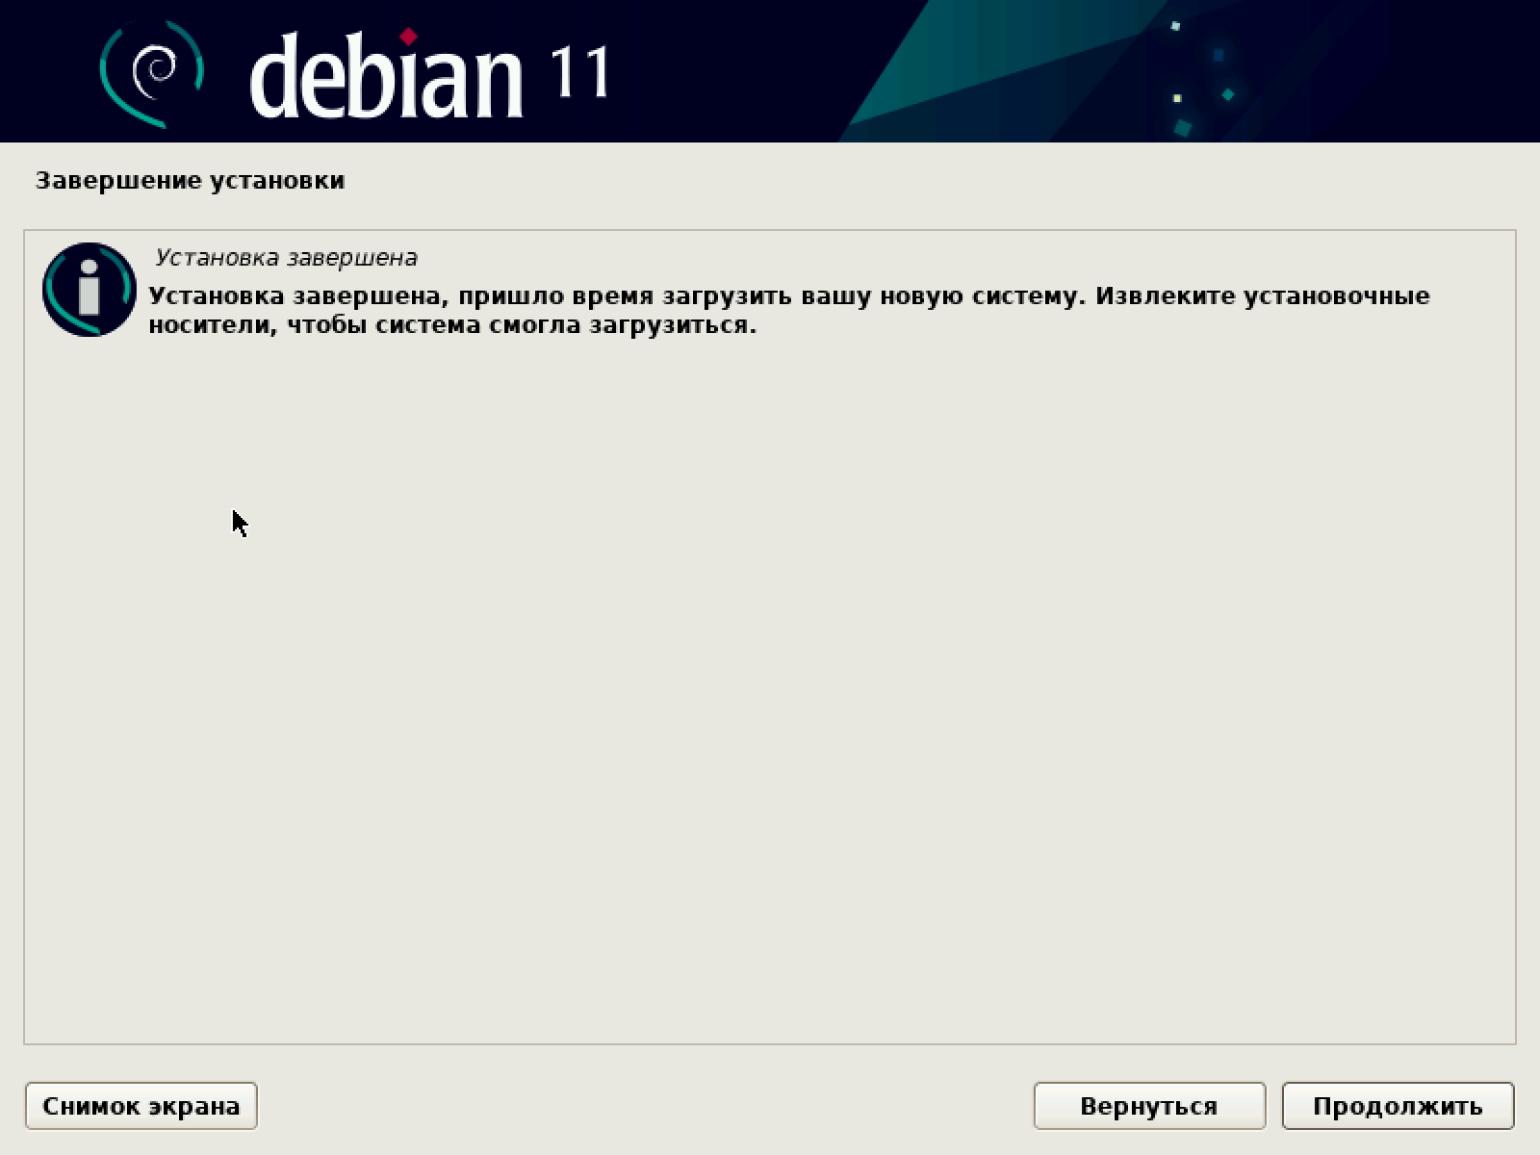
Установка завершена, и появляется экран с предложением запустить систему. Нажимаем «Продолжить».
Загрузка занимает 1–2 минуты, по её окончании появляется экран с именем нашего пользователя — First User. Наша виртуальная машина готова к работе.
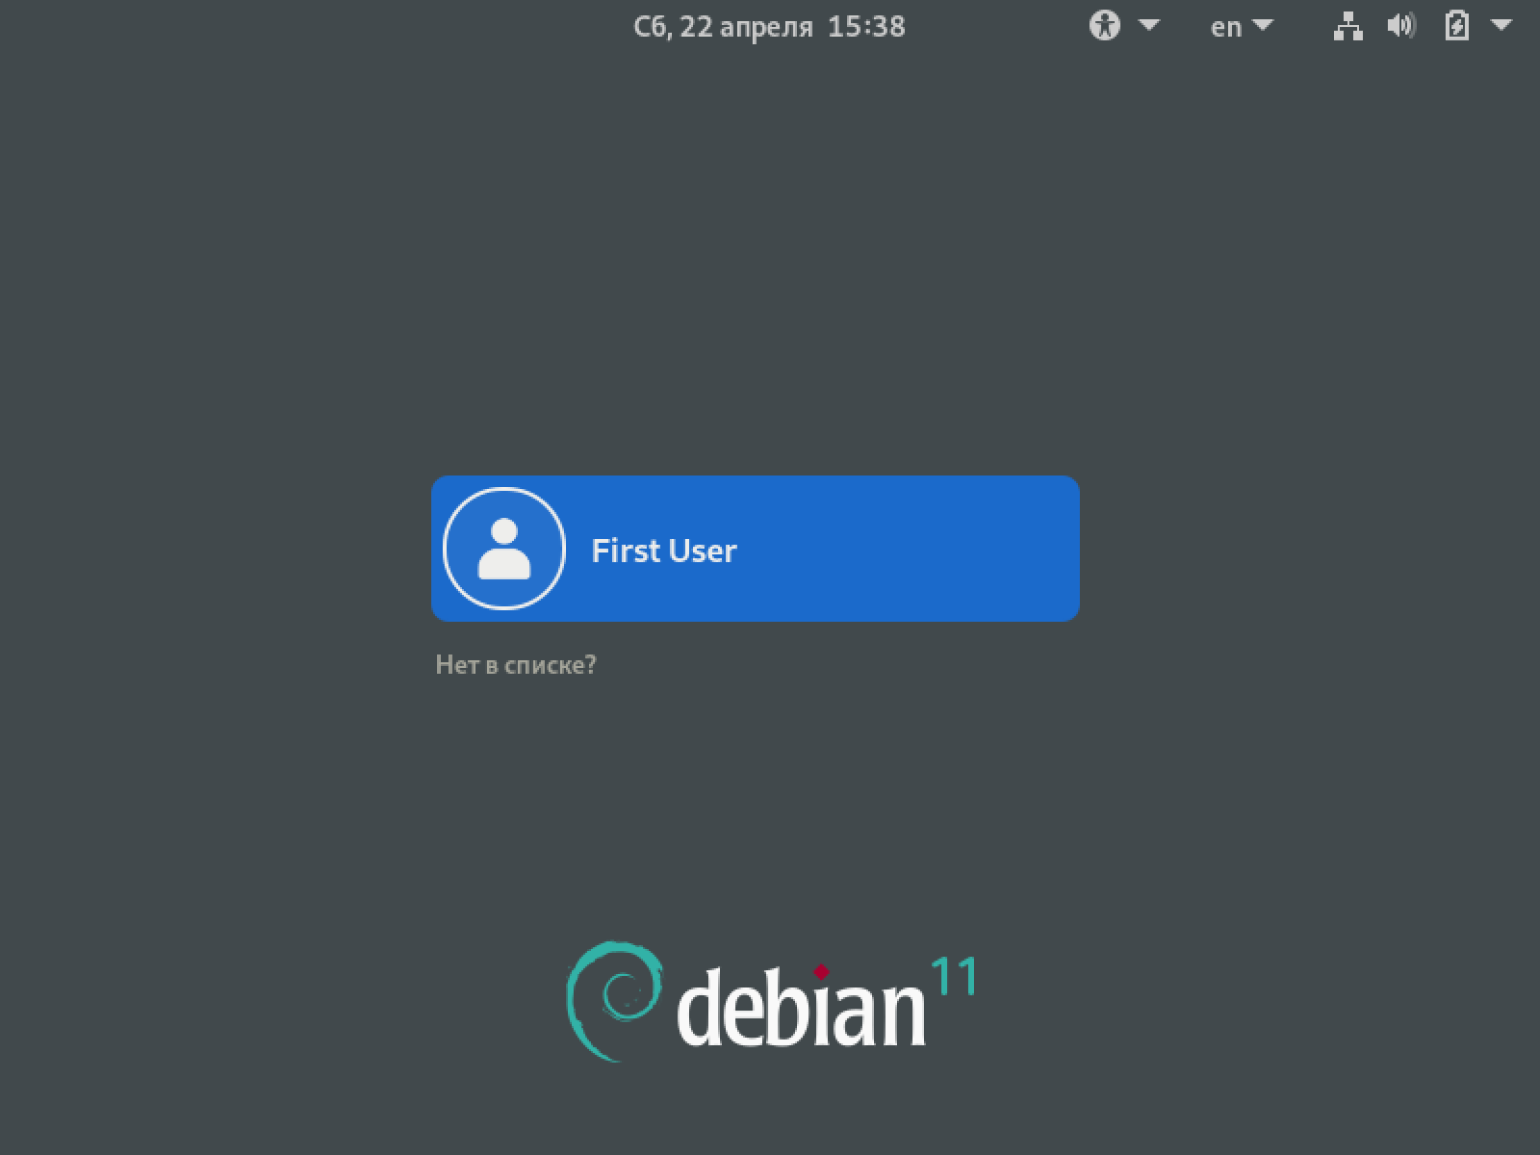
Для входа используем пароль и логин, которые мы до этого установили.
Так выглядит интерфейс нашей виртуальной машины.
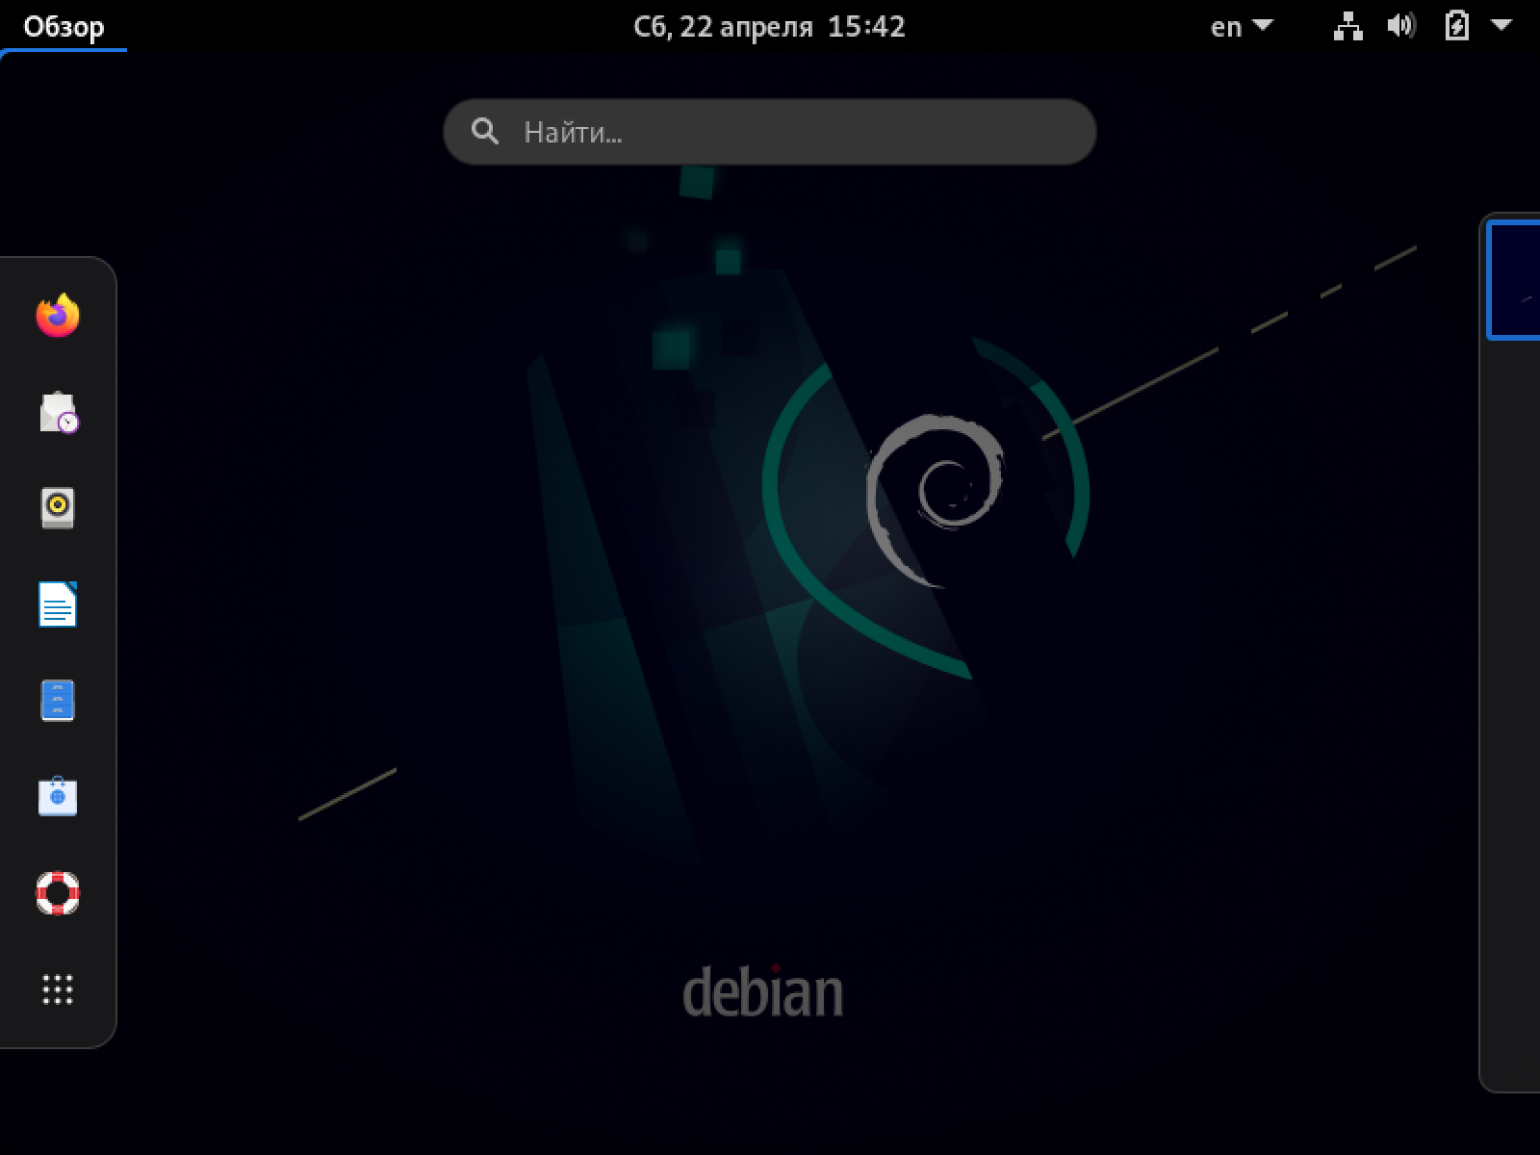
Поздравляем: мы установили виртуальную машину с операционной системой Debian.
Linux и его дистрибутивы: Debian, Ubuntu, Fedora и другие — поддерживают различные языки программирования, что делает их идеальной средой для использования в самых разных областях IT. Самый наглядный пример — операционная система Android, работающая на ядре Linux. Знание Linux необходимо в работе системных администраторов, сетевых инженеров и разработчиков.
Все способы:
- Установка и настройка VirtualBox
- Установка
- Настройка
- Вопросы и ответы: 4
VirtualBox представляет собой эмулятор операционной системы, базирующейся на хостовой машине, а попросту на нашем компьютере. Установка программы обычно не занимает много времени и не требует каких-либо навыков, и сегодня мы подробно рассмотрим данную процедуру.
Установка и настройка VirtualBox
Для начала необходимо посетить официальный сайт и скачать установщик. Сделать это можно по ссылке ниже. Далее мы подробно рассмотрим процесс установки и разберем основные нюансы настройки программы.
Скачать VirtualBox
Установка
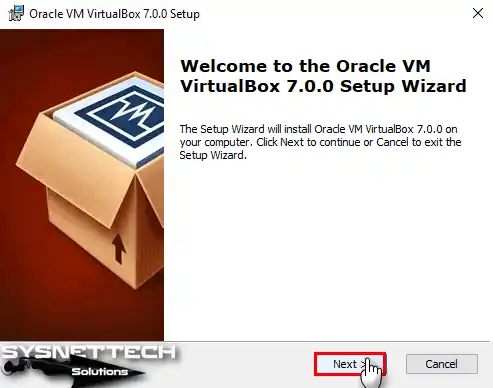
- Запускаем скачанный файл. При запуске менеджер установки отображает наименование и версию устанавливаемого приложения. Пошаговый Мастер упрощает процесс инсталляции, давая пользователю подсказки. Нажимаем «Next».

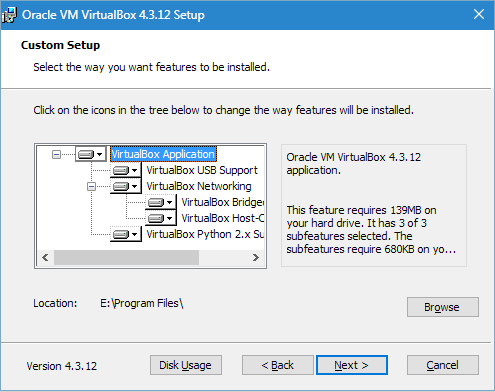
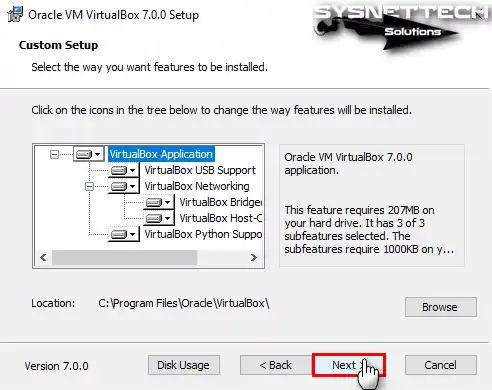
- В открывшемся окне можно удалить ненужные компоненты приложения и выбрать желаемую директорию для установки. Следует обратить внимание на напоминание установщика о необходимом запасе свободного места – на диске должно быть не занято как минимум 161 Мб. Все настройки оставляем по умолчанию и переходим к следующему шагу, нажимая «Next».

- Установщик предложит разместить ярлык приложения на рабочем столе и в панели быстрого запуска, а также установить ассоциацию с ним файлов и виртуальных жестких дисков. Можно выбрать из предложенного желаемые опции, а с ненужных снять галки. Переходим далее.
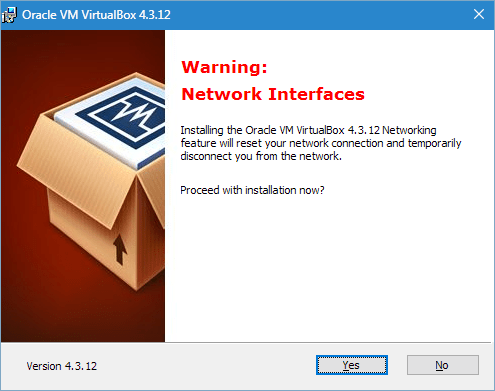
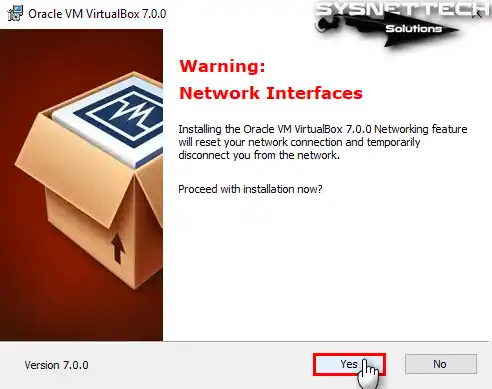
- Установщик предупредит о том, что при инсталляции интернет-соединение (или соединение с локальной сетью) будет разорвано. Соглашаемся, нажимая «Yes».
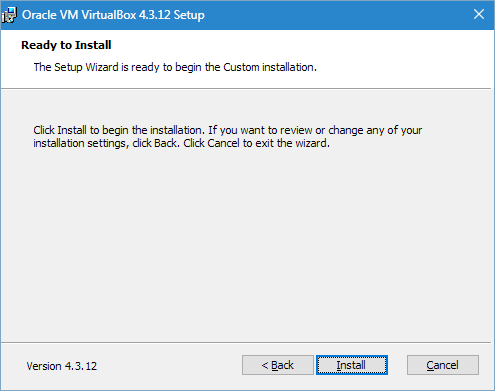
- Нажатием на кнопку «Install» запускаем процесс инсталляции. Теперь нужно только ожидать его завершения. По ходу этого процесса установщик в диалоговом окне предложит установить драйверы контроллеров USB. Это следует сделать, поэтому жмем на соответствующую кнопку.
- На этом все этапы установки VirtualBox пройдены. Процесс, как видно, не представляет сложностей и не занимает много времени. Осталось только завершить его, нажав «Finish».

Настройка
Итак, мы установили приложение, теперь рассмотрим его настройку. Обычно после установки оно запускается автоматически, если только пользователь сам не отменил эту функцию — в таком случае придется выполнить запуск самостоятельно. Когда это происходит впервые, отображается приветственное окно. По мере создания виртуальных машин они будут отображаться на стартовом экране вместе с настройками.

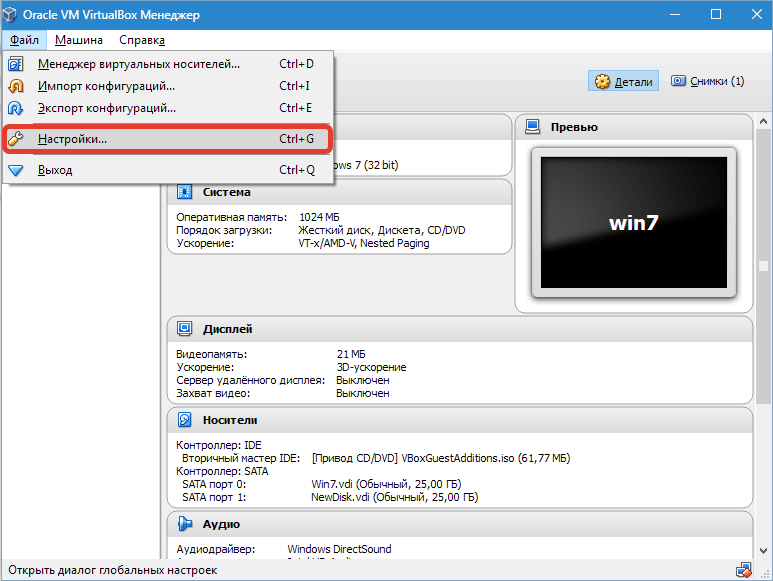
Перед созданием первой виртуальной машины следует настроить приложение. Открыть окно настроек можно, проследовав по пути «Файл» – «Настройки». Более быстрый способ — нажатие комбинации Ctrl+G.
Вкладка «Общие» позволяет задать папку для хранения образов виртуальных машин. Они достаточно объемны, что следует учитывать при определении места их размещения. Папка должна быть расположена на диске, имеющем достаточно свободного места. В любом случае заданную папку можно изменить при создании ВМ, поэтому если вы еще не определились с местом, на данном этапе можно оставить директорию по умолчанию. Пункт «Библиотека аутентификации VDRP» остается по умолчанию.

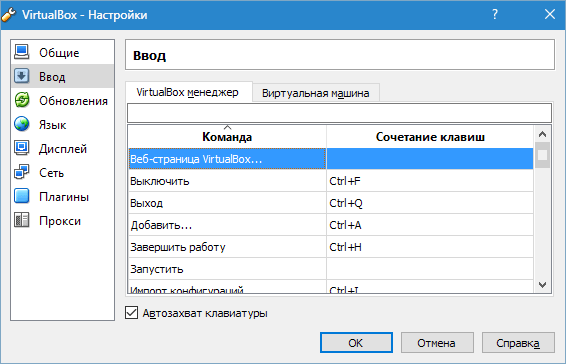
На вкладке «Ввод» можно задать комбинации клавиш для управления приложением и виртуальной машиной. Настройки будут отображены в нижнем правом углу окна ВМ. Рекомендуется запомнить клавишу Host (это Ctrl справа), однако настоятельной необходимости в этом нет.
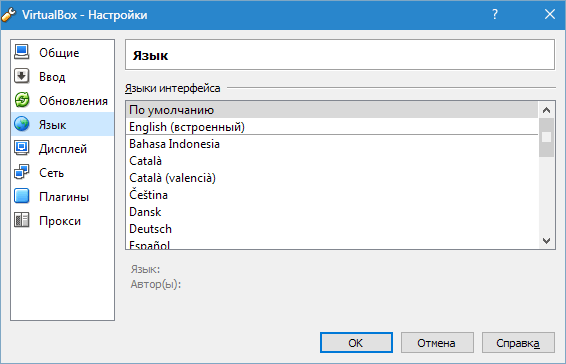
Пользователю предоставляется возможность установить желаемый язык интерфейса приложения.
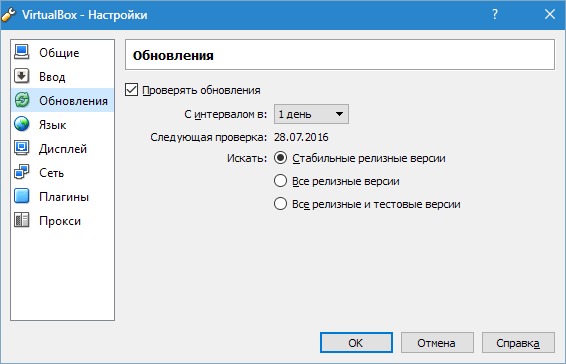
Также можно активировать опцию проверки обновлений или отказаться от нее.
Настраивать параметры дисплея следует отдельно для каждой виртуальной машины. Поэтому в данном случае в окне настроек можно оставить значение по умолчанию.

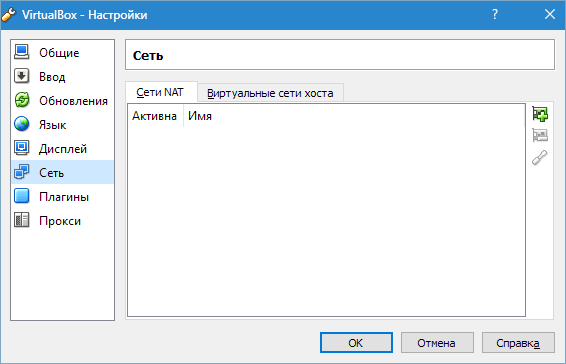
То же самое касается и настроек сети.
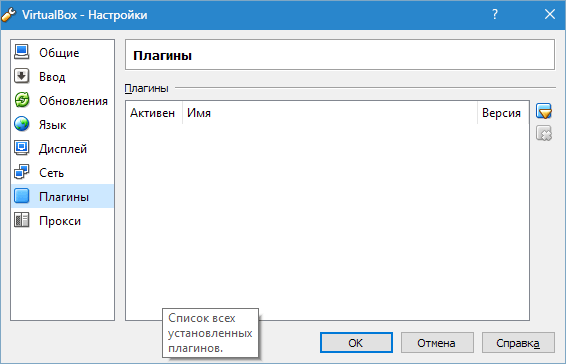
Установка дополнений к приложению выполняется на вкладке «Плагины». Если помните, дополнения были загружены при инсталляции программы. Для того чтобы установить их, нажимаем кнопку «Добавить плагин» и выбираем нужное дополнение. При этом следует учесть, что версии плагина и приложения должны совпадать. Более детально данная процедура рассмотрена в представленных по ссылкам ниже статьях.
Подробнее:
Скачать плагин Oracle VM VirtualBox Extension Pack
Устанавливаем пакет расширений VirtualBox Extension Pack
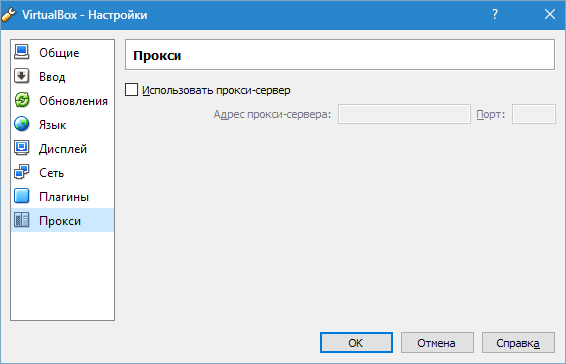
И последний шаг настройки – если планируется использовать прокси, его адрес указывается на одноименной вкладке.
На этом все. Установка и настройка VirtualBox завершена. Теперь можно создавать виртуальные машины, устанавливать ОС и приступать к работе.
Наша группа в TelegramПолезные советы и помощь
This article examines the process of installing and configuring Oracle VM VirtualBox 7.0. Using this software, you may quickly establish a virtual machine on the Microsoft Windows 10 & 11 operating systems, allowing you to collaborate with another user. Let’s get started with Oracle app setup and usage instructions.
How to Install Oracle VM VirtualBox 7.0 to Run Virtual Systems on PC
Oracle VM VirtualBox allows you to use a different system. In contrast, your existing system runs without using the dual-boot method on your host computer, which supports virtualization.
Thanks to Oracle software, you can use a Linux distribution in the virtual machine while continuing your work on your Windows computer. In this case, the Linux system you are running will use your physical PC’s hardware resources efficiently and will not affect your system’s performance too much.
The virtual machines you create offer effortless installation options for various platforms such as Windows, Linux, or macOS. You can seamlessly set up any operating system within your virtual environment. However, by properly making the settings of virtual hardware devices, you both increase VM performance and do not put extra load on your host computer.
System Requirements
For the VirtualBox program to work best, you should use a computer with a modern Intel or AMD processor. Nevertheless, we suggest verifying the minimum hardware prerequisites for your physical computer by referring to the following list.
- Processor: A processor with a minimum of 4 or 8 cores that supports virtualization technology is vital for performance.
- RAM: While 4 GB of memory could meet virtual machines’ requirements, your host PC should possess a minimum memory size of 8 GB to ensure optimal performance.
- Disk: The disk size is automatically determined when installing the operating system. Moreover, you can manually customize the disk size to align with your preferences and requirements. A recommended range of 20 GB to 50 GB of disk space per virtual machine should adequately meet your needs.
- Graphics Card: Having a video memory of at least 2 GB on the video card of your host computer will increase the performance of guest machines.
What’s New
Oracle released the VirtualBox 7.0 version, which includes the most significant update of recent times, on October 10, 2022. The new version shows that the Secure Boot and TPM 1.1/2.0 features are mainly a complete innovation. Additionally, virtual machines are now fully encrypted, but this feature is only available with the CLI.
Significant changes improved the user interface in this version of the Oracle program. Upon opening the program, you will notice that the interface screen has been redesigned to incorporate a new theme. Furthermore, the virtual machine wizard has been recreated with a user-friendly interface, ensuring a more straightforward user experience.
How to Download and Install VirtualBox
After successfully downloading and installing the VBox setup file on your Microsoft Windows 10 computer, the subsequent step entails installing the Extension Pack. This package aims to install the drivers for the systems you install on guest machines.
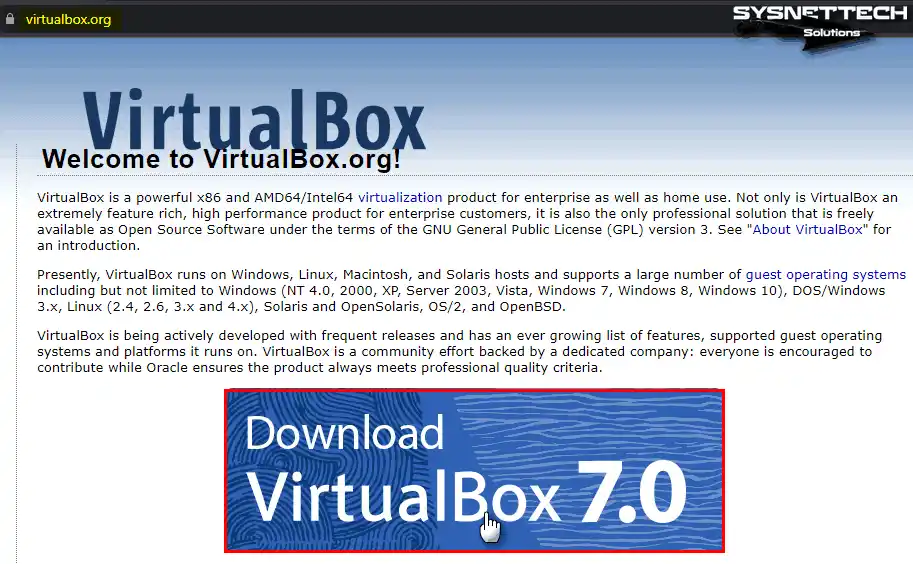
Step 1
To get the Oracle VM program, go to the official website. Click on the Download VirtualBox 7.0 picture on the page that opens next.
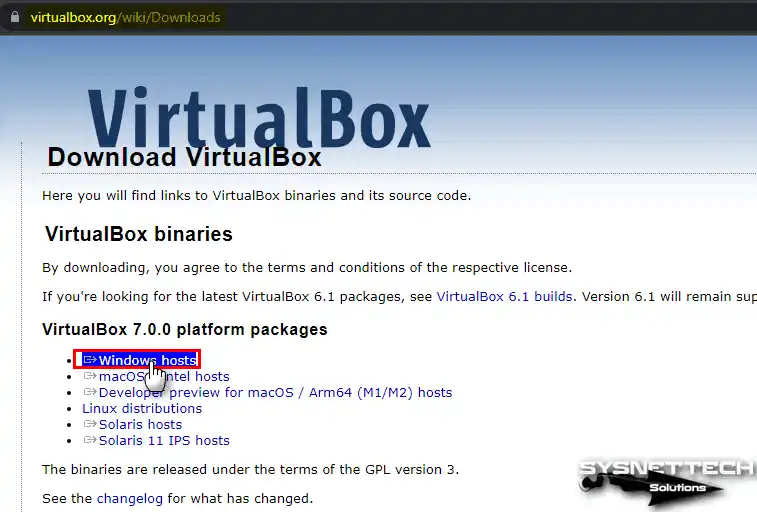
Step 2
When the web page containing the platform packages opens, click on the Windows Hosts link.
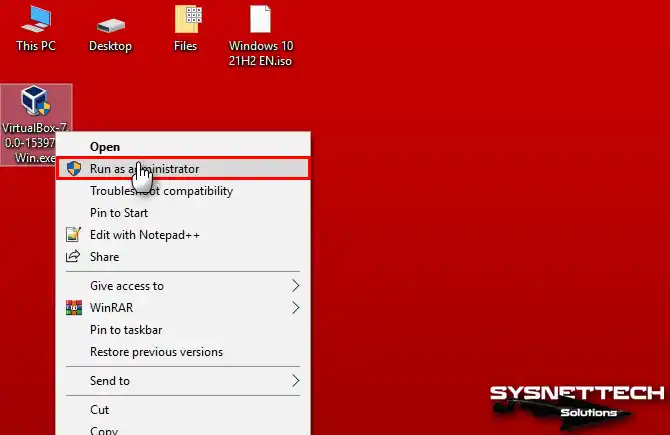
Step 3
When you download the VirtualBox.exe file, run it as an administrator according to your system’s criteria.
Step 4
When the Oracle VM software wizard opens, click Next to continue the installation.
Step 5
To turn off some VirtualBox-related features in the Custom Setup window, change the settings and click Next.
Step 6
In the window, click Yes to acknowledge that the installation will briefly disconnect the network adapters on your PC.
Step 7
Click Yes in the “Missing Dependencies Python Core / win32api” warning window and continue. You can ignore this error and continue with the installation. However, I recommend that you install the win32api extension.

Step 8
Click the Install button in the wizard when the download is complete. If you want to change a stage, click Back and adjust your desired locations.

Step 9
Please remain patient as the Oracle virtual machine software installs on your system.
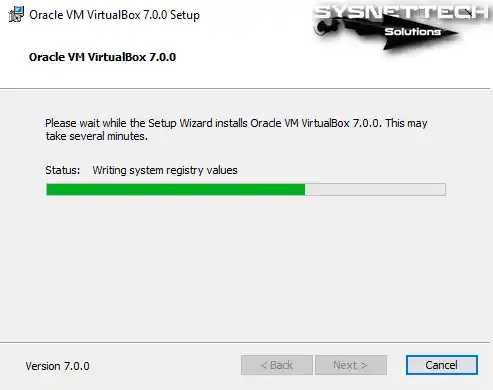
Step 10
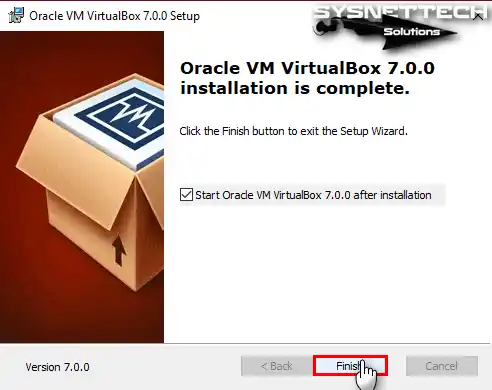
After you install VirtualBox 7.0, do not check the box and just click Finish.
Step 11
When you open Oracle VM Manager, you can open the Help / About window from the tool menu to check its version.

How to Install Extension Pack
Now, after you install VirtualBox on your PC, you should act quickly. First, download the Extension Pack to add the drivers for the virtual guest systems. Then, finish the download and install the package on your system. This way, you can start using your virtual machines more easily.
Step 1
Visit the website where you downloaded the Oracle software, and this time, click the download link in the Extension Pack title instead of the platform and download the package.

Step 2
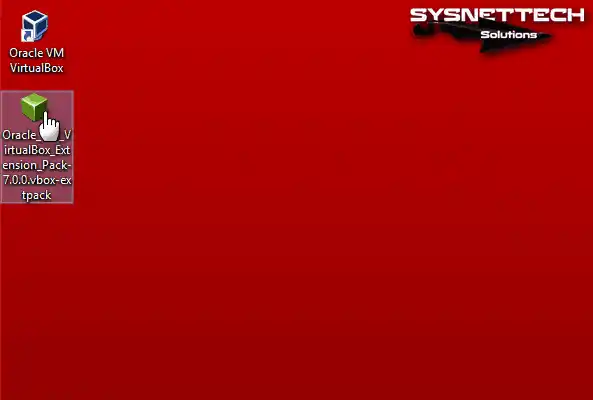
Once you have downloaded the installation file with the vbox-extpack extension, double-click on it to proceed.
Step 3
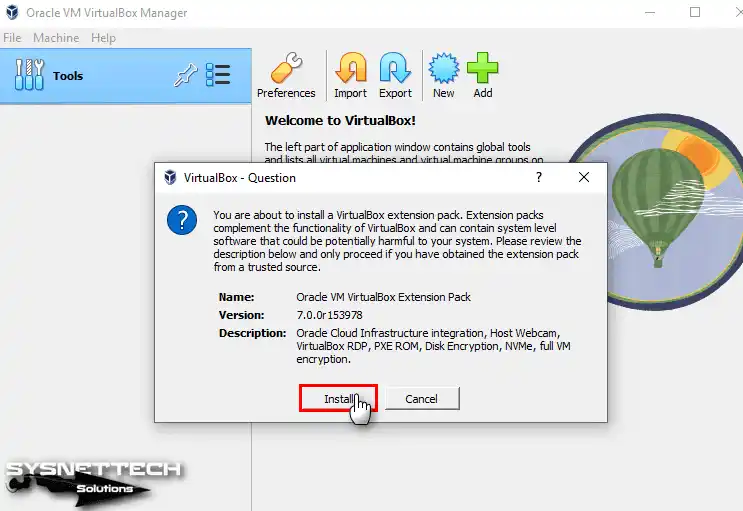
When the VBox program opens automatically, you will see the Question window. In this stage, click the Install button to install Ext Pack, which enables you to use Cloud integration, Host Webcam, RDP, PXE ROM, disk encryption, NVMe, and full VM encryption features.
Step 4
After reading the full text of the license agreement of the extension package, please scroll down the window that appears, as the buttons will be active, and then click the I Agree button.

Step 5
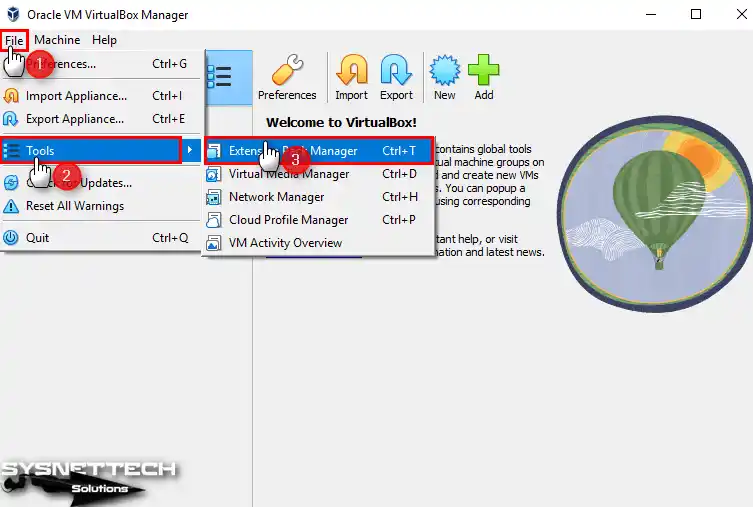
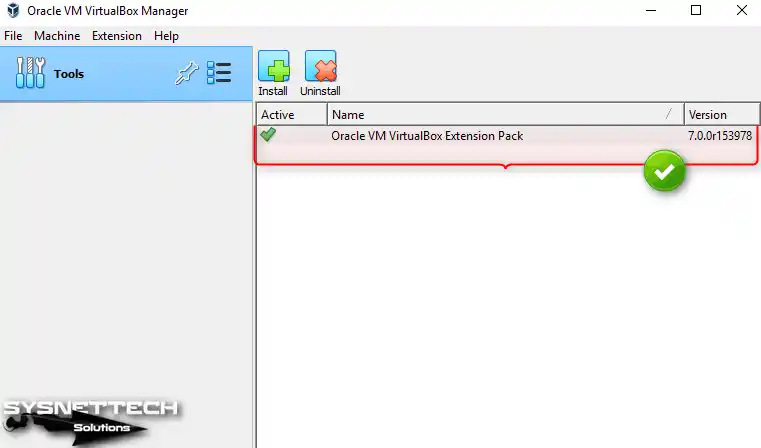
Open the File> Tools> Extension Pack Manager from the tool menu of the virtualization program.
Step 6
The package manager allows you to view the most up-to-date version of the installed software.
How to Make a New Virtual Machine Using Oracle Software
Using Oracle software on your Windows host computer, you can now prepare new VMs and install any operating system.
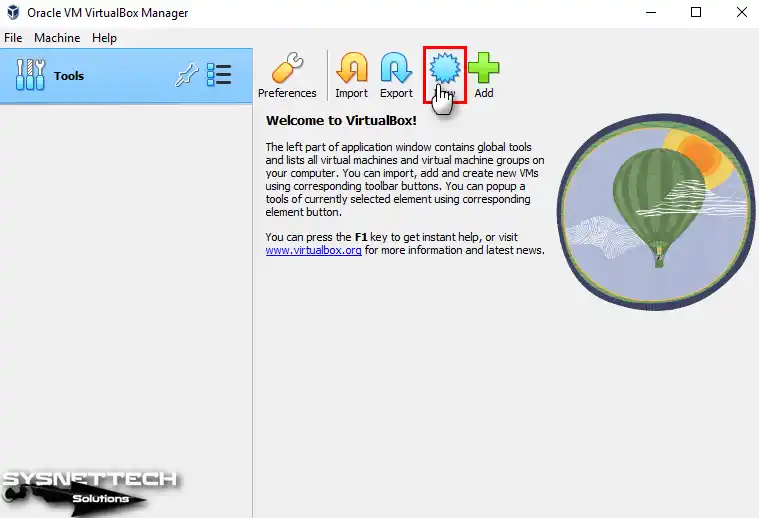
Step 1
After opening the Oracle software, click the New button on the tool menu to run the Virtual Machine Wizard.
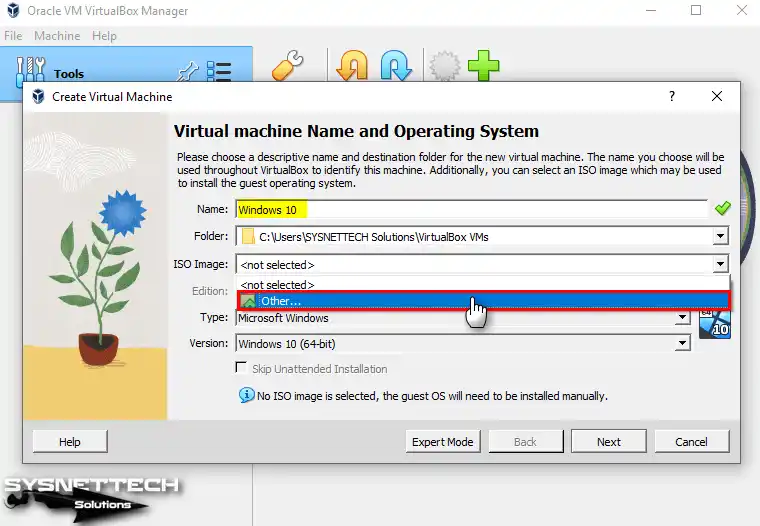
Step 2
After you enter the name of the operating system you intend to install, the values in the Type and Version sections will automatically update. For instance, if you install Windows 10, type the system’s name in the Name field and select Other from the pop-up window to add the ISO image file.
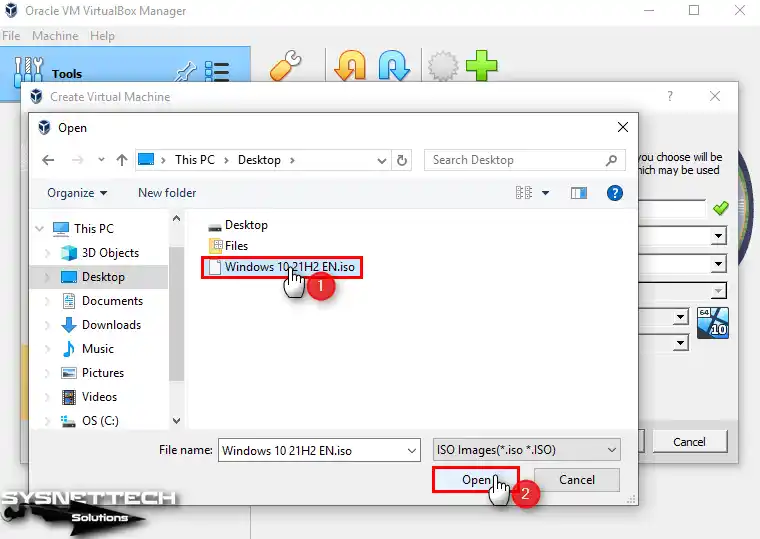
Step 3
Select and open a Windows 10 image file you downloaded to your computer.
Step 4
Skip the unattended installation in the virtual machine wizard with the new interface and continue.

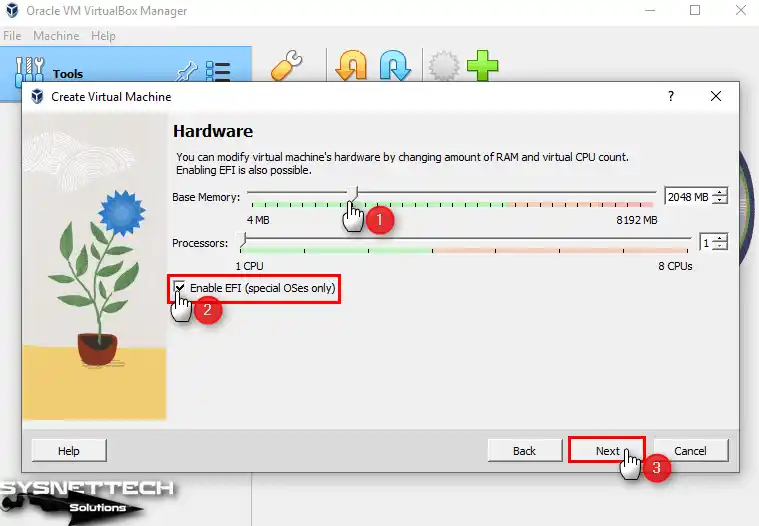
Step 5
Specify the primary memory size and the number of virtual processors in the hardware settings and confirm the EFI installation.
Step 6
Create a new virtual disk for a clean system and configure the disk size in the Virtual Complex Disk settings.

Step 7
Check the hardware information of the Windows guest machine and close the wizard.

Step 8
At this stage, you can start the VM directly and proceed with the installation steps. However, open the virtual hardware settings of the Windows 10 VM.

Step 9
Open General / Advanced settings and change the options in the image below to Bidirectional to enable copy-paste functionality and drag-and-drop file transfer between the virtual machine and host.

Step 10
To change the boot device order of the virtual PC, disable the Floppy device in the Boot Order section of the System/Motherboard settings and enable the new feature, Secure Boot.

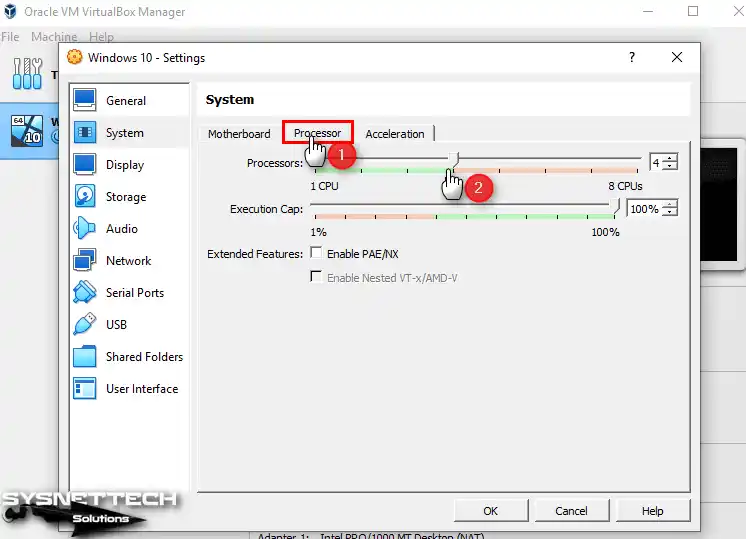
Step 11
To make your VM run better, you can increase the number of virtual cores while considering the hardware of your host computer.
Step 12
To have better graphics on your guest system, enable 3D Acceleration before Display / Screen settings and change the Video Memory size to 256 MB.

Step 13
Enable the Host I/O Cache feature of the SATA controller storage device.

Step 14
Activate the virtual HDD file, also known as the VDI disk file, to run as an SSD drive.

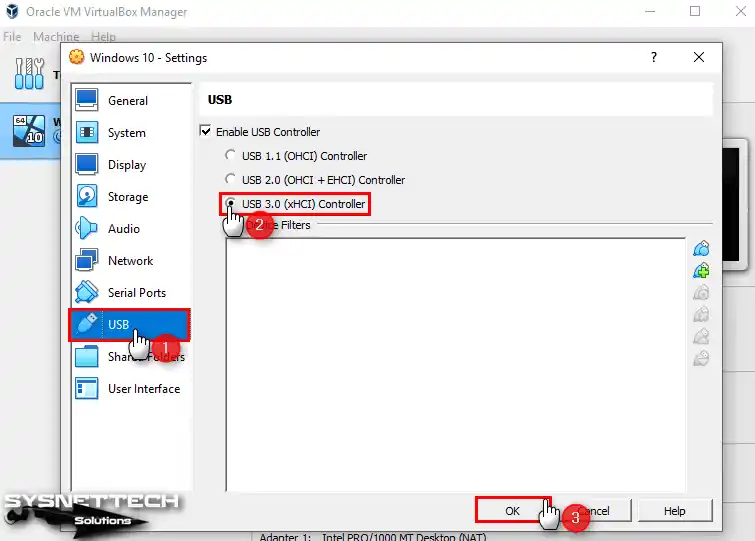
Step 15
To connect your USB 3.x devices to your Windows virtual system, select the xHCI controller from the USB settings.
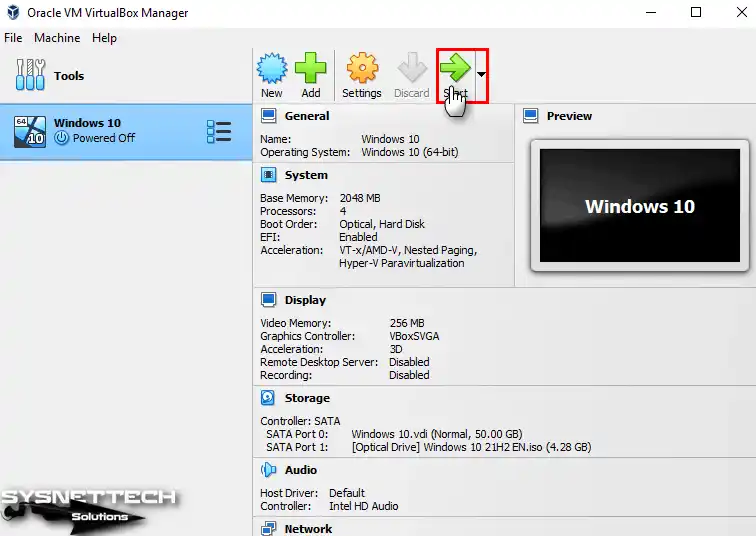
Step 16
After you optimize the hardware settings of your virtual computer, click the Start button to run it.
Step 17
When the Microsoft Windows OS setup wizard or another system’s setup wizard opens, you can continue the installation by selecting your display language and keyboard layout.

Step 18
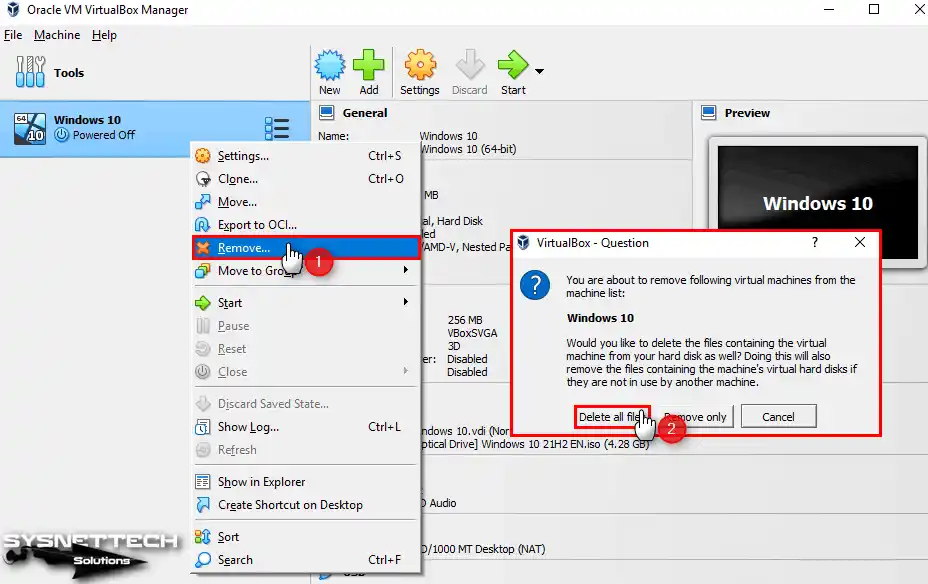
When you delete the VMs you created in Oracle software, please right-click on the VM from the left panel, click Remove, and then Delete All Files to delete them from your host disk.
How to Uninstall Oracle VM VirtualBox
Suppose you wish to uninstall the VBox software from your PC. In that case, you can effortlessly remove it by accessing your system’s settings.
Step 1
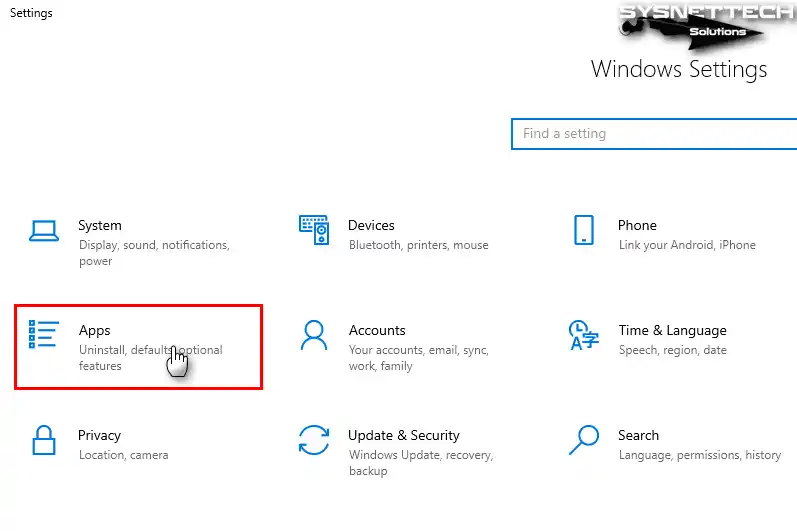
After clicking the Windows 10 start menu, open Settings and click on Apps.
Step 2
Open the Apps & Features settings, type the VirtualBox term in the search box, find it, click the Uninstall button, and complete the removal process.

Video
Installing Old Versions
Conclusion
As a result, with Oracle VM VirtualBox virtualization, you can power up your PC. That means you have the opportunity to try other systems like Linux. Plus, you can install and experience different platforms without dual-booting.
Moreover, you make it easier to create and manage virtual machines. With this software, you can ensure seamless operations on various platforms. In addition, you enhance your computing experience.
In addition, follow the system requirements and installation steps to optimize performance with the settings I mentioned. Finally, the improvements in version 7.0 include user interface and security features.
VirtualBox is an excellent choice for those who want to explore virtualization. In addition, you can take a productive and innovative approach thanks to the flexibility of virtual machines.
If you want to grow your virtual machine skills, think about installing Windows 10 on VirtualBox. This gives you a full Windows system on your current computer. It also lets you test apps and try new features. However, you may just want to run Windows programs. With VirtualBox, you can use them without changing your main system.
Virtualbox is a powerful open-source virtualization software that allows users to run multiple operating systems on a single computer. It is widely used by developers, IT professionals, and hobbyists to create virtual machines for testing, development, and learning purposes. In this blog post, we will guide you through the process of installing Virtualbox 64-bit on Windows 10.
Video Tutorial:
What’s Needed
To install Virtualbox 64-bit on Windows 10, you will need the following:
1. A computer running Windows 10 as the host operating system.
2. A stable internet connection to download Virtualbox.
3. Administrative access to your computer.
What Requires Your Focus?
Installing Virtualbox 64-bit on Windows 10 requires attention to detail and following the steps correctly. It is essential to ensure that your computer meets the system requirements for Virtualbox and that you have administrative access to install the software. Additionally, it is recommended to disable any antivirus software temporarily during the installation process to avoid any potential conflicts.
Method 1: How to Install Virtualbox 64-Bit on Windows 10 via the Official Website
Before we begin, let’s discuss the steps in detail:
1. Go to the official Virtualbox website (www.virtualbox.org) using your preferred web browser.
2. Click on the «Downloads» link in the top navigation menu.
3. Under the «Virtualbox platform packages» section, click on the «Windows hosts» link.
4. On the download page, you will see the latest stable version of Virtualbox for Windows. Click on the «x86/amd64» link to download the 64-bit installer.
5. Once the installer is downloaded, locate the file on your computer and double-click on it to start the installation process.
6. Follow the on-screen instructions to proceed with the installation. You will be prompted to choose the installation location, select optional features, and create shortcuts.
7. During the installation, you may be asked to install additional network drivers. Allow the installation to proceed.
8. Once the installation is complete, Virtualbox will be ready to use on your Windows 10 computer.
Pros | Cons
—–|—–
1. Official and reliable source for the Virtualbox installation. | 1. Requires downloading the installation file from the official website, which may take time depending on your internet connection.
2. Provides the latest stable version of Virtualbox for Windows. | 2. Requires manual installation and configuration.
3. Offers a user-friendly installation process with on-screen instructions. | 3. May require administrative access to install the software.
Method 2: How to Install Virtualbox 64-Bit on Windows 10 via Package Managers
Before we begin, please note that this method is suitable for users who are familiar with package managers such as Chocolatey and prefer command-line installation. Here are the steps:
1. Open the Command Prompt with administrative privileges.
2. Install Chocolatey by running the following command: `@powershell -NoProfile -ExecutionPolicy Bypass -Command «iex ((New-Object System.Net.WebClient).DownloadString(‘https://chocolatey.org/install.ps1’))» && SET «PATH=%PATH%;%ALLUSERSPROFILE%\chocolatey\bin«`.
3. Once Chocolatey is installed, install Virtualbox by running the following command: `choco install virtualbox`.
4. Follow the on-screen instructions during the installation process to proceed.
5. Once the installation is complete, Virtualbox will be ready to use on your Windows 10 computer.
Pros | Cons
—–|—–
1. Command-line installation method for users familiar with package managers. | 1. Requires administrative access and familiarity with the Command Prompt and package managers.
2. Simplifies the installation process by using Chocolatey as a package manager. | 2. May not be suitable for users who prefer a graphical installation interface.
3. Provides an automated installation process by running a series of commands. | 3. Package manager installation may not provide the latest stable version of Virtualbox.
Method 3: How to Install Virtualbox 64-Bit on Windows 10 via Software Repositories
Before we begin, please note that this method is suitable for users who are familiar with Linux distributions and software repositories. Here are the steps:
1. Open the Terminal with administrative privileges.
2. Update the system’s package manager by running the following command: `sudo apt update`.
3. Install Virtualbox by running the following command: `sudo apt install virtualbox`.
4. Follow the on-screen instructions during the installation process to proceed.
5. Once the installation is complete, Virtualbox will be ready to use on your Windows 10 computer.
Pros | Cons
—–|—–
1. Command-line installation method for users familiar with Linux distributions. | 1. Requires administrative access and familiarity with the Terminal and software repositories.
2. Simplifies the installation process by using the system’s package manager. | 2. May not be suitable for users who prefer a graphical installation interface.
3. Provides an automated installation process by running a series of commands. | 3. Software repository installation may not provide the latest stable version of Virtualbox.
Method 4: How to Install Virtualbox 64-Bit on Windows 10 via Third-Party Websites
Before we begin, please note that this method is not recommended as it carries a higher risk of downloading malicious or modified software. It is highly recommended to download Virtualbox only from the official website or trusted sources.
Pros | Cons
—–|—–
N/A | N/A
Please only download Virtualbox from the official website or trusted sources to ensure the safety and integrity of the installation.
There are several reasons why you may encounter difficulties installing Virtualbox 64-bit on Windows 10. Some common reasons include:
1. Outdated or incompatible hardware: Virtualbox requires a 64-bit processor with virtualization support (VT-x or AMD-V). If your computer’s hardware does not meet the requirements, you may not be able to install Virtualbox 64-bit.
2. Disabled virtualization in BIOS settings: If virtualization is disabled in your computer’s BIOS settings, Virtualbox will not be able to run properly. Ensure that virtualization is enabled in the BIOS before attempting to install Virtualbox 64-bit.
3. Conflicts with antivirus software: Some antivirus software may interfere with the installation process or flag Virtualbox as a potential threat. Temporarily disable your antivirus software during the installation process to avoid any conflicts.
Here are the corresponding fixes:
1. Upgrade or replace hardware: If your computer’s hardware is not compatible with Virtualbox, consider upgrading or replacing the hardware to meet the system requirements.
2. Enable virtualization in BIOS settings: Restart your computer and enter the BIOS settings. Look for an option related to virtualization (e.g., Intel Virtualization Technology or AMD Virtualization) and enable it. Save the changes and exit the BIOS settings.
3. Temporarily disable antivirus software: Locate your antivirus software’s settings and disable its real-time protection or temporarily pause it while installing Virtualbox. Remember to re-enable the antivirus software after the installation is complete.
Implications and Recommendations
After successfully installing Virtualbox 64-bit on Windows 10, here are some implications and recommendations to consider:
1. Keep Virtualbox up to date: Regularly check for updates to Virtualbox and install them to benefit from bug fixes, security patches, and new features.
2. Allocate sufficient resources: When creating virtual machines in Virtualbox, ensure that you allocate sufficient resources (such as CPU, memory, and storage) to each virtual machine to avoid performance issues.
3. Back up virtual machines: Virtual machines contain valuable data and configurations. It is recommended to regularly back up your virtual machines to prevent data loss and facilitate disaster recovery.
5 FAQs about Installing Virtualbox 64-Bit on Windows 10
Q1: Is Virtualbox available for other operating systems?
A1: Yes, Virtualbox is available for various operating systems including Windows, macOS, Linux, and Solaris.
Q2: Can I run Windows 10 as a virtual machine on Virtualbox?
A2: Yes, you can run Windows 10 (and other versions of Windows) as a virtual machine on Virtualbox.
Q3: Can I install Virtualbox on a 32-bit version of Windows 10?
A3: No, Virtualbox 64-bit requires a 64-bit version of the host operating system.
Q4: Can I install multiple operating systems in Virtualbox?
A4: Yes, Virtualbox allows you to create and run multiple virtual machines, each with its own operating system.
Q5: Is Virtualbox free to use?
A5: Yes, Virtualbox is free and distributed under the GNU General Public License (GPL).
Final Words
Installing Virtualbox 64-bit on Windows 10 opens up a world of possibilities for running multiple operating systems on a single computer. Whether you’re a developer, IT professional, or simply curious about exploring different operating systems, Virtualbox provides a user-friendly and powerful virtualization solution. By following the methods outlined in this blog post, you can easily install Virtualbox 64-bit on your Windows 10 computer and start creating virtual machines. Enjoy the flexibility and versatility that Virtualbox brings to your computing experience!