
Remote Desktop Services (RDS), known as Terminal Services in Windows Server 2008 and earlier, is one of the components of Microsoft Windows that allow a user to take control of a remote computer or virtual machine over a network connection. RDS is the application of Microsoft’s thin client architecture where Windows software and the entire desktop of the computer running RDS can access any remote client machine that supports the Remote Desktop Protocol(RDP). The user interfaces are displayed from the server to the client system, and the input from the client system is transmitted to the server where the software execution takes place.
With the Windows Server 2008 operating system, the terminal server feature that we frequently use with Windows Server 2012 was edited with RDS and started to be offered as Remote Desktop Services under the Server manager. How to setup and configure RDS for Windows Server 2019, in this article, I will be telling you about this service.
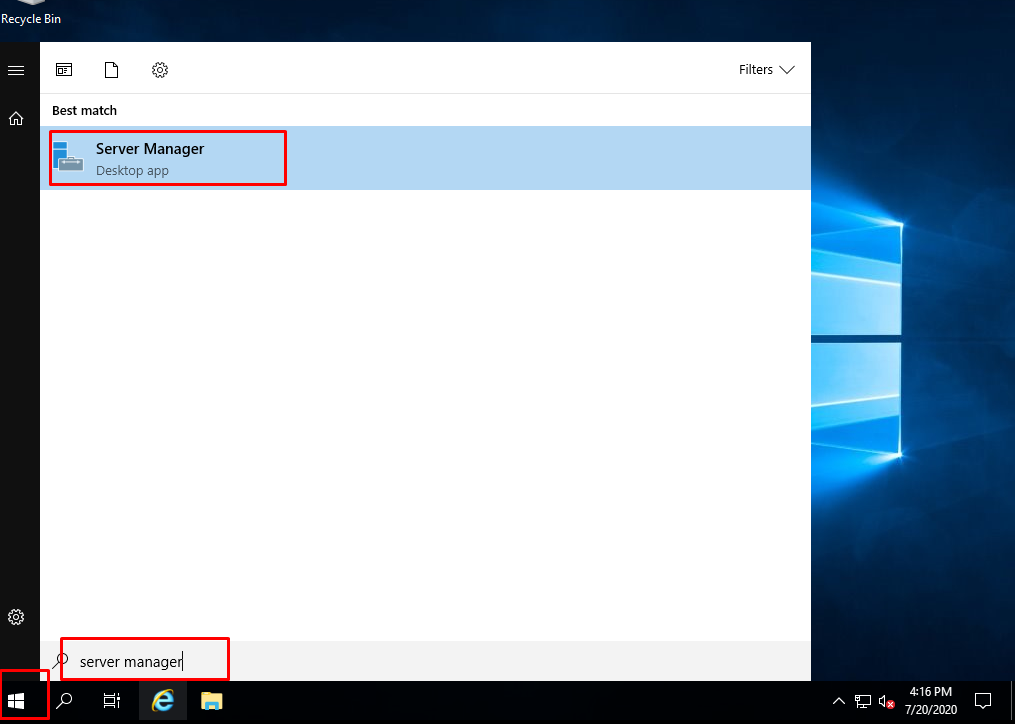
We open our “Server Manager” Dashboard.
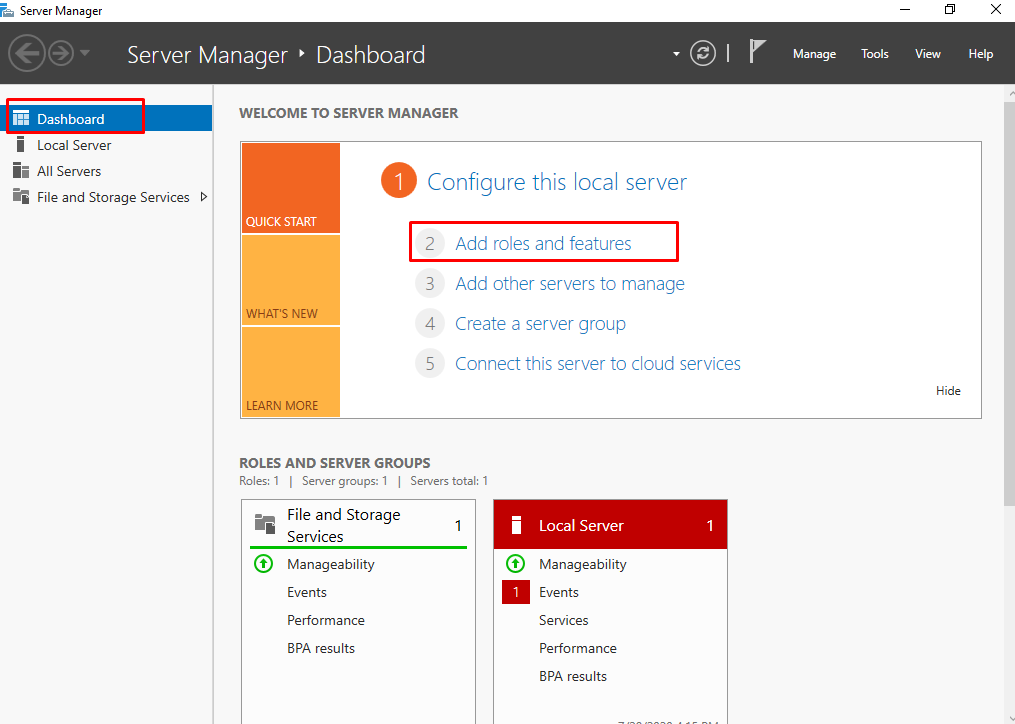
We click on the “Add roles and features” menu in the middle of the Server Manager Dashboard.
“Before you begin” welcomes you as the first step in the “Add Roles and Features Wizard” window that opens. By pressing the “Next” button, we start our pre-configuration for role installation.

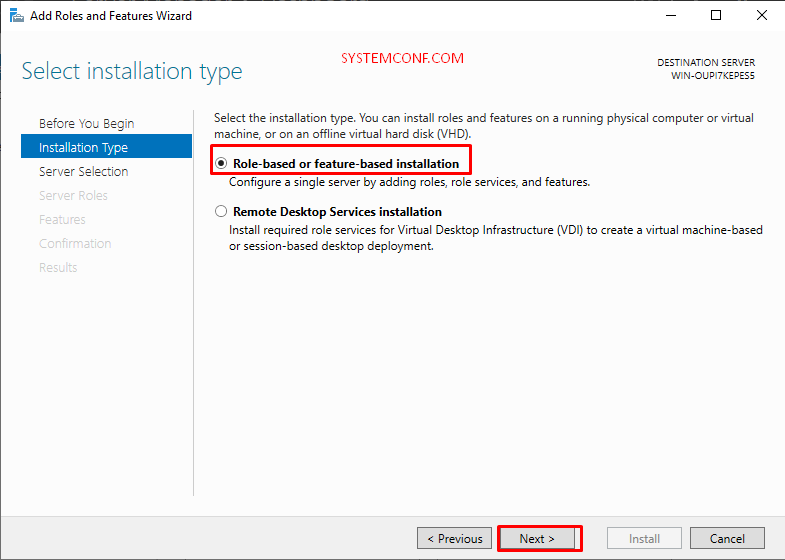
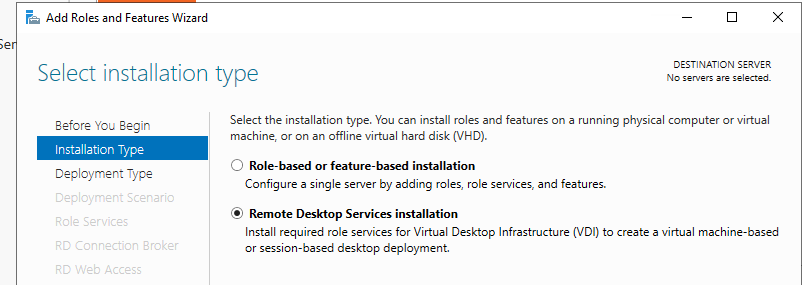
In the “Installation Type” section, we select “Roles-Based 0r feature-based installation” and press the “Next” button.
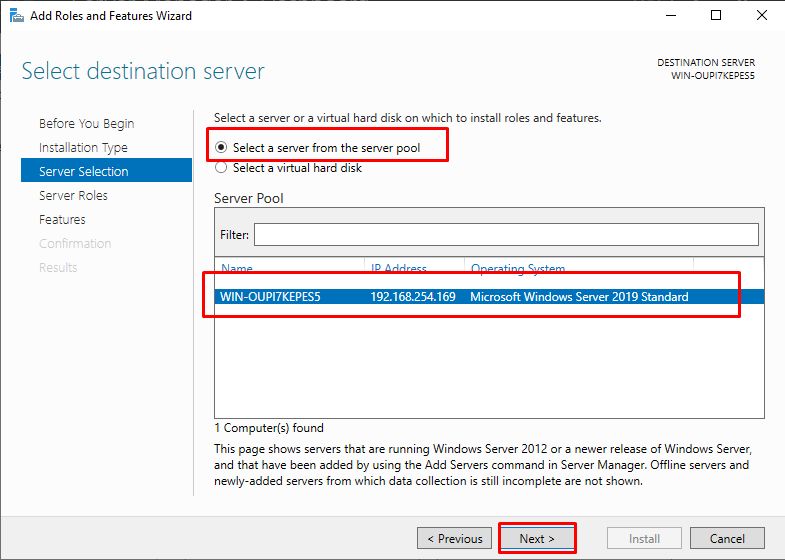
In the “Server Selection” step, if you are managing multiple servers through “Server Manager”, select the server to install from the server pool section. If you do not manage your other servers through the Server Manager, the server you are already processing will be selected by default. After the server selection process is completed, click the “next” button.
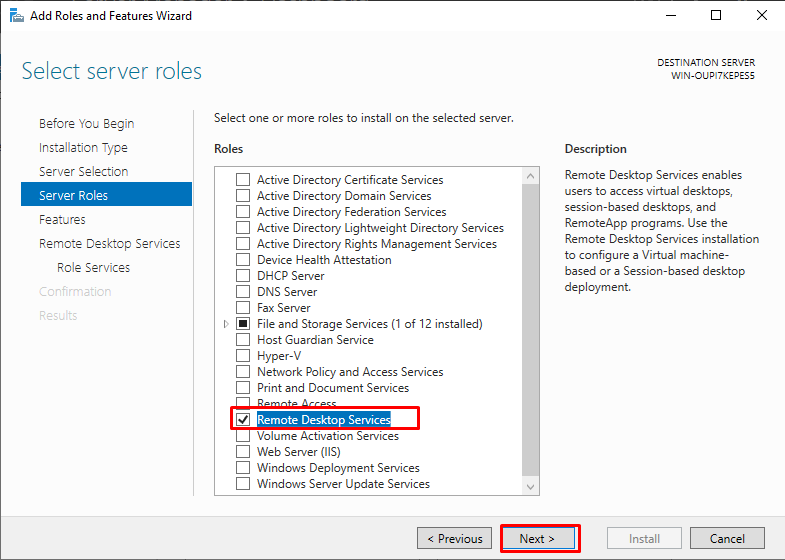
In the “Server Roles” section, we select the “Remote Desktop Services” role that we want to install. We press the “Next” button.
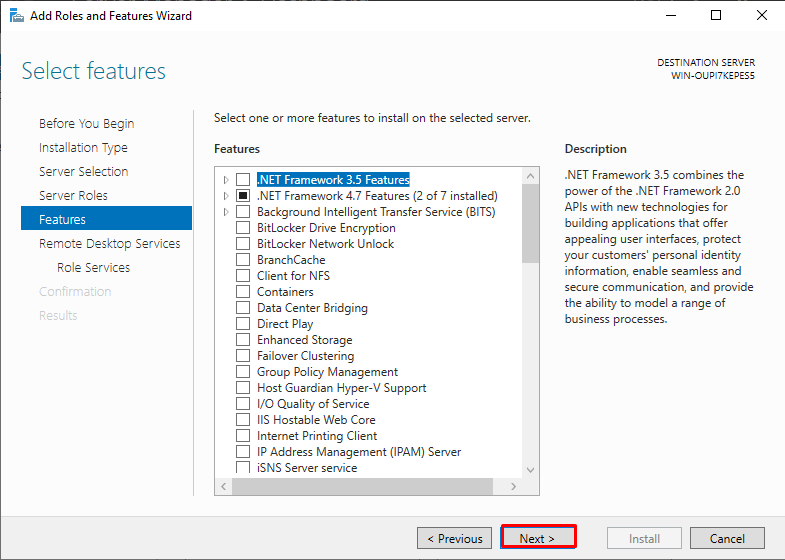
You do not need to do anything in the “Features” step, but if you are going to install a different software after RDS, such as ERP, CRM, you can select the extra features you think you need from this section. If you are going to use it only for RDS, continue by pressing the “next” button without selecting any features.
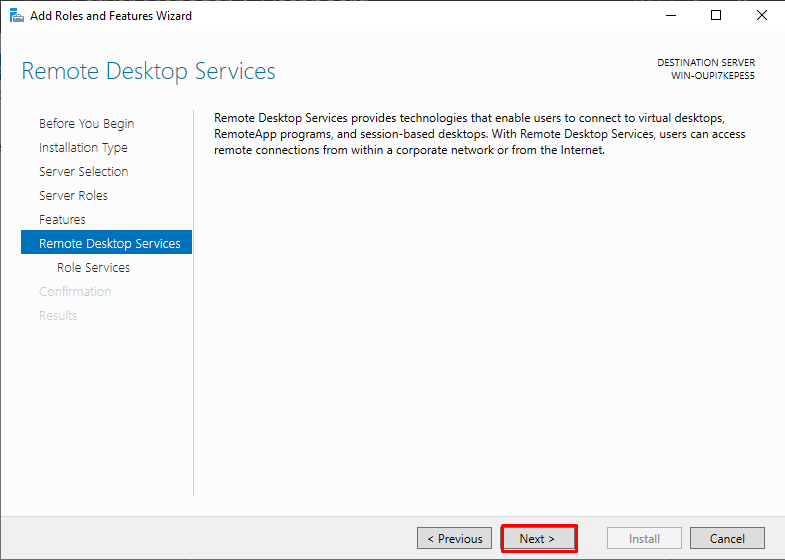
From the “Remote Desktop Services” step it gives you a brief overview of the capabilities and usage of this role. After examining the relevant step, click the “Next” button.
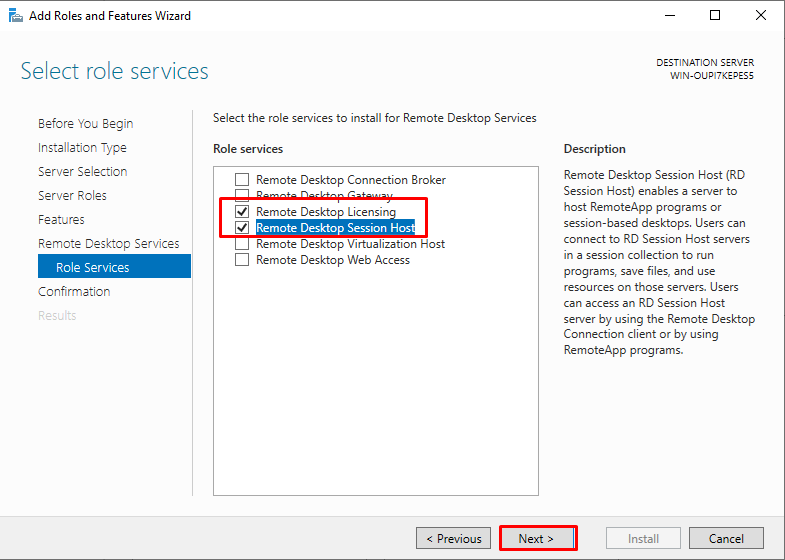
ur RDL service provides license management services for our RDS role infrastructure. The RDS role is offered by Microsoft as an additional licensed product. You can install and test for free on Windows Server Roles and Features. Microsoft offers 120 days of free use for this role. Once your 120-day RDS role expires, you will need to purchase a license to continue using the service. Two different types of licenses are available for RDS. Firstly, our license is device-based, and our second license is based on user-based needs and demands, you can continue your use by choosing user or device-based license models.
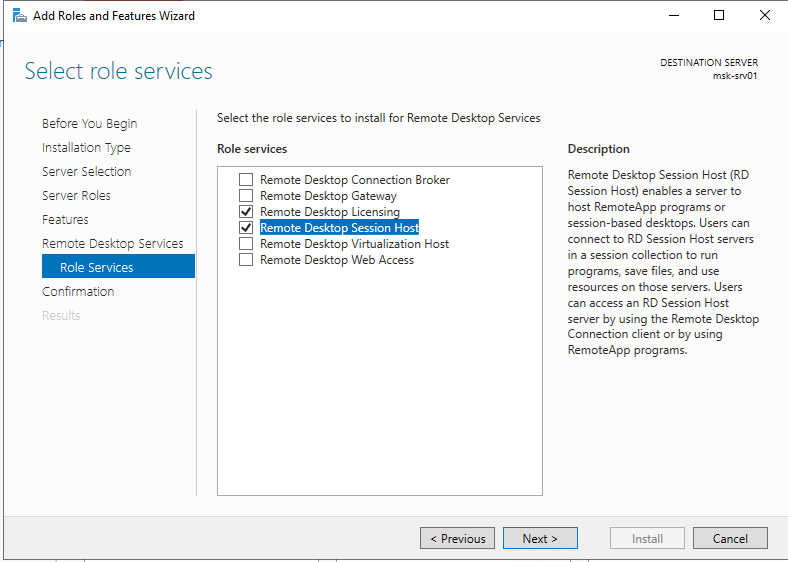
I select the RDSH and RDL roles to continue with the installation. We continue by pressing the “Next” button.
In the “Confirmation” section, we view the RDSH and RDL roles and services we selected. Click the “Install” button.
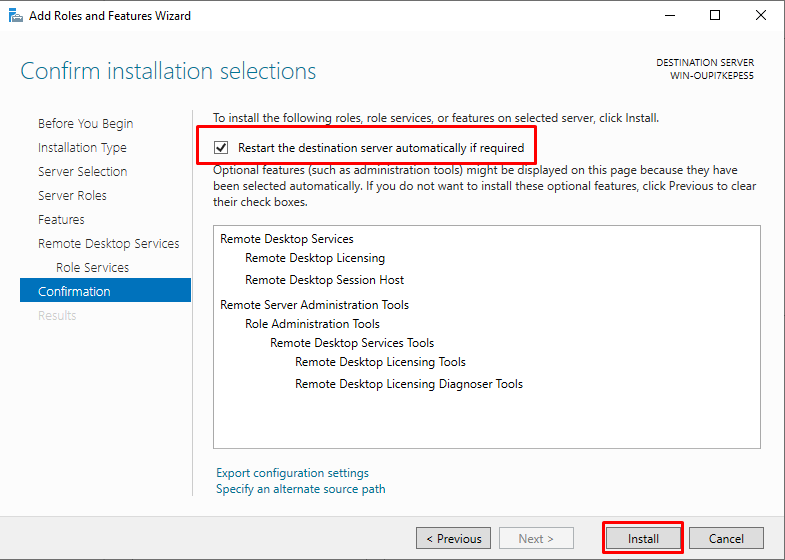
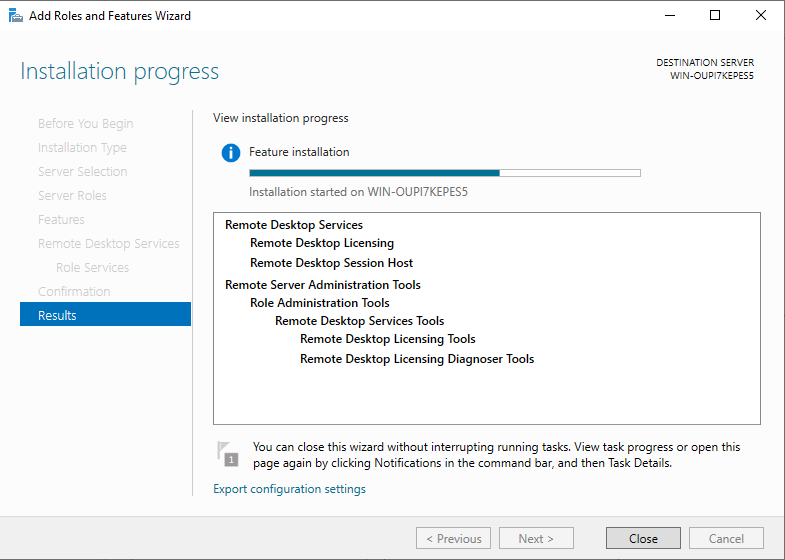
During the installation, the system will restart. The installation will continue when you log in.
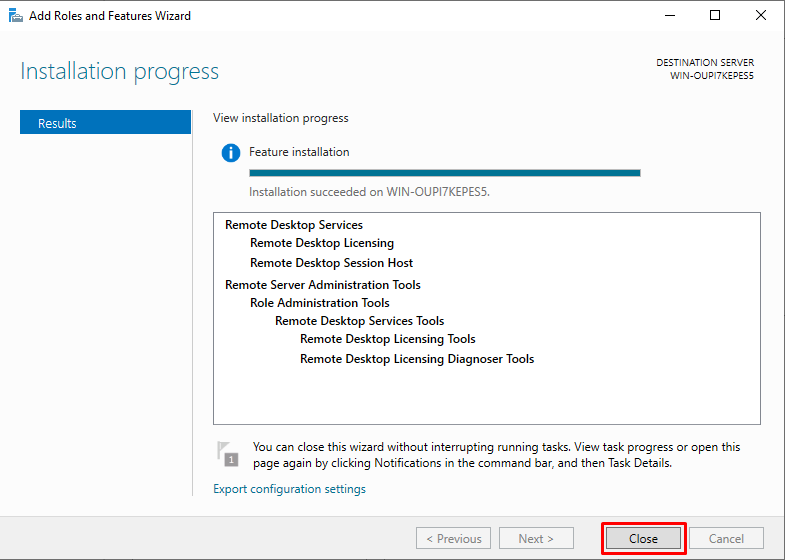
Our RDSH and RDL role and service installations have been completed. Click the “Close” button and log out.
RDSH and RDL setup with Powershell
You can complete the installation in a much shorter time with Powershell. You can install RDSH and RDL using the command below for the same roles as installations.
Install-WindowsFeature Remote-Desktop-Services, RDS-RD-Server, RDS-Licensing –IncludeManagementTools
Configuring RDSH with PowerShell
You can use the following PowerShell commands to complete your RDSH configuration. With this process, we create our license registration for RDSH.
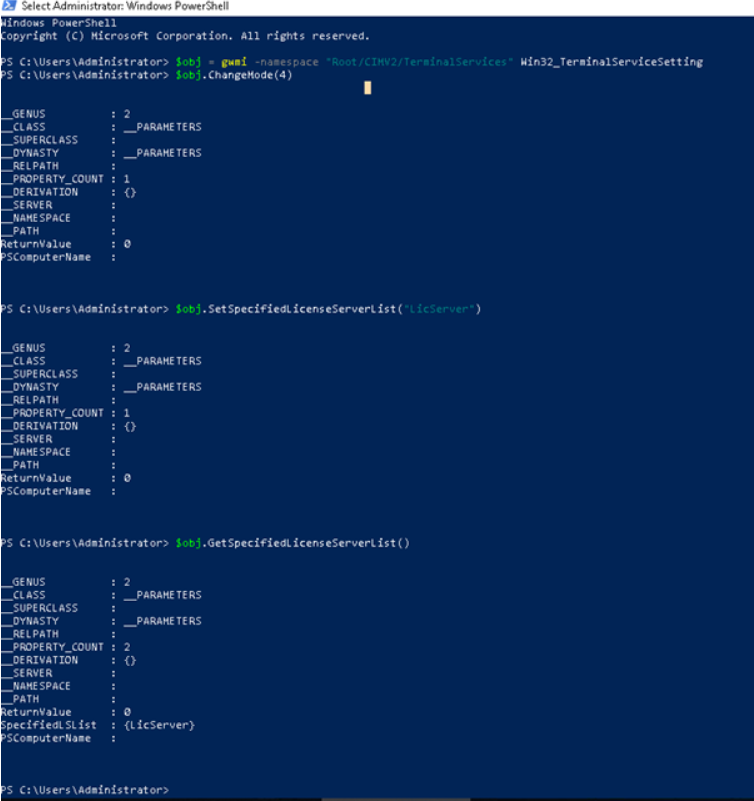
First, we check our service.
$obj = gwmi -namespace “Root/CIMV2/TerminalServices” Win32_TerminalServiceSetting
We choose the type of license we will use with our second command. Type Value for Device-based licensing and 2 for user-based licensing.
$obj.ChangeMode(value)
We are entering our license on RDL.
$obj.SetSpecifiedLicenseServerList(“LicServer”)
Finally, we are viewing our license.
$obj.GetSpecifiedLicenseServerList()
RDS License Management Configuration
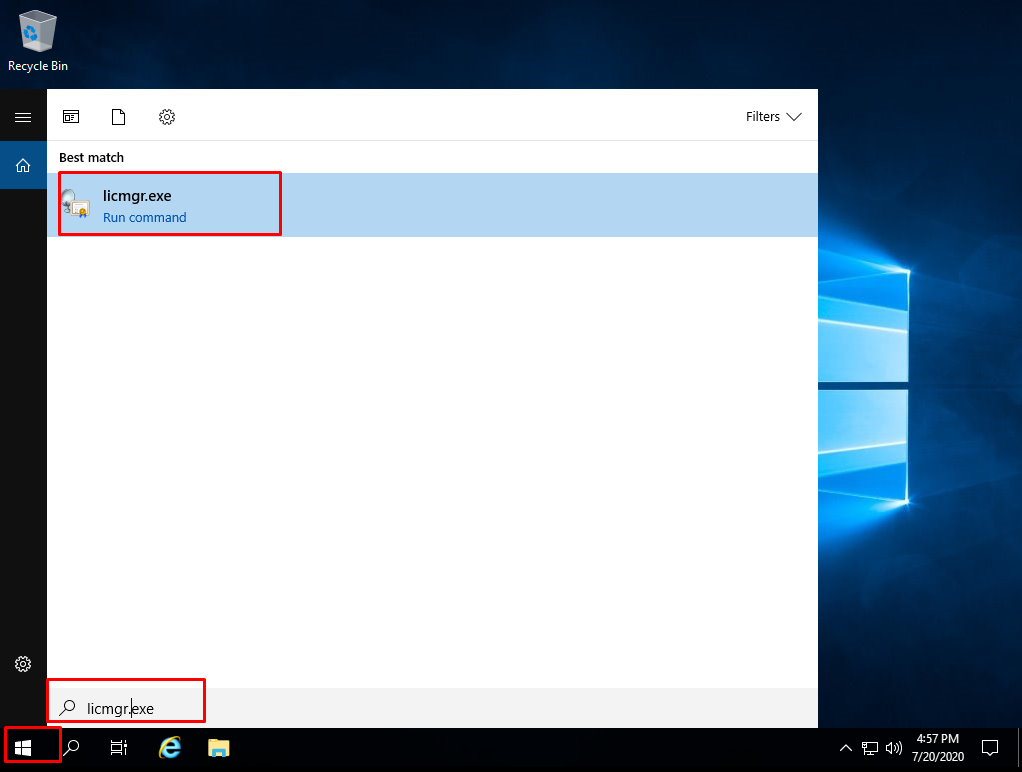
After installation, run RD Licensing Manager (licmgr.exe) to complete your RDS license management configuration.
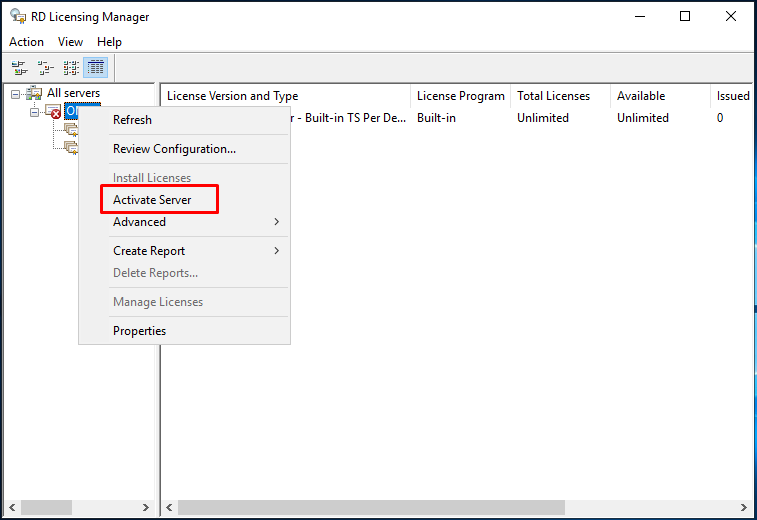
In the RD licensing manager application, under the “All Servers” section on the left, select our server, right-click and click on the “Activate Server” tab.
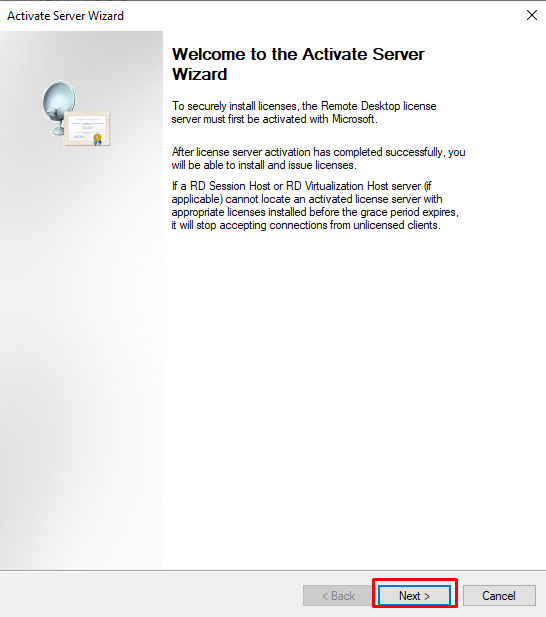
Click the “Next” button in the “Activate Server Wizard” window.
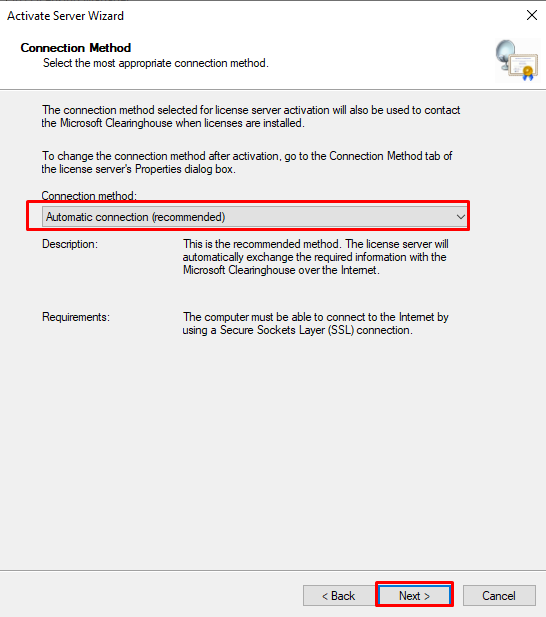
Select the “Automatic connection (recommended)” tab in the “Connection method:” section and click the “Next” button.
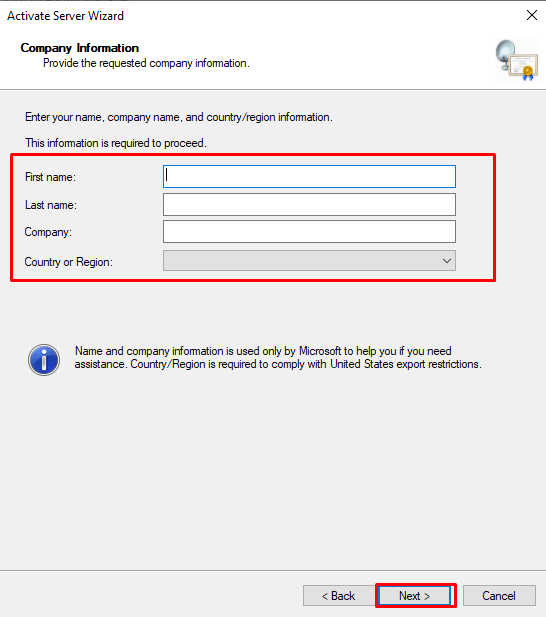
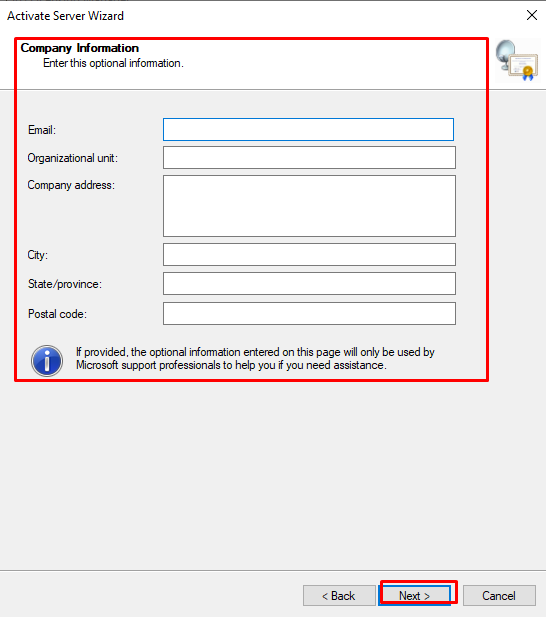
Enter the relevant information on the “Company Information” page and click the “next” button.
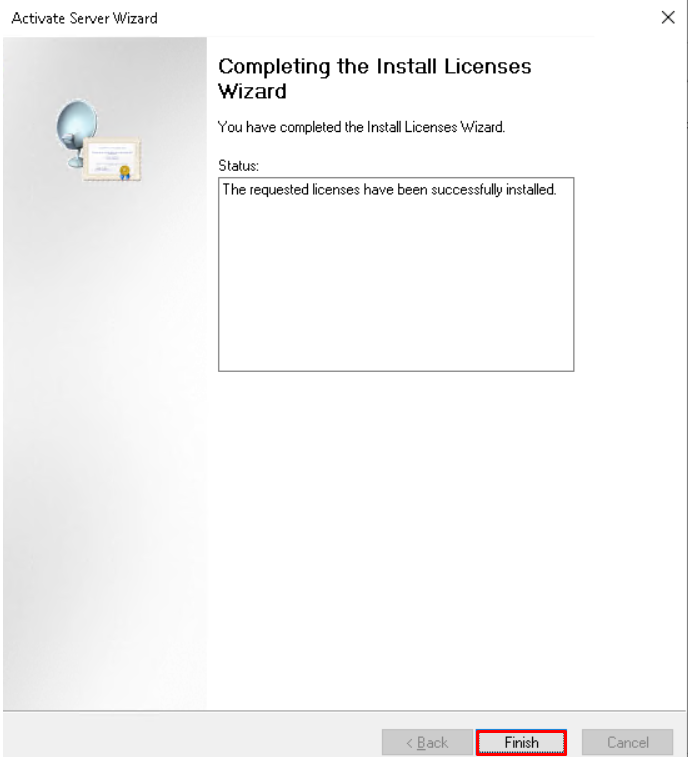
Select the “Start Install Licenses Wizard now” option on the “Completing the Activate Server Wizard” page and click the “next” button.

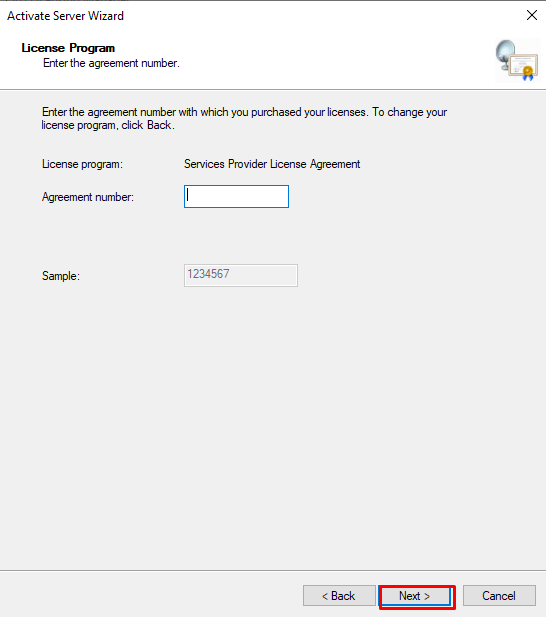
Continue by clicking the Next button in the “Install Licenses Wizard” window. In the License Program section, select the license type and location settings you have.

You will enter the activation or a serial number of your license in this section.
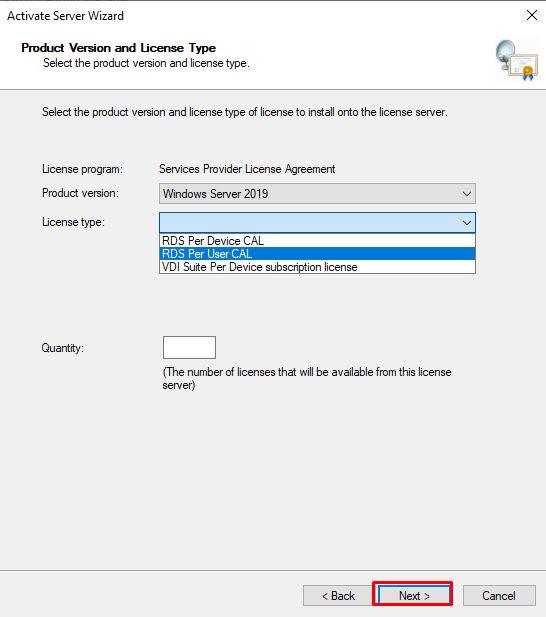
Enter the operating system type and the number of users of the license we have and click the “next” button.
Our license activation process has been completed. We check the latest status of our license.
В этой статье описано, как установить и настроить роль терминального сервера Remote Desktop Session Host на отдельностоящем Windows Server 2022/2019 в рабочей группе (без домена Active Directory) и без всех дополнительных ролей (Connection Broker, Remote Desktop Web Access, RDS Gateway).
Возможности отдельного RDS сервера в рабочей группе ограничены по сравнению с функционалом, доступном в домене AD. Вы не сможете масштабировать RDSH до полноценной RDS фермы Windows Server, нельзя создавать отдельные коллекции сессии или публиковать RemoteApp, отсутствует брокер подключений (RD Connection Broker), нельзя использовать User Profile Disks для хранения профилей пользователей, а при проведении операций обслуживания хоста RDP сервис будет полностью недоступен для пользователей.
Содержание:
- Установка роли Remote Desktop Services Host в Windows Server
- Установка Remote Desktop Licensing и RDS лицензий (CAL)
- Настройка роли Remote Desktop Session Host в рабочей группе
- Публикация приложения RemoteApp на RDS в рабочей группе (без домена)
- Настройка шлюза RD Gateway в рабочей группе
Установка роли Remote Desktop Services Host в Windows Server
Предполагаем, что вы уже установили сервер с Windows Server (2022, 2019 или 2016) и задали первоначальные настройки (задали сетевые параметры и статический IP адрес, имя сервера (hostname), время/дату/часовой пояс, установили последние обновления и т.д.). Теперь можно установить службу RDS через консоль Server Manager или из PowerShell:
При установке службы RDS через Server Manager нужно выбрать Role-based or feature-based installation -> Server roles -> Remote Desktop Services -> в компонентах RDS выберите службы Remote Desktop Session Host и Remote Desktop Licensing (согласитесь с установкой компонентов RSAT для управления ролями).
Если вы выбрали в Server Manager тип установки Remote Desktop Services installation, то в режиме Standard deployment и Quick Start установщик дополнительно установит роли RD Connection Broker и RD Web Access. В нашем случае все эти роли излишни, т.к. мы ставим стендалон RDS сервер.
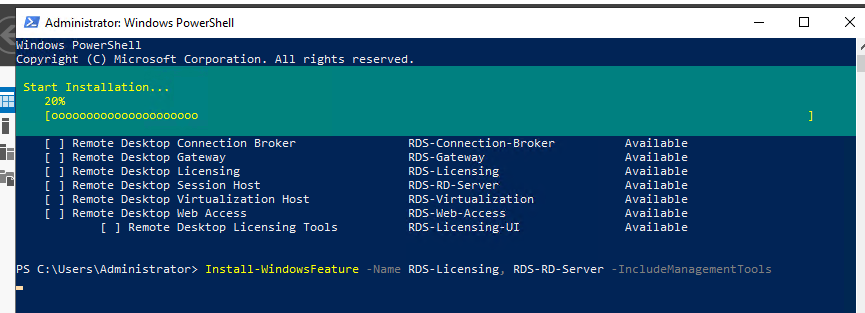
Также вы можете установить указанные роли Windows Server с помощью PowerShell:
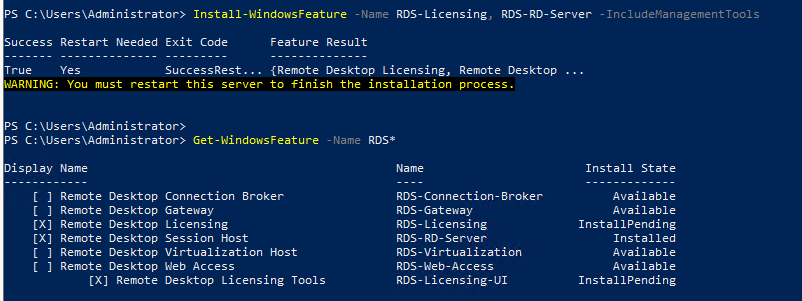
Install-WindowsFeature -Name RDS-Licensing, RDS-RD-Server –IncludeManagementTools
Проверьте, какие RDS роли установлены на сервере:
Get-WindowsFeature -Name RDS* | Where installed
Перезагрузите Windows командой:
Restart-Computer
Установка Remote Desktop Licensing и RDS лицензий (CAL)
Теперь нужно настроить роль Remote Desktop Licensing, которая обеспечивает лицензирование подключений пользователей к вашему RDS хосту. Допустимо установить и активировать роль Remote Desktop Licensing на этом же сервере (если он у вас один), либо можете разместить роль RDLicensing на отдельном сервере. Один сервер RDS Licensing можете выдавать лицензии неограниченному количеству RDSH хостов.
Если вы решили использовать локальный сервер RDLicensing, активируйте сервер лицензий RDS и установите клиентские лицензии (RDS CAL) согласно гайду по ссылке.
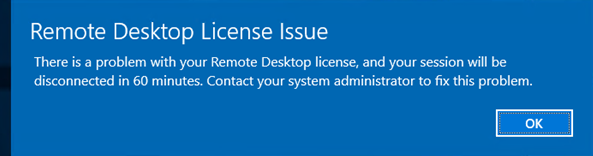
В рабочей группе можно использовать только RDS CAL типа Per Device. Если ваш сервер лицензирования выдает только Per User лицензии, то RDSH сервер будет каждые 60 минут принудительно завершать сеанс пользователей:
Remote Desktop License Issue
There is a problem with your Remote Desktop license, and your session will be disconnected in 60 minutes.
Настройка роли Remote Desktop Session Host в рабочей группе
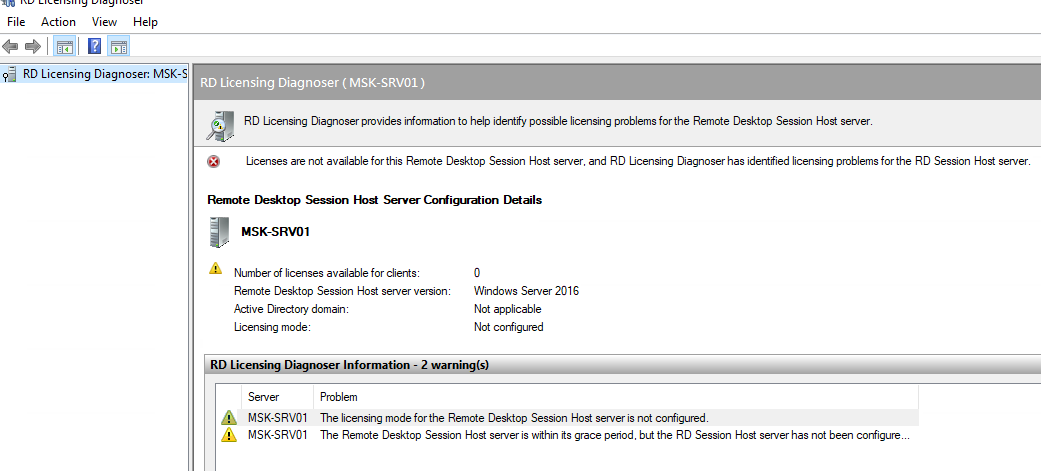
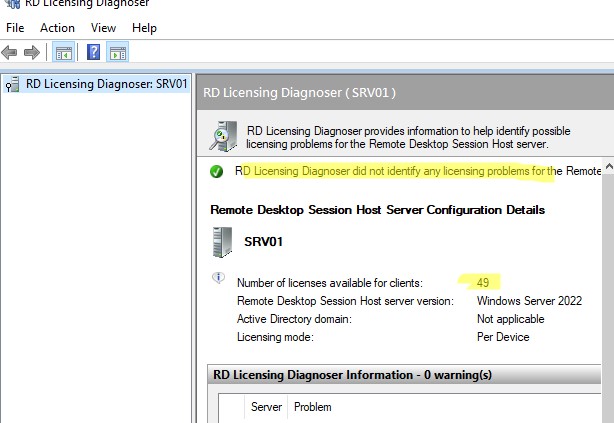
Откройте консоль управления Remote Desktop Licensing Diagnoser (
lsdiag.msc
). В данном случае сервер RDSH еще не настроен на получение RDS CAL лицензий с сервера лицензирования. Об этом свидетельствуют надписи:
- The licensing mode for the Remote Desktop Session Host server is not configured
- Number of licenses available for clients:
0
Если вы не нацелите ваш RDSH сервер на сервер лицензирования, ваш сервер будет находится в триальном grace режиме. Пользователи могут использовать его в течении 120 дней (при каждом подключении в трее будет появляться сообщение “
Служба удаленных рабочих столов перестанет работать через xxx дней
”). После окончания grace периода ваши пользователи не смогут подключится к RDS с ошибкой:
Remote session was disconnected because there are no Remote Desktop client access licenses available for this computer.
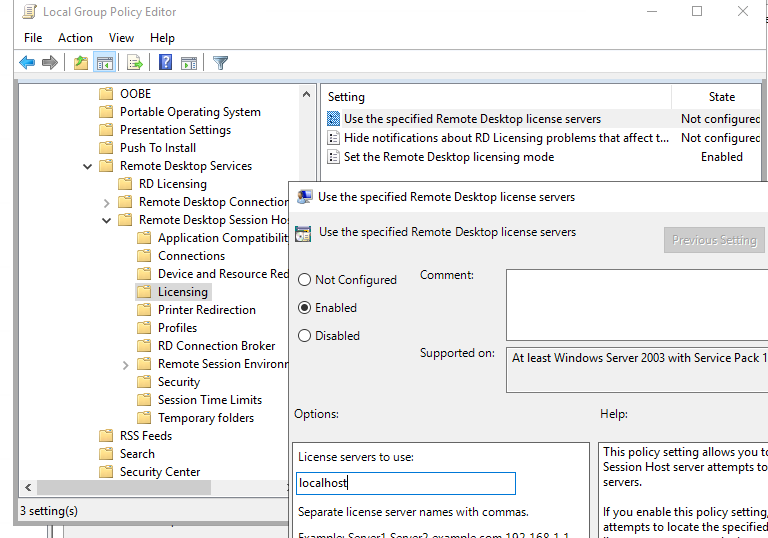
Чтобы задать адрес сервера лицензирования RDS и тип лицензии, воспользуйтесь консолью редактора локальной групповой политики Windows (
gpedit.msc
).
- Перейдите в раздел GPO Computer Configuration -> Administrative Templates -> Windows Components -> Remote Desktop Services -> Remote Desktop Session Host -> Licensing;
- Установите параметр Set the Remote Desktop licensing mode = Per Device;
- В Use the specified Remote Desktop license servers укажите адрес сервера, на котором установлен сервер RDLicensing. Если сервер лицензий установлен на этом же хосте, укажите
localhost
или
127.0.0.1
- Обновите локальные политики, и запустите RDesktop Licensing Diagnoser. Убедитесь, что он видит ваши RDS CAL.

Дополнительно в локальных GPO вы можете настроить лимиты (таймауты) на длительность RDP сессий и правила отключения пользователей при неактивности.
Если вам нужно создать отдельные групповые политики с настройками для локальных пользователей и администраторов, воспользуйтесь функционалом множественных GPO (MLGPO).
Теперь создайте для локальные учетные записи пользователей, который они будут использовать для входа на RDS. Можно создать пользователей с помощью оснастки
lusrmgr.msc
или через PowerShell:
$UserPassword = ConvertTo-SecureString "Pa$$dr0w!!" -AsPlainText -Force
New-LocalUser "AIvanov" -Password $UserPassword -FullName "Andrey Ivanov"
Чтобы разрешить пользователю подключаться к серверу через службы Remote Desktop Services, нужно добавить его учетную запись в локальную группу Remote Desktop Users. Добавьте пользователей вручную через консоль управления группами или через PowerShell:
Add-LocalGroupMember -Group "Remote Desktop Users" -Member AIvanov
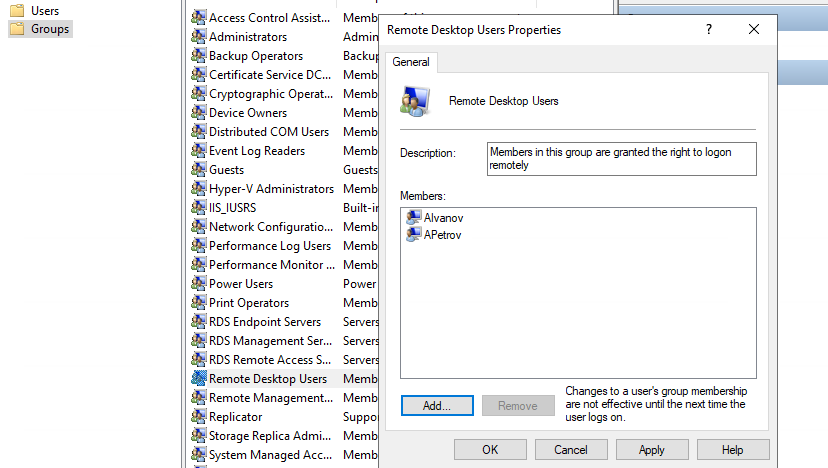
Для данной группы пользователей разрешен вход в локальной политикие Allow logon through Remote Desktop Services (Computer Configuration -> Windows Settings -> Security Settings -> Local Policies -> User Rights Assignment). Эта же политика позволяет обеспечить RDP вход пользователям даже на контроллер домена.
Теперь пользователи могут попробовать со своих компьютеров подключится к вашему RDS хосту с помощью клиента mstsc.exe (или любого другого RDS клиента). Проверьте, что к серверу одновременно может подключится более двух активных RDP сессий.
При подключении к RDSH серверу в рабочей группы нужно указывать имя в формате
srv1\username
(где srv1 – имя компьютера/hostname вашего RDS). Если указать имя пользователя с префиксам
.\
или без префикса, подразумевается что подключение выполняется под вашим локальным пользователем.
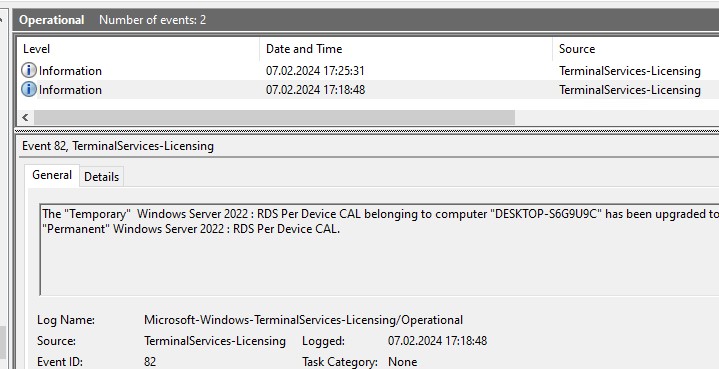
При первом входе устройству пользователя выдается временная лицензия (особенности RDS Per Device лицензирования). При втором входе выдается постоянная лицензия, которая появится в консоли Remote Desktop Licensing Manager. Лицензия выдается на срок от 52 до 89 дней (случайное число).
Информация об успешной выдаче лицензии есть в следующем событие Event Viewer (Applications and Services Logs -> Microsoft -> Windows -> TerminalServices—Licensing -> Operational).
Event ID: 82
 The "Temporary"  Windows Server 2022 : RDS Per Device CAL belonging to computer "ComputerName" has been upgraded to "Permanent" Windows Server 2022 : RDS Per Device CAL.
Если вам нужно подключиться в RDP сессию пользователя, вы можете воспользоваться режимом теневого подключения RDS (он работает и на RDSH в рабочей группе).
Публикация приложения RemoteApp на RDS в рабочей группе (без домена)
На RDS в рабочей группе недоступна консоль управления сеансами, и поэтому отсутствуют инструменты для публикации приложений RemoteApp. Но есть обходное решение позволяющее через реестр опубликовать любое приложение в RemoteApp без домена Active Directory.
Пример REG файла для публикации на RDS сервере AdobeReader в качестве RemoteApp:
Windows Registry Editor Version 5.00
[HKEY_LOCAL_MACHINE\SOFTWARE\Microsoft\Windows NT\CurrentVersion\Terminal Server\TSAppAllowList\Applications\MyAdobeReaderApp]
"CommandLineSetting"=dword:00000000
"RequiredCommandLine"=""
"Name"="Adobe Reader"
"Path"="C:\\Program Files\\Adobe\\Acrobat DC\\Acrobat\\Acrobat.exe"
"ShortPath"="C:\\PROGRA~1\\Adobe\\Acrobat DC\\Acrobat\\Acrobat.exe"
"IconPath"="C:\\PROGRA~1\\Adobe\\Acrobat DC\\Acrobat\\Acrobat.exe"
"IconIndex"=dword:00000000
"ShowInTSWA"=dword:00000001
"SecurityDescriptor"=""
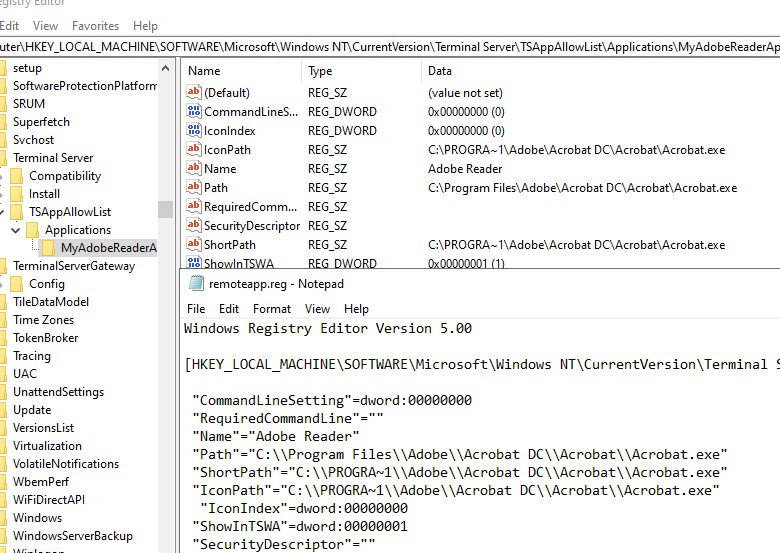
Замените имена и пути в REG файле на ваши и импортируйте его в реестр RDSH.
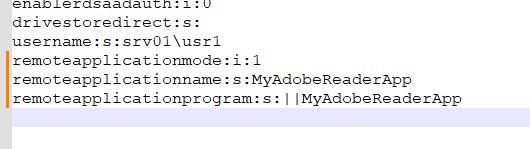
Теперь вручную отредактируйте файл *.RDP ярлыка, чтобы при его запуске автоматически запускалось опубликованное приложение. Добавьте в RDP файл следующие строки:
remoteapplicationmode:i:1
alternate shell:s:||MyAdobeReaderApp
remoteapplicationname:s:MyAdobeReaderApp
remoteapplicationprogram:s:||MyAdobeReaderApp
Попробуйте запустить RemoteApp приложение на RDS с поммощью вашего RDP файла. Опубликованное на RDSH приложение должно успешно запуститься на вашем рабочем столе.
Решение проблемы с медленной работой RemoteApp в Windows Server 2019/2016 описано здесь.
Настройка шлюза RD Gateway в рабочей группе
Если вам нужно организовать безопасный доступ к вашему RDS северу через интернет, рекомендуется разместить его за VPN или опубликовать через шлюз RD Gateway.
Remote Desktop Gateway позволит открыть безопасный доступ из Интернета к RDS серверу интернета по защищенному SSL/TLS подключение по порту TCP:443 (вместо того, чтобы открывать стандартный RDP порт 3389, на котором будут постоянно фиксироваться попытки перебора паролей по RDP).
Вопреки распространённому заблуждению, RD Gateway можно развернуть без домена Active Directory. Подробная инструкция по настройке шлюза RD Gateway без домена доступна в статье Настройка шлюза Remote Desktop Gateway на Windows Server.
In today’s digital world, remote access to computers and servers has become crucial for businesses and individuals alike. Whether you need to access your work computer from home or manage servers in a data center, enabling Remote Desktop Services (RDS) on your Windows Server 2019 is the key to achieving this. RDS allows users to connect to remote desktop sessions, providing a virtual desktop environment that can be accessed from any device.
Enabling RDS on Windows Server 2019 might seem like a complex task, but it doesn’t have to be. In this blog post, we will explore the challenge of enabling RDS and provide you with detailed instructions on how to do it using different methods. We will also discuss some alternative solutions and share bonus tips to optimize your experience. Let’s dive in!
The Challenge of Enabling Remote Desktop Services
Enabling Remote Desktop Services on Windows Server 2019 can present some challenges, especially for those who are not familiar with the process. Here are a few points to consider:
- Complex Configuration: The configuration process for enabling RDS involves several steps and settings that need to be properly configured to ensure secure remote access.
- Network Considerations: Remote access requires proper network configuration to establish a secure connection. Firewall settings, port forwarding, and network infrastructure need to be configured correctly.
- Security Concerns: Enabling RDS opens a potential entry point for unauthorized access if not properly secured. Security measures such as strong passwords, two-factor authentication, and limiting access to authorized users are crucial.
Now that we understand the challenges, let’s explore different methods to enable Remote Desktop Services on Windows Server 2019.
Video Tutorial:
Method 1: How to Enable Remote Desktop Services using Server Manager
Enabling Remote Desktop Services using Server Manager is a straightforward method that allows you to quickly configure and enable RDS on your Windows Server 2019. Follow these steps:
Pros:
1. Easy and intuitive process.
2. Allows for granular control over session settings.
3. Provides a user-friendly interface for managing RDS.
Cons:
1. Requires administrative access to the Windows Server.
2. Limited customization options compared to other methods.
Step 1: Access Server Manager
1. Log in to the Windows Server 2019 using an administrative account.
2. Launch Server Manager by clicking on the «Windows» icon in the taskbar and searching for «Server Manager.«
Step 2: Add Roles and Features
1. In Server Manager, click on «Manage» in the top-right corner and select «Add Roles and Features.«
2. Follow the wizard and select «Role-based or feature-based installation» when prompted.
3. Select the local server from the server pool and click «Next.«
Step 3: Select Remote Desktop Services
1. In the «Server Roles» section of the wizard, scroll down and expand «Remote Desktop Services.«
2. Check the box next to «Remote Desktop Session Host» and click «Next.«
3. Review the information provided on the «Features» page and click «Next.«
Step 4: Configure Session Collections
1. On the «Role Services» page, leave the default selection of «Automatically restart the destination server if required.«
2. Click «Next» and review the confirmation page.
3. Click «Install» to start the installation process.
4. Once the installation is complete, click «Close» to exit the wizard.
Step 5: Configure Licensing
1. After the installation, Server Manager will display a warning sign next to «Remote Desktop Services» in the left-hand menu.
2. Click on «Configure Remote Desktop Licensing» in the «Overview» section.
3. Follow the wizard to select the appropriate licensing mode and add the licensing server if necessary.
4. Complete the configuration process by selecting the licensing mode and adding the licensing server.
Congratulations! You have successfully enabled Remote Desktop Services using Server Manager.
Method 2: How to Enable Remote Desktop Services using PowerShell
Using PowerShell to enable Remote Desktop Services provides a scriptable and automated approach. This method allows you to perform the configuration steps using PowerShell commands, ideal for administrators who prefer command-line interfaces.
Pros:
1. Scriptable and automated process.
2. Provides advanced customization options.
3. Saves time for repetitive tasks.
Cons:
1. Requires knowledge of PowerShell commands.
2. May not be suitable for users unfamiliar with command-line interfaces.
Step 1: Open PowerShell
1. Log in to the Windows Server 2019 using an administrative account.
2. Launch PowerShell by clicking on the «Windows» icon in the taskbar and searching for «PowerShell.«
Step 2: Install Remote Desktop Session Host
1. Run the following command to install the Remote Desktop Session Host role:
«`
Install-WindowsFeature -Name RDS-RD-Server -IncludeAllSubFeature -Restart
«`
2. Wait for the installation to complete and for the server to restart.
Step 3: Configure Remote Desktop Licensing
1. Run the following command to configure Remote Desktop Licensing:
«`
Set-RDLicenseConfiguration -LicenseServer -Mode -ConnectionBroker
«`
Replace « with the name or IP address of the license server and « with the preferred licensing mode.
Replace « with the name or IP address of the connection broker server.
Congratulations! You have successfully enabled Remote Desktop Services using PowerShell.
Method 3: How to Enable Remote Desktop Services using Group Policy
Using Group Policy to enable Remote Desktop Services allows you to centrally manage and enforce RDS settings across multiple servers. This method is ideal for large-scale deployments where consistent configuration is essential.
Pros:
1. Centralized management of RDS settings.
2. Enforces consistent configuration across multiple servers.
3. Provides granular control over RDS via Group Policy settings.
Cons:
1. Requires Active Directory Domain Services.
2. Requires knowledge of Group Policy and Active Directory administration.
Step 1: Open Group Policy Management
1. Log in to a domain controller or a machine with the Group Policy Management Console installed.
2. Launch Group Policy Management from the Start Menu or by typing «gpmc.msc» in the Run dialog.
Step 2: Create or Edit Group Policy Object
1. Expand the forest and domain in the left-hand pane of Group Policy Management.
2. Right-click on the desired organizational unit (OU) or domain and select «Create a GPO in this domain and Link it here» or «Edit» if the GPO already exists.
Step 3: Configure Remote Desktop Services Policies
1. In the Group Policy Management Editor, navigate to «Computer Configuration» > «Policies» > «Administrative Templates.«
2. Expand «Windows Components» and select «Remote Desktop Services.«
3. Configure the desired policies, such as «Allow users to connect remotely using Remote Desktop Services,» «Set rules for remote control of Remote Desktop Services sessions,» and more.
4. Apply the changes and close the Group Policy Management Editor.
Congratulations! You have successfully enabled Remote Desktop Services using Group Policy.
Method 4: How to Enable Remote Desktop Services using RD-Licensing PowerShell Module
Using the RD-Licensing PowerShell module offers an alternative method for managing and configuring Remote Desktop Services licensing on your Windows Server 2019. This method provides more control over licensing settings and helps streamline the management process.
Pros:
1. Flexible and powerful licensing management.
2. Allows for easy tracking and reporting of licenses.
3. Provides advanced customization options.
Cons:
1. Requires knowledge of PowerShell commands.
2. May not be suitable for users unfamiliar with command-line interfaces.
Step 1: Open PowerShell
1. Log in to the Windows Server 2019 using an administrative account.
2. Launch PowerShell by clicking on the «Windows» icon in the taskbar and searching for «PowerShell.«
Step 2: Install RD-Licensing PowerShell Module
1. Run the following command to install the RD-Licensing PowerShell module:
«`
Install-WindowsFeature -Name Remote-Desktop-Services-RD-Licensing -IncludeAllSubFeature -Restart
«`
2. Wait for the installation to complete and for the server to restart.
Step 3: Configure RD-Licensing
1. Run the following command to configure the RD-Licensing mode:
«`
Set-RDLicenseConfiguration -LicenseServer -Mode
«`
Replace « with the name or IP address of the license server and « with the preferred licensing mode.
Congratulations! You have successfully enabled Remote Desktop Services using the RD-Licensing PowerShell module.
Alternatives: What to Do If You Can’t Enable Remote Desktop Services
While enabling Remote Desktop Services on Windows Server 2019 is the preferred method for remote access, there are alternatives available if you encounter difficulties or limitations. Here are a few alternative solutions:
Q1: Use Third-Party Remote Access Tools
A: If enabling Remote Desktop Services is not feasible, you can explore third-party remote access tools such as TeamViewer, AnyDesk, or LogMeIn. These tools provide similar functionality and allow remote access to computers and servers.
Q2: Utilize Virtual Private Networks (VPNs)
A: Setting up a Virtual Private Network (VPN) can provide secure remote access to your network resources without enabling Remote Desktop Services. With a VPN connection, you can access your on-premises servers and resources as if you were physically present in the network.
Q3: Consider Cloud-Based Solutions
A: If managing your own servers and configuring Remote Desktop Services is not ideal, you can explore cloud-based solutions such as Microsoft Azure Virtual Desktop or Amazon WorkSpaces. These services provide virtual desktop infrastructure in the cloud, eliminating the need for on-premises server management.
Bonus Tips
Here are a few bonus tips to enhance your Remote Desktop Services experience:
1. Use Network Level Authentication (NLA): Enable NLA for better security by verifying the user’s credentials before establishing a remote session.
2. Optimize Network Bandwidth: Adjust the display and connection settings in the remote desktop client to optimize network bandwidth usage. Lowering the color depth and disabling unnecessary features can improve performance.
3. Implement Remote Desktop Gateway: Set up a Remote Desktop Gateway for secure connections over the internet. RD Gateway acts as a middleman between the client and the remote desktop session host, providing an extra layer of security.
5 FAQs about Enabling Remote Desktop Services on Windows Server 2019
Q1: Can I enable Remote Desktop Services on Windows Server 2019 without internet access?
A: Yes, you can enable Remote Desktop Services on Windows Server 2019 without internet access. However, internet access might be required for certain features, such as licensing activation.
Q2: Can I modify the default Remote Desktop port on Windows Server 2019?
A: Yes, you can modify the default Remote Desktop port on Windows Server 2019. It can be changed using the Registry Editor in the following registry key: HKEY_LOCAL_MACHINE\System\CurrentControlSet\Control\Terminal Server\WinStations\RDP-Tcp.
Q3: Can I use Remote Desktop Services on Windows Server 2019 for multiple concurrent users?
A: Yes, Remote Desktop Services on Windows Server 2019 supports multiple concurrent users. Depending on the licensing mode and CALs installed, you can have multiple users accessing the server simultaneously.
Q4: Are there any limitations on the number of Remote Desktop Services connections in Windows Server 2019?
A: The number of Remote Desktop Services connections in Windows Server 2019 depends on the licensing mode and the number of Client Access Licenses (CALs) installed. Make sure to review the licensing terms and consult Microsoft’s documentation for more information.
Q5: Can I enable Remote Desktop Services on Windows Server 2019 Core?
A: Yes, you can enable Remote Desktop Services on Windows Server 2019 Core. You can use PowerShell or Server Manager remotely to configure and manage RDS settings on a Windows Server 2019 Core installation.
In Conclusion
Enabling Remote Desktop Services on Windows Server 2019 is an essential task for achieving remote access to computers and servers. While the process may seem daunting, the methods described in this blog post provide clear instructions to enable RDS using Server Manager, PowerShell, Group Policy, and the RD-Licensing PowerShell module.
Whether you choose to enable RDS using a graphical interface or prefer a command-line approach, always ensure that you follow best practices for security and network configuration. Additionally, consider alternative solutions such as third-party remote access tools, VPNs, or cloud-based services if enabling Remote Desktop Services is not an option.
With the proper configuration and security measures in place, Remote Desktop Services on Windows Server 2019 can greatly enhance productivity and enable seamless remote access for both individuals and organizations.
this article will show you tutorial enable RDP on Windows Server 2019. Remote Desktop service means the ability of computers to connect and remotely control via the Internet or in the internal network platform. The Remote Desktop service or RDP, is a protocol owned by Microsoft, and the software is available on all Windows by default from Windows XP onwards. Using Remote Desktop is very useful in connecting to servers with Windows operating system.
Buy Admin RDP Server Online from eldernode.com.
Remote Desktop Protocol service can be enabled on Windows Server 2019 from the PowerShell or through the Server console interface. Enabling RDP Service on Windows Server 2019 is faster on PowerShell that the GUI procedure.
A) Enabling RDP Service Using PowerShell
1. First, run PowerShell with administrator access.
2. After opening PowerShell, type and execute the following command.
Set-ItemProperty -Path 'HKLM:\System\CurrentControlSet\Control\Terminal Server' -name "fDenyTSConnections" -value 0 3. Because Windows Firewall does not allow the remote desktop connection, so you should configure the firewall to allow for RDP remote connections.
Enable-NetFirewallRule -DisplayGroup "Remote Desktop" 4. To disable RDP, run:
Set-ItemProperty -Path 'HKLM:\System\CurrentControlSet\Control\Terminal Server' -name "fDenyTSConnections" -value 1 B) Enabling RDP Service from Server Manager GUI
1. You must first open the server manager from the Start menu.
2. After opening Server Manager, click Local Server in the left column.
3. Click Disabled in front of the Remote Desktop option.
4. In the window that opens, click Allow remote connections to this Computer and click OK.
5. Now select the Select Users option to agree to Remote Desktop firewall exception warning and add users to allow.
6. Enter Username and click Check names. Once you confirm the username, click OK to save.
7. Click OK at the end.
Dear user, we hope you would enjoy this tutorial, you can ask questions about this training in the comments section, or to solve other problems in the field of Eldernode training, refer to the Ask page section and raise your problem in it as soon as possible. Make time for other users and experts to answer your questions.
Enable RDP on Windows Server 2019.
Goodluck.
Readers help support Windows Report. We may get a commission if you buy through our links.
Read our disclosure page to find out how can you help Windows Report sustain the editorial team. Read more
Remote Desktop Connection is a protocol that helps you to connect to another computer that is available at a remote location. But, some users are experiencing problems while enabling Remote Desktop on Windows Server.
So, if you were planning to enable the functionality and remotely access the computer, there are quite a few ways to do that. Read the following sections to learn more about it and choose a method that seems the most convenient.
Does Windows Server 2019 have Remote Desktop?
Yes, Windows Server 2019 does support the functionality and allows users to enable the Remote Desktop feature seamlessly. Though remember, Windows Server 2019 has Remote Desktop turned off by default for security reasons.
So, users need to first manually enable it before being able to connect, access, and control the computer through another device.
How do I enable Remote Desktop in Windows Server 2019?
1. Use PowerShell
- Press the Windows key, search for Windows PowerShell, right-click on the relevant search result, and select Run as Administrator.

- Paste the following command in PowerShell and hit Enter:
Set-ItemProperty -Path 'HKLM:\System\CurrentControlSet\Control\Terminal Server' -name "fDenyTSConnections" -value 0 - By default, remote desktop connections are blocked by the Windows Firewall. Execute the following command to configure the firewall to allow remote desktop connections:
Enable-NetFirewallRule -DisplayGroup "Remote Desktop"

This is, by far, the quickest method to enable Remote Desktop in Windows Server 2019. If due to some reason, you are experiencing problems, use the Server Manager GUI to enable Remote Desktop connections as illustrated next.
2. Use Server Manager GUI
- First, log in to the server as a local administrator.
- Now, search for Server Manager in the Start menu, and launch it.
- Next, select Local Server from the navigation pane on the left, and then click on the Disabled option next to Remote Desktop.

- Tick the Allow remote connections to this computer option.

- You will now see the Remote Desktop firewall exception warning. Click the Select Users button to add allowed users.
- Now add the Username and hit the Check names button. Finally, click OK to save the changes.


That’s it! If the changes don’t reflect right away, perform a quick refresh, and you will find that Remote Desktop is enabled on Windows Server.
3. Use Command Prompt
- Press Windows + R to open Run, type cmd in the text field, and hit Enter.

- Now, paste the following command and hit Enter:
SystemPropertiesRemote
- Under the Remote tab, tick the checkbox for Allow remote connections to this computer, and click on OK to save the changes.


If none of the solutions were helpful, you could use Mikogo for secure remote desktop services. The tool offers a wide range of other features, each simplifying one task or the other.
In case you are experiencing problems with it, find out what to do when Remote Desktop is not working.
If you have any queries or want to share feedback for this guide, drop a comment below.
Milan Stanojevic
Windows Toubleshooting Expert
Milan has been enthusiastic about technology ever since his childhood days, and this led him to take interest in all PC-related technologies. He’s a PC enthusiast and he spends most of his time learning about computers and technology.
Before joining WindowsReport, he worked as a front-end web developer. Now, he’s one of the Troubleshooting experts in our worldwide team, specializing in Windows errors & software issues.