
You are here:
Home » Windows 10 » How To Reinstall The Photos App In Windows 10/11
The universal Photos app is the default photo or image viewer in Windows 10/11 operating system. The classic Windows Photo Viewer, although it has not been removed from Windows 10/11, is disabled by default, and one needs to enable Windows Photo Viewer to make it the default photo viewer program in Windows 10.
The new Photos app is not just an image viewer, but it also offers basic image editing and optimizing tools as well. It provides you with options to add various effects and filters to your photos. With the Photos app, you can crop, rotate, straighten, and retouch your images. The app also allows you to remove red-eye from images.

Probably the only problem with the Photos app is that it is not as quick as the classic Windows Photo Viewer or its competitors like ImageGlass to open photos. The other most common issue is reasonably high resource usage.
If the Windows 10/11 Photos app is not opening, crashing soon after the launch, or displaying an error, you can fix those issues by reinstalling the Photos app. However, like any other default Windows 10/11 apps, the Photos app can’t be uninstalled via the Settings app. In this guide, we will see how to easily uninstall and then install the Photos app in Windows 10/11.
Method 1 – uninstall the Photos app via PowerShell and then install it
Method 2 – uninstall Photos via PowerShell
Method 3 – uninstall the Photos app using CCleaner and then install the same
Method 1 of 3
Reinstall the Photos app in Windows 10/11 using PowerShell
Step 1: Open PowerShell as an administrator. To do this, type PowerShell in the Start menu or taskbar search box, right-click on the PowerShell entry in the search results, and then click the Run as administrator option.

Click the Yes button when you see the User Account Control prompt.
Step 2: In the elevated PowerShell, type the following command and press the Enter key to uninstall the Photos app.
get-appxpackage *Microsoft.Windows.Photos* | remove-appxpackage
This should remove the Photos app. If not, follow the next method.
Step 3: Once the app is removed, open the built-in Microsoft Store app, search for the Microsoft Photos app, and install the same to reinstall the Photos app.

Method 2 of 3
Another way to uninstall the Photos app via PowerShell
Step 1: Open the PowerShell with admin rights.
Step 2: Type the following command and press the Enter key to view all installed apps.
Get-AppxPackage –AllUsers

Step 3: Scroll down, and locate the entry named Microsoft.Windows.Photos and copy its PackageFullName to the Notepad program.
Tip: To quickly find the Photos app entry, right-click on the title bar of PowerShell, click Edit, click Find, type Photos, and then click the Find Next button.
To copy PackageFullName, select PackageFullName (refer to the picture below), and then use Ctrl + C hotkey to copy it.

Step 4: Execute the following command to uninstall the Photos app.
remove-AppxPackage PackageFullName
In the above command, replace PackageFullName with the PackageFullName of the Photos app that you copied to Notepad in Step 3.

Step 5: Now that we have uninstalled the Photos app from Windows 10, it’s time to install a fresh copy of the same from the Store. To do so, open the Store app by clicking the Store app tile on the Start menu or searching for it.
Step 6: Once the Store is launched, type Microsoft Photos in the search box, click on the Microsoft Photos entry, and then click the Install/Get button. If the Install or Get button is not active or you are setting the Open button instead, please close the app once, and then launch the Store app again.
Depending on the speed of your internet connection, the app should be installed and ready to use in 2 to 10 minutes.
Method 3 of 3
Reinstall the photos app using CCleaner
Those of you who are not familiar with PowerShell can use the popular CCleaner (free) software to uninstall the Photos app and then follow the directions mentioned above to install the Photos app from the Store.
Step 1: Download the CCleaner app and install the same on your Windows 10 PC, if not installed already.
Step 2: Launch CCleaner, click Tools and click Uninstall to view all installed apps.
Step 3: Locate the entry named Photos, right-click on it, and click the Uninstall button to uninstall it. Click the OK button when you see the confirmation dialog.


Step 4: Once the Photos app is uninstalled, open the Windows Store app, type Microsoft Photos in the search box, click on Photos app to open its page, and then click Free button to install the Photos app. Simple as that!


Our how to reinstall Solitaire Collection in Windows 10 guide might also interest you.
Все способы:
- Способ 1: Microsoft Store
- Способ 2: Включение приложения
- Установка приложения по умолчанию
- Альтернативные варианты
- Решение возможных проблем
- Вариант 1: Восстановление и сброс настроек
- Вариант 2: «Windows PowerShell»
- Вариант 3: Встроенное средство устранения неполадок
- Вопросы и ответы: 2
Фирменное приложение «Фотографии» обычно предустановлено в Windows 10. Если на компьютере его нет, то оно доступно в Microsoft Store, но, скорее всего, софт просто нужно активировать.
Способ 1: Microsoft Store
«Фотографии» — фирменное средство просмотра изображений и фотографий от Microsoft, которое может быть установлено через другое фирменное приложение — магазин. Если у вас его вдруг нет (оно также установлено по умолчанию), то в нашем отдельном материале вы найдете инструкцию по инсталляции официального маркета компании. Также в ней можно узнать о решении самых распространенных проблем при установке или работе.
Читайте также: Установка Microsoft Store в Windows 10
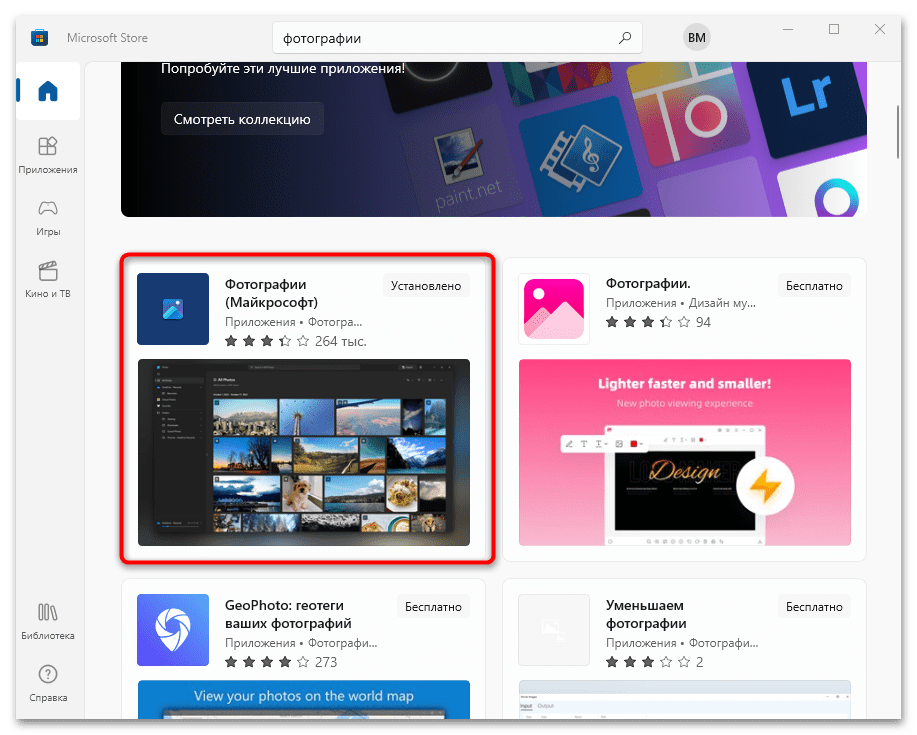
- Запустите Microsoft Store. В поисковой строке пропишите «Фотографии» и нажмите кнопку поиска или на клавишу «Enter».
- На новой странице отобразятся найденные совпадения, среди которых есть и нужное нам. Выберите его, чтобы перейти на страницу с описанием.
- Останется только кликнуть по кнопке установки «Получить» и дождаться, пока «Фотографии» будет инсталлировано на компьютер. Пожалуй, это единственный адекватный способ установить приложение для просмотра фотографий в Windows 10.

Читайте также: Решение проблем со скачиванием приложений из Microsoft Store в Windows 10
Способ 2: Включение приложения
В большинстве случаев «Фотографии» уже есть в системе, но если она не отображается в списке доступных для просмотра изображений программ, то, вероятнее всего, ее нужно просто включить. Для этого его сперва придется найти, используя «Редактор реестра». Более простой способ – использовать специализированный софт, предназначенный для расширения базовых возможностей операционной системы. Наш автор разбирал оба метода, позволяющих самостоятельно активировать приложение.
Подробнее: Включение стандартного приложения «Просмотр фотографий» в Windows 10

Установка приложения по умолчанию
Стандартный способ выбора приложения для открытия графического файла через контекстное меню и функции «Открыть с помощью» со стандартной программной может не сработать: его не будет в списке. Чтобы установить «Фотографии» в Виндовс 10 средством по умолчанию, потребуется перейти в «Параметры» системы:
- Кликните по кнопке «Пуск» и выберите «Параметры», помеченное иконкой в виде шестерни.
- В новом окне нажмите на раздел «Приложения».
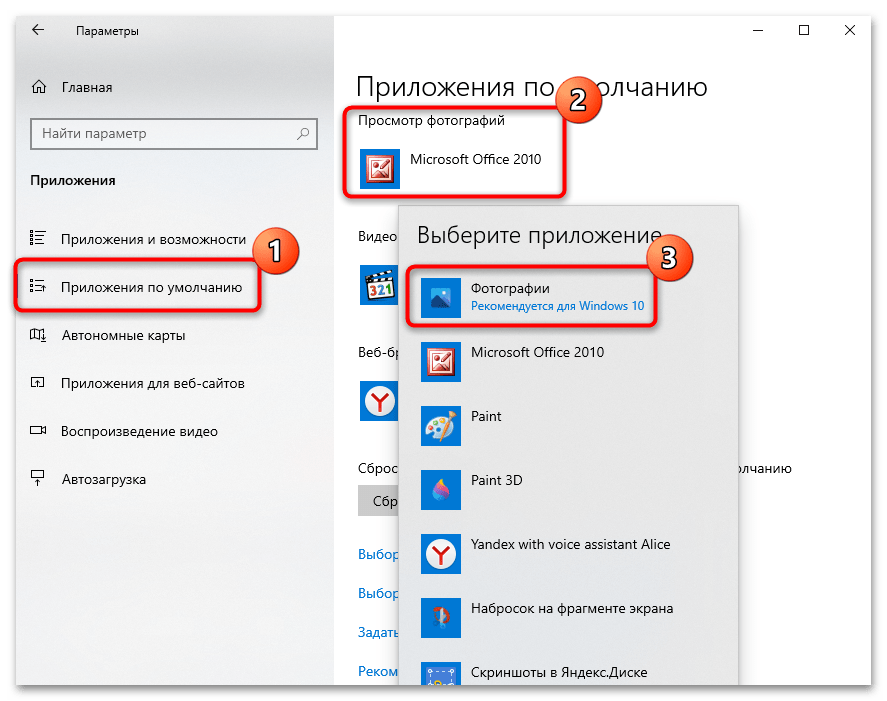
- На панели слева кликните по вкладке «Приложения по умолчанию». Останется отыскать строку «Просмотр фотографий» и нажать на название установленной по умолчанию программы, если это не «Фотографии». Из всплывающего меню выберите нужное — искомый софт помечен как рекомендуемый для Windows 10.

После выбора приложения по умолчанию закройте окно. Как только настройки будут выполнены, все графические файлы в наиболее распространенных форматах станут автоматически открываться в интерфейсе «Фотографий».
Альтернативные варианты
Можно воспользоваться аналогичным софтом, предназначенным для просмотра фото и других изображений. Но, в отличие от приложения «Фотографий», такие программы придется устанавливать отдельно. Некоторые из них предусматривают дополнительные возможности, например встроенный редактор с базовыми инструментами для простого изменения файлов. Другие интегрируются в системное меню, что позволяет быстро открывать доступ к просмотру и редактированию изображений.
Решение возможных проблем
Иногда ни включение, ни установка не доступны, и это означает, что в работе стандартного приложения возникла ошибка. Но встроенные средства Виндовс позволяют устранить ту или иную неполадку самостоятельно.
Вариант 1: Восстановление и сброс настроек
Попробуйте восстановить или сбросить настройки приложения через системные «Параметры»:
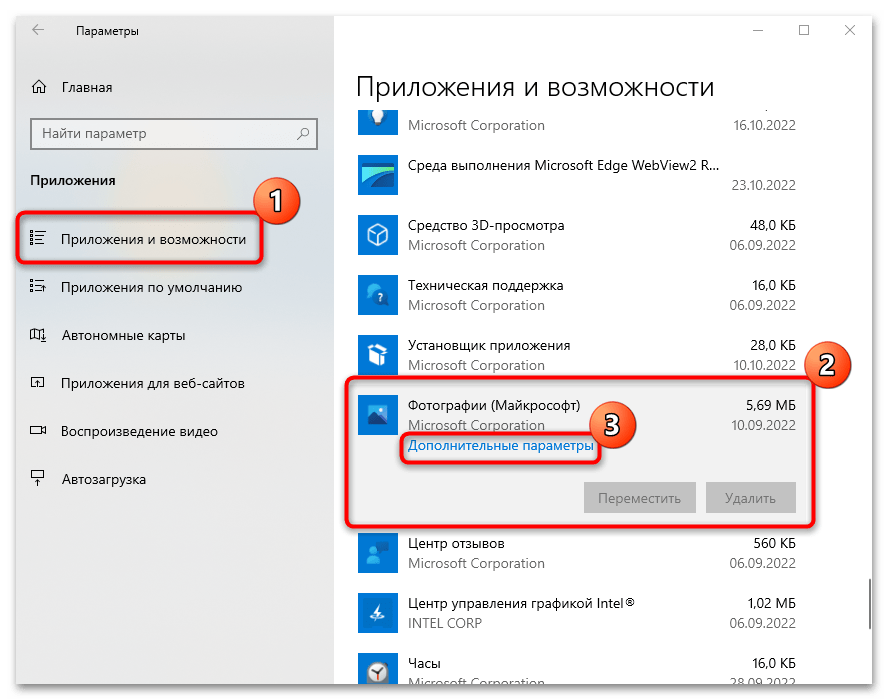
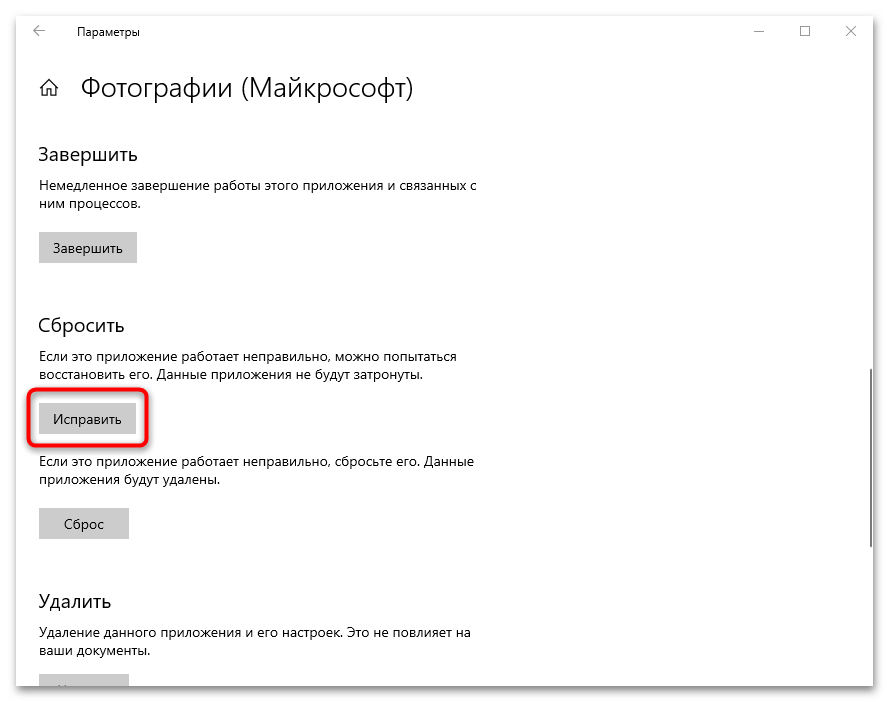
- Запустите «Параметры» через главное меню и перейдите в раздел «Приложения». На вкладке «Приложения и возможности» в списке установленного софта найдите «Фотографии». Кликните по названию левой кнопкой мыши, затем ей же по появившейся строке «Дополнительные параметры».
- В новом окне сначала нажмите на кнопку «Исправить», после чего система попытается вернуть состояние приложения, не затронув данные.
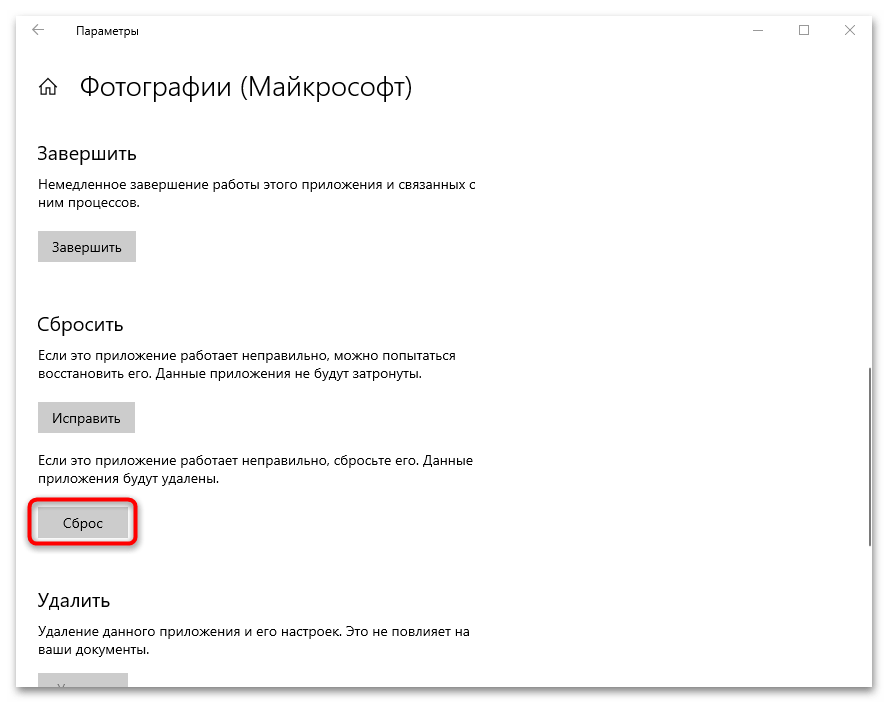
- Если это не сработало, то выберите «Сброс», при котором все настройки и данные «Фотографий» будут удалены.
Такой вариант исправления неполадок подойдет, если фирменная программа работает некорректно.
Вариант 2: «Windows PowerShell»
С помощью терминала PowerShell есть возможность перерегистрировать приложение, что может помочь восстановить его работоспособность. Оно должно начать нормально функционировать после ввода одной специальной команды:
- Запустите «Windows PowerShell» от имени администратора — для этого кликните по кнопке «Пуск» правой кнопкой мыши и выберите соответствующий пункт из меню.
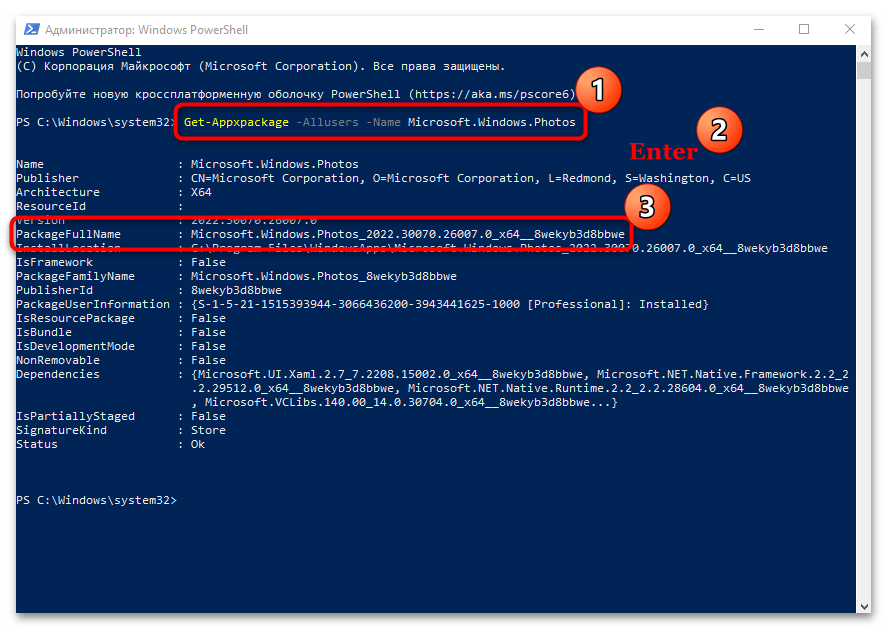
- Выполните команду
Get-Appxpackage -Allusers -Name Microsoft.Windows.Photos, прописав ее и нажав на клавишу «Enter». Обратите внимание на строку «PackageFullName». Ее значение нужно скопировать с помощью сочетания клавиш «Ctrl + C». В нашем случае это «Microsoft.Windows.Photos_2022.30070.26007.0_x64_8wekyb3d8bbwe». - После этого вставьте команду
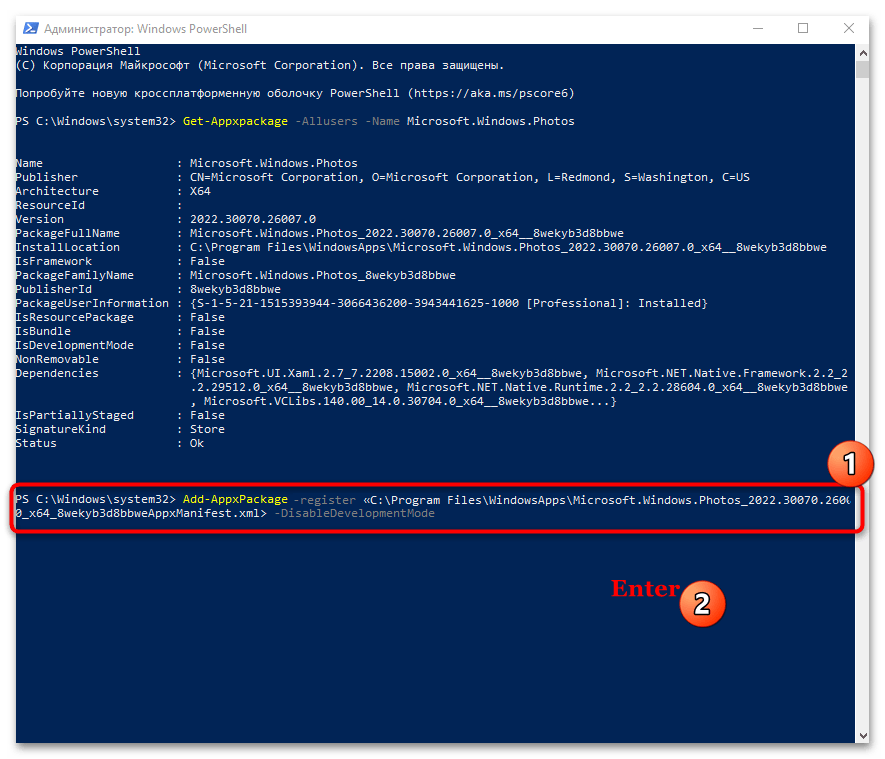
Add-AppxPackage -register «C:\Program Files\WindowsApps\***AppxManifest.xml» –DisableDevelopmentModeи перейдите с помощью стрелок на клавиатуре к месту, где звездочки. На их место вставьте полученное в прошлом шаге название приложения, используя сочетание «Ctrl + V». В нашем примере команда будет выглядеть так:Add-AppxPackage -register «C:\Program Files\WindowsApps\Microsoft.Windows.Photos_2022.30070.26007.0_x64_8wekyb3d8bbweAppxManifest.xml» –DisableDevelopmentMode. Нажмите на клавишу ввода.
После этого приложение «Фотографии» будет перерегистрировано в системе, а его работоспособность может восстановиться.
Вариант 3: Встроенное средство устранения неполадок
В Виндовс 10 имеется встроенное средство устранения неполадок, которое находит самые распространенные проблемы и автоматически их устраняет или предлагает пользователю инструкции по самостоятельному решению. Запустить его можно при помощи «Параметров»:
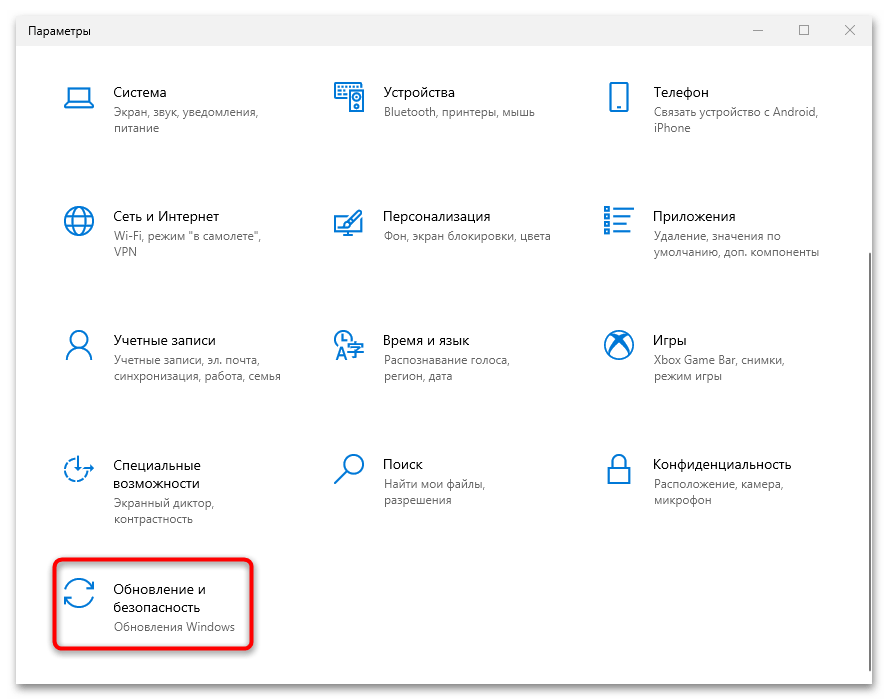
- Через «Параметры» перейдите в раздел «Обновление и безопасность».
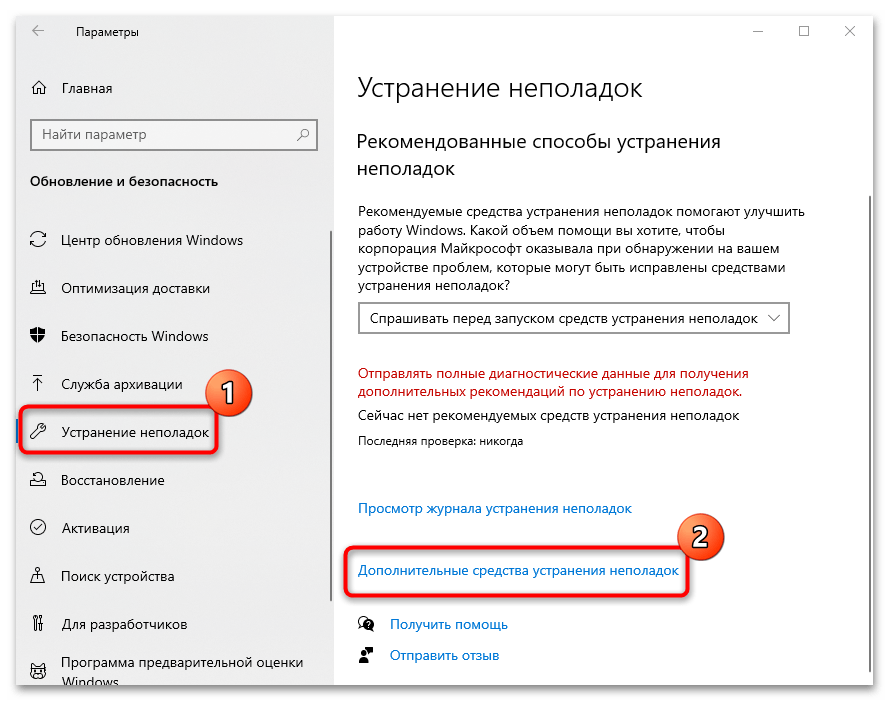
- Нажмите на вкладку «Устранение неполадок» и кликните по строке «Дополнительные средства устранения неполадок».
- Поскольку «Фотографии» — приложение из Microsoft Store, проверять на наличие ошибок нужно именно фирменный магазин. Найдите соответствующий пункт в списке, кликните по нему левой кнопкой мыши. Появится дополнительная кнопка, запускающая проверку неполадок.
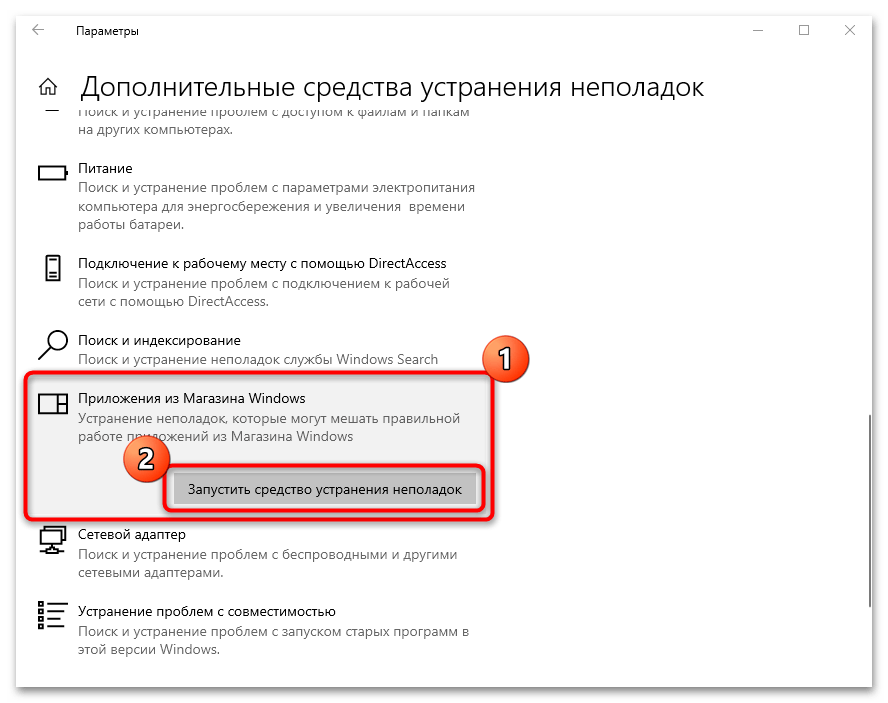
После этого запустится средство устранения неполадок. Если возможно, система обнаружит и самостоятельно исправит ошибку. Также могут отобразиться рекомендации и инструкции для пользователя, которые он должен выполнить, чтобы решить возникшую трудность.
Наша группа в TelegramПолезные советы и помощь
Читайте также: 16 Способов освободить место на диске в Windows 10.
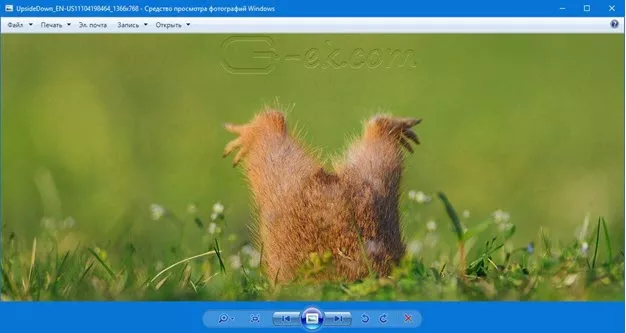
Microsoft в новых версиях Windows 10 скрыла от пользователей старое доброе «Средство Просмотра фотографий Windows», На смену которому пришло современное приложение, под названием «Фотографии» (Photos), нельзя сказать, что новое приложение не удобное, просто не совсем привычное.
Несмотря на то что новое приложение «Фотографии» имеет более богатый функционал в отличии от старого классического, но многие пользователи хотят вернуть «Средство Просмотра фотографий Windows», на самом деле это несложно.
Как вернуть Классическое Средство Просмотра фотографий в Windows 10?
Предлагаем нашим читателям Три способа, с помощью которых, вы сможете установить классический просмотрщик для использования в качестве программы по умолчанию, для просмотра ваших любимых изображений и фотографий.
- Первый способ — позволит вам иметь под рукой готовый Reg файл, вы всегда сможете восстановить средство просмотра фотографий на нескольких компьютерах.
- Второй способ — более быстрый, просто выполните команду в Windows Powershell.
- Третий способ — с помощью приложения и библиотеки shimgvw.dll
Microsoft, не удалила Просмотрщик из Windows 10, установить в настройках Средство Просмотра фотографий Windows по умолчанию нельзя, так как оно отсутствует в списке Приложения по умолчанию. А в Классической панели управления ассоциировать с ним можно только файлы с расширением TIFF. Давайте исправим это ограничение в Windows 10 и включим всеми любимый старый, добрый «Просмотр фотографий».
Просмотр фотографий Windows может быть активирован путем редактирования реестра. Необходимо добавить набор значений для ассоциации графических файлов в Раздел реестра —
[HKEY_LOCAL_MACHINE\SOFTWARE\Microsoft\Windows Photo Viewer\Capabilities\FileAssociations].Это можно сделать в ручную или с помощью команды Powershell.
Включить Windows Photo Viewer с помощью готового Reg файла.
Чтобы сэкономить Ваше время, ниже, я добавил уже готовый файл реестра, теперь вам нет необходимость вносить сложные правки в реестре вручную, все что нужно — загрузить архив, распаковать и запустить файл: Windows 10 Photo Viewer.reg.
Шаг 1: Загрузите архив Windows 10 Photo Viewer.zip и распакуйте его.
Шаг 2: В полученной папке, найдите и запустите файл — «ON_Windows_10_Photo_Viewer»
Шаг 3: Подтвердите запрос контроля учетных записей и добавление сведений.
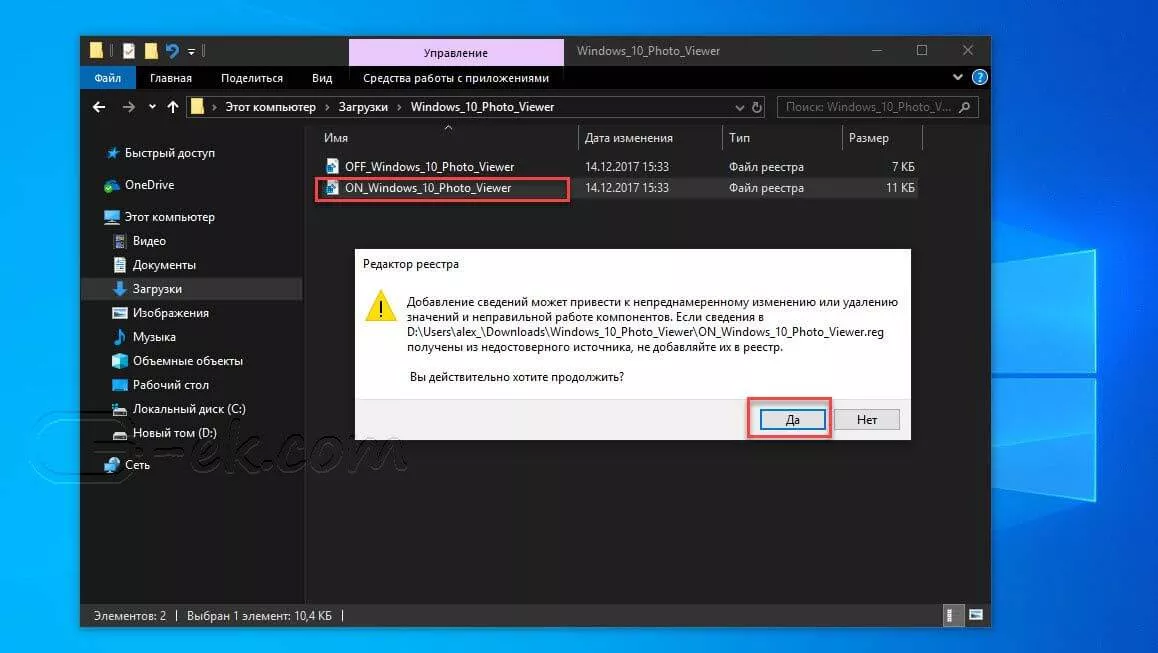
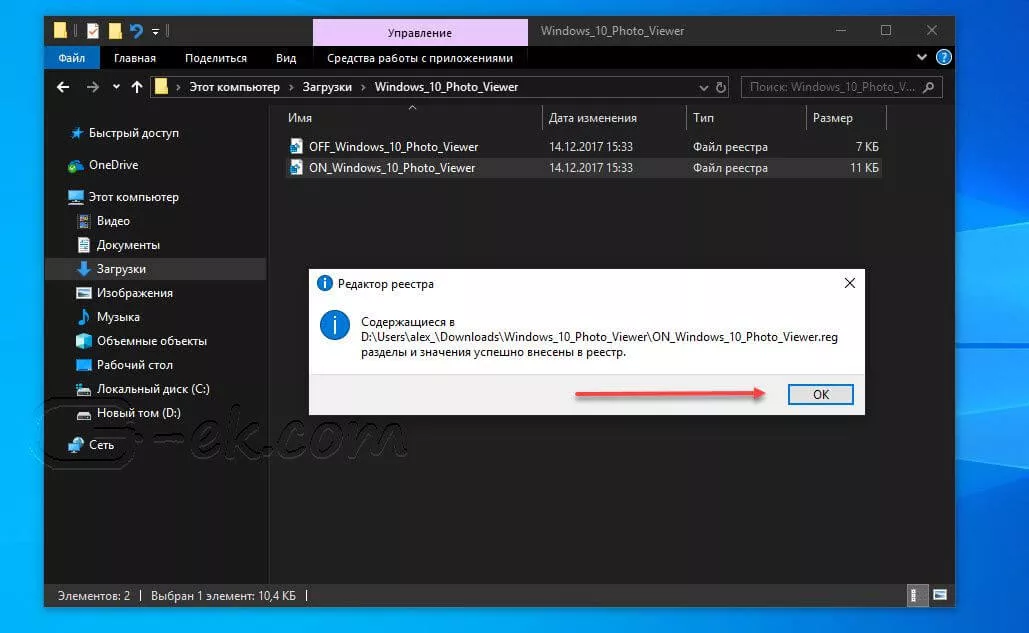
После запуска, все необходимые разделы и значения будут автоматически внесены в реестр, о чем вы будете оповещены, (см. скриншот ниже).
Шаг 4: Теперь откройте Параметры Windows, нажав сочетания клавиш Win + I или нажмите на значок шестеренки в меню «Пуск».
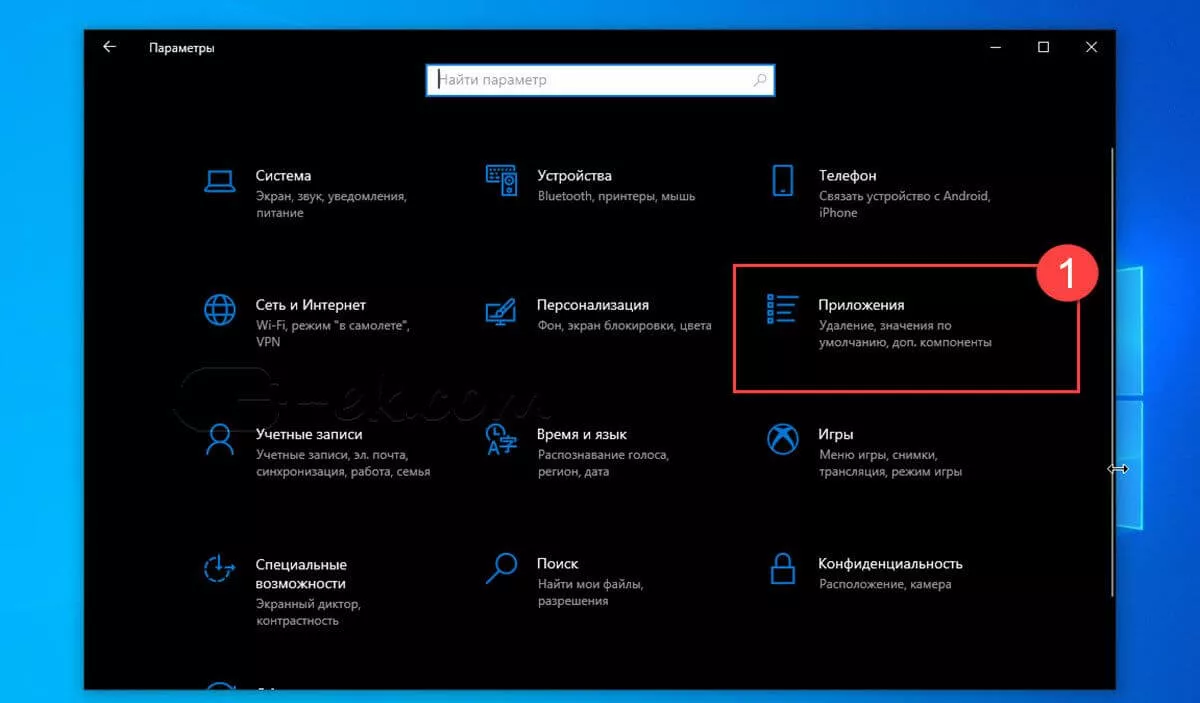
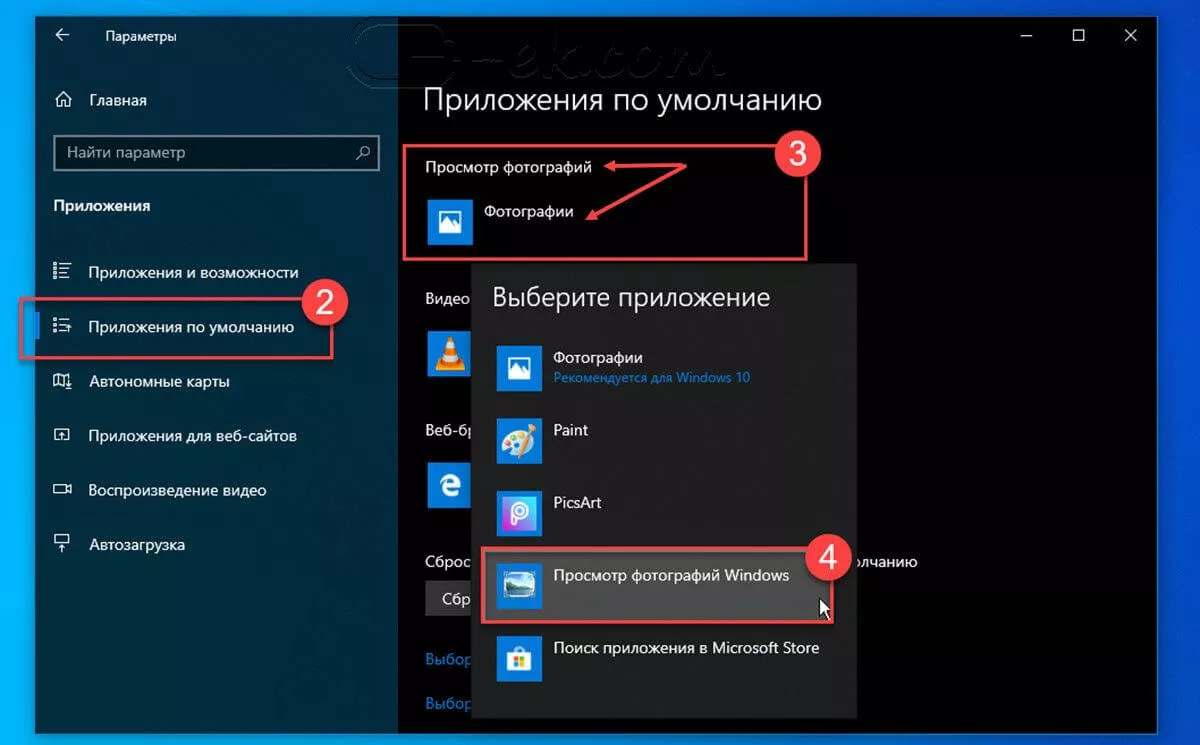
Шаг 5: Перейдите в группу настроек «Приложения» → «Приложения по умолчанию».
На открывшийся странице «Приложения по умолчанию», найдите раздел «Просмотр фотографий», нажмите на значок приложения которое используется по умолчанию и выберите в выпадающем меню «Просмотр фотографий Windows». См. скрин ниже:
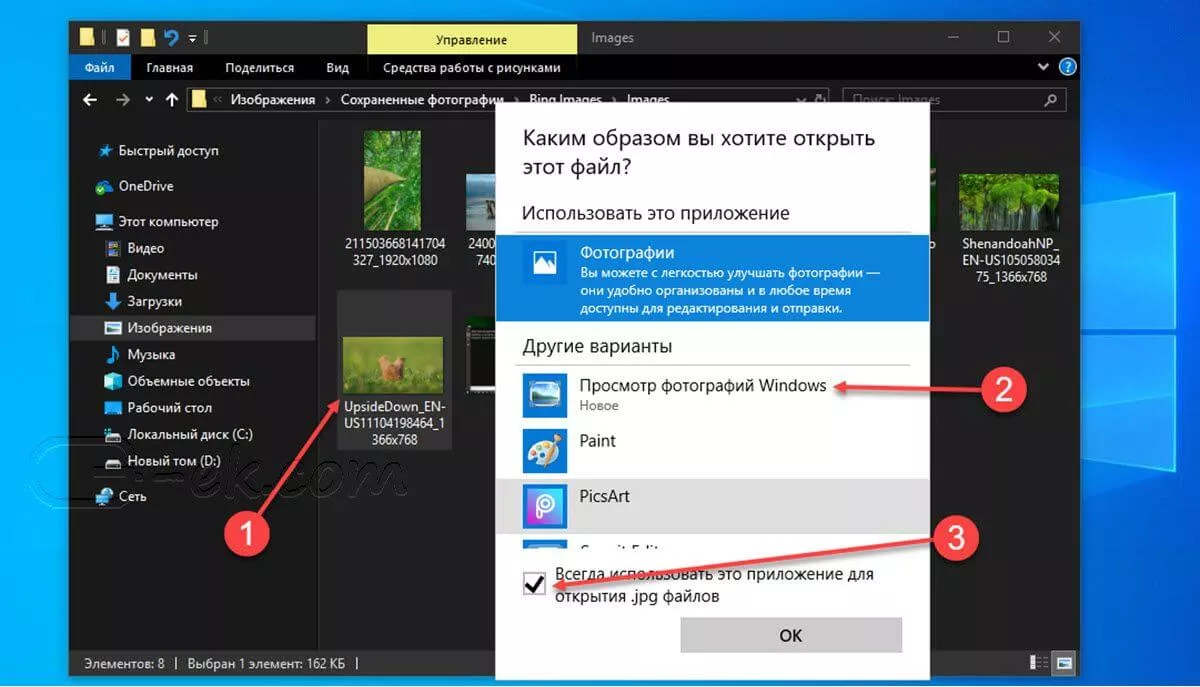
Или, вы можете кликнуть правой кнопкой мыши на любом изображении и выбрать в контекстном меню «Открыть с помощью»
В появившимся окне «Каким образом вы хотите открыть этот файл», выберите «Просмотр фотографий Windows».
Примечание: Если вы захотите вернуть настройки по умолчанию файл отката присутствует в архиве.
Все!
Способ 2 — Включить классическое средство просмотра фотографий с помощью Powershell.
Данный способ отличается от первого, только настройкой Приложения по умолчанию, выполняется для каждого типа изображения.
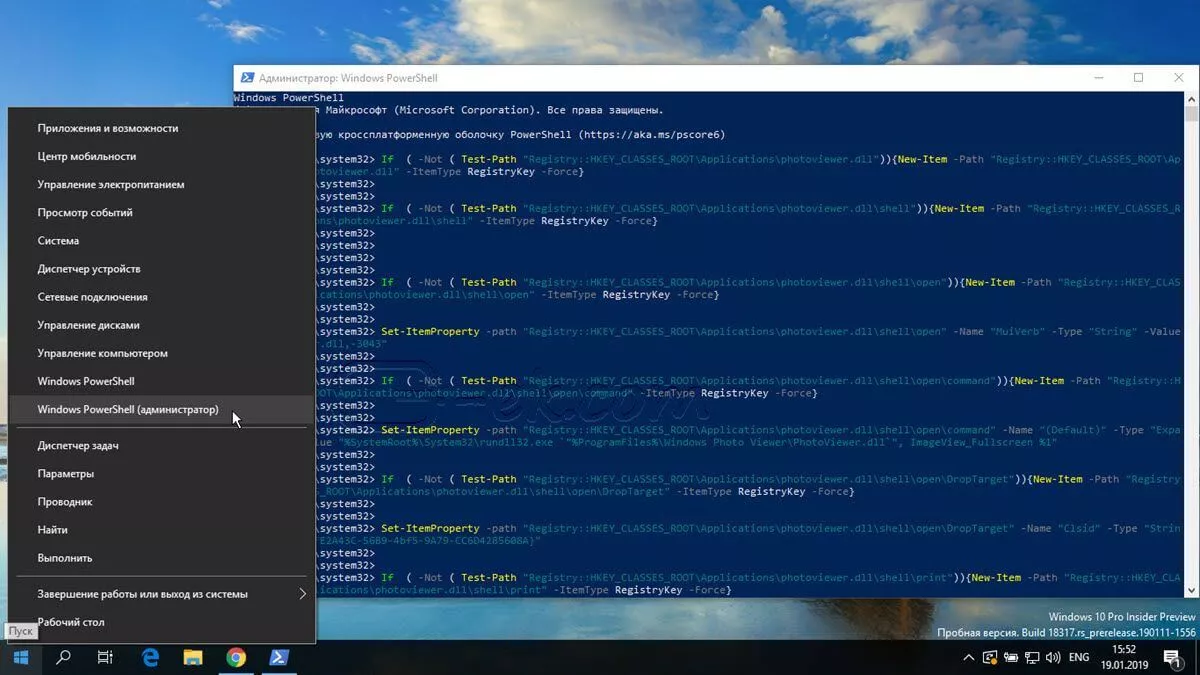
Шаг 1: Кликните правой кнопкой мыши на меню «Пуск».
Шаг 2: В появившемся контекстном меню выберите Windows Powershell (администратор) — Это важно!
Шаг 3: Скопируйте и вставьте следующие команды:
Примечание: Скопируйте и вставьте все команды за один раз включая символ # и нажмите клавишу Enter.
If  ( -Not ( Test-Path "Registry::HKEY_CLASSES_ROOT\Applications\photoviewer.dll")){New-Item -Path "Registry::HKEY_CLASSES_ROOT\Applications\photoviewer.dll" -ItemType RegistryKey -Force}
If  ( -Not ( Test-Path "Registry::HKEY_CLASSES_ROOT\Applications\photoviewer.dll\shell")){New-Item -Path "Registry::HKEY_CLASSES_ROOT\Applications\photoviewer.dll\shell" -ItemType RegistryKey -Force}
If  ( -Not ( Test-Path "Registry::HKEY_CLASSES_ROOT\Applications\photoviewer.dll\shell\open")){New-Item -Path "Registry::HKEY_CLASSES_ROOT\Applications\photoviewer.dll\shell\open" -ItemType RegistryKey -Force}
Set-ItemProperty -path "Registry::HKEY_CLASSES_ROOT\Applications\photoviewer.dll\shell\open" -Name "MuiVerb" -Type "String" -Value "@photoviewer.dll,-3043"
If  ( -Not ( Test-Path "Registry::HKEY_CLASSES_ROOT\Applications\photoviewer.dll\shell\open\command")){New-Item -Path "Registry::HKEY_CLASSES_ROOT\Applications\photoviewer.dll\shell\open\command" -ItemType RegistryKey -Force}
Set-ItemProperty -path "Registry::HKEY_CLASSES_ROOT\Applications\photoviewer.dll\shell\open\command" -Name "(Default)" -Type "ExpandString" -Value "%SystemRoot%\System32\rundll32.exe `"%ProgramFiles%\Windows Photo Viewer\PhotoViewer.dll`", ImageView_Fullscreen %1"
If  ( -Not ( Test-Path "Registry::HKEY_CLASSES_ROOT\Applications\photoviewer.dll\shell\open\DropTarget")){New-Item -Path "Registry::HKEY_CLASSES_ROOT\Applications\photoviewer.dll\shell\open\DropTarget" -ItemType RegistryKey -Force}
Set-ItemProperty -path "Registry::HKEY_CLASSES_ROOT\Applications\photoviewer.dll\shell\open\DropTarget" -Name "Clsid" -Type "String" -Value "{FFE2A43C-56B9-4bf5-9A79-CC6D4285608A}"
If  ( -Not ( Test-Path "Registry::HKEY_CLASSES_ROOT\Applications\photoviewer.dll\shell\print")){New-Item -Path "Registry::HKEY_CLASSES_ROOT\Applications\photoviewer.dll\shell\print" -ItemType RegistryKey -Force}
If  ( -Not ( Test-Path "Registry::HKEY_CLASSES_ROOT\Applications\photoviewer.dll\shell\print\command")){New-Item -Path "Registry::HKEY_CLASSES_ROOT\Applications\photoviewer.dll\shell\print\command" -ItemType RegistryKey -Force}
Set-ItemProperty -path "Registry::HKEY_CLASSES_ROOT\Applications\photoviewer.dll\shell\print\command" -Name "(Default)" -Type "ExpandString" -Value "%SystemRoot%\System32\rundll32.exe `"%ProgramFiles%\Windows Photo Viewer\PhotoViewer.dll`", ImageView_Fullscreen %1"
If  ( -Not ( Test-Path "Registry::HKEY_CLASSES_ROOT\Applications\photoviewer.dll\shell\print\DropTarget")){New-Item -Path "Registry::HKEY_CLASSES_ROOT\Applications\photoviewer.dll\shell\print\DropTarget" -ItemType RegistryKey -Force}
Set-ItemProperty -path "Registry::HKEY_CLASSES_ROOT\Applications\photoviewer.dll\shell\print\DropTarget" -Name "Clsid" -Type "String" -Value "{60fd46de-f830-4894-a628-6fa81bc0190d}"
#
Шаг 4: После выполнения команды закройте окно Powershell и откройте папку с изображениями.
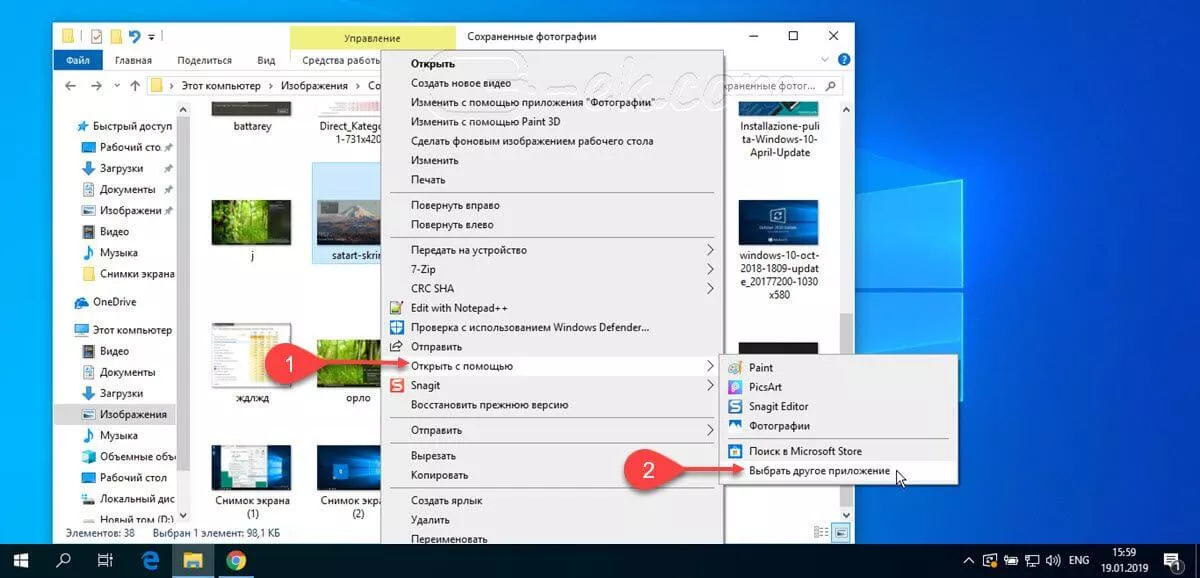
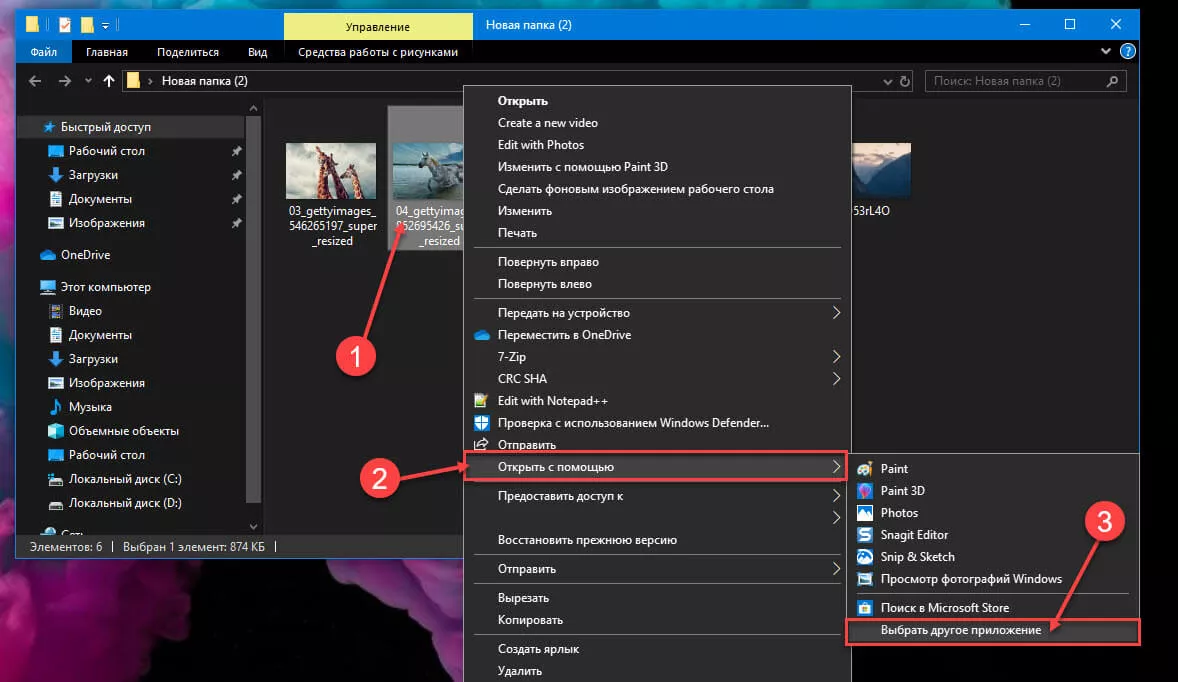
Шаг 5: Нажмите правой кнопкой мыши на любой картинке и выберите в контекстном меню «Открыть с помощью» → «Выбрать другое приложение».
Шаг 6: В открывшимся окне Найдите и нажмите «Просмотр фотографий Windows», Для того чтобы фото и картинки открывались всегда с помощью «Средства Просмотра фотографий Windows» не забудьте поставить галочку как на скриншоте ниже:
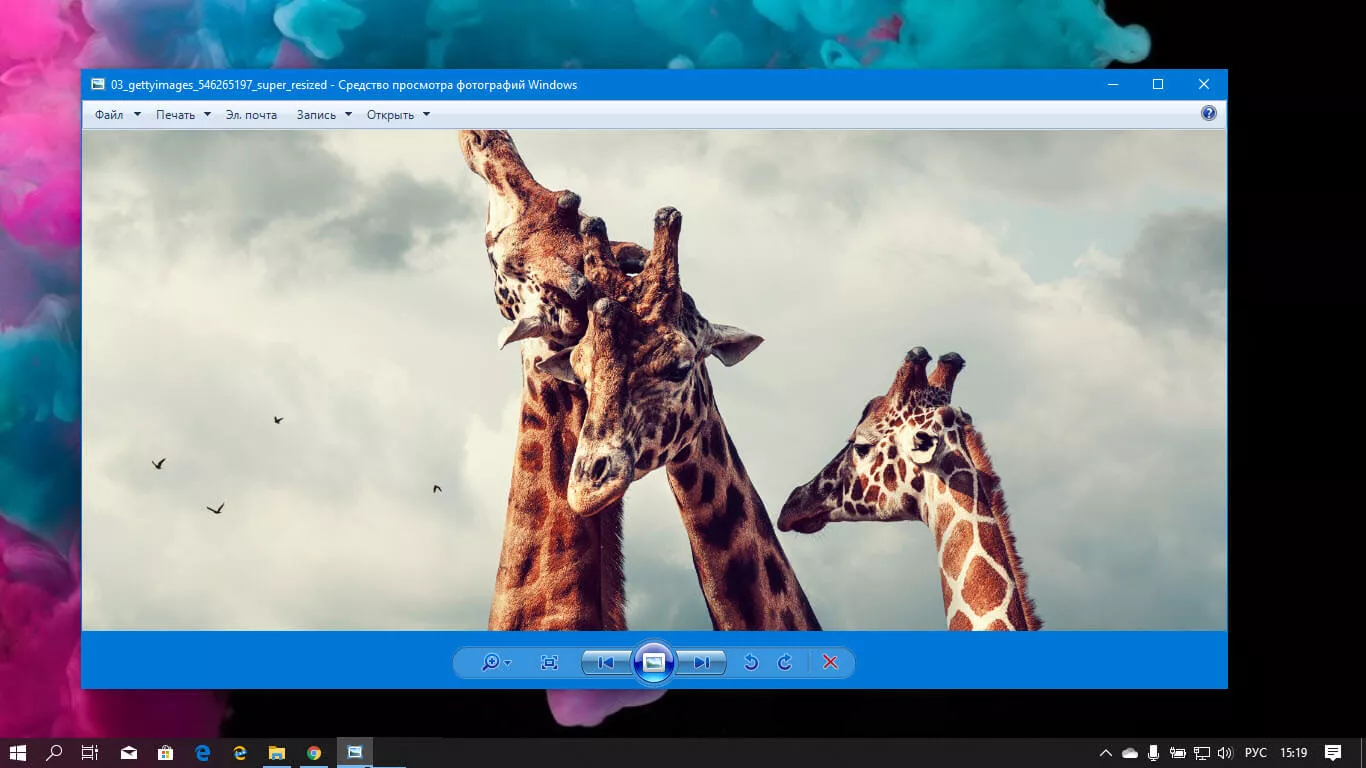
Все! вы справились, перейдите в папку с изображениями или фотографиями и дважды кликните на любой картинке, изображение откроется в «Средстве Просмотра фотографий Windows»!
Способ 3 — Как вернуть стандартный просмотрщик изображений с помощью приложения.
Поскольку способы выше работают при условии что в системе есть файл библиотеки динамической компоновки shimgvw.dll. Еще один способ вернуть средство просмотра фотографий, с помощью отдельного приложения которое уже включает в себя нужную библиотеку если ваша по какой либо причине, повреждена.
Оригинальный просмотрщик картинок в Windows — это не совсем обычное приложение. Расположено оно в библиотеке shimgvw, следовательно и запустить его напрямую нельзя — нужен как минимум rundll32.
Чтобы сделать загрузчик не нужно ничего кроме небольшого числа функций WinAPI, получилось мини-приложение не требующее установки, которое включает в себя две библиотеки shimgvw.dll из Windows 7 и XP SP3, с размером всего 502 килобайта. На выходе получаем независимый просмотрщик картинок, который можно записать на флешку и всегда иметь под рукой.
Шаг 1: Загрузите мини приложение: Средство просмотра изображений для Windows 10.
Шаг 2: Распакуйте полученный архив Sredstvo_prosmotra_fotografij.zip в любое место, я скопирую содержимое архива в корневую директорию диска С:\.
Шаг 3: Теперь, откройте папку с изображениями, кликните на одном из них правой кнопкой мыши и выберите «Открыть с помощью» → «Выбрать другое приложение».
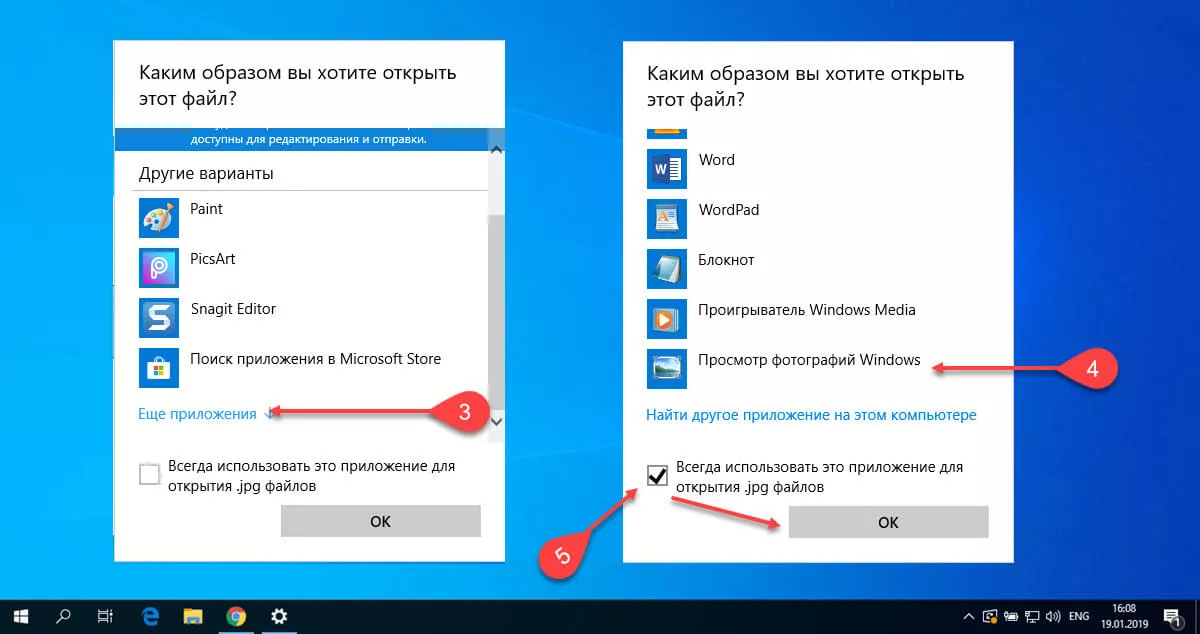
Шаг 3: В окне запроса «Каким образом вы хотите открыть этот файл» прокрутите список в самый низ и нажмите ссылку «Еще приложения».
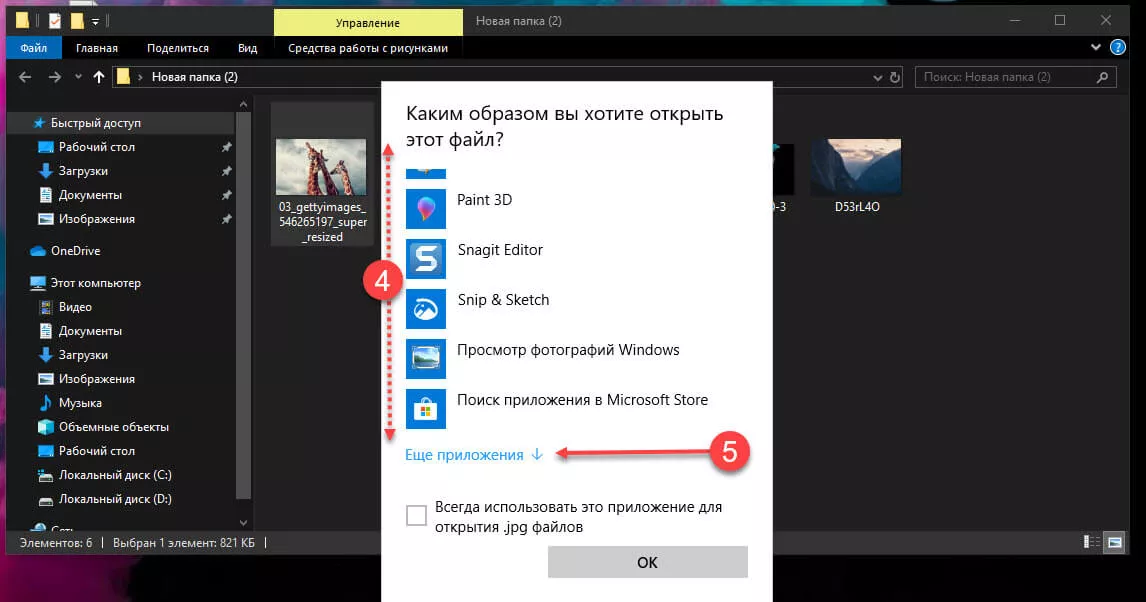
Шаг 4: В следующем окне, установите флажок для «Всегда использовать это приложение для открытия файла jpg» и нажмите ссылку «Найти другое приложение на этом компьютере».

Шаг 5: Теперь перейдите в папку где вы распаковали загруженный архив (я поместил содержимое архива в корень диска С:\Sredstvo_prosmotra_fotografij), выберите файл «Средство просмотра изображений» и нажмите кнопку «Открыть».

Все! Просмотрщик работает!
Повторите эту процедуру для таких типов файлов: .jpg, .jpeg, .png, .tiff, .bmp, .gif, .tif Или, Вы можете настроить ассоциации файлов в приложении «Параметры» перейдите «Приложения» → «Приложения по умолчанию» → «Выбор стандартных приложений для всех типов».
Для того чтобы вернуть просмотр фотографий как в XP, в нем работают анимированные гифки, вам придётся выполнить часть данного руководства, описанную выше. После выполнения, просто переименуйте в папке «Sredstvo_prosmotra_fotografij» библиотеку shimgvw.dll в Win7-shimgvw.dll, а xp-shimgvw.dll в shimgvw.dll.
Все!
Вам может быть интересно: Как вернуть классическое Средство Просмотра фотографий в Windows 11
This article will serve as an informative guide and give you a clear understanding of how to perform silent or interactive installs and uninstalls of the Microsoft Photos (Microsoft Store App) using the Powershell App Deployment Toolkit. The PowerShell App Deployment Toolkit can be used to replace your WiseScript, VBScript and Batch wrapper scripts with one versatile, re-usable and extensible tool. This tool is an absolute must for Microsoft Endpoint Manager Configuration Manager (MEMCM) / (SCCM) Administrators or anyone who is responsible for packaging and deploying software.
How to Install the Microsoft Photos (Microsoft Store App) Using the PowerShell App Deployment Toolkit
- Download the Powershell App Deployment Toolkit 3.8.4:
- https://github.com/PSAppDeployToolkit/PSAppDeployToolkit/releases/download/3.8.4/PSAppDeployToolkit_v3.8.4.zip
- Download the zip file to a folder created at (C:\Downloads)
- Open Windows PowerShell by Right-Clicking on Windows PowerShell and selecting Run as Administrator
- Enter the following command to remove the Zone.Identifier:
Unblock-File -Path C:\Downloads\PSAppDeployToolkit_v3.8.4.zip
- Enter the following command to extract the contents of the zip file:
Expand-Archive -Path C:\Downloads\PSAppDeployToolkit_v3.8.4.zip -DestinationPath C:\Downloads\PADT
- Enter the following commands to copy the AppDeployToolkit & Files folder to “C:\Downloads\PhotosApp“:
Copy-Item -Path "C:\Downloads\PADT\Toolkit\AppDeployToolkit" -Destination "C:\Downloads\PhotosApp\AppDeployToolkit" -RecurseCopy-Item -Path "C:\Downloads\PADT\Toolkit\Files" -Destination "C:\Downloads\PhotosApp\Files"
You should now see the AppDeploymentToolkit folder with files & the empty Files folder at “C:\Downloads\PhotosApp”
Next we’ll want to download the Microsoft Photos (Microsoft Store App) & dependency files using PowerShell.
- Copy the PowerShell script below to “C:\Downloads” & name it Get_Store_Downloads.ps1
- Script Reference: https://flexxible.com/automating-msix-packaging-with-powershell/
#Requires -version 3
<#
.SYNOPSIS
Get links to Microsoft Store downloads and optionally download packages
.DESCRIPTION
Downloaded packages can be installed via Add-AppxPackage -Path
.PARAMETER packageFamilyName
A list of package family names to download
.PARAMETER name
A regular expression which will select the family package names for existing AppX package names that match
.PARAMETER packageTypeFilter
The types of package to download
.PARAMETER downloadFolder
The folder to download non-excluded files to. Will be created if does not exist. If not specified, files will not be downloaded
.PARAMETER ring
The release ring to download
.PARAMETER proxy
Proxy server to use
.PARAMETER excludeExtensions
List of file extensions to not download
.PARAMETER excluderegex
If download Links match this regular expression they will not be downloaded
.PARAMETER language
The language for downloading files
.PARAMETER force
Overwrite files which already exist
.PARAMETER all
Interrogate all local AppX packages rather than just those available to the user running the script (requires elevation). Use with -name
.EXAMPLE
Powershell.exe -ExecutionPolicy ByPass "&" '.\Get_Store_Downloads.ps1' -packageFamilyName Microsoft.Windows.Photos_8wekyb3d8bbwe -downloadFolder C:\Downloads\PhotosApp\Files -excludeRegex 'arm' -force
Downloads the resources from the Microsoft Store for the Microsoft Photos App, excluding files for arm and arm64 architecture and save the files to C:\Downloads\PhotosApp\Files
.NOTES
Modification History:
2022/03/18 @guyrleech Initial public release
2022/03/29 modified by Jason Bergner
#>
<#
Copyright © 2022 Guy Leech
Permission is hereby granted, free of charge, to any person obtaining a copy of this software and associated documentation files (the “Software”), to deal in the Software without restriction,
including without limitation the rights to use, copy, modify, merge, publish, distribute, sublicense, and/or sell copies of the Software, and to permit persons to whom the Software is furnished to do so, subject to the following conditions:
The above copyright notice and this permission notice shall be included in all copies or substantial portions of the Software.
THE SOFTWARE IS PROVIDED “AS IS”, WITHOUT WARRANTY OF ANY KIND, EXPRESS OR IMPLIED, INCLUDING BUT NOT LIMITED TO THE WARRANTIES OF MERCHANTABILITY, FITNESS FOR A PARTICULAR PURPOSE AND NONINFRINGEMENT.
IN NO EVENT SHALL THE AUTHORS OR COPYRIGHT HOLDERS BE LIABLE FOR ANY CLAIM, DAMAGES OR OTHER LIABILITY, WHETHER IN AN ACTION OF CONTRACT, TORT OR OTHERWISE, ARISING FROM, OUT OF OR IN CONNECTION WITH THE SOFTWARE OR THE USE OR OTHER DEALINGS IN THE SOFTWARE.
#>
[CmdletBinding()]
Param
(
[Parameter(Mandatory=$true,ParameterSetName='Family')]
[string[]]$packageFamilyName ,
[Parameter(Mandatory=$true,ParameterSetName='Name')]
[string]$name ,
[Parameter(Mandatory=$false,ParameterSetName='Name')]
[string]$packageTypeFilter = 'All' ,
[string]$downloadFolder ,
[ValidateSet('Slow','Retail','Fast,','RP')]
[string]$ring = 'retail' ,
[string]$proxy ,
[string[]]$excludeExtensions = ('','blockmap','eappx','eappxbundle') ,
[string]$excludeRegex ,
[string]$language = 'en-US' ,
[switch]$force ,
[Parameter(Mandatory=$false,ParameterSetName='Name')]
[switch]$all
)
[hashtable]$proxyParameters = @{}
if( ! [string]::IsNullOrEmpty( $proxy ) )
{
$proxyServer = New-Object -TypeName 'System.Net.WebProxy'
$proxyServer.Address = [uri]$proxy
$proxyServer.UseDefaultCredentials = $true
[System.Net.WebRequest]::DefaultWebProxy = $proxyServer
$proxyParameters.Add( 'Proxy' , $proxy )
$proxyParameters.Add( 'ProxyUseDefaultCredentials' , $true )
Write-Verbose "Proxy set to $proxy"
}
##https://stackoverflow.com/questions/41897114/unexpected-error-occurred-running-a-simple-unauthorized-rest-query?rq=1
Add-Type -TypeDefinition @'
public class SSLHandler
{
public static System.Net.Security.RemoteCertificateValidationCallback GetSSLHandler()
{
return new System.Net.Security.RemoteCertificateValidationCallback((sender, certificate, chain, policyErrors) => { return true; });
}
}
'@
[System.Net.ServicePointManager]::ServerCertificateValidationCallback = [SSLHandler]::GetSSLHandler()
[Net.ServicePointManager]::SecurityProtocol = [Net.ServicePointManager]::SecurityProtocol -bor [System.Net.SecurityProtocolType]::Tls12
if( $PSCmdlet.ParameterSetName -eq 'Name' )
{
Import-Module -Name AppX -Verbose:$false
[array]$packages = @( Get-AppxPackage -AllUsers:$all -PackageTypeFilter $PackageTypeFilter | Where-Object PackageFamilyName -Match $name )
if( $null -eq $packages -or $packages.Count -eq 0 )
{
Throw "No existing AppX packages found matching $name"
}
$packageFamilyName = $packages | Select-Object -ExpandProperty PackageFamilyName -Unique
}
Write-Verbose -Message "Got $($packageFamilyName.Count) packages"
$webclient = $null
if( -Not [string]::IsNullOrEmpty( $downloadFolder ) )
{
if( -Not ( Test-Path -Path $downloadFolder -ErrorAction SilentlyContinue ) )
{
$null = New-Item -Path $downloadFolder -Force -ItemType Directory -ErrorAction Stop
}
if( -Not ( $webClient = New-Object -TypeName System.Net.WebClient ) )
{
Throw "Failed to create a System.Net.WebClient object"
}
}
[int]$count = 0
ForEach( $package in $packageFamilyName )
{
$count++
[string]$requestBody = "type=PackageFamilyName&url=$package&ring=$ring&lang=$language"
$response = $null
$session = $null
$response = Invoke-WebRequest -URI 'https://store.rg-adguard.net/api/GetFiles' -body $requestBody -Method Post -ContentType 'application/x-www-form-urlencoded' -SessionVariable session @proxyParameters
if( $response -and $response.PSObject.Properties[ 'links' ] -and $response.Links.Count -gt 0 )
{
##Write-Verbose -Message "$count / $($packageFamilyName.Count) : Got $($response.Links.Count) links for $requestBody"
ForEach( $link in ($response.Links | Where-Object href -match '^https?://' ))
{
[string]$extension = [System.IO.Path]::GetExtension( $link.innerText ) -replace '^\.'
if( $extension -in $excludeExtensions )
{
Write-Verbose -Message "Ignoring `"$($link.innerText)`" as extension $extension in exclude list"
}
elseif( -Not [string]::IsNullOrEmpty( $excludeRegex ) -and $link.innerText -match $excludeRegex )
{
Write-Verbose -Message "Ignoring `"$($link.innerText)`" as matches $excludeRegex"
}
else
{
$result = [pscustomobject]@{
'PackageFamilyName' = $package
'File' = $link.innertext
'Link' = $link.href
}
if( -Not [string]::IsNullOrEmpty( $downloadFolder ) )
{
[string]$destinationFile = Join-Path -Path $downloadFolder -ChildPath $link.InnerText
if( ( Test-Path -Path $destinationFile -ErrorAction SilentlyContinue) -and -Not $force )
{
Write-Warning -Message "Not downloading to `"$destinationFile`" as already exists - use -force to overwrite"
}
else
{
try
{
$webclient.DownloadFile( ( $link.href -replace '&' , '&' ) , $destinationFile )
if( $properties = Get-ItemProperty -Path $destinationFile )
{
Add-Member -InputObject $result -NotePropertyMembers @{
'Download' = $properties.FullName
'Size (KB)' = [math]::Round( $properties.Length / 1KB , 1 )
}
}
else
{
Write-Warning -Message "Unable to get file properties for $destinationFile"
}
}
catch
{
Write-Warning -Message "Problem downloading $($link.href) - $_"
}
}
}
$result
}
}
}
else
{
## <img src="../img/stop.png">The server returned an empty list.<br>Either you have not entered the link correctly, or this service does not support generation for this product.</p><script type="text/javascript">
Write-Warning -Message "No data or links returned for $requestBody - $($response.Content -split "`n`r?" , 2 -replace '\<[^\>]+\>' | Select-Object -First 1)"
}
}
- Add the following registry key to suppress the “To Allow this website to provide information personalized for you, will you allow it to put a small file (cookie) on your computer?” popup message
REG ADD "HKCU\SOFTWARE\Microsoft\Windows\CurrentVersion\Internet Settings\Zones\3" /t REG_DWORD /v 1A10 /f /d 0
- Open Windows PowerShell by Right-Clicking on Windows PowerShell and selecting Run as Administrator
- Change the directory to “C:\Downloads”
- PS C:\Downloads>
- Enter the following command to download the installation files:
Powershell.exe -ExecutionPolicy ByPass "&" '.\Get_Store_Downloads.ps1' -packageFamilyName Microsoft.Windows.Photos_8wekyb3d8bbwe -downloadFolder C:\Downloads\PhotosApp\Files -excludeRegex 'arm' -force
- After the download completes, you should see .appx & .appxbundle files inside the “C:\Downloads\PhotosApp\Files” directory
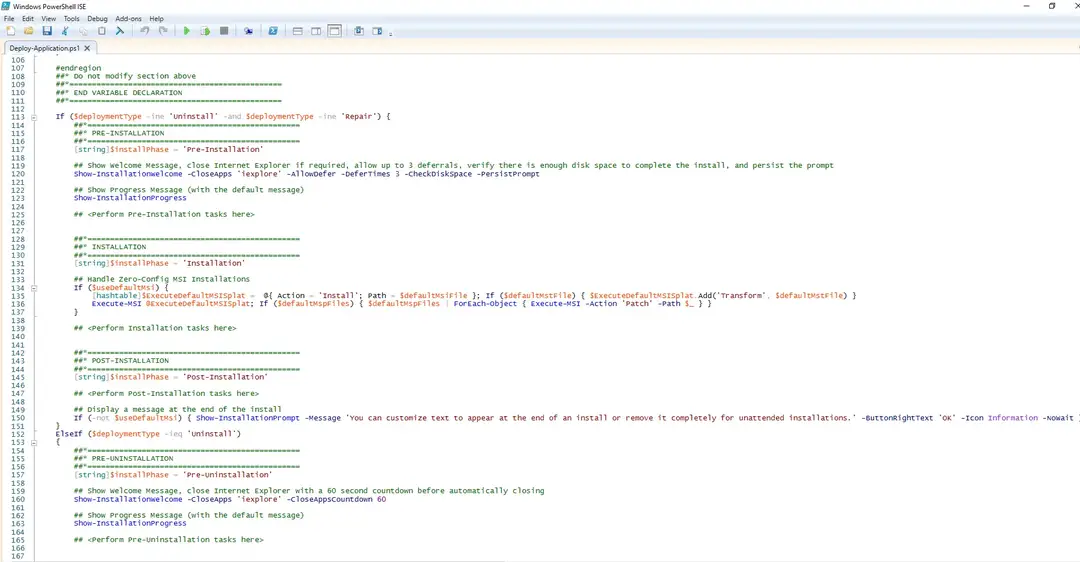
- Copy the PowerShell script below to “C:\Downloads\PhotosApp“ & name it Deploy-PhotosApp.ps1
<#
.SYNOPSIS
	This script performs the installation or uninstallation of the Microsoft Photos Microsoft Store App.
	# LICENSE #
	PowerShell App Deployment Toolkit - Provides a set of functions to perform common application deployment tasks on Windows.
	Copyright (C) 2017 - Sean Lillis, Dan Cunningham, Muhammad Mashwani, Aman Motazedian.
	This program is free software: you can redistribute it and/or modify it under the terms of the GNU Lesser General Public License as published by the Free Software Foundation, either version 3 of the License, or any later version. This program is distributed in the hope that it will be useful, but WITHOUT ANY WARRANTY; without even the implied warranty of MERCHANTABILITY or FITNESS FOR A PARTICULAR PURPOSE. See the GNU General Public License for more details.
	You should have received a copy of the GNU Lesser General Public License along with this program. If not, see <http://www.gnu.org/licenses/>.
.DESCRIPTION
	The script is provided as a template to perform an install or uninstall of an application(s).
	The script either performs an "Install" deployment type or an "Uninstall" deployment type.
	The install deployment type is broken down into 3 main sections/phases: Pre-Install, Install, and Post-Install.
	The script dot-sources the AppDeployToolkitMain.ps1 script which contains the logic and functions required to install or uninstall an application.
.PARAMETER DeploymentType
	The type of deployment to perform. Default is: Install.
.PARAMETER DeployMode
	Specifies whether the installation should be run in Interactive, Silent, or NonInteractive mode. Default is: Interactive. Options: Interactive = Shows dialogs, Silent = No dialogs, NonInteractive = Very silent, i.e. no blocking apps. NonInteractive mode is automatically set if it is detected that the process is not user interactive.
.PARAMETER AllowRebootPassThru
	Allows the 3010 return code (requires restart) to be passed back to the parent process (e.g. SCCM) if detected from an installation. If 3010 is passed back to SCCM, a reboot prompt will be triggered.
.PARAMETER TerminalServerMode
	Changes to "user install mode" and back to "user execute mode" for installing/uninstalling applications for Remote Destkop Session Hosts/Citrix servers.
.PARAMETER DisableLogging
	Disables logging to file for the script. Default is: $false.
.EXAMPLE
    PowerShell.exe .\Deploy-PhotosApp.ps1 -DeploymentType "Install" -DeployMode "NonInteractive"
.EXAMPLE
    PowerShell.exe .\Deploy-PhotosApp.ps1 -DeploymentType "Install" -DeployMode "Silent"
.EXAMPLE
    PowerShell.exe .\Deploy-PhotosApp.ps1 -DeploymentType "Install" -DeployMode "Interactive"
.EXAMPLE
    PowerShell.exe .\Deploy-PhotosApp.ps1 -DeploymentType "Uninstall" -DeployMode "NonInteractive"
.EXAMPLE
    PowerShell.exe .\Deploy-PhotosApp.ps1 -DeploymentType "Uninstall" -DeployMode "Silent"
.EXAMPLE
    PowerShell.exe .\Deploy-PhotosApp.ps1 -DeploymentType "Uninstall" -DeployMode "Interactive"
.NOTES
	Toolkit Exit Code Ranges:
	60000 - 68999: Reserved for built-in exit codes in Deploy-Application.ps1, Deploy-Application.exe, and AppDeployToolkitMain.ps1
	69000 - 69999: Recommended for user customized exit codes in Deploy-Application.ps1
	70000 - 79999: Recommended for user customized exit codes in AppDeployToolkitExtensions.ps1
.LINK
	http://psappdeploytoolkit.com
#>
[CmdletBinding()]
Param (
	[Parameter(Mandatory=$false)]
	[ValidateSet('Install','Uninstall','Repair')]
	[string]$DeploymentType = 'Install',
	[Parameter(Mandatory=$false)]
	[ValidateSet('Interactive','Silent','NonInteractive')]
	[string]$DeployMode = 'Interactive',
	[Parameter(Mandatory=$false)]
	[switch]$AllowRebootPassThru = $false,
	[Parameter(Mandatory=$false)]
	[switch]$TerminalServerMode = $false,
	[Parameter(Mandatory=$false)]
	[switch]$DisableLogging = $false
)

Try {
	## Set the script execution policy for this process
	Try { Set-ExecutionPolicy -ExecutionPolicy 'ByPass' -Scope 'Process' -Force -ErrorAction 'Stop' } Catch {}

	##*===============================================
	##* VARIABLE DECLARATION
	##*===============================================
	## Variables: Application
	[string]$appVendor = ''
	[string]$appName = 'Microsoft Photos Microsoft Store App'
	[string]$appVersion = ''
	[string]$appArch = ''
	[string]$appLang = ''
	[string]$appRevision = ''
	[string]$appScriptVersion = '1.0.0'
	[string]$appScriptDate = 'XX/XX/20XX'
	[string]$appScriptAuthor = 'Jason Bergner'
	##*===============================================
	## Variables: Install Titles (Only set here to override defaults set by the toolkit)
	[string]$installName = ''
	[string]$installTitle = 'Microsoft Photos Microsoft Store App'

	##* Do not modify section below
	#region DoNotModify

	## Variables: Exit Code
	[int32]$mainExitCode = 0

	## Variables: Script
	[string]$deployAppScriptFriendlyName = 'Deploy Application'
	[version]$deployAppScriptVersion = [version]'3.8.4'
	[string]$deployAppScriptDate = '26/01/2021'
	[hashtable]$deployAppScriptParameters = $psBoundParameters

	## Variables: Environment
	If (Test-Path -LiteralPath 'variable:HostInvocation') { $InvocationInfo = $HostInvocation } Else { $InvocationInfo = $MyInvocation }
	[string]$scriptDirectory = Split-Path -Path $InvocationInfo.MyCommand.Definition -Parent

	## Dot source the required App Deploy Toolkit Functions
	Try {
		[string]$moduleAppDeployToolkitMain = "$scriptDirectory\AppDeployToolkit\AppDeployToolkitMain.ps1"
		If (-not (Test-Path -LiteralPath $moduleAppDeployToolkitMain -PathType 'Leaf')) { Throw "Module does not exist at the specified location [$moduleAppDeployToolkitMain]." }
		If ($DisableLogging) { . $moduleAppDeployToolkitMain -DisableLogging } Else { . $moduleAppDeployToolkitMain }
	}
	Catch {
		If ($mainExitCode -eq 0){ [int32]$mainExitCode = 60008 }
		Write-Error -Message "Module [$moduleAppDeployToolkitMain] failed to load: `n$($_.Exception.Message)`n `n$($_.InvocationInfo.PositionMessage)" -ErrorAction 'Continue'
		## Exit the script, returning the exit code to SCCM
		If (Test-Path -LiteralPath 'variable:HostInvocation') { $script:ExitCode = $mainExitCode; Exit } Else { Exit $mainExitCode }
	}

	#endregion
	##* Do not modify section above
	##*===============================================
	##* END VARIABLE DECLARATION
	##*===============================================

	If ($deploymentType -ine 'Uninstall' -and $deploymentType -ine 'Repair') {
		##*===============================================
		##* PRE-INSTALLATION
		##*===============================================
		[string]$installPhase = 'Pre-Installation'

		## Show Welcome Message, Close Microsoft Photos App With a 60 Second Countdown Before Automatically Closing
		Show-InstallationWelcome -CloseApps 'Microsoft.Photos' -CloseAppsCountdown 60

		## Show Progress Message (with the default message)
		Show-InstallationProgress

        ## Remove Any Existing Versions of the Microsoft Photos Microsoft Store App
        $AppPackageNames = @(
        "Microsoft.Windows.Photos"
        )
        foreach ($AppName in $AppPackageNames) {
        Execute-ProcessAsUser -Path "$PSHOME\powershell.exe" -Parameters "-WindowStyle Hidden Get-AppxPackage -Name $AppName | Remove-AppxPackage" -Wait
        #Execute-ProcessAsUser -Path "$PSHOME\powershell.exe" -Parameters "-WindowStyle Hidden Get-AppxPackage -AllUsers -Name $AppName | Remove-AppxPackage -AllUsers" -Wait

        Execute-ProcessAsUser -Path "$PSHOME\powershell.exe" -Parameters "-WindowStyle Hidden Get-AppXProvisionedPackage -Online | Where-Object DisplayName -eq $AppName | Remove-AppxProvisionedPackage -Online" -Wait
        #Execute-ProcessAsUser -Path "$PSHOME\powershell.exe" -Parameters "-WindowStyle Hidden Get-AppXProvisionedPackage -Online | Where-Object DisplayName -eq $AppName | Remove-AppxProvisionedPackage -AllUsers -Online" -Wait
        }

		##*===============================================
		##* INSTALLATION
		##*===============================================
		[string]$installPhase = 'Installation'

        ## Install Microsoft Photos Microsoft Store App Dependencies
        $DependencyPath = Get-ChildItem "$dirFiles" -Include *.appx -File -Recurse -ErrorAction SilentlyContinue

        ForEach ($Dependency in $DependencyPath) {
        Show-InstallationProgress "Installing the Microsoft Photos Microsoft Store App Dependencies. This may take some time. Please wait..."
        Execute-ProcessAsUser -Path "$PSHOME\powershell.exe" -Parameters "-WindowStyle Hidden Add-AppxPackage ""$Dependency""" -Wait
        }

        ## Install Microsoft Photos Microsoft Store App
        $AppPath = Get-ChildItem "$dirFiles" -Include *.appxbundle -File -Recurse -ErrorAction SilentlyContinue

        ForEach ($App in $AppPath) {
        Show-InstallationProgress "Installing the Microsoft Photos Microsoft Store App. This may take some time. Please wait..."
        Execute-ProcessAsUser -Path "$PSHOME\powershell.exe" -Parameters "-WindowStyle Hidden Add-AppxPackage ""$App""" -Wait
        }

		##*===============================================
		##* POST-INSTALLATION
		##*===============================================
		[string]$installPhase = 'Post-Installation'

	}
	ElseIf ($deploymentType -ieq 'Uninstall')
	{
		##*===============================================
		##* PRE-UNINSTALLATION
		##*===============================================
		[string]$installPhase = 'Pre-Uninstallation'

		## Show Welcome Message, Close Microsoft Photos App With a 60 Second Countdown Before Automatically Closing
		Show-InstallationWelcome -CloseApps 'Microsoft.Photos' -CloseAppsCountdown 60

        ## Show Progress Message (With a Message to Indicate the Application is Being Uninstalled)
        Show-InstallationProgress -StatusMessage "Uninstalling the $installTitle. Please Wait..."


		##*===============================================
		##* UNINSTALLATION
		##*===============================================
		[string]$installPhase = 'Uninstallation'

        ## Uninstall Any Existing Versions of the Microsoft Photos App
        $AppPackageNames = @(
        "Microsoft.Windows.Photos"
        )
        foreach ($AppName in $AppPackageNames) {
        #Execute-ProcessAsUser -Path "$PSHOME\powershell.exe" -Parameters "-WindowStyle Hidden Get-AppxPackage -Name $AppName | Remove-AppxPackage" -Wait
        Execute-ProcessAsUser -Path "$PSHOME\powershell.exe" -Parameters "-WindowStyle Hidden Get-AppxPackage -AllUsers -Name $AppName | Remove-AppxPackage -AllUsers" -Wait

        #Execute-ProcessAsUser -Path "$PSHOME\powershell.exe" -Parameters "-WindowStyle Hidden Get-AppXProvisionedPackage -Online | Where-Object DisplayName -eq $AppName | Remove-AppxProvisionedPackage -Online" -Wait
        Execute-ProcessAsUser -Path "$PSHOME\powershell.exe" -Parameters "-WindowStyle Hidden Get-AppXProvisionedPackage -Online | Where-Object DisplayName -eq $AppName | Remove-AppxProvisionedPackage -AllUsers -Online" -Wait
        }

        ## Add Registry Keys to Prevent Windows Apps from Reinstalling
        Write-Log -Message "Adding Registry Keys to Prevent Windows Apps from Reinstalling."

        [scriptblock]$HKCURegistrySettings = {
        Set-RegistryKey -Key 'HKCU\Software\Microsoft\Windows\CurrentVersion\ContentDeliveryManager' -Name 'ContentDeliveryAllowed' -Value 0 -Type DWord -SID $UserProfile.SID
        Set-RegistryKey -Key 'HKCU\Software\Microsoft\Windows\CurrentVersion\ContentDeliveryManager' -Name 'FeatureManagementEnabled' -Value 0 -Type DWord -SID $UserProfile.SID
        Set-RegistryKey -Key 'HKCU\Software\Microsoft\Windows\CurrentVersion\ContentDeliveryManager' -Name 'OemPreInstalledAppsEnabled' -Value 0 -Type DWord -SID $UserProfile.SID
        Set-RegistryKey -Key 'HKCU\Software\Microsoft\Windows\CurrentVersion\ContentDeliveryManager' -Name 'PreInstalledAppsEnabled' -Value 0 -Type DWord -SID $UserProfile.SID
        Set-RegistryKey -Key 'HKCU\Software\Microsoft\Windows\CurrentVersion\ContentDeliveryManager' -Name 'PreInstalledAppsEverEnabled' -Value 0 -Type DWord -SID $UserProfile.SID
        Set-RegistryKey -Key 'HKCU\Software\Microsoft\Windows\CurrentVersion\ContentDeliveryManager' -Name 'SilentInstalledAppsEnabled' -Value 0 -Type DWord -SID $UserProfile.SID
        Set-RegistryKey -Key 'HKCU\Software\Microsoft\Windows\CurrentVersion\ContentDeliveryManager' -Name 'SubscribedContent-314559Enabled' -Value 0 -Type DWord -SID $UserProfile.SID
        Set-RegistryKey -Key 'HKCU\Software\Microsoft\Windows\CurrentVersion\ContentDeliveryManager' -Name 'SubscribedContent-338387Enabled' -Value 0 -Type DWord -SID $UserProfile.SID
        Set-RegistryKey -Key 'HKCU\Software\Microsoft\Windows\CurrentVersion\ContentDeliveryManager' -Name 'SubscribedContent-338388Enabled' -Value 0 -Type DWord -SID $UserProfile.SID
        Set-RegistryKey -Key 'HKCU\Software\Microsoft\Windows\CurrentVersion\ContentDeliveryManager' -Name 'SubscribedContent-338389Enabled' -Value 0 -Type DWord -SID $UserProfile.SID
        Set-RegistryKey -Key 'HKCU\Software\Microsoft\Windows\CurrentVersion\ContentDeliveryManager' -Name 'SubscribedContent-338393Enabled' -Value 0 -Type DWord -SID $UserProfile.SID
        Set-RegistryKey -Key 'HKCU\Software\Microsoft\Windows\CurrentVersion\ContentDeliveryManager' -Name 'SubscribedContentEnabled' -Value 0 -Type DWord -SID $UserProfile.SID
        Set-RegistryKey -Key 'HKCU\Software\Microsoft\Windows\CurrentVersion\ContentDeliveryManager' -Name 'SystemPaneSuggestionsEnabled' -Value 0 -Type DWord -SID $UserProfile.SID
        }
        Invoke-HKCURegistrySettingsForAllUsers -RegistrySettings $HKCURegistrySettings -ErrorAction SilentlyContinue

        ## Add Registry Key to Disable Auto-Updating of Microsoft Store Apps
        Write-Log -Message "Adding Registry Key to Disable Auto-Updating of Microsoft Store Apps."
        Set-RegistryKey -Key 'HKLM\SOFTWARE\Policies\Microsoft\WindowsStore' -Name 'AutoDownload' -Value 2 -Type DWord

        # Add Registry Key to Prevent Suggested Applications from Returning
        Write-Log -Message "Adding Registry Key to Prevent Suggested Applications from Returning."
        Set-RegistryKey -Key 'HKLM\SOFTWARE\Policies\Microsoft\Windows\CloudContent' -Name 'DisableWindowsConsumerFeatures' -Value 1 -Type DWord

		##*===============================================
		##* POST-UNINSTALLATION
		##*===============================================
		[string]$installPhase = 'Post-Uninstallation'


	}
	ElseIf ($deploymentType -ieq 'Repair')
	{
		##*===============================================
		##* PRE-REPAIR
		##*===============================================
		[string]$installPhase = 'Pre-Repair'


		##*===============================================
		##* REPAIR
		##*===============================================
		[string]$installPhase = 'Repair'


		##*===============================================
		##* POST-REPAIR
		##*===============================================
		[string]$installPhase = 'Post-Repair'


    }
	##*===============================================
	##* END SCRIPT BODY
	##*===============================================

	## Call the Exit-Script function to perform final cleanup operations
	Exit-Script -ExitCode $mainExitCode
}
Catch {
	[int32]$mainExitCode = 60001
	[string]$mainErrorMessage = "$(Resolve-Error)"
	Write-Log -Message $mainErrorMessage -Severity 3 -Source $deployAppScriptFriendlyName
	Show-DialogBox -Text $mainErrorMessage -Icon 'Stop'
	Exit-Script -ExitCode $mainExitCode
}
Ok, all the hard work is done and now you can install or uninstall the Microsoft Photos (Microsoft Store App) using one single PowerShell script. Simply change the DeploymentType parameter to install or uninstall. Logging functionality is built-in automatically and you can view the log files under “C:\Windows\Logs\Software”.
Microsoft Photos (Microsoft Store App) NonInteractive Install (PowerShell)
NonInteractive means Very Silent, i.e. no blocking apps. This is automatically set if it is detected that the process is not running in the user session and it is not possible for anyone to provide input using a mouse or keyboard.
- Open Windows PowerShell by Right-Clicking on Windows PowerShell and selecting Run as Administrator
- Change the directory to “C:\Downloads\PhotosApp”
- PS C:\Downloads\PhotosApp>
- Enter the following command:
Powershell.exe -ExecutionPolicy Bypass .\Deploy-PhotosApp.ps1 -DeploymentType "Install" -DeployMode "NonInteractive"
Microsoft Photos (Microsoft Store App) Silent Install (PowerShell)
Silent means no dialogs (progress and balloon tip notifications are suppressed).
- Open Windows PowerShell by Right-Clicking on Windows PowerShell and selecting Run as Administrator
- Change the directory to “C:\Downloads\PhotosApp“
- PS C:\Downloads\PhotosApp>
- Enter the following command:
Powershell.exe -ExecutionPolicy Bypass .\Deploy-PhotosApp.ps1 -DeploymentType "Install" -DeployMode "Silent"
Microsoft Photos (Microsoft Store App) Interactive Install (PowerShell)
Interactive means the install will show dialogs including progress and balloon tip notifications.
- Open Windows PowerShell by Right-Clicking on Windows PowerShell and selecting Run as Administrator
- Change the directory to “C:\Downloads\PhotosApp“
- PS C:\Downloads\PhotosApp>
- Enter the following command:
Powershell.exe -ExecutionPolicy Bypass .\Deploy-PhotosApp.ps1 -DeploymentType "Install" -DeployMode "Interactive"
How to Uninstall the Microsoft Photos (Microsoft Store App) Using the PowerShell App Deployment Toolkit
Microsoft Photos (Microsoft Store App) NonInteractive Uninstall (PowerShell)
NonInteractive means Very Silent, i.e. no blocking apps. This is automatically set if it is detected that the process is not running in the user session and it is not possible for anyone to provide input using a mouse or keyboard.
- Open Windows PowerShell by Right-Clicking on Windows PowerShell and selecting Run as Administrator
- Change the directory to “C:\Downloads\PhotosApp“
- PS C:\Downloads\PhotosApp>
- Enter the following command:
Powershell.exe -ExecutionPolicy Bypass .\Deploy-PhotosApp.ps1 -DeploymentType "Uninstall" -DeployMode "NonInteractive"
Microsoft Photos (Microsoft Store App) Silent Uninstall (PowerShell)
Silent means no dialogs (progress and balloon tip notifications are suppressed).
- Open Windows PowerShell by Right-Clicking on Windows PowerShell and selecting Run as Administrator
- Change the directory to “C:\Downloads\PhotosApp“
- PS C:\Downloads\PhotosApp>
- Enter the following command:
Powershell.exe -ExecutionPolicy Bypass .\Deploy-PhotosApp.ps1 -DeploymentType "Uninstall" -DeployMode "Silent"
Microsoft Photos (Microsoft Store App) Interactive Uninstall (PowerShell)
Interactive means the install will show dialogs including progress and balloon tip notifications.
- Open Windows PowerShell by Right-Clicking on Windows PowerShell and selecting Run as Administrator
- Change the directory to “C:\Downloads\PhotosApp“
- PS C:\Downloads\PhotosApp>
- Enter the following command:
Powershell.exe -ExecutionPolicy Bypass .\Deploy-PhotosApp.ps1 -DeploymentType "Uninstall" -DeployMode "Interactive"
Always make sure to test everything in a development environment prior to implementing anything into production. The information in this article is provided “As Is” without warranty of any kind.
Microsoft Photos is a stock app on Windows 10. It is present on Windows 10 when you install the OS and it is the go-to app for viewing photos if you have nothing else installed. If you choose to install a different photo viewer, you will have to change the default one on Windows 10 i.e., change it to something other than Microsoft Photos.
Stock apps on Windows 10 are present out of a box but many of them can be uninstalled. If you want, you can remove the ones you do not need but Microsoft Photos is one of the core apps on the OS so uninstalling it isn’t that easy (though still possible). If you can’t find the Microsoft Photos app, try the fixes below.
1. Reinstall Photos App on Windows 10
It’s possible that you’ve uninstalled the Microsoft Photos app, or an app that you installed did it for you. In that case, you will have to install the app again. You can do this from the Microsoft Store or via PowerShell.
To install Microsoft Photos from the Microsoft Store;
- Visit this link to the Microsoft Photos app in your browser.
- Click Get.
- Open the Microsoft Store app when prompted by the browser.
- Click Get and then Install.
- Microsoft Photos will be installed.
If you’re unable to install Microsoft Photos from the Microsoft Store app, you can install it via PowerShell.
- Open PowerShell with admin rights.
- Run this command:
$manifest = (Get-AppxPackage Microsoft.WindowsStore).InstallLocation + ‘AppxManifest.xml’. - Microsoft Photos will be installed.
Note: Restart the system if the app doesn’t appear.
2. Reset Microsoft Store
The Microsoft Store app may cause problems with other apps. The Microsoft Photos app may very be present on your system but the Microsoft Store may prevent it from opening. Try resetting the app.
- Tap the Win +R keyboard shortcut to open the run box.
- In the run box, enter
wsreset.exeand tap the Enter key. - A Command Prompt window will open and close on its own.
- The store app will be reset. Try opening the Microsoft Photos app.
3. Run Windows Store app troubleshooter
The Microsoft Photos app is a Microsoft Store and Windows 10 has a troubleshooter that can help resolve problems with these types of apps.
- Open the Settings app with the Win+I keyboard shortcut.
- Go to Update & Security.
- Select the Troubleshoot tab.
- Click Additional troubleshooters.
- Run the Windows Store Apps troubleshooter.
- Apply all fixes that it recommends.
- Restart the system.
4. Try a different photo viewer
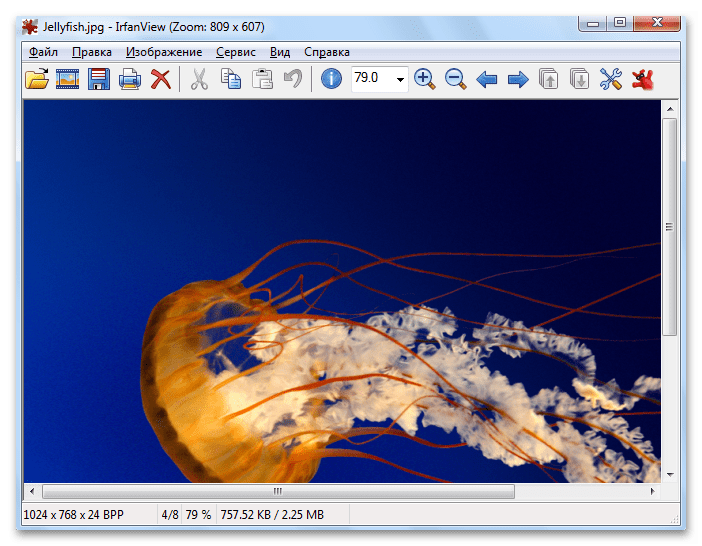
If you’re still unable to open and use the Microsoft Photos app, you can install a third-party photo viewer. There are plenty of great alternatives to the Microsoft Photos app. We recommend giving IrfanView a try.
Conclusion
The Microsoft Photos app is the best photo viewer that Microsoft has ever developed. In fact, many Windows 10 users often complain about it. That said, if you’re determined to use it and it doesn’t reappear with any of the fixes listed above, create a new user account and it will be present in it. You will have to switch to using the new account.

Fatima Wahab
Fatima has been writing for AddictiveTips for six years. She began as a junior writer and has been working as the Editor in Chief since 2014.
Fatima gets an adrenaline rush from figuring out how technology works, and how to manipulate it. A well-designed app, something that solves a common everyday problem and looks