
Last Updated :
05 Apr, 2025
Installing software on your computer usually means clicking through a setup wizard, but did you know you can do it faster with just a few typed commands? Using the Command Prompt (CMD) in Windows, you can install programs without all the mouse clicks, making it a handy trick for quick setups or managing multiple systems.
In this blog, we’ll walk you through the step-by-step process of installing software using CMD. From using built-in tools like Windows Package Manager (winget) to executing installation commands for standalone executables, you’ll discover how to harness the power of the command line to install software quickly and efficiently.
How to Install Programs Using CMD in Windows
Here, we will discuss 3 different methods to set up applications using the Command Prompt on Windows 10 and 11, which include Winget, Chocolatey, or direct installer executables.
1. Install Software using Winget: Suggested
The winget command is a built-in package manager for Windows 10 and Windows 11. It simplifies installing and managing software from the Windows Store or other sources.
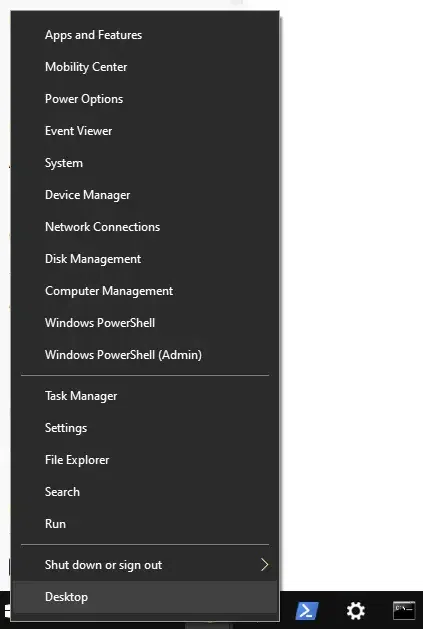
Step 1: Open CMD as Administrator
- Right-click the Start button and select Command Prompt (Admin) or Windows Terminal (Admin).
Step 2: Check if winget is Installed
- First, check if
wingetis installed by running:
winget --version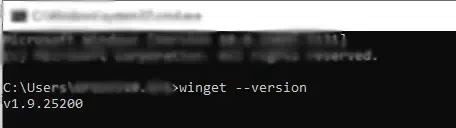
If not installed, ensure you’re using Windows 10 1809+ or Windows 11 and install the App Installer from the Microsoft Store.
Step 3: Search for Software
- You can search for available software by running:
winget search <software_name>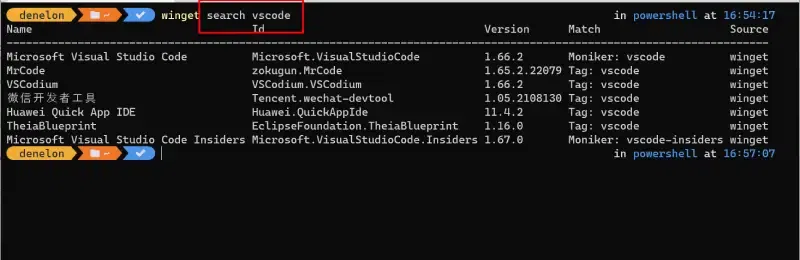
For example: winget search vscode
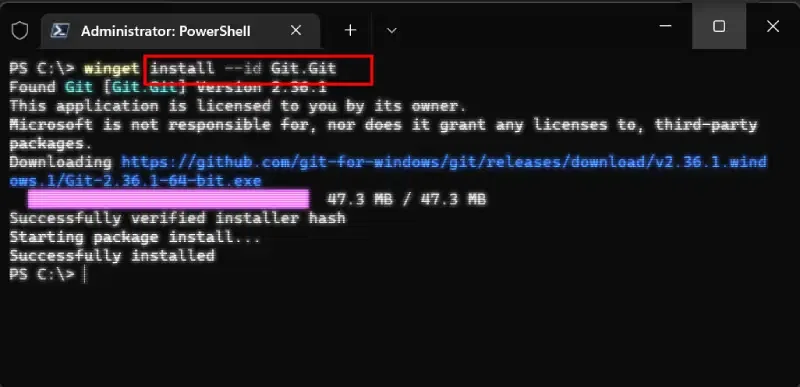
Step 4: Install the Software
- Once you’ve found the software, use the following command to install it:
winget install <software_name>- For example:
winget install git
After installation, you can verify by checking if the software appears in your applications list or by searching for it directly in CMD.
2. Use Chocolatey to Install Applications
Chocolatey is a popular third-party package manager for Windows that allows you to automate software installations through the Command Prompt.
Step 1: Install Chocolatey
- To install Chocolatey, run the following command in CMD as Administrator:
Set-ExecutionPolicy Bypass -Scope Process -Force; [System.Net.ServicePointManager]::SecurityProtocol = [System.Net.SecurityProtocolType]::Tls12; iex ((New-Object System.Net.WebClient).DownloadString('https://chocolatey.org/install.ps1'))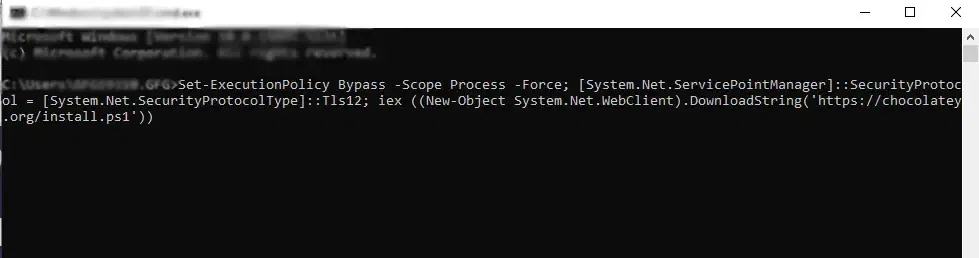
Step 2: Install programs using Chocolatey
- Once Chocolatey is installed, you can install software by running:
choco install <software_name>
For example: choco install googlechrome (install Google Chrome)
Step 3: Verify Installation
- Check if the software is installed by running the following command:
choco list --local-only3. Direct Installer Executables
For certain software, you may want to run an installer directly through CMD.
Step 1: Download the .exe Installer
- Download the installer executable from the software’s official website.
Step 2: Navigate to the Installer’s Location
- Open CMD, and use the
cdcommand to navigate to the directory where the installer is located. Example:
cd C:\Downloads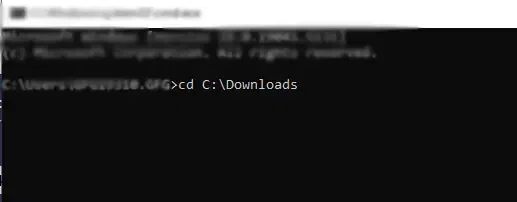
Step 3: Run the Installer
- Run the installer using the following command:
software-installer.exe /silent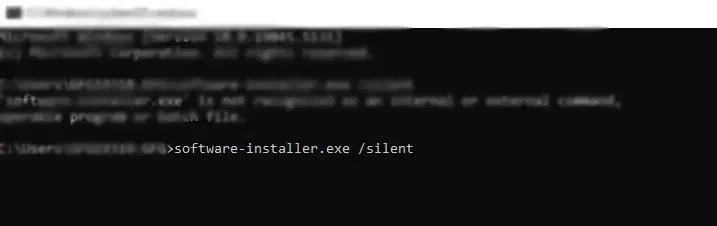
Most installers support a /silent flag, which installs the software without user interaction.
Bonus: Troubleshooting Tips
- Access Denied Errors: Ensure you open CMD as Administrator to avoid any disruption.
- Software Not Found in Package Managers: Double-check the name of the software by using
wingetorchoco search. - Issues with Executables: Ensure the installer supports silent mode or check the documentation for installation options.
Conclusion
Installing programs via CMD in Windows offers a quick and efficient way to manage applications, especially when working with multiple systems or headless environments. Whether you’re a system administrator or developer, knowing how to use winget, or Chocolatey for software management can save time and streamline your workflow.
On Windows 11, in addition to using a standalone (.exe or .msi) installer or the Microsoft Store, you can also use the Windows Package Manager (winget) to download and install apps on your laptop or desktop computer.
The Windows Package Manager is a command-line tool that makes it easier to discover, download, install, update, and even remove apps on Windows 11 or 10 installations with Command Prompt, reducing the number of steps it would take using a different method.
This guide will walk you through the steps to search, download, and install one or multiple apps on Windows 11.
How to install apps with Command Prompt
On Windows 11, you can use quick and easy commands to find, download, and install virtually any app that has been registered in the Windows Package Manager repository, even those from the Microsoft Store.
Search app with winget
To search for an app to install with commands on Windows 11, use these steps:
- Open Start.
- Search for Command Prompt, right-click the top result, and select the Run as administrator option.
- Type the following command to search an app and press Enter: winget search APP-NAME
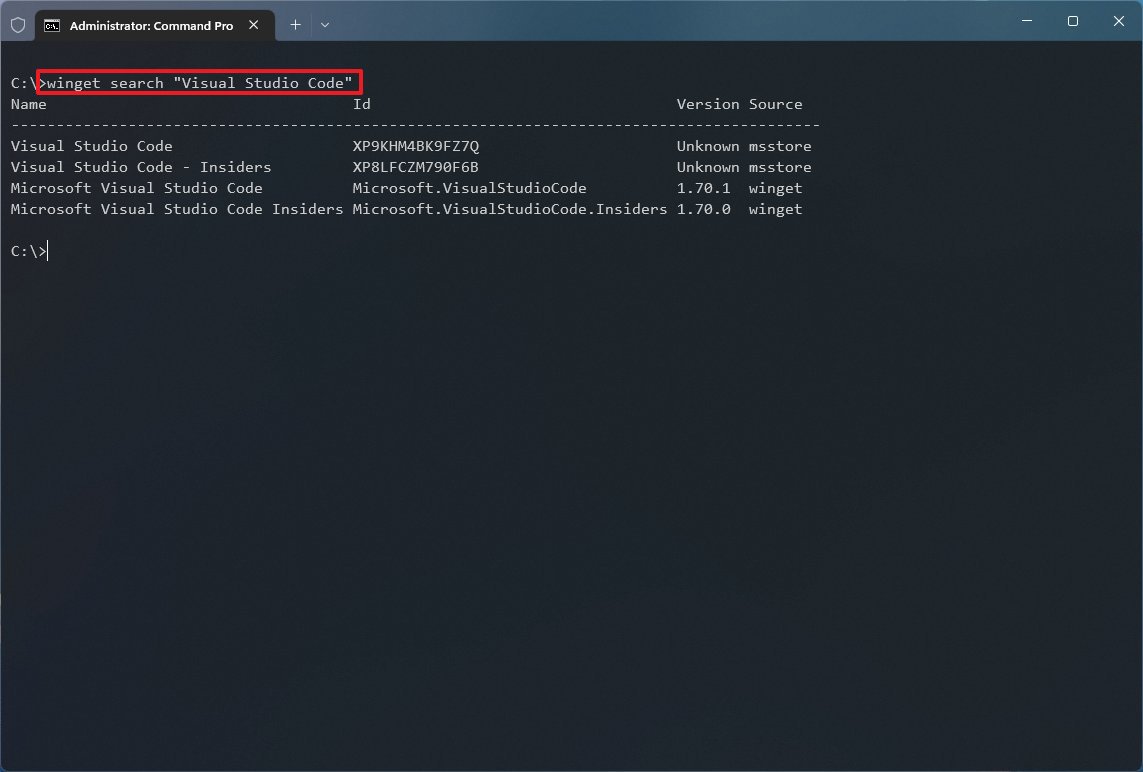
In the command, change APP-NAME for the actual name of the app. If the name has spaces, use quotation marks. For example, «Visual Studio Code.»
All the latest news, reviews, and guides for Windows and Xbox diehards.
- Confirm the app name and ID value.
Once you complete the steps, you can use the app name or its ID to install it with the Windows Package Manager tool.
When using the search command, the «Source» column will tell you whether the app is available from the Windows Package Manager (winget) or Microsoft Store (msstore) repository.
You will also notice that the app ID will have a different structure depending on the source. For example, the VLC media player has the ID of «VideoLAN.VLC» in the winget repository and the «XPDM1ZW6815MQM» in the msstore repository. These are the same apps, but depending on the ID you use, the app will install from different sources.
Install an app with winget
To install an app with the winget command, use these steps:
- Open Start.
- Search for Command Prompt, right-click the top result, and select the Run as administrator option.
- Type the following command to install an app with the winget command and press Enter: winget install «APP-NAME»
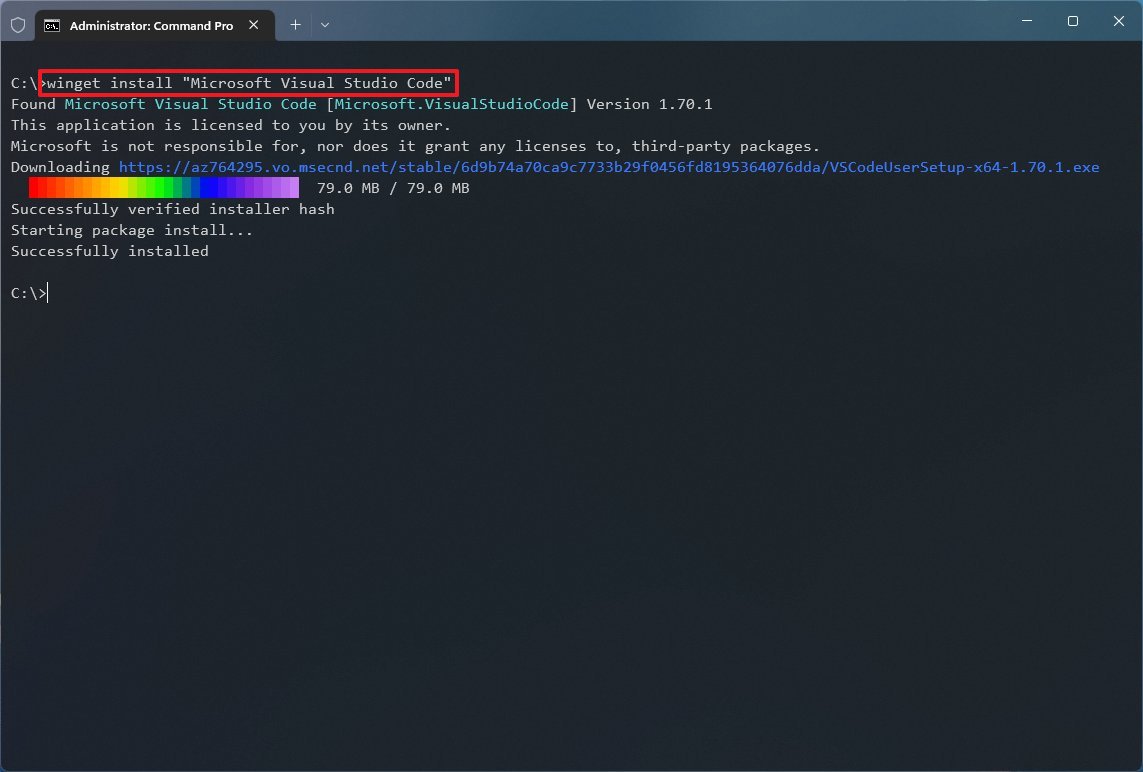
In the command, change «APP-NAME» for the app’s name. The quotation marks are only required when the name has multiple words with space. This example installs the VSCode app: winget install «Microsoft Visual Studio Code»
- (Optional) Type the following command to install an app by ID and press Enter: winget install APP-ID
After you complete the steps, the app will install on Windows 11. Although you can use the app name, the ID option is the better option because it’s more specific, lets you choose the source repository, and you will find fewer conflicts running the command.
Install multiple apps with winget
To install multiple apps with the winget command, use these steps:
- Open Start.
- Search for Command Prompt, right-click the top result, and select the Run as administrator option.
- Type the following command to install multiple apps with the winget command and press Enter: winget install «APP-NAME-1» -e && winget install «APP-NAME-2» -e
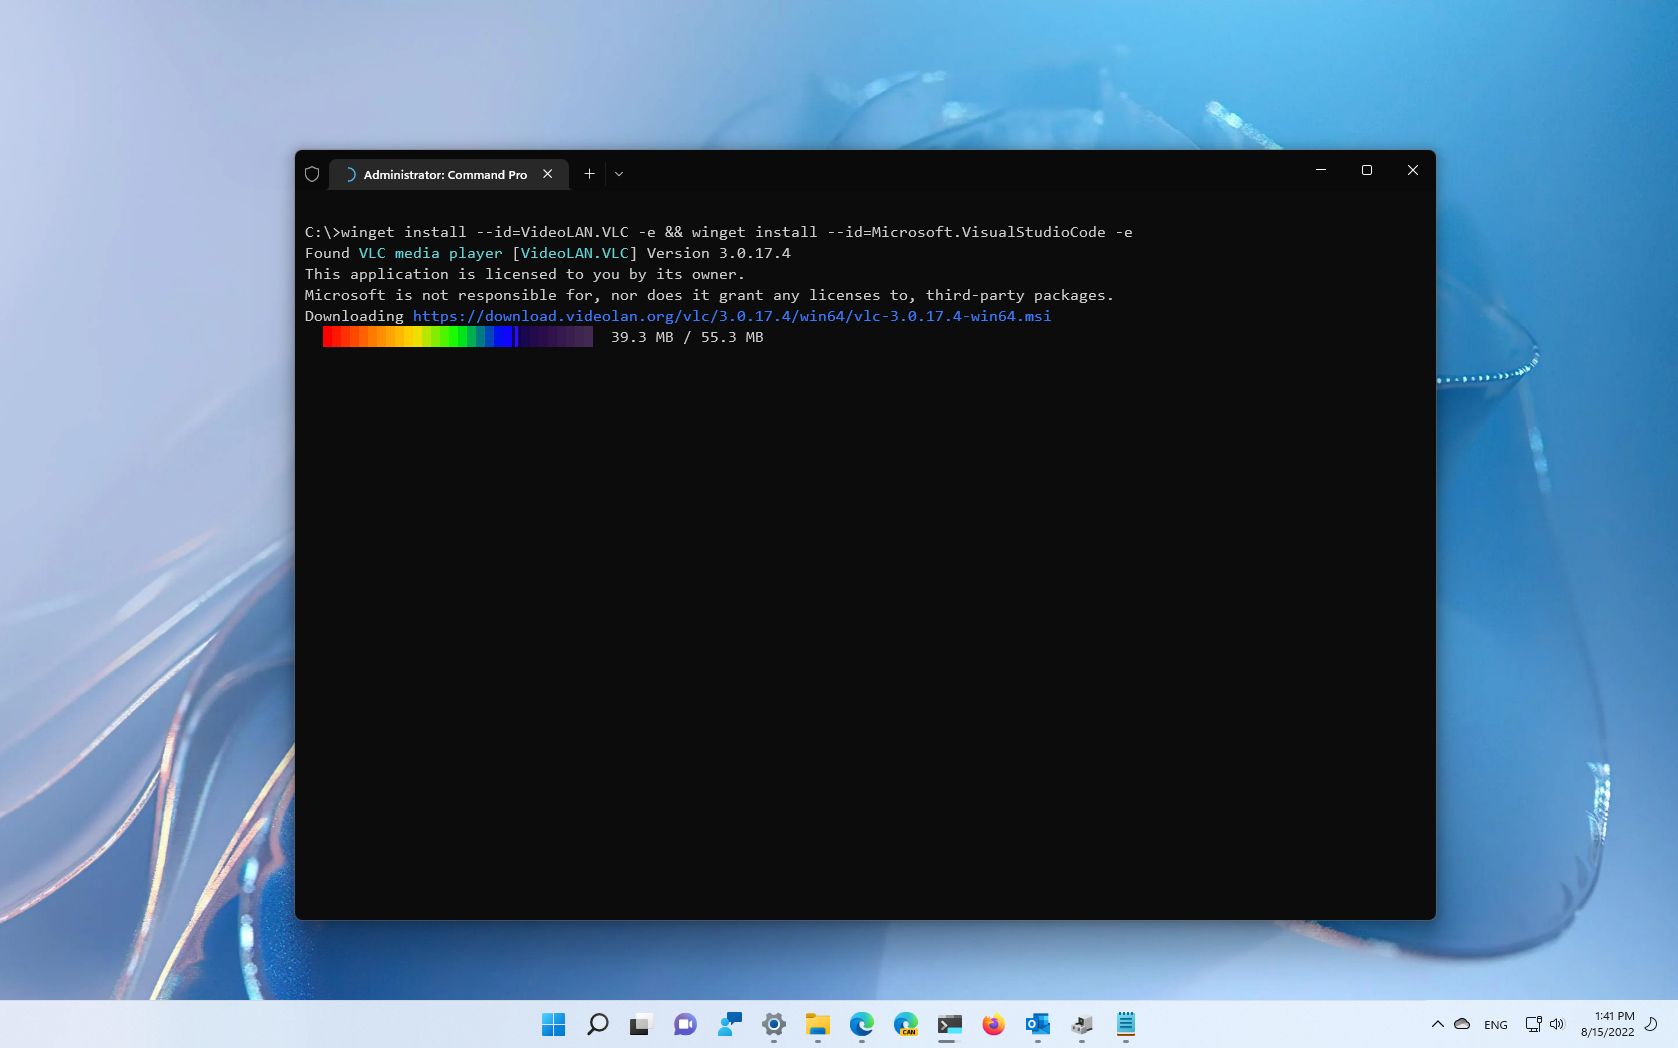
- (Optional) Type the following command to install multiple apps by ID and press Enter: winget install —id=APP-NAME-1 -e && winget install —id=APP-NAME-2 -e
In the commands, change «APP-NAME-1» and «APP-NAME-2» for the actual names of the apps. If you want to queue even more app installations, add a space and && along with the app installation command. This example installs the VLC and Visual Studio Code apps: winget install —id=VideoLAN.VLC -e && winget install —id=Microsoft.VisualStudioCode -e

Once you complete the steps, the command will begin installing the apps one at a time.
Check installed apps with winget
To check whether the application has been installed, use these steps:
- Open Start.
- Search for Command Prompt, right-click the top result, and select the Run as administrator option.
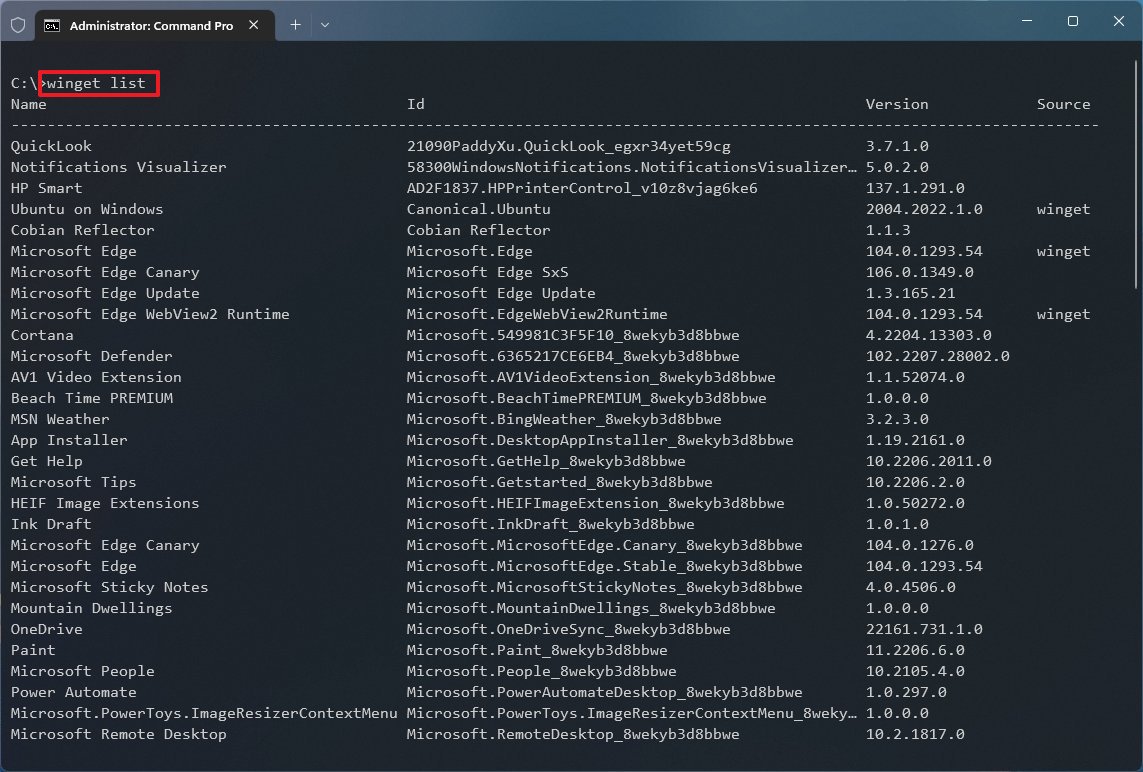
- Type the following command to list the app installed on Windows 11 and press Enter: winget list
- (Optional) Type the following command to confirm an app installation and press Enter: winget list APP-NAME
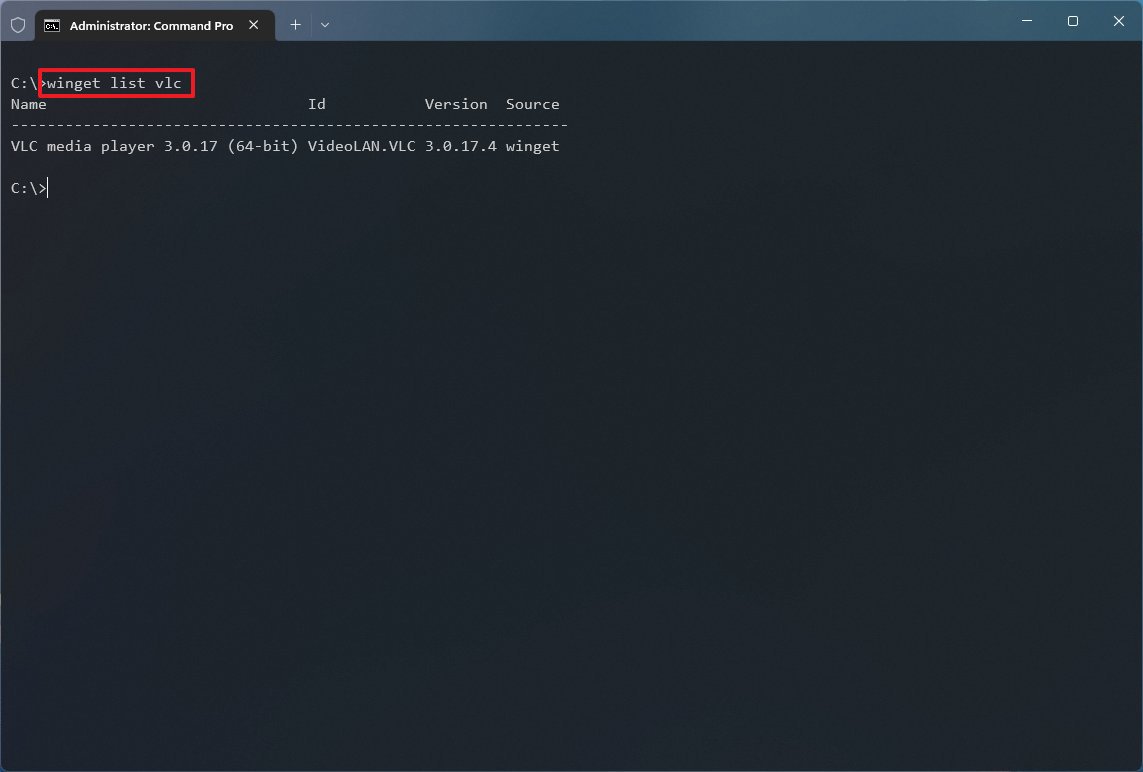
After you complete the steps, you can confirm whether the app has been successfully installed on Windows 11.
More resources
For more helpful articles, coverage, and answers to common questions about Windows 10 and Windows 11, visit the following resources:
- Windows 11 on Windows Central — All you need to know
- Windows 10 on Windows Central — All you need to know
Mauro Huculak has been a Windows How-To Expert contributor for WindowsCentral.com for nearly a decade and has over 15 years of experience writing comprehensive guides. He also has an IT background and has achieved different professional certifications from Microsoft, Cisco, VMware, and CompTIA. He has been recognized as a Microsoft MVP for many years.
Installing software can be a complex, repetitive, and error-prone process. Before using it, you must first download it, start the installation process, and wait while it installs. This consumes a lot of your time. You can save this time by learning how to install apps from the command prompt. You may also install apps from PowerShell simultaneously.
PowerShell and Command Prompt can install applications on your Windows 10 or 11 seamlessly. The steps required to install apps, however, vary a little. This definitive guide will show you how to install apps from the Command Prompt or PowerShell to save significant time, effort, and steps.
Why Install Apps from Command Prompt and PowerShell?
Command Prompt is an executive command-line interface, whereas PowerShell is a cross-platform task automation solution with an interactive command-line shell. They are designed to elicit an action, especially the ones that take significant time, like app installation.
Command prompt and PowerShell enable you to install apps with a single click instead of executing separate .exe files. They make installation effortless, seamless, and faster for your PC.
Here we use a seamlessly simple software Chocolatey to help you install applications using commands only.
What is Chocolatey?
Chocolatey is a package manager comprising command-line tools and a collection of services to automate the program management process. It contains software binaries, configuration files, metadata, and a list of prerequisites needed for it to function effectively. It simplifies the complex process of application installation and saves you time and effort.
Chocolatey manages all facets of Windows software using a universal packaging standard. Chocolatey offers you a standardized and unified method to install them no matter what kind of software you are installing—native installs, zips, scripts, runtime binaries, or internally built programs. First, you are required to set up Chocolatey on your computer, and we use both PowerShell and Command Prompt to install it using commands.
Install Apps from PowerShell
Step 1: Open the Start menu by clicking on the Win Key on your system or keyboard.
Step 2: In the Search bar, type in the keyword Powershell.

Step 3: The first thing you must check when the PowerShell window starts is that the execution policy is not limited. Copy and paste the following command and press Enter to examine the execution policy configured on your computer.
Get-ExecutionPolicy

Step 4: You must perform the following command if the outcome of the previous stages is Restricted; otherwise, you can skip this step and move on to Step 5.
Set-ExecutionPolicy AllSigned
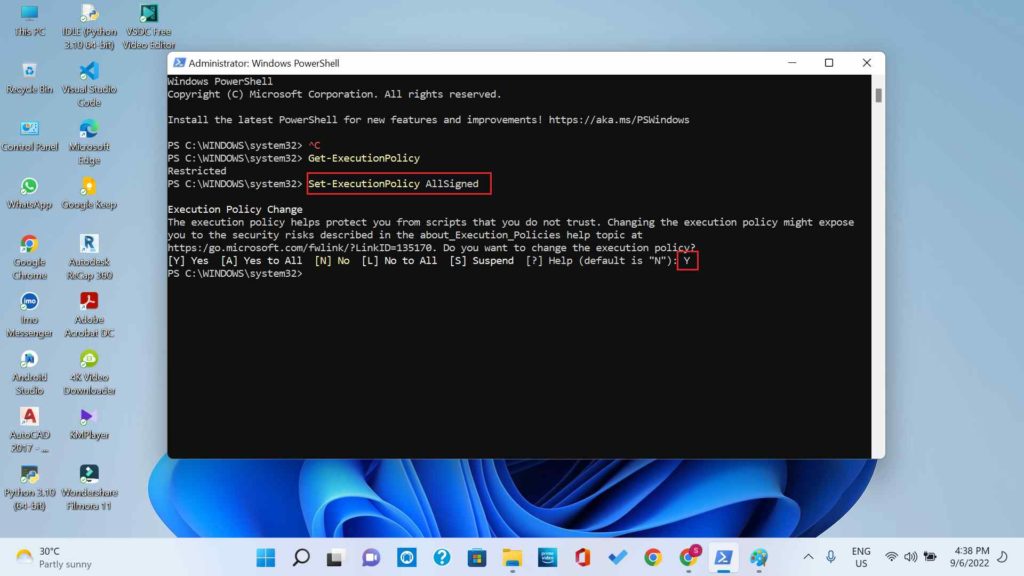
After running the command, type Y and hit enter.
Step 5: Let’s run the program to install Chocolatey on our computer next. Paste the following command and then hit enter:
Set-ExecutionPolicy Bypass -Scope Process -Force; ::SecurityProtocol = ::SecurityProtocol -bor 3072; iex ((New-Object System.Net.WebClient).DownloadString('https://community.chocolatey.org/install.ps1'))

Step 6: Wait as Chocolatey is installed on your computer. When everything is installed, your PowerShell screen should look like the one below.

Step 7: To see the Chocolatey folder on your computer, open File Explorer and go to the following location.
This PC --> Local Disk (C:) --> ProgramData --> Chocolatey
Step 8: Now get back to PowerShell. Copy the following command and paste it to see all the Chocolatey commands available.
choco -?

Install Apps from Command Prompt
Step 1: To install Chocolatey using Command Prompt, you must first open Command Prompt. To open the command prompt, click on the Search icon. You can also click on the Windows key on your keyword and system screen to open the Search bar.
Step 2: Type cmd in the Search bar and click on Run as Administrator.
Step 3: On the next screen, copy and paste the following command into the elevated Command Prompt window to install Chocolatey on your computer.
@"%SystemRoot%\System32\WindowsPowerShell\v1.0\powershell.exe" -NoProfile -InputFormat None -ExecutionPolicy Bypass -Command "::SecurityProtocol = 3072; iex ((New-Object System.Net.WebClient).DownloadString('https://community.chocolatey.org/install.ps1'))" && SET "PATH=%PATH%;%ALLUSERSPROFILE%\chocolatey\bin"

Step 4: The aforementioned command will install Chocolatey on your computer. Wait for it to finish running after a little while.
Step 5: Enter the following command in cmd to see what Chocolatey can do for you.
choco -?

Now that you have Chocolatey on your computer, you need to check its package repository for Windows software. These will help you install other applications using the commands. These repositories are safe available on the official website – https://community.chocolatey.org/packages

Now, you need to look for the install command for packages to install applications on your Windows PC. For example if you need to install Mozilla Firefox on your computer using commands. You can search for it and then copy the command for its installation.

In this case, it is > choco install firefox.
Now you open PowerShell or Command Prompt to execute these commands and install Firefox on your computer. Chocolatey will also inform you about the installation within the PowerShell or Command Prompt window.
Final Takeaways
If you want the regular procedure of installing a program on your Windows 11 or 10 using Chocolatey, it can be done using simple commands. Follow the step-by-step guide for installing the application with Command prompt and PowerShell.
We hope the article was helpful for you in finding out about the easy to install applications on your Windows 10 & 11. We would like to know your views on this post to make it more useful. Your suggestions and comments are welcome in the comment section below. Share the information with your friends and others by sharing the article on social media.
We love to hear from you!
We are on Facebook, Twitter, Instagram, and YouTube. Let us know of any queries or suggestions. We love to get back to you with a solution. We regularly post tips, tricks, and answers to common technology-related issues.
Related Topics –
How to Update Powershell on Windows 11
How to Zip/Unzip Files Using Powershell on Windows 10
6 Ways to Empty the Recycle Bin in Windows 11
How To Fix PowerShell Keeps Popping Up on Windows 11
How To Recover Files Deleted By PowerShell On Windows Computer
To install an `.exe` file from the command prompt (cmd), navigate to the directory where the executable is located and run it using the command followed by its filename.
cd C:\path\to\your\exefile && yourfile.exe
Understanding the Basics of CMD
CMD, or Command Prompt, is a powerful command-line interface in Windows that allows users to execute a variety of commands, enabling the management of system operations and running programs directly. Learning to install an EXE from CMD can streamline your processes, automate tasks, and provide greater control over your system.
Overview of CMD Commands
CMD serves as a dynamic tool for users who prefer typing commands rather than navigating through graphical interfaces. It offers features like batch scripting, which allows for repeated tasks to be automated, along with a wealth of command-line tools for system maintenance and configuration.
Importance of Admin Privileges
When installing software via CMD, it’s crucial to ensure you have the necessary administrative privileges. Many installers require elevated permissions to modify system files or settings, and not having these permissions can lead to errors during installation.
To run CMD as an administrator:
- Right-click on the Command Prompt icon.
- Select «Run as administrator.»
This ensures that any commands executed within this session have the proper permissions to install applications.
Uninstall From Cmd: A Simple Step-By-Step Guide
Preparing for Installation
Checking Compatibility
Before you install an EXE file, verifying its compatibility with your system is essential. Ensure the following:
- Your operating system (OS) matches the application’s requirements (e.g., 32-bit vs 64-bit).
- You have sufficient space on your hard drive for installation.
Finding the EXE File
Locating the EXE file you wish to install can be done in several ways:
- Use a web browser to download the installer from a trusted site.
- Navigate to the installation file on your computer using File Explorer. Ensure you note the full path to this EXE file, as you’ll need it in the CMD commands.
Uninstall Service Cmd: A Quick Guide to Mastery
Basic Commands to Install EXE Files
Understanding the Syntax
When installing an EXE file via CMD, understanding the command structure is crucial. Typically, the command contains the path to the installer, and additional flags can modify its behavior (e.g., running in silent mode).
The Command to Install EXE Files
To initiate the installation, enter the following command in CMD, substituting the path with your own:
start "" "C:\path\to\your\installer.exe"
This command launches the installer, and the `start «»` portion ensures the command runs without occupying the command line for further commands later.
Using the Silent Installation Option
Silent installations allow for software to be installed without user interaction, making it ideal for automated setups. Many installers support a silent mode through specific flags. For example:
"C:\path\to\your\installer.exe" /silent
This command will execute the installer quietly, completing the installation without prompting the user for input.
Install Cmd: A Quick Guide to Mastering Command Line
Common Installation Scenarios
Installing MSIs with CMD
If you encounter an MSI file instead of an EXE, it represents a Windows installer package. You can install these using the following command:
msiexec /i "C:\path\to\your\installer.msi"
The `msiexec` command is specifically designed for Windows Installer packages. Adding `/i` indicates that you’re installing the package.
Batch File for Multiple Installations
When handling multiple installations, a batch file can be a highly efficient solution. This script allows you to execute multiple commands sequentially. Here’s how a simple batch file structure might look:
@echo off
start "" "C:\path\to\first_installer.exe"
start "" "C:\path\to\second_installer.exe"
Using `@echo off` prevents the display of each command in the console, creating a cleaner output.
Uninstall Cmd: A Simple Guide to Command Line Removal
Troubleshooting Common Installation Issues
Error Codes and Their Meanings
During installation, you may encounter various error codes. Understanding these will aid in troubleshooting:
- Error 1602: User cancellation.
- Error 1618: Another installation is already in progress.
Searching online for these codes often provides user-contributed solutions that can resolve the issue.
Checking Installation Success
After running an installation command, it’s wise to verify that the application has been successfully installed. You can check if an application appears in the Start Menu or use the following CMD command to list installed programs:
wmic product get name
This command will display all installed software, allowing you to confirm if your application is present.
Install Python Using Cmd on Windows: A Quick Guide
Advanced CMD Installation Techniques
Using Windows PowerShell for Installation
While CMD is powerful, Windows PowerShell offers a more advanced syntax and capabilities. If you need to handle more complex installations or scripts, consider using PowerShell. For example, installing a package with PowerShell can be done with the following:
Start-Process -FilePath "C:\path\to\your\installer.exe" -ArgumentList "/silent"
Automating Installations with Scripts
Using automation tools like Chocolatey can significantly simplify the installation process. Chocolatey is a package manager for Windows that allows for easy installation of software directly from CMD. To use it, first ensure Chocolatey is installed, then you can install software with a simple command:
choco install your-package-name
This command automates the download and installation process for a wide range of applications.
Install Windows From Cmd: A Quick How-To Guide
Conclusion
Mastering the ability to install an EXE from CMD is a valuable skill that can enhance efficiency and control over your Windows environment. By understanding the basic commands, preparing correctly, troubleshooting effectively, and utilizing advanced techniques, you can streamline software installations significantly. Practicing what you’ve learned here will empower you to become proficient in using CMD for a variety of tasks.
Run .exe From Cmd: Your Quick Start Guide
Additional Resources
For further learning, consider checking the official Microsoft documentation on CMD, exploring online courses, or joining community forums where you can gain insights and support from fellow CMD enthusiasts. Embrace the power of CMD, and elevate your software installation skills today!
In this post, we are going to discuss on How to Install program from Command Line Windows 10, How to install software in Windows using Command Prompt in Windows 10. You will be guided with easy steps/methods to do so. Let’s starts the discussion.
‘Install program from Command Line Windows 10’:
It is quite simple & easy to install any software in Windows 10 computer through the application/program installation setup executable. To do so, you need to find the executable of program installer setup or extract the setup file from zipped/compressed file, and once setup file found or extracted, you need to right-click on it and select ‘Run as Administrator’, and then follow on-screen instructions to finish software installation and then it will be done.
On other hand, it is also possible and quite simple & easy to install any application/program in Windows 10 computer through Command Prompt. It means you can also try to install a application/program from Command-Line in your Windows computer. If you are looking for the ways to install software in Windows using Command Prompt in Windows 10 computer, then you are in right-place for this. Here, you are provided with easy ways to do so. Let’s go for the steps.
How to Install program from Command Line Windows 10?
Method 1: How to install software in Windows using Command Prompt?

Step 1: Type ‘cmd’ in Windows Search Box and press ‘SHIFT + ENTER’ keys on keyboard to open ‘Command Prompt as Administrator’
Step 2: Type the name of file directly if it is ‘.exe’ file, for example, ‘setup.exe’ and hit ‘Enter’ key on keyboard to execute. This will immediately run the installer with administrator permission.
Method 2: What is command to Install and run program from Command Line Windows 10?
Step 1: Open ‘Command Prompt as Administrator’ in Windows PC, type the name of program that you want to run.
Step 2: If it is on PATH System variable, it will be executed. If not, you will have to type the full path to the program. To run ‘D:Any_Folderany_program.exe’ type ‘D:Any_Folderany_program.exe’ on the Command prompt and press Enter.
Method 3: How to run EXE file from Command Prompt?
Step 1: Open ‘Command Prompt as Administrator’ using above method and go to location of your folder using Command Prompt, run the exe from there.
Step 2: Alternatively, you can create a batch (.bat) of two lines.
Method 4: How to install a program manually?
Step 1: Find and double-click on executable of program setup file
Step 2: Follow on-screen instructions to finish installation. Once installed, check if it works for you.
Method 5: How to install a program from CD/DVD?
Step 1: Insert the program/software disc into your computer’s disc drive or tray, label side up
Step 2: Click the option to run Install or Setup and follow on-screen instructions to finish installation.
Fix Windows PC issues with ‘PC Repair Tool’:
‘PC Repair Tool’ is easy & quick way to find and fix BSOD errors, DLL errors, EXE errors, problems with programs/applications, malware or viruses infections, system files or registry issues, and other system issues with just few clicks.
Conclusion
I am sure this article helped you on How to Install program from Command Line Windows 10, How to install software in Windows using Command Prompt in Windows 10 with easy steps/methods. You can read & follow our instructions to do so. That’s all. For any suggestions or queries, please write on comment box below.