
В этой статье мы покажем, как установить и настроить PostgreSQL для использования в Django проектах. Мы рассмотрим процесс установки PostgreSQL, настройку базы данных в Django, а также подключение к базе данных PostgreSQL с помощью Python библиотеки psycopg2.
Если вы хотите выразить благодарность автору сайта, статей и курса по Django, вы можете сделать это по ссылке ниже:
Установка postgreSQL на ПК
Если мы хотим установить на локальную машину PostgreSQL, то переходим на официальный сайт и скачиваем Postgres.
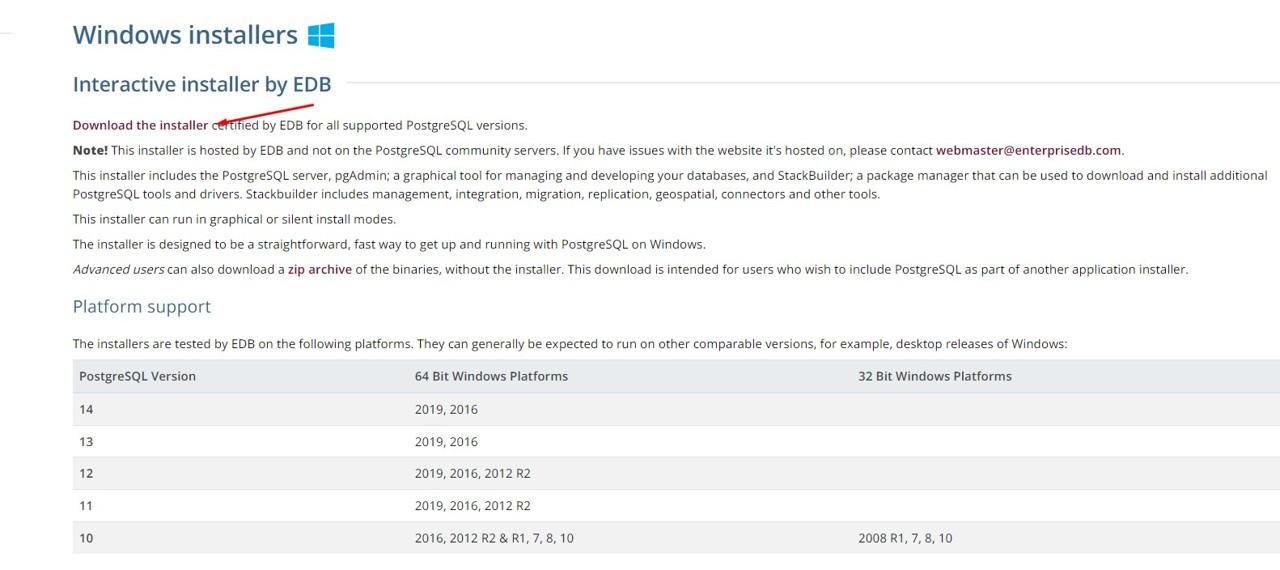
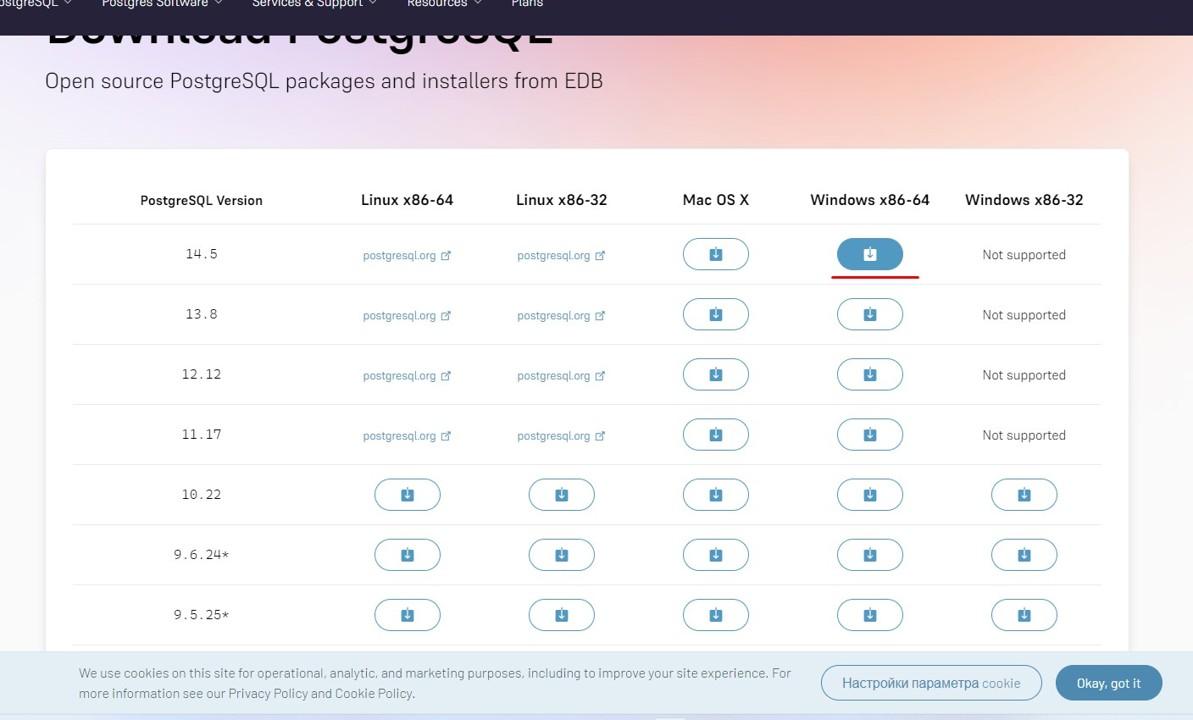
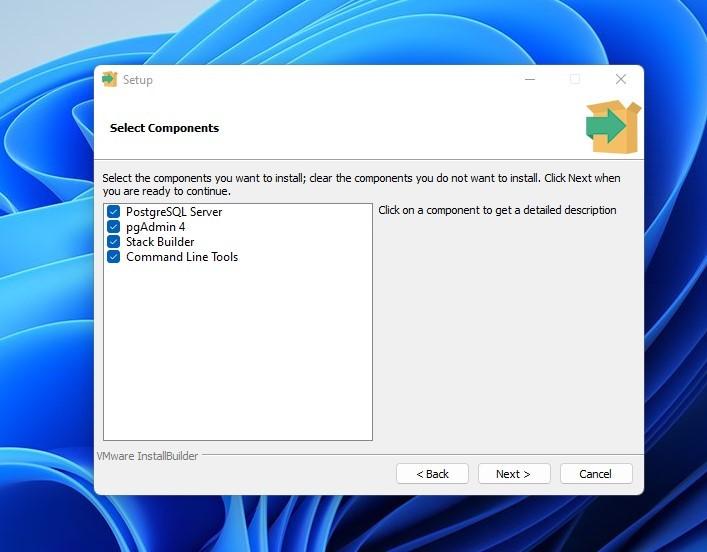
После скачивания, начинаем установку. Все оставляем по умолчанию.
Пароль при требовании придумайте любой, я на локальной машине использую: root
Установка PostgreSQL в Django
Далее в терминале нам необходимо установить драйвер для работы с СУБД: pip install psycopg2
Результат установки:
Терминал
(venv) PS C:\Users\Razilator\Desktop\Base\backend> pip install psycopg2
Collecting psycopg2
  Using cached psycopg2-2.9.5-cp311-cp311-win_amd64.whl (1.2 MB)
Installing collected packages: psycopg2
Successfully installed psycopg2-2.9.5

[notice] A new release of pip available: 22.3 -> 23.0
[notice] To update, run: python.exe -m pip install --upgrade pip
(venv) PS C:\Users\Razilator\Desktop\Base\backend>
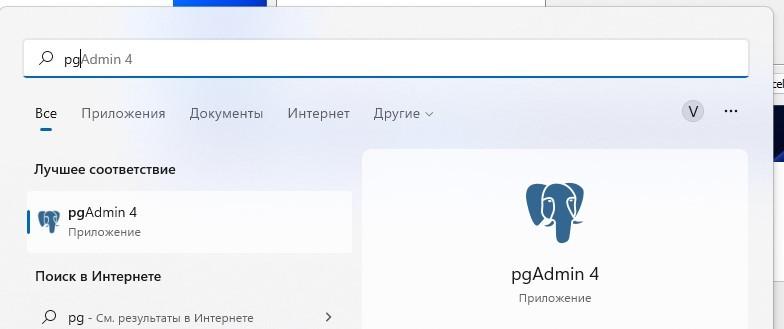
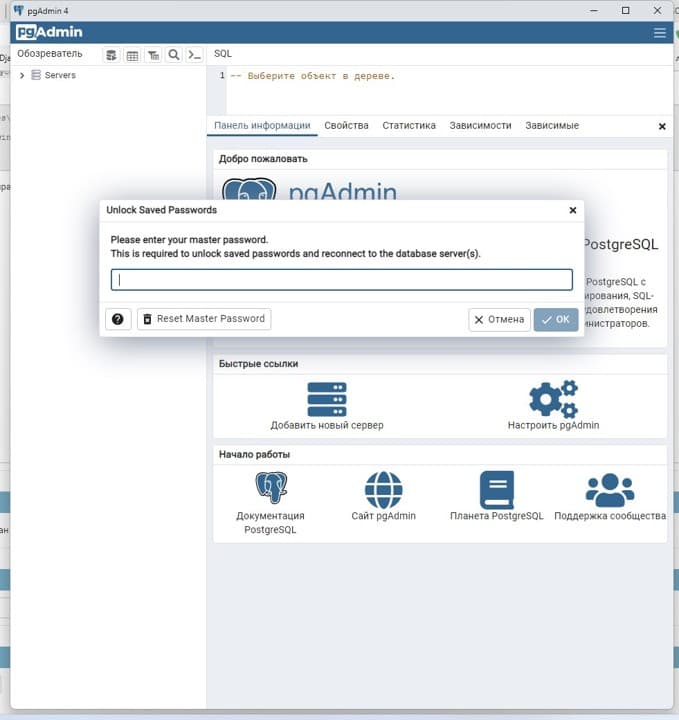
Запускаем pgAdmin
В меню пуск введите в поиске pgAdmin, подключитесь по созданному паролю при установке.
Если пароль не работает, можете восстановить его Reset Master Password.
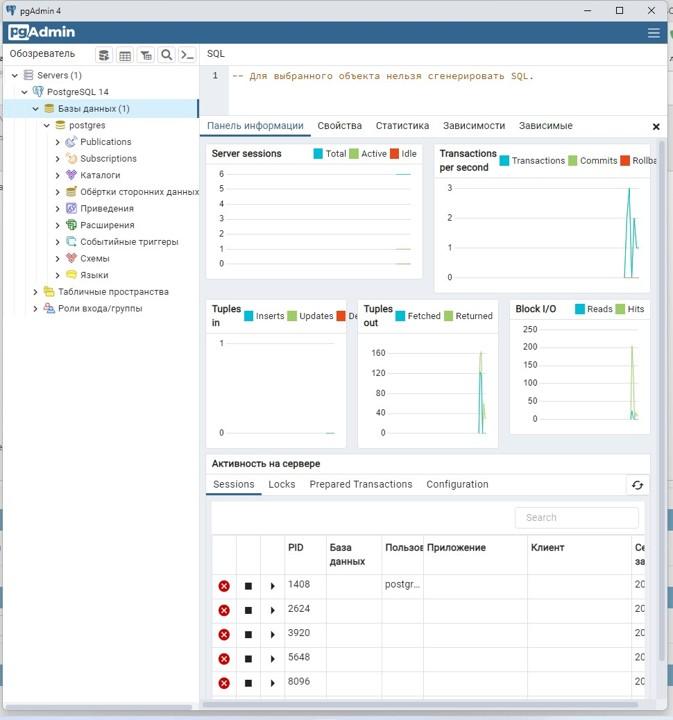
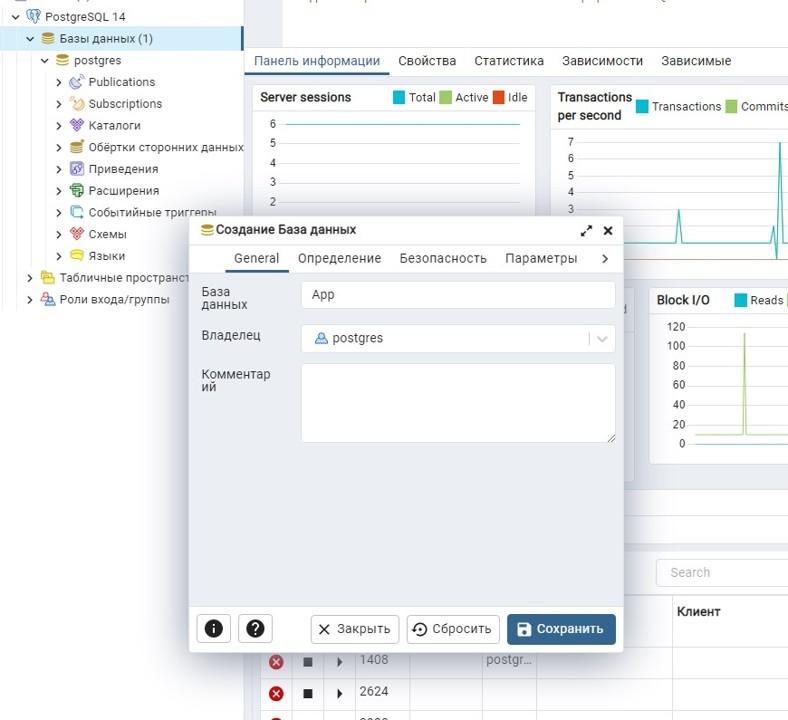
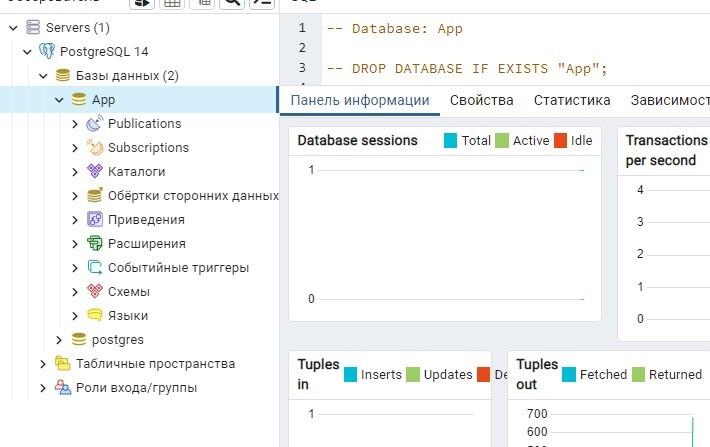
Теперь нам необходимо создать базу данных для нашего сайта (нажать левой кнопкой мыши на Базы Данных и создать базу данных):
Сохранение данных для переноса БД из SQLITE в PostgreSQL в Django
Если вы не хотите терять данные, которые вы написали за время уроков, это статьи, зарегистированные пользователи, категории, то до следующего пункта настроек мы можем воспользоваться созданием копии базы данных для последующего переноса в PostgreSQL.
Чтобы создать дамп базы данных, нам необходимо в терминале прописать следующую команду: python manage.py dumpdata --exclude contenttypes --output db.json, также мы можем исключать ненужные таблицы добавляя исключения в команду: --exclude auth.permission --exclude admin.logentry, таким образом мы исключим ещё логи и права доступа.
Если вы далаете дамп из под Windows, у вас может возникнуть проблема с кодировкой, в этом случае команда будет следующая: python -Xutf8 manage.py dumpdata --exclude contenttypes --output db.json. Данной командой мы создадим дамп базы данных в json формате.
Исключим contenttypes, из дампа, чтоб не возникло лишних ошибок при импорте базы данных при использовании PostgreSQL.
После успешной настройки БД PostgreSQL, вы можете восстановить дамп следующей командой: python manage.py loaddata db.json, если возникла проблема при восстановлении с кодировкой, то восстановите дамп через следующую команду: python -Xutf8 manage.py loaddata db.json
Настройка Django для работы с PostgreSQL
Далее нам необходимо изменить конфигурационный файл settings.py, в нём мы добавим новые настройки для базы данных вместо старых:
Найдите эти настройки:
settings.py
# Database
# https://docs.djangoproject.com/en/4.1/ref/settings/#databases

DATABASES = {
    'default': {
        'ENGINE': 'django.db.backends.sqlite3',
        'NAME': BASE_DIR / 'db.sqlite3',
    }
}
И вместо них добавьте следующие:
settings.py
# Database
# https://docs.djangoproject.com/en/4.1/ref/settings/#databases

DATABASES = {
    'default': {
        'ENGINE': 'django.db.backends.postgresql',
        'NAME': '<dbname>',
        'USER': 'postgres',
        'PASSWORD': '<password>',
        'HOST': 'localhost',
        'PORT': 5432,
    }
}
Таким образом мы настроим Django на работу с Postres.
К сожалению наши пользователи и статьи удалятся, поэтому делать лучше Postgres заранее, сразу после создания проекта. Но мы же делаем это как dev версию, поэтому нам не страшно что-то тестировать и удалять. Заодно я почищу папки media, удалю sqlite файл.
Примечание: учтите это при деплое, Postgres ставим сразу! Но до него ещё доберемся.
Далее после установки проводим миграции и создаем суперпользователя:
Терминал
(venv) PS C:\Users\Razilator\Desktop\Base\backend> py manage.py makemigrations
No changes detected
(venv) PS C:\Users\Razilator\Desktop\Base\backend> py manage.py migrate
Operations to perform:
  Apply all migrations: admin, auth, blog, contenttypes, sessions, sites, system, taggit
Running migrations:
  Applying contenttypes.0001_initial... OK
  Applying auth.0001_initial... OK
  Applying admin.0001_initial... OK
  Applying admin.0002_logentry_remove_auto_add... OK
  Applying admin.0003_logentry_add_action_flag_choices... OK
  Applying contenttypes.0002_remove_content_type_name... OK
  Applying auth.0002_alter_permission_name_max_length... OK
  Applying auth.0003_alter_user_email_max_length... OK
  Applying auth.0004_alter_user_username_opts... OK
  Applying auth.0005_alter_user_last_login_null... OK
  Applying auth.0006_require_contenttypes_0002... OK
  Applying auth.0007_alter_validators_add_error_messages... OK
  Applying auth.0008_alter_user_username_max_length... OK
  Applying auth.0009_alter_user_last_name_max_length... OK
  Applying auth.0010_alter_group_name_max_length... OK
  Applying auth.0011_update_proxy_permissions... OK
  Applying auth.0012_alter_user_first_name_max_length... OK
  Applying taggit.0001_initial... OK
  Applying taggit.0002_auto_20150616_2121... OK
  Applying taggit.0003_taggeditem_add_unique_index... OK
  Applying taggit.0004_alter_taggeditem_content_type_alter_taggeditem_tag... OK
  Applying taggit.0005_auto_20220424_2025... OK
  Applying blog.0001_initial... OK
  Applying blog.0002_alter_article_slug_alter_article_thumbnail... OK
  Applying blog.0003_alter_article_time_create_comment_and_more... OK
  Applying blog.0004_article_tags... OK
  Applying sessions.0001_initial... OK
  Applying sites.0001_initial... OK
  Applying sites.0002_alter_domain_unique... OK
  Applying system.0001_initial... OK
  Applying system.0002_alter_profile_avatar... OK
  Applying system.0003_alter_profile_avatar_alter_profile_bio_and_more... OK
  Applying system.0004_feedback... OK
(venv) PS C:\Users\Razilator\Desktop\Base\backend> py manage.py createsuperuser
Авторизуюсь с созданного пользователю и добавлю пару статей для будущих уроков.
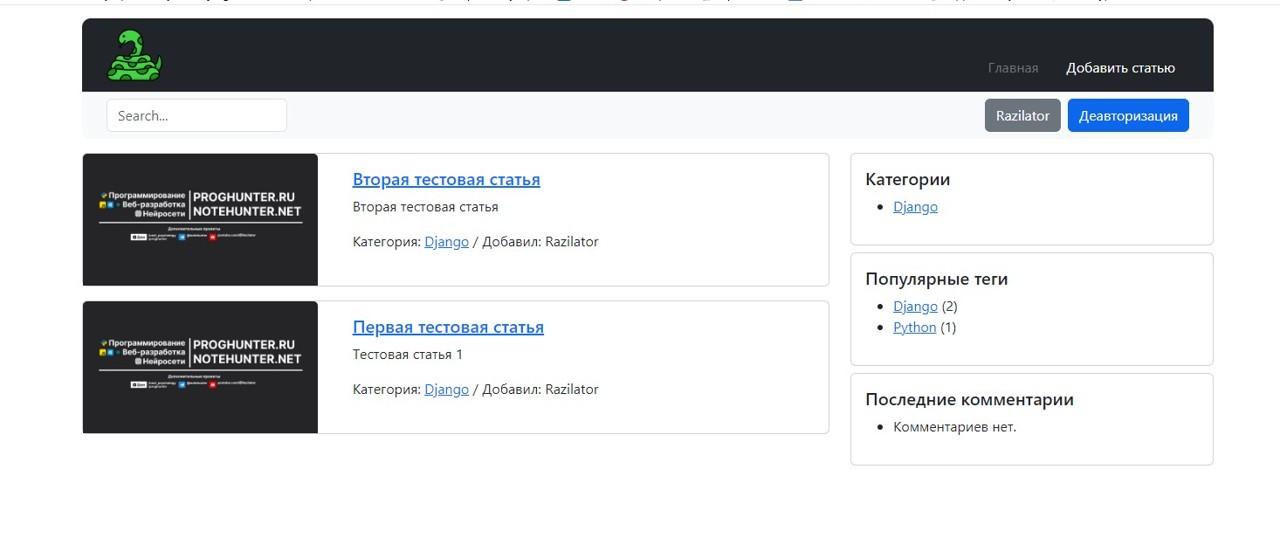
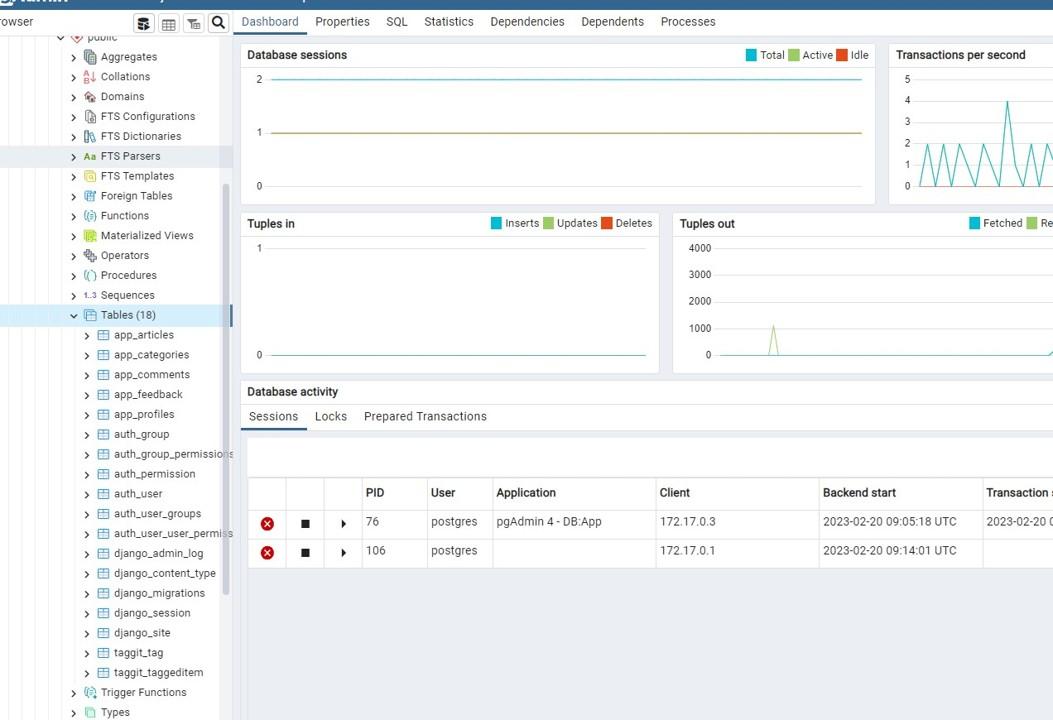
Также взглянем на наши таблицы в базе данных:
Время на прочтение4 мин
Количество просмотров29K
В данной статье будет представлена подробная инструкция по установке и настройке программ Apache, Python и PostgreSQL для обеспечения работы Django проекта в ОС MS Windows. Django уже включает в себя упрощенный сервер разработки для локального тестирования кода, но для задач, связанных с продакшен, требуется более безопасный и мощный веб-сервер. Мы настроим mod_wsgi для взаимодействия с нашим проектом и настроим Apache в качестве шлюза в внешний мир.
Стоит отметить, что установка и настройка будет производиться в ОС MS Windows 10 с 32 разрядностью. Также 32 битная реакция будет универсальна и будет работать на 64 битной архитектуре. Если вам нужна 64 битная установка повторите те же действия для 64 битных дистрибутивов программ, последовательность действий будет идентична.
В качестве Django проекта будем использовать программу Severcart. Она предназначена для управления перемещениями картриджей, учёта печатающего оборудования и договоров поставки и обслуживания. Установка всех программ и модулей будет производиться в каталог C:\severcart. Местоположение не принципиально.
Python
Первым шагом является загрузка и установка Python с веб-сайта Python. Выбираем Windows в качестве операционной системы и 32-битную версию. На момент написания статьи текущей версией является 3.9.0rc2.
Загрузив файл установки, щелкните правой кнопкой мыши файл установки и выберите «Запуск от имени администратора». Вы должны увидеть экран ниже
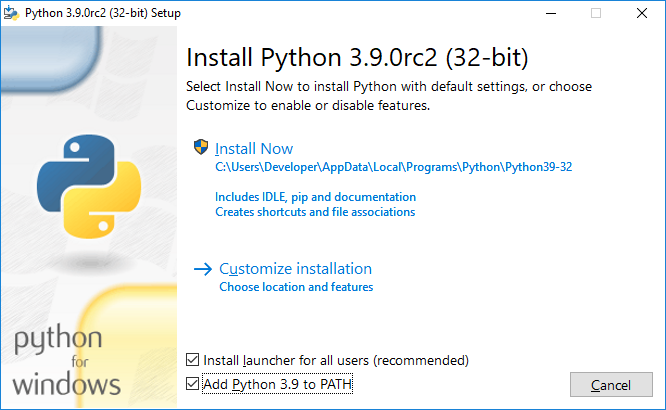
Устанавливаем галочки напротив чекбоксов «Install launcher for add user (recomended)» и «Add Python 3.9 to PATH» и нажимаем на «Customize installation».

Устанавливаем галочки на против «pip», «py launcher», «for all users (requires elevation)» и нажимаем «Next».
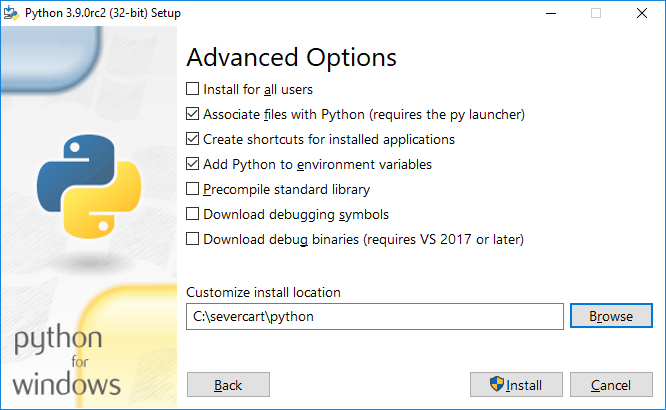
Выбираем все поля ввода как на картинке выше и нажимаем на «Install».
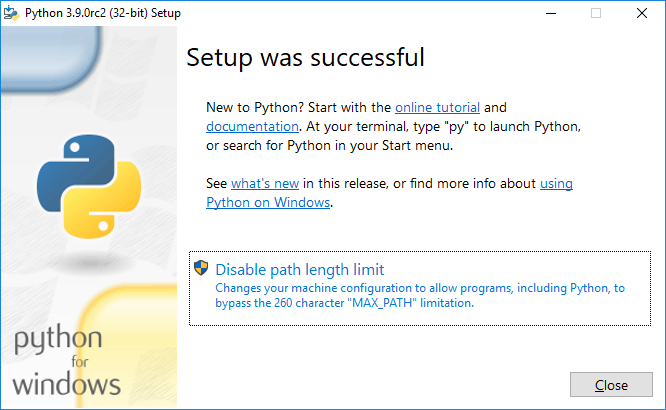
Чтобы убедиться, что установка прошла успешно, откройте cmd и введите python. Если установка прошла успешно, вы должны увидеть приглашение, подобный приведенному ниже

Устанавливаем mod_wsgi
Скачиваем скомпилированный пакет с mod_wsgi c сайта
www.lfd.uci.edu/~gohlke/pythonlibs. Модуль выполняет функции посредника межу сервером Apache и Django проектом. Самый свежий пакет будет с именем mod_wsgi-4.7.1-cp39-cp39-win32.whl. Обратите внимание, что пакет скомпилирован для 32 битной Windows CPython версии 3.9. Также стоит отметить, что очевидная установка модуля pip install mod_wsgi скорее всего завершится ошибкой, т.к. в процессе установки потребуется компилятор Visual Studio C++. Ставить компилятор целиком ради одного Python пакета в Windows считаем нецелесообразным.
Устанавливаем модуль с помощью стандартного пакетного менеджера pip в cmd или powershell:
pip install -U mod_wsgi-4.7.1-cp39-cp39-win32.whl

Apache
Скачиваем дистрибутив с сайта https://www.apachelounge.com/download/.
Самая свежая версия Web-сервера является Apache 2.4.46 win32 VS16. Также для работы программы понадобиться заранее установленный пакет «Visual C++ Redistributable for Visual Studio 2019 x86».
Распаковываем дистрибутив Apache в каталог C:\severcart\Apache24, далее меняем строку с номером 37 на свою
Define SRVROOT "C:/severcart/Apache24"
Проверяем работу Apache, выполнив в командной строке
C:/severcart/Apache24/bin> httpd.exe
В результате должны увидеть в браузере по адресу 127.0.0.1 строку «It works!».

Устанавливаем службу Apache, для этого выполним в командной строке от имени Администратора инструкцию:
C:\severcart\Apache24\bin>httpd.exe -k install -n "Apache24"
Далее подключим модуль mod_wsgi к Apache. Для этого выполним в командной строке инструкцию
C:\Windows\system32>mod_wsgi-express module-config
В результате в стандартный вывод будет распечатаны строки:
LoadFile "c:/severcart/python/python39.dll"
LoadModule wsgi_module "c:/severcart/python/lib/site-packages/mod_wsgi/server/mod_wsgi.cp39-win32.pyd"
WSGIPythonHome "c:/severcart/python"
Создаем файл C:\severcart\Apache24\conf\extra\httpd-wsgi.conf и копипастим туда распечатанные строки выше.
Подключаем новую конфигурацию к основному файлу httpd.conf
Include conf/extra/httpd-wsgi.conf
Сохраняем изменения, перезагружаем службы Apache
Net stop Apache24
Net start Apache24
PostgreSQL
Устанавливаем PostgreSQL взятый с сайта https://postgrespro.ru/windows. Текущая версия программного продукта – 12. Преимущества Российского дистрибутива от канонического представлены на том же сайте.


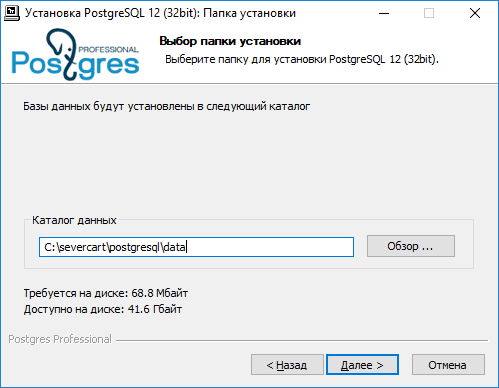

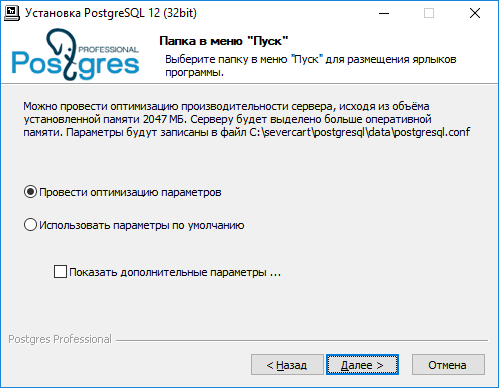
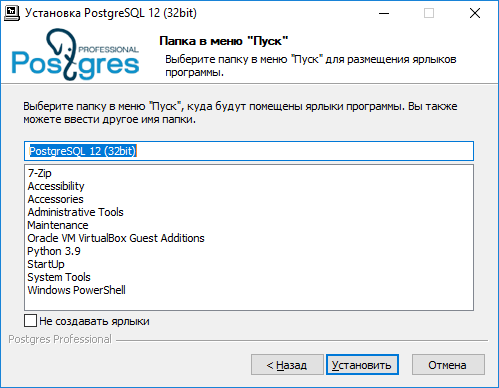
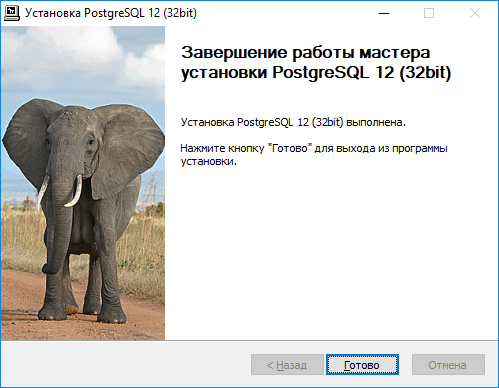
Действия по установке представлены выше и комментариях не нуждаются. Установка крайне проста.
Создаем БД в postgres, где потом будут храниться структуры данных Django проекта
C:\severcart\postgresql\bin>psql -h 127.0.0.1 -U postgres -W

CREATE DATABASE severcart WITH ENCODING='UTF8' OWNER=postgres CONNECTION LIMIT=-1 template=template0;

БД создана. Теперь разворачиваем Django проект.
Устанавливаем web приложение
Для этого скачиваем zip архив с сайта https://www.severcart.ru/downloads/ и распаковываем в каталог C:\severcart\app\

Вносим изменения в главный конфигурационный файл C:\severcart\app\conf\settings_prod.py для указания реквизитов подключения к БД
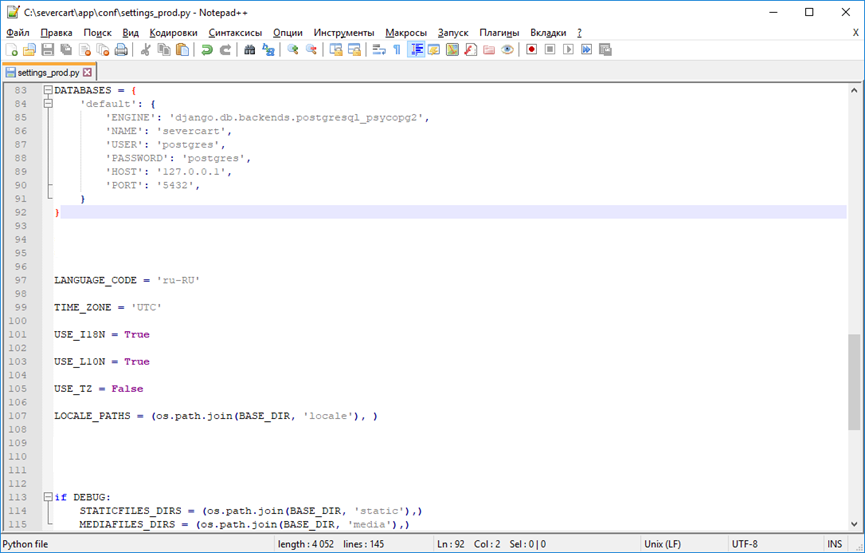
Python словарь DATABASES содержит в себе реквизиты подключения к БД. Подробности по настройке читайте здесь https://docs.djangoproject.com/en/3.1/ref/databases/#connecting-to-the-database
Устанавливаем Python пакеты значимостей для работы приложений внутри Django проекта
C:\severcart\app\tkinstaller>python install.py

В процессе работы скрипта будет произведена инициализация БД таблицами, констрейтами, индексами и прочим, а будет предложено создать пользователя, от имени которого будет производиться работа в программе.
Подключаем Django приложение к серверу Apache для этого дополняем конфигурационный файл
httpd-wsgi.conf следующим текстом
Alias /static "c:/severcart/app/static"

Alias /media "c:/severcart/app/media"

<Directory "c:/severcart/app/static">
    # for Apache 2.4
    Options Indexes FollowSymLinks
    AllowOverride None
    Require all granted
</Directory>

<Directory "c:/severcart/app/media">
    # for Apache 2.4
    Options Indexes FollowSymLinks
    AllowOverride None
    Require all granted
</Directory>


WSGIScriptAlias / "c:/severcart/app/conf/wsgi_prod.py"
WSGIPythonPath "c:/severcart/python/"

<Directory "c:/severcart/app/conf/">
<Files wsgi_prod.py>
    Require all granted
</Files>
</Directory>
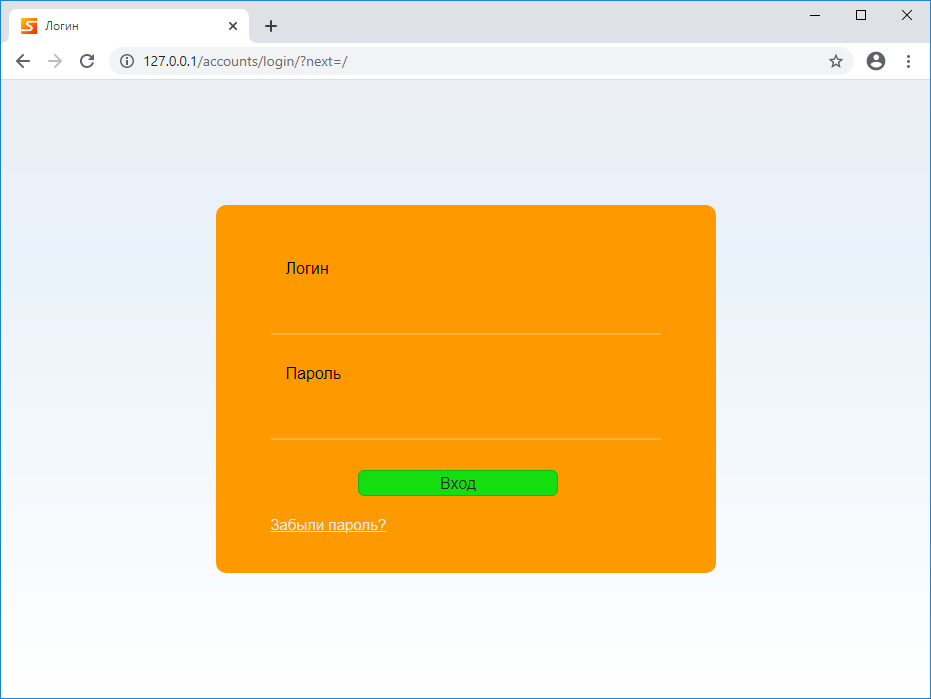
Перезагружаем службу Apache и проверяем работу приложения
На этом все. Спасибо что дочитали.
В следующей статье будем создавать установочный самораспаковывающийся архив в InnoSetup для быстрого развертывания Django проекта на компьютере заказчика. Для тех кто хочет повторить все действия на Яндекс.Диск загружены все используемые дистрибутивы.
We’ll know that SQLite is very powerful, embedded relational database management system and it offers a really amazing set of tools to manage approximately all sorts of data. But when it comes Multi-user applications (where multiple users want to use the same databases), It fails. So It is recommended to choose a fully featured relational database management system rather than SQLite.
Some examples of Fully featured RDBMS are MySQL, PostgreSQL, Oracle databases.
Django is very flexible in terms of changing databases.
So in this article, we’ll see how we can change the database from SQLite to PostgreSQL.
Prerequisites
Instead of creating everything from scratch, we’re taking the example of our previous article, in which we’re using SQLite database.
If you haven’t read our previous article yet, then here it is http://thecrazyprogrammer.com/2019/01/django-models.html
Let’s start.
Step 1: Install PostgreSQL
To Install PostgreSQL for Django in Ubuntu:
Open terminal and type these two commands.
sudo apt-get update
sudo apt-get install python-pip python-dev libpq-dev postgresql postgresql- contrib
To Install PostgreSQL for Django in Windows:
Download the installer from its official site: https://www.postgresql.org/download/windows/
And follow the instructions mentioned in the link. While installing you have to enter a password and a port number. Note it down.
To Install PostgreSQL for Django in Mac OS:
Like windows, you need to download the installer from its official site: https://www.postgresql.org/download/macosx/
While installing you have to enter a password and a port number. Note it down.
Step 2: Setup User and Database
Login using your password.
Here I am using a Ubuntu 18.04 and I am accessing the PostgreSQL from the terminal, So I have to switch to the user postgres that was created while installing PostgreSQL.
To switch the user to postgres, open terminal and type
sudo su – postgres

Now you’re ready to enter the shell session for the postgres user. Log into a Postgres session by typing:
psql

Now create a database by typing:
CREATE DATABASE myproject;
Choose the database name that is more relevant to your project. As it is just an example so I am using here myproject.
Now create a user to use the database that we’ve just created. To create a user type:
CREATE USER myuser WITH PASSWORD ‘mypassword’;

So our user and database are created.
Now, at last, give the rights to the user to access the database type:
GRANT ALL PRIVILEGES ON DATABASE myproject TO myuser;

Now just type \q to get back to the postgres user’s shell session then type exit.
That’s all about database setup.
Step 4 : Install psycopg2
psycopg2 is a most popular PostgreSQL database adapter to work with Python. To install pycopg2 type:
pip install django psycopg2

Note: I am using pip3 instead of pip because I have both the versions installed in my Ubuntu Linux.
Step 5: Edit Your Project’s Settings File
Open your project’s setting file in write mode and go to the DATABASES section.

Here you can see that sqlite3 is connected with our project. To change it to PostgreSQL just change these lines as:
DATABASES = {
‘default’: {
‘ENGINE’: ‘django.db.backends.postgresql’,
‘NAME’: ‘myproject’,
‘USER’: ‘myuser,
‘PASSWORD’ : ‘mypassword’,
‘HOST’ : ‘localhost’,
‘PORT’ : ‘5432’
}
}

In the above code, NAME, USER, PASSWORD are name of database, name of your user and password that we’ve created while creating the user.
And PORT is same number that I recommended to note down while installing the PostgreSQL.
Step 6: Migrate Your Project
So we’ve installed PostgreSQL and configured the settings.py file. Now last step is to migrate your project.
Open your project directory in terminal and type:
python manage.py runserver

All set, test and run your project.
That’s all about changing database from SQLite to PostgreSQL.
Note: While migrating, if you’re facing a warning like:
UserWarning: The psycopg2 wheel package will be renamed from release 2.8; in order to keep installing from binary please use “pip install psycopg2-binary” instead. For details see: <http://initd.org/psycopg/docs/install.html#binary-install-from-pypi>.
“””)
You can solve this issue with installing psycopg2-binary by using following command:
pip install psycopg2-binary
If you’ve any query related to Django PostgreSQL installation and setup, please let us know in the comment box.
Sooner or later in time, you will foray into the domain of web development. With the numerous frameworks out there, you might be be regarding where to begin. Our recommendation is Django for building applications flawlessly and proficiently, with a database of your decision. (Pretty much every web application needs a database.) In this tutorial, we’ll use PostgreSQL for instance of how to set up a Django application with a PostgreSQL database, all done through the Windows command prompt.
What is PostgreSQL?
PostgreSQL is an advanced, enterprise class open source relational database that supports both SQL (relational) and JSON (non-relational) querying. It is a highly stable database management system, backed by more than 20 years of community development which has contributed to its high levels of resilience, integrity, and correctness. PostgreSQL is used as the primary data store or data warehouse for many web, mobile, geospatial, and analytics applications. The latest major version is PostgreSQL 11.
PostgreSQL has a rich history for support of advanced data types, and supports a level of performance optimization that is common across its commercial database counterparts, like Oracle and SQL Server.
Installation
At first check you have Python installed or not. To check that type the following on your command prompt
python –version
If you have python installed already, you should see:
Python [the version that is installed]
If the Python you installed is version 3 or above, pip is as of now automatically installed.
Now we’ll have to set up a virtual environment. This is incredibly significant as you’re building a huge application and you don’t need various versions of various components to conflict with each other.
Install virtualenv and virtualenvwrapper by entering the following in your command prompt:
pip install virtualenvwrapper-win
Install PostgreSQL
Go to the download page for PostgreSQL installers and install the latest version of PostgreSQL that is suitable to your system.
- In the PostgreSQL Setup Wizard, in the Select Components page, uncheck the components that you would prefer not to install, or simply leave it be. If you uncheck anything, don’t stress, simply launch the installer later and select the component you need, and PostgreSQL will be updated accordingly.
- At the Password page, enter the password for the database superuser (postgres). This account will be used to access your SQL Shell (pqsl) later on.
- At the Port page, choose the port number that the server should listen on, or stick to the default 5432. Just make sure that the port is not currently used by any other applications.

- Open the command line. Accept the default for the Server, Database, Port, and Username fields by pressing Enter. However, at the Password field, you must enter the password that you chose during in the Setup Wizard.
Install Django and integrate with PostgreSQL
With pip, Django can be easily installed from the command line with a simple one-line instruction.
Once you’re in that directory, create a virtual environment by typing:
virtualenv newprojectenv
You can give the environment any name you want. Now activate the environment with:
newprojectenv\Scripts\activate
This must be done before we install any applications within the virtual environment.
If the virtual environment is activated, you would see (newprojectenv) in the command prompt as shown below. To exit the virtual environment, simply type “deactivate,” but leave the virtual environment
With the virtual environment active, install Django.
pip install Django
We will also need to install psycopg2. psycopg2 is a package that will allow Django to use the PostgreSQL database that we just configured. Similarly, to install, write:
pip install psycopg2
Now, it’s time to start a Django project! This is done within our newproject directory. Start the project by typing: (Make sure to add the dot at the end of the command so that this is set up correctly.)
Django-admin startproject newproject .
We now need to make changes in settings.py of our app. We need to make changes in the “DATABASES” of settings.py, since the connectivity present by default is of SQLite
DATABASES = {
‘default’: {
‘ENGINE’: ‘django.db.backends.sqlite3’,
‘NAME’: os.path.join(BASE_DIR, ‘db.sqlite3’),
}
}
We’ll need to change this section to tell Django to use PostgreSQL instead. The change is simple.
DATABASES = {
‘default’: {
‘ENGINE’: ‘django.db.backends.postgresql_psycopg2’,
‘NAME’: ‘yourproject’,
‘USER’: ‘yourprojectuser’,
‘PASSWORD’: ‘password’,
‘HOST’: ‘localhost’,
‘PORT’: ‘’,
}
}
The username and password you set there will be used later when we create a superuser for the database. Create the administrative account by typing:
python manage.py createsuperuser
You will be prompted to provide login credentials.
Now that everything is set up, test whether your database is performing by running the Django development server.
python manage.py runserver
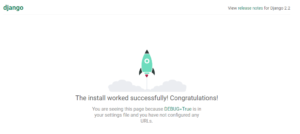
On running the server, if you get the following, you have successfully deployed your app.
Django is a high level full-stack open-source web framework written in Python, that encourages rapid development and clean, pragmatic design.
Django, in its ‘out-of-the-box’ state, is set up to communicate with SQLite — a lightweight relational database included with the Python distribution. So by default, Django automatically creates an SQLite database for your project.
In addition to SQLite, Django also has support for other popular databases that include PostgreSQL, MySQL, and Oracle.
However, PostgreSQL has a number of features that are not shared by the other databases Django supports, which makes it an idle choice for a Django app in production.
In this article, we will go through the integration of PostgreSQL with a Django Application.
Pre-Requirements
We are assuming you already have Django installed on your machine and one Django project up and running, if not then read the following article — Starting A Django Project
Installing PostgreSQL
Windows and macOS X users can download PostgreSQL from the official site https://www.postgresql.org/download/ and simply install it.
Note that tutorial is strictly based on Python 3
Linux User
sudo apt-get install postgresql postgresql-contribAlso, Linux users need to install some dependencies for PostgreSQL to work with Python.
sudo apt-get install libpq-dev python3-devInstall psycopg2
Next, we need to install the PostgreSQL database adapter to communicate to the database with Python to install it run the following command in the shell.
pip install psycopg2Create A PostgreSQL User and Database
As the default configuration of Postgres is, a user called Postgres is made on, and the user Postgres has full super admin access to entire PostgreSQL instance running on your OS.
sudo -u postgres psqlNow the terminal should be prefixed with postgres=# , The above command gets you the psql command-line interface in full admin mode.
Now let’s create a user and database.
Creating Database
CREATE DATABASE mydb;This will create a database named mydb, note that every SQL statement must end with a semicolon.
Creating User
CREATE USER myuser WITH ENCRYPTED PASSWORD 'mypass';Here we are creating a user named myuser with password mypass. You can use any username and password you wish.
Modifying Connection Parameters
 ALTER ROLE myuser SET client_encoding TO 'utf8';
 ALTER ROLE myuser SET default_transaction_isolation TO 'read committed';
 ALTER ROLE myuser SET timezone TO 'UTC';
We are setting the default encoding to UTF-8, which Django expects.
We are also setting the default transaction isolation scheme to “read committed”, which blocks reads from uncommitted transactions.
Lastly, we are setting the timezone by default, our Django projects will be set to use UTC.These are essential parameters recommended by the official Django team.
Granting Permission To The User
GRANT ALL PRIVILEGES ON DATABASE mydb TO myuser;Now our user has administrative access to the database.
Now exit the SQL prompt.
\qIntegrating PostgreSQL With Django
Open the settings.py file of your project and scroll straight to the database section, which should look like this.
DATABASES = {
   'default': {
        'ENGINE': 'django.db.backends.sqlite3',
        'NAME': os.path.join(BASE_DIR, 'db.sqlite3'),
    }}
We need to update these settings to integrate our PostgreSQL with the project.
DATABASES = {
    'default': {
        'ENGINE': 'django.db.backends.postgresql_psycopg2',
        'NAME': 'mydb',
        'USER': 'myuser',
        'PASSWORD': 'mypass',
        'HOST': 'localhost',
        'PORT': '',
    }}
Let’s quickly go over the settings,
DATABASES — This constant is a dictionary of database connection information and is required by Django. You can have multiple connections to different databases, but most of the time, you will just need an entry called default.
default — This is the default database connection configuration. You should always have a default set of connections settings.
'ENGINE': 'django.db.backends.postgresql_psycopg2' — This tells Django to use the Postgres backend. This, in turn uses psycopg2, Python’s Postgres library which we installed earlier.
'NAME': 'mydb' — The name of the database you want to connect to.
'USER': 'myuser' — The User with access to the database.
'PASSWORD': 'mypass' — The password for your database user.
'HOST': 'localhost' — The address of the database server you want to connect to.
'PORT': '' — The port you want to connect to, which by default is ‘5432’
Test The Database Connection
After updating the database configurations, it’s time to test the connection. The Django database migration process ensures all Django project logic associated with a database is reflected in the database itself.
During the first migration against the database, there are a series of migrations Django requires that create tables to keep track of administrators and sessions.
In the directory where manage.py script exists, run the following command.
python manage.py migrateIf everything went right you should see an output like this.
Operations to perform:
  Apply all migrations: admin, auth, contenttypes, sessions
Running migrations:  Applying contenttypes.0001_initial... OK
  Applying auth.0001_initial... OK
  Applying admin.0001_initial... OK
  Applying admin.0002_logentry_remove_auto_add... OK
  Applying admin.0003_logentry_add_action_flag_choices... OK
  Applying contenttypes.0002_remove_content_type_name... OK
  Applying auth.0002_alter_permission_name_max_length... OK
  Applying auth.0003_alter_user_email_max_length... OK
  Applying auth.0004_alter_user_username_opts... OK
  Applying auth.0005_alter_user_last_login_null... OK
  Applying auth.0006_require_contenttypes_0002... OK
  Applying auth.0007_alter_validators_add_error_messages... OK
  Applying auth.0008_alter_user_username_max_length... OK
  Applying auth.0009_alter_user_last_name_max_length... OK
  Applying auth.0010_alter_group_name_max_length... OK
  Applying auth.0011_update_proxy_permissions... OK
  Applying sessions.0001_initial... OK
Furthermore, you can now create a superuser and login to the admin dashboard.