
Внедрение надёжной и эффективной системы управления базами данных (СУБД) – ключевой аспект в современном мире информационных технологий. PostgreSQL, одна из наиболее мощных и масштабируемых открытых СУБД, пользуется заслуженным признанием среди специалистов по базам данных. В данной статье вы найдёте основные шаги по установке PostgreSQL на виртуальный выделенный сервер, работающий на Windows Server 2016.
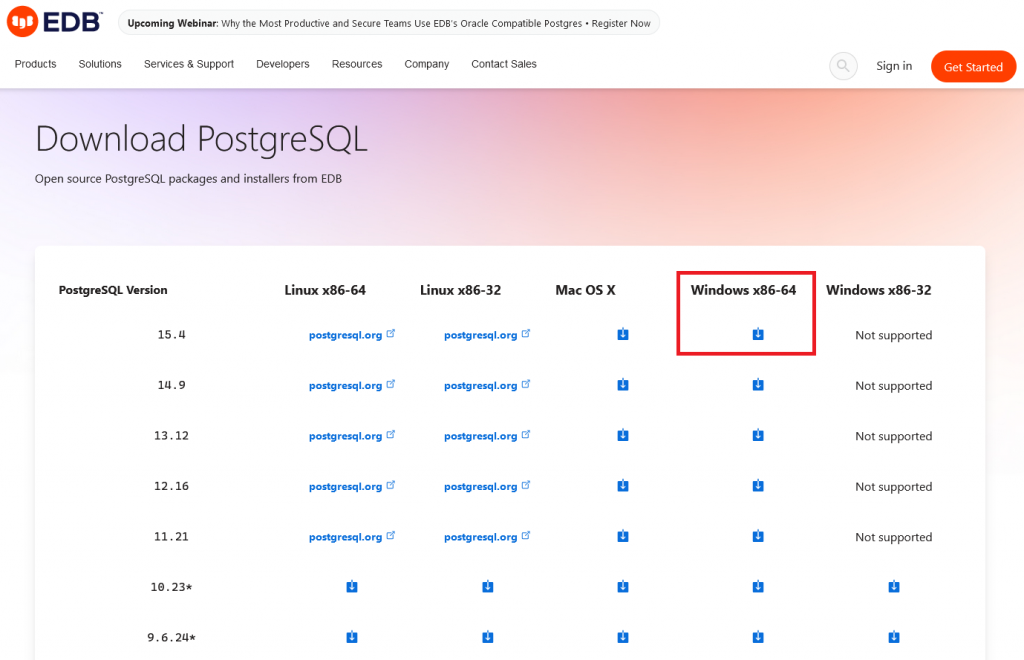
Дистрибутив PostgreSQL под Windows доступен для загрузки на своей официальной странице.
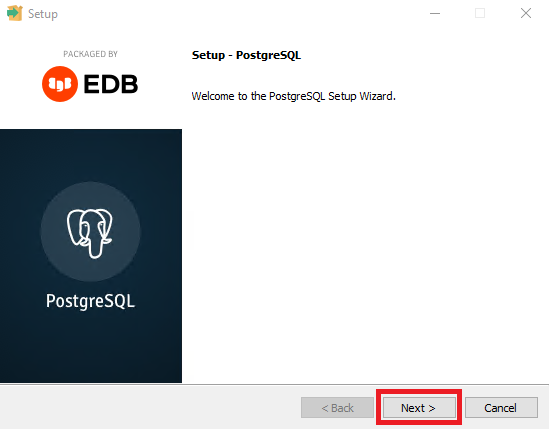
После завершения загрузки дистрибутива на ваш сервер запустите скачанный установщик. В его стартовом окне нажмите Next.
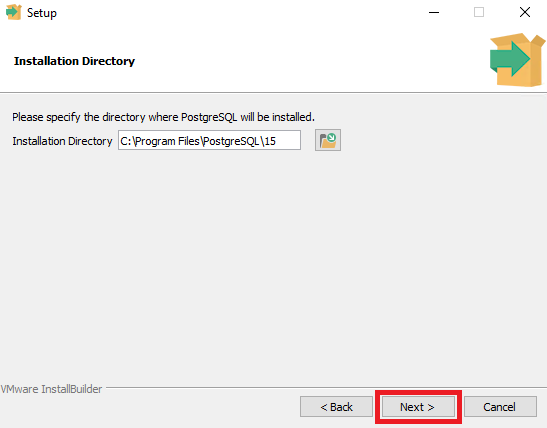
На следующем шаге укажите каталог, в который будет произведена установка. Либо оставьте каталог, предложенный по умолчанию.
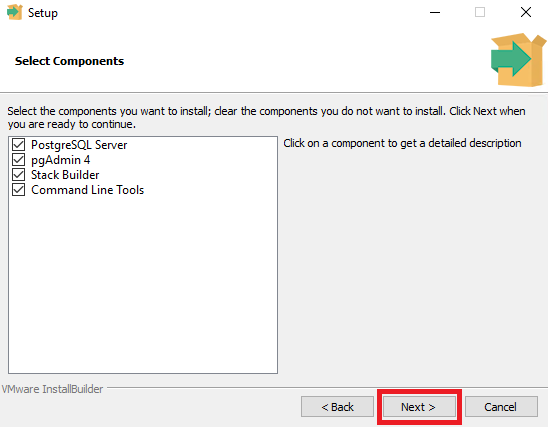
Далее выберите компоненты, предназначенные для установки. По умолчанию выбор активирован для всех компонентов.
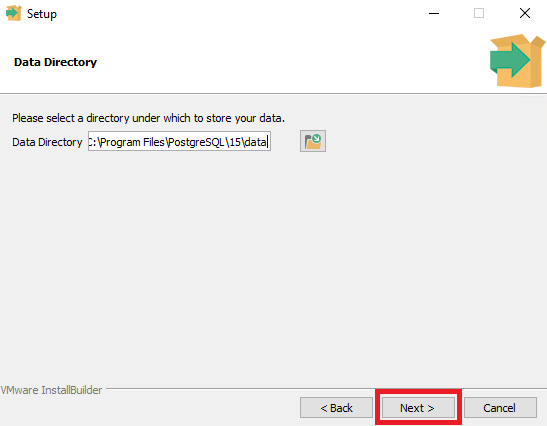
На следующем шаге укажите каталог, в котором будут храниться данные PostgreSQL. Так же, как и ранее, вы можете оставить директорию, предложенную по умолчанию, и нажать Next.
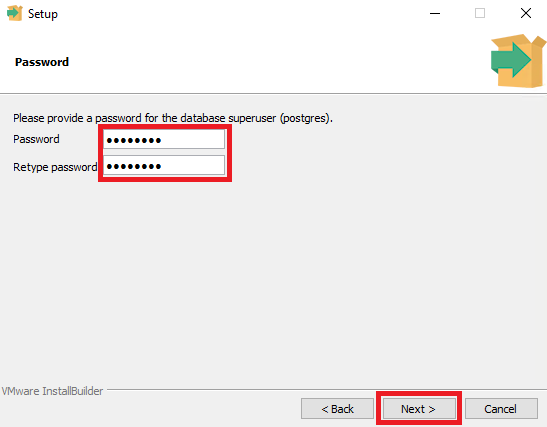
После чего система попросит вас ввести пароль администратора, который впоследствии понадобится вам для подключения к СУБД.
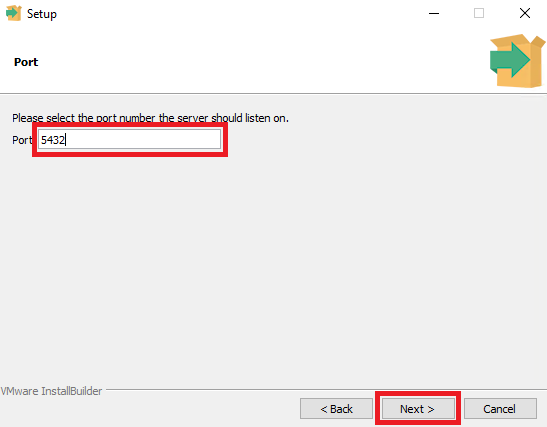
Далее укажите порт, по которому в дальнейшем вы сможете подключаться к СУБД. По умолчанию система предлагает к использованию порт под номером 5432.
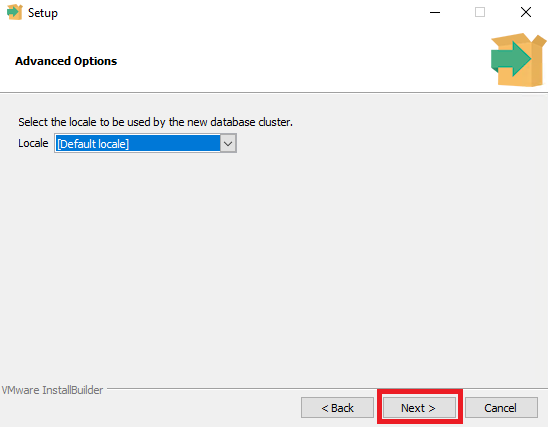
На следующем шаге выберите язык, который будет использоваться в интерфейсе PostgreSQL. Вы так же можете оставить значение по умолчанию и нажать Next.
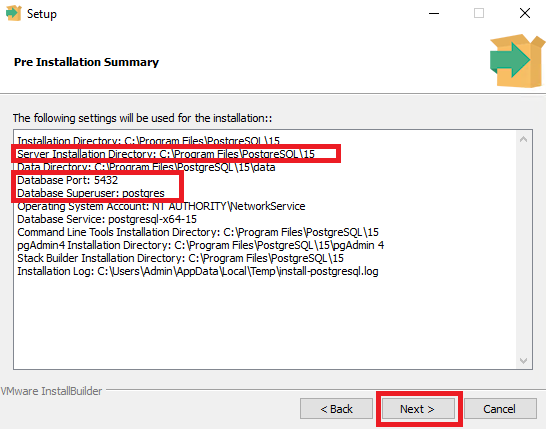
В итоговом окне установщик покажет настройки, выбранные вами для инсталляции. В том числе здесь указан путь к директории, в которую установлена СУБД, номер порта, имя суперпользователя СУБД.
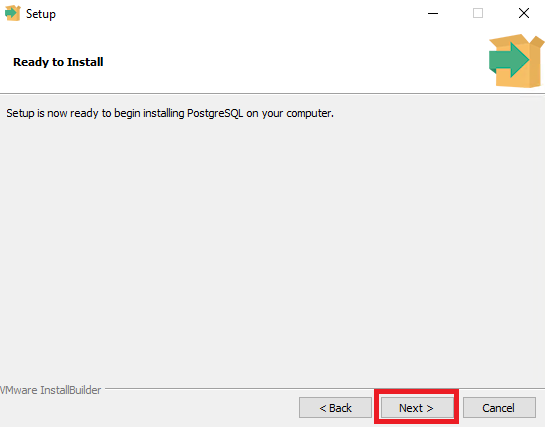
Наконец, для запуска непосредственно процесса установки PostgreSQL нажмите Next.
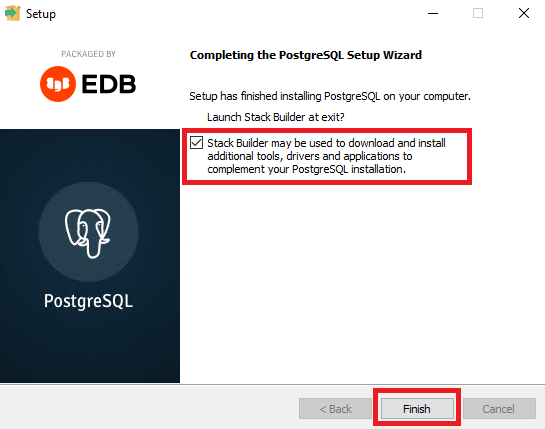
После завершения инсталляции нажмите Finish. При этом если вы оставите активной галочку в заключительном окне установщика, то запустится инсталляция Stack Builder. Данная утилита используется для загрузки и установки дополнительных инструментов, драйверов и приложений, и нужна для завершении инсталляции PostgreSQL.
Установка Stack Builder
Сначала необходимо будет выбрать установленную версию PostgreSQL.

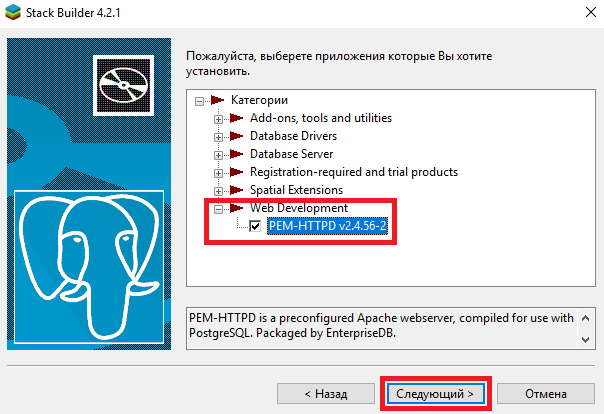
Далее выберите приложение, предназначенное для установки. В нашем примере мы проинсталлируем пакет PEM-HTTPD – предварительно сконфигурированный веб-сервер Apache, скомпилированный для использования с PostgreSQL.
Затем выберите или оставьте предложенный по умолчанию каталог для загрузки пакета PEM-HTTPD.
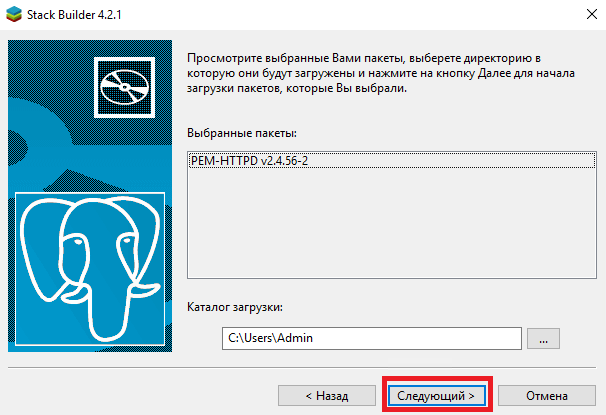
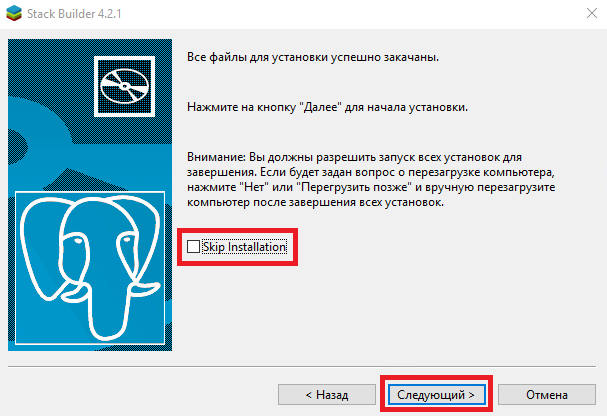
Для завершения установки Stack Builder нажмите кнопку Следующий. Если вы не будете активировать опцию Skip Installation, то визард запустит инсталляцию пакета PEM-HTTPD.
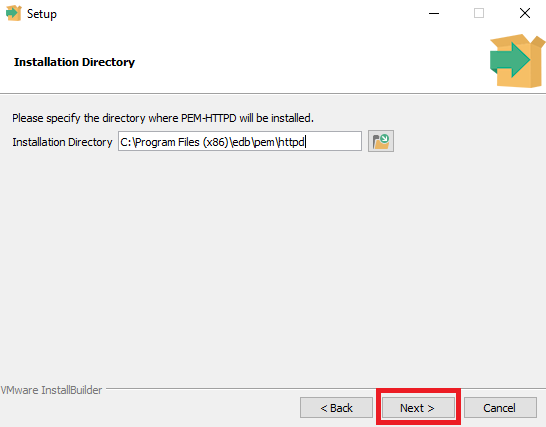
Установка PEM-HTTPD
В стартовом окне мастера установки PEM-HTTPD нажмите Next.

Далее – Next, если вы не изменяете каталог установки пакета.
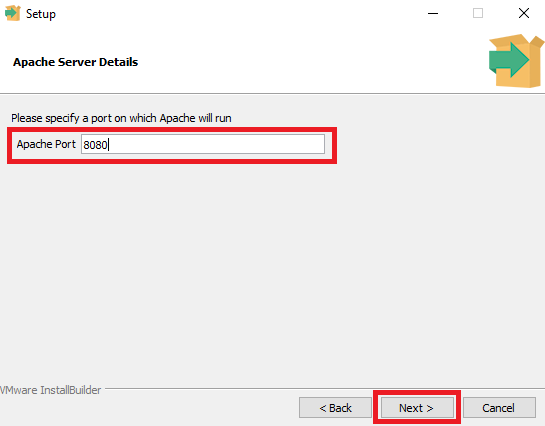
В следующем окне визард попросит вас указать номер порта, по которому будет доступен веб-сервер. Если вы согласны со значением, предложенным по умолчанию, то также нажмите Next.
Следующее окно сообщает, что всё готово к установке. Нажмите Next.

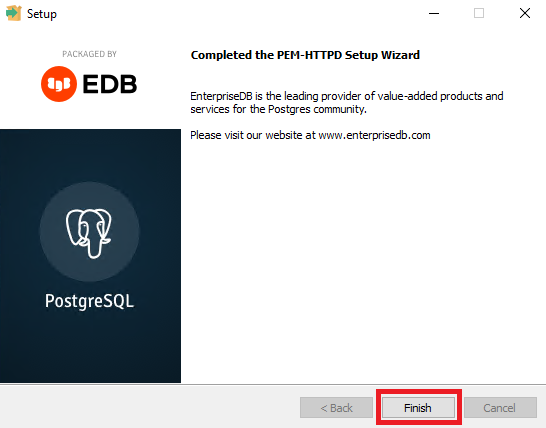
По окончании установки нажмите Finish.
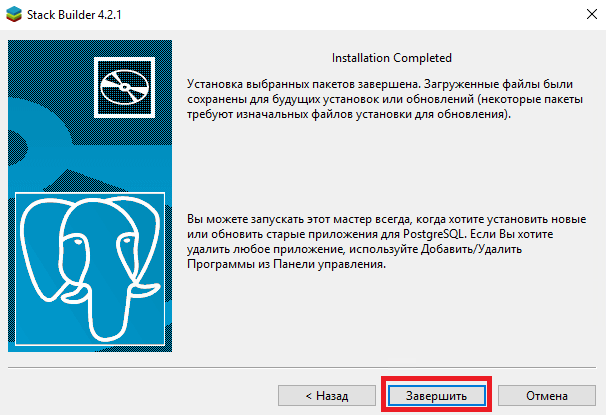
После чего также завершите установку Stack Builder, нажав Завершить.
Запуск PostgreSQL
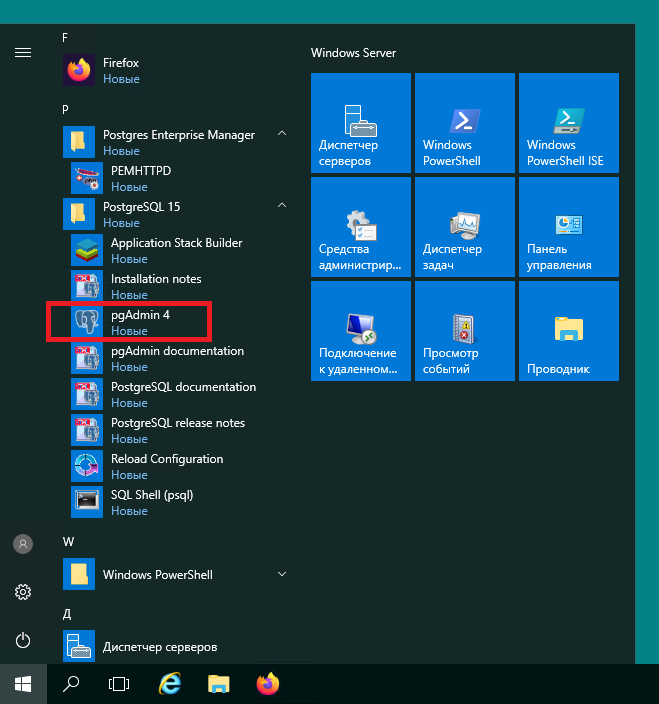
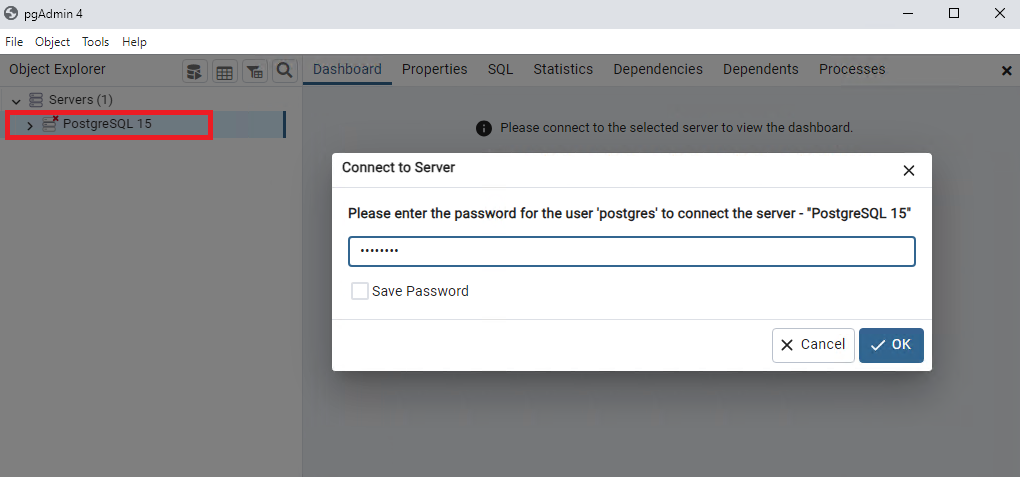
Для запуска интерфейса PostgreSQL нажмите кнопку Пуск, после чего перейдите PostgreSQL 15 → pgAdmin 4.
При подключении СУБД попросит вас набрать пароль, который вы вводили на одном из шагов при установке PostgreSQL.
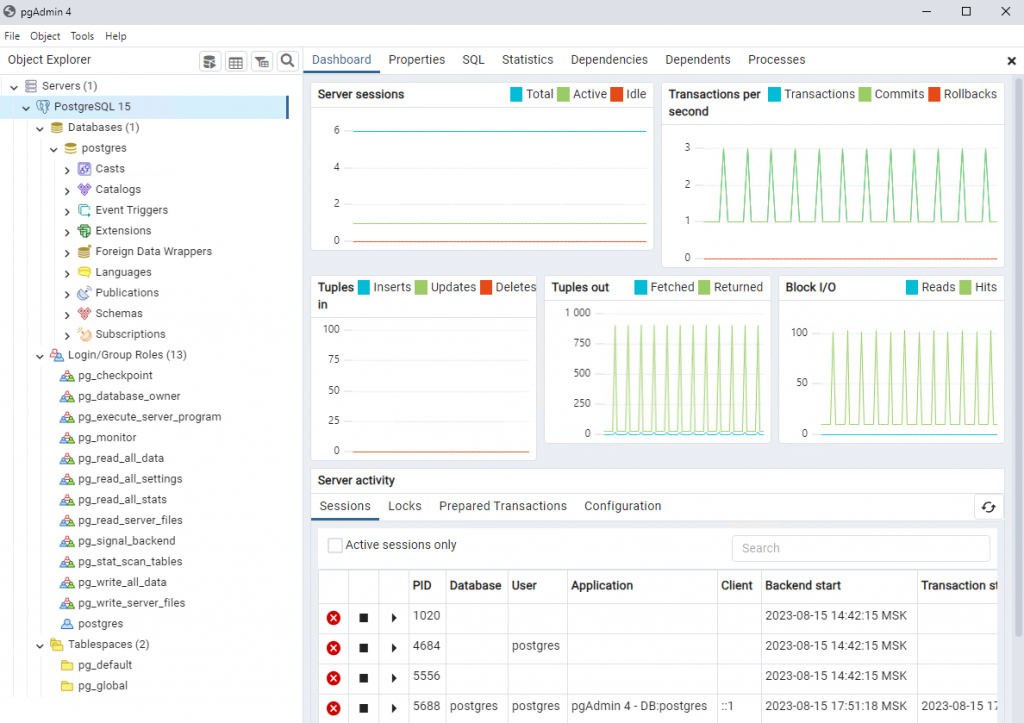
В итоге откроется интерфейс pgAdmin – популярный графический инструмент для работы с СУБД PostgreSQL. Он предоставляет собой удобный и интуитивно понятный интерфейс для выполнения различных задач, связанных с управлением и администрированием баз данных PostgreSQL. PgAdmin может значительно облегчить работу с PostgreSQL, особенно для тех, кто предпочитает графический интерфейс или не любит вводить SQL-команды напрямую.
PostgreSQL is an open source object-relational database system with over 15 years of active development and a reputation for reliability. This database management system supports the SQL92 and SQL99 standards and provides a number of own extensions. PostgreSQL is fully ACID-compliant and it includes most SQL:2008 data types, including INTEGER, NUMERIC, BOOLEAN, CHAR, VARCHAR, DATE, INTERVAL, and TIMESTAMP.
Furthermore, this database management system provides interfaces to ODBC and JDBC as well as programming interfaces to a variety of development languages.
PostgreSQL runs stored procedures in more than a dozen programming languages, including Java, Perl, Python, Ruby, Tcl, C/C++, and its own PL/pgSQL, which is similar to Oracle’s PL/SQL. Included with its standard function library are hundreds of built-in functions that range from basic math and string operations to cryptography and Oracle compatibility.
Learn how to install PostgreSQL on Windows Server 2016.
Confirm the settings you want to use. If you wish to change any of the settings, click Back until you reach the relevant step. After you have verified that the settings are correct, click Next to continue.
PostgreSQL installation tutorial on Windows Server 2016. In this article, we want to be with you on how to install PostgreSQL on Windows Server 2016.
What is PostgreSQL?
PostgreSQL is a standard, flexible database that uses SQL language to distribute and describe data. This database, sometimes called Postgres, is controlled and developed by a team of the same name. Currently, this database is also used in small and large projects, and because of its flexibility and freeness, it has attracted many enthusiasts.
PostgreSQL has various versions that can be installed on Windows, Linux and even MacOS.
Join us in this article with how to install PostgreSQL on Windows Server 2016 with PGadmin.
PostgreSQL installation tutorial on Windows Server 2016
1- First, enter your Windows Server 2016 environment.
2- Then download the PostgreSQL package for Windows via the following link.
Download PostgreSQL for Windows
Note that after clicking on the download link on the PostgreSQL site, you will be asked for the Windows version, which you must specify exactly the 32-bit or 64-bit operating system and architecture.
3- After downloading, double-click on the downloaded file to start the installation process.
After starting the installation process, click Next.
4- In this section, you must select the address of the PostgreSQL storage and installation path and click Next.
5- In the next step, you have to select the desired components and click Next.
Note that if you need pgadmin for web access to PostgreSQL, you must select it at this stage.
6- After selecting the components in this step, specify the path for storing data or databases and click Next.
7- In the seventh step, you must enter a password for Superuser and click Next.
8- In this section, enter the PostgreSQL communication port and click Next.
9- In the last section, select the desired TimeZone of the system and click Next.
Note: Note that the port, for example in this tutorial 5445, must be open in the Windows Firewall.
If you need information to work with Windows Firewall, learn how to open the port in Windows Firewall.
Note: It is recommended that you set this option to Default Locale to set the date and time for your Windows.
10- Finally, a summary of the settings you want to display is displayed. If confirmed, click Next to start the installation process.
11- After copying the files and its settings, the installation of PostgreSQL is finished and you can use it.
Access PostgreSQL
To access Pgadmin via the Start menu, search for pgAdmin and then click on it.
To access the Shell environment, search for SQL Shell in the Start menu and open it.
PostgreSQL installation tutorial on Windows Server 2016
Goodluck.
-
Скачайте и установите соответствующую вашей операционной системе версию, используя инструкцию .
-
Зайдите в PostgreSQL через pgAdmin (пользователь postgres/postgres). pgAdmin установится вместе с PostgreSQL и доступен через меню ПУСК.
Требуется для определения параметров оборудования. Если для этого используется сервис MachineInfo, то не нужен. -
Создайте пользователя, под которым будут работать компоненты Оркестратора, и необходимые БД:
CREATE ROLE orch_user WITH
  LOGIN
  NOSUPERUSER
  INHERIT
  NOCREATEDB
  NOCREATEROLE
  NOREPLICATION
  PASSWORD 'postgres';
GRANT pg_execute_server_program TO orch_user;

CREATE DATABASE ltools WITH OWNER orch_user;
CREATE DATABASE ltoolslogs WITH OWNER orch_user;
CREATE DATABASE ltoolsidentity WITH OWNER orch_user;
CREATE DATABASE ltoolslicense WITH OWNER orch_user;-
Настройте доступ к БД по сети (по умолчанию она доступна только локально по localhost):
- Откройте папку
C:\Primo\PostgreSQL\Data - Внесите изменения в файл postgresql.conf:
- Внесите изменения в файл pg_hba.conf:
local all all trust host all all 0.0.0.0/0 trust - Откройте папку
-
Перезапустите службу PostgreSQL.
Установка NotificationsУстановка RabbitMQ
This article describes How To Install PostgreSql 12.2 1 on Microsoft Windows Server 2016
PostgreSQL is a powerful, open source object-relational database system that uses and extends the SQL language combined with many features that safely store and scale the most complicated data workloads. The origins of PostgreSQL date back to 1986 as part of the POSTGRES project at the University of California at Berkeley and has more than 30 years of active development on the core platform.
PostgreSQL has earned a strong reputation for its proven architecture, reliability, data integrity, robust feature set, extensibility, and the dedication of the open source community behind the software to consistently deliver performant and innovative solutions. PostgreSQL runs on all major operating systems, has been ACID-compliant since 2001, and has powerful add-ons such as the popular PostGIS geospatial database extender. It is no surprise that PostgreSQL has become the open source relational database of choice for many people and organisations.
PostgreSQL comes with many features aimed to help developers build applications, administrators to protect data integrity and build fault-tolerant environments, and help you manage your data no matter how big or small the dataset. In addition to being free and open source, PostgreSQL is highly extensible. For example, you can define your own data types, build out custom functions, even write code from different programming languages without recompiling your database!
PostgreSQL tries to conform with the SQL standard where such conformance does not contradict traditional features or could lead to poor architectural decisions. Many of the features required by the SQL standard are supported, though sometimes with slightly differing syntax or function. Further moves towards conformance can be expected over time. As of the version 12 release in October 2019, PostgreSQL conforms to at least 160 of the 179 mandatory features for SQL:2016 Core conformance. As of this writing, no relational database meets full conformance with this standard.
PostgreSQL is the first database management system that implements multi-version concurrency control (MVCC) feature, even before Oracle. The MVCC feature is known as snapshot isolation in Oracle.
PostgreSQL is a general-purpose object-relational database management system. It allows you to add custom functions developed using different programming languages such as C/C++, Java, etc.
PostgreSQL is designed to be extensible. In PostgreSQL, you can define your own data types, index types, functional languages, etc. If you don’t like any part of the system, you can always develop a custom plugin to enhance it to meet your requirements e.g., adding a new optimizer.
If you need any support, an active community is available to help. You can always find the answers from the PostgreSQL’s community for the issues that you may have when working with PostgreSQL. Many companies offer commercial support services in case you need one.
Many companies have built products and solutions using PostgreSQL. Some featured companies are Apple, Fujitsu, Red Hat, Cisco, Juniper Network, etc.
Now you can find some examples in this video.
Please subscribe to support our channel.
To be aware of our new videos please subscribe our channel.
Visit our website https://sdk-it.com
Visit our youtube channel
Watch IT & Learn IT & Apply IT.
Enjoy!