Oracle Database 11g is an enterprise database by Oracle. It delivers industry-leading performance, scalability, security, and reliability on a choice of clustered or single servers running Windows, Linux, and UNIX along with comprehensive features to easily manage the most demanding transaction processing, business intelligence, and content management applications.
Below are the new features introduced,
- Database Replay
- Flashback Data Archive
- Edition-based Redefinition
Let’s see how to install Oracle 11G Database on Windows 10.
1. Download 11G Database
Click to Download Oracle 11G database. You need an Oracle account to download any software. Click on Accept License Agreement. Enter the username and password.
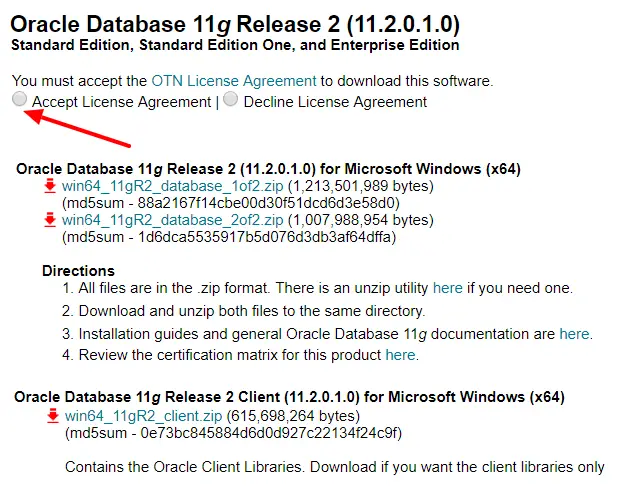
Download both win64_11gR2_database_1of2.zip, win64_11gR2_database_2of2.zip.Below is the step-by-step installation steps.
2. Unzip installer files
Next, unzip both zip files in the same folders. If you unzip in a different folder then copy the stage folder from win64_11gR2_database_2of2\database\ to \win64_11gR2_database_1of2\database\ folder.
Now click on the setup.exe file to start the installation. Oracle quickly does the pre-requisite check and launches the Universal Installer.
3. Configure Security Updates
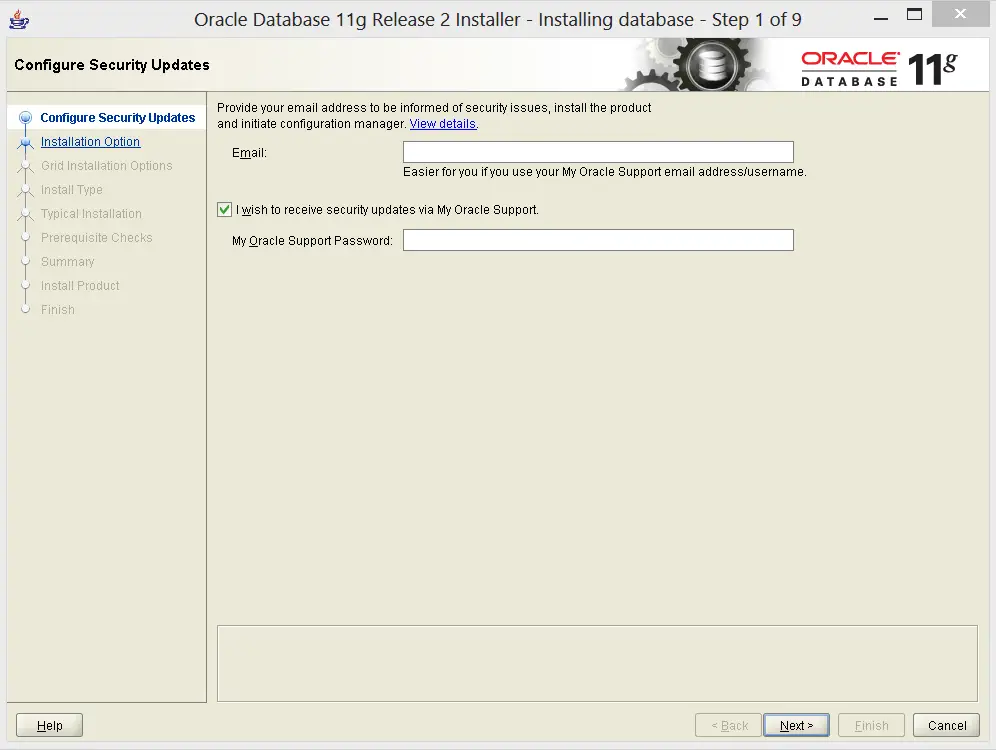
Provide your email address to receive security issue information. It is optional. Unselect I wish to receive security updates via My Oracle Support.
If you have this information you can enter it.
4. Installation option
Now select the database installation option.
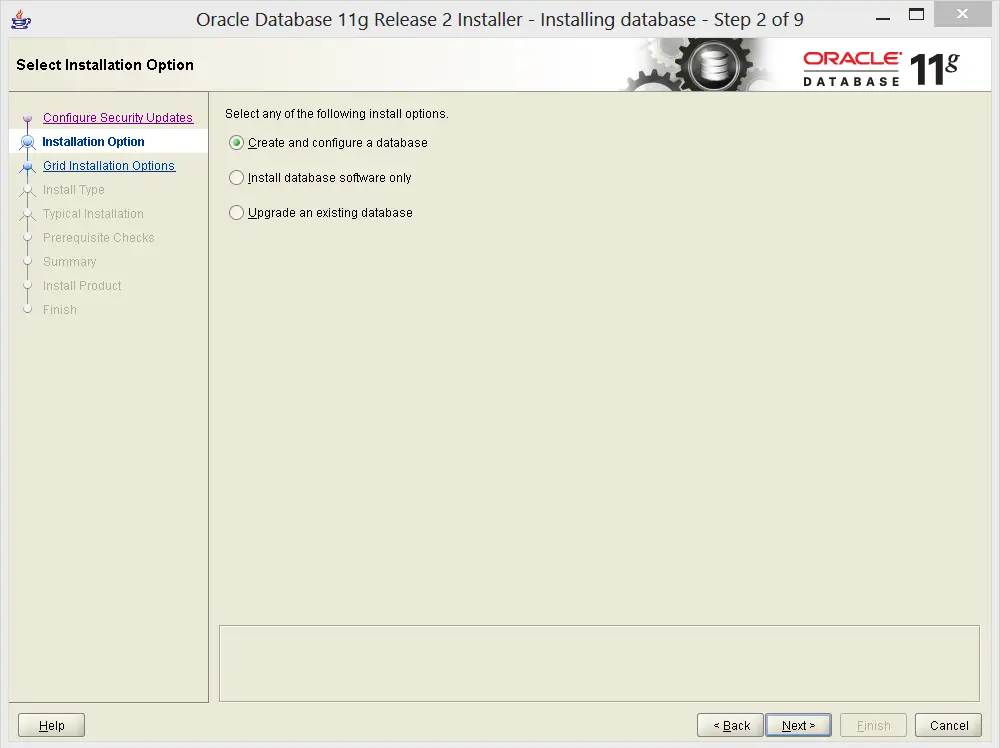
- Create and configure database – This option creates and configures a database.
- Install database software only – This installs only database software. Post-installation you need to manually create and configure the database.
- Upgrade existing database – This upgrades the existing database.
Select the default and click the Next button.
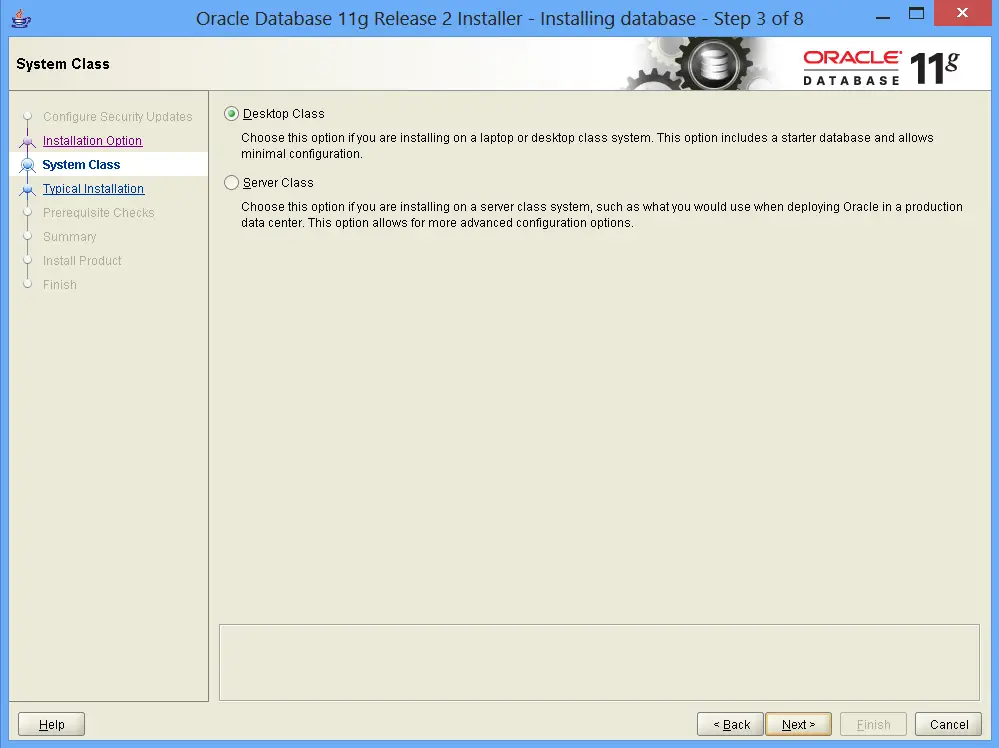
5. System Class
Select either Desktop Class or Server Class and click the Next button.
6. Database configuration
Installed defaults on all basis configurations like Oracle base, Software location, and Database file location. Click browse and select a different location to change it.
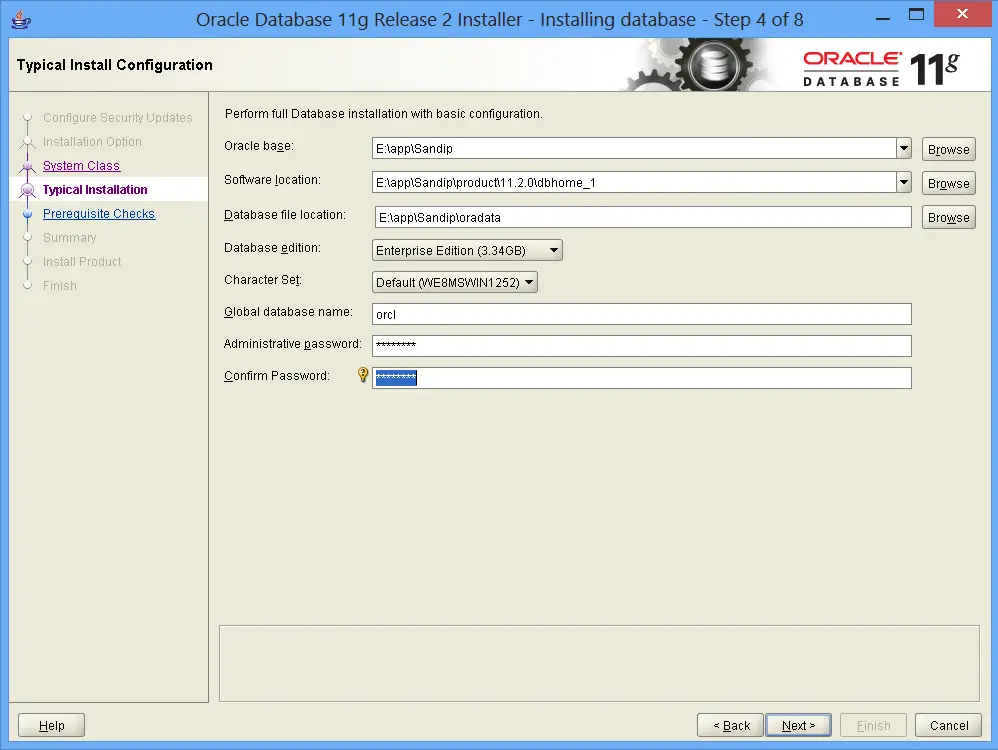
The installer creates a global database with the name orcl. Enter the Administrative password and enter the same password in Confirm Password field and click Next
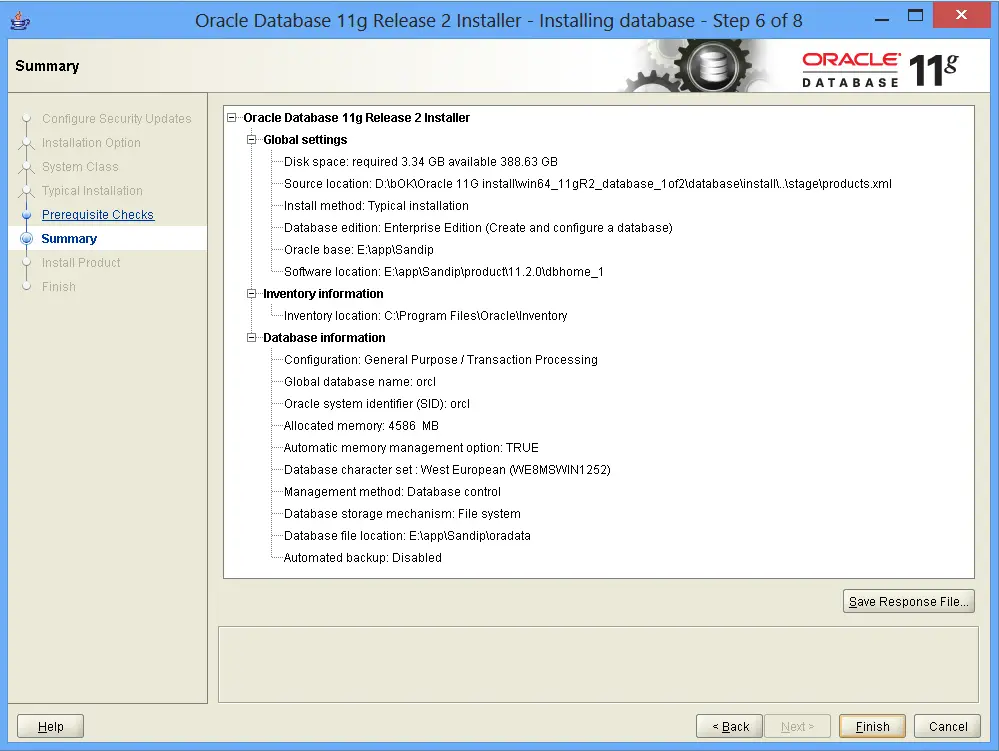
7. Summary
This screen shows a summary of the installation. Review it. If it is fine click on the Finish button or click on the Back button to change.
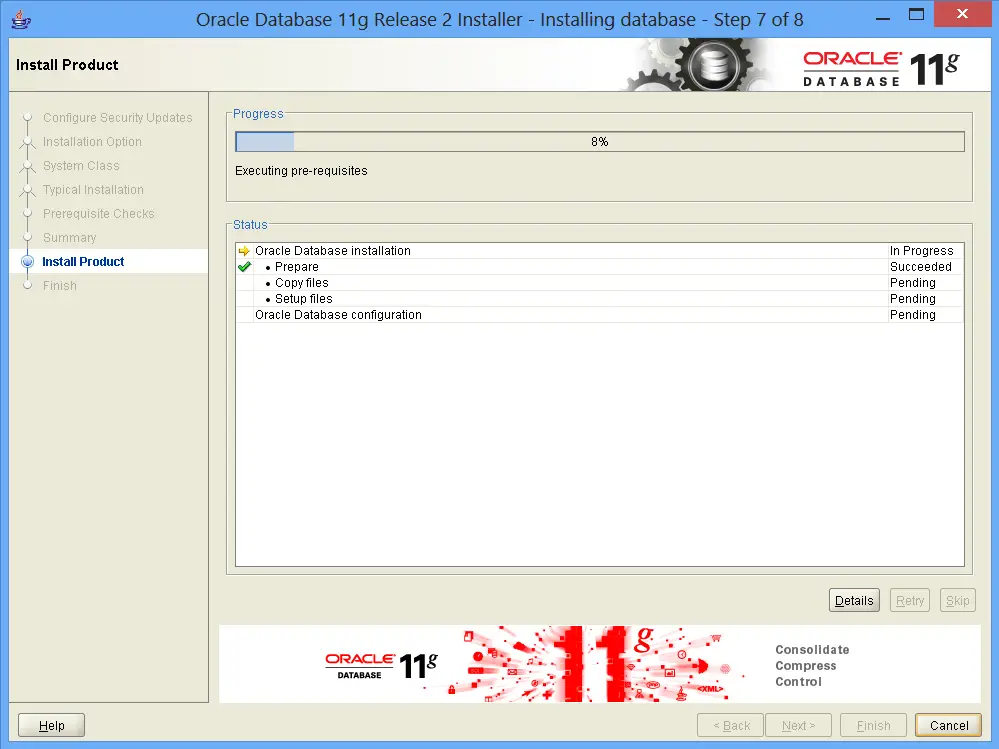
8. Install Product
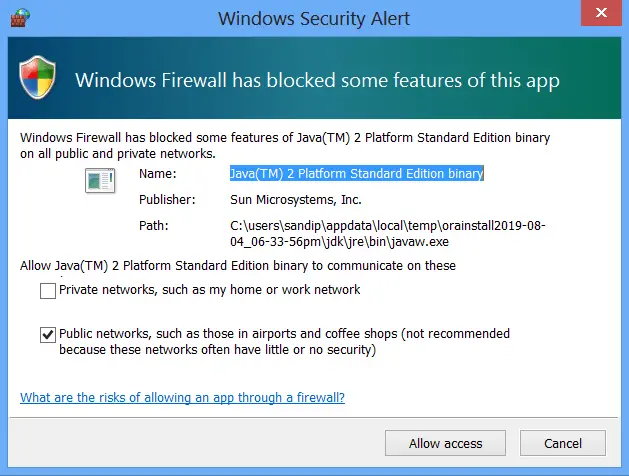
The installer starts and copies all necessary files.
Click Allow Access.
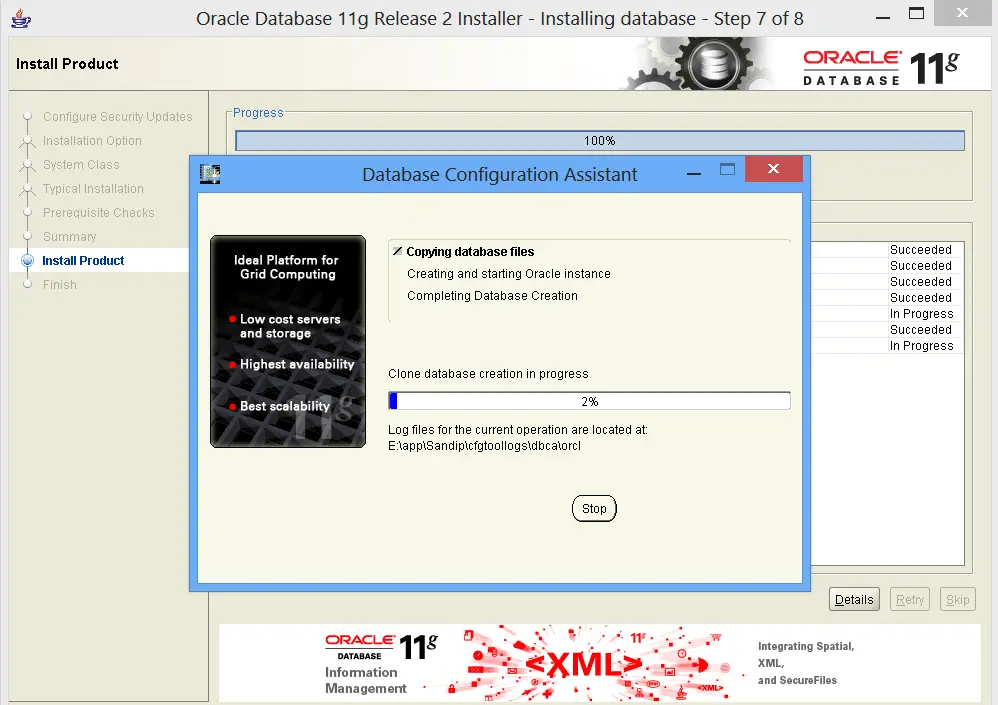
9. Database Configuration Assistant
The installer creates and configures the database.
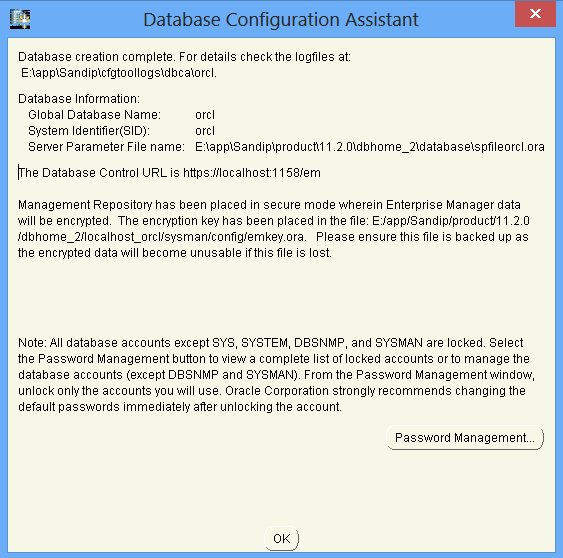
The below popups shows database information. Click Ok to finish the installation.
Summary
In this guide, we explained how to install Oracle Database 11G Release 2 on Windows.
Update: 9th October 2015
The installation procedure mentioned below are applicable for Windows 10 also. So enjoy! I just finished installing the 11G R2 64Bit database in my computer running Windows 10 64Bit professional.
I believe if someone is attempting to install Oracle database in a laptop or desktop machine, it is purely for limited development requirements or learning.
A many who are new to Oracle database may not able to install the software on many versions of Microsoft client OS like Windows 7 or 8 until certain levels of hacks are made.
Ignore what “I know everything” geeks screaming across tech forums, asking you questions like “DID YOU READ THE CERTIFICATION MATRIX”
You don’t have the time, neither do I.
Let us install the Oracle database 11g R2 this time on a Windows 8.1 (Update 1) dell laptop with following configuration 8GB memory, 1TB Hdd, Windows 8.1 update 1 64Bit Other oracle software installed
- Developer Suite 6i
- Developer Suite 10g
Download the installation files from Oracle repositories
- There are two files to download, a total of 2GB
- Extract the zip files and move the files inside a single folder
Once extracted, you have something like below
-
Now Switch to the second folder, which reads as “win64_11gR2_database_2of2”
- Open up the “components” folder (D:\Oracle11gR2_64Bit\win64_11gR2_database_2of2\database\stage\Components)
- There will be four sub-folders within “Components” folder, copy them to D:\Oracle11gR2_64Bit\win64_11gR2_database_1of2\database\stage\Components folder
That’s all. Just start the installation process. Make sure you have changed the virtual memory settings of your box prior the installation (If you already have developer suite 10g, you already changed it) Start the installation by executing “setup.exe”

You will get one warning, about not meeting the recommended environment requirements (/me chuckles). We didn’t check the 32Bit version of Oracle Database 11g R2, however the method should be same. Hope you enjoyed another post from us
for Windows7bugs
rajesh
In this article, we will look at how to download & install Oracle 11g database on Windows 10. You can follow same process for any version of windows like Windows 11, Windows 10 (62 bit/32 bit), Windows 7 and Windows 8.
Oracle database is a widely used Relational Database Management System (RDBMS). Oracle 11g is one of the most popular versions of oracle database. The “g” stood for “grid computing” which supports clusters of servers that are treated as a single unit.
First, let’s look at system requirements for Oracle 11g database.
Operating System Requirements (Any of it):-
- Windows 11
- Windows 10
- Windows 8
- Windows 7
- Windows XP SP2+
- Windows Server
Hardware Prerequisites:-
- AMD Opteron, Intel Pentium® at 500 MHz or faster or Intel EM64T (Intel processer i3, i5, i7)
- Minimum 500 MB free disk space for installation, 10 GB recommended
- Minimum 1 GB physical memory, 4 GB recommended
Oracle 11g version is now not available under Download tab on official website of oracle, please use following direct link to download it from Oracle corporation website.
Direct Download Link for Oracle 11g
You can also search for “oracle database xe prior release archive” in Google Search to go to above download link.
On download page, you will see 3 options for different operating systems. I have windows 64 bit so I will go with first option.
Please go with respective file type based on your processer 32/64 bit.
To check processer type go to file Explore, right click on This PC/My Computer –> Properties –> System type
In the pop window, you need to accept Oracle License Agreement & click on checkbox.
In the next page, it will display login option for Oracle account. I have already created my oracle account so I will login with my account details. After successful login, it will start download automatically.
If you don’t have oracle account, don’t worry. Its free & you can create it by just providing your email id & some personal details.
Once download is completed, you will see OracleXE112_Win64 zip file in your default download directory.
Oracle 11g Installation
Now we will start installation process for Oracle 11g. First you need to unzip downloaded file. Right click on zip file & unzip it using any software or windows option.
Inside unzip folder, you will have DISK1 folder when you go inside it you will see your setup.exe file for Oracle 11g Database.
To Start installation process, double click on steup.exe or right click on it & “Run as Administrator“. Please make sure your windows user has administrator access to install software on your system.
After confirming “do you want to allow this app to make changes to your device“, you will see Welcome Page for Oracle 11g installation, just click on Next.
In License Agreement page, select “I accept the terms in license agreement” & click on Next.
Now you have to select setup location of your oracle 11g, by default it goes to C:\orclexe. You can click on Browse & change the location for setup as per your preference however I will go with default location. Now go ahead & click on Next.
In the next page you have to set the password for your oracle database which will be used for SYS & SYSTEM database account, please make sure you note down the login password. Now Click on Next.
In next windows it will give you Summary for Oracle 11g database configuration, review it & Click on Install.
Now your installation process should be started which will take some time based on your system configuration, please relax & wait till it is completed.
Note: – Oracle stopped support for oracle 11g version so you might run into issue with your latest version of windows however oracle 11g is light version out of all oracle database version & you should definitely try once, in case of any error you can try with another version like oracle 19c.
This is going to be last page for your oracle database installation if you don’t run into any issue. Now click on Finish to complete your setup.
Verify Oracle 11g Setup
Now we are going to check our oracle 11g database. Go to windows command line (cmd) & run “tnsping XE“. You will get OK message as shown in below screen-shot.
Now got to Windows Start -> Run. In Open box type “Services.msc” & hit entre. In Services window scroll-down & look for Oracle. As given in screen-shot “OracleServiceXE” & “OracleXETNSListener” should be running. By default, both services will be setup as Automatic & server will be started automatically. You can set it manually in case your system is running slow & you don’t need oracle database running all time. You can start it manually whenever you need it.
Connect to Oracle 11g
Web Interface:- You can connect to oracle 11g database using Web Interface. Go to Desktop & click on Shortcut “Get Started with Oracle Database 11g Express Edition“.
In case of any error please checkout below link, we have covered all common database connection errors in below post.
Oracle 11g Database Connection Errors
Now go back to desktop & again double click on Shortcut “Get Started with Oracle Database 11g Express Edition”. Oracle web console will be opened in default web browser. Not click on “Application Express“.
Login with SYSTEM username & password which you set while installation (That’s why I asked to make a note of password while installation process).
In this page, you can create new workspace. To create new workspace, use database user as Create New ( new database user will be created). Give name for new database (MYDB) & set username & password for new database (make a note of it). Now click on Create Workspace.
After “Successfully created workspace MYDB. To begin, click here to login” message, click on “click here”
Login using new database username & password which you set while creating new workspace & click on Login.
Now click on “SQL Workshop“, Go to SQL Commands.It will open sql editor where you can write your SQL Query, now write sql query “select sysdate from dual” & click on Run. You will see output of your select as “Results“. That’s how you can connect to oracle 11g database using web Interface (its only available with old version like 11g).
SQL Plus:- Go to Windows Serach bar & search for “Run SQL” , click “Run SQL command line“. You can use any account to connect to database, I am going to use SYSTEM so type “connect SYSTEM“. In next step you need to enter password for SYSTEM username (password will not be visible so just type your password & hit enter).
Same way lets run one test sql, “SELECT SYSDATE FROM DUAL“. You will get current date as output.
SQL Developer:- SQL developer is database client which is used to connect to oracle database. Open your sql developer & click on “New Connection“, please fill-up all details as shown in screen-shot, save new connection & click on connect button to connect to MYDB.
Please check out below post for SQL Developer installation on windows.
How to Install Oracle SQL Developer on Windows 10
To execute query Write “select * from emp” in sql worksheet & click on RUN icon, you should able to see data for your emp table.
That’s it. Hope this article will help you to install oracle 11g database on your windows system. Happy Learning !!
Please don’t forget to leave your feedback in below comments section!!
Generally we install Oracle 11g or 10G or lower version of oracle client in Win10 system, are unable to install, the general installation of the time will flash back. What is the reason for this? In fact, very simple, win10 out of the time is relatively late, in oracle11g out of time, and no Win10 operating system; So in the installation process of Oracle11G environmental monitoring, it can not identify the Win10 system, so it thought that the system environment is wrong, directly flash back. In fact, know the reason, it is easy to do, we just need to put it in oracle11g monitoring system environment scope, add win10 configuration can be. Here are the steps:
1 Download the client installation package.

2 Locate the Oracle Environment monitoring configuration file and modify the following two configuration files

3 open and see what is inside: in fact, open is very simple, inside is the oracle installation monitoring is the following these systems, you can execute the installation, otherwise the environment has a problem, do not continue to install, so we in this inside, put the win10 configuration file into
2022-11-11
How do I install Oracle 11g client on Windows?
To install the Oracle 11g client, perform the following:
- Download and unzip Oracle 11g Client ODT-ODAC (11.2.
- Launch the Setup.exe file. (
- Click Next to continue.
- Select the option to install Oracle Data Access Components for Oracle Client.
- Retain the default paths if they appear as shown here with references to 11g.
Where can I find Oracle drivers in Windows?
To find out what Oracle ODBC drivers are installed on your Windows system, you can use the ODBC manager to look at them:
- Go to Control Panel.
- Go to Administrative Tools.
- Run Data Sources (ODBC).
- Go to System DSN tab.
- Click the Add button.
How do I install Oracle drivers on Windows 10?
How can I install an Oracle ODBC driver in Windows 10?
- Download and extract the Oracle packages. First, open the Oracle Instant Client page in your browser.
- Add an Oracle Client directory environment variable.
- Install your ODBC Oracle client package.
- Set up the DSN for Oracle driver.
- Install missing Visual C++ libraries.
How do I install Toad for Oracle 11g on Windows 10?
How to download Toad for Oracle
- Set the Environment for the installation.
- Select the Toad for Oracle Edition that meets your needs.
- Obtain a License Key from the vendor.
- Select the Installer Type.
- Download the Toad for Oracle Installer Application.
- Install Toad for Oracle and related products with the installer.
How do I know if Oracle 11g is installed?
Follow these steps:
- From the Start menu, select All Programs, then Oracle – HOMENAME, then Oracle Installation Products, then Universal Installer.
- In the Welcome window, click Installed Products to display the Inventory dialog box.
- To check the installed contents, find the Oracle Database product in the list.
What is Oracle driver name?
Database URL Formulation
| RDBMS | JDBC driver name |
|---|---|
| MySQL | com.mysql.jdbc.Driver |
| ORACLE | oracle.jdbc.driver.OracleDriver |
| DB2 | COM.ibm.db2.jdbc.net.DB2Driver |
| Sybase | com.sybase.jdbc.SybDriver |
How do I install ODBC drivers on Windows 10?
Step-by-step ODBC Data Source Setup in Windows 10
- Press Windows + R to open the Run dialog.
- Type in odbcad32 and click OK.
- In the ODBC Data Source Administrator dialog box, select the System DSN or User DSN tab.
- Click Add.
- Locate the necessary driver in the list and click Finish.
How do I install Oracle ODBC drivers?
Installing Oracle Instant Client ODBC
- Download Install the Instant Client Basic or Basic Light package as described above.
- Download the Instant Client ODBC package.
- Install the unixODBC driver manager if it is not already available.
- Execute odbc_update_ini.sh from the Instant Client directory.
https://www.youtube.com/watch?v=MPQSj7fEdlA

