
OpenVPN – это набор open source программ, который заслуженно является одним из самых популярных и легких решений для реализации защищенной VPN сети. OpenVPN позволяет объединить в единую сеть сервер и клиентов (даже находящиеся за NAT или файерволами), или объединить сети удаленных офисов. Серверную часть OpenVPN можно развернуть практически на всех доступных операционных системах (пример настройки OpenVPN на Linux). Вы можете установить OpenVPN сервер даже на обычный компьютер с десктопной редакцией Windows 10.
В этой статье, мы покажем, как установить OpenVPN сервер на компьютер с Windows 10, настроить OpenVPN клиент на другом Windows хосте и установить защищенное VPN подключение.
Содержание:
- Установка службы OpenVPN сервера в Windows
- Создаем ключи шифрования и сертификаты для OpenVPN
- Конфигурационный файл OpenVPN сервера в Windows
- Настройка OpenVPN клиента в Windows
Установка службы OpenVPN сервера в Windows
Скачайте MSI установщик OpenVPN для вашей версии Windows с официального сайта (https://openvpn.net/community-downloads/). В нашем случае это OpenVPN-2.5.5-I602-amd64.msi (https://swupdate.openvpn.org/community/releases/OpenVPN-2.5.5-I602-amd64.msi).
Запустите установку.
Если вы планируете, OpenVPN сервер работал в автоматическом режиме, можно не устанавливать OpenVPN GUI. Обязательно установите OpenVPN Services.
Начиная с версии OpenVPN 2.5, поддерживается драйвер WinTun от разработчиков WireGuard. Считается, что этот драйвер работает быстрее чем классический OpenVPN драйвер TAP. Установите драйвер Wintun, откажитесь от установки TAP-Windows6.
Установите OpenSSL утилиту EasyRSA Certificate Management Scripts.
Запустите установку.
По умолчанию OpenVPN устаналивается в каталог C:\Program Files\OpenVPN.
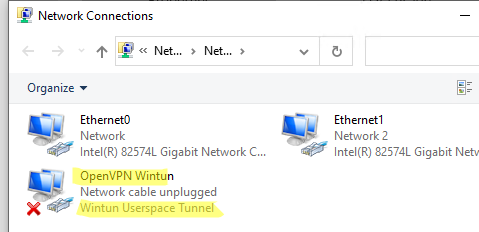
После окончания установки появится новый сетевой адаптер типа Wintun Userspace Tunnel. Этот адаптер отключен, если служба OpenVPN не запущена.
Создаем ключи шифрования и сертификаты для OpenVPN
OpenVPN основан на шифровании OpenSSL. Это означает, что для обмена трафиком между клиентом и серверов VPN нужно сгенерировать ключи и сертификаты с использованием RSA3.
Откройте командную строку и перейдите в каталог easy-rsa:
cd C:\Program Files\OpenVPN\easy-rsa
Создайте копию файла:
copy vars.example vars
Откройте файл vars с помощью любого текстового редактора. Проверьте пути к рабочим директориям.
Обязательно поправьте переменную EASYRSA_TEMP_DIR следующим образом:
set_var EASYRSA_TEMP_DIR "$EASYRSA_PKI/temp"

Можете заполнить поля для сертификатов (опционально)
set_var EASYRSA_REQ_COUNTRY "RU"
set_var EASYRSA_REQ_PROVINCE "MSK"
set_var EASYRSA_REQ_CITY "MSK"
set_var EASYRSA_REQ_ORG "IT-Company"
set_var EASYRSA_REQ_EMAIL " [email protected] "
set_var EASYRSA_REQ_OU " IT department "

Срок действия сертификатов задается с помощью:
#set_var EASYRSA_CA_EXPIRE 3650
#set_var EASYRSA_CERT_EXPIRE 825
Сохраните файл и выполните команду:
EasyRSA-Start.bat
Следующие команды выполняются в среде EasyRSA Shell:
Инициализация PKI:
./easyrsa init-pki
Должна появится надпись:
init-pki complete; you may now create a CA or requests.
Your newly created PKI dir is: C:/Program Files/OpenVPN/easy-rsa/pki
Теперь нужно сгенерировать корневой CA:
./easyrsa build-ca
Задайте дважды пароль для CA:
CA creation complete and you may now import and sign cert requests.
Данная команда сформировала:
- Корневой сертификат центра сертификации: «C:\Program Files\OpenVPN\easy-rsa\pki\ca.crt»
- Ключ центра сертификации «C:\Program Files\OpenVPN\easy-rsa\pki\private\ca.key»
Теперь нужно сгенерировать запрос сертификата и ключ для вашего сервера OpenVPN:
./easyrsa gen-req server nopass
Утилита сгенерирует два файла:
req: C:/Program Files/OpenVPN/easy-rsa/pki/reqs/server.req
key: C:/Program Files/OpenVPN/easy-rsa/pki/private/server.key
Подпишем запрос на выпуск сертификата сервера с помощью нашего CA:
./easyrsa sign-req server server
Подтвердите правильность данных, набрав yes.
Затем введите пароль CA от корневого CA.
В каталоге issued появится сертификат сервера («C:\Program Files\OpenVPN\easy-rsa\pki\issued\server.crt»)

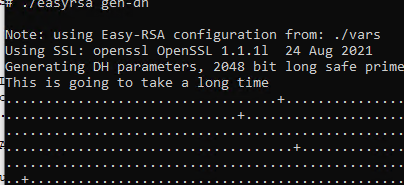
Теперь можно создать ключи Диффи-Хеллмана (займет длительное время):
./easyrsa gen-dh
Для дополнительной защиты VPN сервера желательно включить tls-auth. Данная технология позволяет использовать подписи HMAC к handshake-пакетам SSL/TLS, инициируя дополнительную проверку целостности. Пакеты без такой подписи будут отбрасываться VPN сервером. Это защитит вас от сканирования порта VPN сервера, DoS атак, переполнения буфера SSL/TLS.
Сгенерируйте ключ tls-auth:
cd C:\Program Files\OpenVPN\bin
openvpn --genkey secret ta.key
Должен появиться файл «C:\Program Files\OpenVPN\bin\ta.key». Переместите его в каталог C:\Program Files\OpenVPN\easy-rsa\pki
Теперь можно сформировать ключи для клиентов OpenVPN. Для каждого клиента, который будет подключаться к вашему серверу нужно создать собственные ключи.
Есть несколько способов генерации ключей и передачи их клиентам. В следующем примере, мы создадим на сервере ключ клиента и защитим его паролем:
./easyrsa gen-req kbuldogov
./easyrsa sign-req client kbuldogov
Данный ключ («C:\Program Files\OpenVPN\easy-rsa\pki\private\kbuldogov.key») нужно передать клиенту и сообщить пароль. Клиент может снять защиту паролем для ключа:
openssl rsa -in "C:\Program Files\OpenVPN\easy-rsa\pki\private\kbuldogov.key"-out "C:\Program Files\OpenVPN\easy-rsa\pki\private\kbuldogov_use.key"

Если вы хотите сгенерировать ключ, не защищенный паролем, нужно выполнить команду:
./easyrsa gen-req имяклиента nopass
На сервере с OpenVPN вы можете создать неограниченное количество ключей и сертификатов для пользователей. Аналогичным образом сформируйте ключи и сертфикаты для других клиентов.
Вы можете отохвать скомпрометированные сертификаты клиентов:
cd C:\Program Files\OpenVPN\easy-rsa
EasyRSA-Start.bat
./easyrsa revoke kbuldogov
Итак, мы сгенерировали набор ключей и сертификатов для OpenVPN сервера. Теперь можно настроить и запустить службу OpenVPN.
Конфигурационный файл OpenVPN сервера в Windows
Скопируйте типовой конфигурационный файл OpenVPN сервера:
copy "C:\Program Files\OpenVPN\sample-config\server.ovpn" "C:\Program Files\OpenVPN\config-auto\server.ovpn"
Откройте файл server.ovpn в любом текстовом редакторе и внесите свои настройки. Я использую следующий конфиг для OpenVPN:
# Указываем порт, протокол и устройство
port 1194
proto udp
dev tun
# Указываем пути к сертификатам сервера
ca "C:\\Program Files\\OpenVPN\\easy-rsa\\pki\\ca.crt"
cert "C:\\Program Files\\OpenVPN\\easy-rsa\\pki\\issued\\server.crt"
key "C:\\Program Files\\OpenVPN\\easy-rsa\\pki\\private\\server.key"
dh "C:\\Program Files\\OpenVPN\\easy-rsa\\pki\\dh.pem"
# Указываем настройки IP сети, адреса из которой будет будут получать VPN клиенты
server 10.24.1.0 255.255.255.0
#если нужно разрешить клиентам подключаться под одним ключом, нужвно включить опцию duplicate-cn (не рекомендуется)
#duplicate-cn
# TLS защита
tls-auth "C:\\Program Files\\OpenVPN\\easy-rsa\\pki\\ta.key" 0
cipher AES-256-GCM
# Другая параметры
keepalive 20 60
persist-key
persist-tun
status "C:\\Program Files\\OpenVPN\\log\\status.log"
log "C:\\Program Files\\OpenVPN\\log\\openvpn.log"
verb 3
mute 20
windows-driver wintun
Сохраните файл.
OpenVPN позволяет использовать как TCP, так и UDP для подключения. В этом примере я запустил OpenVPN на 1194 UDP. Рекомендуется использовать протокол UDP, это оптимально как с точки зрения производительности, так и безопасности.
Не забудьте открыть на файерволе порты для указанного вами порта OpenVPN на клиенте и на сервере. Можно открыть порты в Windows Defender с помощью PowerShell.
Правило для сервера:
New-NetFirewallRule -DisplayName "AllowOpenVPN-In" -Direction Inbound -Protocol UDP –LocalPort 1194 -Action Allow
Правило для клиента:
New-NetFirewallRule -DisplayName "AllowOpenVPN-Out" -Direction Outbound -Protocol UDP –LocalPort 1194 -Action Allow
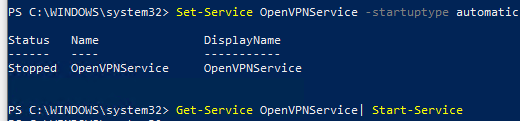
Теперь нужно запустить службу OpenVPN и изменить тип ее запуска на автоматический. Воспользуйтесь таким командами PowerShell, чтобы включить службу:
Set-Service OpenVPNService –startuptype automatic –passthru
Get-Service OpenVPNService| Start-Service
Откройте панель управления, и убедитесь, что виртуальный сетевой адаптер OpenVPN Wintun теперь активен. Если нет, смотрите лог «C:\Program Files\OpenVPN\log\server.log»
Если при запуске OpenVPN вы видите в логе ошибку:
Options error: In C:\Program Files\OpenVPN\config-auto\server.ovpn:1: Maximum option line length (256) exceeded, line starts with..
Смените в файле server.ovpn символы переноса строки на Windows CRLF (в notepad++ нужно выбрать Edit -> EOL Conversion -> Windows CR LF). Сохраните файл, перезапустите службу OpevVPNService.
Данный конфиг позволит удаленным клиентам получить доступ только к серверу, но другие компьютеры и сервисы в локальной сети сервера для них недоступны. Чтобы разрешить клиентам OpenVPN получить доступ к внутренней сети нужно:
Включить опцию IPEnableRouter в реестре (включает IP маршрутизацию в Windows, в том числе включает маршрутизацию меду сетями Hyper-V): reg add «HKLM\SYSTEM\CurrentControlSet\Services\Tcpip\Parameters» /v IPEnableRouter /t REG_DWORD /d 1 /f
Добавьте в конфгурационный файл сервера OpenVPN маршруты до внутренней IP сети:
push "route 10.24.1.0 255.255.255.0"
push "route 192.168.100.0 255.255.255.0"
Если нужно, назначьте клиенту адреса DNS серверов:
push "dhcp-option DNS 192.168.100.11"
push "dhcp-option DNS 192.168.100.12"
Если нужно завернуть все запросы клиента (в том числе Интернет трафик) на ваш OpenVPN сервер, добавьте опцию:
push "redirect-gateway def1"
Настройка OpenVPN клиента в Windows
Создайте на сервере шаблонный конфигурационный файла для клиента VPN (на базе iшаблона client.ovpn) со следующими параметрами (имя файла kbuldovov.ovpn)
client
dev tun
proto udp
remote your_vpn_server_address 1194
resolv-retry infinite
nobind
persist-key
persist-tun
ca ca.crt
cert kbuldogov.crt
key kbuldogov.key
remote-cert-tls server
tls-auth ta.key 1
cipher AES-256-GCM
connect-retry-max 25
verb 3
В директиве remote указывается публичный IP адрес или DNS имя вашего сервера OpenVPN.
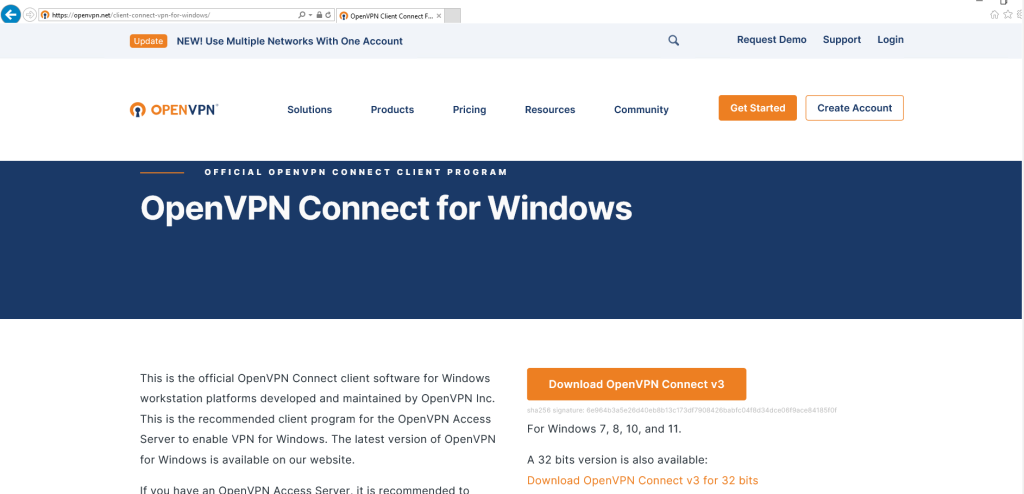
Скачайте и установите клиент OpenVPN Connect для Windows (https://openvpn.net/downloads/openvpn-connect-v3-windows.msi).
Теперь на компьютер с клиентом OpenVPN нужно с сервера скопировать файлы:
- ca.crt
- kbuldogov.crt
- kbuldogov.key
- dh.pem
- ta.key
- kbuldogov.ovpn
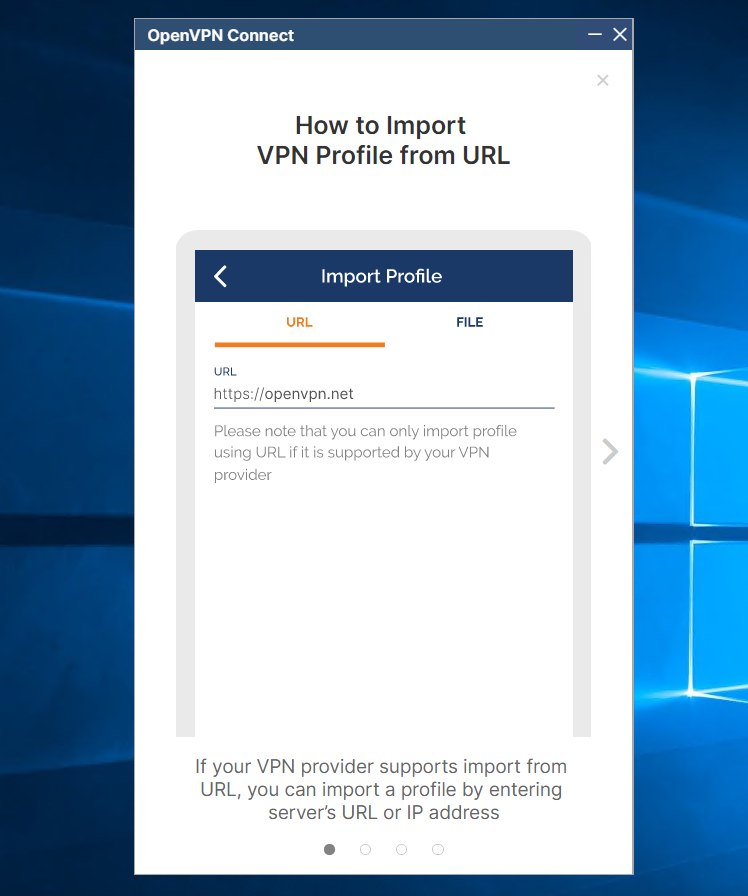
Теперь импортируйте файл с профилем *.ovpn и попробуйте подключиться к вашему VPN серверу.
Если все настроено правильно, появится такая картинка.
Проверьте теперь лог OpenVPN на клиенте «C:\Program Files\OpenVPN Connect\agent.log»
Mon Dec 27 08:09:30 2021 proxy_auto_config_url
Mon Dec 27 08:09:31 2021 TUN SETUP
TAP ADAPTERS:
guid='{25EE4A55-BE90-45A0-88A1-8FA8FEF24C42}' index=22 name='Local Area Connection'
Open TAP device "Local Area Connection" PATH="\\.\Global\{25EE4A55-BE90-45A0-88A1-8FA8FEF24C42}.tap" SUCCEEDED
TAP-Windows Driver Version 9.24
ActionDeleteAllRoutesOnInterface iface_index=22
netsh interface ip set interface 22 metric=1
Ok.
netsh interface ip set address 22 static 10.24.1.6 255.255.255.252 gateway=10.24.1.5 store=active
IPHelper: add route 10.24.1.1/32 22 10.24.1.5 metric=-1
Клиент успешно подключится к OpenVPN серверу и получил IP адрес 10.24.1.6.
Проверьте теперь лог на сервере («C:\Program Files\OpenVPN\log\openvpn.log»). Здесь также видно, что клиент с сертификатом kbuldogov успешно подключится к вашему серверу.
2021-12-27 08:09:35 192.168.13.202:55648 [kbuldogov] Peer Connection Initiated with [AF_INET6]::ffff:192.168.13.202:55648
2021-12-27 08:09:35 kbuldogov/192.168.13.202:55648 MULTI_sva: pool returned IPv4=10.24.1.6, IPv6=(Not enabled)
2021-12-27 08:09:35 kbuldogov/192.168.13.202:55648 MULTI: Learn: 10.24.1.6 -> kbuldogov/192.168.13.202:55648
2021-12-27 08:09:35 kbuldogov/192.168.13.202:55648 MULTI: primary virtual IP for kbuldogov/192.168.13.202:55648: 10.24.1.6
Create an Utho account to try this guide with a $100 credit.
Sign Up

INTRODUCTION
In this tutorial, we will learn how to instal and setup OpenVPN Connect in Windows Server 2012R2, 2016, 2019.
Step 1. Login to your Windows Server
Step 2. Download OpenVPN Connect Setup OpenVPN Connect in Windows
Download OpenVPN for Windows
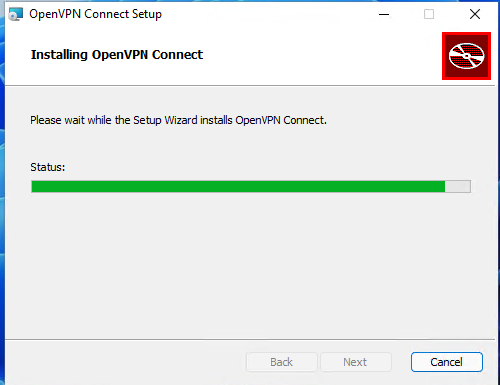
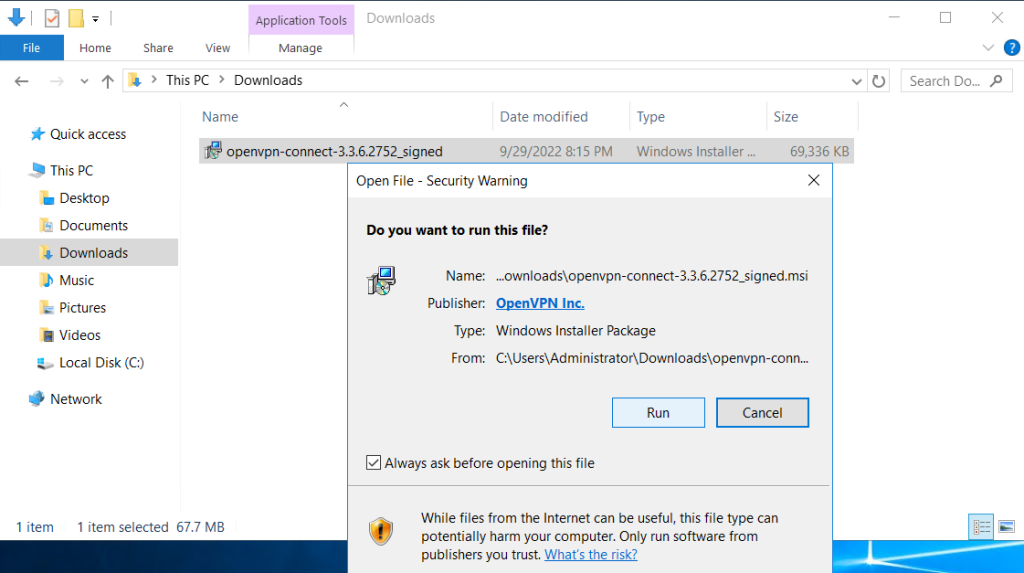
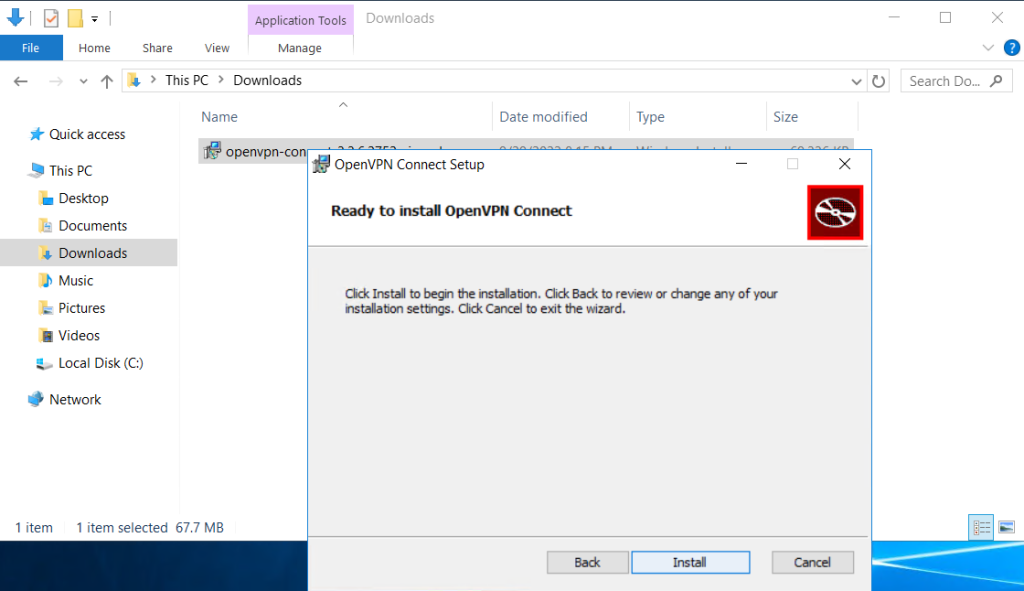
Step 3. Open the installer package Setup OpenVPN Connect in Windows

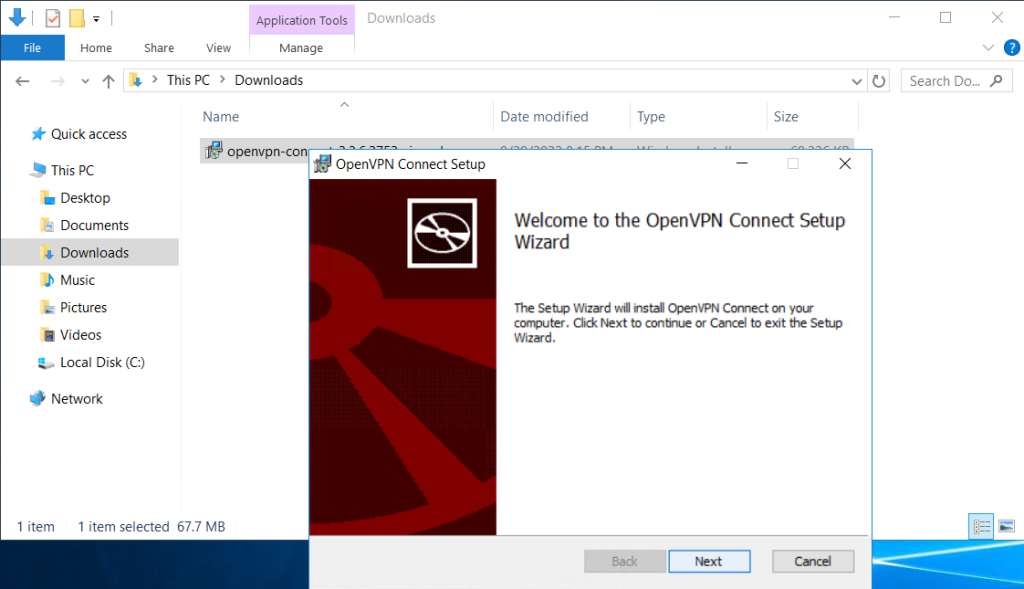
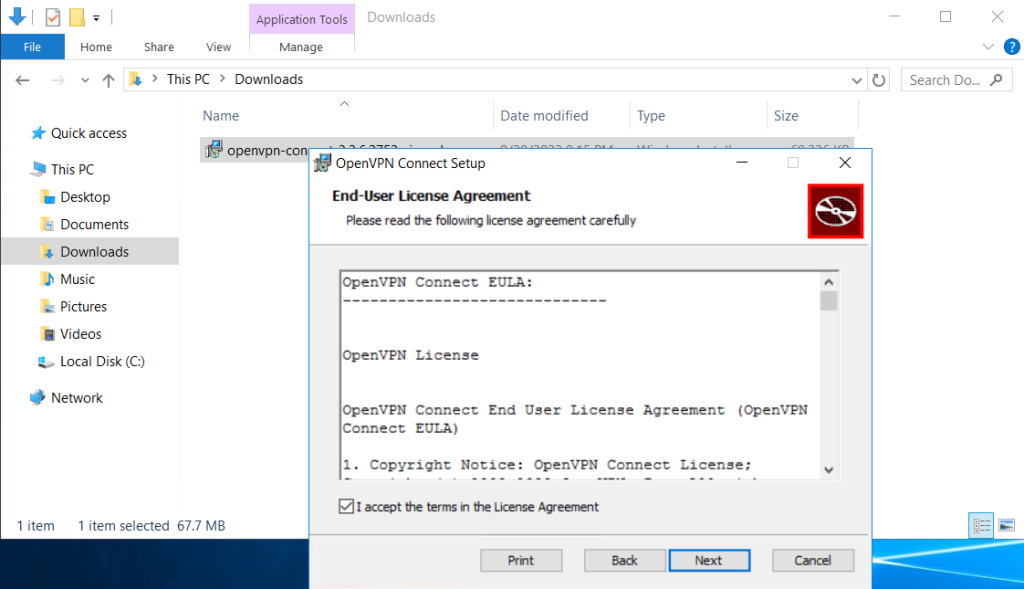
Step 4. Follow the installation window
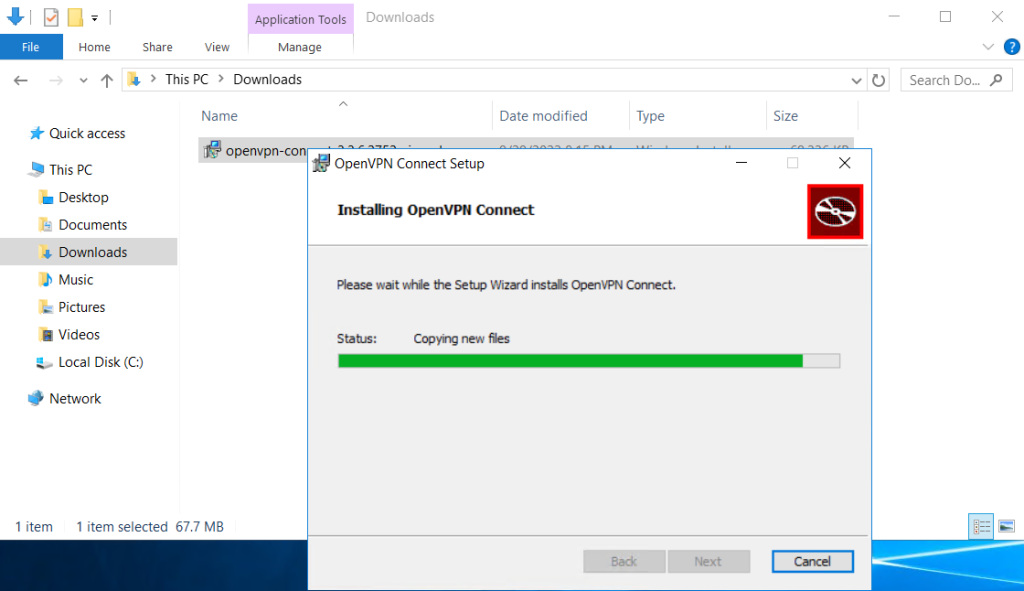
OpenVPN Connect installed.
Step 5. Import your OpenVPN profile and you are good to go. Setup OpenVPN Connect in Windows
Thank You!
Create an Utho account to try this guide with a $100 credit.
Sign Up
OpenVPN is an open-source software suite that is one of the most popular and easiest solutions for implementing a secure VPN. OpenVPN allows you to combine a server and clients (even those behind a NAT or firewall) into a single network, or to connect networks of remote offices. You can deploy a server part of OpenVPN almost in all available operating systems, including Linux, Windows, MacOS, and *BSD. You can install an OpenVPN server on Windows Server 2022/20119/2016/2012R2 or even on a computer running desktop Windows edition (Windows 10 or 11).
In this article, we will show how to install and configure an OpenVPN server on a computer running Windows 10, set up an OpenVPN client on another Windows device, and establish a secure VPN connection.
Contents:
- How to Install OpenVPN Server Service on Windows
- Create OpenVPN Encryption Keys and Certificates
- OpenVPN Server Configuration File for Windows
- Configuring OpenVPN Client on Windows
OpenVPN is extremely popular in the SOHO segment to provide access to remote employees: you don’t need to buy any special hardware, licenses to build a VPN server based on Windows Server, expose RDP port to the Internet, and can easily protect against RDP brute force attacks.
How to Install OpenVPN Server Service on Windows
Download the OpenVPN MSI installer for your Windows version from the official website (https://openvpn.net/community-downloads/). In our case, this is OpenVPN-2.5.7-I602-amd64.msi (https://swupdate.openvpn.org/community/releases/OpenVPN-2.5.7-I602-amd64.msi).
Run the setup and select OpenVPN Service to install. If you want your OpenVPN server to start automatically, you may not install OpenVPN GUI.

OpenVPN 2.5 (and newer) supports the WinTun driver from the WireGuard developers. This driver is faster that the default TAP OpenVPN driver. We recommend installing Wintun driver instead of TAP-Windows6.
Install the EasyRSA Certificate Management Scripts OpenSSL utility.
Complete the installation.
By default, OpenVPN is installed to C:\Program Files\OpenVPN.
When the installation is complete, you will see a new network adapter Wintun Userspace Tunnel. This adapter is disabled if the OpenVPN service is not running.
Create OpenVPN Encryption Keys and Certificates
OpenVPN is based on OpenSSL encryption. This means that RSA3 keys and certificates must be used to establish a network connection between the client and the VPN server.
Open the command prompt and go to easy-rsa directory:
cd "C:\Program Files\OpenVPN\easy-rsa"
Create a copy of the file:
copy vars.example vars
Open the vars file in any text editor. Check the paths to the OpenVPN and EaseRSA working folders.
Be sure to edit the EASYRSA_TEMP_DIR variable as shown below:
set_var EASYRSA_TEMP_DIR "$EASYRSA_PKI/temp"

You may fill in the certificate fields (optional):
set_var EASYRSA_REQ_COUNTRY "DE"
set_var EASYRSA_REQ_PROVINCE "BY"
set_var EASYRSA_REQ_CITY "MUN"
set_var EASYRSA_REQ_ORG "WOSHUB-Com"
set_var EASYRSA_REQ_EMAIL "[email protected]"
set_var EASYRSA_REQ_OU "IT dept"
Set certificate expiration dates:
set_var EASYRSA_CA_EXPIRE 3650
set_var EASYRSA_CERT_EXPIRE 825
Save the file and run the command:
EasyRSA-Start.bat
All of the following commands must be run in the EasyRSA shell:
Initialize PKI:
./easyrsa init-pki
You should see this message:
init-pki complete; you may now create a CA or requests.
Your newly created PKI dir is: C:/Program Files/OpenVPN/easy-rsa/pki
Then generate the root CA:
./easyrsa build-ca
Enter a CA password twice:
CA creation is complete and you may now import and sign cert requests.
The command above has created:
- A root certificate of the Certification Authority:
C:\Program Files\OpenVPN\easy-rsa\pki\ca.crt - A Certification Authority key: C
:\Program Files\OpenVPN\easy-rsa\pki\private\ca.key
Then generate a certificate request and a key for your OpenVPN server:
./easyrsa gen-req server nopass
The tool will generate two files:
req: C:/Program Files/OpenVPN/easy-rsa/pki/reqs/server.req
key: C:/Program Files/OpenVPN/easy-rsa/pki/private/server.key
Sign the request to issue a server certificate using your CA:
./easyrsa sign-req server server
Confirm the data by typing yes.
Then enter the CA password for your root CA.
The server.crt file will appear in the issued folder (C:\Program Files\OpenVPN\easy-rsa\pki\issued\server.crt).

Then you can generate Diffie-Hellman keys (takes a long time):
./easyrsa gen-dh
To provide additional protection for your VPN server, it is recommended to enable tls-auth. This feature allows using HMAC signatures in SSL/TLS handshake, thus initiating an extra integrity check. Packets without such a signature will be dropped by the VPN server. This will protect you against VPN server port scanning, DoS attacks, SSL/TLS buffer overflows, etc.
Generate a tls-auth key:
cd C:\Program Files\OpenVPN\bin
 openvpn --genkey secret ta.key
The C:\Program Files\OpenVPN\bin\ta.key file will appear. Move it to C:\Program Files\OpenVPN\easy-rsa\pki folder.
Then you can generate keys for your OpenVPN clients. Each client connecting to your VPN server must have its own key pair.
There are several ways to generate OpenVPN keys and distribute them to clients.
In the example below, we will create a client key on the server and protect it with a password (PEM pass phrase):
./easyrsa gen-req testuser1
 ./easyrsa sign-req client testuser1
Copy the key file (C:\Program Files\OpenVPN\easy-rsa\pki\private\testuser1.key) to the client computer tell the user the password (voice, email, SMS). The client can disable the password protection for the key:
openssl rsa -in "C:\Program Files\OpenVPN\easy-rsa\pki\private\testuser1.key"-out "C:\Program Files\OpenVPN\easy-rsa\pki\private\testuser1_use.key"

If you want to generate a key that is not password protected, you need to run the command:
./easyrsa gen-req testuser2 nopass
You may create any number of keys and certificates for users on your VPN server. Generate keys and certificates for other clients in the same way.
You can revoke compromised client certificates:
cd C:\Program Files\OpenVPN\easy-rsa
 EasyRSA-Start.bat
 ./easyrsa revoke testuser2
Therefore, we have generated a set of keys and certificates for the OpenVPN server. Now you can configure and run your VPN service.
OpenVPN Server Configuration File for Windows
Copy the configuration file template for the OpenVPN server:
copy "C:\Program Files\OpenVPN\sample-config\server.ovpn" "C:\Program Files\OpenVPN\config-auto\server.ovpn"
Open server.ovpn in any text editor and make your settings. I am using the following OpenVPN configuration:
# Specify a port, a protocol and a device type
port 1194
proto udp
dev tun
# Specify paths to server certificates
ca "C:\\Program Files\\OpenVPN\\easy-rsa\\pki\\ca.crt"
cert "C:\\Program Files\\OpenVPN\\easy-rsa\\pki\\issued\\server.crt"
key "C:\\Program Files\\OpenVPN\\easy-rsa\\pki\\private\\server.key"
dh "C:\\Program Files\\OpenVPN\\easy-rsa\\pki\\dh.pem"
# Specify the settings of the IP network your VPN clients will get their IP addresses from
server 10.24.1.0 255.255.255.0
# If you want to allow your clients to connect using the same key, enable the duplicate-cn option (not recommended)
# duplicate-cn
# TLS protection
tls-auth "C:\\Program Files\\OpenVPN\\easy-rsa\\pki\\ta.key" 0
cipher AES-256-GCM
# Other options
keepalive 20 60
persist-key
persist-tun
status "C:\\Program Files\\OpenVPN\\log\\status.log"
log "C:\\Program Files\\OpenVPN\\log\\openvpn.log"
verb 3
mute 20
windows-driver wintun
Save the file.
OpenVPN allows you to use both TCP and UDP protocols. In this example, we have run OpenVPN on UDP port 1194. It is recommended to use UDP as it is optimal for both performance and security.
Remember to open ports in the firewall for the OpenVPN port number you have specified on the client and the server. You can open the port in Windows Defender using PowerShell.
Firewall rule for the OpenVPN server:
New-NetFirewallRule -DisplayName "AllowOpenVPN-In" -Direction Inbound -Protocol UDP –LocalPort 1194 -Action Allow
The rule for the client:
New-NetFirewallRule -DisplayName "AllowOpenVPN-Out" -Direction Outbound -Protocol UDP –LocalPort 1194 -Action Allow
Then run the OpenVPN service and change its startup type to automatic. Use the PowerShell to enable the service:
Set-Service OpenVPNService –startuptype automatic –passthru
 Get-Service OpenVPNService| Start-Service

Open the network connections dialog (ncpa.cpl) and make sure that OpenVPN Wintun virtual adapter is now enabled. If it is not, check the log file C:\Program Files\OpenVPN\log\server.log.
If you see the following error in the log when starting OpenVPN:
Options error: In C:\Program Files\OpenVPN\config-auto\server.ovpn:1: Maximum option line length (256) exceeded, line starts with…
Change line break character to Windows CRLF (in Notepad++, select Edit -> EOL Conversion -> Windows CR LF) in server.ovpn. Save the file and restart the OpenVPNService.
This OpenVPN configuration allows remote clients to access the server resources only. Other computers and services in the server‘s local network are not available for remote clients. In order to allow OpenVPN clients to access the internal LAN, enable the IPEnableRouter option in the registry (enables IP routing in Windows including routing between Hyper-V networks, and allows you to use port-forwarding):
reg add "HKLM\SYSTEM\CurrentControlSet\Services\Tcpip\Parameters" /v IPEnableRouter /t REG_DWORD /d 1 /f
Add the routes to your local IP network to the server configuration file:
push "route 10.24.1.0 255.255.255.0"
push "route 192.168.31.0 255.255.255.0"
If needed, assign DNS server addresses to the client:
push "dhcp-option DNS 192.168.31.10"
push "dhcp-option DNS 192.168.31.11"
If you want to redirect all client requests (including the Internet traffic) to your OpenVPN server, add the option:
push "redirect-gateway def1"
Configuring OpenVPN Client on Windows
Create a template configuration file for a VPN client (based on client.ovpn template) on your server with the following settings (the file name is testuser1.ovpn):
client
dev tun
proto udp
remote your_vpn_server_address 1194
resolv-retry infinite
nobind
persist-key
persist-tun
ca ca.crt
cert testuser1.crt
key testuser1.key
remote-cert-tls server
tls-auth ta.key 1
cipher AES-256-GCM
connect-retry-max 25
verb 3
Specify a public IP address or a DNS name of your OpenVPN server in the remote directive.
Download and install OpenVPN Connect for Windows (https://openvpn.net/downloads/openvpn-connect-v3-windows.msi).
Then copy the following files from your server to the computer with the installed OpenVPN client:
- ca.crt
- testuser1.crt
- testuser1.key
- dh.pem
- ta.key
- testuser1.ovpn
Import *.ovpn profile file and try to connect to your VPN server.
If you have set it correctly, you will see the image below:
Check the OpenVPN connection log on the client: C:\Program Files\OpenVPN Connect\agent.log
Mon Jul 17 08:09:30 2022 proxy_auto_config_url
Mon Jul 17 08:09:31 2022 TUN SETUP
TAP ADAPTERS:
guid='{25EE4A55-BE90-45A0-88A1-8FA8FEF24C42}' index=22 name='Local Area Connection'
Open TAP device "Local Area Connection" PATH="\\.\Global\{25EE4A55-BE90-45A0-88A1-8FA8FEF24C42}.tap" SUCCEEDED
TAP-Windows Driver Version 9.24
ActionDeleteAllRoutesOnInterface iface_index=22
netsh interface ip set interface 22 metric=1
Ok.
netsh interface ip set address 22 static 10.24.1.10 255.255.255.252 gateway=10.24.1.5 store=active
IPHelper: add route 10.24.1.1/32 22 10.24.1.5 metric=-1
The client has successfully connected to the VPN server and received the IP address 10.24.1.10.
Now check the OpenVpn log on the server-side (C:\Program Files\OpenVPN\log\openvpn.log). Here you can also see that the client with the testuser1 certificate has successfully connected to the server.
2022-07-17 08:09:35 192.168.13.20:55648 [tesuser1] Peer Connection Initiated with [AF_INET6]::ffff:192.168.13.20:55648
2022-07-17 08:09:35 tesuser1/192.168.13.20:55648 MULTI_sva: pool returned IPv4=10.24.1.10, IPv6=(Not enabled)
2022-07-17 08:09:35 tesuser1/192.168.13.20:55648 MULTI: Learn: 10.24.1.10 -> testuser1/192.168.13.20:55648
2022-07-17 08:09:35 tesuser1/192.168.13.20:55648 MULTI: primary virtual IP for tesuser1/192.168.13.20:55648: 10.24.1.10
Данная инструкция предназначена для системных администраторов и IT-специалистов, которые планируют развернуть сервер OpenVPN для создания защищенного VPN-соединения. OpenVPN является одним из самых надежных и популярных решений для организации виртуальной частной сети, обеспечивающего высокий уровень безопасности и производительности.
Установка OpenVPN сервера в Windows
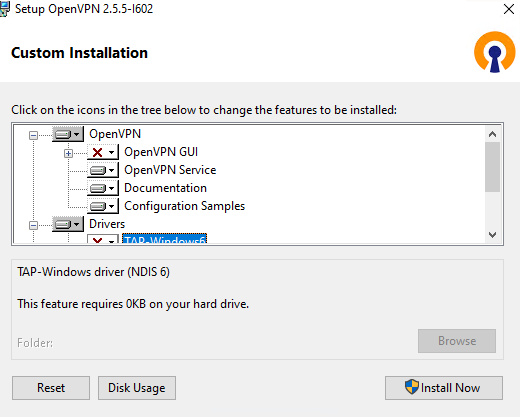
Запустите скачанный ранее MSI установщик. Нажмите Customize:

Рисунок 1 – Установка OpenVPN Server на Windiws.
OpenVPN GUI можно не устанавливать. Обязательно установите OpenVPN Services.

Рисунок 2 – Установка Wintun и OpenSSL.
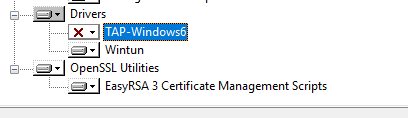
Установите драйвер Wintun и OpenSSL утилиту EasyRSA 3 Certificate Management Scripts. От установки TAP-Windows6 можно отказаться:

Рисунок 3 – Установка OpenVPN Services на Windiws.
Запустите установку нажав Install Now.
Создание ключей шифрования и сертификатов для OpenVPN
Откройте командную строку от имени администратора и перейдите в каталог easy-rsa:
cd C:\Program Files\OpenVPN\easy-rsa
Создайте копию файла vars:
Откройте файл vars в любом текстовом редакторе. Проверьте пути к рабочим директориям. Можете по желанию заполнить поля для сертификатов:

Рисунок 4 – Редактирование файла vars.
Срок действия сертификатов можно задать с помощью:
#set_var EASYRSA_CA_EXPIRE 3650
#set_var EASYRSA_CERT_EXPIRE 825
Сохраните файл и выполните команду:
Следующие команды выполняются в среде EasyRSA Shell. Инициализация PKI:
Должна появится надпись:
init-pki complete; you may now create a CA or requests.
Your newly created PKI dir is: C:/Program Files/OpenVPN/easy-rsa/pki
Теперь нужно сгенерировать корневой CA:
Задайте и повторите пароль для CA, должна появится надпись:
CA creation complete. Your new CA certificate is at:
* C:/Program Files/OpenVPN/easy-rsa/pki/ca.crt
Данная команда сформировала:
- корневой сертификат центра сертификации: C:\Program Files\OpenVPN\easy-rsa\pki\ca.crt;
- ключ центра сертификации C:\Program Files\OpenVPN\easy-rsa\pki\private\ca.key
Теперь нужно сгенерировать запрос сертификата и ключ для вашего сервера OpenVPN:
./easyrsa gen-req server nopass
Утилита сгенерирует два файла:
- req: C:/Program Files/OpenVPN/easy-rsa/pki/reqs/server.req
- key: C:/Program Files/OpenVPN/easy-rsa/pki/private/server.key
Подпишем запрос на выпуск сертификата сервера с помощью нашего CA:
./easyrsa sign-req server server
Подтвердите правильность данных, набрав yes. Затем введите пароль CA от корневого CA. В каталоге issued появится сертификат сервера C:\Program Files\OpenVPN\easy-rsa\pki\issued\server.crt
Теперь можно создать ключи Диффи-Хеллмана:
Далее желательно включить tls-auth.
cd C:\Program Files\OpenVPN\bin
openvpn --genkey secret ta.key
Должен появиться файл C:\Program Files\OpenVPN\bin\ta.key. Переместите его в каталог C:\Program Files\OpenVPN\easy-rsa\pki
Теперь можно сформировать ключи для клиентов OpenVPN.
./easyrsa gen-req client1 nopass
./easyrsa sign-req client client1
Итак, мы сгенерировали набор ключей и сертификатов для OpenVPN сервера. Теперь можно настроить и запустить службу OpenVPN.
Конфигурационный файл OpenVPN сервера в Windows
Скопируйте типовой конфигурационный файл OpenVPN сервера:
copy "C:\Program Files\OpenVPN\sample-config\server.ovpn" "C:\Program Files\OpenVPN\config-auto\server.ovpn"
Откройте файл server.ovpn в любом текстовом редакторе и внесите свои настройки.
Пример конфигурации для OpenVPN:
# Указываем порт и протокол
port 1194
proto udp
dev tun
# Указываем пути к сертификатам сервера
ca "C:\\Program Files\\OpenVPN\\easy-rsa\\pki\\ca.crt"
cert "C:\\Program Files\\OpenVPN\\easy-rsa\\pki\\issued\\server.crt"
key "C:\\Program Files\\OpenVPN\\easy-rsa\\pki\\private\\server.key"
dh "C:\\Program Files\\OpenVPN\\easy-rsa\\pki\\dh.pem"
# Указываем настройки сети
server 10.45.139.0 255.255.255.0
# TLS защита
tls-auth "C:\\Program Files\\OpenVPN\\easy-rsa\\pki\\ta.key" 0
cipher AES-256-GCM
# Другая параметры
keepalive 20 60
persist-key
persist-tun
status "C:\\Program Files\\OpenVPN\\log\\status.log"
log "C:\\Program Files\\OpenVPN\\log\\openvpn.log"
verb 3
mute 20
windows-driver wintun
Сохраните файл.
Теперь нужно перезапустить службу OpenVPNService. Откройте панель управления, и убедитесь, что виртуальный сетевой адаптер OpenVPN Wintun теперь активен.
Рисунок 5 – Настройка OpenVPN Server и сетевого адаптера.
После успешного выполнения всех шагов инструкции у вас должен быть работающий VPN-сервер, готовый к использованию.
Настройка клиента OpenVPN
Создайте из шаблона client.ovpn клиентский конфигурационный файл со следующим содержимым:
client
dev tun
proto udp
remote адрес вашего сервера 1194
resolv-retry infinite
nobind
persist-key
persist-tun
ca ca.crt
cert client1.crt
key client1.key
remote-cert-tls server
tls-auth ta.key 1
cipher AES-256-GCM
connect-retry-max 25
verb 3
На клиентском ПК скачайте и установите OpenVPN Connect. Скопируйте на клиента следующие файлы:
ca.crt
client1.crt
client1.key
dh.pem
ta.key
client1.ovpn
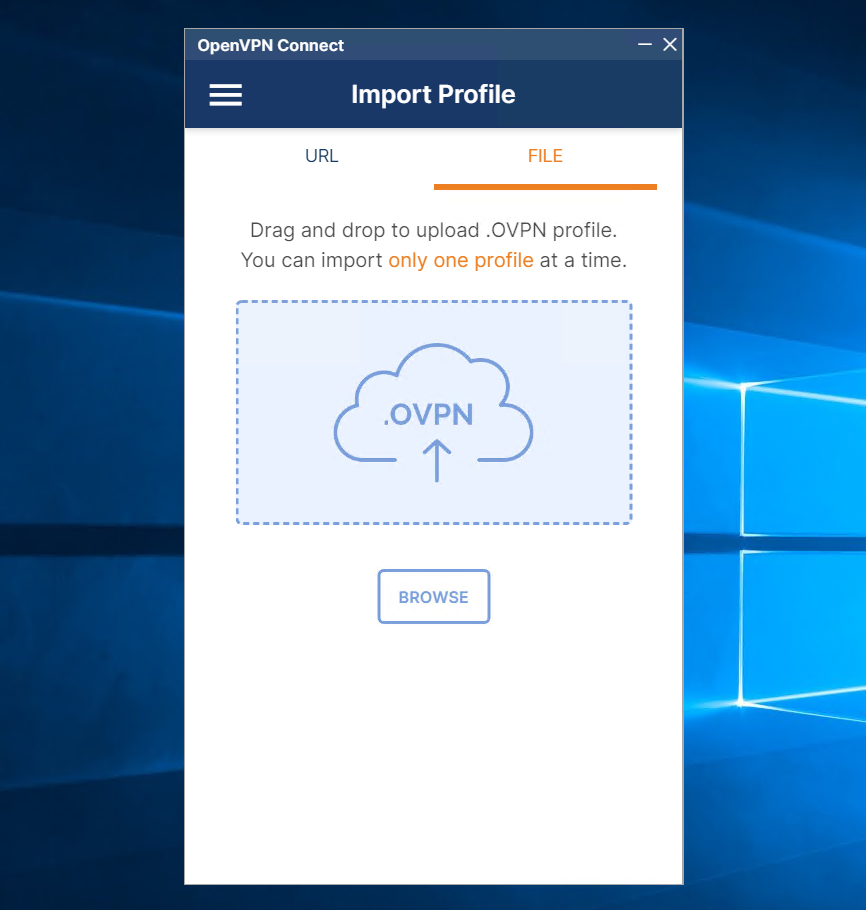
Запустите OpenVPN Connect, откройте вкладку UPLOAD FILE и перетащите туда файл client1.ovpn, после чего нажмите кнопку CONNECT:
Рисунок 6 – Настройка OpenVPN Connect, шаг 1.
Рисунок 7 – Настройка OpenVPN Connect, шаг 2.
Готово. Если все настроено правильно, то вы подключитесь к своему OpenVPN серверу.
Among the many VPN solutions available, OpenVPN is a preferred choice for many users. This comprehensive guide will delve into the step-by-step process of OpenVPN server Windows installation and configuration.
By the end of this post, you’ll have a fully operational OpenVPN server on your Windows machine and a deeper understanding of VPN technology. So, whether you’re a tech enthusiast or a beginner in the world of VPNs, let’s embark on this journey together.
What is an OpenVPN Server?
An OpenVPN Server is a VPN server that uses the OpenVPN protocol to create secure, encrypted connections between devices. It’s a popular choice for businesses and individuals due to its robust security features and flexibility.
To appreciate what an OpenVPN Server does, it’s essential to understand the role of a VPN server. A VPN server is a computer that manages VPN connections and allows your device to become part of its local network.
When you connect to a VPN server, your online traffic is routed through it, and your data is encrypted, enhancing your privacy and security.
Requirements for Installing an OpenVPN Server on Windows
Before we dive into the installation process, ensuring you have everything you need to successfully install and configure an OpenVPN Server on your Windows machine is crucial. YOu don’t want to interrupt the process by searching for stuff to download or install.
Here are the prerequisites:
A Windows Machine and Administrative Access
You’ll need a computer with a Windows operating system. OpenVPN is compatible with various versions of Windows. Ensure your system is updated with the latest patches and updates.
Installing new software typically requires administrative access to your computer. Ensure you have the necessary permissions to install and configure software on your machine.
Stable Internet Connection
A stable internet connection is crucial for downloading the necessary software and testing your VPN connection. It’s also important to note that a VPN can affect your internet speed, so a high-speed connection is recommended.
OpenVPN Software
You’ll need to download the OpenVPN software. We’ll cover this in more detail in the installation section, but it’s good to note that the software is free and can be downloaded from the official OpenVPN website.
Basic Networking Knowledge
While I’ll strive to make this guide as beginner-friendly as possible, having some basic understanding of networking concepts such as IP addresses, firewalls, and ports will be helpful. If you’re new to these concepts, don’t worry! There are plenty of resources online where you can learn the basics.
Time and Patience
Setting up an OpenVPN server on Windows is simple but requires some time and patience. Don’t rush the process. If you encounter any issues, take a break, troubleshoot, and remember that the OpenVPN community is an excellent resource for finding solutions.
Now that we’ve covered the prerequisites let’s dive into the installation process. Here’s a step-by-step guide to installing an OpenVPN Server on your Windows machine:
Step 1. Download the OpenVPN Software and Run The Installer
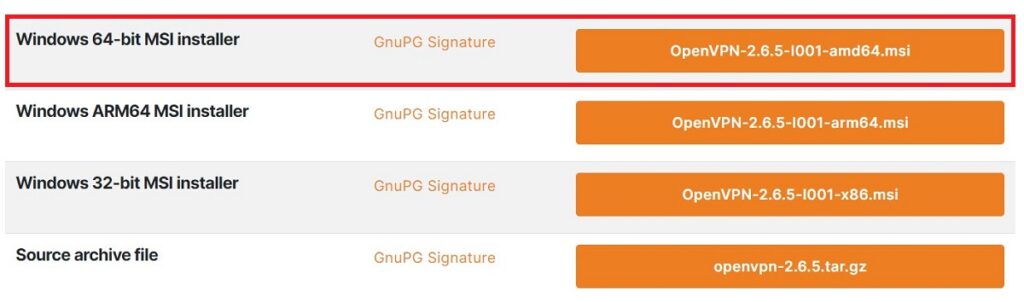
The first step is to download the OpenVPN software. Visit the official OpenVPN website and navigate to the “Community Downloads” page. Here, you’ll find the latest version of OpenVPN Community Edition, which is free. Download the Windows installer package.
Step 2. Proceed With The Installation
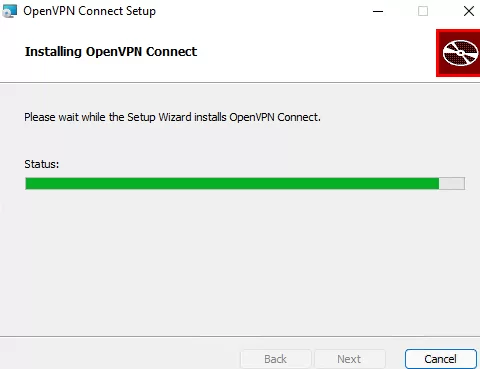
The wizard will ask you to choose a location on your computer to install OpenVPN. The default location is usually suitable for most users. Click “Install” to begin the installation process.
The wizard will now install OpenVPN on your computer. This process may take a few minutes. The more powerful your computer is, the faster the installation will go. Once the installation is complete, click “Next.”
Finally, you’ll see a screen confirming that OpenVPN has been installed. Ensure the “Start OpenVPN GUI” box is checked, and click “Finish.”
How to Configure Your OpenVPN Server on Windows
Now that you’ve installed OpenVPN Server on your Windows machine, the next step is to configure it. This process involves creating a configuration file that tells OpenVPN how to establish your VPN connection. Here’s a step-by-step guide:
Step 1. Create a Configuration File
OpenVPN uses configuration files (.ovpn) to determine how to set up the VPN connection. You’ll need to create a new text file with the .ovpn extension. You can do this using any text editor, such as Notepad. Save this file in the OpenVPN’s configuration directory, typically C:\Program Files\OpenVPN\config.
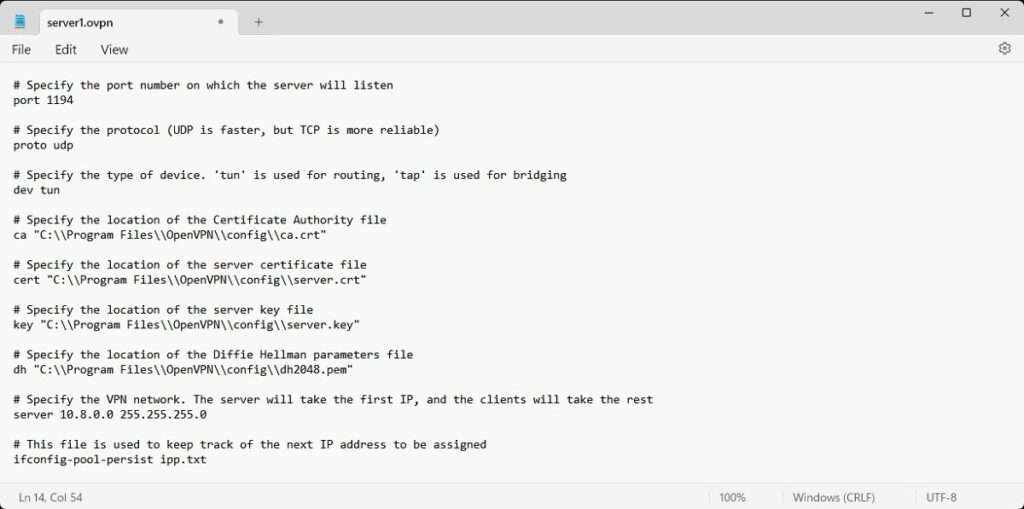
In the configuration file, you’ll need to specify various settings for your VPN server. Here’s a basic example of what your configuration file might look like:
# Specify the port number on which the server will listen
port 1194
# Specify the protocol (UDP is faster, but TCP is more reliable)
proto udp
# Specify the type of device. ‘tun’ is used for routing, ‘tap’ is used for bridging
dev tun
# Specify the location of the Certificate Authority file
ca “C:\\Program Files\\OpenVPN\\config\\ca.crt”
# Specify the location of the server certificate file
cert “C:\\Program Files\\OpenVPN\\config\\server.crt”
# Specify the location of the server key file
key “C:\\Program Files\\OpenVPN\\config\\server.key”
# Specify the location of the Diffie Hellman parameters file
dh “C:\\Program Files\\OpenVPN\\config\\dh2048.pem”
# Specify the VPN network. The server will take the first IP, and the clients will take the rest
server 10.8.0.0 255.255.255.0
# This file is used to keep track of the next IP address to be assigned
ifconfig-pool-persist ipp.txt
# This command pushes the client to redirect all traffic through the VPN
push “redirect-gateway def1 bypass-dhcp”
# These commands push specific DNS servers to the client
push “dhcp-option DNS 208.67.222.222”
push “dhcp-option DNS 208.67.220.220”
# This command helps in case of connection drops
keepalive 10 120
# This command specifies the encryption cipher
cipher AES-256-CBC
# These commands are used to drop privileges
user nobody
group nogroup
# These commands are used to keep the key and tun/tap device across VPN restarts
persist-key
persist-tun
# This command is used to write status to a file
status openvpn-status.log
# This command is used to set the log verbosity
verb 3
You can find ready-made sample configuration files in your OpenVPN directory. This directory is generally under the Program Files (not Program Files x86) folder.
Step 2. Generate Certificates and Keys
OpenVPN uses certificates and keys to secure the VPN connection. You’ll need to generate a Certificate Authority (CA) certificate, a server certificate, and a server key. OpenVPN provides easy-rsa, a set of scripts to help you generate these.
If you’re using an older version of the OpenVPN server, you can find these scripts in the C:\Program Files\OpenVPN\easy-rsa directory. If not, you have to download them from the GitHub repository.
Step 4. Start the OpenVPN Server
You’re ready to start your OpenVPN server once you’ve created your configuration file and generated your certificates and keys.
Open the OpenVPN GUI by clicking on its icon in your system tray. Right-click the icon and select “Connect.” You should see a message saying the connection has been established if everything is set up correctly.
How to Connect to Your OpenVPN Server
Once you’ve successfully installed and configured your OpenVPN Server on your Windows machine, the next step is to connect to it. Here’s a step-by-step guide:
Step 1. Install the OpenVPN Client
To connect to your OpenVPN Server, you’ll need to install the OpenVPN Client on the device you’ll be using to connect to the server. This could be another computer, a smartphone, or a tablet.
You can download the OpenVPN Client (OpenVPN Connect) from the official website. Make sure to choose the correct version for your operating system.
Step 2. Generate a Client Configuration File
Like the server, the client also needs a configuration file to connect to the server. You’ll need to create a new .ovpn file with the correct settings for your server. This file should include the client certificate, key, and Certificate Authority (CA) certificate.
Once you’ve created this file, transfer it to the device you’ll use to connect to the server.
Step 3. Import the .ovpn File and Connect to Your VPN
On the device you’ll use to connect to the server, open the OpenVPN Client and import the .ovpn file you created in the previous step. This will create a new VPN profile.
In the OpenVPN Client, select the VPN profile you just created and click “Connect.” If everything is set up correctly, you can establish a secure connection to your OpenVPN Server.
Tips for Using OpenVPN Server
Now that you’ve successfully installed, configured, and connected to your OpenVPN Server, here are some tips to help you get the most out of your VPN experience:
Regularly Check for Updates
Like any other software, OpenVPN is regularly updated to introduce new features, improve performance, and fix security vulnerabilities. Remember to check for and install updates to your OpenVPN Server and Client software to ensure the best performance and security.
Monitor Your Server
Keep an eye on your server’s performance and usage. This can help you identify any potential issues before they become serious problems. OpenVPN includes several features that can help with this, including status logs and real-time status monitoring.
Secure Your Server
While OpenVPN is secure by default, there are additional steps you can take to enhance your server’s security. For example, you can use firewall rules to restrict access to your server, use strong passwords and certificates for authentication, and regularly update and patch your server’s operating system.
Optimize Performance
You can tweak several settings to optimize your OpenVPN Server’s performance. For example, you can adjust the MTU size, use a faster cipher, or enable compression. However, be aware that some of these settings may also affect the security of your VPN, so it’s essential to understand the implications before making changes.
Use a Reliable DNS Provider
When you connect to your VPN, you’ll likely use it to access the internet. This means you’ll need a reliable DNS provider. While you can use any DNS provider, some are more privacy-focused than others. Do some research to find a provider that fits your needs.
Get Involved in the Community
The OpenVPN community is a great resource for tips, troubleshooting advice, and updates. Be bold, ask questions, and share your experiences. The more involved you are, the more you’ll learn.
Troubleshooting Common OpenVPN Server Installation Problems
Even with the most detailed guides, you might encounter issues when installing and configuring your OpenVPN Server. Here are some common problems and their solutions:
Connection Timeout: If you’re experiencing connection timeouts, it could be due to a firewall blocking the connection. Check your firewall settings to ensure the port specified in your OpenVPN configuration file is open.
Authentication Failure: Double-check your certificates and keys if you’re getting an authentication failure. Ensure they’re correctly specified in your configuration file and match on both the server and client sides.
Slow Connection Speeds: If your VPN connection is slower than expected, it could be due to your encryption settings. While more robust encryption provides better security, it can also slow down your connection. Try adjusting your encryption settings to find a balance between speed and safety.
Cannot Access Internet While Connected to VPN: If you can’t access the Internet while connected to your VPN, it could be due to your DNS settings. Check your configuration file to ensure you push the correct DNS servers to the client.
Server Does Not Start Automatically on Boot: If your OpenVPN Server doesn’t start automatically when your machine boots up, you may need to adjust your system settings to start the OpenVPN service automatically.
Running an OpenVPN Server is Simple and Effective
Setting up an OpenVPN Server on a Windows machine might seem daunting, but it’s achievable with the proper guidance and patience. Remember, the OpenVPN community is a fantastic resource for issues or questions.
Whether using your new OpenVPN server to secure your internet connection, access geo-restricted content, or learn more about networking and cybersecurity, you’ve taken a significant step towards a more secure and private online experience.
Congratulations on setting up your OpenVPN Server on Windows, and here’s to many secure browsing sessions in the future!
Also Read;
- Wireguard vs OpenVPN: How Do They Compare?
- How to Choose the Right VPN Protocol
- VPN Troubleshooting: Fixing Common VPN Problems
Frequently Asked Questions
Can I install OpenVPN Server on any version of Windows?
OpenVPN Server is compatible with various versions of Windows, including Windows 7, 8, 10, 11, and Windows Server 2012, 2016, and 2019. However, keeping your operating system updated with the latest patches and updates for optimal performance and security is always a good idea.
Do I need administrative access to install OpenVPN Server on Windows?
Yes, installing new software on a Windows machine typically requires administrative access. This is because the installation process often involves changing system files and settings. If you’re using a work computer or a shared machine, you may need to request these permissions from your IT department.
What is a .ovpn file?
A .ovpn file is a configuration file used by OpenVPN. It contains settings that tell OpenVPN how to establish a VPN connection. This includes the server address, port number, and encryption settings. You must create a .ovpn file for each client connecting to your OpenVPN Server.
Why am I getting an authentication failure?
Authentication failures can occur if there’s a problem with your certificates or keys. These are used to verify the identity of the client and server and establish a secure connection. If they are correctly specified in your configuration file, but you still have issues, try to regenerate your certificates and keys.
Why is my VPN connection slow?
Slow connection speeds can be due to a variety of factors. One common cause is the encryption settings. While stronger encryption provides better security, it also requires more processing power, which can slow down your connection. You can try adjusting your encryption settings to see if this improves your speed.