

Инструкция по установке MySQL 8 на Windows Server 2016. Вместе с MySQL сервером поставим MySQL Workbench. При желании можно дополнительно поставить MySQL for Visual Studio, MySQL Shell, MySQL Router, MySQL Connectors и документацию.
Немного от себя
Не знаю с чем связан такая мода на перепрыгивание версии продукта с 5 на 8 у MySQL. Возможно, это маркетологи маркетируют цифрами. Может быть, это связано с тем, что MySQL был выкуплен компанией Oracle. Однако, несмотря на жонглирование версиями, MySQL стал доступнее и приятнее. Уже на этапе установки у меня не то что не возникло никаких новых вопросов, но даже пропало несколько старых. Когда я качал инсталлятор, я уже думал о том, что дальше придётся качать Workbench нужной версии, что-то дополнительно настраивать. Не пришлось.
Дистрибутив
Заходим на сайт https://dev.mysql.com/downloads/windows/.
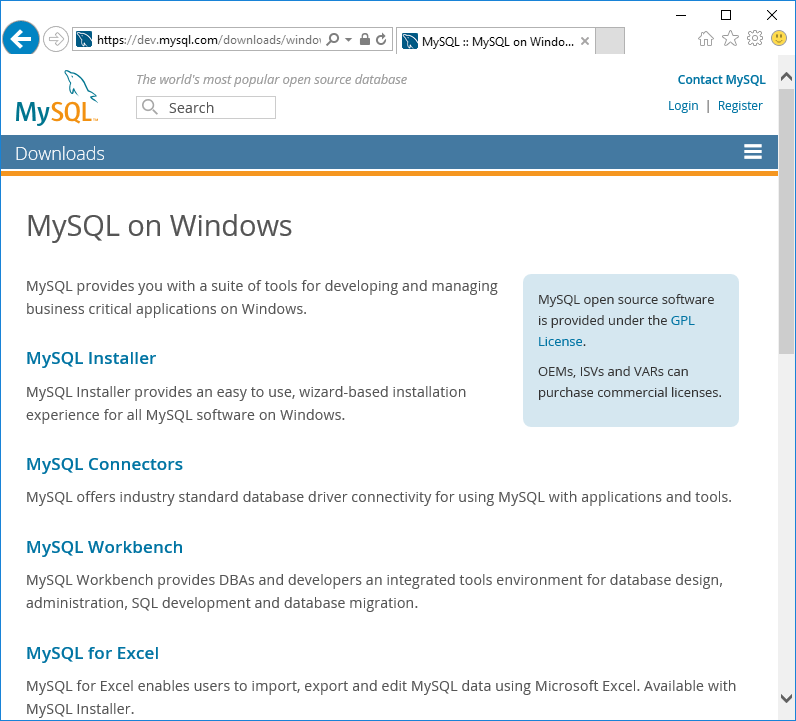
Переходим в MySQL Installer https://dev.mysql.com/downloads/installer/.
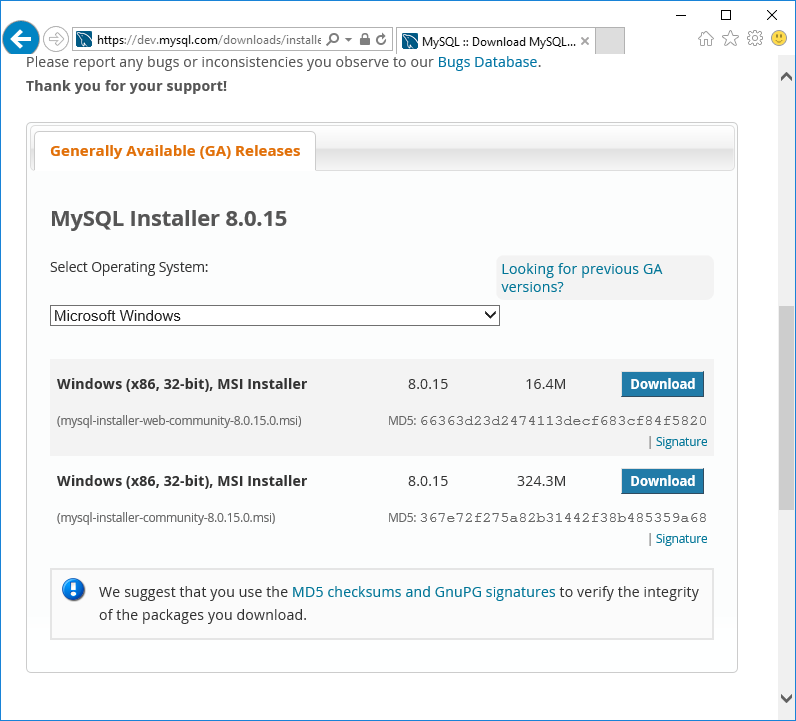
Меня интересует Microsoft Windows. Есть два варианта инсталлятора:
- mysql-installer-web-community-8.0.15.0.msi
- mysql-installer-community-8.0.15.0.msi
Судя по размеру, web-версия будет выкачивать нужные модули при установке, а в целом, отличий нет. Качаю mysql-installer-community-8.0.15.0.msi.
Установка
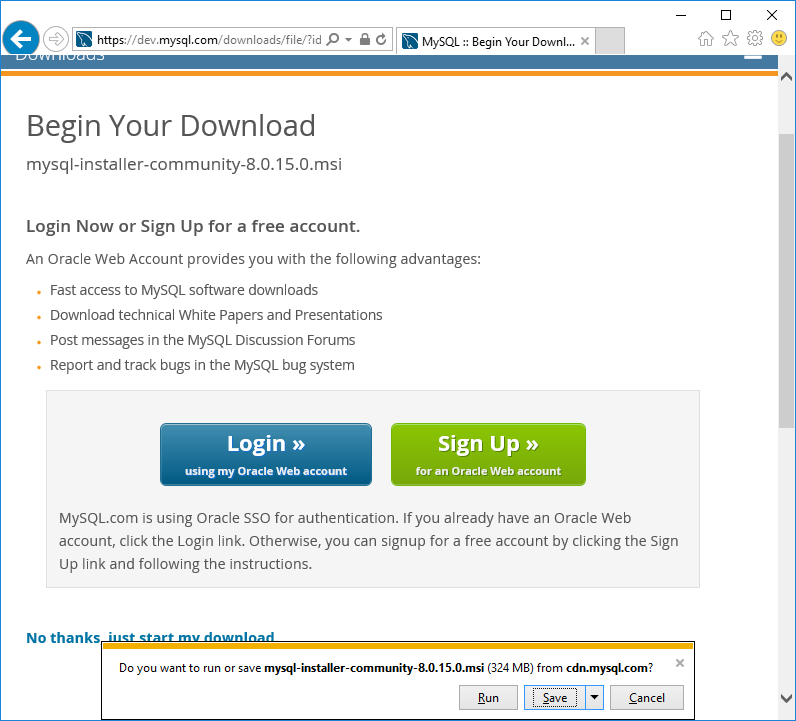
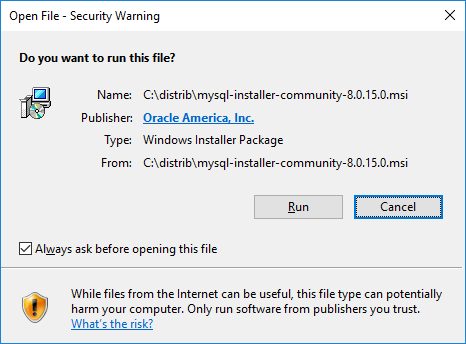
Запускаем скачанный дистрибутив.
Начинается установка.
Открывается мастер. Попадаем в раздел License Agreement.
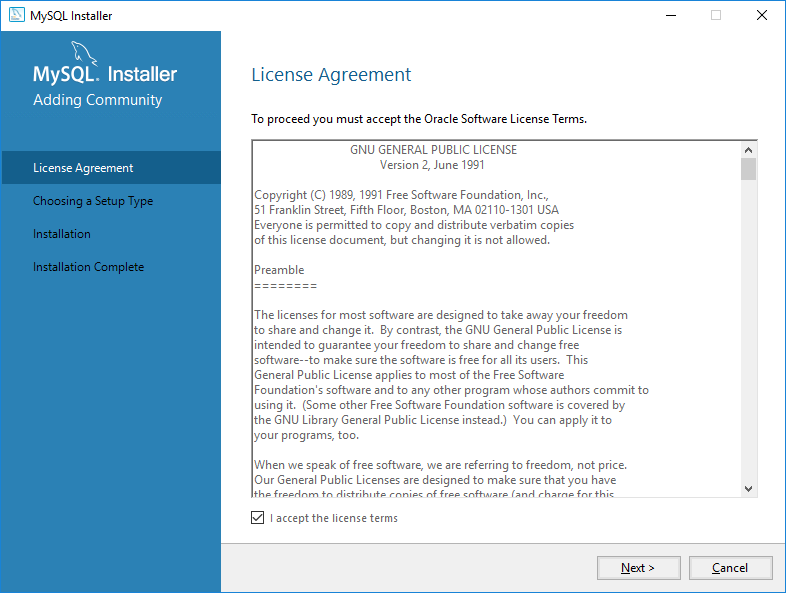
Принимаем лицензию. Next. Попадаем в раздел Choosing a Setup Type.
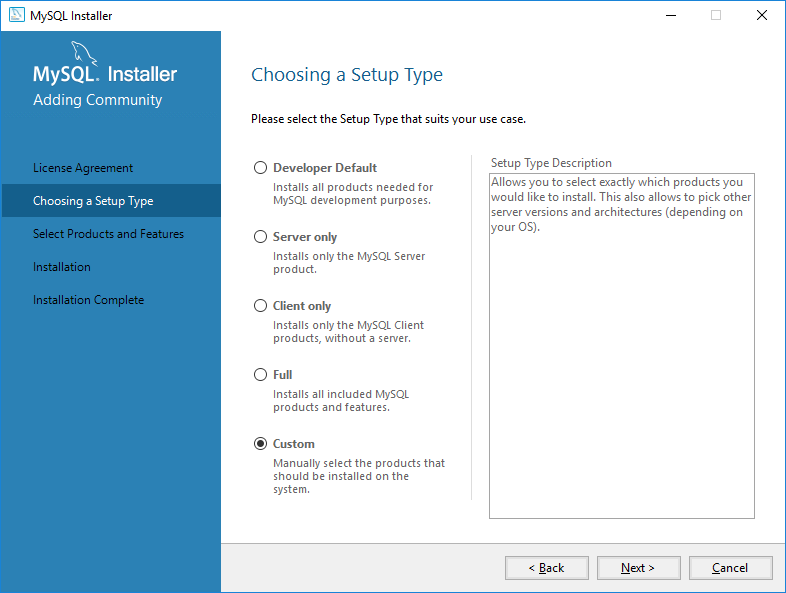
Нужно выбрать тип установки. Тип установки отличается только набором установленных компонентов. Выбираю Custom, т.к. точно знаю что мне необходимо установить. Next. Попадаем в раздел Select Products and Features.
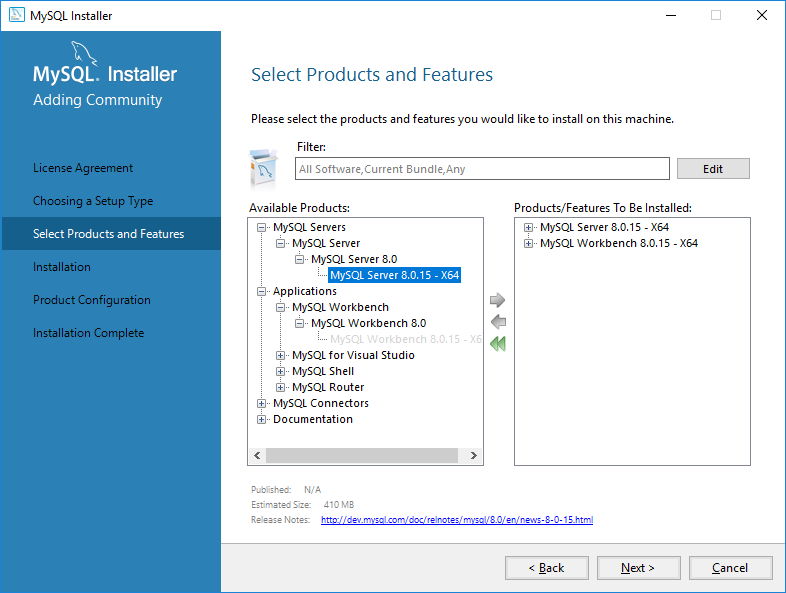
Здесь я выбираю только два компонента:
- MySQL Server 8.0.15 — X64
- MySQL Workbench 8.0.15 — X64
Next. Попадаем в раздел Installation.
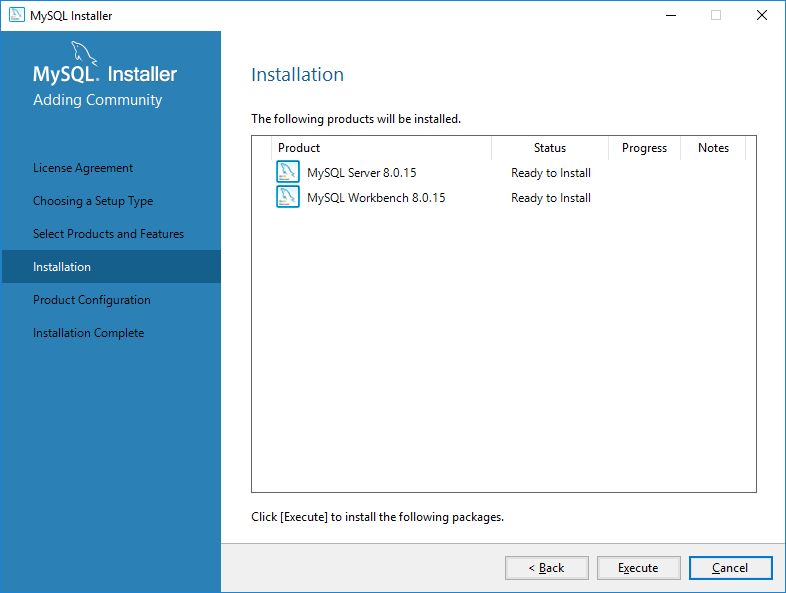
Проверяем выбранные компоненты. Execute.
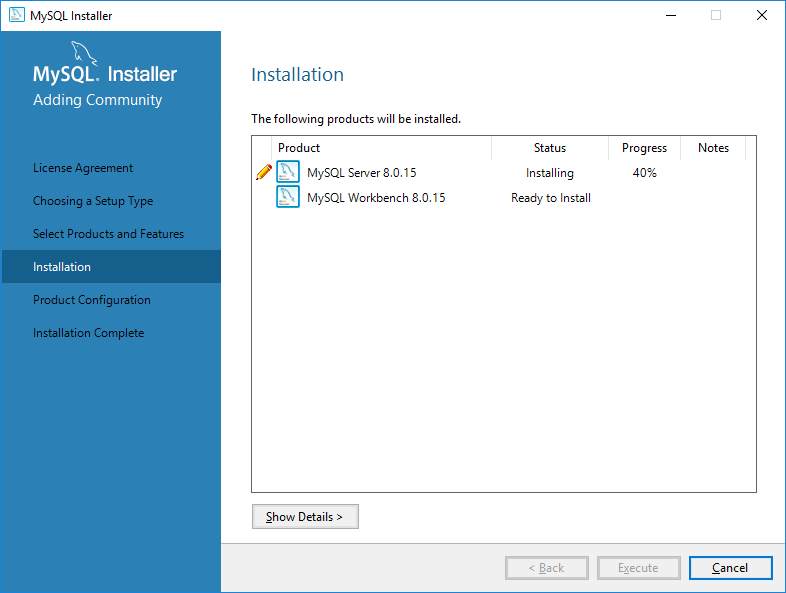
Начинается установка компонентов, сначала ставится MySQL Server.
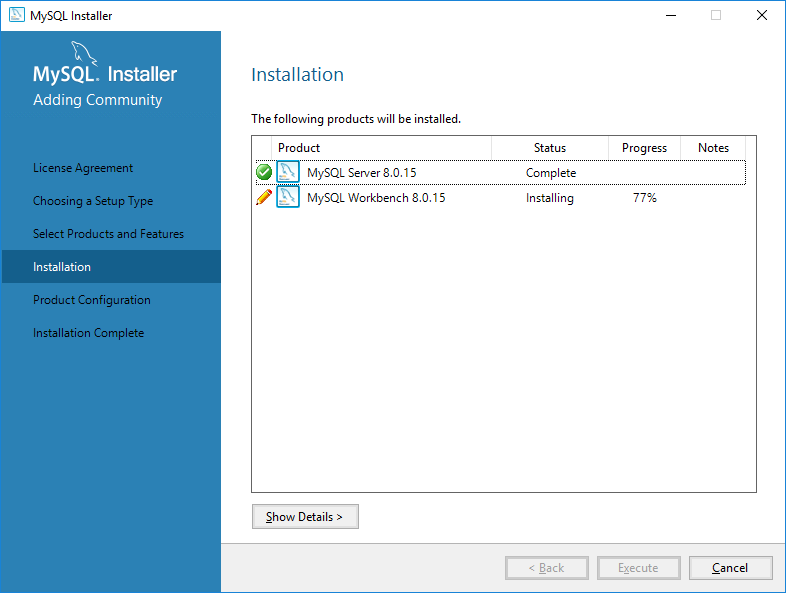
Затем устанавливается Workbench.
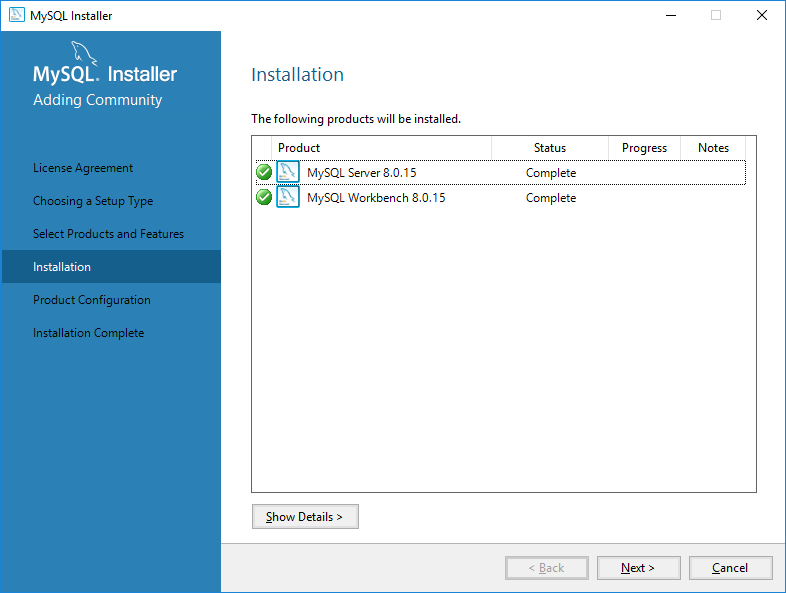
Next. Попадаем в раздел Product Configuration.
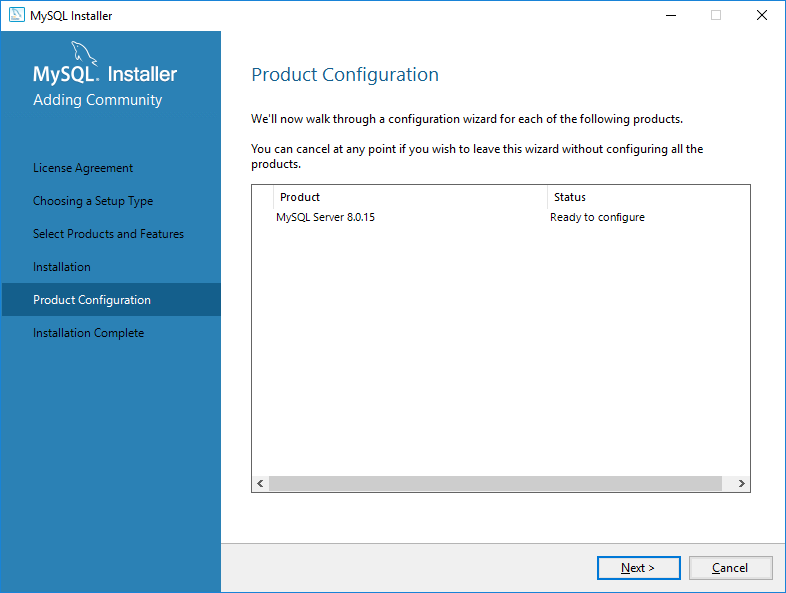
Нам предлагают настроить установленный MySQL Server. Next. Попадаем в раздел Group Replication.
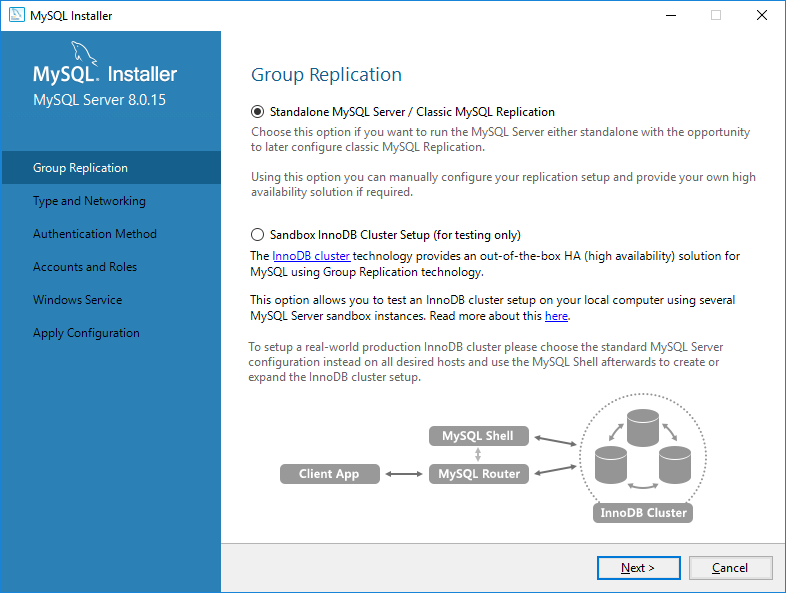
Здесь можно выбрать два варианта:
- Standalone MySQL Server / Classic MySQL Replication.
- Sandbox InnoDB Cluster Setup (for testing only)
Меня интересует первый вариант. Next. Попадаем в раздел Type and Networking.
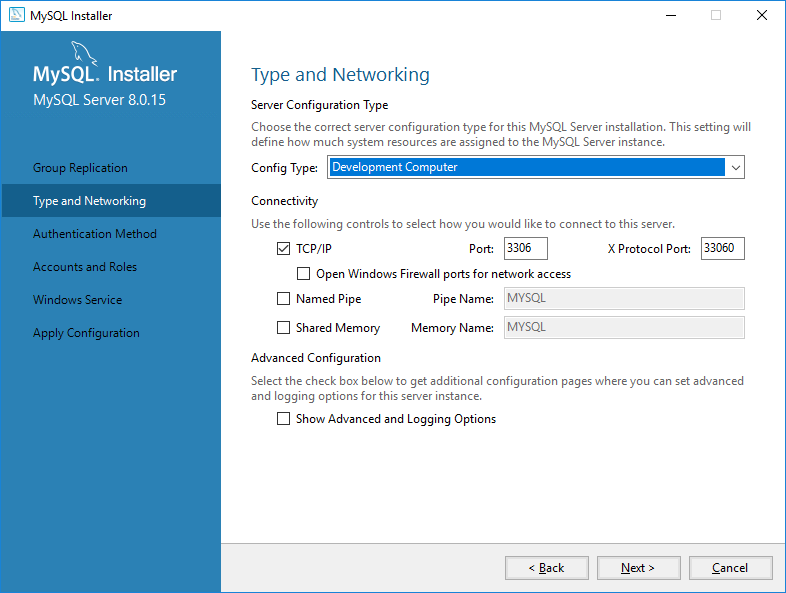
Выбираем тип конфигурации.
Config Type: выбираю Developer Computer. Этот вариант потребляет меньше всего памяти. Можно также выбрать среднее и максимальное потребление оперативки.
Connectivity: выбираю стандартный TCP/IP Port 3306. Можно ещё использовать Named Pipe и Shared Memory.
Next. Попадаем в раздел Authentication Method.
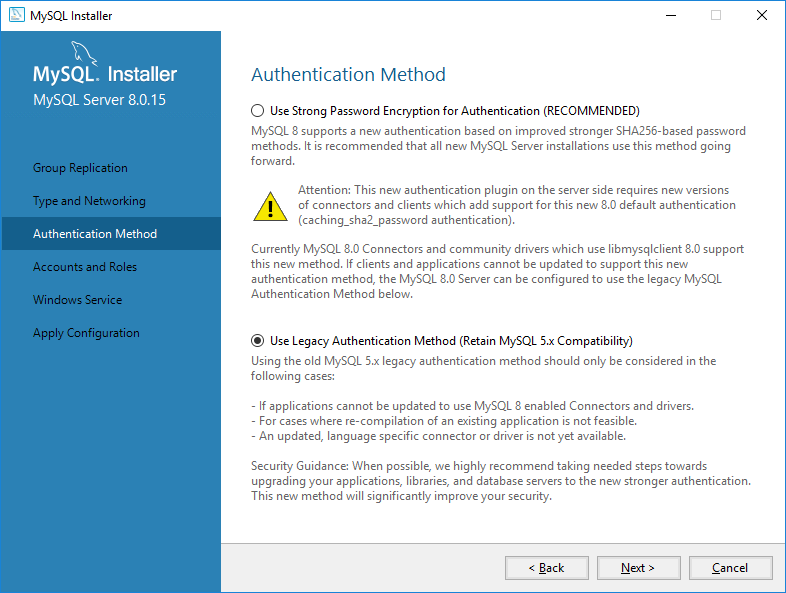
Снова предлагают два варианта:
- Use Strong Password Encryption for Authentication
- Use Legacy Authentication Method (Retain MySQL 5.x Compatibility)
Из соображений совместимости выбираю второй вариант. Next. Попадаем в раздел Accounts and Roles.

Здесь указываем рутовый пароль. Можно настроить конкретных юзеров, но я это буду делать потом, когда базы появятся. Next. Попадаем в раздел Windows Service.
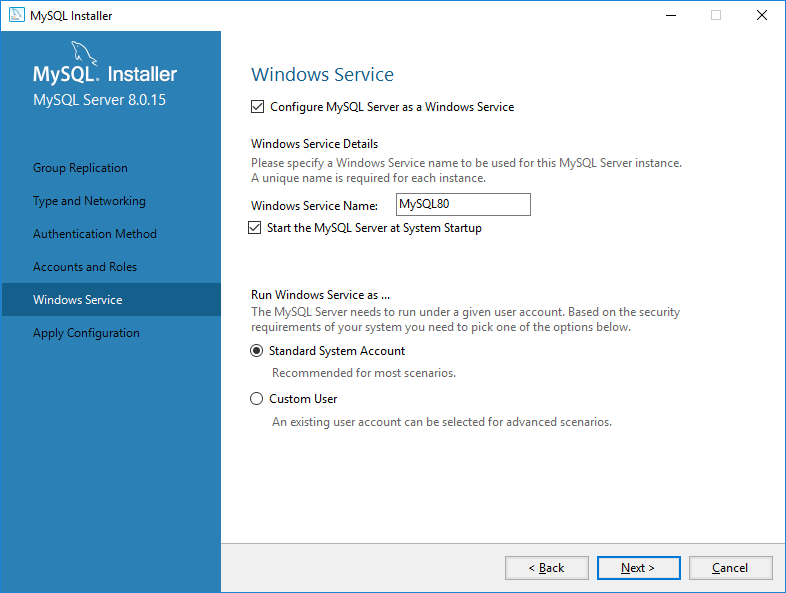
Здесь можно указать название сервиса Windows. Ставлю также галку, чтобы MySQL сервис запускался при загрузке. Можно сменить пользователя, от имени которого будет работать сервис. Next. попадаем в раздел Apply Configuration.

Execute.
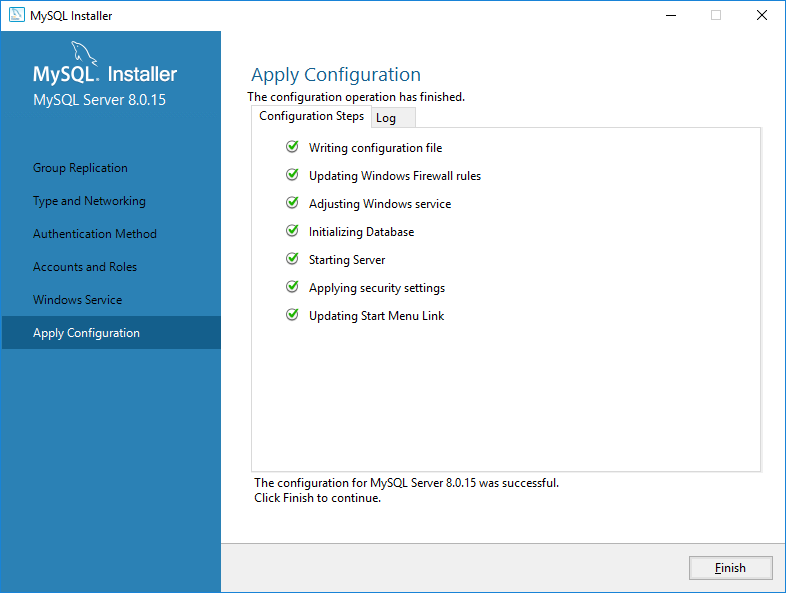
Установка завершена. Finish. Возвращаемся в раздел Product Configuration
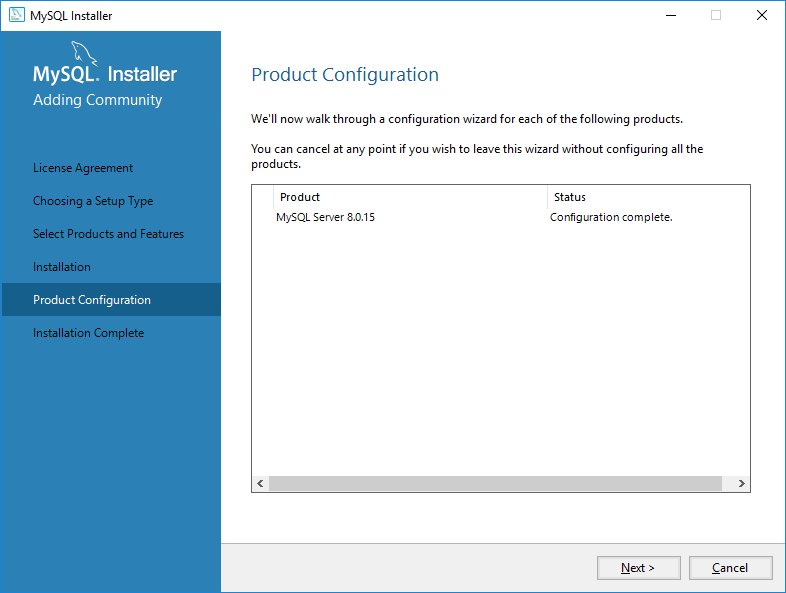
Конфигурация MySQL Server завершена. Next.
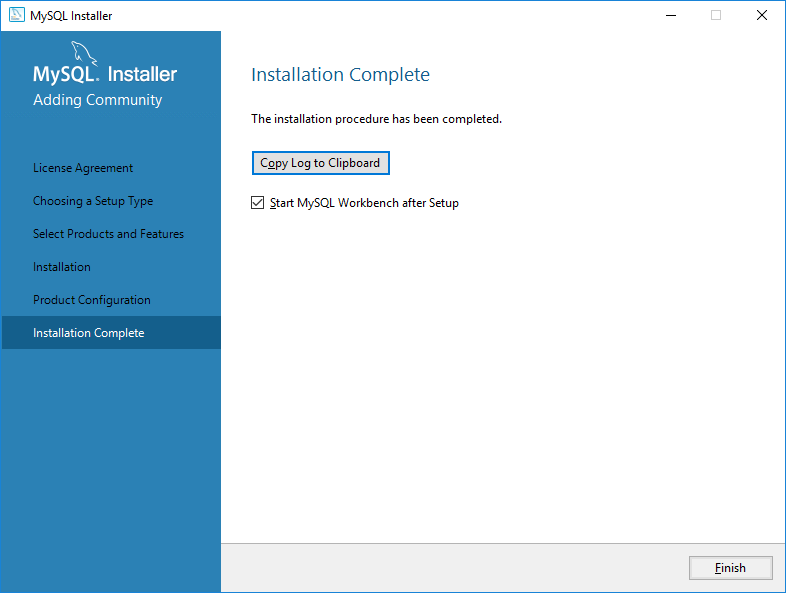
Finish. MySQL Server 8 и Workbench установлены.
Posted By: Mar. 25, 2020
How to Install MySQL in Windows Server 2016
If you are using the Windows server to host your website, you may use the MsSQL database server as a database backend. But, MsSQL is Microsoft’s commercial product and you will need to purchase license to use MsSQL will all features. So it is very difficult for small businesses to pay license costs.
To resolve this, you could try open-source database servers like, MySQL database server and use it as a database backend to save a license cost. You should install MySQL in your Windows Server 2016.
MySQL is a part of the Linux-based server and specially designed for LAMP/LEMP stack. It is also available for the Windows operating system. So you should use MySQL to manage and host your application.
In this tutorial, we will show you how to install and upgrade MySQL server on Windows Server 2016.
Prerequisites
- A server running Windows Server 2016.
Download MySQL Installer
MySQL Server is available for Microsoft Windows 64-bit operating systems only. Before installing MySQL Server, it is recommended to see https://www.mysql.com/support/supportedplatforms/database.html for supported Windows platform.
The simple and easiest way to install MySQL server in Windows Server 2016 system is to install it using MySQL installer. MySQL installer provides a simple and user-friendly wizard to install MySQL on Windows.
At the time of writing this article, the latest available version of MySQL is MySQL 8.0.19.
You can download the latest version of MySQL installer from the MySQL Community Download page as shown below.
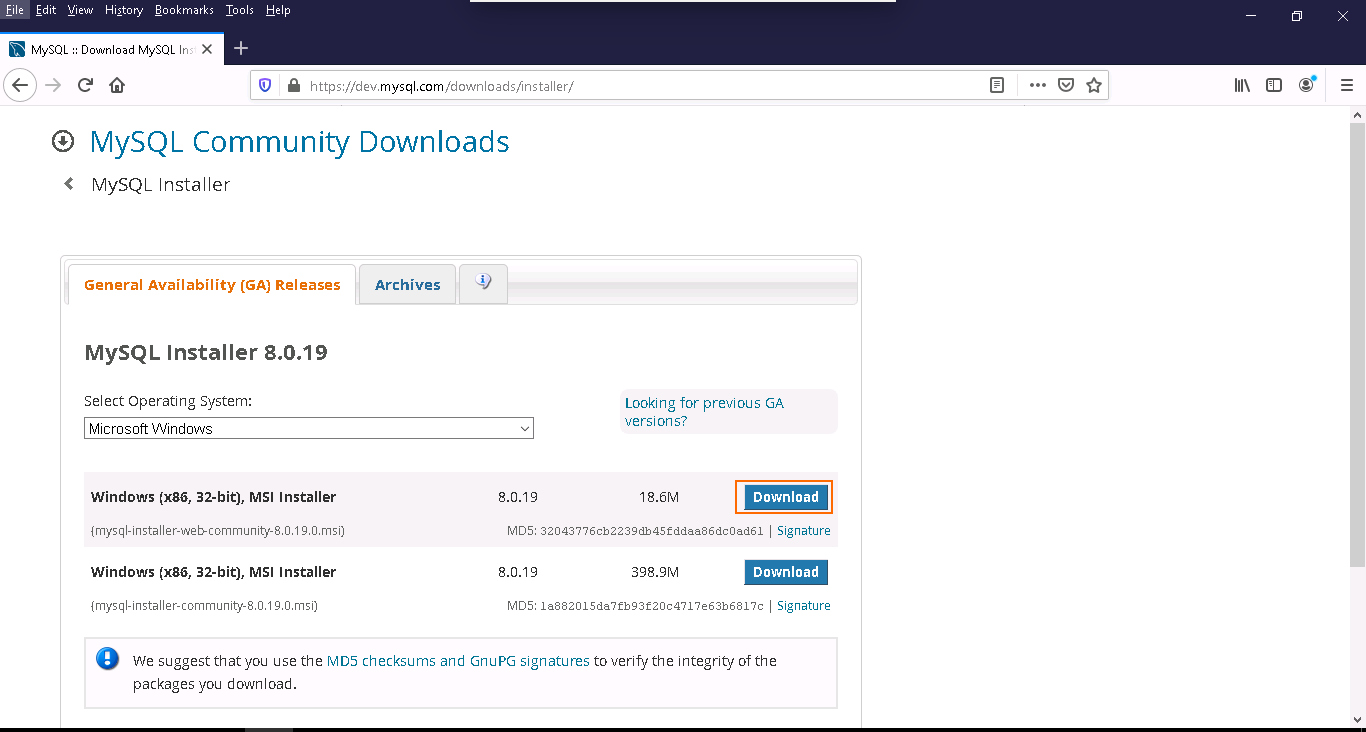
As you can see, there is two option available for download:
1- If you are connected to the internet, you can choose the online installation version mysql-installer-web-community-8.0.19.0.msi.
2- If you are not connected to the internet and want to install MySQL offline, you can choose the offline installation version mysql-installer-community-8.0.19.0.msi.
Click on the Download button to download the MySQL MSI installer.
You can install the following components using the MySQL installer:
- MySQL Server
- MySQL Workbench
- MySQL Notifier
- MySQL Shell
- MySQL Router
- ODBC Connector
- C++ Connector
- J Connector
- Net Connector
- MySQL Documentation
- Samples and Examples
Once you are done, you can proceed to the next step.
Install MySQL Server
You can follow the below steps to install the MySQL server on Windows server 2016:
Step 1 – Double click on the downloaded mysql-installer-web-community-8.0.19.0.msi file. You should see the MySQL Installer wizard in the following page:
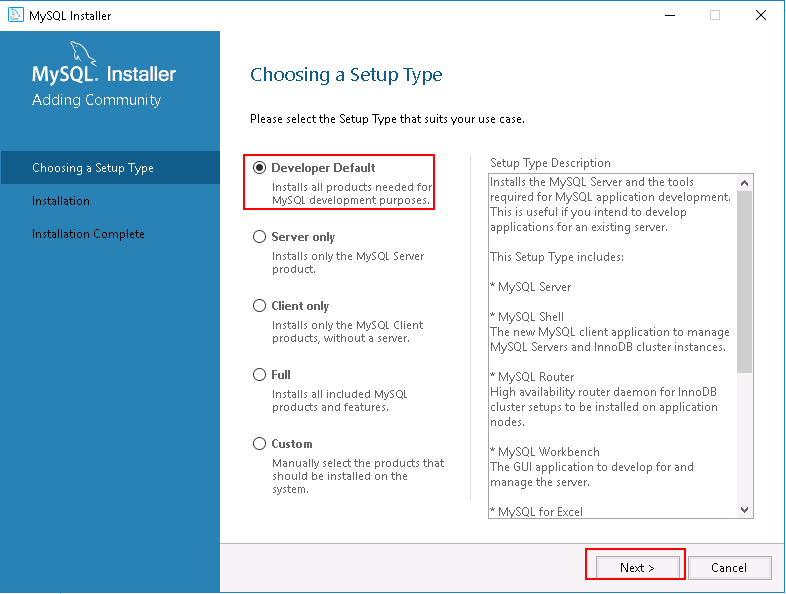
Developer Default option will install the selected version of MySQL Server with other MySQL tools required for MySQL development.
Step 2 – Choose your desired setup type and click on the Next button. You should see the list of all dependencies required to install MySQL server:
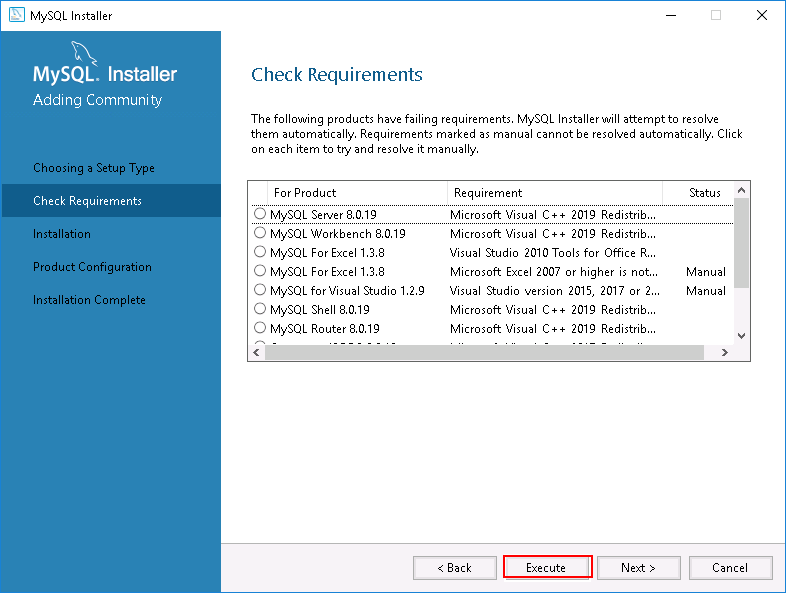
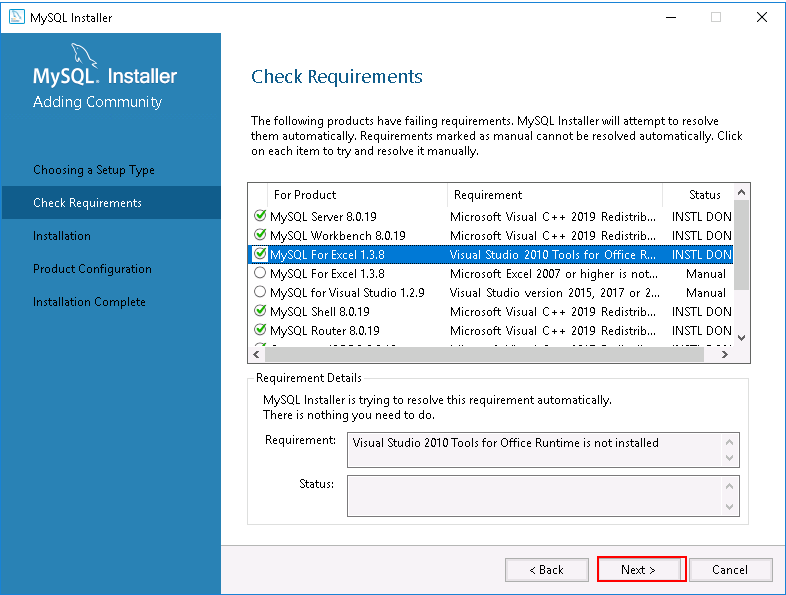
Step 3 – Click on the Execute button to install all dependencies. Once all the dependencies are installed, you should see the following page:
Step 4 – Click on the Next button to start the installation. You will be asked to install the MySQL server with some missing dependencies:
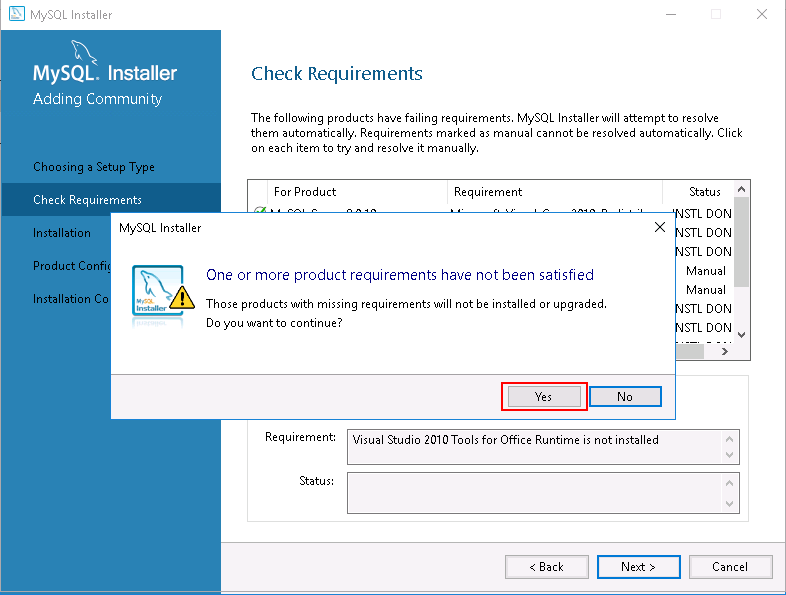
Step 5 – Click on the Yes button. You should see the following page:

Step 6 – Click on the Execute button to download and install the MySQL server with all required dependencies. Once the installation has been completed, you should see the following page:
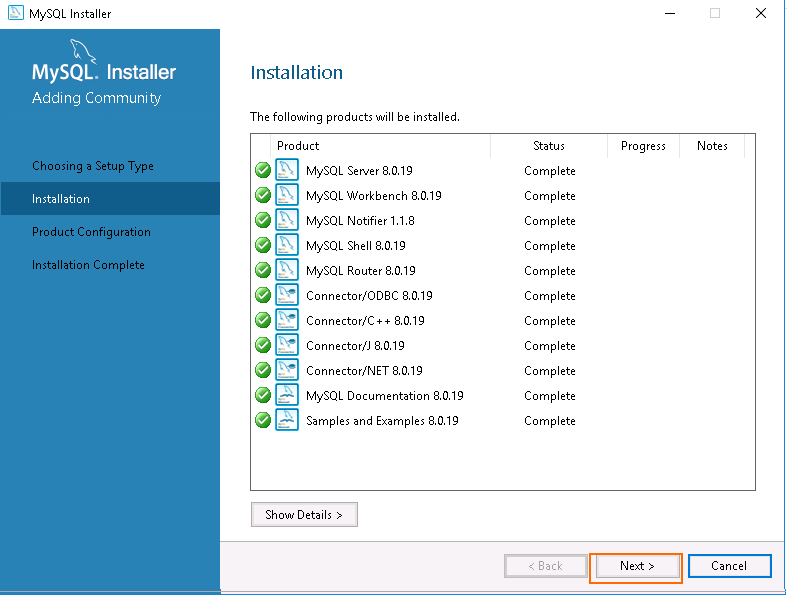
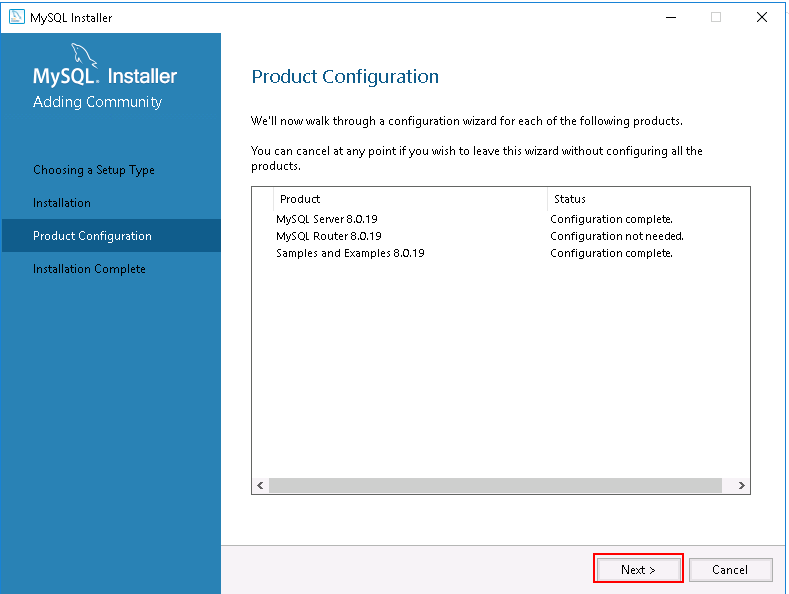
Step 7 – Click on the Next button. You should see the product configuration page:

Step 8 – Click on the Next button. You should see the following page:
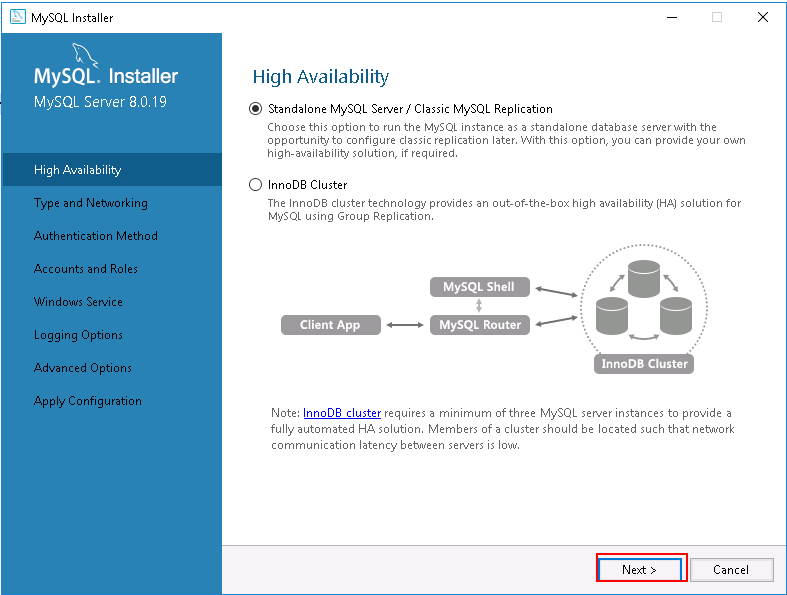
Step 9 – Select the Standalone MySQL server and click on the Next button. You should see the following page:
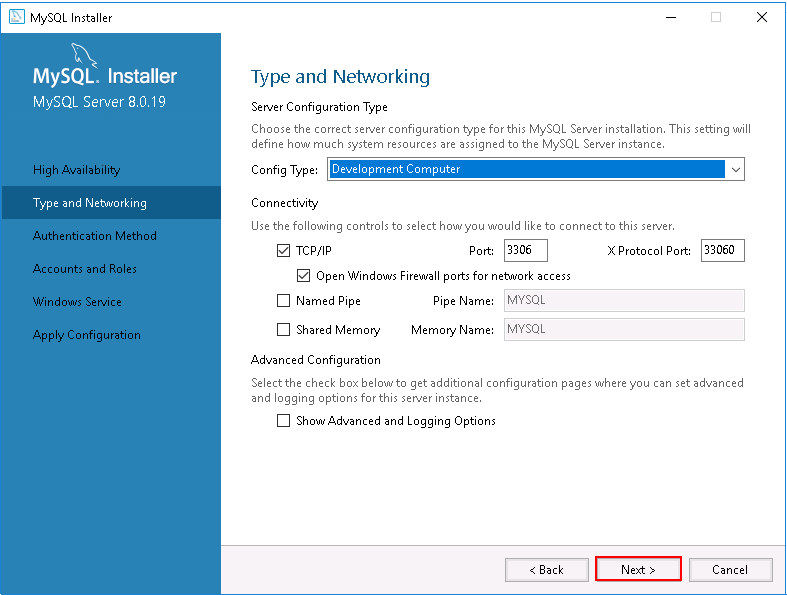
Step 10 – Choose the server configuration type and click on the Next button. You should see the following page:
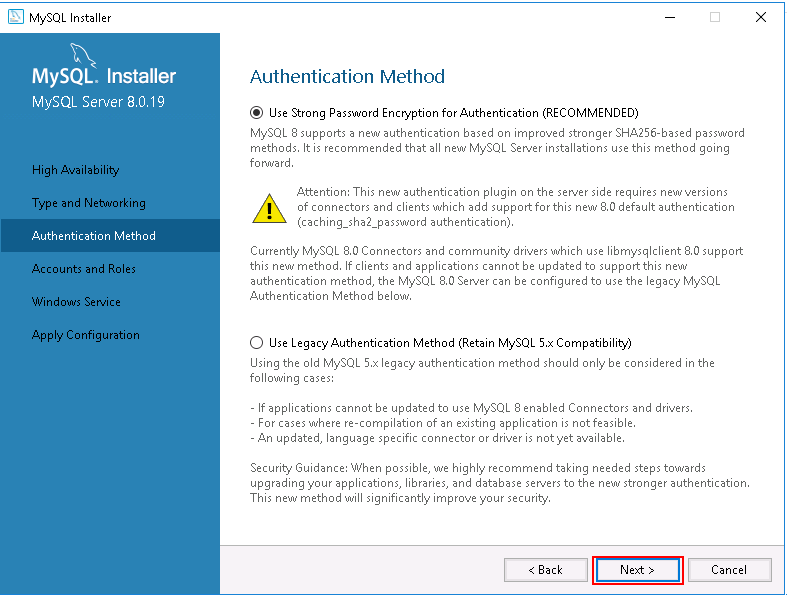
Step 11 – Select the authentication method and click on the Next button. You should see the following page:
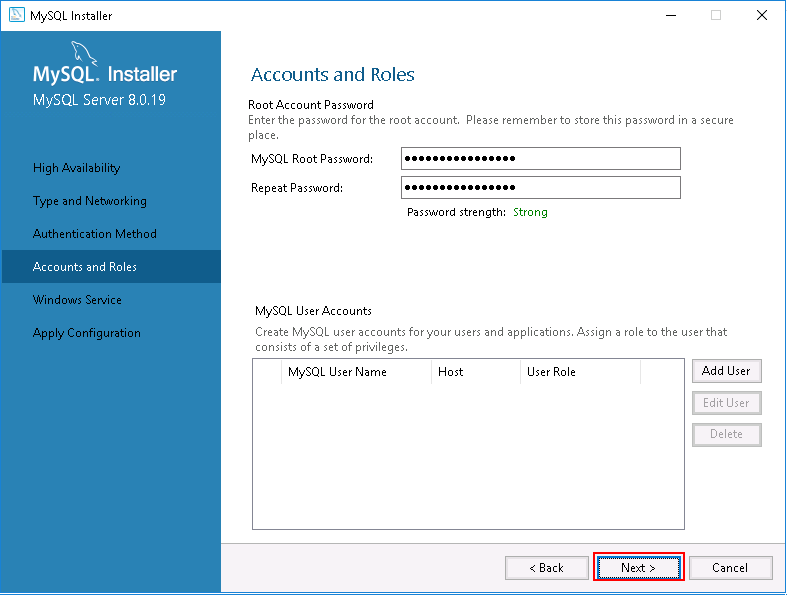
Step 12 – Set your root password and click on the Next button. You should see the following page:

Step 13 – Configure MySQL service and click on the Next button. You should see the following page:
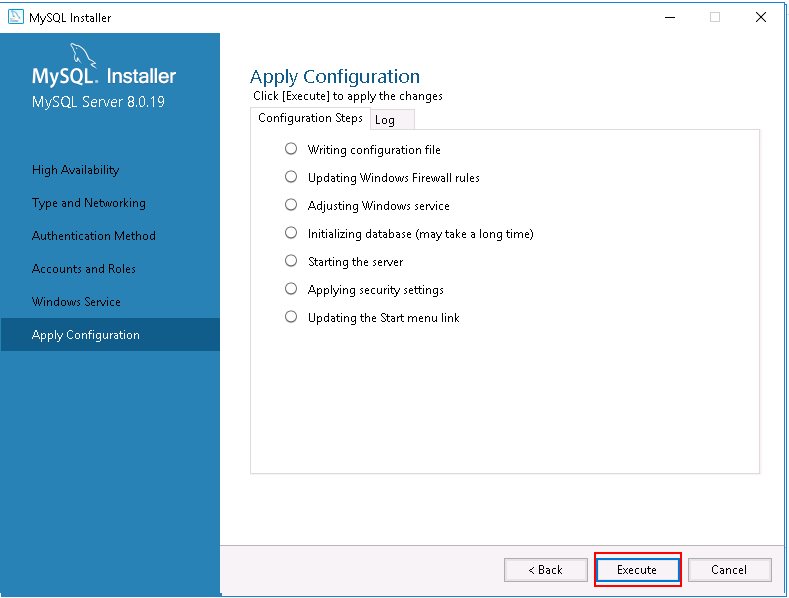
Step 14 – Click on the Execute button to apply the changes. You should see the following page:
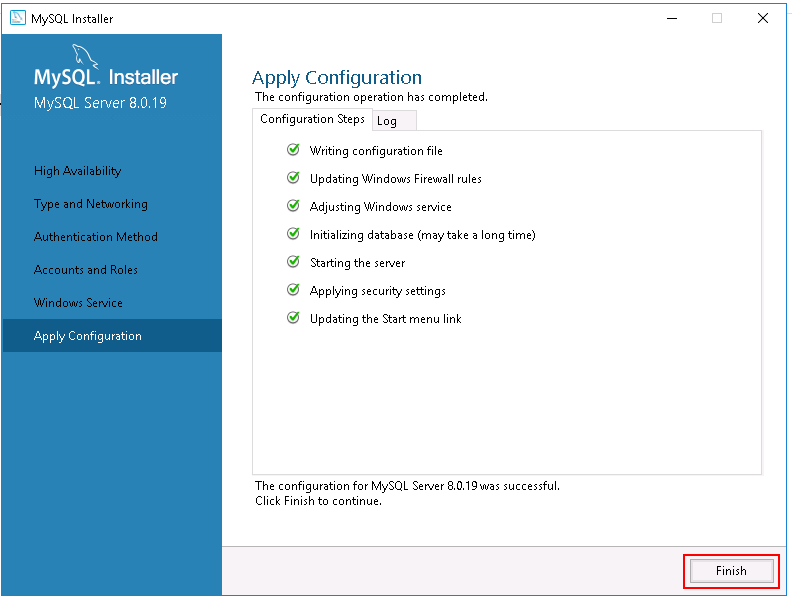
Step 15 – Click on the Finish button to complete the MySQL server configuration. You should see the following page:
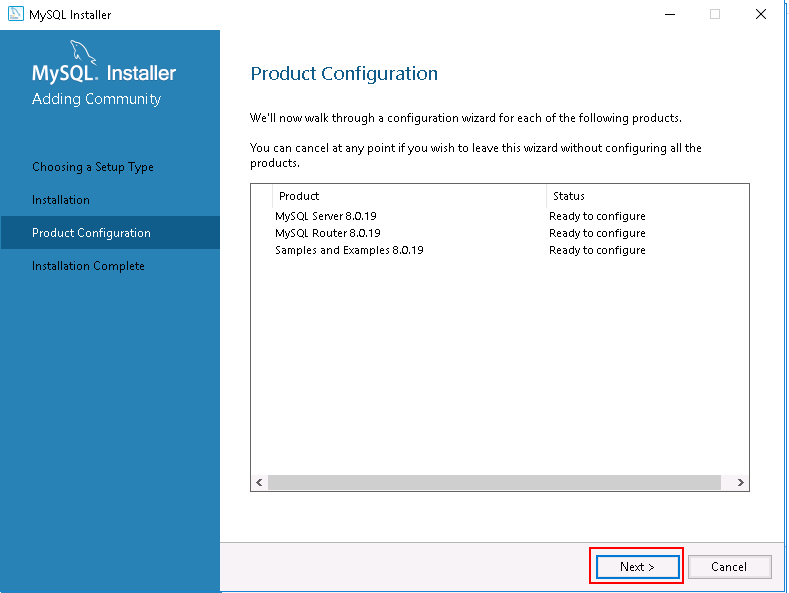
Step 16 – Click on the Next button to configure MySQL Router. You should see the following page:
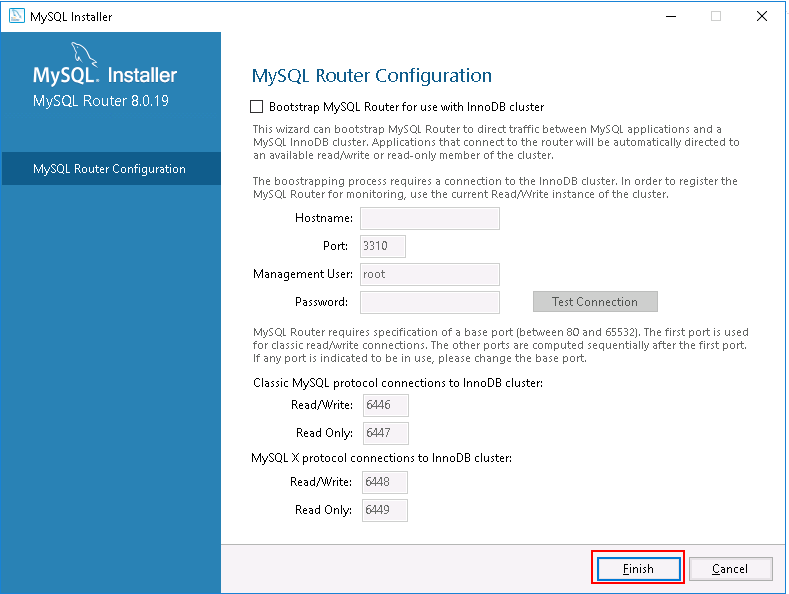
Step 17 – Click on the Finish button to complete the Router configuration. You should see the following page:

Step 18 – Click on the Next button to configure Samples and Examples. You should see the following page:
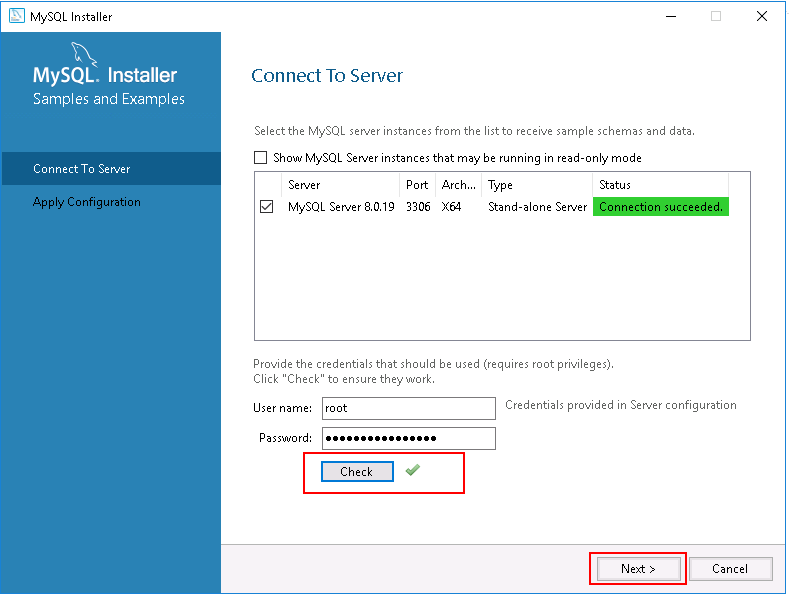
Step 19 – Select the MySQL server to receive sample schemas and data, click on the Check button and click on the Next button. You should see the following page:

Step 20 – Click on the Execute button to apply the changes. You should see the following page:
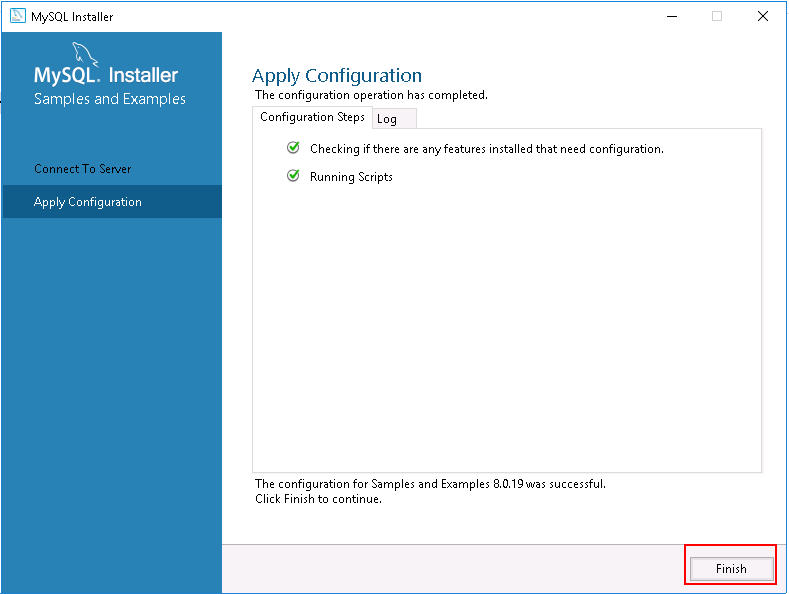
Step 21 – Click on the Finish button to complete the configuration. You should see the following page:
Step 22 – Click on the Next button. You should see the following page:
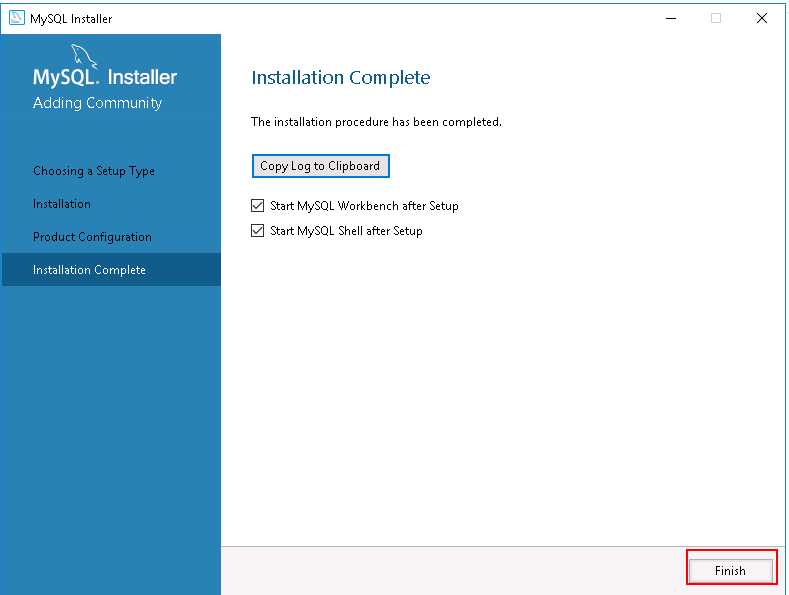
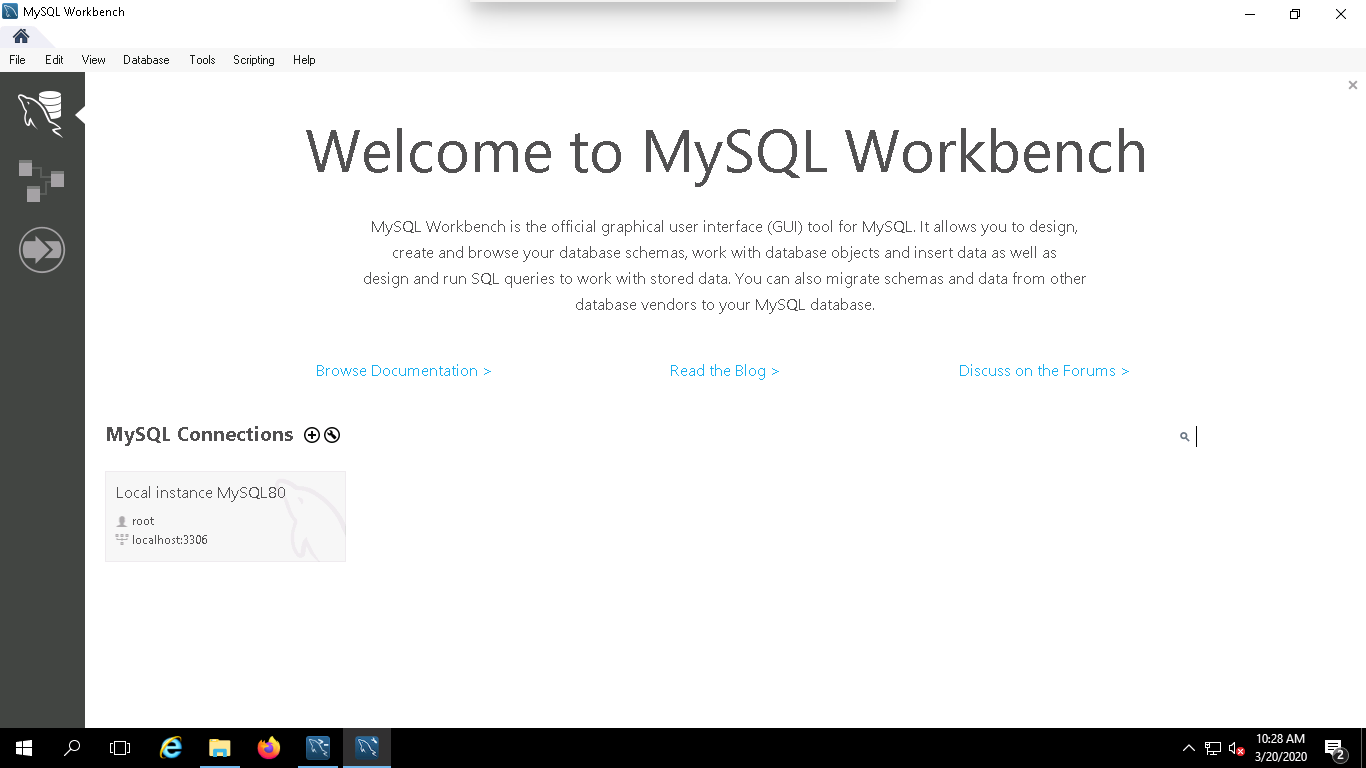
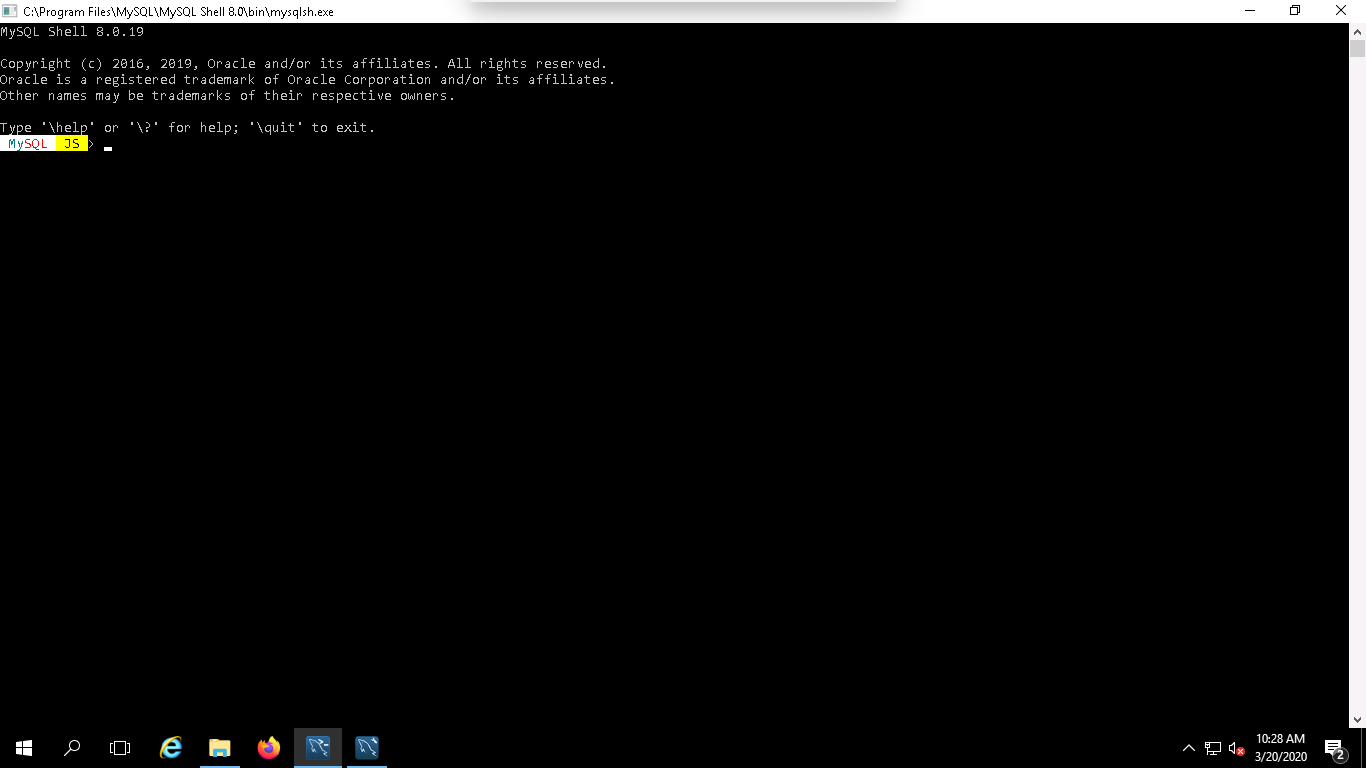
Step 23 – Click on the Finish button to complete the installation and launch MySQL Workbench and MySQL Console. You should see the following page:
MySQL Workbench:
MySQL Console:
Once you are done, you can proceed to the next step.
Upgrade MySQL Server
If you have MySQL Server already installed on your Windows server and want to upgrade it to the latest version, follow the below steps:
Step 1 – Download the latest version of MySQL installer from the MySQL Community Download page.
Step 2 – Double click on the downloaded mysql-installer-web-community-8.0.19.0.msi file. You should see the following page:
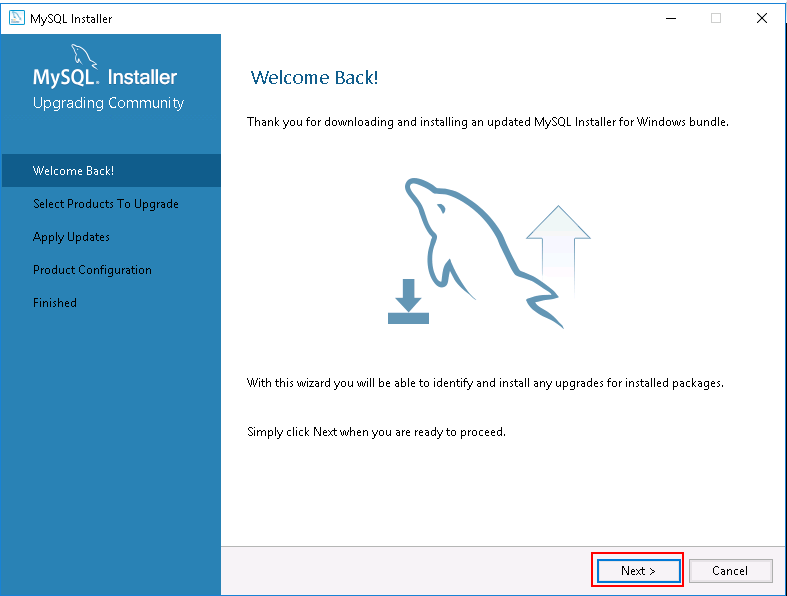
Step 3 – Click on the Next button. You should see the installed version and available upgrade version of MySQL server with other products are shown in the following page:
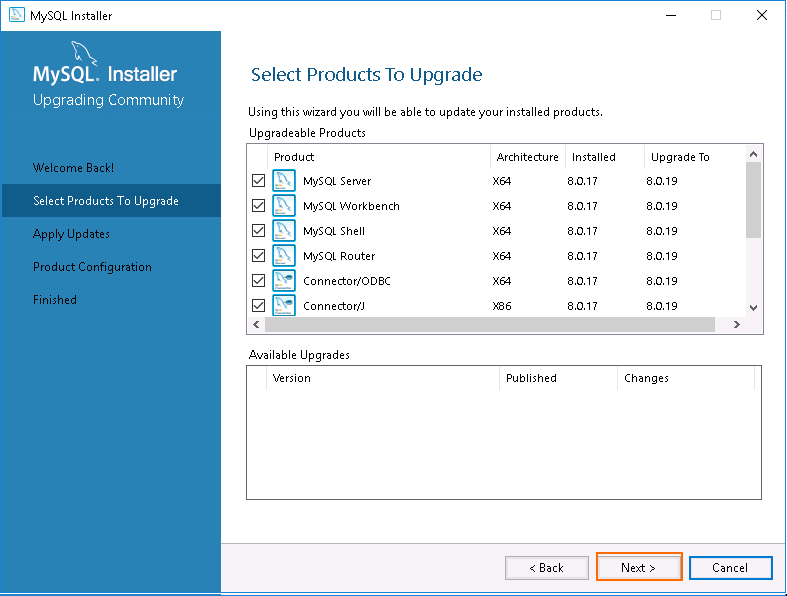
As you can see, MySQL server 8.0.17 is already installed and you will need to upgrade this to version 8.0.19.
Step 4 – Click on the Next button. You should see the following page:
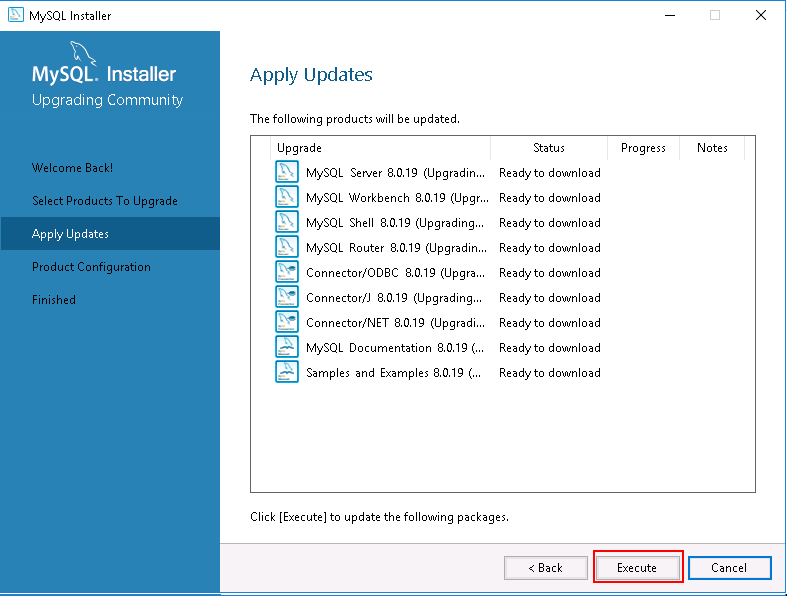
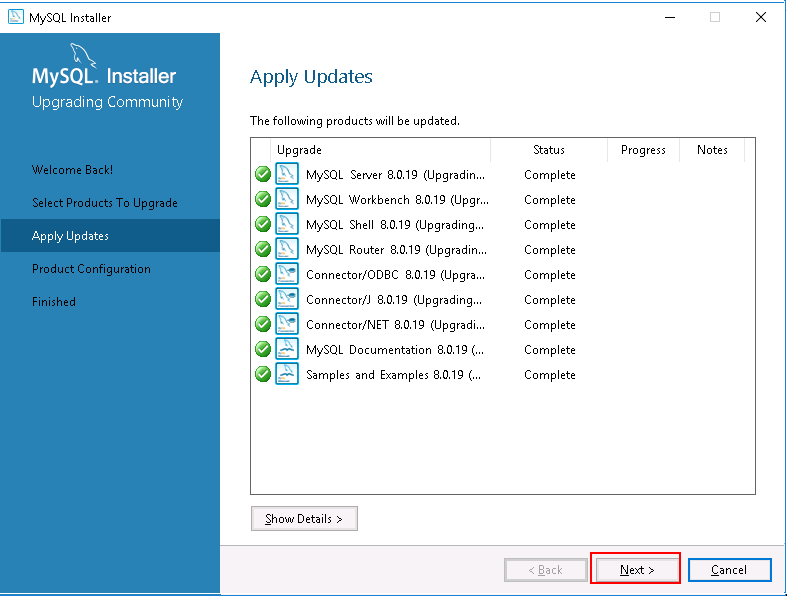
Step 5 – Click on the Execute button to download and upgrade the MySQL server.Once MySQL server with all products is upgraded, you should see the following page:
Step 6 – Next, click on the Next button and complete the remaining process to configure the MySQL server.
Conclusion
In the above guide, we learned how to install and upgrade the MySQL server on Windows server 2016. I hope you can now easily install MySQL server on any fresh Windows server.
For
more information about MySQL for Windows, visit the MySQL Windows
documentation at https://www.mysql.com/why-mysql/windows/.
MySQL представляет собой реляционную СУБД (систему управления базами данных) с открытым исходным кодом. Данная СУБД используется как в небольших проектах, так и в корпоративных системах, обрабатывающих большие объёмы данных. MySQL является одной из самых распространённых СУБД в силу простоты в использовании и низкого порога входа. Ниже рассмотрим специфику установки MySQL на виртуальный сервер, работающий под управлением Windows Server 2016.
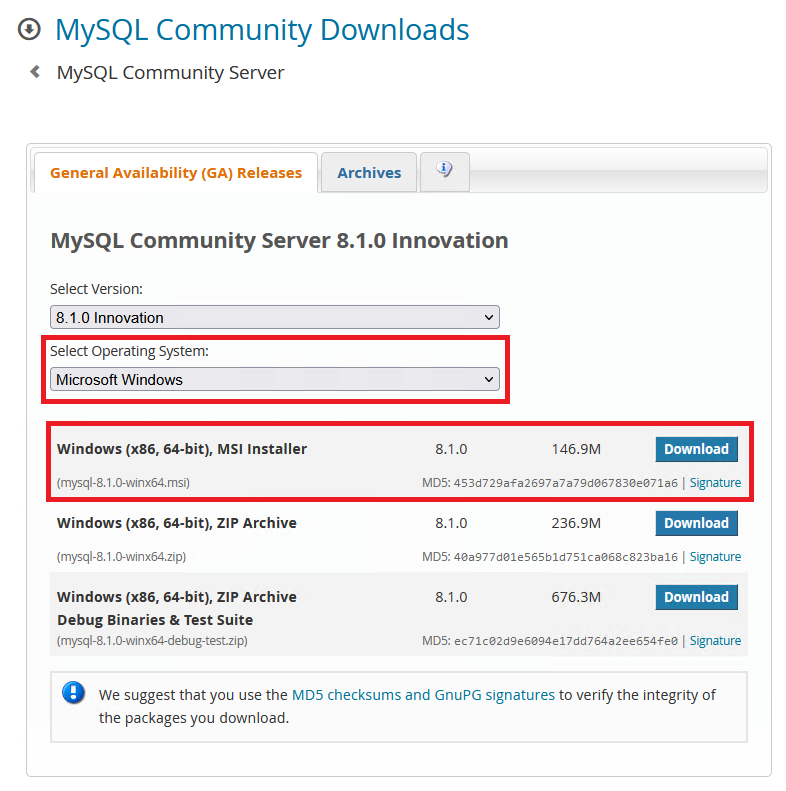
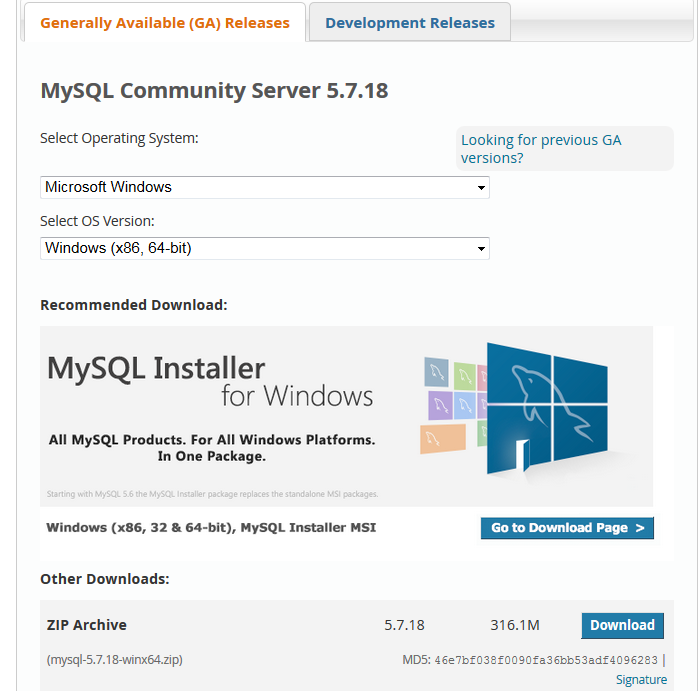
Дистрибутив MySQL доступен на странице загрузки официального сайта. Для того, чтобы загрузить его, выберите операционную систему Microsoft Windows, после чего нажмите Download на строке Windows (x86, 64-bit), MSI Installer.
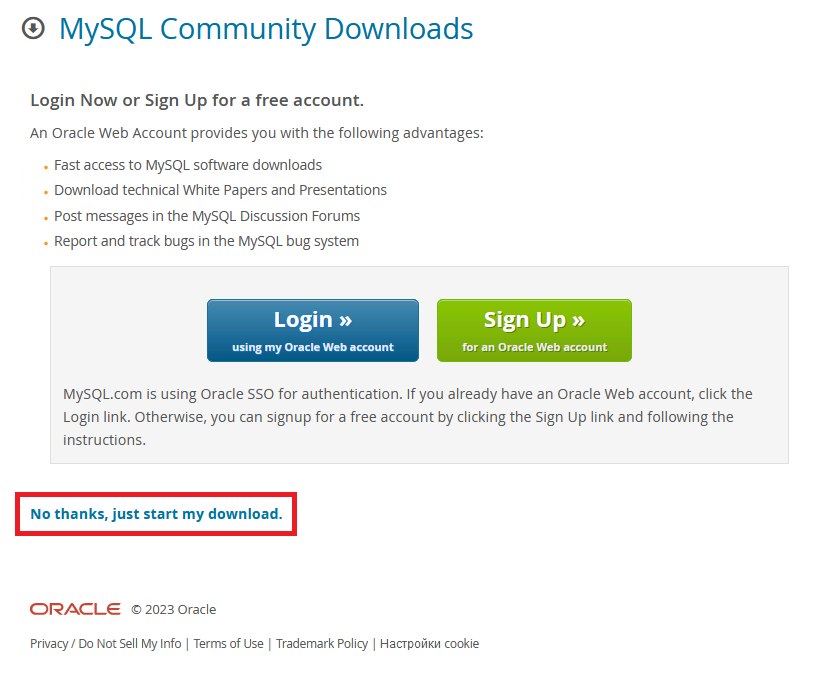
Перед загрузкой дистрибутива система предложит вам войти или зарегистрироваться на сайте MySQL. Вы можете войти на сайт, если у вас есть соответствующая учётная запись, либо зарегистрироваться, если есть желание. Чтобы не делать ни первого, ни второго, нажмите на ссылку No thanks, just start my download.
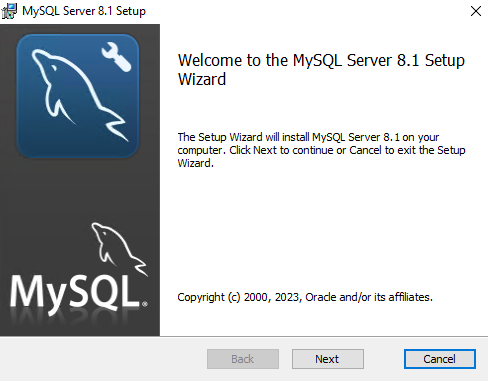
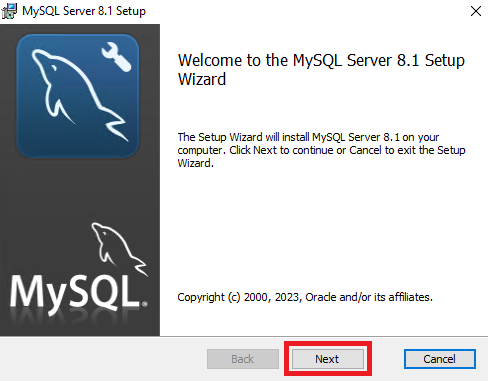
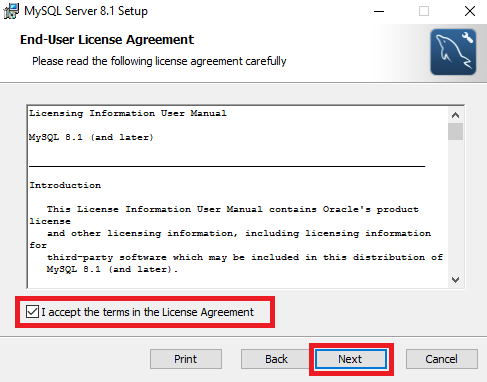
По окончании загрузки запустите скачанный файл на исполнение. В стартовом окне мастера установки нажмите Next.
В следующем окне необходимо согласиться с условиями лицензии, активировав опцию I accept the terms in the License Agreement. После чего нажмите Next.
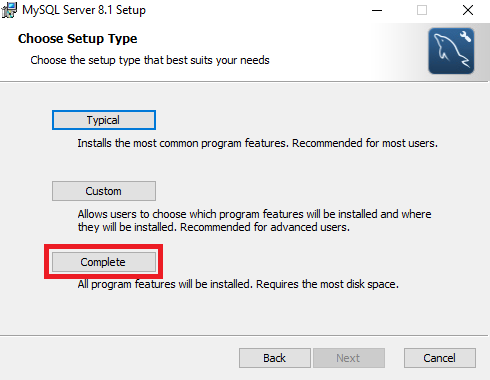
Далее, для установки полного пакета MySQL нажмите кнопку Complete.
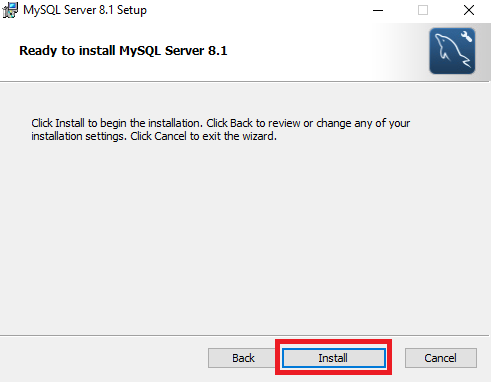
И наконец, для запуска непосредственно инсталляции нажмите Install.
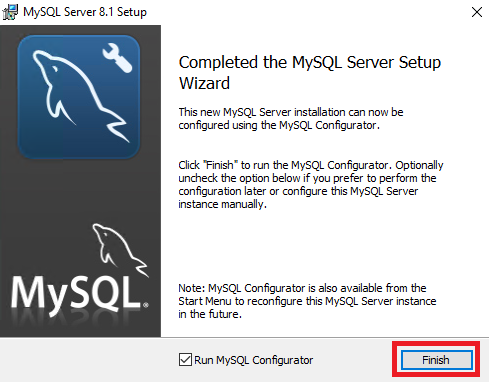
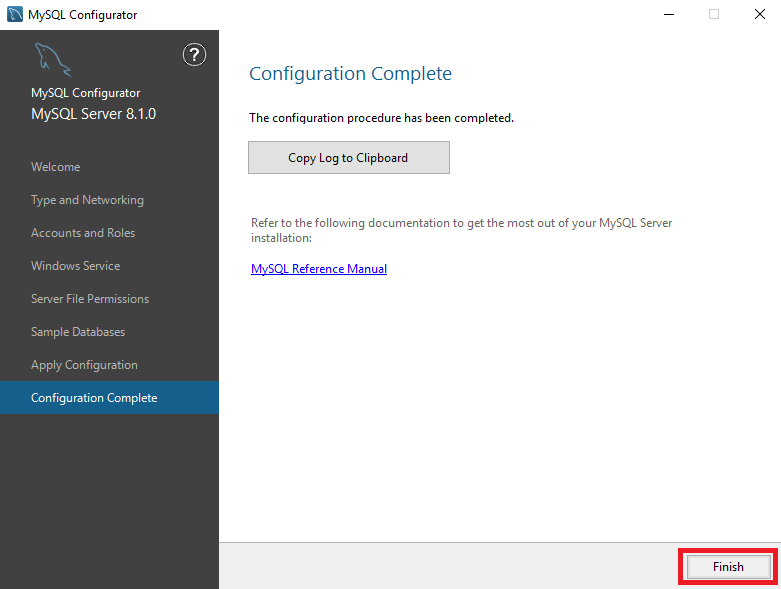
Когда установка закончится, нажмите Finish. При этом, если будет стоять галочка в строке Run MySQL Configuration, после закрытия установщика система запустит конфигуратор MySQL.
Конфигуратор MySQL
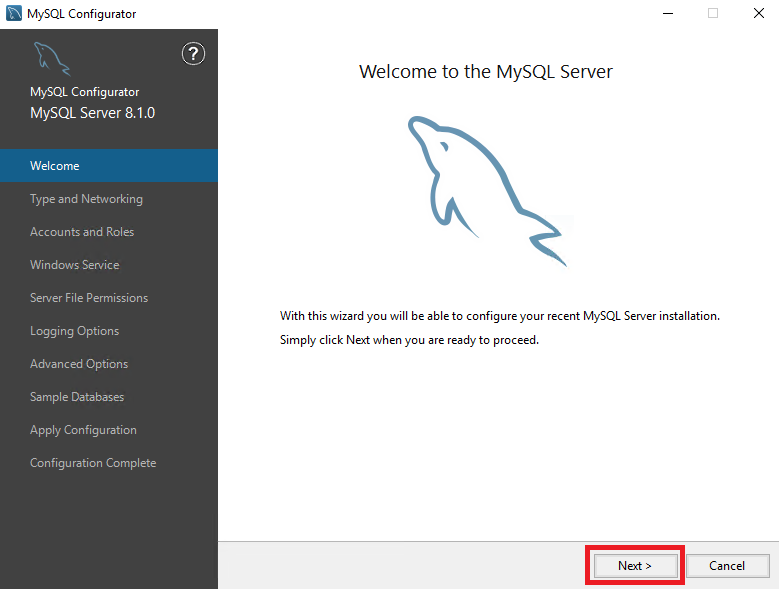
В стартовом окне конфигуратора нажмите Next.
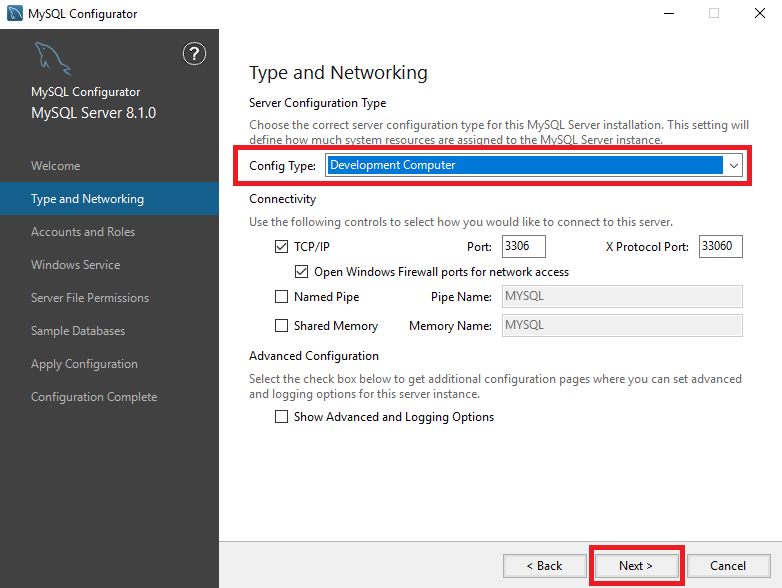
На следующем шаге в строке Config Type выберите Development Computer. Данная конфигурация позволяет установить MySQL с целью демонстрации его возможностей. Дополнительные опции на этом шаге пока оставьте предложенными по умолчанию.
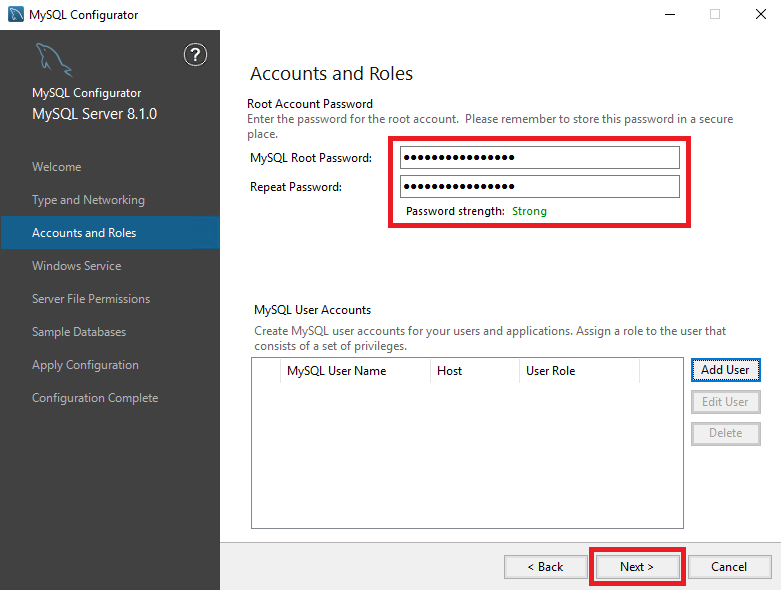
В окне Accounts and Roles придумайте и введите пароль для учётной записи root. Также, при необходимости добавьте в MySQL пользователя для использования в системе и назначьте ему роль, состоящую из набора привилегий. Добавление новой учётной записи можно произвести при помощи кнопки Add User.
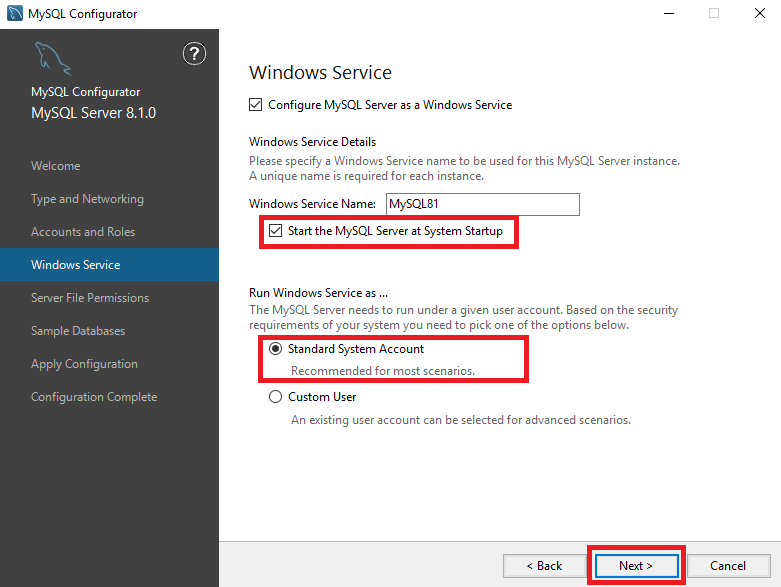
Далее, мастер установки предполагает, что по умолчанию MySQL будет запускаться как служба, которая будет называться MySQL81. Активированная опция Start the MySQL Server at System Startup означает, что служба будет запускаться вместе с запуском сервера. Выбранное значение Standard System Account говорит о том, что служба будет запущена от имени стандартной системной учётной записи. В нашем примере нет необходимости использовать для этого специализированного пользователя.
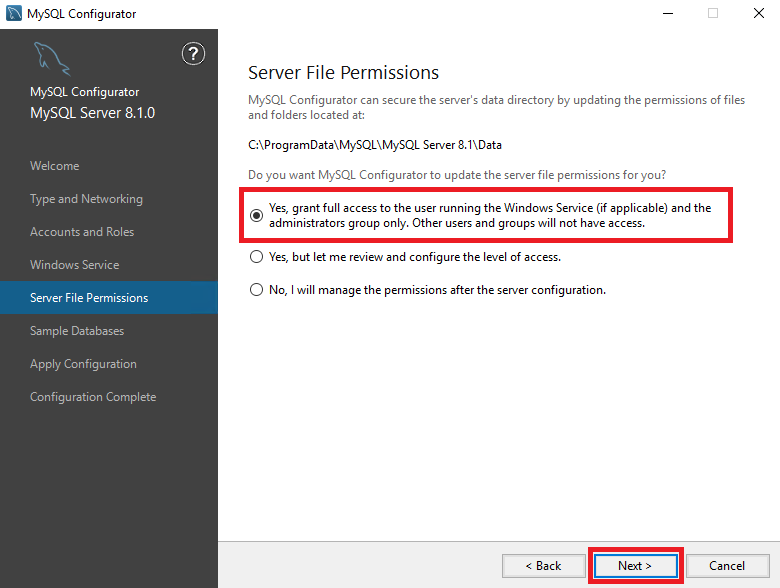
В окне Server File Permissions конфигуратор предлагает защитить каталог данных сервера, обновив разрешения для файлов и папок, размещённых в каталоге установки MySQL. Из предложенных вариантов выберите предоставление полного доступа только учётной записи, запускающей службу, и группе администраторов.
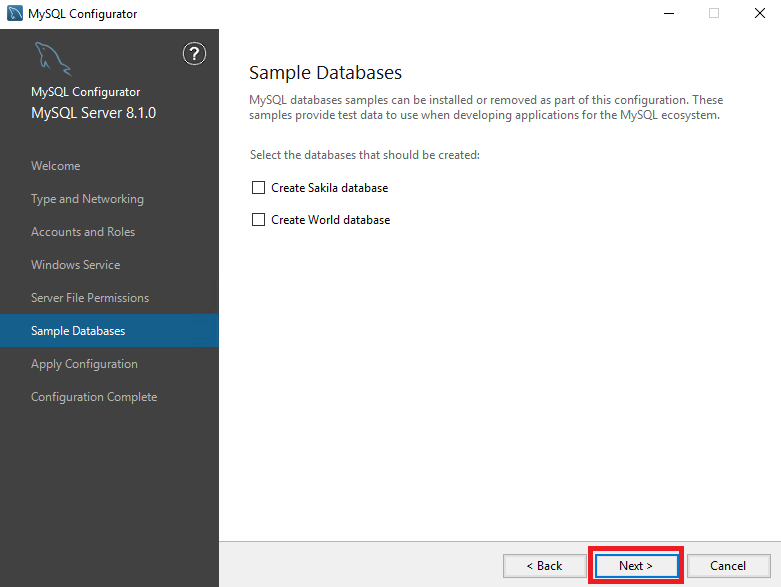
На следующем шаге мастер предлагает создать образцы баз данных, которые могут стать частью конфигурации. Данные образцы предоставляют тестовые данные для использования при разработке приложений.
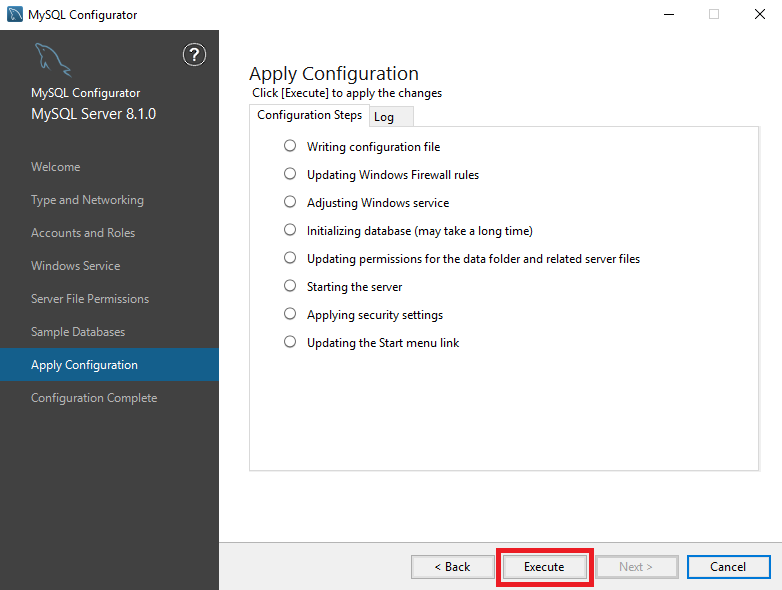
Для применения выбранной конфигурации нажмите Execute.
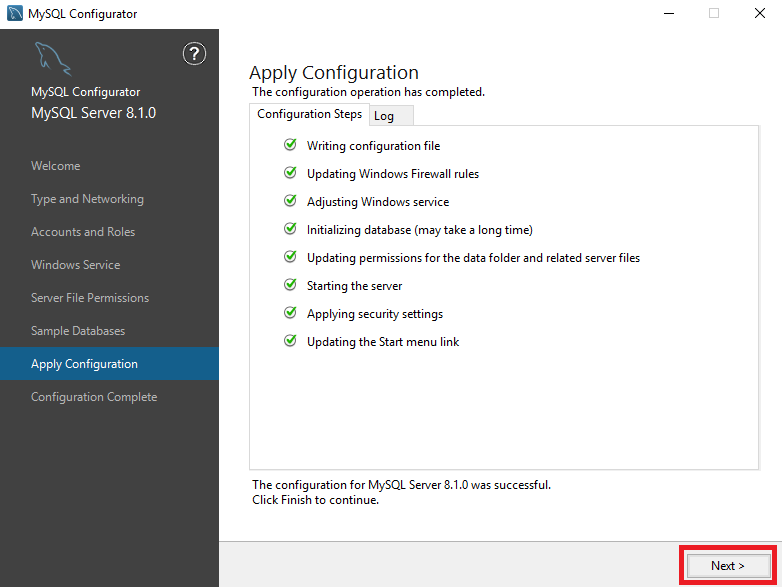
После применения конфигурации нажмите Next.
В следующем окне нажмите Finish.
Запуск MySQL
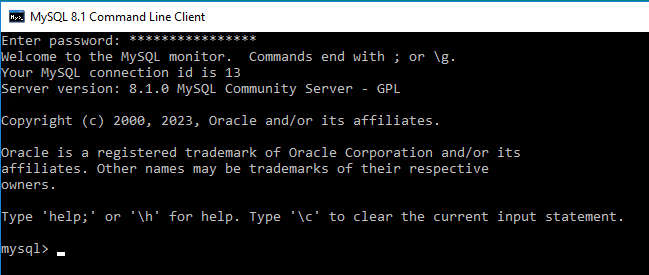
После окончания работы конфигуратора можно будет запустить командную строку MySQL и проверить корректность исполнения запросов. Для запуска командной строки в меню Пуск необходимо использовать ярлык MySQL 8.1 Command Line Client.
Для подключения к MySQL нужно набрать пароль учётной записи root, который вы вводили в окне Accounts and Roles во время настройки конфигуратора.
В качестве проверки работоспособности мы использовали несколько простейших команд, которые позволяют увидеть, что наши запросы исполняются корректно. Например, команда SHOW DATABASES; покажет все присутствующие в нашем MySQL базы данных. При помощи команды CREATE DATABASE your_base; мы создали новую базу данных с именем your_base.
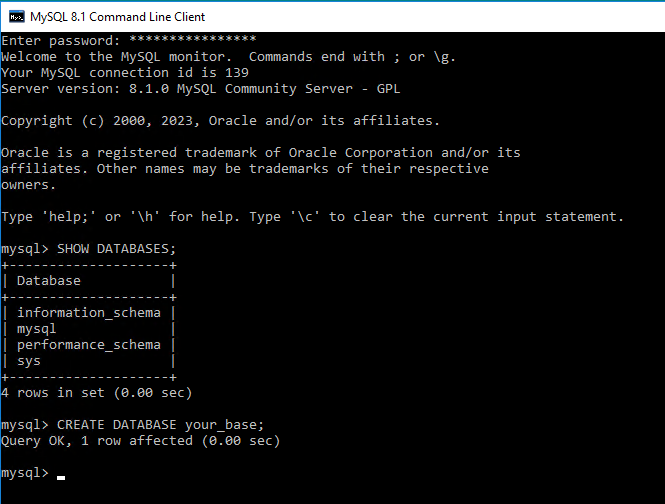
Созданная база будет находиться в списке баз данных, если повторно ввести команду SHOW DATABASES;.
Для того, чтобы переключиться на новую базу, мы использовали команду USE your_base;. Следующей командой мы создали простенькую таблицу в созданной базе данных:
CREATE TABLE your_table(
ident INT,
size INT,
name VARCHAR(12));
Наша новая таблица содержит три столбца: поля ident и size типа INTEGER, а также символьное поле name длиной равной двенадцати символам.
Для выхода из командной строки применяется команда EXIT;.
Install MySQL Server
- Step 1 – Double click on the downloaded mysql-installer-web-community-8.0. …
- Step 2 – Choose your desired setup type and click on the Next button. …
- Step 3 – Click on the Execute button to install all dependencies. …
- Step 4 – Click on the Next button to start the installation.
- Can you install MySQL on Windows Server?
- Can PHP run on Microsoft Windows IIS?
- Can we install MySQL on Windows server 2019?
- How do I know if MySQL is installed on Windows?
- How do I know if MySQL is installed?
- What is MySQL installer?
Can you install MySQL on Windows Server?
It is possible to run MySQL as a standard application or as a Windows service. By using a service, you can monitor and control the operation of the server through the standard Windows service management tools.
Can PHP run on Microsoft Windows IIS?
IIS only runs on Windows, but keep in mind that running PHP on IIS is not the same as running PHP on Windows. There are options to run PHP on Windows like XAMPP or WampServer. However, these two options make some additional choices for you. They run Apache as a web server and use MySQL or MariaDB as a database server.
Can we install MySQL on Windows server 2019?
You can install MySQL on Windows by downloading an MSI Installer package and following a few steps after that. MySQL is a part of a typical Linux server build (or LAMP stack) but is also available for use on Windows operating systems. Depending on your requirements, you can develop your database in MySQL.
How do I know if MySQL is installed on Windows?
Step 2: Verify MySQL is Running on Windows
A new window will launch and display the list of services available on your system. Scroll down to find MySQL, and check the status column. Left-click the MySQL service to highlight it, then right-click to open a context menu. Finally, left-click on start.
How do I know if MySQL is installed?
Check MySQL Version with V Command
The command mysql –V is not OS specific. This command works on Windows, OS X, and Linux distributions including Ubuntu. The MySQL client version in the example above is 10.4.
What is MySQL installer?
MySQL Installer is a standalone application designed to ease the complexity of installing and configuring MySQL products that run on Microsoft Windows. It supports the following MySQL products: MySQL Servers.
В этой простой пошаговой инструкции мы рассмотрим, как установить сервер MySQL на Nano Server на базе Windows Server 2016. Опустим процедуру установки Nano Server Windows Server 2016, и предполагаем, что у нас уже имеется настроенный чистый Nano Server.
- Для установки нам потребуется последняя версия 64 битного дистрибутива MySQL для Windows. Скачать его можно по этой ссылке: http://dev.mysql.com/downloads/mysql/

- Распакуйте архив на рабочей станции администратора и переименуйте каталог mysql-5.7.18-winx64 в MySQL
- Запустите с правами администратора консоль PowerShell и с помощью PowerShell Remoting скопируйте каталог с дистрибутивом на Nano Server
$nanoip = “192.168.0.102” # IP адрес сервера Nano
$ps_remote = New-PSSession -ComputerName $nanoip -Credential ~\Administrator
Copy-Item -ToSession $ps_remote -Path .\MySQL” -Destination C:\ -Force -Recurse - Подключитесь к компьютеру Nano Server:
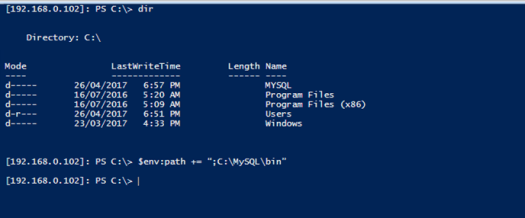
Enter-PSSession $ps_remote - Добавьте путь к каталогу MySQL\bin в переменные окружения:
$env:path += “;C:\MySQL\bin”
- Чтобы этот пусть остался в переменной окружения даже после перезагрузки сервера, выполните команду:
setx PATH $env:path /M - Проверьте, что имеющийся бинарный файл mysql.exe работоспособен, выведя версию MySQL на экран:
mysql –version
- Инициализируйте демона MySQL:
mysqld –initialize –console - Создайте файл mysql-init.txt (замените пароль на ваш):
Set-Content -Value “ALTER USER ‘root’@’localhost’ IDENTIFIED BY ‘P@ssw0rd!’;” -Path c:\mysql\mysql-init.txt -Encoding UTF8 - Передадим файл mysql-init.txt демону MySQL для инициализации:
mysqld –init-file=c:\\mysql\\mysql-init.txt –console - Остановите работу MySQL, нажав Ctrl+C
- Установите службу MySQL:
mysqld –install - После установки службы, проверить ее состояние и запустить ее можно с помощью команд
Get-Service MySQL
Start-Service MySQL - Выведем список системных баз данных с помощью указанного ранее пароля:
mysql –user=root –password=P@ssw0rd! -Bse “SHOW DATABASES;” > mydatabases.txt
Совет. Мы перенаправили вывод mysql в текстовый файл mydatabases.txt, т.к. интерактивные сессии демон не поддерживает - Выведем на экран содержимое файла mydatabases.txt:
.\mydatabase.txt
Таким образом, всего за несколько минут мы установили и запустили службу MySQL на Nano Server.