
Before you begin
You must use a kubectl version that is within one minor version difference of
your cluster. For example, a v1.33 client can communicate
with v1.32, v1.33,
and v1.34 control planes.
Using the latest compatible version of kubectl helps avoid unforeseen issues.
Install kubectl on Windows
The following methods exist for installing kubectl on Windows:
- Install kubectl binary on Windows (via direct download or curl)
- Install on Windows using Chocolatey, Scoop, or winget
Install kubectl binary on Windows (via direct download or curl)
-
You have two options for installing kubectl on your Windows device
-
Direct download:
Download the latest 1.33 patch release binary directly for your specific architecture by visiting the Kubernetes release page. Be sure to select the correct binary for your architecture (e.g., amd64, arm64, etc.).
-
Using curl:
If you have
curlinstalled, use this command:curl.exe -LO "https://dl.k8s.io/release/v1.33.0/bin/windows/amd64/kubectl.exe"
-
-
Validate the binary (optional)
Download the
kubectlchecksum file:curl.exe -LO "https://dl.k8s.io/v1.33.0/bin/windows/amd64/kubectl.exe.sha256"Validate the
kubectlbinary against the checksum file:-
Using Command Prompt to manually compare
CertUtil‘s output to the checksum file downloaded:CertUtil -hashfile kubectl.exe SHA256 type kubectl.exe.sha256 -
Using PowerShell to automate the verification using the
-eqoperator to
get aTrueorFalseresult:$(Get-FileHash -Algorithm SHA256 .\kubectl.exe).Hash -eq $(Get-Content .\kubectl.exe.sha256)
-
-
Append or prepend the
kubectlbinary folder to yourPATHenvironment variable. -
Test to ensure the version of
kubectlis the same as downloaded:Or use this for detailed view of version:
kubectl version --client --output=yaml
Install on Windows using Chocolatey, Scoop, or winget
-
To install kubectl on Windows you can use either Chocolatey
package manager, Scoop command-line installer, or
winget package manager.- choco
- scoop
- winget
choco install kubernetes-cliwinget install -e --id Kubernetes.kubectl -
Test to ensure the version you installed is up-to-date:
-
Navigate to your home directory:
# If you're using cmd.exe, run: cd %USERPROFILE% cd ~ -
Create the
.kubedirectory: -
Change to the
.kubedirectory you just created: -
Configure kubectl to use a remote Kubernetes cluster:
New-Item config -type file
Verify kubectl configuration
In order for kubectl to find and access a Kubernetes cluster, it needs a
kubeconfig file,
which is created automatically when you create a cluster using
kube-up.sh
or successfully deploy a Minikube cluster.
By default, kubectl configuration is located at ~/.kube/config.
Check that kubectl is properly configured by getting the cluster state:
If you see a URL response, kubectl is correctly configured to access your cluster.
If you see a message similar to the following, kubectl is not configured correctly
or is not able to connect to a Kubernetes cluster.
The connection to the server <server-name:port> was refused - did you specify the right host or port?
For example, if you are intending to run a Kubernetes cluster on your laptop (locally),
you will need a tool like Minikube to be installed first and then re-run the commands stated above.
If kubectl cluster-info returns the url response but you can’t access your cluster,
to check whether it is configured properly, use:
kubectl cluster-info dump
Troubleshooting the ‘No Auth Provider Found’ error message
In Kubernetes 1.26, kubectl removed the built-in authentication for the following cloud
providers’ managed Kubernetes offerings. These providers have released kubectl plugins
to provide the cloud-specific authentication. For instructions, refer to the following provider documentation:
- Azure AKS: kubelogin plugin
- Google Kubernetes Engine: gke-gcloud-auth-plugin
(There could also be other reasons to see the same error message, unrelated to that change.)
Optional kubectl configurations and plugins
Enable shell autocompletion
kubectl provides autocompletion support for Bash, Zsh, Fish, and PowerShell,
which can save you a lot of typing.
Below are the procedures to set up autocompletion for PowerShell.
The kubectl completion script for PowerShell can be generated with the command kubectl completion powershell.
To do so in all your shell sessions, add the following line to your $PROFILE file:
kubectl completion powershell | Out-String | Invoke-Expression
This command will regenerate the auto-completion script on every PowerShell start up. You can also add the generated script directly to your $PROFILE file.
To add the generated script to your $PROFILE file, run the following line in your powershell prompt:
kubectl completion powershell >> $PROFILE
After reloading your shell, kubectl autocompletion should be working.
Install kubectl convert plugin
A plugin for Kubernetes command-line tool kubectl, which allows you to convert manifests between different API
versions. This can be particularly helpful to migrate manifests to a non-deprecated api version with newer Kubernetes release.
For more info, visit migrate to non deprecated apis
-
Download the latest release with the command:
curl.exe -LO "https://dl.k8s.io/release/v1.33.0/bin/windows/amd64/kubectl-convert.exe" -
Validate the binary (optional).
Download the
kubectl-convertchecksum file:curl.exe -LO "https://dl.k8s.io/v1.33.0/bin/windows/amd64/kubectl-convert.exe.sha256"Validate the
kubectl-convertbinary against the checksum file:-
Using Command Prompt to manually compare
CertUtil‘s output to the checksum file downloaded:CertUtil -hashfile kubectl-convert.exe SHA256 type kubectl-convert.exe.sha256 -
Using PowerShell to automate the verification using the
-eqoperator to get
aTrueorFalseresult:$($(CertUtil -hashfile .\kubectl-convert.exe SHA256)[1] -replace " ", "") -eq $(type .\kubectl-convert.exe.sha256)
-
-
Append or prepend the
kubectl-convertbinary folder to yourPATHenvironment variable. -
Verify the plugin is successfully installed.
If you do not see an error, it means the plugin is successfully installed.
-
After installing the plugin, clean up the installation files:
del kubectl-convert.exe
del kubectl-convert.exe.sha256
What’s next
- Install Minikube
- See the getting started guides for more about creating clusters.
- Learn how to launch and expose your application.
- If you need access to a cluster you didn’t create, see the
Sharing Cluster Access document. - Read the kubectl reference docs
Drakos
Posted on
• Edited on
Intro (Updated 17/07/2022)
Kubernetes is made for managing your cloud resources and build scalable apps. It’s considered the most popular tool for automating, deploying, and scaling your whole cloud. It runs on all major operating systems and it is the most popular open source tool in the cloud market. Kubernetes can scale your whole infrastructure, check the health of each service, work as a load balancer, automate deployments and many more. You can install & setup as many nodes (clusters) as you want, and deploy your pods (docker containers) and services across the cloud. In this tutorial you will learn how to setup Kubernetes and deploy the official web GUI dashboard where you can manage and monitor everything but first you have to install Hyper-V & Docker in order to use Kubernetes.
Step 1: Install & Setup Hyper-V
Windows as we all know, have their own virtualization software and it’s called Hyper-V which is basically something like VirtualBox on steroids. Hyper-V can manage your virtual machines (VM) using the default GUI tool provided by Microsoft for free, or through command line. Enabling Hyper-V can be easily done but first, make sure your PC meets the following requirements: Your OS should be Windows 10 (Enterprise, Pro or Education) with minimum 4GB RAM and CPU Virtualization support, although you have to double check if it’s enabled in your BIOS settings.
You can remove or add features that don’t come up pre-installed during the installation of Windows, like Hyper-V. Always remember that some of the features require internet access to download extra components from Windows Update. Follow the next steps to enable Hyper-V on your machine.
- Go to Control Panel
- On your left panel, click on Programs
- Then click Programs and Features followed by Turn Windows features on and off.
- Check Hyper-V and Windows Hypervisor Platform
- Click OK

Your system will now start installing Hyper-V on the background, it may need to reboot a couple of times until everything is configured properly. Don’t expect any notification or something! Run the following powershelgl command as Administrator and verify if Hyper-V is installed successfully on your machine: Get-WindowsOptionalFeature -Online -FeatureName Microsoft-Hyper-V
Example.
PS C:\Windows\system32> Get-WindowsOptionalFeature -Online -FeatureName Microsoft-Hyper-V

FeatureName      : Microsoft-Hyper-V
DisplayName      : Hyper-V Platform
Description      : Provides the services that you can use to create and manage virtual machines and their resources.
RestartRequired  : Possible
State            : Enabled
Enter fullscreen mode
Exit fullscreen mode
Step 2: Install Docker for Windows
Kubernetes is build on top of Docker, theoretically is just a tool that communicate with your Docker containers and manage everything on enterprise level. To install Docker just grab & run the following installer https://desktop.docker.com/win/main/amd64/Docker%20Desktop%20Installer.exe . During installation Docker will ask you to choose between Hyper-V and WSL. For better security uncheck WSL 2. Docker will setup a Linux virtual machine on top of Hyper-V and start all the necessary services without manually configure anything. After the installation, you can either «communicate» with Docker using the CLI tool docker or running HTTP requests though its API.
Step 3: Install Kubernetes on Windows 10
Docker comes with a handy GUI tool where you can modify some settings or install & enable Kubernetes. Follow the following instructions, WARNING! If Docker is installed successfully and you can’t locate its tray icon, you have to reboot your system. If the problem persists, check the official troubleshooting guide here https://docs.docker.com/docker-for-windows/troubleshoot/. Now follow the instructions to install Kubernetes.
- Right-click the Docker tray icon
- Click «Settings»
- On the left panel click «Kubernetes»
- Check
Enable Kubernetesand click «Apply»
*** If you’re behind a firewall, don’t forget to allow:
C:\program files\docker\docker\frontend\docker desktop.exe
C:\program files\docker\docker\resources\com.docker.backend.exe
C:\program files\docker\docker\resources\bin\kubectl.exe
C:\program files\docker\docker\resources\com.docker.vpnkit.exe
Enter fullscreen mode
Exit fullscreen mode
During installation, Docker is going to install additional packages and dependencies. It may take around 5~10 minutes and the installation time depends on your Internet speed and your PC performance. Wait until the ‘Installation complete!’ popup message is shown up. After installing Kubernetes you can make sure that everything is working fine using the Docker app. If both services (Docker & Kubernetes) are running successfully without any errors then both icons at bottom left will go green.
Example.

OR

Step 4: Install Kubernetes Dashboard
Kubernetes Dashboard is the official web-based UI where you can manage Kubernetes resources. It’s not installed by default. Deploying applications with Kubernetes can be easily managed using the cli tool called kubectl where you can interact with your cloud and manage your Pods, Nodes, or Clusters. If you pass the apply argument followed by your YAML configuration file you can easily create or update Kubernetes resources. Run the following commands to deploy & enable the Kubernetes Dashboard using the following commands.
- Go to https://github.com/kubernetes/dashboard/releases
- Scroll down to
Installationand download latest yaml configuration file for example https://raw.githubusercontent.com/kubernetes/dashboard/v2.6.0/aio/deploy/recommended.yaml - Deploy it using
kubectl apply -f .\recommended.yaml - Verify that it’s running using the following command:
kubectl.exe get -f .\recommended.yaml.txt
Example.
PS C:\Users\user\Desktop> kubectl.exe get -f .\recommended.yaml.txt

NAME                             STATUS   AGE

namespace/kubernetes-dashboard   Active   2m10s

NAME                                  SECRETS   AGE

serviceaccount/kubernetes-dashboard   1         2m10s

NAME                           TYPE        CLUSTER-IP    EXTERNAL-IP   PORT(S)   AGE

service/kubernetes-dashboard   ClusterIP   10.97.3.127   <none>        443/TCP   2m9s
Enter fullscreen mode
Exit fullscreen mode
Step 5: Access the dashboard
There are two ways to access the dashboard with tokens, the first one (deprecated, works only for older versions) is using the default token that was crated during the installation of Kubernetes and the second (more secure) way is by creating users, giving them permissions, and then get the generated token.
Newest version
-
Create a new configuration file:
dashboard-admin.yamlapiVersion: v1 kind: ServiceAccount metadata: name: admin-user namespace: kubernetes-dashboard --- apiVersion: rbac.authorization.k8s.io/v1 kind: ClusterRoleBinding metadata: name: admin-user roleRef: apiGroup: rbac.authorization.k8s.io kind: ClusterRole name: cluster-admin subjects: - kind: ServiceAccount name: admin-user namespace: kubernetes-dashboard -
Deploy it using
kubectl.exe apply -f .\dashboard-admin.yaml.txt -
Generate token using
kubectl.exe -n kubernetes-dashboard create token admin-user -
Run
kubectl proxy -
Copy paste the token to http://localhost:8001/api/v1/namespaces/kubernetes-dashboard/services/https:kubernetes-dashboard:/proxy/
Old version (deprecated)
- Run the following command powershell (not cmd)
((kubectl -n kube-system describe secret default | Select-String "token:") -split " +")[1] - Copy the generated token
- Run
kubectl proxy. - Open the following link on your browser: http://localhost:8001/api/v1/namespaces/kubernetes-dashboard/services/https:kubernetes-dashboard:/proxy/
- Select
Token& paste the generated token - Sign In
Finally
If everything is configured properly you’ll be able to see the dashboard and your cloud resources. From there you can do almost all the «hard» work without dealing with the CLI every time. You may sometimes get your hands dirty with the command line but if you don’t understand the concept of Docker and Kubernetes or you don’t have time to for maintaining your own cloud, it’s better to stick with some PaaS providers that can cost you a fortune.

Support
If you liked this article please follow me on Twitter 
https://twitter.com/devcrafter91
If you need a portable, extensible, and open-source platform you can use to manage containerized workloads and services, Kubernetes on Windows is a must-have. Kubernetes enables you to deploy and manage containerized applications at scale.
In this tutorial, you’ll learn to install Kubernetes on Windows using Hyper-V and Docker. And at the end of this tutorial, you will have a working Kubernetes cluster and a web-based UI you can use to deploy and manage your pod and applications.
Read on and start scaling your applications!
Prerequisites
This tutorial will be a hands-on demonstration. If you’d like to follow along, be sure you have a Windows 10 computer (or later) with the following:
- At least 4GB of RAM. The general rule for RAM is 300MB for each node in the cluster.
- A processor that supports hardware virtualization (most Intel and AMD processors released since 2005).
Enabling Hyper-V to Support Virtualization
Before running Kubernetes, you first have to enable Hyper-V on your machine. Hyper-V is a type 1 hypervisor that provides the virtualization technology upon which Kubernetes will run.
1. Open PowerShell as an administrator, and run the command below to enable Hyper-V (Microsoft-Hyper-V).
2. Once enabled, reboot your computer to apply the changes.
3. Finally, run the following command to verify that Hyper-V is enabled and running.
Get-WindowsOptionalFeature -Online -FeatureName Microsoft-Hyper-VThe output below shows you’ve successfully enabled Hyper-V.

Installing Docker Desktop
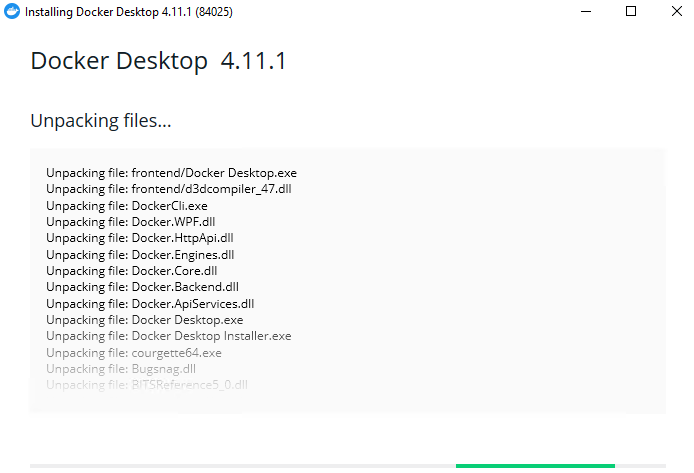
After enabling Hyper-V, you next need to install Docker Desktop so that you can work quickly with Docker containers on your computer. Docker Desktop includes everything you need to run containers, including the Docker Engine, a container runtime, and a management UI.
Kubernetes is designed to run on top of a container runtime like Docker. While you could install Kubernetes directly on your computer, using Docker Desktop is much easier as it includes all of the necessary tools and utilities.
1. Open your favorite web browser, navigate to the Docker Desktop download page, and download and run the installer.

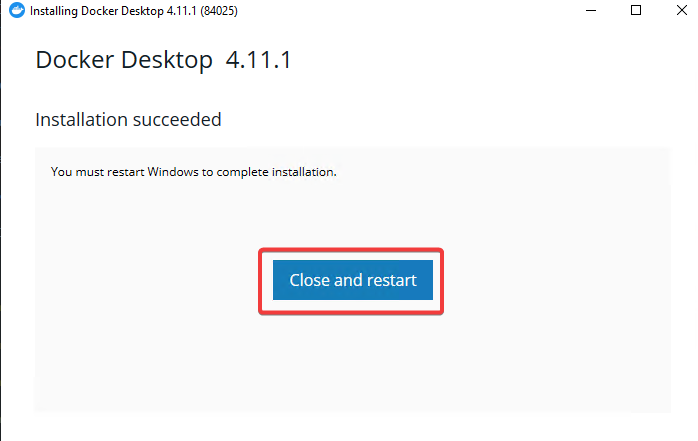
2. Once Docker Desktop is installed, click Close and Restart to restart your computer.
A restart is required to complete the installation since the installer needs to modify your Windows configuration.
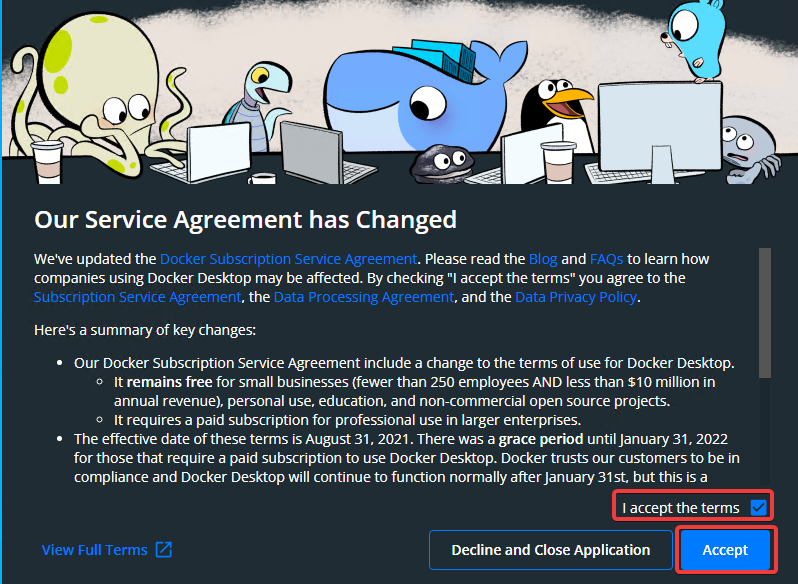
3. After restart, open Docker Desktop, tick the I accept the terms checkbox, and click Accept to accept the license agreement.
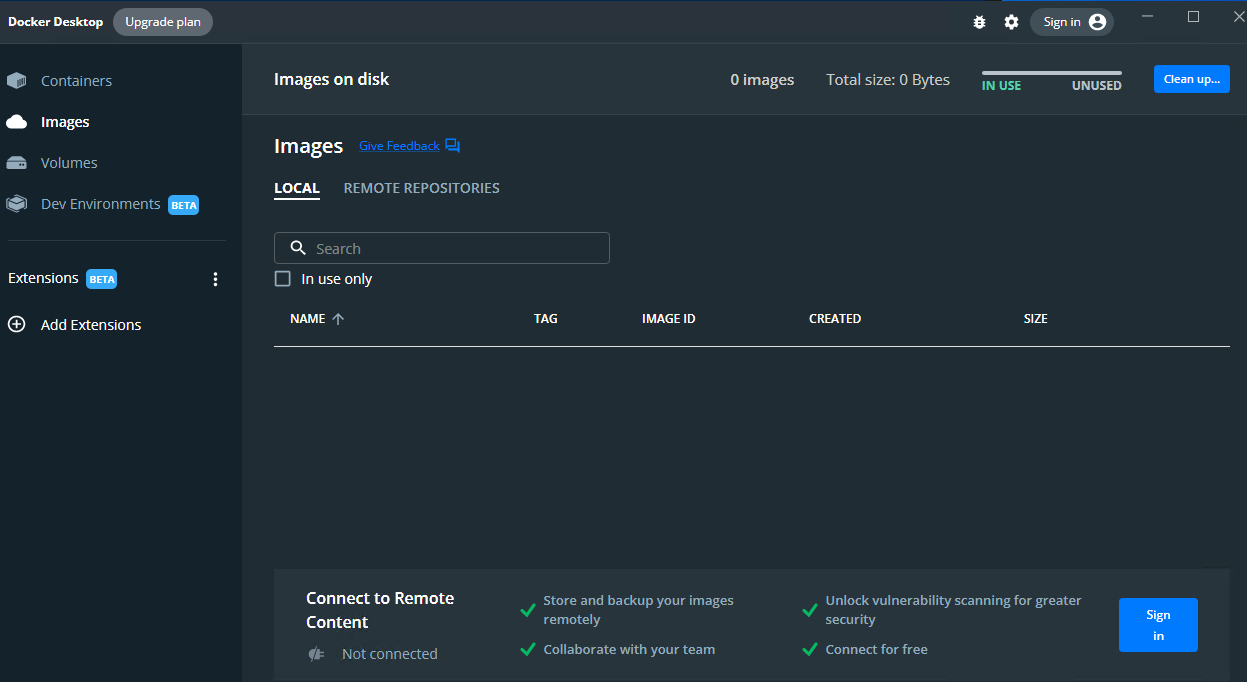
If all goes well, Docker Desktop opens, as shown below.
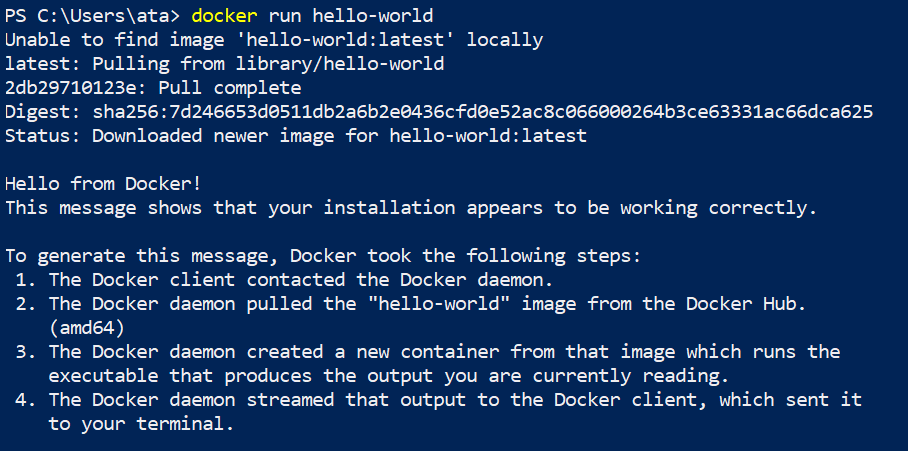
4. Finally, run the below docker run command to verify that Docker is working as expected.
This command pulls the hello-world container from Docker Hub if it is not already present on your computer and runs it.
The docker command is accessible from any CLI(Command Line Interface) like PowerShell or Command Prompt, as long as the Docker service runs. If not, run the command below to start the Docker service. Start-Service *docker*
This output below signifies your installation is working correctly.
Installing Kubernetes via the Docker Desktop
Now that you have enabled Hyper-V and installed Docker Desktop, you’re ready to install Kubernetes on Windows. In this tutorial, you will use the Docker Desktop GUI to enable and install Kubernetes.
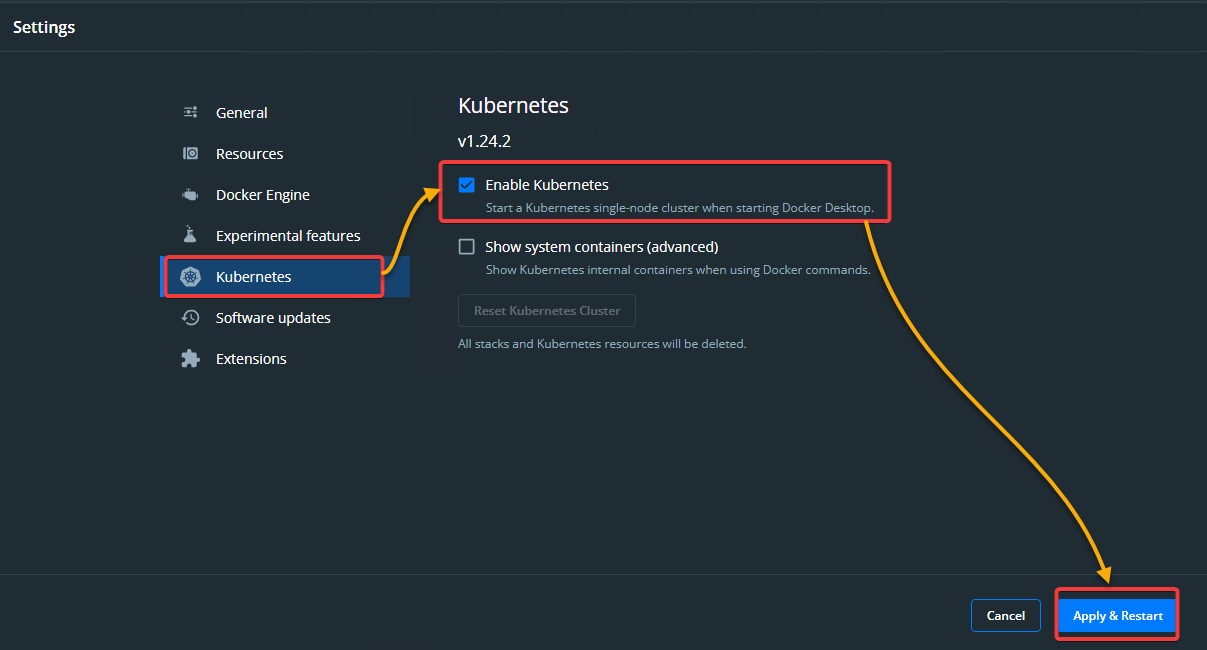
1. Right click on the Docker icon in the system tray and select Settings from the context menu to access the Docker Desktop settings.
2. Next, select Kubernetes (left panel), tick the Enable Kubernetes checkbox, click Apply & Restart to apply the changes, and restart Docker Desktop.
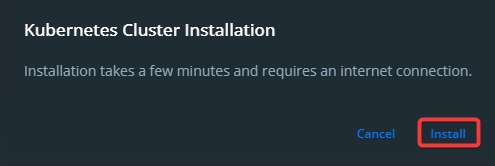
3. Click Install when prompted, as shown below. Doing so installs Kubernetes on your computer, which might take a few minutes to complete.
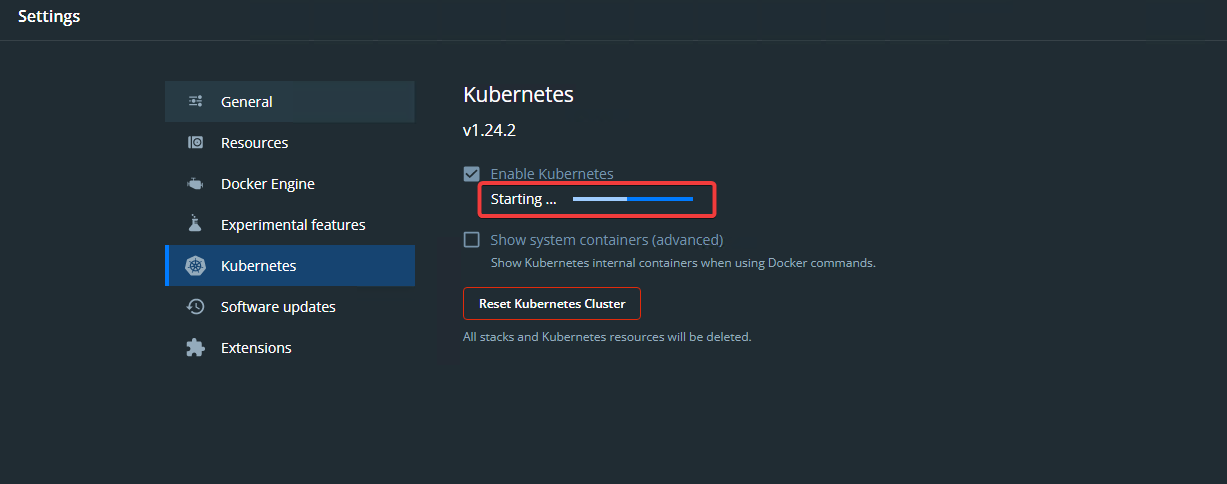
You will see the Kubernetes cluster starting in the middle of the screen. This cluster contains a single node, which is your computer.
At this point, your Kubernetes cluster is running (bottom-left) like in the screenshot below, and you can start using that cluster.

Installing kubectl on Windows
You’ve successfully started your Kubernetes cluster, but how do you manage it? kubectl is a command line tool that lets you interact with your Kubernetes cluster, which you need to install.
kubectl is available as a standalone binary that you can download from the Kubernetes releases page.
1. Download the latest kubectl binary for your computer. The latest version at the time of writing this tutorial is kubectl v1.25.
2. Next, download the checksum file for the same release. You will use this checksum file to verify the authenticity of the downloaded binary.
3. Run the below command to compare the two SHA-256 hashes of the kubectl release and checksum file you downloaded.
You must put the kubectl binary and the checksum file in the same directory for this validation to work.
The commands below perform the following:
- Change the working directory to the kubectl binary and checksum files’ location. Ensure you change the C:\Users\ata\Download\Programs path to where you saved the files.
- Compute the SHA-256 hash (CertUtil) of the kubectl binary.
- Compare the result with the checksum in the checksum file.
cd C:\Users\ata\Download\Programs
$($(CertUtil -hashfile .\kubectl.exe SHA256)[1] -replace " ", "") -eq $(type .\kubectl.exe.sha256)
If both results match, you will see a True output, as shown below, which indicates that the binary is not corrupt, and you can proceed with installing the binary. Otherwise, you’ll get a False output and have to re-download the kubectl binary.

4. Now, run the below command to add the path of the kubectl binary to your PATH environment variable. Be sure to replace <full/path/of/kubectl/binary> with your computer’s actual path of the kubectl binary.
This command makes the kubectl binary accessible on the command-line interface
setx /m PATH "$Env:PATH;<full/path/of/kubectl/binary>"
5. Close the current PowerShell session, and open a new one for the changes to take effect.
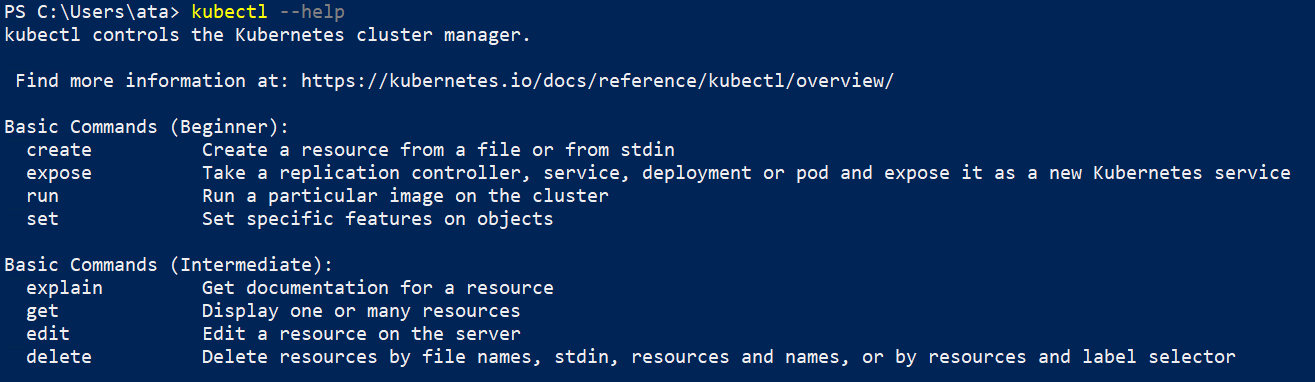
6. Next, run the below command to verify that kubectl is installed and working.
This command prints out the man page for kubectl, which indicates that it is working correctly.
7. Lastly, run the following command to double-check that kubectl is configured to work with your Kubernetes cluster. This command prints out the URL and the status (cluster-info) of your Kubernetes master.
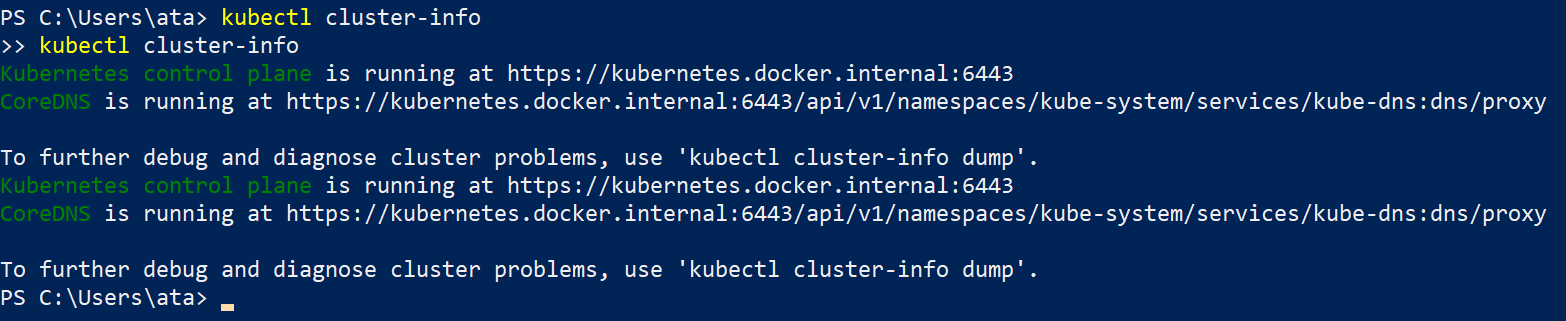
If you get an Unable to connect to the server error, as shown below, make sure your Kubernetes cluster is running and that you can connect to it from your computer.

Conclusion
Throughout this tutorial, you learned how to install Kubernetes on Windows and verify the installation works by starting up a Kubernetes cluster. Kubernetes has made it possible to automate many of the manual processes to ease the tasks of deploying, managing, and scaling containerized applications.
Now at this point, you have a working Kubernetes cluster and are ready to deploy your first application. Why not explore more about Kubernetes? Start running your applications on Windows without any headaches!
- Home
- Blog
- Devops
- How to Install Kubernetes on Windows? Step-by-Step Guide
Table of Contents
- Kubernetes Installation System Requirements for Windows
- How to Install Kubernetes on Windows? In 5 Simple Steps
- How to Use Kubernetes?
- How to Uninstall Kubernetes on Windows?
- What is Kubernetes?
- Conclusion
With the increasing complexity of contemporary software creation, containerization techniques have become essential since they are practical and flexible in transporting applications.
As more and more organizations adopt hybrid and multi-cloud, Kubernetes becomes a strategic instrument to harmonize and organize container-based workloads. In 2022, Platform9 published a survey among enterprises where it was stated that as many as 85% run containerized apps in production, with Kubernetes being the most common choice out of several other options for orchestration.
Let’s get started. We will guide you through the complete roadmap on how to install Kubernetes for Windows users. This tutorial will show you how to set up Kubernetes and deploy the official web GUI dashboard, which will allow you to manage and monitor everything.
Kubernetes Installation System Requirements for Windows
For installing Kubernetes in your system, here are a few prerequisites that need special attention. The hardware and software requirements are discussed below:
A. Hardware requirements
- Master node with at least 2 GB memory. (Additional will be great)
- Worker node with 700 MB memory capacity.
- Your Mouse/Keyboard (monitor navigation)
B. Software requirements
- Hype-V
- Docker Desktop
- Unique MAC address
- Unique product UUID for every node
C. Additional Libraries or Tools (Installed Prior)
- Enable Hyper-V and the WSL.
- Enable Kubernetes and Microsoft’s PowerShell functionality.
- Ensure you install all the required libraries and other tools beforehand for proper Kubernetes usage.
- Ensuring that there is a full range of connectivity between all the machines in the cluster is a must.
How to Install Kubernetes on Windows? In 5 Simple Steps
Let’s discuss the detailed process on how to install Kubernetes on Windows in just five simple steps:
Step 1: Install & Setup Hyper-V
As we all know, Windows has its virtualization software, known as Hyper-V, which is essentially VirtualBox on steroids. Hyper-V allows you to manage your virtual machines (VMs) using either the free Microsoft GUI tool or the command line. It’s simple to enable Hyper-V, but first, make sure your PC meets the following requirements:
- Your operating system should be Windows 10 (Enterprise, Pro, or Education), with
- At least 4GB of RAM and CPU Virtualization support, though you should double-check that it’s turned on in your BIOS settings.
You can disable or enable features like Hyper-V that may not be pre-installed when Windows is installed. Always keep in mind that some of the features require internet access to download additional Windows Update components.
To enable Hyper-V on your machine, follow the steps below:
1. Open the Control Panel.
2. Select Programs from the left panel.
3. Next, go to Programs and Features, then Turn Windows Features On or Off.
4. Examine Hyper-V and the Hypervisor Platform for Windows.
5. Select OK.
Your system will now begin installing Hyper-V in the background; it may be necessary to reboot a few times until everything is properly configured. Don’t hold your breath for a notification or anything! Verify that Hyper-V is installed successfully on your machine by running the following command as Administrator in PowerShell:
Get-WindowsOptionalFeature -Online -FeatureName Microsoft-Hyper-V
Once the state is shown as Enabled for above command in Power shell, we are good to go.
Step 2: Download Docker for Windows and install it.
Kubernetes is a container orchestration system built on top of Docker. It is essentially just a tool for communicating with Docker containers and managing everything at an enterprise level. Simply go to install Docker and click to Get Docker Desktop for Windows (stable).
Windows users can use Docker Desktop
Docker Desktop for Windows is a version of Docker optimized for Windows 10. It’s a native Windows application that makes developing, shipping, and running dockerized apps simple. Docker Desktop for Windows is the fastest and most reliable way to develop Docker apps on Windows, as it uses Windows-native Hyper-V virtualization and networking. Docker Desktop for Windows can run Docker containers on both Linux and Windows.
Installation of Docker Desktop
Let us take a look on the different steps involved in installing docker desktop.
- Double-click Docker for Windows Installer to run the installer.
- Docker starts automatically once the installation is complete. Docker is running and accessible from a terminal, as indicated by the whale in the notification area.
- Run .
- Try out some Docker commands in a command-line terminal like PowerShell!
- Run the Docker version to check the version.
- Run Docker run hello-world to verify that Docker can pull and run images.
- Boom!
As long as the Docker Desktop for Windows app is running, Docker is accessible from any terminal. The Docker whale in the taskbar has a setting button that can be accessed from the UI.
For a detailed step by step installation guide with screenshot, visit the blog — How to Install Docker on Windows, Mac, & Linux: A Step-By-Step Guide
WARNING: FOLLOW THE INSTRUCTIONS BELOW! If Docker was successfully installed but you can’t find its tray icon, you’ll need to restart your computer. Check the official troubleshooting guide here if the issue persists.
Step 3: Install Kubernetes on Windows 10
Docker includes a graphical user interface (GUI) tool that allows you to change some settings or install and enable Kubernetes.
To install Kubernetes, simply follow the on-screen instructions on the screen:
1. Right-click the Docker tray icon and select Properties.
2. Select «Settings» from the drop-down menu.
3. Select «Kubernetes» from the left panel.
4. Check Enable Kubernetes and click «Apply»
Docker will install additional packages and dependencies during the installation process. It may take between 5 and 10 minutes to install, depending on your Internet speed and PC performance. Wait until the message ‘Installation complete!’ appears on the screen. The Docker app can be used after Kubernetes has been installed to ensure that everything is working properly. Both icons at the bottom left will turn green if both services (Docker and Kubernetes) are running successfully and without errors.
Example.
Step 4: Install Kubernetes Dashboard
The official web-based UI for managing Kubernetes resources is Kubernetes Dashboard. It isn’t set up by default. Kubernetes applications can be easily deployed using the cli tool kubectl, which allows you to interact with your cloud and manage your Pods, Nodes, and Clusters. You can easily create or update Kubernetes resources by passing the apply argument followed by your YAML configuration file.
Use the following commands to deploy and enable the Kubernetes Dashboard.
1. Get the yaml configuration file from here.
2. Use this to deploy it.
. kubectl apply -f .\recommended.yaml3. Run the following command to see if it’s up and running.:
kubectl.exe get -f .\recommended.yaml.txtStep 5: Access the dashboard
The dashboard can be accessed with tokens in two ways: the first is by using the default token created during Kubernetes installation, and the second (more secure) method is by creating users, giving them permissions, and then receiving the generated token. We’ll go with the first option for the sake of simplicity.
1. Run the following command PowerShell (not cmd)
((kubectl -n kube-system describe secret default | Select-String "token:") -split " +")[1]2. Copy the generated token
3. Run
kubectl proxy.4. Open the following link on your browser:
http://localhost:8001/api/v1/namespaces/kubernetes-dashboard/services/https:kubernetes-dashboard:/proxy/5. Select
Token & paste the generated token
6. Sign In
Finally
You’ll be able to see the dashboard and your cloud resources if everything is set up correctly. You can then do almost all of the «hard» work without having to deal with the CLI every time. You may occasionally get your hands dirty with the command line, but if you don’t understand Docker and Kubernetes or don’t have the time to manage your own cloud, it’s better to stick with some PaaS providers that can be quite expensive.
How to Use Kubernetes?
Kubernetes is one of the effective container orchestration platforms that automatically deploys, scales, and manages containerized applications. After we have seen how to install Kubernetes on Windows, here are the top three tips that I prefer when using Kubernetes:
Understand the Basics:
- Pods: Smallest deployable units in Kubernetes. Each container might be a pod with the same or different network space, volume, and port mapping.
- Deployments: Establish the targeted state that you would want for your application. These help you to have a certain number of copies of your application available and operational throughout.
- Services: Connect a group of pods to a network. They help in load balancing, service discovery, and providing stable network endpoints.
Use Declarative Configuration:
Kubernetes is built as a declarative system that describes the needed condition and leaves it to care for itself. Define your applications, services, and other resources in YAML or JSON configuration files. State your need and go to Kubernetes to show how to arrive at and sustain this stage.
Learn and use kubectl:
Kubectl is the command-line interface between a Kubernetes cluster and user(s). Check your cluster status using kubectl get, kubectl describe, and kubectl logs for a view of pods and services. You can also enroll in a certified DevOps Foundation course to learn in a better way.
How to Uninstall Kubernetes on Windows?
The procedures for uninstalling cert-manager on Kubernetes are outlined below. Depending on which method you used to install cert-manager — static manifests or helm — you have two options.
Warning: To uninstall cert-maneger, follow the same steps as you did to install it, but in reverse. Whether cert-manager was installed from static manifests or helm, deviating from the following process can result in issues and potentially broken states. To avoid this, make sure you follow the steps outlined below when uninstalling.
Step 1: Before continuing, make sure that all user-created cert-manager resources have been deleted. You can check for any existing resources with the following command:
$ kubectl get Issuers,ClusterIssuers,Certificates,CertificateRequests,Orders,Challenges --all-namespacesAfter you’ve deleted all of these resources, you can uninstall cert-manager by following the steps outlined in the installation guide.
Step 2: Using regular manifests to uninstall.
- Uninstalling from a regular manifest installation is as simple as reversing the installation process and using the delete command.
kubectl.2. Delete the installation manifests using a link to your currently running version vX.Y. Z like so:
$ kubectl delete -f https://github.com/jetstack/cert-manager/releases/download/vX.Y.Z/cert-manager.yamlStep 3: Uninstalling with Helm.
1. Uninstalling cert-manager from a Helm installation is as simple as reversing the installation process and using the delete command on both the server and the client. kubectl and helm.
$ helm --namespace cert-manager delete cert-manager2. Next, delete the cert-manager namespace:
$ kubectl delete namespace cert-manager3. Finally, delete the cert-manger CustomResourceDefinitions using the link to the version vX.Y.Z you installed:
$ kubectl delete -f https://github.com/jetstack/cert-manager/releases/download/vX.Y.Z/cert-manager.crds.yamlThe namespace is in the process of being terminated.
The namespace may become stuck in a terminating state if it is marked for deletion without first deleting the cert-manager installation. This is usually because the APIService resource is still present, but the webhook is no longer active and thus no longer reachable.
4. To fix this, make sure you ran the above commands correctly, and if you’re still having problems, run:
$ kubectl delete apiservice v1beta1.
What is Kubernetes?
Kubernetes is a container-based platform for managing cloud resources and developing scalable apps. It is widely regarded as the most common platform for automating, deploying, and scaling the entire cloud infrastructure. The platform runs on all major operating systems and is the most widely used open-source cloud tool.
Kubernetes can scale your entire infrastructure, monitor each service’s health, act as a load balancer, and automate deployments, among other things. You can deploy your pods (docker containers) and services across the cloud by installing and configuring as many nodes (clusters) as you want.
Conclusion
In this tutorial, we have explained in detail how to install Kubernetes with Hyper-V. Also, we have tackled what requirements we need, both in terms of the software and hardware. We have explained how to install Hyper-V and Docker on Windows 10. It is important to note that the fundamental difference between Kubernetes and Docker is that Kubernetes is meant to run across a cluster and Docker is meant to run through nodes.
Kubernetes is also more extensive than Docker Swarm and is meant to coordinate a cluster of nodes at scale in production in an efficient manner. Each software is crucial to having a smooth installation process.
You must ensure you are well-versed with DevOps concepts for the best outcome. Want to learn Kubernetes and how to use it? KnowledgeHut-certified DevOps foundation courses are perfect as per my experience to get the best hands-on learning of Kubernetes to build scalable applications.
Frequently Asked Questions (FAQs)
1. What is the easiest way to install Kubernetes on Windows?
Setting up a Kubernetes cluster on your local machine is very easy if you use Docker Desktop, making the installation process simple.
2. Do all Kubernetes features work on Windows?
Not all Kubernetes features supported by Windows are available as they differ in some regards. One must also confirm with the Kubernetes docs which specific features work in Windows.
3. Is there a specific version of Windows Server required for Kubernetes on Windows?
Yes, Kubernetes on Windows demands Windows Server 2019 and above versions for containerization and orchestration.
4. Are there any limitations when using Windows containers in Kubernetes?
Yes, there are challenges to some extent. For instance, some network plugins are unsupported, while Linux containers may act differently. Please refer to the Kubernetes documentation for more specific information about Windows container limitations.
Kubernetes has become the de facto standard when it comes to deploying and managing containers in production. However, many enterprises today still run their container services on-premises using virtual machines or private clouds.
If you’re wondering how to install Kubernetes on windows 10, you’re in just the right place. This tutorial will show how to install the Kubernetes master with three nodes on Windows computers (as an alternative to Linux). We will walk you through the step-by-step process of setting up Kubernetes on Windows. To do so, we’ll use a pre-configured virtual machine equipped with all the necessary components for installing and running Kubernetes. This is not a tutorial on how to use Kubernetes or its features but merely a guide on how to get it up and running on your Windows computer.
So, let’s get started!
What is Kubernetes?
Kubernetes is an open-source system for managing containerised applications across multiple hosts. It groups containers that make up an application into logical units for easy management and discovery. Kubernetes uses containers to enable portability, ease of debugging and consistency across environments. Containers are always consistent because they are self-contained and always run the same way. Kubernetes makes it easy to run a distributed system on a single computer. Kubernetes clusters on Windows handle things like load balancing, failover, and scalability. In order to manage Kubernetes clusters, ensure you can Kubectl download for Windows.
Learn Software Development Courses online from the World’s top Universities. Earn Executive PG Programs, Advanced Certificate Programs or Masters Programs to fast-track your career.
What are some alternatives to Kubernetes?
Some of the alternatives and additional tools that are available for Kubernetes include:
- Docker Swarm – Swarm, is a native clustering solution for Docker. It allows you to pool the CPUs and RAM of multiple computers to run containers as one large cluster. This is a native clustering solution, but it uses a separate Swarm manager to handle container orchestration, discovery and scheduling across computers. This makes it more complex, less flexible and harder to manage.
- Kubo – Kubo is another open-source orchestrator for Kubernetes (Kubernetes for Windows). It works like Swarm but is less flexible and supports only Kubernetes.
- Helm – Helm is a package manager for Kubernetes. It allows you to install pre-configured applications and services, such as a database or a monitoring tool, with the click of a button. With Swarm, you need to configure and install everything from scratch. With Kubernetes, Helm comes pre-installed.
Some key features and benefits of Kubernetes
The reasons why the Kubernetes cluster on windows has grown so much in popularity and usage over time are plenty. But some of the most striking reasons include the following:
- Easy To Scale: Kubernetes makes it easy to scale your application. You can easily add new nodes to your application, and Kubernetes will automatically distribute your app across all the nodes.
- Easy To Manage: Kubernetes gives you control over your containers while they are running. You can access the logs, kill the process, or even restart the container. Kubernetes also helps you manage your containers when they are not running. It makes it easy to schedule the containers and run them at the right time.
- Easy To Deploy: Kubernetes simplifies your application’s deployment process. You can deploy the app from your local computer or from a central server.
- Fault Tolerance: Kubernetes helps you handle the fault tolerance of your application. It helps you identify any failures or downtime of your application and take action, proving all the reasons behind teh popularity of Kubernetes cluster on windows.
Installing Kubernetes on Windows
Before you install Kubernetes on Windows, you need to make sure that you meet all the system requirements. The following are the minimum requirements for installing Kubernetes on Windows computers –
- Two or more Windows 10 computers with Intel or AMD x86-64 processors and at least 4GB RAM per node.
- The computers must be on the same LAN and be able to access the internet.
- One computer must have administrator rights, and all the computers in the cluster must have TCP/IP port 5989 open.
Once you confirm that your system meets these requirements, follow the steps below to answer the question – how to install Kubernetes on windows 10
Step 1: Download and Run the VM with Kubernetes
To install Kubernetes on Windows, you will first need to download the pre-configured VM with Kubernetes pre-installed. You can download the VM from here.
Once you download the VM, open VirtualBox and click on New to create a new VM. Once you have selected a name for the VM and chosen your operating system, select the downloaded file and click on Import to select the VM. Once the VM is imported, click on Start to start the VM and click on Console to open a terminal.
Step 2: Install Kubelet, Kube-controller and Kube-proxy
Once the VM has booted up, install Kubelet, Kube-controller and Kube-proxy on all three nodes. Kubelet is a container that runs inside every Kubernetes node and acts like a mini-container orchestration engine. Kube-proxy is a network Proxy that makes routing decisions for the pods. Kube-controller is a service that runs on each node and is responsible for managing the pods and their lifecycle. Kubectl download for Windows is also recommended if you’re managing clusters.
Step 3: Install Core Services (Etcd, API Server and Controller Manager)
Once you have installed the Kubelet, Kube-proxy and Kube-controller, install Etcd, API Server and Controller Manager. Etcd is a distributed storage that is responsible for storing data, such as configuration and metadata. API Server is the server that hosts the Kubernetes API. The Controller Manager is responsible for controlling the pods and their lifecycle.
Step 4: Install Kubernetes Dashboard
With the core services in place, now is the time to install the main part – the Kubernetes dashboard. The dashboard is a user interface that enables an easy and intuitive way to manage your Kubernetes cluster. It is like the GUI of Kubernetes that allows you to easily edit the cluster’s configuration by clicking on buttons instead of editing the configuration files.
Conclusion
Kubernetes is the de facto standard for container orchestration. It has become a must-have for enterprises that want to move to containers. While Kubernetes is usually installed on Linux-based computers, it can also be installed on Windows 10 computers. To install Kubernetes on Windows, you must download and run a VM with pre-installed Kubernetes. You can then install Kubelet, Kube-proxy, Kube-controller, Etcd, API Server, and Controller Manager on all three nodes to complete the installation. Finally, install the Kubernetes dashboard to manage your Kubernetes cluster.
We hope you now understand how to install Kubernetes on Windows 10. Following these list of steps after confirming that you meet the prerequisites will help you easily install Kubernetes on your system. Once that is done, all you need to do is get hands-on experience working with the tool. Mastering Kubernetes is one of the sure-shot ways of getting well-paying jobs in the field of DevOps. While DevOps is a broad field and goes beyond just Kubernetes, learning Kubernetes is definitely one of the first stepping stones to success.
At upGrad, we understand the importance of understanding practical tools and applications when it comes to solving real-life problems, which reflects in all of the courses and training we offer.
Check out our Advanced Certificate Programme in DevOps, offered in collaboration with IIIT-B. This ~8-month course is designed to give both beginners as well as experienced professionals a proper dive into the world of DevOps using different industry projects that concern real-life applications. Go through the course material, and get yourself enrolled soon!
Frequently Asked Questions (FAQs)
1. Can Kubernetes be installed on Windows?
Kubernetes can be easily installed on Windows once you’ve ensured that you meet the prerequisites and follow the steps described in the article above.
2. What is the CPU limit in Kubernetes?
Each container in Kubernetes has a limit of 0.5 CPU and 128MiB of memory.
3. How many nodes can Kubernetes have?
Kubernetes is designed to accommodate configurations that have no more than 110 pods per node. Not more than 5000 nodes. And not more than 150k total pods.