Пройдите тест, узнайте какой профессии подходите
Работать самостоятельно и не зависеть от других
Работать в команде и рассчитывать на помощь коллег
Организовывать и контролировать процесс работы
Быстрый ответ
Для конфигурации переменных среды Java в ОС Windows следуйте инструкциям ниже:
-
Укажите путь к установленной Java, например:
C:\Program Files\Java\jdk-18.0.1. -
Настройте переменную
JAVA_HOME: -
Добавьте путь к каталогу
binJava в переменнуюPath:
Теперь вы способны запустить инструменты Java (java, javac) из командной строки.

Полное руководство по переменным среды Java
Настройка JAVA_HOME и Path
Переменная JAVA_HOME указывает местоположение Java Development Kit (JDK):
Добавление пути к директории bin JDK к системной переменной Path разрешит вам обращаться к командам Java из любого места:
Установка JAVA_TOOL_OPTIONS
При помощи JAVA_TOOL_OPTIONS вы можете задать кодировку Unicode для вашего приложения:
Работа с Classpath
Не стоит устанавливать глобальную переменную CLASSPATH. Предпочтительнее управлять ею для каждого приложения индивидуально, используя ключи -cp или -classpath:
Проверка и устранение проблем
После изменения переменных убедитесь в правильности настройки:
Если вы столкнулись с проблемами, возможно, понадобится перезагрузка компьютера или переустановка JDK.
Визуализация
Принцип работы установки переменных:
JAVA_HOME— это место, где «живёт» Java, откуда начинается её работа.Path— это путь, по которому Java передвигается, выполняя задачи.
Правильно настроенные переменные среды выглядят так:
Такая конфигурация обеспечивает надёжное и ясное взаимодействие ваших программ.
Умные советы для опытных пользователей
Быстрый доступ к переменным среды
Для быстрого доступа к окну переменных среды используйте комбинацию Win + R, введите sysdm.cpl и перейдите к разделу «Дополнительные параметры системы».
«Rapid Environment Editor» облегчит редактирование переменных среды.
Временная настройка переменных
Вы можете временно переопределить путь в командной строке:
Персонализация опций Java
Воспользуйтесь различными опциями запуска Java для настройки под специфические требования вашего приложения:
Обновление JDK
При обновлении JDK не забудьте также обновить ссылки на него в JAVA_HOME и Path.
Полезные материалы
- Как установить переменные Path и среды в Windows — подробное руководство, демонстрирующее основы работы с переменными среды в ОС Windows.
- PATH и CLASSPATH (Справочник по Java™) — документация Oracle, объясняющая, как управлять переменной PATH.
- Обсуждение настройки переменных среды для Java в ОС Windows на Stack Overflow — полезная ветка форума со множеством примеров и советов.
- Руководство Microsoft по управлению переменными среды — актуально для всех версий ОС Windows.
- Настройка
JAVA_HOMEдля Apache Tomcat — описание процесса в контексте установки Tomcat. - Видеоурок по установке Java JDK на ОС Windows 10 с настройкой
JAVA_HOME— наглядное пособие для новичков. - Как установить Java Software Development Kit — пошаговое руководство с иллюстрациями от WikiHow.
Last Updated :
17 May, 2024
PATH is an environment variable that is used by Operating System to locate the exe files (.exe) or java binaries ( java or javac command). The path once it is set, cannot be overridden. The PATH variable prevents us from having to write out the entire path to a program on the Command Line Interface every time we run it. Moreover, the path is just a variable that stores a bunch of shortcuts.
To execute Java console-based programs in Windows or Linux environments, we have to use Java and javac commands. The commands java and javac are not known to the operating system as we don’t specify where the executables reside. Hence, we need to specify the path where the executables are located. This is the reason we set the path and specify the path of the bin folder because the bin contains all binary executable files. After setting the path, it can load all necessary items in the program including the compiler or interpreter itself.
Below is the procedure for how to set Java Path in both Windows and Linux?
To Set Java Path in Windows
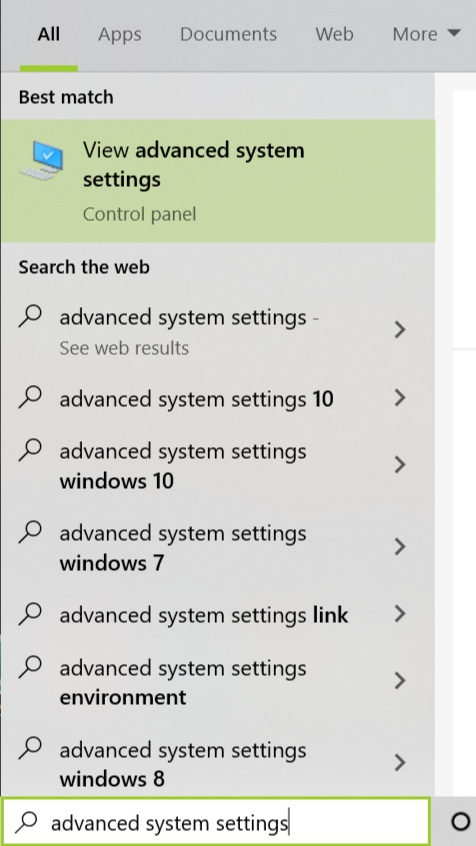
Step 1: Go to the Search box and type Advanced System settings in it. Now click on the View Advanced System settings.
Step 2: Select the Advanced tab and then click environment variables.
Step 3: In the system, variables click the New button. Now in the edit System variable, type variable name as JAVA_HOME and variable path as the path where the JDK folder is saved and click on OK button Usually the path of the JDK file will be C:\Program Files\Java\jdk1.8.0_60.
Step 4: Now in the system variables go to the path and click the Edit button.
Step 5: Click the New button.
Step 6: Now add the following path: %JAVA_HOME%\bin
To Find Java Path in Windows:
Here are the simple steps to find your Java path in Windows:
Step 1: Open a Command Prompt window.
Type the following command and press Enter:
where java
Step 2: You should see the path to your Java installation printed in the Command Prompt. It will typically look something like this:
C:\Program Files\Java\jdk1.8.0_291\bin\java.exe
That’s it! You’ve found your Java path in Windows.
To Set Java Path in Linux
Follow the given steps to set Java Path in Linux —
- Open the terminal and enter the following command:
sudo nano /etc/environment.
- A file will be opened and add the following command to that file:
JAVA_HOME = "YOUR_PATH".
- Replace YOUR_PATH with the JDK bin file path.
- Now restart your computer or virtual machine that you are using (or) reload the file: source /etc/environment
- You can test the path by executing
echo $JAVA_HOME
- If you get the output without any error, then you’ve set the path correctly.
- If you get any errors, try repeating the procedure again.
To Find Java Path in Linux:
Here are the steps to find Java Path in Linux System —
Step 1: Open a Terminal window.
Step 2: Type the following command and press Enter:
which java
Step 3: You should see the path to your Java installation printed on the terminal. It will typically look something like this:
/usr/bin/java
That’s it! You’ve found your Java path in Linux.
Conclusion
So, this was all about how you can find and set Java path in Windows and Linux. If you also have other queries regarding setting Java Path, Java_Home variable and default Java path, You can also refer to the following frequently asked questions.
Setting the Java environment variable in Windows 10 is a breeze once you know the steps. This process involves adding the Java Development Kit (JDK) path to the system’s environment variables, allowing your system to recognize Java commands in any command prompt window. Begin by finding your Java installation directory, then adjust your system environment settings to include this path, and finish by confirming it works. It’s as easy as pie!
Setting the Java environment variable ensures that your system knows where to find Java components when you run them. Here’s how you can do it step-by-step.
Step 1: Locate the Java Installation Directory
First, navigate to the directory where Java is installed on your computer.
You can usually find it in the “Program Files” or “Program Files (x86)” folder on your C: drive. If you haven’t installed Java yet, download it from the official Oracle website and note the installation path.
Step 2: Open System Properties
Access the System Properties by searching for “Environment Variables” in your Windows search bar and selecting “Edit the system environment variables.”
This step opens the System Properties window, where you can manage environment variables. You’ll find this option is often a hidden gem that saves loads of time by providing direct access to key settings.
Step 3: Access Environment Variables
Click on the “Environment Variables” button in the System Properties window.
This action opens another window where you can view and edit both user and system variables. It’s like entering the control room of your computer’s configuration.
Step 4: Create or Update JAVA_HOME Variable
Under System Variables, click “New” to create a new variable, or select an existing JAVA_HOME variable and click “Edit.”
In the variable name, type “JAVA_HOME.” In the variable value, paste the path to your Java installation directory. This step ensures all Java applications know where to find the JDK.
Step 5: Update the PATH Variable
Find the “Path” variable under System Variables, select it, and click “Edit.”
Add a new entry by clicking “New” and typing “%JAVA_HOME%bin”. This step tells your system to look in the Java bin directory for executable files, making Java commands available everywhere.
Once you’ve completed these steps, you’ll be able to run Java applications from any command prompt window. Just open a new command prompt, type java -version, and hit enter. If everything is set up correctly, you’ll see your Java version displayed, confirming that your environment variables are working like a charm.
Tips for Setting Java Environment Variable in Windows 10
- Always double-check the Java installation path before setting the JAVA_HOME variable.
- Use the latest version of Java to ensure compatibility and security.
- Remember to open a new command prompt window to apply changes after setting the variables.
- If you need multiple Java versions, consider using a version manager.
- Regularly update your Java version to take advantage of the latest features and security patches.
Frequently Asked Questions
How do I know if Java is installed on my computer?
You can check if Java is installed by opening a command prompt and typing java -version. If Java is installed, you will see the version information.
What if I can’t find the Environment Variables setting?
You can access it through the Control Panel by navigating to “System and Security” > “System” > “Advanced system settings.”
Can I set the environment variables for just one user?
Yes, you can set user-specific environment variables by adding them in the “User variables” section instead of “System variables.”
What happens if I set the wrong path for JAVA_HOME?
If the path is incorrect, Java-related commands won’t work, and you might encounter errors when running Java programs.
Do I need to restart my computer after setting the environment variables?
No, a restart isn’t necessary. However, you should close and reopen any command prompt windows.
Summary
- Locate the Java installation directory.
- Open System Properties.
- Access Environment Variables.
- Create or update JAVA_HOME variable.
- Update the PATH variable.
Conclusion
Setting the Java environment variable in Windows 10 is a straightforward process that unlocks the full potential of Java on your machine. By following the outlined steps, you ensure your system is ready to handle Java applications smoothly. Whether you’re developing software, running complex applications, or just curious about programming, configuring your environment correctly is like laying a strong foundation for a house. It supports everything you build on top of it.
Completing this setup not only allows Java to run efficiently but also helps in keeping your system organized. It’s akin to ensuring every tool in your toolbox is in the right place—making your work more efficient and less stressful. If you’re venturing into the world of Java, these skills will be invaluable, acting as your compass and map in coding adventures.
Feel free to explore more about Java and its endless possibilities. Remember, the Java community is vast and vibrant, always ready to answer questions and provide support. So, roll up your sleeves, get your system humming, and dive into the fascinating world of programming with Java!
Matt Jacobs has been working as an IT consultant for small businesses since receiving his Master’s degree in 2003. While he still does some consulting work, his primary focus now is on creating technology support content for SupportYourTech.com.
His work can be found on many websites and focuses on topics such as Microsoft Office, Apple devices, Android devices, Photoshop, and more.
This article explains how to set JAVA_HOME environment variable on the Windows Operating system. The JAVA_HOME is an environment variable that points to the JDK (Java Development Kit) installation directory.
Table of Contents
Prerequisite
- JDK (any version) should be Installed
- Window OS
Note: In this tutorial, we are taking the example of JDK 19 which is already installed on the Windows 10 Operating system.
Why do we need JAVA_HOME environment variable?
The JAVA_HOME environment variable is used by the Java compiler, debugger, and other tools to locate the JDK (Java Development Kit). In order to use the JDK, it is important to set the JAVA_HOME environment variable so that the tools can find it. This variable should be configured on all Operating Systems that have a Java installation, including Windows, Ubuntu, Linux, Mac, and Android.
Follow the below steps properly, in order to set Java environment variables in your Windows machine. Here we will set JAVA_HOME and update the Path system variable.
1. Find Java Home Directory
First of all, you should find out where the JDK (Java Development Kit) is installed in your system. It is typically under the C:\Program Files\Java directory. As you can see in the below image, in our case it is installed at C:\Program Files\Java\jdk-19

2. Open System Environment Variables Dialog
To open the system environment variables dialog, you can type the ‘environment‘ in the Window search box and click on Edit the system environment variables as shown in the below image,

Now click on the Environment Variables button as follow, to open the Environment variable dialog.

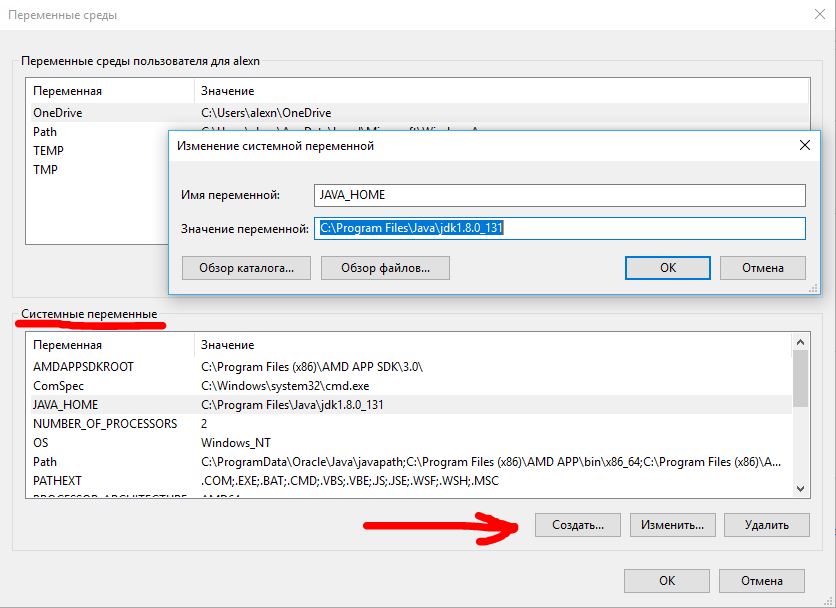
3. Create JAVA_HOME Variable
In the Environment Variables dialog, click on the New button to add the JAVA_HOME variable as follow:

In the below dialog fill the details like Variable name: JAVA_HOME and Variable value: C:\Program Files\Java\jdk-19

After that, you should update the Path variable as shown in the sequence number in the below image,

How to Verify the JAVA_HOME System Environment Variable?
In order to verify the successful setup of the JAVA_HOME environment variable, you can open the Command Prompt by typing ‘cmd‘ in the Window search box as shown in the below image:

Once the Command Prompt is opened, type the command java -version and press Enter key. Now here you will see the java version getting displayed, it means you have successfully set up the JAVA_HOME environment variable on your Window machine.

Related articles:
- Download JDK 19 and Install on Windows 10 (64-bit)
- How to Download JDK 17 and Install on Windows 11 [64-bit]
- How to Download and Install JDK 11 on Windows 10?
- How to install Maven on Windows System
- How to install and configure Tomcat Server in Eclipse?
- Install MySQL Server 8.0.27 [zip Archive] on Windows 10
You may also like:
- File Upload in Java Servlet Example
- Spring Boot File Upload with Advance Progress bar in Ajax
- How to write Excel files in java using Apache POI?
- Drag and drop file upload using Javascript
Java Development Kit (сокр. JDK) – комплект разработки приложений для работы с языком программирования java. Включает в себя: интерпретатор, облегченный интерпретатор jre, компилятор, отладчик, java библиотеки классов, программу сбора документации, диcассемблер, программу архивации и сжатия jar.
- Загрузка с сайта пакета JDK (Java Development Kit)
- Установка JDK (Java Development Kit)
- Настройка переменных окружения
Как установить Java JDK (Java Development Kit) в Windows 11
1. Загрузка с сайта пакета JDK (Java Development Kit)
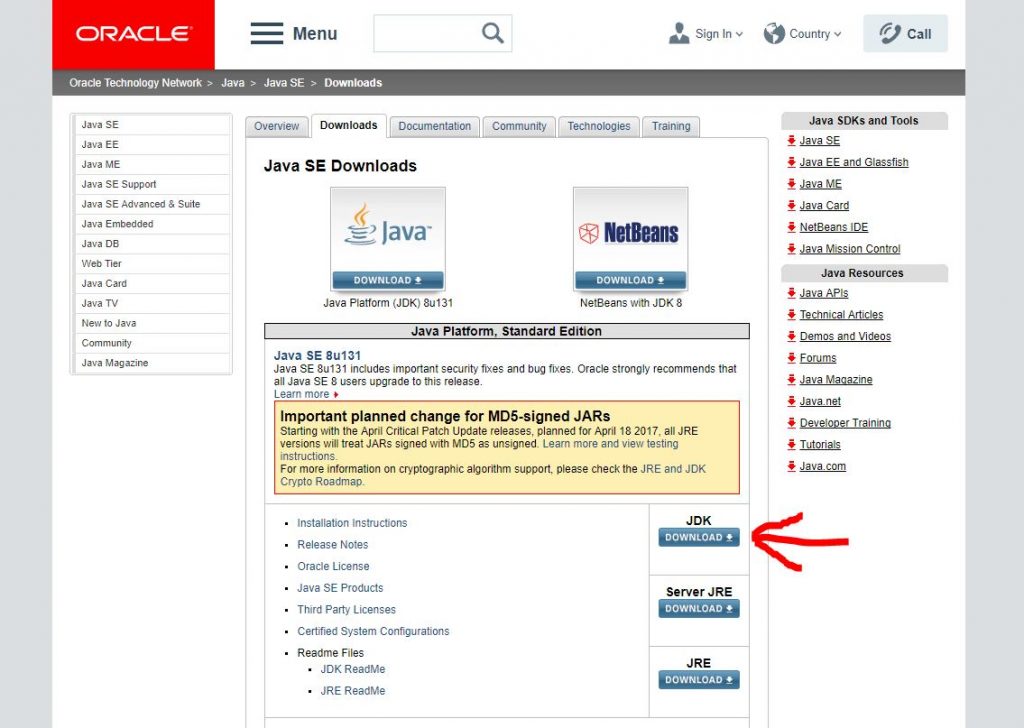
Переходим на сайт Oracle по ссылке и выбираем JDK (Download)
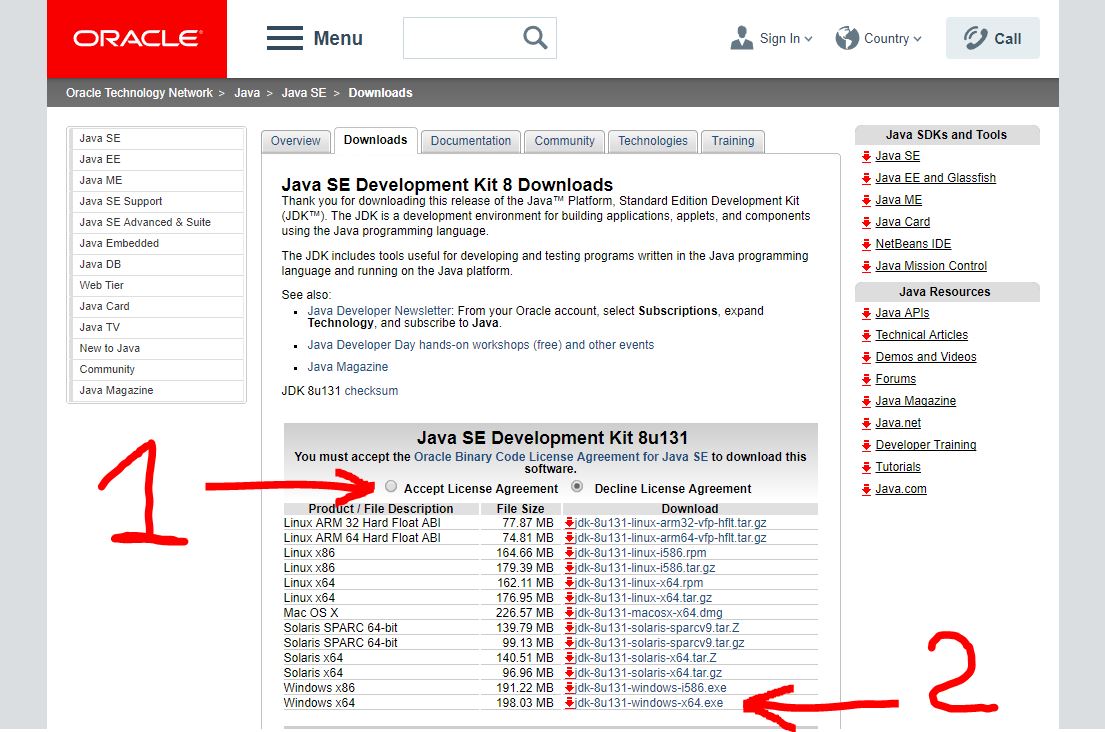
На следующей странице нужно согласится с условиями и загрузить пакет соответствующий нашей ОС. В моём случае это 64-разрядная Windows 10.
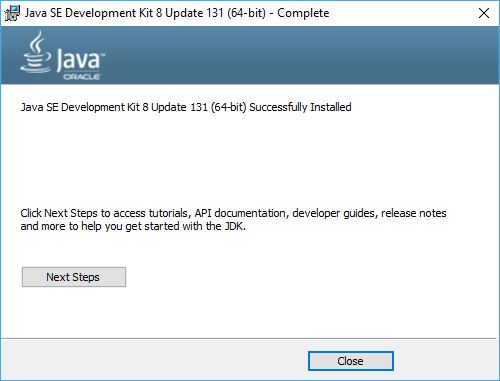
2. Установка JDK (Java Development Kit)
Запускаем установщик с правами администратора и устанавливаем всё по умолчанию, ничего не меняя в процессе.
3. Настройка переменных окружения
Инсталлятор Java не выполняет настройку переменных окружения, поэтому придётся нам это делать вручную после установки.
JAVA_HOME — переменная, указывающая на директорию, в которую установлена Java. Программы её используют чтобы определить, где установлена Java.
Для этого комбинацией клавиш Win+R открываем окно «Выполнить«. Набираем команду: «control /name microsoft.system« без кавычек.
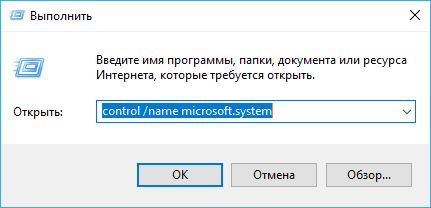
Затем нужно выбрать «Дополнительные параметры системы» и в открывшемся окне «Свойства системы» нажимаем кнопку «Переменные среды«. Если Вы ничего не меняли при установке JDK, то путь будет таким: «C: \ Program Files \ Java \ jdkНомерВерсии».
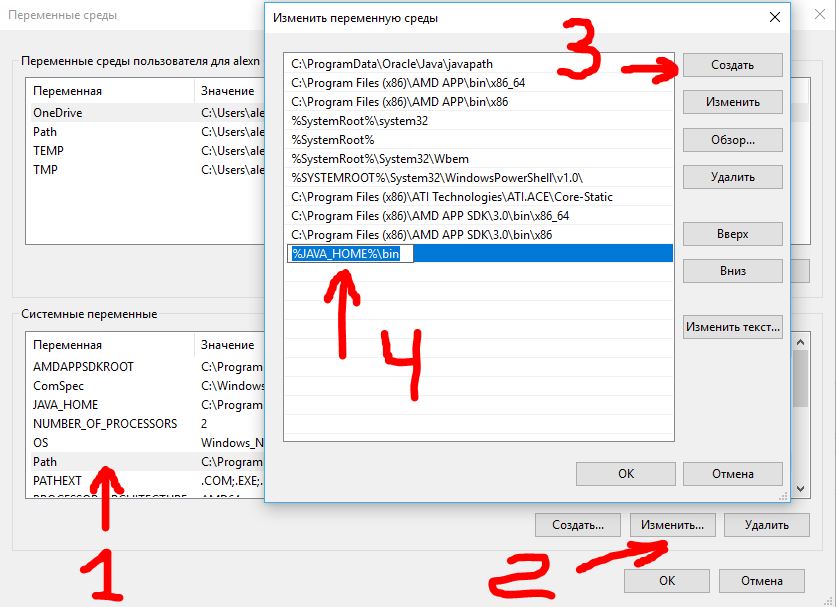
Далее необходимо отредактировать значение переменной PATH, добавив туда путь к директории, где находятся исполняемые файлы Java, то есть
%JAVA_HOME%\bin
4. Тест конфигурации
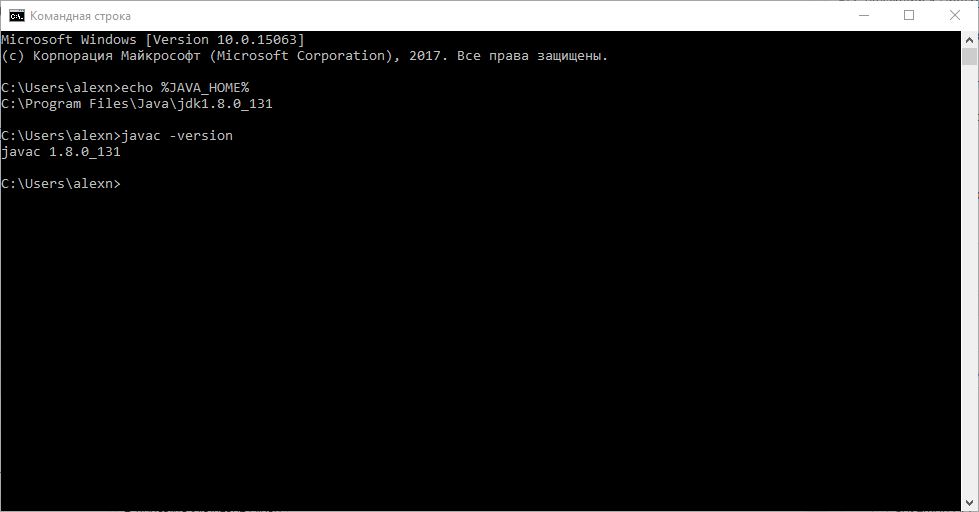
Открываем командную строку и вводим:
echo %JAVA_HOME%
Выводит директорию где установлено Java JDK.
javac -version
Выведет версию java-компилятора, если переменная PATH установлена правильно.