
GeoServer is an open source server for sharing geospatial data in both vector and raster format. It is designed to host major data sources, which can easily render on maps.
Download stable version of GeoServer to Install:
Google out http://geoserver.org/ link.
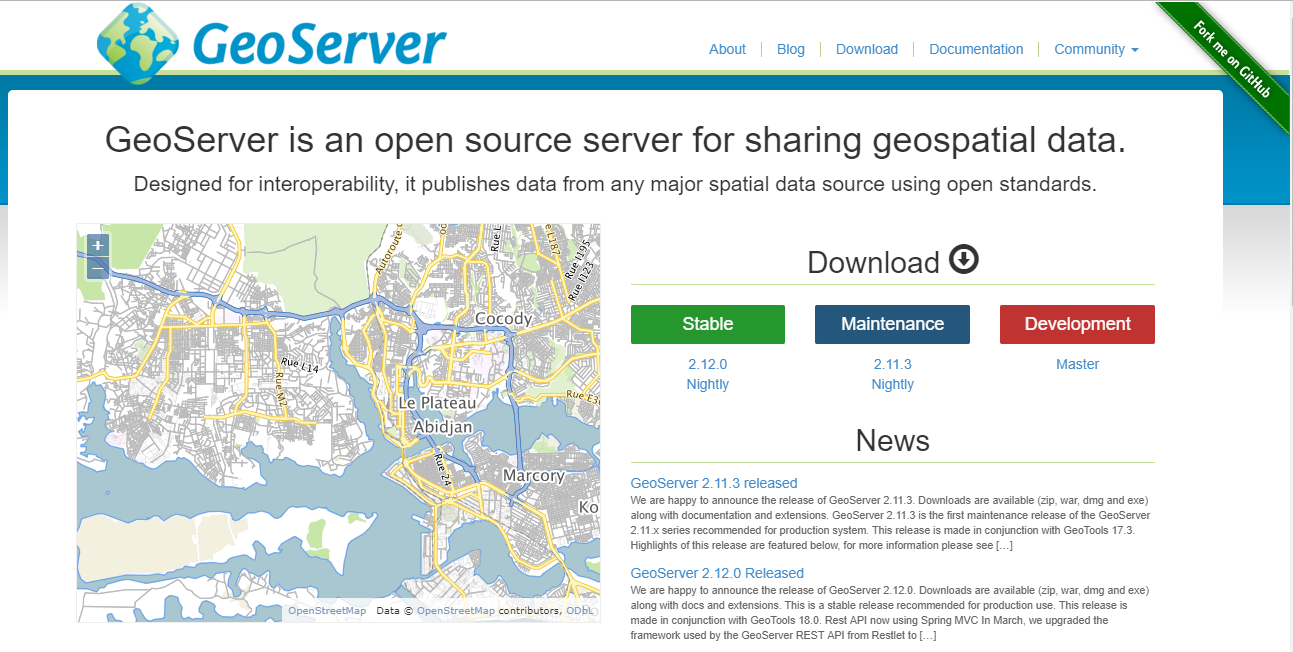
Hit the Download tab and install the stable version of geoserver. In this tutorial we have downloaded GeoServer 2.12.0. Before installation make sure that you already have JRE installed. If you have not installed that please visit
http://www.oracle.com/technetwork/java/javase/downloads/index.html
to download JRE (Java runtime environment) and install it.
To install GeoServer follow the steps given below,
Step 1:
First of all download the GeoServer application file and keep in drive, where you want to install it.
Step 2 to install geoserver:
Double click the application file and start installation.
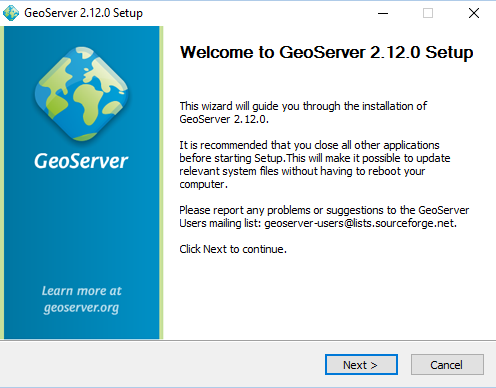
Click next button.
Step 3:
Select I agree option and set the path to drive, where you want to install this application.

Click I agree.
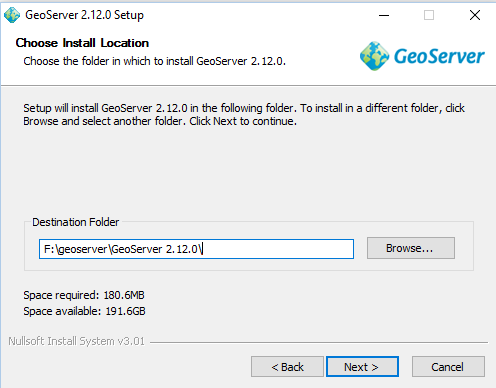
Before choosing the install location check space available in drive. Then provide installation location and click next.
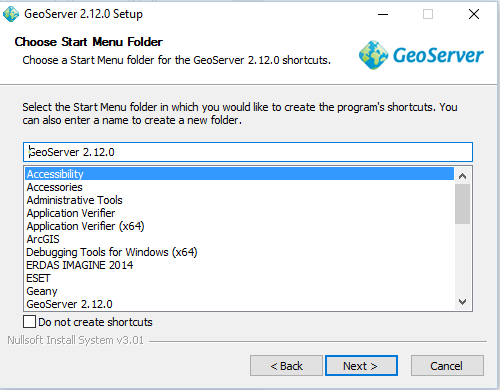
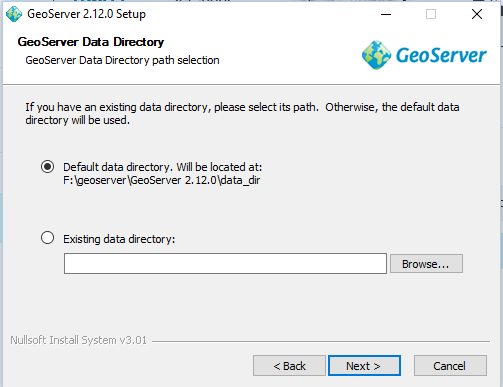
Here click next button.
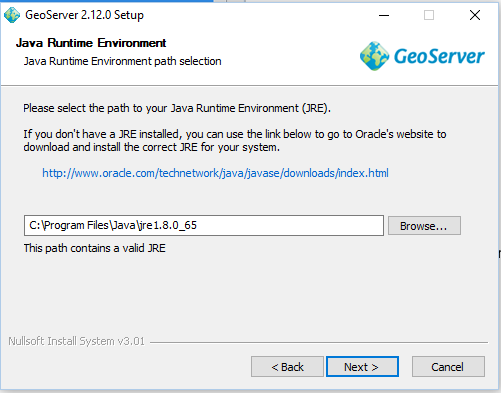
Give the path where you have installed the JRE.
Click next button.
Step 4 to install geoserver:
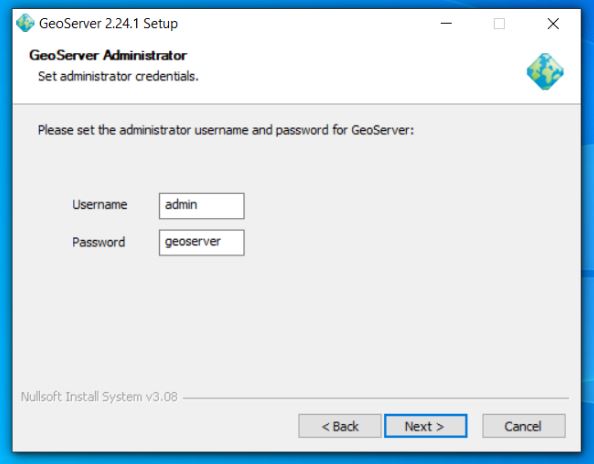
You can change the Username and password.
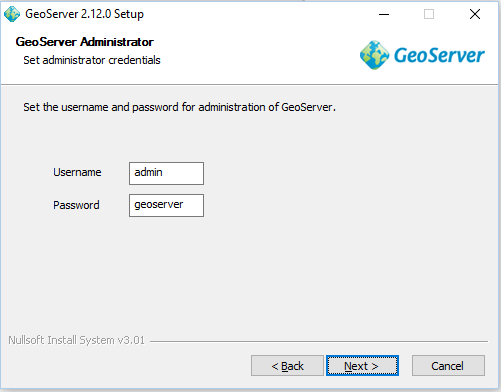
Set the Username and password and click next button.
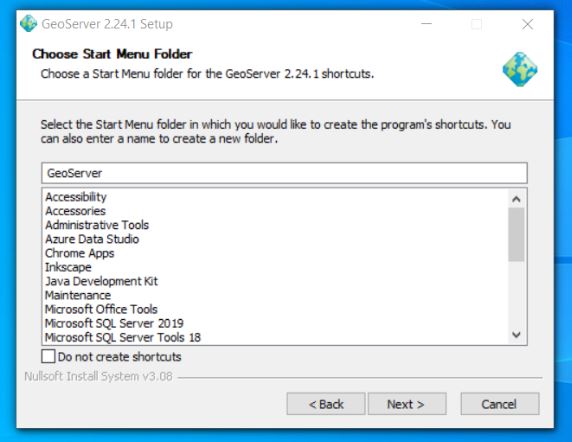
Click next button.
Click next button.
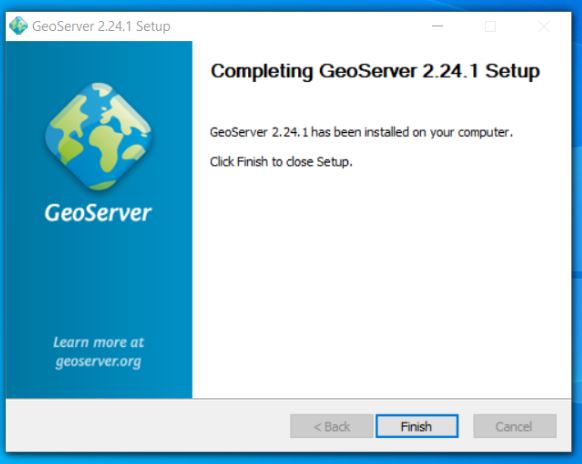
Check the details provided and click install button. After installation click finish button. You will find the GeoServer folder in the directory.
Step 5 to install geoserver:
After installation search Start GeoServer application, it will run in command prompt then in web browser search localhost:8080/geoserver/web link.
You can also visit articles on Publish and style Vector data, Publish and style Raster data, Install geoserver in linux operating system etc.
Feel free to comment in provided comment box for any other queries and problem.
Owner and Director of a Private Limited company which serves individual to large scale industries in the field of Maps and GIS. He is a Gold Medalist in M.Tech(Spatial Information Technology) and owns some famous Technology blogs and website… Know more
View all posts by Akshay Upadhyay
GeoServer is an open-source server for sharing geospatial data. It allows users to publish and manage spatial data efficiently, making it a vital tool for GIS professionals. If you want to build your own WMS server, GeoServer is a great tool to start with. In this article we will guide you how to install GeoServer on Windows 11. GeoServer supports wide range of operating systems including Windows, Linux and macOS. In the previous article, we learned how to install GeoServer on Ubuntu 24.04.
Steps to Install GeoServer on Windows 11
Step 1. Download GeoServer Installer
Navigate to the official download site for GeoServer. Choose Windows version and let the download begin. You should have the installation file such as: GeoServer-2.26.2-winsetup.exe
Step 2. Install GeoServer
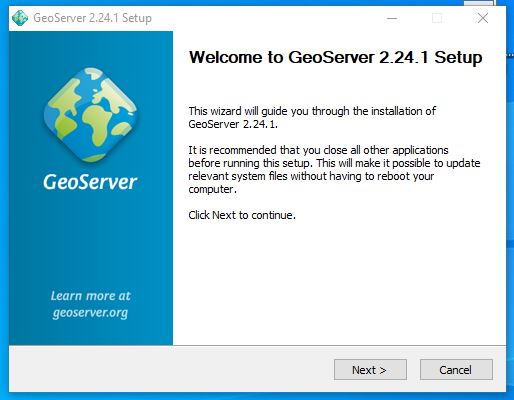
Double-click the installer and follow the installation steps shown on your screen.

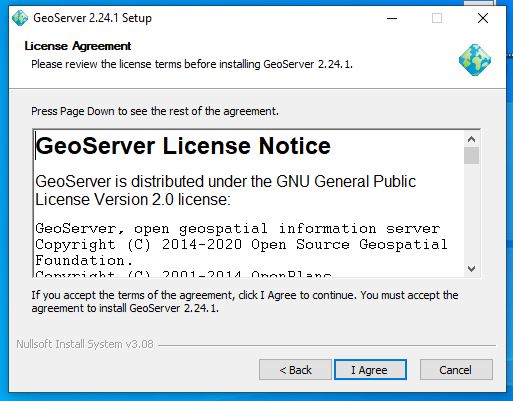
Hit Next to continue and accept the license agreement

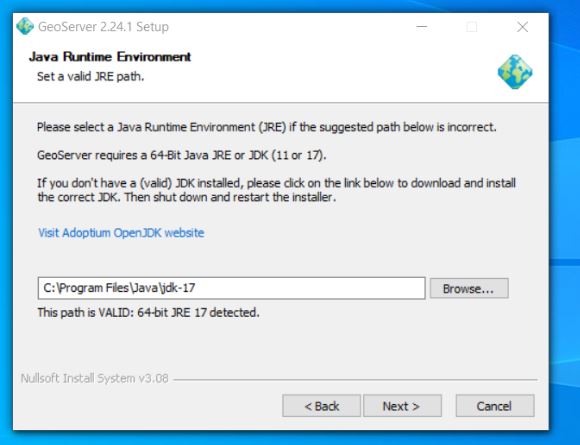
Click Agree and the next step is setting the valid Java path. Please make sure that you have installed JRE 11 or 17. You can download from the Oracle Java download page. Please note that GeoServer requires Java 11 or 17. If you have Java JRE version 23, or 24, it won’t work. You will get the error like this (This path is INVALID: no 64-bit JRE(11 or 17) found.

So, the solution is to install the Java 11 or Java 17 which can be downloaded from the above link. If all good, you will see this window.

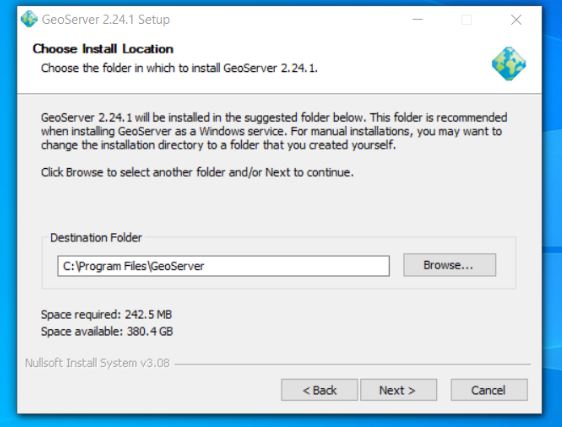
Once the Java path is valid, we can continue to set the GeoServer data folder. You may change the directory with your desired one.

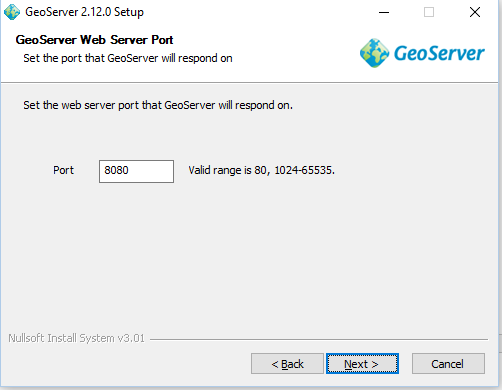
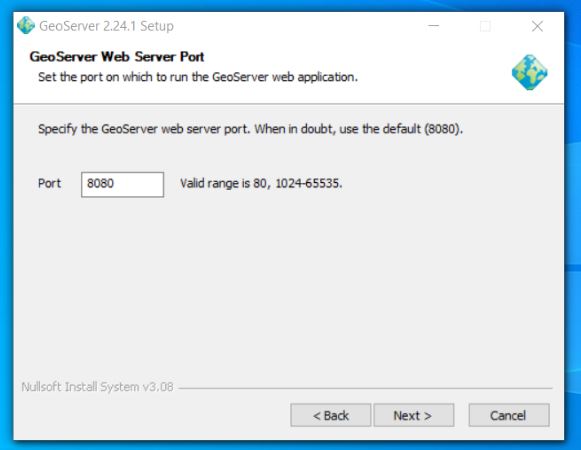
Next, we need to specify the web server port. The default value is 8080 but you can change it to something else such as 8282.

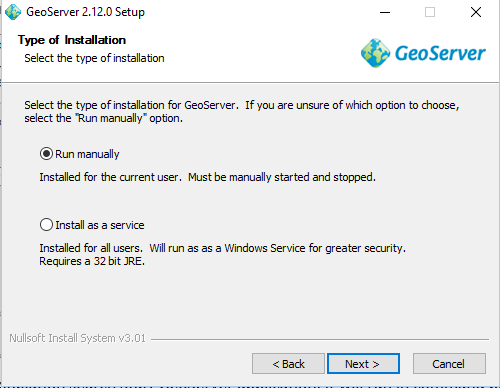
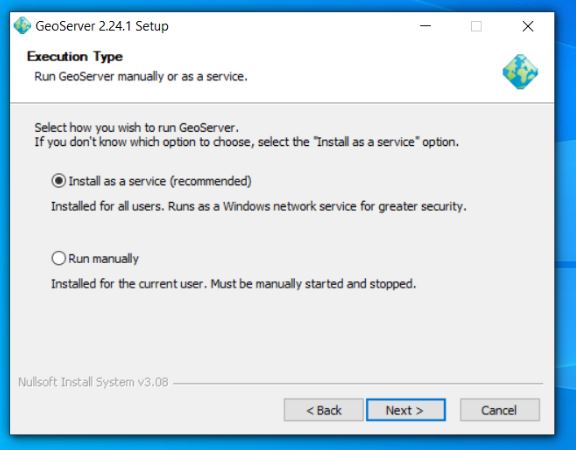
Next, choose Install as a service for ease of use.

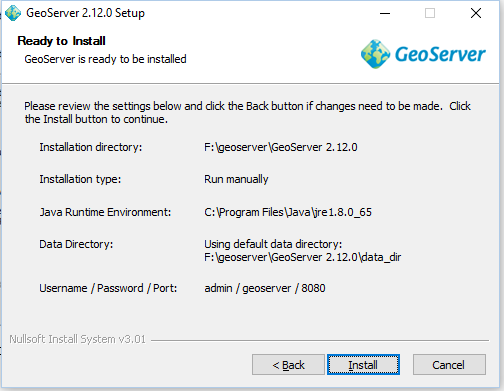
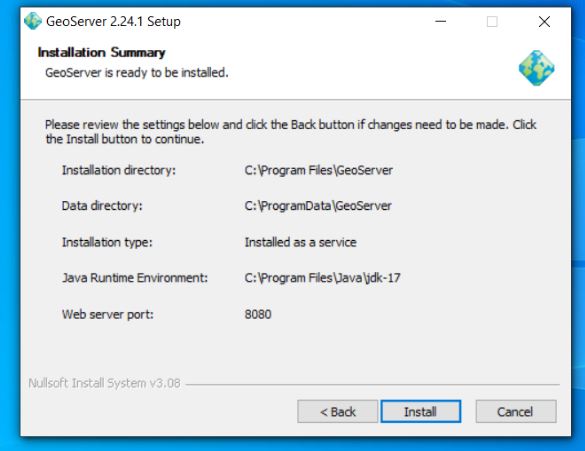
Check the installation summary before pressing the Install button.

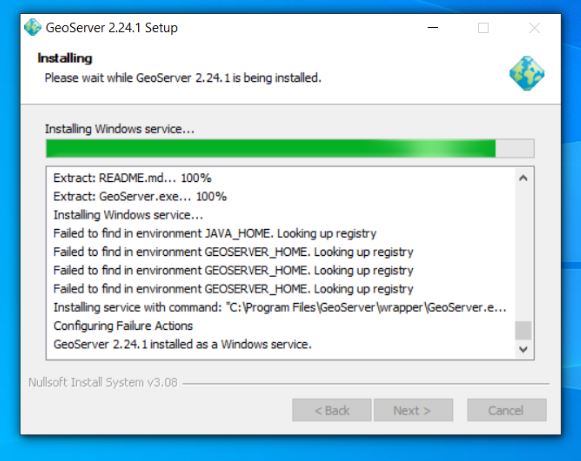
Make sure the installation completed successfully with no errors.

At this point, we have successfully installed GeoServer on Windows 11.
Step 3. Configure Firewall
If you want to access GeoServer from the network, we need to configure the firewall to allow the incoming traffic through the GeoServer port number. In my case, my port number is 8282.
Open Windows Defender Firewall with Advanced Security. Click Inbound Rules and then create a new rule. Select Port and then type the port number. Make sure you choose Allow Connection.
Step 4. Open GeoServer web page
At this point, we have successfully installed GeoServer on Windows 11. Now open the web browser and type your IP address with the following format:
http://your-ipaddress:8282/geoserver

The default user is: admin and default password is: geoserver.
Установка Geoserver в WSL для Windows 10
1. Установить WSL2 и Debian/Ubuntu
wsl --install -d Debian
2. Скачать дистрибутив Geoserver
Устновка Geoserver — https://blog.techsample.ru/post/Ustanovka-i-nastroyka-Geoserver-(Linux)
Распаковать дистрибутив в ~/geoserver
3. Установить Java Runtime
sudo apt-get install openjdk-11-jdk
4. Запуск и прокидывание порта через SSH
~/geoserver/bin/startup.sh
ssh -R 8096:localhost:8095 <user>@<server_ip> -p <ssh_port> -N -f
-N — no login
-f — no attach to console (no foreground?)
Настройка reverse-proxy nginx на внешнем сервере, куда проксируем наш локальный geoserver:
https://blog.techsample.ru/post/Nginx-installing-and-configuring
5. [Опционально] Автозапуск Geoserver как сервиса в Linux
Так как в WSL под Win10 проблемы с systemd, установим другой — supervisord
sudo apt install supervisor
Запустим его:
sudo service supervistor start
Создадим конфиг-файл /etc/supervisor/conf.d/geoserver.conf со следующим содержимым:
[program:geoserver]
command=/home/<user>/geoserver/bin/startup.sh
directory=/home/<user>/geoserver/bin
user=<user>
stdout_logfile=/home/<user>/geoserver/supervisor.log
stderr_logfile=/home/<user>/geoserver/supervisor.log.err
Перезапустим Supervisor:
sudo service supervisor stop
sudo service supervisor start
Проверим статус:
supervisorctl status geoserver
Если не запустился, запустим вручную:
supervisorctl start geoserver
Далее, необходимо создать CMD-файл в директории автозапуска для пользователя :
c:\Users\<user>\AppData\Roaming\Microsoft\Windows\Start Menu\Programs\Startup\wsl_geoserver.cmd
Со следующим содержимым:
wsl -u root service supervisor start
wsl ssh -R 8096:localhost:8095 <vps_user@<vps_ip>-p <vps_ssh_port> -N -fc
См. также
-
Установка и настройка Geoserver в Linux, blog.techsample.ru
-
ssh port forwarding without logging in, stackexchange.com
-
How to create a service in WSL2, askubuntu.com
-
supervisor docs, supervisord.org
-
supervisor help, https://losst.pro/nastrojka-supervisor?ysclid=ldea0dqtrx805489893
Создано: 10/01/2023 14:43, Изменено: 27/01/2023 12:09, Просмотров: 73
Назад

Once you have your data in an Enterprise Grade database sharing that information becomes important. Some vendors, in particular Digital mapping SAAS vendors want you to transfer your data into their clouds but for a lot of authorities that is categorically impossible for large segments of their data. For example about 3/4 of UK planning authorities run on software built by a company called IDOX Group plc which holds its data in Oracle this cannot be moved. For Geographical data here’s where Geoserver comes in.
Geoserver Official Website
From the website
GeoServer is an open source server for sharing geospatial data.
Designed for interoperability, it publishes data from any major spatial data source using open standards.
GeoServer implements industry standard OGC protocols such as Web Feature Service (WFS), Web Map Service (WMS), and Web Coverage Service (WCS). Additional formats and publication options are available as extensions including Web Processing Service (WPS), and Web Map Tile Service (WMTS).
Another way of putting it Geoserver allows programs that display and manipulate geographic information to display and edit that data while keeping it safe and secure and located in enterprise databases. It can connect to SQL Server / Postgresql and I am told Oracle which are the main relational databases used by Local authorities today so once setup and configured it could be used to compare and contrast information in one location from variable datastores. Datastores that for historical reasons cannot be moved. Here I concentrate on SQL Server because we have a particular issue with new systems needing to connect to SQL Server but it would be great if we could get it working with Oracle as well.
The following are my notes on installation and configuration of Geoserver on Windows linking to SQL Server and in this case a remote(not on the same computer) SQL Azure instance I believe any remote SQL Server instance would be similar. This post is a detailed explanation of the installation of Geoserver locally on a laptop but I believe installation would be exactly the same on a Windows Server machine albeit additional steps would be required to publish to the web either internally or externally.
Its all configuration so remember your host names / IP numbers / ports / usernames / passwords / database, table and column names
To start this tutorial please ensure the following resources are available;
–
WorkFlow Synopsis Overview
1)Download and install Java runtime engine (as above importantly here I use 11)
2)Download and install Geoserver (2.24.1 in this case)
3)Test that the Geoserver Admin dashboard is up and working
4)Download and configure Geoserver Extension for SQL Server library (SQL Azure example)
5)Good idea to setup a login specifically to your SQL Azure instance with least privilege – Your SQL Server instance with geodatabases may already have suitable logins. So steps 5 and 6 can be skipped
6)Good idea to create an example table with Geodatabase in SQL Azure – will be used as a test connection table – NOTE if you already have a SQL Server with geodatabases you could use that instead.
7)White list IP within the SQL Azure instance firewall rules to Geoserver computer
8)Opening Geoserver and setting the ‘Store’ to reference your SQL Azure database using the login setup in step 5.
9)Adding a new layer from the Store made in point 8 and seeing if you can Preview the layer – Ideally you should have a table that has some features in it. Setting the WMS and WFS up in Geoserver with sufficient rights to allow editing (if WFS setup)
10)I don’t explain it in my post below but the next step would be to test in QGIS to see if you can setup a project in QGIS which can pull from Geoserver against a basemap and you check that the Polygons are actually where you want them to be.
Workflow Detailed
1)Download the install Java Runtime via JDK
There are some complications here
Initially I tried to use the Java Runtime engine 17 and went through the complete Geoserver installation but on testing I was getting a Java error when trying to view layers. After a short google I came across a stack overflow thread that indicated that geoserver support for JDE 17 was experimental and I should use Java Runtime engine 11. Deinstallation of 17 and installation of 11 solved this.
Additionally there is the issue of where you obtain the Java Runtime installation from – there is the Adoptium location and then there is Oracle location. Oracle are making moves to charge for use of their Java Runtime engine so it is important that you use Adoptium resource to reduce costs.
Later I will list the url to the JDK download for Java Runtime engine but it is important to realise that Adoptium is a safe source, well supported and noted as open source.
https://adoptium.net/en-GB/members/
so
Google Search for Adoptium
https://adoptium.net/en-GB/
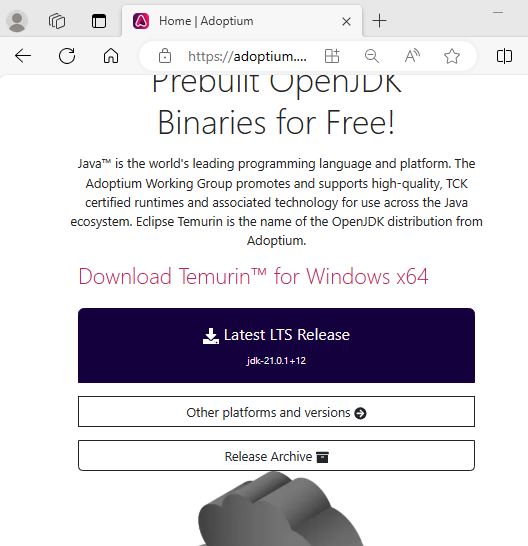
Navigate to other platforms and versions and target windows 64 bit JDK and 11 LTS version and download the .msi.
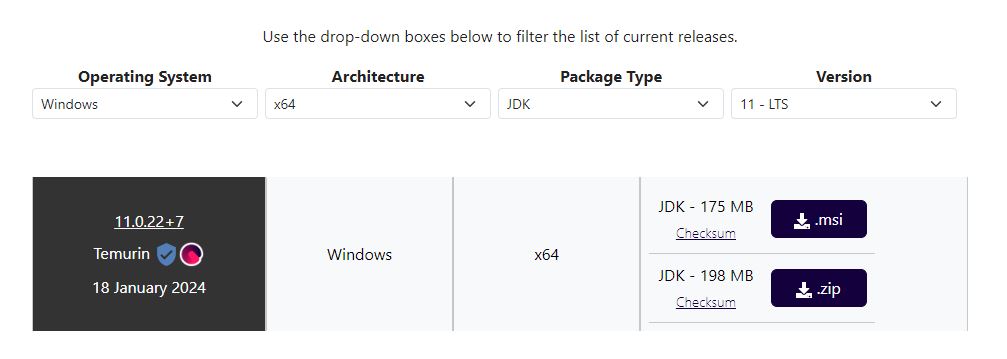
After a short delay you will be shown the msi which will be in your downloads folder
Double click on it to install.
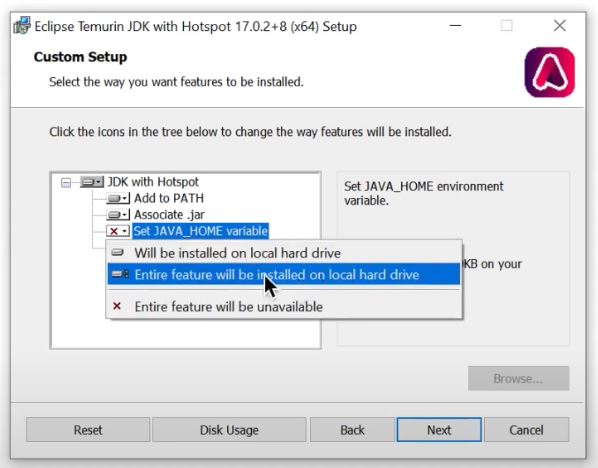
Now the only thing that is tricky here is to setup the java home directory as follows
Video Installing Adoptium JDK on Windows
In particular note this section
2) Download and install Geoserver
Go to the official Geoserver web page and follow the links to download the windows installer
Here I use the windows version of Geoserver version 2.41.1 obtained January 2024 from the following url
Geoserver Official Website
See download button and then go to Windows Installer

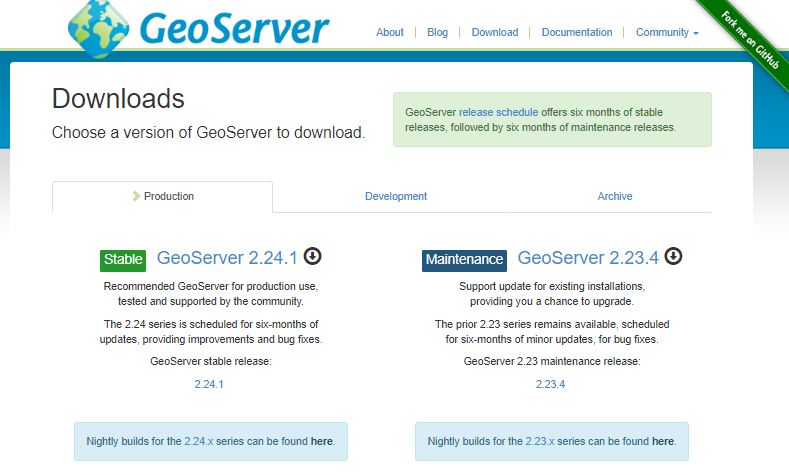
I chose the left option and then I chose the Windows Installer option
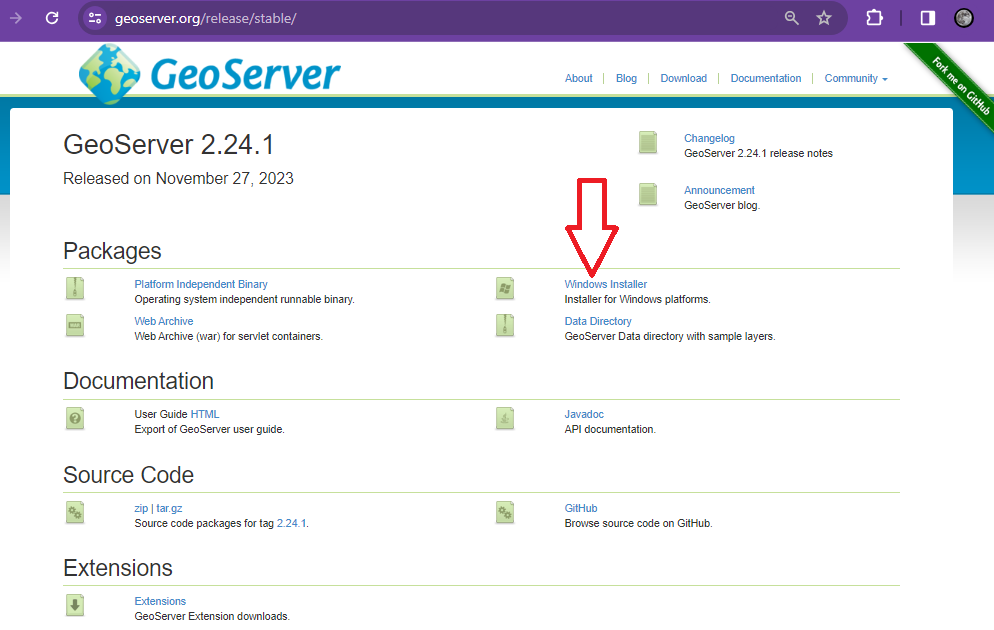
This will download Geoserver-2.24.1-winsetup.exe to your download directory and you can then start the geoserver installation process
Next open up the executable and follow the instructions
Next agree the licence
Next we reference the java library installed in the previous step – if you have set the java_home variable correctly it should automatically find JRE 11 for you and it will place it within the path reference below. I don’t have a screenshot of the JRE 11 reference here as on my first installation I referenced the Oracle 17 JRE – (note I went back de-installed geoserver installed JRE 11 and then reinstalled geoserver to counter the proprietary Oracle runtime library and importantly to fix the issue that I was facing of geoserver not being compatible with JRE 17
The rest of the install from here is standard for a windows install

Next setup the default admin password – defaults are admin / geoserver
Set up port geoserver runs on – default is 8080
Next choose the execution type I like to install geoserver as a service
Confirm your preferences and then trigger install
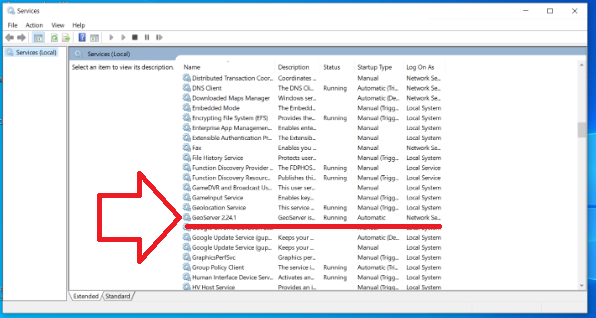
Now you should see geoserver on your local machine as a service which you will need to ensure is running to access properly
3) Test that Geoserver Admin dashboard is up and working at least locally
If you have used the same settings as me open a browser and navigate to the following url
https://localhost:8080/geoserver/web
Login with the username and password which is usually admin / geoserver
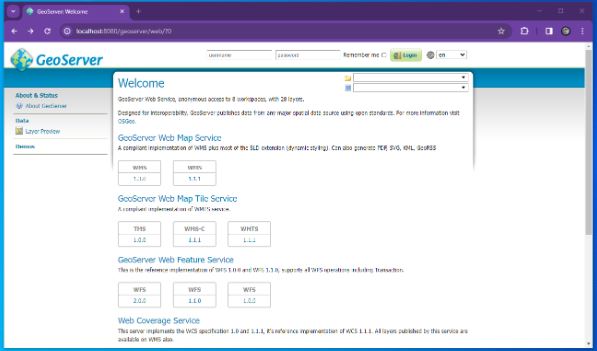
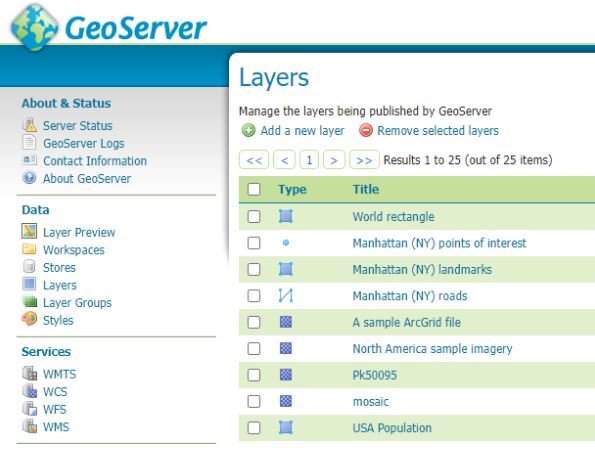
At which point you should see something similar to the following
4) Download and configure Geoserver Extension for SQL Server
At install Geoserver comes with the ability to connect to Postgres but NOT SQL Server so we must install/configure plugin extension to enable Geoserver SQL Server connections.
Here we go back to the geoserver.org website and go to download but this time instead of choosing the windows installer we look to the Extensions section and choose SQL Server
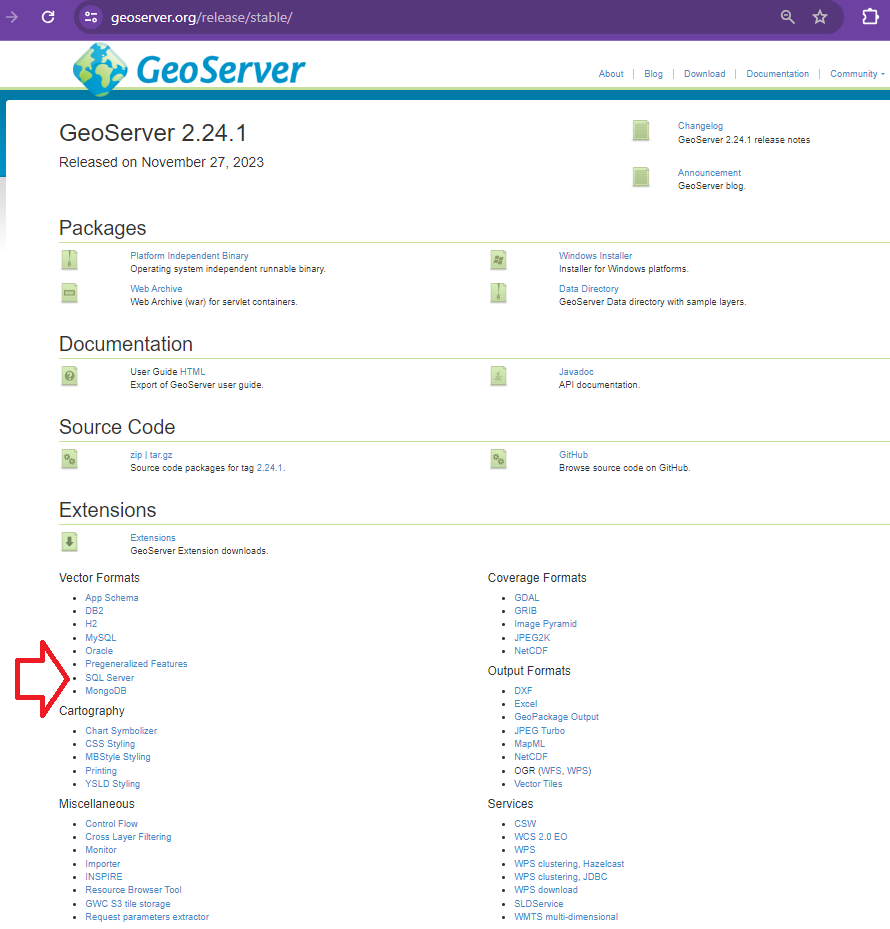
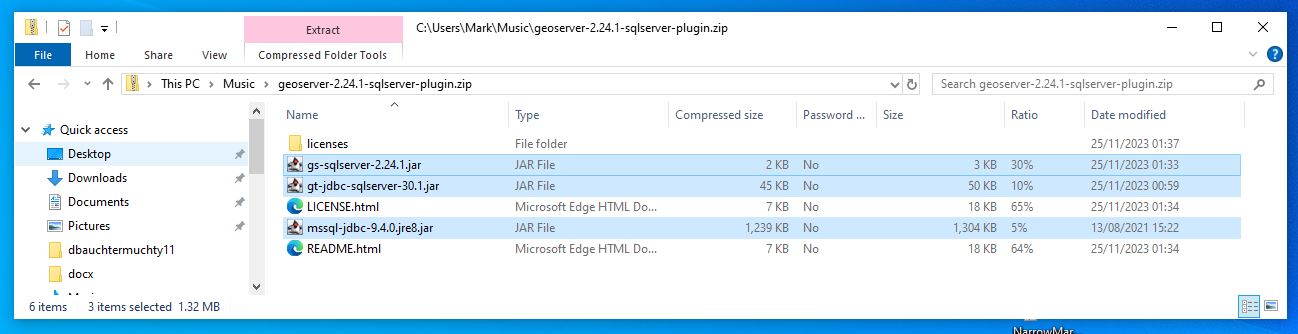
This should download geoserver-sqlserver extension plugin
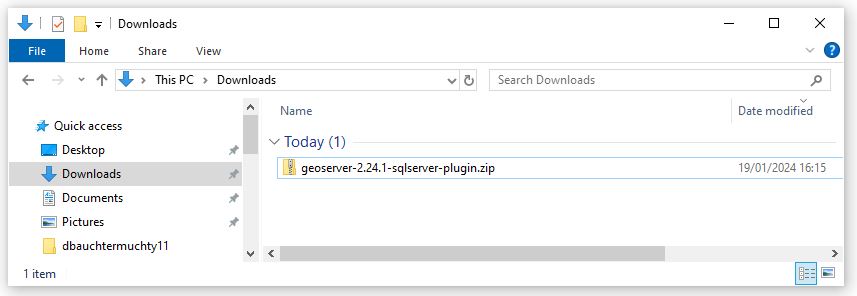
Next copy all files with the jar suffix into the following directory
C/program files/GeoServer/webapps/geoserver/WEb-Inf/Lib
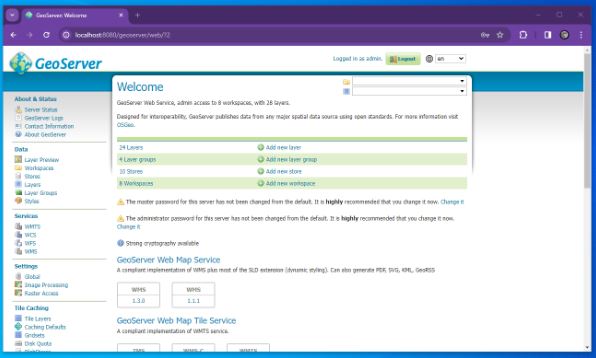
Next restart the geoserver and go back to the local host and sign in
http://localhost:8080/geoserver/web/?0
We are now very close to linking to SQL Server prior to that we must whitelist our geoserver so that your SQL Server instances will accept connections from your geoserver. Steps 5 and 6 are more about creating a user and ensuring you have a geodatabase with a georeferenced table skip to 7 if you want to read about white listing in SQL Azure or you have an alternative database that you could use with requirements already set up.
5) Next its a good idea to create a user with least privilege this will be used to set up the link so go to SSMS
Least privilege User Login Setup SQL Server
Here allow the amount of access you wish users to have remembering the principles of least privilege
6) Lets create an example table with geometry that we will be connecting
When I first tried connecting to SQL Server (SQL Azure in my case) I didn’t have any georeferenced tables so I created one and added a few records. If you have a database already with tables with geometry or geography you might not need to do this step.
So open SSMS and navigate to your database and use the following TSQL to create a table here I call it t064
SET ANSI_NULLS ON
GO

SET QUOTED_IDENTIFIER ON
GO

CREATE TABLE [dbo].[t064](
[PKID] [int] IDENTITY(1,1) NOT NULL,
[geomcol] [geometry] NULL,
[sitename] [varchar](30) NULL,
PRIMARY KEY CLUSTERED
(
[PKID] ASC
)WITH (STATISTICS_NORECOMPUTE = OFF, IGNORE_DUP_KEY = OFF, OPTIMIZE_FOR_SEQUENTIAL_KEY = OFF) ON [PRIMARY]
) ON [PRIMARY] TEXTIMAGE_ON [PRIMARY]
GO
This is a really simple table with three columns and you might want to link to it through QGIS and just create a few records – I would try and use a default projection of 27700 if you are UK based. I might come back with an example table with records..
If you want to link to this table for testing then you should try and input at least one record here. I added records using QGIS and I hope to come back to this post and update it to be more specific
7) White List the IP within your SQL Server or SQL Azure instance.
Setting IP White List in SQL Azure
 Opening Geoserver and setting the ‘Store’ to reference your SQL Azure database using the login setup in step 5
Navigate to the local host url for Geoserver namely
http://localhost:8080/geoserver/web/?0
Go to store and then you should see the following page
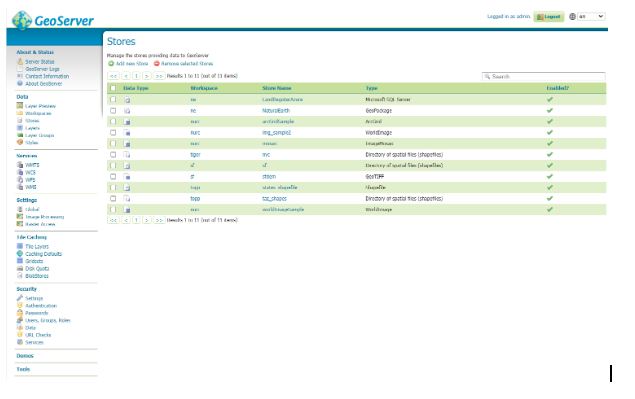
Hit the Add New Store green plus button in the top left corner you will be presented with the following screen
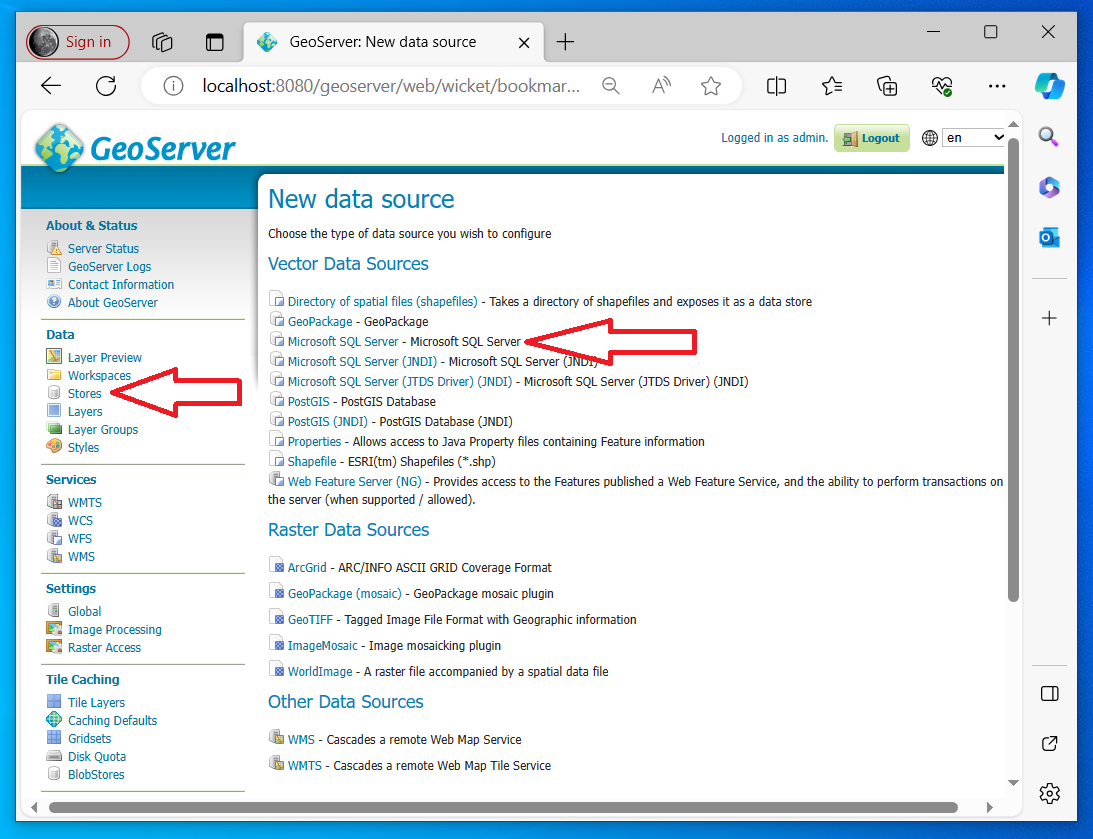
Fill out as many details as you can
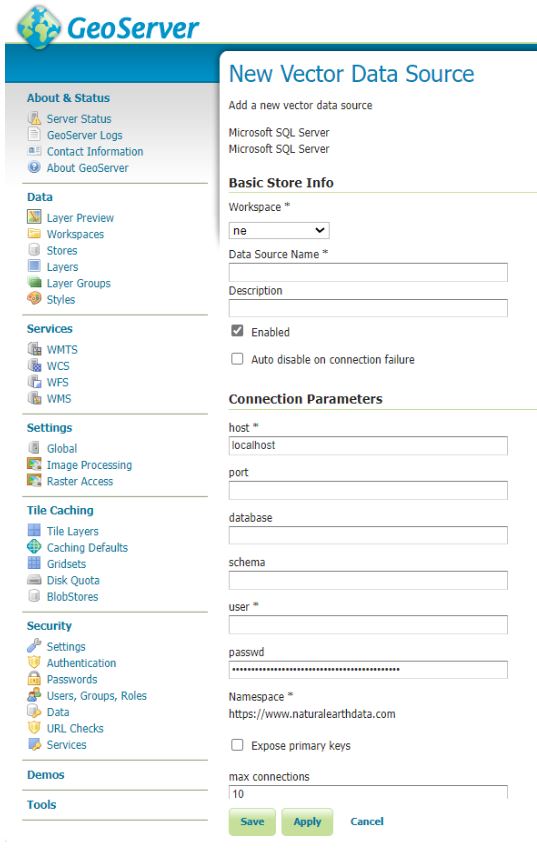
For SQL Azure this is likely to be similar to the following
Host = namevariable.database.windows.net (normally unique to instance in SQL Azure)
Port = 1433 (sql azure default)
Schema = dbo (sql azure default is dbo but your database maybe bespoke)
User = uservariable (remember least privilege is a good idea)
Passwd = passwordvariable (should be unique to your database)
Save and Apply and then your new connection should appear in your store
Here’s an example…. (see top line)
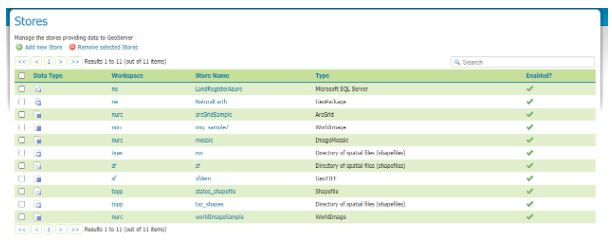
For the purposes of this tutorial I setup a login with db_owner rights to the database LandRegisterAzure your mileage will vary.
9) Next we add the layer which references the SQL Server
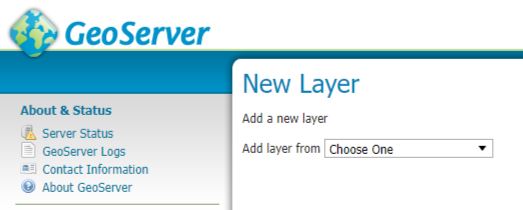
Select Layers within the Data section of the menu (usually to the left of the geoserver dashboard) then hit Add a new layer
You should get the following windows
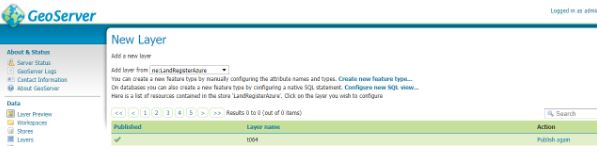
From the drop down select the store which references your SQL server. This will reveal all the tables and views in the database and you scroll through them to the table or view you wish to publish and in the column marked Action will be publish you can hit the Publish highlighted text (I’ve done that here already so under Action our table is marked as Publish again and there is a tick in the column titled Published.
We can now quickly test to see if things look like they are working by going to Layer Preview.
Look to the left hand side and select Layer Preview
Scroll down through the list and identify the layer that you have just added. I now select the open layers option

A new browser tab will open and if you have successfully configured the SQL Server you should be presented with your layer – without any background
10) I don’t go into it here but next I will try and write up my notes on QGIS and Geoserver setup – On my laptop I managed to set up a WFS to my SQL Azure instance through Geoserver where the layer was added to a project and I was able to edit information in my SQL Azure database through QGIS and were displayed correctly against a basemap in the right place!!
–/END/–
Sorry for the delay in posting part 4. I’ve been a little busy lately but here it is. Part 4 goes over how to install GeoServer and how to publish a PostGIS database to it. Here I am using GeoServer 2.10.1 Installation was done on both a Windows 10 laptop and Windows Server 2012R machine for testing.
There is more detailed instructions on the GeoServer site which you should read. The instructions were easy to follow, so there’s no need to rewrite it so here. I’m just giving a summary of what I did.
JRE 8
-
JRE 8 is required.
-
Download JRE 8 from Oracle
-
I installed both x86 (jre-8u121-windows-i586.exe) and x64 (jre-8u12-windows-x64.exe) versions.
Installing GeoServer 2.10.1
-
Download GeoServer. I used the stable version 2.10.1
-
Follow the instructions on the GeoServer site
I found the installation process to be fairly easy. The only thing I had to do was make sure that the JRE path was correct. I have both the x64 and x86 JRE 8 versions installed — the default option during the installation process uses the path to the the x86 JRE (e.g. C:\Program Files \(x86\)\Java\jre8\). I left the path as the default since I want to run GeoServer as a service, which requires 32bit JRE (i.e. x86 JRE version\).

Once the installation completes and if you’re able access the Geoserver web admin page from the program menu or by opening a web browser and typing http://localhost:8080/geoserver/web then you’re good.

If you can access this page then it means GeoServer was installed properly
Installing GeoServer Extensions
There are many GeoServer Extensions — you should read about them and decide which one you want to install to extend the functionalities of your GeoServer. These are the ones that I installed on my GeoServer. They seemed to have been installed properly but haven’t been fully tested out yet. There are tutorials on the GeoServer site you can explore.
-
Vector Tiles — outputs json, geojson, topojson, mbtile
-
Importer — batch uploading of data via a GUI
-
YSLD — styling of layers in YSLD format (easier to do/read then SLD)
-
Printing Module — printing using Mapfish printing service. I installed this put haven’t figured it out or worked with it yet. I will post my notes when I get it working.
You can download the extension(s), here. Mark sure the extension(s) you download matches your GeoServer version, in this case it is 2.10.1. The Vector Tiles extension for GeoServer 2.10.1 can be found in the community-latest folder. With GeoServer 2.11 Vector Tiles is part of the core extensions. The instructions from the GeoServer site to install the Vector Tiles extension is for GeoServer 2.11 but it is sill applicable to version 2.10. You can read the instructions here.
Basically you just download and extract the jar files for the extension and put them in the directory of your GeoServer’s WEB-INF\Lib folder (e.g. C:\Program Files\(x86)\GeoServer 2.10.1\webapps\geoserver\WEB-INF\lib\).
After you copy and paste the jar files into the correct directory, the instruction guide (above links) says to restart GeoServer. That didn’t work for me on my Windows 10 laptop. I had to restart my computer then restart GeoServer before I could see the added extension. The same thing happened on a Windows 2012R Server — I had to restart the server, then restart GeoServer and wait for a few minutes (up to 5 minutes) then refresh the GeoServer Web Admin page to see the extensions showed up.
Verifying Extensions Installed properly
Vector Tile Extension
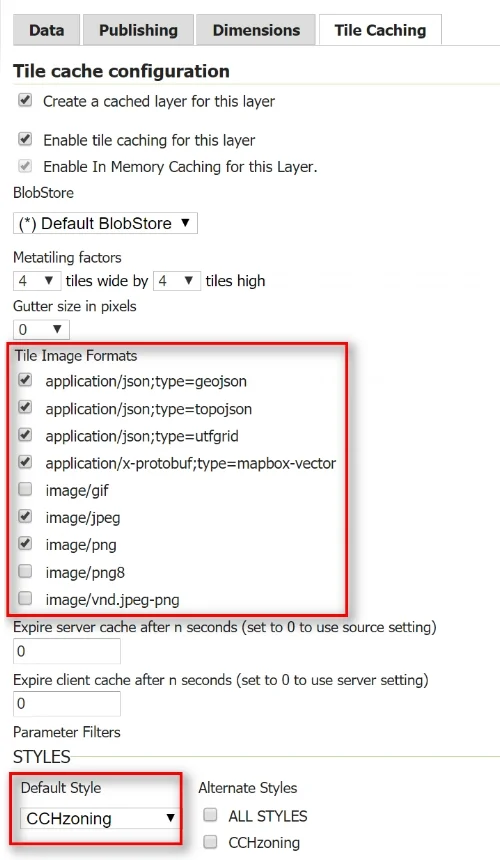
If you log into the Geoserver through the web admin page and click on a layer and then click the Tile Caching Tab you should see the vector tile output options that you just added to GeoServer.

Output options available after installing the Vector Tiles extension
Importer Extension
If the Importer extension installed properly then you should see a new tool, called Import Data under Data Section in the left hand side of the GeoServer web admin page.
YSLD Extension
If the YSLD extension installed properly then you should be able to see the available format under Data >> Styles >> New Style. With this extension, you can style layers in YSLD and SLD formats. As you can see from the example below, I’ve also added the CSS extension for styling layers in CSS format. See link here for more information on styling in GeoServer. There are even styling cookbooks available to make it easier.
Importing Data to GeoServer
This section goes over how to use the Import Data tool to batch import a PostGIS database. Using the Import Data tool is a much easier option than having to use cURL command line option to do batching data importing to GeoServer.
Create a new Worskspace and Data Store
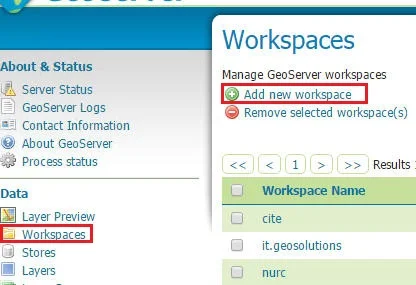
Open the GeoServer web admin page — login if needed. Then under the Data section, click Workspaces >> Add new workspace
In the new workspace window that comes up, type in a name for your new workspace — limited to 10 characters and no spaces (e.g. CCH). For Namespace URI (Uniform Resource Identifier) this can be anything — according to the GeoServer site, a URI is similar to a URL except it does not need to point to an actual location on the web. It just needs to be a unique identifier, such as http://g70.design/geoserver/CCH.
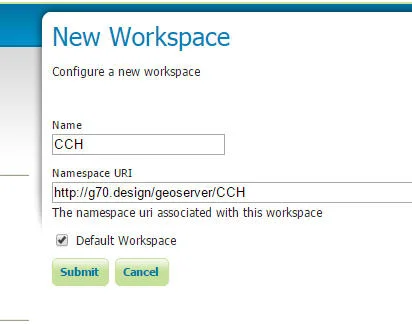
Type in a Name (limit to 10 characters & no spaces) and a URI
Batch Import Data
When you are done creating a new workspace, it’s time to import some data into it. For this example, I’m batch importing some layers from a PostGIS database that I created earlier in part 3.
In GeoServer, click Import Data. Then in the right hand panel, 1) Choose PostGIS as the data source to import from; 2) Under Configure the data source: fill in the appropriate information to connect to your PostGIS database; 3) Specify the Target for the Import: fill in the appropriate info for your workspace and data store — you can use an existing data store or create a new. If you create a new one — the store name will default to the name of your PostGIS table (e.g. workspace = CCH, store = CCHGIS (which is the name of my PostGIS database).

Substitute your own information in the fields above. For Store you can create a new one (default name store name will be the name of your database) or use an existing one. Click Next button
In the Import panel that comes up you should be able to see the PostGIS database you just connected to. Select the layer(s) that you want to import into the data Store. I think of the workspace as the directory and the store as a container for the data.
Note: When batch importing I was only able to batch import layers that were on the same page. If I selected layers that were listed on page 1 then clicked to page 2 to select more layers then GeoServer only imported the layers I selected from the current page that I was on. This meant that I had to select all the layers I wanted to imported on page 1 then click Import and wait for it to successfully import, then go to page 2 and repeat the process, etc.

Select the layers you want to import >> Click Import then want for the layers to be successfully imported before importing more layers on page 2, 3, etc. See Note above.
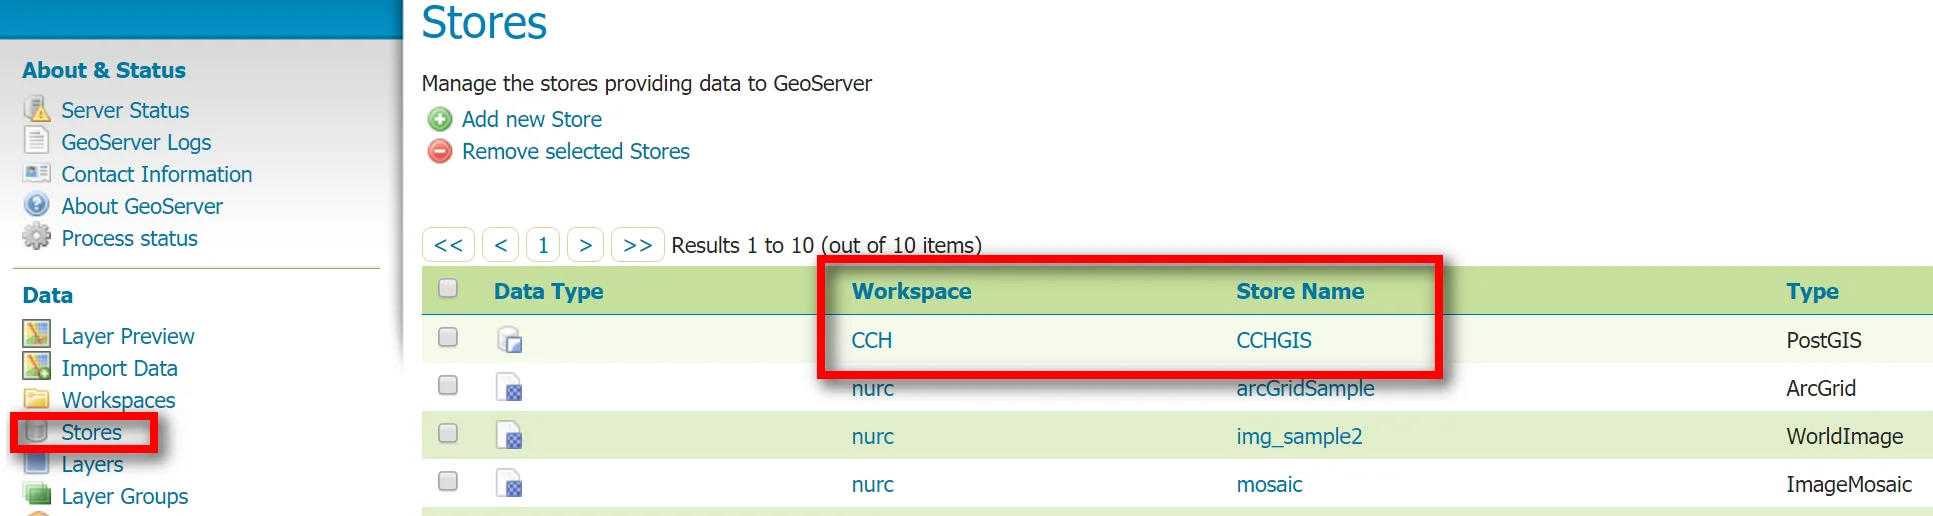
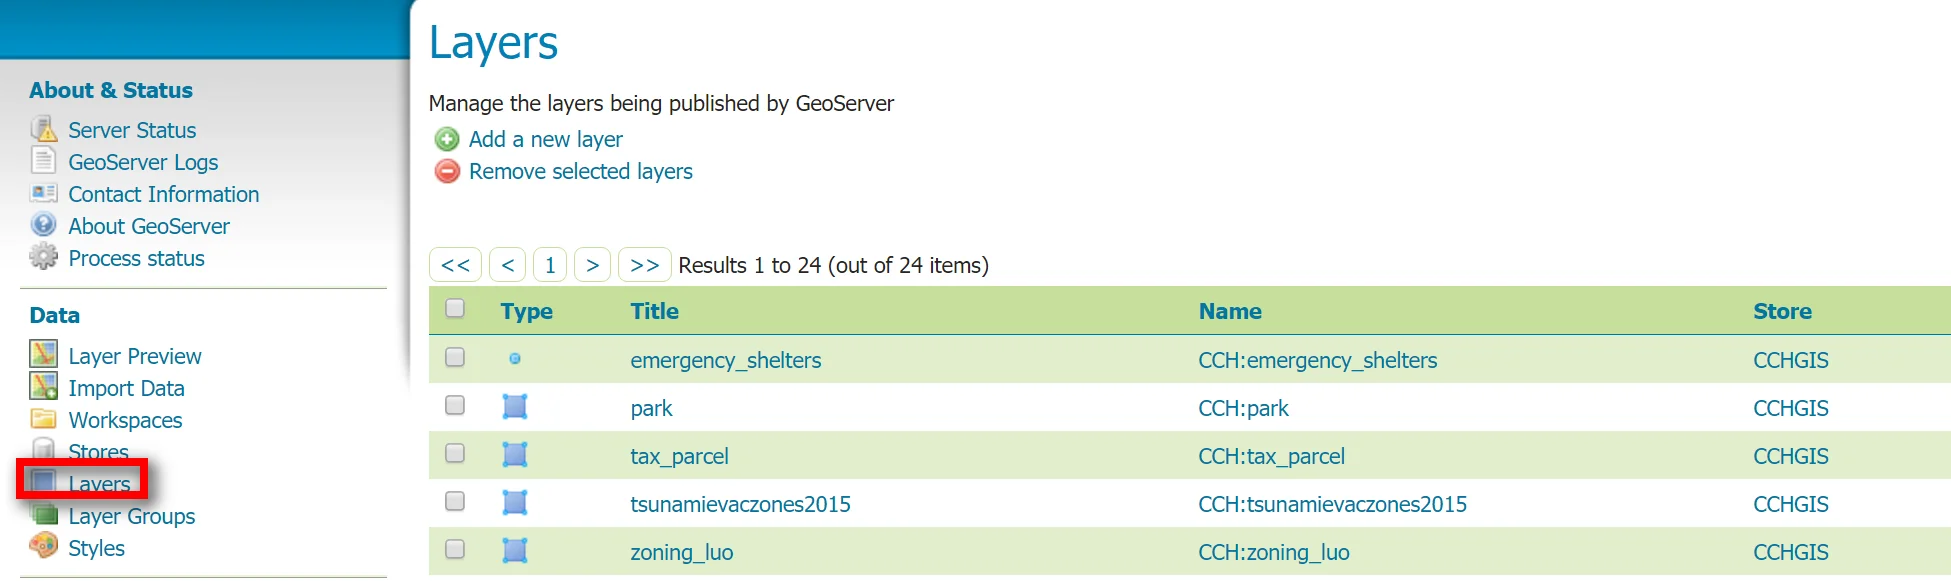
If you go to the Stores panel, you will see the newly created Workspace (e.g CCH) and the Store (CCHGIS, which is also the name of my PostGIS database).
If you click on Layers in the left hand panel, you will see the layers that were imported. Notice under Name, it is the workspace name followed by the layer name (e.g. CCH:park) and the Store is CCHGIS.
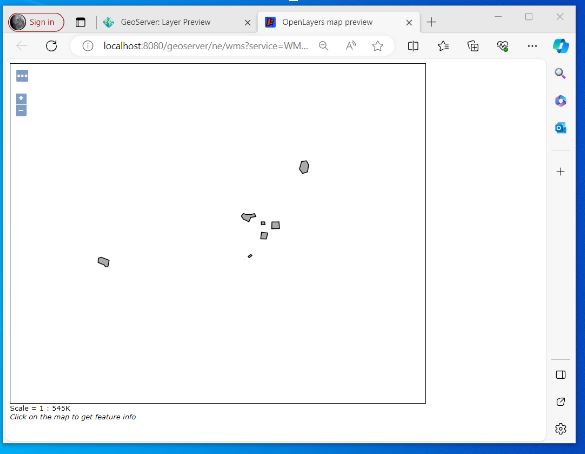
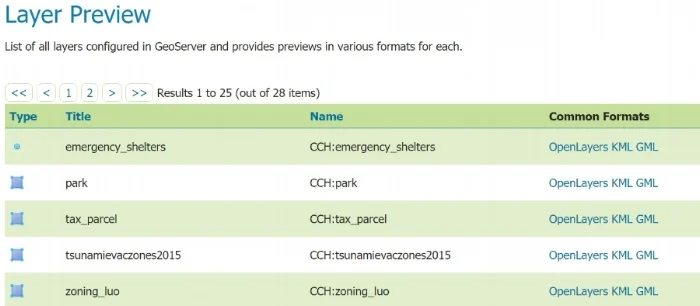
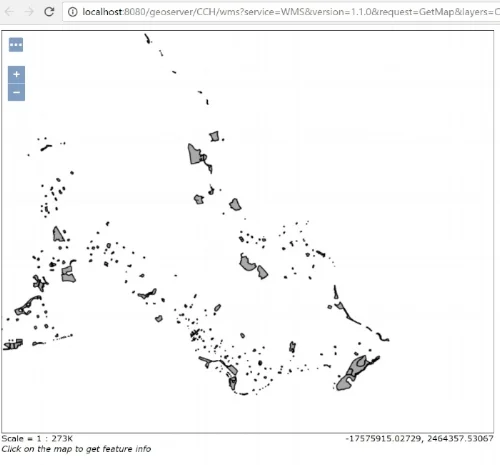
You can also preview the layers by Clicking Layer Preview in the left hand panel then click OpenLayers (under Common Formats heading). Notice that the layer is given a default feature color.
Below is an example layer preview of the park layer with polygon features shown in gray (default color).
Styling Layers
Styling layers in GeoServer can be done using SLD, YSLD, or CSS. See the GeoServer Styling Workshop for more info. Supposedly you can use QGIS to create SLDs – this would be an easy option, however, when I tried it using QGIS 2.18.3 it didn’t work. Out of curiosity I also tried exporting an SLD using an extension in ArcGIS, called Arc2Earth — this didn’t work either. So for now I guess the best way to create and edit styling in GeoServer is directly edit XML or use the GeoServer style editor.
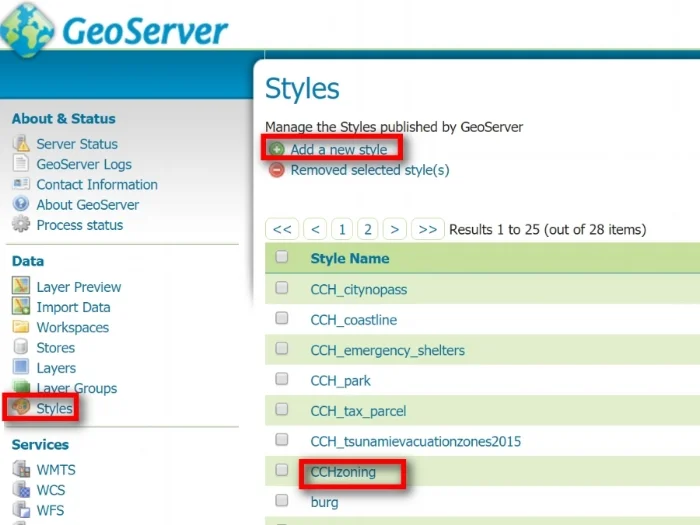
Click on Styles in the left hand panel then in the right hand panel you can either Add a new style or click on an existing style to edit it. Notice there are already default styles for the layers I batched imported (e.g. CCH_citynopass, CCH_coastline, etc). You can either delete then and create new ones or edit them — whatever you prefer.
Below is a snapshot of the New Style window. Choose a format then either upload an existing style file or use the Style Editor to write your own styles. I highly recommend reading the GeoServer Styling Section. It has lots of useful info, including «cookbook recipes» you can copy and edit for your purpose.

Here is a sample of a style in YSLD format I created for a zoning layer. Notice under Format, you can’t change the format from one to another (e.g. can’t switch format from YSLD to SLD). Also notice there are 3 tabs: Publishing, Layer Preview, and Layer Attributes — these are shown below.

With the Publishing tab you can select which layer the style is associated with and whether it is the default style for that layer. Here I am associating my CCHzoning style to the zoning layer and making it the default symbology.

The Layer Preview tab gives you a preview of your style. Any changes/edits made in the Style Editor will be reflected in the preview. Notice where it says «Previewing on layer: CCH:zoning_luo» — make sure this corresponds correctly to your style. I’ve had it where maybe I forgot to check of something and I’m not previewing on the correct layer (i.e. Previewing on layer: CCH_TMK but my style is for zoning so nothing shows up in preview). If this happens, you can click on the layer name and then you can select the correct layer.

Make style changes/edits using the Style Editor to see a preview of what changes will look like. You may have to click the Apply button to see the changes. Use the Validate button to help you «debug» your style structure. Use the Submit button to finalize/save the changes.
The Layer Attributes tab will allow you to see the attribute field names, and type associate with the layer.

It takes a bit of work to do the styling but it’s not that hard to do. It’s just a hassle and not as easy as just being able to use SLD created in QGIS. I’m hoping the SLD from the next version of QGIS will work with GeoServer.
Publishing Layers
Once you’ve create styles for your layer then the next thing you’d want to do is publish them as WMS, WFS, etc. Click on Layers in the left hand panel then select a layer to edit its properties. There are 4 tabs: Data, Publishing, Dimension, and Tile Caching. I would suggest reading up on all the options within these tabs to properly configure and publish your layers. Don’t forget to click the SAVE at the bottom of each tab after you make your changes.
The Data tab, shown below is basically the metadata for your layer. Fill in any input that is needed, make sure the layer is enabled though.

The Publishing tab allows you to edit the WFS and WMS settings for the layer. Notice the default style for WMS is the zoning style I created earlier.

The Dimension tab allows you to enable a time and elevation dimension if your layer has these properties.
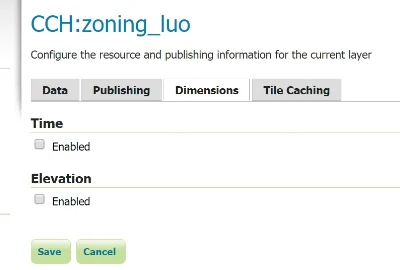
The Tile Caching tab is where you can create caches for your layer. and select the tile image format. Notice you will not have these formats: geojson, topojson, utfgrid, or mapbox-vector if you didn’t install their respective extensions.
Once your layers are published you should test it out to see if your GeoServer services are working by trying to call them in a web mapping application or in a desktop GIS software (e.g. ArcGIS, QGIS). Below are some examples of my GeoServer services as shown in a Leaflet and Open Layers web maps, and in ArcGIS and QGIS.

Leaflet map showing layers from my GeoServer

Open Layers web map showing the park layer from my GeoServer

My GeoServer added in QGIS with zoning layer displayed

My GeoServer added in ArcCatlog with a preview of the zoning layer.