
Exchange 2016 is latest version of Email server from Microsoft. If you are coming from Exchange 2013, there are few new features introduced in Exchange 2016. RTM version of Exchange 2016 have been released in October 2015. The installation of Exchange 2016 is similar to the installation of Exchange 2013. The major difference between Exchange 2016 and Exchange 2013 is, Exchange 2016 now have just two roles, Mailbox and Edge Transport server roles as opposed to Exchange 2013 which had Mailbox, Client Access and Edge Transport server roles. In this post, I will show steps to Install Exchange 2016 in Windows Server 2012 R2. You can also check the latest updates and service packs to install the latest version of Exchange 2016.
Exchange 2016 co-existence is supported with Exchange 2010 (with SP3 update rollup 11 or greater) and Exchange 2013 (with cumulative update 10 or higher). There are different prerequisites for different installation scenario you must follow before you install Exchange 2016, so make sure you follow them. The diagram below shows a network scenario with two hosts, MBG-DC01 and MBG-EX01. MBG-DC01 is a domain controller and MBG-EX01 is Exchange 2016. Both hosts are running Windows Server 2012 R2 operating system.

Here are prerequisites for this type of scenario.
- Active Directory forest functional level must be at least Windows Server 2008 or higher.
- Active Directory site must contain at least one Global Catalog server and a writable domain controller.
- Exchange server must be member of domain controller.
- User must have Enterprise Admin, Schema Admin and Domain Admin rights before you start the installation of Exchange 2016.
Installation Steps:
Log on to MBG-EX01 server and install remote server administration toolkit using PowerShell cmdlet Add-WindowsFeature RSAT-ADDS. Open PowerShell as Administrator and install the RSAT tool.

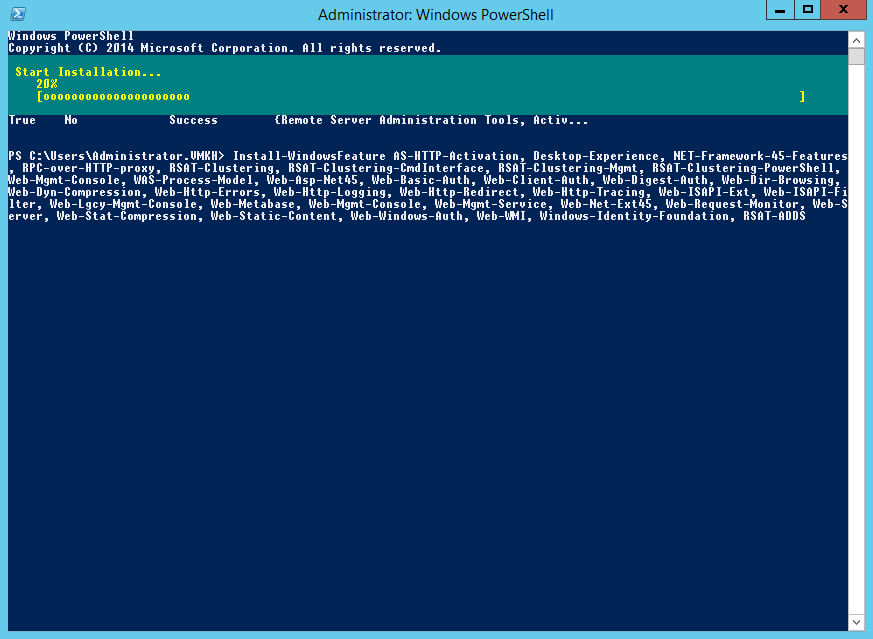
Run following commands to install required windows components in MBG-EX01 (Mailbox Server). Reboot the server after installing these roles and features.
Install-WindowsFeature AS-HTTP-Activation, Desktop-Experience, NET-Framework-45-Features, RPC-over-HTTP-proxy, RSAT-Clustering, RSAT-Clustering-CmdInterface, RSAT-Clustering-Mgmt, RSAT-Clustering-PowerShell, Web-Mgmt-Console, WAS-Process-Model, Web-Asp-Net45, Web-Basic-Auth, Web-Client-Auth, Web-Digest-Auth, Web-Dir-Browsing, Web-Dyn-Compression, Web-Http-Errors, Web-Http-Logging, Web-Http-Redirect, Web-Http-Tracing, Web-ISAPI-Ext, Web-ISAPI-Filter, Web-Lgcy-Mgmt-Console, Web-Metabase, Web-Mgmt-Console, Web-Mgmt-Service, Web-Net-Ext45, Web-Request-Monitor, Web-Server, Web-Stat-Compression, Web-Static-Content, Web-Windows-Auth, Web-WMI, Windows-Identity-Foundation

Download and install .NET Framework 4.5.2 in Mailbox server. Install it first, installation order is important.

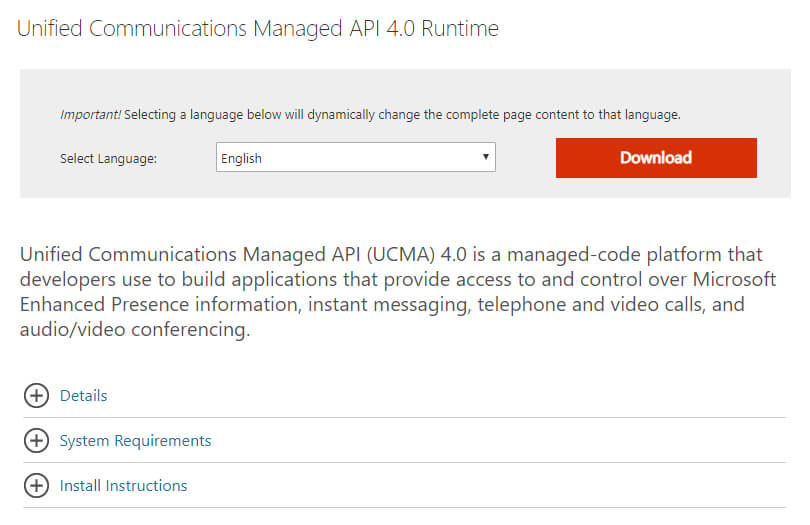
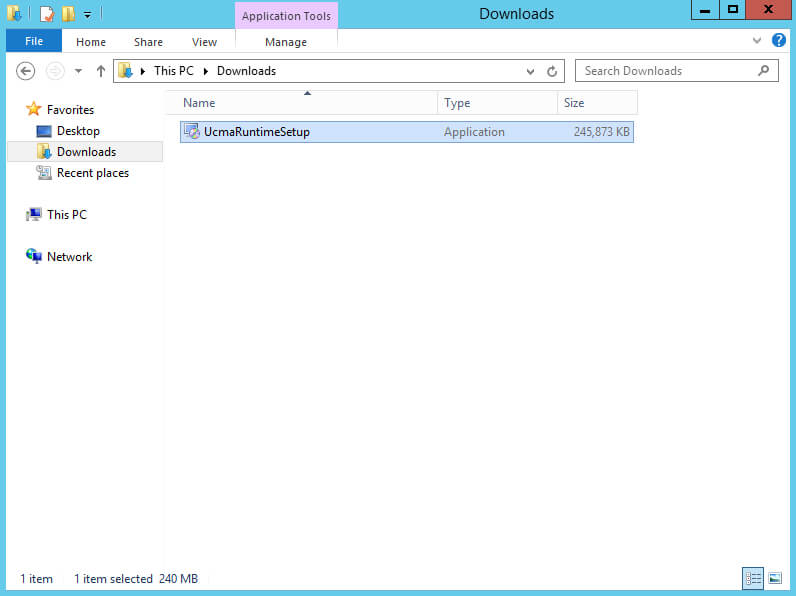
Then download and install Microsoft Unified Communications Managed API 4.0, Core Runtime 64-bit in Mailbox server.

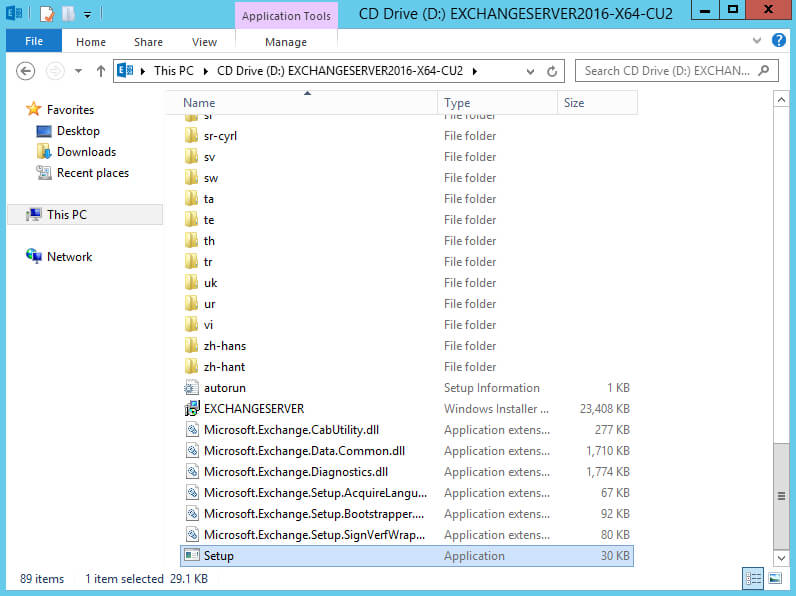
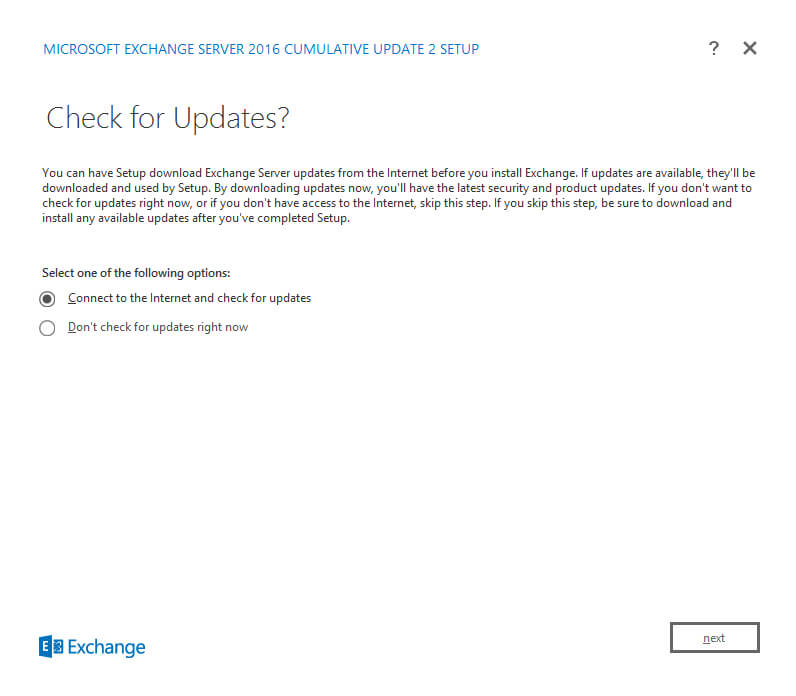
Start the installation of Exchange 2016. You will be asked to install the updates.

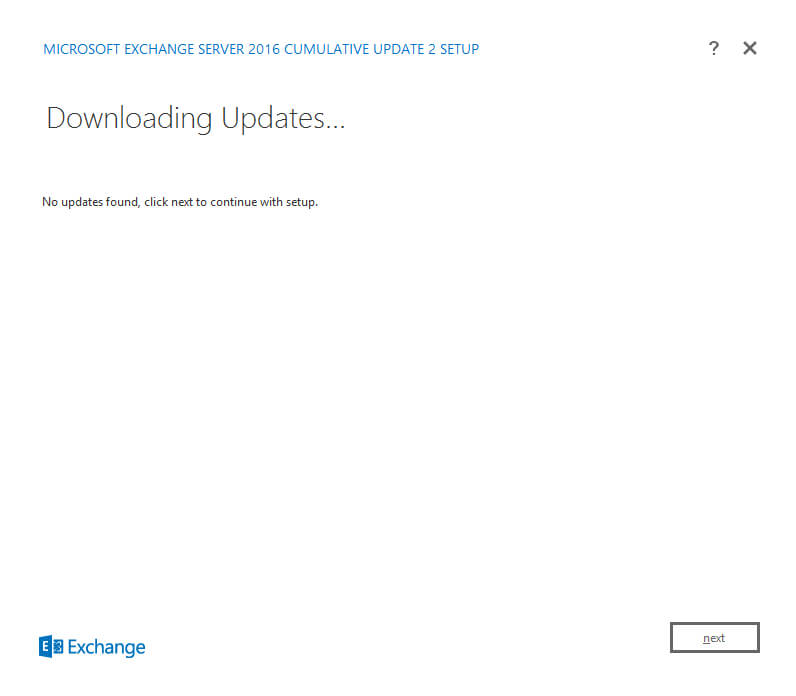
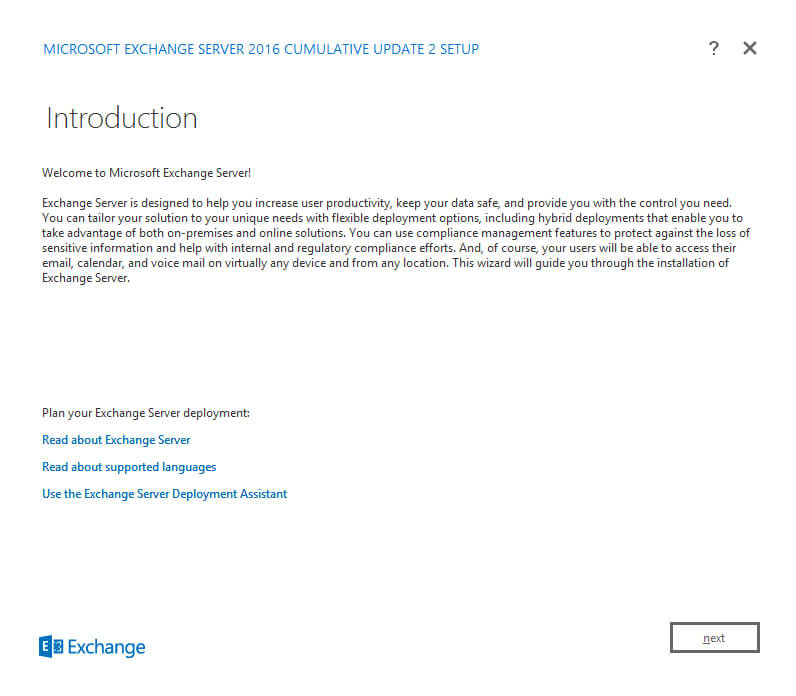
Choose Connect to the Internet and check for updates option and click Next. The setup will download and install the required updates and the setup will present you with Introduction page as shown below.

Go through the Introduction page and click next.

Choose I accept the terms in the license agreement option and click next.

Choose to use recommended settings and click next.

Check Mailbox role and click next.

Browse the installation location and click next.

Type the name of Exchange organization and click next.

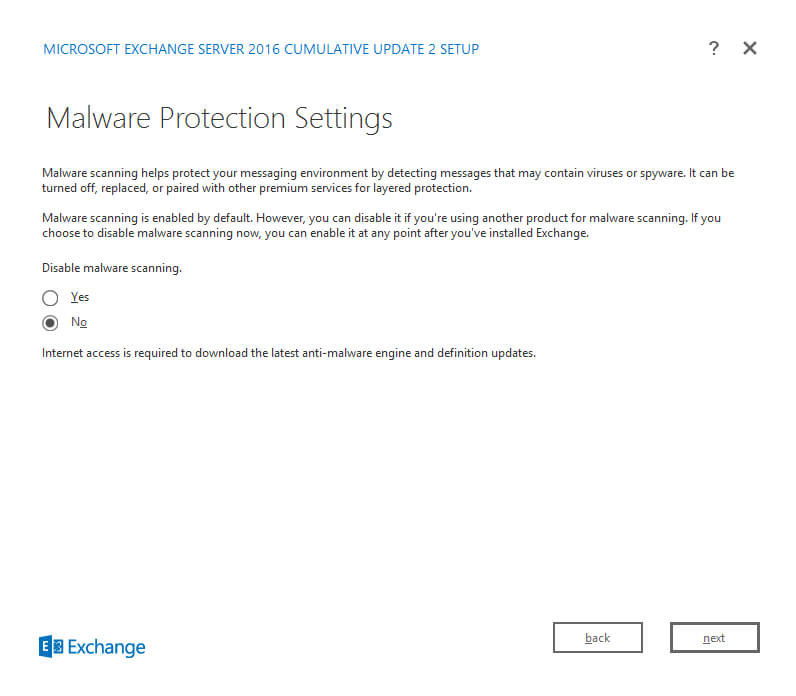
Choose no and click next. Choosing no will actually enable the malware protection.

The installation will go through the readiness check as shown above. Make sure you don’t get any errors. Above warning simply states that the setup will now prepare installation using Setup /PrepareAD command and no Exchange 2010 or Exchange 2013 servers have been detected in this network. Click install button to start the Exchange 2016 installation.

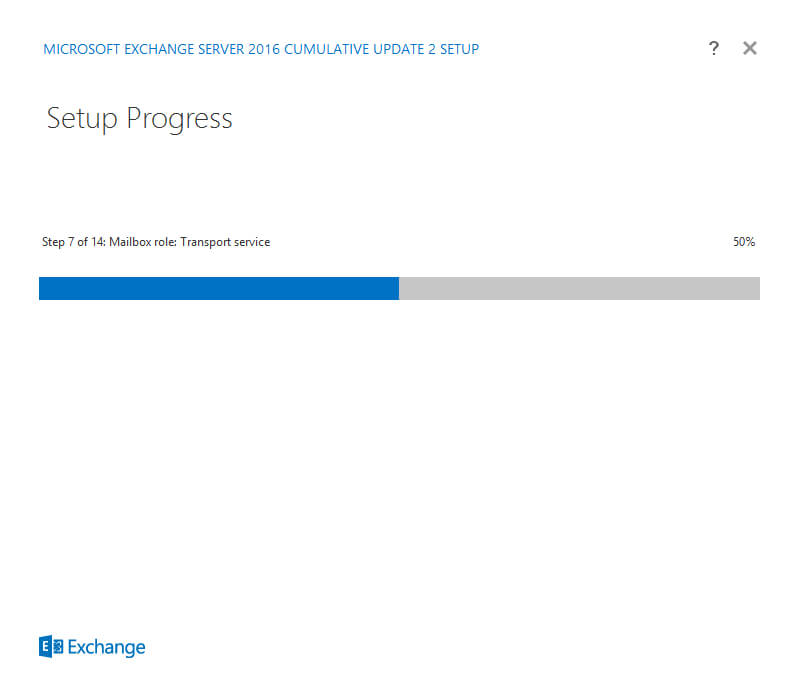
The installation will now begin. The setup will install all the required components for Mailbox server.

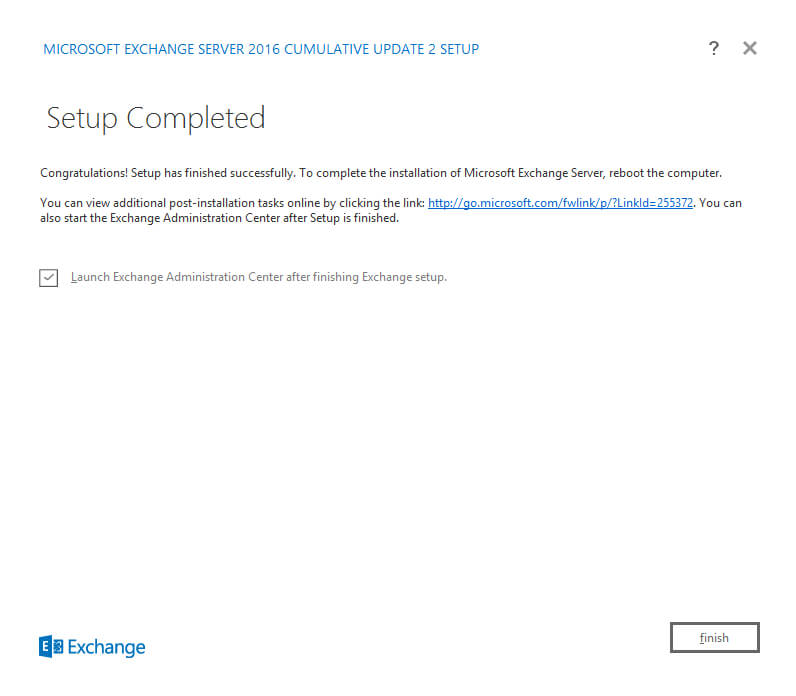
The setup is now completed. Click finish to close the installation wizard. Now reboot the Exchange server. You can check current build and version of Exchange server using following cmdlet,
[PS] C:\Windows\System32>Get-ExchangeServer | fl name,edition,admindisplayversion

You can also view the setup log file located in <system drive>\ExchangeSetupLogs\ExchangeSetup.log path. The log shows all the details of Exchange installation. Also shows details of installation error if any.
You can now logon to Exchange Admin Center using the URL, https://localhost/ecp

Enter the username and password and click sign in.

In this way you can install Exchange 2016 in Windows Server 2012 R2. You can now create mailbox database, create mailboxes, setup incoming and outgoing email, and so on.
The following two tabs change content below.
- Bio
- Latest Posts
Bipin is a freelance Network and System Engineer with expertise on Cisco, Juniper, Microsoft, VMware, and other technologies. You can hire him on UpWork. Bipin enjoys writing articles and tutorials related to Network technologies. Some of his certifications are, MCSE:Messaging, JNCIP-SEC, JNCIS-ENT, and others.
In this Article, I will walk you through the Exchange 2016 Installation on Windows Server 2012 R2.
It is very exited to have a look of Exchange 2016 installation. Okay, Let’s Begin
There would be three phases to install Exchange 2016,
- Prepare Forest and Domain
- Installing all the prerequisites required for exchange 2016
- Installing Exchange 2016
Post the installation we will be having all the post installation checks for checking the Exchange Service health and Mail flow
Phase 1:Prepare Forest and Domain:
- Mount the Exchange 2016 DVD in the server
- To prepare the Forest/Domain, You can login in to the Domain controller or use the same server where you going to install Exchange 2016.
- You should be Enterprise admin/Schema Admin to prepare the Schema
Here I am running the command on the server where I am going to install exchange 2016 since it is testlab.
- Run the Command
.\setup /PrepareSchema /IAcceptExchangeServerLicenseTerms

- Run the Command
.\setup /PrepareAD /on:windowstechpro /IAcceptExchangeServerLicenseTerms


- Run the Command
.\setup /Preparedomain /IAcceptExchangeServerLicenseTerms

Phase 2: Installing all the prerequisites required for exchange 2016
Login in to the server and Open the PowerShell as Run as administrator

Copy the command and paste it in PowerShell and Execute
Install-WindowsFeature RSAT-ADDS,AS-HTTP-Activation, Desktop-Experience, NET-Framework-45-Features, RPC-over-HTTP-proxy, RSAT-Clustering, RSAT-Clustering-CmdInterface, RSAT-Clustering-Mgmt, RSAT-Clustering-PowerShell, Web-Mgmt-Console, WAS-Process-Model, Web-Asp-Net45, Web-Basic-Auth, Web-Client-Auth, Web-Digest-Auth, Web-Dir-Browsing, Web-Dyn-Compression, Web-Http-Errors, Web-Http-Logging, Web-Http-Redirect, Web-Http-Tracing, Web-ISAPI-Ext, Web-ISAPI-Filter, Web-Lgcy-Mgmt-Console, Web-Metabase, Web-Mgmt-Console, Web-Mgmt-Service, Web-Net-Ext45, Web-Request-Monitor, Web-Server, Web-Stat-Compression, Web-Static-Content, Web-Windows-Auth, Web-WMI, Windows-Identity-Foundation

Post installation, Reboot the Server by using command restart-computer or Shutdown -r -t 0

Post reboot, Install .NET Framework 4.5.2. You can download it from the Download Link


Install Unified Communications Managed API 4.0 Runtime. You can download it from the Download Link


Phase 3: Installing Exchange 2016
Mount the Exchange 2016 Setup drive and Click on Install or run Program from your media

You can check for Updates if your server connected to internet or you select Don’t check for updates right now. I am going with second option since i have not connected my server to internet. It is always good to check for the updates before installing the Exchange.


Accept the License Agreement and Click Next

Select second option and Click Next

Select Mailbox Role and Management tools, You can go for Edge Transport role if you are placing it in DMZ for Outbound Mail Routing.

Select the path for Exchange server Installation and Click Next


Setup Completed Successfully. Select Launch Exchange Administration Center and Click On Finish. Enter Administrator Credentials and Click Sign in

You can the Exchange 2016 EAC. It is pretty Cool.. Isn’t it??

Run the Exchange PowerShell Command to get the Exchange Version
Get-ExchangeServer |Format-Table Name,AdminDisplayVersion

#Exchange2016 #ExchangeServerInstallation
-
Founder & Author, Windowstechpro

The following section describes a step-by-step guide for the installation of Microsoft® Exchange Server 2016. The installation considers a single server deployment of Exchange Server 2016 with the Mailbox role. Additional details of the topology and architecture of the lab environment which was used in the installation is described here;

| Domain Controller | |
| Operating System | Windows Server 2012 R2 |
| Forest Functional Level | Windows Server 2012 R2 |
| Domain Functional Level | Windows Server 2012 R2 |
| Exchange Server 2016 | |
| Operating System | Windows Server 2012 R2 |
| Installed Role | Mailbox Role |
1. Operating System Support for Exchange Server 2016
The following operating systems are supported;
| Component | Operating System |
| Mailbox and Edge Server Role | Windows Server 2012 R2 Standard or Datacenter |
| Windows Server 2012 Standard or Datacenter | |
| Windows Server vNext | |
| Management Tools | Windows Server 2012 R2 Standard or Datacenter |
| Windows Server 2012 Standard or Datacenter | |
| 64-bit edition of Windows 8.1 |
2. Active Directory Preparation
The first task in the installation of any version of Exchange is to prepare the Active Directory environment where the Exchange Server will be placed.
However, prior to the preparation, it should be checked against the following Network and Directory Server requirements;
| Component | Operating System |
| Domain controllers | Windows Server 2012 R2 Standard or Datacenter |
| Windows Server 2012 R2 Standard or Datacenter | |
| Windows Server 2008 R2 Standard/Enterprise/Datacenter | |
| Windows Server 2008 Standard/Enterprise/Datacenter | |
| Active Directory forest | Windows Server 2008 or higher |
Once the above requirements are verified for consistency, proceed with the following preparation tasks on the server/computer which will be used to prepare the Active Directory using the Exchange Server 2016 Active Directory Prepare module.
-
Open Windows PowerShell and run the following command to install the Remote Tools Administration Pack.
Install-WindowsFeature RSAT-ADDS

3 Server role prerequisite installation
The prerequisites for Exchange 2016 varies on the server role which will be associated with it. The section describes the installation of Exchange 2016 on a server containing Windows Server 2012 R2 Operating System.
3.1 Prerequisites for Mailbox Server Role
The following section instructs the prerequisite installation that should be performed in a server running a standalone Exchange 2016 server with the Mailbox Server Role.
- Open a Windows PowerShell session by navigating to Start > All Programs > Accessories > Windows
PowerShell. - Run the following command to install the required Windows components.
Install-WindowsFeature NET-Framework-45-Features, RPC-over-HTTP-proxy, RSAT-Clustering, RSAT-Clustering-CmdInterface, RSAT-Clustering-Mgmt, RSAT-Clustering-PowerShell, Web-Mgmt-Console, WAS-Process-Model, Web-Asp-Net45, Web-Basic-Auth, Web-Client-Auth, Web-Digest-Auth, Web-Dir-Browsing, Web-Dyn-Compression, Web-Http-Errors, Web-Http-Logging, Web-Http-Redirect, Web-Http-Tracing, Web-ISAPI-Ext, Web-ISAPI-Filter, Web-Lgcy-Mgmt-Console, Web-Metabase, Web-Mgmt-Console, Web-Mgmt-Service, Web-Net-Ext45, Web-Request-Monitor, Web-Server, Web-Stat-Compression, Web-Static-Content, Web-Windows-Auth, Web-WMI, Windows-Identity-Foundation, RSAT-ADDS


-
After installing the features, Download and Install;
- Microsoft .Net Framework 4.5
- Microsoft Unified Communications Managed API 4.0, Core Runtime 64-bit
3.2 Prerequisites for Edge Server Role
The following section instructs the prerequisite installation that should be performed in a server running a standalone Exchange 2016 server with the Mailbox Server Role.
- Open a Windows PowerShell session by navigating to Start > All Programs > Accessories > Windows
PowerShell. - Run the following command to install the required Windows components.
Install-WindowsFeature ADLDS
3. After installing the features, Download and Install Microsoft .Net Framework 4.5
4 Prepare Active Directory and domains
To prepare the active Directory and the Domains for Exchange 2016, follow the following steps. To execute the commands, the commands should be run using the Schema Admins group and the Enterprise Admins group membership.
4.1 Extend Active Directory Schema
- Mount the Exchange Server 2016 installation Media
- Open up a Command Prompt session and navigate to the setup files from the command prompt
-
Type the following command followed by an Enter
Setup.exe /PrepareSchema /IAcceptExchangeServerLicenseTerms

4.2 Prepare Active Directory
-
On the command prompt, run the following;
Setup.exe /PrepareAD /OrganizationName:”<organization name>” /IAcceptExchangeServerLicenseTerms

4.3 Prepare Domains
-
On the command prompt, run the following;
Setup.exe /PrepareAllDomains /IAcceptExchangeServerLicenseTerms

The below section describes the installation of the Mailbox Server role for Exchange Server 2016.
If you’re installing the first Exchange 2016 server in the organization, and the Active Directory preparation steps have not been performed, the account you use must have membership in the Enterprise Administrators group. If you haven’t previously prepared the Active Directory Schema, the account must also be a member of the Schema Admins group.
- Log on to the server that will be used as the Mailbox server.
- Ensure that the above prerequisites are completed.
- Mount and navigate to the Exchange Server 2016 installation Media.
- Start Exchange 2016 Setup by double-clicking Setup.exe.
- On the Check for Updates page, select whether you want Setup to connect to the Internet and download product and security updates for Exchange 2016 and click Next.

- Once the setup is finished copying files on the Copying Files page, click Next.


- The Introduction page gives additional guidance for the installation procedure. Review the content and Click next to continue.

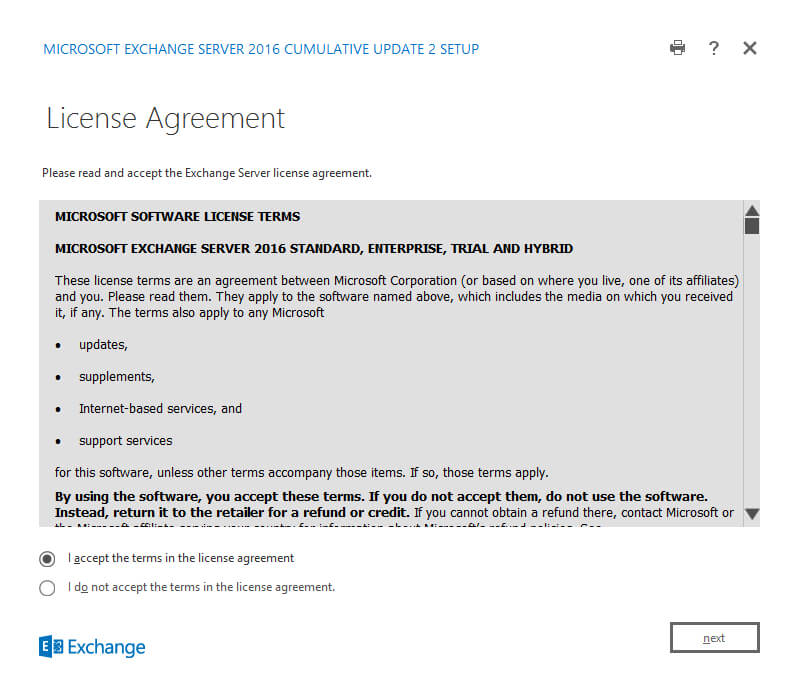
- On the License Agreement page, review the terms. If you agree to the terms, select I accept the terms in the license agreement, and then click next.

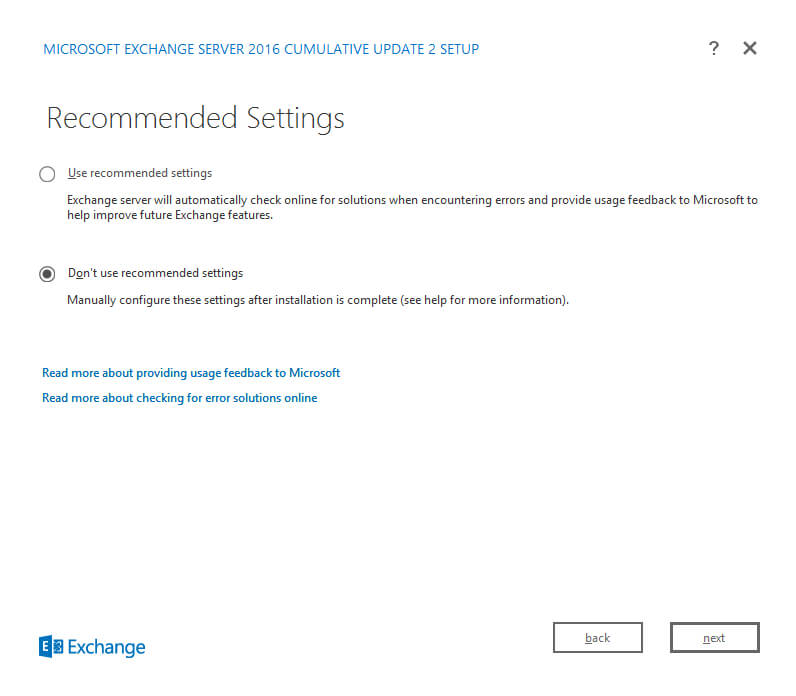
- On the Recommended Settings page, select whether you want to enable or disable the Exchange Error resolution and feedback feature. The option will either enable or disable automatically check for resolutions for any errors that occurs while the setup is running and sends Microsoft feedback. Click Next to proceed.

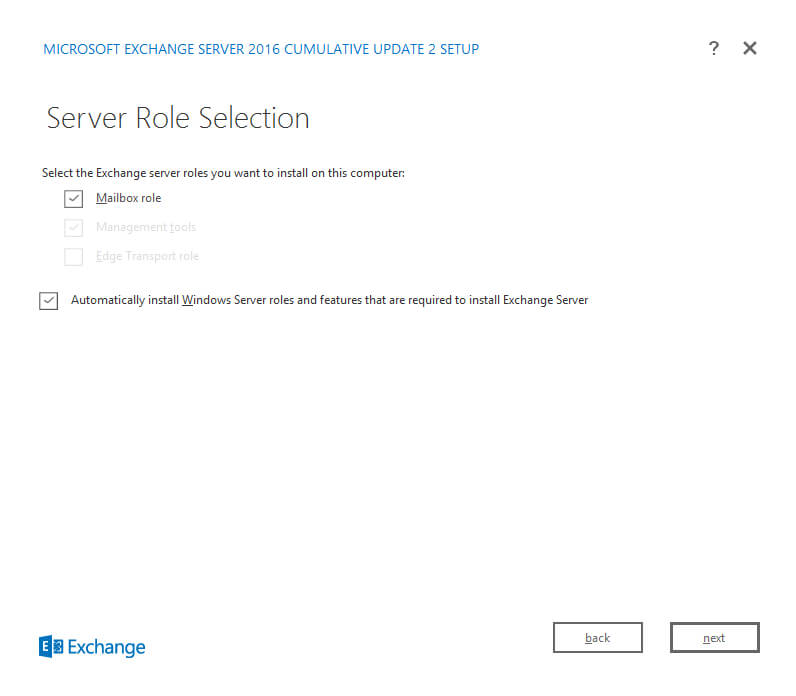
- On the Server Role Selection page, choose what server role you want to install. Whether to install the Mailbox role, Management Tools or Edge Server role on the server. For this lab Mailbox server role will be selected. Note that Edge and Mailbox cannot collocate on the same server and Management Tools will be installed by default when you chose the Mailbox role. If any Windows prerequisites are needed for the setup, select the Automatically install Windows Server roles and features that are required to install Exchange Server. Click Next to proceed.

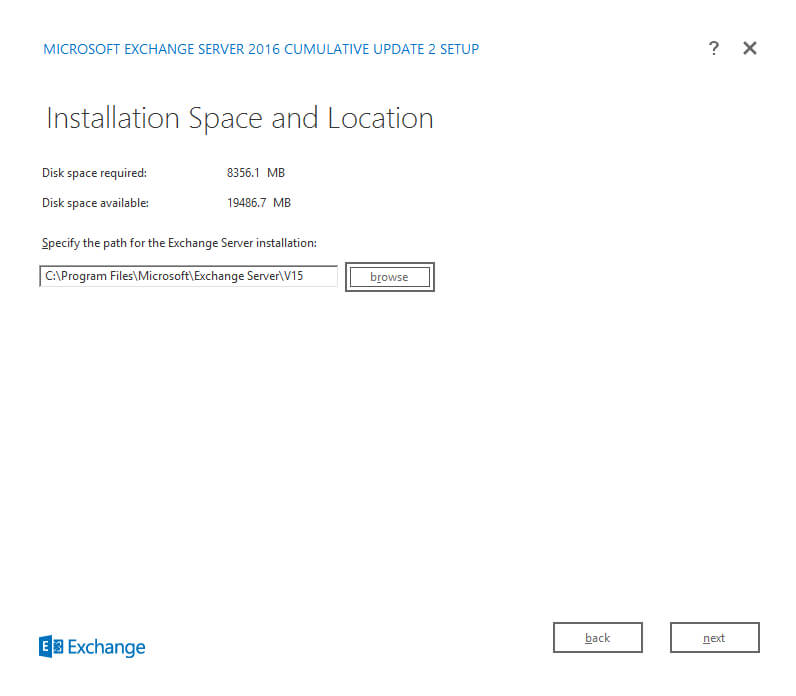
- On the Installation Space and Location page, either accept the default installation location or click Browse to choose a new location with adequate storage space.

- If installing the Mailbox role, a Malware Protection Settings page will appear. Choose whether to enable or disable malware scanning and click Next.

- On the Readiness Checks page, view the status to determine if the organization and server role prerequisite checks completed successfully. If unsuccessful, perform the required tasks and click Back, and Next to run the Readiness check again. If successful, click Install to proceed.

- The installation will be performed.

- Once the setup completes installing all the components, the Setup Completed page will be displayed. Select Finish.

- As a best practice, restart the server which you performed the installation.
5 Review Exchange Installation
Once all the above tasks are performed, proceed with the below steps to verify the installation using the Exchange 2016 Administrative Center and PowerShell. Like its predecessor, Exchange Server 2016 management is handled by the Exchange Admin Center. The browser based management console, EAC can be used to manage your organizations on-premises as well as Office 365 and hybrid deployment scenarios.
To Navigate to the Exchange Admin Center;
- Open the web browser.
-
On the URL section, type the below
https://<FQDN_of_the_Exchange_Server>/ECP

- Enter your username and password in Domain\user name and Password and then click sign in.
- Review the tabs and sections the new Admin Center.

Installing exchange 2016 step by step on Windows Server 2012 R2.
Before Exchange 2016 Install – Go through the Minimum system requirements below – Note Preview versions are not Production ready.
Minimum System Requirements and Forest Functional Level for Exchange Server 2016
You can Download the Exchange Server 2016 CU2 Setup using the below Link
Download Microsoft Exchange Server 2016
Step 1:
To Prepare Active Directory using the same machine.
Install the Below Feature
Open Windows PowerShell.
Install-WindowsFeature RSAT-ADDS

Step 2:
Am Going to Install all roles in the Scenario
Open Windows PowerShell
Install-WindowsFeature AS-HTTP-Activation, Desktop-Experience, NET-Framework-45-Features, RPC-over-HTTP-proxy, RSAT-Clustering, RSAT-Clustering-CmdInterface, RSAT-Clustering-Mgmt, RSAT-Clustering-PowerShell, Web-Mgmt-Console, WAS-Process-Model, Web-Asp-Net45, Web-Basic-Auth, Web-Client-Auth, Web-Digest-Auth, Web-Dir-Browsing, Web-Dyn-Compression, Web-Http-Errors, Web-Http-Logging, Web-Http-Redirect, Web-Http-Tracing, Web-ISAPI-Ext, Web-ISAPI-Filter, Web-Lgcy-Mgmt-Console, Web-Metabase, Web-Mgmt-Console, Web-Mgmt-Service, Web-Net-Ext45, Web-Request-Monitor, Web-Server, Web-Stat-Compression, Web-Static-Content, Web-Windows-Auth, Web-WMI, Windows-Identity-Foundation

# Run Restart-Computer to Reboot the Server
Step 2.1:
Download and Install Microsoft .NET Framework 4.7.1 (Offline Installer)
https://www.microsoft.com/en-us/download/details.aspx?id=42642
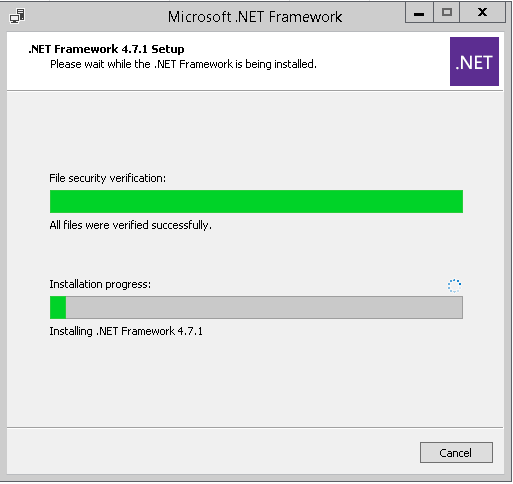
Restart the Computer
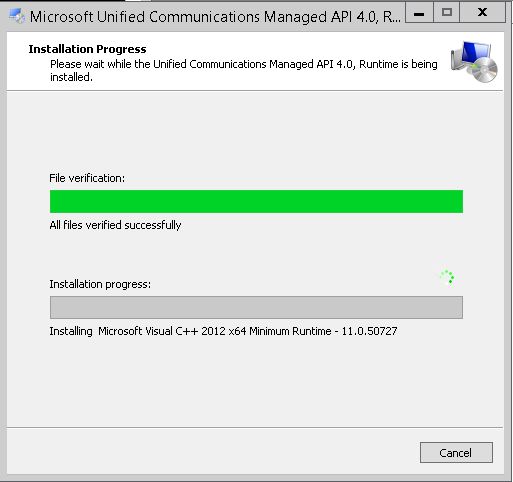
Step 3: Download and Install Unified Communications Managed API 4.0 Runtime
http://www.microsoft.com/en-us/download/details.aspx?id=34992
Step 4:
Preparing Schema Open Windows PowerShell Browse to Setup Location Run as administrator.
.\setup /PrepareSchema /IAcceptExchangeServerLicenseTerms

Step 5:
Preparing Active Directory
Open Windows PowerShell
Browse to Setup Location
Run as administrator.
.\setup /Preparead /IAcceptExchangeServerLicenseTerms /OrganizationName:"Enter Exchange Org Name"
Note : If you are already in a Exchange Organization – Remove /OrganizationName Parameter

Step 6:
Preparing Domain
Open Windows PowerShell
Browse to Setup Location
Run as administrator.
.\setup /Preparedomain /IAcceptExchangeServerLicenseTerms

Note :
If you are in a Child domain Scenario
Run
.\setup /Preparealldomains /IAcceptExchangeServerLicenseTerms
Step 7:
Run the setup.exe
Choose Next,Accept the agreement.

Step 8:
Choose the Roles.
Choose Next
Note :”Edge Transport Role” Which can be installed in DMZ.

Step 9:
Choose Next

Step 10:
Choose Next
If you already Did “Step 4” you won’t see a option to create organization. As Already Exchange Org is already created
Else Enter a Org Name.
Step 11:
Choose “No” for Malware Scanning
&
Choose Next
Step 10:
Choose Install

Step 11:

Microsoft Exchange Server 2016 Build 225.17 – Setup Completed.
Get-ExchangeServer | FT Name,Admin*


Satheshwaran Manoharanhttps://www.azure365pro.com
Award-winning Technology Leader with a wealth of experience running large teams and diversified industry exposure in cloud computing. From shipping lines to rolling stocks.In-depth expertise in driving cloud adoption strategies and modernizing systems to cloud native. Specialized in Microsoft Cloud, DevOps, and Microsoft 365 Stack and conducted numerous successful projects worldwide. Also, Acting as a Technical Advisor for various start-ups.
This article is for those looking for a detailed and straightforward guide on installing Exchange Server 2016 on Windows Server 2012 R2.
For details on how to install Exchange Server 2019 on Windows Server 2019, you can read my guide “Install Exchange Server 2019 on Windows Server 2019”.
This guide walks you through installing Exchange Server 2016 without implementing failover.
A description of the hardware requirements for Exchange 2016 can be found here.
We will consider the case when you already have two servers with the Windows Server 2012 R2 operating system installed on them. In addition, the Active Directory Domain Services role must be installed on one of the servers.
You can read more about how to install Windows Server 2012 R2 in my guide “Install Windows Server 2012 R2”.
In addition, one of the servers must have the Active Directory Domain Services role installed, and the second server must be domain joined.
You can learn how to install Active Directory Domain Services on Windows Server 2012 R2 by reading “Install Active Directory Domain Services on Windows Server 2012 R2”.
After installing Exchange Server 2016, my guide “Configure Exchange Server 2016” will guide you through the configuration.
I recommend that you always use the English edition of Exchange Server. As practice shows, the original (English) versions of Exchange work more stable, besides, it will be easier for you to communicate in the same language with professionals in case of problems or if you want to exchange experience.
You can download the current version of Exchange Server 2016 by following the link. Then you will need to mount the downloaded ISO image to the virtual drive.
This guide covers the installation of Exchange Server 2016 Cumulative Update 2 (Exchange 2016 CU2, released: June 2016). You need to download the current Cumulative Update at the time of reading the article. Each CU is a complete Exchange installation that includes updates and changes from all previous CUs. You don’t need to install previous CUs or Exchange 2016 RTM.
On Windows Server 2012 R2, you must install all available updates before installing Exchange Server 2016.
On the future Exchange server, go to the system under an account that consists of the following groups: Enterprise Admins, Schema Admins, and Domain Admins.
On the “Taskbar”, right-click on “Windows PowerShell” and select “Run as Administrator”.
Let’s install the remote administration tools for the subsequent preparation of Active Directory for the installation of Exchange Server 2016 using the command:
Install-WindowsFeature RSAT-ADDS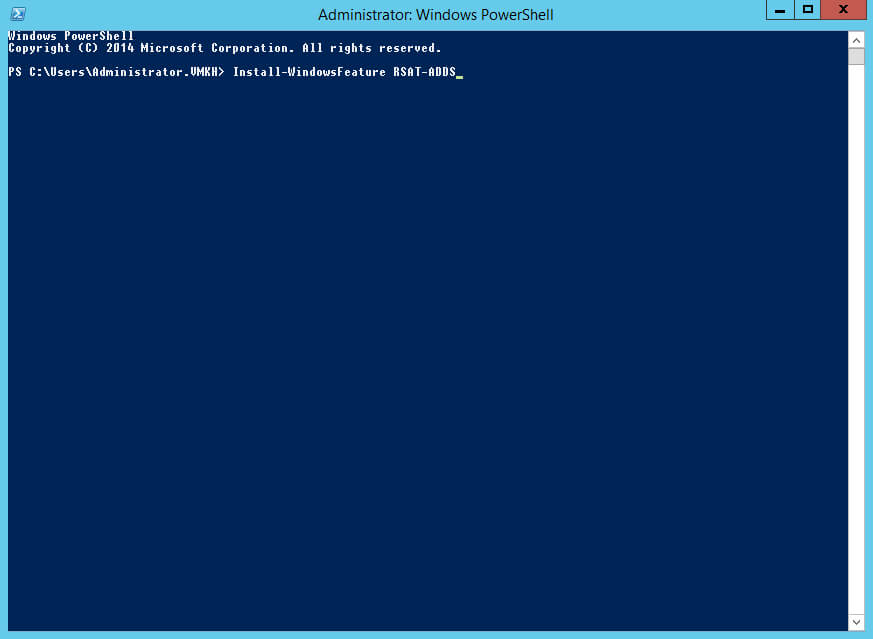
The process of installing the remote administration tools has begun.
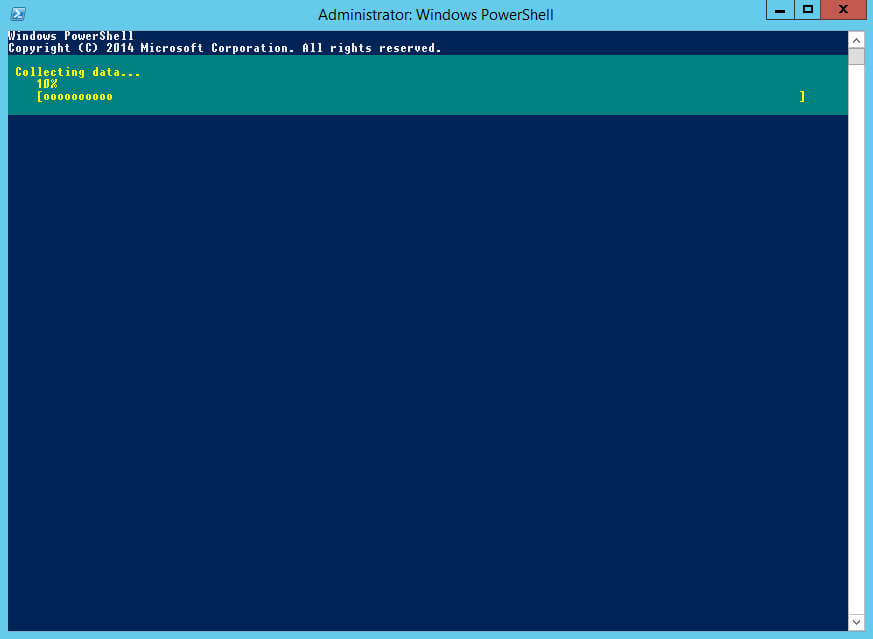
Installation of Remote Administration Tools completed successfully.
Now you need to install additional components required for the Exchange server using the command:
Install-WindowsFeature AS-HTTP-Activation, Server-Media-Foundation, NET-Framework-45-Features, RPC-over-HTTP-proxy, RSAT-Clustering, RSAT-Clustering-CmdInterface, RSAT-Clustering-Mgmt, RSAT-Clustering-PowerShell, WAS-Process-Model, Web-Asp-Net45, Web-Basic-Auth, Web-Client-Auth, Web-Digest-Auth, Web-Dir-Browsing, Web-Dyn-Compression, Web-Http-Errors, Web-Http-Logging, Web-Http-Redirect, Web-Http-Tracing, Web-ISAPI-Ext, Web-ISAPI-Filter, Web-Lgcy-Mgmt-Console, Web-Metabase, Web-Mgmt-Console, Web-Mgmt-Service, Web-Net-Ext45, Web-Request-Monitor, Web-Server, Web-Stat-Compression, Web-Static-Content, Web-Windows-Auth, Web-WMI, Windows-Identity-Foundation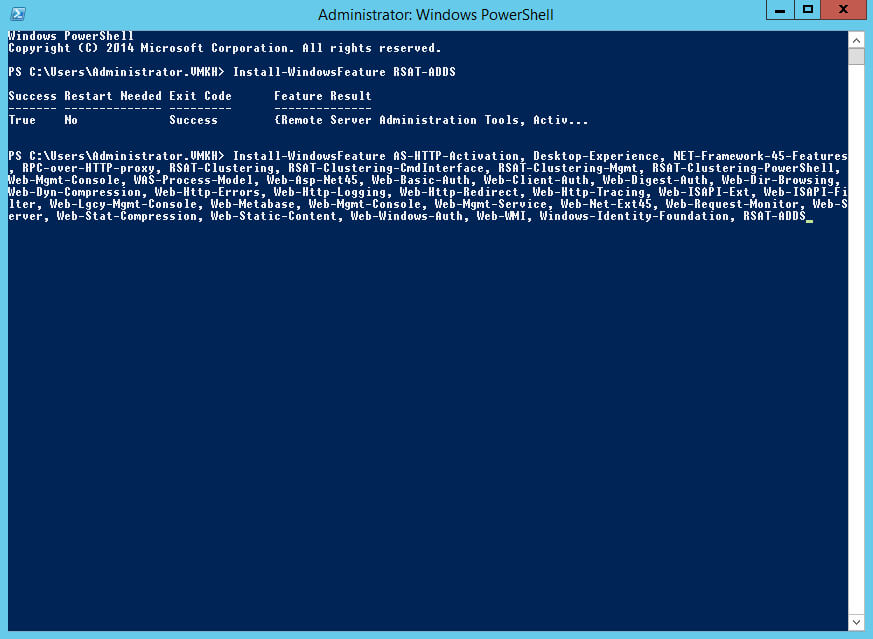
The process of installing additional components required for the Exchange Server has begun.
The installation of the additional components required for the Exchange Server has been completed successfully.
Now you need to reboot the server.
On the keyboard, press the key combination “Win” and “x”, in the menu that opens, select “Shut down or sign out”, then “Restart”.
The server will start to reboot.
On the future Exchange server, go to the system under an account that consists of the following groups: Enterprise Admins, Schema Admins, and Domain Admins.
Before preparing Active Directory and installing Exchange Server 2019, you need to install additional software on the future Exchange server:
- Unified Communications Managed API 4.0
- Visual C++ Redistributable Package for Visual Studio 2012
- Visual C++ Redistributable Package for Visual Studio 2013
Let’s install Unified Communications Managed API 4.0
Follow the link and click on the “Download” button.
Run the downloaded Unified Communications Managed API 4.0 installer file.
The “Unified Communications Managed API 4.0 Installation Wizard” will open.
Click on the “Next” button.
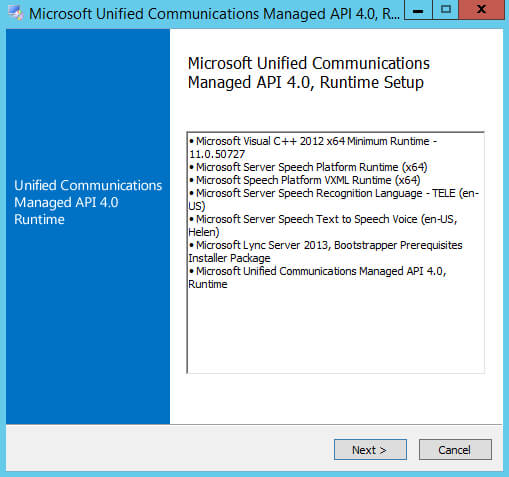
Next, you must accept the license terms, if you agree with them, and click on the “Next” button.

The installation process for “Unified Communications Managed API 4.0” has begun.
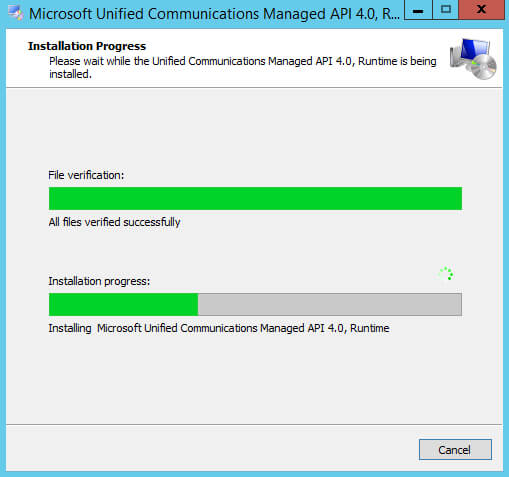
Installation of “Unified Communications Managed API 4.0” is complete.
Click on the “Finish” button.

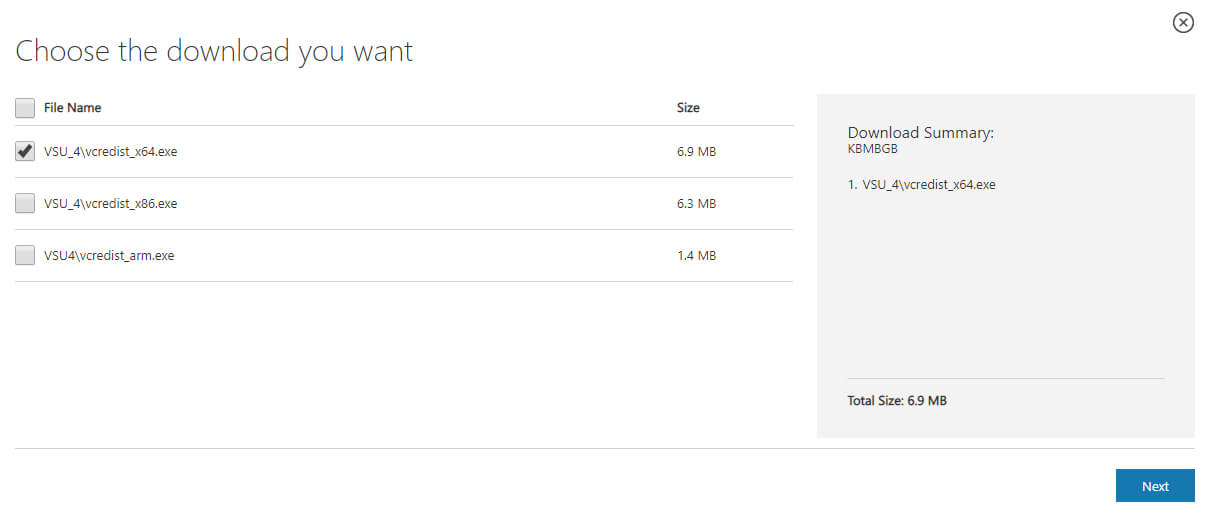
Let’s install Visual C++ Redistributable Package for Visual Studio 2012.
Follow the link and click on the “Download” button.

Select “VSU_4\vcredist_x64.exe” and click on the “Next” button.
Run the downloaded Visual C ++ Redistributable Package for Visual Studio 2012 installer file.
Next, you must accept the license terms, if you agree with them, and click on the “Install” button.
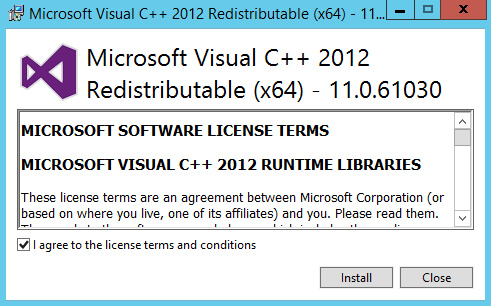
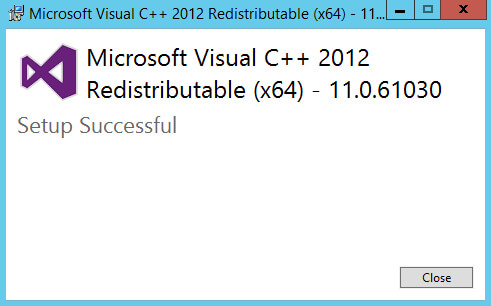
Installation of Visual C ++ Redistributable Package for Visual Studio 2012 completed successfully.
Click on the “Close” button.
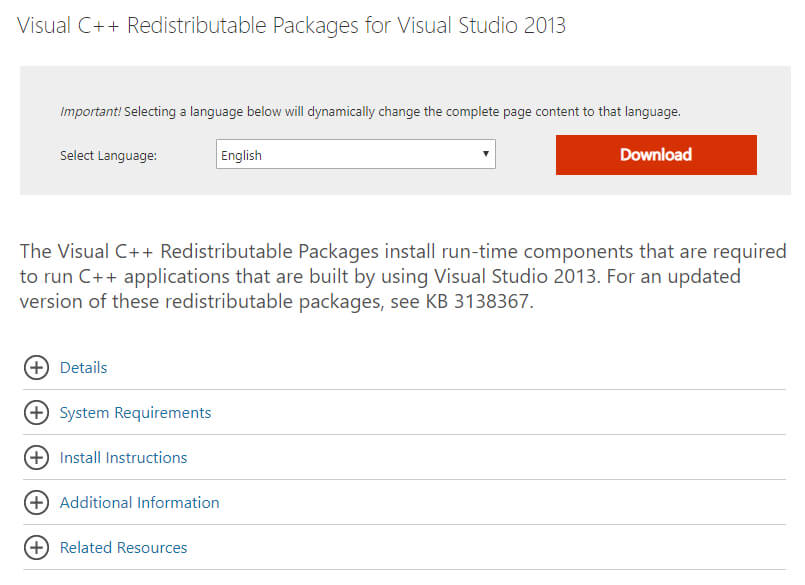
Let’s install Visual C++ Redistributable Package for Visual Studio 2013.
Follow the link and click on the “Download” button.
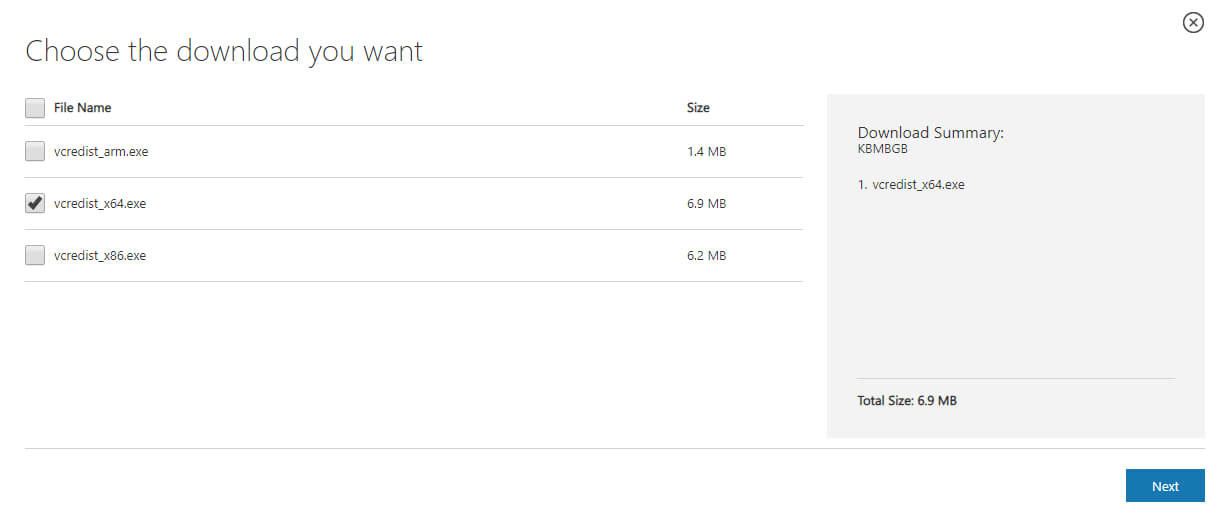
Select “vcredist_x64.exe” and click on the “Next” button.
Run the downloaded Visual C ++ Redistributable Package for Visual Studio 2013 installer file.
Next, you must accept the license terms, if you agree with them, and click on the “Install” button.
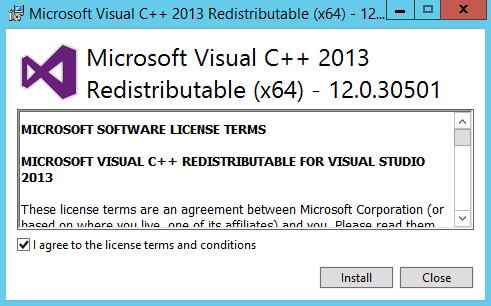
Installation of Visual C++ Redistributable Package for Visual Studio 2013 completed successfully.
Click on the “Close” button.

Now you need to prepare Active Directory to work with Exchange Server.
Click “Start”, point to “cmd” in the search bar, then right-click on “Command Prompt” and select “Run as administrator”.
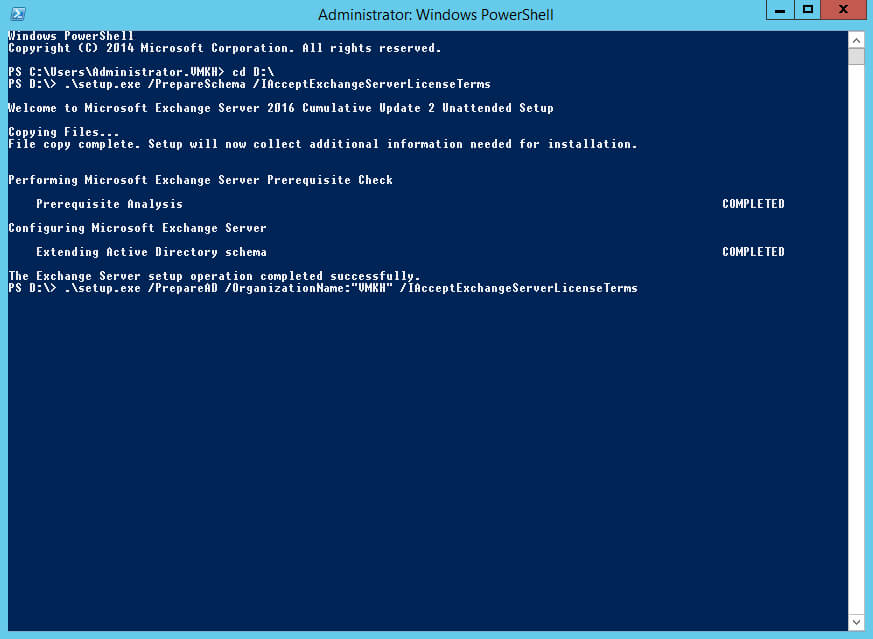
Go to drive “D” (virtual drive) where the Exchange Server 2016 installation files are located using the command:
cd D:\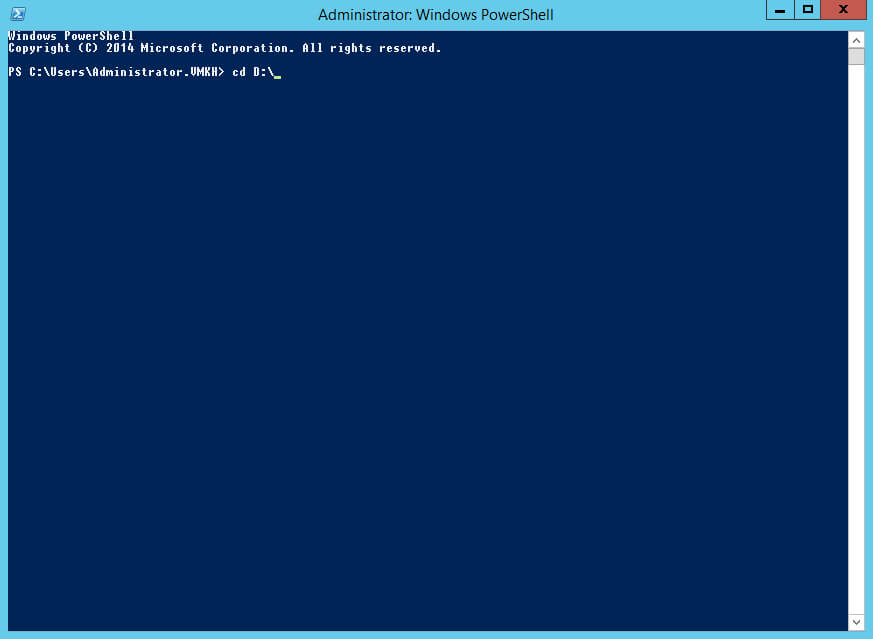
Let’s prepare the Active Directory schema to work with Exchange Server using the command:
E:\Setup.exe /IAcceptExchangeServerLicenseTerms_DiagnosticDataON /PrepareSchema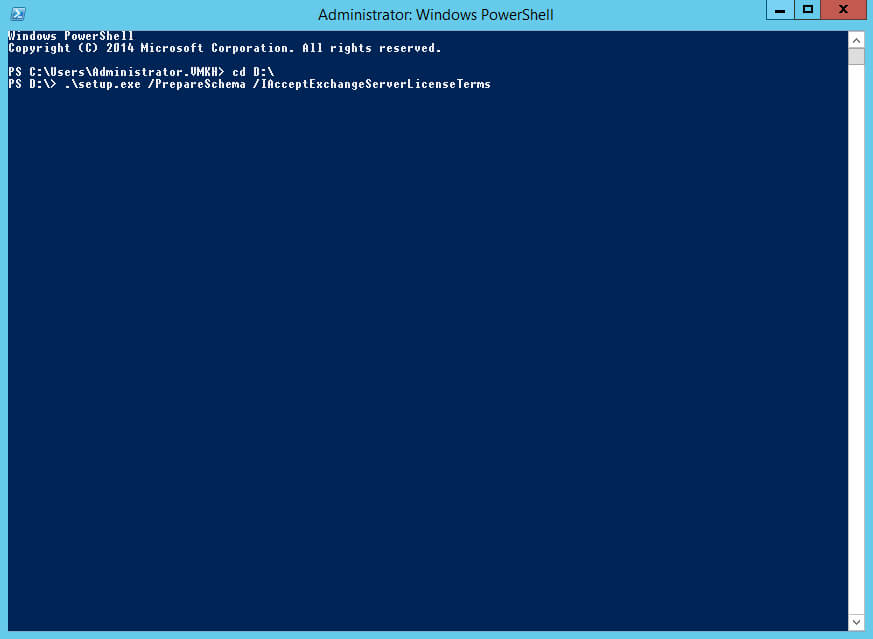
The process of preparing the Active Directory schema has begun.
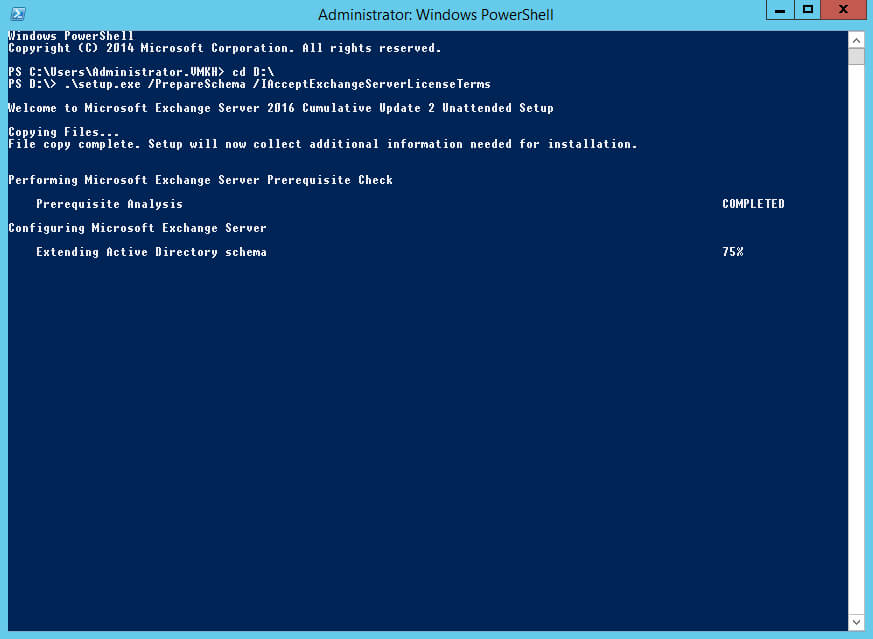
The Active Directory schema preparation process completed successfully.
Now you need to prepare containers, objects, and other Active Directory components and create the Exchange organization.
Please note that after “OrganizationName” you must indicate the name of your organization in English.
Let’s prepare containers, objects, and other Active Directory components, as well as create an Exchange organization, using the command:
E:\Setup.exe /IAcceptExchangeServerLicenseTerms_DiagnosticDataON /PrepareAD /OrganizationName:"VMKH"Please note that this manual uses the organization’s name “VMKH”.
The process of preparing containers, objects, and other Active Directory components has begun.
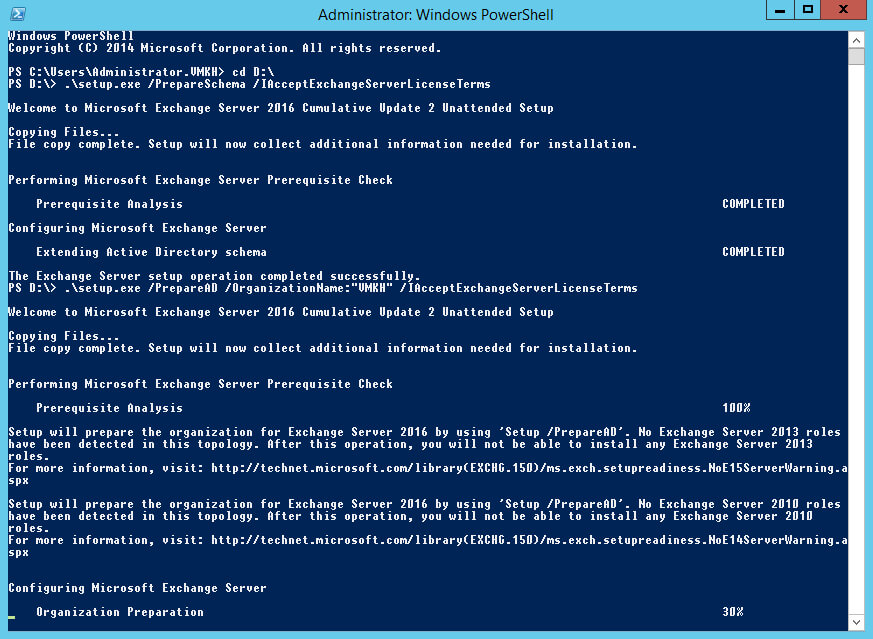
The preparation process for containers, objects, and other Active Directory components has been completed successfully.
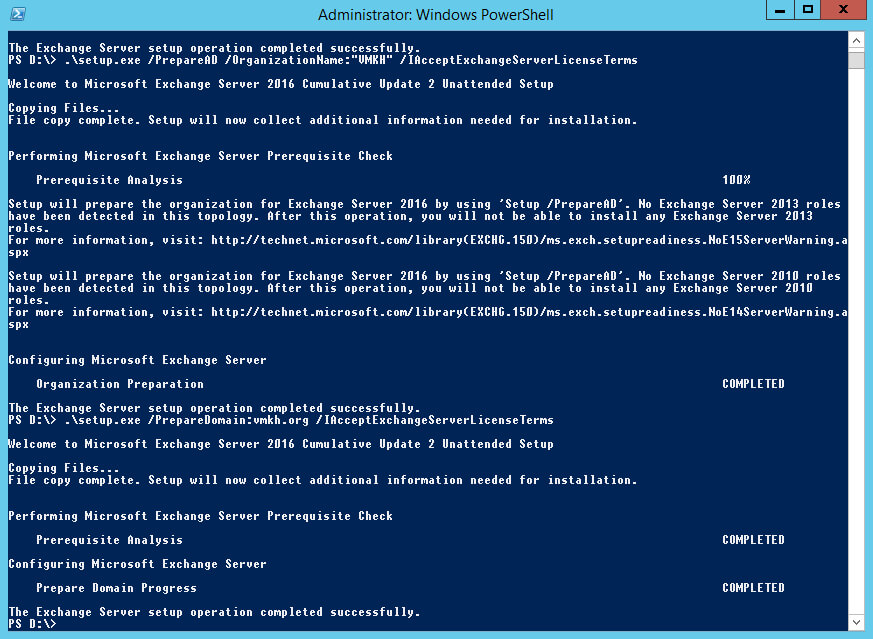
Now you need to prepare the domain for the Exchange Server installation.
Prepare a domain for installing Exchange Server using the command:
E:\Setup.exe /IAcceptExchangeServerLicenseTerms_DiagnosticDataON /PrepareDomain:vmkh.orgPlease note that this tutorial uses the “vmkh.org” domain.
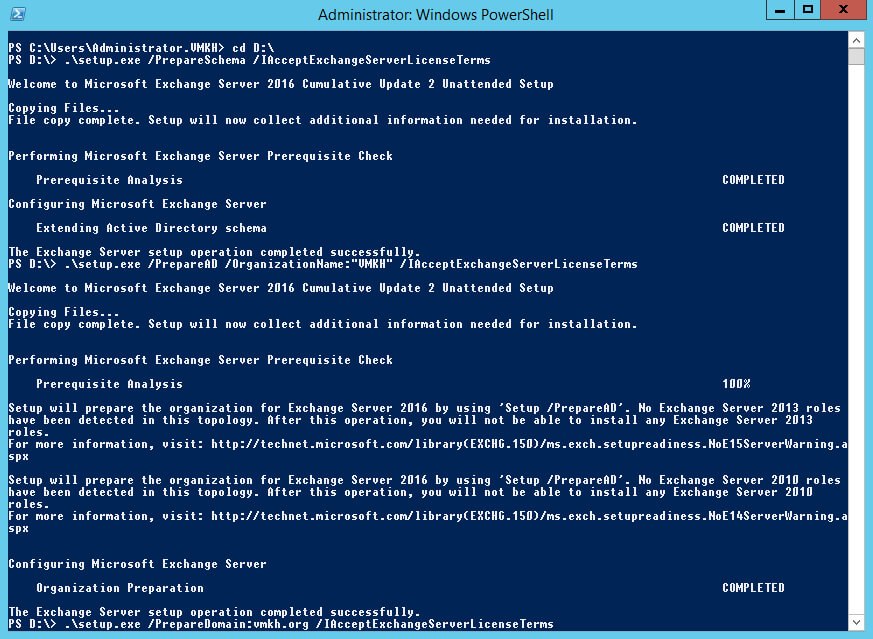
The domain preparation process has completed successfully.
Now you can start installing Exchange Server 2016.
Go to drive “D” (virtual drive) where the Exchange Server 2016 installation files are located and run “Setup.exe”.
At this point, you can check for updates to Exchange Server 2016.
Select “Connect to the Internet and check for updates” and click on the “Next” button.
There are currently no updates for Exchange Server 2016.
Click on the “Next” button.
Next, the “Exchange Server Setup Wizard” invites you to read the information regarding Exchange Server 2016.
Click on the “Next” button.
Next, you must accept the license terms, if you agree with them, and click on the “Next” button.
We select “Don’t use recommended settings” so that the Exchange server does not automatically send error reports and other information on the use of the Exchange server to Microsoft.
Click “Next”.
Now you need to choose which roles will be installed on your server.
Select “Mailbox role”, then select “Automatically install Windows Server roles and features that are required to install Exchange Server” and click on the “Next” button.
Next, you can select the directory where you want to install Exchange Server 2016.
Leave the settings unchanged and click on the “Next” button.
You can now configure your anti-malware settings.
In the “Disable malware scanning” item, select “No” and click on the “Next” button.
Next, the process of checking readiness for installation will begin, after it is completed, you can start the installation process of Exchange Server 2016.
Click on the “Install” button.

The installation process for Exchange Server 2016 has begun.
Exchange Server 2016 installation completed successfully.
Select “Launch Exchange Administration Center after finishing Exchange setup” and click on the “Finish” button.
Please note that the Exchange Administration Center is used to administer the Exchange server, available at https://ru-msk-ex-01/ecp, where ru-msk-ex-01 is the name of my Exchange server. Accordingly, you need to specify the name or IP address of your server with Exchange Server 2016 installed.
To display the Exchange Administration Center Control Panel correctly, you must add the Exchange Server address to Trusted Sites in Internet Explorer.
Click on the “Add” button.
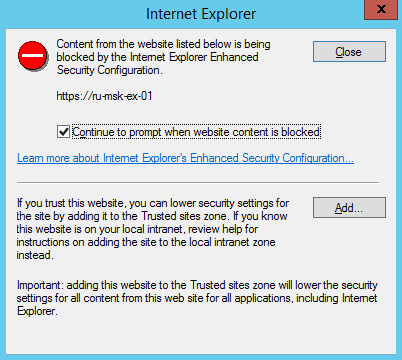
In the “Add this website to the zone” field, specify the address of the Exchange server and click on the “Add” button.
The Exchange server address has been added to the list of trusted sites.
Click on the “Close” button.
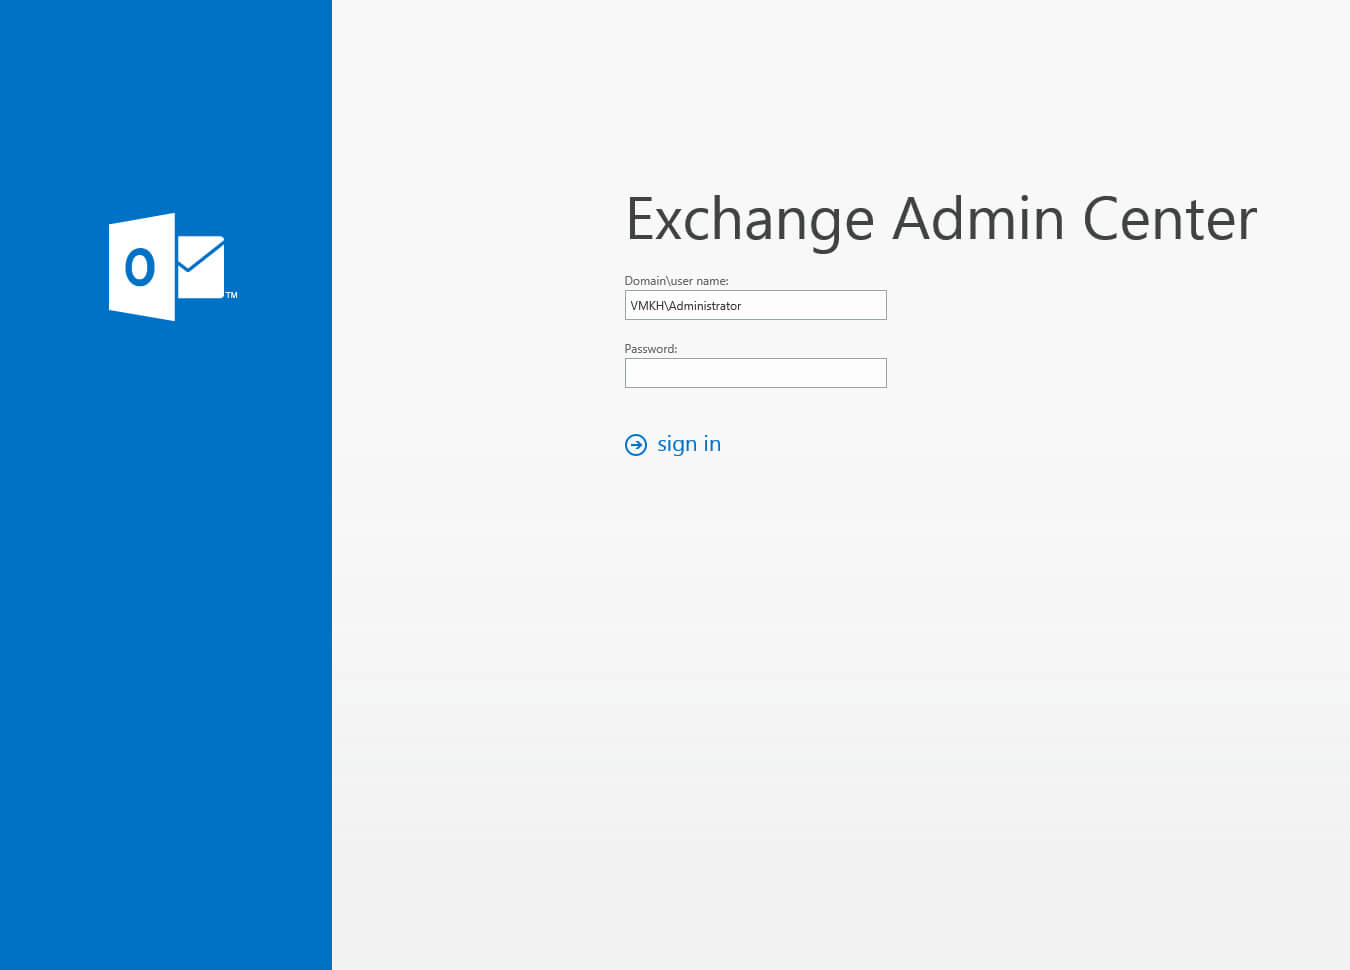
Next, you need to specify the username and password of an account with Exchange administrator rights and click on the “Sign in” button.
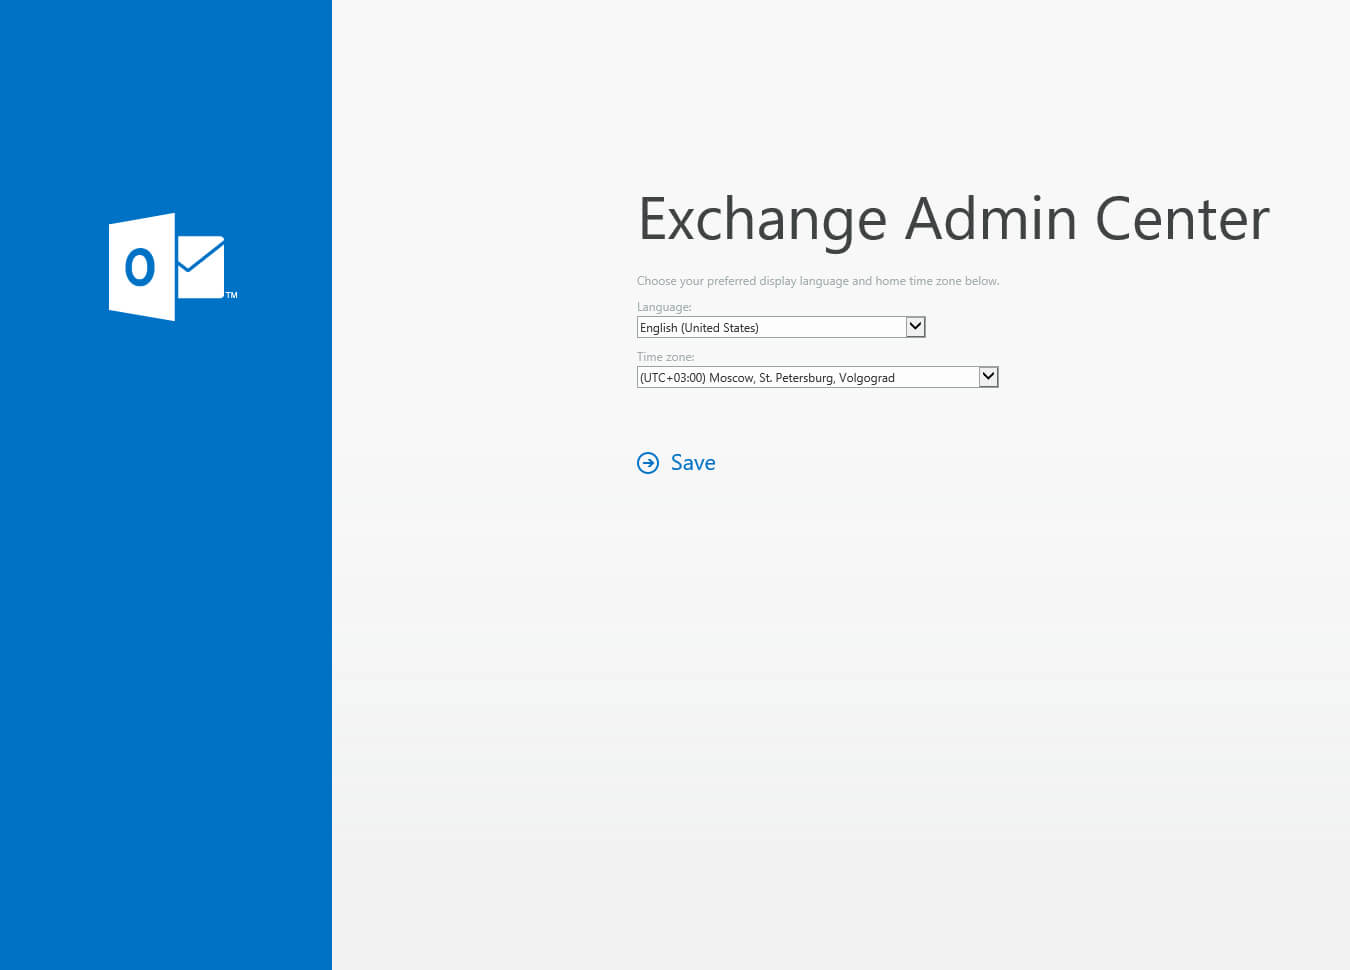
Now you need to select the language in which further information will be displayed, as well as the time zone.
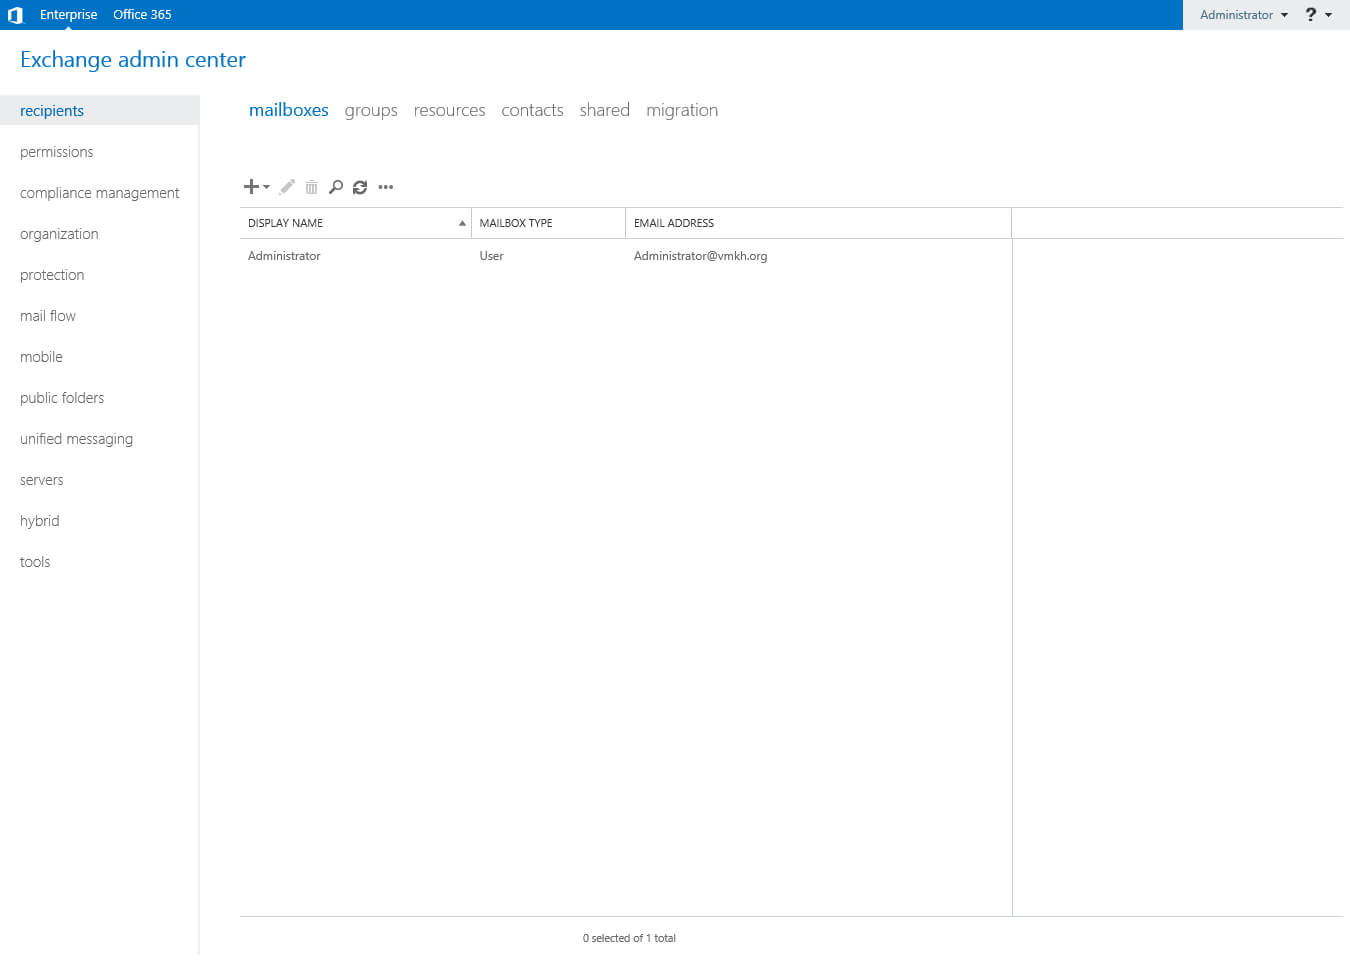
Welcome to the Exchange Admin Center Control Panel.
You can now check the status of the Exchange Server services.
Click “Start”, point to “Exchange Management Shell” in the search bar, then right-click on “Exchange Management Shell” and select “Run as administrator”.
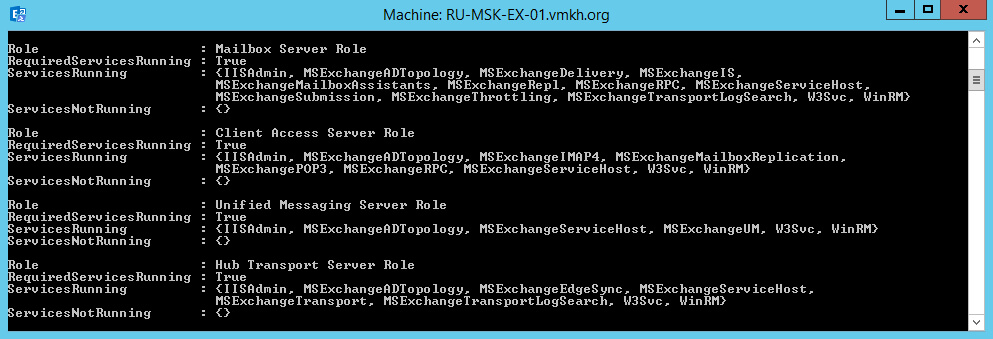
Let’s check the status of the Exchange Server services using the command:
Test-ServiceHealth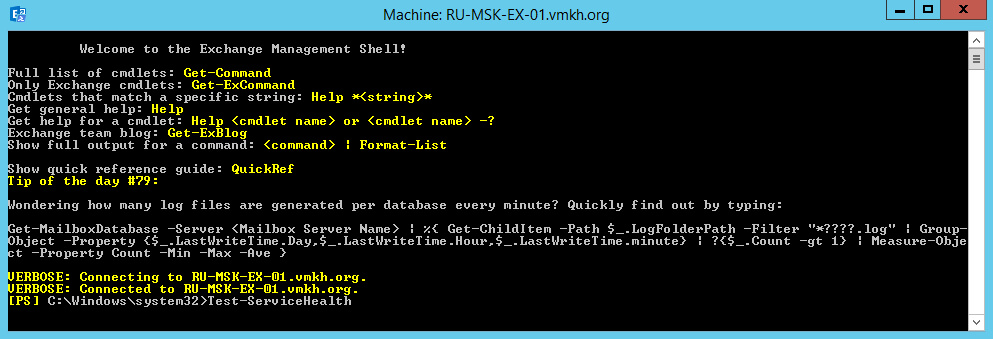
Service check completed successfully.
A “True” value in “RequireServiceRunning” indicates that the services are running.
Follow Me
🎬 YouTube
🐦 X / Twitter
🎨 Instagram
🐘 Mastodon
🧵 Threads
🎸 Facebook
🧊 Bluesky
🎥 TikTok
💻 LinkedIn
📣 daily.dev Squad
🧩 LeetCode
🐈 GitHub
👾 Discord
Is this content AI-generated?
Nope! Each article is crafted by me, fueled by a deep passion for Docker and decades of IT expertise. While I employ AI to refine the grammar—ensuring the technical details are conveyed clearly—the insights, strategies, and guidance are purely my own. This approach may occasionally activate AI detectors, but you can be certain that the underlying knowledge and experiences are authentically mine.