
Установка и настройка DNS-сервера и Active Directory, DHCP-сервера в Windows Server 2019 не отличается от предыдущих выпусков серверов компании Microsoft, таких как Windows Server 2016, 2012. Пройдя несколько шагов несложно устанавить следующие роли: DNS-сервер и Доменные службы Active Directory, DHCP-сервер.
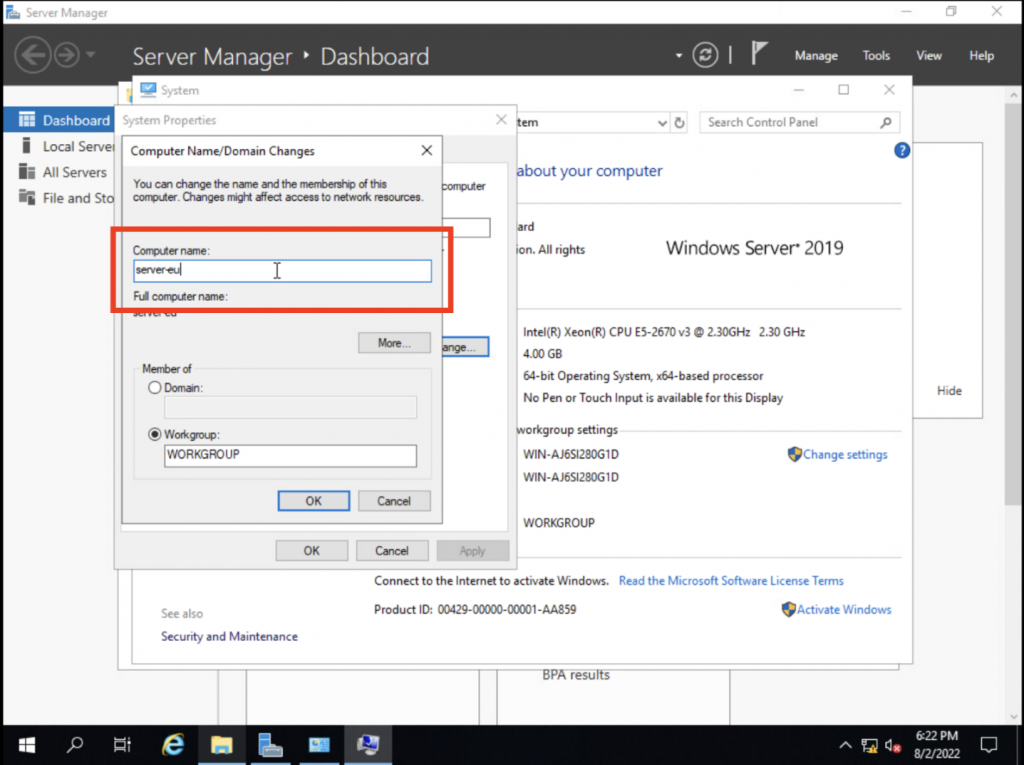
- Переименование сервера
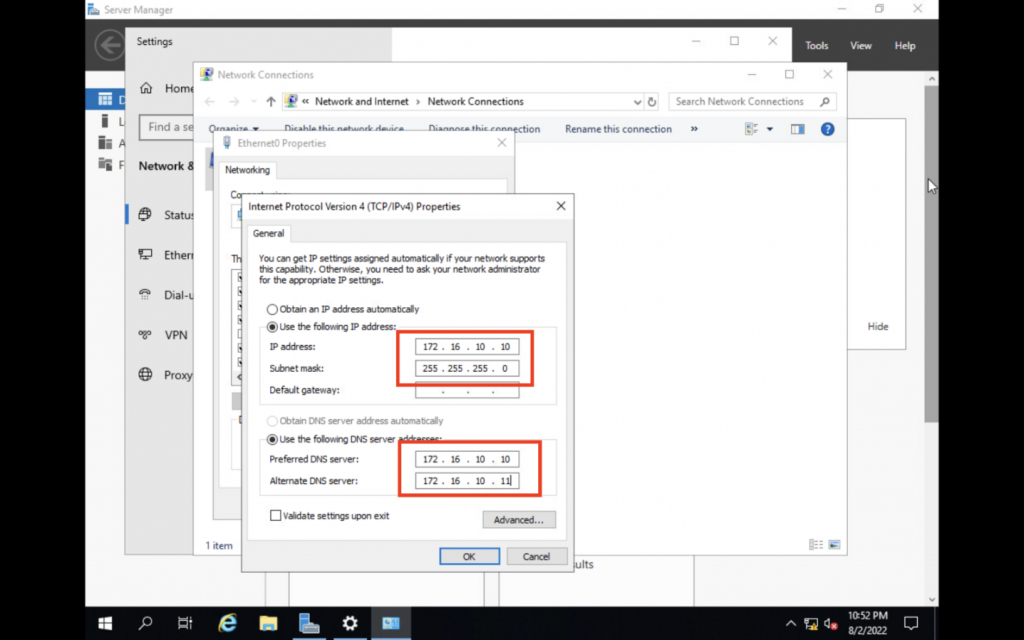
- Настройка сетевого интерфейса
- Установка на сервера ролей: DNS-сервер, Доменные службы Active Directory, DHCP-сервер
- Повышение роли сервера до уровня контроллера домена
- Настройка обратной зоны DNS
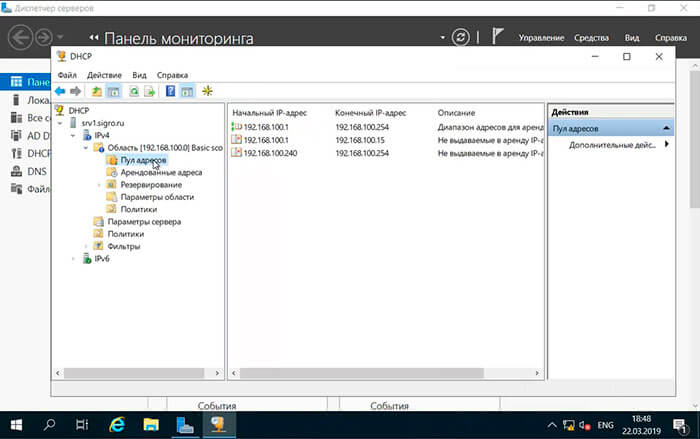
- Настройка DHCP-сервера
Переименование сервера
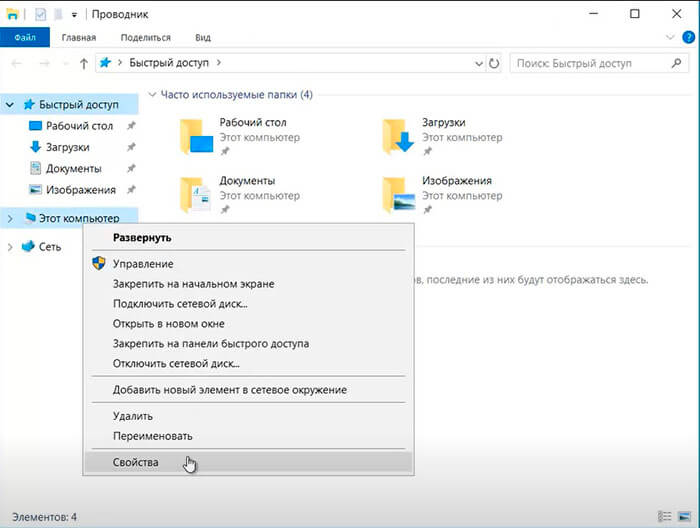
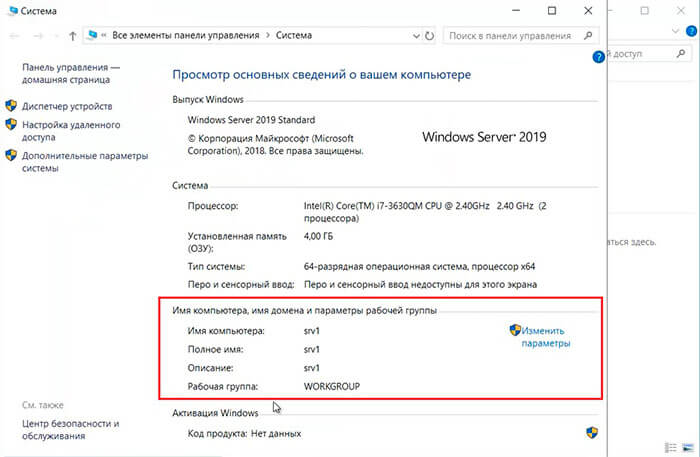
1. Для изменения имени сервера нажимаем правой клавишей мыши на «Этот компьютер«, в появившемся меню выбираем «Свойства«.
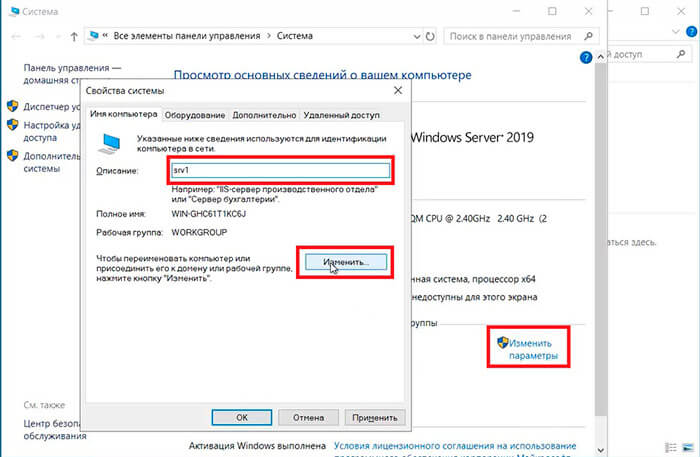
2. Далее нажимаем «Изменить параметры«. В открывшемся окне добавляем описание сервера, далее выбираем «Изменить«.
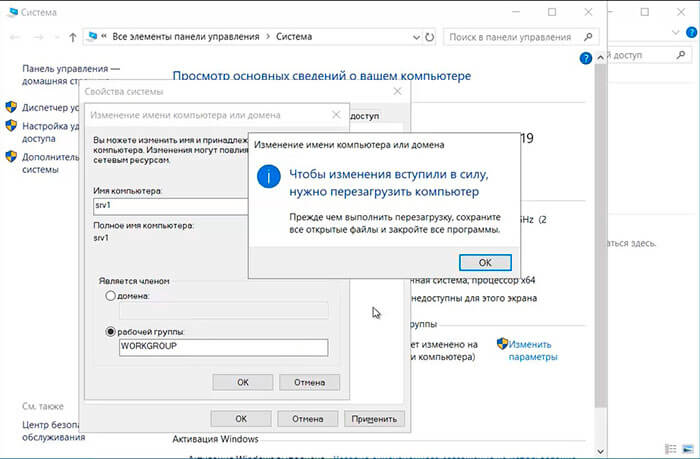
3. Задаём «Имя компьютера«, нажимаем «ОК«. Появится предупреждение о том, что изменения вступят в силу после перезагрузки компьютера. Подтверждаем — «ОК«
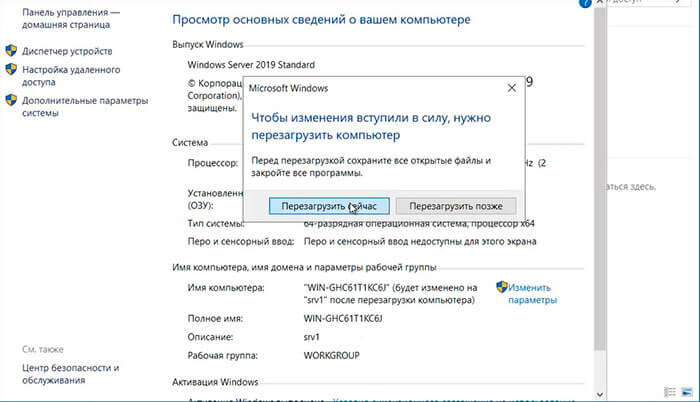
4. Нажимаем «Перезагрузить сейчас» и ожидаем перезагрузки сервера.
5. После перезагрузки компьютера проверяем имя сервера («Мой компьютер» — правой клавишей мыши — «Свойства«).
Настройка сетевого интерфейса
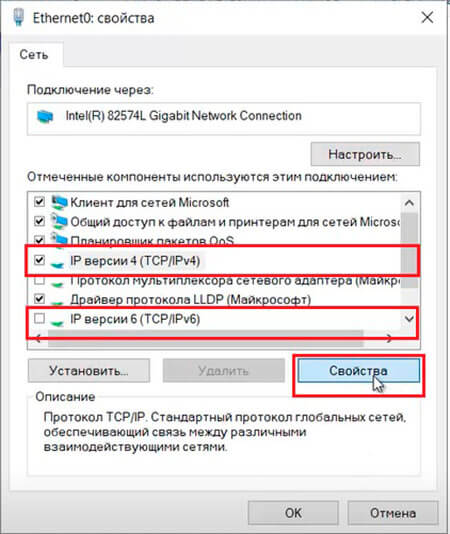
6. Для настройки сетевого интерфейса в поиске набираем ncpa.cpl, далее «Enter«. Снимаем чекбокс «IP версии 6«, далее выбираем «IP версии 4«, далее «Свойства«.
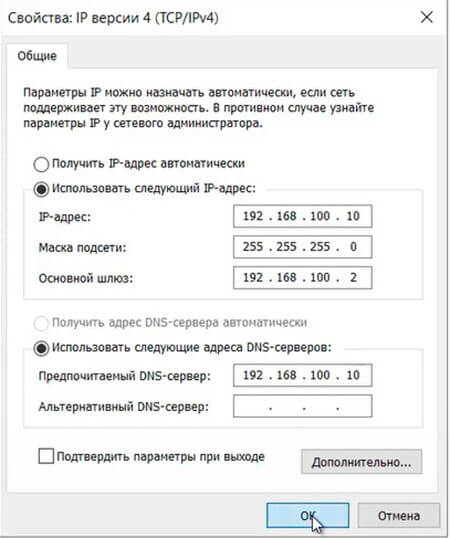
7. Выбираем «Использовать следующий IP-адрес» и задаём статический IP-адрес сервера, маску подсети, основной шлюз (если есть), и предпочитаемый DNS-сервер. Нажимаем «ОК«. На этом настройка сетевого интерфейса закончена.
Установка на сервера ролей: DNS-сервер, Доменные службы Active Directory, DHCP-сервер
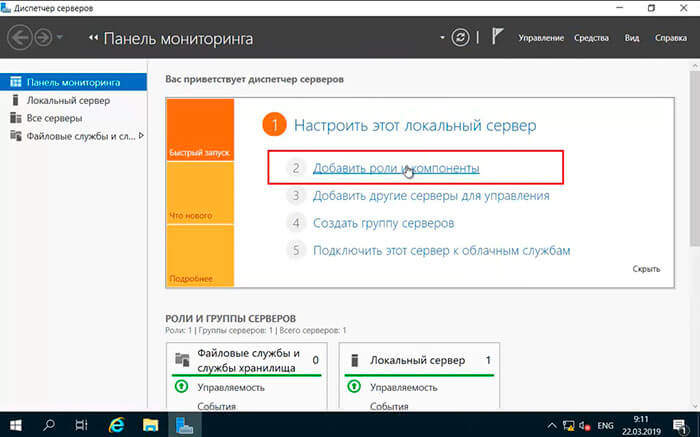
8. Нажимаем «Пуск«, далее «Диспетчер серверов«.

9. В новом окне выбираем «Добавить роли и компоненты«.
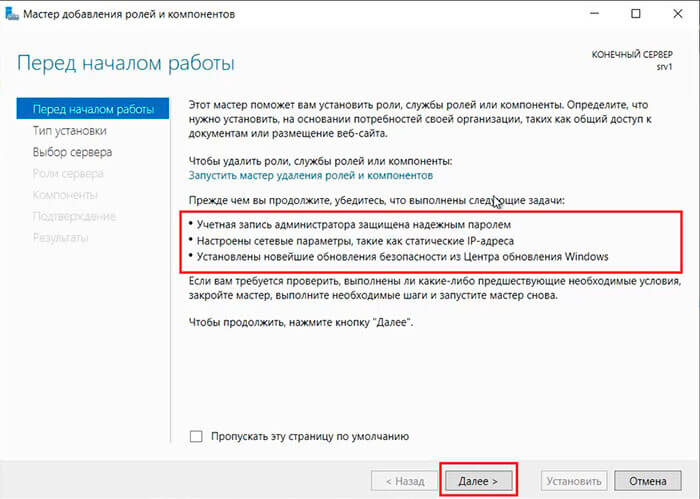
10. Читаем предупреждение сервера «Перед началом работы«, не забываем защитить учетную запись администратора надежным паролем, затем «Далее«.
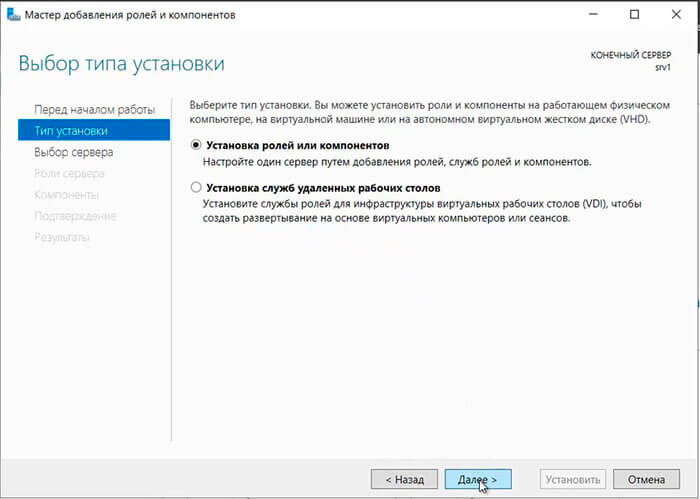
11. Проверяем, что чекбокс стоит на «Установка ролей или компонентов«, затем «Далее«.
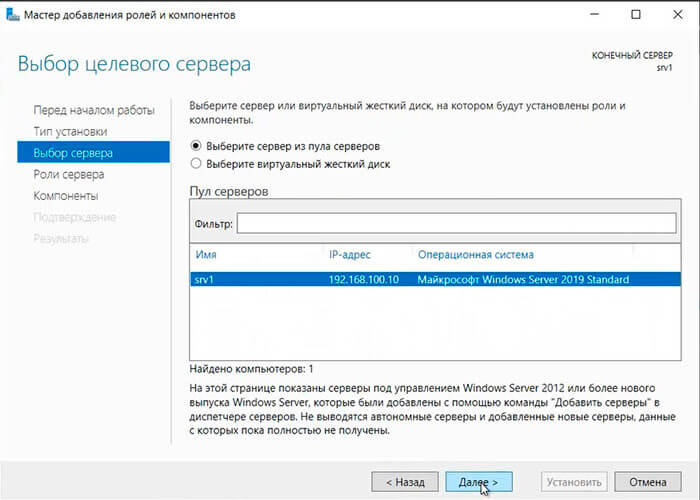
12. Выбираем сервер, на который будут установлены роли и компоненты. Снова «Далее«.
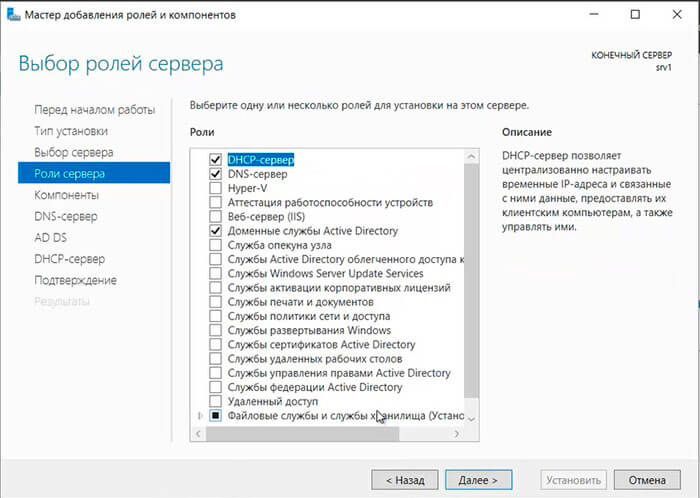
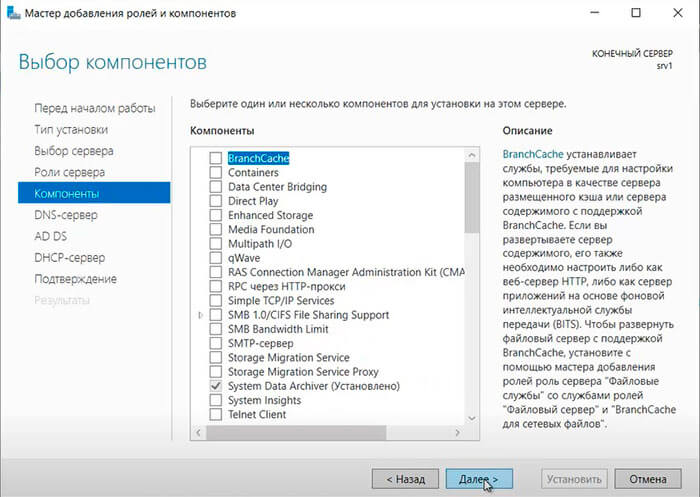
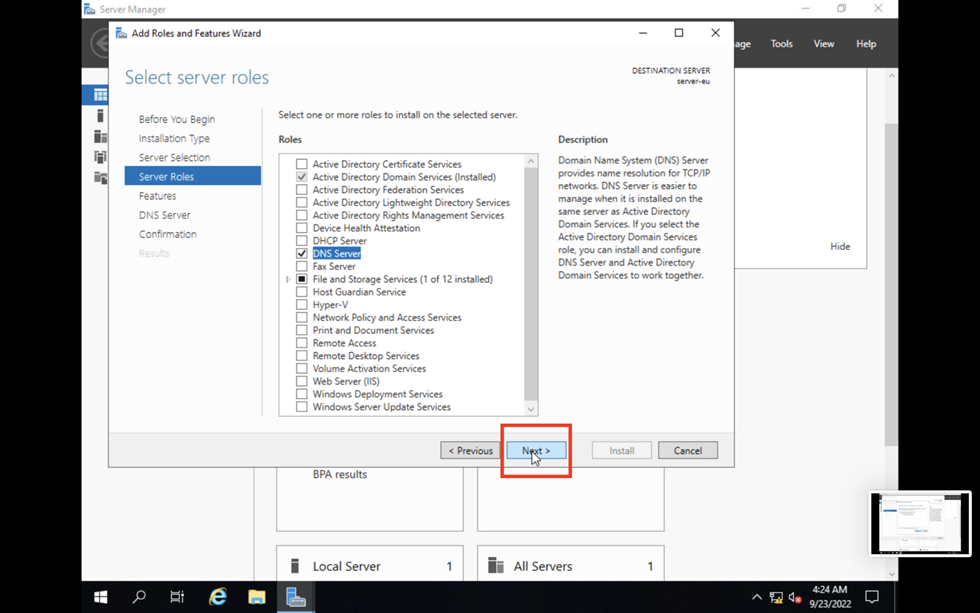
13. Устанавливаем чекбоксы напротив выбранных ролей сервера, в данном случае это DNS-сервер, Доменные службы Active Directory, DHCP-сервер. Нажимаем «Далее«.
14. При каждом выборе роли будет появляться «Мастер добавление ролей и компонентов«, который будет спрашивать о добавлении компонентов для выбранных ролей сервера. Нажимаем «Добавить компоненты«.

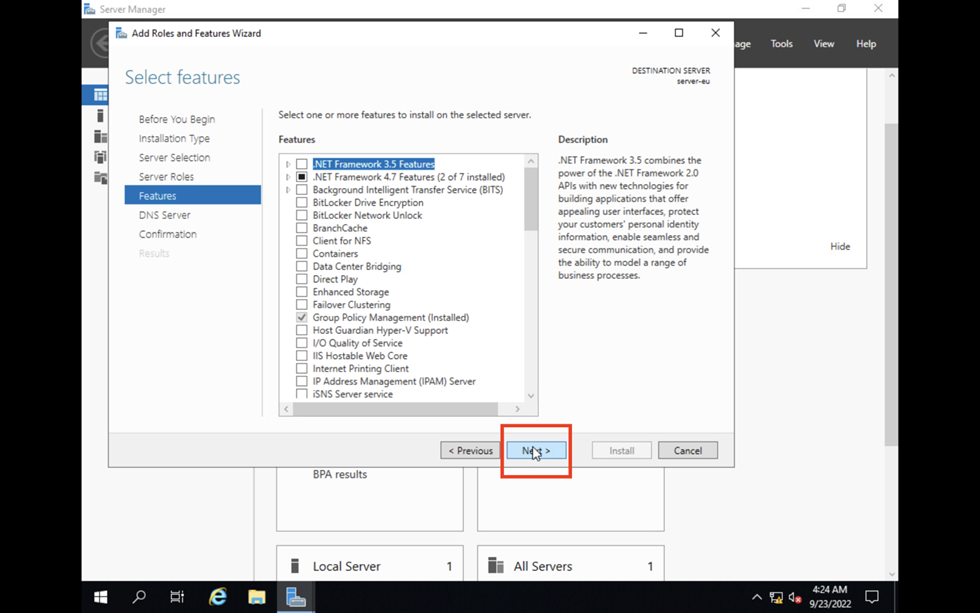
15. Нажимаем «Далее«, необходимые компоненты были выбраны в предыдущем шаге.
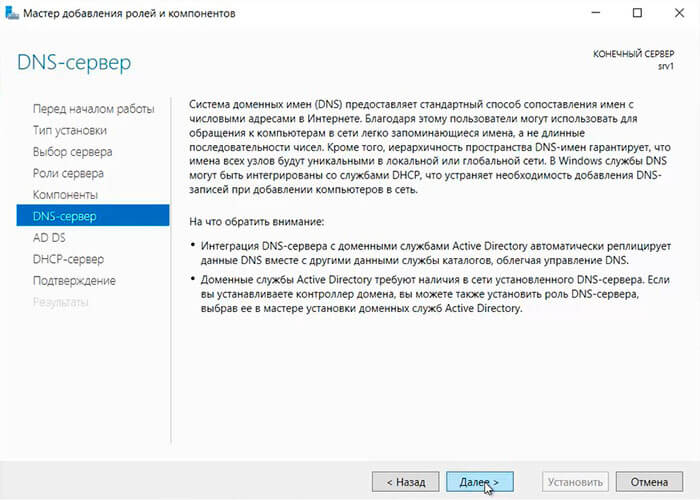
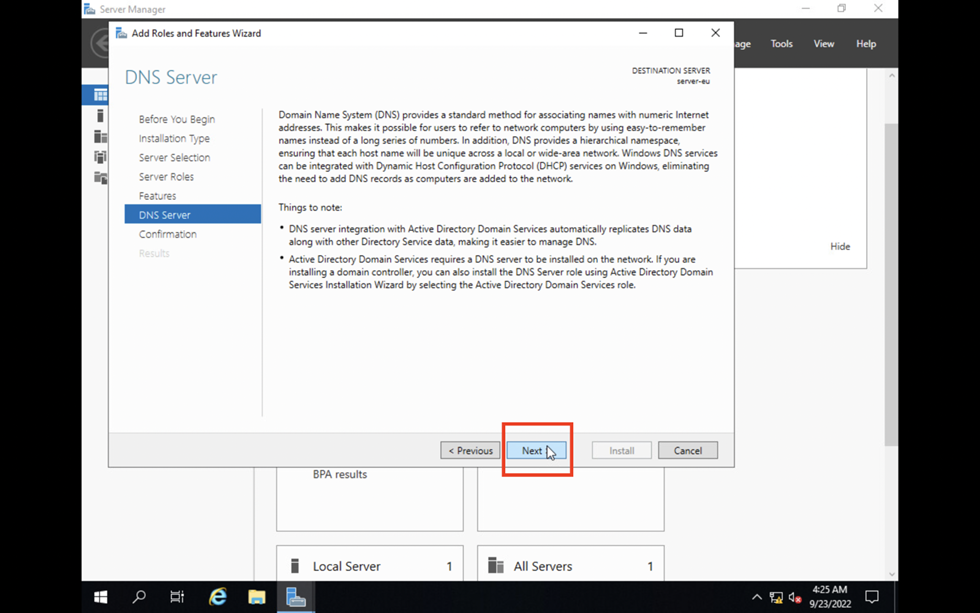
16. Читаем предупреждение DNS-сервера на что обратить внимание, затем «Далее«.
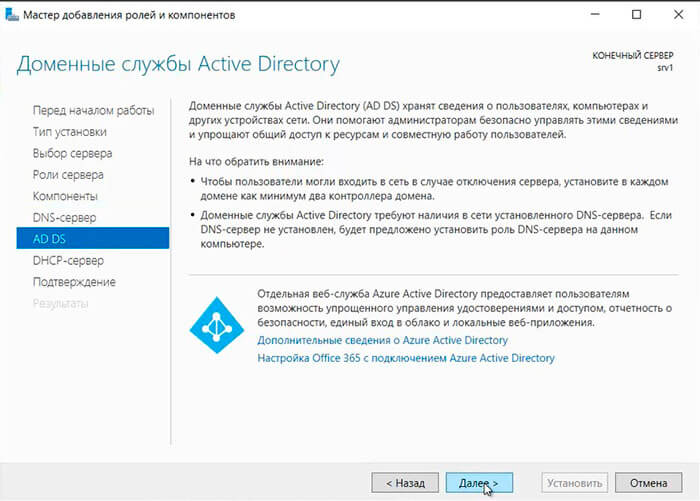
17. Читаем предупреждение AD DS, нажимаем «Далее«.
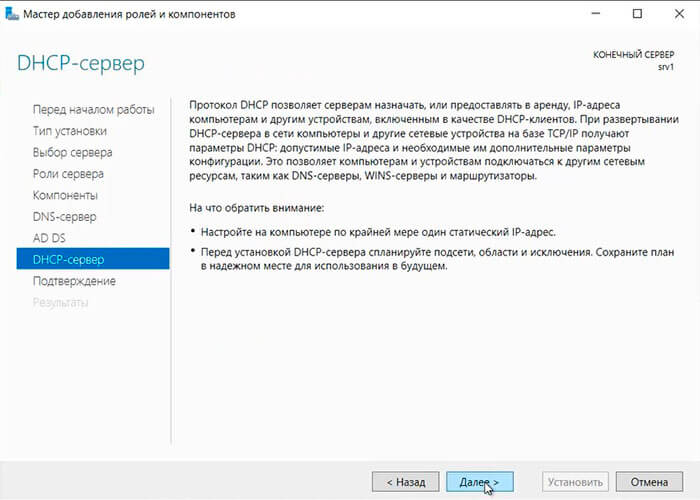
18. Читаем предупреждение DHCP-сервера, снова «Далее«.
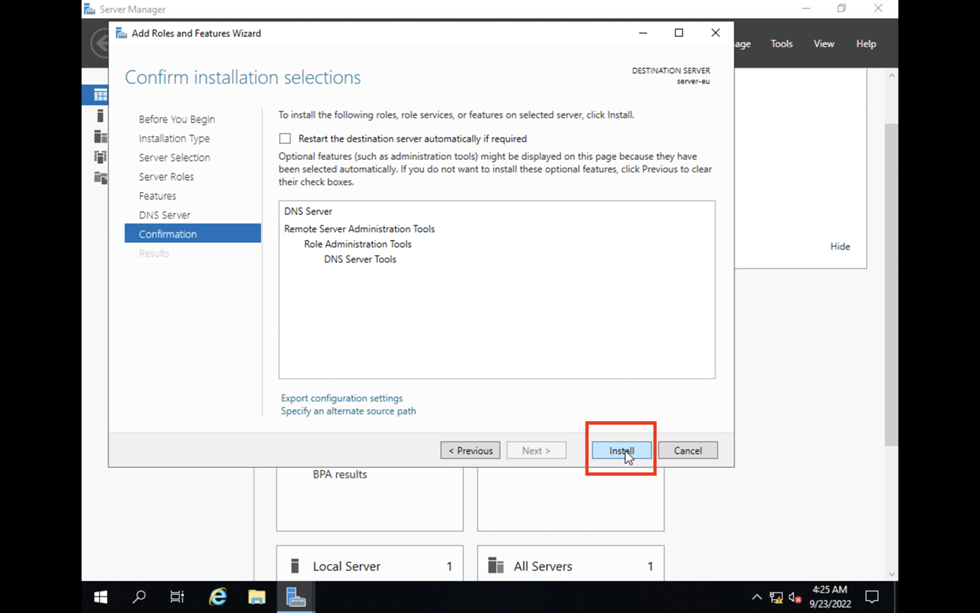
19. Ставим «чекбокс» напротив «Автоматический перезапуск конечного сервера, если требуется«, нажимаем «Установить«.
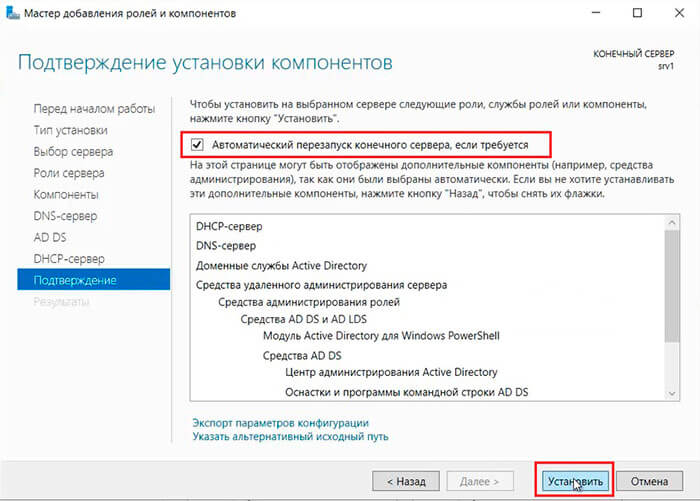
В результате произойдет установка выбранных ролей сервера.
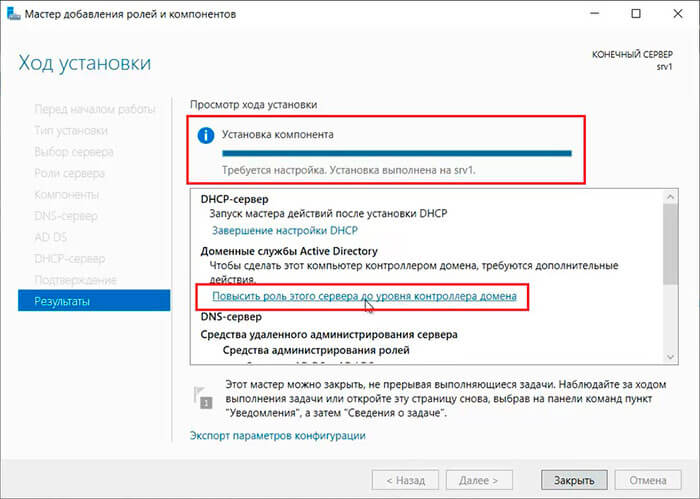
Повышение роли сервера до уровня контроллера домена
20. Нажимаем «Повысить роль этого сервера до уровня контроллера домена«.
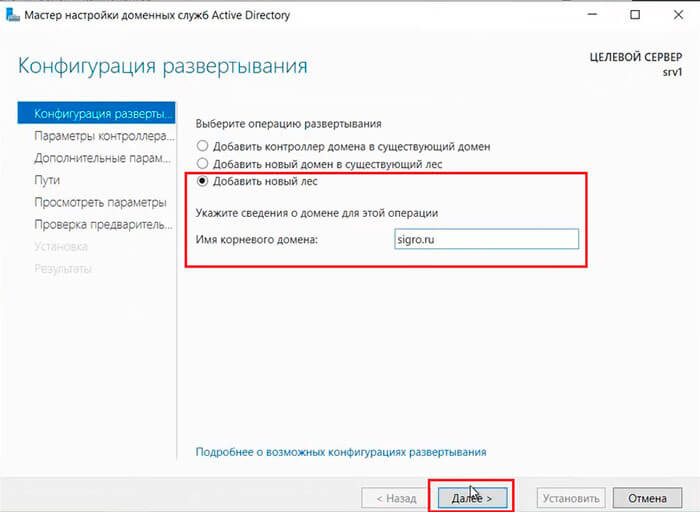
21. Далее выбираем «Добавить новый лес» и задаем «Имя корневого домена«.
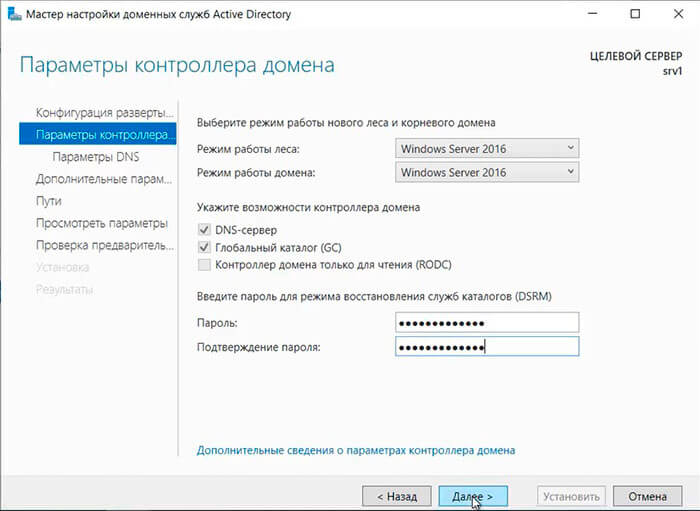
22. В следующем окне дважды вводим пароль для режима восстановления служб каталогов (DSRM), затем «Далее«.
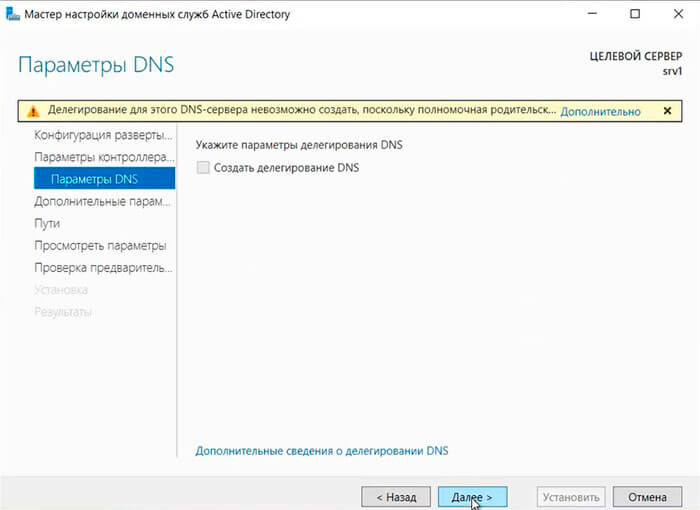
23. В следующем окне снова «Далее«.
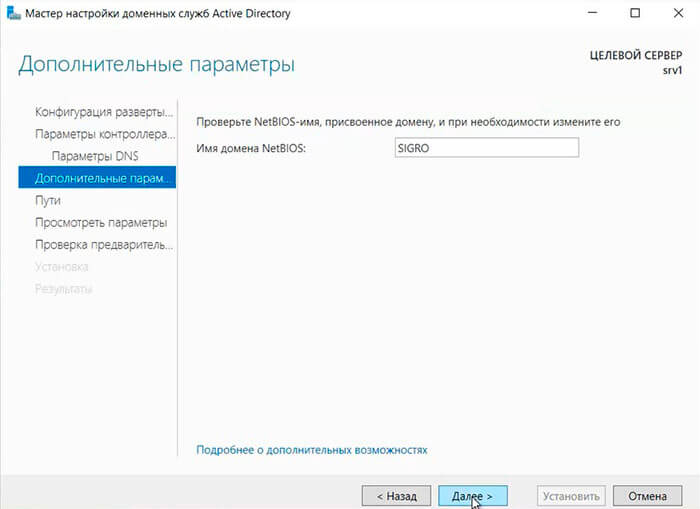
24. Проверяем NetBIOS-имя, присвоенное домену, и при необходимости меняем его. Затем «Далее«.
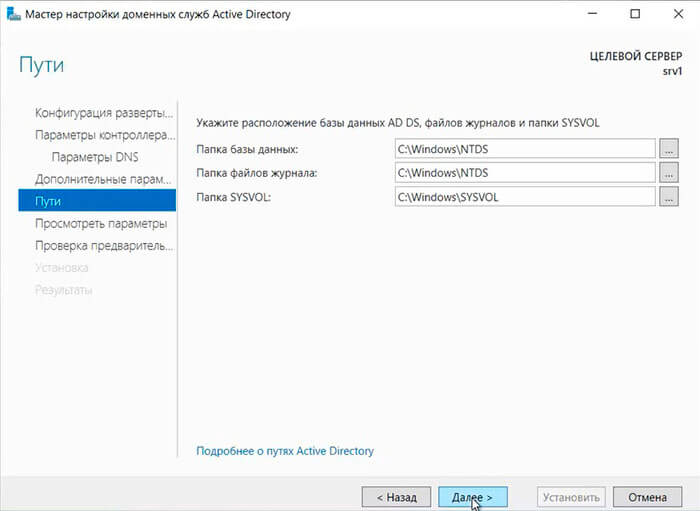
25. Оставляем по умолчанию расположение базы данных AD DS, файлов журналов и папки SYSVOL, снова «Далее«.
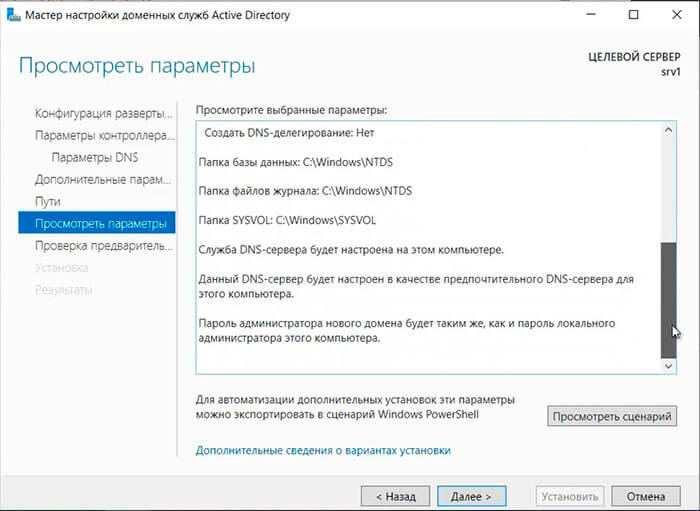
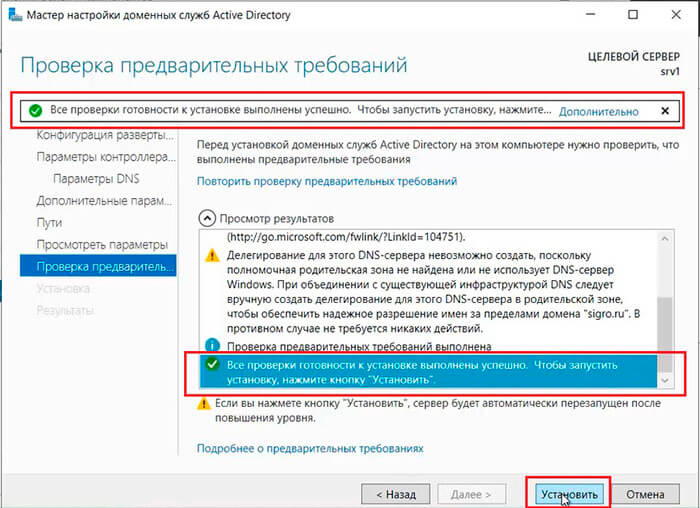
26. После просмотра выбранных параметров и их одобрения нажимаем «Далее«.
27. Если проверка готовности к установке выполнена успешна, то запускаем установку — «Установить«.
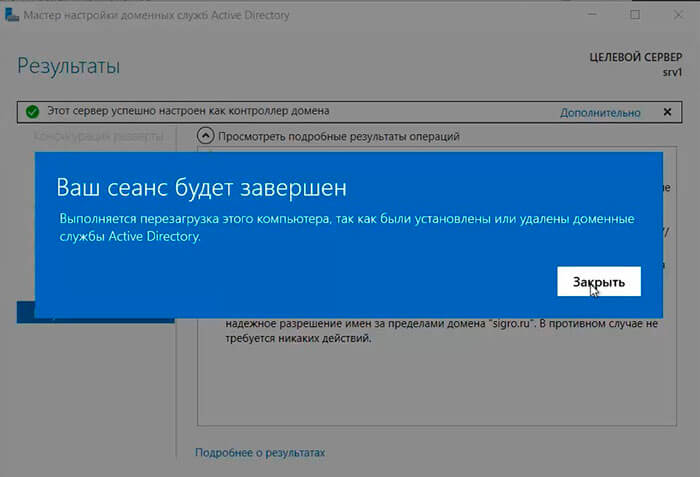
28. По завершению установки произойдет перезагрузка сервера.
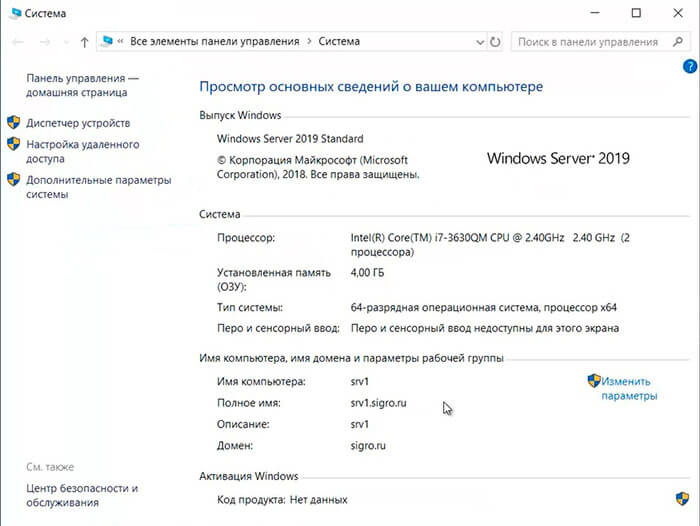
29. После перезагрузки полное имя компьютера изменится, к имени сервера добавиться доменное имя. Active Directory можно использовать.
Настройка обратной зоны DNS
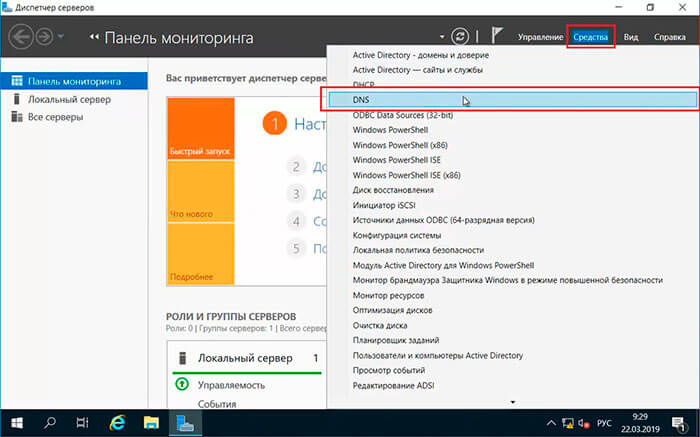
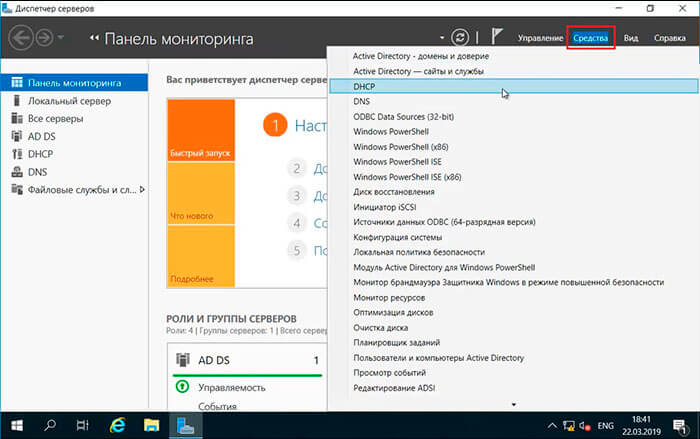
30. Для настройки обратной зоны DNS в Диспетчере серверов выбираем «Средства» — «DNS«
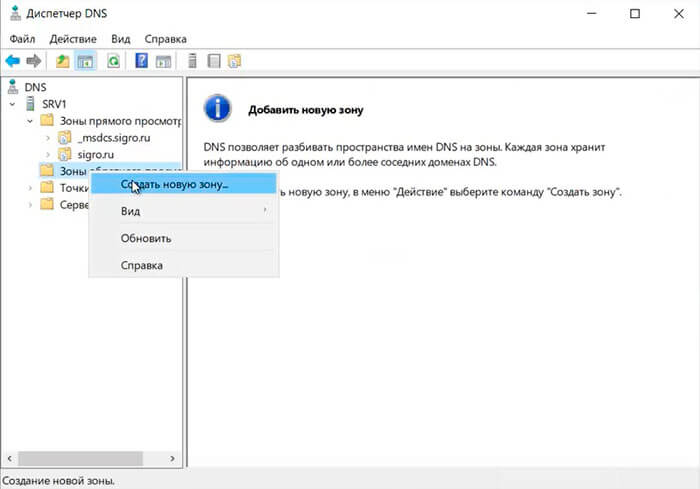
31. Раскрываем дерево DNS, нажимаем правой клавишей мыши на «Зоны обратного просмотра«, в появившемся меню «Создать новую зону…«.
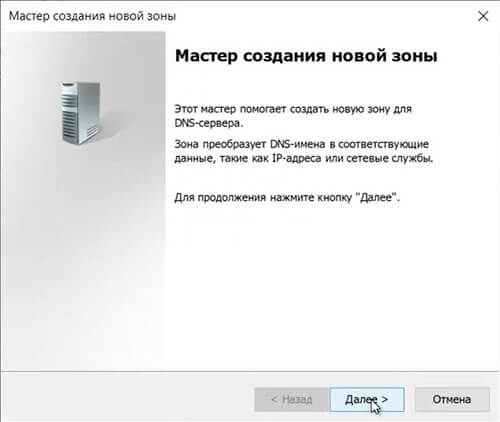
32. В появившемся мастере создания новой зоны нажимаем «Далее«.
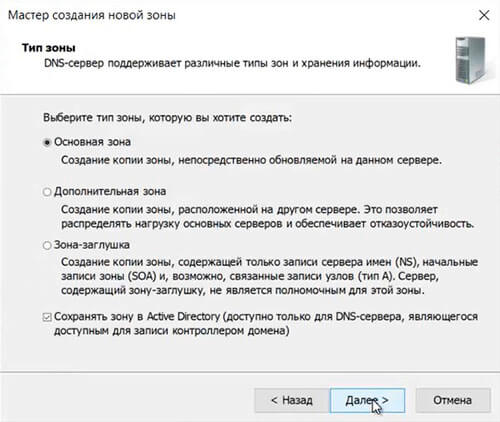
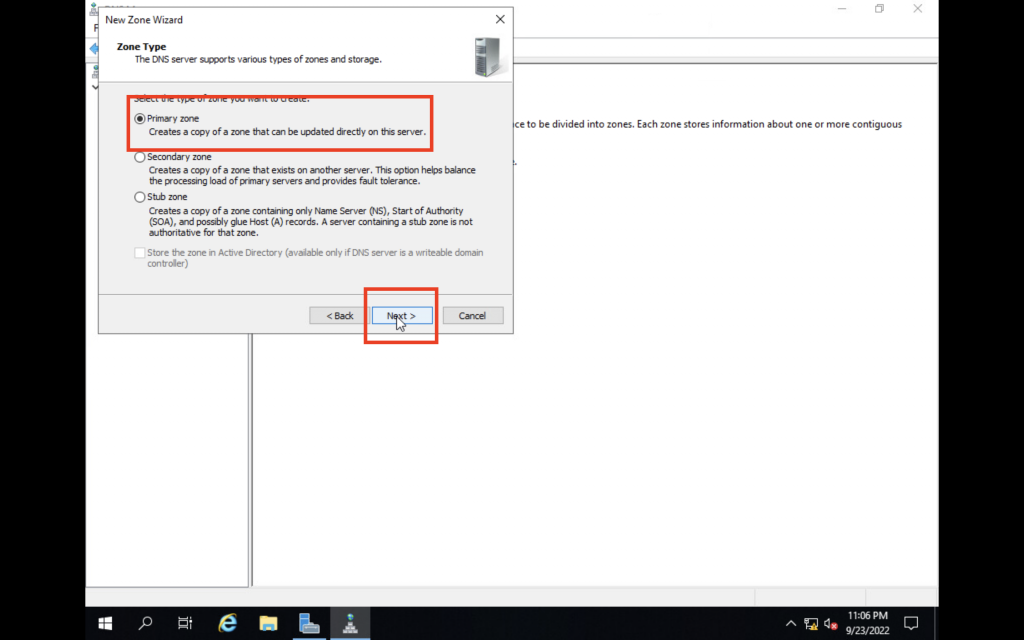
33. Выбираем «Основная зона«, затем «Далее«.
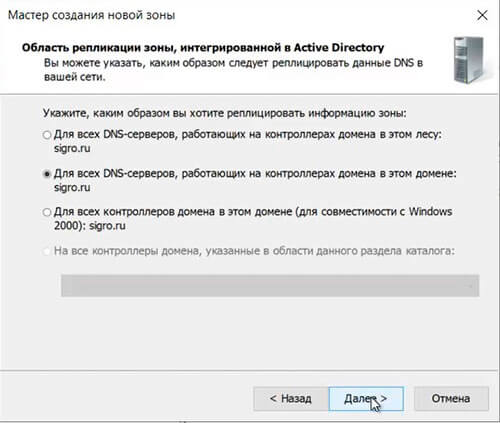
34. Оставляем по умолчанию область репликации зоны, интегрированной в Active Directory, нажимаем «Далее«.
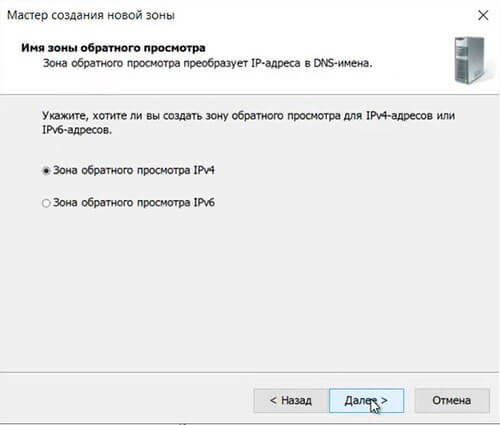
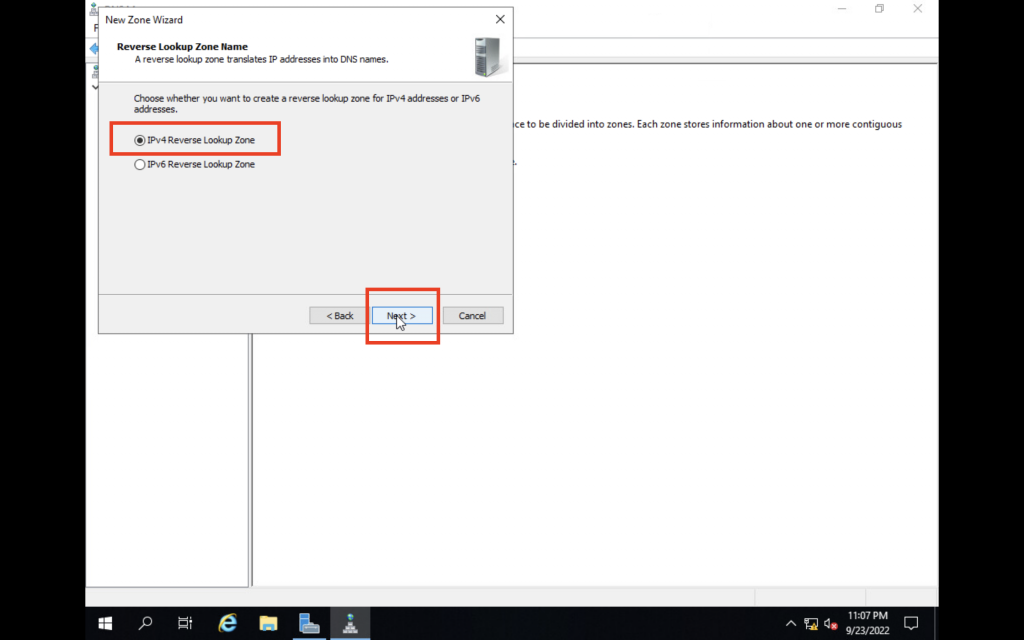
35. Оставляем «Зона обратного просмотра IPv4», просто «Далее«.
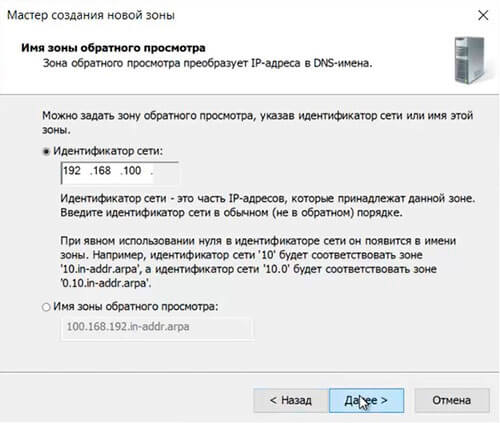
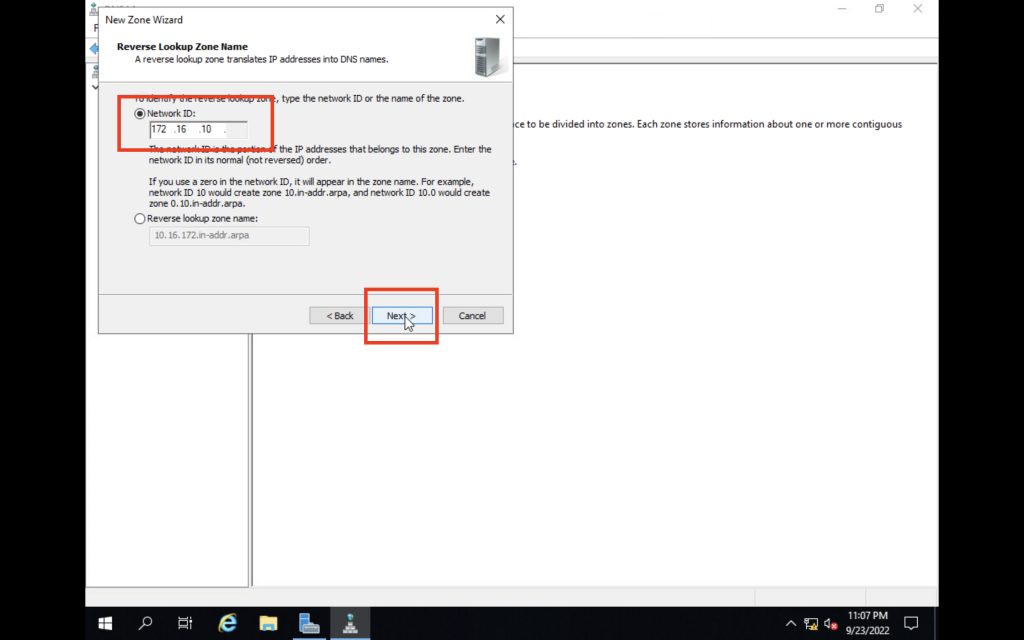
36. В следующем окне задаем Зону обратного просмотра, которая преобразует IP-адреса в DNS-имена. В идентификатор сети забиваем три актета своей сети, затем «Далее«.
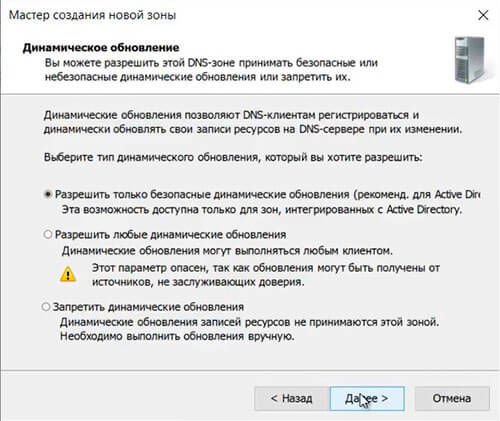
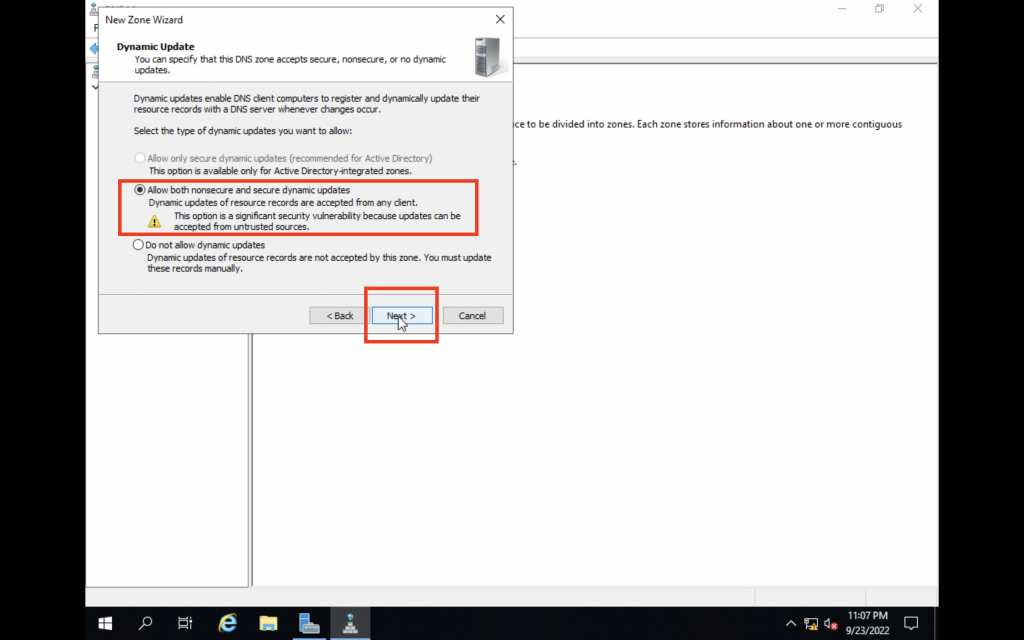
37. Разрешаем только безопасные динамические обновления, снова «Далее«.
38. Зона обратного просмотра создана.

Настройка DHCP-сервера
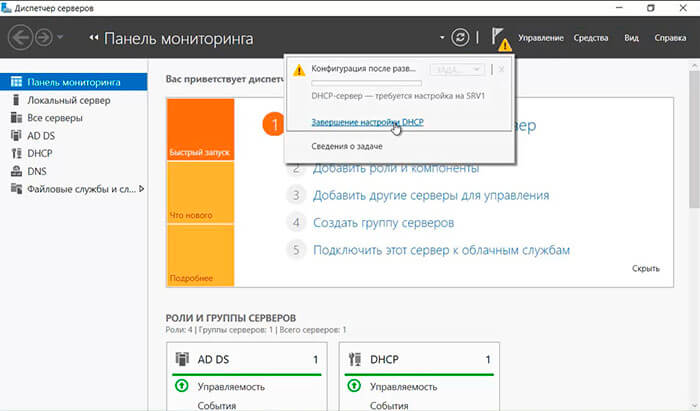
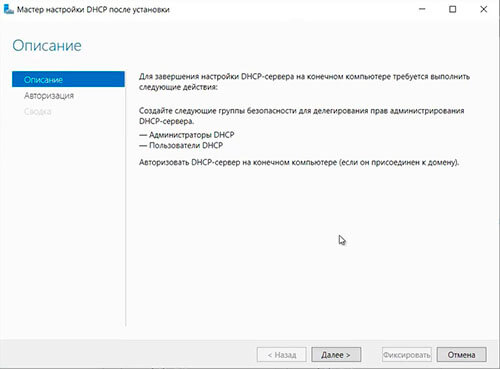
39. После установки роли DHCP-сервера в Диспетчере серверов нажимаем на желтый треугольник, в появившемся окне выбираем «Завершение настройки DHCP«.
40. В следующем окне читаем описание завершения настройки DHCP-сервера на конечном компьютере, затем «Далее«.
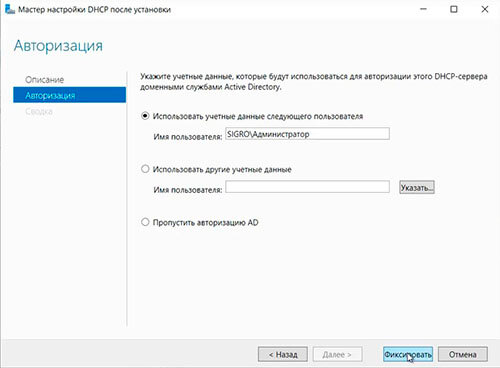
41. Оставляем по умолчанию учетные данные, которые будут использоваться для авторизации DHCP-сервера доменными службами Active Directory. Нажимаем «Фиксировать«.
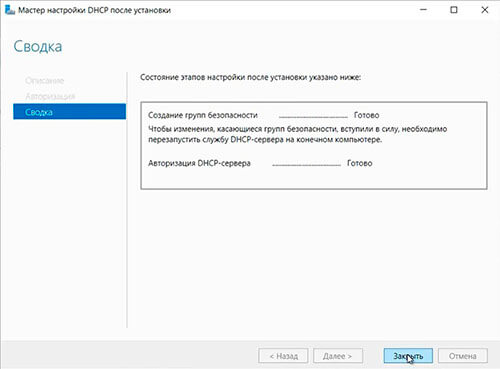
42. В следующем окне нажимаем «Закрыть«.
43. В диспетчере серверов нажимаем «Средства» — «DHCP«.
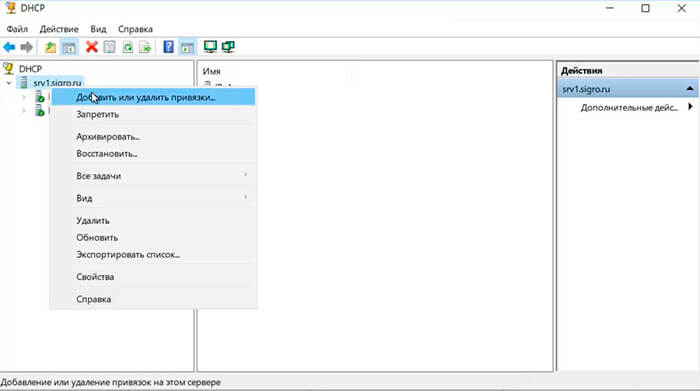
44. В открывшемся окне открываем дерево DHCP. Правой клавишей мыши нажимаем на домен, в появившемся окне выбираем «Добавить или удалить привязки…«.
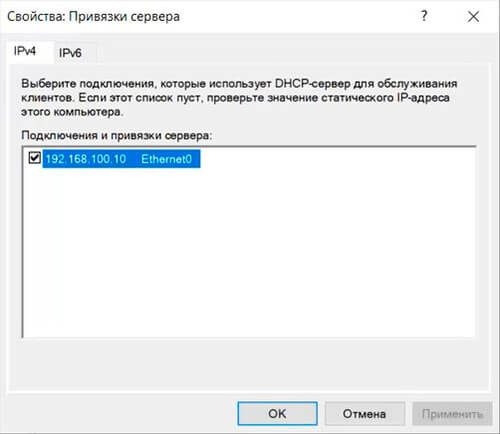
45. Проверяем сетевой интерфейс, который будет использовать DHCP-сервер для обслуживания клиентов. Далее «ОК«.
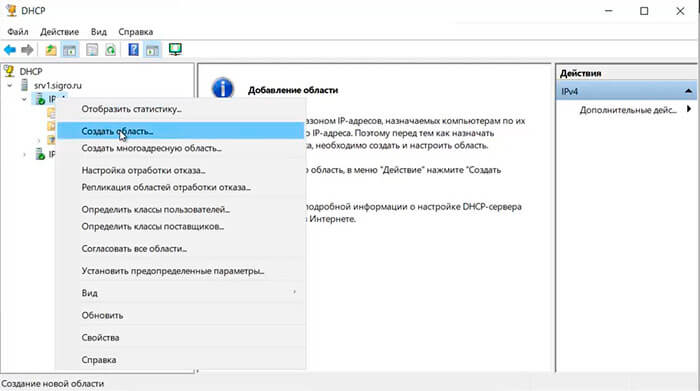
46. Затем правой клавишей нажимаем на IPv4, в появившемся меню выбираем «Создать область…«.
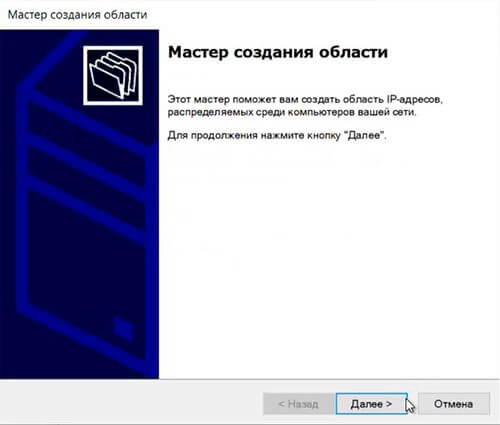
47. Откроется мастер создания область, который помогает создать область IP-адресов, распределяемых среди компьютеров вашей сети. Нажимаем «Далее«.
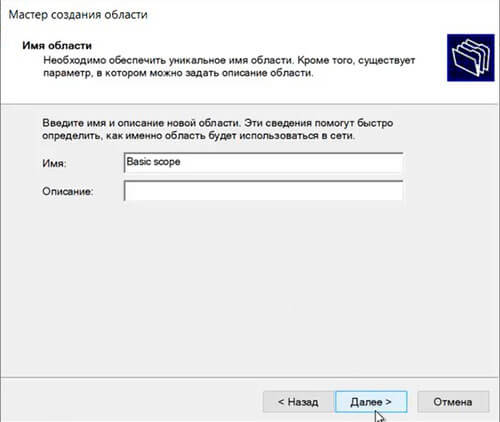
48. Задаем имя новой области, если необходимо, задаем также описание новой области. Снова «Далее«.
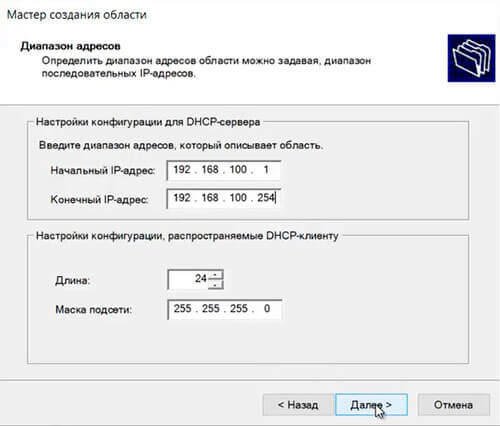
49. Вводим диапазон адресов, который описывает создаваемую область, маску подсети. Нажимаем «Далее«.
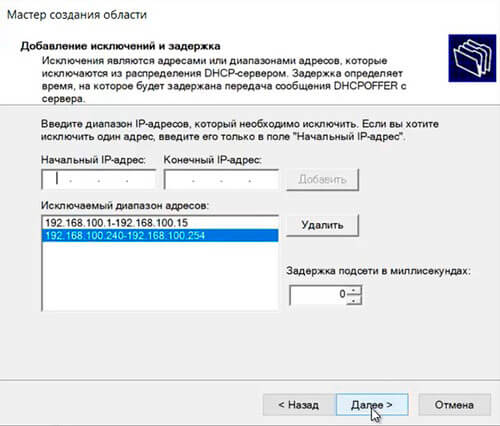
50. В следующем окне вводим с помощью кнопки «Добавить» один адрес или диапазон IP-адресов, который необходимо исключить. После ввода всех адресов или диапазонов нажимаем «Далее«.
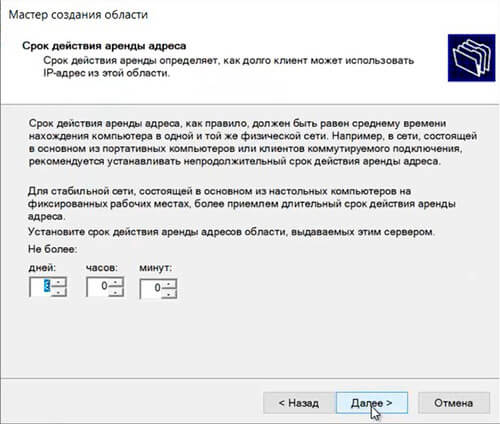
51. Оставляем по умолчанию срок действия аренды адресов области, выдаваемых сервером. Снова «Далее«.
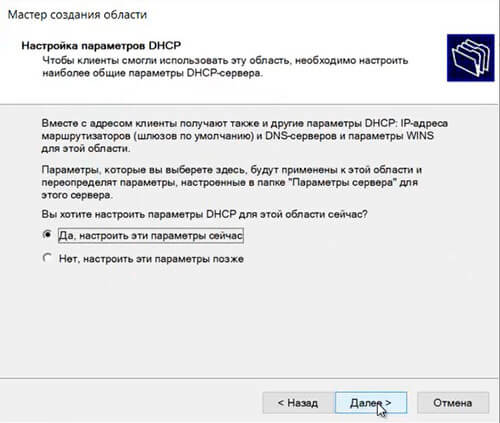
52. Для настройки других параметров DHCP выбираем «Да, настроить эти параметры сейчас«, затем «Далее«.
53. Добавляем с помощью кнопки «Добавить» IP-адрес маршрутизатора, снова «Далее«.

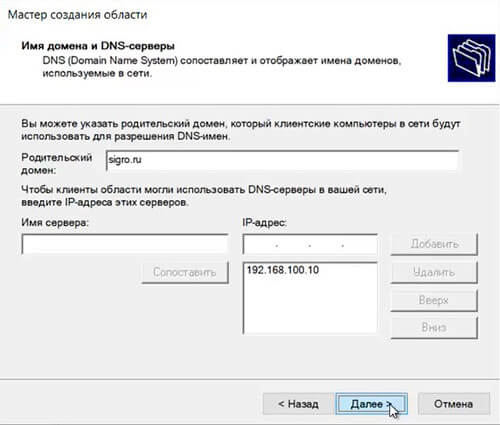
54. Оставляем по умолчанию родительский домен, который клиентские компьютеры в сести будут использовать для разрешения DNS-имен. Затем «Далее«.
55. Вводим IP-адреса WINS-сервера, или нажимаем просто «Далее«.

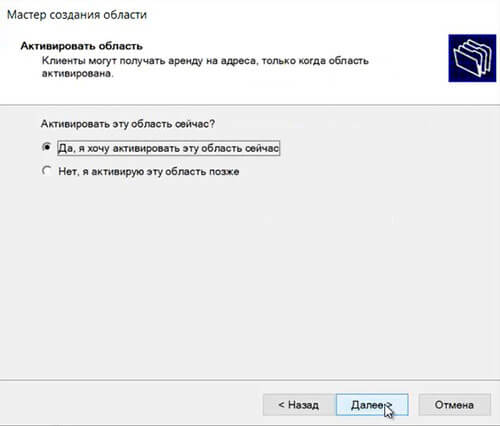
56. Выбираем «Да, я хочу активировать эту область сейчас«, затем «Далее«.
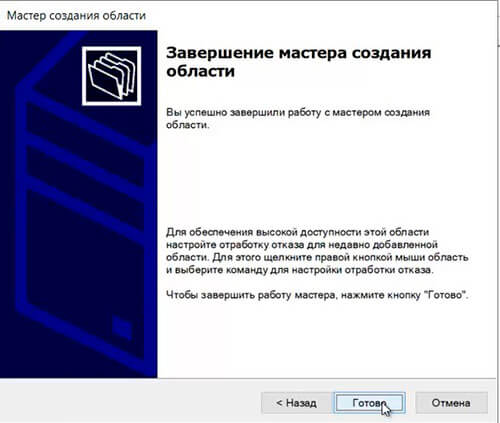
57. В следующем окне появится «Вы успешно завершили работу с мастером создания области», нажимаем «Готово».
58. Вновь созданный диапазон появится в «Пул адресов«.
Посмотреть видео можно здесь:
Читайте также:
- Windows server 2019 — установка и настройка WSUS, создание и настройка GPO
- Windows server 2019 — добавление и удаление компьютера в домене
- Windows server 2019 — переименование администратора домена, изменение формата выводимого имени пользователя
- Windows server 2019 — создание и удаление пользователя, группы, подразделения в домене
- Windows server 2019 — установка и настройка сервера печати, разворачивание МФУ с помощью GPO
- Windows server 2019 — GPO изменение экранной заставки, отключение монитора, изменение политики паролей
The Domain Name System (DNS) is a crucial component of the TCP/IP protocol suite that maps human-readable domain names to IP addresses. It enables seamless communication between computers on a network or the internet. In this guide, we’ll walk through the steps to install and configure a DNS Server on Windows Server 2019.
Prerequisites
Before proceeding, ensure that your Windows Server 2019 has a static IP address configured. A static IP address is required for the DNS Server to function correctly.
Step 1: Install the DNS Server Role
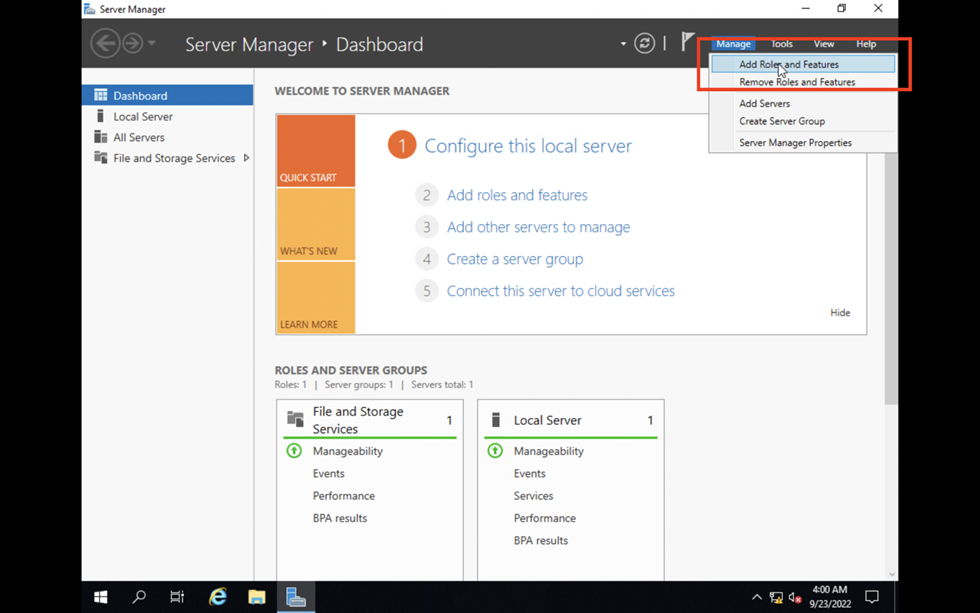
1. Open the Server Manager.
2. Navigate to the “Manage” menu and select “Add Roles and Features.”
3. In the “Add Roles and Features Wizard,” click “Next” until you reach the “Server Roles” page.
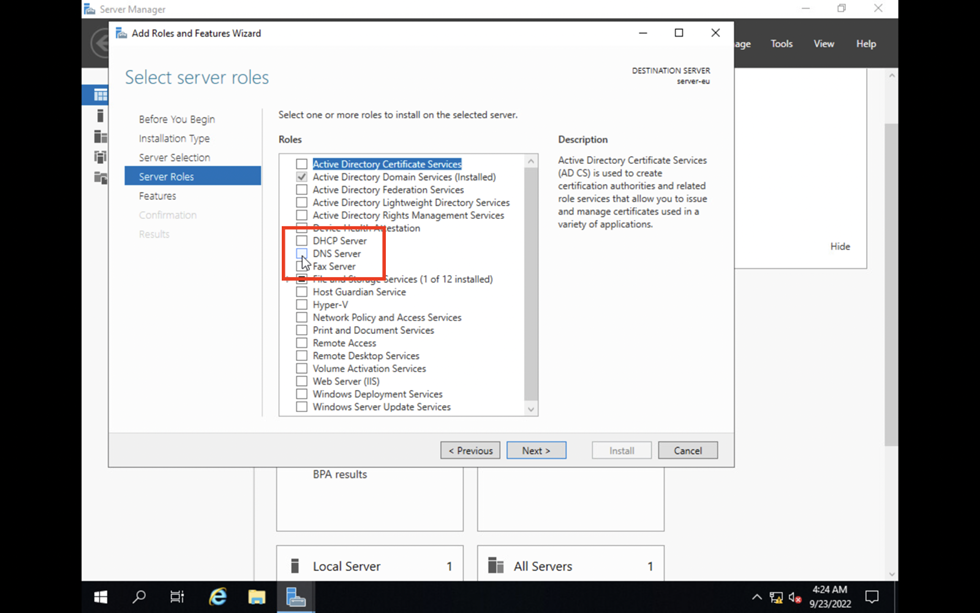
4. Select the “DNS Server” role from the list of available roles.
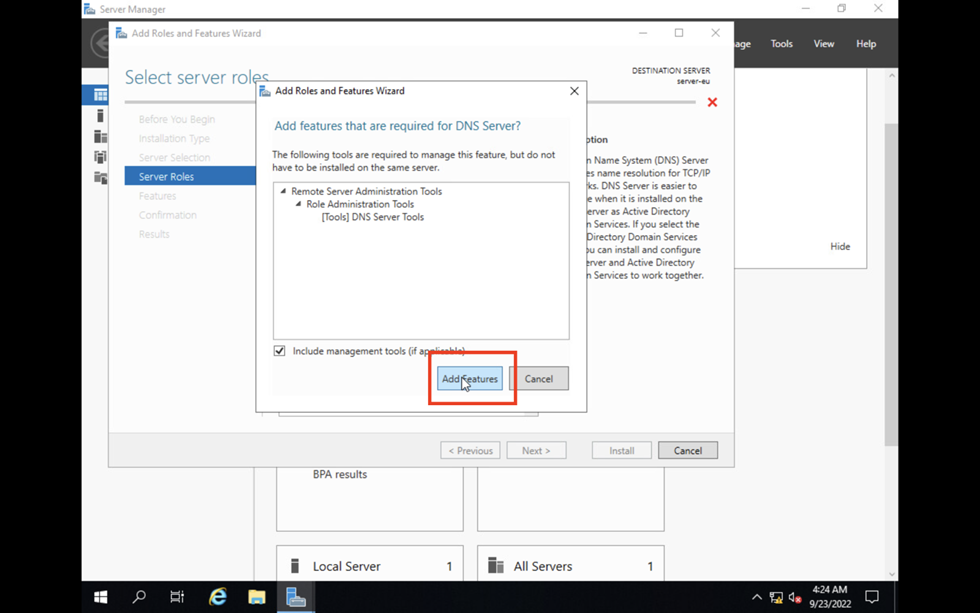
5. Click “Add Features” when prompted, and then click “Next.”
6. Proceed through the remaining prompts, confirming the installation selections.
7. Click “Install” to begin the installation process.
8. Wait for the installation to complete, and then click “Close.”
Step 2: Configure DNS Forward Lookup Zone
With the DNS Server installed, you can now configure a DNS Forward Lookup Zone. A Forward Lookup Zone requests the IP address that corresponds to a fully qualified domain name (FQDN). When you type a domain name like “example.com” in your browser, the DNS Forward Lookup Zone translates that FQDN to the IP address of the server hosting that site.
Follow these steps to add a DNS Forward Lookup Zone:
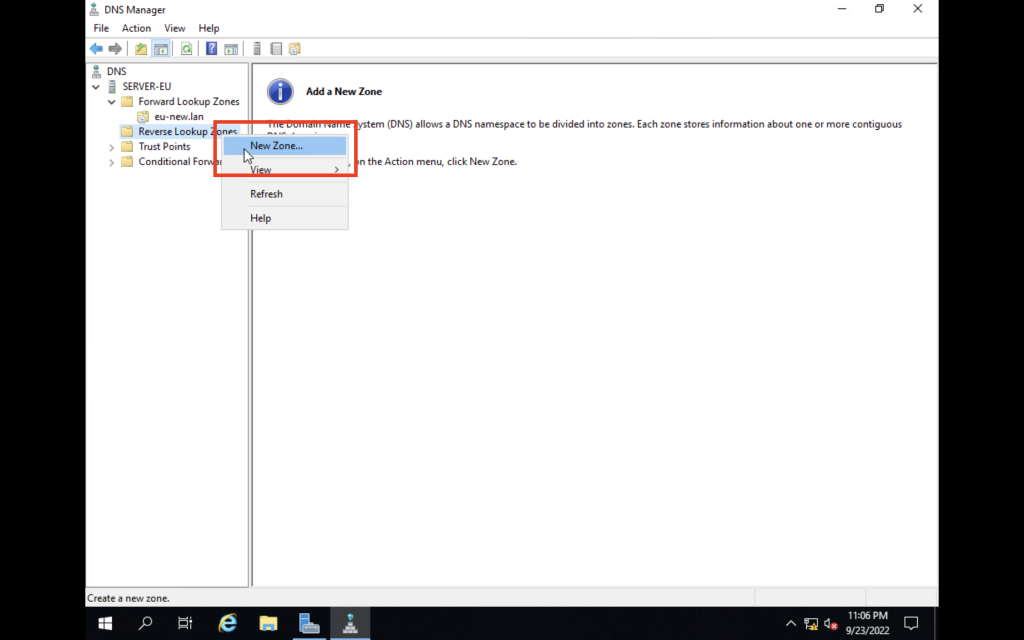
2. Right-click your server name and choose “New Zone…” to open the New Zone Wizard.
3. Click “Next” on the first Wizard screen.
4. Choose the “Primary Zone” option and click “Next.”
5. Select “Forward Lookup Zone” and click “Next.”
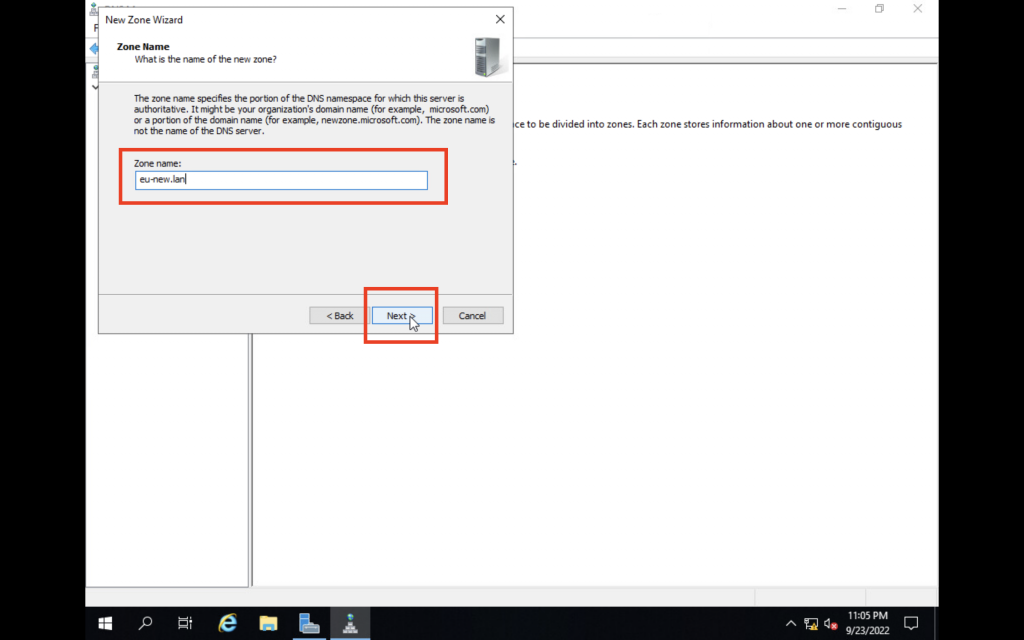
6. Enter the desired “Zone Name” for the lookup and click “Next.”
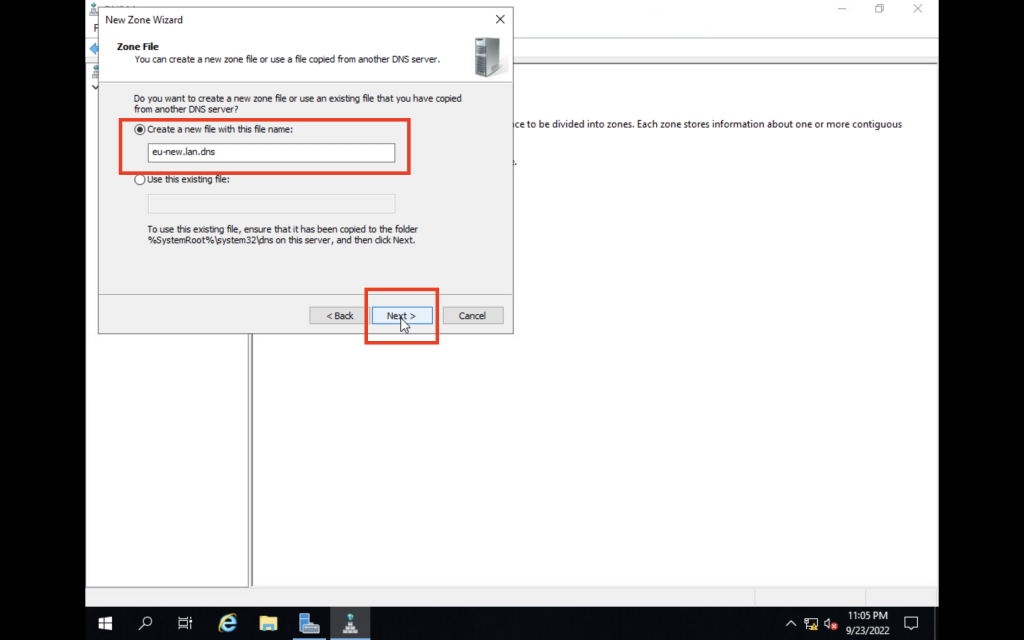
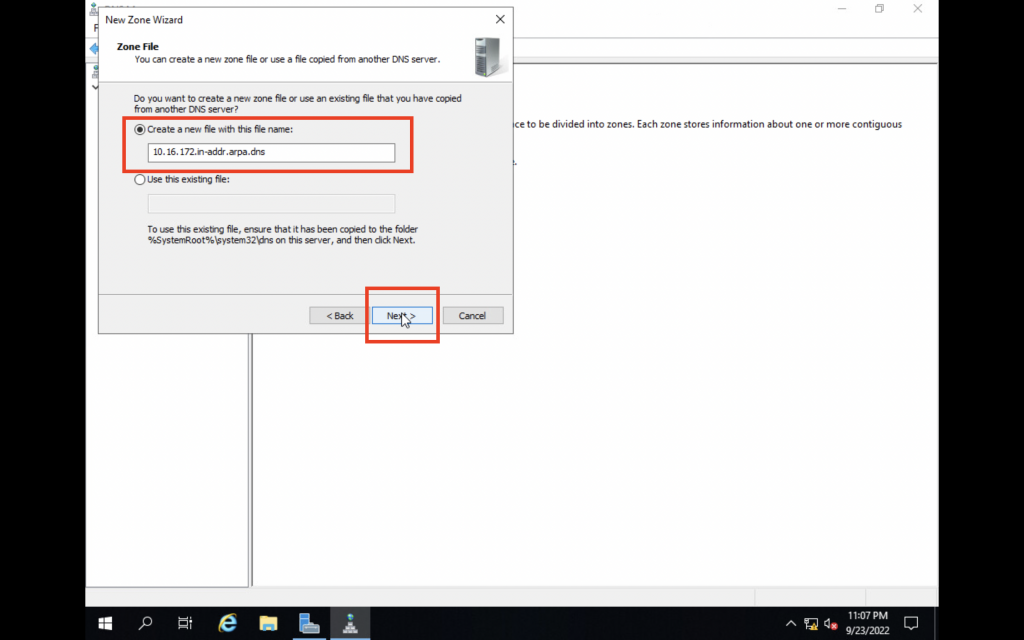
7. Specify a “Zone File” or use the auto-generated one, then click “Next.”
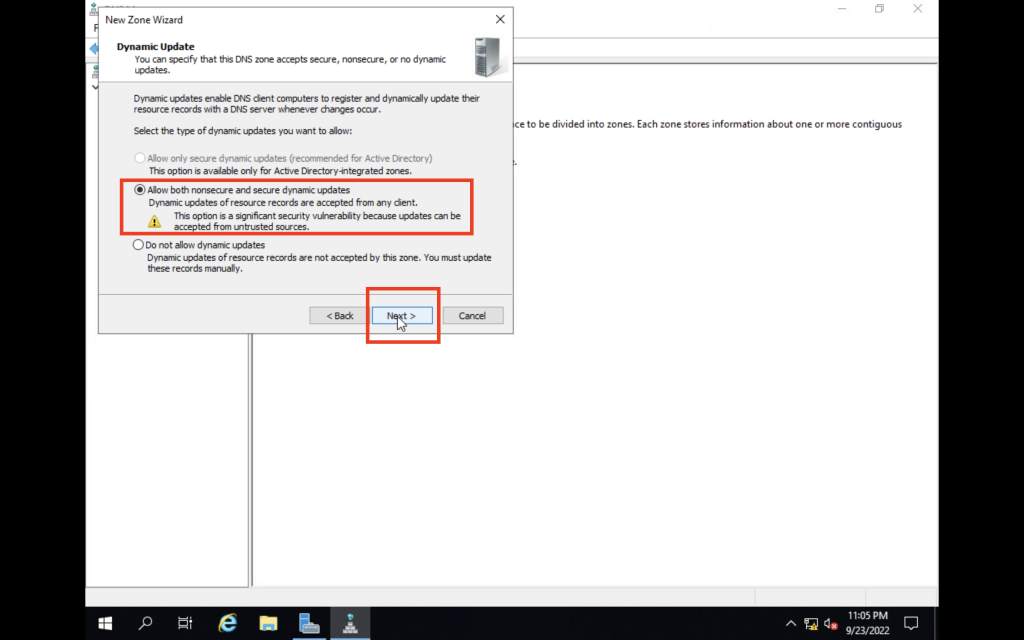
8. Configure dynamic updates if needed, or click “Next” to proceed.
9. Review the settings and click “Finish” to complete the New Zone Wizard.
10. Verify that your Forward Lookup Zone appears in the DNS Manager.
With the Forward Lookup Zone configured, you can now add DNS records for your domain names and their corresponding IP addresses.
Conclusion
You have successfully installed and configured a DNS Server on Windows Server 2019, including setting up a DNS Forward Lookup Zone. With the DNS Server up and running, you can now manage domain name resolution for your network or organization. Remember to follow best practices and keep your DNS Server updated with the latest security patches and updates.
Салимжанов Р.Д
Part 3 Basic Configuration of Windows Server 2019(DNS, AD)
Salimzhanov R.D.
Во второй части, мы рассмотрели, как провести настройку удаленного доступа и установку необходимых служб, таких как, DHCP-сервер.
Сейчас мы рассмотрим настройку DNS-сервера и Active Directory (AD).
Мы знаем, что DNS-сервер — это технология интернет-протокола, которая переводит человеко-читаемые доменные имена в IP-адреса компьютеров, чтобы обеспечить связь между ними. DNS (Domain Name System) серверы хранят базы данных доменных имен и их соответствующих IP-адресов, позволяя пользователям получить доступ к веб-сайтам и другим ресурсам в интернете по их доменным именам.
А если простыми словами, то DNS сервер работает по принципу.
После ввода названия какого-либо сайта в браузер:
1) Запрос, который ввел пользователь переадресуется на DNS-сервер.
2) Интернет-провайдер настраивает на своем сетевом оборудовании локальные DNS-серверы. Далее сервер DNS ищет записи о соответствии запрашиваемого домена IP-адресу.
3) По IP-адресу устройство ищется во всемирной паутине.
4) Если оно найдено, запрос обрабатывается и возвращается ответ. В итоге пользователь видит запрошенный сайт.
5) Если не удалось определить IP-адрес устройства, пользователь получает сообщение об ошибке.
Настройка DNS-сервера внутри компании имеет несколько важных целей:
1. Управление именами: Внутренний DNS-сервер позволяет управлять именами хостов и служб внутри сети, что упрощает доступ к ресурсам.
2. Ускорение доступа: Локальный DNS-сервер может значительно ускорить разрешение имен, так как запросы не нужно отправлять на внешние серверы.
3. Безопасность: Внутренний DNS-сервер позволяет контролировать и фильтровать запросы, что может повысить уровень безопасности сети.
Перейдем к настройке, следуем инструкции в скринах:
Создадим зону DNS:
Обратная зона DNS (Reverse DNS Zone) используется для преобразования IP-адресов в доменные имена. Это обратный процесс по сравнению с обычным DNS, где доменное имя преобразуется в IP-адрес. То есть простыми словами мы присвоим имя нашему серверу для пинга с пользовательского ПК.
DNS и Active Directory (AD) являются взаимосвязанными технологиями, поскольку Active Directory зависит от DNS для обеспечения разрешения имен компьютеров и других сетевых ресурсов.
В среде Windows-сервера Active Directory использует DNS для регистрации и поиска устройств, служб и других ресурсов в сети. Когда компьютер присоединяется к домену Active Directory, он автоматически регистрирует свое имя и IP-адрес в службе DNS. Это позволяет другим компьютерам в сети находить и общаться с ним по его имени вместо IP-адреса.
Таким образом, DNS и Active Directory тесно интегрированы для обеспечения эффективной и безопасной работы сети в среде Windows.
Настроим Active Directory (AD):
Создание дополнительных папок (или контейнеров) в Active Directory (AD) позволяет организовать и управлять объектами более эффективно. К примеру, нам это пригодится, когда будем настраивать групповую политику.
Добавляем пользователя в раздел User:
Далее переходим на другой ПК подключений к нашему серверу и подключаемся через нашего созданного пользователя:
Далее входим от пользователя.
Если выдает ошибку проверьте подключение:
После входа автоматически перезагружается ПК.
После перезагрузки входим под созданного пользователя и работаем, если нужно что-то поменять в системе, то заходим от админа (созданного естественно заранее).
Теперь на сервере в подразделении компьютеров отображается подключение:
Если надо мы его можем перенести в другое нужное нам подразделение:
Следующая часть будет об управлении групповыми политиками.
1) Основные сведения об обратной зоне DNS // [электронный ресурс]. URL: https://learn.microsoft.com/ru-ru/azure/dns/dns-reverse-dns-overview / (дата обращения 16.08.2024).
2) Помощник Админа // [канал]. URL: https://t.me/channel_adminwinru (дата обращения 18.08.2024).
Back to: Technology Guides
A DNS server is an essential building block of any network. It is a database that translates an IP address into a human readable name in a forward lookup zone and the reverse as well in a reverse lookup zone.
Client machines in a network refer to name servers who host a DNS to know which machines are located at which IP address.
In this guide, we will learn how to install a DNS server on a Windows Server 2019 machine. Once a client machine is setup to use it as a name server, it will know the IP address of a machine from a name.
Getting started
In this guide, we are going to assume you already have the following:
-
Microsoft Windows Server 2019 installed on a server.
-
You want to connect two client machines with Microsoft Windows 10 installed to the network.
We are going to be using the following network configuration:
|
ASSET |
NAME |
IP ADDRESS |
SUBNET MASK |
|
Server 1 |
server-eu |
172.16.10.10 |
255.255.255.0 |
|
Client Machine 1 |
wks-1 |
172.16.10.101 |
255.255.255.0 |
|
Client Machine 2 |
wks-2 |
172.16.10.201 |
255.255.255.0 |
We are going to be using the domain eu-new.lan.
The complete name or Fully Qualified Domain Name (FQDN) of each asset will be:
-
Server 1 will be:
server-eu.eu-new.lan
-
Client 1 will be:
wks-1.eu-new.lan
-
Client 2 will be:
wks-2.eu-new.lan
Server configuration
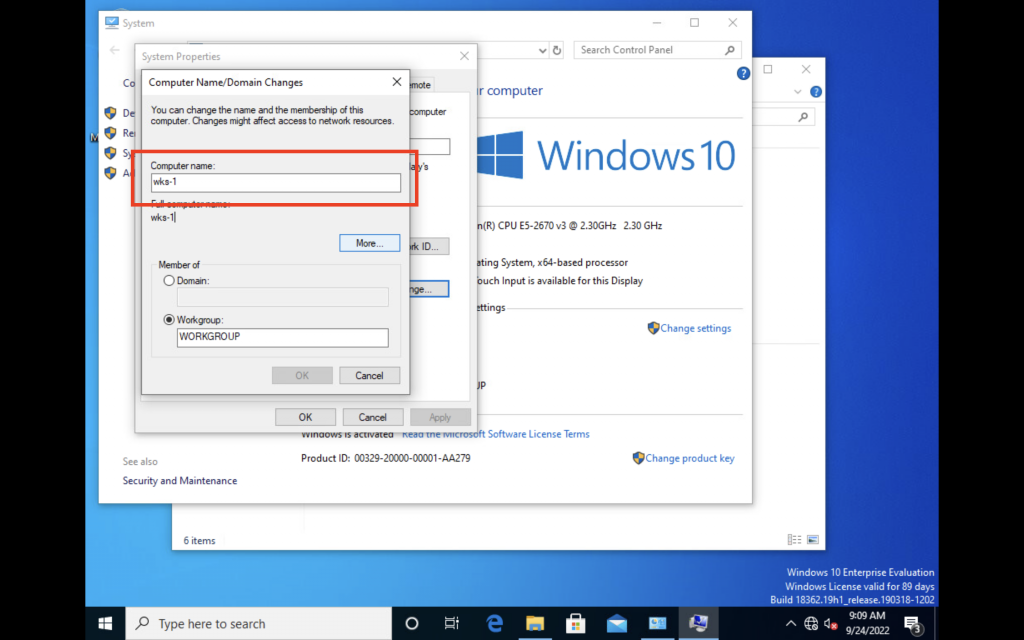
1. Configure NETBIOS name to server-eu
We start by establishing our server’s name to be server-eu.
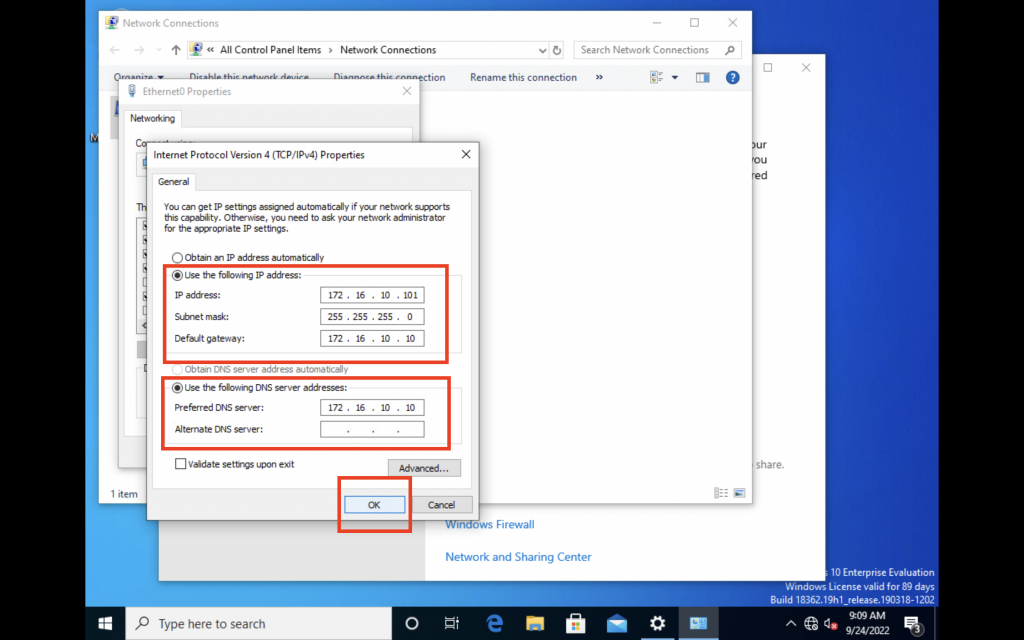
2. Configure network to use 172.16.10.10
We will now configure our server’s network to be a static IP address of 172.16.10.10 so that our client will know which address to connect to.
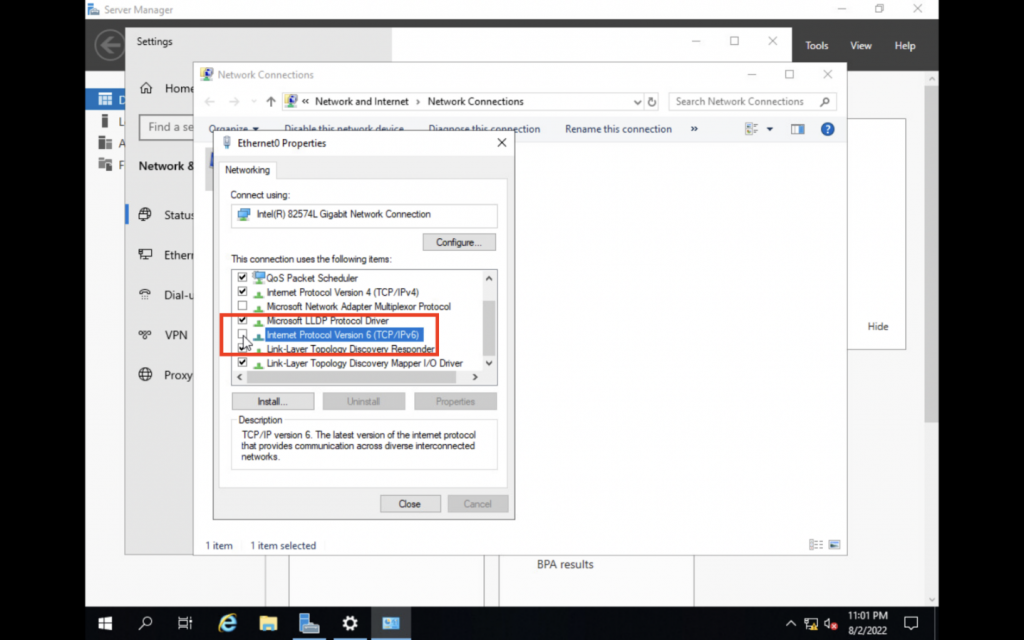
We are disabling IPv6 because we will only be using IPv4 and we want to make sure it will not interfere with our setup.
3. Install the DNS Server.
Now that the basic computer configuration is out of the way, we can start installing the DNS Server.
4. Configure the DNS Server.
Once the installation is completed, we can start configuring our DNS zones.
4.1 Create our Primary Forward Lookup Zone
This zone will take care of translating client names to IP addresses. All records must be part of a domain name. We will be using eu-new.lan.
4.2 Create our Primary Reverse Lookup Zone
This zone will take care of doing the reverse. It will translate IP addresses to client names.
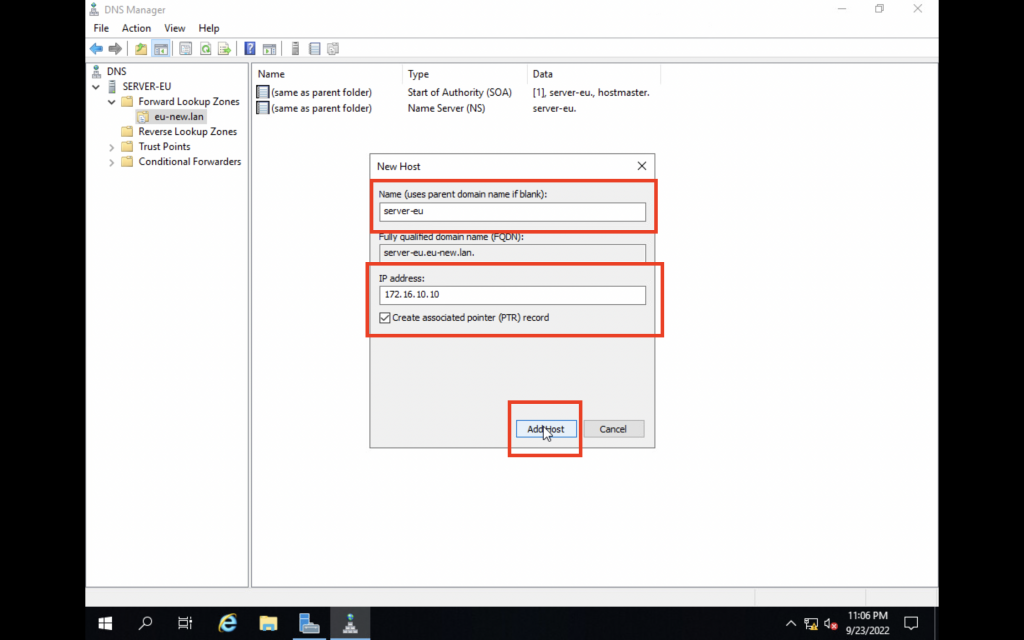
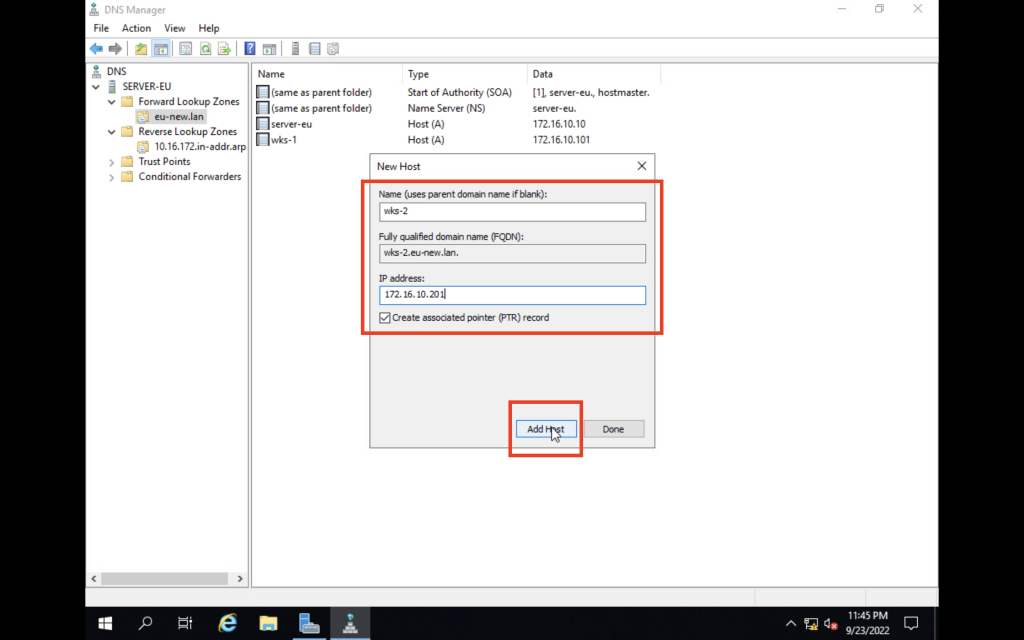
4.3 Add our A record
We will now create an A record that will bind our server name server-eu to the IP address 172.16.10.10.
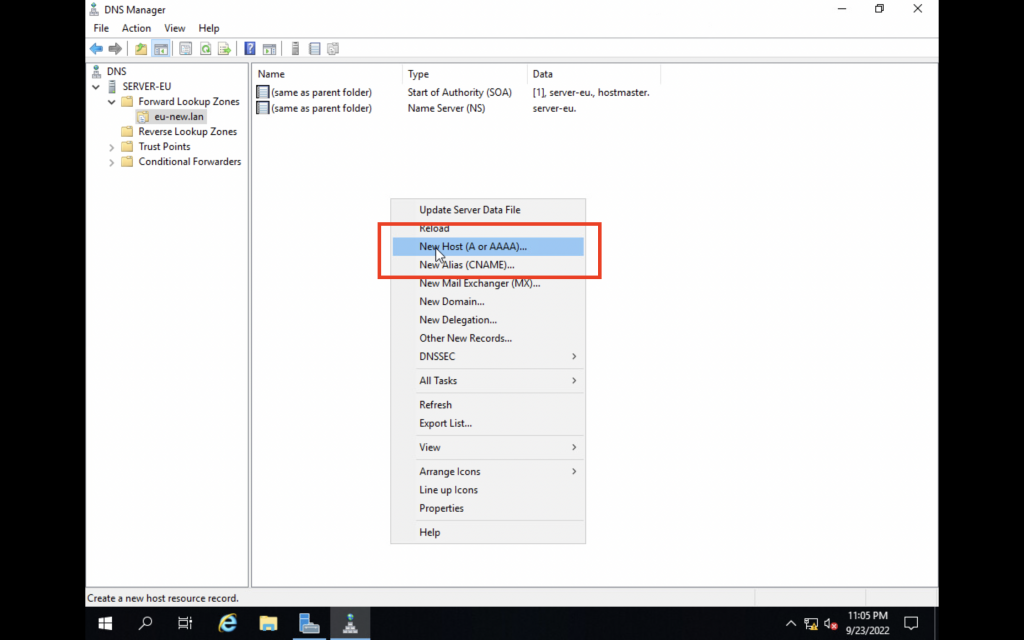
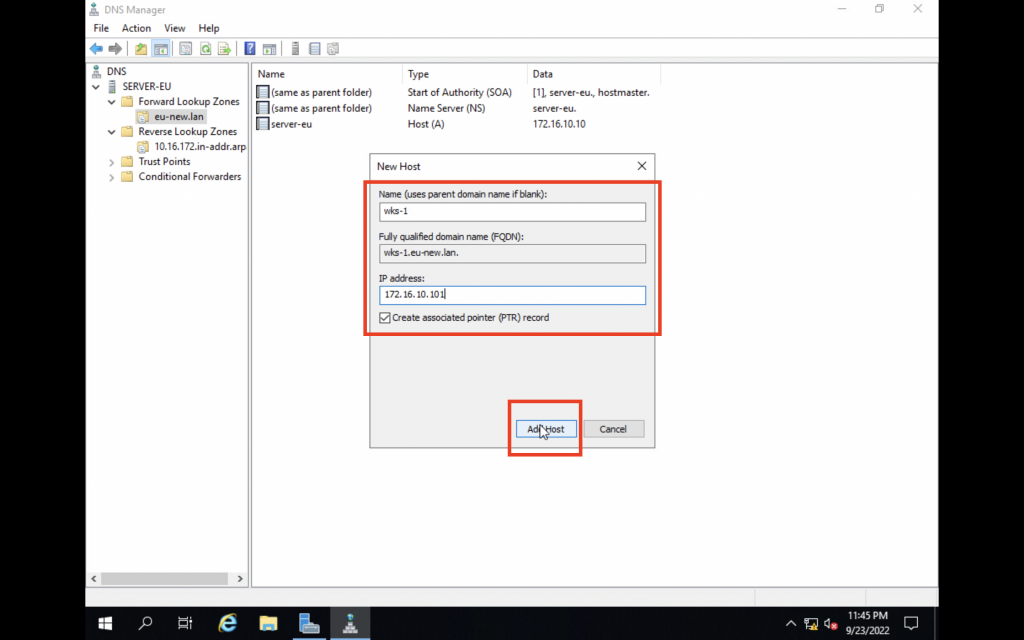
Let’s also create the A records to point to our two clients.
Client 1 and 2 configuration
It is now time to integrate the two client machines into the network test our DNS Server.
After configuring client 1, we can test the DNS configuration to see if we’re able to resolve the A records with .
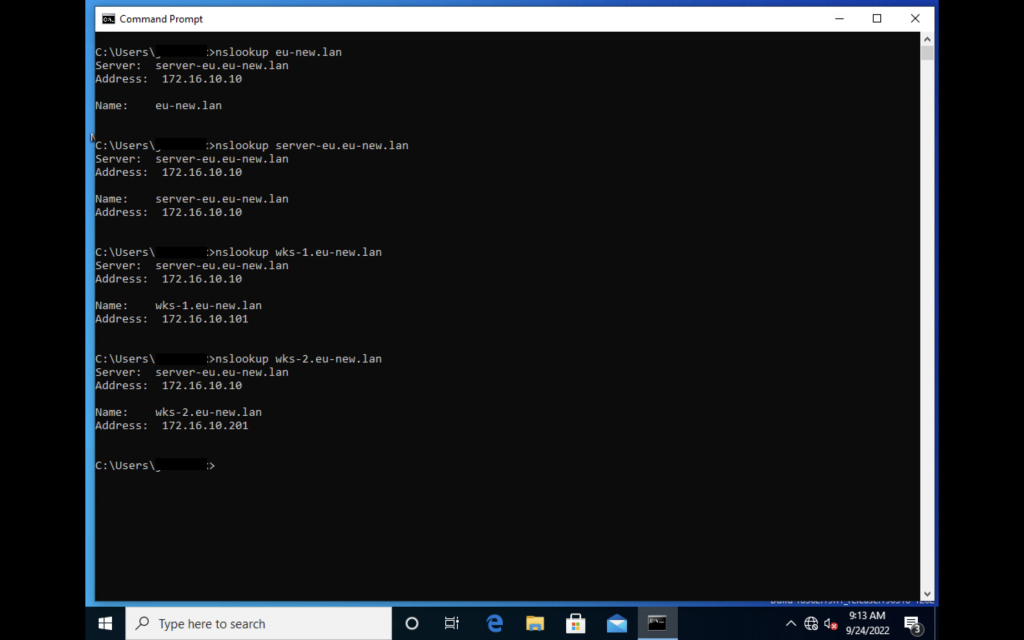
We can see that the records are resolving to the right IP addresses, we can now ping the server using its FQDN instead of its IP address after allowing pings through the firewall.
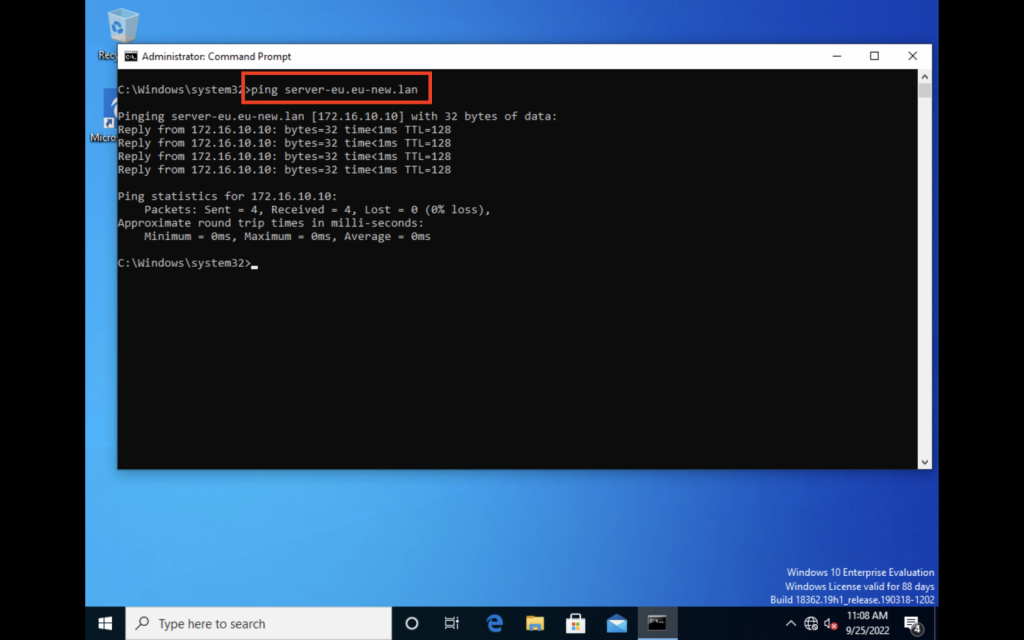
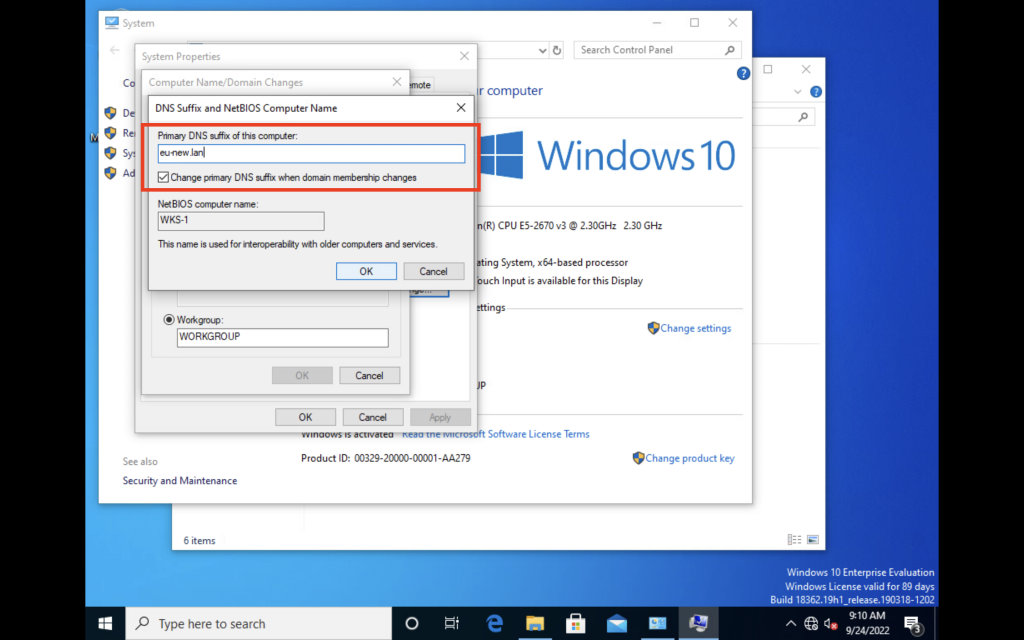
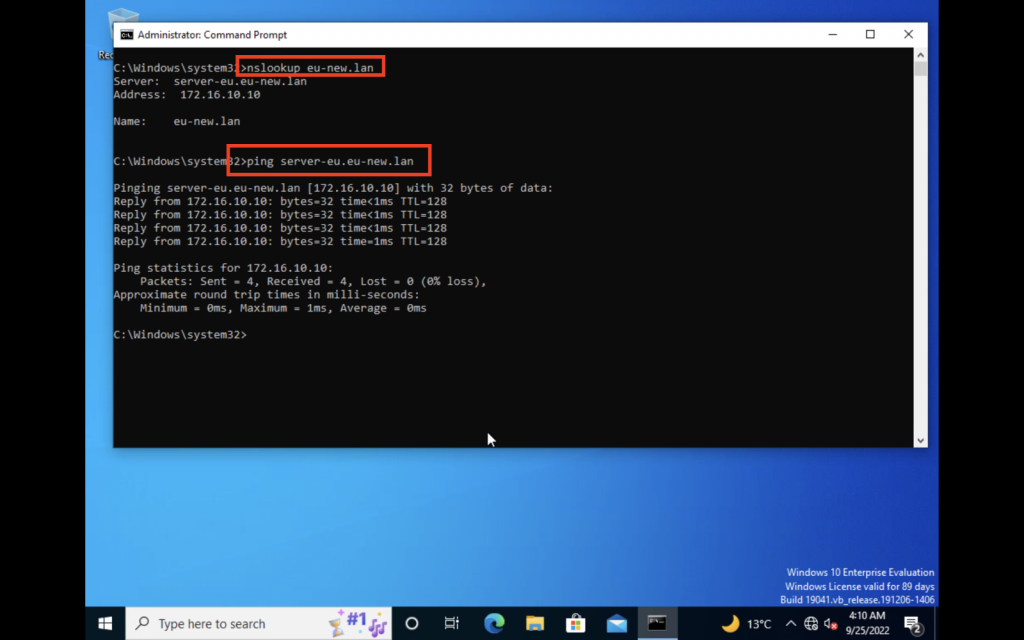
After configuring client 2 to use 172.16.10.201 and use the name of wks-2 with a DNS suffix of eu-new.lan, we can see that the DNS records resolves as well and we can successfully ping the server using its FQDN.
Conclusion
In this guide, we have learned how to setup a proper DNS server on Windows Server 2019 and integrate two client machines running Windows 10 to the network 172.16.10.0.
All devices are now part of the domain eu-new.lan and are looking up the DNS server for A records to resolve FQDN to IP addresses and vice-versa.
Our next step after installing the DNS server is to use Active Directory and integrate it. You can refer to our guide on how to install Active Directory.
Let’s get started today
Efficient internet connectivity plays a central role in enhancing website performance, which is possible with the help of proper server configuration. The Domain Name System (DNS) is currently the primary backbone of the Internet which helps with efficient connection services.
This enables users to access websites and online applications easily.

To install and configure a DNS server, you need to learn about the basics of Domain Name System- what is DNS, and what are the prerequisites for DNS server installation. In this blog, let’s look at the basics, along with the step-by-step process of DNS server installation and configuration. This helps with smooth implementation across various platforms and client settings.
What is a Domain Name System (DNS)?
Domain Name System or DNS is part of the Internet and is an efficient, distributed database. It translates user-friendly domain names into IP addresses so that different types of computers and servers can find and communicate with each other across the Internet.
Proper DNS configuration helps ensure that websites, internet-based applications, and other relevant services are accessible and load quickly for all users. When DNS is inefficient or misconfigured, it can result in extended loading times, sluggish website performance, and complete unavailability. DNS configuration directly impacts a user’s experience when navigating the web.
What is a DNS Server?
A DNS server plays a key role in the DNS resolution process. This specialized computer server queries its database before returning the required IP address to the client. It specifically happens when a user enters a domain name into their web browser. This enables an efficient connection to the domain for better system functioning.
Your browser communicates with a network of root domain name servers when you enter a domain name, such as wwW .xyz. com. These servers act as reference books and provide the IP address associated with the same domain name. Then, the browser communicates directly with the hosting server using that IP address.
DNS helps translate user requests into IP addresses. Without DNS, you may have to memorize and enter long IP addresses when connecting to other websites rather than typing the website’s name.
DNS Hierarchy and Components
The DNS system usually operates in a hierarchical structure which includes several key components. These are very important to the correct functioning of networking systems.
•Root Servers: These servers hold information regarding top-level domains (TLDs) like .com, .org, and .net. They often remain at the top of the DNS hierarchy.
•Top-Level Domain (TLD) Servers: These servers manage TLDs like .com or .edu, which are often considered generic TLDs and country-code TLDs (ccTLDs).
•Authoritative DNS Servers: These servers provide specific domain names and authoritative answers to users for the same domains.
•Recursive DNS Servers: Third-party DNS providers and internet service providers (ISPs) operate these servers. They usually help resolve domain names on behalf of users and recursively query authoritative DNS servers until they get their IP addresses.
Prerequisites for DNS Server Installation
Before installing and configuring a DNS server, you must have the following information:
•Your domain name.
•The IP address and hostname of each server that you want to provide name resolution for.
You always need to verify that the following minimum conditions are proper before configuring your computer as a DNS:
•A Windows Server 2012R2, 2016, 2019, or 2022 operating system.
•An open Remote Desktop Protocol (RDP) 3389 port.
•A domain user with the required administrative privileges to configure the DNS.
•Minimum of 4 GB of RAM and a 2-core CPU.
Steps to Install and Configure a DNS Server
The process of installing and configuring a DNS server in Windows is very simple and straightforward. It enables you to configure and manage the same server for your network. It also involves adding the DNS server role to your Windows Server machine, creating and managing DNS records, and configuring basic DNS settings.
Make sure to sign in as an administrator user to the Windows Server and follow the steps below to install the DNS server. Please note that the same steps apply to the installation and configuration of DNS on Windows Server 2016/2019/2022.
Step 1: Prepare Your Server
You must change the name that was automatically given to your server when it was deployed. It is a good practice to make the server have a fixed IP address for at least one network connection before installing DNS into it.
Step 2: Add the DNS Role
Open Server Manager from the Manage menu once you’ve prepared your server. Then, select the option ‘Add Roles and Features.’ Make sure to read the introductory information on the screen and then click on Next.
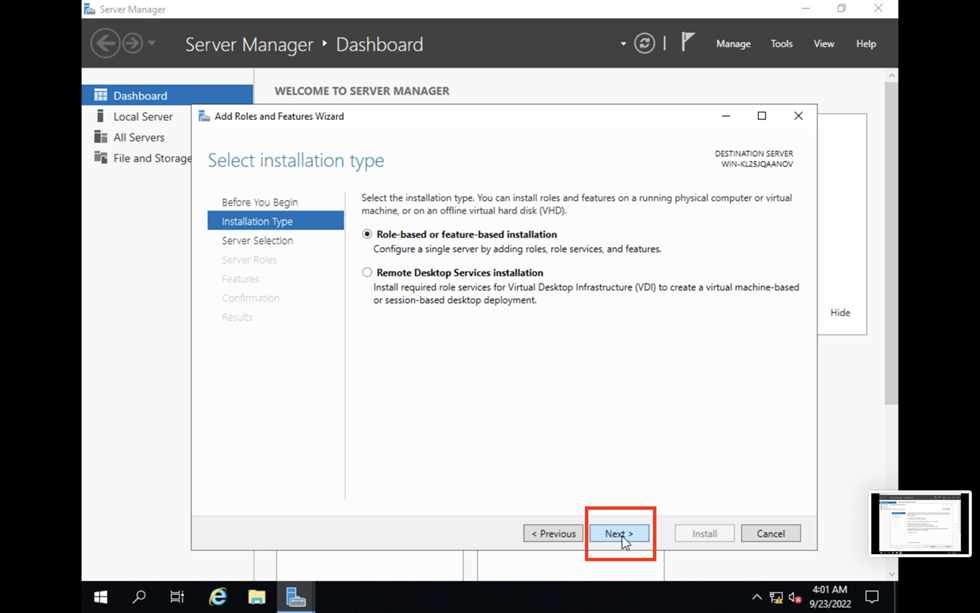
Step 3: Select the Installation Type
You must select an installation type on the next screen, which comes with two options:
•Role-based or feature-based installation
•Remote desktop services installation
Select a Role-based or feature-based installation based on your requirements, and click on “Next”.
Step 4: Select the Server for Installing the DNS Role
Scroll down to find the DNS Server role on the “Select server roles” screen and click on it. A window will appear asking whether you want to ‘Add features required for DNS Server’. Tick the checkbox saying “Include management tools” (if applicable), and click on Add features. Then, click on “Next” again.
Step 5: Add the DNS Server Role and Other Relevant Management tools
You will get to see some information about the Domain Name System (DNS) on the next screen. Please note that this will just be for informative purposes, so click on “Next.” Now, you will be asked to confirm your choices. Review the information carefully and click on Install if everything is correct.
Step 6: Check for Multiple Installation Choices
The installation process shouldn’t take you too long, so click on the “install” option as soon as you see it. You may also choose to click on the “Close” option even before the process has finished. Conversely, if you want to return to the progress screen, you may find it again under the Notifications menu.
Step 7: Analyze the Progress of the DNS Role installation
You must restart the server for the changes to take effect once the installation process has finished. You will see a new section on the left-hand side of Server Manager and a new card in the middle of the screen once you’ve restarted.
To continue configuring your DNS service, click on the Tools menu and select the DNS option. Analyze if the DNS service is visible in the Server Manager.
Step 8: Configure Your DNS Server
You can easily configure the server after having installed the DNS server role. Right-click on the name of the server on the DNS Manager window, and select Configure a DNS Server. You will now be able to see the option that says ‘Configure a DNS Server Wizard’. Then, click on “next.”
The next window presents you with three different options:
•Create a forward lookup zone
•Create forward and reverse lookup zones
•Configure root hints only
For this tutorial, let’s select the first option, which says, “Create a forward lookup zone.” Then, click on “Next” again.
Step 9: Select the Configuration Action That Must be Carried Out
The next screen will ask you to select which DNS server will maintain your primary forward lookup zone:
•This server maintains the zone
•An ISP maintains the zone
For this tutorial, let’s select the option that says “this server maintains the zone” and click on the “Next” option.
On the next screen, you will be asked by the system to give a name to your DNS zone. Try to select something descriptive related to the organization or the use of the same server. Click on “next” again after you’ve entered the name. This enables you to give an identity to the specific DNS zone.
At this point, the wizard asks whether you want to create a new zone file or use an existing file copied from another server. For this tutorial, let’s select the option that says “create a new file with this file name”, use the default name suggested, and click on “next.”
Step 10: Choose the Name to be given to the DNS Zone File
The system will ask you to choose which dynamic updates to allow on the next screen. You will specifically find three options if you have an AD DS and only two if you don’t.
For this tutorial, let’s select the option Do not allow dynamic updates.” This means that all records will only be updated manually. Click on “next” once you have made your choice.
You can add forwarders on the next screen, which are the servers to which the DNS queries are sent in case the server can’t answer. The two options to choose from are:
•Yes, it should forward queries to DNS servers with the following IP addresses.
•No, It should not forward queries.
You will need to add an IP address for the forwarder if you choose the first option. You can add the forwarders if applicable. Then, you will need the final screen. Then, click on the “finish” option to save your changes and close the wizard.
Step 11: Check the Server Configuration
The final step for you is to check that the DNS server has been configured correctly. You can begin to create your DNS records manually after your server is successfully installed and configured.
Conclusion
A DNS server is a key aspect of technology infrastructure that shouldn’t be overlooked. Understanding and implementing proper DNS configuration is the key to ensuring efficient and secure internet connectivity. This also helps ensure the optimal performance of all internet-connected applications and services.
Individuals and organizations can navigate the digital world more efficiently and securely by following best practices and optimizing DNS server settings. Efficient DNS configuration can make a lot of difference in delivering a safer, faster, and more reliable online experience.
Need more assistance with DNS server installation and configuration?