
Post contents
In the past, Android Studio did not support AMD’s CPUs for hardware emulation of an Android device. That all changed in 2018 when Google added Hyper-V support to the Android Emulator.
However, while working on my Ryzen CPU powered desktop, I had difficulties getting the program working on my machine.
BIOS Setup
To use Hyper-V, we have to have various settings configured on our motherboards.
Two of the settings we need to enable are:
IOMMU— Provides resources to be passed directly to virtual machinesSVM Mode— «Secure Virtual Machine» features, enabling applications to use features for VMs
I personally have a Gigabyte motherboard (the Gigabyte GA-AB350M-Gaming 3), so I’ll showcase the places I had to find the options for these motherboard settings.
SVM Mode
To enable SVM mode, first start at the first screen to the left, labeled «M.I.T».
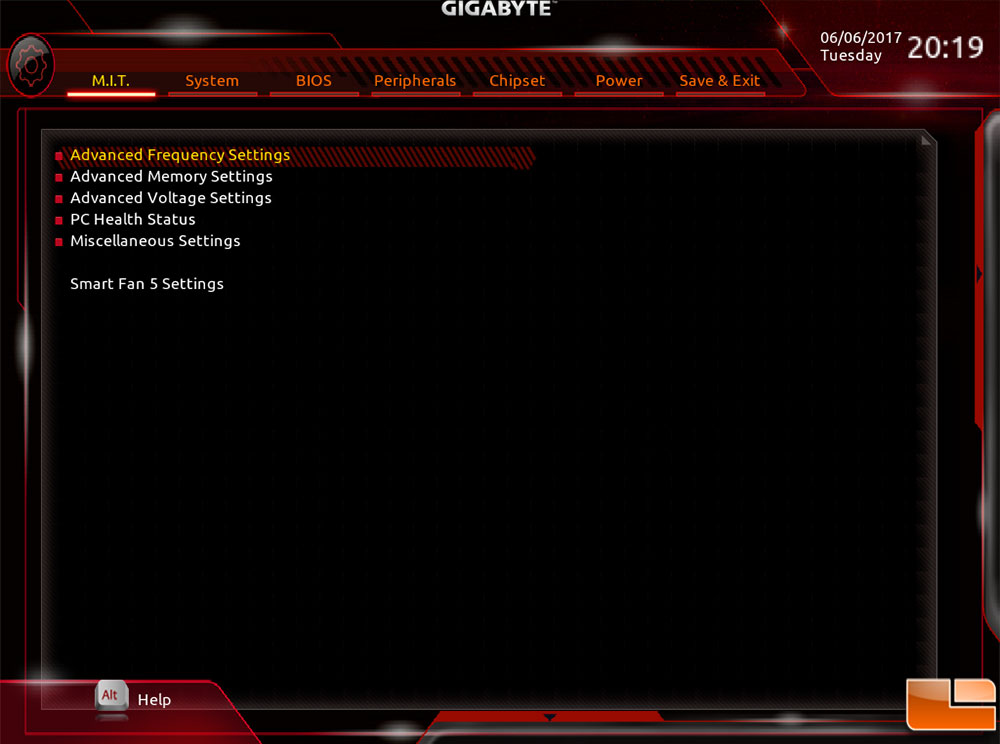
Then, select «Advanced Frequency Settings».

Finally, open the «Advanced CPU Core Settings».
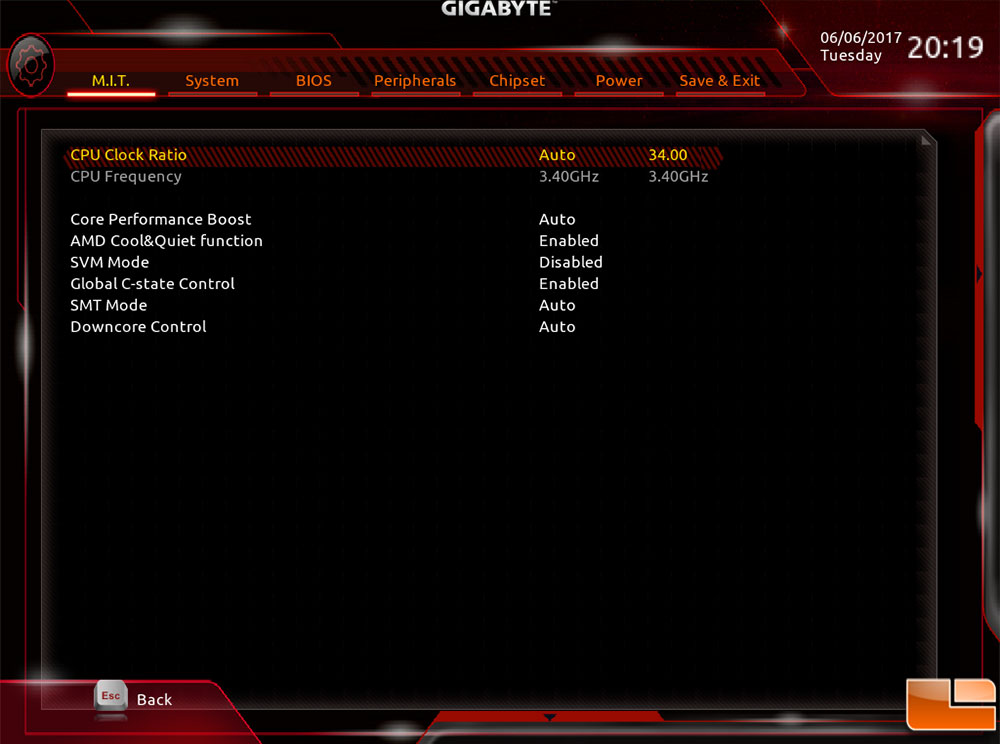
Once on this page, you should see «SVM Mode» as the fourth option from the bottom. Toggle that to «Enabled», then move onto enabling IOMMU
IOMMU
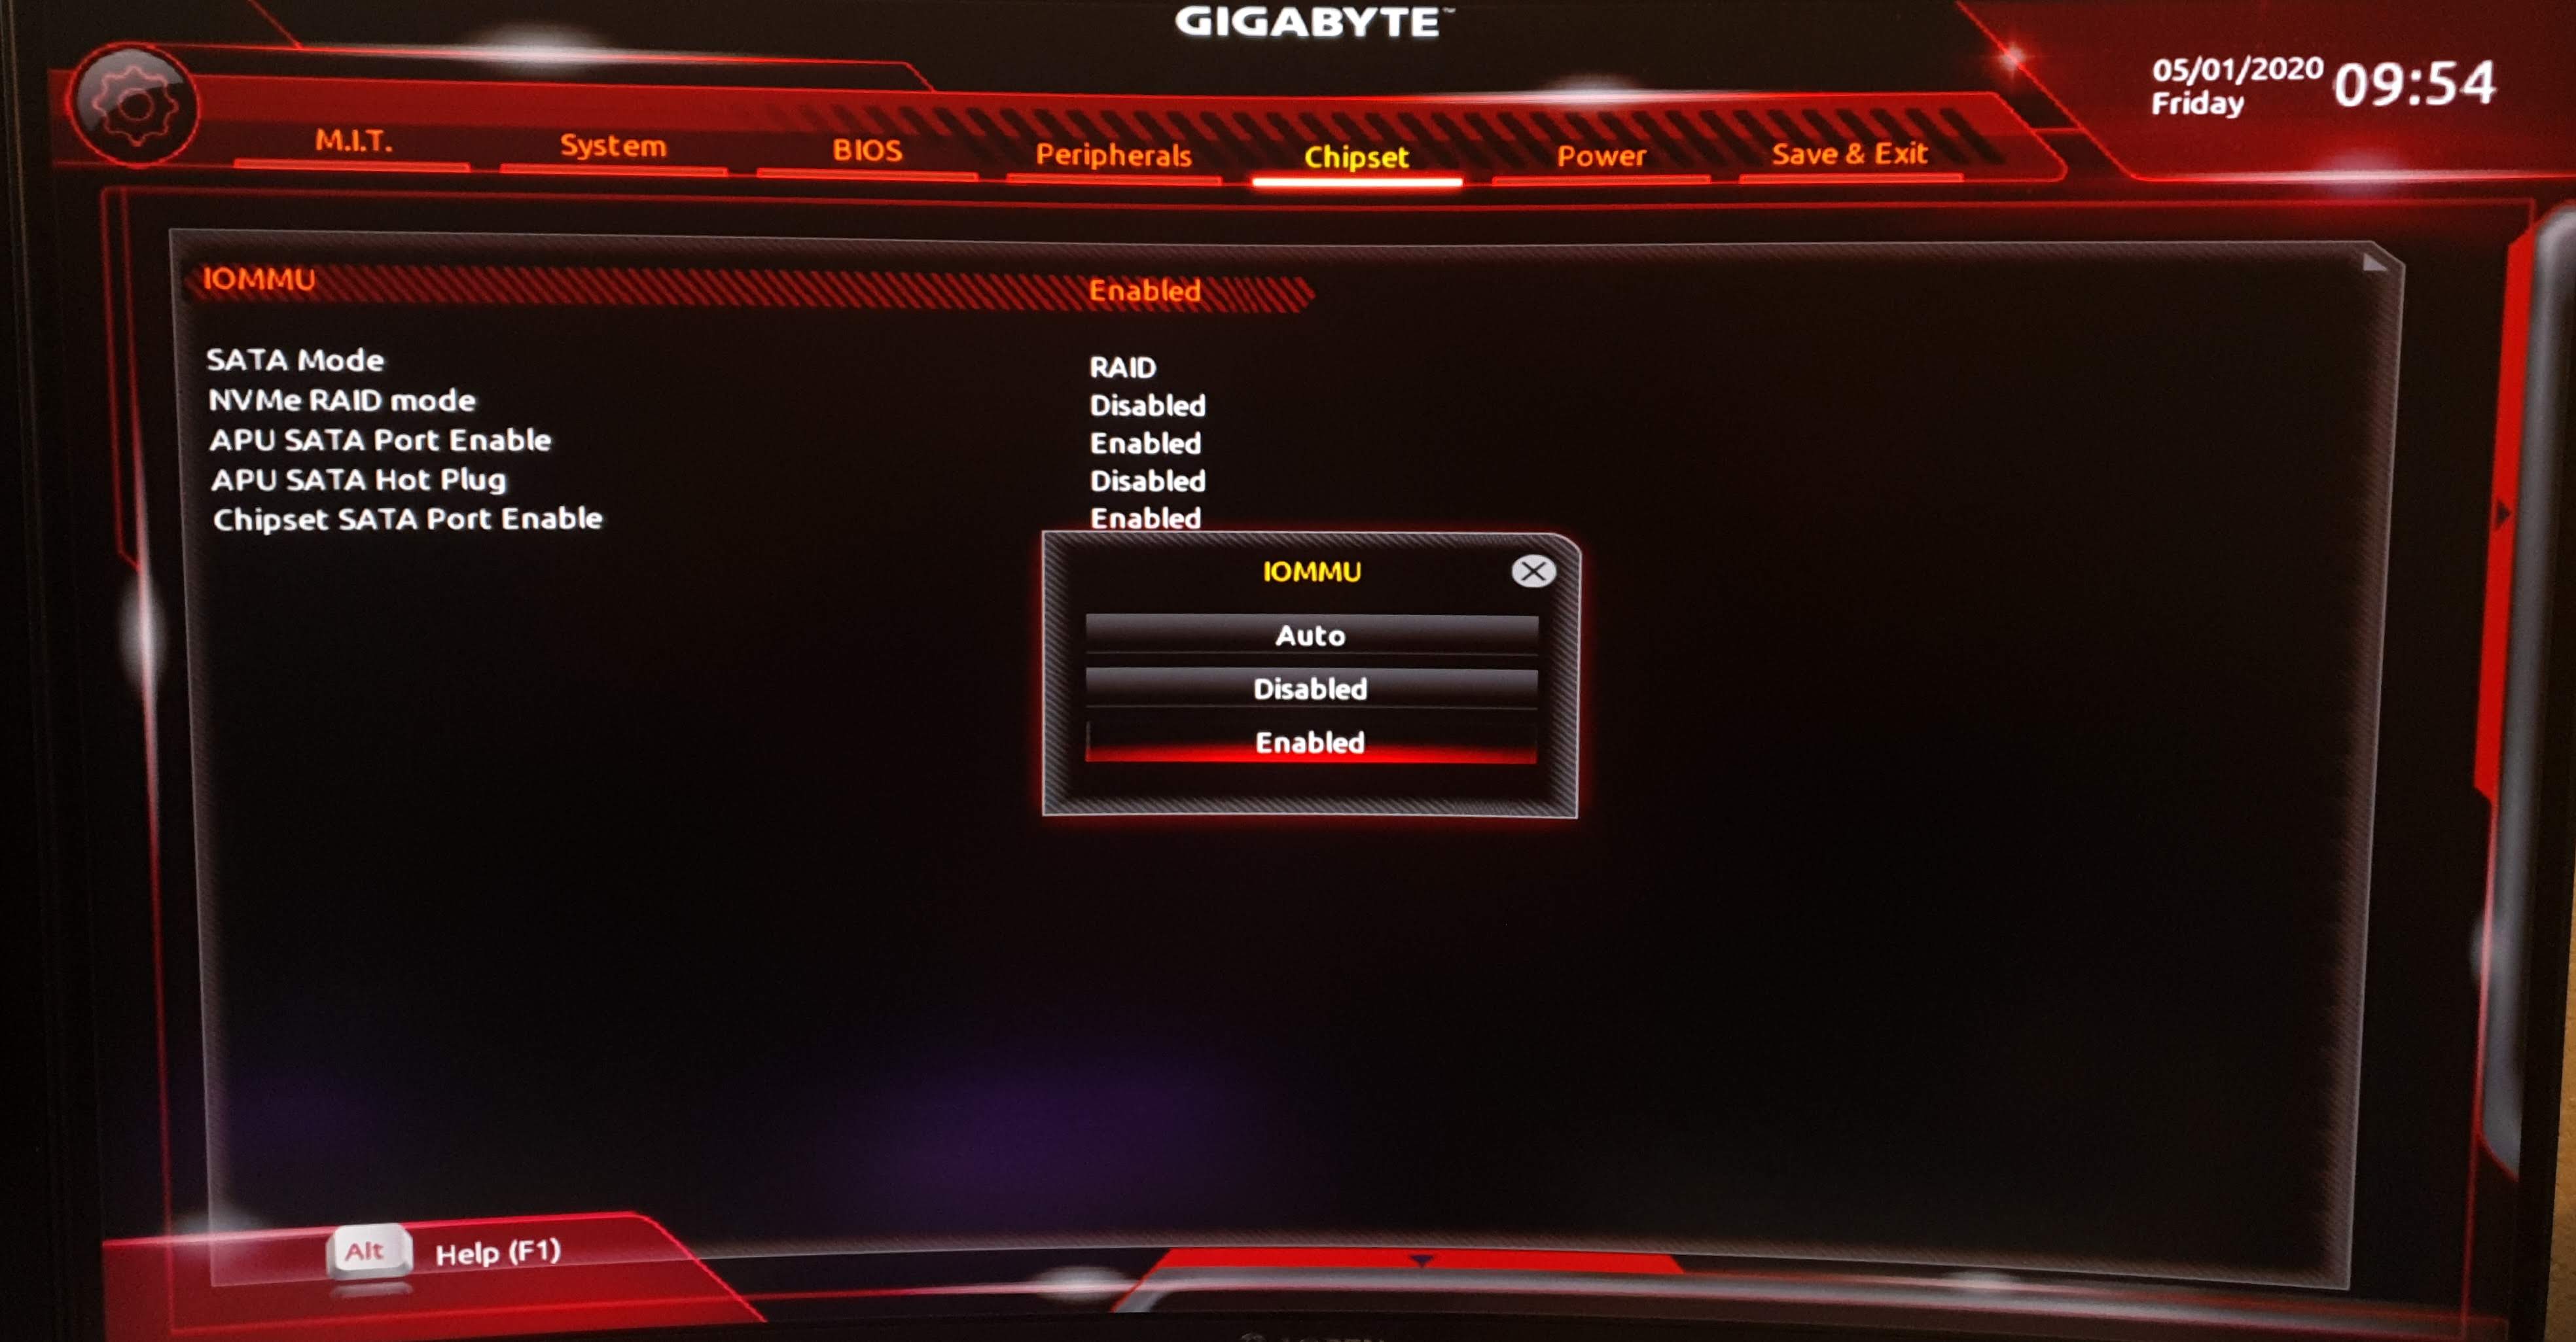
Enabling IOMMU on a Gigabyte AMD motherboard is much easier than enabling SVM mode. Simply go to the «Chipset» root tab, and it should be the first option at the top. Even if it’s set to «Auto», go ahead and update that to be «Enabled».
Once changed, tab over to «Save & Exit» and select «Exit and save changes».
Windows Features Setup
Now that we have our BIOS (UEFI, really) configured correctly, we can enable the Windows features we need for the Android Emulator.
To start, press Win + R, which should bring up the «Run» dialog. Once open, type OptionalFeatures and press «OK».
Once that’s run, you’ll see a «Turn Windows features on or off» window.
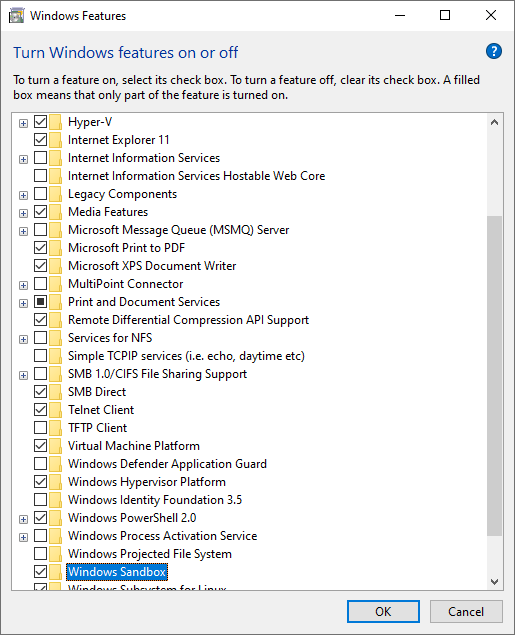
You’ll want to turn on the following options:
- Hyper-V
- Windows Hypervisor Platform
- Windows Sandbox
After these three settings are selected, press «OK» and allow the features to install. After your features are installed, your machine will need a reboot. Go ahead and restart your computer before proceeding to install Android Studio.
Setup Android Studio
You have a few different methods for installing Android Studio. You can choose to use Google’s installer directly, you can utilize the Chocolatey CLI installer, or even use JetBrain’s Toolbox utility to install and manage an instance of Android Studio. Any of these methods work perfectly well, it’s down to preference, really.
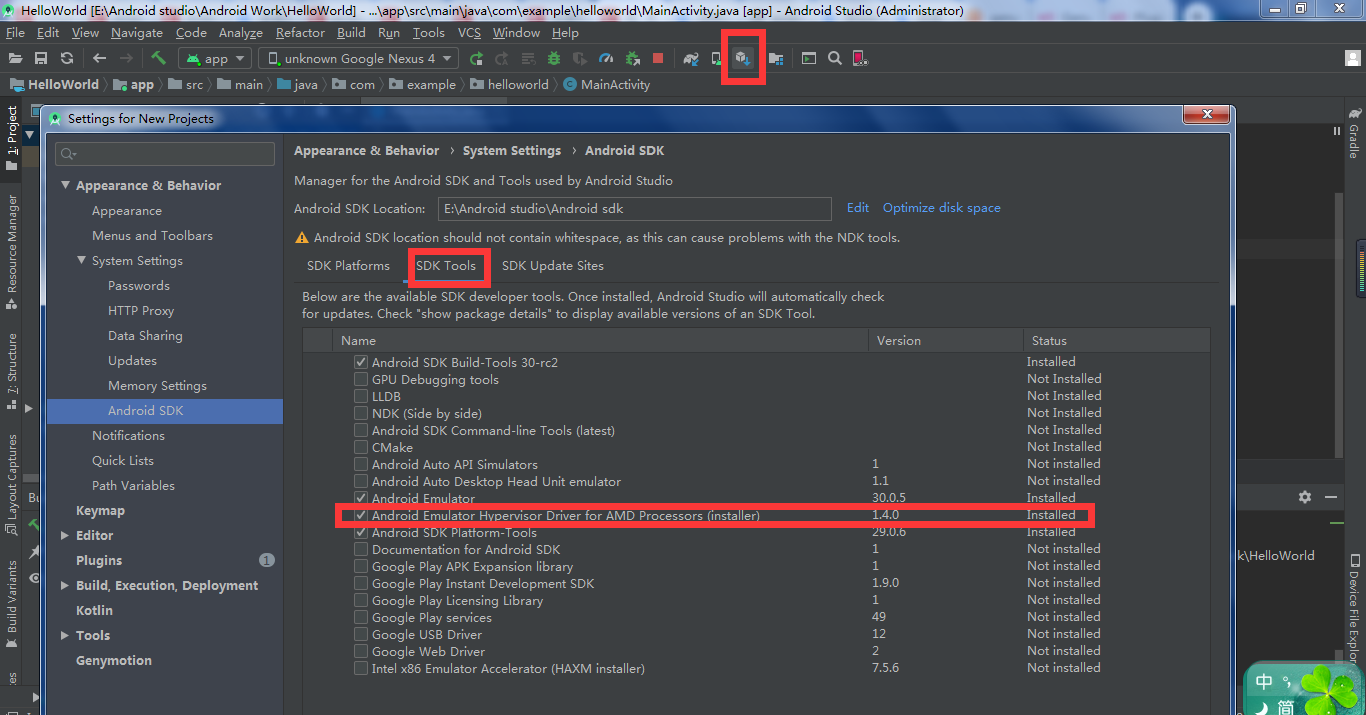
Once you get Android Studio installed, go ahead and open the SDK Manager settings screen from the «Configure» dropdown.
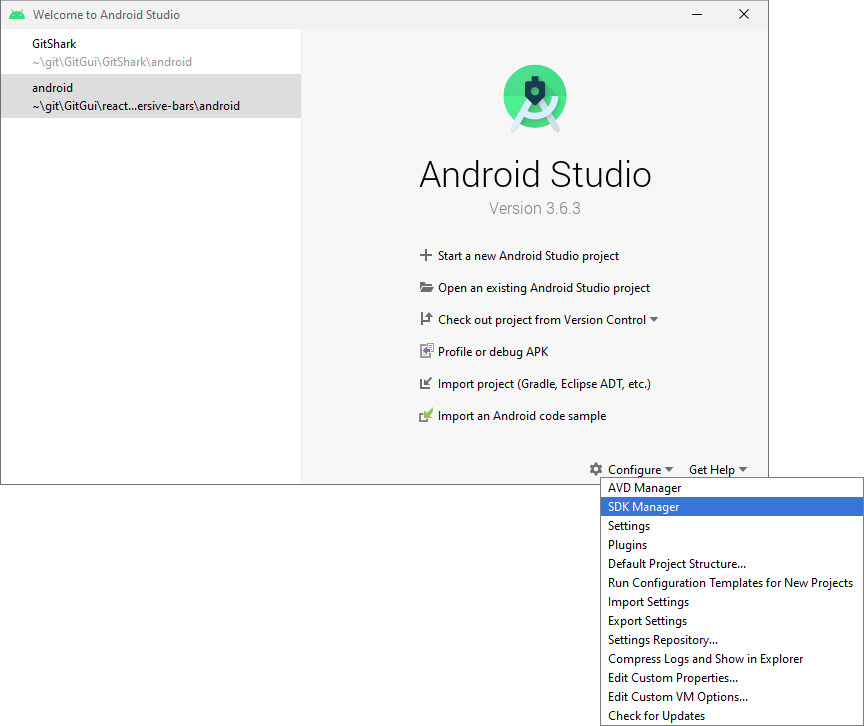
Once you see the popup dialog, you’ll want to select the «SDK Tools» tab. There should be a selection of tools that you can install or update. One of those selections (in about the middle of the list) should be called «Android Emulator Hypervisor Driver for AMD Processors (installer)»
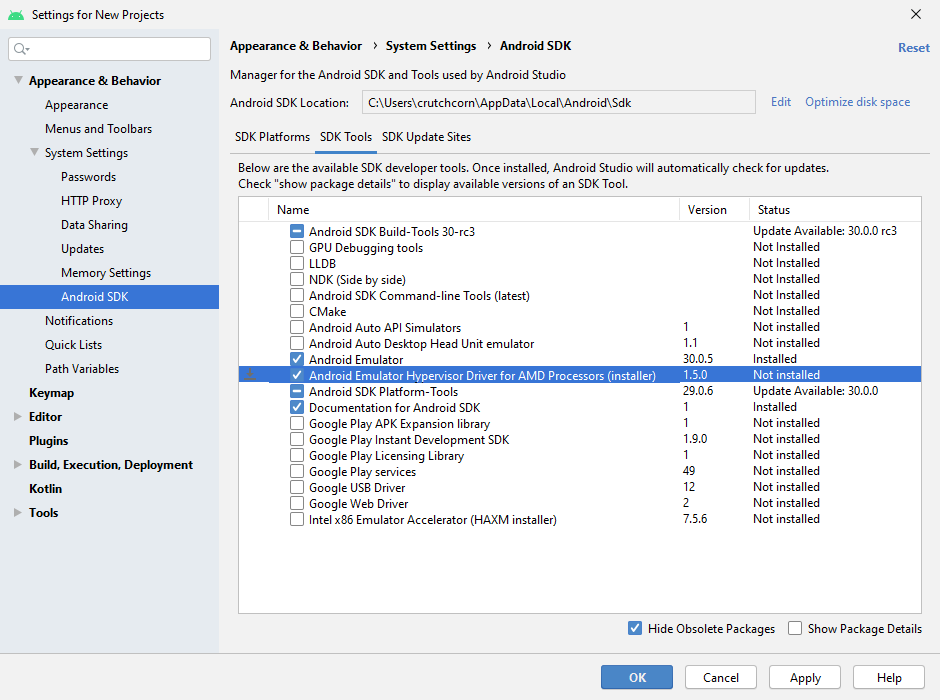
Once you’ve selected it, press «Apply» to download the installer. Because the «Apply» button only downloads the installer, we’ll need to run it manually.
Run the Installer
To find the location of the installer, you’ll want to go to the install location for your Android SDK. For me (who used the Jetbrains Toolbox to install Android Studio), that path was: %AppData%/../Local/Android/Sdk.
The hypervisor installer is located under the following subpath of that path:
SDK_INSTALL_LOCATION\extras\google\Android_Emulator_Hypervisor_Driver

If you like having this macOS-like preview pane of files, you can find it in the OneCommander application. We covered this app in our «Ultimate Windows Development Environment Guide» article
Once you have the path located, you’ll want to run the silent_installer.bat inside of an elevated shell. I did this by pressing Win + X and pressing «Windows PowerShell (Admin)». Once that was opened, I copied the path to the PowerShell window via cd and ran the installer.
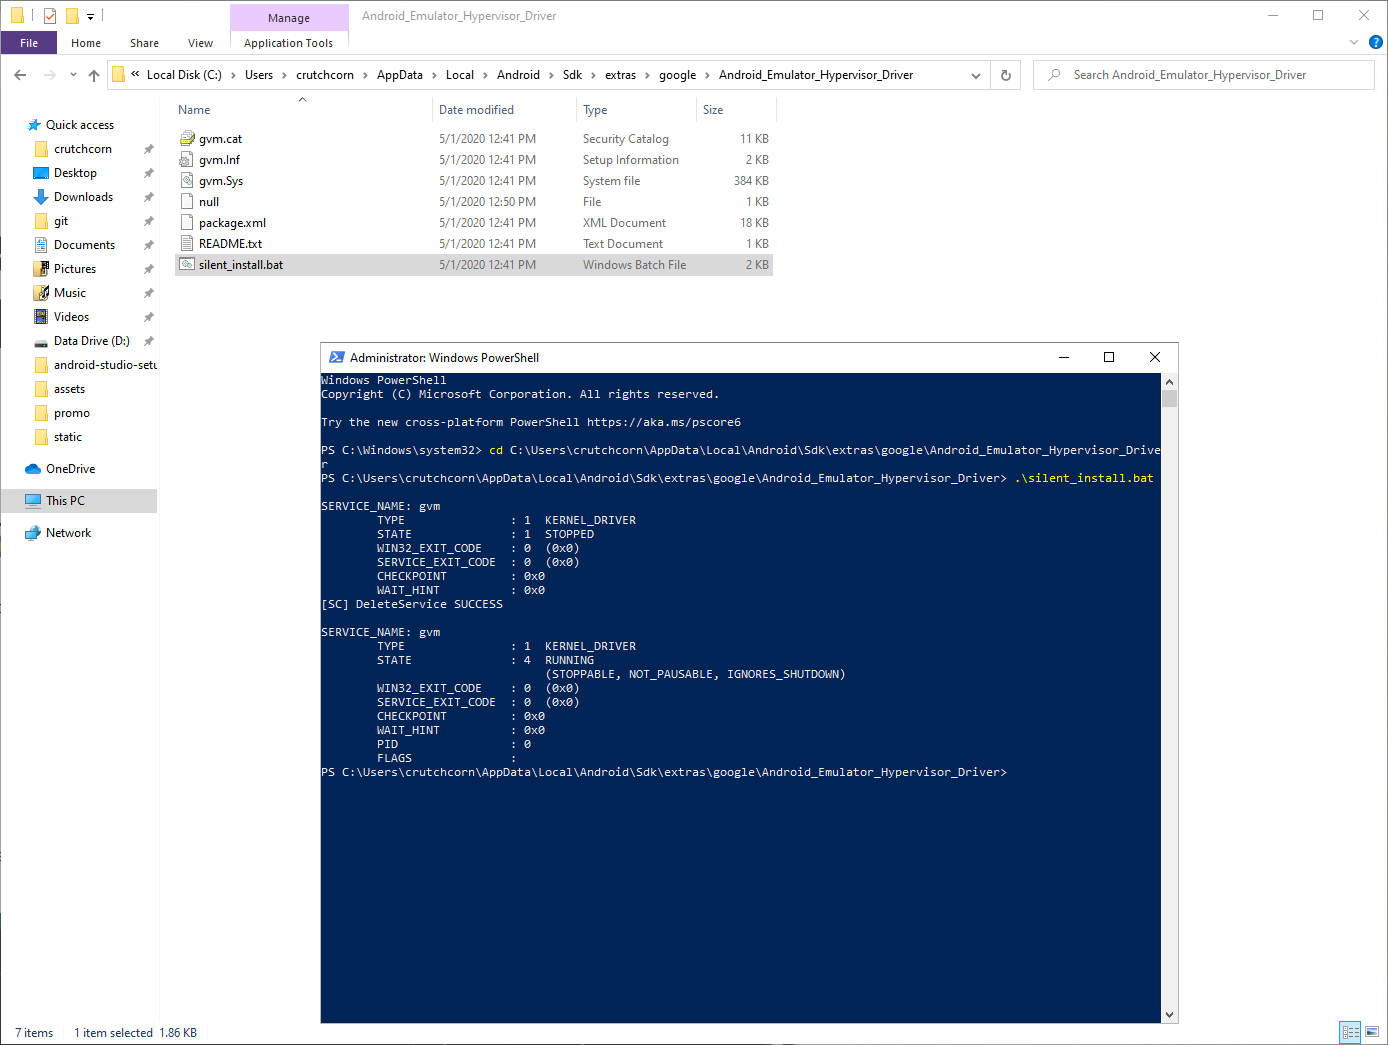
You should see the message «DeleteService SUCCESS» if everything ran as expected.
If you get an error
[SC] StartService FAILED with error 4294967201., make sure you’ve followed the steps to enable BOTH settings in your BIOS as well as ALL of the features mentioned in Windows
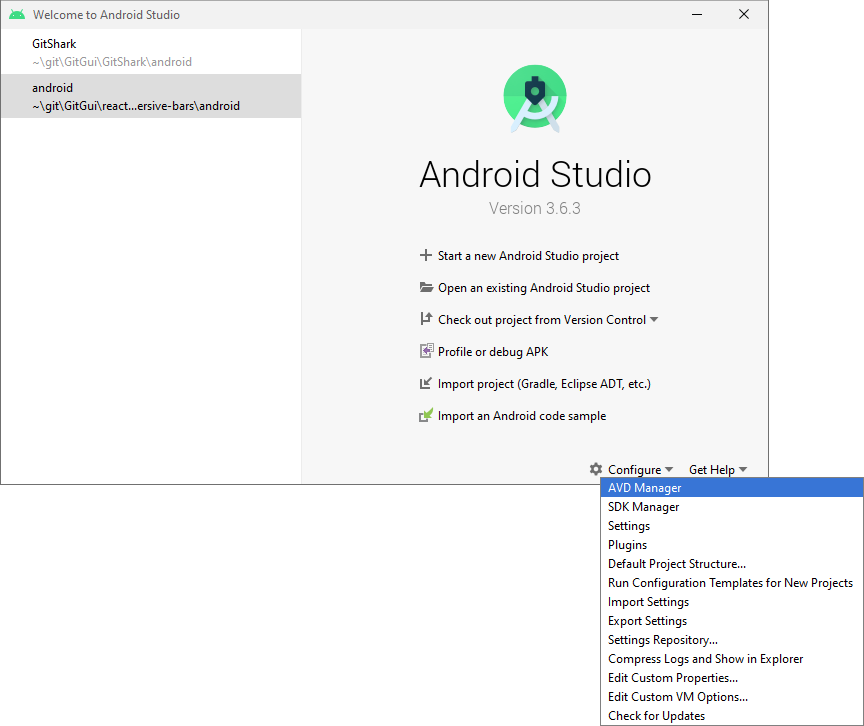
AVD Setup
To run the emulator, you need to set up a device itself. You do this through the «AVD Manager» in the «configure» menu.
You’ll then see a list of the devices that you currently have setup. I, for example, have three different devices already setup as you can see here:
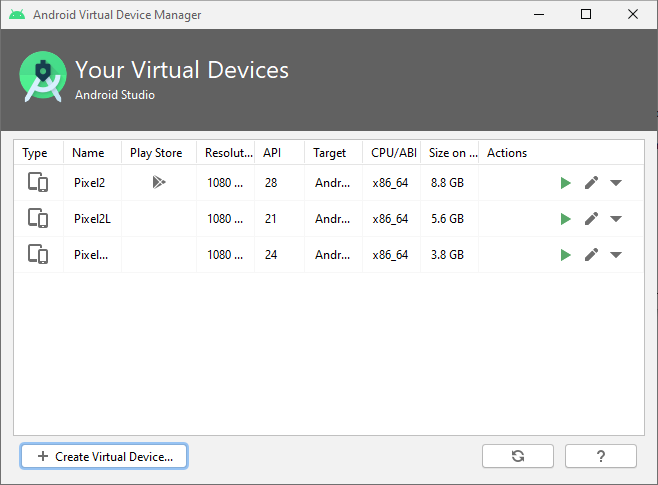
You can create a new one by pressing «Create Virtual Device».
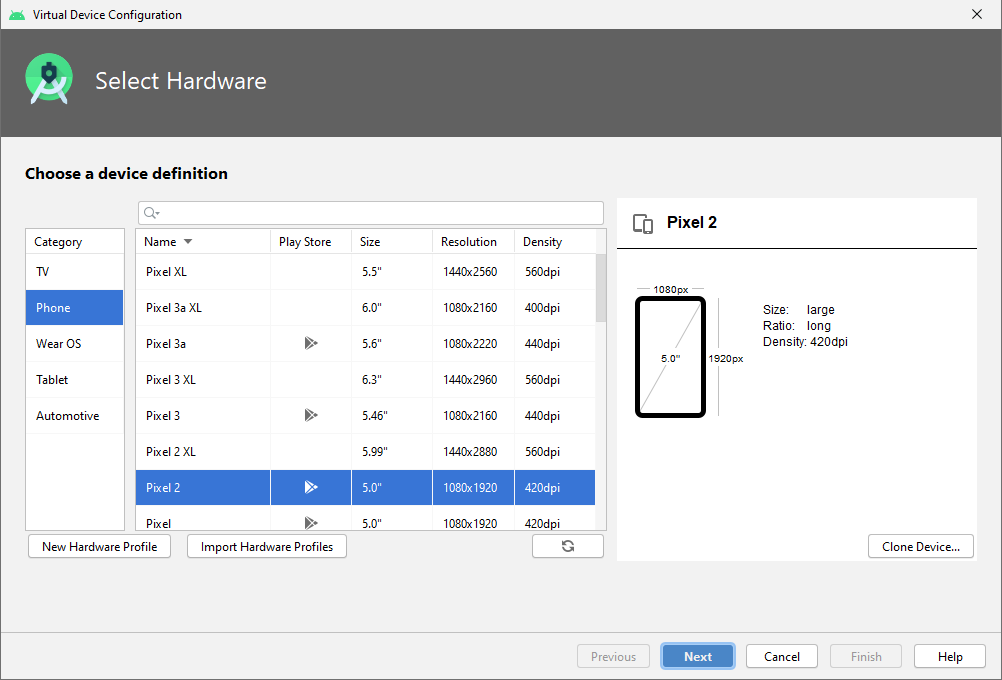
Upon the dialog creation, you’ll see a list of devices that you can use as a baseline for your emulator. This sets the hardware information (screen size and such). Even if you pick a device, it does not restrict the versions of Android you can use with it. I picked Pixel 2 and KitKat for my KK testing device, despite the Pixel 2 being released well after that OS release.
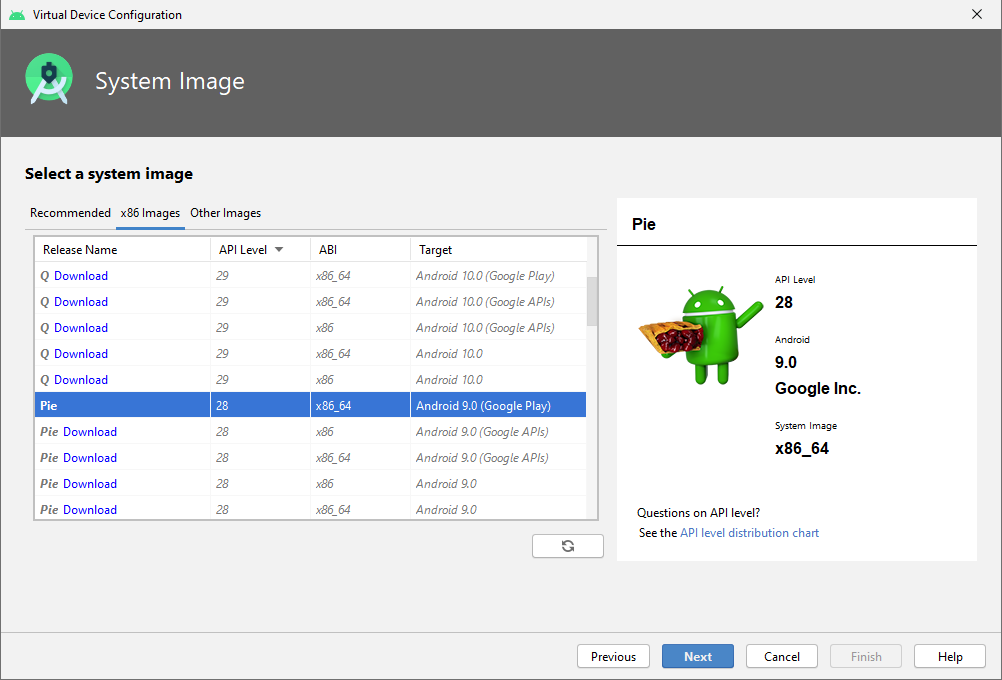
Once you’ve selected a device, you can pick the version of Android to run. You’ll want to select an x86 or x86_64 build of Android you’re looking for. I’ve noticed better performance from x86_64 emulators myself, so I went with an x86_64 build of Android Pie.
Afterward, you’ll want to name your emulator. I try to keep them without strings and not too long, so if I need to run the emulator manually in the CLI, I can do so with the name of the emulator easily.
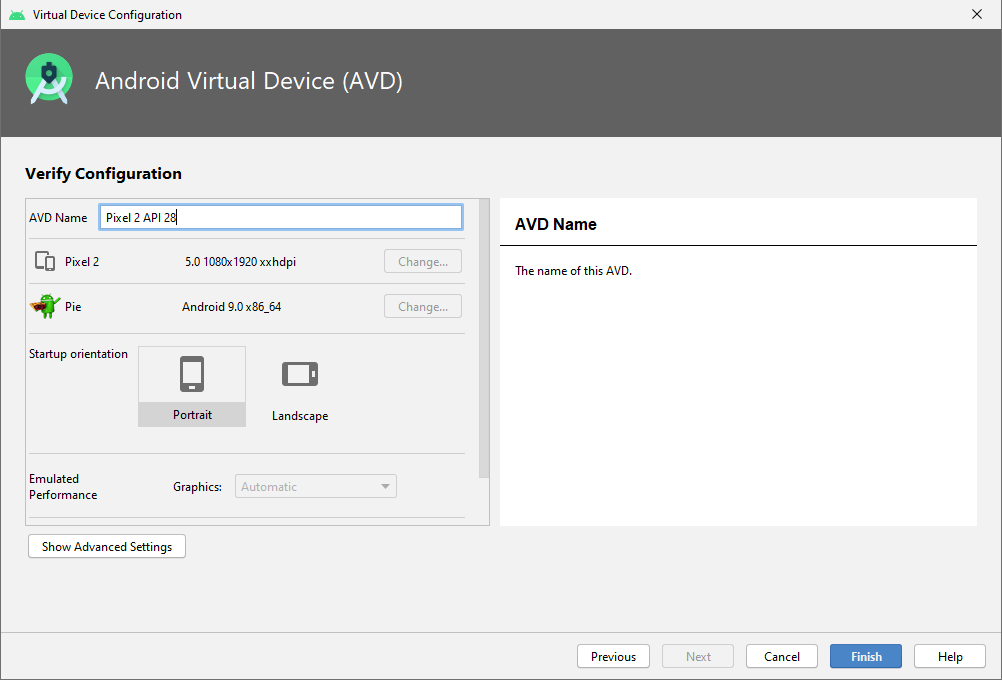
Finally, once you’ve selected «Finish», it should save the emulator’s settings and start the emulator itself.
You may get an error such as
HAXM is not installedwhen trying to set up an emulator. If you get this error, it’s most likely that you have not enabled the settings in BIOS. I know in my case, I had recently performed a BIOS upgrade, and it had reset my BIOS settings, making me go back and re-enable them.
Conclusion
I’ve had incredible success with my Ryzen powered desktop during my Android development. Not only is it cost-efficient for my usage compared to the Intel option, but it’s able to run the emulator quickly. Hopefully, this article has been able to help you set up your machine as well.
Let us know what your thoughts on this article were! We not only have our comments down below, but we have a Discord community as well that we invite you to join! We chat about all kinds of programming and CS related topics there!
I am runnning AMD processor on windows machine and I get the following error when trying to install Android Emulator Hypervisor Driver for Android Studio: Sipotek

However, Mircrosoft’s official docs tells me that my Operating System — Windows 10 Home Edition doesn’t support this Hyper-V installation:

Is Hyper-V a virtual environment? If so, what are other alternatives to Hyper-V so that I can develop phone applications? My goal is be able to use Android Studio & React-Native on my computer to build and run apps. So I’m looking for an alternative option than upgrage my Windows 10 Home edition. Is there work around by using Azure or Dock?
I want to be a mobile APP, and I encountered various problems when installing Android studio. It all stems from the fact that the computer CPU is AMD. After exploring various methods, I finally found a solution, and successfully installed Andriod studio and The simulator and successfully ran the first program Helloworld!
1. Download and install Android studio
The download of foreign websites is relatively slow. Here is a recommended download site. The resources are very comprehensive, including the Android SDK for Android development, tools encountered during development, Android development tutorials and so on.
http://www.androiddevtools.cn/
Enter to find the Android development tools, go in and find the first latest version of the Android studio installation package
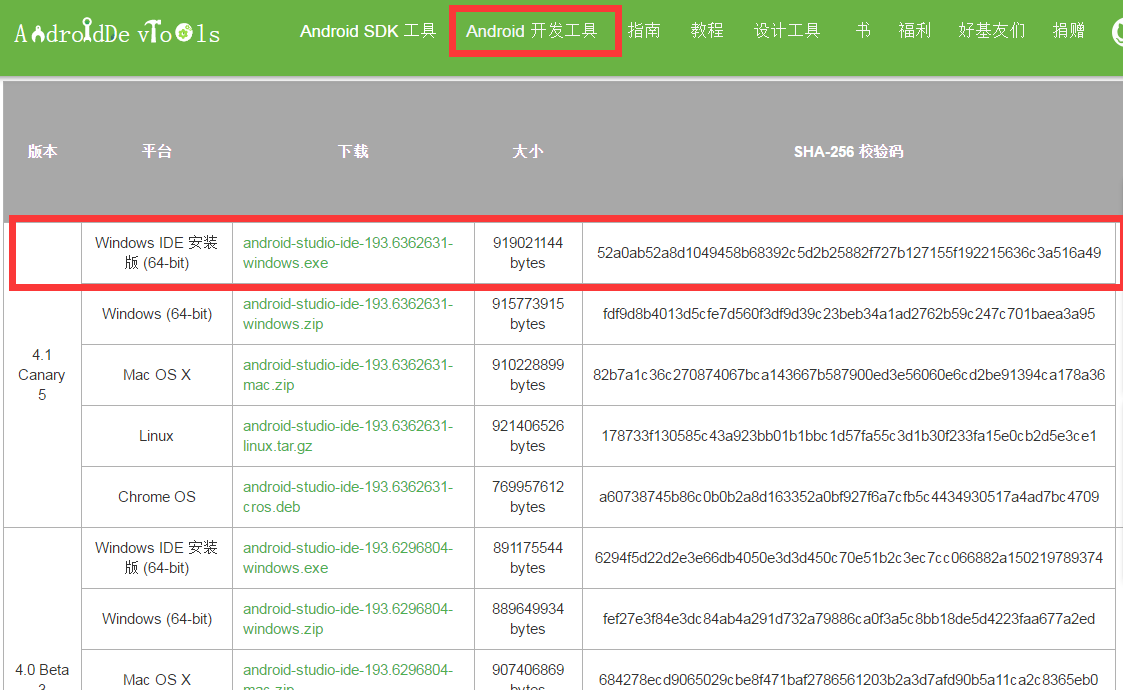
After , you can follow the steps to install. There are many tutorials for the installation process, so I wo n’t explain them one by one here. For convenience, attach a link
Android studio installation tutorial and use
The above steps are very detailed, just follow the steps.
The following focuses on the problems in the installation:
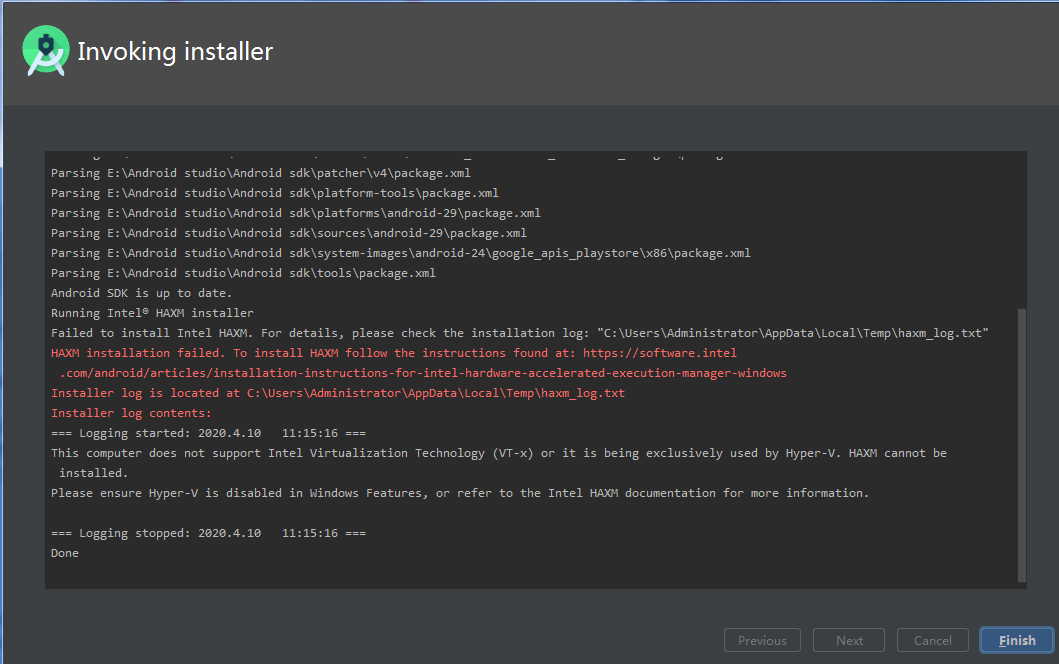
2. The cause of the problem
AMD computers do not support fast hardware acceleration, so HAXM cannot be installed, so that we cannot use the emulator that comes with Android studio
(1)Install SDK tools for AMD
(2) Download and install the external simulator Genymotion
(3) Download the genymotion plugin
(4) Configure Android Studio
(1)Install SDK tools for AMD
Install this AMD emulator first, and then perform the following steps
(2) Download and install the external simulator Genymotion
Download Genymotion on the official website, install it, and register (PS is only available for registration)
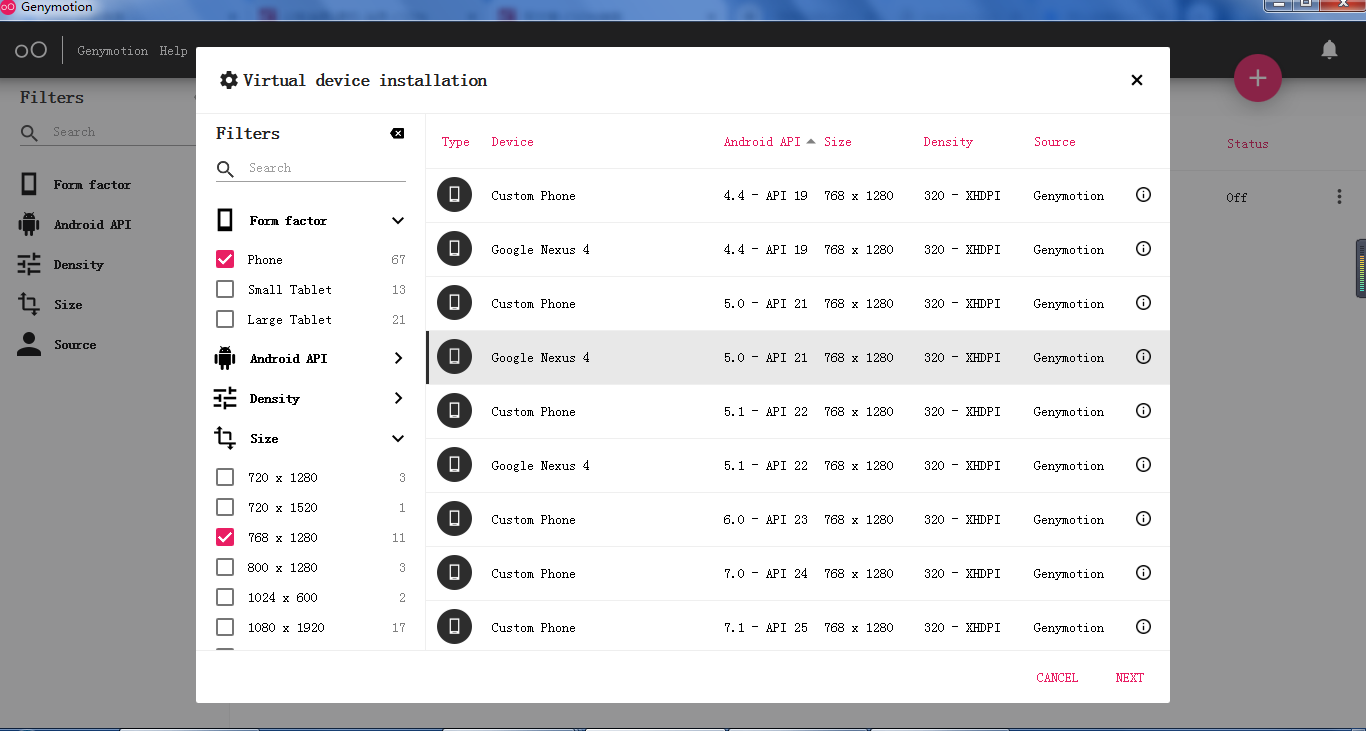
After the installation is successful, open genymotion to enter this interface (PS this is already installed by me, but the installation should be empty), and then click the + sign to select the device you want to add A little

This is the device I selected. After double-clicking the device, you can wait for the installation.
(3) Download the genymotion plugin
Official website download and installation document link
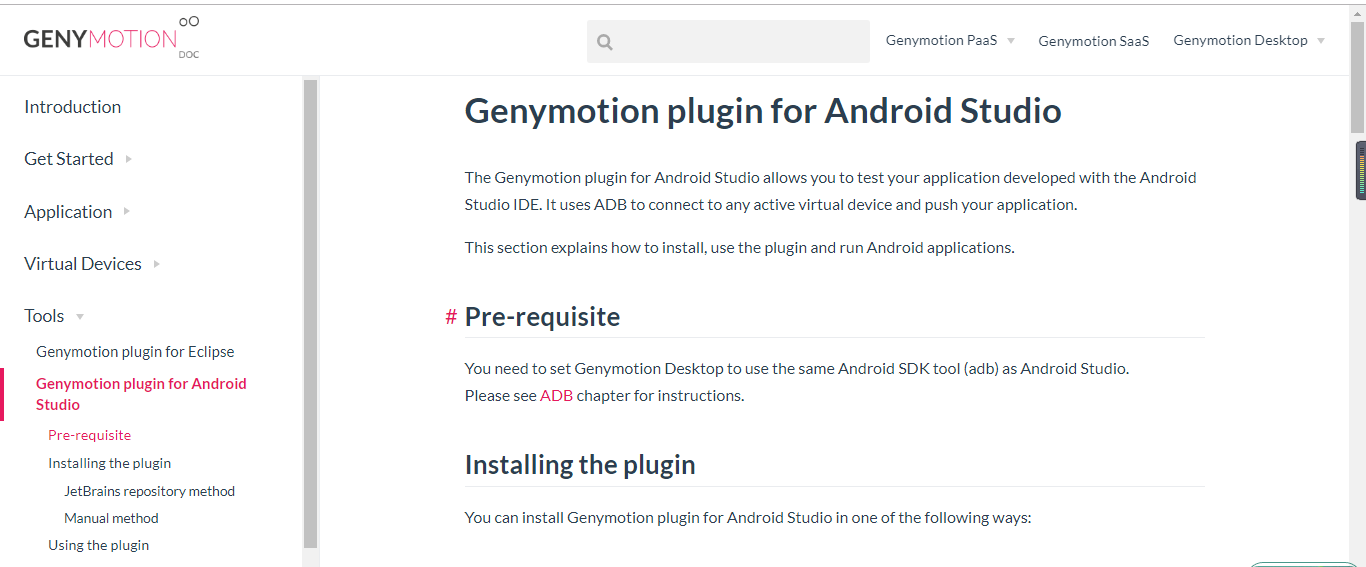
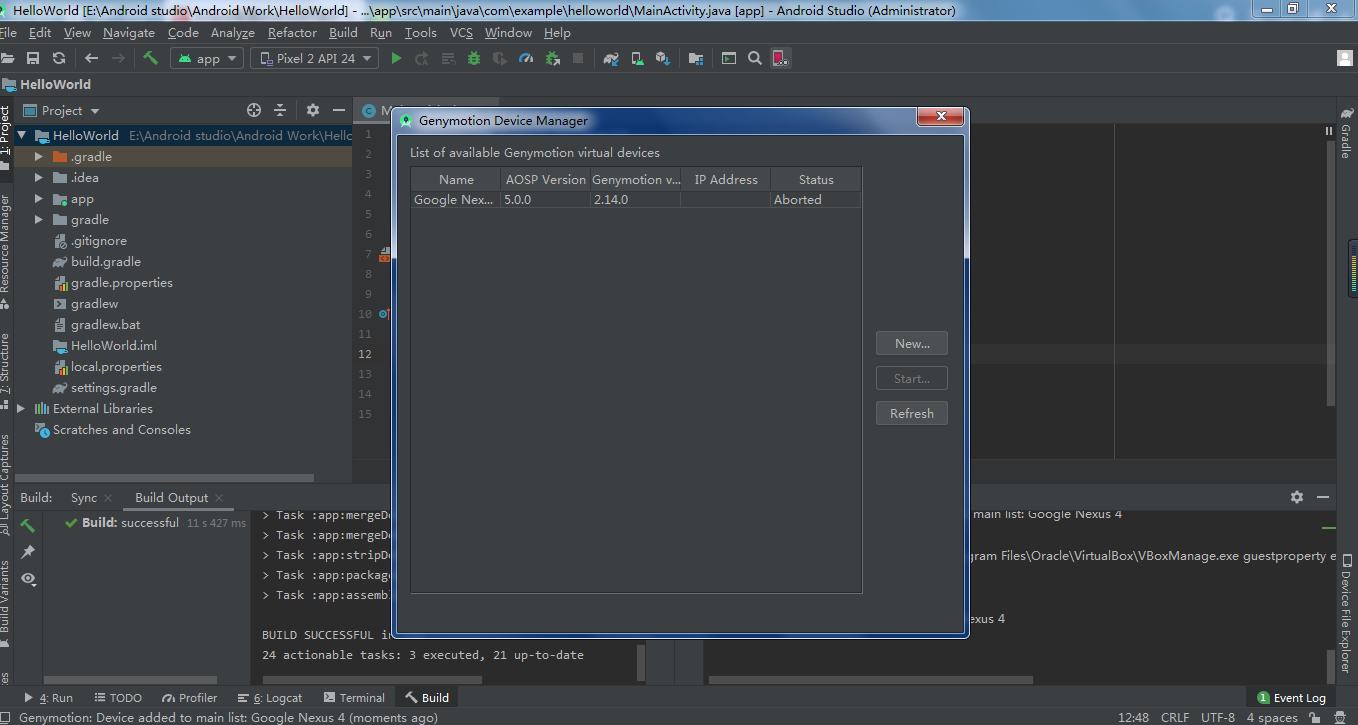
Follow the steps in the official documentation, then you can see the interface you added, if you want to install a new device, you can also click new to add
(4) Configure Android Studio
Download the plugin on the official website
Official website link https://www.genymotion.com/plugins/
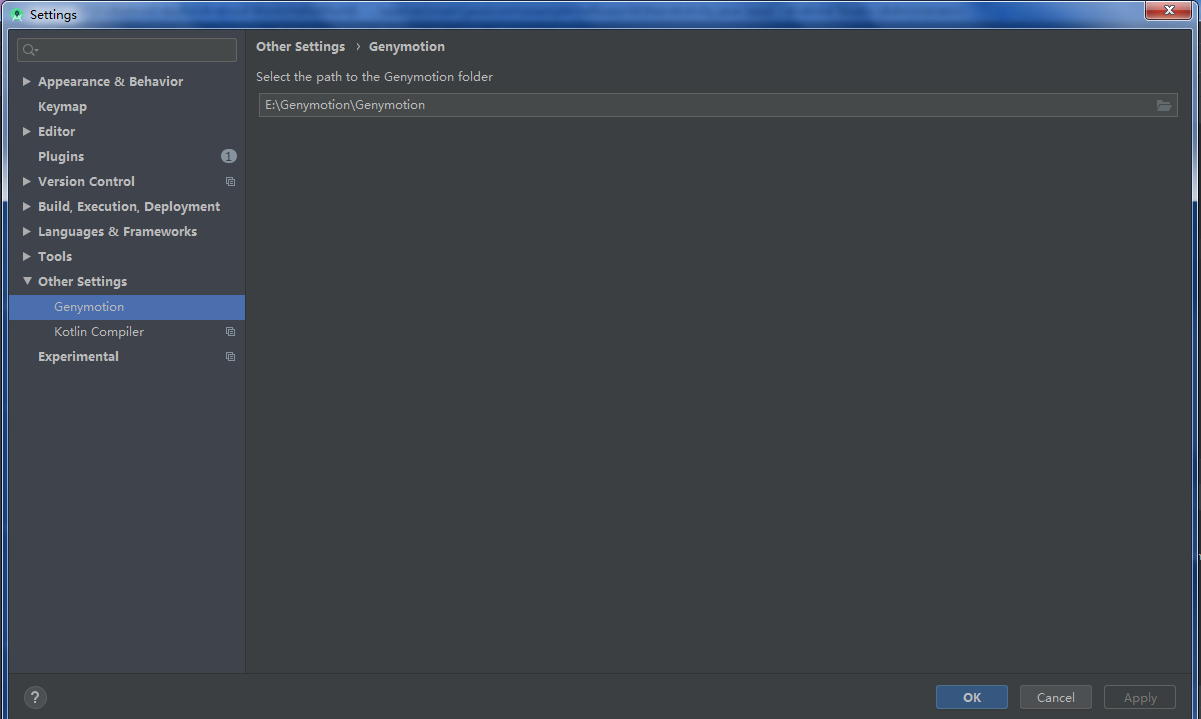
After downloading, open settings
The following items are correct
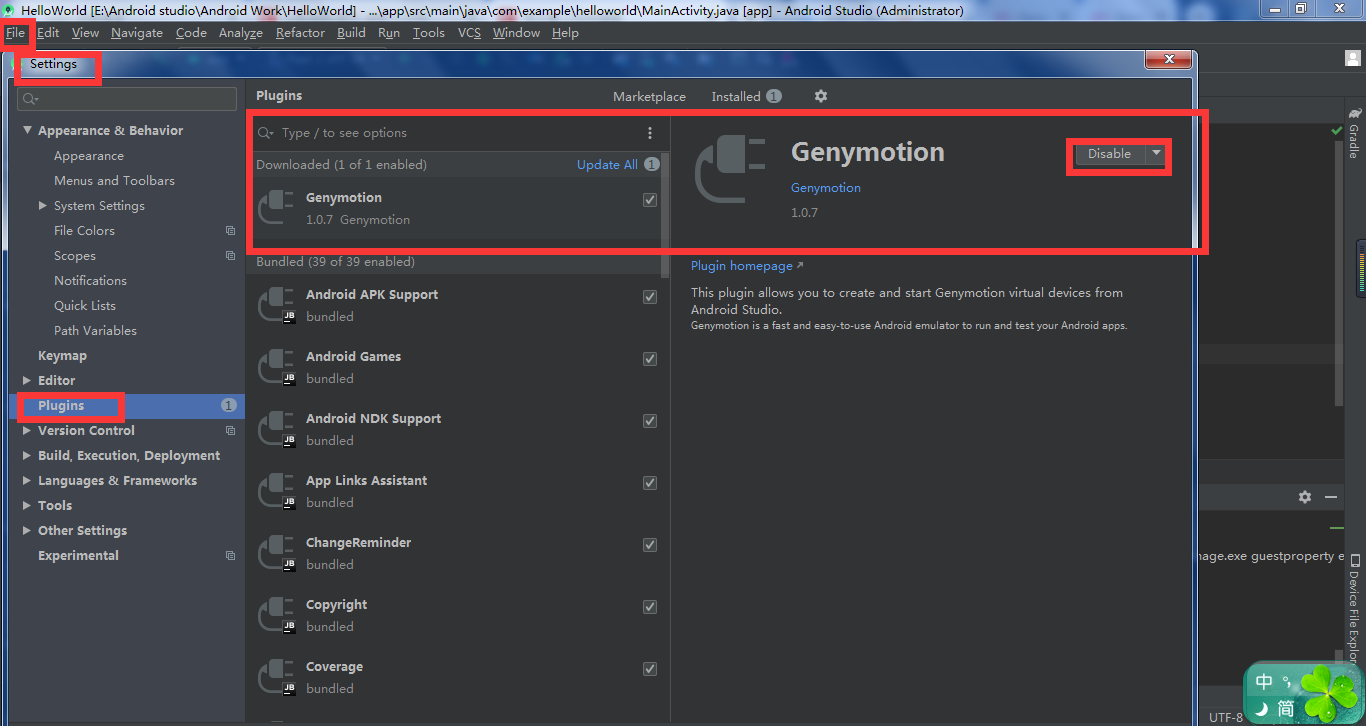
Open the settings again and change the installation directory to the root directory of genymotion
operation result
After the above steps are completed, you can run the device on genymotion, then write a Helloworld applet in Android studio, you can see the result on the genymotion simulator
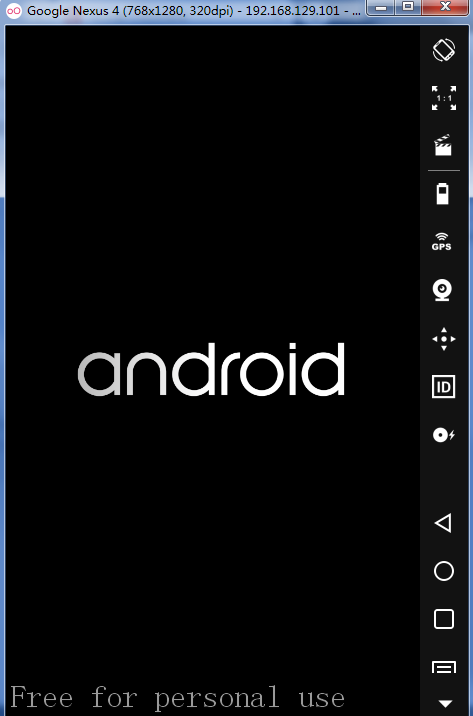
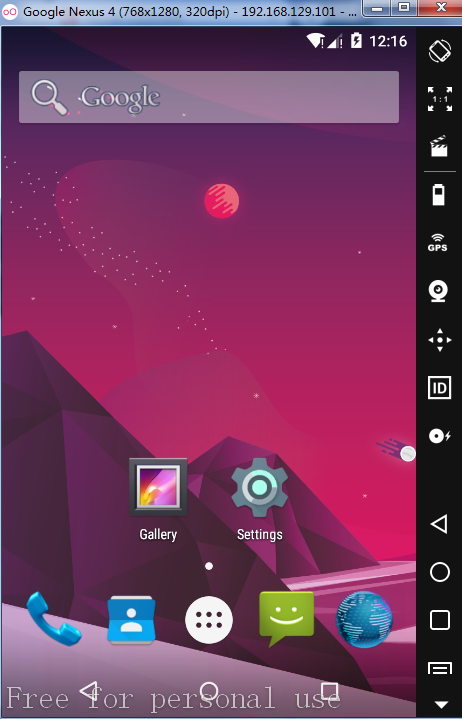
Double click to run this device

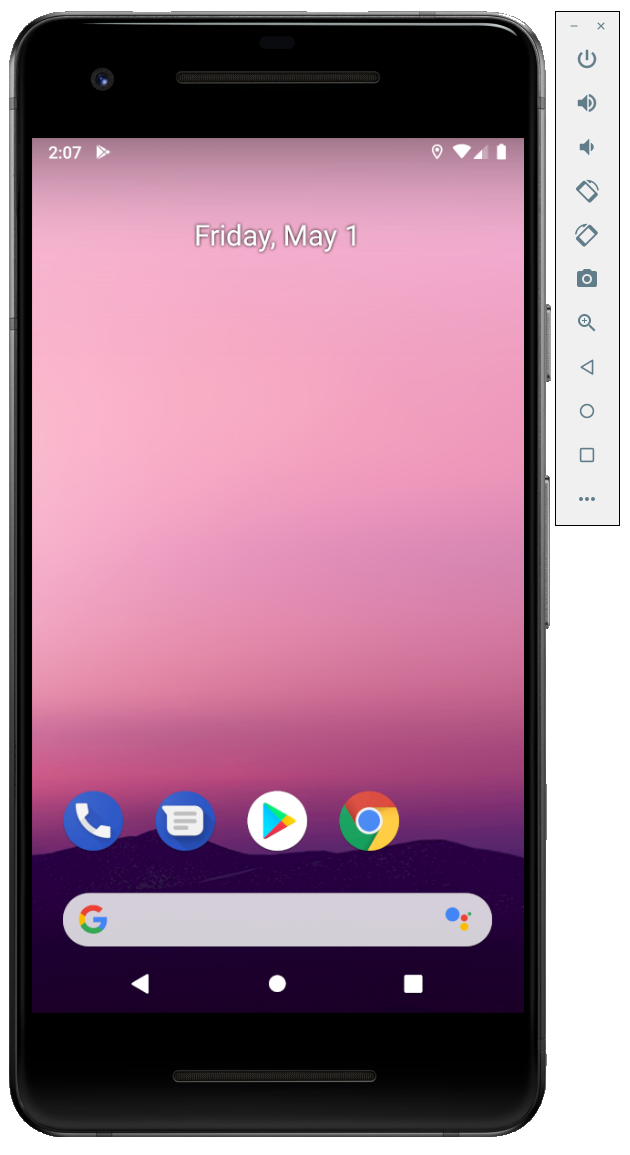
This interface appears, it proves that the startup is successful, just wait for a while
Run Android studio program
Just select the device with red frame, this device is the genymotion device that is starting up
(ps must start genymotion before displaying the running device)
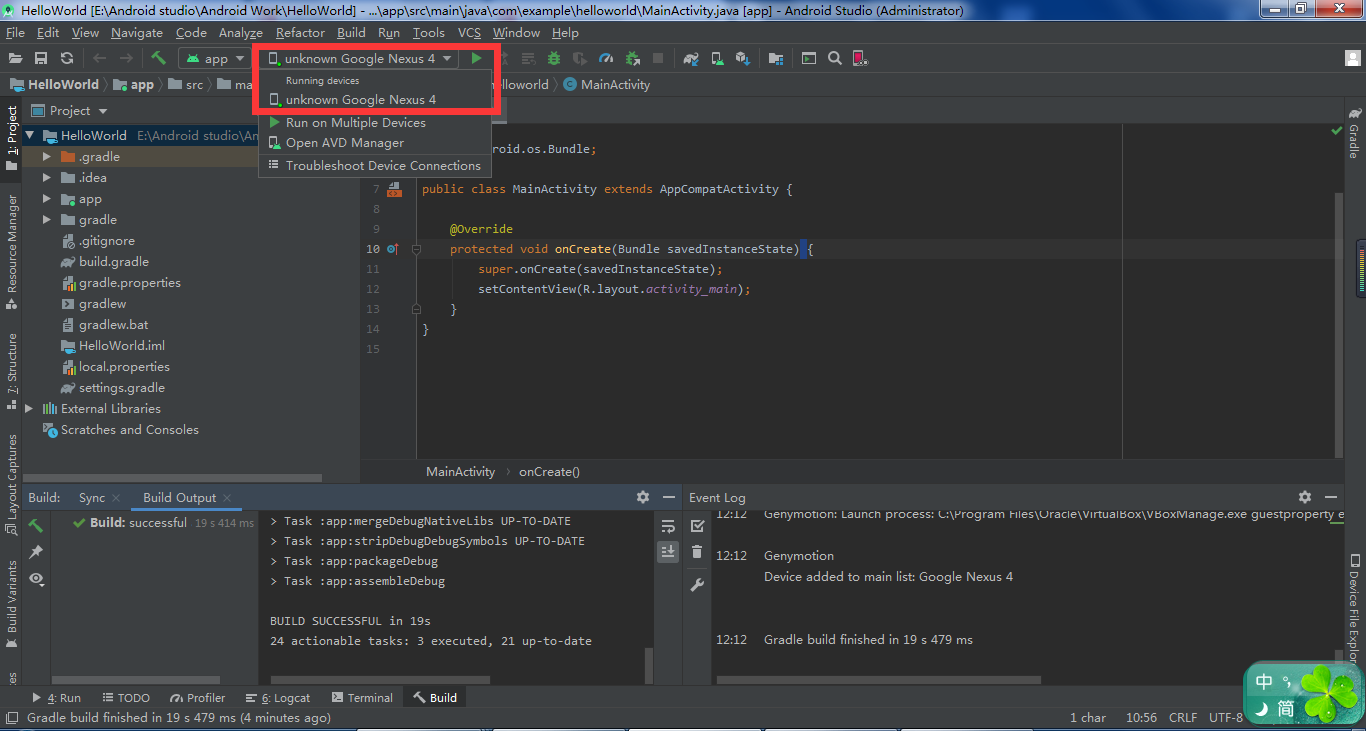
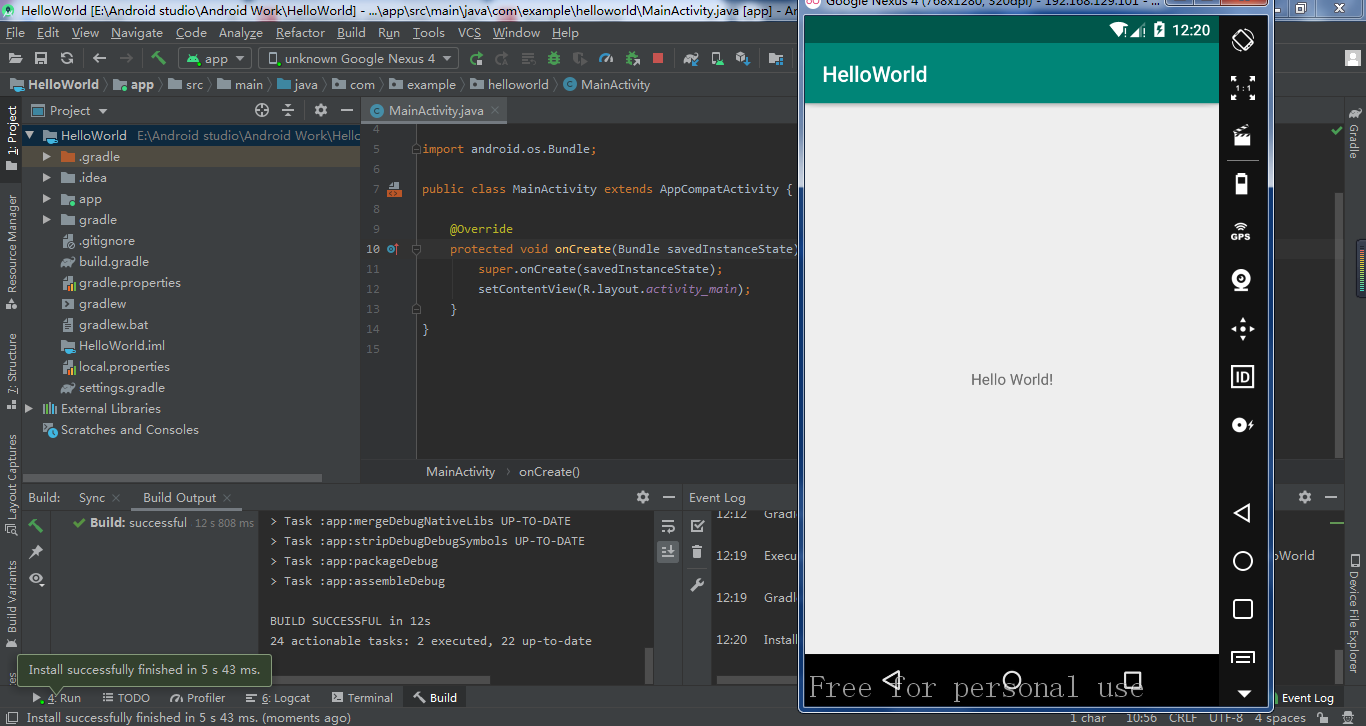
The Helloworld program is now running on the simulator!
After a few days of tossing and finally finishing this, I finally worked hard to pay attention, write a document to record the process, happy!
- Download a Preview
- Install Alongside Stable
- New Features
- Release Updates
Updates archive
-
►
2025
2025(35)
-
►
May
May(3)
-
►
April
April(10)
-
►
March
March(7)
-
►
February
February(9)
-
►
January
January(6)
-
-
►
2024
2024(90)
-
►
December
December(7)
-
►
November
November(4)
-
►
October
October(8)
-
►
September
September(8)
-
►
August
August(9)
-
►
July
July(6)
-
►
June
June(7)
-
►
May
May(9)
-
►
April
April(9)
-
►
March
March(6)
-
►
February
February(8)
-
►
January
January(9)
-
-
►
2023
2023(76)
-
►
December
December(4)
-
►
November
November(9)
-
►
October
October(7)
-
►
September
September(8)
-
►
August
August(3)
-
►
July
July(4)
-
►
June
June(6)
-
►
May
May(10)
-
►
April
April(4)
-
►
March
March(7)
-
►
February
February(9)
-
►
January
January(5)
-
-
►
2022
2022(59)
-
►
December
December(3)
-
►
November
November(5)
-
►
October
October(8)
-
►
September
September(4)
-
►
August
August(4)
-
►
July
July(2)
-
►
June
June(7)
-
►
May
May(6)
-
►
April
April(5)
-
►
March
March(6)
-
►
February
February(5)
-
►
January
January(4)
-
-
►
2021
2021(54)
-
►
December
December(3)
-
►
November
November(2)
-
►
October
October(6)
-
►
September
September(4)
-
►
August
August(5)
-
►
July
July(8)
-
►
June
June(4)
-
►
May
May(5)
-
►
April
April(1)
-
►
March
March(7)
-
►
February
February(4)
-
►
January
January(5)
-
-
►
2020
2020(107)
-
►
December
December(7)
-
►
November
November(3)
-
►
October
October(8)
-
►
September
September(6)
-
►
August
August(11)
-
►
July
July(14)
-
►
June
June(10)
-
►
May
May(12)
-
►
April
April(11)
-
►
March
March(11)
-
►
February
February(6)
-
►
January
January(8)
-
-
▼
2019
2019(145)
-
►
December
December(16)
-
►
November
November(12)
-
▼
October
October(10)
- Android Studio 3.6 Beta 2 available
- Android Emulator Hypervisor Driver for AMD Process…
- Emulator 29.2.6 Canary, HAXM 7.5.4 to Stable
- ConstraintLayout 2.0.0 beta 3
- Android Studio 4.0 Canary 1 available
- Emulator 29.2.5 Canary
- Emulator 29.2.4 Canary: Fixes, AMD Hypervisor Preview
- Android Studio 3.6 Beta 1 available
- Emulator 29.2.3 Canary
- Android Studio 3.5.1 available
-
►
September
September(13)
-
►
August
August(12)
-
►
July
July(6)
-
►
June
June(9)
-
►
May
May(18)
-
►
April
April(14)
-
►
March
March(12)
-
►
February
February(10)
-
►
January
January(13)
-
-
►
2018
2018(128)
-
►
December
December(13)
-
►
November
November(12)
-
►
October
October(10)
-
►
September
September(10)
-
►
August
August(16)
-
►
July
July(10)
-
►
June
June(13)
-
►
May
May(9)
-
►
April
April(11)
-
►
March
March(12)
-
►
February
February(9)
-
►
January
January(3)
-
-
►
2017
2017(48)
-
►
December
December(3)
-
►
November
November(2)
-
►
October
October(8)
-
►
September
September(3)
-
►
August
August(4)
-
►
July
July(3)
-
►
June
June(3)
-
►
May
May(4)
-
►
April
April(5)
-
►
March
March(5)
-
►
February
February(6)
-
►
January
January(2)
-
-
►
2016
2016(5)
-
►
December
December(3)
-
►
November
November(2)
-
Subscribe to updates
Posts