
Первым делом – запускаем Server Manager:

Затем выбираем опцию Roles и добавляем новую роль для нашего сервера, нажав Add Roles:

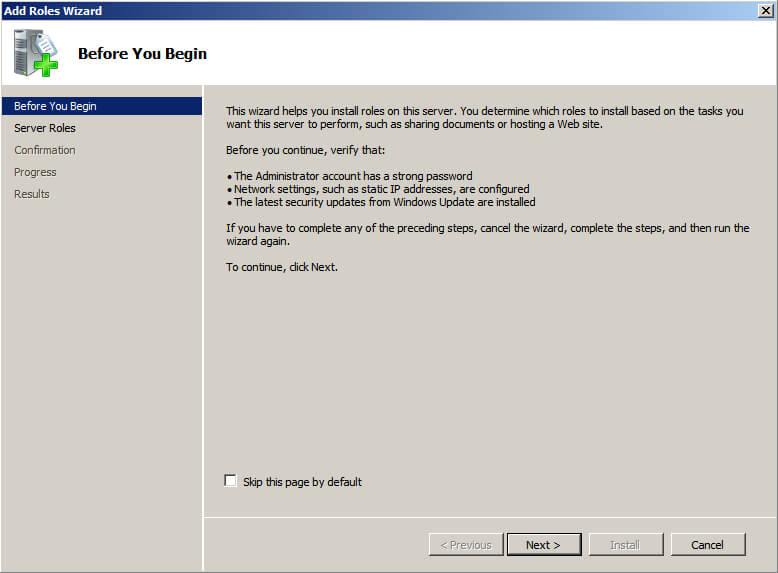
Нас встречает мастер установки ролей, а также просят убедиться, что учетная запись администратора имеет устойчивый пароль, сетевые параметры сконфигурированы и установлены последние обновления безопасности. Прочитав уведомление кликаем Next

Сервер, выступающий в роли DC обязан иметь статический IP адрес и настройки DNS Если данные настройки не были выполнены заранее, то нас попросят выполнить их в дальнейшем на одном из этапов.
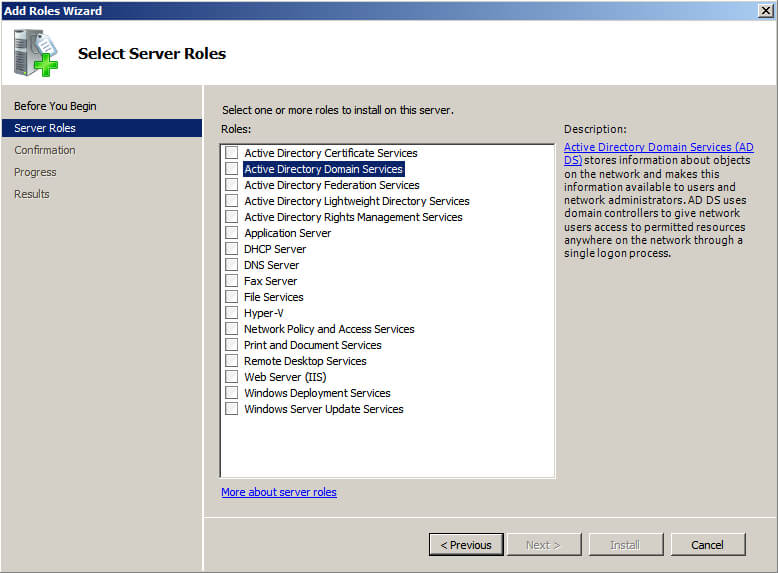
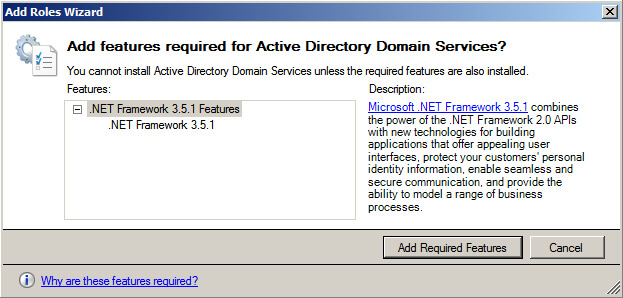
В списке доступных ролей выбираем Active Directory Domain Services. Мастер сообщает, что для установки данной роли нужно предварительно выполнить установку Microsoft .NET Framework. Соглашаемся с установкой, нажав Add Required Features и кликаем Next

Нас знакомят с возможностями устанавливаемой роли Active Directory Domain Services (AD DS) и дают некоторые рекомендации. Например, рекомендуется установить, как минимум 2 сервера с ролями AD DS (т.е сделать 2 DC) на случай, чтобы при выходе из строя одного сервера, пользователи домена все ещё могли бы залогиниться с помощью другого. Также, нас предупреждают о том, что в сети должен быть настроен DNS сервер, а если его нет, то данному серверу нужно будет дать дополнительную роль – DNS. После того, как прочитали все рекомендации, кликаем Next чтобы продолжить установку.

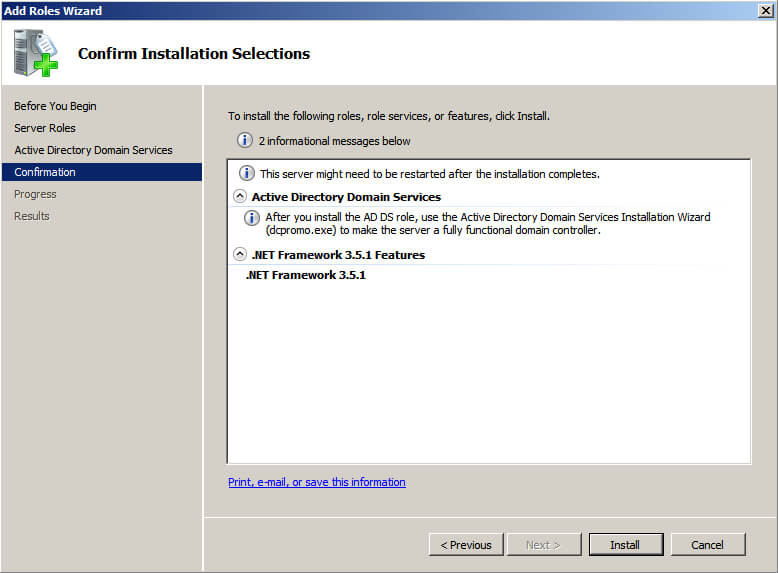
Наконец, нам предоставляют сводную информацию об устанавливаемой роли и дополнительных компонентах для подтверждения. В данном случае, нас уведомляют о том, что будет установлена роль AD DS и компонент .NET Framework 3.5.1. Для подтверждения установки кликаем Install.

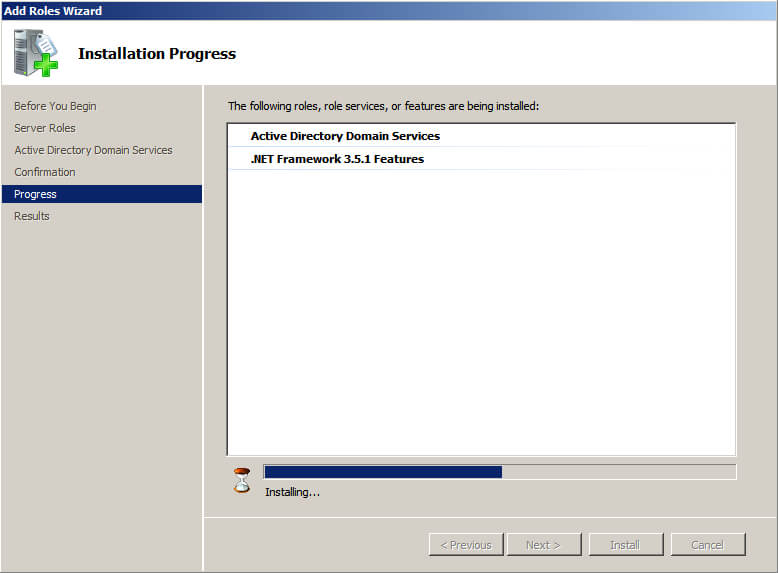
Дожидаемся пока завершится процесс установки роли и компонентов.

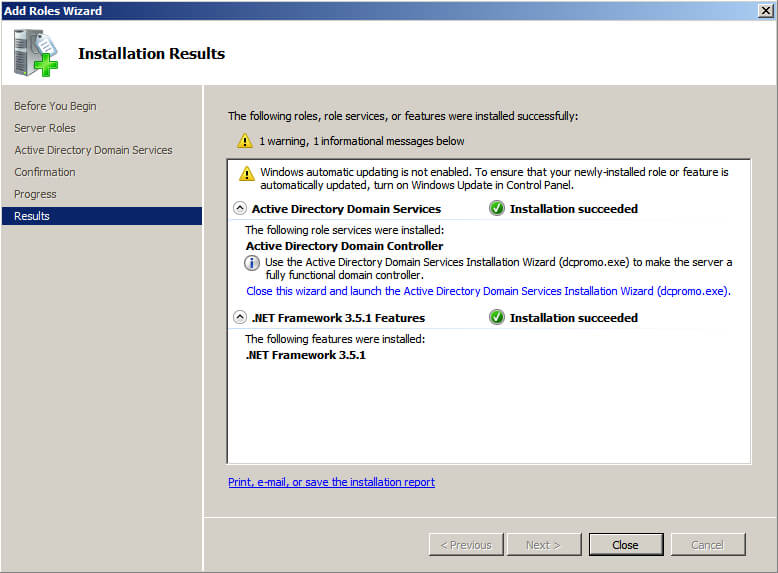
Через какое-то время перед нами появится результат установки, он должен быть успешным как для роли так и для компонентов Installation succeeded. Закрываем мастер установки, нажав Close.

Вернувшись в Server Manager мы увидим, что у нас появилась роль AD DS, однако ее статус неактивен. Чтобы продолжить настройку кликаем на Active Directory Domain Services.

Перед нами открывается уведомление о том, что наш сервер пока ещё не является контроллером домена, и чтобы это исправить нам следует запустить мастер настройки AD DS (dcpromo.exe). Кликаем на ссылку Run the Active Directory Domain Services Installation Wizard или же запускаем его через Пуск – Выполнить – dcpromo.exe.

Перед нами открывается мастер настройки AD DS. Расширенный режим установки можно не включать. Для продолжения кликаем Next

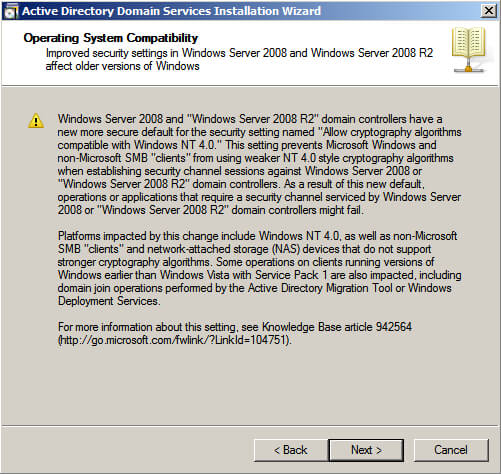
Нас встречает уведомление о том, что приложения и SMB клиенты, которые используют старые небезопасные криптографические алгоритмы Windows NT 4.0 при установке соединений, могут не заработать при взаимодействии с контроллерами домена на базе Windows Server 2008 и 2008 R2, поскольку по умолчанию, они не разрешают работу по данным алгоритмам. Принимаем данную информацию к сведению и кликаем Next

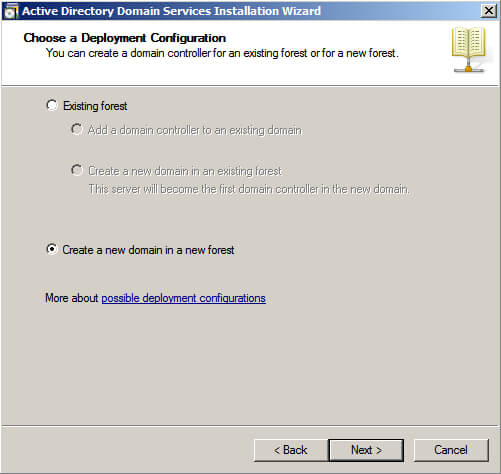
Далее нам нужно выбрать принадлежность данного контроллера домена. Если бы у нас уже имелся лес доменов, то данный DC можно было бы добавить туда, либо добавив его в существующий домен, либо же создав новый домен в существующем лесу доменов. Поскольку мы создаем контроллер домена с нуля, то на следующей вкладке мы выбираем создание нового домена и нового леса доменов Create a new domain in a new forest и кликаем Next.

После этого нам предлагают задать FQDN корневого домена нового леса. В нашем случае мы выбрали merionet.loc. Сервер проверит свободно ли данное имя и продолжит установку, нажимаем Next.

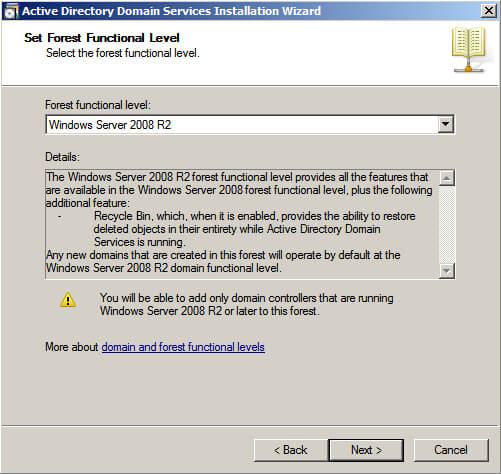
Далее задаем функциональный уровень леса доменов. В нашем случае — Windows Server 2008 R2 и кликаем Next.
Обратите внимание, что после задания функционального уровня, в данный лес можно будет добавлять только DC равные или выше выбранного уровня. В нашем случае от Windows Server 2008 R2 и выше.

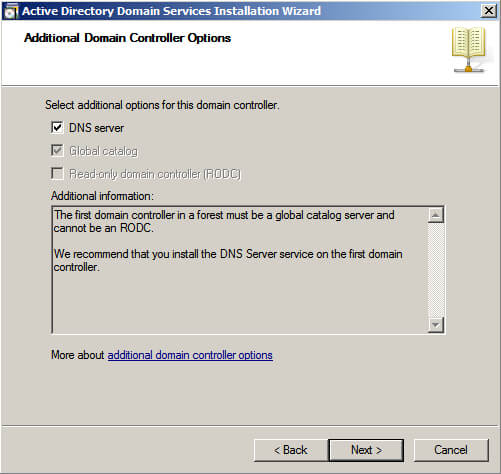
Далее, нам предлагают выбрать дополнительные опции для данного DC. Выберем DNS Server и нажимаем Next.

В случае, если ваш сервер ещё не имеет статического IP адреса, перед вами появится следующее предупреждение с требованием установить статический IP адрес и адрес DNS сервера. Выбираем No, I will assign static IP addresses to all physical network adapters

Устанавливаем статические настройки IP адреса и DNS. В нашем случае – в роли DNS сервера выступает дефолтный маршрутизатор (Default Gateway) нашей тестовой сети.

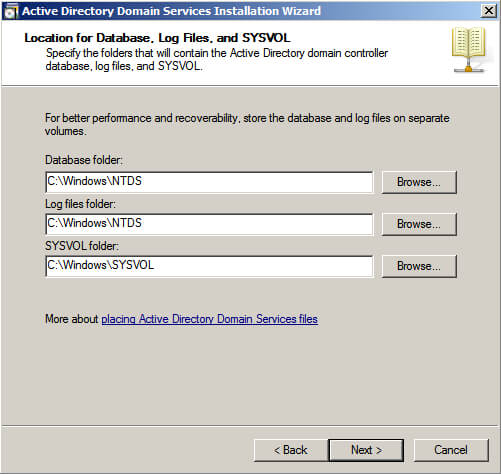
Далее, установщик предлагает нам выбрать путь, по которому будут храниться база данных Active Directory, лог-файл и папка SYSVOL, которая содержит критичные файлы домена, такие как параметры групповой политики, сценарии аутентификации и т.п. Данные папки будут доступны каждому DC в целях репликации. Мы оставим пути по умолчанию, но для лучшей производительности и возможности восстановления, базу данных и лог-файлы лучше хранить в разных местах. Кликаем Next.

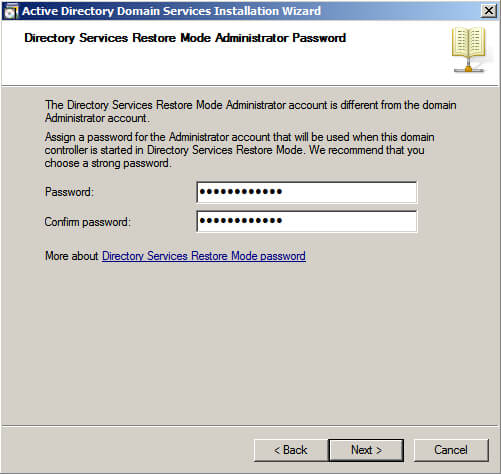
Далее нас просят указать пароль учетной записи администратора для восстановления базы данных Active Directory. Пароль данной УЗ должен отличаться от пароля администратора домена. После установки надежного сложного пароля кликаем Next.

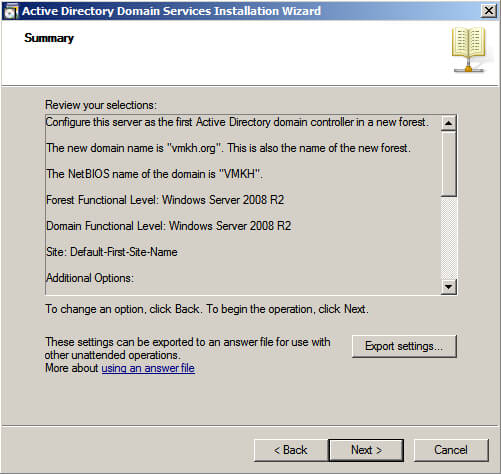
Далее нам выводят сводную информацию о выполненных нами настройках. Проверяем, что все корректно и кликаем Next.

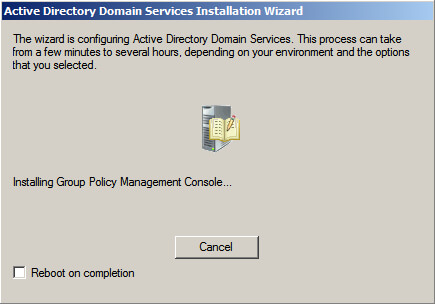
Мастер настройки приступит к конфигурации Active Directory Domain Services. Поставим галочку Reboot on completion, чтобы сервер перезагрузился по завершении конфигурирования.

После перезагрузки сервер попросит нас залогиниться уже как администратора домена MERIONET.

Поздравляем, Вы создали домен и контроллер домена! В следующей статье мы наполним домен пользователями и позволим им логиниться под доменными учетными записями.
This article provides prerequisites and steps for installing Active
Directory Domain Services (AD DS) on Rackspace cloud servers running Microsoft Windows Server 2008 R2
Enterprise 64-bit.
This article does not provide instructions for adding a Domain
Controller (DC) to an already existing Active Directory Forest
infrastructure.
Note: For information about setting up the Active Directory Role
on a cloud server running Windows Server 2012, see Install Active Directory on Windows Server 2012.
Before you install AD DS on a Rackspace cloud server running
Windows Server 2008 R2 Enterprise 64-bit, you must perform the
following prerequisite tasks.
Select your domain name and know the domain administrator password
that you want to use.
Note: Your domain name should be reliably unique. Do not use the
same domain as your website, for example, and avoid extensions like
.local unless you have registered that domain name in DNS. We suggest
a domain name that is not used for anything else, like
internal.example.com.
Windows Server 2008 can properly install and configure DNS during
the AD DS installation if it knows that the DNS is local. To accomplish
this, assign the private network adapter to the preferred DNS
server address of the same private network adapter, as follows:
-
From the Windows Start menu, open Administrative
Tools > Server Manager. -
In the Server Summary section of the Server Manager
window, click View Network Connections. -
In the Network Connections window, right-click the private
adapter and select Properties. -
From the list of conected items, select Internet Protocol Version 4,
and then click Properties. -
Copy the IP address that is displayed in the IP address
box and paste it in the Preferred DNS server box. Then, click
OK.
-
Click OK in the Properties dialog box, and close the
Network Connections window.

Adding the Active Directory Domain Services role installs the
framework for Windows Server 2008 to become a DC and run AD DS. It does
not promote the server to a DC or install AD DS.
-
In the Server Manager window, select the Roles directory.
-
In the Roles Summary section, click Add Roles.
-
On the Before You Begin page of the Add Roles Wizard, click
Next. -
On the Select Server Roles page, select the Active Directory
Domain Services check box, and then click Next. -
On the Confirmation page, click Next.
-
On the Installation Progress page, click Install.
-
On the Results page, after the role is successfully added,
click Close.
- Open the Server Manager window if it is not already
open. - In the Properties area of the Local Servers page,
click Remote Management. - Select the Enable remote management of this server from
other computers check box.
Now that you have prepared the server, you can install AD DS (DCPROMO).
Note: As an alternative to performing steps 1
through 3, you can type dcpromo.exe at the
command prompt. Then, skip to step 4.
-
If it is not already open, open the Server Manager
window. -
Select Roles > Active Directory Domain Services.
-
In the Summary section,click Run the Active Directory
Domain Services Installation Wizard (dcpromo.exe). -
On the Welcome page of the Active Directory Domain Services
Installation Wizard, ensure that the Use advanced mode
installation check box is cleared, and then click Next. -
On the Operating System Compatibility page, click
Next. -
On the Choose a Deployment Configuration page, select Create
a new domain in a new forest and then click Next. -
On the Name the Forest Root Domain page, enter the domain name
that you choose during preparation steps. Then, click
Next.The installation program verifies the NetBIOS name.
-
On the Set Forest Functional Level page, select Windows Server 2008
R2 in the Forest function level list. Then, click Next.The installation program examines and verifies your DNS setting.
-
On the Additional Domain Controller Options page, ensure that
the DNS server check box is selected, and then click Next. -
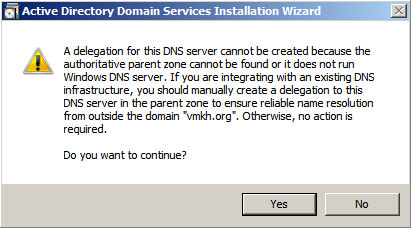
In the message dialog box that appears, click
Yes. -
On the Location for Database, Log Files, and SYSVOL page,
accept the default values and then click Next. -
On the Directory Services Restore Mode Administrator Password
page, enter the domain administrator password that you chose during
the preparation steps. This is not your admin password that was
emailed to you during the creation of your server, although you can
use that password if you want to. Then, click Next. -
On the Summary page, review your selections and then click
Next.The installation begins.
Note: If you want the server to restart automatically after the
installation is completed, select the Reboot on completion check
box. -
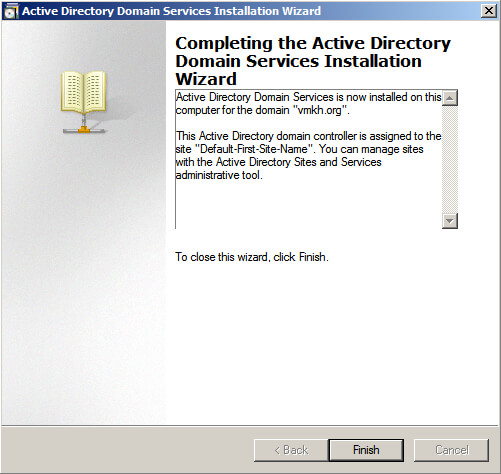
If you did not select the Reboot on completion check box,
click Finish in the wizard. Then, restart the
server. -
After a few minutes, reconnect to your server in the Console in the
Cloud Control Panel or RDP. -
To log in, perform the following steps:
a. Click **Switch User**, and then click **Other User.**

b. For the user, enter the full domain name that you chose, followed by a back slash and **Administrator** (for example, **internal.example.com\\Administrator**).

c. Enter the password that was emailed to you when you first built the server. If you changed your password for the local admin account on this server before you began the installation of AD DS, use that password.

d. Click the log in button.
The installation of Active Directory Domain Services on your server is
complete.
Updated 2 months ago
Active Directory® Domain Services (AD DS) is a server role of the Windows Server® 2008 and Windows Server 2008 R2 operating systems. AD DS provides a distributed directory service that you can use for centralized, secure management of your network.
This guide describes the installation for the AD DS server role. You can use the procedures in this guide to install AD DS on servers that are running Windows Server 2008 or Windows Server 2008 R2 environment.
When you install AD DS to create the first domain controller in a new forest, keep the following considerations in mind:
- You must make forest and domain functional level decisions that determine whether your forest and domain can contain domain controllers that run Microsoft Windows® 2000 Server, Windows Server 2003, Windows Server 2008, or Windows Server 2008 R2.
- Domain controllers running the Microsoft Windows NT® Server 4.0 operating system are not supported with Windows Server 2008 or Windows Server 2008 R2.
- Servers running Windows NT Server 4.0 are not supported by domain controllers that are running Windows Server 2008 or Windows Server 2008 R2.
- The first domain controller in a forest must be a global catalog server and it cannot be an RODC.
Lets take a look at how to install Microsoft’s Active Directory.
1.Specify the preferred DNS server
Windows Server 2008 R2 can properly install and configure DNS during the AD DS installation if it knows that the DNS is local. So That is why we need to set up network parameters:

2. After that Open Server Manager and click on Roles and then Add Roles to start installation:

3.On the Select Server Roles page, select the Active Directory Domain Services check box, and click Add Required Features and then click Next:

4. Click Next (this page introduction about ADDS):

5. Click Install.

6. When the installation is finished you will be shown a success message, Click Close.

7. Enable remote management , Open the Server Manager window if it is not already open and Follow below to enable remote management:

8.Open up Server Manager, expand Roles and click on Active Directory Domain Services. On the right hand side click on the Run the Active Directory Domain Services Installation Wizard (dcpromo.exe) :

9. Click Next on the Welcome wizard:

10. On the Operating System Compatibility page, click Next (The message that is shown now relates to older clients that do not support the new cryptographic algorithms supported by Server 2008 R2, these are used by default in Server 2008 R2)

11. On the Choose a Deployment Configuration page, select Create a new domain in a new forest and then click Next:

12. Enter the domain name that you choose during preparation steps. and click Next:

13. On the Set Forest Functional Level page, select Windows Server 2008 R2 in the Forest function level list. and click Next:

14. On the Additional Domain Controller Options page, select DNS server check box and then click Next:

click Yes on the message dialog box that appears:

15. On the Location for Database, Log Files, and SYSVOL page, accept the default values and then click Next.

16. Choose Active Directory Restore Mode Password and click next:

17. On the Summary page, review your selections(you can also export your settings) and then Click Next:

18. The installation begins and if you want server to restart automatically after the installation is completed, select the Reboot on completion check box:

19. Click Finish to complete installation:

Then click Restart Now to restart the server:
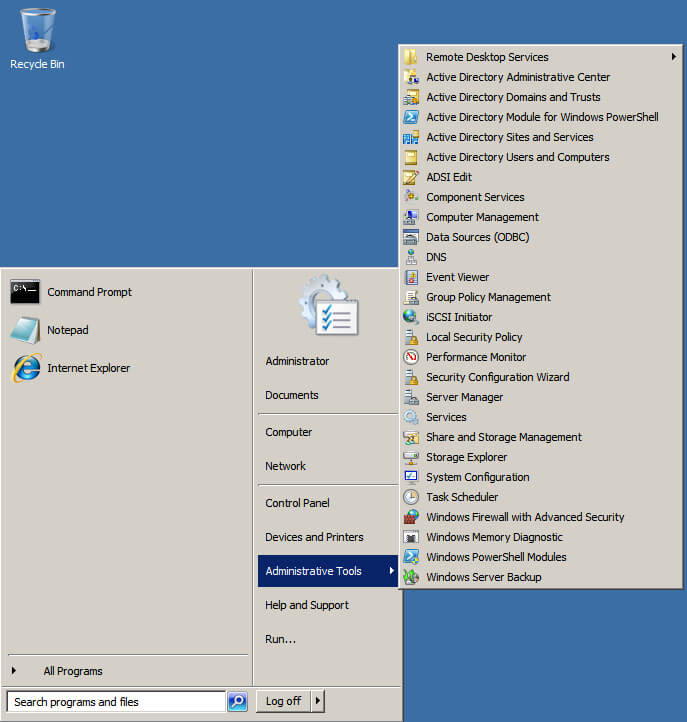
You can see ADDS roles under Administrator Tools from Start:

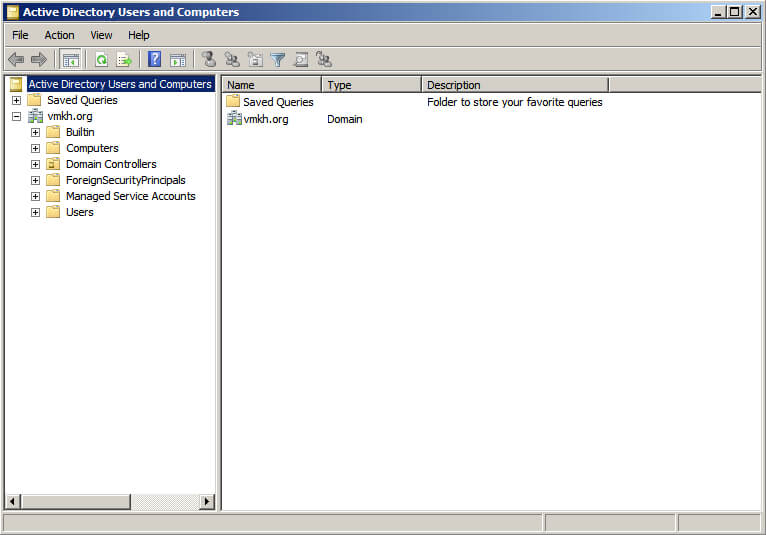
The following windows you can see AD Users and Computers And DNS manager screens:

That’s all – Installation of Active Directory Domain Services on your server is complete.
Данная статья предназначена для тех, кто искал подробное и понятное руководство о том, как установить Active Directory Domain Services на Windows Server 2008 R2.
В этом руководстве мы будем рассматривать тот случай, когда у вас уже есть сервер с установленной на нем операционной системой Windows Server 2008 R2.
Подробно о том, как установить Windows Server 2008 R2, вы можете прочитать в моем руководстве “Установка Windows Server 2008 R2”. Узнать о том, как установить Active Directory Domain Services на Windows Server 2019, вы можете, прочитав “Установка Active Directory Domain Services на Windows Server 2019”.
Рекомендую всегда использовать англоязычные издания Windows Server. Как показывает практика, оригинальные (английские) версии Windows работают стабильнее, к тому же вам будет проще общаться на одном языке с профессионалами в случае возникновения проблем или при желании обменяться опытом.
Перед началом установки роли Active Directory Domain Services необходимо присвоить серверу корректное имя в соответствии со стандартами вашей организации, а затем указать статический IP-адрес, маску подсети, шлюз и адрес сервера DNS.
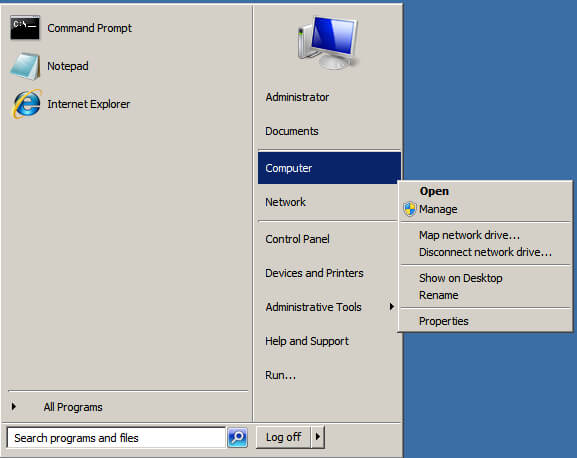
Заходим в систему под учетной записью с правами администратора и переходим в меню “Start”, нажимаем правой кнопкой мыши на “Computer” и выбираем “Properties”.
Далее в окне “System” в разделе “Computer name, domain, and workgroup settings” нажимаем на кнопку “Change settings”.

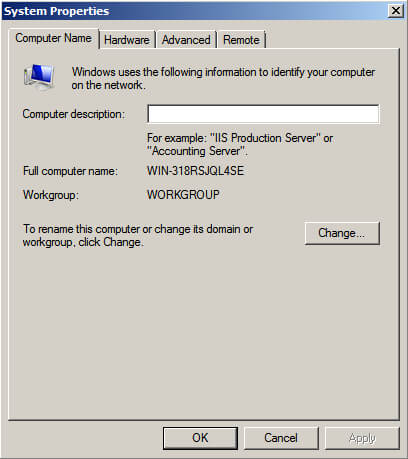
В окне “System Properties” на вкладке “Computer Name” нажимаем на кнопку “Change”.
Настоятельно рекомендую заранее продумать, как будут называться сервера в вашей организации.
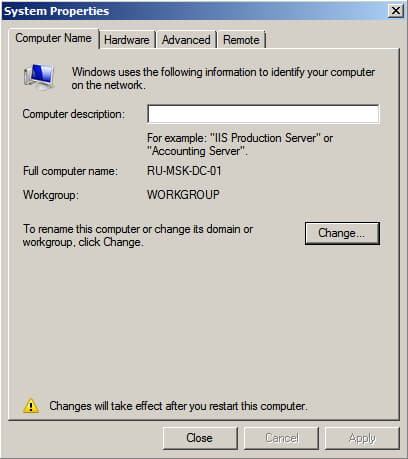
Далее указываем новое имя сервера в поле “Computer Name” и нажимаем на кнопку “OK”.
Система предупредит о том, что для применения новых настроек необходимо перезагрузить сервер.
Нажимаем кнопку “OK”.
В окне “System Properties” нажимаем на кнопку “Close”.
Теперь система предложит перезагрузить сервер для того чтобы новые настройки вступили в силу.
Нажимаем на кнопку “Restart Now”.
Далее сервер начнет перезагружаться.

Теперь необходимо прописать статический IP-адрес в настройках сетевого подключения.
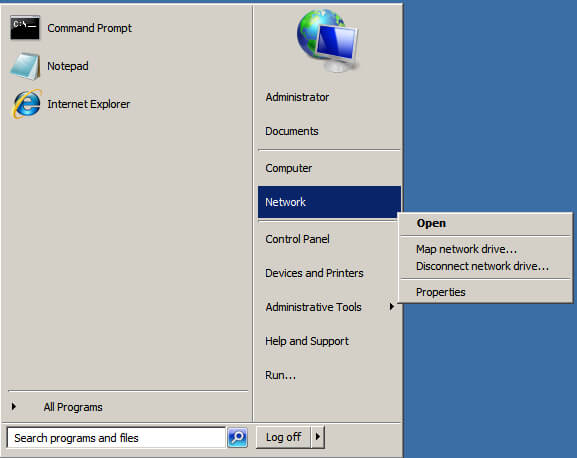
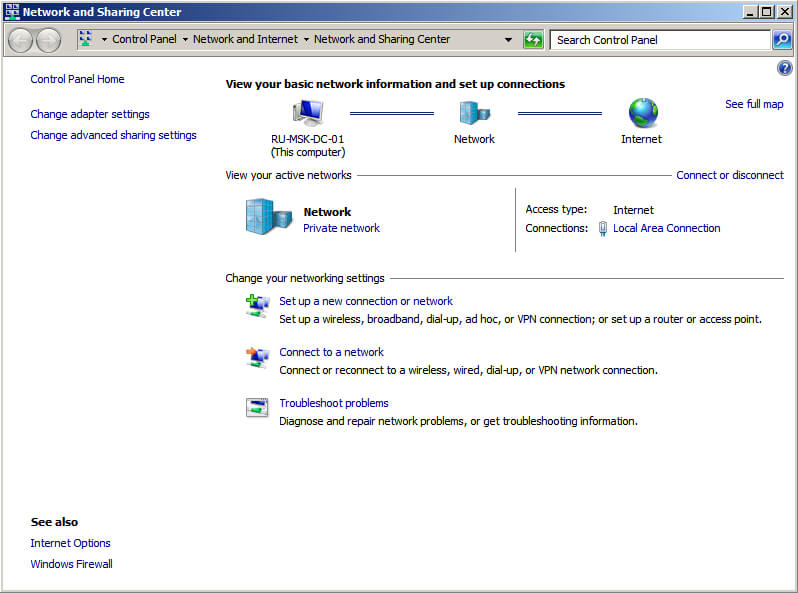
Заходим в систему под учетной записью с правами администратора и переходим в меню “Start”, нажимаем правой кнопкой мыши на “Network” и выбираем “Properties”.
Далее в окне “Network and Sharing Center” нажимаем на кнопку “Change adapter settings”.
Теперь нажимаем правой кнопкой мыши на сетевом подключении “Ethernet” и выбираем пункт “Properties”.
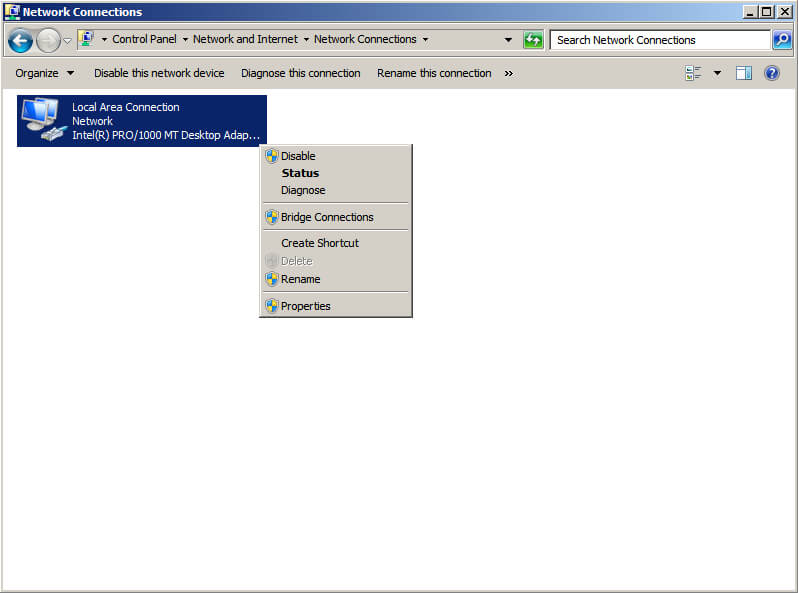
Выбираем “Internet Protocol Version 4 (TCP/IPv4)” и нажимаем на кнопку “Properties”.
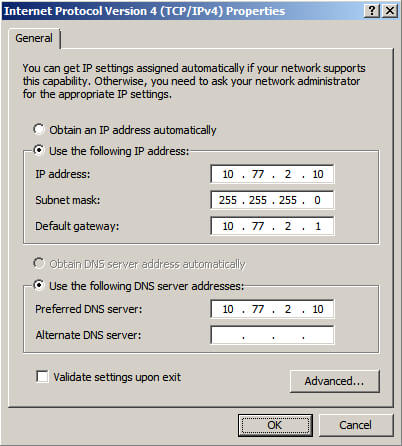
Далее выбираем пункт “Use the following IP address” и указываем свободный IP-адрес, маску подсети и шлюз. Обратите внимание, вы должны заранее понимать, как устроена ваша сеть и знать какие IP-адреса свободны.
В поле “Preferred DNS server” указываем IP-адрес этого сервера, так как на вашем сервере будет присутствовать роль “DNS Server”, которая устанавливается вместе с ролью “Active Directory Domain Services”.
Нажимаем на кнопку “OK”.
В окне “Local Area Connection Properties” нажимаем кнопку “Close”.
Теперь можно приступить к установке роли “Active Directory Domain Services”.
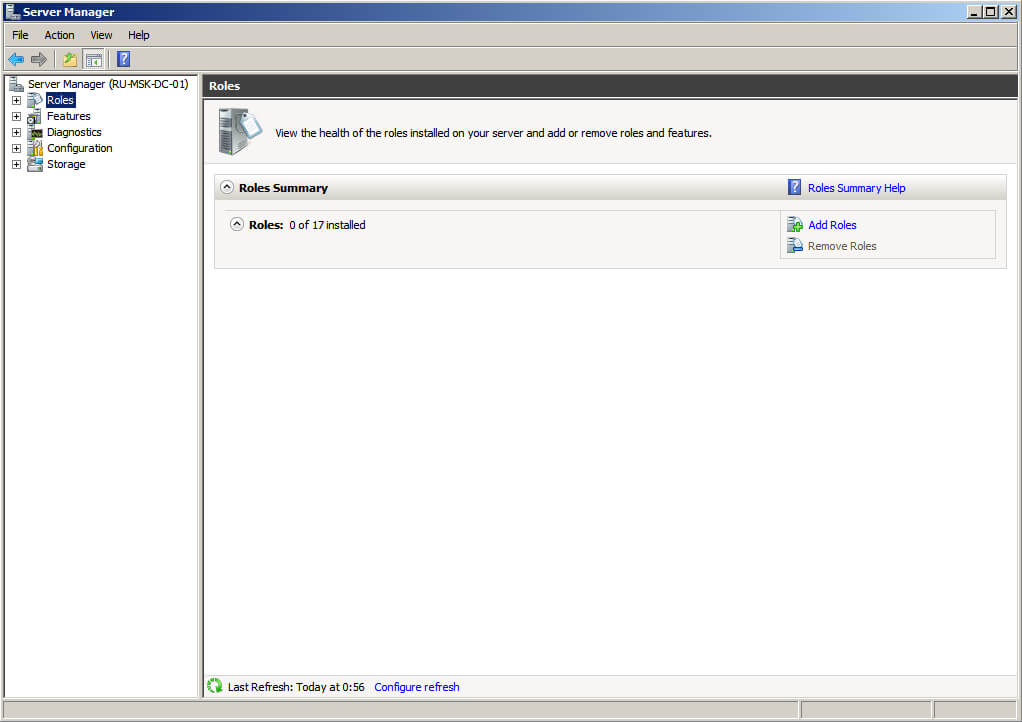
Открываем “Server Manager” и в пункте “Roles” выбираем “Add Roles”.
Нажимаем на кнопку “Next”.
Выбираем роль “Active Directory Domain Services”.
На следующем этапе “Мастер установки ролей” предупредит, что для установки роли “Active Directory Domain Services” нужно установить несколько компонентов.
Нажимаем на кнопку “Add Required Features”.
На этом этапе выбирать роль DNS Server не обязательно. Она будет установлена позже.
Нажимаем на кнопку “Next”.

Далее “Мастер установки ролей” предлагает ознакомиться с дополнительной информацией касательно роли “Active Directory Domain Services”.
Нажимаем на кнопку “Next”.

Для того чтобы начать установку выбранной роли, нажимаем на кнопку “Install”.
Началась установка выбранной роли и необходимых для нее компонентов.
Установка роли “Active Directory Domain Services” завершена.
Теперь нажимаем на кнопку “Close this wizard and launch the Active Directory Domain Services Installation Wizard (dcpromo.exe)”, для того чтобы повысить роль вашего сервера до уровня контроллера домена.
Настоятельно рекомендую заранее продумать какое доменное имя вы будете использовать при добавлении нового леса.
Нажимаем на кнопку “Next”.

Далее предлагается ознакомиться с дополнительной информацией касательно функционала Windows Server 2008 R2.
Нажимаем на кнопку “Next”.
В данном руководстве рассматривается добавление нового леса, поэтому в окне “Active Directory Domain Services Installation Wizard” выбираем пункт “Create a new domain in a new forest”.
Нажимаем на кнопку “Next”.
В поле “FQDN of the new forest root domain” указываем желаемое имя для корневого домена.
Нажимаем на кнопку “Next”.

На следующем шаге предлагается выбрать функциональный уровень нового леса и корневого домена.
Если вы добавляете новый лес и планируете в дальнейшем использовать сервера на базе операционной системы Windows Server 2008 R2, то необходимо выбрать “Windows Server 2008 R2”.
Нажимаем на кнопку “Next”.
Для корректной работы контроллера домена необходимо установить роль “DNS server”.
Выбираем “DNS server” и нажимаем на кнопку “Next”.
На данном этапе “Мастер настройки AD DS” предупредит, что делегирование для этого DNS-сервера не может быть создано.
Нажимаем на кнопку “Yes”.
Теперь можно изменить пути к каталогам базы данных AD DS, файлам журнала и папке SYSVOL. Рекомендую оставить эти значения по умолчанию.
Нажимаем на кнопку “Next”.
Указываем пароль для DSRM (Directory Service Restore Mode — режим восстановления службы каталога) и нажимаем на кнопку “Next”.
На следующем шаге отображается сводная информация по настройке сервера.
Нажимаем на кнопку “Next”.
Начался процесс повышения роли сервера до уровня контроллера домена.
Процесс повышения роли сервера до уровня контроллера домена завершен.
Нажимаем на кнопку “Finish”.
Теперь система предложит перезагрузить сервер для того чтобы новые настройки вступили в силу.
Нажимаем на кнопку “Restart Now”.
Далее сервер начнет перезагружаться.

Повышение роли сервера до уровня контроллера домена завершено.
Для управления пользователями, группами и другими объектами каталога Active Directory можно использовать привычную многим оснастку Active Directory Users and Computers.
Заходим в систему под учетной записью с правами администратора домена.
Переходим в меню “Start” и выбираем пункт “Administrative Tools”, далее выбираем “Active Directory Users and Computers”.
Откроется оснастка Active Directory Users and Computers.
Подпишись
⭐ Telegram | Блог
🎬 YouTube
🐦 Twitter
🎨 Instagram
🐘 Mastodon
🧵 Threads
🎸 Facebook
🧊 Bluesky
🎥 TikTok
💻 LinkedIn
📣 daily.dev Squad
🧩 LeetCode
🐈 GitHub
Комьюнити IT-экспертов
🚀 Telegram | Чат
👾 Discord
Этот контент создан искусственным интеллектом?
Нет! Каждая статья — результат моей работы, наполненной страстью к Docker и десятилетиями опыта в IT. Я применяю ИИ для улучшения грамматики, чтобы обеспечить четкость технических деталей, однако все идеи, стратегии и рекомендации исключительно мои. Этот метод иногда может вызывать срабатывание детекторов ИИ, но можете быть уверены, что вся представленная информация и опыт — подлинно мои.
Active Directory Domain Controller is a critical part of Microsoft Server infrastructure. Active Directory is a directory which stores all the information about resources of a domain in a database. The Active Directory database is NTDS.dit and is stored in server with Active Directory Domain Services server role installed. Resources can be objects like users, computers, groups, printers and so on. Active Directory allows you to manage users, computers, and resources from central location. Before you install Active Directory Domain Controller in your network, it is better to know about logical structure of Active Directory in Server 2008. This article shows steps to install Active Directory Domain Controller in Windows Server 2008 R2.
The diagram below shows an example of network with domain controller. MBG-DC01 will be Active Directory Domain Controller once the role is installed. PC1 and PC2 will be joined to domain.
After installing Windows Server 2008, the very first thing you should do is rename the Server name and assign static IP address. Open Server Manager.

Select Roles and click Add Roles button as shown above. Click Next on before you begin page.

On Select Server Roles page, check Active Directory Domain Services role from the list. This role requires .Net Framework 3.5.1 so click Add Required Feature. Click Next. Introduction to Active Directory page is displayed. Read the introduction and click Next.

Click Install. The installation will now begin.

After installation is complete, click the dcpromo link.

AD DS installation wizard will open. Check use advanced mode installation option. Click Next.

Read the OS compatibility page. Older operating systems like Windows NT that do no support new stronger cryptography algorithms may not be able to connect to Windows Server 2008 or 2008 R2. Click Next.

Choose option, create a new domain in a new forest. Click Next.

Type the root domain name. Here the root domain name is, mustbegeek.com. Click Next.

NetBIOS name is automatically selected as shown above. Click Next.

Choose forest functional level. Since this server is the forest root domain I will choose Server 2008 R2 as forest functional level. Click Next.

DCpromo tries to find the DNS server, if it doesn’t find it will prompt you to setup DNS server. It is good idea to make Active Directory as DNS server too. DNS is required for many components of Windows Server to work properly. So check DNS server. This will create AD integrated DNS zone. Click Next.

You now have option to specify installation location for Database, Log and Sysvol folders. Database folder is where the NTDS.DIT database file will be stored. Log folder is where the logs of the database are stored. SYSVOL is the folder where all the replication information are stored. I will leave the default installation location and click Next.

Type the directory services restore mode administrator password and click Next. This password comes in handy while restoring the Active Directory should the server fail for some reason.

Review the summary page and click Next.

The installation will now start.

Click Finish to complete the installation. The server will now reboot to complete the installation. After server reboots, you can open Active Directory Users and Computers to verify the installation of domain controller. You can now create user accounts and join hosts to the domain. You can manage Active Directory using various tools like, Active Directory Users and Computer, Active Directory Sites and Services and Active Directory Domains and Trusts.
The following two tabs change content below.
- Bio
- Latest Posts
Bipin is a freelance Network and System Engineer with expertise on Cisco, Juniper, Microsoft, VMware, and other technologies. You can hire him on UpWork. Bipin enjoys writing articles and tutorials related to Network technologies. Some of his certifications are, MCSE:Messaging, JNCIP-SEC, JNCIS-ENT, and others.