
Если вы попробуете запустить редактор локальной групповой политики в Windows 11/10 Домашней редакции, вы получите сообщение об ошибке «Не удается найти gpedit.msc». Причина — отсутствие редактора в этой версии системы. Однако, при желании, его можно включить.
В этой простой инструкции о том, как включить gpedit.msc в Домашней (Home) версии Windows с помощью простых команд и дополнительная информация на тему, которая может быть полезной.
Установка gpedit.msc средствами системы

Самый быстрый и исправно работающий метод включения редактора локальной групповой политики в Windows 11/10 — создание bat файла со следующим кодом:
pushd "%~dp0"

dir /b %SystemRoot%\servicing\Packages\Microsoft-Windows-GroupPolicy-ClientExtensions-Package~3*.mum >List.txt
dir /b %SystemRoot%\servicing\Packages\Microsoft-Windows-GroupPolicy-ClientTools-Package~3*.mum >>List.txt

for /f %%i in ('findstr /i . List.txt 2^>nul') do dism /online /norestart /add-package:"%SystemRoot%\servicing\Packages\%%i"
pause
Создав файл, нажмите по нему правой кнопкой мыши и выполните запуск от имени администратора.
Дождитесь завершения выполнения всех команд:

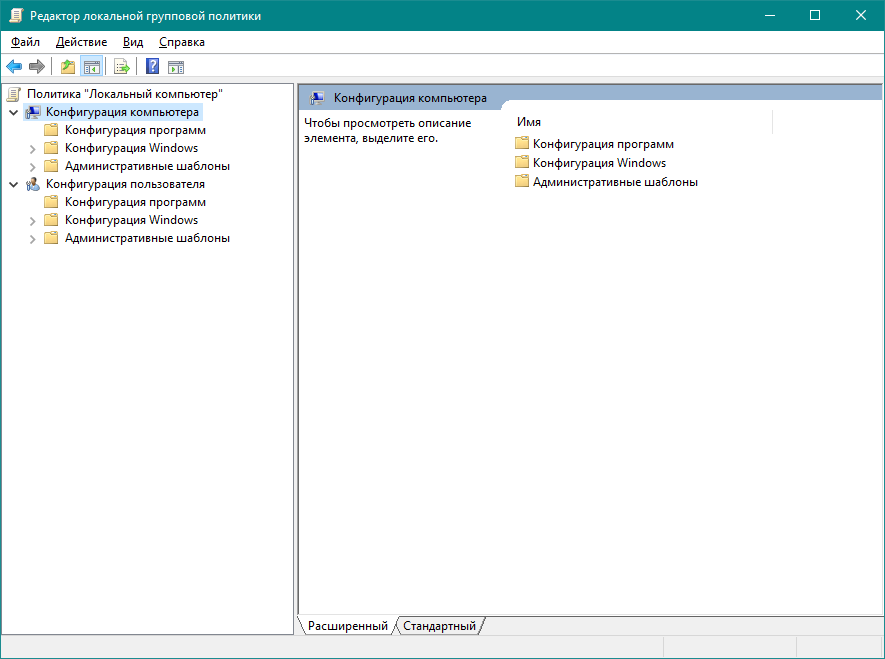
Останется закрыть командную окно командной строки и запустить gpedit.msc как обычно — редактор локальной групповой политики будет исправно работать, заданные настройки применяться и сохраняться:

Решение возможных проблем, если редактор локальной групповой политики всё равно не запускается:
- Попробуйте перезагрузить компьютер и попробовать снова.
- Попробуйте скопировать папки GroupPolicy, GroupPolicyUsers и файл gpedit.msc из C:\Windows\SysWOW64 в C:\Windows\System32
- Сообщение «Консоль управления MMC не может создать оснастку при запуске gpedit.msc — попробуйте скачать этот архив, распаковать его и запустить файл нужной разрядности от имени администратора.
Если эти варианты не помогли, попробуйте ещё один способ:
- Загрузите архив Group Policy Editor for Windows 10 & 11 Home Edition с этой страницы и распакуйте его.

- Запустите файл setup.exe и выполните установку. Если будет запрошена установка .NET Framework — выполните её тоже.
- Запустите файл gpedit-enabler.bat от имени администратора из папки с распакованным архивом и дождитесь выполнения команд.

Выполнив все действия, проверьте запуск и работу редактора локальной групповой политики теперь.
И, в завершение, ещё одна возможность — использование стороннего редактора, такого как Policy Plus, если другие методы не срабатывают.
Консоль редактора локальных групповых политик в Windows (gpedit.msc) используется для тонкой настройки параметров Windows.
Gpedit.msc
– это стандартная MMC оснастка, доступная во всех версиях Windows (Pro/Enterprise/Education), кроме домашних редакций (Home/Single Language). В этой статье мы рассмотрим особенности использования локального редактора GPO, а также способы установить и запустить gpedit.msc в домашних редакциях Windows 10 и Windows 11 Home.
Содержание:
- Настройка Windows с помощью редактора локальных групповых политик
- Установка редактора локальной политики gpedit.msc в Windows 10/11 Домашняя
Настройка Windows с помощью редактора локальных групповых политик
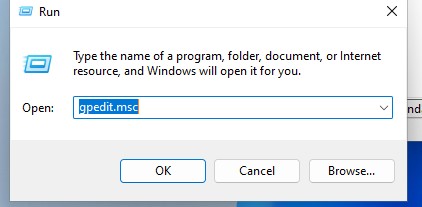
Чтобы запустить редактор локальных групповых политик в Windows, нужно выполнить команду
gpedit.msc
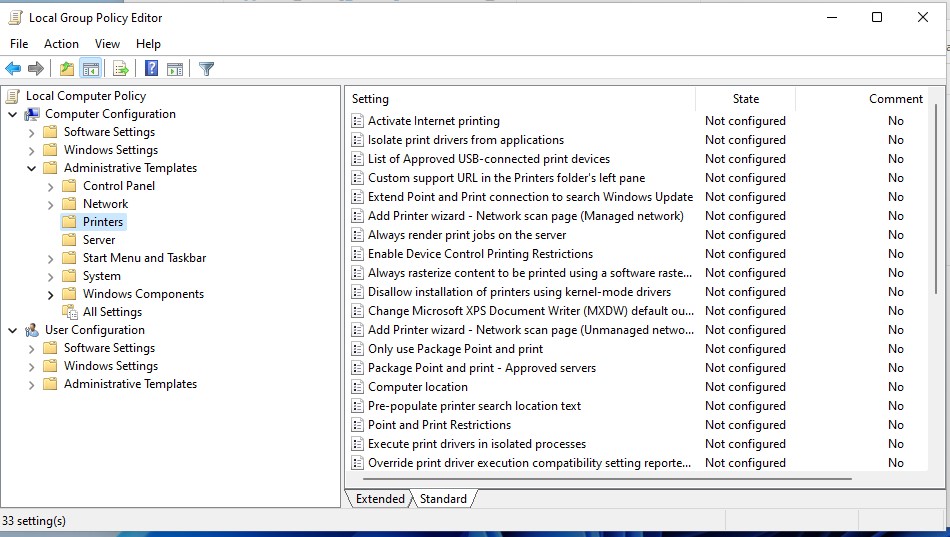
Доступные настройки в консоли редактора локальной GPO представлены в виде древовидной структуры и разделены на две секции:
- Параметры компьютера (Computer Configuration) – глобальные настройки ОС Windows и компонентов. Вносят изменения в раздел реестра HKEY_LOCAL_MACHINE (HKLM)
- Параметры пользователей (User configuration) – настройки, которые применяются для пользователей компьютера. Изменения вносятся в ветку реестра пользователя HKEY_CURRENT_USER (HKCU)
В редакторе GPO содержится несколько тысяч настроек Windows, которые расположены в стройной иерархии, имеют подробное описание и предлагают для выбора предопределенные опции настройки.
В каждой секции есть по три подраздела:
- Software Settings
- Windows Settings — здесь расположены основные настройки безопасности Windows (в том числе настройки политики паролей, блокировки аккаунтов, политики аудита, назначения прав пользователей)
- Administrative Templates – настройки различных компонентов и подсистем Windows. Здесь доступны как стандартные административные шаблоны Windows, так и дополнительно установленные ADMX шаблоны групповых политик (например, admx шаблоны для управления программами из пакета MS Office или шаблоны для Google Chrome)
Чтобы изменить любой параметр GPO в консоли, нужно найти раздел, в котором он находится и открыть его настройки в правой панели.
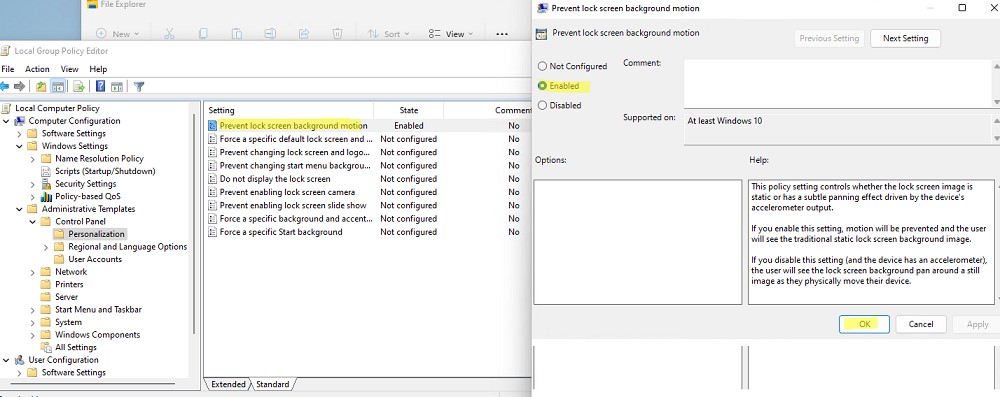
По умолчанию все параметры в разделе административных шаблонов не настроены (Not configured). У большинства настроек GPO доступно есть всего три параметра: Enabled/Disabled/Not configured. По умолчанию все политики не заданы. Вы можете включить или отключить параметр, выбрав Enabled или Disabled, и нажав OK.Если вы хотите вернуть стандартное значение настройки, выберите Not Configured.
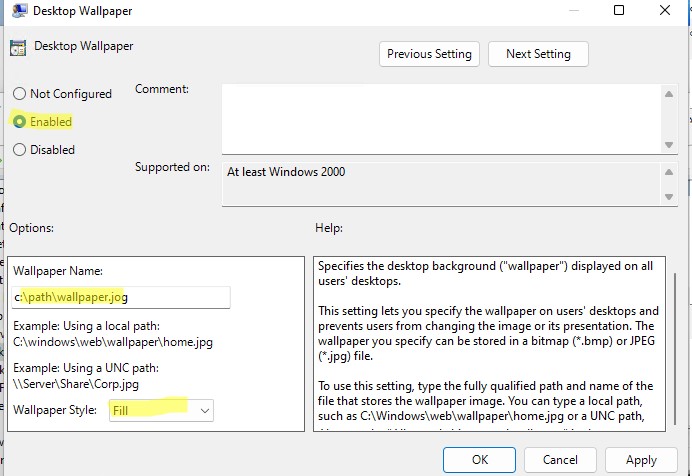
У некоторых настроек GPO можно задать дополнительные параметры, которые можно настроить в секции Options. Например, чтобы задать файл обоев рабочего стола через GPO, нужно включить политику (Enabled), указать путь к файлу с рисунков в поле и выбрать стиль рисунка.
В поле Help доступно детальное описание каждого параметра GPO. В поле Supported on указаны версий Windows, для которых данная политика применяется. Например, At least Windows 10 означает, что политика применима только к Windows 10/11 и Windows Server 2016/2019/2022. Данный параметр не будет работать на Windows 8.1 или 7.
Настройки, заданные в редакторе gpedit.msc имеют высокий приоритет и перезаписывают любые настройки, заданные пользователем или администратором в графическом интерфейсе Windows или в панели управления.
Редактор локальной GPO хранит настройки примененных параметров в registry.pol файлах в каталогах
-
%SystemRoot%\System32\GroupPolicy
– политики компьютера -
%SystemRoot%\System32\GroupPolicyUsers
– политики пользователя
Если вы удалите файлы из этих папок, вы сбросите все настройки локальных политик на значения по-умолчанию (Not configured).
В ADMX файлах GPO определяются параметры реестра и их значения, в которые нужно внести изменения. Поэтому фактически, когда вы включили той или иной параметр реестра, обработчик групповых политики внесет изменения в реестр.
Соответствия между названия параметров политик и ключами реестра описываются в Excel документе Windows11andWindowsServer2019PolicySettings—23H2.xlsx, доступном для загрузки с сайта Microsoft. Актуальная версия справочника — Group Policy Settings Reference Spreadsheet for Windows 11 2023 Update 23H2, https://www.microsoft.com/en-us/download/details.aspx?id=105668
Установка редактора локальной политики gpedit.msc в Windows 10/11 Домашняя
Консоль редактора локальной GPO отсутствует в домашних редакциях Windows (Home и Single Language). При попытке открыть MMC консоль редактора, появится ошибка:
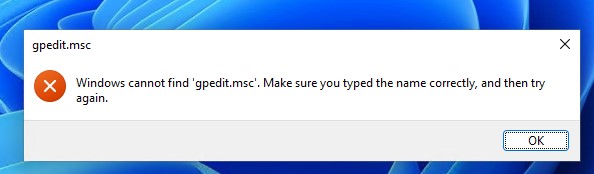
Не удается найти gpedit.msc. Проверьте, правильно ли указано имя и повторите попытку.
Есть обходной недокументированный способ установки редактора gpedit.msc в Windows 10 или 11 Home из хранилища пакетов Windows. Откройте командную строку (cmd.exe) с правами администратора и выполните две следующие команды:
FOR %F IN ("%SystemRoot%\servicing\Packages\Microsoft-Windows-GroupPolicy-ClientTools-Package~*.mum") DO (DISM /Online /NoRestart /Add-Package:"%F")
FOR %F IN ("%SystemRoot%\servicing\Packages\Microsoft-Windows-GroupPolicy-ClientExtensions-Package~*.mum") DO (DISM /Online /NoRestart /Add-Package:"%F")
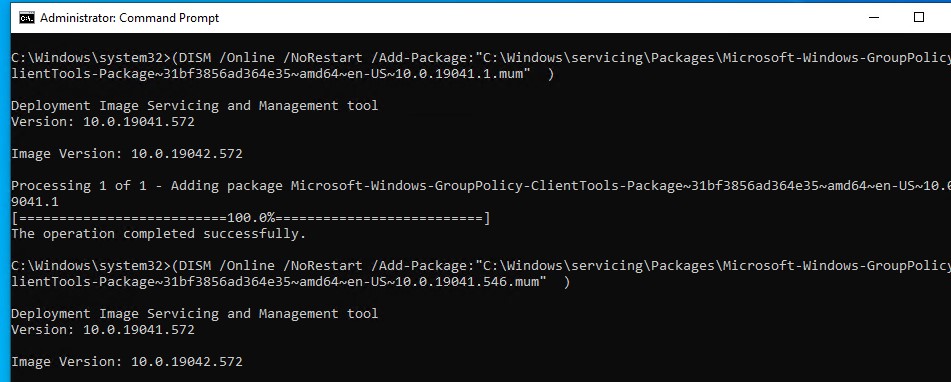
DISM выполните установку пакетов ClientTools и ClientExtensions из внутреннего хранилища Windows. Если у вас установлен другой язык, например русский, также будут установлены пакеты с ru-RU:
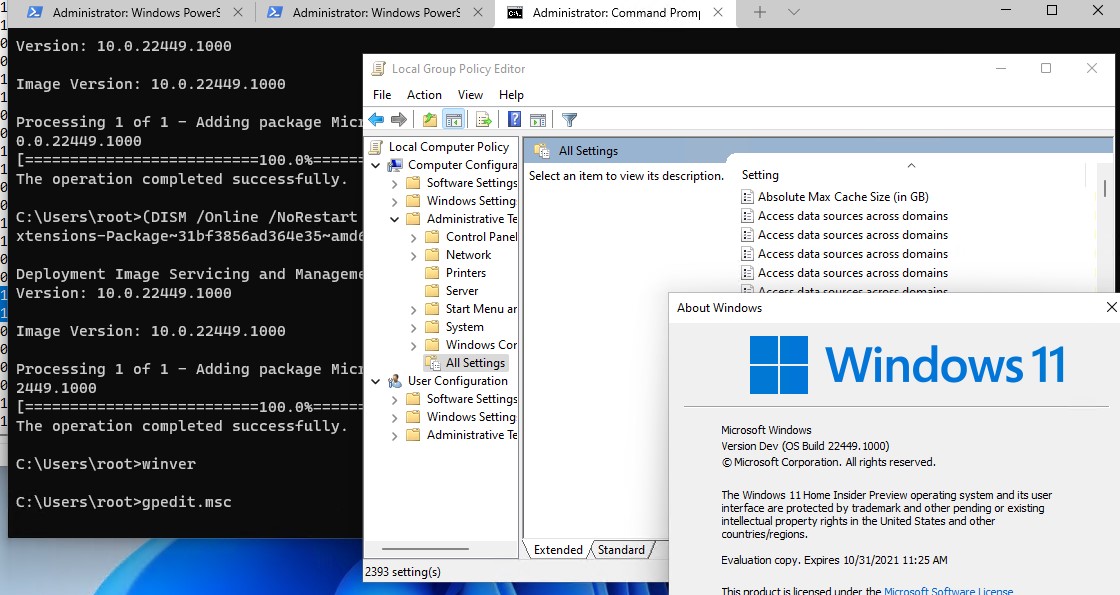
Теперь вы сможете запустить консоль gpedit.msc в домашней версии Windows.
Однако, после редактирования политик, настройки сразу не будут применяться к реестру, как в Pro/Enterprise редакции. Здесь не поможет ни выполнение команды gpupdate /force, ни перезагрузка компьютера. Дело в том, что домашней редакции Windows отсутствует обработчик GPO, который применяет настройки из registry.pol файла в реестр. Для автоматического применения GPO придется обновить редакцию Windows с Home до Pro, но это не всегда возможно.
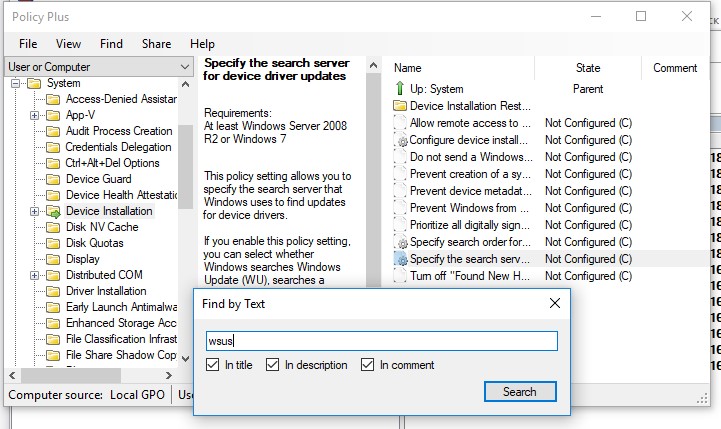
К счастью, есть обходной способ применения настроек GPO в Windows Home с помощью сторонней утилиты Policy Plus (https://github.com/Fleex255/PolicyPlus). Policy Plus – это альтернативный редактор GPO для Windows. Он позволяет редактировать настройки локальной GPO без использования консоли gpedit.
Чтобы применить настройки из локальных групповых политики из POL файлов, закройте MMC оснастку gpedit.msc и выберите в Policy plus параметр File -> Save Policy.
Должно появится сообщение:
User policies: saved to disk and applied diff to Registry.
Computer policies: saved to disk and applied diff to Registry.

Редактор локальных групповых политик (или сокращенно gpedit.msc) — это оснастка для консоли управления Microsoft (Microsoft Management Console, MMC), которая позволяет вносить тонкие настройки в групповые политики. Например, параметры безопасности системы, аудит входа или ввода неверного пароля, а также настройка компонентов системы.
Обычно, если есть та или иная проблема, вы находите решение в интернете и там администратор советует вам открыть gpedit.msc, перейти по определенному пути и включить галочку.
Но на системе версии Windows 10 Home данная оснастка отсутствует. Можно, конечно, попытаться найти другое решение и внести корректировку в реестр вручную, но это чревато другими ошибками.
Если консоль не установлена, то при вводе команды ‘gpedit.msc‘ в окне запуска (Win-R) у вас появится ошибка.

Вот инструкция как ее установить:
Откройте консоль (cmd) в режиме администратора. Обычно, это можно сделать, нажав правой кнопкой на меню Пуск и выбрав соответствующий пункт. Если там нет такого пункта, то начните вводить в меню Пуск либо по кнопке поиск на панели задач «командная строка» и у вас должно появится информация о запуске как на картинке. Выберите пункт «Запуск от имени администратора«.

В окне командной строки необходимо ввести последовательно две команды. То есть сначала первую команду:
FOR %F IN ("%SystemRoot%\servicing\Packages\Microsoft-Windows-GroupPolicy-ClientTools-Package~*.mum") DO (DISM /Online /NoRestart /Add-Package:"%F")Нажать Enter и подождать ее завершения «Операция успешно завершена.»
И затем выполнить вторую команду:
FOR %F IN ("%SystemRoot%\servicing\Packages\Microsoft-Windows-GroupPolicy-ClientExtensions-Package~*.mum") DO (DISM /Online /NoRestart /Add-Package:"%F")Нажать Enter и также подождать ее завершения «Операция успешно завершена.».
Теперь можете смело пробовать вызывать окно запуска команд (Win+R) и вводить туда gpedit.msc.
Следует обратить внимание, что после изменения локальных политик, для их применения пользователям редакций Windows 10 Home необходимо перезагрузить компьютер.
Кроме того, в Home редакциях Windows не поддерживаются множественные локальные политики (MLGPO).
(Visited 9 554 times, 2 visits today)
Posted by SnowLeo
The Local Group Policy Editor (gpedit.msc) is a Windows tool used by Administrators to modify group policies. Group Policy is used by Windows domain administrators to modify Windows policies for all or a particular PC on the domain. With the help of gpedit.msc, you can easily control which application can run by which users can lock down certain features for particular users, restrict access to specific folders, modify Windows user interface and the list goes on.
Also, there is a difference between Local Group Policy and Group Policy. If your PC is not in any domain then the gpedit.msc can be used to edit policies that apply on the particular PC and in this case, it is called Local Group Policy. But if the PC is under a domain, the domain administrator can modify policies for a particular PC or all the PCs under the said domain and in this case, it is called Group Policy.

Now Group Policy Editor is also referred to as gpedit.msc as you may have noticed above, but this is because the filename of the Group Policy Editor is gpedit.msc. But sadly, Group Policy is not available for Windows 10 Home Edition users, and it’s only available for Windows 10 Pro, Education, or Enterprise edition. Not having gpedit.msc on Windows 10 is a huge drawback but don’t worry. In this article, you will find a way to easily enable or install the Group Policy Editor (gpedit.msc) on Windows 10 Home Edition.
For Windows 10 Home Edition users, they have to make changes through Registry Editor which is quite a task for a novice user. And any wrong click can seriously damage your system files and may lock you out of your own PC. So without wasting any time, let’s see How to Install Group Policy Editor on Windows 10 Home with the help of the below-listed tutorial.
Table of Contents
Make sure to create a restore point just in case something goes wrong.
First, see if you have Group Policy Editor installed on your PC or not. Press Windows Key + R and this will bring up the Run dialog box, now type gpedit.msc and hit Enter or click OK if you don’t have the gpedit.msc installed on your PC then you will see the following error message:
“Windows cannot find ‘gpedit.msc’. Make sure you typed the name correctly, and then try again.”

Now it is confirmed that you don’t have Group Policy Editor installed, so let’s continue with the tutorial.
Method 1: Install GPEdit Package in Windows 10 Home Using DISM
1. Open Command Prompt. The user can perform this step by searching for ‘cmd’ and then press Enter.

2. Type the following command one by one and hit Enter after each one:
FOR %F IN ("%SystemRoot%\servicing\Packages\Microsoft-Windows-GroupPolicy-ClientTools-Package~*.mum") DO (DISM /Online /NoRestart /Add-Package:"%F")

FOR %F IN ("%SystemRoot%\servicing\Packages\Microsoft-Windows-GroupPolicy-ClientExtensions-Package~*.mum") DO (DISM /Online /NoRestart /Add-Package:"%F")

3. Wait for the command to finish executing, and this will install the ClientTools and ClientExtensions packages on Windows 10 Home.
Microsoft-Windows-GroupPolicy-ClientTools-Package~…~amd64~~….mum
Microsoft-Windows-GroupPolicy-ClientTools-Package~…~amd64~en-US~….mum
Microsoft-Windows-GroupPolicy-ClientExtensions-Package~…~amd64~~….mum
Microsoft-Windows-GroupPolicy-ClientExtensions-Package~…~amd64~en-US~….mum
4. Press Windows Key + R then type gpedit.msc and hit Enter to open Group Policy Editor.
Note: No reboot is required to run Group Policy Editor successfully.
5. This will successfully launch Group Policy Editor, and this GPO is fully functional and contains all the necessary policies available in Windows 10 Pro, Education, or Enterprise edition.

Method 2: Install Group Policy Editor (gpedit.msc) using a third-party installer
Note: This article will use a third-party installer or patch to install gpedit.msc on Windows 10 Home edition. Credit for this file goes to davehc for posting it in Windows7forum, and user @jwills876 posted it on DeviantArt.
1. Download Group Policy Editor (gpedit.msc) from this link.
2. Right-click on the downloaded zip file then selects Extract here.
3. You will see a Setup.exe where you extracted the archive.
4. Right-click on the Setup.exe and select Run as Administrator.
5. Now, without closing the setup file, if you have 64-bit Windows, you will need to follow the below steps.

a. Next, navigate to C:\Windows\SysWOW64 folder and copy the following files:
GroupPolicy
GroupPolicyUsers
gpedit.msc

b. Now press Windows Key + R then type %WinDir%\System32 and hit Enter.
c. Paste the files & folders you copied in step 5.1 in the System32 folder.

6. Continue with the installation but at the last step, don’t click on Finish and don’t close the installer.
7. Navigate to C:\Windows\Temp\gpedit\ folder, then right-click on x86.bat (For 32bit Windows Users) or x64.bat (For 64bit Windows Users) and Open it with Notepad.

8. In the Notepad, you will find 6 string lines containing the following:
%username%:f

9. You need to replace %username%:f with “%username%”:f (Including the quotes).

10. Once finished, save the file and make sure to run the file as Administrator.
11. Finally, click on the Finish button.
Fix MMC could not create the snap-in error:
1. Press Windows Key + R then type sysdm.cpl and hit Enter to open System Properties.
2. Switch to Advanced tab then click on “Environment Variables” button at the bottom.

3. Now under the System variables section, double-click on “Path“.

4. On the Edit environment variable window, click on New.

5. Type %SystemRoot%\System32\Wbem and hit Enter.

6. Click OK then again click OK.
This should fix MMC could not create the snap-in error but if you’re still stuck then follow this tutorial.
Method 3: Use Policy Plus (Third-party tool)
If you don’t want to use Group Policy Editor or find the above tutorial too technical, don’t worry you can easily download and install a third-party tool called Policy Plus, an alternative to Windows Group Policy Editor (gpedit.msc). You can download the utility for free from the GitHub. Just download the Policy Plus and run the application as it doesn’t require installation.

Recommended:
- Clear Clipboard using Command Prompt or Shortcut
- What is a VPN, and how it works?
- Increase Microphone Volume in Windows 10
- Run Android Apps on Windows PC
That’s it you have successfully Install Group Policy Editor (gpedit.msc) on Windows 10 Home Edition but if you still have any queries regarding this tutorial then feel free to ask them in the comment’s section.
Readers help support Windows Report. We may get a commission if you buy through our links.
Read our disclosure page to find out how can you help Windows Report sustain the editorial team. Read more
As we all know, there are some differences between the Home and Professional versions of Windows 10. One of these is the missing gpedit.msc or Local Group Policy Editor in the Home edition, but it can always be installed manually.
There are a couple of ways you can do that, including running a few commands or using a reliable alternative to Local Group Policy Editor. We will focus on the former in the following sections.
Does Windows 10 Home have Gpedit?
The Group Policy Editor (gpedit.msc) cannot be accessed by default in any Home or Starter edition of Windows 10, and the same can be applied to previous Windows releases such as Windows 7, though the Pro and Enterprise editions have it built-in.
This isn’t the only component that’s missing, but the same goes for Group Policy Management Console. Luckily, we have a guide on how to install Group Policy Management Console that can help you with that.
How do I enable Gpedit msc in Windows 10?
-
1. Type cmd in the Search bar, and click on Run as administrator.

-
2. Click Yes in the UAC prompt.
-
3. Paste the following two commands one at a time, and hit Enter after each:
FOR %F IN ("%SystemRoot%\servicing\Packages\Microsoft-Windows-GroupPolicy-ClientTools-Package~*.mum") DO ( DISM /Online /NoRestart /Add-Package:"%F" )FOR %F IN ("%SystemRoot%\servicing\Packages\Microsoft-Windows-GroupPolicy-ClientExtensions-Package~*.mum") DO ( DISM /Online /NoRestart /Add-Package:"%F" )
-
4. To verify if the Local Group Policy Editor is installed, press Windows + R to open Run, type gpedit.msc and click OK.


If your PC does not have Group Policy Editor enabled, you can easily tweak some settings to enable it. For this, you will have to use Command Prompt.
And once done, you will have gpedit.msc running in Windows 10 Home. If you have any troubles with DISM, check out what to do if DISM commands fail in Windows 10.
- FIX: Your organization manages updates on this PC error
- How to disable telemetry in Windows 11
- Download & install Group Policy Editor on Home Edition
What can I do if the Group Policy Editor doesn’t start?
1. Force update the Group Policy Editor
- Press Windows + R to open Run, type the following command, and click OK:
gpupdate /force

Windows will now force update the policies on your computer, and it should also fix issues with gpedit.msc.
2. Make changes in the Registry
- Press Windows + R to open the Run console, type regedit, and press Enter or click OK.
- Navigate to the following location in the Registry:
HKEY_CLASSES_ROOT/CLSID/{8FC0B734-A0E1-11D1-A7D3-0000F87571E3}/InProcServer32
- Double-click the Default key, enter the following path under Value data, then click OK:
%SystemRoot%/System32/GPEdit.dll


Once done, check if you are now able to launch gpedit.msc in Windows.
3. Change the Environment Variables
- Click the Windows button, type control panel, and select the app from the list.

- Make sure you have Large icons selected under the View by menu, and then click on System.

- Now scroll down in the right pane and choose Advanced system settings.

- Navigate to the Advanced tab, then hit the Environment Variables button.
- Select Path under System variables and click the Edit button.
- Copy and paste the following variables into the form and click OK:
%Systemroot%/System32%Systemroot%%Systemroot%/system32/WBEM


That being said, if you managed to open gpedit.msc, you might also be interested in finding out how to edit a Group Policy in Windows 10.
If you have any other questions, leave them in the comments section below, and we’ll be sure to take a look.
Andrew Wafer
Andrew is not just trying to bring you closer to Windows, but he’s truly interested in this platform. He just happens to be passionate about sharing that knowledge with our readers and that’s what makes his presence here, at WindowsReport, such a valuable one.
He specializes in writing about the best products for this operating system and Windows 10 fixes. Determined and creative, Andrew also loves coffee, country music, and Sunday mornings.