- Download R-Studio
R-STUDIO run in the demo mode allows you to evaluate how the utility recovers lost files. The only limitation is you can not recover files larger than 256KB in the demo mode.
All R-Studio versions (except the technician version*) are registered on on-the-fly and no reinstallation required. Depending on the registration key the software is activated to local or network version. When R-Studio run in the demo mode has found a lost file larger than 256KB you may simply double click the file to preview it. If you are satisfied with the file content you may buy the R-Studio license, register the software and recover the file right away.
Besides compatibility with all 32-bit Windows R-Studio supports 64-bit Windows
and allows to use all physical memory (RAM) installed on such computers that
highly increases a scan performance especially on high-capacity disks.
For professional Data Recovery Services, we offer R-Studio Technician.
- Installation/Registration Instructions
- EULA
- An Intel-compatible platform running Windows 11/10/8.1/8/7/Vista/XP/2000 Windows Server 2022/2019/2016/2012/2008/2003.
- At least 256 MB of RAM, a mouse, and enough disk space for recovered files, image files, etc.
- The administrative privileges are required to install and run R-Studio utilities.
- A network connection for data recovering over network.
Service Utilities for Local Recovery
R-Studio Emergency GUI Startup Media Creator for Windows users
RStudioEmg9.exe
Download Size: 206.37 MB
Date Released: Jul 20 2024
Version: 9.4 build 795
R-Studio Emergency GUI ISO Image for Mac, UNIX, Linux and Win users (Intel based)
RStudioEmg9.iso
Download Size: 132.59 MB
Date Released: Jul 20 2024
Version: 9.4 build 795
R-Studio Emergency TUI Startup Media Creator for Windows users
RStudioEmgTUI9.exe
Download Size: 46.76 MB
Date Released: May 20 2024
Version: 9.4 build 794
R-Studio Emergency TUI ISO Image for Mac, UNIX, Linux and Win users (Intel based)
RStudioEmgTUI9.iso
Download Size: 43.18 MB
Date Released: May 20 2024
Version: 9.4 build 794
R-Studio Emergency is run from a removable media when it is necessary to recover data on a computer, where operating system cannot start up because its system files are corrupted or deleted.
There are two R-Studio Emergency versions: R-Studio Emergency TUI (Text User Interface) and R-Studio Emergency GUI (Graphical User Interface). *
R-Studio Emergency Startup Media Creator is installed under Windows OS and creates R-Studio Emergency (TUI or GUI) startup floppy disks set**, any removable startup media*** or ISO Image for the startup CD/DVD (available for direct download bellow).
Read the help page R-Studio Emergency: Creating Startup Disks for more details.
R-Studio Emergency ISO Images are used to create R-Studio Emergency**** startup CD. To create the startup CD you should use any disk burning utility to burn a CD from the downloaded ISO Image. You may download R-Studio Emergency ISO images for Intel-based Macintosh, Windows, Linux and UNIX computers/servers.
You may read more about emergency file recovery for Windows computers in our article Emergency File Recovery Using R-Studio Emergency.
* Both versions have the same functionality but R-Studio Emergency GUI can not be run on a PC if its graphics card is not supported by the utility.
** The floppy disks set supports a limited number of storage/network devices and is not recommended if you may create a startup CD.
*** A startup USB media or ZIP drive can be created and used if a computer BIOS supports booting from them.
**** R-Studio Emergency is included in R-Studio package but its activation key is generated separately and requires a hardware code obtaining. The activation key can be requested through Client Portal within one year from the date of purchase.
Service Utilities for Network Recovery
R-Studio Agent
RStudioAgentEn9.exe
Download Size: 2.93 MB
Date Released: Mar 05 2025
Version: 9.4 build 1684
R-Studio Agent Portable
RStudioAgentPortableEn9.exe
Download Size: 4.45 MB
Date Released: Mar 05 2025
Version: 9.4 build 1684
R-Studio Agent is installed on computers where files are to be recovered over network. It may be remotely installed on a computer runs WinNT/2000/XP/2003/Vista/2008/Windows 7/10/11 from a computer also running WinNT/2000/XP/2003/Vista/2008/Windows 7/10/11. In this case, the administrator must have administrative privileges on the remote computer.
R-Studio Agent supports the TCP/IP protocol and any protocol supported in Microsoft Network.
R-Studio Agent Portable is the R-Studio Agent executable file that can be run on a Windows computer from any USB device. No installation is required.
R-Studio Agent Emergency Startup Media Creator for Windows users
RStudioAgentEmg9.exe
Download Size: 14.9 MB
Date Released: Jan 31 2022
Version: 9.0 build 1651
R-Studio Agent Emergency ISO Image for Mac, UNIX, Linux and Win users (Intel)
RStudioAgentEmg9.iso
Download Size: 14.4 MB
Date Released: Jan 31 2022
Version: 9.0 build 1651
R-Studio Agent Emergency is run from a floppy disk or a compact disk when it is necessary to recover data on a remote computer, on which operating system cannot start up because its system files are corrupted or deleted. R-Studio Agent Emergency supports the TCP/IP protocol and automatic network configuration using DHCP.
R-Studio Agent Emergency Startup Media Creator is installed under Windows OS and creates R-Studio Agent Emergency startup media* or ISO Image for the startup CD (available for direct download bellow).
Read the help page R-Studio Agent Emergency: Creating Startup Disks for more details.
R-Studio Agent Emergency ISO Image is used to create R-Studio Agent Emergency startup CD/DVD. To create the startup CD you should use any disk burning utility to burn a CD from the downloaded ISO Image.
You may download R-Studio Agent Emergency ISO for Intel-based Macintosh, Windows, Linux and UNIX computers/servers.
You may read more about emergency network file recovery in our article Emergency Data Recovery over Network.
* The floppy disk supports a limited number of storage/network devices and is not recommended if you may create a startup CD. A startup USB media or ZIP drive can be also created and used if a computer BIOS supports booting from them.
** Five (5) R-Studio Agent/Agent Emergency registration keys are included in R-Studio Network package.
Please never install any application, save image file, write any information or recover deleted files on the same logical disk where the deleted files are located. If you have one HD and one logical partition only, please visit FAQ section section to find our technical staff recommendations.
- Пошаговая установка R для windows
- Пошаговая установка R для macos
- Пошаговая установка R для linux (на примере Ubuntu)
- Если Windows только-только поставлена, то, пожалуйста, создайте пользователя с логином английскими буквами и работайте из под него.
Например, имя пользователя “Mashenka” подходит, а “Машенька” не подходит. Английское имя сильно облегчит жизнь в дальнейшем  Проблема в том, что при взаимодействии Rstudio — R могут возникать проблемы, если в названии папки есть русские буквы, а у “Машеньки” путь к документам выглядит как “C:/Users/Машенька/”.
Если компьютер давно используется с логином русскими буквами (“Машенька”), то оставляйте как есть, но:
При установке внимательно следите, что все программы ставятся в папки не содержащие русских букв. Мы рекомендуем поставить R в папку `C:/R`, а Rstudio в папку `C:/Rstudio`.- На время установки отключите антивирус.
Нет, мы не хотим подсунуть слушателям хитрый троянский вирус Просто встречались с проблемами при установке, если антивирус включён.
- Установите классический R для windows.
Тем, кто уже знаком с R и не боится повозиться самостоятельно, мы советуем попробовать вместо классического R поставить MRO, Microsoft R Open. Это другой дистрибутив R, оптимизированный под работу с 64-битными процессорами. Всё полностью идентично, кроме двух нюансов: во-первых, MRO немного быстрее, во-вторых, MRO ставит все пакеты на единую дату, выбираемую пользователем, а классический R ставит самые свежие версии пакетов.
- Установите RStudio.
Rstudio — это всего лишь удобная красивая графическая оболочка к R. Суровые брутальные программисты могут вполне обойтись и без Rstudio Не спутайте Rstudio с R-studio, платной программой для восстановления данных.
- Настройте Rstudio.
Запустите RStudio. Зайдите в раздел Tools — Global options.
В разделе General:
* уберите галочку у Restore .Rdata into workspace in startup.
* выберите `Never` у Save workspace to .Rdata on exit
В разделе Sweave:
* "Weave .Rnw files using" выберите knitr.В разделе Code — Diagnostics:
* выставьте все галочки.- Установите свежую версию Rtools.
Это дополнительные программы, которые позволяют нам, в частности, из R создавать экселевские файлы.
- Шаг только для windows. Если имя пользователя windows набрано русскими буквами, а создавать нового никак не хочется!
7.1. Создайте папку для установки пакетов без русских букв и пробелов, например, C:/Rlib.
7.2. Создайте папку для временных файлов без русских букв и пробелов, например, C:/Temp.
7.3. Выполните в консоли Rstudio команду
system("setx R_LIBS C:/Rlib")
system("setx TEMP C:/Temp")
system("setx TMP C:/Temp")
Вместо C:/Rlib должно быть имя папки созданной для установки пакетов.
Вместо C:/Temp должно быть имя папки созданной для временных файлов.
7.4. Перезапустите Rstudio
7.5. Проверьте, что R знает, куда ему ставить пакеты. Для этого выполните в консоли Rstudio команду
.libPaths()Она должна указать путь к папке C:/Rlib. После этого все пакеты будут ставиться в папку C:/Rlib.
- Установите все необходимые для курса пакеты R.
Скачайте файл install_all.R. Откройте его в RStudio (File — Open file).
Если русские буквы видны как кракозябры, то после открытия файла выберите File — Reopen with Encoding... — UTF-8 и отметьте внизу галочку Set as default for source files.
Запустите скрипт, инсталлирующий пакеты, выбрав Code — Source with Echo. При этом требуется соединение с Интернетом.
При установке может встретиться вопрос: “Do you want to install from sources the packages which need compilation?”
Следует ответить “Нет”!
Причина: некоторые пакеты содержат код C++ и для установки из исходников (source) требуют наличия и корректной настройки компилятора C++ на компьютере. При ответе “Нет” будут скачаны уже заранее скомпилированые пакеты.
Бегущие красные надписи не означают ошибок, признаком ошибки является только явное сообщение Error.
- Не забудьте включить обратно антивирус

Пошаговая установка R для macos
- Установите классический R для macos.
Тем, кто уже хорошо знаком с R и не боится повозиться самостоятельно, мы советуем попробовать вместо классического R поставить MRO, Microsoft R Open. Это другой дистрибутив R, оптимизированный под работу с 64-битными процессорами. Всё полностью идентично, кроме двух нюансов: во-первых, MRO немного быстрее, во-вторых, MRO ставит все пакеты на единую дату, выбираемую пользователем, а классический R ставит самые свежие версии пакетов.
- Установите RStudio.
Rstudio — это всего лишь удобная красивая графическая оболочка к R. Суровые брутальные программисты могут вполне обойтись и без Rstudio Не спутайте Rstudio с R-studio, платной программой для восстановления данных.
- Запустите RStudio.
При первом запуске Rstudio может появится сообщение о необходимости установки Xcode command line tools (инструменты командной строки для разработчиков). Их нужно установить.
- Настройте Rstudio. Зайдите в раздел Tools — Global options.
В разделе General:
* уберите галочку у Restore .Rdata into workspace in startup.
* выберите `Never` у Save workspace to .Rdata on exit
В разделе Sweave:
* "Weave .Rnw files using" выберите knitr.В разделе Code — Diagnostics:
* выставьте все галочки.- Шаг только для Macos. Выполните в консоли Rstudio команду
system("defaults write org.R-project.R force.LANG en_US.UTF-8")Это позволит избежать потенциальных проблем с изображением кириллицы на компьютерах, где не срабатывает автоматическое определение настроек.
- Установите все необходимые для курса пакеты R.
Скачайте файл install_all.R. Откройте его в RStudio (File — Open file). Запустите, выбрав Code — Source with Echo. При этом требуется соединение с Интернетом.
При установке может встретиться вопрос: “Do you want to install from sources the packages which need compilation?”
Следует ответить “Нет”!
Причина: некоторые пакеты содержат код C++ и для установки из исходников (source) требуют наличия и корректной настройки компилятора C++ на компьютере. При ответе “Нет” будут скачаны уже заранее скомпилированые пакеты.
Бегущие красные надписи не означают ошибок, признаком ошибки является только явное сообщение Error.
Пошаговая установка R для linux (на примере Ubuntu)
- Добавьте официальный репозиторий R:
sudo apt-key adv --keyserver keyserver.ubuntu.com --recv-keys E298A3A825C0D65DFD57CBB651716619E084DAB9
sudo add-apt-repository 'deb https://cloud.r-project.org/bin/linux/ubuntu bionic-cran35/'
sudo apt update
Вместо bionic (для 18.04) должно быть кодовое название версии Ubuntu (disco для 19.04)
- Установите классический R:
sudo apt-get install r-base r-base-dev- Установите RStudio.
Rstudio — это всего лишь удобная красивая графическая оболочка к R. Суровые брутальные программисты могут вполне обойтись и без Rstudio Не спутайте Rstudio с R-studio, платной программой для восстановления данных.
- Настройте Rstudio.
Запустите RStudio. Зайдите в раздел Tools — Global options.
В разделе General:
* уберите галочку у Restore .Rdata into workspace in startup.
* выберите `Never` у Save workspace to .Rdata on exit
В разделе Sweave:
* "Weave .Rnw files using" выберите knitr.В разделе Code — Diagnostics:
* выставьте все галочки.- Для пакетов R, скачивающих данные из Интернета, может потребоваться установка дополнительных библиотек linux
sudo apt-get install libcurl4-openssl-dev libxml2-dev libssl-dev- Установите все необходимые для курса пакеты R.
Скачайте файл install_all.R. Откройте его в RStudio (File — Open file). Запустите, выбрав Code — Source with Echo. При этом требуется соединение с Интернетом.
Бегущие красные надписи не означают ошибок, признаком ошибки является только явное сообщение Error.
Примечания:
- На ubuntu Rstudio узнает содержимое переменной PATH из файла
etc/environ. Поэтому если в этом файле в переменной PATH нет пути к латеху, то Rstudio не увидит латех. Достаточно добавить путь к латеху в этом файле
DOWNLOAD
Used by millions of people weekly, the RStudio integrated development environment (IDE) is a set of tools built to help you be more productive with R and Python.
Don’t want to download or install anything? Get started with RStudio on
Posit Cloud for free
. If you’re a professional data scientist looking to download RStudio and also need common enterprise features, don’t hesitate to
book a call with us
.
Want to learn about core or advanced workflows in RStudio? Explore the
RStudio User Guide
or the
Getting Started
section.
1: Install R
RStudio requires R 3.6.0+. Choose a version of R that matches your computer’s operating system.
R is not a Posit product. By clicking on the link below to download and install R, you are leaving the Posit website. Posit disclaims any obligations and all liability with respect to R and the R website.
All Installers and Tarballs
In this tutorial, we will learn how to download and install R as well as Rstudio with the help of the following steps –
Downloading and Installing R
Explore the Real-World Applications of Recommender Systems
Step 1
Go to https://www.r-project.org/

Step 2
Click on “download R”
Step 3
Choose a CRAN location (mirror site) and click the appropriate link.
Step 4
At the top of the page, click the «Download R for Windows» link.
Step 5
At the top of the page, click the «install R for the first time» link.
Step 6
Select «Download R for Windows» and save the executable file to your computer’s hard drive.
Step 7
Run the.exe file and follow the on-screen directions to complete the installation.
Downloading and installing R Studio
Step 1
Go to https://www.rstudio.com/products/rstudio/download/

Step 2
Click on «Download RStudio Desktop.»

Step 3
Save the executable file by selecting the recommended version for your system or the most recent Windows version.
Step 4
Run the.exe file and follow the on-screen directions to complete the installation.
Note: It is very important to set the environment path correctly.
RStudio is an Open source and enterprise-ready professional Software environment for R Programming. It is available in the desktop version (free and pro) and the server version (free & Pro). Here, we show where or How to download and Install R Studio software (desktop version) with screenshots. The following are the steps involved in the download the exe file.
A step-by-step approach to Download R Studio
Step 1: To download for Windows, first Go to the official website by clicking this link Download. The screenshot below shows the official website Home page.
Next, Click on the download R Studio desktop button to start the download process.

NOTE: We have to install the Programming Software before installing it. If you haven’t installed R, then please refer to the Software Download article to understand the steps & Install Software article for the installation process.
Step 2: Once you click on the specified download R Studio button, the following tab or window opens. Please select the Desktop (Free License) and click the download button.

Step 3: Or scroll down the page and select your operating system’s software. From the screenshot below, we are selecting the RStudio 0.99.903 – Windows Vista/7/8/10.
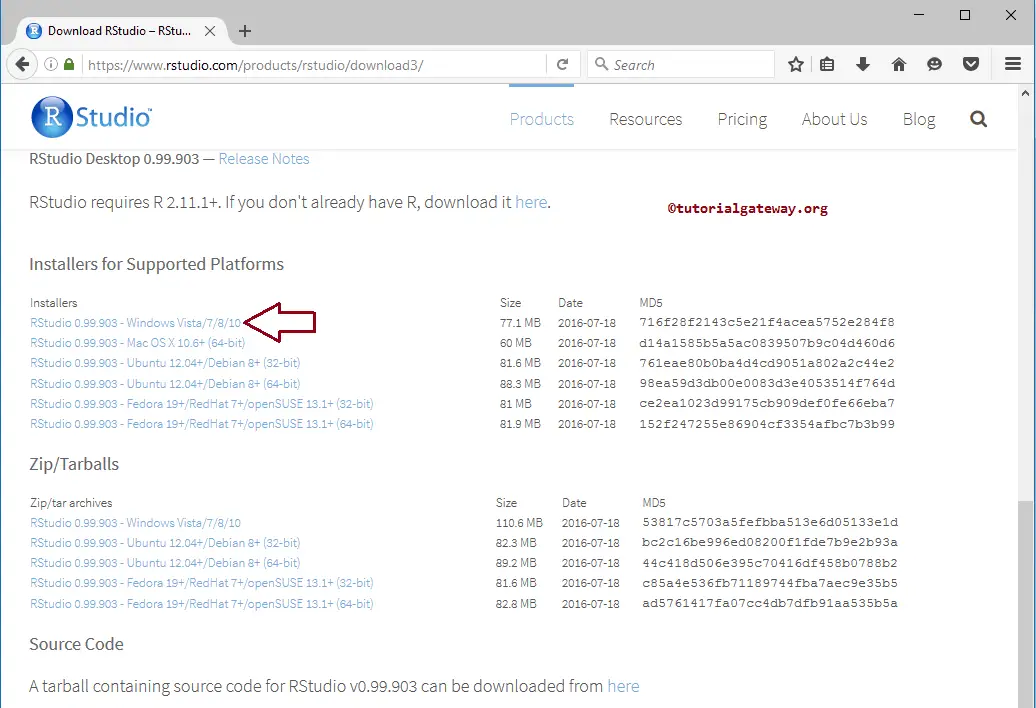
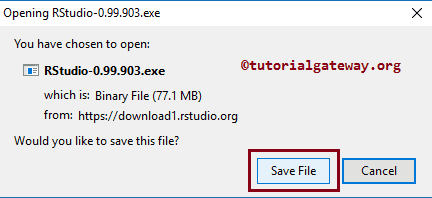
Once you click on the hyperlink, a pop-up window opens to save this file. Please select the Save or Download File option for R Studio.
Step by Step process to install R Studio
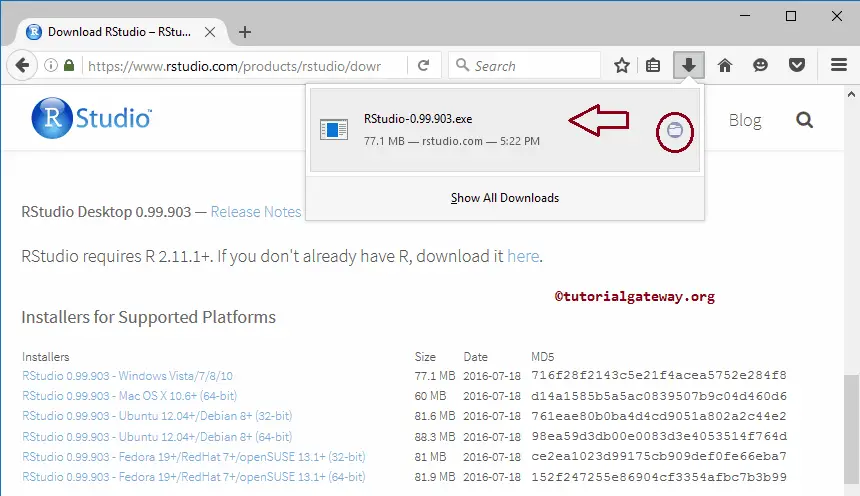
Step 1: To install RStudio, navigate your file system to the previously downloaded file, and click on the RStudio-0.99.903.exe application. Or, if you downloaded the file using Firefox, then do as shown below. Remember, the version number may be different for you.
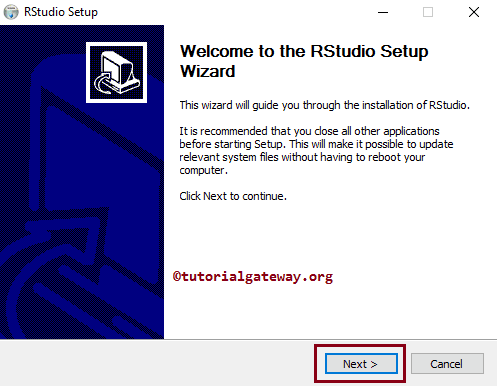
After you click on the install application, the Welcome to the R Studio Setup Wizard window opens. Please select the Next button.
Step 3: Here, you can change the default installation directory. To do that, we have to click on the Browse… button beside the text box. It opens our file system to navigate the location and select the directory.
See that we are using the default directory as the destination folder to install R Studio.

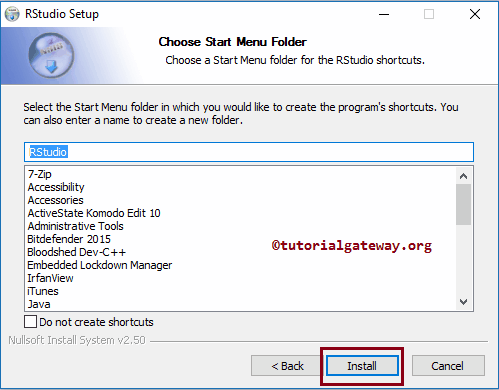
Here, you can change the program’s shortcut’s default directory. For this, we have to select the directory name from the list. From the screenshot below, see that we selected the folder (default).
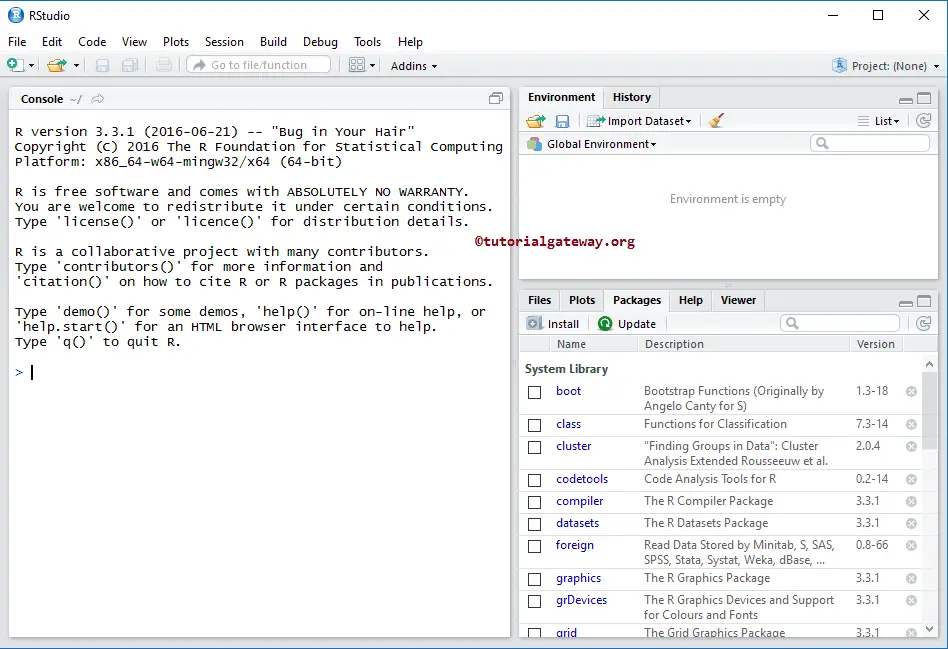
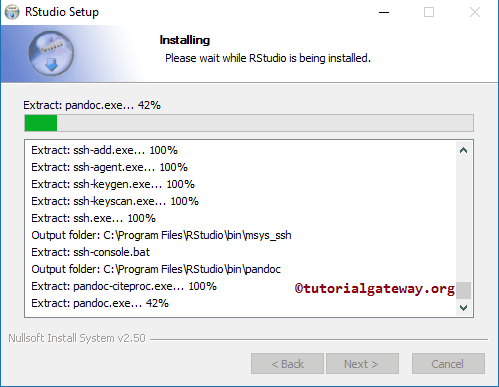
Step 5: Please wait for the extraction and installing of R studio to be completed. Next, Click the Finish button to complete the Installation.
Let us open the R Studio ide to see the Software environment that supports the direct code execution.