
Для запуска нашего лаунчера и самой игры Minecraft, у вас обязательно должен быть установлена Джава. На данной странице, вы узнаете все основные подробности установки. На всё это у вас уйдёт не много времени, а в результате получите доступ к одной из самых популярных игр в истории. Дополнительно, узнайте какие версии Java используют новые и старые версии игры.
Содержание:
Важная информация
Где скачать Java 8
Где скачать Java 16
Где скачать Java 17
Установка Java в Windows (XP, 7, 8, 10, 11)
Установка Java в MacOS
Установка Java в Linux
— Установка Java в Ubuntu для TLauncher/Minecraft
— Установка Java в Debian/Mint для TLauncher/Minecraft
— Установка Java в Fedora/CentOS для TLauncher/Minecraft
Решение проблем при установке Java
Обсуждение
Важная информация
Для TLauncher нужна именно Java 8! В некоторых Linux системах работает и с Java 11.
Рекомендованная версия Джава для Minecraft (1.16.5 и ниже) на Windows: Java 8 Update 51 (приоритет) или Java 8 Update 45.
Рекомендованная версия Java для Майнкрафт (1.16.5 и ниже) на MacOS/Linux: Java 8 Update Последний.
Рекомендованная версия Джава для Minecraft (1.17 и 1.17.1) на Windows: Java 16 (используемая разработчиками игры).
Рекомендованная версия Java для Майнкрафт (1.17 и 1.17.1) на MacOS/Linux: Java 16 (используемая разработчиками игры).
Рекомендованная версия Джава для Minecraft (1.18 и выше) на Windows: Java 17 (используемая разработчиками игры).
Рекомендованная версия Java для Майнкрафт (1.18 и выше) на MacOS/Linux: Java 17 (используемая разработчиками игры).
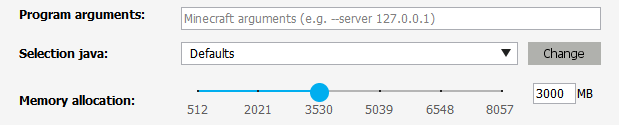
ВНИМАНИЕ: TLauncher автоматически* использует нужную версию Java рекомендованную разработчиками игры: для версии игры 1.18 — Java 17, для игры 1.17 — Java 1.16, для игры 1.16.5 и ниже — Java 8 Update 51. Поэтому, не нужно вручную устанавливать Java 16 или 17! Если происходит ошибка запуска связанная с Java, то проверьте в настройках лаунчера (Иконка «Шестеренки» -> «Настройки»), что стоит «Выбор Java» на «По умолчанию«. Если стоит другая версия, лаунчер будет пытаться запустить каждую версию от нее и может быть ошибка! Меняйте это, если понимаете для чего.

* Нужно использовать актуальную версию TLauncher 2.84 и выше.
Где скачать Java 8
Автоопределение системы для Java (Переход на внешний сайт);
Windows*: Java Windows x64; Java Windows x32
MacOS*: Java MacOS x64 (MacOS 10.7.3 и ВЫШЕ версии!);
Linux*: Java Linux x64 RPM; Java Linux x32 RPM; Java Linux x64; Java Linux x32
Где скачать Java 16
Windows*: Java Windows x64
MacOS*: Java MacOS x64
Linux*: Java Linux x64 RPM; Java Linux ARM x64 RPM; Java Linux x64 Deb
Где скачать Java 17
Windows*: Java Windows x64
MacOS*: Java MacOS x64; Java MacOS ARM x64
Linux*: Java Linux x64 RPM; Java Linux ARM x64 RPM; Java Linux x64 Deb
* Все версии взяты с официального сайта Java, не было внесено никаких изменений, подписаны цифровой подпись Oracle!
Установка Java в Windows (XP, 7, 8, 10, 11)
1) Определяем разрядность вашей системы — x32 или x64, если знаете, переходите к следующим пунктам. Если нет, то открываем «Мой компьютер» -> в верхнем меню (Компьютер) ищем «Свойства системы» и кликаем на эту кнопку.

2) Ищем пункт «Тип системы«, и возле него будет указана разрядность вашей системы.

2.1) Если указано «32-разрядная операционная система, процессор x64«, то рекомендуется переустановить Windows используя разрядность x64, так как процессор ваш поддерживает. В противном случаи, x32 обладает ограничениями на выделения оперативной памяти!
3) Определив вашу разрядность, скачиваем версию Java для x32 или x64 по ссылкам выше.
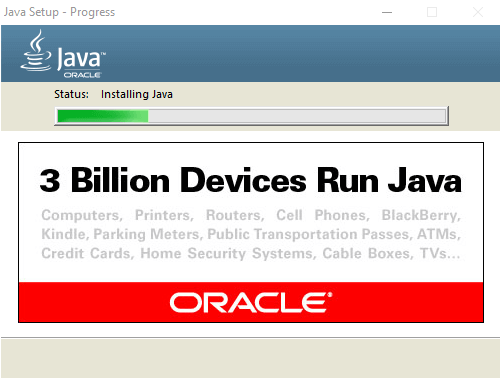
4) Запускаем скаченный установщик и нажимаем на кнопку «Install«. Произойдёт установка и теперь ваш компьютер готов к работе с Minecraft/TLauncher.
Установка Java в MacOS
1) Скачиваем версию Java под MacOS x64 по ссылке выше.
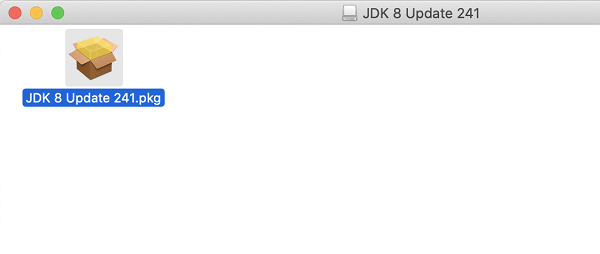
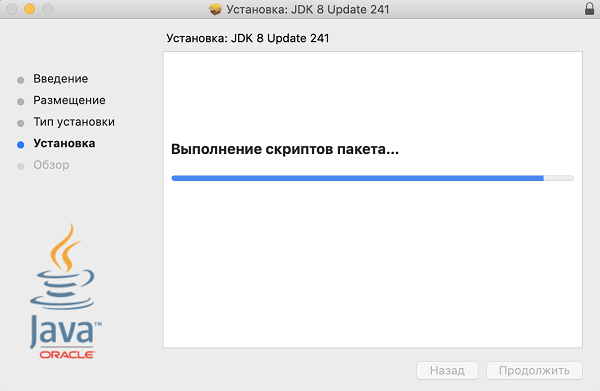
2) Запускаем скаченный образ DMG и запускаем в нём пакет установки PKG:
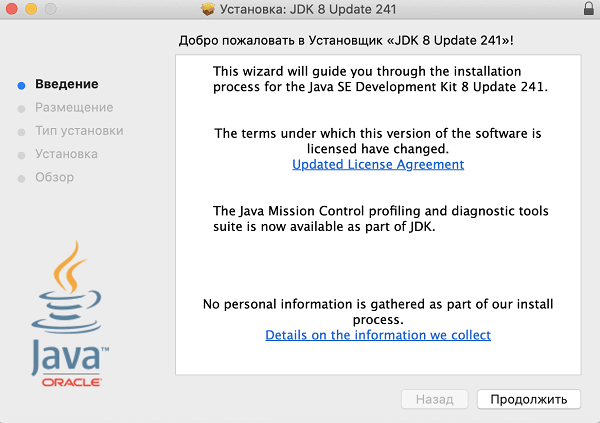
3) В первых двух окнах просто нажимаем «Продолжить«:
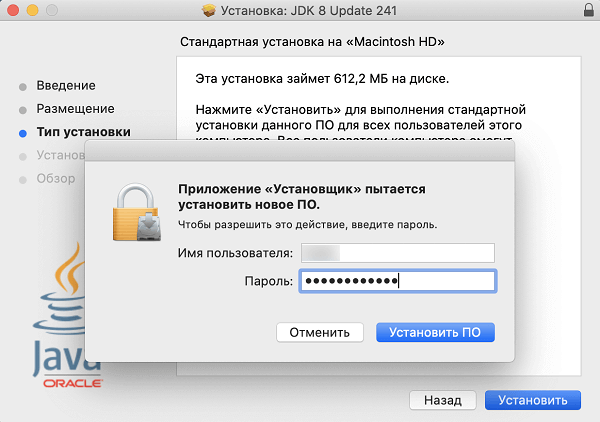
4) Как всегда, при установке в Мак ОС, вводим пароль:
5) Готово! Теперь у вас установлена Java на OS X.
Установка Java в Linux
Установка Java в Ubuntu для TLauncher/Minecraft
1) Открываем Терминал и выполняем стандартные sudo apt-get update , а после sudo apt-get upgrade .
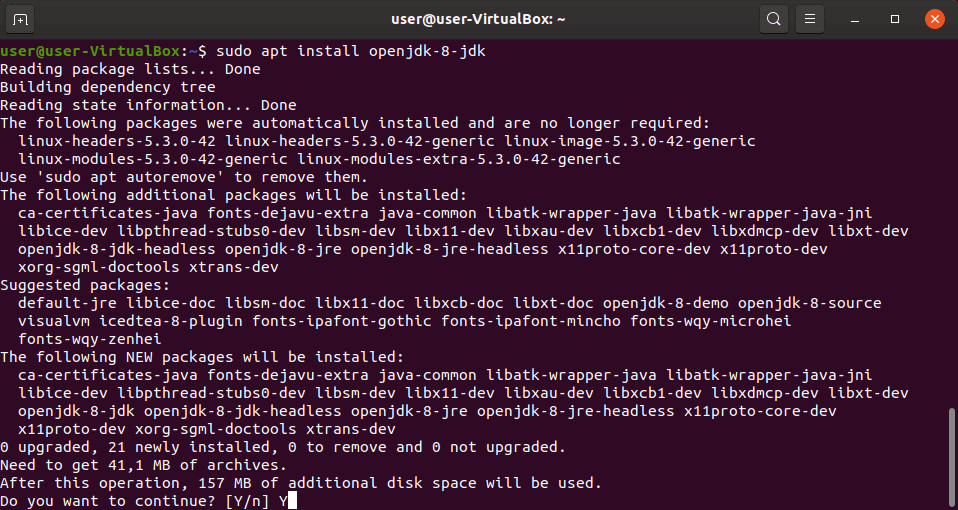
2) Устанавливаем Java: sudo apt install openjdk-8-jdk и соглашаемся Y на установку.
3) Скачиваем Linux версию лаунчера и распаковываем архив с .jar файл в любое место (Архив .zip распаковываем, но не сам .jar!)
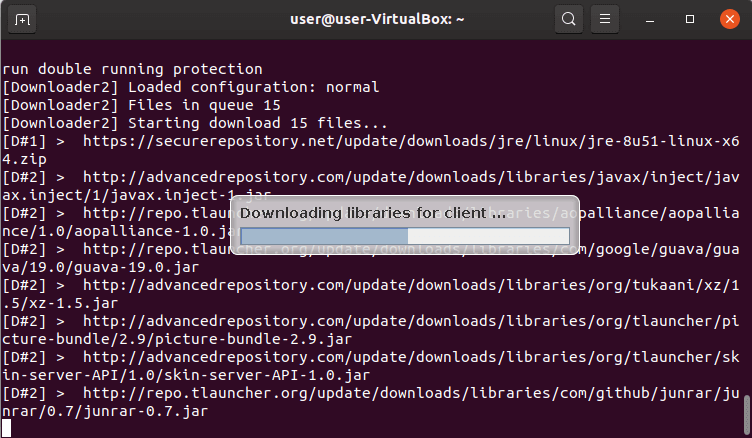
4) Запускаем лаунчер командой sudo java -jar /home/user/Downloads/TLauncher-2.83.jar . У вас будет другой путь, смотря куда положили файл! Будут скачены нужные файлы и запущен лаунчер:
Установка Java в Debian/Mint для TLauncher/Minecraft
1) Открываем Терминал и выполняем стандартные sudo apt-get update , а после sudo apt-get upgrade .
2) Устанавливаем саму Java: sudo apt install default-jdk и соглашаемся Y на установку.

3) Скачиваем Linux версию лаунчера и распаковываем архив с .jar файл в любое место (Архив .zip распаковываем, но не сам .jar!)
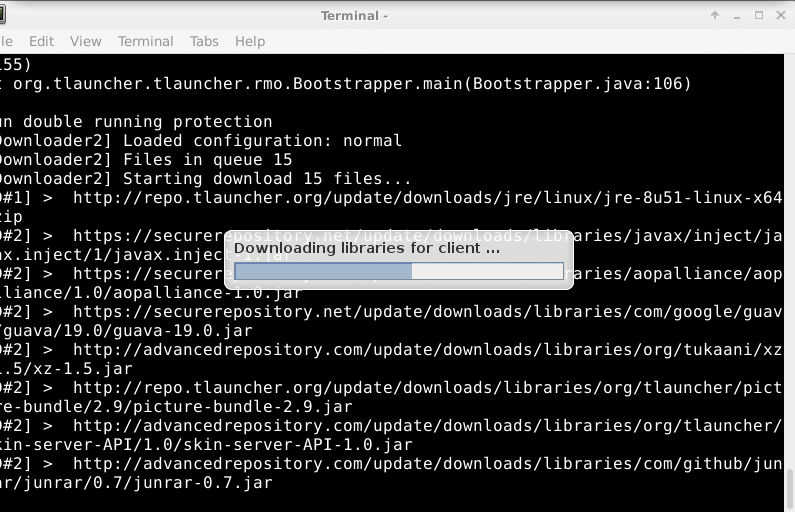
4) Запускаем лаунчер командой sudo java -jar /root/Downloads/TLauncher-2.83.jar . У вас будет другой путь, смотря куда положили файл! Будут скачены нужные файлы и запущен лаунчер:
Установка Java в Fedora/CentOS для TLauncher/Minecraft
1) Открываем Терминал и выполняем стандартные sudo yum update и обновляем.
2) Устанавливаем Java: sudo yum install java-11-openjdk и соглашаемся Y на установку.
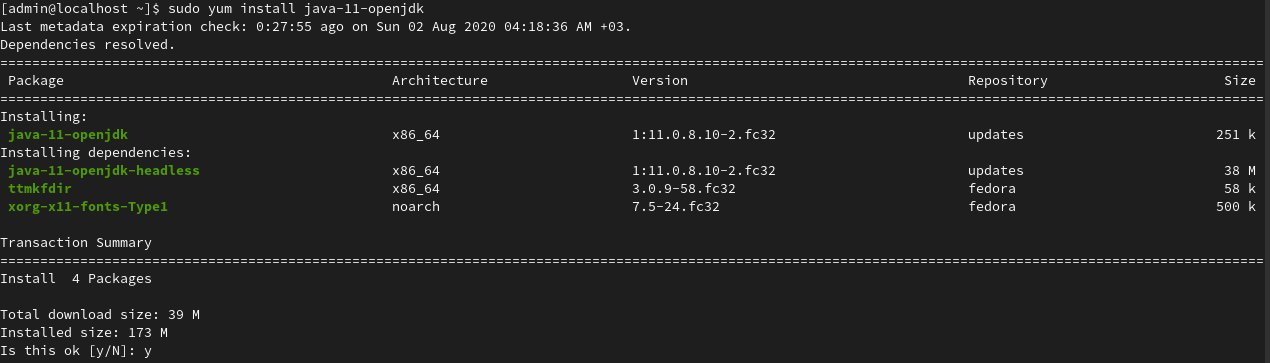
3) Выполняем команду sudo update-alternatives —config java и указываем в поле число соответствующей версии Java 11, чтобы установить её по умолчанию. Проверяем с помощью java -version , что выводит Java 11:

4) Скачиваем Linux версию лаунчера и распаковываем архив с .jar файл в любое место (Архив .zip распаковываем, но не сам .jar!)
5) Запускаем лаунчер командой sudo java -jar /home/user/Downloads/TLauncher-2.84.jar . У вас будет другой путь, смотря куда положили файл! Будут скачены нужные файлы и запущен лаунчер.
Решение проблем при установке Java
1) Не запускается установщик Java, без ошибок и окон.
1.1) Пробуем полностью перезагрузить компьютер и запустить снова установщик.
1.2) Если перезагрузка не помогает, нужно переустановить вашу ОС (Windows и т.д.), так как она сломалась.
To run our launcher and the Minecraft game itself, you must have Java installed. On this page, you will learn all the basic installation details. All this will not take long, and as a result, you will get one of the most popular games in history at your disposal. Additionally, find out which versions of Java use new and old versions of the game.
Contents:
Important information
Where to Download Java 8
Where to Download Java 16
Where to Download Java 17
Installing Java in Windows (XP, 7, 8, 10, 11)
Installing Java in macOS
Installing Java in Linux
— Installing Java in Ubuntu for TLauncher/Minecraft
— Installing Java in Debian/Mint for TLauncher/Minecraft
— Installing Java in Fedora/CentOS for TLauncher/Minecraft
Troubleshooting Java Installation
Important information
To run TLauncher requires Java 8!! However, on some Linux systems, they also work with Java 11.
Recommended Java version for Minecraft (1.16.5 and lower) on Windows: Java 8 Update 51 (most recommended) or Java 8 Update 45.
Recommended Java version for Minecraft (1.16.5 and lower) on MacOS/Linux:: the latest Java 8 Update.
Recommended Java version for Minecraft (1.17 and 1.17.1) on Windows: Java 16 (used by game developers).
Recommended Java version for Minecraft (1.17 and 1.17.1) on MacOS/Linux: Java 16 (used by game developers).
Recommended Java version for Minecraft (1.18 and higher) on Windows: Java 17 (used by game developers).
Recommended Java version for Minecraft (1.18 and higher) on MacOS/Linux: Java 17 (used by game developers).
WARNING: TLauncher automatically* uses the right version of Java recommended by the game developers: for the game version 1.18 — Java 17, for the game 1.17 — Java 1.16, for the game 1.16.5 and below — Java 8 Update 51. Therefore, there is no need to manually install Java 16 or 17! If there is a error starting associated with Java, then check the settings in the Launcher (Icon «Gears» -> «Settings»), that it is «Selecting java» to «Defaults«. If it is a different version, the launcher will try to run every version from it and there may be an error! Change this if you know what it’s for.
* You need to use the current version of TLauncher 2.84 or higher.
Where to Download Java 8
OS auto-detection for Java (on an external site);
Windows*: Java Windows x64; Java Windows x32
MacOS*: Java MacOS x64 (macOS 10.7.3 and HIGHER!);
Linux*: Java Linux x64 RPM; Java Linux x32 RPM; Java Linux x64; Java Linux x32
Where to Download Java 16
Windows*: Java Windows x64
MacOS*: Java MacOS x64
Linux*: Java Linux x64 RPM; Java Linux ARM x64 RPM; Java Linux x64 Deb
Where to Download Java 17
Windows*: Java Windows x64
MacOS*: Java MacOS x64; Java MacOS ARM x64
Linux*: Java Linux x64 RPM; Java Linux ARM x64 RPM; Java Linux x64 Deb
* All versions were taken from the official Java website without modifications and are signed with the Oracle digital signature!
Installing Java in Windows (XP, 7, 8, 10, 11)
1) Determine the architecture of your OS — x32 или x64, If you already know it, proceed to the next steps. Otherwise, open «My Computer» -> in the top menu («Computer«) «), look for «System properties» and click on this button.
2) Look for the «System type» parameter — the architecture of your system is specified there
2.1) If you have «32-bit Operating System, x64-based processor«, it is recommended to install 64-bit Windows, as your CPU supports it. Otherwise, x32 will impose limitations on RAM allocation!
3) After determining the architecture, download the x32 or x 64 Java version from the links above.
4) Launch the downloaded installer and click on the «Install» button. After the installation your PC is ready to work with Minecraft/TLauncher.
Installing Java in macOS
1) Download the Java version for macOS x64 from the link above.
2) Run the downloaded DMG image and launch the PKG installation package in it:
3) In the first two windows, just click «Continue«:
4) As usual when installing in macOS, enter the password:
5) Done! You now have Java installed on OS X.
Installing Java in Linux
Installing Java in Ubuntu for TLauncher/Minecraft
1) Open the Terminal and execute the standard sudo apt-get update , and then sudo apt-get upgrade .
2) Install Java: sudo apt install openjdk-8-jdk and then Y.
3) Download the Linux version of the launcher and unpack the archive from the .jar file to any location (unpack just the .zip archive, not the .jar itself!).
4) Run the launcher with the sudo java -jar /home/user/Downloads/TLauncher-2.83.jar command. You may have a different path, depending on where you put the file! The necessary files will be downloaded and the launcher run:
Installing Java in Debian/Mint for TLauncher/Minecraft
1) Open the Terminal and execute the standard sudo apt-get update , and then sudo apt-get upgrade .
2) Install Java: sudo apt install default-jdk and then Y.
3) Download the Linux version of the launcher and unpack the archive from the .jar file to any location (unpack just the .zip archive, not the .jar itself!).
4) ЗRun the launcher with the sudo java -jar /root/Downloads/TLauncher-2.83.jar command. You may have a different path, depending on where you put the file! The necessary files will be downloaded and the launcher run:
Installing Java in Fedora/CentOS for TLauncher/Minecraft
1) Open the Terminal execute the standard sudo yum update and update.
2) Install Java: sudo yum install java-11-openjdk and then Y
3) Execute the sudo update-alternatives —config java and specify the number of the relevant Java 11 version in the field to install it by default. Using java -version , check what Java 11 displays:
4) Download the Linux version of the launcher and unpack the archive from the .jar file to any location (unpack just the .zip archive, not the .jar itself!).
5) Run the launcher with the sudo java -jar /home/user/Downloads/TLauncher-2.84.jar command. You may have a different path, depending on where you put the file! The necessary files will be downloaded and the launcher run.
Troubleshooting Java Installation
1) The Java installer does not launch without error messages and pop-ups.
1.1) Try to completely reboot your PC and run the installer again.
1.2) If rebooting does not help, you should reinstall your OS (Windows, etc.), as it is broken.
This guide will walk you through installing Java 21 on Windows.
The Minecraft Launcher comes with its own Java installation, so this section is only relevant if you want to use the Fabric .jar based installer, or if you want to use the Minecraft Server .jar.
1. Check if Java Is Already Installed
To check if Java is already installed, you must first open the command prompt.
You can do this by pressing Win R and typing cmd.exe into the box that appears.
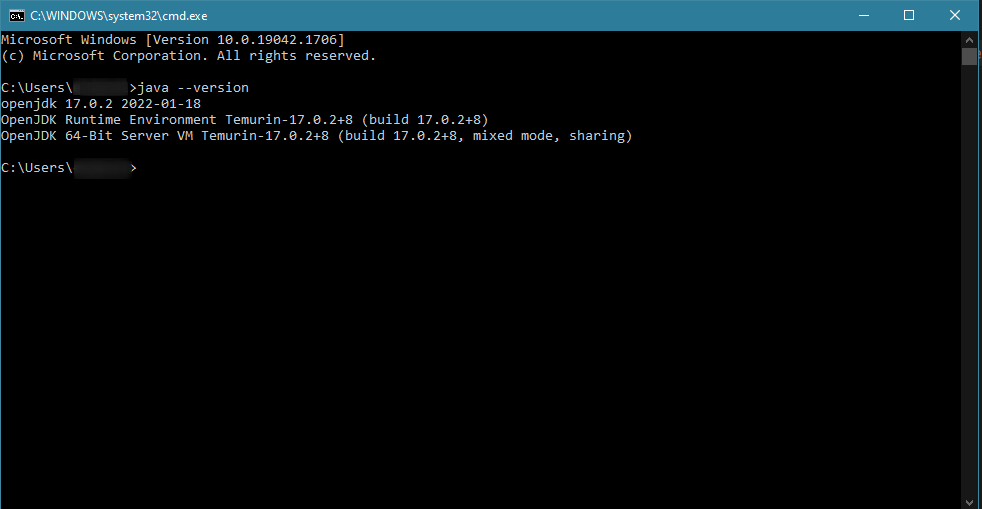
Once you have opened the command prompt, type java -version and press Enter.
If the command runs successfully, you will see something like this. If the command failed, proceed to the next step.
WARNING
To use Minecraft 1.21, you’ll need at least Java 21 installed. If this command displays any version lower than 21, you’ll need to update your existing Java installation.
2. Download the Java 21 Installer
To install Java 21, you’ll need to download the installer from Adoptium.
You’ll want to download the Windows Installer (.msi) version:
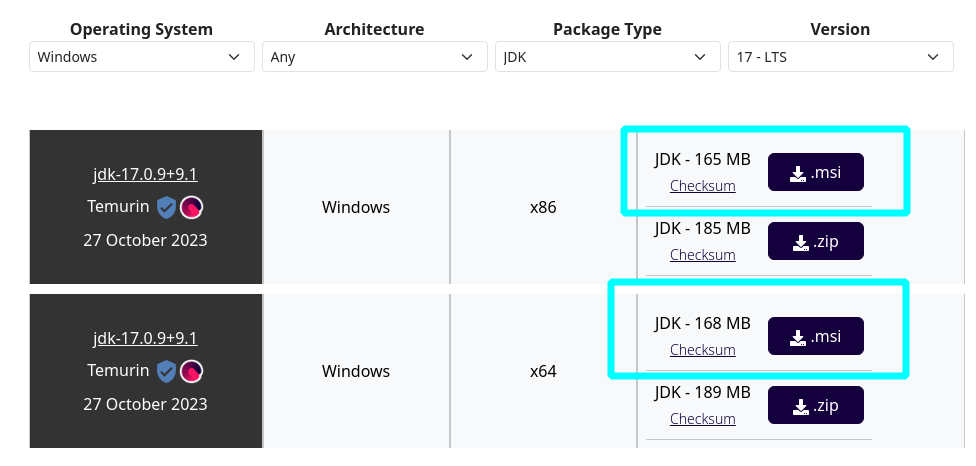
You should choose x86 if you have a 32-bit operating system, or x64 if you have a 64-bit operating system.
The majority of modern computers will have a 64-bit operating system. If you are unsure, try using the 64-bit download.
3. Run the Installer!
Follow the steps in the installer to install Java 21. When you reach this page, you should set the following features to «Entire feature will be installed on local hard drive»:
Set JAVA_HOME environment variable— This will be added to your PATH.JavaSoft (Oracle) registry keys
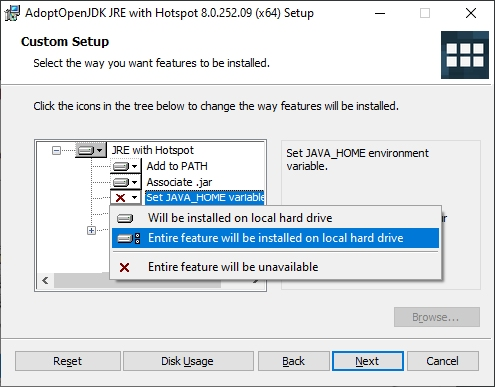
Once you’ve done that, you can click Next and continue with the installation.
4. Verify That Java 21 Is Installed
Once the installation is complete, you can verify that Java 21 is installed by opening the command prompt again and typing java -version.
If the command runs successfully, you will see something like shown before, where the Java version is displayed:
If you encounter any issues, feel free to ask for help in the Fabric Discord in the #player-support channel.
Automatically installing Java (recommended)
In Prism Launcher 9.0+, you can let the launcher handle Java automatically on Windows, macOS and Linux (not available in all packages) by enabling «Autodetect Java version» and «Auto-download Mojang Java» in:
Settings (top toolbar) > Java
This will make the launcher automatically download the right version of Java for your version of Minecraft (Java 8 for pre-1.17, Java 17 for 1.17-1.20.4, etc.). The rest of this page is going to explain downloading Java manually, and is probably not needed for you.
If the Java downloader is not available for you — which is the case on most Linux packages apart from the official Flatpak and AppImage downloads — manual installation is recommended instead.
Manually installing Java
Oracle Java is not recommended. As of 2019, it has licensing that prohibits certain uses, and it requires an account to download certain versions. Their downloads are intended for those who have purchased a support contract from Oracle.
Instead, this guide recommends installing OpenJDK from one of the reputable vendors. OpenJDK is a source code only distribution of Java made by a collaboration between Oracle and industry partners such as Adoptium, Microsoft, Red Hat, and Azul. Unlike Oracle Java, it is released under a license that minimizes legal risk for users and does not require payment.
If you would like to learn more about OpenJDK and the vendors mentioned in this page, here are their websites:
- Adoptium Temurin
- Microsoft OpenJDK
- Azul OpenJDK
- OpenJDK source distribution
Otherwise, continue reading for quick download links and a guide for which one to choose.
Selecting Java
Once you have installed Java, Prism Launcher will be able to detect it during the first time set-up wizard.
If you installed Java after already completing the first time setup process, you can access and modify your Java configuration globally for all instances through:
Settings > Java > Java Runtime > Auto-Detect…
or for a specific instance:
Right click an instance > Edit > Settings > Java > Java installation > Auto-Detect…
If you have just installed a version of Java and it doesn’t show up, try pressing Refresh or restart the launcher. If you don’t have your desired Java version installed, keep reading.
Installing Java on Windows
First, check your CPU architecture. Here is a method that works on all Windows versions:
- Click or tap on the Start Menu
- Search Command Prompt or Terminal and click on it
- Type in
echo %PROCESSOR_ARCHITECTURE%and press enter - Read the result.
- If it says
AMD64, you have a 64-bit x86-64 CPU. This is sometimes called x64 or amd64. - If it says
X86, you have a 32-bit x86 CPU. This is sometimes called x32 or x86-32. - If it says
ARM64, you have a 64-bit ARM CPU. This is sometimes called aarch64 or ARM64.
- If it says
Then, download the appropriate Java:
| Minecraft | CPU type | Download page | Viable alternatives |
|---|---|---|---|
| Minecraft 1.20.5 or above | x86-64 | Microsoft OpenJDK 21 for Windows x64, .msi installer |
Azul, Coretto, Temurin, GraalVM |
| x86 | Not available  |
||
| aarch64 | Microsoft OpenJDK 21 for Windows aarch64, .msi installer |
Azul | |
| Minecraft 1.17 to 1.20.4 | x86-64 | Microsoft OpenJDK 17 for Windows x64, .msi installer |
Azul, Coretto, Temurin, GraalVM |
| x86 | Temurin OpenJDK 17 for Windows x32, .msi installer |
Azul, Coretto | |
| aarch64 | Microsoft OpenJDK 17 for Windows aarch64, .msi installer |
Azul | |
| Minecraft 1.16 or below | x86-64 | Temurin OpenJDK 8 for Windows x64, .msi installer |
Azul, Coretto |
| x86 | Temurin OpenJDK 8 for Windows x64, .msi installer |
Azul, Coretto | |
| aarch64 | Not available |
Tip: If you are on Windows 11, you can automatically install 8, 17 and 21 by running winget install Microsoft.OpenJDK.21; winget install Microsoft.OpenJDK.17; winget install EclipseAdoptium.Temurin.8.JDK in the Terminal app.
Installing Java on macOS
First, check your CPU architecture.
- Open the Apple menu in the top left corner of the screen
- Click «About This Mac»
- Check what it says after «Processor»
- If it contains
Intel, you have a 64-bit x86-64 CPU. This is sometimes called x64 or amd64. - If it contains
Apple, you have a 64-bit ARM CPU. This is sometimes called aarch64 or ARM64.
- If it contains
Then, download the appropriate Java:
| Minecraft | CPU type | Download page | Viable alternatives |
|---|---|---|---|
| Minecraft 1.20.5 or above | x86-64 | Microsoft OpenJDK 21 for macOS x64, .pkg installer |
Azul, Coretto, Temurin, GraalVM |
| aarch64 | Microsoft OpenJDK 21 for macOS aarch64, .pkg installer |
Azul, Coretto | |
| Minecraft 1.17 to 1.20.4 | x86-64 | Microsoft OpenJDK 17 for macOS x64, .pkg installer |
Azul, Coretto, Temurin, GraalVM |
| aarch64 | Microsoft OpenJDK 17 for macOS aarch64, .pkg installer |
Azul, Coretto | |
| Minecraft 1.16 or below | x86-64 | Temurin OpenJDK 8 for macOS x64, .pkg installer |
Azul, Coretto |
| aarch64 | Azul OpenJDK 8 for macOS aarch64, .dmg installer |
Coretto |
Installing Java on Linux
On Linux, it’s recommended to use your package manager for installing Java.
Fedora, RHEL, CentOS, AlmaLinux, or RockyLinux
On the COPR package all required Java versions should be installed, but this is the command to install it:
sudo dnf install java-1.8.0-openjdk java-17-openjdk java-21-openjdkVoid Linux
sudo xbps-install openjdk17-jre openjdk8-jre openjdk21-jre Arch Linux, Manjaro, EndeavorOS, Garuda
sudo pacman -S jre17-openjdk jre8-openjdk jre21-openjdkUbuntu, Pop!_OS, Linux Mint, Zorin OS, or elementaryOS
sudo apt install openjdk-17-jre openjdk-8-jre openjdk-21-jreDebian, MX Linux
sudo apt install openjdk-17-jre openjdk-21-jreJava 8 is not available in Debian 10+ due to lack of security support, but you can use the Adoptium repository for security support until 2026:
wget -qO - https://packages.adoptium.net/artifactory/api/gpg/key/public | sudo apt-key add -
sudo add-apt-repository --yes https://packages.adoptium.net/artifactory/deb/
sudo apt-get update && sudo apt-get install temurin-8-jdk
Alpine Linux
sudo apk add openjdk17 openjdk8Flatpak
The Prism Launcher Flatpak already bundles Java.
NixOS
The Prism Launcher NixOS package already bundles Java.
Special cases
Forge 1.16.5 and Java 8u321+
Old versions of Forge crash with Java 8u321+. For this reason, using Java 8u312 or lower is recommended.
A note about Intel HD 2000/3000 on Windows 10
Since those iGPUs are not officially supported on Windows 10, with them the game is likely going to crash with any modern java binary.
For 1.16.5 or older there’s a workaround in installing an older Java binary. Mojang Java 8u51 is recommended, and can be automatically installed with the above.
Unfortunately there’s no workaround for Java 17 (and so newer Minecraft), so you can only downgrade your Windows or switch to Linux there.
If you want to try, there’s this guide that could work. Nothing is guaranteed here, though.
Older Minecraft on MacOS
If you use some older Minecraft versions, you might have had this error:
Terminating app due to uncaught exception 'NSInternalInconsistencyException', reason: 'NSWindow drag regions should only be invalidated on the Main Thread!'Here is a fix:
- First, remove, if you had, your current Oracle Java
- Then download and install this Java 8u241 binary
- Select this java binary on Prism Launcher, and it should fix your issue!
Pages in Getting Started:
- Installing Prism Launcher
- Installing Java
- Migrating from MultiMC
- Create an Instance
- Downloading Modpacks
- Downloading Mods
- OptiFine Alternatives
- Installing OptiFine
- Controller Support
- Command Line Interface
- Change Themes
- CatPacks
- Data storage
Comment Rules
By submitting a comment, you agree to uphold the Prism Launcher Code of Conduct.
✅ What user-contributed comments are for
- Share additional information relevant to the article.
- Mention a workaround for a common issue.
- Link to useful third-party resources that are relevant to the current page, such as tutorials or articles.
- It is allowed to occasionally link to resources you’ve created. When doing so, you must disclose your affiliation with the resource in some way. However, linking to resources you’ve created should not represent the majority of your interactions with user notes. Excessive self-promotion is not allowed and will be moderated away.
🚫 What user-contributed comments are not for
- Do not point out something in the documentation being incorrect or outdated.
- Instead, open an issue on the prismlauncher.org issue tracker. If you can, please open a pull request to improve the documentation.
- You can use the Edit button at the bottom of each documentation page for this purpose.
- Do not ask support questions. Please use other community platforms instead.
- Do not submit bug reports. Please use the main Prism Launcher repository’s issue tracker instead.
- Do not submit feature requests. Please use the Prism Launcher repository’s issue tracker repository instead.
- Do not post off-topic comments. Comments must be strictly related to the page they are linked to.
Comments not following the above rules will be removed.
Launcher contributors may occasionally go through the comments and may incorporate information from them in the documentation. By submitting a comment, you accept that it may be incorporated in unmodified or modified form in the launcher and/or documentation, subject to the GPL-3.0 license for the launcher and AGPL-3.0 license for the documentation.