
Get that Linux feeling — on Windows
Installing and Updating Cygwin Packages
Installing and Updating Cygwin for 64-bit versions of Windows
Run setup-x86_64.exe any time you want to
update or install a Cygwin package for 64-bit windows.
The gpg signature
for setup-x86_64.exe can be used to verify the
validity of this binary using the public
key here.
General installation notes
When installing packages for the first time, the setup program
does not install every package. Only the minimal base packages
from the Cygwin distribution are installed by default, which takes up about 100 MB.
Clicking on categories and packages in the setup program package installation
screen allows you to select what is installed or updated.
Individual packages like bash, gcc, less, etc.
are released independently of the Cygwin DLL, so the Cygwin DLL version is not
useful as a general Cygwin release number. The setup program
tracks the versions of all installed components and provides the mechanism
for installing or updating everything available from this site for
Cygwin.
Once you’ve installed your desired subset of the Cygwin distribution,
the setup program will remember what you selected, so re-running it
will update your system with any new package releases.
The setup program will check by default if it runs with administrative
privileges and, if not, will try to elevate the process. If you want to avoid
this behaviour and install under an unprivileged account just for your own
usage, run setup with the --no-admin option.
Q: How do I add a package to my existing Cygwin installation?
A: Run the setup program and select the package you want to add.
Tip: if you don’t want to also upgrade existing packages, select ‘Keep’ at the
top-right of the package chooser page.
Q: Is there a command-line installer?
A: Yes and no. The setup program understands
command-line
arguments which allow you to control its behavior and choose
individual packages to install. While this provides some functionality
similar to such tools as apt-get or yum it is not as
full-featured as those package managers.
Performing an automated installation can be done using the -q and
-P package1,package2,... options.
Q: Why not use apt, yum, my
favourite package manager, etc.?
A: The basic reason for not using a more full-featured package manager is that
such a program would need full access to all of Cygwin’s POSIX functionality. That
is, however, difficult to provide in a Cygwin-free environment, such as exists on
first installation. Additionally, Windows does not easily allow overwriting of
in-use executables so installing a new version of the Cygwin DLL while a package
manager is using the DLL is problematic.
Q: How do I install everything?
A: You do not want to do this! This will install an enormous number of packages
that you will never use, including debuginfo and source for every package.
If you really must do this, clicking on the «Default» label next to the
«All» category to change it to «Install» will mark every Cygwin package for
installation. Be advised that this will download and install tens of gigabytes
of files to your computer.
Q: How do I verify the signature of setup?
A: e.g.
$ gpg --recv-key 1A698DE9E2E56300
gpg: requesting key 1A698DE9E2E56300 from hkp server keys.gnupg.net
gpg: key 1A698DE9E2E56300: "Cygwin <cygwin@cygwin.com>" imported
gpg: 3 marginal(s) needed, 1 complete(s) needed, PGP trust model
gpg: depth: 0  valid:   8  signed:   2  trust: 0-, 0q, 0n, 0m, 0f, 8u
gpg: depth: 1  valid:   2  signed:   0  trust: 2-, 0q, 0n, 0m, 0f, 0u
gpg: Total number processed: 1
gpg:               imported: 1  (RSA: 1)

$ gpg --keyid-format=long --with-fingerprint --verify setup-x86_64.exe.sig setup-x86_64.exe
[...]
gpg: Signature made 12 Mar 2020 16:26:58 GMT
gpg:                using RSA key 1A698DE9E2E56300
gpg: Good signature from "Cygwin <cygwin@cygwin.com>"
Primary key fingerprint: 5640 5CF6 FCC8 1574 682A  5D56 1A69 8DE9 E2E5 6300
Q: What’s the hash of setup?
A: See here
Q: How can I do an offline install?
A1: Install without access to the internet, using a local package
repository
-
Create a local copy of the package repository e.g. by
usingrsyncon one
of the mirrors. - Move that copy to an accessible location, or copy it to removable media.
-
Run setup, and enter the URL, path or UNC path of that repository when
prompted to «Choose A Download Site».
A2: Install without access to the internet, using setup’s separate download
and install actions.
-
Run setup in «Download without installing» mode somewhere it can access a
mirror, with the desired packages selected. -
Run setup again in «Install from local directory» mode, with the same «Local
package directory», and set of packages selected.
Q: How can I install the last Cygwin
version for an old, unsupported Windows version?
A: Run setup with the options --allow-unsupported-windows:
--site circa_URL
| Windows version | Setup version | Cygwin DLL version | circa URL |
|---|---|---|---|
|
Windows 7 Windows Server 2008 R2 (NT 6.1) Windows 8 Windows Server 2012 (NT 6.2) |
current | 3.4.10 |
64-bit: http://ctm.crouchingtigerhiddenfruitbat.org/pub/cygwin/circa/64bit/2024/01/30/231215
Also use |
|
Windows Vista Windows Server 2008 (NT 6.0) All 32-bit Windows |
current | 3.3.6 |
32-bit: http://ctm.crouchingtigerhiddenfruitbat.org/pub/cygwin/circa/2022/11/23/063457 64-bit: http://ctm.crouchingtigerhiddenfruitbat.org/pub/cygwin/circa/64bit/2022/11/23/063529 |
|
Windows XP SP3 Windows Server 2003 (NT 5.1) |
2.932 (32-bit, 64-bit) |
2.5.2 |
32-bit: http://ctm.crouchingtigerhiddenfruitbat.org/pub/cygwin/circa/2016/08/30/104223 64-bit: http://ctm.crouchingtigerhiddenfruitbat.org/pub/cygwin/circa/64bit/2016/08/30/104235
Also use |
|
Windows 2000 (NT 5.0) Windows XP SP2 |
2.774 | 1.7.18 |
32-bit: http://ctm.crouchingtigerhiddenfruitbat.org/pub/cygwin/circa/2013/06/04/121035
Also use |
Thanks to
the Cygwin
Time Machine for providing this archive.
A note about 32-bit Cygwin
The limited address space of 32-bit Windows means that
random
failures in the fork(2) system call are more likely. Therefore, we
recommend using 32-bit Cygwin only in limited scenarios, with only a minimum
of necessary packages installed, and only if there’s no way to run 64-bit
Cygwin instead.
You have been warned. If you’re still sure you really need a 32-bit
Cygwin, and there’s absolutely no way around it, you may use
the setup-x86.exe installer, following the
instructions above. The gpg signature can be
used to verify the validity of this binary.
Q: How do I help improve setup?
A: See the setup
project page for more information.
GUI translations can be made and updated at
weblate.
Last Updated :
11 Oct, 2021
Cygwin is a collection of tools that provide a Linux Operating System’s terminal look, feel, and some of its basic functionality for users of Windows OS who want to have a go over the basic commands of Linux without worrying about installing a Linux OS.
To use this tool, first of all, we need to download Cygwin setup depending on the version of Windows i.e either 32 bit or 64bit.
Installation
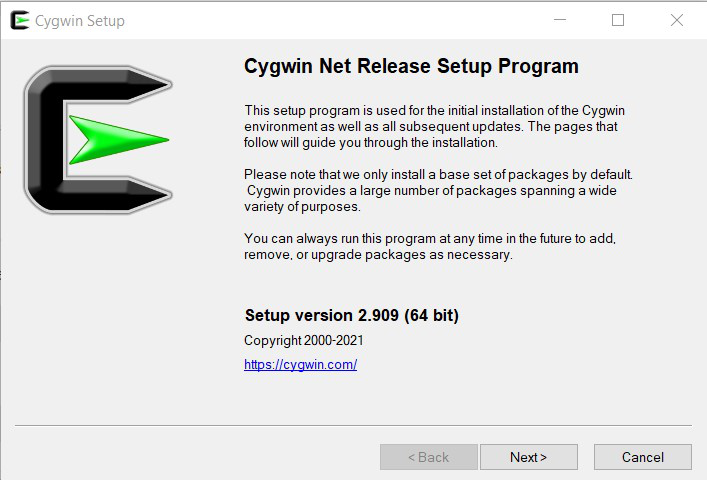
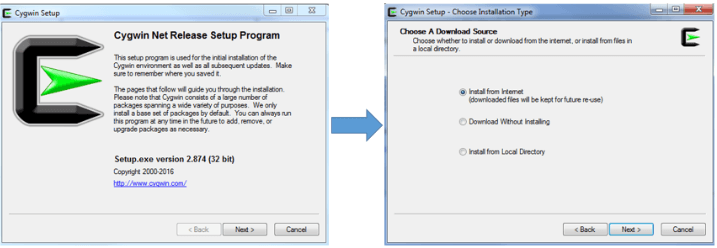
Step 1: Launch the Cygwin installation setup and press Next
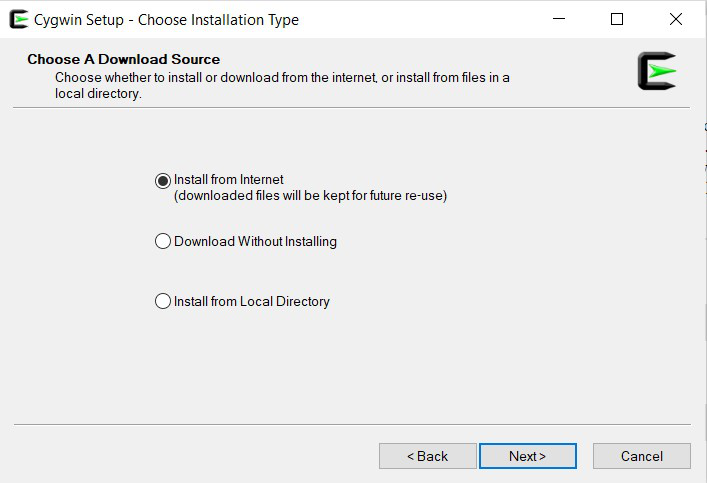
Step 2: Choose “Install from Internet” and press Next
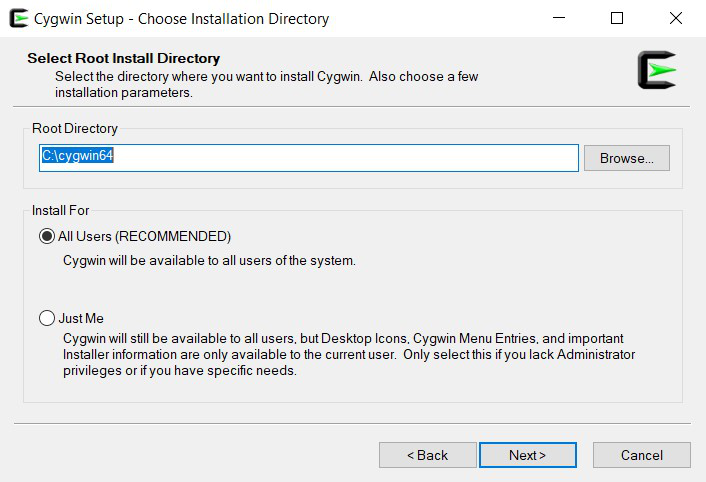
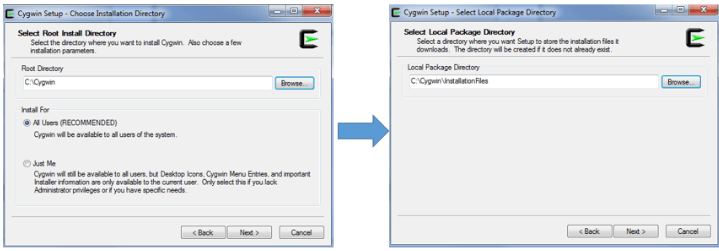
Step 3: Select the root install directory where you want to install it and choose whether to install it for yourself or for all users and press Next
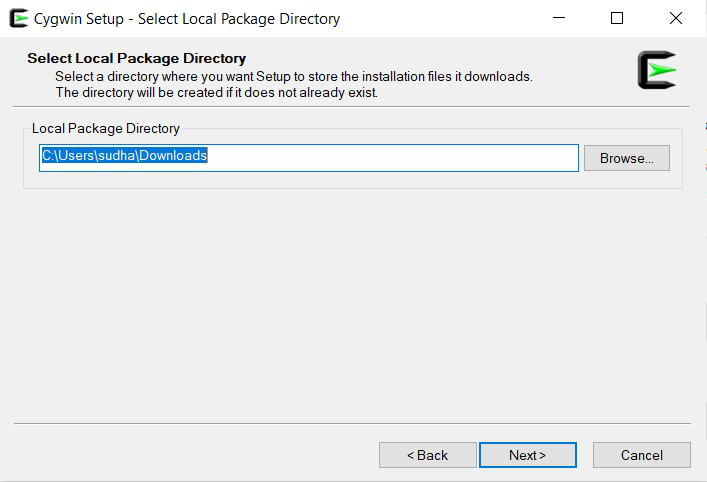
Step 4: Select a directory where you want to store installation files downloaded by this installation setup and press Next
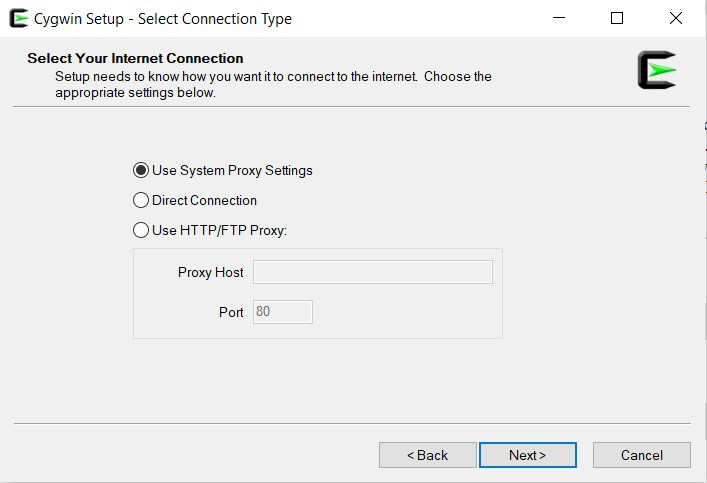
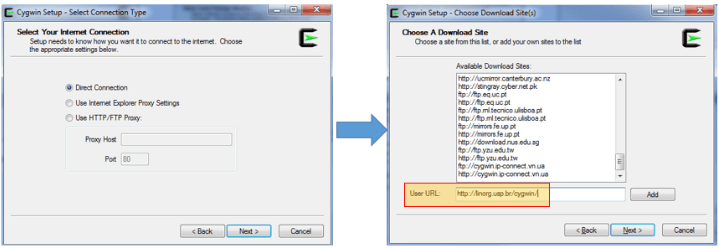
Step 5: Select the way you want installation setup to connect to the internet and press Next
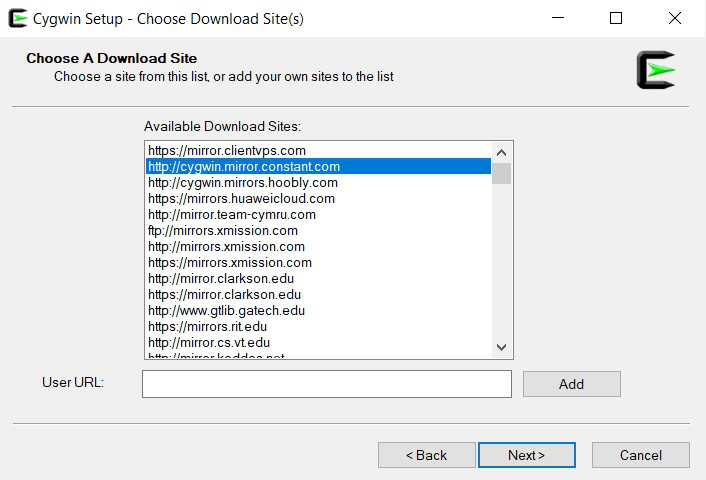
Step 6: Choose a download site from available download sites and press Next
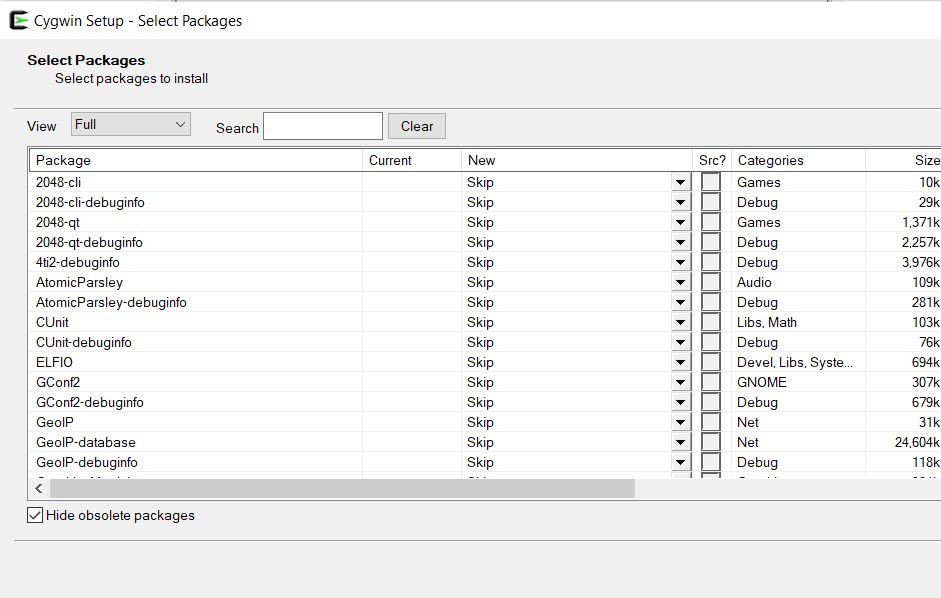
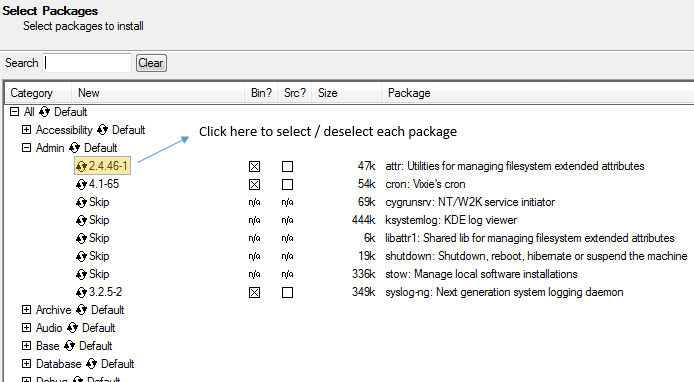
Step 7: Select packages to install depending upon your needs and press Next
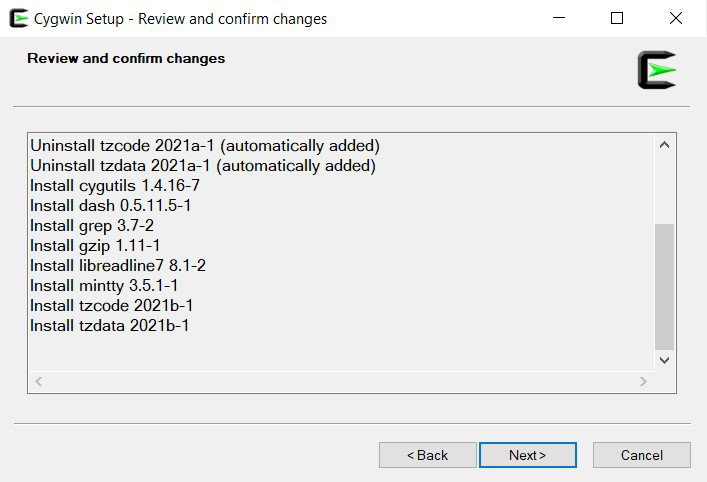
Step 8: Review and Confirm changes
Step 9: Packages will take some time to get downloaded
Step 10: Installation completes and Cygwin is ready to be explored now, press Next
Add Cygwin Path to Windows Environment Variable
To make Cygwin work in your normal command prompt, we need to add Cygwin to Windows Environment Variables as follow:-
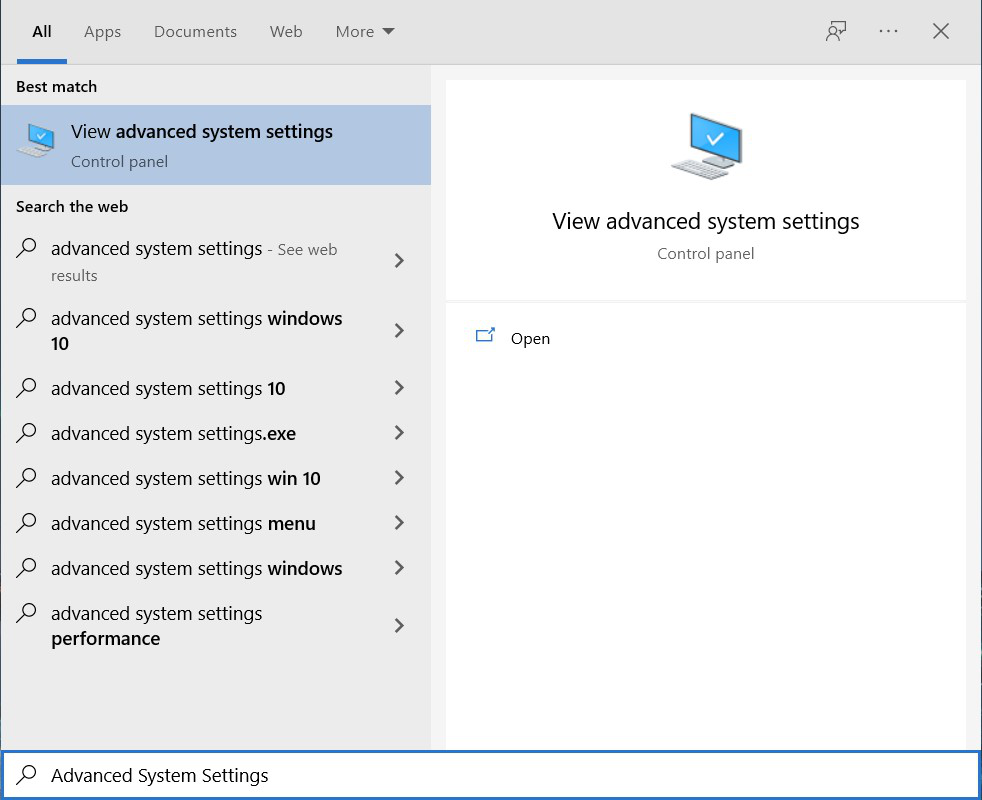
Step 1: In the search bar type “Advanced System Settings” and click on the matching field
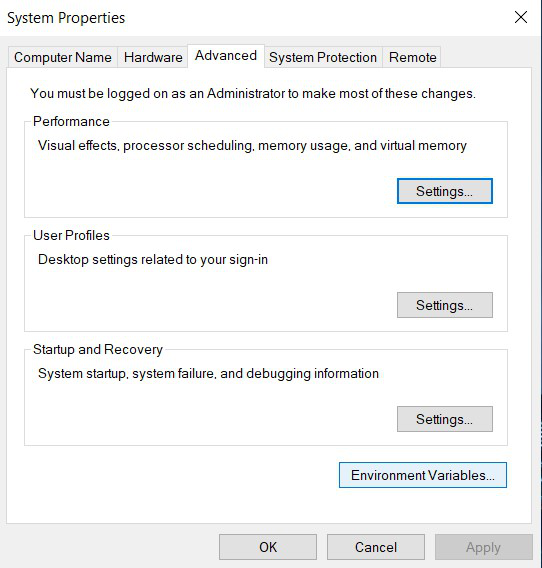
Step 2: Click on the Environment Variable button on the bottom right side
Step 3: Under the system variable tab, select the Path variable and press OK
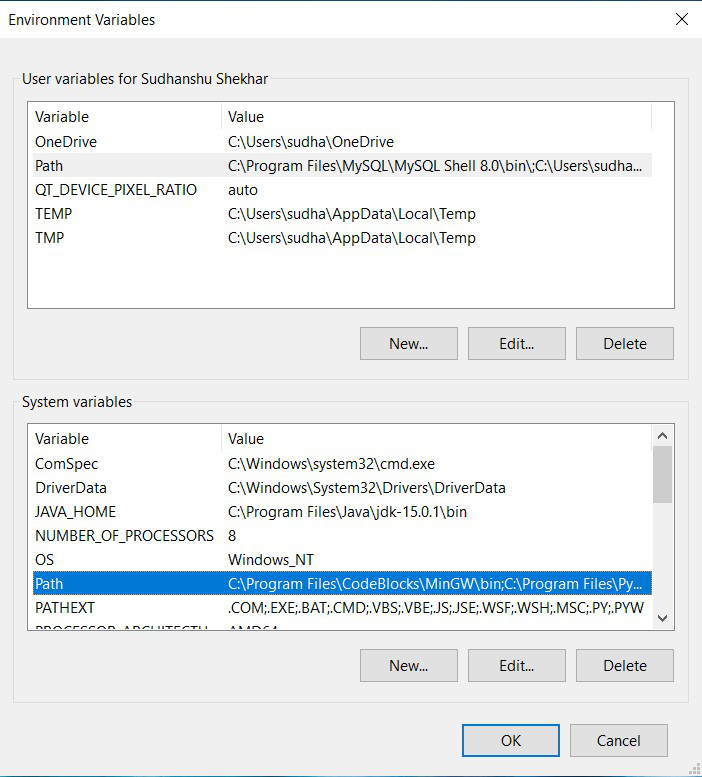
Step 4: In the installation phase of Cygwin, i.e in Step 3 where the root install directory was chosen for Cygwin installation, go to that location and inside it, copy the location of the bin folder.
copy Location
Step 5: Paste it in the environment variable section which was opened after the completion of Step 3 and press OK
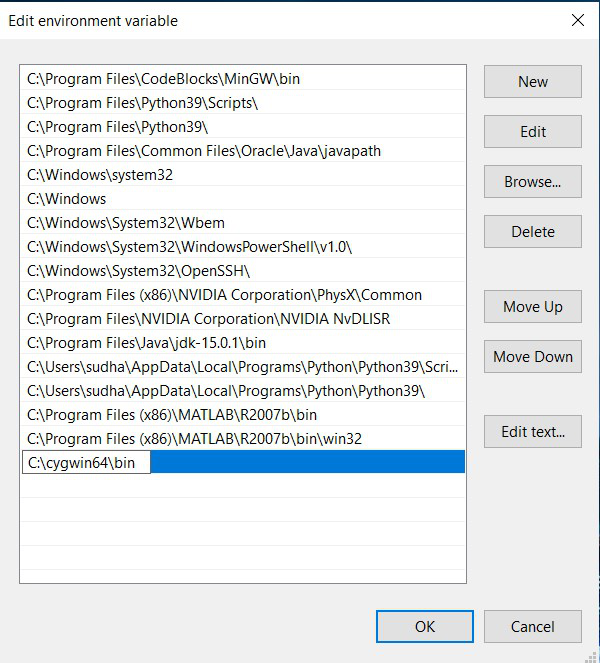
Setting up of Environment variables is completed, we can now run our Linux commands in command prompt
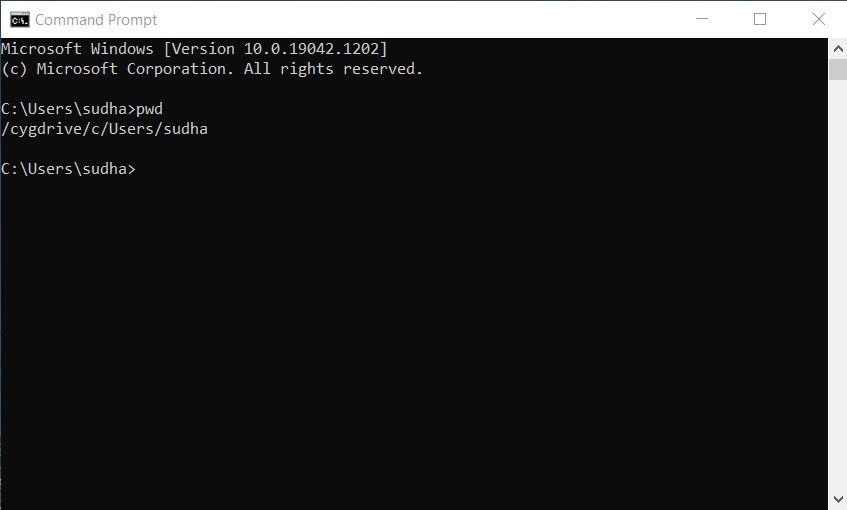
Usage
To use Linux commands in Windows with Cygwin, we can now either open Cygwin or command prompt and all we have to do is to type the command into the terminal/prompt and press Enter, as follows :
Example 1: pwd command in command prompt
pwd
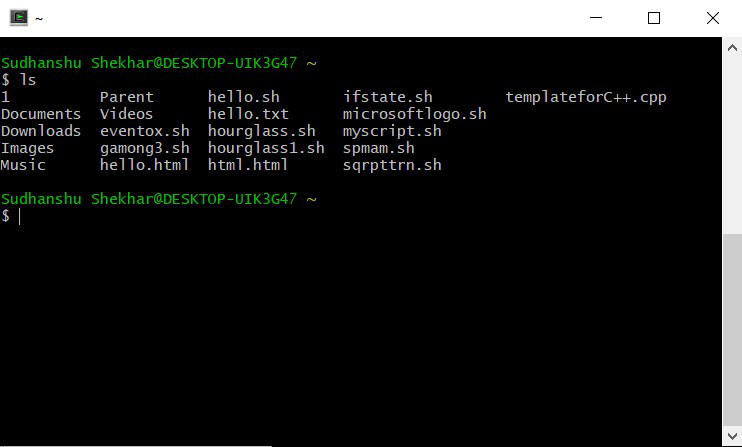
Example 2: ls command in command prompt
ls
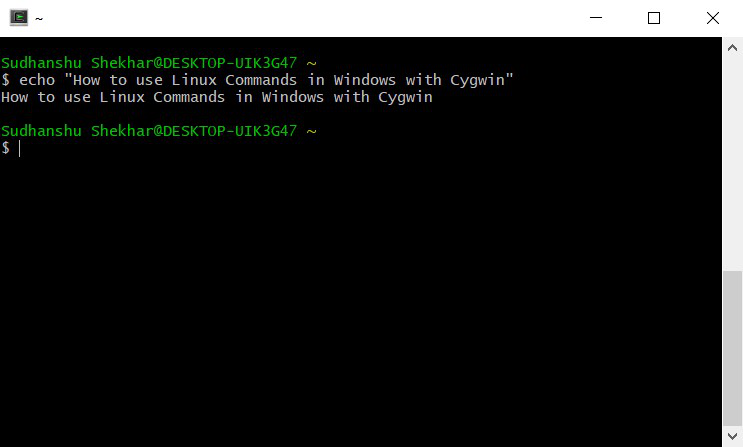
Example 3: echo command in command prompt
echo "your text"
There might come some situation when you want to execute some non-basic commands of Linux in Cygwin whose packages are not installed during the installation process, as follows :
Example 1: nano command in command prompt
nano file_name.txt
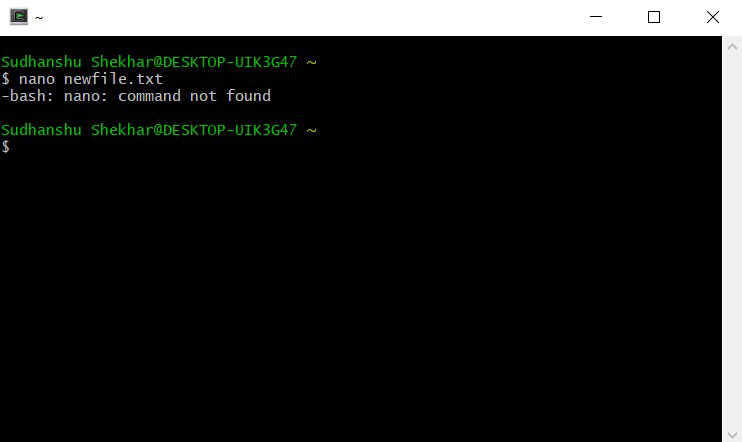
This happens because of the reason that the installed package of Cygwin doesn’t contain the functionality for these commands. To use these commands you have to select packages in the Installation Phase (Step 7) containing the functionality for this command.
During the last Microsoft Build Developer Conference held from March 30th to April 1st, Microsoft released an announcement and gave a presentation that surprised the industry: beginning with Windows 10 update #14136, it would be possible to run bash on Ubuntu on top of Windows.
Although this update has already been released by now, it is still in beta and is only available for insiders / developers and not for the public in general.
Without a doubt, when this feature reaches stable status and is available for everyone to use, it will be welcome with open arms – especially by FOSS professionals who work with technologies (Python, Ruby, etc) that are native to the Linux command line environment. Unfortunately, it will only be available in Windows 10 and not on previous versions.
However, Cygwin a well-known and widely-used Linux environment for Windows has been around for quite some time and has been extensively utilized by Linux pros whenever they’ve had the need to work on a Windows computer.
While foundationally different from “Bash on Ubuntu on Windows”, Cygwin is free software and provides a large set of GNU and Open Source tools that you can use as if you were on Linux, and a DLL that which contributes with substantial POSIX API functionality. On top of that, you can use Cygwin on all 32 and 64-bit Windows versions starting with XP SP3.
Downloading and Installing Cygwin
In this article we will guide you how to set up Cygwin with the most frequently used tools in the Linux command line. Depending on the available storage space and on your specific needs, you can later choose to install others very easily.
To install Cygwin (note that the same instructions apply to updating the software), we will need to download the Cygwin setup, depending on your version of Microsoft Windows. Once downloaded, double click on the .exe file to begin with the installation and follow the steps outlined below to complete it.
Step 1 – Launch the installation process and choose “Install from Internet”:
Step 2 – Select an existing directory where you want to install Cygwin and its installation file (Warning: don’t choose folders with spaces on their names):
Step 3 – Choose your Internet connection type and a select a FTP or HTTP mirror (go to https://cygwin.com/mirrors.html to select a mirror near your geographical location and then click Add to insert the desired mirror in the site list) to proceed with the download:
After you click next in the last screen, some preliminary packages -which will guide the actual installation process- will be retrieved first. If the chosen mirror is not operational or does not contain all the necessary files, you will be prompted to use another one. You can also choose a FTP server if the HTTP counterpart does not work.
If everything goes as expected, within a matter of minutes you will be presented with the package selection screen. In my case, I ended up choosing ftp://mirrors.kernel.org after others failed.
Step 4 – Select the packages you want to install by clicking on each desired category. Note you can also choose to install the source code as well. You can also search for packages using the input textbox. When you’re done selecting the packages you need, click Next.
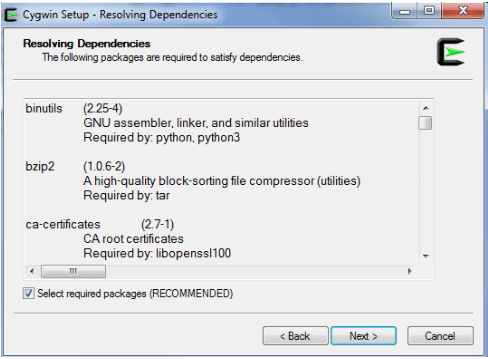
If you selected a package that has dependencies, you will be prompted to confirm the installation of dependencies as well.
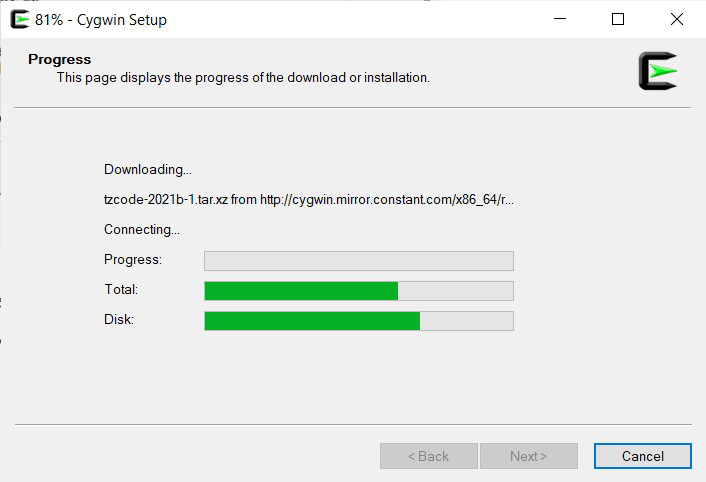
As it is to be expected, the download time will depend on the number of packages you selected previously and their required dependencies. In any event, you should see the following screen after 15-20 minutes.
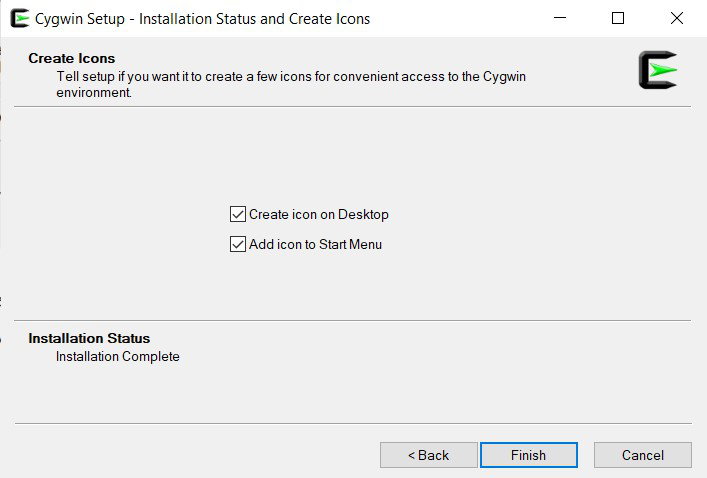
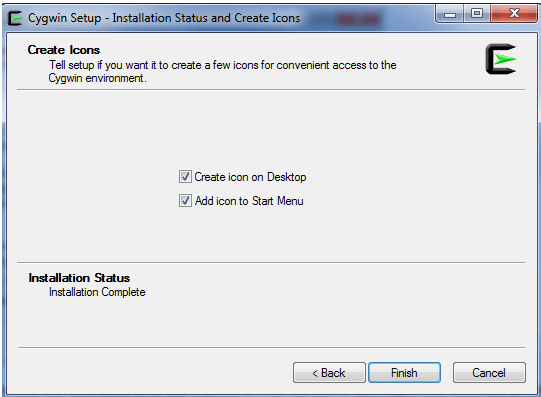
Select the desired options (Create icon on Desktop / Add icon to Start Menu) and click Finish to complete the installation:
After you have successfully completed steps 1 through 4, we can open Cygwin by double clicking its icon on the Windows desktop, as we will see in the next section.
Pages: 1 2
Cygwin — это Linux-подобная среда для систем на базе Windows. Он состоит из эмулятора и набора инструментов, которые обеспечивают возможность работы на Linux в среде Windows.
Cygwin состоит из DLL cygwin1.dll, которая действует как уровень эмуляции, обеспечивающий функциональность системного вызова POSIX через Windows. С Cygwin пользователи имеют доступ к стандартным утилитам UNIX, которые могут использоваться либо из предоставленной bash-оболочки, либо через командную строку Windows.
Кроме того, она предоставляет программистам поддержку в использовании Win32 API вместе с Cygwin API, позволяя переносить утилиты UNIX в Windows без особых изменений исходного кода.
Преимущества Cygwin по сравнению с командной строкой/WSL
Существует ряд преимуществ использования оболочки Cygwin по сравнению с командной строкой Windows. Ниже перечислены некоторые из основных:
- Предоставляет оболочку UNIX для Windows, обеспечивая доступ к целому ряду утилит от UNIX/Linux до Windows.
- Нет необходимости устанавливать полноценную ОС Linux или настраивать виртуальную машину, когда ресурсов, доступных через Cygwin, может быть достаточно.
- Оптимальное использование ресурсов и системные требования для работы в Windows, поскольку среда эмулируется и работает поверх Windows.
- Идеально подходит для тестирования/разработки, когда требуется использовать утилиты UNIX/Linux в Windows.
- Совместим со старыми ОС Windows, такими как Windows 7 и т.д., тогда как среда WSL, предлагаемая Windows, поддерживается только в более новых версиях.
Как скачать
Чтобы загрузить последнюю версию Cygwin, перейдите по этой ссылке на ее официальный сайт. Можно загрузить версию, под установленную версию Windows и архитектуры системы. 32-разрядную версию можно скачать тут, а 64-разрядную — тут.
Установка
Запустите скачанный файл с предыдущего шага. Подтвердите все запросы и предупреждения, отображаемые на экране компонентом UAC Windows. После прохождения этого квеста, будет запущена программа установки, как показано ниже.

Нажмите далее.

Появится запрос на выбор источника загрузки. В большинстве случаев параметр по умолчанию «Install from Internet» (Установить из Интернета) подходит и ничего изменять не приходится. Если у вас есть локальный загруженный репозиторий или вы просто хотите загрузить и установить Cygwin позже, выберите один из других доступных вариантов. Для продолжения нажмите «Далее».

В следующем окне предлагается указать «Root Directory» для установки, а также указать, будет ли она установлена для всех пользователей «All Users» или только для вас «Just Me». Если довольны значениями по умолчанию, то нажмите кнопку «Далее», чтобы продолжить установку.

Чтобы загрузить файлы пакета, программа установки попросит вас указать «Локальный каталог пакетов». По умолчанию указывается папка «Загрузки». Если требуется указать другое расположение, укажите путь к нему и нажмите кнопку «Далее», чтобы продолжить настройку.

В большинстве случаев для загрузки пакетов следует использовать параметр «Using System Proxy Settings». Если вы не хотите использовать прокси-сервер и использовать прямое подключение к Интернету, выберите параметр «Direct Connection», также есть возможность указать пользовательские параметры прокси-сервера, если таковые существуют. Для продолжения установки нажмите «Далее».

Затем программа предложит выбрать зеркало, откуда Cygwin загрузит файлы пакета. Чтобы обеспечить более высокую скорость загрузки, лучше выбрать зеркало, которое географически расположено ближе. Если вы не знаете что выбрать, выберите любое зеркало из списка и нажмите «Далее», чтобы продолжить.

Cygwin предоставляет множество утилит на базе UNIX/Linux, работающих под управлением Windows. Не все пакеты устанавливаются по умолчанию. Устанавливается только минимальный набор важных пакетов. На этом шаге можно настроить Cygwin, выбрав/убрав различные категорий пакетов. Помните, что добавить или удалить пакеты в Cygwin можно и позже. Если у вас есть конкретный список важных пакетов для вашей работы, вы можете выбрать их сейчас и продолжить, нажав «Далее».

На следующем экране отображается список выбранных пакетов с запросом на просмотр и подтверждение. Нажмите «Далее» для подтверждения и продолжения.

Выбранные пакеты начнут загружаться, и это может занять некоторое время в зависимости от скорости выбранного зеркала загрузки и количества выбранных пакетов.

После загрузки всех пакетов программа продолжит установку пакетов.

После завершения установки появится возможность создания значков на рабочем столе и в меню «Пуск» для упрощения доступа. По завершении нажмите кнопку «Готово», чтобы закончить работу мастера установки.

Теперь можно запустить Cygwin, через поиск в меню «Пуск», как показано выше, или дважды щелкнув значок на рабочем столе (если он был создан во время установки).

Оболочка Cygwin поддерживает обычно используемые команды UNIX/Linux. Если какая-либо команда не работает, можно повторно запустить программу установки и выбрать отсутствующий пакет, если он доступен в репозитории Cygwin (пример — Ansible), и установить его. Установленная команда теперь должна стать доступной как обычная команда в CLI оболочки Cygwin.
Заключение
Cygwin — полезная утилита, обеспечивающая оболочку UNIX/Linux, эмулированную в среде Windows. Он облегчает перенос определенных приложений в Windows и позволяет разрабатывать и использовать скрипты на основе Linux в Windows для различных задач. Его установка так же проста, как и любая программа на базе Windows с настройкой на основе графического интерфейса пользователя.
Дополнительную информацию о Cygwin можно найти здесь. Подробные инструкции по использованию можно найти в разделе часто задаваемых вопросов и руководстве пользователя.
This guide was tested under Windows 10. It should be work with other supported Windows Versions too.
Install Cygwin (without admin rights)
This documentation is based on Oliver Doepner’s IT blog. Thank you for your work Oliver.
- Download setup-x86_64.exe.
- Open command line window (WIN+R and type
cmd). - Go to the download directory, e. g.:
cd %USERPROFILE%\Downloads
- Run setup-x86_64.exe with the
--no-adminoption:setup-x86_64.exe --no-admin
- During installation select the
wgetpackage. - After installation open a Cygwin Terminal via Windows desktop shortcut.
- If you are behind an internet proxy (for example on a company environment) create
/etc/profile.d/proxy.shfor internet access:#!/usr/bin/env bash export http_proxy=http://your.proxy.server:proxy_port export https_proxy=http://your.proxy.server:proxy_port export ftp_proxy=http://your.proxy.server:proxy_port export no_proxy=localhost,.example.com
- Now you need a file called
/usr/local/bin/cyg-get. Downlaod it viawget -O /usr/local/bin/cyg-get https://gitlab.com/cogline.v3/cygwin/raw/master/cyg-get?inline=false
Alternatively, you can also create the file yourself.
#!/usr/bin/env bash

# import proxy definition
[[ -r /etc/profile.d/proxy.sh ]] && . /etc/profile.d/proxy.sh

readonly SUCCESS=0
readonly ERROR=1
readonly E_WRONG_ARGS=2

get_current_version()
{
  cd /usr/local/bin

  [[ -e setup-x86_64.exe ]] && rm setup-x86_64.exe
  wget -q http://cygwin.com/setup-x86_64.exe
  chmod u+x setup-x86_64.exe
}

main()
{
  local all_parameters="$@"
  local params="--no-admin"
  local packages=

  while :; do
    case "$1" in
      install)
        params="${params} -q -P"
        shift
        # list of comma separated packages
        packages=$(echo $@|sed -e 's/\s\+/,/g')
        params="${params} ${packages}"
        ;;
      remove)
        params="${params} -q -x"
        shift
        packages=$(echo $@|sed -e 's/\s\+/,/g')
        params="${params} ${packages}"
        ;;
      update)
        params="${params} -q -g"
        get_current_version
        ;;
      # Unknonw option
      -?*)
        echo "unknown option: $1"
        exit $E_WRONG_ARGS
        ;;
      # Default case: If no more options then break out of the loop.
      *)
        get_current_version
        break
    esac
    shift
  done

  run /usr/local/bin/setup-x86_64.exe ${params}
  exit $SUCCESS
}

main "$@"
- Make the script executable:
chmod ugo+x /usr/local/bin/cyg-get
- On the Windows desktop create a copy of the Cygwin terminal shortcut, rename it Cygwin Setup.
- Edit the shortcut target, replace:
mintty.exe -i /Cygwin-Terminal.ico -
with
mintty.exe -i /Cygwin-Terminal.ico /bin/bash -l -c 'cyg-get'
- Now test it and execute the desktop shortcut or run cyg-get from the Cygwin command
prompt.
Cygwin Package Management
With the created script /usr/local/bin/cyg-get you can do package management on command line like in a linux environment. Alternatively, you could also use the pure command-line tool apt-cyg.
Install packages
cyg-get install package_1 package_2 ... package_n
Remove packages
cyg-get remove package_1 package_2 ... package_n
Update all packages
Note
The update option will first download a new version of setup-x86_64.exe and after that all packages will be updated.