
-
Что это такое?
-
Как остановить процесс?
-
Как проверить на вирусы?
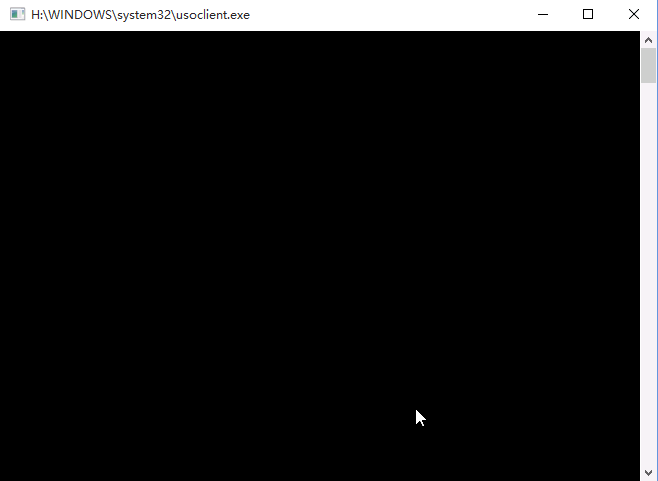
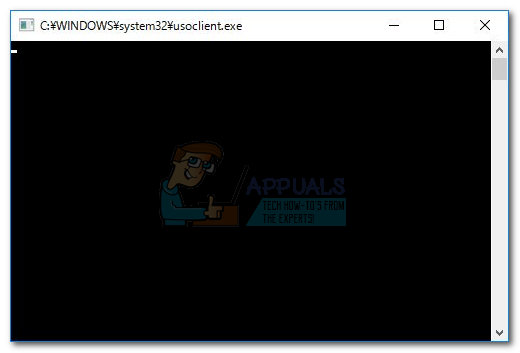
При отображении неизвестного черного окна командной строки появляется желание мгновенно выключить компьютер, дабы возможный вирус не успел повредить важные файлы. Но если вы увидели слово usoclient, можете не беспокоиться. Итак, Usoclient.exe: что это и как отключить?
Что это такое?
Usoclient.exe – это стандартный процесс Windows, который вызывается Планировщиком заданий и отвечает за сканирование и управление стоковой утилиты «Центр обновления Windows».
Как уже известно, файл не является вирусом и полностью безопасен. Однако, если usoclient.exe расположен в любой другой папке, кроме С:\Windows\system32\usoclient.exe, стоит проверить компьютер на наличие вирусов. Любое другое расположение объекта свидетельствует о его фейковости.
В целом, запущенный Usoclient не влияет на производительность компьютера и не нуждается в обязательном отключении.
Как остановить процесс?
Если всплывающее окно таки мешает, отключите его в несколько простых действий:
- Откройте окно «Выполнить», нажав Win+R.
- Введите
taskschd.mscи нажмите Enter.
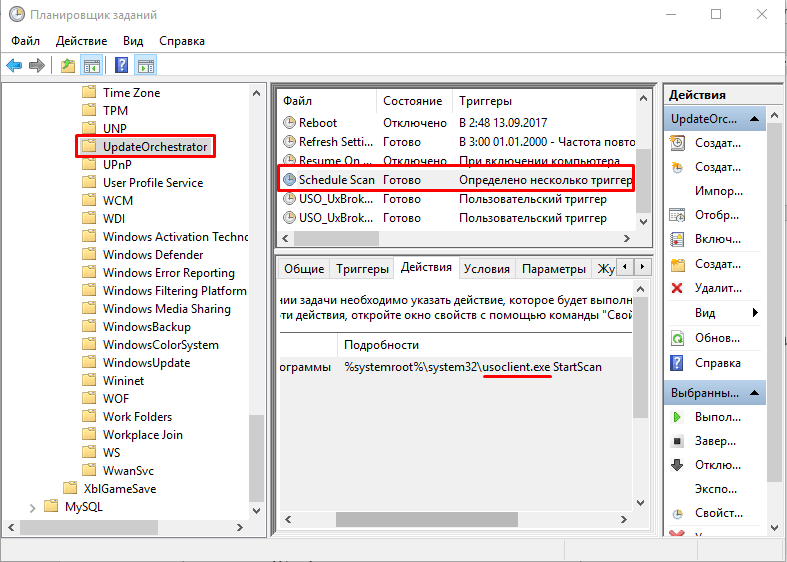
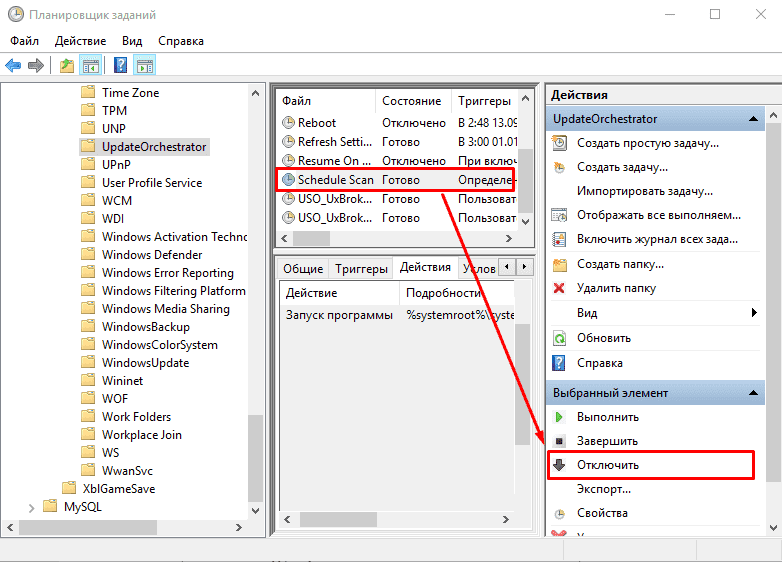
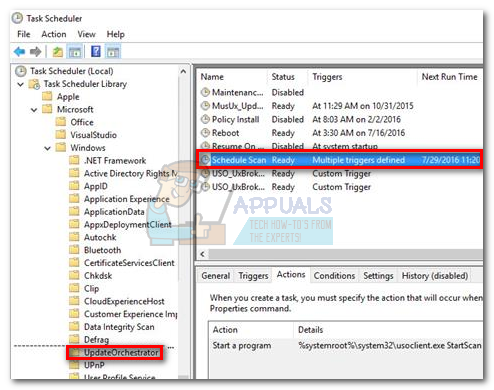
- В окне «Планировщик задач» откройте следующее дерево: Библиотека планировщика заданий – Microsoft – Windows – UpdatеOrchestrator.
- Найдите задачу Schedule Scan и кликните по ней.

- В правом подменю нажмите кнопку «Отключить».


Внимание! После остановки задачи проверять обновления Windows нужно вручную!
Как проверить на вирусы?
Если файл находится не в стандартной директории, проверьте компьютер:
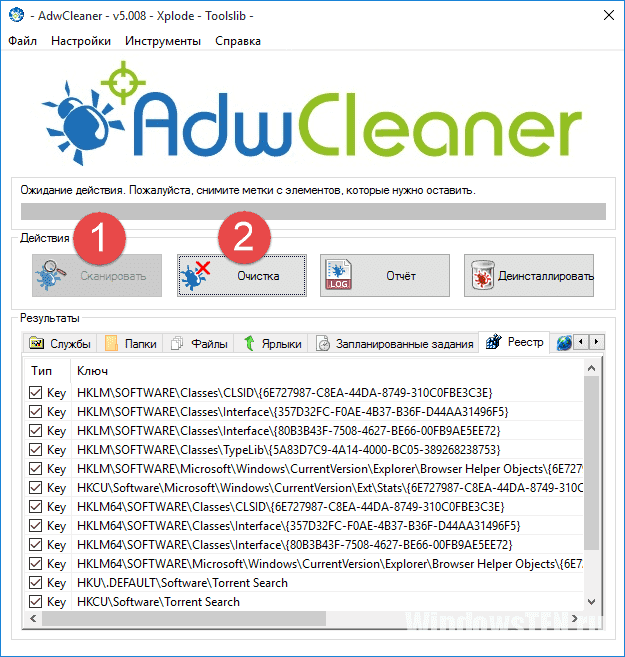
- Установите AdwCleaner, Web CureIt! и CCleaner.
- Запустите AdwCleaner (от имени администратора), нажмите кнопку «Сканировать», а после завершения проверки – «Очистка».

- Откройте Dr.Web CureIt! и выполните глубокую проверку системы. В случае обнаружения угрозы следуйте подсказкам программы.
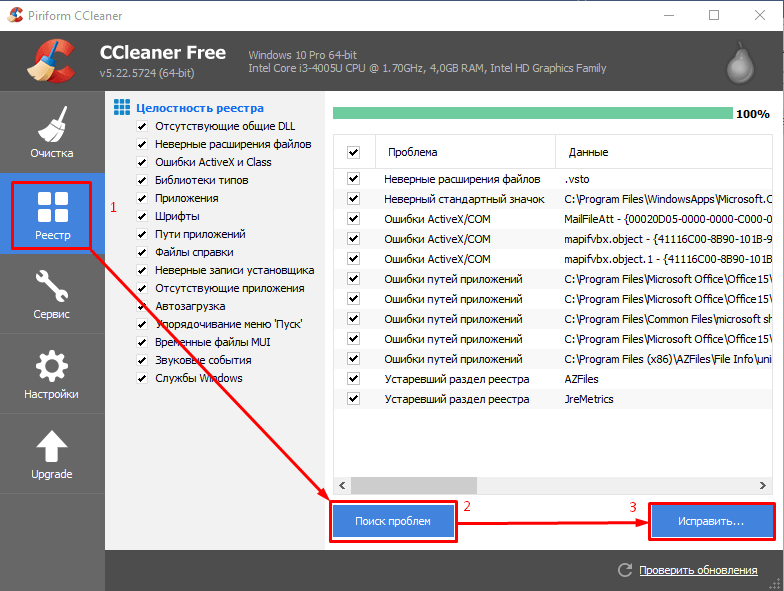
- Запустите CCleaner и очистите записи реестра.

На этом статья подходит к концу. Вы узнали всю необходимую информацию об Usoclient.exe: что это и как отключить. На все вопросы буду рад ответить в комментариях.
В диспетчере задач Windows 10, а также в отчетах о сетевой активности вы можете увидеть процессы с именами usoclient.exe и usocoreworker.exe. Иногда они способны вызывать высокую нагрузку на процессор, а в некоторых случаях просто любопытство пользователей заставляет задать вопрос о том, что это за процессы и безопасны ли они.
В этом материале подробно о назначении usocoreworker.exe и usoclient.exe в Windows 10, для чего они нужны и дополнительная информация, которая может оказаться полезной. Примечание: вы можете и не увидеть таких процессов, они не всегда запущены. Но, если зайти в Параметры — Обновления и безопасность — Центр обновления Windows, usocoreworker.exe сразу запустится. Обновление: про процесс MoUSOCoreWorker.exe в новых версиях Windows 11 и Windows 10
- Что такое usoclient.exe и usocoreworker.exe
- Что делать, если эти процессы грузят CPU
- Использование usoclient.exe в командной строке
Что представляют собой usoclient.exe и usocoreworker.exe

Usoclient.exe и usocoreworker.exe располагающиеся в папке C:\Windows\System32 и соответствующие им процессы в диспетчере задач являются системными компонентами Windows 10 и относятся к Update Session Orchestrator — системной службе, работающей с обновлениями: их поиском, скачиванием и установкой.
В русской версии Windows 10 служба в списке служб носит название «Обновить службу оркестратора» или «Служба оркестратора обновлений», не исключаю, что в будущем она будет переименована: сейчас название очень похоже на машинный перевод. В английской версии — «Update Orchestrator Service».
Помимо самой службы, запускать процессы, связанные с работой usocoreworker.exe и usoclient.exe могут задания, найти которые можно в планировщике заданий в разделе «Библиотека планировщика заданий» — «Microsoft» — «Windows» — «UpdateOrchestrator».
Что делать, если эти процессы грузят процессор и память
Иногда вы можете столкнуться с тем, что usoclient.exe или usocoreworker.exe грузят процессор компьютера или ноутбука. В большинстве случаев — это нормальная ситуация, которая возникает время от времени, а именно в те периоды, когда система выполняет работу с обновлениями (в том числе в фоновом режиме).
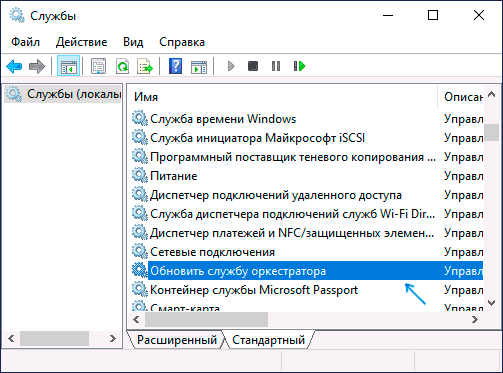
То есть переживать об этом не стоит, если ситуация не носит постоянный характер, и нагрузка никогда не падает. В последнем случае следует разобраться, что мешает нормальной работе системы с обновлениями. В случае, если вы отключали обновления Windows 10, попробуйте дополнительно отключить и службу «Обновить службу оркестратора», а затем перезагрузить компьютер: возможно, это решит проблему.
Использование usoclient.exe в командной строке
При желании вы можете использовать usoclient.exe вручную в командной строке со следующими параметрами для работы с обновлениями:
- usoclient.exe RestartDevice — для перезагрузки и завершения установки обновлений. Может не работать в некоторых версиях Windows 10.
- usoclient.exe ResumeUpdate — продолжить процесс обновления при загрузке.
- usoclient.exe ScanInstallWait — скачивает, но не устанавливает обновления. До выполнения команды следующие команды exe использовать нельзя.
- usoclient.exe StartDownload — запустить скачивание обновлений.
- usoclient.exe StartInstall — запустить установку обновлений, работает после ScanInstallWait.
- usoclient.exe StartInteractiveScan — интерактивный поиск обновлений (может показать диалоговые окна с информацией и запросами).
- usoclient.exe StartScan — запустить поиск обновлений.
Обратите внимание, для передачи параметров не используются какие-то дополнительные символы (слэш, дефис), просто вводим параметр сразу после usoclient.exe.
Microsoft Windows updates are essential since they fix bugs and security loopholes in Windows. But sometimes these updates cause the Windows to become unstable and create more problems then the update was supposed to fix. And one such issue that is created by Windows update is the brief usoclient.exe CMD popup at the startup. Now, most people think that this usoclient.exe pop-up appears because their system is infected with a virus or malware. But don’t worry as Usoclient.exe is not a virus and it simply appears because of Task Scheduler.

Now if the usoclient.exe appears only sometimes and doesn’t stay long you can definitely ignore the issue altogether. But if the pop-up stays long and does not go away then it’s an issue and you need to fix the underlying cause to get rid of the usoclient.exe pop-up. So without wasting any time let’s see What is usoclient.exe, and how do you disable usoclient.exe at the startup with the help of the below-listed tutorial.
Table of Contents
Usoclient stands for Update Session Orchestra. Usoclient is the replacement of Windows Update Agent in Windows 10. It is a component of Windows 10 Update and naturally, its main task is to check for new updates automatically in Windows 10. Since usoclient.exe has replaced Windows Update Agent, so it has to handles all the tasks of Windows Update Agent such as to install, scan, pause, or resume Windows update.
Is Usoclient.exe is a virus?
As discussed above usoclient.exe is a very legitimate executable file that is associated with Windows Updates. But in some cases, a virus or malware infection is also capable of creating pop-ups to hamper the user experience or to create unnecessary issues. So it is important to check if the usoclient.exe popup is really caused by the Windows Update USOclient or due to a virus or malware infection.
To check the pop up that is appearing is Usoclient.exe or not, follow the below steps:
1.Open Task Manager by searching for it using the search bar or press Shift + Ctrl + Esc keys together.

2.As soon as you hit Enter button the Task Manager window will open up.

3.Under the processes tab, look for the Usoclient.exe process by scrolling through the list of processes.
4.Once you find the usoclient.exe, right-click on it and select “Open file location“.
5.If the location of the file that opens up is C:/Windows/System32 then it means you are safe and there is no harm to your system.

6.But if the location of the file opens anywhere else then it is definite that your system is infected with viruses or malware. In this case, you need to run powerful antivirus software that will scan & remove the virus infection from your system. If you don’t have one then you can check out our in-depth article to run Malwarebytes to remove viruses or malware from your system.
But what if the Usoclient.exe popup is actually caused by Windows Update, then your natural instinct will be to remove the UsoClient.exe from your PC. So now we will see if it is a good idea to delete the UsoClient.exe from your Windows folder or not.
Is It Ok to Delete the Usoclient.exe?
If the Usoclient.exe popup is appearing on your screen for a long time and is not easily going away, then obviously you need to take some action in order to resolve the issue. But deleting Usoclient.exe is not advisable since it may trigger some unwanted behavior from Windows. Since Usoclient.exe is a system file that is actively used by Windows 10 on a day-to-day basis, so even if you delete the file from your system the OS will recreate the file at the next boot. In short, there is no point in deleting the Usoclient.exe file as this will not fix the pop-up issue.
So you need to find some solution which will fix the underlying cause of the USoclient.exe popup and will resolve this problem altogether. Now the best way to do this is to simply disable the Usoclient.exe on your system.
How to Disable Usoclient.exe?
There are several methods using which you can easily disable the Usoclient.exe. But before you go ahead and disable the Usoclient.exe, it is important to understand that by disabling it you are preventing your computer from staying up-to-date with the latest Windows updates that will make your system more vulnerable as you won’t be able to install security updates & patches released by Microsoft. Now if you are OK with this then you can proceed with the below methods to disable the Usoclient.exe
3 Ways to Disable UsoClient.exe in Windows 10
Before proceeding, make sure to create a restore point just in case something goes wrong.
Method 1: Disable Usoclient.exe using Task Scheduler
You can disable the Usoclient.exe pop-up to appearing on your screen using Task Scheduler, to do so follow the below steps:
1.Press Windows Key + R then type taskschd.msc and hit Enter to open Task Scheduler.
2.Navigate to the below path in the Task Scheduler window:
Task Scheduler Library > Microsoft > Windows >UpdateOrchestrator
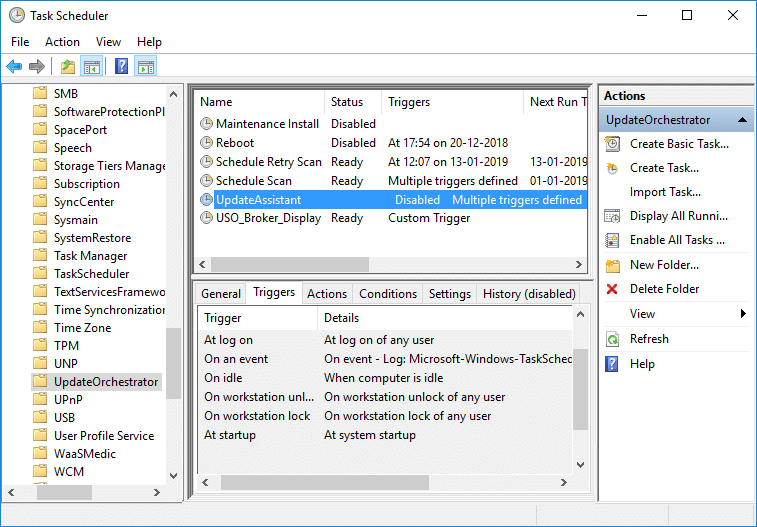
3.Once you reached the selected path, click on UpdateOrchestrator.
4.Now from the middle window pane, right-click on the Schedule Scan option and select Disable.
Note: Or you can click on Schedule Scan option to select it then from the right-window pane click on Disable.

5.Close Task Scheduler window and reboot your PC to save changes.
After the computer restarts, you will notice that the Usoclient.exe pop up will no longer appear on your screen.
Method 2: Disable Usoclient.exe using Group Policy Editor
You can disable the Usoclient.exe pop-up to appearing on your screen using Group Policy Editor. This method only works for Windows 10 Pro, Education, & Enterprise edition version, if you’re on Windows 10 Home then you need to either install Gpedit.msc on your system or you can directly go to the next method.
Let’s see how to disable automatic restart for Automatic Updates by opening your Group Policy Editor:
1.Press Windows Key + R then type gpedit.msc and hit Enter.
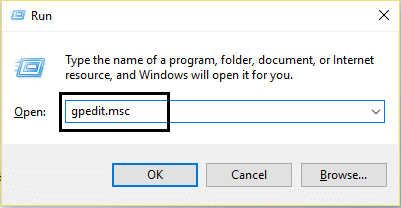
2.Now navigate to the following location under Group Policy Editor:
Computer Configuration > Administrative Templates > Windows Components > Windows Update
3.Select Windows update than in the right window pane, double-click on “No auto-restart with logged on users for scheduled automatic updates installations“.

4.Next, Enable the No auto-restart with logged on users for scheduled automatic updates installations setting.

5.Click Apply followed by OK.
6.Close Group Policy Editor and restart your PC.
Method 3: Disable Usoclient.exe using Registry Editor
You can also use Registry Editor to disable Usoclient.exe pop at startup. This method involves creating a Dword 32-bit value called NoAutoRebootWithLoggedOnUsers.
To use Registry Editor to disable Usiclient.exe follow the below steps:
1.Press Windows Key + R then type regedit and hit Enter.

2.Now navigate to the following folder under Registry Editor:
HKEY_LOCAL_MACHINE\SOFTWARE\Policies\Microsoft\Windows\WindowsUpdate\AU

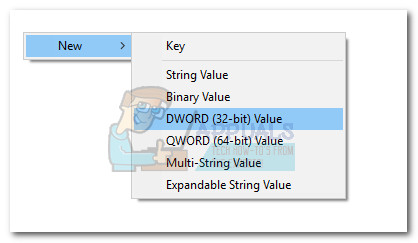
3.Right-click on the AU folder and select New > DWORD (32-bit) Value.

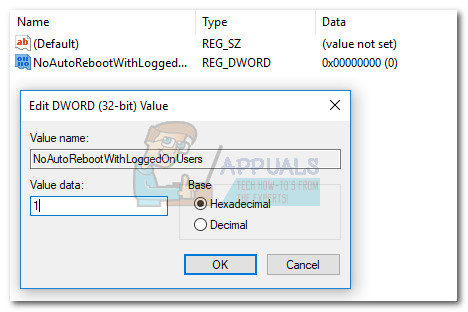
4.Name this newly created DWORD as NoAutoRebootWithLoggedOnUsers.

5.Double-click on NoAutoRebootWithLoggedOnUsers and set it’s value to 1 by entering 1 in the Value data field.

6.Click OK and close the Registry Editor.
7.Reboot your PC to save changes and after the computer restarts, you will find out that the Usoclient.exe pop up will no longer be visible.
So the next time you see the USOClient.exe pop-up at the startup you don’t need to be alarmed unless the pop-up stays there and conflicts with Windows startup. If the popup causes issue then you can use any one of the above methods to disable the Usoclient.exe and let it not interfere with your system startup.
Recommended:
- Fix Windows Media Player Server Execution Failed Error
- How to Connect a Bluetooth Device on Windows 10
- Fix Can’t Print PDF Files from Adobe Reader
- How to Format Hard Drive on Windows 10
I hope the above steps were able to help you Disable Usoclient.exe in Windows 10 but if you still have any queries regarding this guide then feel free to ask them in the comment’s section.
Most users get interested in the usoclient.exe process after noticing a brief CMD popup every time they start Windows 10. Because of this odd behavior, some users are confused about whether the UsoClient executable is a legitimate system process or a malware executable. The reason why you end up seeing the brief CMD prompt of UsoClient is that the process is called through Task Scheduler.
While a brief (under 1 second) uscoclient.exe CMD prompt is normal, there’s also a WU (Windows Update) bug that causes it to remain on the user’s screen indefinitely.
This article is meant as an explanatory guide to explain the purpose of the usoclient.exe client, how to distinguish security threat from legitimate component and how to disable the program altogether.
What is usoclient.exe?
The legitimate usoclient.exe is a genuine Windows Update (WU) component used to check for updates automatically. The acronym USO stands for Update Session Orchestrator and is the replacement for the Windows Update Agent on Windows 10. It’s the main purpose (similar to its predecessor), is to run tasks that scan, install or resume Windows updates.
Potential security threat
We weren’t able to identify any associated malware program capable of posing as the UsoClient executable. But looking at other similar scenarios, it’s entirely possible for a malware program to pose as system file with elevated privileges in order to avoid detected by security scans.
Luckily, we can easily verify this scenario by discovering the location of the UsoClient executable. To do this, open Task Manager (Ctrl + Shift + Esc) and locate the usoclient.exe by scrolling through the Processes list. Then, right-click on usoclient.exe and click on Open File Location.
If the revealed location is anywhere else than in C: / Windows / System32 /, there’s a high chance that your system is struggling with a system infection. In this case, it’s advisable to use a powerful scanner to remove the virus infection. If you don’t have one at the ready, consider using Malwarebytes to clean your system of malware infections.
If the revealed location was indeed in C: / Windows / System32 /, you can probably rest assured as you’re not dealing with a malware executable. But if you want even more peace of mind, you can still trigger a security scan on the executable in order to be sure. If you want to save time, upload just the executable to VirusTotal and let the software analyze it.
Is it ok to delete the UsoClient executable?
Deleting the usoclient.exe program is certainly not advisable since you might trigger unwanted behaviors. Even more, since it’s a system file commonly used by Windows, you’ll likely find that your OS will promptly recreate the file at the next startup.
A better solution would be to disable the program, or better yet, start by letting Windows Troubleshooter fix the bug that will cause the CMD prompt of UsoClient to cling on your screen indefinitely. Please follow the methods below in order until you encounter a fix that manages to remove the usoclient.exe CMD prompt.
Note: Keep in mind that if you end up disabling the usoclient.exe you’ll likely prevent your system from staying up to date with the latest updates.
Method 1: Running Windows Troubleshooter
Some users have reported managing to fix the issue by running the Windows Update troubleshooter. But keep in mind that this method is only effective you the usoclient.exe CMD prompt stays on-screen indefinitely.
Note: Completing the steps below will not disable the usoclient.exe – you will still be able to receive Windows updates. The fix is only aimed at resolving the bug that causes the usoclient.exe CMD prompt to remain on screen until closed manually.
Here’s a quick guide on how to resolve the bug with the Windows Update troubleshooter:
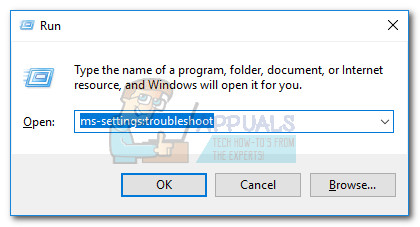
- Press Windows key + R to open up a Run window. Type or paste “ms-settings:troubleshoot” and hit Enter to open the Troubleshoot tab of Windows 10 Settings.

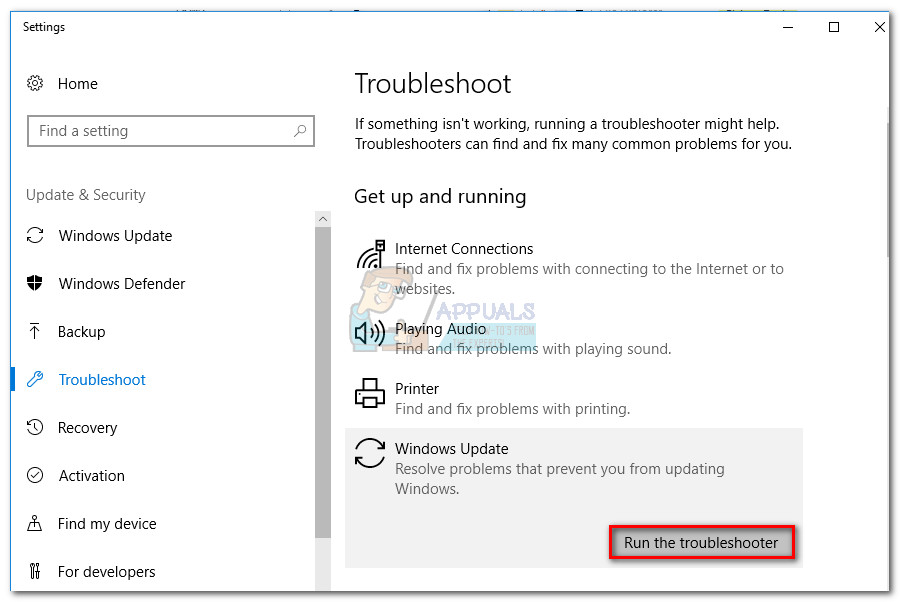
- In the Troubleshoot tab, click on Windows Update then choose Run the troubleshooter.

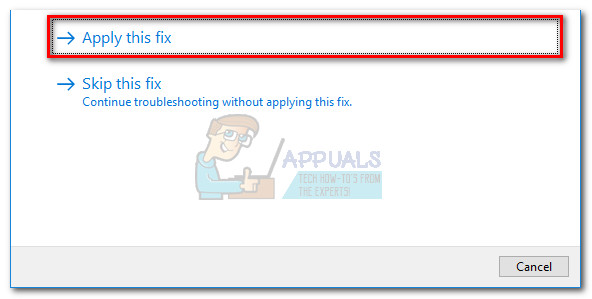
- Wait for the troubleshooting component to investigate for problems, then follow the on-screen prompts to trigger the repair strategies. You’ll probably have to click on Apply this fix. When the process is complete, restart your computer manually if not prompted to do so automatically.

If this method hasn’t resolved the issue or if you’re looking for a permanent fix to disable the UsoClient executable, continue with the other methods below.
Method 2: Disabling usoclient.exe from Task Scheduler
Although we certainly don’t recommend this without an apparent reason, it is possible to prevent the UsoClient.exe pop-up CMD prompt from appearing by disabling the process from the task scheduler
Here’s a quick guide to disabling the usoclient.exe pop up from the Task Scheduler:
- Press Windows key + R to open up a Run command. Type “taskshcd.msc” and hit Enter to open the task scheduler.
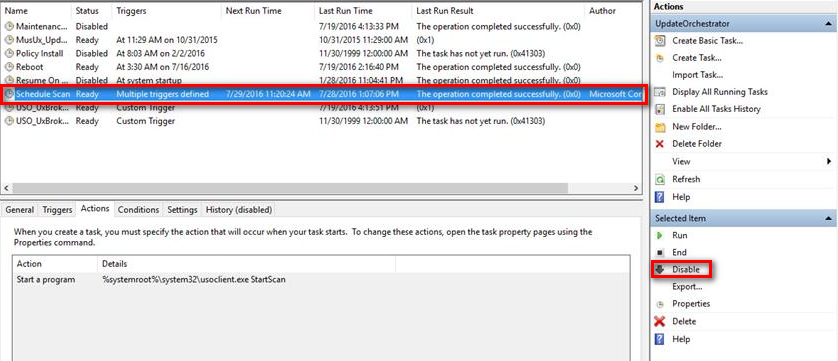
Type taskschd.msc in the Run to open Task Scheduler - In the task scheduler window, navigate to Task Scheduler Library > Microsoft > Windows > UpdateOrchestrator using the left pane.
- Once you open the UpdateOrchestrator folder, move over to the center pane and select the Schedule Scan task.

- With the Schedule Scan selected, move over to the right pane and click on Disable (under Selected item).

- Close the task scheduler and reboot your computer. At the next restart, you should notice that the UsoClient.exe CMD pop up no longer appears. But keep in mind that leaving this task disabled will not keep the WU (Windows Update) component informed with the latest available updates.
Note: In case you ever decide to resume the normal functionality of the Update Orchestrator component, reverse engineer the steps above and choose Enable at the last step to revert to the normal behavior.
If you cannot access the task scheduler from your Windows 10 version, disable the usoclient.exe using Method 3.
Method 3: Disabling usoclient.exe using Registry Editor
If the first method wasn’t applicable to your system, you can also use Registry Editor to prevent the usoclient.exe pop CMD pop up from ever bothering you again. This method involves creating a Dword 32-bit value called NoAutoRebootWithLoggedOnUsers in order to disable the auto-reboot feature of the UsoClient executable.
Here’s a quick guide on how to disable usoclient.exe from Registry Editor:
- Press Windows key + R to open up a Run window. Type “regedit” and hit Enter to open up the Registry Editor.
- In Registry Editor, use the left pane navigate to the following location.
HKEY_LOCAL_MACHINE \ SOFTWARE \ Policies \ Microsoft \ Windows \ WindowsUpdate\ AU.

- With the AU folder selected, move over to the right panel and right-click on a free space and choose New > Dword (32-bit) Value. Then, rename the newly created value to NoAutoRebootWithLoggedOnUsers.

- Double-click on NoAutoRebootWithLoggedOnUsers and set it’s value to 1.

- Close Registry Editor and reboot your computer. The CMD pop-ups caused by usoclient.exe should no longer be visible after the restart.

In case you ever want to revert to the normal behavior, return to Registry Editor, navigate to HKEY_LOCAL_MACHINE \ SOFTWARE \ Policies \ Microsoft \ Windows \ WindowsUpdate\ AU and delete the NoAutoRebootWithLoggedOnUsers entry or set it’s value to 0.
Kevin Arrows
Kevin Arrows is a highly experienced and knowledgeable technology specialist with over a decade of industry experience. He holds a Microsoft Certified Technology Specialist (MCTS) certification and has a deep passion for staying up-to-date on the latest tech developments. Kevin has written extensively on a wide range of tech-related topics, showcasing his expertise and knowledge in areas such as software development, cybersecurity, and cloud computing. His contributions to the tech field have been widely recognized and respected by his peers, and he is highly regarded for his ability to explain complex technical concepts in a clear and concise manner.

If every time when you start Windows 10, you notice a brief CMD popup in the unsoclient.exe process, you should read this article and find out more about this executable. The UsoClient executable is called through Task Scheduler that is why it appears on the computer screen. It is normal if the usoclient.exe CMD prompt appears for under 1 second. However, a WU (Windows Update) bug also can cause the executable to remain on the screen.
The usoclient.exe process can couse potential security threats
Usoclient.exe is a genuine part of WU that is used to look for updates automatically. USO, which stands for Update Session Orchestrator replaces the Windows Update Agent on Windows 10 operating system. The usoclient.exe process is responsible for running tasks that scan, install or resume Windows updates.
According to Kevin Arrows, no associated malicious application is capable of posing as the UsoClient executable. However, a malware program could potentially pose as system file with elevated privileges. In order to verify this scenario, users have to open Task Manager and locate usoclient.exe in the processes list. Further, right-click on the useclient.exe process and select Open File Location.
If the disclosed location is not C:/Windows/System32/, then your system potentially struggles with a system infection.
Removing the usoclient.exe process might cause unwanted behaviors. In addition, users will likely find out that their operating system will promptly recreate the file at the next startup. That is why we would not recommend you to delete it.
What we would recommend is to disable the program or, even better, start by letting Windows Troubleshooter fix the vulnerability that leads to the CMD prompt of UsoClient.
Do not forget that disabling the usoclient.exe will likely prevent OS from staying updated.
Method 1: Run Windows Troubleshooter
There are opinions that running the Windows Update Troubleshooter can fix the UsoClient issue. However, this method would work for you if the usoclient.exe CMD prompt appears on your screen indefinitely.
- Click on Windows key + R in order to access a Run window and type ‘ms-settings:troubleshoot’, select Enter and open the Troubleshoot tab of Windows 10 Settings.
- Select Windows Update and choose Run the troubleshooter.
- Follow the on-screen prompts in order to trigger the repair strategies. When the process will complete, restart your PC if it won’t restart automatically.
If the first method has not resolved the problem, check the second one.
Method 2: Disable the usoclient.exe process from Group Policy Editor
Users should keep in mind that this method is not recommended without an apparent reason. However, it is possible to prevent the UseClient CMD prompt from popping up by disabling the usoclient.exe process from Group Policy Editor.
- Click on Windows key + R in order to access a Run command and type ‘gpedit.msc’. Open the Local Group Policy Editor by pressing Enter.
- Then, navigate to Task Scheduler Library > Microsoft > Windows > UpdateOrchestrator by using the left pane.
- After the UpdateOrchestrator folder is opened, move over to the center pane and select Schedule Scan task.
- Further, move over to the right pane and under Selected item select Disable.
- Finally, close the Local Group Policy Editor and restart your PC. After you restart it the UsoClient.exe CMD pop won’t longer appear.
Method 3: Disable the usoclient.exe process using Registry Editor
- Press Windows key + R and access a Run window. Type there ‘regedit’ and press enter to access Registry Editor.
- Navigate to HKEY_LOCAL_MACHINE\\SOFTWARE\\Policies\\Microsoft\\Windows\\WindowsUpdate\\ AU.
- Select AU folder and move over to the right panel. Then right-click on a free space and select New>Dword (32-bit) Value. Now you have to rename the created value to NoAutoRebootWithLoggedOnUsers.
- Double-click on the newly created value and set it to 1.
- Close Registry Editor and restart your computer.
Note: If you want to revert the system to the normal behavior, you have to return to Registry Editor and navigate to HKEY_LOCAL_MACHINE \\ SOFTWARE \\ Policies \\ Microsoft \\ Windows \\ WindowsUpdate\\ AU and delete the NoAutoRebootWithLoggedOnUsers entry or set it’s value to 0.