
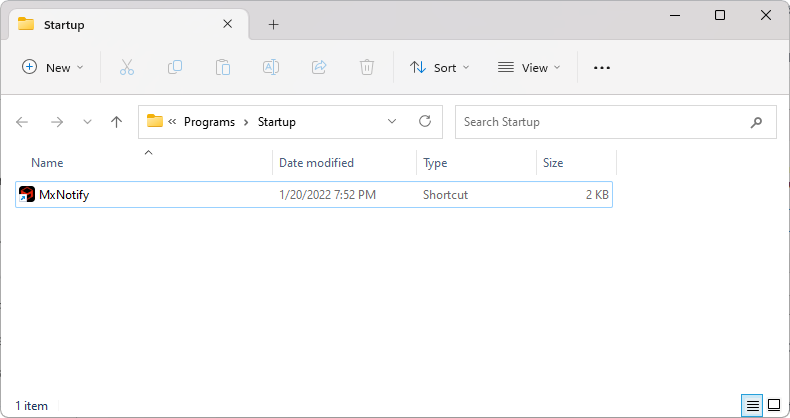
The Startup folder contains a list of application shortcuts that run automatically every time you start up your computer. You can add programs by adding their shortcuts to the folder to make them run during your Windows 11 or Windows 10 startup. You can also remove any of them if you don’t want them to run during startup.
Location of Startup Folder for All users
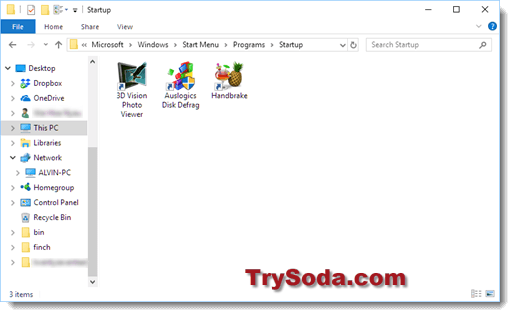
Here’s how to go to the all-users’ startup folder in Windows 10 or Windows 11:
- Open File Explorer from the start menu.
- Browse to the following directory.
C:\ProgramData\Microsoft\Windows\Start Menu\Programs\StartUp
- Please take note that the above directory is assuming your default Windows was installed in C: drive. If your Windows is in another drive, change the drive letter.
- Add or remove any program’s shortcut into or from the folder.
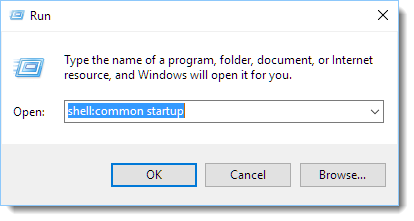
Another much faster way to go to the startup folder in Windows 11/10:
- Go to start menu and type Run. Hit enter.
- In the Open field, type shell:common startup and then hit enter.

Startup Folder for Current User Only
If you would like to configure startup for only the currently logged-in user, here’s where you should go:
- Open File Explorer.
- Browse to the following folder.
C:\Users\Username\AppData\Roaming\Microsoft\Windows\Start Menu\Programs\Startup
- Replace the Username with the actual username you’re currently using in your Windows system.
- Add or remove any shortcut as you want.
Another quicker method to go to this folder:
- Go to start menu and type Run. Press enter.
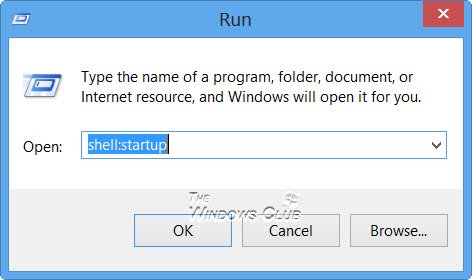
- Type shell:startup in the open field and press enter.
Configure Windows 11/10 Startup Apps from Msconfig
Not all application EXE shortcuts would be shown in the startup folder mentioned above. Some would not be there but would still run during startup. To have a clearer view of all the background programs and services that would run during the startup of your Windows 10 computer, use Msconfig. Here’s how:
- Go to Start, then Run.
- Type msconfig and hit enter.
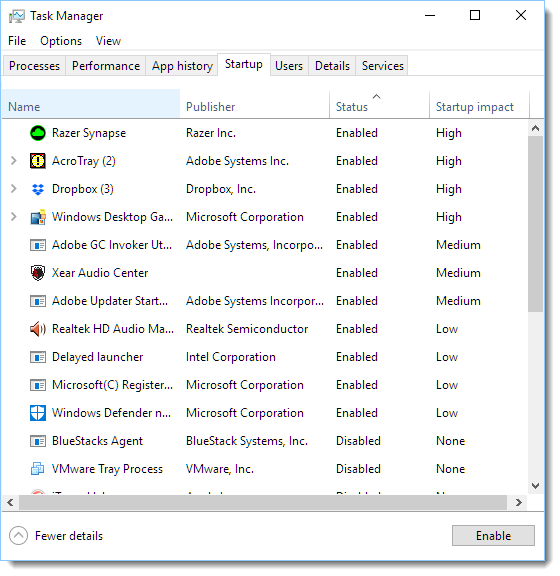
- In the System Configuration window, go to the Startup tab.
- Click on the Open Task manager link.
- Programs shown in the startup list are all the programs that would run during startup.
- You can disable any of these programs by right clicking it and select disable, if you would not like it to run during startup.
More ways to make your computer start faster
Even after trying out the tips we talked about for managing startup programs in Windows 10/11, there’s more you can do to make your computer start up faster and run smoother. Here are some extra steps:
- Think about using a tool just for managing startup programs. There are extra tools out there, not made by Windows, that give you more options. They can let you delay when certain programs start, stop some from starting at all, and other cool things.
- Turn off startup programs you don’t need. Look through the programs that start automatically and turn off the ones you really don’t need right away. Sure, keeping your antivirus going or cloud storage connected is smart, but some stuff just isn’t necessary and can slow down how fast your computer starts.
- Keep your computer clean. Cleaning your system regularly helps it start faster and work better. Use a tool to get rid of files you don’t need, clean out temporary files, and uninstall programs you never use. This frees up space and makes it easier for your computer to get going.
- Think about getting better hardware. If your computer is still slow to start after you’ve done all you can with software, it might be time to upgrade your hardware. More memory (RAM) or a quicker hard drive or SSD can make a big difference in how fast your computer starts and runs.
Nyau Wai Hoe is the Founder and Chief Editor of WindowsDigitals.com. With a degree in software engineering and over 12 years of experience in the tech support industry, Nyau has established himself as an expert in the field, with a primary focus on the Microsoft Windows operating system. As a tech enthusiast, he loves exploring new technologies and leveraging them to solve real-life problems.
Download Windows Speedup Tool to fix errors and make PC run faster
The Startup folder in Windows 11/10 contains a list of shortcuts of those applications that start when your Windows start. Earlier, you could easily access the Windows 7 startup folder from Start Menu > Startup. But where is the Startup folder in Windows 11/10?
What is Windows Startup folder?
The Startup folder in Windows OS is a folder where the operating system places shortcuts of programs that are needed to start with Windows. It is just one of such locations. If you open it, you will see a list of program shortcuts for apps that are meant to run automatically whenever the computer boots up.
To open the Windows 11/10 Startup folder:
- Open the WinX Menu
- Select Run to open the Run box
- Type shell:startup and hit Enter to open the Current Users Startup folder
- Type shell:common startup and hit Enter to open the All Users Startup folder.
Where is the Startup folder in Windows 11/10?
The Current Users Startup folder in Windows 11/10 is located at:
C:\Users\Username\AppData\Roaming\Microsoft\Windows\Start Menu\Programs\Startup
These programs start up for the current logged-in user only. To directly access this folder, open Run, type shell:startup and hit Enter.
Or to quickly open the folder, press WinKey, type shell:startup and hit Enter.
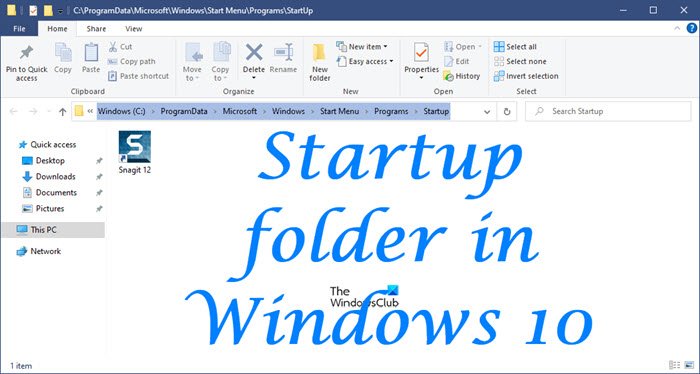
Startup folder in Windows 11/10
The All Users Windows 11/10 Startup folder is located at:
C:\ProgramData\Microsoft\Windows\Start Menu\Programs\StartUp
These programs start up for all users. To open this folder, bring up the Run box, type shell:common startup and hit Enter.

Or to open the folder quickly, you can press WinKey, type shell:common startup and hit Enter.
You can add shortcuts of the programs you want to start with your Windows in this folder.
Related: There are no startup items to display
How do I change what programs run at startup in Windows 11/10?
You may use msconfig in Windows 7 or Task Manager in Windows 11/10 to manage startup programs.
You can also delay Startup Programs or control the order in which they load when Windows boots.
This post on Windows Registry Startup Paths may also interest you.
Anand Khanse is the Admin of TheWindowsClub.com, a 10-year Microsoft MVP (2006-16) & a Windows Insider MVP (2016-2022). Please read the entire post & the comments first, create a System Restore Point before making any changes to your system & be careful about any 3rd-party offers while installing freeware.
Rick Akura
Learn where the startup folder is located in Windows 11 and 10. Find out how to access it quickly and make changes as needed.
The startup folder in Windows 11/10 is an incredibly useful feature that allows you to launch programs or perform certain tasks when your computer boots up. This feature can save you time and make your computing experience more efficient.
In this article, we will discuss how you can access the startup folder, add and remove items from it, and provide tips on how to customize your startup experience.
Table of Contents
- What Is the Windows Startup Folder?
- Windows 11/10 Startup Folder Location
- How to Find the Startup Folder in Windows 11/10
- Find the Windows Startup Folder With Run
- Find the Windows Startup Folder With File Explorer
- Find the Windows 11 Startup Folder for All Users
- How to Change What Programs Run at Startup in Windows 11/10
- Tips for Customizing Your Startup Experience
What Is the Windows Startup Folder?
The Windows Startup folder in the Windows operating system contains applications that will launch when your computer boots up. Any application or script in this folder will run as soon as you turn on your computer. The startup folder can be accessed from different locations, depending on the version of Windows you’re using.
In older versions of Windows, such as 7 and Vista, you can access it through the Start menu by clicking All Programs > Startup. However, this doesn’t exist in Windows 10 or the latest Windows 11 systems.
A startup folder ensures the programs stored there will automatically run during each boot process and customize certain default configurations for specific software tools. This way, any configuration settings made within those applications don’t have to be done manually every time they are opened but rather once upon system startup or reboot.
Having several applications running upon system start-up can take up unnecessary resources such as RAM memory and CPU power if not used wisely, so it is recommended to only include essential programs inside the startup folder unless necessary otherwise due to specific needs and preferences related to these applications’ overall usage patterns within their respective workflows.
Windows 11/10 Startup Folder Location
Looking for the Startup folder in Windows 11 or 10? Unfortunately, there’s no Start menu shortcut to it. But not to worry! You can easily find it through a few simple steps. Copy and paste this path into your File Explorer address bar, and you’ll be on your way. The Windows 11/10 Startup folder is located in:
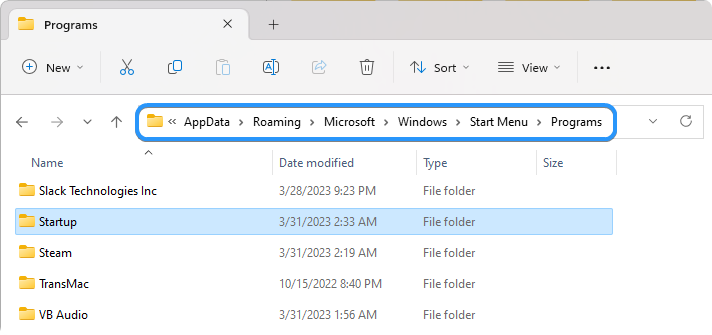
C:\Users\username\AppData\Roaming\Microsoft\Windows\Start Menu\Programs\Startup
Make sure to replace «username» with your local user or another user on your computer you want to check startup apps for. Once in the Startup folder, you can easily add any application or script you want to run upon system startup. You can also remove applications from this folder if they are no longer needed.
How to Find the Startup Folder in Windows 11/10
You can use several methods to access the Windows 11/10 Startup folder. Let’s take a look at the three most common ways below.
1. Find the Windows Startup Folder With Run
The Run applet is a feature in Windows 11 and 10 that allows users to quickly open applications, launch files, access system settings, search the web, and more. This tool is particularly useful when you know exactly what you want to do but can’t remember how to get there. The Run utility simplifies the process by allowing you to access various tools from one central location.
You can use the Run applet to get to your Startup folder quickly. You need to do this:
-
Press the Windows + R keyboard shortcut to bring up the Run applet. Here, type «shell:startup» without the quotes, and then hit Enter.
-
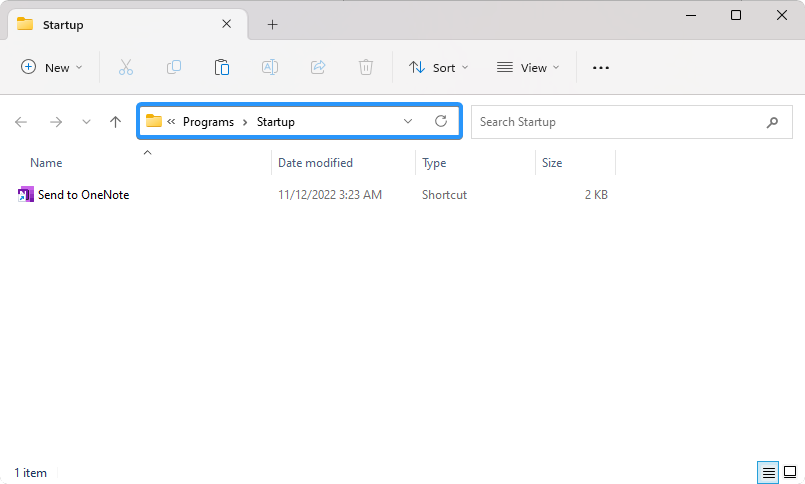
The Run applet will immediately open the Startup folder in your File Explorer. You can make changes here, like deleting or adding a shortcut.

-
Alternatively, after pressing the Windows + R keyboard shortcut, you can input “%appdata%\Microsoft\Windows\Start Menu\Programs\Startup” without the quotes and press Enter. This will also take you to the Startup folder on your current user.
2. Find the Windows Startup Folder With File Explorer
File Explorer is an application that allows you to browse and manage your files, folders, and drives. The File Explorer contains all the features necessary for working with items on your computer, like creating and deleting files and folders, searching for content within your documents, and copying/pasting items between different locations.
Using File Explorer, you can easily navigate to the Startup folder in Windows 11/10. Here’s what you need to do:
- Open File Explorer from your taskbar or press the Windows + E keyboard shortcut.
-
Before beginning, you must ensure that hidden files and folders are shown in your File Explorer. To do this, click on the three-dot menu in the toolbar, and select «Options» from the context menu.
-
Switch to the «View» tab using the header menus. Here, scroll down until you see «Hidden files and folders.» Click on it once to expand its options, and make sure «Show hidden files, folders, and drives» is enabled.
- Click the Apply button to finalize your changes, then close the window with the OK button.
-
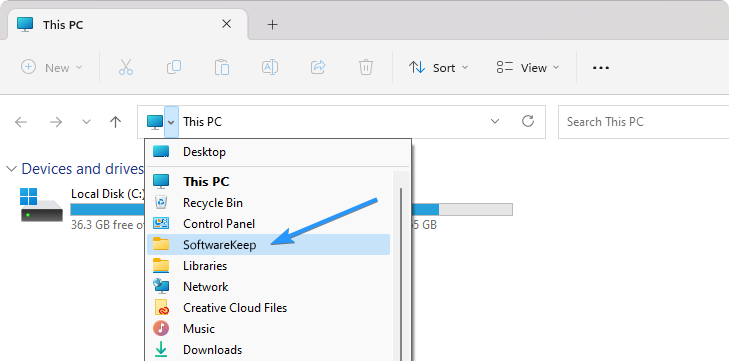
Next, click on the arrow in the File Explorer address bar, and click on the folder with your local username.
-
Open the «AppData» folder. It should look different from a regular folder, as it’s a hidden file you’re not supposed to see by default.
-
Navigate to Roaming > Microsoft > Windows > Start Menu > Programs location, and look for the «Startup» folder. Double-clicking on it will open the folder containing your startup app shortcuts.


3. Find the Windows 11 Startup Folder for All Users
The two methods described above help you locate the Startup folder only for your own user profile. However, some applications install programs for all users, and the shortcuts are then stored in a separate location for the Startup folder.
Here are the steps to locate the «All users» Startup folder location in Windows 11:
-
Press the Windows + R keyboard shortcut to bring up the Run applet. Here, type «shell:common startup» without the quotes, and then hit Enter.
-
By following this step, you will be able to promptly access the Startup folder for all users on Windows 11.
-
Alternatively, you can also input a path to the Run applet. To do this, copy and paste “%ProgramData%\Microsoft\Windows\Start Menu\Programs\StartUp” into the Run input field and press Enter to get there.
To put it simply, “C:\ProgramData\Microsoft\Windows\Start Menu\Programs\StartUp” is the location of the Startup folder for all users on Windows 11 and 10.
How to Change What Programs Run at Startup in Windows 11/10
If too many applications run at startup, your device may slow down. You can remove or disable some applications in your Startup folder to prevent this. You can also use Windows 11/10 Task Manager to edit what programs run automatically when you boot up your computer. Here’s how:
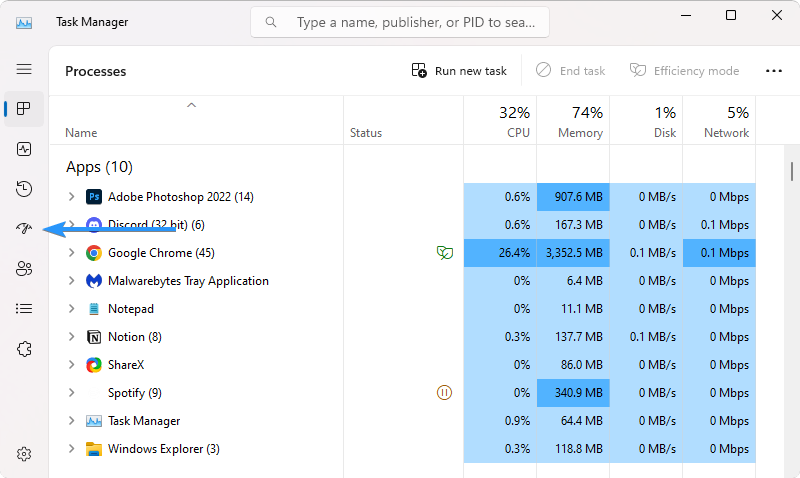
- Right-click on the Start menu and choose “Task Manager” from the options. Alternatively, press the Ctrl + Shift + Esc keys on your keyboard to bring up the Task Manager.
-
Switch to the Startup apps tab.
-
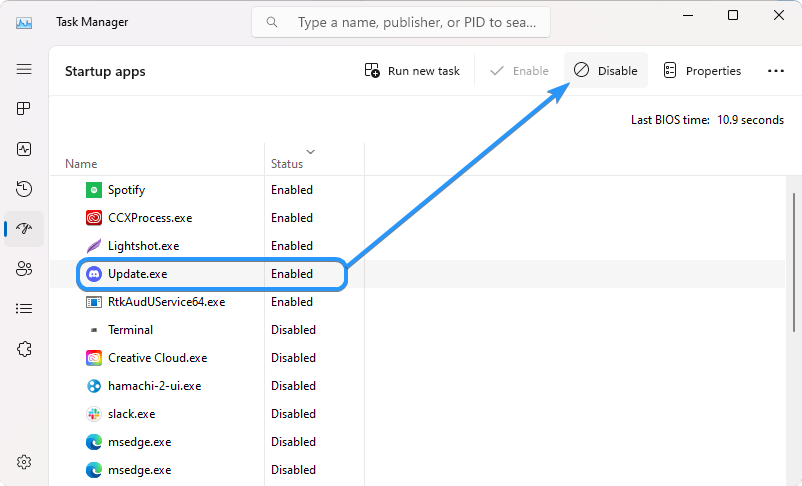
Review all the applications listed. If you see an app you don’t need on startup, click on it once to select it, and click the “Disable” button.
-
If an app you want to start when you boot your system is currently disabled, select it by clicking on it once, then click the “Enable” button.
- Repeat these steps for all applications you want to disable or enable during startup.

Tips for Customizing Your Startup Experience
Now that you know how to access and modify the Startup folder, let’s discuss some other tips on how to customize your startup experience:
- Prioritize essential programs: Only add essential programs for your daily work to the startup folder. Adding too many programs can cause your computer to slow down when it boots up.
- Disable unnecessary startup programs: Go to Task Manager and disable any programs starting when your computer boots up. This will help speed up the boot process.
- Check for changes: After installing new apps, check the Startup folder periodically to ensure nothing has been added without your knowledge.
- Use a third-party tool: Consider using a third-party tool like CCleaner or Autoruns to manage your startup programs. These tools can help you identify and disable unnecessary startup programs.
These tips will help you get the most out of your Windows 11/10 system and maximize your productivity. With a few simple steps, you can customize your computer’s startup experience to fit your needs and keep it running smoothly!
Conclusion
The Startup folder in Windows 11/10 is a handy feature to help you manage and customize your computer’s startup experience. With a few clicks, you can quickly find this folder, add or remove items, and use other helpful tips to get the most out of your system.
This article has been a helpful guide for you to learn about the Startup folder in Windows 11/10. Using the tips and tricks we provided, you’ll be well on your way to having a more efficient and productive computing experience.

In Windows 10/11, the Start menu is represented by two folders. One folder is for all users, and the other is only for the currently logged-in user.
The Start Menu folder for all users is C:\ProgramData\Microsoft\Windows\Start Menu\Programs.
The Start Menu folder location specific to your account is C:\Users\your-user-name\AppData\Roaming\Microsoft\Windows\Start Menu\Programs.
To access these locations quickly, we can use the following run commands (to open the Run dialog box, press Windows key + R).
Run the following command to open the location containing start menu programs available to all users:
shell:Common Programs
The following run command opens the start menu folder contains programs specific to your account:
Shell:Programs
And this is how we locate the Start menu folder in Windows 10/Windows 11 operating system.
Все способы:
- Расположение каталога «Автозагрузка» в Виндовс 10
- Способ 1: Прямой путь к папке
- Способ 2: Команда для окна «Выполнить»
- Управление автозагрузкой приложений
- Заключение
- Вопросы и ответы: 12
«Автозагрузка» или «Startup» — полезная функция Windows, предоставляющая возможность управления автоматическим запуском стандартных и сторонних программ вместе с загрузкой операционной системы. По своей сути это не только интегрированный в ОС инструмент, но и обычное приложение, а значит, у него есть свое расположение, то есть отдельная папка на диске. В нашей сегодняшней статье мы расскажем, где же находится директория «Автозагрузки» и как в нее попасть.
Расположение каталога «Автозагрузка» в Виндовс 10
Как и полагается любому стандартному инструменту, папка «Startup» находится на том же диске, на котором установлена операционная система (чаще всего таковым является C:\). Путь к ней в десятой версии Windows, как и в предшествующих ей, является неизменным, отличается в нем лишь имя пользователя компьютера.
Попасть в директорию «Автозагрузки» можно двумя способами, причем для одного из них даже не потребуется знать точное расположение, а вместе с ним и имя юзера. Рассмотрим все более подробно.
Способ 1: Прямой путь к папке
Каталог «Startup», содержащий в себе все программы, которые запускаются вместе с загрузкой операционной системы, в Виндовс 10 располагается по следующему пути:
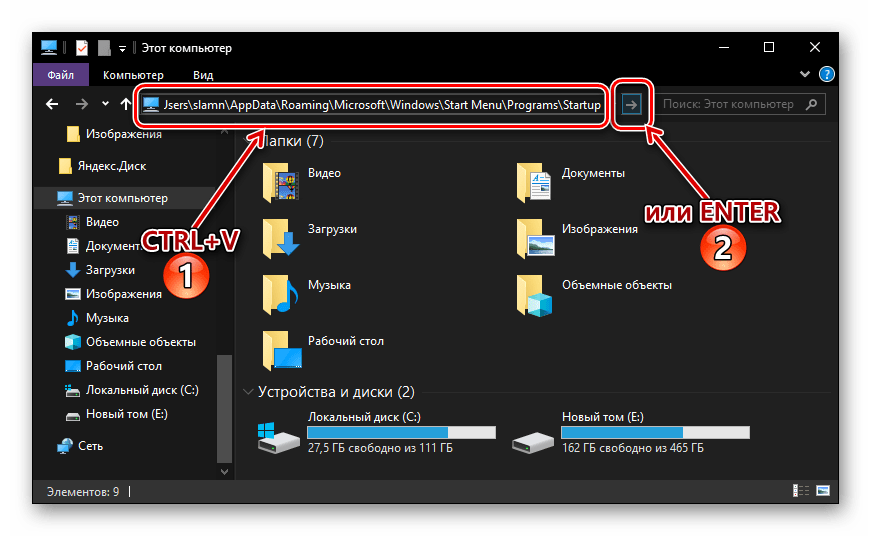
C:\Users\Username\AppData\Roaming\Microsoft\Windows\Start Menu\Programs\Startup
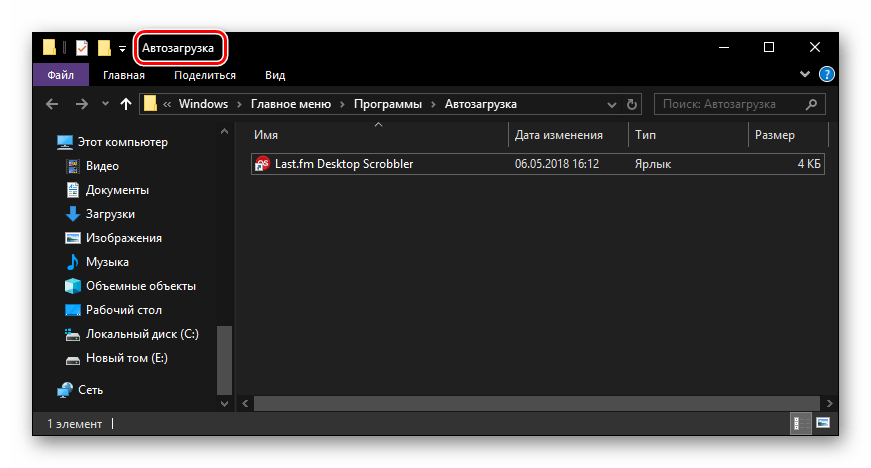
При этом важно понимать, что буква С – это обозначение диска с установленной Windows, а Username – директория, название которой должно соответствовать имени пользователя ПК.
Для того чтобы попасть в данный каталог, подставьте в указанный нами путь свои значения (например, предварительно скопировав его в текстовый файл) и вставьте полученный результат в адресную строку «Проводника». Для перехода нажмите «ENTER» или указывающую вправо стрелку, расположенную в конце строки.
Если же вы захотите самостоятельно перейти в папку «Автозагрузки», для начала включите отображение скрытых файлов и папок в системе. О том, как это делается, мы рассказывали в отдельной статье.
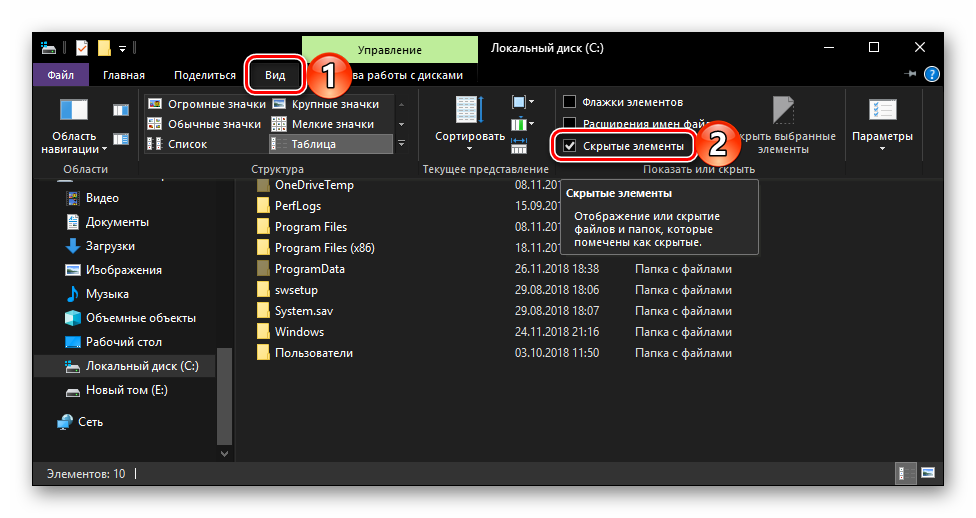
Подробнее: Включение отображения скрытых элементов в ОС Виндовс 10
Если же вы не хотите запоминать путь, по которому располагается директория «Startup», или считаете такой вариант перехода к ней слишком сложным, рекомендуем ознакомиться со следующей частью данной статьи.
Способ 2: Команда для окна «Выполнить»
Получить мгновенный доступ к практически любому разделу операционной системы, стандартному инструменту или приложению можно посредством окна «Выполнить», предназначенного для ввода и выполнения различных команд. К счастью, существует и возможность быстрого перехода в директорию «Автозагрузки».
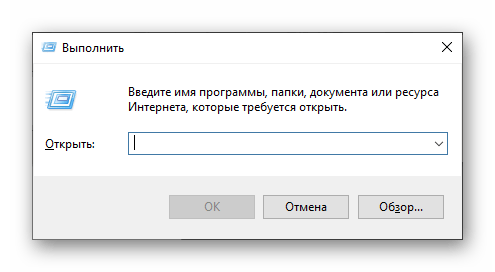
- Нажмите «WIN+R» на клавиатуре.
- Введите команду
shell:startup, после чего нажмите «ОК» или «ENTER» для ее выполнения. - Папка «Startup» будет открыта в окне системного «Проводника».

Используя стандартный инструмент «Выполнить» для перехода в каталог «Автозагрузки», вы не только экономите время, но и избавляете себя от необходимости запоминания довольно длинного адреса, по которому он располагается.
Управление автозагрузкой приложений
Если же поставленная перед вами задача заключается не только в переходе к директории «Startup», но и в управлении данной функцией, наиболее простым и удобным в реализации, но все же не единственным, вариантом будет обращение к системным «Параметрам».
- Откройте «Параметры» Windows, нажав левой кнопкой (ЛКМ) мышки по значку шестеренки в меню «Пуск» или воспользовавшись быстрыми клавишами «WIN+I».
- В окне, которое появится перед вами, перейдите в раздел «Приложения».
- В боковом меню кликните ЛКМ по вкладке «Автозагрузка».


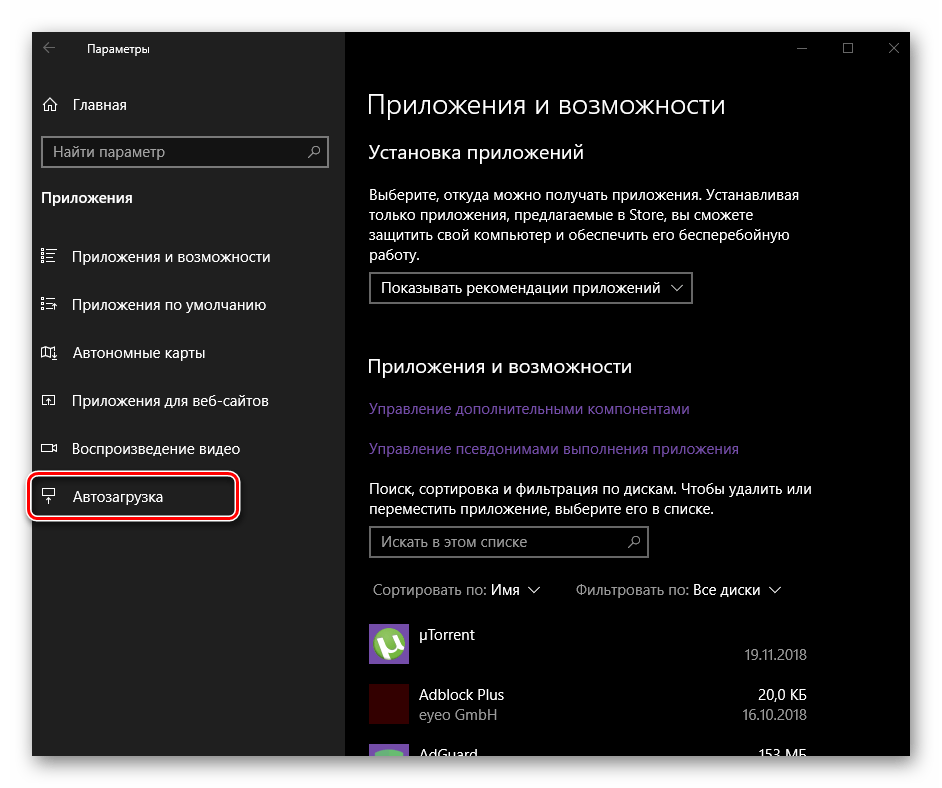
Непосредственно в этом разделе «Параметров» вы можете определить то, какие приложения будут запускаться вместе с системой, а какие нет. Узнать более детально о том, какими еще способами можно настроить «Автозагрузку» и в целом эффективно управлять этой функцией, вы можете из отдельных статей на нашем сайте.

Подробнее:
Добавление программ в автозагрузку Виндовс 10
Удаление программ из списка автозагрузки в «десятке»
Заключение
Теперь вы точно знаете, где находится папка «Автозагрузка» на компьютерах, работающих под управлением Windows 10, а также знаете и о том, как можно в нее максимально быстро попасть. Надеемся, данный материал был полезен для вас и по рассмотренной нами теме не осталось вопросов. Если же таковые имеются, смело задавайте их в комментариях.
Наша группа в TelegramПолезные советы и помощь