
Not all microphones connect via the audio jack on a laptop or PC. The audio jack is the commonly used port for a wide range of audio devices but some devices can and do use a USB port. These microphones aren’t any less capable than those that use an audio jack. In fact, many of them offer better sound quality.
Devices that connect over a USB port are easy to use. Drivers for them are normally generic ones and they’re already present making the device plug & play. That said, if USB microphone you’ve connected to your system isn’t working or if you’ve connected a microphone via an audio jack to USB adapter and it isn’t detected, try the fixes below.
1. Restart app/system
If you connected the USB mic to your system after opening the app you intend to use it in, it is possible the app cannot detect the new device.
- Disconnect the microphone from the system.
- Close the app you want to use it with.
- Connect the microphone to the system.
- Open the app and check if the mic is detected.
If this doesn’t work, try the same steps but with the system.
- Disconnect the mic from the system.
- Shut the system down.
- Connect the mic to the system.
- Boot the system up.
- Open an app and check if the mic is detected.
2. Select the microphone from Sounds
The mic may have been set up correctly but it may not be set as the preferred device or the default device on Windows 10. You need to set it as the default device from the Sound settings.
- Open Control Panel.
- Go to Hardware & sound.
- Click Sounds.
- Go to the Recording tab.
- Right-click the mic and select Set as default device.
- Restart the system and check if the mic is detected.
3. Reinstall USB Microphone
Reinstalling the Microphone may help resolve issues with it.
- Open Device Manager.
- Expand Audio Inputs and Outputs
- Right-click the USB mic and select Uninstall device.
- Disconnect the mic.
- Connect the mic again.
- Windows 10 will detect and install drivers for the device.
4. Run hardware troubleshooter
Problems with the USB port may be one reason the mic isn’t working. To troubleshoot the UBS port you have to run the hardware troubleshooter.
- Tap the Win+R keyboard shortcut to open the Run box.
- In the run box, enter
msdt.exe -id DeviceDiagnosticand tap the enter key. - Run the Hardware troubleshooter and apply all fixes that it recommends.
- Restart the system and connect the mic again.
5. Run audio troubleshooter
The audio problems may not have to do with the USB port. Instead, other audio-related settings may need to be checked in order for the mic to work. The easiest way to check and fix problems with audio settings is to run the audio troubleshooter.
- Open the Settings app with the Win+I keyboard shortcut.
- Go to Update & Security.
- Select the Troubleshoot tab.
- Click Additional troubleshooters.
- Select and run the Audio troubleshooter.
- Apply all fixes that it recommends.
- Restart the system and use your mic.
6. Check power source
Some devices, including mics, that can connect via the USB port need an external power source. Check if your mic needs either an external power source or not. It will come with the appropriate cable and directions on how to connect it. Try connecting it to the same USB port that you use to charge device i.e., the charging port on a Windows 10 system.
Conclusion
USB mics often offer better audio quality than those that connect over the audio jack. This holds especially true for cheaper mics. A more expensive mic will work well regardless of the port that it uses. You should also check if the mic model you’re using has any known issues with it. Check forums dedicated to the device and its set up and make sure you’ve done everything to set it up correctly.

Fatima Wahab
Fatima has been writing for AddictiveTips for six years. She began as a junior writer and has been working as the Editor in Chief since 2014.
Fatima gets an adrenaline rush from figuring out how technology works, and how to manipulate it. A well-designed app, something that solves a common everyday problem and looks
As a PC gamer or regular user, on your Windows 11 or Windows 10 computer, you may encounter microphone-related issues like Discord Mic not working, Microphone not plugged in, Zoom Microphone not working, Skype Audio or Microphone not working and so on. In this post, we provide the most suitable solutions to the issue of USB microphone not working on Windows 11/10.

If your USB microphone is not working on your Windows 11/10 system, you can try our recommended solutions below in no particular order to resolve the issue.
- Run Recording Audio Troubleshooter
- Restart Windows Audio service
- Update/Reinstall latest driver for the USB Microphone
- Uninstall and Reinstall the USB microphone
- Run Hardware and Devices Troubleshooter
Let’s take a look at the description of the process involved concerning each of the listed solutions.
Before you try the solutions below, you can do the following, and after each task see if your USB microphone is now working normally on your PC without issues:
- Disconnect and reconnect the USB microphone.
- Check if your USB mic has a physical mute button and set the switch accordingly.
- Restart your computer. In most cases, a quick restart of your PC will resolve minor issues.
- Make sure microphone access is turned on and mic is not disabled in Settings app or Device Manager on your PC, the mic is set as default input device and Exclusive Mode is disabled in Microphone properties.
- Use another USB cable. If the USB cable is detachable from the microphone, try another USB cable. If there’s provision on the mic, you can use an audio jack cable to connect to the PC or you may use the USB audio jack adapter.
- Try another USB port. You can plug the USB microphone into another USB port on your computer.
- Check for updates and install any available bits on your Windows 11/10 device. On the other hand, if the error started after a recent Windows update, you can perform System Restore or uninstall the update as a last resort maybe, after you have tried the solutions described below.
- If you recently installed any Voice Over Internet Protocol (VOIP) app on your PC and the issue in focus started, uninstall the app.
1] Run Recording Audio Troubleshooter
If your USB microphone is not working on your Windows 11/10 system, you can begin troubleshooting to fix the sound/audio issue on your device by running the Recording Audio Troubleshooter.
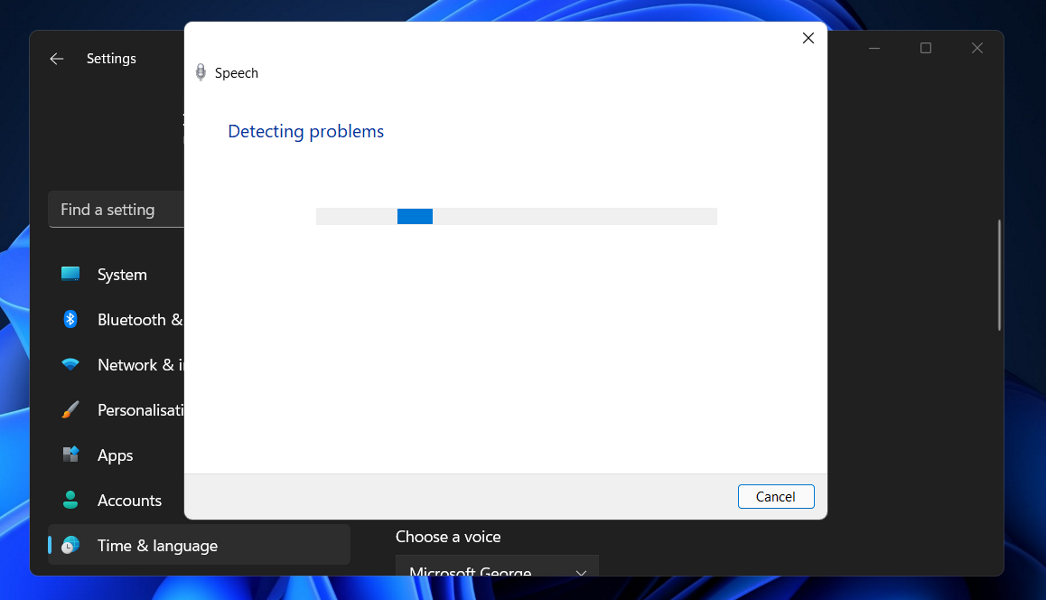
To run Recording Audio Troubleshooter on your Windows 11 device, do the following:

- Press Windows key + I to open the Settings app.
- Navigate to System > Troubleshoot > Other troubleshooters.
- Under the Other section, scroll to find Recording Audio.
- Click Run button.
- Follow on-screen instructions and apply any recommended fixes.
To run the Recording Audio Troubleshooter on your Windows 10 device, do the following:

- Press Windows key + I to open the Settings app.
- Go to Update and Security.
- Click the Troubleshooter tab.
- Scroll down and click on Recording Audio.
- Click the Run the troubleshooter button.
- Follow on-screen instructions and apply any recommended fixes.
Continue with the next solution if the issue in view remains unresolved.
2] Restart Windows Audio service

The Audio service running in Windows 11/10 manages audio for programs, and If this service is stopped or disabled on your system, it will affect the sound devices and your audio peripherals will not work properly. In this case, you need to make sure to start/restart the Windows Audio service.
Do the following:
- Press Windows key + R to invoke the Run dialog.
- In the Run dialog box, type services.msc and hit Enter to open Services.
- In the Services window, scroll and locate the Windows Audio service.
- Double-click on the entry to edit its properties.
- In the properties window, click the drop-down on the Startup type and select Automatic.
- Next, make sure the service is started. If the service is already started, right-click the entry and select Restart from the context menu.
- Click Apply > OK to save changes.
- Restart PC.
On boot, check if the issue you’re currently facing is resolved. Otherwise, try the next solution.
3] Update/Reinstall latest driver for the USB Microphone

Outdated driver for the USB microphone you installed on your system is a likely culprit here. In this case, to rule out the possibility, you can update your audio driver. To perform this task, you can do so in the following ways:
- You can manually update audio driver for the USB mic via Device Manager if you have already downloaded the .inf or .sys file for the driver.
- You can also update the audio driver via Command Prompt.
- In Windows Update, you can as well get the driver updates on the Optional Updates section.
- Another option available for you, is to automatically update your drivers using any of the free Driver Update software for Windows 11/10 PC.
Keep in mind that updating driver is not always the ultimate solution to fix issues with externally connected hardware devices like microphones – the reason being software vendors often release a buggy update or a partially broken one, which if you have installed that update the issue won’t still be resolved. In this case, you may need to reinstall the driver in case updating doesn’t work properly.
You can uninstall the audio driver, and then restart your PC – on boot, Windows will scan for hardware changes and automatically reinstall the generic driver for the USB mic device. Alternatively, after you uninstall the driver, you can download the latest version of the driver from the microphone hardware manufacturer’s website and then install on your PC.
4] Uninstall and Reinstall the USB microphone
USB or Bluetooth mics, as well as headsets connected to your Windows 11/10 PC will be listed in Devices and Printers applet in the Control Panel. So, to resolve the issue in hand, you can remove the device to uninstall it and then reconnect the device once again to reinstall it properly in Windows. To perform this task, do the following:
- Press Windows key + R to invoke the Run dialog.
- In the Run dialog box, type control and hit Enter to open Control Panel.
- From the top right corner of the window, set the View by option to Large icons or Small icons.
- Click Devices and Printers.
- Next, right-click on the USB microphone attached to the PC.
- Select Remove device option from the context menu.
- Click Yes on the prompt that pops up.
This will uninstall the device. You can disconnect and reconnect the mic to the computer, then check if the error is resolved. If not, try the next solution.
5] Run Hardware and Devices Troubleshooter

At this point, you may be dealing with faulty hardware, in this case, the USB microphone which may need to be replaced. To be certain the USB microphone is faulty, you can run the Hardware and Devices Troubleshooter to fix problematic devices. You can also manually check for faulty hardware by trying another USB microphone on the PC or try the problematic mic on another system and see if it works. If the issue isn’t with the hardware, you can check for faulty components, including batteries if the mic requires it to operate.
Any of these solutions should work for you!
Related post: Intel SST microphone not working on Windows
Why does my microphone not work on Windows 11?
If your microphone isn’t detected after updating Windows 11, you may need to give your apps permission to use it. Here’s how:
- Select Start > Settings > Privacy & security > Microphone.
- Now, make sure Microphone access is turned on.
Why is my PC not detecting my USB mic?
If your Windows 11/10 PC is not detecting your USB mic, it could be due to a number of reasons, mainly incompatible drivers. You can uninstall your USB controller driver to quickly fix the issue. You can also update your audio and sound drivers and see if that helps.
При подключении USB-флешки, внешнего жесткого диска или SSD и других USB-устройств, а иногда — и без подключенных по этому интерфейсу устройств, вы можете увидеть сообщение «USB-устройство не опознано. Последнее USB-устройство, подключенное к этому компьютеру, работает неправильно, и Windows не удается опознать его».
В этой инструкции подробно о возможных причинах сбоя и о способах исправить ошибку «USB-устройство не опознано» в Windows 11, Windows 10 и предыдущих версиях системы. На близкую тему: Как исправить ошибку Сбой запроса дескриптора устройства (код 43) в Windows.
Первые действия при появлении ошибки «USB-устройство не опознано»

Ошибки «USB-устройство не опознано» в Windows 11, 10 и других версиях ОС обычно вызваны теми или иными аппаратными проблемами: иногда с самим подключаемым устройством, иногда — со стороны вашего ПК или ноутбука. Суть проблемы в том, что по какой-то причине устройство не может передать сведения о себе операционной системе, либо ОС не может получить их.
Прежде всего рекомендую следующие варианты действий, чтобы быстро определить и в некоторых случаях — исправить возникшую проблему:
- Проверьте, появляется ли ошибка, если отключить устройство, перезагрузить компьютер (при этом использовать пункт «Перезагрузка», а не «Завершение работы» с последующим включением) и снова подключить устройство. Если в этом варианте ошибка исчезает и устройство работает, а при последующих выключениях вы вновь сталкиваетесь со сбоем — попробуйте отключить быстрый запуск Windows 11 или 10.
- При наличии такой возможности, проверьте: а работает ли это же USB-устройство, если подключить его к другому компьютеру: если в этом случае проблемы не наблюдаются, можно заключить, что само устройство исправно. Иначе — есть основания предполагать, что причина проблемы в его аппаратной неисправности или повреждении контактов.
- Проверьте, появляется ли ошибка при подключении к другим USB-разъемам: USB 2.0 вместо 3.0 (или наоборот), на задней панели ПК вместо передней. Не используйте USB-хабы (в том числе на мониторе), удлинители, разветвители при подключении: предпочтите прямое подключение.
- В случае, если вы столкнулись с ошибкой при подключении устройства отдельным USB-кабелем, попробуйте использовать другой совместимый кабель, при этом учитывайте: некоторые кабели USB поддерживают только зарядку, без передачи данных.
- Если к вашему компьютеру подключено большое количество USB-устройств, попробуйте отключить те из них, которые не нужны прямо сейчас, а также устройство с ошибкой. Перезагрузите компьютер и вновь подключите устройство, с которым возникли проблемы.
- При необходимости внешнего питания для подключаемого устройства, убедитесь, что соответствующий блок питания исправен.
И ещё один вариант, который следует попробовать, особенно если раньше это же устройство работало исправно, а возможность проверки работы устройства на другом компьютере отсутствует:
- Отключите USB устройство, которое не опознается и выключите компьютер (удерживайте Shift, нажимая «Завершение работы»). Вытащите вилку из розетки, после чего нажмите и удерживайте кнопку включения на компьютере несколько секунд — это уберет остатки зарядов с материнской платы и комплектующих.
- Включите компьютер и подключите проблемное устройство снова после загрузки Windows. Есть вероятность, что оно заработает.
Диспетчер устройств и драйверы USB
Следующая по распространенности причина — неправильная работа драйверов USB-контроллеров и других драйверов чипсета на вашем ПК или ноутбуке. В этой ситуации то же самое USB-устройство будет исправно работать на других компьютерах.
Основное решение:
- Зайдите на официальный поддержки вашей модели материнской платы или ноутбука, вручную скачайте драйверы из раздела «Чипсет» а при наличии — отдельные драйверы USB-контроллеров и управления электропитанием.
- Установите скачанные драйверы.
- Перезагрузите компьютер и проверьте, решило ли это проблему.
Отсутствие важных системных драйверов чипсета может, в том числе, влиять и на работу USB-контроллеров, поэтому их установка в некоторых случаях оказывается результативной.
Следующая возможность — исправление работы USB-устройств (контроллеров USB) в диспетчере устройств:
- Зайдите в диспетчер устройств: для этого можно нажать клавиши Win+R на клавиатуре, ввести devmgmt.msc и нажать Enter, а в случае Windows 11 и Windows 10 — нажать правой кнопкой мыши по кнопке Пуск и выбрать соответствующий пункт контекстного меню.
- Ваше неопознанное устройство скорее всего будет находиться в следующих разделах диспетчера: Контроллеры USB или Другие устройства.

- Установить драйвер этого устройства не получится, до тех пор, пока оно опознается как «Неизвестное USB-устройство», а в его свойствах в качестве ИД Оборудования указано: USB\DEVICE_DESCRIPTOR_FAILURE Однако, иногда может сработать следующий подход: нажмите правой кнопкой мыши по устройству и выберите пункт «Удалить устройство». Подтвердите удаление, а после него в меню диспетчера устройств выберите «Действие» — «Обновить конфигурацию оборудования».
- Проверьте диспетчер устройств на наличие других пунктов с ошибками или без установленных драйверов: при наличии таковых, попробуйте установить драйверы для них (может пригодиться: Как установить драйвер неизвестного устройства): иногда это приводит к восстановлению работы и других устройств компьютера.
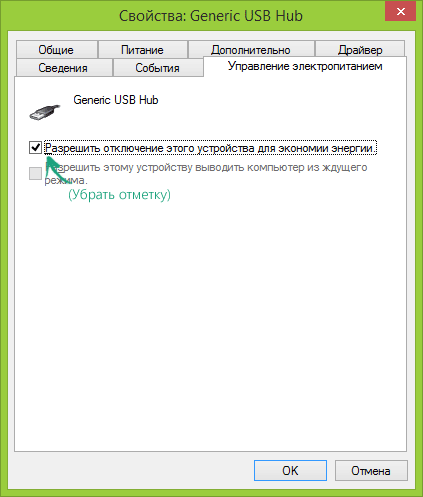
- В разделе «Контроллеры USB» для всех устройств с именами: Расширяемый хост-контроллер USB, Generic USB Hub, Корневой USB-концентратор, USB Root Controller и аналогичными, в свойствах на вкладке «Управление электропитанием» снимите отметку «Разрешить отключение этого устройства для экономии питания», примените параметры и перезагрузите компьютер.


Если предыдущие способы не сработали или ваша ситуация отличается от описываемой в каких-то деталях, ниже — дополнительные варианты решения и нюансы, которые могут быть полезными:
- В некоторых случаях вы можете видеть сообщение «USB-устройство не опознано» даже при отсутствии подключенных USB-устройств (кроме, например, клавиатуры и мыши, которые работают исправно). Это может говорить о том, что неправильно работает какое-то из внутренних устройств, подключенных по интерфейсу USB: на ПК это часто кард-ридер, на ноутбуках это может быть веб-камера или тачпад. Причиной же могут быть быть проблемы с их подключением (в случае ПК легко проверить и переподключить) или выход из строя.
- В Windows 11 и Windows 10 при работе с внешними жесткими дисками и другими накопителями, подключаемыми к высокоскоростным разъемам USB Type-C, USB 3.0 — 3.2 может сработать запрет на выключение USB-портов: зайдите в панель управления Windows — Электропитание (или нажмите клавиши Win+R и введите powercfg.cpl), выберите используемую схему электропитания, нажмите «Изменить дополнительные параметры питания». Затем в параметрах USB запретите временное отключение USB портов.

- При наличии обновлений БИОС для вашей материнской платы или ноутбука, попробуйте установить соответствующие обновления — иногда это решает проблему.
- Проверьте наличие настроек быстрой инициализации USB, параметры быстрой загрузки Fast Boot и экономии энергии USB-портов в БИОС/UEFI. При наличии этих настроек: отключите их все. Также можно попробовать использовать автоматическую установку безопасных параметров БИОС (пункт Load Optimized Defaults или Load Fail-Safe Defaults на вкладке Exit).
- В случае, если вы столкнулись с проблемой после неудачной прошивки флешки или другого устройства, поищите в Интернете: есть ли какая-то возможность перевода этого устройства в тестовый режим (для флешки) или какой-либо режим восстановления. Это может помочь определить её в соответствующей программе и установить прошивку повторно.

Надеюсь, что-то из перечисленного вам поможет, и вы не увидите сообщений о том, что одно из подключенных к этому компьютеру USB-устройств работает неправильно. Будет отлично, если в комментариях ниже вы сможете описать в деталях ваш случай и результат восстановления работоспособности устройства. Также в контексте рассматриваемой темы может быть полезным отдельный материал: Компьютер не видит флешку — что делать?
Readers help support Windows Report. We may get a commission if you buy through our links.
Read our disclosure page to find out how can you help Windows Report sustain the editorial team. Read more
Upgrading the operating system might hurt your peripherals. For instance, many users reported that the USB microphone is not working in Windows 10 and Windows 11.
Though upgrade is not the only cause here, it’s one of the prominent ones. But you don’t have to revert to the previous iteration just yet. Instead, several solutions will help get things up and running.
This guide will walk you through the issues leading to the microphone not working on Windows and its solutions.
Why is my USB mic not working?
Not all microphones are compatible with the audio jack of a laptop or desktop computer. Although the audio jack is the most widely utilized port for a wide range of audio devices, specific devices use the USB port as a secondary port.
Devices that connect to a computer via USB are simple to operate. Drivers for them are typically general, and they are already present, allowing the device to be used immediately.
Compared to microphones that connect via an audio jack, these microphones are not any less capable. Moreover, several of them have the superior sound quality to the competition.
Accordingly, if your USB microphone is not working, or if you have connected a microphone via an audio jack to a USB adapter and the microphone is not being identified, try the fixes listed below to troubleshoot your situation.
Users have faced different forms of this error including:
- Microphone not working on Windows 11 Realtek
- USB mic not working on Windows 10
- Microphone array not working on Windows 11
- Windows 10 USB microphone driver download issues
- Windows 11 teams microphone not working
- Fifine microphone not working
- CMTECK microphone not working
Regardless of the exact issue you have, the solutions below will get it fixed.
How can I fix the USB microphone not working issue?
1. Reinstall the drivers
-
1. Unplug your USB microphone from the Windows 10 device, and then plug them back in.
-
2. Press Windows + R to open Run, type devmgmt.msc, and click OK.
-
3. Locate the problematic microphone, right-click on it, and select Uninstall device.

-
4. Again, click Uninstall in the confirmation prompt.
-
5. Similarly, uninstall the driver for the USB port that microphone was plugged into under the Universal Serial Bus controllers entry.
-
6. Unplug the microphone and restart the computer.
-
7. When the computer restart, Windows will automatically install the drivers.
Your USB microphone might work again after the sound drivers have been reinstalled. Here is a step-by-step guide to assist you in doing this effectively.


Once done, verify if the USB headset microphone that was not working is functional. In case the problem persists, head to the following method.
Also, find out what to do if Windows doesn’t install the drivers after you restart the computer.
2. Run the Hardware and Sound troubleshooter
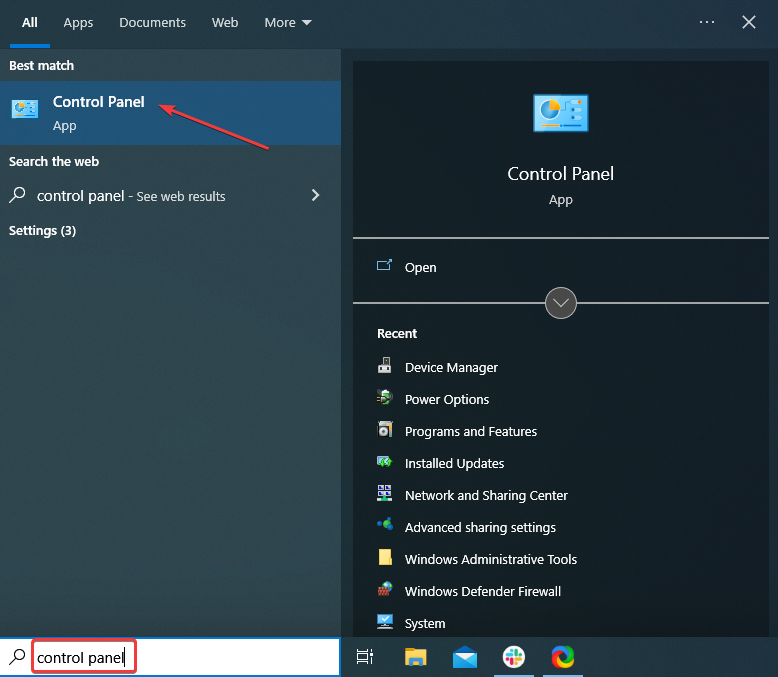
- Type Control Panel in the Search bar, and click on the relevant search result.

- Now, click on the View by dropdown menu, and select Large icons.

- Locate and select Troubleshooting.
- Now, click on the Troubleshoot audio recording option under Hardware and Sound.
- Follow the on-screen instructions to complete the troubleshooting process.


The built-in troubleshooters are pretty effective if the USB microphone doesn’t work in Windows. You may also try running the other troubleshooters about the microphone in case this one doesn’t work.
Once done, check if the USB headset microphone is not working in Windows 10 or Windows 11 problem is resolved.
3. Update your microphone drivers
Also, look at the drivers you have installed for your USB microphone. If they are not compatible with your Windows version, you will have to look on the manufacturer’s website for the correct version and update the drivers manually. This should fix the USB mic not recognized issue quite fast.
However, there is a more straightforward method. You can update your drivers automatically by using a dedicated driver updating third-party app. This will save you the time and effort of manually searching and downloading the latest driver versions.
4. Update the app accessing your microphone
If you are facing a problem with the USB microphone not showing up or not working in Windows 10 or Windows 11 on a specific app, the problem lies with the app itself. In this case, you should check for compatibility.
Check the system requirements to verify if the app is meant for your device. Also, if an updated version of the app is available, download and install it right away.
- Fix: Built-in Microphone Has Disappeared From Device List
- How to update drivers in Windows 10 [Full Guide]
- 5+ best driver detector software for Windows 10/11
5. Additional solutions
If your USB microphone is still not working correctly, maybe the following workaround will prove helpful:
- Update your audio drivers from the Device Manager
- Install the latest Windows updates: Keep in mind that Microsoft regularly rolls out updates to fix various issues reported by users. The latest updates may bring dedicated microphone fixes that will help you solve the problem.
- Remove all USB devices: Some users confirmed that unplugging absolutely all USB devices and restarting their computers fixed the problem.
How do I fix the USB microphone not working on Windows 11?
If the USB microphone is not working in Windows 11, you first must verify that the desired microphone has been configured in the audio settings.
Also, check the connections, and verify that the port and the cable are not damaged. In this case, the USB microphone will not be recognized. You may update the microphone drivers as well.
Besides, if the problem started recently, it could be misconfigured system settings or applications installed in the past. So here, instead of identifying the problem manually, a simple solution would be to perform a System Restore.
Does a USB mic need a driver?
Yes, the USB microphone will need a driver to function on a Windows device. Though, you might not have to download it manually.
When you plug in the microphone, Windows looks through its database for the dedicated driver and installs it automatically.
So, as long as you use a microphone manufactured by a reputed brand, the installation of drivers should be automatic. Details regarding it would be listed on the product’s description page.
That’s it! By the time you reach this part of the guide, you should have things up and running if the USB microphone is not working in Windows 10 or 11.
Also, determine what to do if the microphone’s volume is too low in Windows.
Use the comments section below to let us know if these methods worked for you or if you need any further assistance on this issue.
Ivan Jenic
Windows Hardware Expert
Passionate about all elements related to Windows and combined with his innate curiosity, Ivan has delved deep into understanding this operating system, with a specialization in drivers and driver troubleshooting.
When he’s not tackling diverse driver-related problems, Ivan enjoys watching good movies and spending time hiking with his family and friends.