
As a Windows 10 user, you may have encountered situations where you need to enable USB debugging on your laptop. This feature is particularly useful for developers who want to test and debug their Android applications directly on their devices. However, it can also be beneficial for regular users who want to transfer files, backup data, or perform other tasks that require a deeper connection between their device and laptop. In this article, we will walk you through the process of enabling USB debugging on your laptop Windows 10.
Understanding USB Debugging
Before we dive into the steps, it’s essential to understand what USB debugging is and how it works. USB debugging is a feature that allows you to establish a secure connection between your Android device and laptop. This connection enables you to transfer data, install applications, and perform other tasks that require a direct link between the two devices.
USB debugging is typically used by developers to test and debug their applications. However, it can also be useful for regular users who want to:
- Transfer files between their device and laptop
- Backup data from their device to their laptop
- Install custom ROMs or recoveries on their device
- Use their device as a webcam or microphone
Requirements for Enabling USB Debugging
To enable USB debugging on your laptop Windows 10, you will need to meet the following requirements:
- A Windows 10 laptop with a USB port
- An Android device with USB debugging capabilities (most devices have this feature)
- A USB cable to connect your device to your laptop
- The latest version of the Android SDK (Software Development Kit) installed on your laptop
Enabling USB debugging on your laptop Windows 10 is a relatively straightforward process. Here are the steps you need to follow:
Step 1: Enable Developer Options on Your Device
To enable USB debugging, you first need to enable developer options on your Android device. To do this:
- Go to your device’s settings menu
- Scroll down and select “About phone”
- Tap on “Build number” seven times (this will enable developer options)
- Go back to the settings menu and select “Developer options”
- Toggle the switch next to “Developer options” to enable it
Step 2: Enable USB Debugging on Your Device
Now that you have enabled developer options, you can enable USB debugging on your device. To do this:
- Go to the “Developer options” menu
- Scroll down and select “USB debugging”
- Toggle the switch next to “USB debugging” to enable it
- You will see a prompt asking you to allow USB debugging; select “OK”
Step 3: Install the Android SDK on Your Laptop
To establish a connection between your device and laptop, you need to install the Android SDK on your laptop. To do this:
- Go to the official Android website and download the Android SDK
- Follow the installation instructions to install the SDK on your laptop
- Make sure you install the latest version of the SDK
Step 4: Connect Your Device to Your Laptop
Now that you have enabled USB debugging on your device and installed the Android SDK on your laptop, you can connect your device to your laptop. To do this:
- Use a USB cable to connect your device to your laptop
- Your device will prompt you to allow USB debugging; select “OK”
- Your laptop will recognize your device and install the necessary drivers
Step 5: Verify USB Debugging
To verify that USB debugging is enabled, you can use the following command in the Command Prompt on your laptop:
- Open the Command Prompt on your laptop
- Type “adb devices” and press Enter
- If your device is connected and USB debugging is enabled, you will see your device’s serial number listed
Troubleshooting Common Issues
If you encounter any issues while enabling USB debugging, here are some common solutions:
Issue 1: Device Not Recognized
If your laptop does not recognize your device, try the following:
- Check that your device is properly connected to your laptop
- Make sure that USB debugging is enabled on your device
- Try restarting your laptop and device
Issue 2: USB Debugging Not Enabled
If USB debugging is not enabled on your device, try the following:
- Check that developer options are enabled on your device
- Make sure that USB debugging is enabled in the developer options menu
- Try restarting your device
Conclusion
Enabling USB debugging on your laptop Windows 10 is a relatively straightforward process. By following the steps outlined in this article, you can establish a secure connection between your Android device and laptop. This connection enables you to transfer data, install applications, and perform other tasks that require a direct link between the two devices. Remember to troubleshoot any common issues that may arise during the process.
Additional Tips and Recommendations
Here are some additional tips and recommendations to keep in mind:
- Always use a genuine USB cable to connect your device to your laptop
- Make sure that your device is properly connected to your laptop before enabling USB debugging
- Use the Android SDK to establish a connection between your device and laptop
- Be cautious when using USB debugging, as it can potentially compromise the security of your device
By following these tips and recommendations, you can ensure a safe and successful USB debugging experience.
What is USB Debugging and Why Do I Need It?
USB Debugging is a feature that allows developers to connect their Android device to a computer and use the Android Debug Bridge (ADB) to debug and test their applications. It also enables users to transfer data, install apps, and perform other tasks on their device using their computer. Enabling USB Debugging is essential for developers, testers, and users who want to customize their Android device or troubleshoot issues.
By enabling USB Debugging, you can use various tools and software to interact with your device, such as Android Studio, ADB, and Fastboot. This feature is also useful for users who want to root their device, install custom ROMs, or recover data from a bricked device. However, it’s essential to note that USB Debugging can also pose security risks if not used properly, so it’s crucial to understand the risks and use it responsibly.
How Do I Enable USB Debugging on My Windows 10 Laptop?
To enable USB Debugging on your Windows 10 laptop, you need to follow a series of steps. First, go to your device’s Settings app and select “About phone” or “About device.” Scroll down to the “Build number” section and tap on it seven times to enable Developer options. Then, go back to the Settings app and select “Developer options.” Look for the “USB Debugging” option and toggle it on.
Next, connect your device to your Windows 10 laptop using a USB cable. You may see a prompt on your device asking you to allow USB Debugging. Select “OK” or “Allow” to enable USB Debugging. You can also set up your device to always allow USB Debugging from your laptop by selecting the “Always allow from this computer” option. Once you’ve enabled USB Debugging, you can use ADB and other tools to interact with your device.
What Are the Requirements for Enabling USB Debugging on Windows 10?
To enable USB Debugging on Windows 10, you need to meet certain requirements. First, your device must be running Android 4.2 or later. You also need to have a Windows 10 laptop with the latest updates installed. Additionally, you need to have the Google USB Driver installed on your laptop, which you can download from the Android Developers website.
It’s also essential to have a compatible USB cable and a device that supports USB Debugging. Some devices may have specific requirements or restrictions for enabling USB Debugging, so it’s crucial to check your device’s documentation or manufacturer’s website for more information. Furthermore, you need to have administrative privileges on your laptop to enable USB Debugging.
How Do I Know If USB Debugging Is Enabled on My Device?
To check if USB Debugging is enabled on your device, go to the Settings app and select “Developer options.” Look for the “USB Debugging” option, and if it’s toggled on, then USB Debugging is enabled. You can also check the status of USB Debugging by connecting your device to your laptop and opening a command prompt or terminal window.
Type the command “adb devices” and press Enter. If your device is listed, then USB Debugging is enabled. If you don’t see your device listed, then USB Debugging is not enabled, or there’s an issue with the connection. You can also use the “adb status” command to check the status of USB Debugging and troubleshoot any issues.
What Are the Risks of Enabling USB Debugging on My Device?
Enabling USB Debugging on your device can pose security risks if not used properly. When USB Debugging is enabled, your device is more vulnerable to attacks from malicious software or hackers. This is because USB Debugging allows developers to access and modify system files, which can be exploited by malware or unauthorized users.
Additionally, if you’re using a public computer or a USB port that’s not secure, you may be at risk of data theft or malware infection. It’s essential to use USB Debugging responsibly and only enable it when necessary. You should also disable USB Debugging when not in use and use a secure USB port or computer to minimize the risks.
Can I Enable USB Debugging on My Device Without a Computer?
Yes, you can enable USB Debugging on your device without a computer. To do this, go to your device’s Settings app and select “About phone” or “About device.” Scroll down to the “Build number” section and tap on it seven times to enable Developer options. Then, go back to the Settings app and select “Developer options.” Look for the “USB Debugging” option and toggle it on.
Once you’ve enabled USB Debugging, you can use a USB OTG (On-The-Go) adapter to connect your device to another device, such as a USB drive or a keyboard. This allows you to use USB Debugging without a computer. However, keep in mind that using USB Debugging without a computer may limit the functionality and tools available to you.
How Do I Disable USB Debugging on My Device?
To disable USB Debugging on your device, go to the Settings app and select “Developer options.” Look for the “USB Debugging” option and toggle it off. You can also disable USB Debugging by going to the “Developer options” menu and selecting “Revoke USB debugging authorizations.”
This will revoke all USB debugging authorizations and disable USB Debugging on your device. Additionally, you can also disable USB Debugging by performing a factory reset on your device. This will restore your device to its default settings and disable all developer options, including USB Debugging.
Android is the most feature-rich platform. It has all the options you’ll ever need to control and configure the device however you want. However, some advanced settings are buried deep down. To access them you have to install ADB shell and use it. Today, I will show you how to install ADB on Windows 10.
What is ADB
Android Debug Bridge or more widely knows as ADB shell is a command line tool that helps developers access advanced settings and debug Android apps and system settings. Besides from debugging, you can use ADB shell to back up the android device, install apps on your SD card by default, disable specific features of an app, transfer files, etc. In fact, you can even use ADB to make system level changes.
Generally, ADB is bundled with Android SDK (Software Development Kit). So, if you’ve installed Android SDK then you already have access to the ADB shell on Windows 10 with several other essential tools like Fastboot. However, if you are not a developer and don’t want to install the complete Android SDK package for just one tool that is only used occasionally then you can install ADB on Windows separately. i.e, without installing Android SDK.
Related: How to Run Android Apps on Ubuntu [Natively]
Enable USB Debugging Mode
Before installing ADB on Windows 10, you need to configure your Android device to accept the ADB commands. To do that, you have to enable USB debugging mode. Thankfully, it is very easy to do. Just follow the below instructions.
- Launch apps menu and tap on the “Settings” icon.
- Here, scroll down and tap on the option “About“.
- Now, scroll down again and repeatedly tap on the option “Build number” 7 times.
- Go back to the main Settings screen, scroll down and tap on the new option “Developer Options“.
- Here, toggle the button next to USB Debugging option. Tap on the option “Ok” in the confirmation pop-up to enable USB debugging mode.
That’s it, you’ve configured the Android device to receive ADB shell commands. You can now install ADB on Windows 10.
Related: 10 Best Secret Texting Apps for Android (Private Texting Apps for Android)
Note: the same procedure is applicable for older versions of Windows like 7 and 8.
1. To start off, download ADB for Windows from the official Google website.
2. Create a new folder with the name “ADB” in the root of the C drive. Now, extract all the files in the downloaded ZIP file to the folder you just created. This is how it looks like when you are done extracting.

3. Grab a USB data cable and connect your android device to the Windows computer. If prompted, select “file transfer (MTP)” mode.
4. Now, search for “Command Prompt” in the start menu and open it.
5. In the command prompt, use the below command to navigate the ADB installation folder. If you’ve installed ADB folder in some other place then change the command accordingly.
cd c:\ADB

6. Once you are here, execute the following command ADB Daemon.
adb devices
7. As soon as you execute the command, you will see “Allow USB debugging” prompt on your android device screen. Tap on the “Ok” button. Now, your device will be listed in the command prompt.

If you see your device listed then you’ve successfully installed ADB on Windows 10. If not, make sure that the device is properly connected and you have installed android drives on Windows. Generally, you can download android drivers specific to your device on the manufacturer website.
Related: How to Use Multiple Facebook Accounts on Android
Optional: Access ADB from Any Folder
As you can see, with the above method, you have to first navigate to the ADB installation folder if you want to use the ADB shell. This is not so much a problem but an inconvenience. To deal with that, you can add ADB to Windows Path. This allows you to access ADB from any folder or directory.
1. To add ADB to Windows path, search for “View advanced system settings” in the start menu and open it.
2. In this window, click on the button “Environment Variables“.

3. Here select the Path variable under “User variables for Username” and click on the button “Edit“.
Related: How To Disable Auto Media Download Feature In WhatsApp [Android]

4. Now, click on the “New” button.

5. Enter the path to the ADB folder and click on the button “Ok” to save the changes. In my case, the folder path is C:\ADB.

6. Click on the “Ok” on other main windows to save the changes.
From this point forward, you can access ABD from any folder. As you can see from the below image, I’m starting the ADB daemon from a folder in my E drive.
That’s all there is to do and it is that simple to install ADB on Windows 10 and add ADB to Windows path. If you find this article useful then do read how to disable volume buttons in android and how to hide audiobooks from music players in android.
Comment below sharing your thoughts and experiences about using the above method to install ADB on Windows.
Related: How to Download Android Apps to PC without Installing Any Software [Quick Tip]
To enable USB debugging on your computer, you can follow these steps. First, make sure your Android phone is connected to your computer via a USB cable. Then, tap on the Developer Options option and mark the USB debugging box. Then, you can enable and disable the USB debugging mode whenever you want. Now, your Android phone should be ready to mount on your computer!
If you’ve broken the screen of your Android phone, you can still connect it to your PC using USB OTG. You can even use a mouse to connect the broken phone. This way, you can access your broken device and recover data. You can also use this method to fix other problems with your Android phone, including booting from a USB drive and reinstalling Android. Here are some other useful steps for you to try:
Now, you can connect your Android phone to your PC and start sending commands to it. USB debugging is a great tool for Android developers. When you connect your device to your computer, it allows you to send advanced commands to the device, such as modifying the ROM. Unlike the graphical interfaces you see in the Android market, USB debugging is much safer for your device.
If you’re wondering how to enable USB Debugging on Android, you can do so by connecting your phone via a USB mouse and keyboard. If your phone is broken or unresponsive, you can use an OTG Adapter to connect it to a USB mouse. If the phone is locked, you can use the “Find My Mobile” service to bypass the locked screen. And once you’ve connected the phone to a USB mouse, you’ll need a USB mouse.
First, determine the version of Android you’re using. You can do this by going to Settings -> About Device -> Software infomation ->Build Number. From there, simply tap Build Number seven times continuously. Then, tap the Build Number again to enable USB debugging on Android. If your phone doesn’t have this option, check the USB Debugging switch, or select another mode.
Can We Enable USB Debugging From PC?
If you’ve recently purchased an Android device, you may be wondering how you can enable USB Debugging on your computer. Well, it’s incredibly easy! First, go into the Developer Options on your Android device. Scroll down to USB Debugging and check the box. You’ll now receive a pop-up notification to confirm your USB Debugging permissions. Tap OK to confirm.
Once you’ve enabled USB Debugging, you can connect your Android phone to your PC and start creating apps! If you’ve been unable to get started, you can follow these simple steps. After you’ve connected your smartphone to your computer, it will ask for permission to allow the software to communicate with your phone. While you can always revoke the permissions if you change your mind later, it’s a good idea to trust the PC before you allow it to connect to your phone.
You can also use the ADB command to enable USB debugging on your computer. This is the easiest method if your device has a broken screen. If your device is not broken or locked, you can use the ADB command to disable it. This method is available for most Android devices. Open a PowerShell window or Command Prompt and enter “adb” to run the software. If you’re using a touchscreen, you’ll want to make sure you’re connected to a computer. You can use the mouse to activate this option, but you can also do this with a keyboard and mouse.
How Do I Connect USB Debugging to My Computer?
In order to enable USB debugging, you need to switch on the option on your Android device. You can do this by going into settings and selecting ‘Developer options’. Once enabled, you’ll be able to get full control of your device while connected to your computer. However, you should be aware of some risks associated with using this mode. Using USB debugging could make your Android device vulnerable to external threats and malware.
When you’re developing an app, you need to make sure your device is recognized by your computer before you enable USB debugging. If it isn’t, you’ll have to install the necessary drivers in order to talk to your phone. In most cases, Windows users just need to ensure that their phone is recognized by their PC and install the necessary drivers. Android users can use a specific sequence of steps to open the menu.
To enable USB debugging on your Android device, go to the settings of your device. Go to the Application options on your Android device. From there, you’ll need to check the USB debugging box. You’ll also need to choose Stay Awake and allow mock locations. Once this has been done, you’ll be in the Debug mode and the notification bar will say “USB debugging connected.” The device will still mount to your computer.
How Do I Enable USB Debugging in Recovery Mode?
You have a broken screen on your Android. The easiest way to fix this problem is to connect the broken screen to your PC or laptop. Once the USB drivers are installed, you can use your mouse or a USB OTG cable to unlock the device. Next, enable USB debugging and your broken screen will be fixed. If the problem is not that serious, you can try the other methods below to repair your broken Android device.
First, open the Command Prompt. Open a PowerShell window or Command Prompt. In the Command Prompt, type sdbctl.exe. Then, navigate to the folder containing your phone’s firmware. After that, click the Developers option in Settings. You should now see a screen that says USB debugging is disabled. If the screen does not pop up, follow the instructions below to enable USB debugging on your Android device.
Can I Enable USB Debugging Using Adb?
To enable USB Debugging on your computer, you must have a device running Android. To do this, open your app drawer and tap the Settings icon. Select “About Phone” and tap the “Build Number” item seven times. Once you have done this, you should receive a message stating that you are a developer. After connecting your device to your computer, you will see a popup window called “Allow USB Debugging”. Select the Always allow from this computer box and hit OK. When the popup window is closed, your device should be listed in the list. Follow the instructions in the prompt window to install appropriate drivers.
To begin USB debugging, you must connect your device to your PC via a USB cable. Then, open udev rules on your PC. Then, plug the device into your PC. In the next window, you should see a dialog asking whether you wish to enable USB debugging. Check the “always allow” option and choose OK. Then, you can start executing the commands to monitor your device.
Can Adb Work Without USB Debugging?
Before you can run adb commands on your Android device, you must be sure that the device is connected to a network. You should set up your firewall so that adb will not run in the background. You must also turn off Bluetooth on the Android device paired to your computer. To run adb commands, connect your Android device with a USB cable to your computer. Set your device to listen to TCP/IP port 5037.
Once you’ve done this, you can run adb connect PHONE_IP to connect to the device via USB. Once the device is connected, you need to enable USB debugging. You can enable USB debugging by going into the Android device’s settings. If you don’t know how to enable USB debugging, you can find out more in the documentation from Amazon.
How Do I Use Debugging Mode in Windows 10?
If you’re a developer, you need to learn how to enable USB Debugging Mode on Windows 10. Alternatively, you can use the Windows USB Troubleshooter to diagnose your USB device’s problems. You can also find out the model of your device by opening the Settings app, then selecting the About this device option. Then, select the USB Debugging tab to see which hardware devices support USB Debugging.
First, you need to enable Developer Mode on your device. This is available on most versions of Windows, including Windows 10. You can enable it by going to the Developer Options page. Here, you’ll find shortcuts to optimization settings. Click the Show settings link and select the checkbox. On the developer’s page, you’ll also find several tools that will allow you to access the device’s internal memory or the device’s SD card. You can also access the Device Portal remotely from any computer.
Once the USB debug driver is installed on the host computer, you can begin debugging. Once the target computer restarts, USB debugging should connect automatically. If your debugging configurations fail to connect, you can try restarting the target computer. Alternatively, you can use the shutdown -r -t 0 command to reboot the target PC. And if you’re on a Mac, you can connect the USB debug cable to the USB port on the target computer and click “Connect.”
Learn More Here:
1.) Android Help Center
2.) Android – Wikipedia
3.) Android Versions
4.) Android Guides
Table of contents
- How to Install Android Debug Bridge for Windows 10?
- Step 1: Check if you already have the ADB driver installed on your PC
- Step 2: Get the ADB driver file
- Step 3: Activate USB debugging on your Android device
- Step 4: Open Device Manager and install the ADB driver
- Pro Tip: Update your Drivers for Better Performance
- Downloading and Installing ADB in Windows 11
- Conclusion
Those who are familiar with the Android Debug Bridge (ADB) already know the benefits it can give.
The feature allows them to side-load apps that they cannot acquire from the Google Play Store.
For instance, they can use the ADB to record their phone’s screen via their computer. Basically, the ADB is a command line tool that allows users to control their Android device on their Windows PC using a USB cable.
If you’re still wondering about this feature and how you can add it to your PC, you’ve come to the right place! In this article, we will teach you how to install Android Debug Bridge for Windows 10.
Read the article to get bonus tips to enhance your user experience!
How to Install Android Debug Bridge for Windows 10?
In general, you must go through the following steps to install the ADB on your computer:
- Check if you already have the ADB driver installed on your PC.
- Get the ADB driver file.
- Activate USB Debugging on your Android device.
- Open Device Manager and install the ADB driver.
You will see the detailed instructions below. Make sure you follow them carefully to be able to set up the ADB correctly.
Step 1: Check if you already have the ADB driver installed on your PC
The first thing you have to do is check if your computer already has the ADB driver installed. Simply perform a test via Chrome to see if your PC can recognize your Android device and communicate with it. To do that, follow the steps below:
- Use a USB cable to connect your Android device to your computer.
- Open Google Chrome.
- Inside the URL bar, type chrome://inspect, then press Enter.
If the test fails, you do not have the ADB driver installed on your PC yet. On the other hand, if you see the name of your Android device, then it means that you already have the ADB driver on your computer.
Step 2: Get the ADB driver file
Of course, before you can add the ADB driver to your PC, you have to get the installation file first.
Typically, your Android device’s manufacturer provides the ADB driver file. Download the installation file from the official website.
Step 3: Activate USB debugging on your Android device
Once you’ve downloaded the ADB driver file, you must enable the USB Debugging function on your Android device. You can only enjoy the full potential of the ADB when the USB debugging function is activated.
Here are the steps:
Note
By default, the USB Debugging option is hidden for Android 4.2 and newer versions.
- Open Settings on your Android device.
- Scroll down, then tap About Phone or About.
- Enable the Developer options by tapping the Build number seven times.
- Remember to set the toggle at the top to On.
- Enable USB Debugging.
- Plug your Android device into your computer. On your Android device, you will see a message saying, Allow USB Debugging? Select the box beside the Always allow from this computer option, then tap OK.
Step 4: Open Device Manager and install the ADB driver
You can open Device Manager to install the ADB driver. In this article, we are going to use Google Nexus 7 because the steps are quite similar for all other Android devices. Once you’re ready, just follow the instructions below:
- Plug your Android device into your computer.
- Open the Run dialog box by pressing
Windows Key + Ron your keyboard. - Type
devmgmt.msc, then hit Enter. This should bring up Device Manager. - Look for your Android device.
- Right-click it, then select Properties from the options. If the driver is not installed properly, you will see a yellow warning icon beside your Android device.
- Go to the Driver tab, then click Update Driver.
- A new window will pop up. Select the Browse my computer for driver software option.
- Search for the ADB driver file you previously downloaded by clicking Browse.
- Select the box beside Include Subfolders, then click Next. Device Manager will automatically install the ADB driver.
If you do not need this feature, you might ask, “Where can I uninstall the ADB driver?” You can do that via Device Manager. You just need to follow the first four steps, then select Uninstall Device.
Fix this issue quickly
You can try using a safe and totally free tool developed by the Auslogics team of experts.
A few simple steps to troubleshoot the issue:
Download the tiny Auslogics TroubleShooter tool.
Run the application (no installation is needed).
The app will check for the issue mentioned in the article. When the scan is done, check that this is the issue you were looking to solve and click ‘Apply now’ to apply the recommended fix.
You can use the app to troubleshoot other malfunctions for free by simply typing in a brief description of the issue your PC is experiencing. Or you can scan your PC for performance issues using the My Scanner tab.
Pro Tip: Update your Drivers for Better Performance
We suggest updating all your drivers to ensure that you can use the ADB without any hassle.
You can manually do this, but the process can be tedious and time-consuming. Moreover, it can be risky. If you download and install the wrong driver, you might cause system instability issues on your PC.
So, if you do not have the patience and tech skills to update your drivers manually, we recommend using Auslogics Driver Updater.
Once you activate this program, it will automatically identify your system version. That said, Auslogics Driver Updater will locate the latest manufacturer-recommended drivers compatible with your system.
Downloading and Installing ADB in Windows 11
If you know what you are doing, you can easily download and install ADB in Windows 11. To do so, you have to access the Android Studio developer site to download the required file, after which you can add the driver to your machine.
Here are simple steps to follow to help download the driver on your Windows 11 machine:
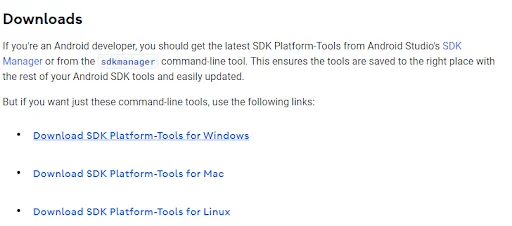
- Visit the Android Studio site on your computer.
- Next, scroll down the page to find the download options. Then click the “Download SDK Platform-Tools for Windows” option to download the Android Debug Bridge driver on your PC.
- Accept the terms and conditions.
- Next, click the Download button, then wait for the download process to finish.
- Copy the downloaded file and paste it into the C drive.
- After extracting the copied file, right-click the newly extracted folder and choose Open in Terminal.
- Launch Windows PowerShell and execute the following commands one by one:
cmd
ADB devices
- Allow for debugging when the USB debugging prompt window appears on your phone screen.
- Run the “adb devices” command again to view the list of all devices connected to your computer.
- Now, run the ADB command on your connected device.
Conclusion
Throughout this article, we’ve explained how to install ADB drivers on your Windows 10 and 11 PC. Go through the steps to download, install, connect, and control your Android devices from your computer.
Was this article helpful? Share it with your friends and colleagues, and share your thoughts in the comments below!