
Сайт разработчика (https://www.urbackup.org/)
Обзор
Сервер
Веб-интерфейс сервера доступен через FastCGI (на порту 55413) и HTTP (на порту 55414).
На порту FastCGI может быть настроено шифрование SSL.
Для обнаружения клиентов, сервер каждые 50 сек. отправляет широковещательный UDP пакет на 255.255.255.255:35622
Сервер UrBackup может подключаться на http://198.58.118.162 для загрузки обновлений серверной и клиентской части.
Рабочие каталоги сервера
/usr/share/urbackup - веб-интерфейс
/var/urbackup       - база данных конфигурации и прочие рабочие файлы
Исполняемые файлы
/usr/bin/urbackupsrv
/usr/bin/urbackup_snapshot_helper
/usr/bin/urbackup_mount_helper
Принцип работы резервного копирования файлов
- Резервное копирование запускается когда сервер обнаруживает, что время до последнего инкрементного резервного копирования больше, чем интервал для инкрементного резервного копирования, или время до последнего полного резервного копирования больше, чем интервал для полного резервного копирования. Резервное копирование также можно запускать по запросам клиентов.
- Сервер создает новый каталог для сохранения резервной копии. Схема именования для этого каталога — YYMMDD-HHMM. Каталог создается в хранилище резервной копии в каталоге, имя которого равно имени клиента.
- Сервер запрашивает у клиента построение списка файлов. Клиент создает список файлов и сообщает, что он построен.
- Сервер загружает ’urbackup/data/filelist.ub’ с клиента. Если это инкрементальное резервное копирование, то сервер сравнивает новый ’filelist.ub’ с последним полученным от клиента и определяет различия.
- Сервер запускает загрузку файлов. Если это инкрементальное резервное копирование, то загружаются только новые и измененные файлы. Если резервное копирование полное, то с клиента загружаются все файлы.
- Сервер загружает файл во временный файл и размещает его в папке urbackup_tmp_files в каталоге хранилища резервных копий, либо в указанную в расширенных настройках временную папку. При успешной загрузке файла сервер вычисляет его хэш и проверяет наличие другого файла с таким же значением хэша. Если такой файл существует, они считаются одинаковыми, и жесткая ссылка на другой файл сохраняется, а временный файл удаляется. Если такой файл не существует, файл перемещается в новое расположение резервной копии. Путь к файлу и значение хэша сохраняются в базе данных сервера.
- Если выполняется инкрементальное резервное копирование и файл не изменен, то создается жесткая ссылка на соответствующий файл предыдущего резервного копирования.
- Если выполняется инкрементальное резервное копирование при включенной опции «использовать символические ссылки при инкрементальном резервном копировании» и каталог с более чем 10 файлами или папками не изменился, то каталог переносится в “.directory_pool” и на него создаются символьные ссылки в старом и новом каталоге резервного копирования. КОличество символьных ссылок на данный каталог увеличивается/уменьшается каждый раз когда создается/удаляется другая символьная ссылка.
- Если во время резервного копирования клиент переходит в автономный режим, а резервное копирование выполняется инкрементально, сервер продолжает создавать жесткие ссылки на файлы в предыдущем резервном копировании, но не пытается снова загрузить файлы. Файлы, которые не удалось загрузить, не сохраняются в списке файлов на стороне сервера. Если резервная копия является полной и клиент переходит в автономный режим, процесс резервного копирования прерывается и сохраняется список частичных файлов, включающий все файлы, загруженные до этого момента.
- Если все файлы были переданы, сервер обновляет «текущую» символическую ссылку в расположении хранилища резервной копии клиента, чтобы указать на новую резервную копию. Это происходит только в том случае, если клиент не отключился во время резервного копирования.
Проблема переполнения
В каталоге пула “.directory_pool” часто остаются каталоги на которые не осталось символических ссылок из каталогов резервных копий. Такие каталоги лежат мертвым грузом и со временем заполняют все хранилище.
UrBackup не умеет чистить такие каталоги, поэтому их приходится чистить вручную.
Пример скрипта чистки пула
#!/bin/bash

cli_path=/mnt/backup/urbackup/COMP3

# составляем список всех линков со всех каталогов резервных копий
find -L /mnt/backup/urbackup/COMP3/220610-2333 -type l -exec ls -lh {} \; | cut -d '>' -f 2 > $cli_path/links.txt
find -L /mnt/backup/urbackup/COMP3/220611-0814 -type l -exec ls -lh {} \; | cut -d '>' -f 2 >> $cli_path/links.txt
#...

# удаляем каталоги пула на которые нет линков в каталогах резервных копий
for f in $cli_path/.directory_pool/??/*; do
  cat $cli_path/links.txt | grep $f >/dev/null || (
    echo $f
    rm -rf "$f"
  )
done
Клиент для Windows
Клиент имеет основной процесс и процесс интерфейса. Интерфейсный процесс отображается в трее, предоставляет пользователю интерфейс для управления и передает команды и изменения конфигурации основному процессу.
Основной процесс слушает 3 порта:
- 35622/UDP — порт обнаружения, принимает широковещательные сообщения от сервера и сообщает в ответ имя своего компьютера
- 35623/TCP — порт управления, принимает команды и изменения конфигурации от интерфейсного процесса и от сервера
- 35621/TCP — порт передачи данных, принимает запросы на резервирование от сервера
Сервер устанавливает постоянное соединение с портом управления 35623/TCP каждого клиента, через который они могут запрашивать задачи резервирования и изменения конфигурации от сервера.
Основной процесс сканирует каталоги резервирования и создает файлы
- «urbackup/data/filelist.ub» — список всех резервируемых файлов
- «urbackup/backup_client.db» — индексная база данных о всех резервируемых файлах
Для быстрого обновления этих файлов основной процесс использует встроенный механизм Windows для мониторинга изменений в каталогах. Каждые 10 секунд, а также при запросе списка файлов, индексная база получает обновления.
Для резервирования файлов, сервер загружает список файлов от клиента и запускает резервирование и загрузку изменений через встроенный в Windows файловый сервер.
Для резервирования образа используется только порт 35621/TCP.
Клиент для Linux
Установка клиента Linux
Строку запуска скрипта установки необходимо брать с сайта (ссылка выше). На 6.10.2020 она выглядит так.
TF=$(mktemp) && wget "https://hndl.urbackup.org/Client/2.4.10/UrBackup%20Client%20Linux%202.4.10.sh" -O $TF && sudo sh $TF; rm -f $TF
systemctl status urbackupclientbackend
Рабочий каталог клиента
/var/lib/urbackup
Рабочий каталог клиента создается при первом подключении клиента к серверу. В нем случайно генерируется ключевой файл server_ident.key, по которому клиент будет проводить аутентификацию сервера в дальнейшем. Никакой другой сервер уже не сможет подключиться к клиенту, если данный файл создан.
Если необходимо переключить клиента на другой сервер, то необходимо удалить рабочий каталог клиента /var/lib/urbackup
Скрипт удаление urbackup клиента
/usr/local/sbin/uninstall_urbackupclient
Настройка механизма снепшотов
/usr/local/etc/urbackup/snapshot.cfg

# urbackup поддерживает варианты:
# 1) dattobd volume snapshot kernel module from https://github.com/datto/dattobd
# 2) LVM - Logical Volume Manager snapshots
Клиент командной строки
/usr/local/bin/urbackupclientctl
Открытие доступа на FW
vi /usr/lib/firewalld/services/urbackup-client.xml
<?xml version="1.0" encoding="utf-8"?>
<service>
  <short>urbackup-client</short>
  <description>UrBackup client for Linux</description>
  <port protocol="tcp" port="35621"/>
  <port protocol="udp" port="35622"/>
  <port protocol="tcp" port="35623"/>
</service>
firewall-cmd --reload
firewall-cmd --info-service=urbackup-client

firewall-cmd --permanent --zone=<your_zone> --add-service=urbackup-client
firewall-cmd --reload
Перенос на другой хост
/path/to/urbackup— каталог с бэкапами/var/urbackup— каталог с рабочими данными
Пути к данным каталогам на старом и новом хосте должны совпадать.
Для переноса UrBackup сервера на другой хост, необходимо
- остановить и отключить urbackup сервис на старом хосте
- установить urbackup сервер на новом хосте
- остановить сервис urbackup сервера на новом хосте
- переименовать каталоги
/var/urbackup,/path/to/urbackupв*.default(сохраняем исходное состояние) - перенести со старого хоста на новый с сохранением всех метаданных (время, права, владелец, …) каталоги
/var/urbackup,/path/to/urbackup - если на новом хосте на перенесенных каталогах владелец и группа отличны от urbackup, то необходимо установить владельца и группу urbackup
- запустить сервис urbackup сервера на новом хосте
Пример восстановления доступов
chown -R urbackup:urbackup /var/urbackup
chmod 755 /var/urbackup
chmod -R 644 /var/urbackup/*
chmod 750 /var/urbackup/backup_server_files.db
chmod 750 /var/urbackup/dataplan_db.txt
chmod 750 /var/urbackup/dataplan_db.txt.new
chmod 750 /var/urbackup/fileindex
chmod 750 /var/urbackup/server_version_info.properties
chmod 750 /var/urbackup/server_version_info.properties.new
chmod 750 /var/urbackup/UrBackupUpdate.exe
chmod 750 /var/urbackup/UrBackupUpdateLinux.sh
chmod 750 /var/urbackup/*.sig*

chown -R urbackup:urbackup /path/to/urbackup
chown 755 /path/to/urbackup
chown 750 /path/to/urbackup/*
Сервер UrBackup немного отличается на CentOS 8 и Ubuntu 20.04.
В Ubuntu 20.04 используется файл /var/urbackup/backupfolder в котором хранится путь к каталогу с бэкапами.
В CentOS 8 такого файла нет, вероятно путь к каталогу с бэкапами хранится в базе.
Это необходимо учитывать при переносе между хостами с разными ОС.
Также для данного файла необходимо задать особые права
chown root:root /var/urbackup/backupfolder
chmod 644 /var/urbackup/backupfolder
Установка
Установка на Ubuntu 20.04
Установка
add-apt-repository ppa:uroni/urbackup
apt update
apt install urbackup-server
В процессе установки укажите путь к каталогу для хранения резервных копий urbackup
/path/to/urbackup
Проверьте статус сервиса
systemctl status urbackupsrv
Установка на CentOS 8
# создание пользователя urbackup
useradd -r -d /var/urbackup -s /sbin/nologin -c "User for UrBackup Server" urbackup

# создание каталога резервных копий
mkdir /path/to/urbackup
chown -R urbackup:urbackup /path/to/urbackup
chmod -R 770 /path/to/urbackup

# добавление репозитория uroni
cd /etc/yum.repos.d/
wget https://download.opensuse.org/repositories/home:uroni/CentOS_8/home:uroni.repo

# установка
dnf install urbackup-server

# запуск сервера
systemctl enable urbackup-server
systemctl start urbackup-server
Настройка
Откройте веб-интерфейс вашего сервера http://<ip_your_server>:55414
Настройки / Путь для хранения бэкапов — укажите каталог для хранения резервных копий
Резервирование
MySQL
Ссылки по теме
- Backup MySQL
Безопасность
Безопасность клиента
/var/lib/urbackup/server_ident.key
Installing and Configuring URBackup
Backups are important for so many reasons. I have had backups save my bacon more than once, and I have also learned the hard way how important backups really are. Data loss is no joke, and in this day and age there is truly no reason to have data loss.
Today, I want to cover a really great backup tool that is open source, and not too difficult to get setup. URBackup (like You Are Back Up! — get it?) is a really terrific tool boasting both a Server and Client installation that then makes your backup server (where you store your data) talk to your client machines (where you are backing up your data from) with some nice auto-discovery features built in.
Now, learn from me. Make sure your firewall has port 55414 and 55415 open so that URBackup’s client and server can talk easily. You’ll save yourself a lot of time and headache.
What you’ll need
- A server with enough drive space to store backups.
- Docker and Docker Compose installed on that server — check out https://github.com/bmcgonag/docker_installs for some easy to use scripts for various versions of Ubuntu, Debian, and CentOS.
- At least one client machine running either Windows, Linux, or both if you like.
- About an hour of time.
Installation
First, if you haven’t already done so, please make sure you have both Docker-CE and Docker-Compose installed on your intended server system. This is important as it’s how we will install the server portion of URBackup.
Installing Docker-CE and Docker-Compose
Installation via a Simple Script
You can easily install Docker-CE, Docker-Compose, Portainer-CE, and NGinX Proxy manager by using this quick install script I created and maintain on Github. Just use the command:
wget https://gitlab.com/bmcgonag/docker_installs/-/raw/main/install_docker_nproxyman.sh
To download the script to your desired host.
Change the permissions to make the script executable:
chmod +x ./install_docker_nproxyman.sh
and then run the script with the command:
./install_docker_nproxyman.sh
When run, the script will prompt you to select your host operating system, then will ask you which bits of software you want to install.
Simply enter ‘y’ for each thing you want to install.
At some point, you may be asked for your super user (sudo) password as well.
Allow the script to complete installation.
At this point, you might want to log out and back in, as this will allow you to use the docker and docker-compose commands without the need of sudo in front of them.
Installing URBackup Server
Now, we’ll grab the docker-compose text from the URoni/URBackup dockerhub page, and setup our space for backups.
- Setup a space to store your backups.
mkdir -p urbackup/{data,storage}
This will setup a folder structure with a new folder called «urbackup», and two folders inside of that folder called «data» and «storage».
2. Move into the «urbackup» folder:
cd urbackup
3. Create a new docker-compose.yml file:
nano docker-compose.yml
4. Paste the following code into that file:
version: '2'

services:
  urbackup:
    image: uroni/urbackup-server:latest
    container_name: urbackup
    restart: unless-stopped
    environment:
      - PUID=1000 # Enter the UID of the user who should own the files here
      - PGID=1000  # Enter the GID of the user who should own the files here
      - TZ=America/Chicago # Enter your timezone
    volumes:
      - ./data:/var/urbackup
      - ./storage:/backups
      # Uncomment the next line if you want to bind-mount the www-folder
      #- /path/to/wwwfolder:/usr/share/urbackup
    network_mode: "host"
    # Activate the following two lines for BTRFS support
    cap_add:
      - SYS_ADMIN
Save the file contents with CTRL + O, then press Enter, and exit the nano editor with CTRL + X.
5. Now run the URBackup docker-compose with:
docker-compose up -d
Once it downloads URBackup, and says «done», give it about 30 seconds, then open a web browser, and go to the ip address of your server on port 55414.
For instance, my server ip is 192.168.7.51, so I went to
http://192.168.7.51:55414
If all went well, you should now see the URBackup Server Web UI in front of you.
Install a URBackup Client
If you are using Windows, you’ll download the client application .exe file from the URBackup site (https://urbackup.com). Next install the client normally, and when done, you’ll use the Graphical User Interface to decide whether you want to backup only certain folders, or the entire system, etc.
You can go back to the URBackup Server, and refresh the page to see if the Windows machine has been autodiscovered. If not, you might waith a couple of minutes and try again. If it still doesn’t show up, then make sure you don’t have a firewall on that’s blocking ports 55414 and 55415. These are the ports that URBackup uses to communicate between server and client.
Linux Client
If you are running Linux, you’ll want to grab the command line command from the URBackup site, and paste it into the terminal.
At the time of writing the command is:
TF=$(mktemp) && wget "https://hndl.urbackup.org/Client/2.4.11/UrBackup Client Linux 2.4.11.sh" -O $TF && sudo sh $TF; rm -f $TF
But, it’s always best to go to the official source, and make sure the command is up to date.
Once pasted into the terminal, run it by pressing Enter, and enter your sudo password when prompted.
You may also have to enter ‘Y’ at some point, and choose how you want backups / snapshots to be done.
After everything runs, check the Web Interface, and make sure your machine shows up.
Now, you can enter a command to tell URBackup what to backup.
I chose only my Downloads folder, but give it whatever path you want.
sudo urbackupclientctl add-backupdir -d /home/brian/Downloads/
Run this as many times as you like to add multiple folders for backup.
Support My Efforts on Patreon
https://www.patreon.com/bePatron?u=234177
UrBackup — это простая в настройке кроссплатформенная система резервного копирования типа клиент-сервер.
Позволяет создавать инкрементные и полные резервные копии как целых разделов, так и отдельных каталогов, с возможностью выбора файлов, которые попадут в архив, и делать снапшоты разделов жесткого диска.
Примечание: В настоящее время резервное копирование образа предназначено для резервного копирования загрузочного тома (C:) систем Windows.
Другие данные должны быть скопированы и восстановлены с помощью резервного копирования файлов.
UrBackup предоставляет веб-интерфейс для управления резервными копиями.
Установка
Сервер UrBackup
Установить пакет urbackup-server:
# apt-get install urbackup-server
Создать каталог для резервных копий:
Каталог должен принадлежать пользователю urbackup. У пользователя должны быть права на чтение/запись в этот каталог:
# chown -R urbackup:urbackup /mnt/backups
Запустить сервер UrBackup:
# systemctl enable --now urbackup-server
Примечание: По умолчанию UrBackup прослушивает порты 55413 и 55414:
# netstat -lnpt | grep urbackupsrv
tcp        0      0 0.0.0.0:55413               0.0.0.0:*                   LISTEN      4184/urbackupsrv
tcp        0      0 0.0.0.0:55414               0.0.0.0:*                   LISTEN      4184/urbackupsrv
tcp        0      0 :::55413                    :::*                        LISTEN      4184/urbackupsrv
tcp        0      0 :::55414                    :::*                        LISTEN      4184/urbackupsrv
Веб-интерфейс будет доступен по адресу http://<IP-сервера>:55414:

Внимание! Если появляется ошибка: «Каталог, где UrBackup будет сохранять резервные копии недоступен….», следует изменить путь к каталогу резервных копий в Настройках, либо изменить права доступа к нему.
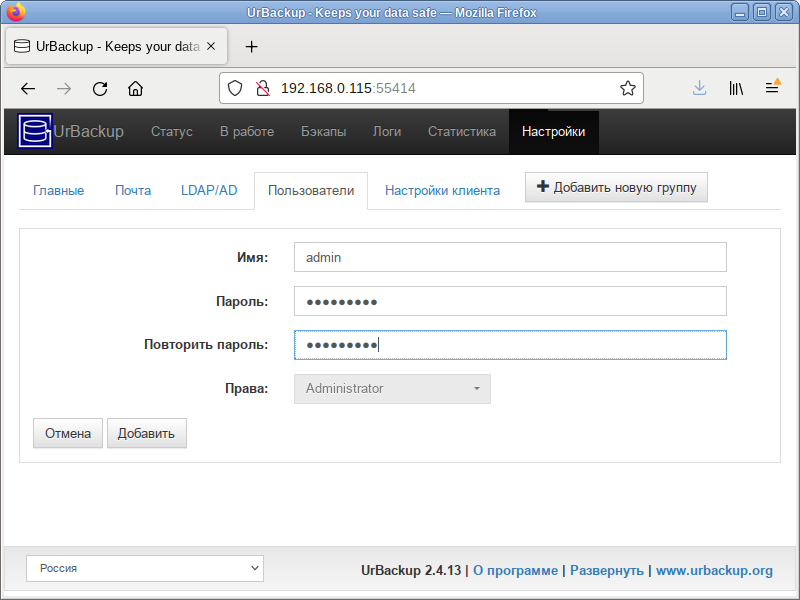
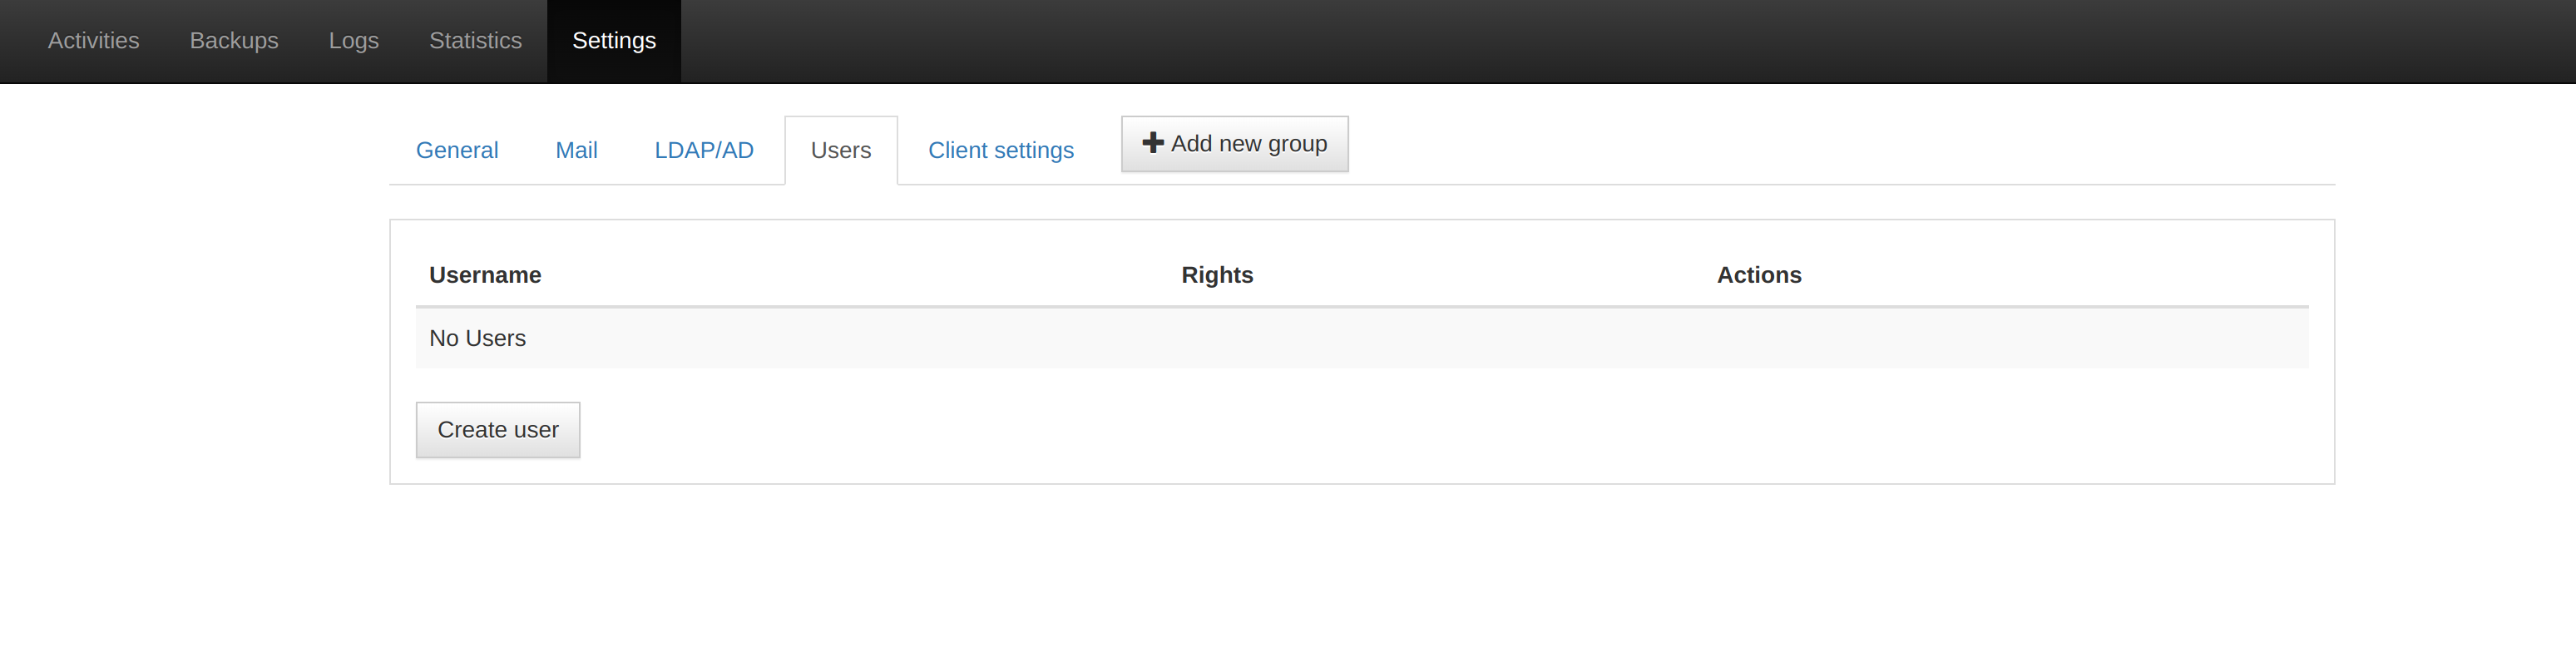
Примечание: Сразу после установки доступ к веб-интерфейсу сервера UrBackup будет возможен без аутентификации. Чтобы в дальнейшем требовался ввод имени пользователя и пароля необходимо создать администратора (перейти на вкладку «Настройки» → «Пользователи» и нажать кнопку «Создать»):
Клиент UrBackup
Установить пакет urbackup-client:
# apt-get install urbackup-client
Запустить клиент UrBackup:
# systemctl enable --now urbackup-client
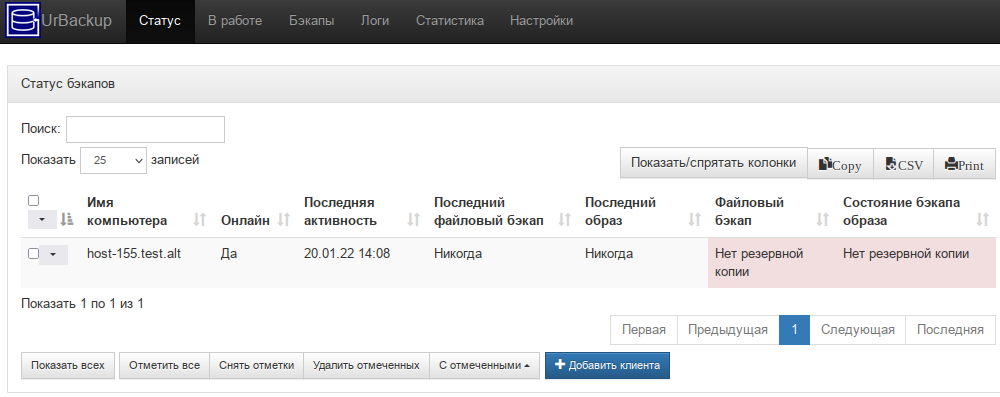
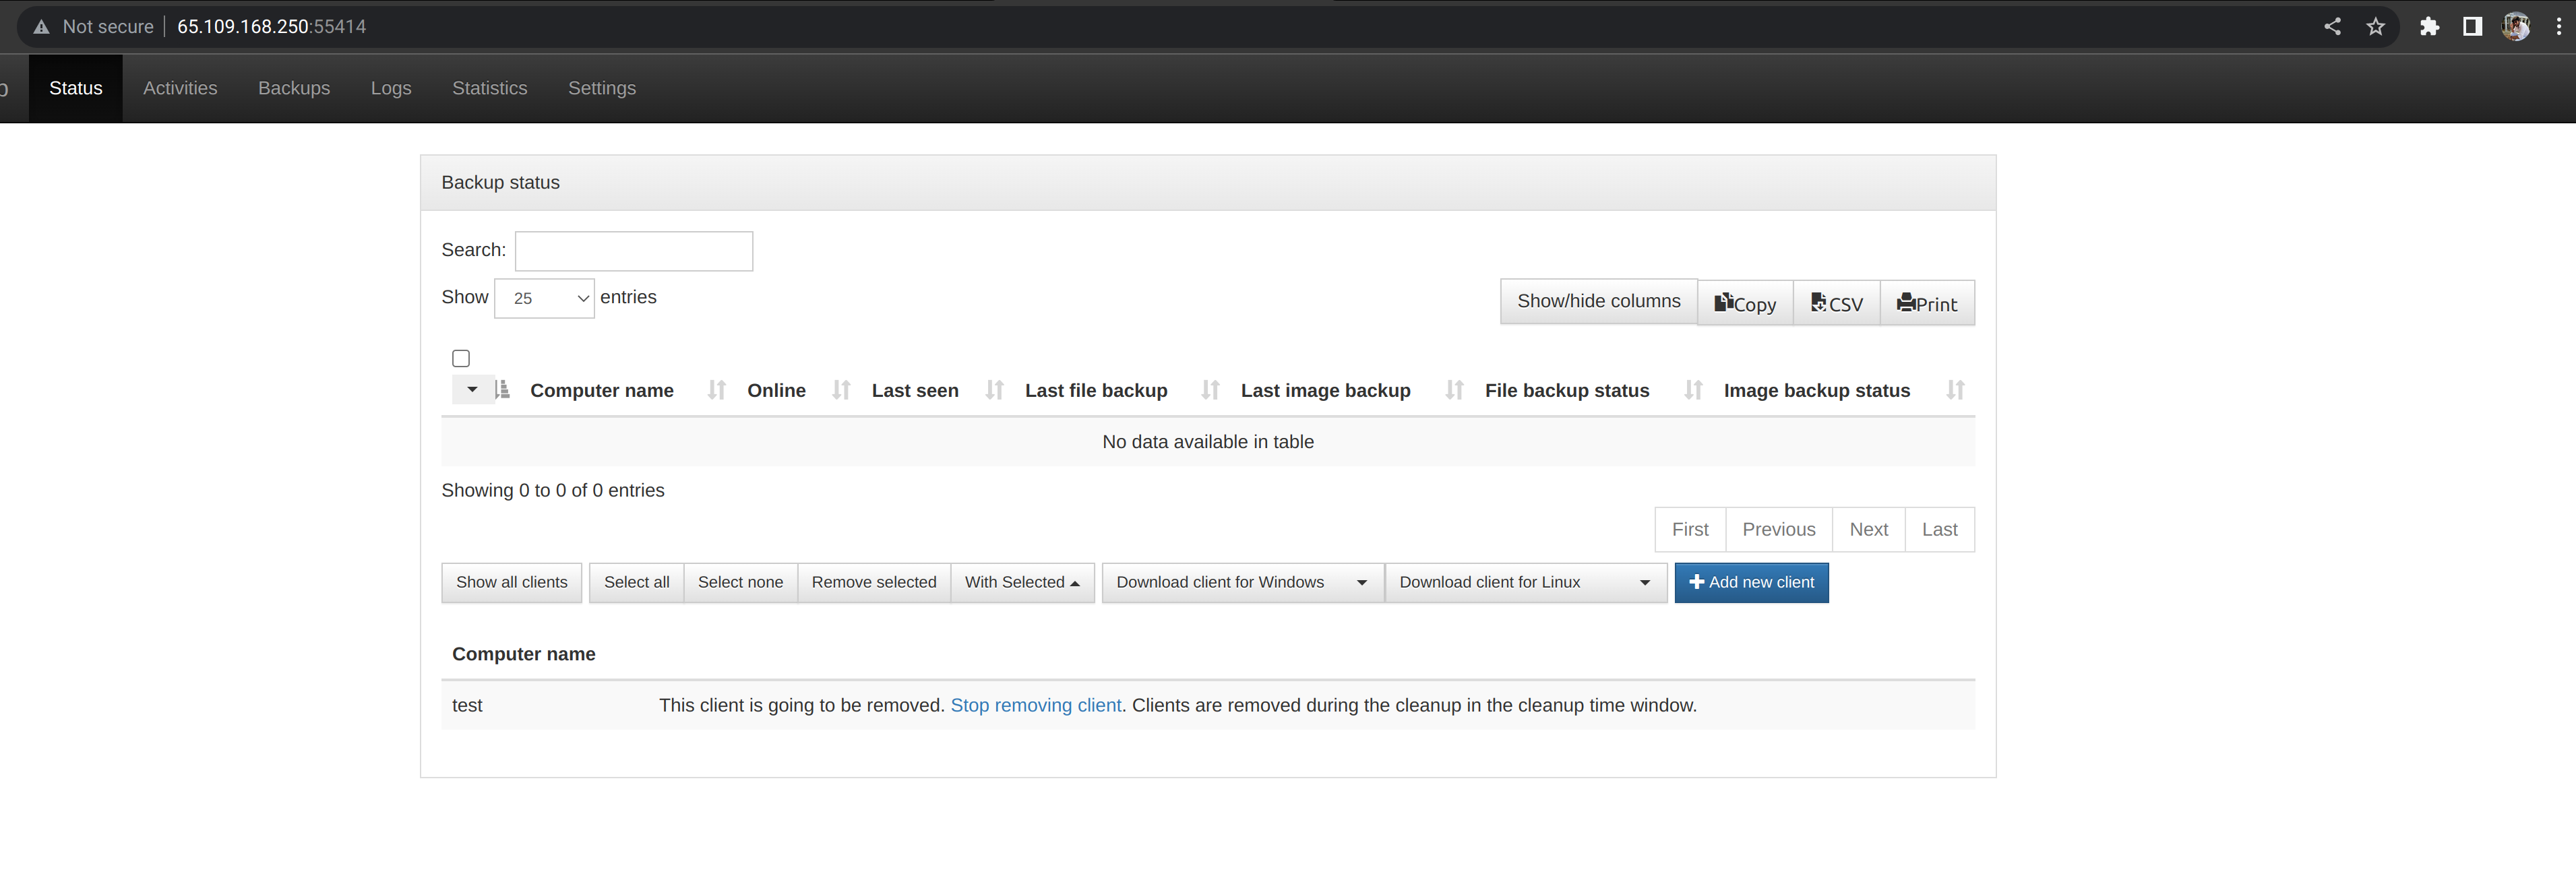
Локальные клиенты будут обнаружены сервером автоматически и появятся в веб-интерфейсе на вкладке «Статус»:
Настройка
В веб-интерфейсе на вкладке «Настройки»→«Главные» можно изменять настройки UrBackup. Некоторые настройки влияют только на сервер, а некоторые влияют как на клиент, так и на сервер. Для этих настроек администратор может установить значения по умолчанию или переопределить настройки клиента.
На вкладке «Сервер» можно указать каталог для хранения резервных копий:

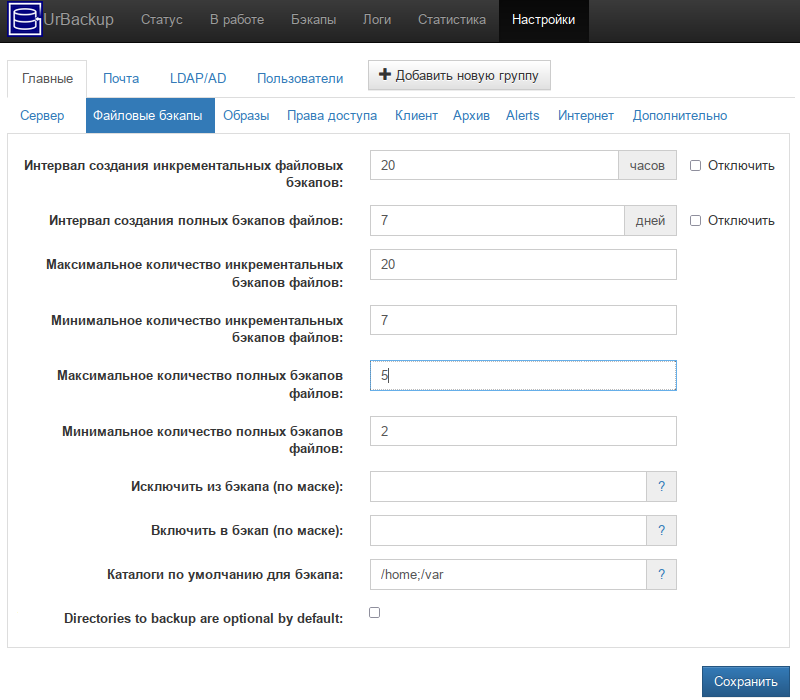
На вкладке «Файловые бэкапы» можно указать настройки файловых резервных копий, в том числе каталоги, которые будут бэкапироваться на клиенте (каталоги разделяются ;):
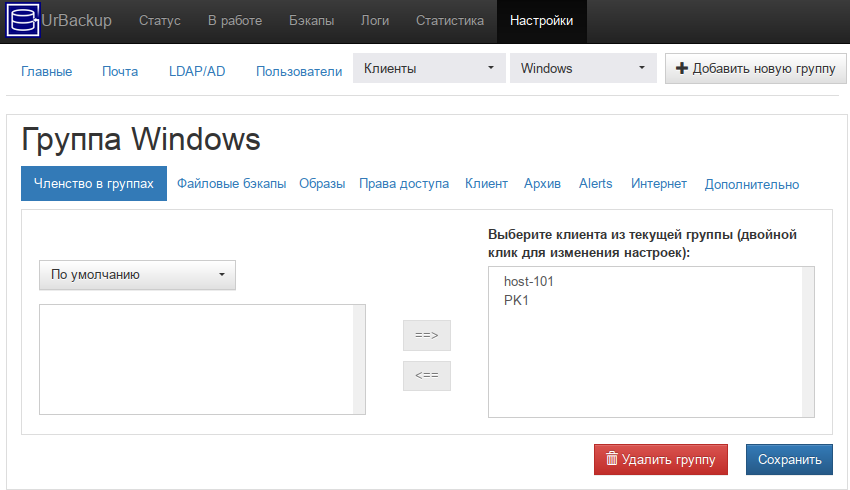
Для более удобного администрирования можно создать несколько групп, распределить клиенты по группам, и задать настройки отдельно для каждой группы клиентов:
Создание резервных копий на сервере
Бэкап будет производиться на основании общих установок.
Бэкап можно также произвести вручную, отметив клиент и выбрав тип бэкапа в выпадающем списке:
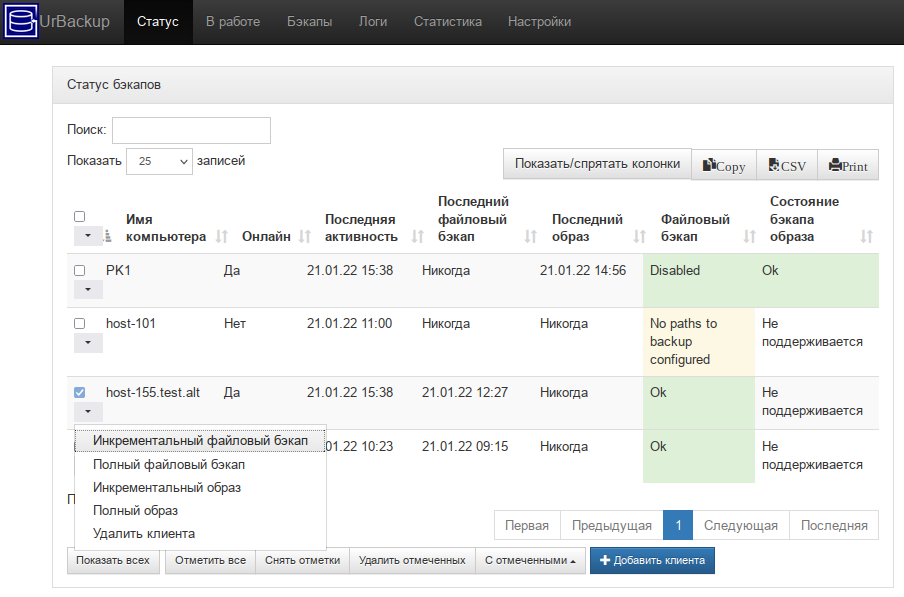
Более подробно отслеживать активность резервного копирования можно на вкладках «В работе», «Бэкапы» и «Логи»:

Отчёты/содержимое резервных копий можно просмотреть на вкладке «Бэкапы»:
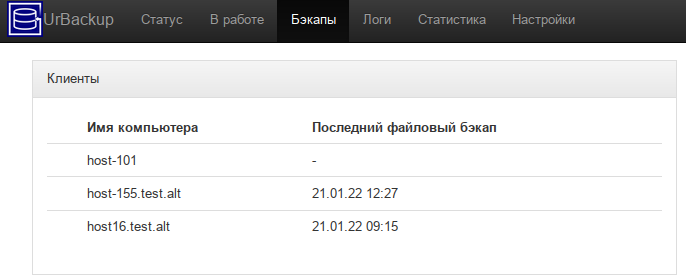
Выбрав клиента, можно просмотреть список его бэкапов:

Примечание: Если отметка в столбце «Архивировано» установлена, резервная копия архивируется. Пока резервная копия заархивирована, её нельзя удалить средствами UrBackup.
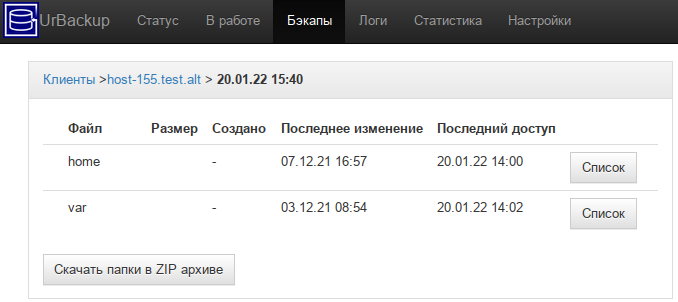
Выбрав бэкап, можно просмотреть его содержимое:
Резервные копии сохраняются в каталоге, который был указан в веб-интерфейсе. В этом каталоге для каждого клиента создается свой подкаталог.
Образы дисковых разделов хранятся в виде файлов в формате vhdz (имя файла будет иметь вид: Image_<Drive>_<YYMMDD-HHMM>.vhdz):
# ls -l /mnt/backups/PK1/220121-1456_Image_C/
итого 14730884
-rwxr-x--- 1 urbackup urbackup 15080483897 янв 21 15:27 Image_C_220121-1456.vhdz
-rwxr-x--- 1 urbackup urbackup     1310700 янв 21 14:56 Image_C_220121-1456.vhdz.cbitmap
-rwxr-x--- 1 urbackup urbackup     2621376 янв 21 15:27 Image_C_220121-1456.vhdz.hash
-rwxr-x--- 1 urbackup urbackup         556 янв 21 14:56 Image_C_220121-1456.vhdz.mbr
-rwxr-x--- 1 urbackup urbackup           0 янв 21 15:27 Image_C_220121-1456.vhdz.sync
Резервные копии файлов находятся в подкаталогах <YYMMDD-HHMM>. Каталог current является ссылкой на последнюю резервную копию. Резервные копии папок с файлами сохраняются в открытом виде:
# ls /mnt/backups/host-155.test.alt/220120-1540/
home  var
Работа с UrBackup на клиенте
Для работы с UrBackup на клиенте предназначена утилита urbackupclientctl:
urbackupclientctl start— запустить инкрементное/полное резервное копирование;urbackupclientctl status— получить текущий статус резервного копирования;urbackupclientctl browse— просмотр списка резервных копий и файлов/папок в резервных копиях;urbackupclientctl restore-start— восстановить файлы/папки из резервной копии;urbackupclientctl set-settings— установить параметры резервного копирования;urbackupclientctl add-backupdir— добавить новый каталог в список каталогов, для которых выполняется резервное копирование;urbackupclientctl list-backupdirs— вывести список каталогов, для которых выполняется резервное копирование;urbackupclientctl remove-backupdir— удалить каталог из списока каталогов, для которых выполняется резервное копирование.
Справку по конкретной команде можно получить, выполнив команду:
urbackupclientctl <command> --help
Список резервных копий:
# urbackupclientctl browse
[{
"archived": 0,
"backuptime": 1642686041,
"disable_delete": true,
"id": 2,
"incremental": 1,
"size_bytes": 109955109
}
,{
"archived": 0,
"backuptime": 1642684086,
"id": 1,
"incremental": 0,
"size_bytes": 2306704775
}
]
Запустить полное бэкапирование:
# urbackupclientctl start -f
Waiting for server to start backup... done
Preparing... done
[======================================================>        ] 86% 2.01947 GB/2.36159 GB at 400.289 MBit/s
Completed successfully.
Восстановление данных из резервной копии:
# urbackupclientctl restore-start -b 2
Starting restore. Waiting for backup server...  done
[=============================================================> ] 97% 2.33831 GB/2.41119 GB at 76.024 KBit/s
Restore completed successfully.
Добавление каталогов, для которых будут создаваться резервные копии:
# urbackupclientctl add-backupdir -d /etc
Просмотреть список каталогов, для которых создаются резервные копии:
#  urbackupclientctl list-backupdirs
PATH  NAME FLAGS
----- ---- ----------------------------------------------
/home home follow_symlinks,symlinks_optional,share_hashes
/var  var  follow_symlinks,symlinks_optional,share_hashes
/etc  etc  follow_symlinks,symlinks_optional,share_hashes
Резервное копирование баз данных
На сервере БД должен быть установлен клиент UrBackup.
MySQL/MariaDB
Примечание: Используйте этот метод, если база данных небольшая (например, 1 ГБ).
Для создания дампа БД следует в файле /etc/urbackup/mariadbdump.conf установить параметр
MARIADB_DUMP_ENABLED=1, и указать имя/пароль MySQL-пользователя.
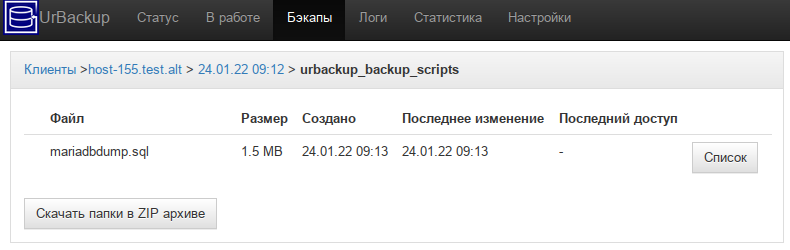
В результате при создании файловых бэкапов будет создаваться дамп базы данных /mnt/backups/<client>/<YYMMDD-HHMM>/urbackup_backup_scripts/mariadbdump.sql.
Восстановить дамп MySQL/MariaDB, можно выполнив команду:
# mysql -u root -p < mariadbdump.sql
PostgreSQL
Создание дампа БД
Примечание: Используйте этот метод, если база данных небольшая (например, 1 ГБ).
Для создания дампа БД следует в файле /etc/urbackup/postgresqldump.conf установить параметр
POSTGRESQL_DUMP_ENABLED=1.
В результате при создании файловых бэкапов будет создаваться дамп базы данных /mnt/backups/<client>/<YYMMDD-HHMM>/urbackup_backup_scripts/postgresqldump.sql.
Пример команды восстановления дампа PostgreSQL:
# su - postgres -s /bin/sh -c "psql -f /home/user/postgresqldump.sql postgres"
Создание базовой копии
В файле /etc/urbackup/postgresbase.conf установить параметр POSTGRESQL_BASE_ENABLED=1.
Добавить виртуального клиента:
# urbackupclientctl set-settings -v virtual_clients -k wal
Разрешить пользователю postgres устанавливать соединение репликации. Для этого в файле /var/lib/pgsql/data/pg_hba.conf раскомментировать строку:
local replication postgres trust
В файле /var/lib/pgsql/data/postgresql.conf для max_wal_senders установить значение отличное от нуля, для wal_level установить значение archive.
Перезапустить PostgreSQL и проверить работает ли бэкапирование:
/usr/share/urbackup/scripts/postgresbase > /dev/null
Starting base backup of PostgreSQL at Пн 24 янв 2022 09:14:11 EET...
Base backup of PostgreSQL finished at Пн 24 янв 2022 09:14:12 EET.
Если вы не хотите иметь непрерывную резервную копию WAL, можно остановиться на этом этапе.
Для частого резервного копирования данных WAL на сервер резервного копирования необходимо настроить PostgreSQL таким образом, чтобы данные WAL куда-то копировались, а после завершения резервного копирования WAL удалялись.
Настроить PostgreSQL для архивирования файлов WAL в каталог, установив (файл /var/lib/pgsql/data/postgresql.conf) для параметра archive_mode значение on и для параметра archive_command значение
cp %p /var/lib/walarchive/incoming/%f; mv /var/lib/walarchive/incoming/%f /var/lib/walarchive/staging/%f
Создать каталоги:
# mkdir -p /var/lib/walarchive/{incoming,staging,backup}
# chown postgres:postgres /var/lib/walarchive/{incoming,staging,backup}
Настроить архивы WAL для резервного копирования:
# urbackupclientctl add-backupdir --keep -d /var/lib/walarchive/backup -v wal
Затем следует настроить интервал резервного копирования [wal], чтобы он был относительно небольшим, а интервал резервного копирования основного клиента с базовым сценарием резервного копирования относительно большим.
Для восстановления данных следует сначала восстановить резервную копию:
# urbackupclientctl restore-start -b last -d urbackup_backup_scripts/postgresbase
Starting restore. Waiting for backup server...  done
[===================================>                           ] 56% 24.8957 MB/44.8081 MB
Restore completed successfully.
а затем скопировать последний набор файлов WAL на сервер базы данных PostgreSQL и следовать инструкции по восстановлению (см. https://postgrespro.ru/docs/postgrespro/9.6/continuous-archiving#backup-pitr-recovery).
Примечание: После восстановления файлов из архива с резервной копией проверьте права и владельца файлов. Они должны принадлежать пользователю от имени которого запускается сервер PostgreSQL:
# chown postgres:postgres /var/lib/pgsql/data
# chmod 700 /var/lib/pgsql/data
Ссылки
https://www.urbackup.org/administration_manual.html
Data is one of the most important things for a business or individual. Losing data can be fatal. Well, yes, unless you have a reliable backup system in place. Why not consider UrBackup?
UrBackup is an open-source backup system designed for quick backup and file restoration. And in this tutorial, you’ll learn how to set up and use UrBackup to manage your backups.
Sounds interesting? Read on and let UrBackup save the day!
Prerequisites
This tutorial will be a hands-on demonstration. If you’d like to follow along, be sure you have a server and client machine. This tutorial uses a Windows Server 2019 as the backup server and Windows 10 as the client. You can use any server or client, but the instructions may differ slightly.
Downloading and Installing the UrBackup Server
UrBackup is open source client/server backup system that offers data security and a speedy restoration time. But before taking advantage of the UrBackup Server, you must install it on your server first.
1. Open your favorite web browser, and navigate to the official UrBackup server download page.
2. Next, click the UrBackup Server 2.5.26 (x86/x64) (Vista/7/8.1/10 + Server editions) version to download the latest installer. The MSI installer version might not work on older versions of Windows Server.

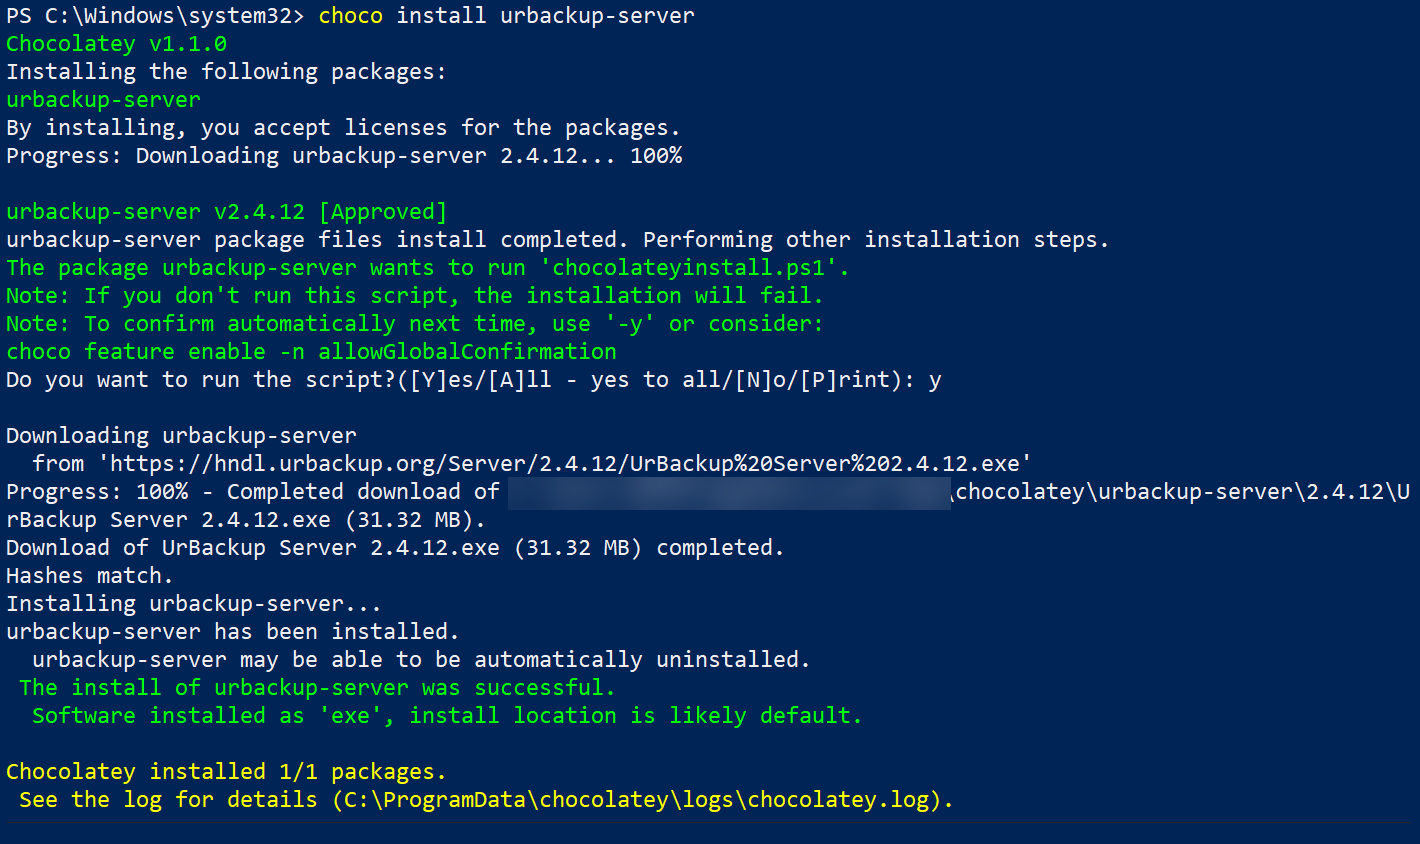
Perhaps you have Chocolatey installed on your server. If so, you can open PowerShell as administrator and run the choco install command below to install the UrBackup Server (urbackup-server).
choco install urbackup-server
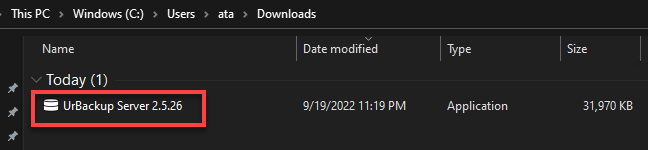
3. Once downloaded, launch the installer to begin installing the UrBackup Server.
4. Select your preferred language during the installation, as shown below, and click OK to continue.
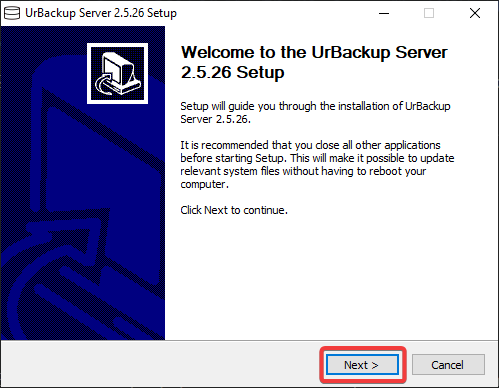
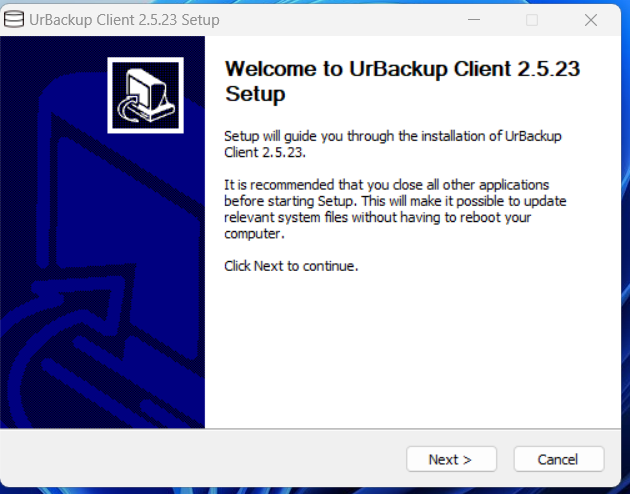
5. Now, click Next on the Welcome page to continue.
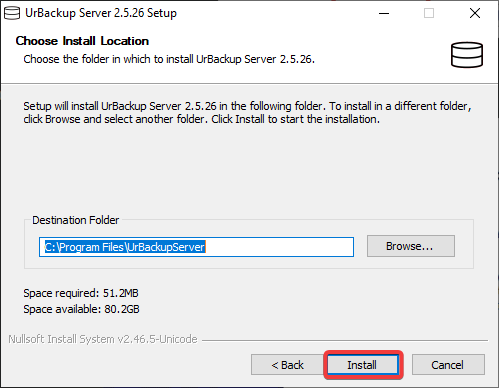
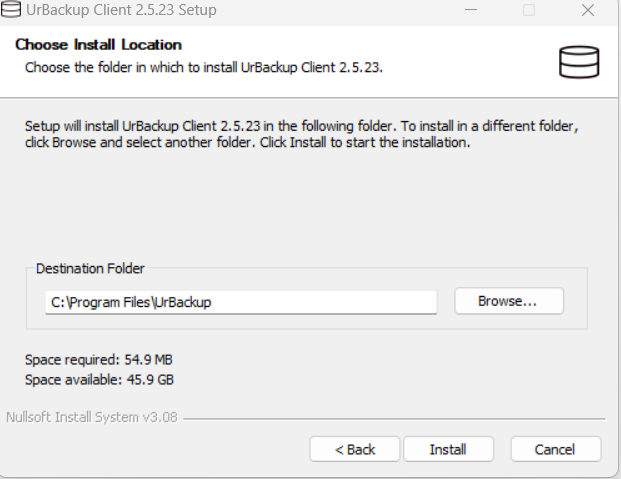
5. Click Browse to select UrBackup Server’s install location, and click Install to commence the installation.
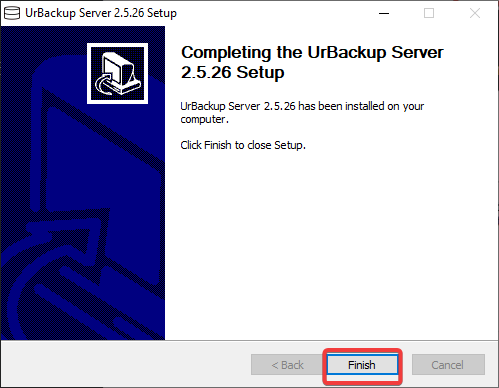
6. Lastly, click Finish when the installation completes, which closes the installation wizard.
Configuring UrBackup Server
After installing, you’ll still need to configure the UrBackup Server to control each backup’s behavior. How? UrBackup has a web UI that lets you manage UrBackup Server settings and all your backups.
To configure UrBackup Server:
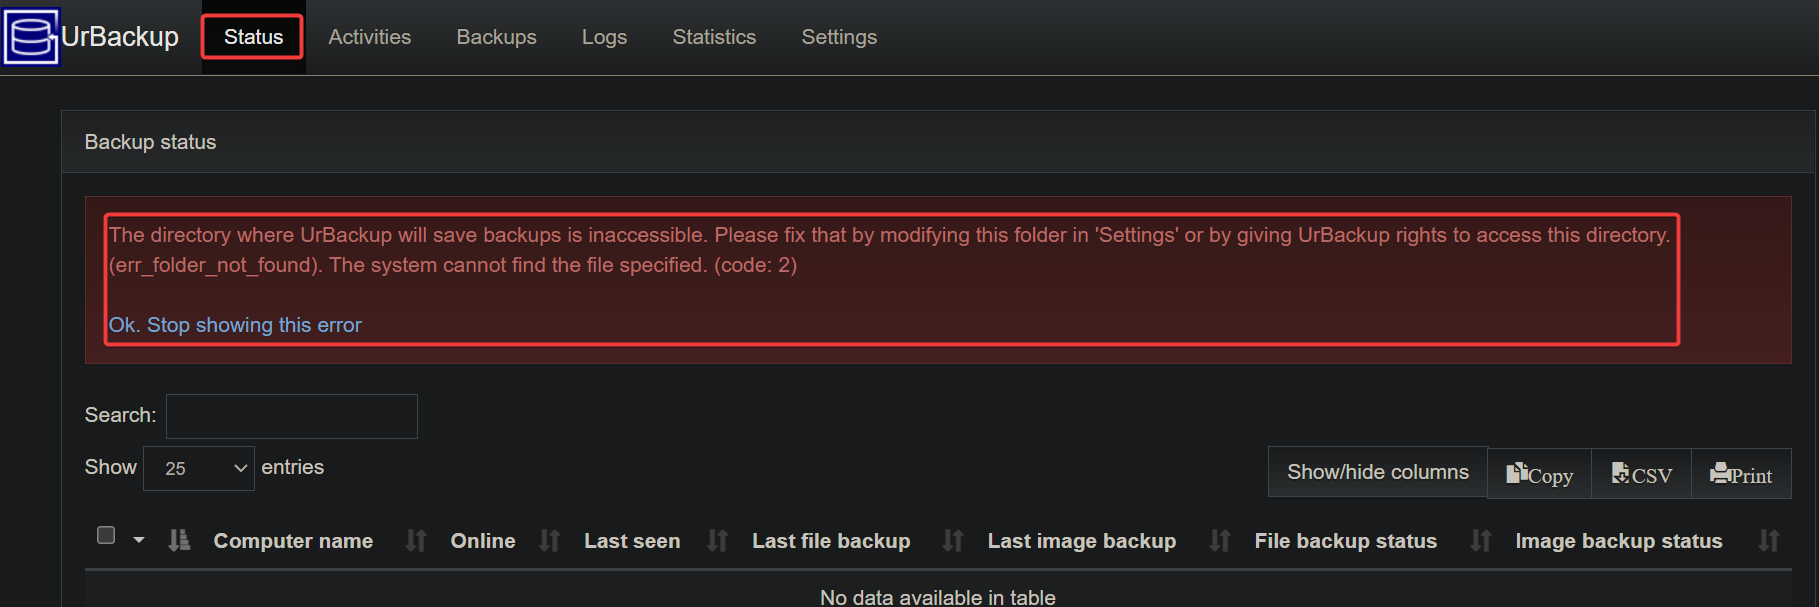
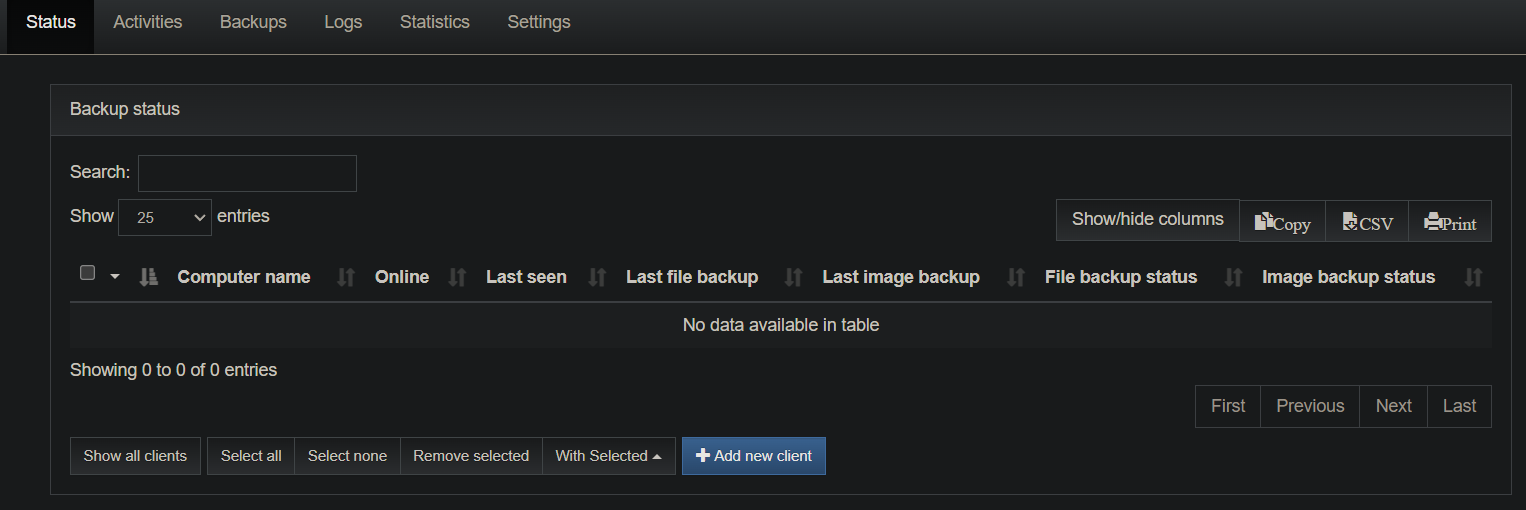
1. Navigate to http://localhost:55414 in your web browser to open the UrBackup Server web UI. You’ll see an error message saying the backup directory is missing under the Status tab, as shown below.
This error shows up since you haven’t configured the backup directory yet. No worries, you’ll fix this error in the following step.
2. Open PowerShell as administrator and run the following New-Item command to create a backup Directory called urbackup. But the directory’s name and path are arbitrary.
New-Item "C:\urbackup" -itemType Directory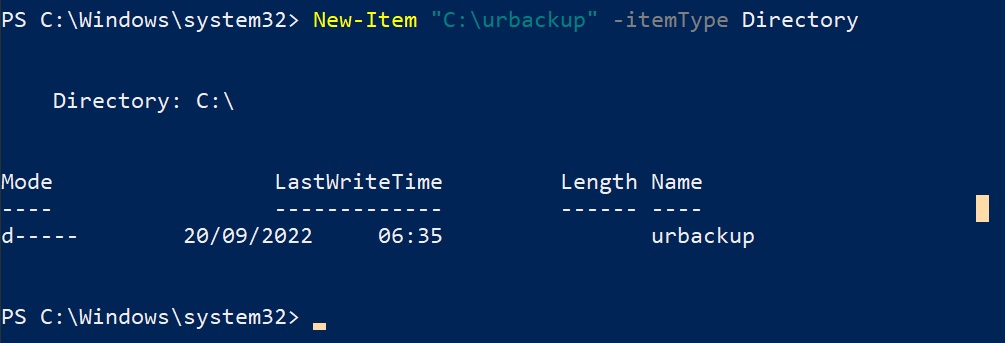
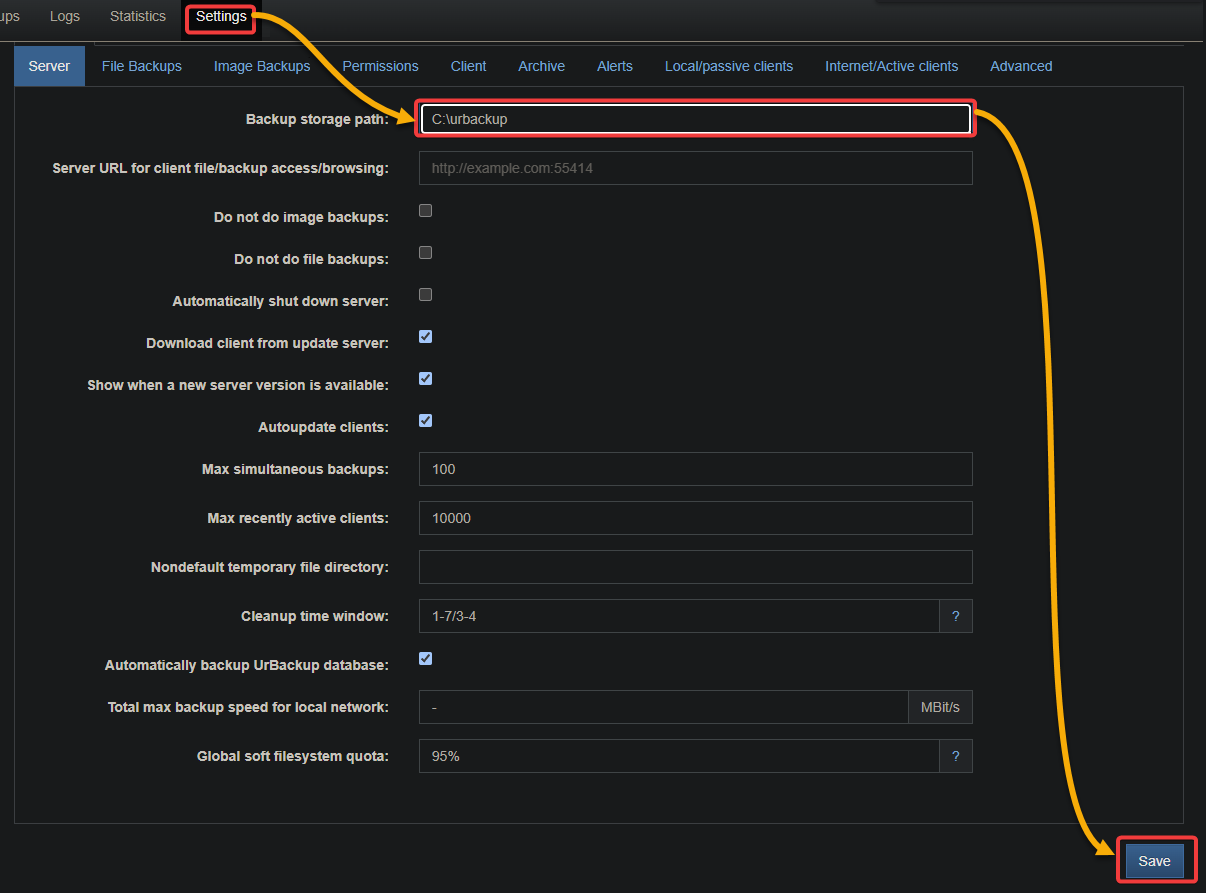
3. Next, click the Settings tab in the web UI to access UrBackup Server’s settings.
In the Backup storage path field, provide the path of your backup directory, which in this case is C:\urbackup, and click Save (bottom-right) to save the settings.
4. Navigate to the Status tab to verify that the error message is gone.
But this time, you’ll see another error message below since the Windows file system uses short names (8.3 format) for compatibility with older versions of Windows.
UrBackup can create these short names, but it’s not recommended as it can lead to problems. To avoid potential problems, you’ll disable 8.3 name generation on your Windows Server in the following step.
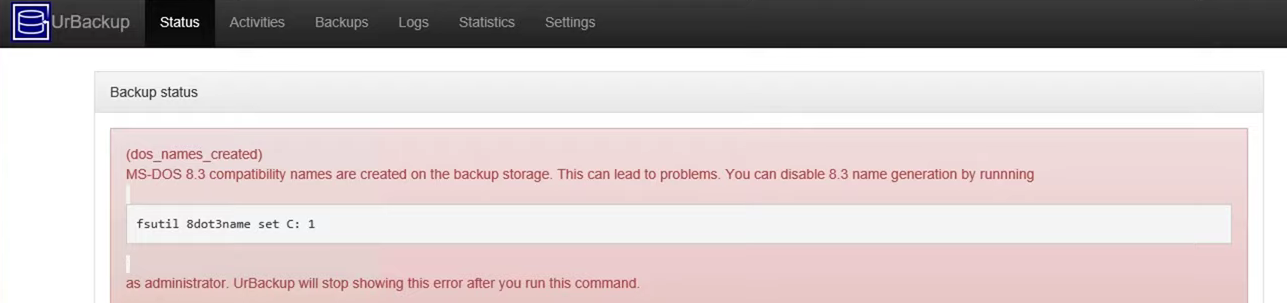
5. Run the following fsutil command to disable the 8.3 name generation (8dot3name).
fsutil 8dot3name set C: 1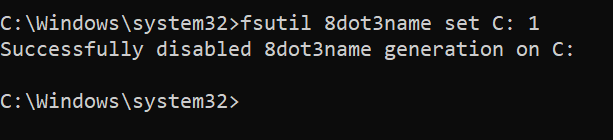
6. Finally, refresh the page to verify that all the errors are gone and that UrBackup Server is now running.
Configuring the UrBackup Client
After setting up UrBackup Server, you’ll need a client to back up. But first, you must install and configure UrBackup Client on your client machine.
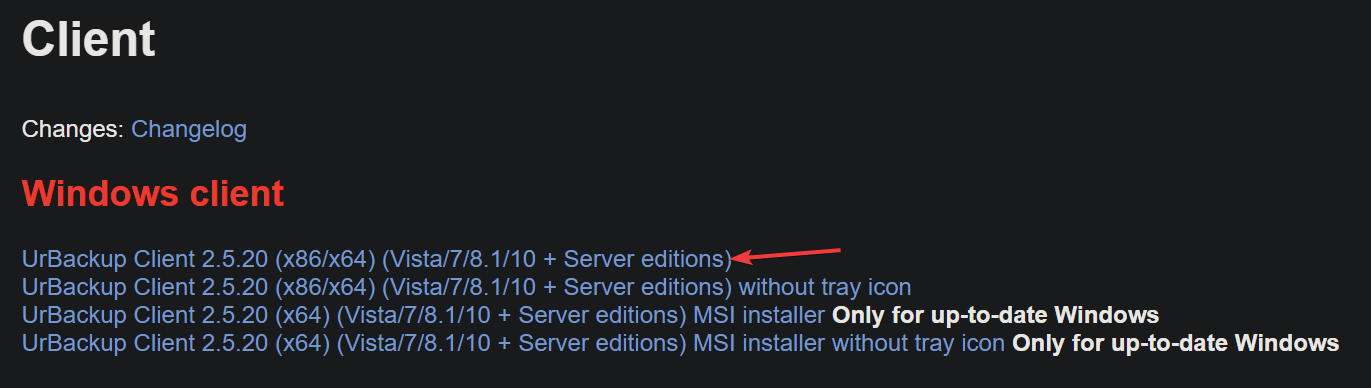
1. Navigate to the UrBackup Client’s official download page, and select the first version (UrBackup Client 2.5.20 (x86/x64) (Vista/7/8.1/10 + Server editions) to download the UrBackup Client’s installer.
2. Once downloaded, launch the installer and install the client as you did with the UrBackup Server. The first time you install the UrBackup Client, a pop-up window appears, where you can configure your UrBackup Client.
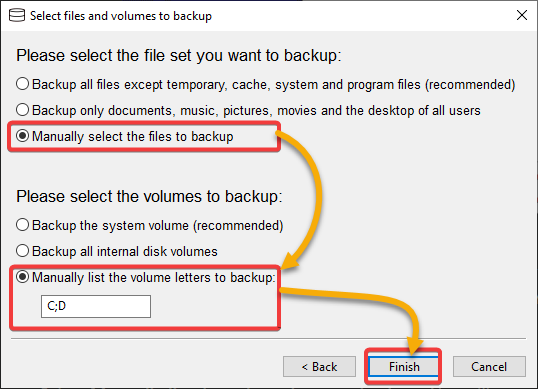
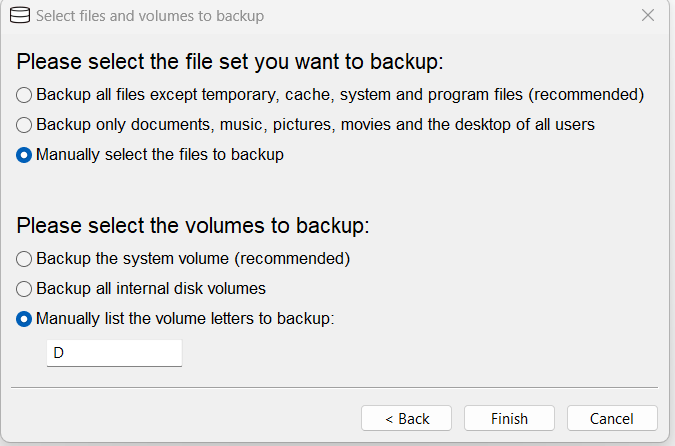
3. Select the following options to configure the UrBackup Client, and click Finish.
These options give you total control over what gets backed up. But feel free to change these options later.
- Manually select the files to back up – This option lets you always select files to back up.
- Manually list the volume letter to back up – This option lets you select the drive to back up.
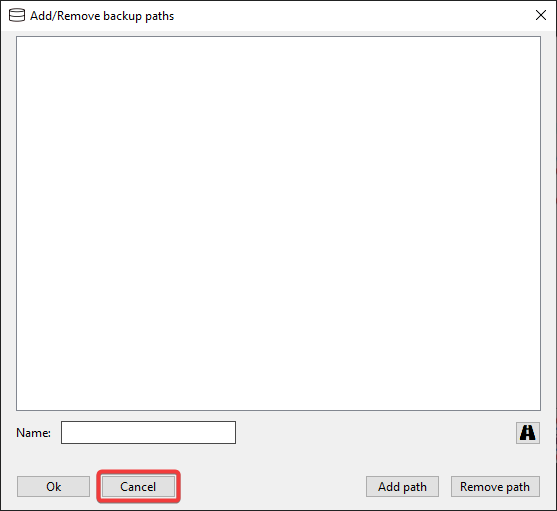
4. Finally, click Cancel on the Add/Remove backup paths windows since these are unnecessary for this tutorial.
At this point, the UrBackup Client is installed and configured.
Backing Up Files from Client to Server
Now that you have installed and configured the UrBackup Server and Client, it’s time to test the backup system. Depending on your needs, you may want to back up a full partition or the whole client’s system.
But for the sake of demonstration, you’ll only back up a small file in your client’s Documents folder.
To backup files from the client to your server using UrBackup:
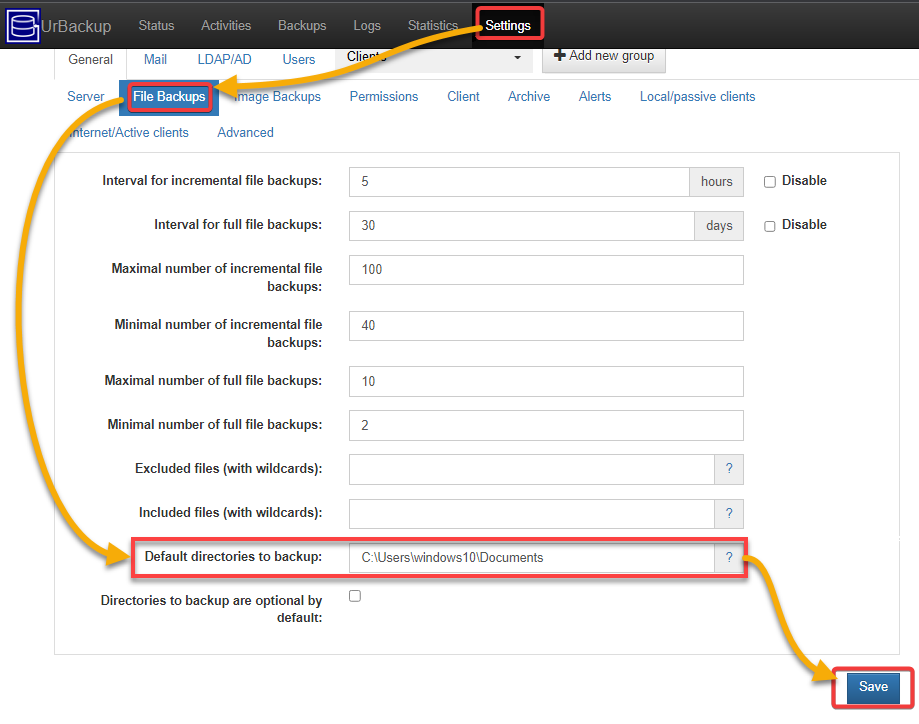
1. Configure the file backup settings with the following:
- On the backup server machine, click on the Settings menu tab in the UrBackup web UI to access the UrBackup server settings.
- Navigate to the File Backups tab, and provide the file’s directory path to backup. For example, C:\Users\windows10\Documents.
- Keep other default and click Save to save the changes.
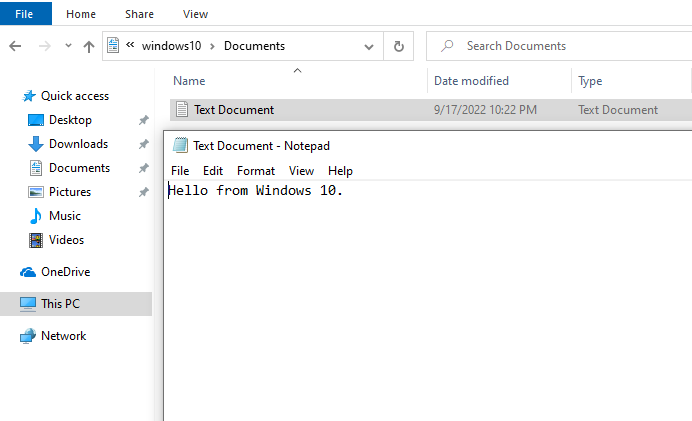
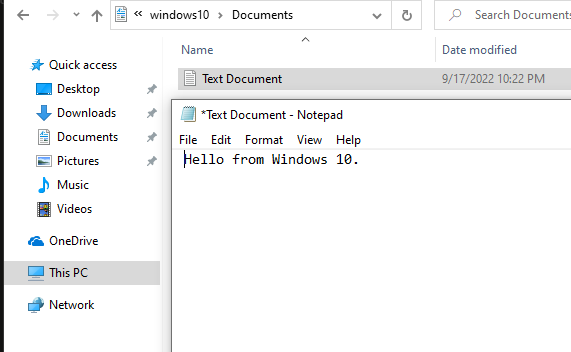
2. Next, create a text file (Text Document) in the Documents folder of your client machine with some content (Hello from Windows 10).
3. Navigate to the Status tab on the UrBackup Server web UI on your server. You will see that the client is now connected and has shown up in the list.
Since the client and the server are on the same network, the backup happens quickly and automatically.
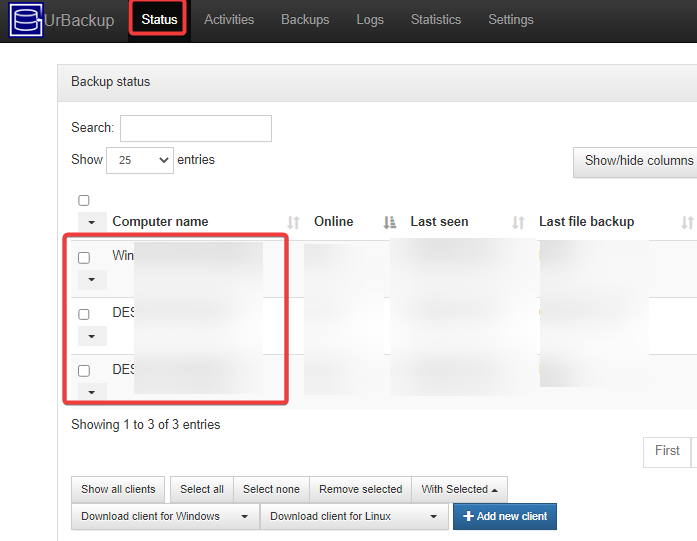
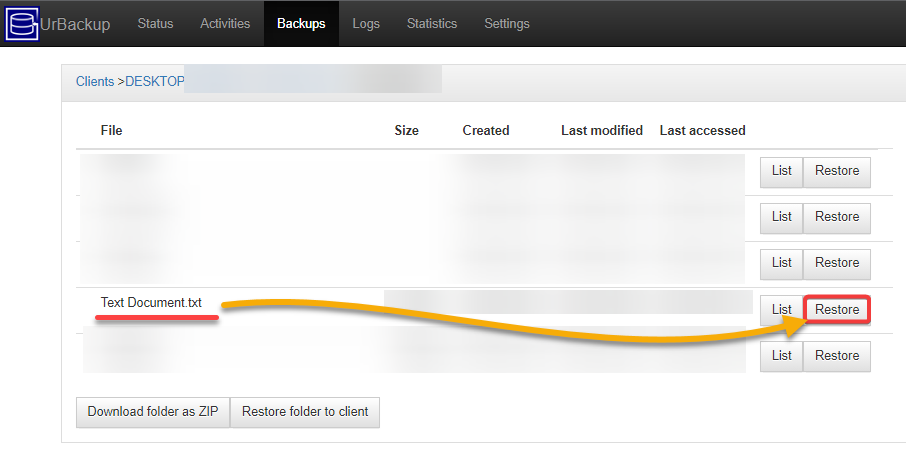
4. Now, navigate to the Backups tab, and click your client’s name to view the backed-up files. You’ll see a list of all the backups created for the selected client (step five).
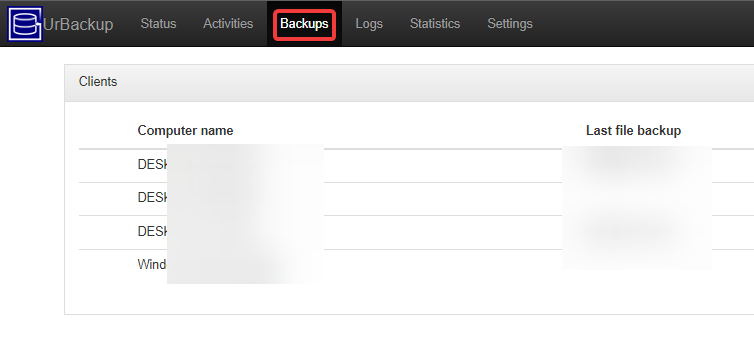
5. Click the most recent backup to view more information about that backup.
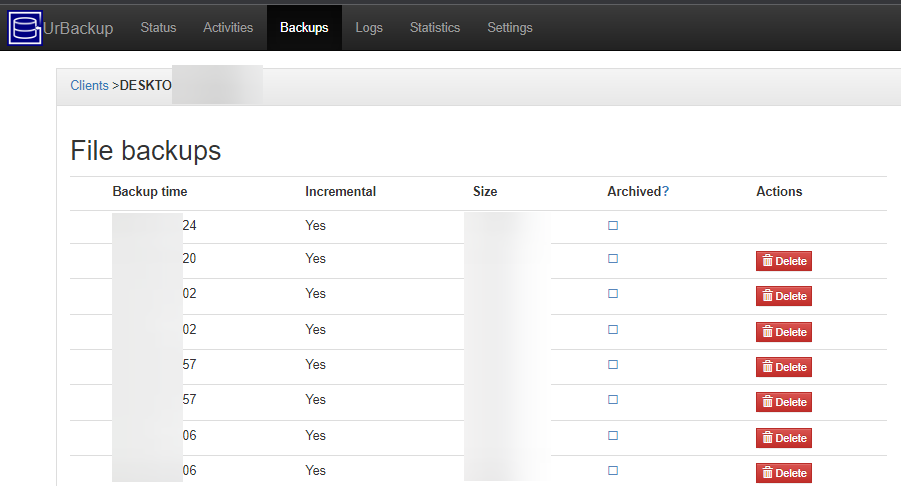
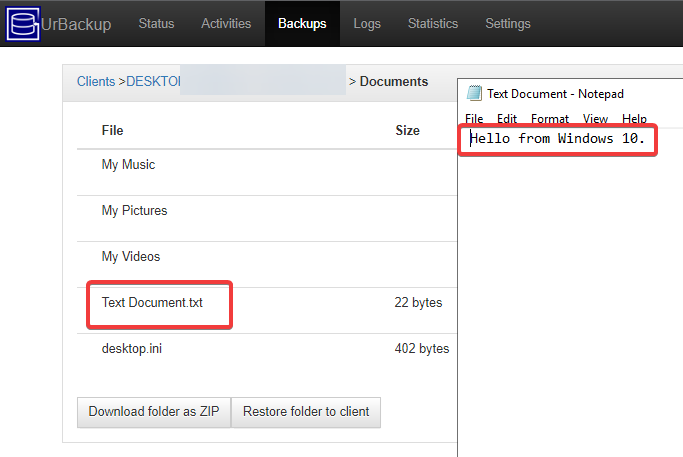
6. Next, click on the Text Document file to download and open the file on your server.
Verify the content is the same as what you provided to your client (Hello from Windows 10), as shown below.
Restoring Deleted Files
You’ve previously backed up a text file to your server, and that’s cool. But how exactly UrBackup secures your data?
Losing crucial files can be catastrophic, especially if the missing ones are project files. Worry not! Accidentally deleting files in your client machine is nothing to get frustrated about. So long as your file is backed up on your server, you can restore them to your client machine anytime.
To see how the file restoration works with UrBackup:
1. Switch to your client machine and delete the Text Document file from the Documents folder.
2. Now, click Restore next to the backup you want to restore (Text Document) in UrBackup web UI on your server.
3. Click OK when prompted to continue the file restoration.
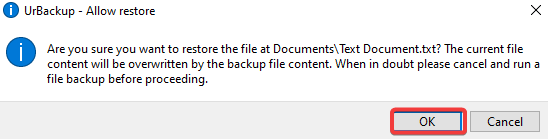
Once restored, you’ll see the following message.

4. Finally, navigate to the deleted file’s original location and verify that the file has been restored.
Conclusion
Data loss is a serious issue causing many problems for individuals and businesses. The good news is that in this tutorial, you’ve learned how to UrBackup as one solution for backing up and securing data. At this point, you already have a reliable backup system in place, which also lets you quickly restore deleted files.
As powerful as the UrBackup Server/Client system is, it’s worth noting that no backup system is 100% foolproof. Data loss can still occur due to hardware failure, software bugs, human error, or malicious attacks. So having multiple backup systems handy is always a good idea.
Now that your data is safe, why not secure your network connection next? Perhaps connect your clients using an HTTPS Connect web proxy? This HTTP Proxy uses TLS to encrypt all communication between clients and servers.
Note
We are using URBACKUP a Third Party Tool which is used to backup file system and Database to a remote server, This can be used for both Linux Based and Windows server.
Requirements
1. We need a Server to store the backups which are taken. this server can be Windows or Linux based.
Usage
1. We need to set up the URBACKUP Server first to do the same follow the below steps.
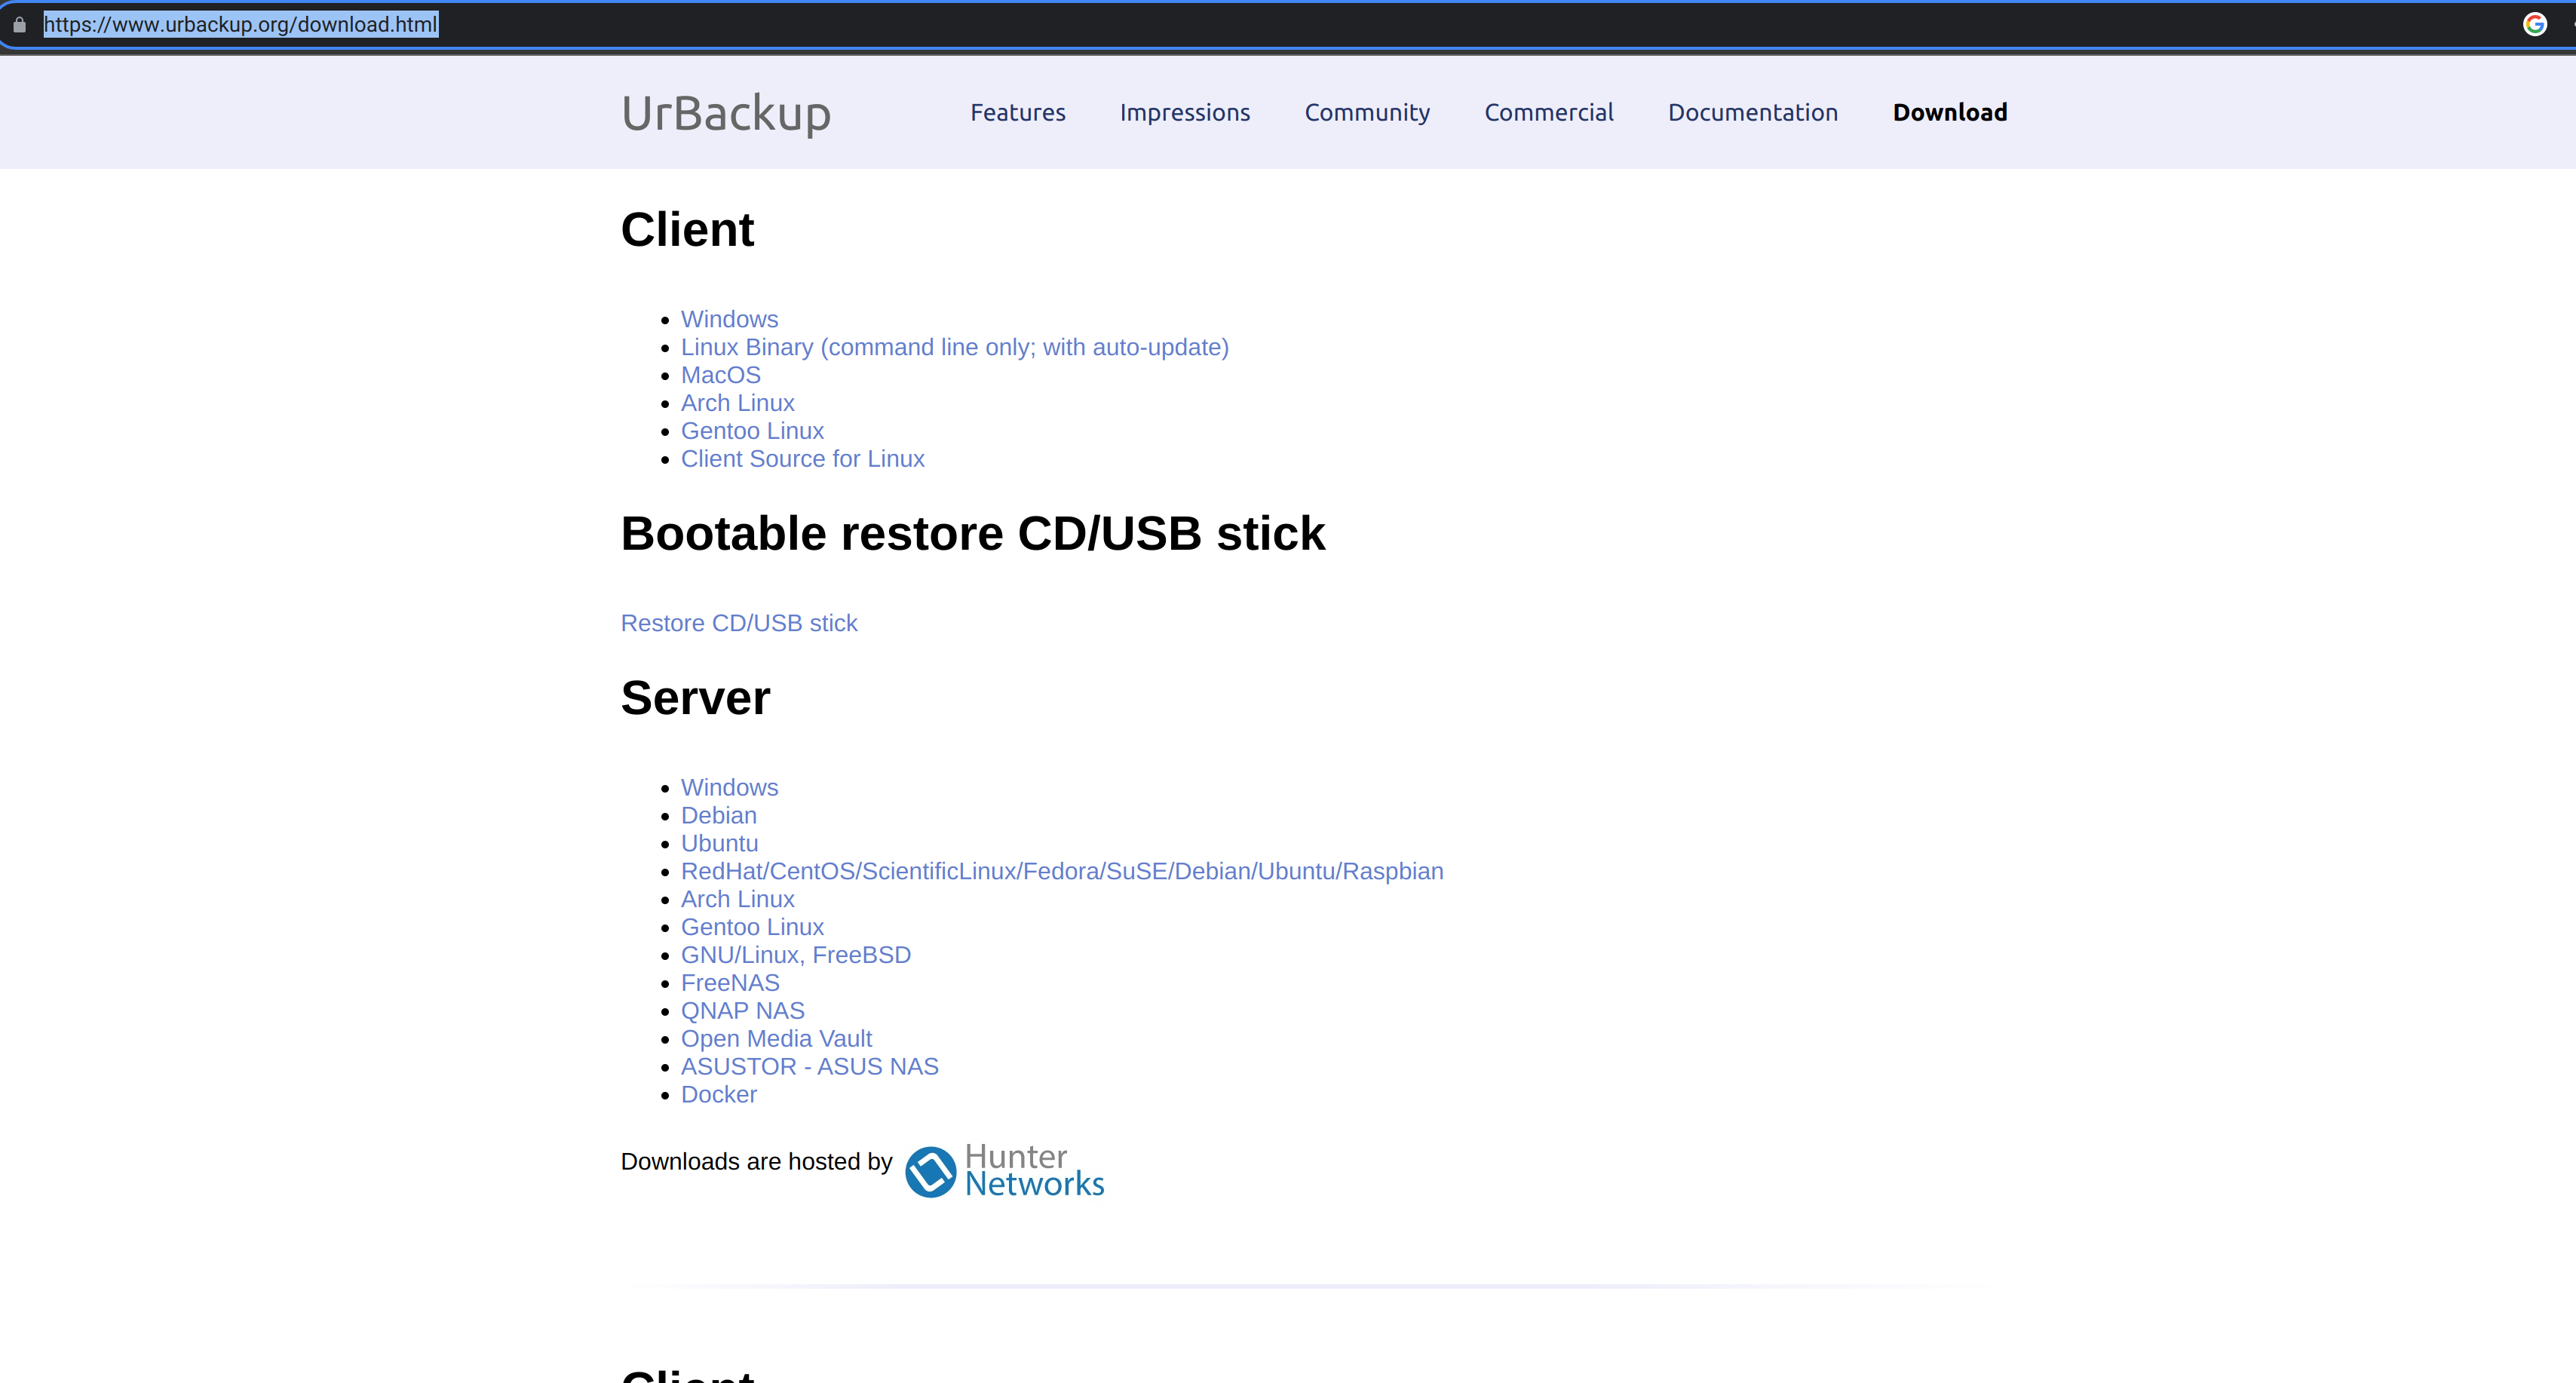
1.a. In the backup server you need to install URBackup server to install follow this : (https://www.urbackup.org/download.html)
1.b Once the installation is started it might ask for the directory where to store the backups please select a directory and the urbackup user should have permissions to access it once it is done, you can browse the domain or IP of the URBackup server with the port 55414.
1.c. Once that is done we need to configure the server.
- Once the above page is opened we need to create a user and set a password for the same, to do so we need to click on the setting icon on the top and then click on the user and create a user as shown in the below snap.
- Once the above is done we can continue setting up the server to do so click on general as shown in the below snap.
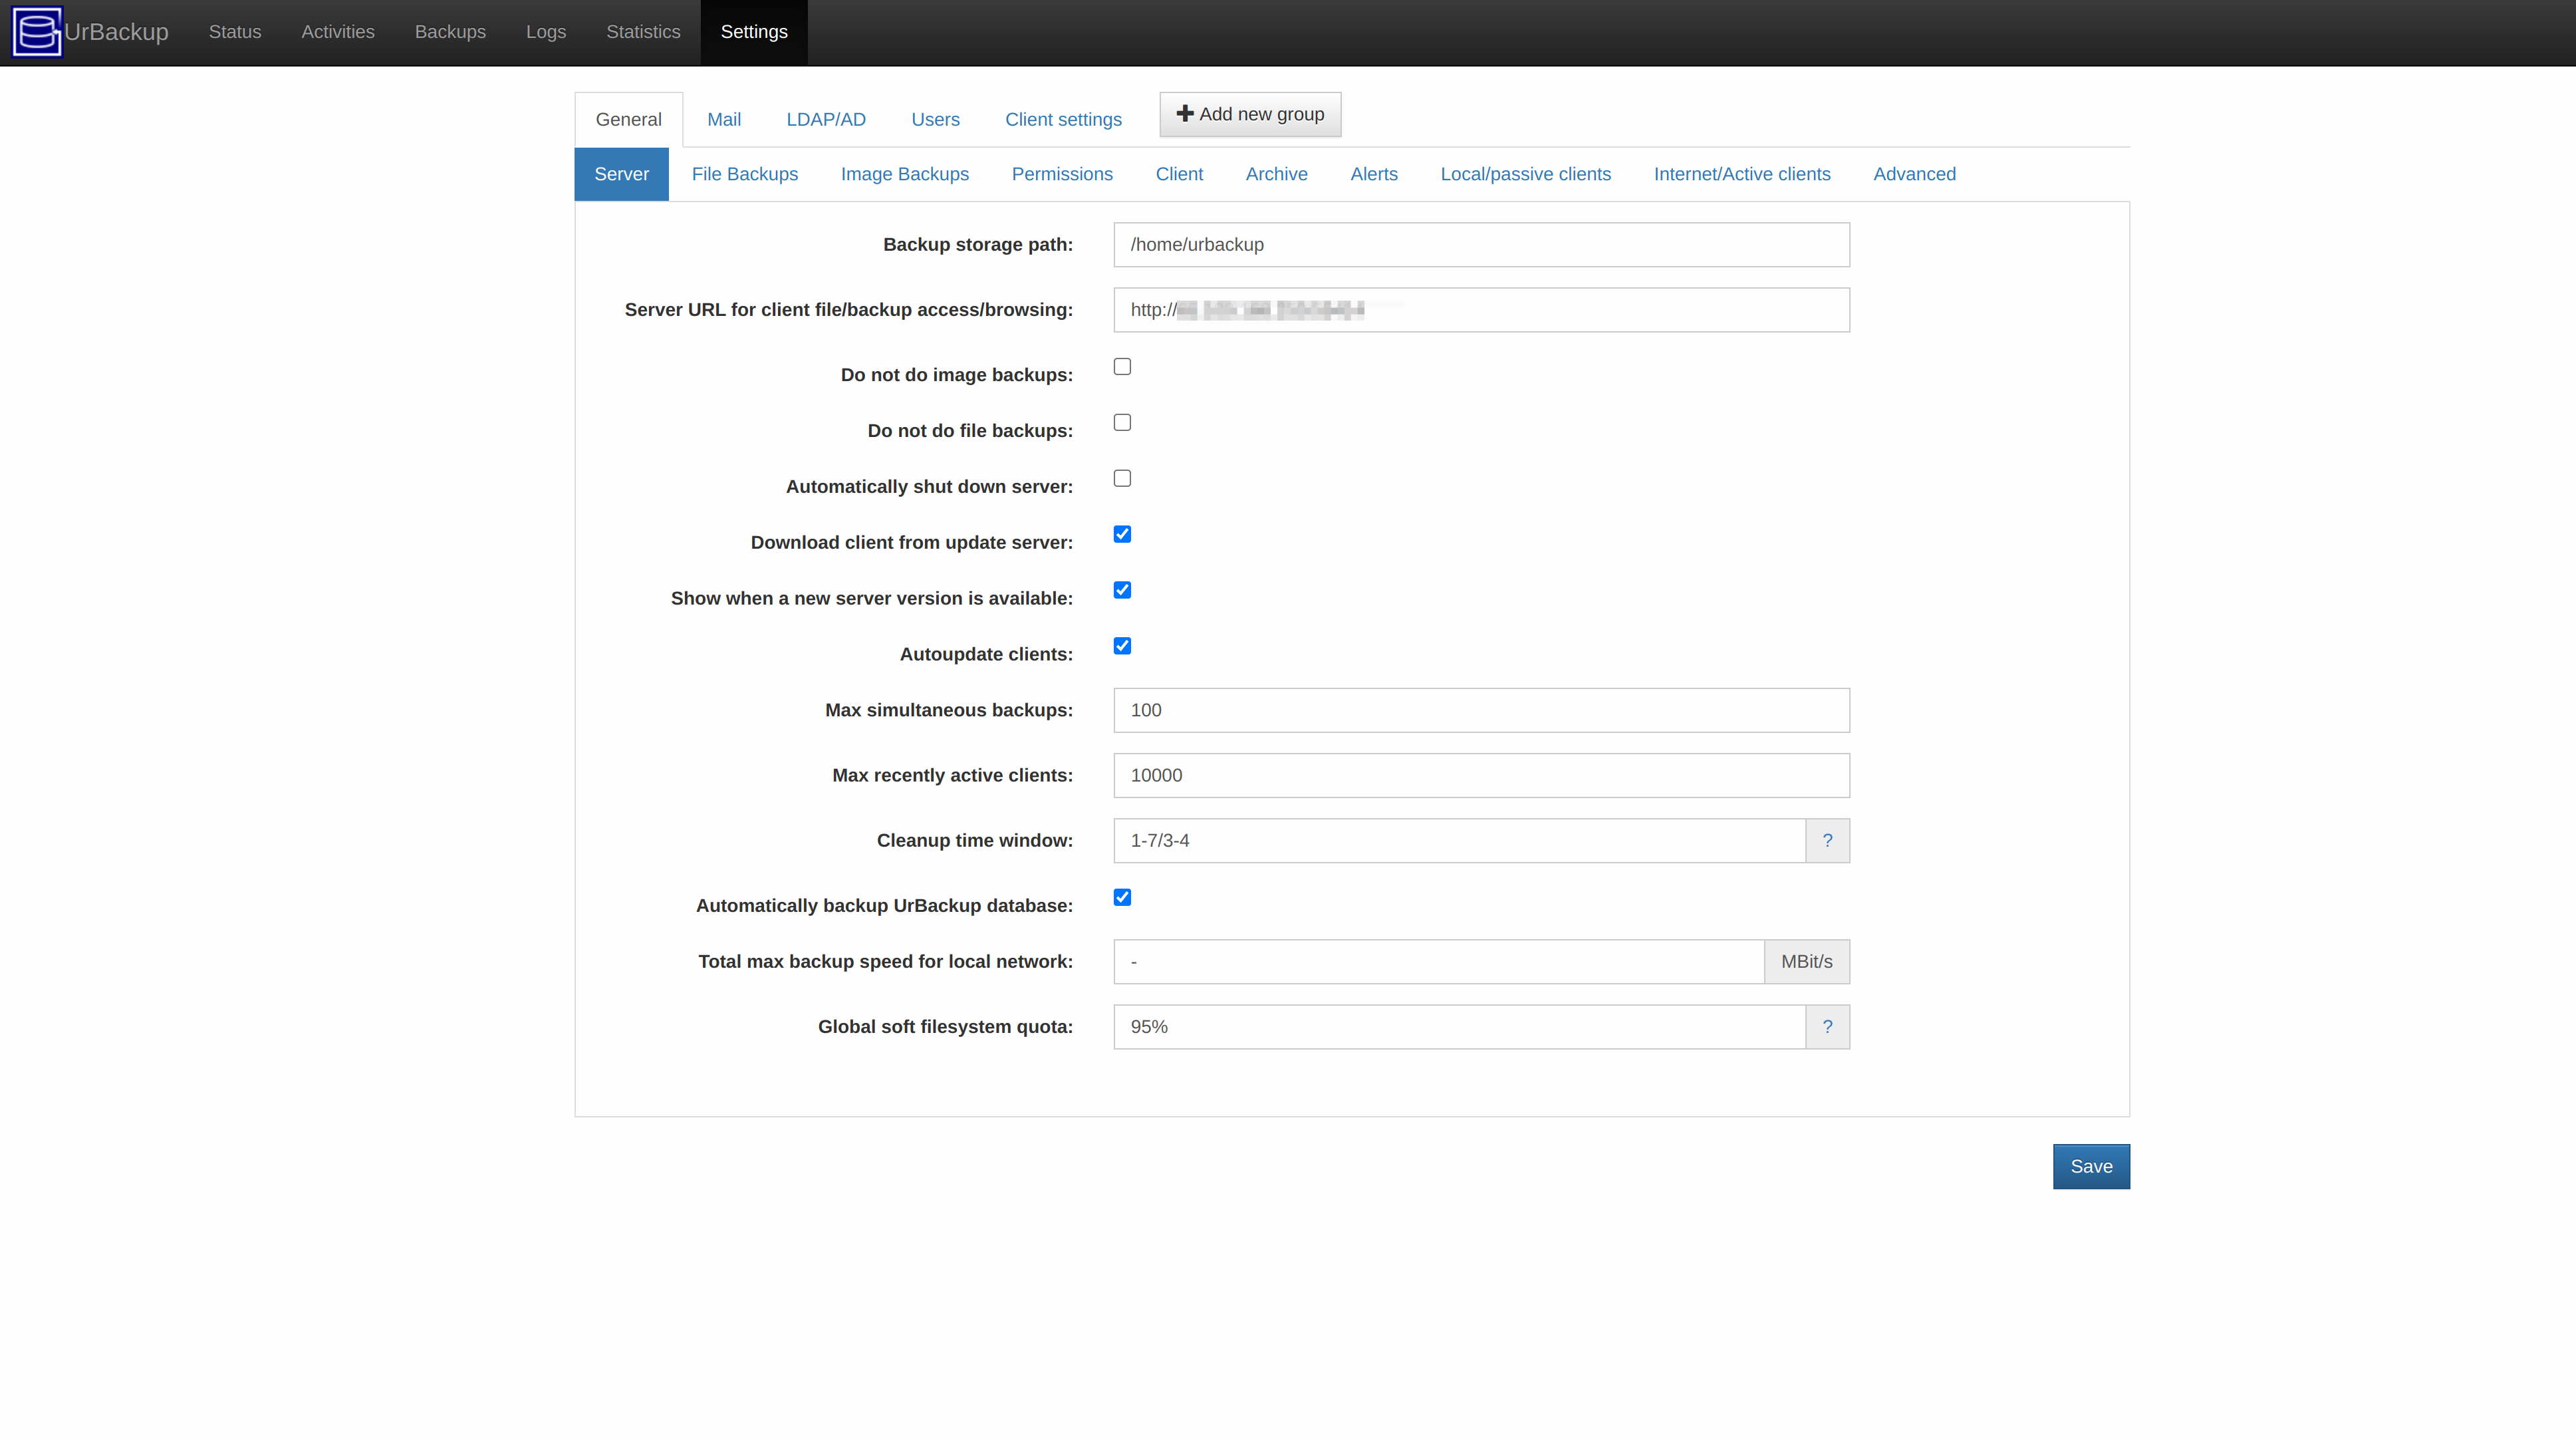
- Click on server under general as shown in the above snap and fill the details below as shown in the above.
Backup Storage Path :
This is the location where we need to store the backups in the server.
Server URL for client file/backup access/browsing :
Here we need to add the server url which you are trying to access urbackup
- Once that is done we need to set the options for the File Backup to do so click the next option after the server as shown in the below snap.
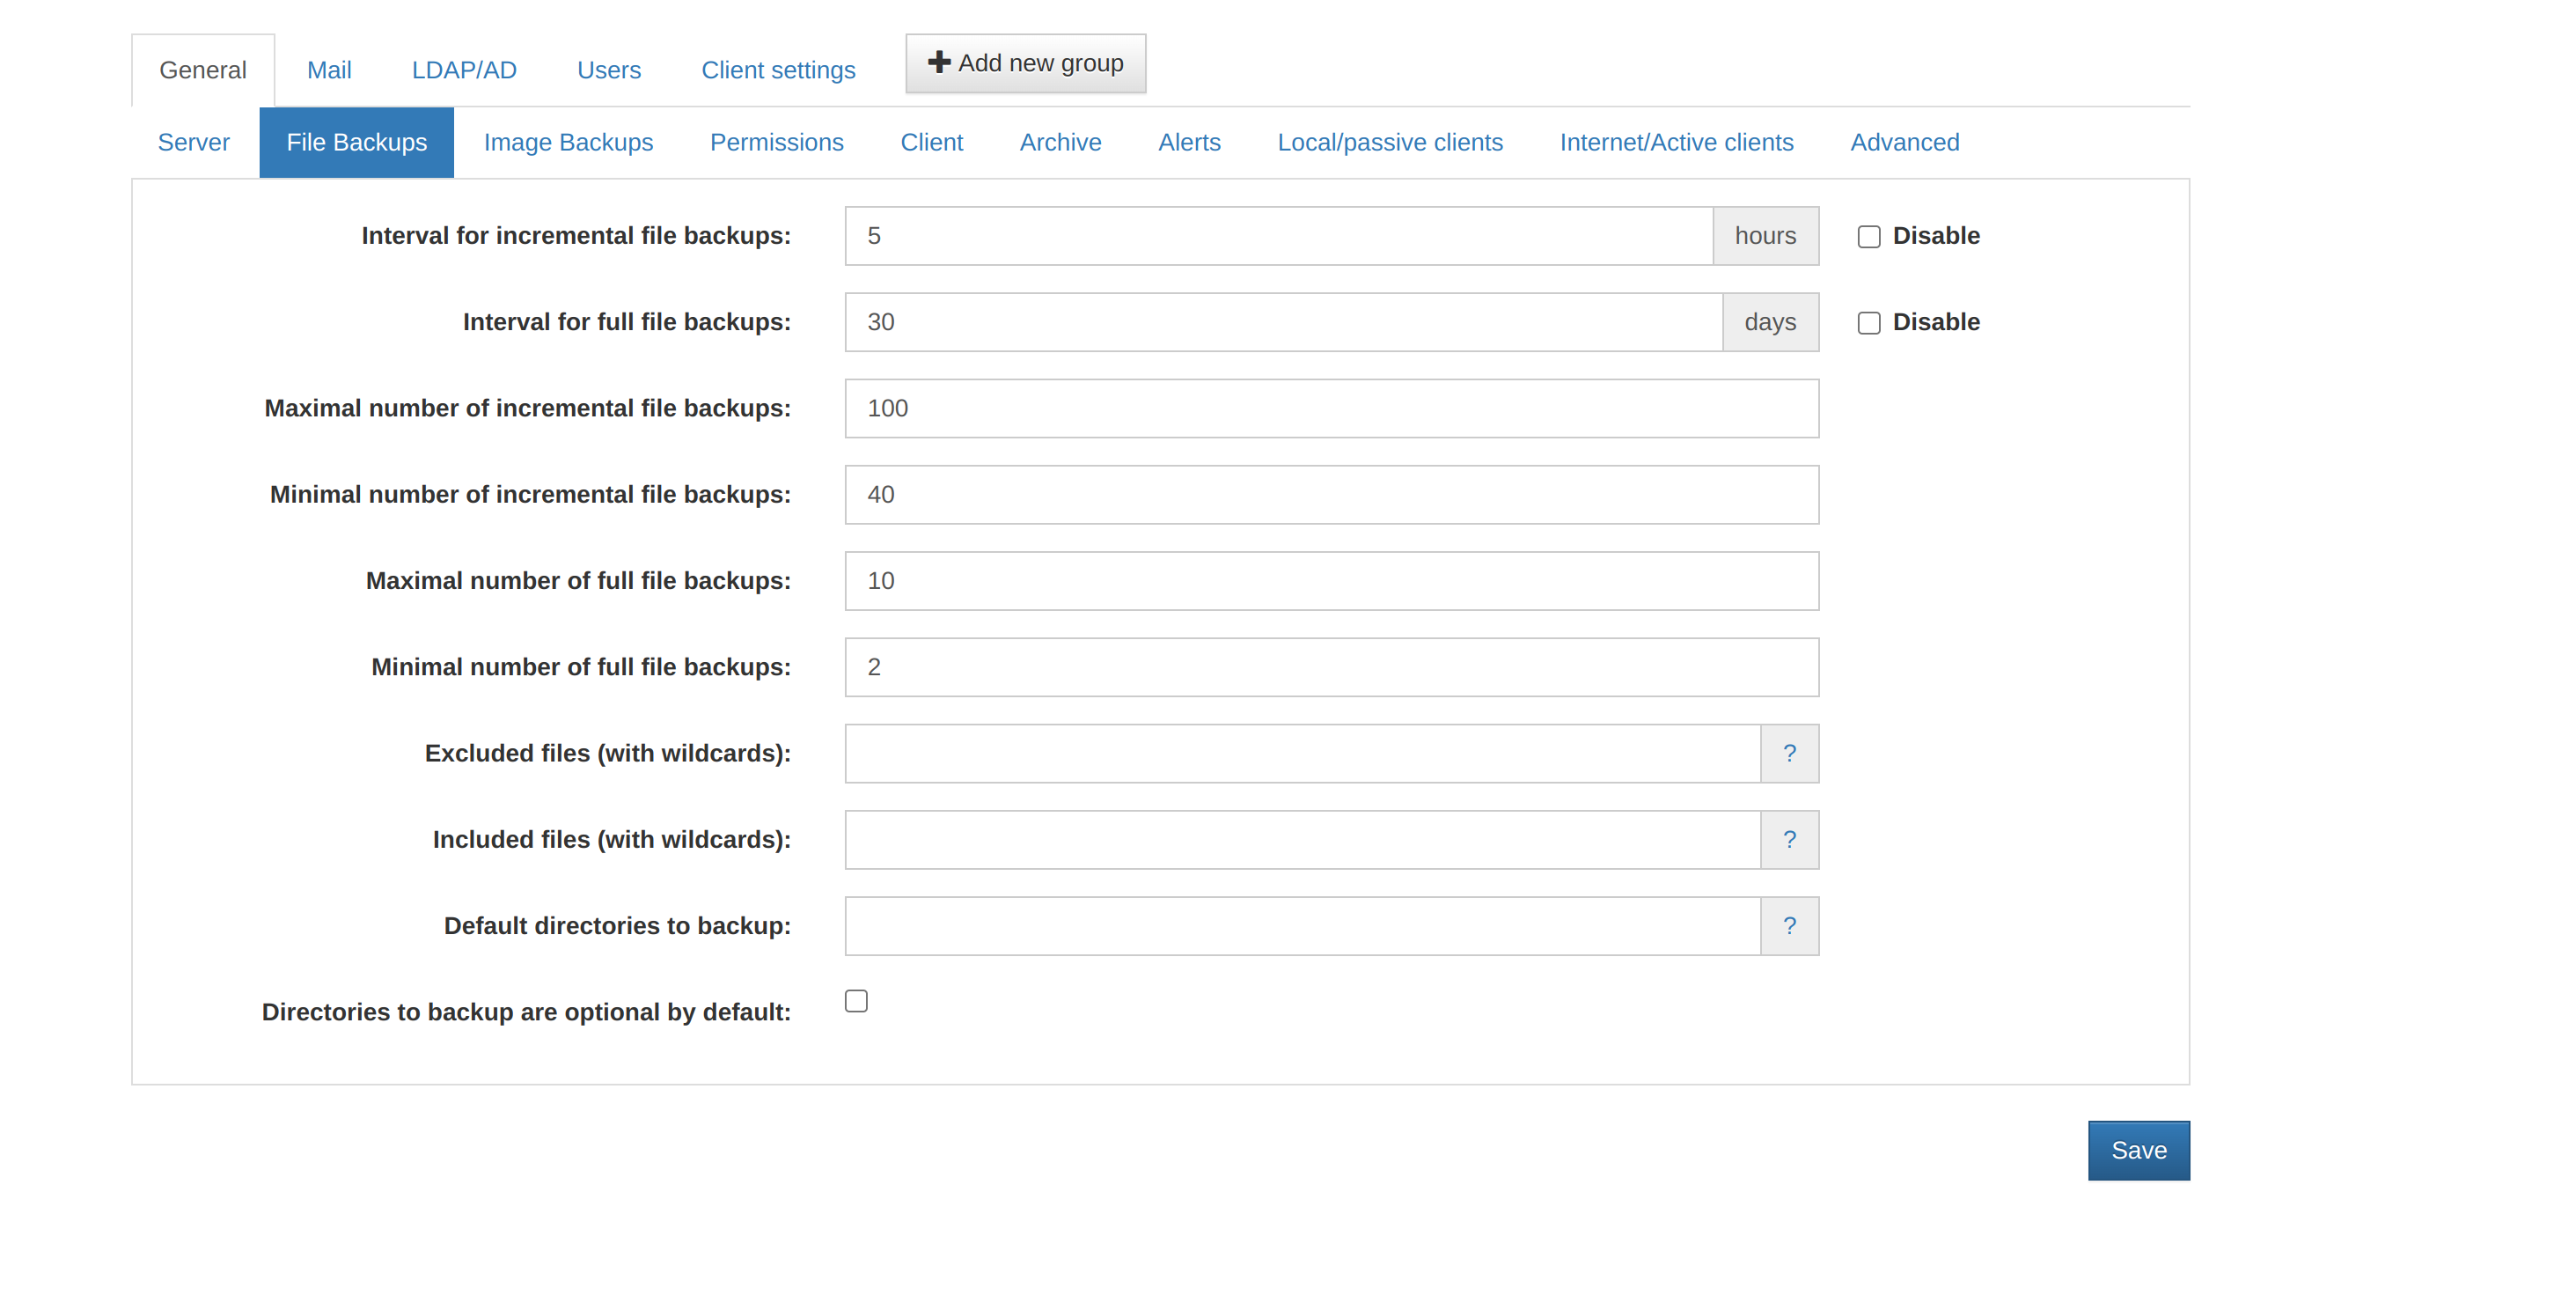
- we need to change the default values like interval for incremental file backups and things as shown in the snap above, we can also change the options as per our requirements.
Incremental Backup :
Instead of making a copy of every file on the server, backing up files incrementally stores just what has changed since the last backup was performed, only the files and db entries that have changed are backed up instead of backing up the whole data.
Incremental Backup Interval :
By default Incremental Backup Interval is set in hours, the default value is 5 hours, if it is to be changed, the minutes need to be changed to hours.
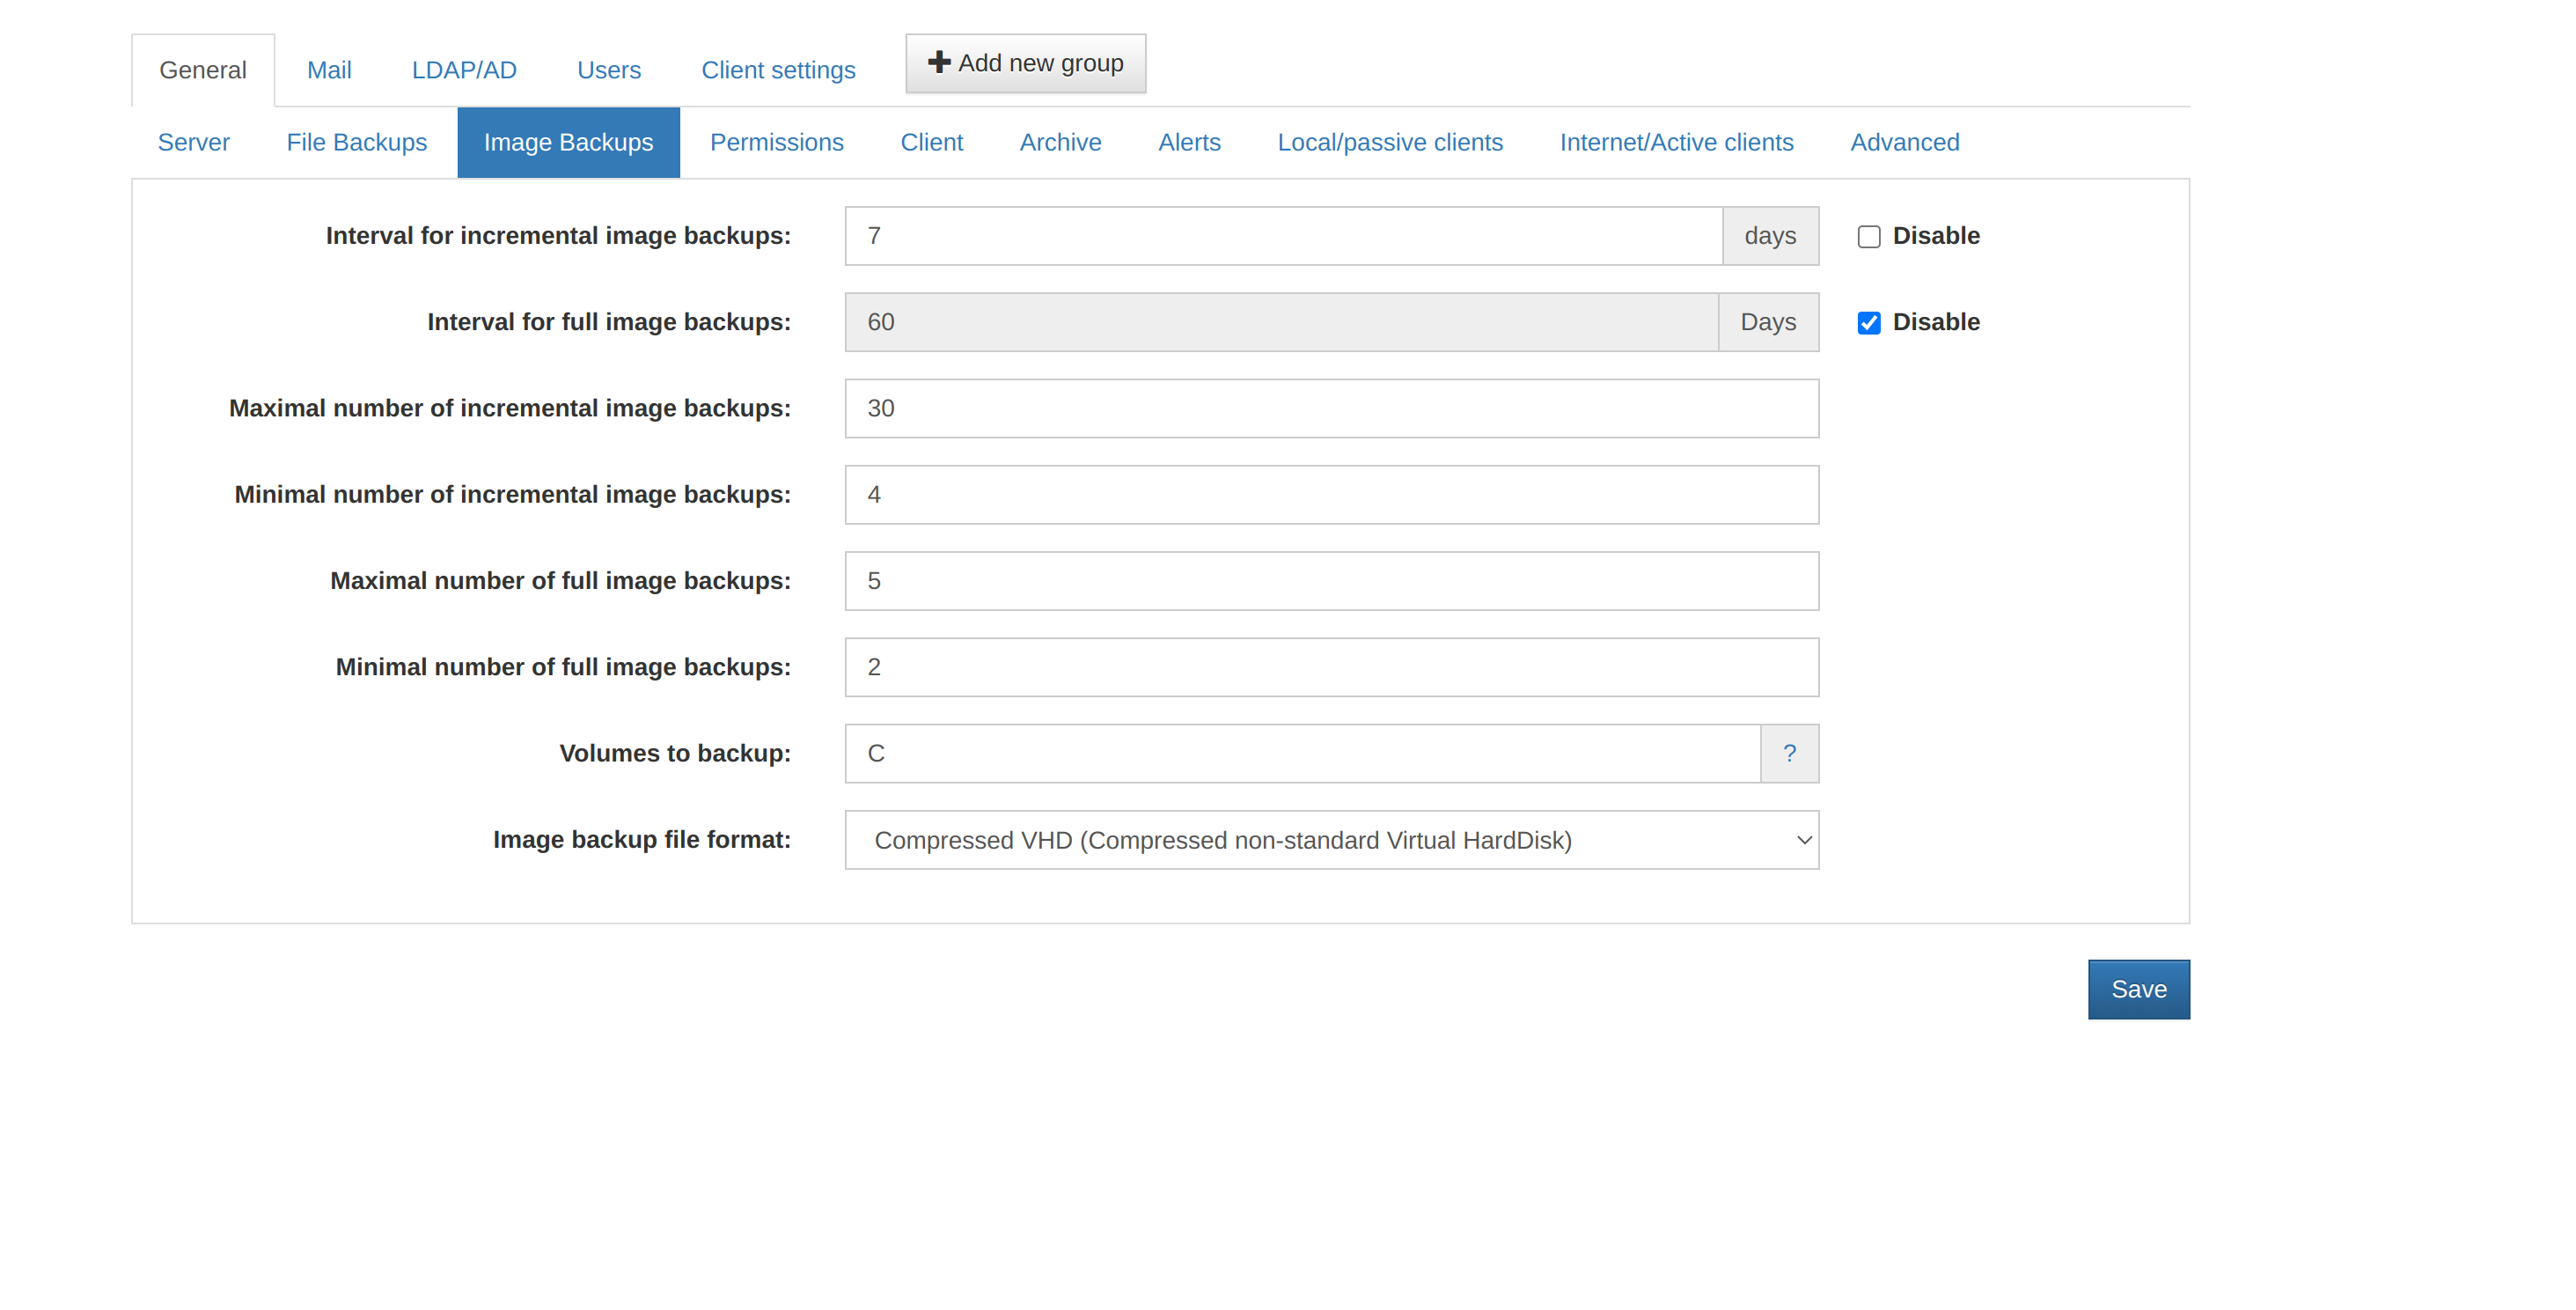
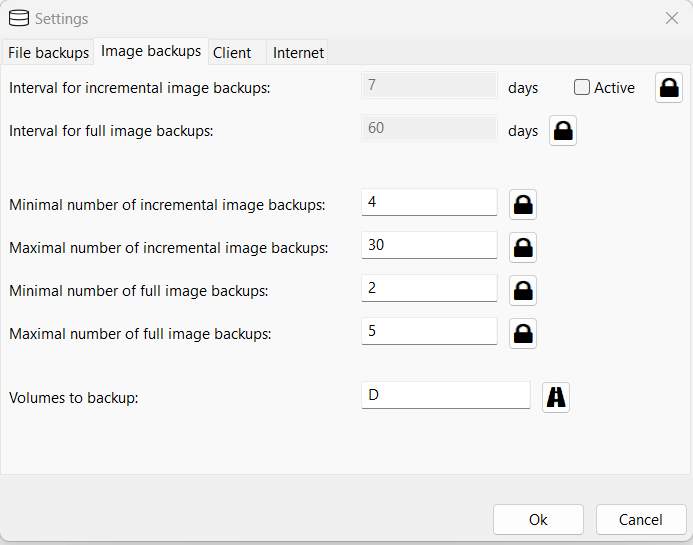
- Then we can also change the options for Image Backups as shown in the below snap. This is optional and depends upon the needs of the client.
-
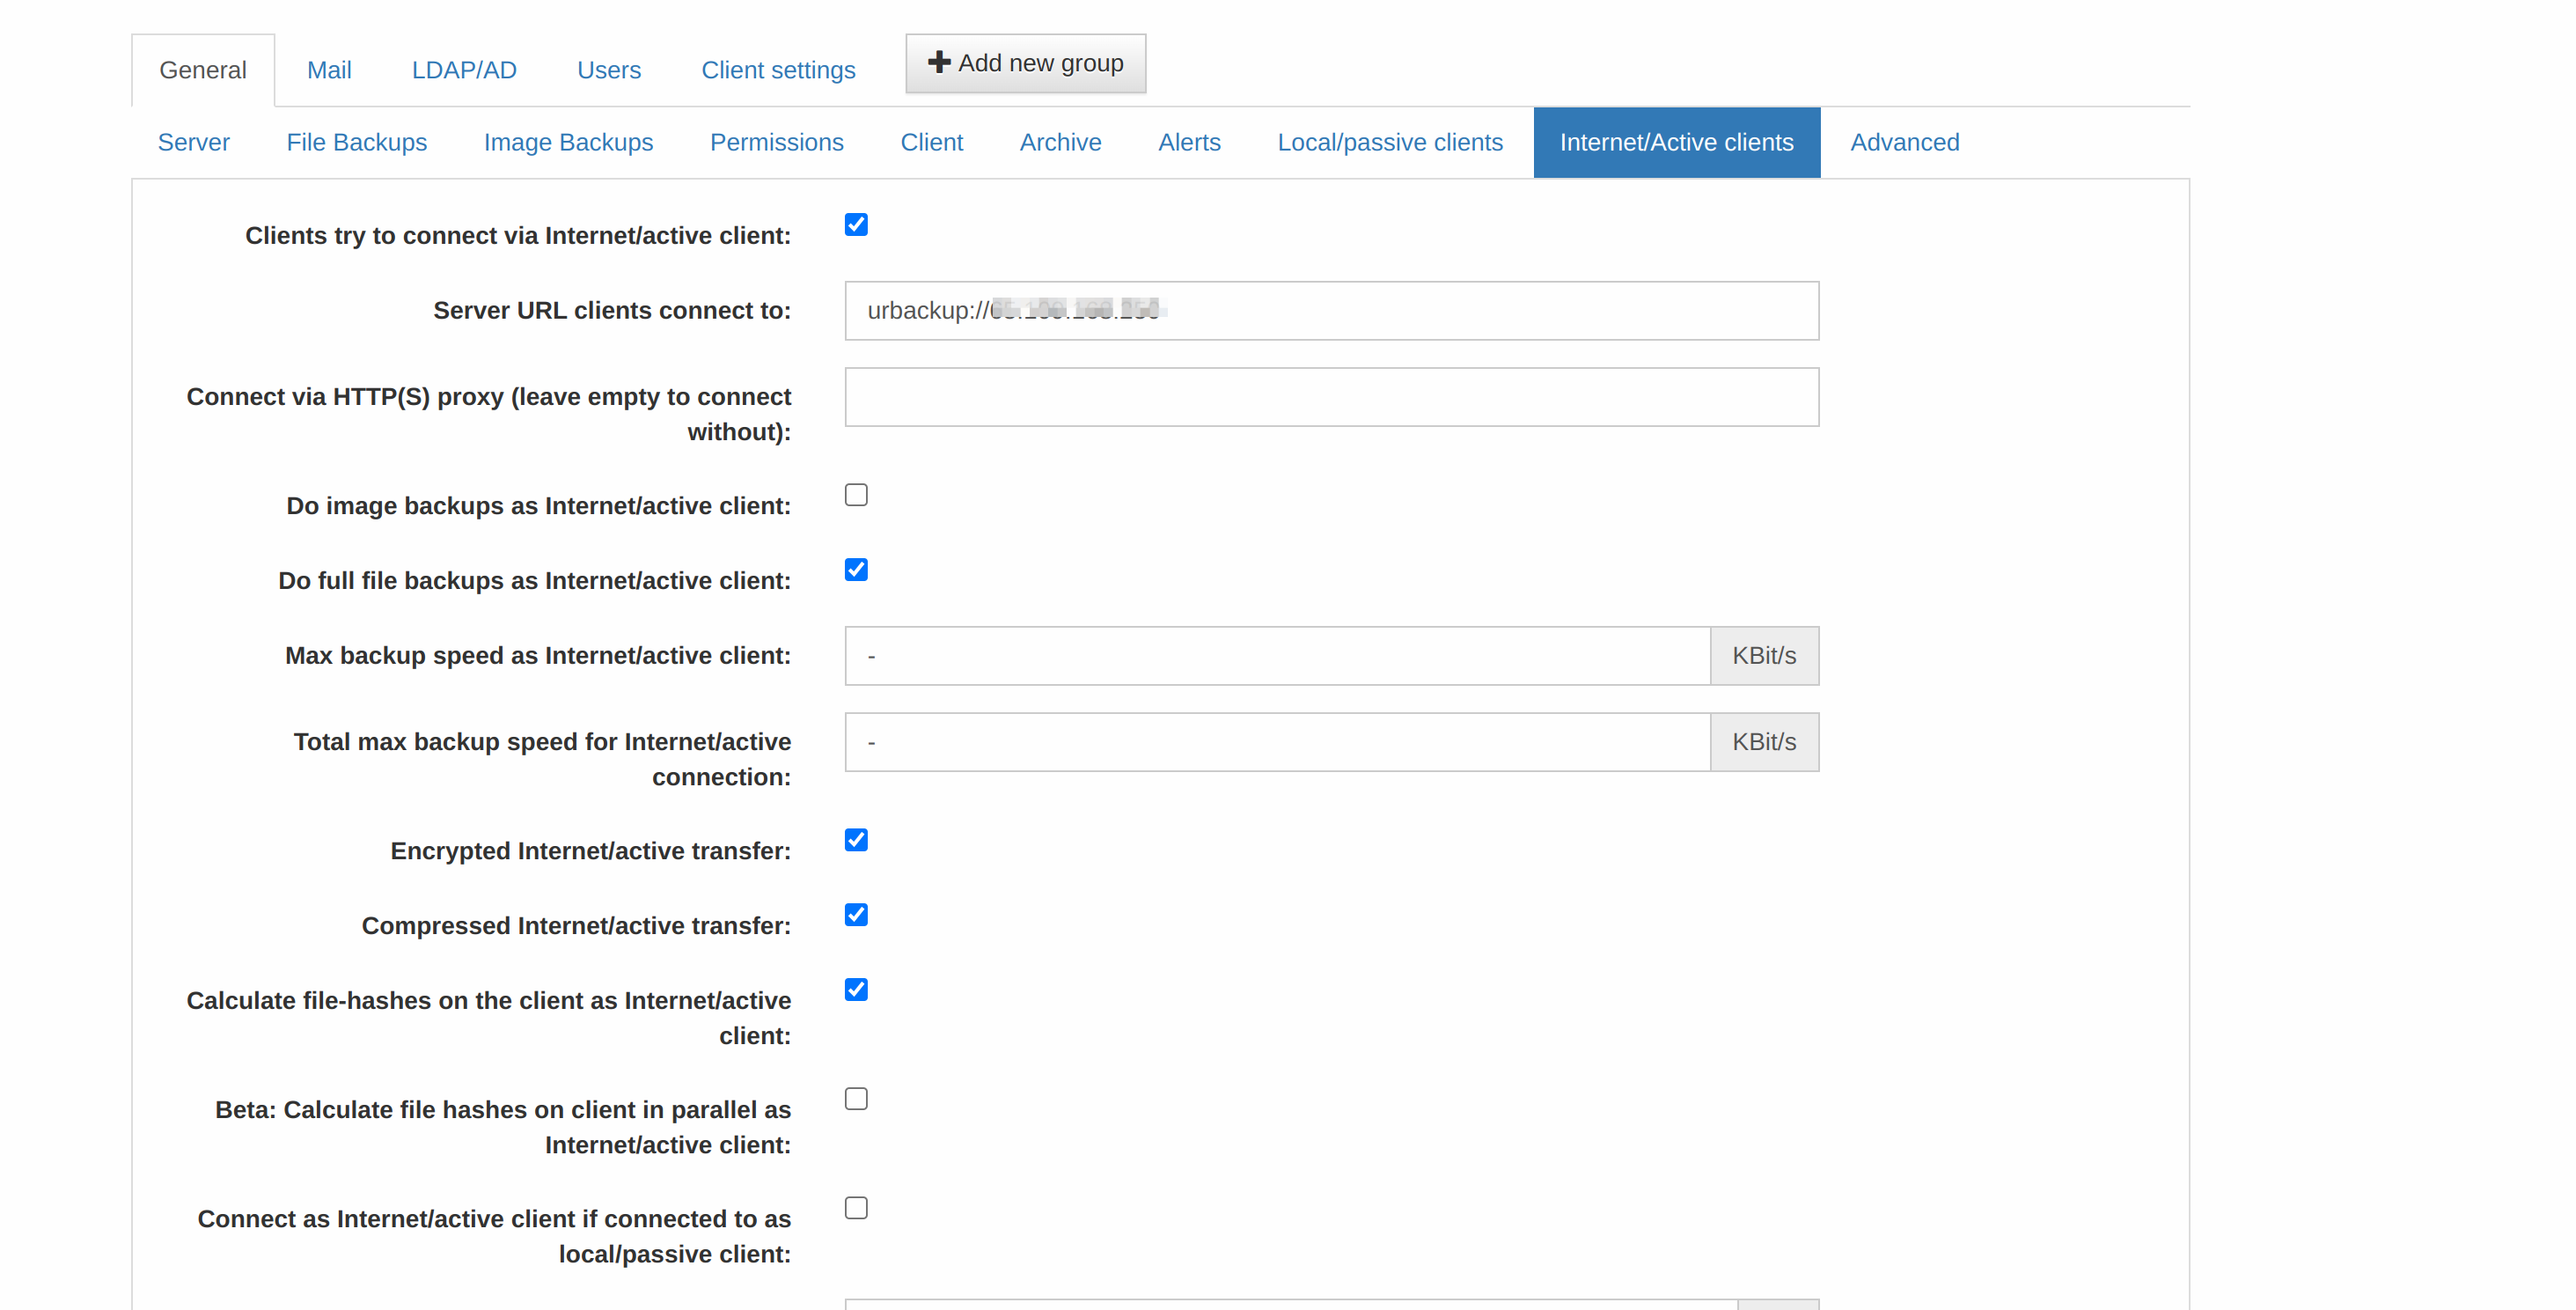
Once the above is done we need to configre the Internet/Active Clients option, this will be the configuration we need to pass in the URbackupp client servers.
-
To do the same follow the below snap.
-
As shown in the above snap we need to enter the URbackup Server Domain or IP to it, this IP or domain we use for connecting URbackup client to the server.
-
Save the configuration changes everytime before moving to the next section.
-
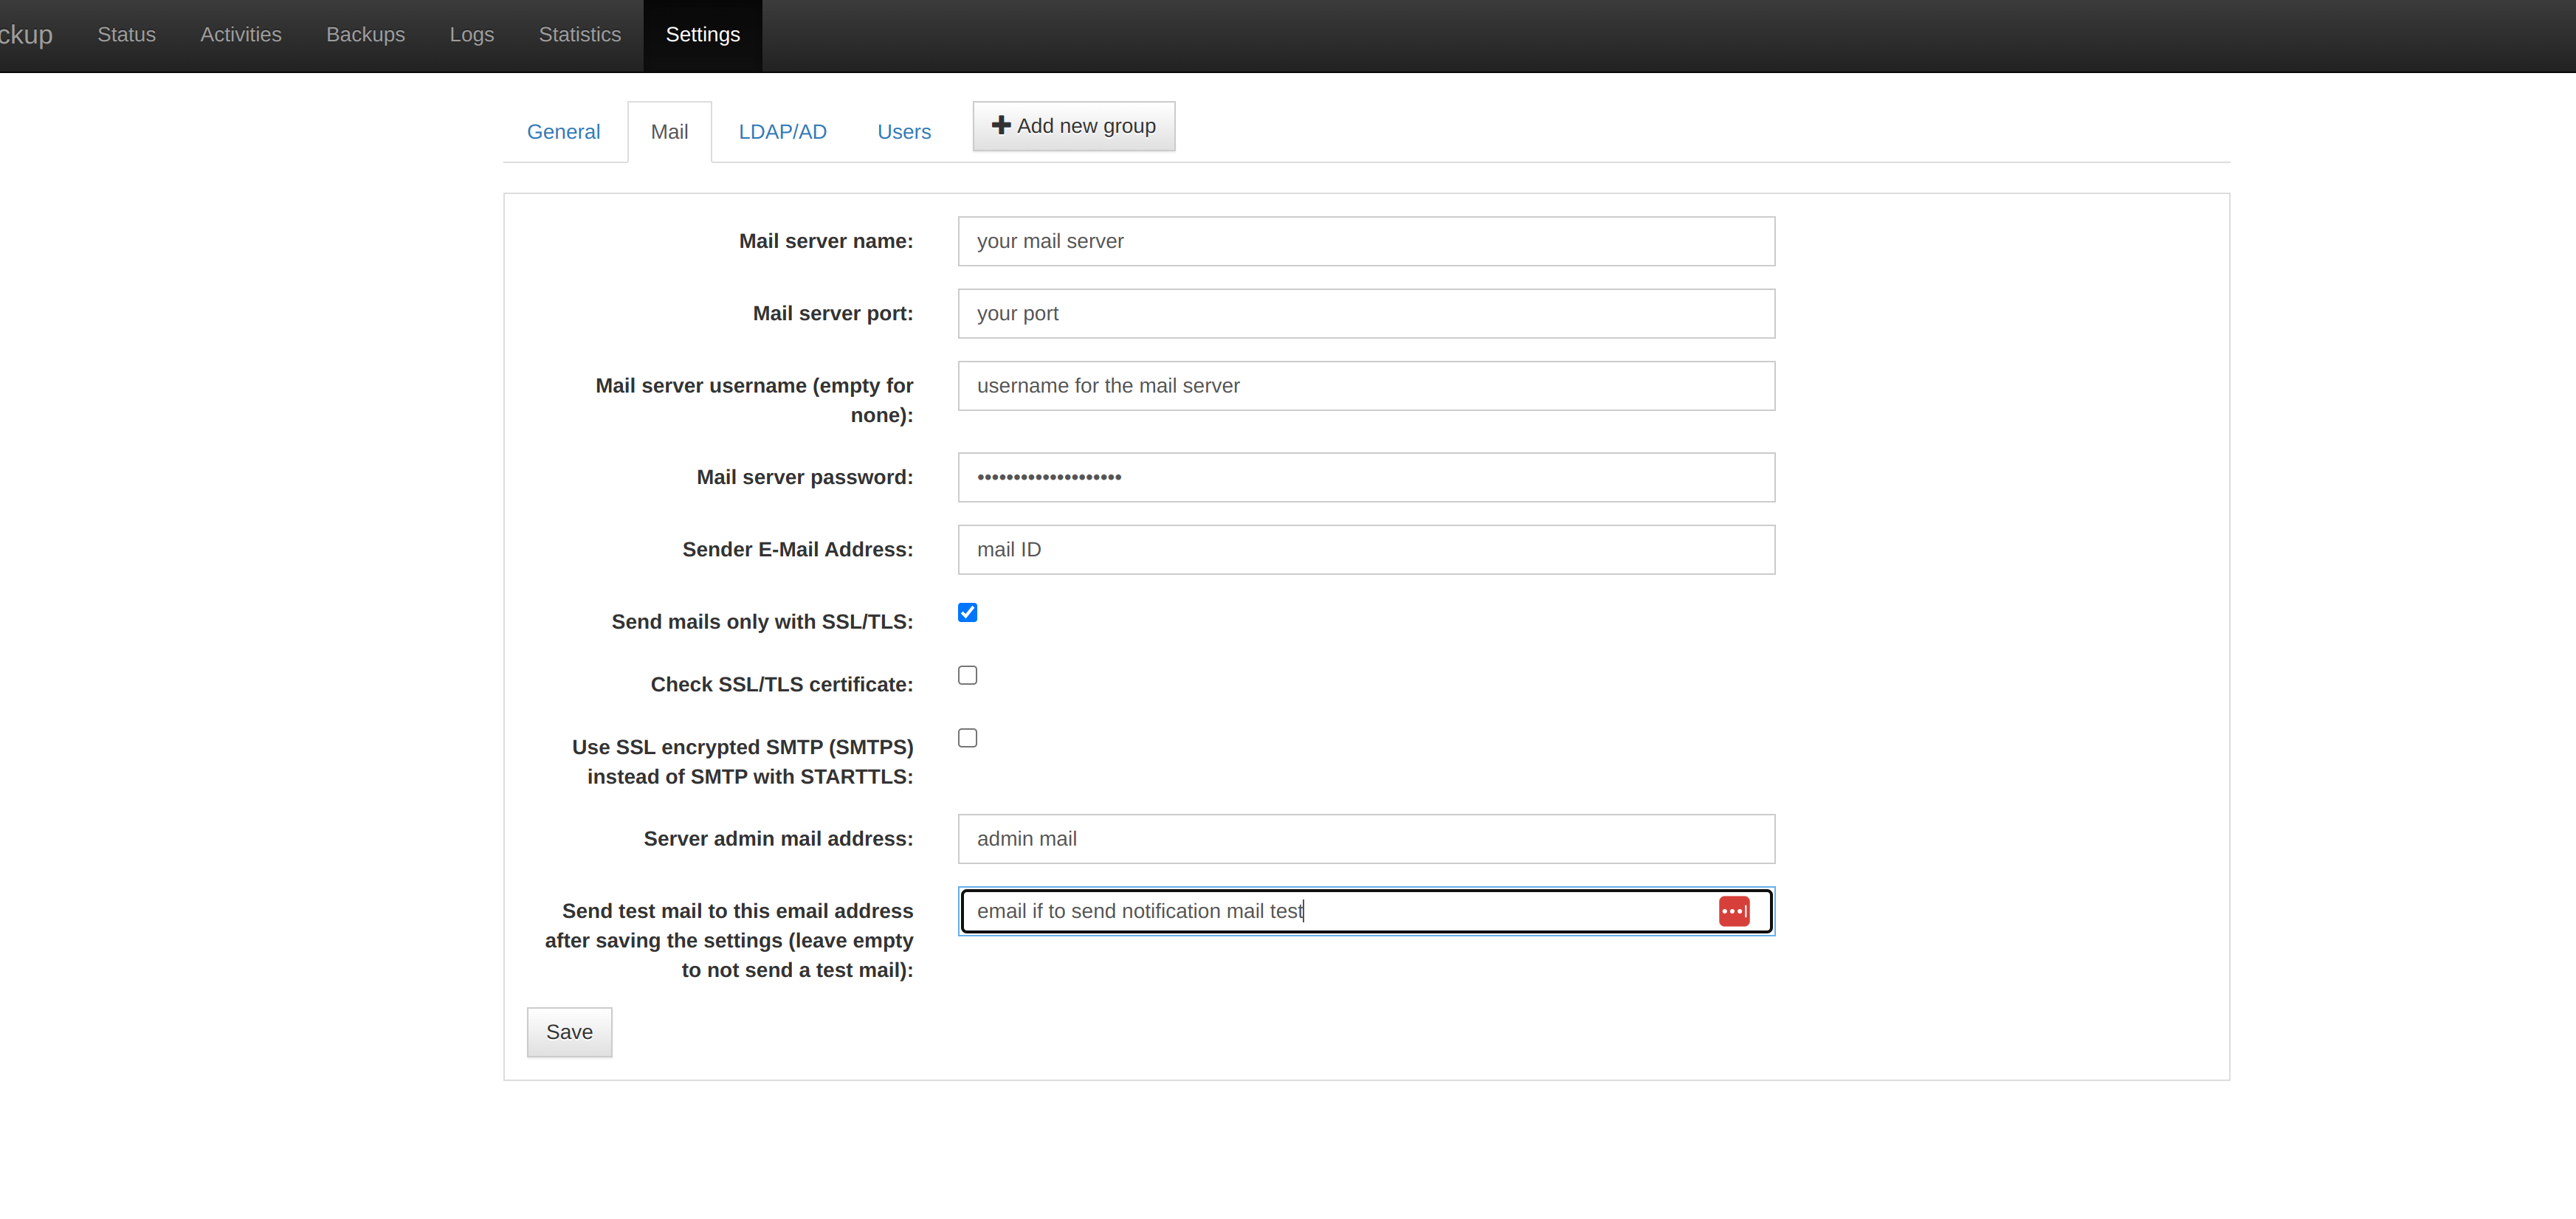
Once the above is done we can enable email notification for the backup to do so click on Mail next to general and configure as show in the below snap.
-
Once this is done the server is ready, now we can start adding clients to the server to do so, follow the below in structions.
-
Go to the urbackup home page, you can find a Add New Client button over there as show in the below snap.
- Click on the Add New Client, it will ask you the client details with the IP or hostname and the client name as show in the below snap.
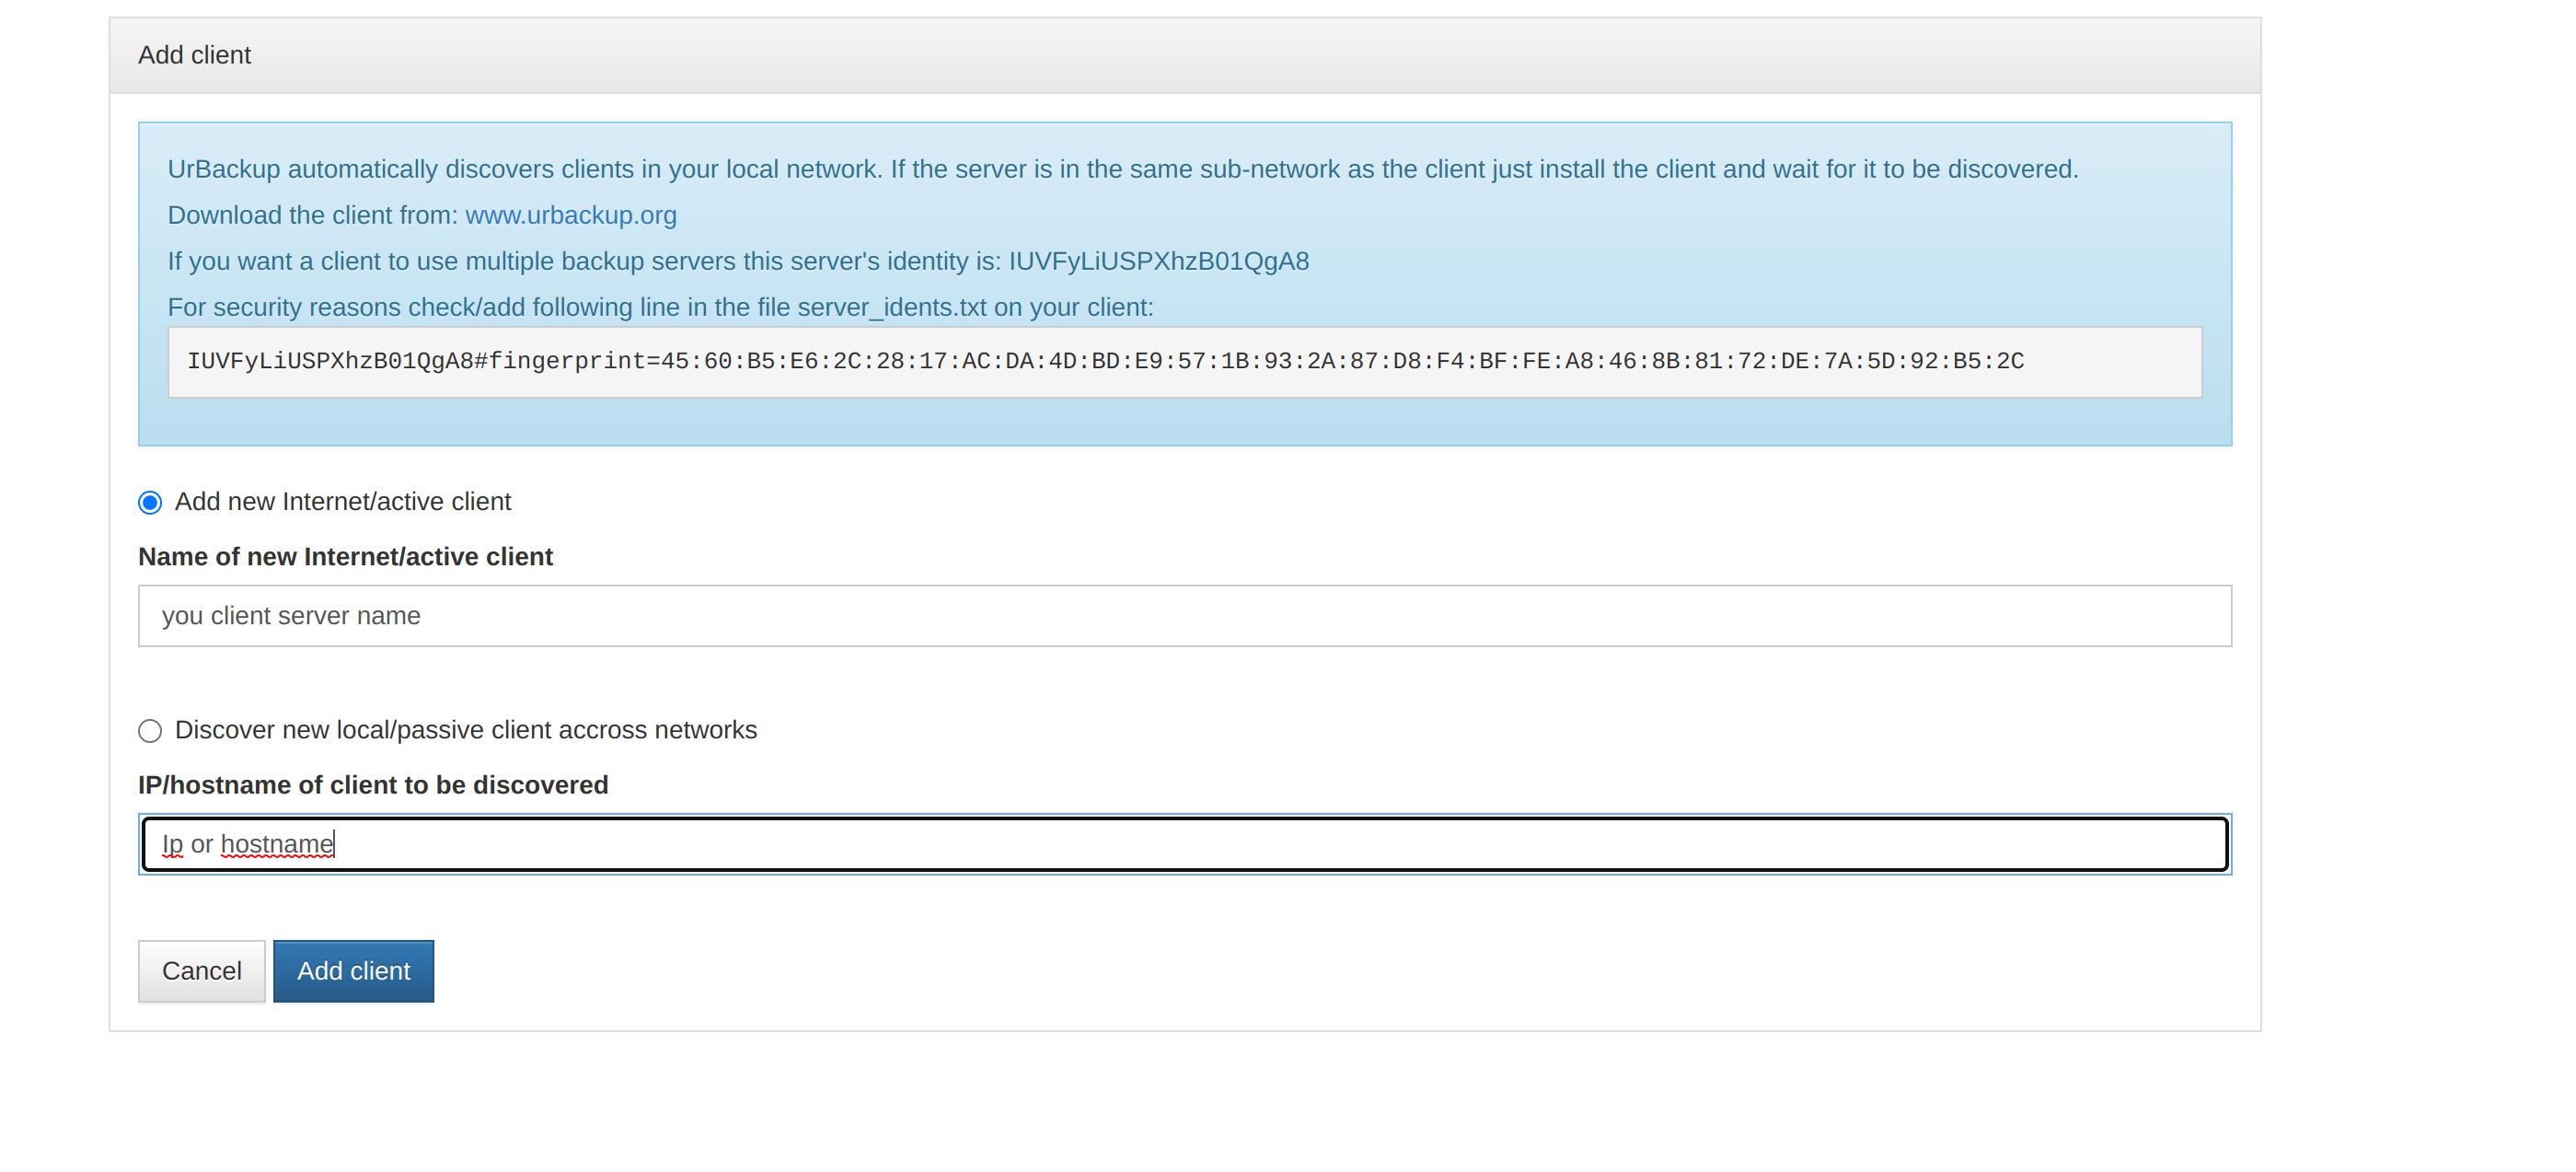
There are two options to add the client:
- Internet/Active Client — This is the remote client, only client name needs to be mentioined for this option.
- Client to be discovered — This is for local network, IP/hostname of client needs to be mentioined for this option.
- Once this is done it will take you to the client download page as show in the below snap.
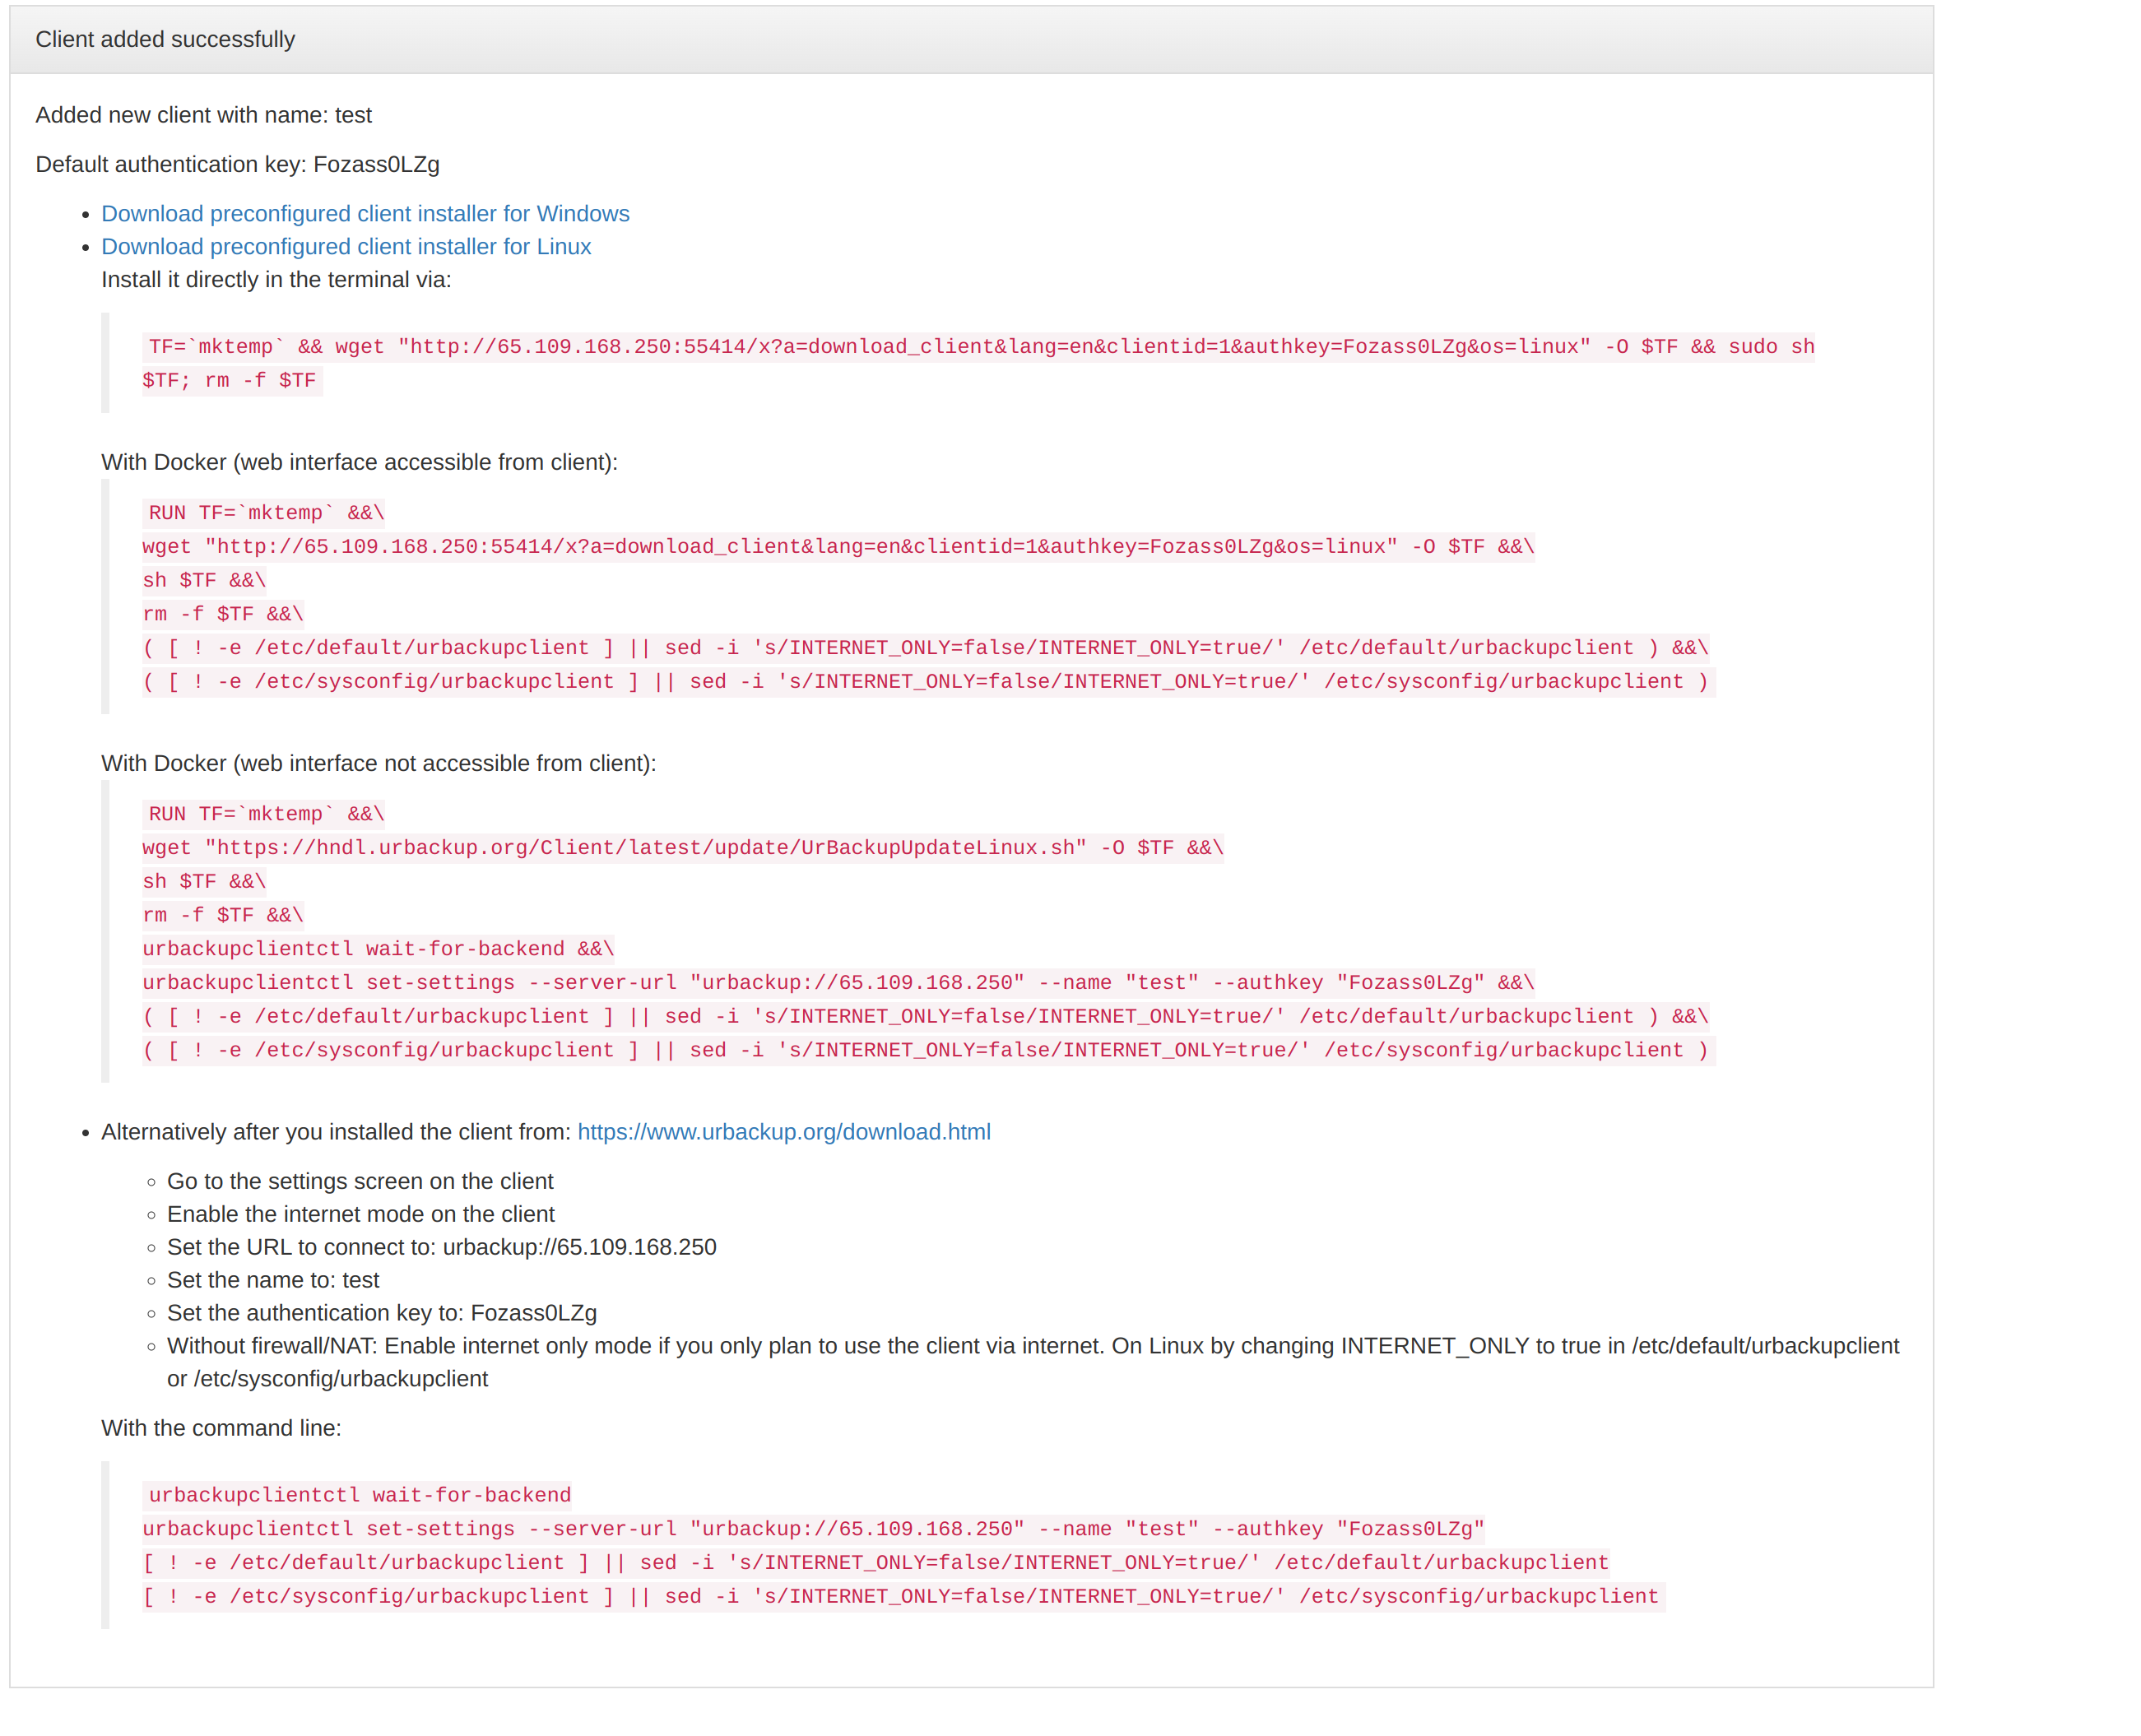
- In the above snap we have options to download clients on different OS like windows, linux, docker..
For Linux:
-
It is easy for linux we just need to run the command under (Install it directly in the terminal via), this will set up the urbackup client in the linux. Make sure the port 55414 and passive port range 49152-65534 are open.
-
Once the above is done we need to setup the directories which has to be backuped up in client server, the below command is used in terminal to check the current backup directory list:
/usr/local/bin/urbackupclientctl list
- To add a backup direcroty you need to run the below command in the terminal:
/usr/local/bin/urbackupclientctl add-backupdir -x -f -d /home/backupdir/
-
The above command will add the /home/backupdir as the directory whcih has to be backedup.
-
To remove a existing direcroty you need to get the direcroty which is added and to be removed from the list command and then need to run the below command replacing your path.
/usr/local/bin/urbackupclientctl remove-backupdir -d /path/to/backup/dir
- Once the above is added we need to restart the urbackup client to do so run the below command:
systemctl restart urbackupclientbackend
- Check urbackup client status
systemctl status urbackupclientbackend
- Install LSB Modules for client
For apt based servers like Ubuntu, Debian:
For yum based servers like Alma, Rocky, RedHat, CentOS:
- You can find the client in the urbackup dashboard as online and last seen as shown in the below snap for example.
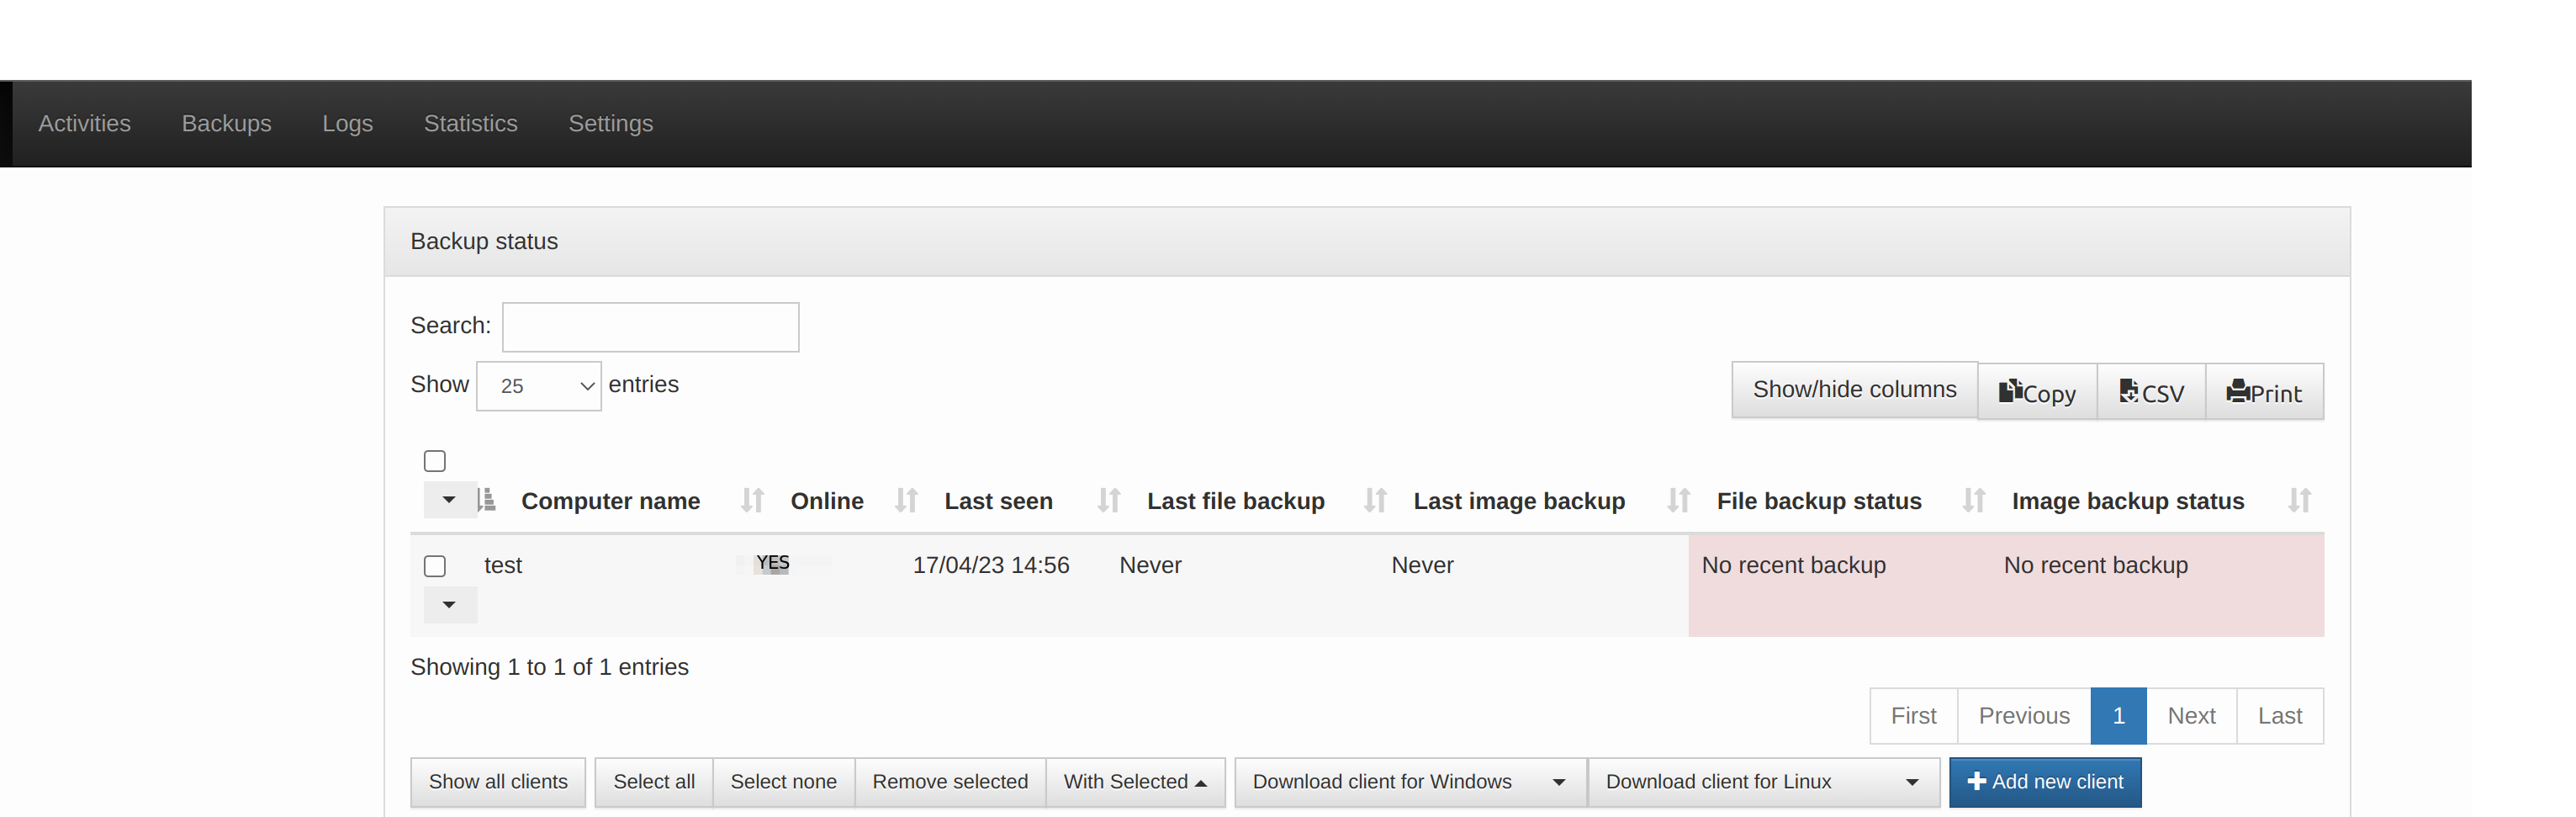
- You can start the backup by clicking the drop down and then you can select whcih type of backup and start it once started it will do the backup as per the intervals setted in the server configuration above.
For Windows:
- To setup urbackup client in the windows we need to download the preconfigured windows client from the download page which will be shown while we are adding a client as shown below.
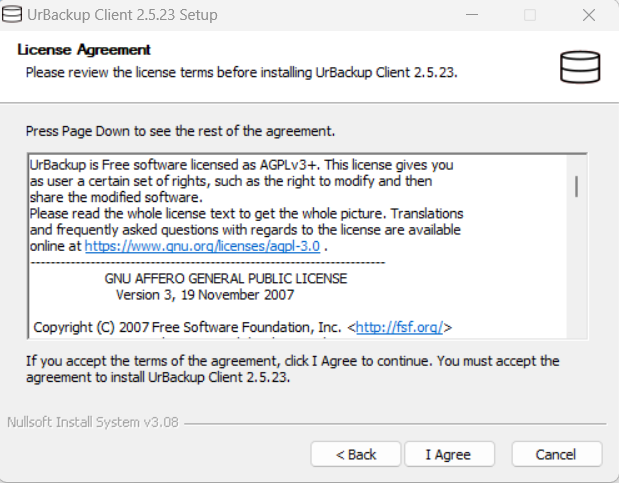
- Once downloaded we need to install the client in the windows machine follow the below snaps.
-
Once you click on the install the installer will install the urbackup client on the windows machine.
-
Once it is installed you will open a configuration page like below.
-
In the above tab you can select the mode of backups we can keet the defaults as shown in the above snap and click on finish.
-
once that is done the URBackup client is installed with the selected options.
-
After that you can find the urbackup icon on the tray as shown in below snap.
- Right click on the icon will give you the options as shown in below snap.
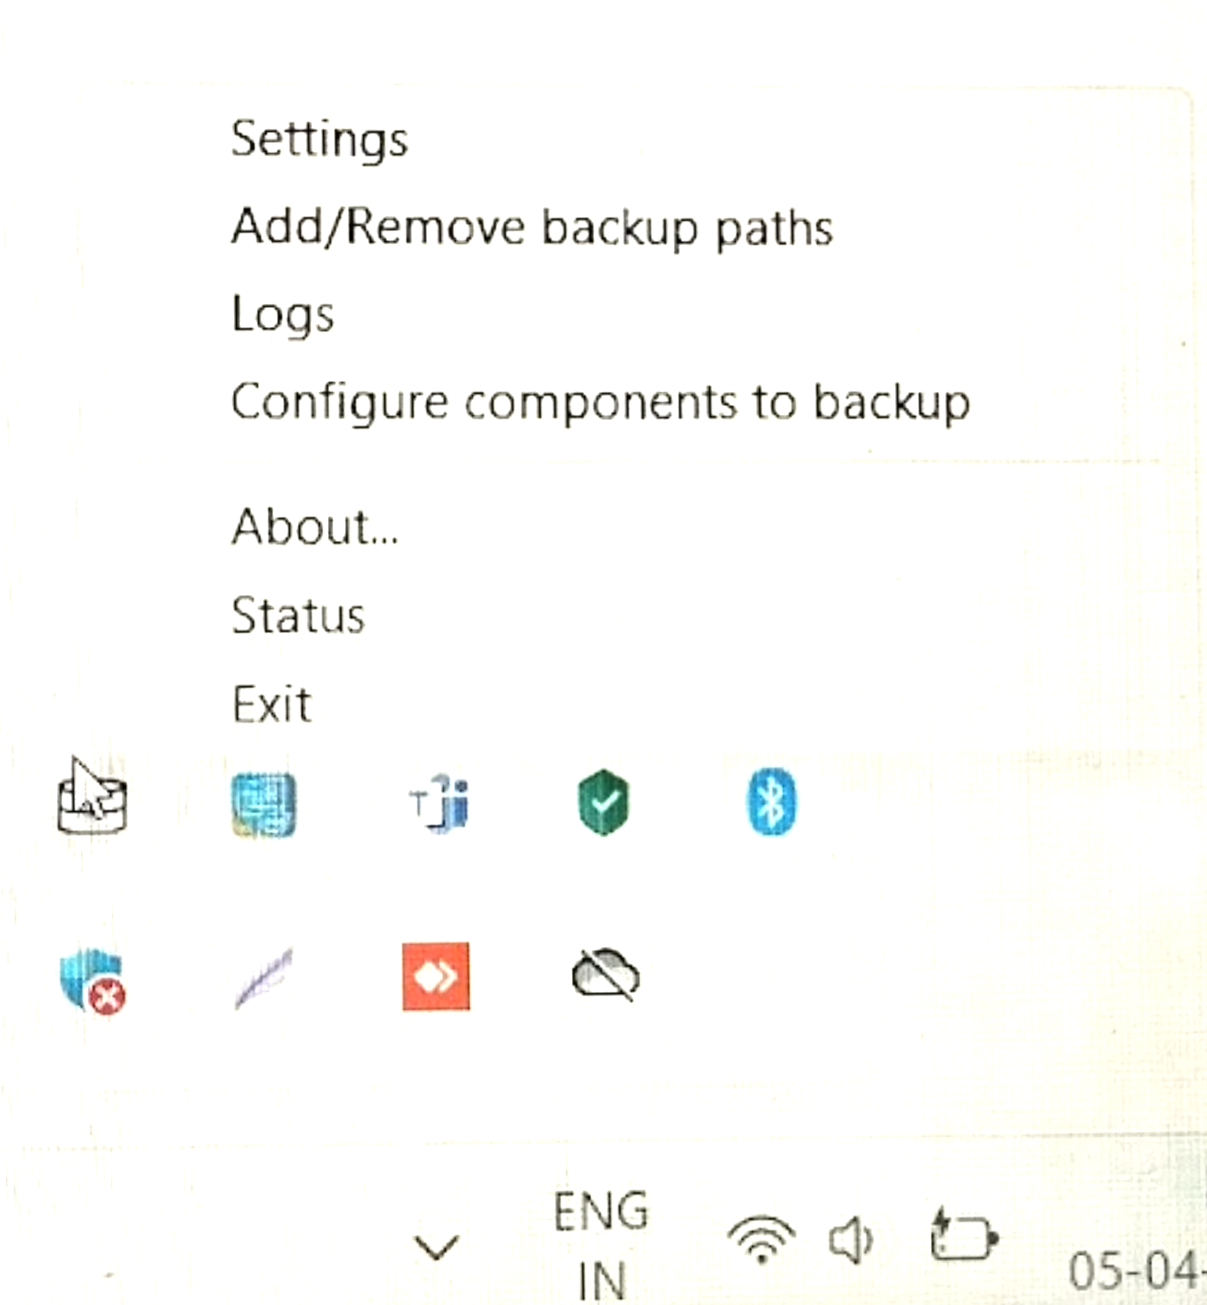
- Click on setting to configure the urbackup client it will open a windows as below.
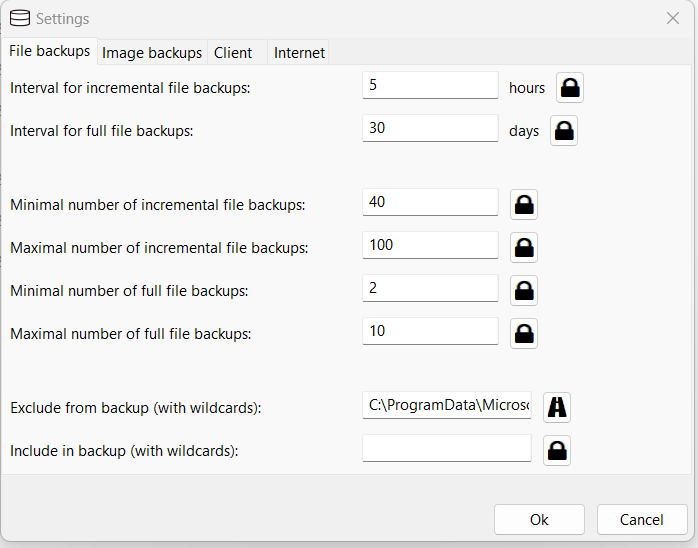
-
It will open a tab similar to above image and here you can set the interval of file backups and the folders to exclude and other options you can configre as per your requrement.
-
Then click on the Image backups you will get a tab similar to the below snap and you can configure according to your requirements the default is below.
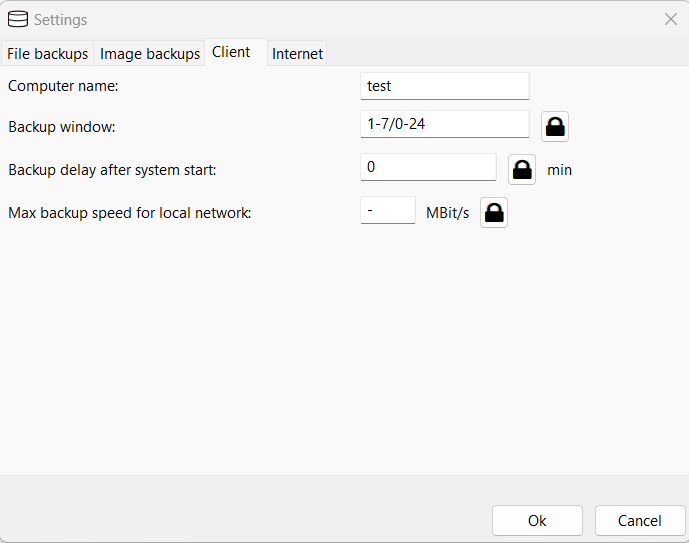
- Once the above is done click on client next to the image backups. As this is a preconfigured windows client, the client section will be configured already so we don’t need to chnage anything over there.
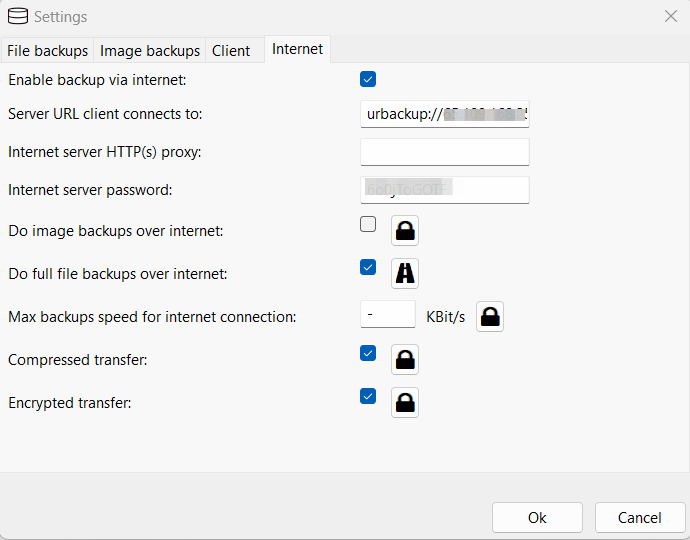
- Once you verify the above, click on the next option Internet, this will also be preconfigured just verify with the server details that we set in the server that tab will be similar to the below.
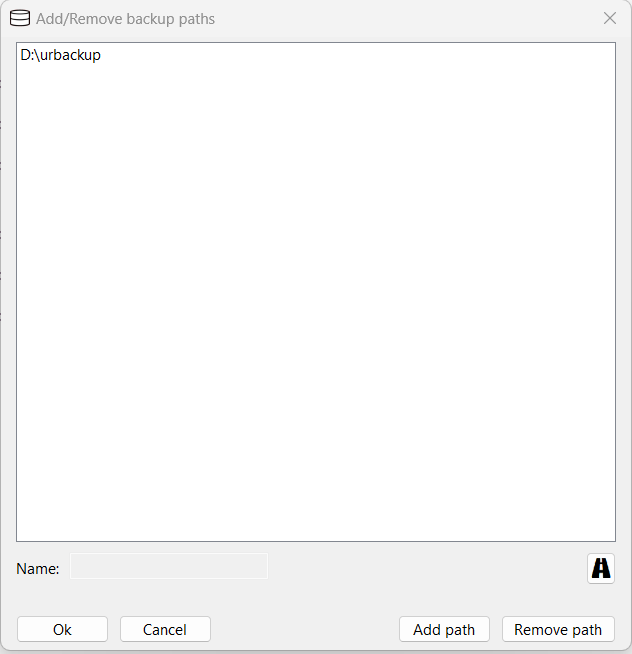
- With the above step the URbackup client configuration on the setting is done. then click on the add/remove backup paths in the tray icon it will open a page similar to the below snap, this we used to set the directory for the backup this is similar to adding directory in the linux. we can also remove the path in the same window.
-
Once the above is done the client configuration will be compeletd, restart the urbackup service from the services in your windows machine.
-
Once this is done you can check the status of the backup client and backup in the status option on the tray icon. it will be similar to below snap but this snap is a test so the connection is still waiting if it is connected it will show you as connected.
To take DB backups
-
On Linux with the binary client: Change 0 to 1, also provide mysql root password in /usr/local/etc/urbackup/mariadbdump.conf. Afterwards file backups will include the dump file of the database at urbackup_backup_scripts/mariadbdump.sql and restart the urbackup client.
-
Once the above is done the urbackup will start taking DB backups also.
-
Configure the client to backup the MySQL data directory. E.g. /var/lib/mysql on Linux and C:\ProgramData\MySQL\MySQL Server 5.5\data on Windows. Make sure you have configured a snapshotting method on Linux and restart the urbackup client
-
This way we will take the entire directory of the mysql.
To Restore:
- We can download the backups for the URbackup server page, to do so go to the backups page in the urbackup server dashboard as shown in the below snap from there we can download the backups.

Conclusion:
Note
The URBackup is configured successfully to take File and DB backups.