
Disk Quota Management and Configuration on Windows Server 2012
This article explains how to setup and configure Disk Quota on Microsoft Windows Server 2012. Free step by step guide and tutorial for setting up Disk Quota on Windows Server 2012.
Let’s get started.
1. Login to the Test Server.
2. Now login onto the server, as shown below.

3. Enter your username and password (ABC\administrator) and click OK, as shown below.

4. On the certificate verification window, click Yes, as shown below.

5. The Next window will show the Server Desktop.

6. Open the Server Manager from the bottom left corner of the server desktop, as shown below

7. Click on Add Roles & Features from the Server Manager Dashboard, as shown below.

8. Click Next to begin the process, as shown below.

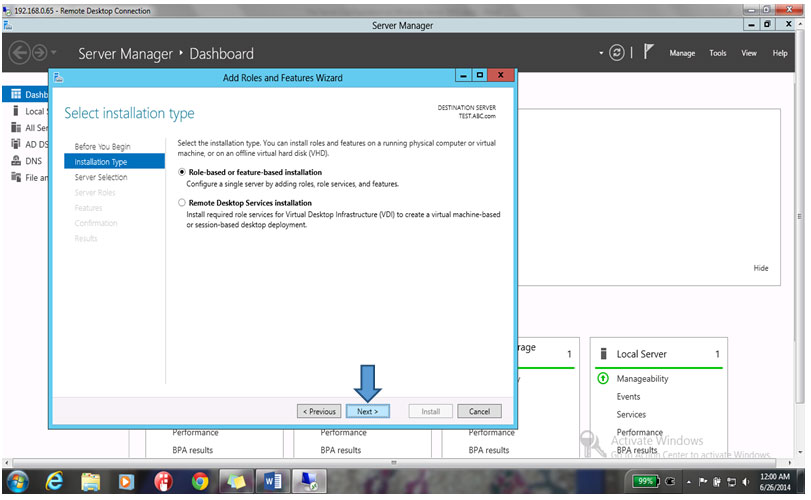
9. By default, Role-based or feature-based Installation is selected already, so click Next, as shown below
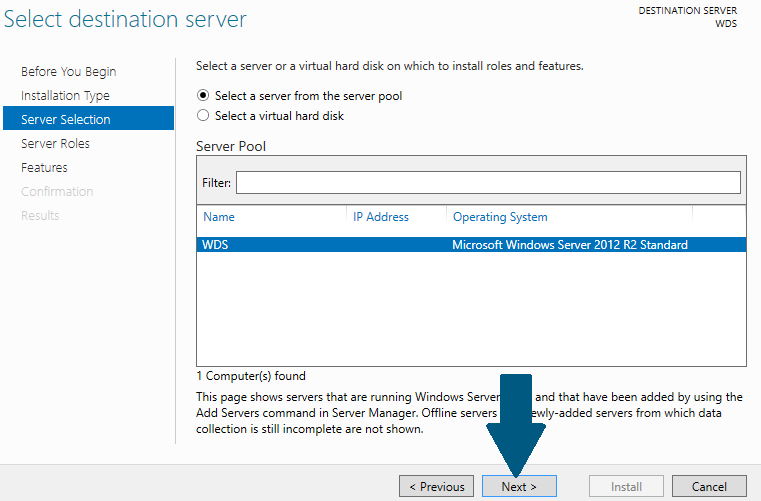
10. On the next window, continue with default server (Test) selection and click Next, as shown below.

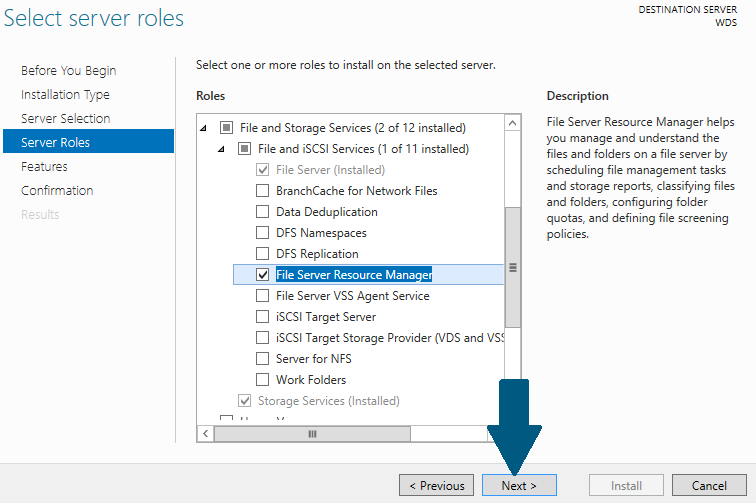
11. Click File Server option, given under File & ISCSI Services, as shown below.

12. Then click the File Server Resource Manager option, as shown below.

13. As you click on this option, it will open a pop-up window for Add Roles and Features Wizard, as shown below. Click on Add Features.

14. When you click on Add Features, it will take you back to the previous window, as shown below. Click Next to continue.

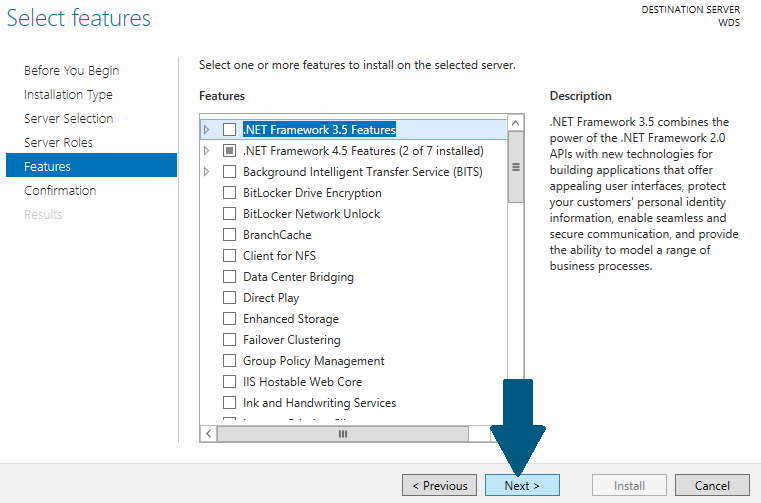
15. Click Next to continue.

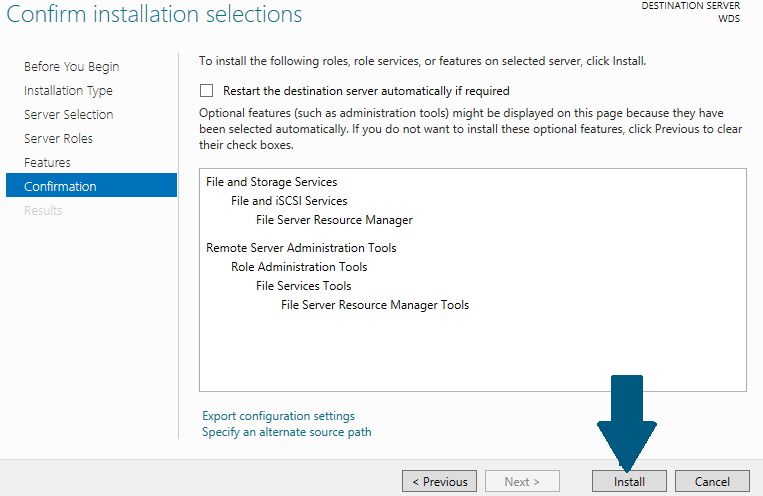
16. On the Confirm Installation Selection window, click Install to continue, as shown below.

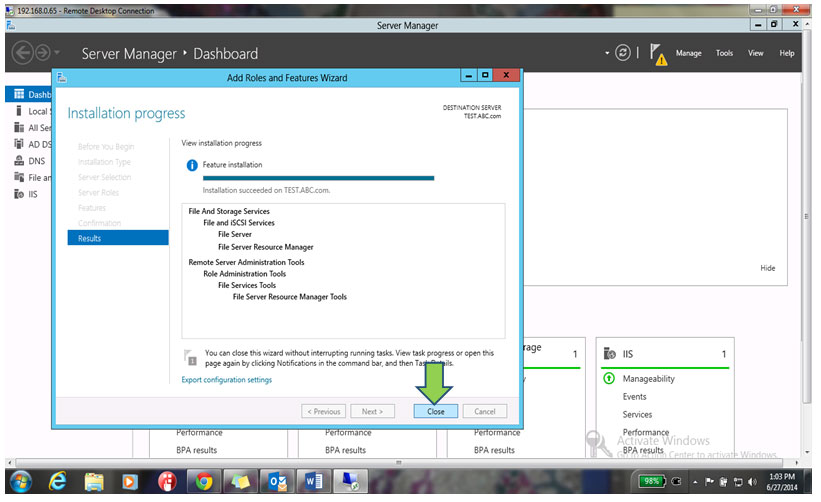
17. Click Close once the installation has finished, as shown below.

18. Click Close once the installation has finished, as shown below.
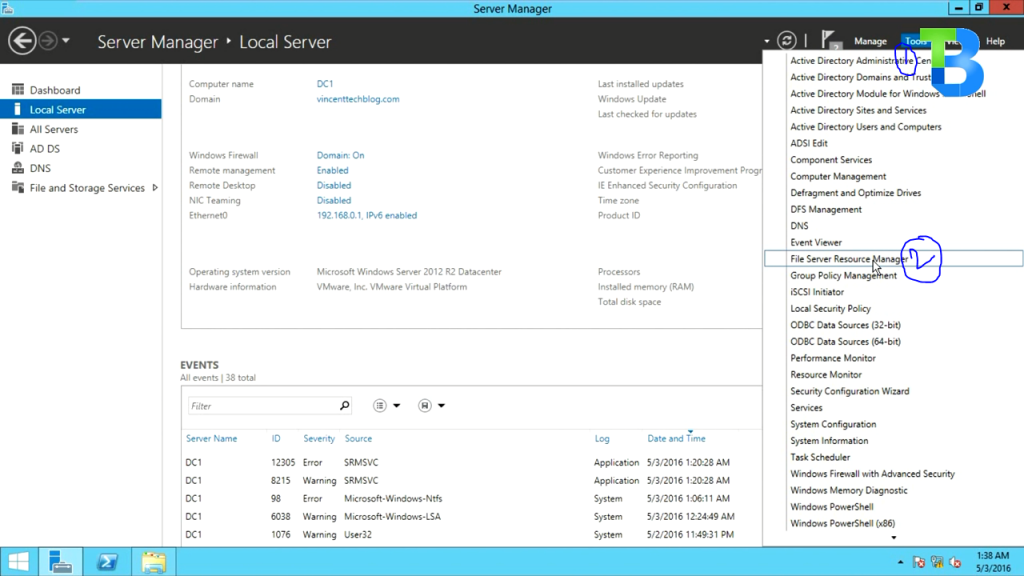
19. Now open File Server Resource Manager from the Tool option given in the top right corner of the Server Manager Dashboard, as shown below.

20. In the next window, Expend Quota Management & Select Quota Templates, you can see there are lot of predefined Quota Templates in the right-hand pane, as shown below

21. We will create our own Quota Template so that you understand how to do so.
22. To create your own Quota Template, right click on Quota Template and select Create Quota Template, as shown below.

23. The Quota Template will resemble the image shown below.

24. Fill in the following information, as shown in the image below.
- Give the template a name in Template Name
- Provide any Description for your Reference
- Select limit size, up to 1 GB
- Select Hard Quota if you do not want user to exceed the limit
- Select Soft Quota if you want user to be able to exceed the quota limit, and want only to monitor space used by user.

25. Click Add to define Threshold notification settings, as shown below.

26. The Threshold notifications window will resemble the image shown below.

27. The value given under Generate Notification when usage reaches will remain at 85% so select the option Send email to user who exceeded the threshold and click OK, as shown below.

28. When you click OK, you will get warning stating that the SMTP server is not configured and due to that, Notification emails cannot be sent. Click Yes to continue, as shown below.

29. You can see that Warning Threshold has been set for the Quota Template, so click OK to continue.

30. You can see the Quota Template of 1 GB limit has been created.

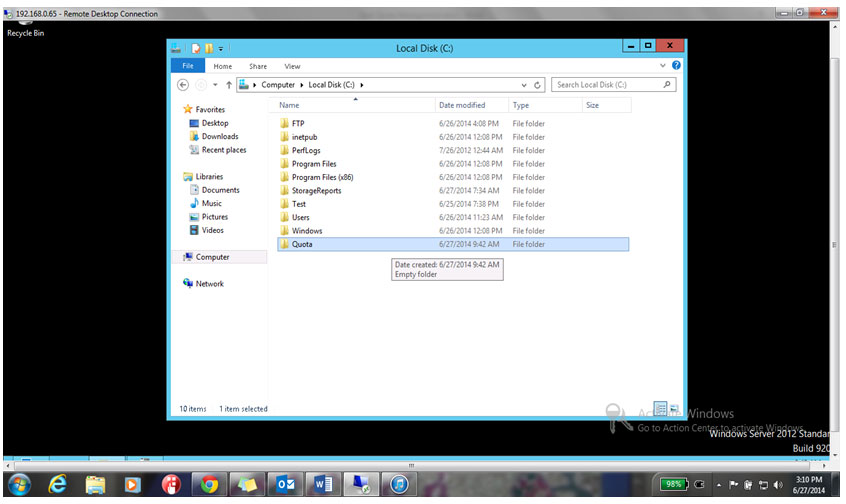
31. Now we will create a new folder (named Quota) in the C Drive of the computer.

32. Close this window and go back to the Quota Management window, select the existing 1 GB Quota Template, right-click on it and select the Create Quota from Template option, as shown below.

33. Click Browse to define the Quota Path (Folder) on to which quota will be applied.

34. On the next window, select the folder (Quota) and click OK.

35. Click on Create to create the quota on the folder.

36. To verify, we will copy some heavy size (1.30 GB) data into the Quota folder in the C drive and observe the result, as shown below.

37. You can see that the data has started copying, as shown below.

38. Soon you will get the Threshold exceeds warning notification that you defined on this folder.

This is how we will define the disk quota on the folder, so that users cannot save data in a limited amount space, which has been defined by the Administrator(s).
Read more
- Windows Server 2012 System Requirements
- Windows 2012 Server Versions
- Installing Windows Server 2012 on Virtual Cloud
- File server configuration on Windows Server 2012
- Installing Active Directory in Windows 2012 Server
- Installation and configuration of printer server and network printer on Windows 2012 Server
- How to join Computers to a Domain in Windows Server 2012
- User Creation in Active Directory Windows 2012 Server
- How to Configure Group Policy in Windows Server 2012
- FTP Server Installation and Configuration on Windows Server 2012
- IIS Server Installation and Configuration on Windows Server 2012
- DHCP Server Configuration in Windows Server 2012
- VPN Server Installation and Configuration on Windows Server 2012
- DNS Server Installation and Configuration on Windows Server 2012
- Setup Shared Folder Permissions on Windows Server 2012
- WSUS Server Configuration on Windows Server 2012
Practice Exams
- MTA Practice Test
- MCSA, MCSE Practice Test
Tutorial
- MCSE Tutorial
Study Guide
- MCSE, MCSA Study Guide
Interview Questions
- MCSE and MCSA Interview Questions
- Networking Interview Questions
Resume
- MCSE Resume
- Network Administrator Resume
Configuring Disk Quota (windows Server 2012 R2)
Welcome to this step by step tutorial, you will be learning about How to Configure Disk Quota using File Server Resource Manager (FSRM) on Windows Server 2012 R2.
File Server Resource Manager is a pack of tools for Windows Server® 2008 or above that allows administrators to control and manage the quantity and type of data files that is stored on their network or servers.
Disk Quota is a tool part of the FSRM Pack of tools. It helps to Manage the capacity of a storage device on the server or network.
The Step by step process below shows how to Install Configure Disk Quota
Prerequisite: Ensure you have a Domain Network configured and at least one client computer for testing after configuration. Also, ensure FSRM is Installed and Configure File Share or DFS for central file storage to ensure Disk Quota works effectively.
Task Performed: DC1 (Domain Controller installed with Server 2012 R2) and a Client Computer (Installed with Windows 10)
Configure Disk Quota on DC1
Step 1
Go to Server Manager

Step 2
On the Server Manager Console. Select “Tools” on the right top corner and choose “File Server Resource Manager”
Step 3
On the File Server Resource Manager console, select “Quota Management -> Quotas”, Then Right-Click on “Quotas”. Select “Create Quota”
Step 4
Browser for Quota Path
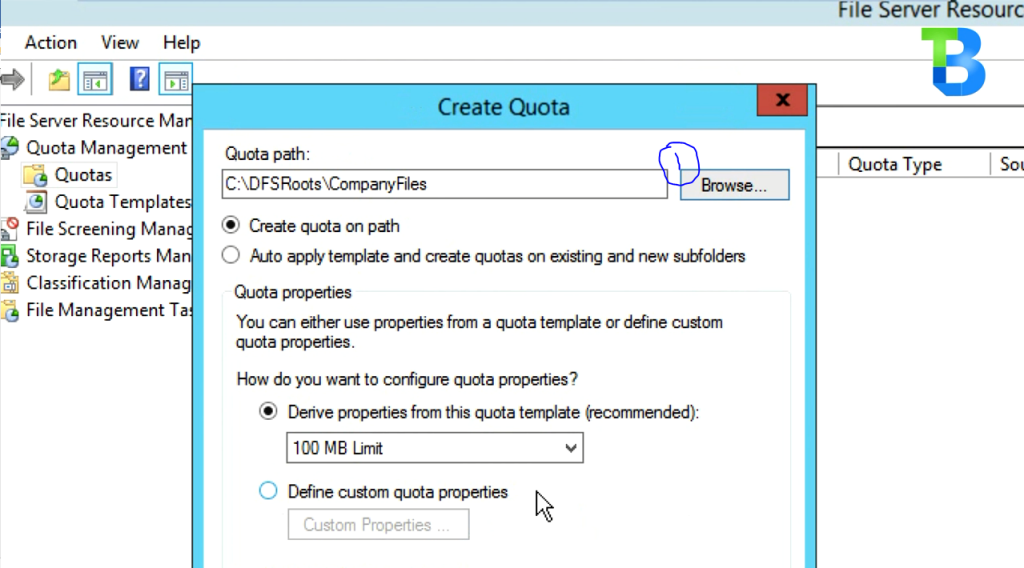
Step 5
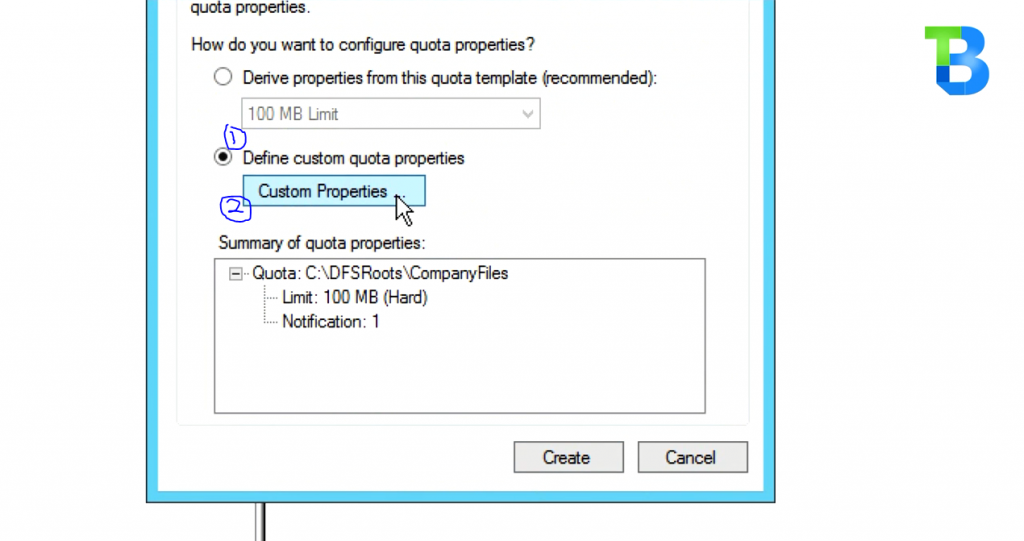
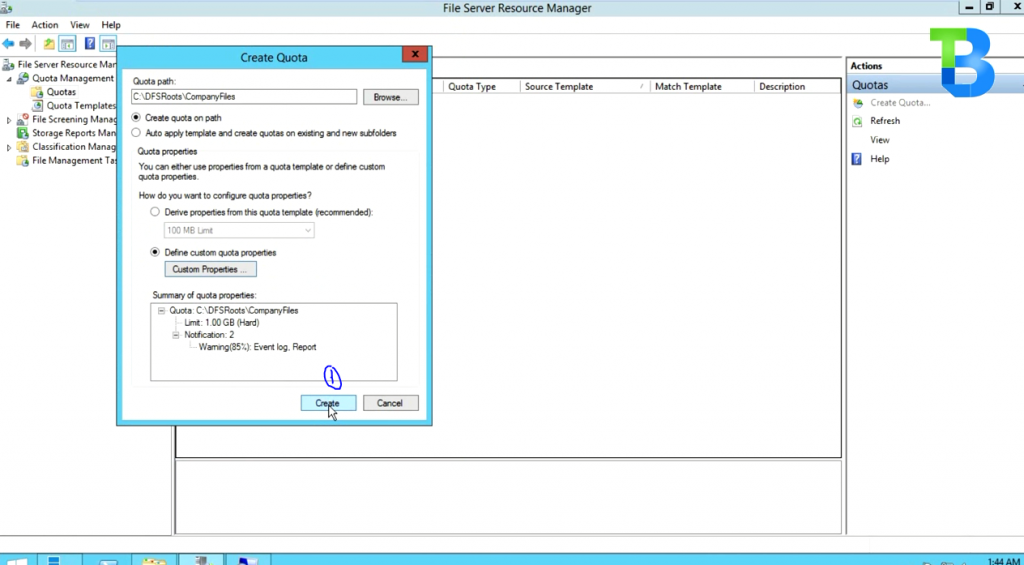
Select “Define Custom Quota Properties” and choose “custom Properties”
Step 6
Under the “Space Limit” Section, specify your preferred limit and choose “Ok”

Step 7
Select “Create”
Step 8
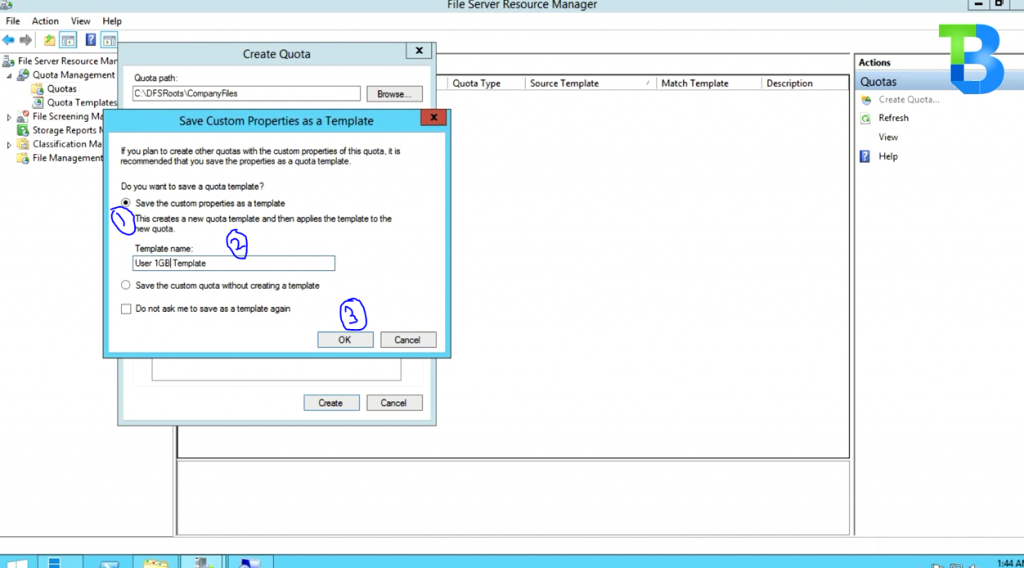
Save as a template with your preferred name. Our is “Graphic files template” and choose ‘OK’
We are done.
Next is to test the Quota selected by Storing Files with the greater limit capacity you have specified on the path and see our quota in operation.
See also, How to configure DFS Namespace and Replication, Server 2012
Watch the Disk Quota Configuration Tutorial video below;
The File Server Resource Manager is a role in Windows Server 2012 R2 which is used to enable quotas on shared folders. This article will explain how to share a folder and enable quota using the File Server Resource Manager. Specifically, you will learn:
- Configuring File Server Resource Manager.
- Sharing a folder using File and Storage Services.
- Enabling quota on shared folder.
Prerequisites
Following are prerequisites for this tutorial:
- The administrator account has a strong password.
- Static IP is configured.
- Latest windows updates are installed.
- Firewall is turned off.
Configuring File Server Resource Manager
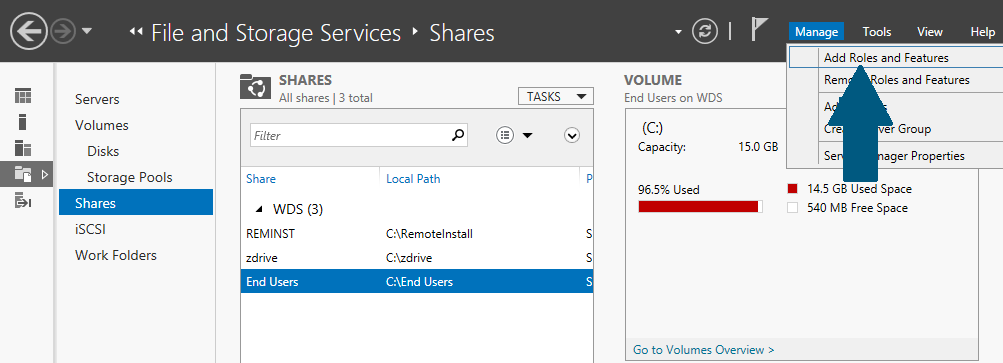
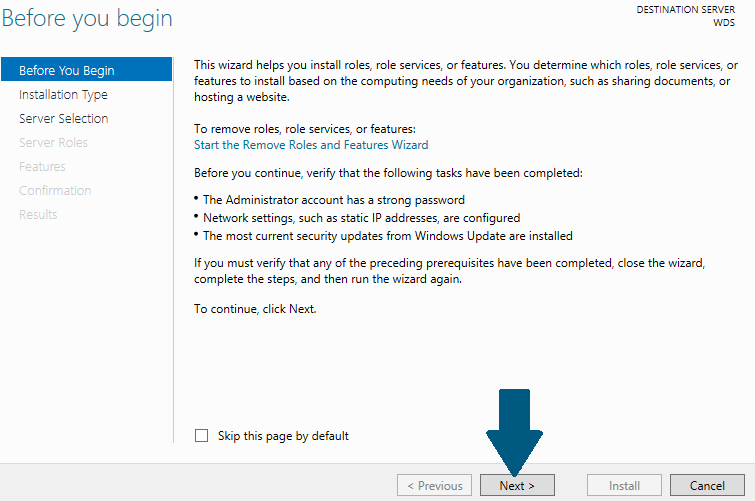
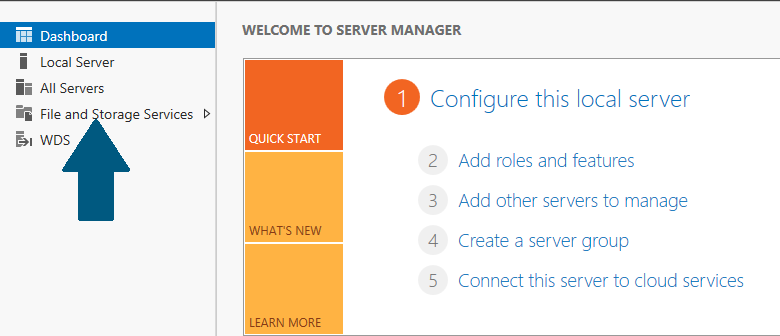
Step 1: Open server manager dashboard, click Manage -> Add Role and Features.
Step 2: Click Next.
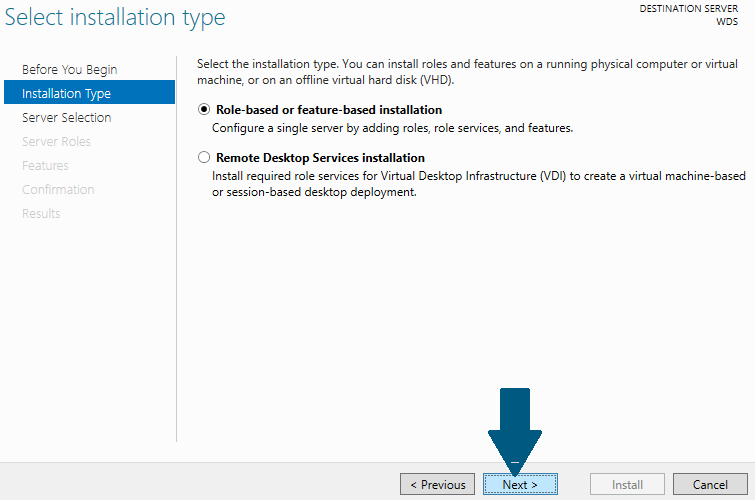
Step 3: Choose Role-based or feature-based installation and click Next.
Step 4: Click Next.
Step 5: Expand File and Storage Services -> File and iSCSI Services -> File Server Resource Manager. Click Next.
Step 6: Click Add Features.
Step 7: Choose .NET Framework and then Click Next.
Step 8: Click Install.
Sharing a Folder using File and Storage Services
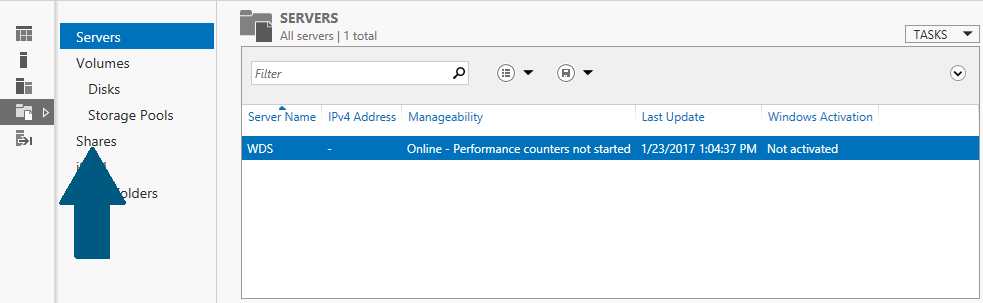
Step 1: Open server manager dashboard, click File and Storage Services.
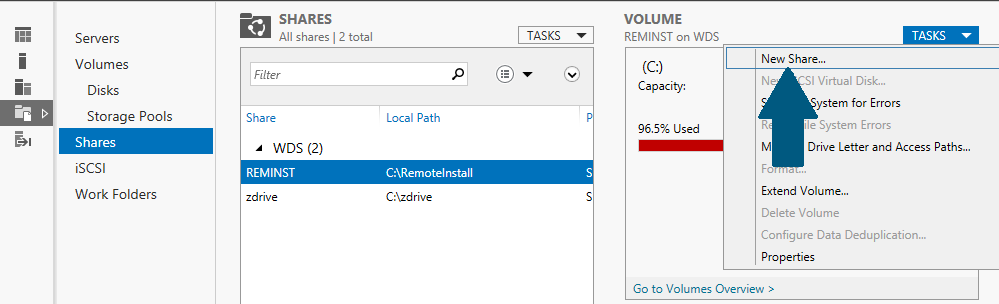
Step 2: Click Shares.
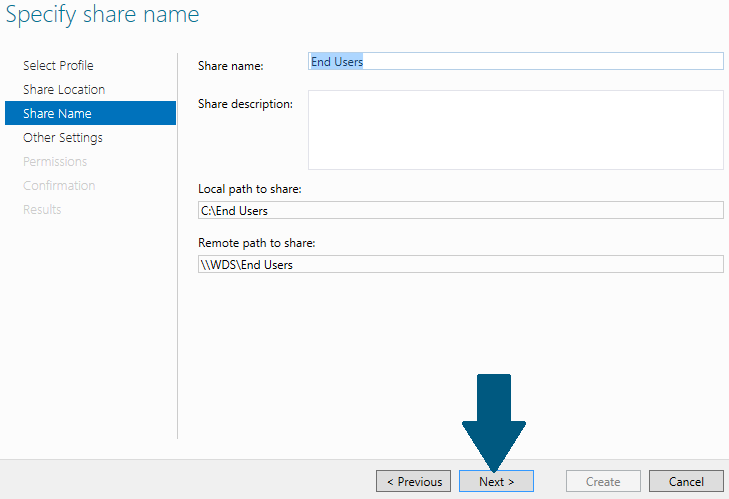
Step 3: Click Tasks -> New Share.
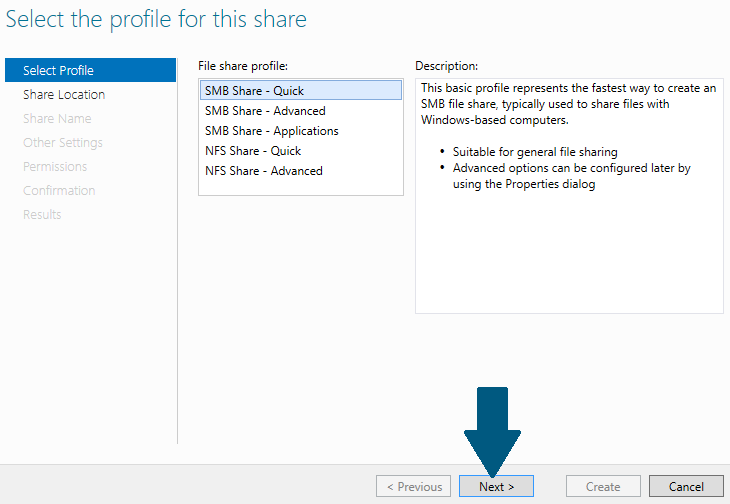
Step 4: Choose SMB Share — Quick. Click Next.
Step 5: Click Browse.
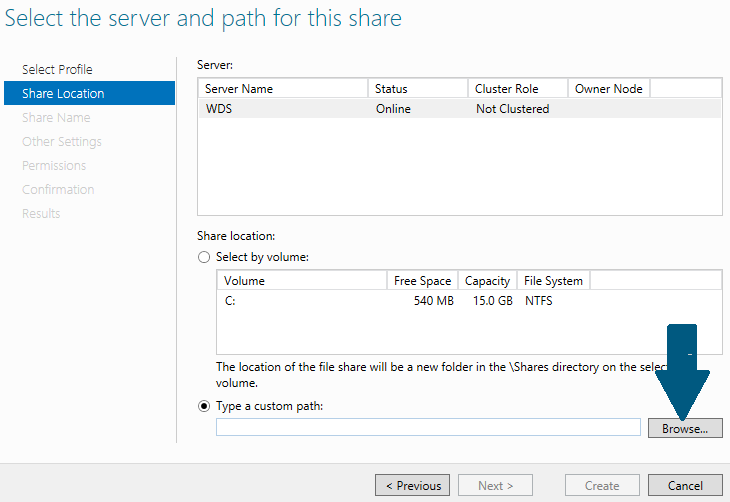
Step 6: Click New Folder and name it.
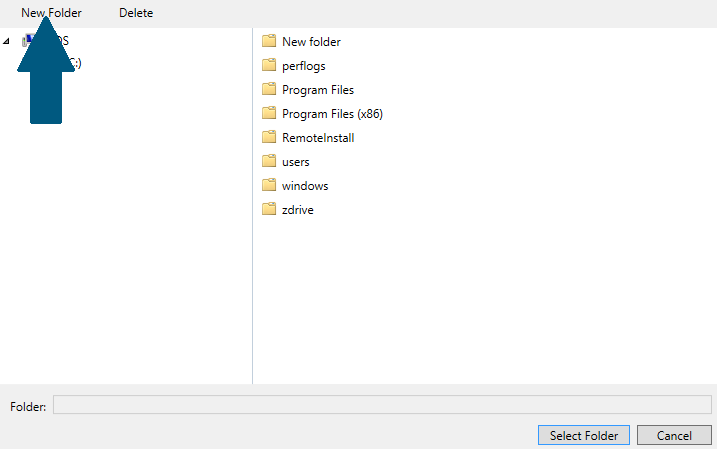
Step 7: Choose the folder created in step 6 and click Select Folder.
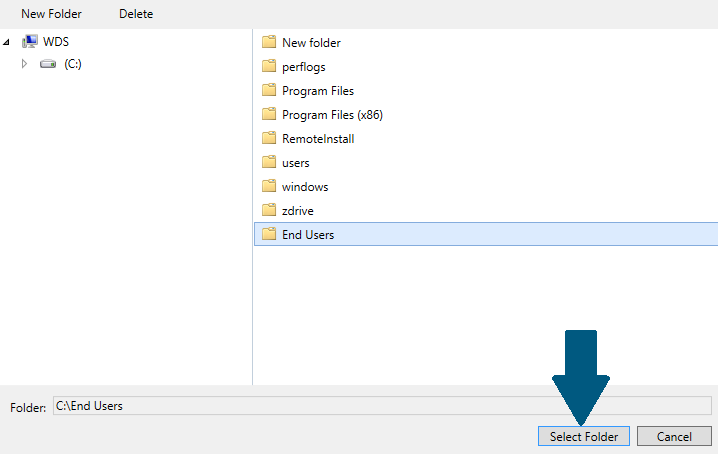
Step 8: Click Next.
Step 9: Click Next.
Step 10: Check Enable access-based enumeration and click Next.
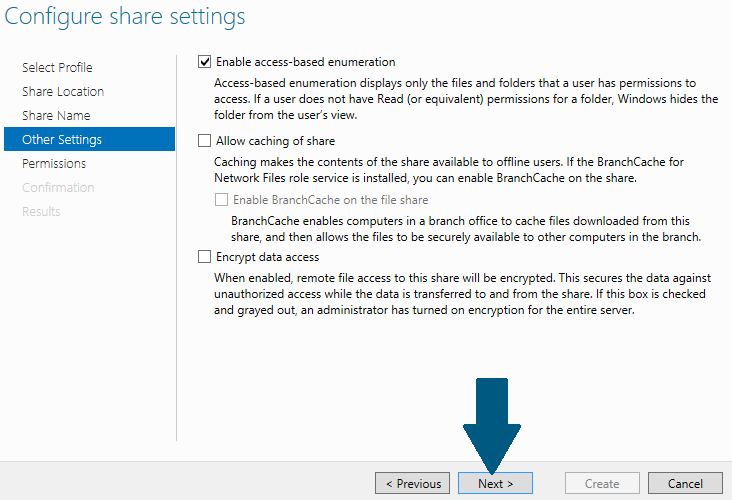
Step 11: Click Next.
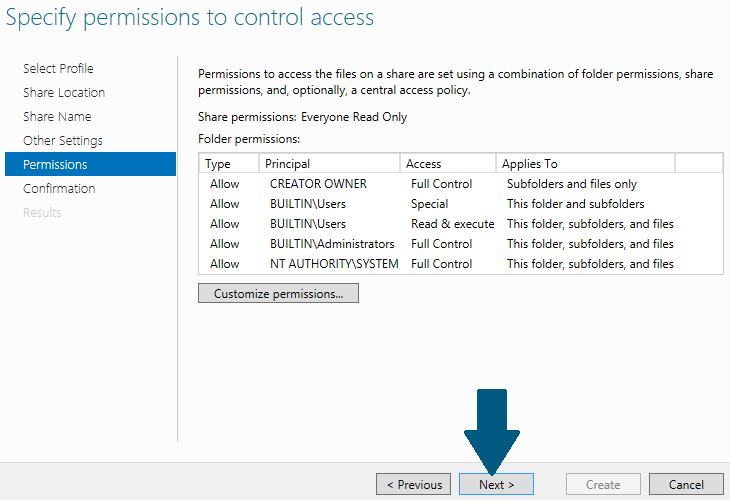
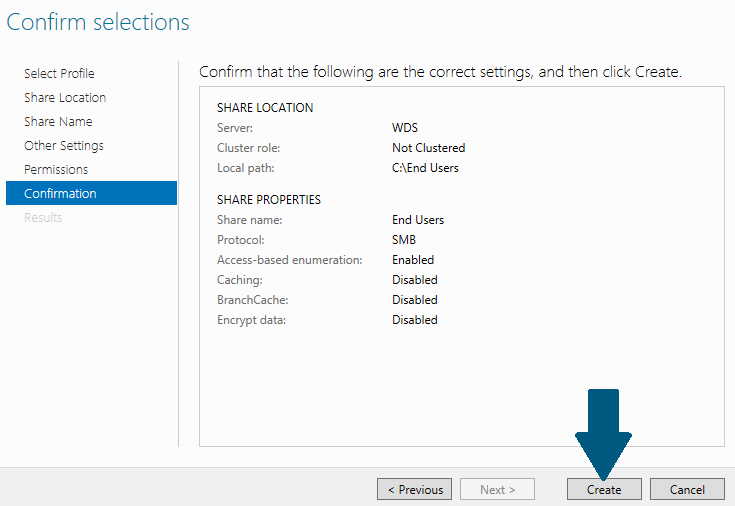
Step 12: Click Create.
Enabling Quota on Shared Folder
Step 1: Open server manager dashboard, click Tools -> File Server Resource Manager.
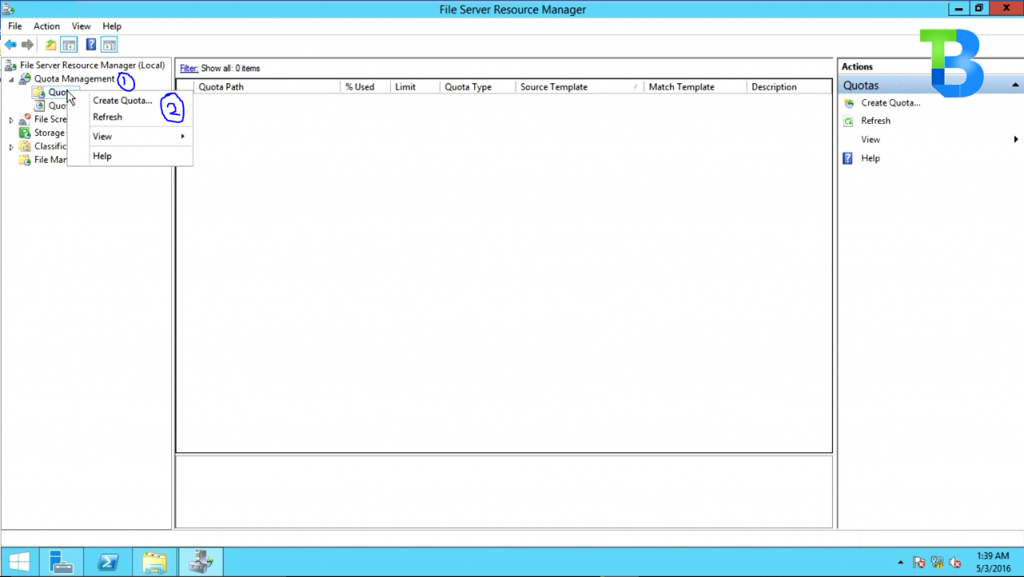
Step 2: Expand File Server Resource Manager -> Quota Management. Click Create Quota…

Step 3: Click Browse and provide the path of the shared folder.
Step 4: Choose Drive properties from this quota template (recommended): and choose the template from the drop down. Click Create.
Conclusion Quota management is a useful feature which allows you to set a storage limit on a shared folder. When you finished this article, you might want to further explore a file screening provided by the File Server Resource Manager.

How To Configure Disk Quota In Windows Server 2016 Disk Quota Management On the quota management node of the file server resource manager microsoft ® management console (mmc) snap in, you can perform the following tasks: create quotas to limit the space allowed for a volume or folder, and generate notifications when the quota limits are approached or exceeded. Review available pre configured quota templates. (in quota management, click the quota templates node.) edit quota template properties. create a new quota template to enforce a storage policy in your organization. create a quota template. create a quota based on the template on the volume or folder. create a quota.
How To Configure And Enable Quota On Shared Folder Using File Server The step by step process below shows how to install configure disk quota prerequisite: ensure you have a domain network configured and at least one client computer for testing after configuration. also, ensure fsrm is installed and configure file share or dfs for central file storage to ensure disk quota works effectively. Learn to create and enable disk quotas in windows server 2012 in order to help manage disk space on file servers in this easy ask an admin article. Enable disk quotas on windows 10 windows server 2016; configuring disk quotas with group policy settings; managing disk quotas using command prompt powershell. This article will explain how to share a folder and enable quota using the file server resource manager. specifically, you will learn: configuring file server resource manager. sharing a folder using file and storage services. enabling quota on shared folder. prerequisites. following are prerequisites for this tutorial:.
How To Configure And Enable Quota On Shared Folder Using File Server Enable disk quotas on windows 10 windows server 2016; configuring disk quotas with group policy settings; managing disk quotas using command prompt powershell. This article will explain how to share a folder and enable quota using the file server resource manager. specifically, you will learn: configuring file server resource manager. sharing a folder using file and storage services. enabling quota on shared folder. prerequisites. following are prerequisites for this tutorial:. By creating quotas exclusively from templates, you can centrally manage your quotas by updating the templates instead of the individual quotas. then, you can apply changes to all quotas based on the modified template. How can i create and enable disk quotas in server 2012? managing disk space on file servers can be a challenge, especially as users like to hoard information and use network shares to store non work related files. Most of the organizations that use the file server resource manager use the tool for quota management. if you expand the console’s quota management container, you will see that it. Quotas can be created and managed through the file server resource manager console. quotas are based on quota templates. a quota template defines a size limit and controls what will happen when that limit is reached. quotas, on the other hand, apply a quota template to a specific path.
How To Configure And Enable Quota On Shared Folder Using File Server By creating quotas exclusively from templates, you can centrally manage your quotas by updating the templates instead of the individual quotas. then, you can apply changes to all quotas based on the modified template. How can i create and enable disk quotas in server 2012? managing disk space on file servers can be a challenge, especially as users like to hoard information and use network shares to store non work related files. Most of the organizations that use the file server resource manager use the tool for quota management. if you expand the console’s quota management container, you will see that it. Quotas can be created and managed through the file server resource manager console. quotas are based on quota templates. a quota template defines a size limit and controls what will happen when that limit is reached. quotas, on the other hand, apply a quota template to a specific path.