
В данной статье мы затронем установку Home Assistant с некоторыми аддонами как на поддерживаемые, так и на не поддерживаемые официально системы (32 бит).
В настоящее время умные дома становятся все более популярными среди потребителей. Это связано с быстро развивающейся технологией, которая позволяет создавать устройства и системы, способные управлять различными аспектами жизни в доме, такими как освещение, отопление, кондиционирование воздуха, безопасность и развлечения. Кроме того, умные дома позволяют сократить расходы на энергию и повысить уровень комфорта и удобства жизни.
В данной статье мы поговорим о том, как создать умный дом на платформе Home Assistant. Home Assistant — это бесплатная и открытая система управления домашними устройствами, которая позволяет интегрировать различные устройства и сервисы для автоматизации и управления жизнью в доме.
Преимущества Home Assistant перед системами умных домов других производителей (Xiaomi,Tuya, и др.) заключается в возможности использовать устройства разных производителей с разными типами подключения (WiFi, MQTT, Zigbee, Bluetooth) без привязки к экосистеме определенного производителя.

Нам потребуется компьютер или ноутбук с 512+ Мб ОЗУ
Если ваш компьютер или ноутбук имеет 64-битный процессор, установка Home Assistant значительно упрощается, так как подробная инструкция доступна на официальном сайте.
Однако, если у вас есть устройство с 32-битным процессором и архитектурой i386, то установка аддонов для работы с внешними датчиками может быть сложной из-за отсутствия официальной поддержки. Однако, не отчаивайтесь, поскольку в этой статье мы рассмотрим способы установки на такие устройства. (Важно отметить, что эти методы также могут быть применены на 64-битных системах, но они сложнее официальных в реализации).
1. Установка системы
Для сервера умного дома подойдет практически любой дистрибутив Linux, но рекомендуется Debian. В данной статье буду использовать сам Debian.
Начнем с установки. Этот процесс одинаков практически для любой системы.
-
Скачайте последнюю версию ISO.
Я выбрал образ «Small», так как он включает большинство файлов в образ, что требует меньше загрузки в процессе установки. -
Скачайте Balena Etcher, инструмент для записи ISO-образов на USB-накопитель. Если вы работаете в системе linux, вместо этого можно использовать dd.
-
Подключите загруженный USB-накопитель к системе и загрузитесь с USB.
-
Следуйте процессу установки.
Большая часть процесса — это следование настройкам по умолчанию и просто нажатие кнопки Continue.Не забудьте ввести учетные данные для пользователя root и пользователя, не являющегося администратором.
Если вы планируете использовать компьютер только для умного дома, убедитесь, что вы не устанавливаете графический интерфейс пользователя (GUI), и обязательно установите SSH-сервер.
-
После завершения установки войдите в систему по SSH, либо напрямую с пк, используя учетные данные обычного пользователя (не рут).
2. Установка Docker и Docker Compose
Несмотря на то, что Docker и Docker engine официально не поддерживают 32-битные системы, его можно установить, воспользовавшись данным репозиторием на GitLab:
wget https://gitlab.com/docker-32bit/debian/raw/i386/build-image.sh
sudo bash build-image.sh
Docker Compose можно установить командой:
sudo apt install docker-compose3. (опционально) Установка Portainer
Portainer может пригодиться для более удобного управления будущими Docker-контейнерами.
Для установки Portainer создадим конфигурационный файл docker-compose.yaml:
cd /opt
sudo nano docker-compose.yaml
Не забудьте обновить часовой пояс в конфигурации ниже.
Кроме того, я храню весь свой конфиг Docker и тома в этой папке. Это облегчает резервное копирование. Эти тома будут хранить данные из образа Docker локально, чтобы данные не терялись при пересборке контейнера (например, при обновлении) /opt
Здесь мы передаем файл, содержащий наши локальные настройки времени, чтобы Portainer знал, который сейчас час (для временных меток журнала), а также сокет, управляющий Docker, чтобы Portainer мог выполнять действия в Docker.
version: '3.0'

services:
  portainer:
    container_name: portainer
    image: bigbugcc/portainer-ce
    restart: unless-stopped
    ports:
      - "9000:9000/tcp"
      - "9443:9443/tcp"
    environment:
      - TZ=Asia/Novosibirsk
    volumes:
      - /etc/localtime:/etc/localtime:ro
      - /var/run/docker.sock:/var/run/docker.sock
      - /opt/portainer/data:/data
Разрешения
Мы также разрешим нашему пользователю, не являющемуся администратором, изменять этот файл. Опять же, чтобы немного облегчить нам жизнь.
sudo chown root:docker docker-compose.yaml
sudo chmod g+w docker-compose.yaml
Проверьте конфигурацию
Хотите убедиться, что вы не допустили ошибок в конфигурации? Выполните следующую команду, и Docker выведет вам то, что будет запущено, а также все ошибки в вашем конфиге и предупреждения.
docker-compose -f docker-compose.yaml configЗапуск
docker-compose up -dЗапускаем, и Docker загрузит последний образ Portainer и все настроит. После этого мы сможем открыть веб-интерфейс Portainer, перейдя по адресу (вы получите предупреждение о самоподписанном сертификате) или (нешифрованное соединение).
https://<ip компьютера>:9443
http://<ip компьютера>:9000

При первом посещении этого портала он попросит нас создать учетную запись пользователя.
4. Установка Home Assistant
Если вы пропустили предыдущий пункт, то потребуется первоначальная настройка Docker Compose для работы:
cd /opt
sudo nano docker-compose.yaml
Далее записываем конфигурацию контейнера в файл(не забываем указать свой часовой пояс для правильного показа времени в интерфейсе и логах):
version: '3.0'

services:
  [...]
  homeassistant:
    container_name: homeassistant
    image: "ghcr.io/home-assistant/home-assistant:stable"
    restart: unless-stopped
    environment:
      - TZ=Asia/Novosibirsk
    volumes:
      - /opt/homeassistant/config:/config
      - /etc/localtime:/etc/localtime:ro
    privileged: true
    network_mode: host
Создадим папку для конфигурационных файлов Homeassistant и запустим его:
cd /opt
sudo mkdir -p homeassistant/config
docker-compose up -d
Теперь Docker извлечет образ Home Assistant и все настроит.

Настройка Home Assistant
Теперь, когда контейнер запущен и работает, нам нужно настроить сам экземпляр Home Assistant.
Откройте браузер и перейдите по адресу http://<ip компьютера>:8123
Начальная настройка Home Assistant

Выберите имя пользователя и пароль для вашей учетной записи Home Assistant. Эта учетная запись также будет «администратором».
Далее пройдите через настройку вашей домашней зоны. В процессе настройки Home Assistant даже покажет вам устройства, которые он уже обнаружил и которые вы можете интегрировать с самого начала.
После завершения настройки вы окажетесь на информационной панели Home Assistant. Если вы настроили какие-либо устройства на предыдущем этапе, они будут отображаться на главном экране.

Управление Portainer из Home Assistant
Как только мы начнем добавлять дополнения, нам захочется довольно часто иметь возможность быстро просматривать их без необходимости открывать дополнительные окна браузера.
Для этого мы воспользуемся панелью iframe. Эта интеграция добавит Portainer в боковую панель Home Assistant.
cd /opt/homeassistant/config
sudo nano configuration.yaml
Чтобы добавить iframe для Portainer, добавьте следующий код в файл configuration.yaml:
panel_iframe:
  portainer:
    title: Portainer
    url: "https://192.168.10.106:9443"
    icon: mdi:docker
    require_admin: true
5. Установка брокера Mosquitto для работы MQTT и Zigbee устройств
В этой части мы добавим наше первое дополнение. Брокер Mosquitto MQTT позволит нам соединяться с широким спектром устройств, и я настоятельно рекомендую его к установке.
Обновим конфигурацию docker-compose.yaml:
services:
  [...]
  homeassistant:
    [...]
    depends_on:
      - mosquitto

  mosquitto:
    container_name: mosquitto
    image: eclipse-mosquitto
    restart: unless-stopped
    ports:
      - "1883:1883/tcp"
    environment:
      - TZ=Asia/Novosibirsk
    volumes:
      - /opt/mosquitto/config:/mosquitto/config
      - /opt/mosquitto/data:/mosquitto/data
      - /opt/mosquitto/log:/mosquitto/log
    stdin_open: true
    tty: true
Мы добавили строки stdin_open и tty, чтобы впоследствии мы могли подключиться к терминалу контейнера для выполнения некоторых команд.
Обратите внимание, что мы также добавили зависимость от контейнера mosquitto для нашего контейнера Home Assistant. Таким образом, наш брокер будет в сети до запуска Home Assistant, и мы можем быть уверены, что наше соединение не прервется.
Файл конфигурации mosquitto.conf
Когда мы запустим контейнер Mosquitto с помощью docker-compose up -d, в журналах появятся ошибки о невозможности открыть файл конфигурации /mosquitto/config/mosquitto.conf. Чтобы исправить это, мы можем загрузить файл конфигурации по умолчанию и сохранить его во вновь созданном каталоге config:
cd /opt/mosquitto/config/
sudo wget https://raw.githubusercontent.com/eclipse/mosquitto/master/mosquitto.conf
Однако мы сделаем несколько изменений. Вы можете добавить следующие строки в конец конфигурационного файла, так как по умолчанию все настройки закомментированы (настройки по умолчанию).
sudo nano mosquitto.conf
# Добавьте следующие строки в конец

# Listen on port 1883 on all IPv4 interfaces
listener 1883
socket_domain ipv4
# save the in-memory database to disk
persistence true
persistence_location /mosquitto/data/
# Log to stderr and logfile
log_dest stderr
log_dest file /mosquitto/log/mosquitto.log
# Require authentication
allow_anonymous false
password_file /mosquitto/config/mqttuser
Пользователи Mosquitto
Далее мы создадим пользователя в Home Assistant для соединения с брокером.
В идеале мы позже создадим нового пользователя для каждого устройства (семейства). Например, одна учетная запись для устройств Shelly, одна для Zigbee2MQTT и т.д.
Выполните следующую команду для создания пользователя с именем homeassistant. Обратите внимание, что параметр -c создаст новый файл паролей и перезапишет все существующие файлы. Поэтому отбросьте этот параметр, если вы хотите создать вторую учетную запись.
docker exec -it mosquitto mosquitto_passwd -c /mosquitto/config/mqttuser homeassistantЕсли теперь вы проверите содержимое только что созданного файла mqttuser, вы найдете свое имя пользователя и хэшированный пароль:
cat /opt/mosquitto/config/mqttuser
homeassistant:$7$101$q7VtJJ/E*******7$1I******************************************b/G**************************************A==
Теперь мы можем перезапустить контейнер Mosquitto, чтобы он загрузил наши изменения:
sudo docker-compose restart mosquittoЛоги должны показать, что контейнер Mosquitto запущен:
sudo cat /opt/mosquitto/log/mosquitto.log
1662413136: mosquitto version 2.0.15 starting
1662413136: Config loaded from /mosquitto/config/mosquitto.conf.
1662413136: Opening ipv4 listen socket on port 1883.
1662413136: mosquitto version 2.0.15 running
Настройка MQTT в Home Assistant
Теперь мы можем подключить Home Assistant к нашему брокеру MQTT, чтобы он мог начать подписываться на темы и отправлять сообщения. Поскольку пока нет других подключенных MQTT клиентов, Home Assistant пока не будет добавлять новые устройства.

Мы добавляем новую интеграцию MQTT в Home Assistant и вводим учетные данные, которые мы установили минуту назад для аутентификации.

Логи контейнера MQTT подтверждают успешное подключение Home Assistant:
sudo cat /opt/mosquitto/log/mosquitto.log
1662413136: mosquitto version 2.0.15 running
1662414198: New connection from 192.168.10.106:43153 on port 1883.
1662414198: New client connected from 192.168.10.106:43153 as 4atvQWWEyf2XpG3yy0kgOW (p1, c1, k60, u'homeassistant').
1662414198: Client 4atvQWWEyf2XpG3yy0kgOW disconnected.
1662414198: New connection from 192.168.10.106:39605 on port 1883.
1662414198: New client connected from 192.168.10.106:39605 as 5gNbahjfE5DulEufquYcaa (p2, c1, k60, u'homeassistant').
6. Установка Zigbee2MQTT для подключения датчиков и других устройств умного дома по протоколу Zigbee
Для этого потребуется приобрести отдельный Zigbee-координатор, который подключается к компьютеру по USB. Я использовал этот в своей системе.
Найти координатор Zigbee
В конфигурации Docker compose нам нужно будет назначить координатор Zigbee, который будет подключен через USB, к контейнеру Docker.
Подключите ваш координатор Zigbee (например, Conbee II, Sonof Zigbee 3.0 Plus, …) к вашей машине. Затем выполните следующую команду, чтобы получить уникальный путь к устройству.
ls -l /dev/serial/by-id/
usb-ITead_Sonoff_Zigbee_3.0_USB_Dongle_Plus_eexxxxxxxxxxxxxxxxxxxxxxxxxxxxxxx52-if00-port0 -> ../../ttyUSB0
Позже мы будем использовать этот уникальный путь by-id в нашей конфигурации вместо типичного /dev/ttyUSB0, потому что всегда есть риск, что устройство получит новый TTY после перезагрузки, особенно при подключении других устройств.
Docker-compose
Мы расширяем наш docker-compose.yaml конфигурацией для контейнера Zigbee2MQTT.
services:
  [...]

  zigbee2mqtt:
    container_name: zigbee2mqtt
    image: koenkk/zigbee2mqtt
    restart: unless-stopped
    ports:
      - "8099:8099/tcp"
    environment:
      - TZ=Asia/Novosibirsk
    volumes:
      - /opt/zigbee2mqtt/data:/app/data
      - /run/udev:/run/udev:ro
    devices:
      - /dev/serial/by-id/usb-ITead_Sonoff_Zigbee_3.0_USB_Dongle_Plus_eexxxxxxxxxxxxxxxxxxxxxxxxxxxx52-if00-port0:/dev/ttyACM0
Обратите внимание, что я изменил отображение портов для этого контейнера. Порт 8080 уже используется администратором, поэтому я изменил порт внешнего интерфейса Zigbee2MQTT на 8099 (см. ниже) и указал его в конфигурации Docker.
Мы не будем пока запускать наш контейнер, так как сначала нам нужно настроить нашу конфигурацию.
Создаем пользователя MQTT
Когда мы настраивали MQTT-брокер Mosquitto, я говорил, что предпочитаю создавать MQTT-пользователя для каждого сервиса. Поэтому давайте создадим пользователя для нашего контейнера Z2M.
docker exec -it mosquitto mosquitto_passwd /mosquitto/config/mqttuser z2m_mqtt
Password:          # Enter a password
Reenter password:  # Repeat the password

cat mosquitto/config/mqttuser
[...]
z2m_mqtt:$7$101$1xcB1yrF********$O$XR******************2/N************************************************************g==
Конфиг Zigbee2MQTT
Чтобы получить копию стандартного конфига, запустите sudo wget https://raw.githubusercontent.com/Koenkk/zigbee2mqtt/master/data/configuration.yaml в папке, где будет храниться конфиг (/opt/zigbee2mqtt/data). Затем откройте и отредактируйте его с помощью sudo nano /opt/zigbee2mqtt/data/configuration.yaml.
Мы укажем Z2M подключиться к нашему MQTT-брокеру, использовать синтаксис, который понимает Home Assistant для обнаружения устройств, настроить веб-сервер и позволить Z2M сгенерировать некоторые ключи, используемые для настройки сети Zigbee.
# Adapter settings
serial:
  port: /dev/ttyACM0

# MQTT
mqtt:
  base_topic: zigbee2mqtt
  server: '!secret server'
  user: '!secret user'
  password: '!secret password'
  client_id: zigbee

# Zigbee network
permit_join: false # Do not allow random devices to connect automatically

# Webserver
frontend:
  port: 8099 # Custom port
  url: 'http://<ip.of.our.box>:8099' # Update IP here

# Devices and groups
# Extract config to separate files
devices: devices.yaml
groups: groups.yaml

# Home Assistant integration
homeassistant: true
Если вы проверите журналы через Portainer или docker-compose logs zigbee2mqtt, вы увидите, что наш контейнер прекрасно запустился:
Using '/app/data' as data directory
Zigbee2MQTT:info  2022-10-04 12:09:47: Logging to console and directory: '/app/data/log/2022-10-04.12-09-47' filename: log.txt
Zigbee2MQTT:info  2022-10-04 12:09:47: Starting Zigbee2MQTT version 1.28.0 (commit #03ba647)
Zigbee2MQTT:info  2022-10-04 12:09:47: Starting zigbee-herdsman (0.14.62)
Zigbee2MQTT:info  2022-10-04 12:09:48: zigbee-herdsman started (resumed)
Zigbee2MQTT:info  2022-10-04 12:09:48: Coordinator firmware version: '{"meta":{"maintrel":1,"majorrel":2,"minorrel":7,"product":1,"revision":20220219,"transportrev":2},"type":"zStack3x0"}'
Zigbee2MQTT:info  2022-10-04 12:09:48: Currently 0 devices are joined:
Zigbee2MQTT:info  2022-10-04 12:09:48: Zigbee: disabling joining new devices.
Zigbee2MQTT:info  2022-10-04 12:09:48: Connecting to MQTT server at mqtt://<ip.of.our.box>:1883
Zigbee2MQTT:info  2022-10-04 12:09:48: Connected to MQTT server
Zigbee2MQTT:info  2022-10-04 12:09:48: MQTT publish: topic 'zigbee2mqtt/bridge/state', payload '{"state":"online"}'
Zigbee2MQTT:info  2022-10-04 12:09:48: Started frontend on port 0.0.0.0:8099
Zigbee2MQTT:info  2022-10-04 12:09:48: MQTT publish: topic 'zigbee2mqtt/bridge/state', payload '{"state":"online"}'
Добавим Z2M на боковую панель Home Assistant:
Процесс аналогичен с добавлением Portainer:
panel_iframe:
  portainer:
  [...]
  zigbee2mqtt:
    title: Zigbee2MQTT
    icon: mdi:zigbee
    url: http://192.168.10.106:8099
    require_admin: true
После перезапуска Home Assistant (docker-compose restart homeassistant) получим примерно следующее:


В данном видеоролике подробно и наглядно показано как пользоваться Zigbee2MQTT. Если вы в первый раз работаете с ним, рекомендую к просмотру.
Конец
Спасибо за внимание, есть еще немало дополнений, которые можно добавить, поэтому статья будет дополняться.
Если возникнут вопросы или предложения — пишите в комментарии, рад любой активности.
Если вы читаете эту статью, то есть вероятность того, что вы «наигрались» с готовыми решениями от вендоров и они перестали вас удовлетворять по тем или иным причинам. Но возможно вы попали сюда по каким-то иным соображениям, поэтому советую вам ознакомиться с предыдущей статьей цикла, описывающей возможные варианты построения своего умного дома. Вдруг вам понравятся другие пути.
А если вы все-таки решили погрузиться в мир Open Source решений, то мы постараемся раскрыть для вас некоторые важные аспекты этого направления.
Open Sourcе — в буквальном переводе означает «открытый код». Это означает, что разработчики не скрывают свой программный код, и его может модернизировать или использовать для своих целей абсолютно любой желающий. Естественно, эти программы являются бесплатными. Их разработкой обычно занимаются программисты-энтузиасты, которые, чаще всего группами, занимаются реализацией идей и превращают их в работоспособный продукт.
Конечно, эти программы можно использовать как для личного использования, так и в коммерческих целях. Обычно, его распространяют, базируясь на идеологии GNU GPL.
Плюсы и минусы
Ввиду того, что опенсорс продукты разрабатываются энтузиастами, у них есть свои плюсы и минусы:
ПлюсыМинусыБесплатноОткрытый код, который можно дорабатывать и изменятьЕго можно просто скачать и установить
Нерегулярность либо отсутствие обновленийОчень частые проблемы при обновлении (вылетают модули и система перестает работать)Проблемы с поддержкой
Отсутствие единого ответственного за продуктДовольно сложная установкаНастройка и внедрение занимают значительное времяТребуются навыки программирования и знание машинной логикиТребуется очень много дополнительной информации для настройки даже тех модулей, для которых существует подробная документация (форумы, чаты и общение со специалистами)
Плюс ко всему, у OpenSource проектов есть один огромнейший минус. Если основная группа разработчиков потеряла интерес к продукту, то он очень быстро «умирает», так как перестает развиваться. Такая же ситуация возможна, если лидер команды решает коммерциализировать продукт, или приходит инвестор, который вообще может закрыть проект или интегрировать его в свой. То есть конечный пользователь останется с тыквой и без туфелек.
Выбор системы
Как мы упоминали в более ранних статьях, у нас уже сформировался некий рейтинг используемых нашими пользователями бесплатных систем управления. Мы не будем рассказывать обо всех, но кратко опишем лидеров нашего рейтинга, чтобы вы понимали особенности каждого из них.
Home Assistant
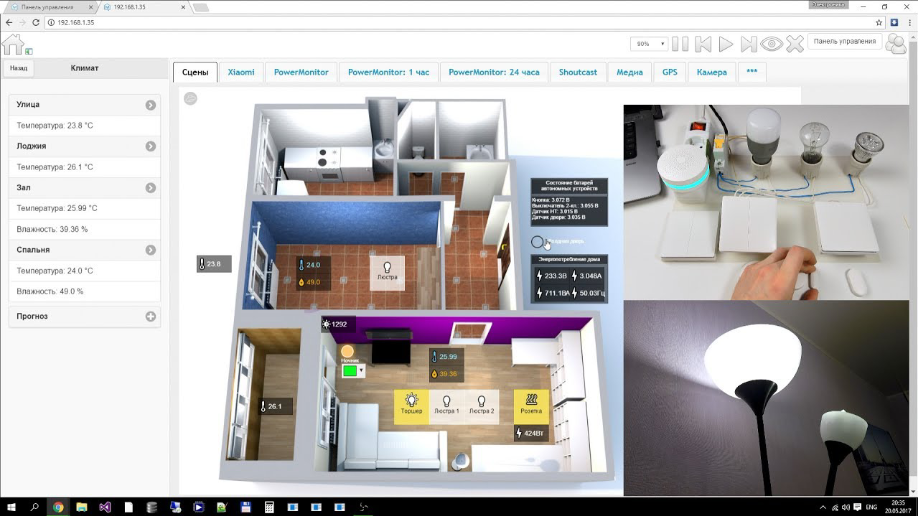
Home Assistant — open source система автоматизации, написанная на языке Python3. Она очень активно развивается, выходят постоянные обновления и появляется поддержка очень большого количества новых устройств. Также она довольно простыми способами интегрируется с большинством популярных экосистем и в ней осуществляется поддержка популярных онлайн-сервисов. В рейтинге сообщества Sprut.ai она занимает первое место.
Данную систему можно установить как на практически любой, достаточно производительный одноплатный ПК, так и на любой полноценный компьютер.
Что касается инструкций по установке, то помимо официальных мануалов от разработчиков, у нас есть целый цикл по установке и настройке системы от Александра Жабунина. Система поддерживает различные способы, в том числе и установку в виде распаковки образа на флешку (у нас на портале есть готовый образ для наших пользователей), но существуют и альтернативные способы установки.
Что касается особенностей системы, то одна из самых главных заключается в том, что система имеет два варианта — простой Home Assistant и Hass.io. Разница между ними в том, что в Hass.io есть раздел с аддонами, которые можно установить прямо из веб интерфейса. В простом Home Assistant такой возможности нет. Плюс к этому, есть еще один нюанс. Официальный образ от разработчика отличается от образов и вариантов установки на нашем портале тем, что у официального варианта нет полноценного доступа до хост-системы. В наших вариантах — доступ есть и он полноценный. Иногда это важно. Но некоторым может быть нет, поэтому они могут воспользоваться обычным вариантом установки, предлагаемым разработчиками. А что касается дополнительных настроек, то на нашем портале есть огромное количество информации на эту тему, которую вы можете с легкостью найти по тегу Home Assistant.
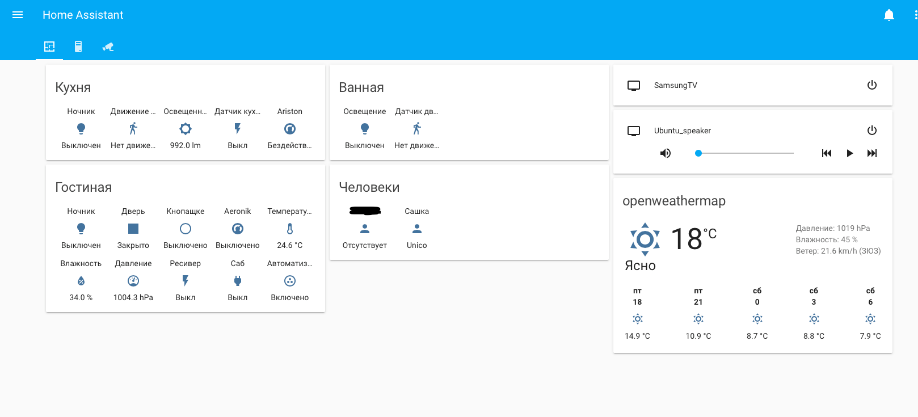
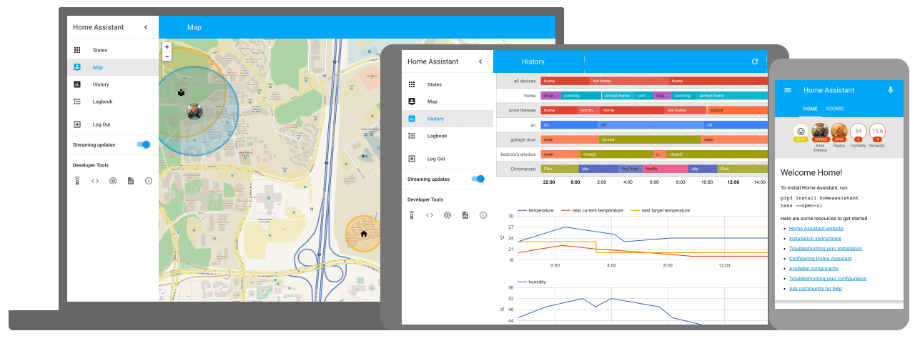
Пример внешнего вида интерфейса.Немного статей по данной системе, с которыми рекомендую ознакомиться.
Home Assistant, статья 1 (установка)
Home Assistant, статья 2 (базовая настройка).
Home Assistant, статья 3 (добавляем устройства)
Homebridge

Homebridge — сервер, написанный на Nodejs с использованием API Apple, который позволяет добавить устройства в ваш Дом, которые не имеют сертификацию и изначально не поддерживают интеграцию в Apple HomeKit.
Благодаря слаженной работе разработчиков, на сегодняшний день, в систему интегрировано очень большое количество устройств. На нашем портале вы можете найти очень много статей на тему Raspberry Pi, которые могут вам помочь в настройке и изучении этой системы.
Homebridge является кросс-платформенным решением, которое можно установить на Windows, Linux и Mac OS X.
Также участниками общества были сделаны образы для Raspberry Pi уже с установленными Homebridge Вариант 1 и Вариант 2.
MajorDoMo
MajorDoMo — система автоматизации, написанная на языке PHP. Система быстро развивается и так же, как и все системы, является OpenSource проектом. Имеет свою армию фанатов. Но чтобы настроить данную систему идеально под себя, потребуются немалые знания языка PHP. Хотя есть поддержка модульной структуры и большое количество готовых модулей. К тому же, в отличии от большинства продуктов, Мажордомо имеет очень мощную Российскую команду разработчиков.
Если вы хотите почитать больше материалов на эту тему, воспользуйтесь поиском по тегу MajorDomo на нашем портале.
ioBroker
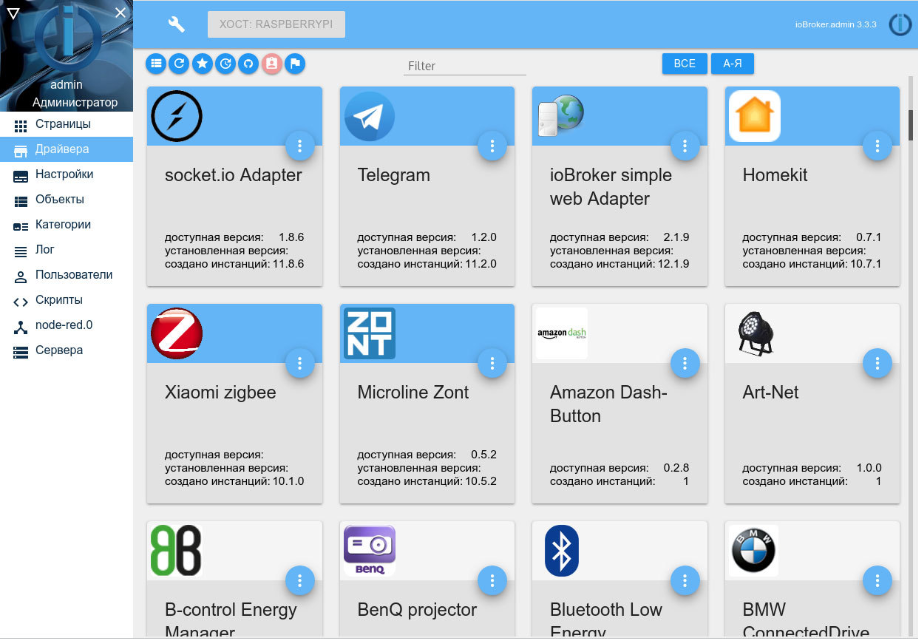
ioBroker — еще одна система для построения умного дома, написанная на NodeJS как и Homebridge.
Система тоже очень хорошо развивается и имеет большое количество интегрируемых устройств. Имеет армию своих фанатов, но интерфейс программы оставляет желать лучшего — дизайн остался еще в 2000х годах. Но, как говорится, «на вкус и цвет».
Хотя некоторые участники нашего сообщества утверждают, что для высоконагруженных систем с большим количеством устройств, ioBroker — это единственное подходящее решение. Это, конечно, может относиться к промышленным автоматизациям, но факт наличия подобного мнения означает, что систему используют даже в таких целях.
Что касается обычного использования системы для классического умного дома, то у нас на портале есть несколько интересных статей на эту тематику:
А если вы хотите почитать побольше, то можете воспользоваться тегом ioBroker на нашем портале.
Node RED
Node RED — визуальная среда программирования, использующая API и онлайн сервисы, соединяющая между собой исполнительные устройства. NodeRED можно установить на любую систему, главное, чтобы можно было установить NodeJS.
Так как данная система является визуальной, то тут Минимум кода и максимум визуальности. Система на нашем портале пользуется большой популярностью и имеет много статей.
Хотя малое количество кода — это не совсем правда. Чтобы создать нечто сложное, вам придется все равно писать и писать код. Для каждого блока в вашей блок-схеме.
Но система обладает значительным преимуществом перед остальными. Она может быть интегрирована с чем угодно.
Например, мы можем использовать Home Assistant только в качестве визуального интерфейса управления и сервера для подключения устройств, а все автоматизации можно выполнять в Node-Red. Он и сам является полноценной системой автоматизации. Есть огромное количество модулей для интеграции тех или иных устройств и систем. Поэтому он и является одним из самых универсальных решений, которое можно водрузить поверх уже существующей системы как дополнение, или создавать на его базе новую, полноценную систему управления вашим умным домом.
Статьи по данной теме можно найти на нашем портале по тегу Node Red.
Domoticz
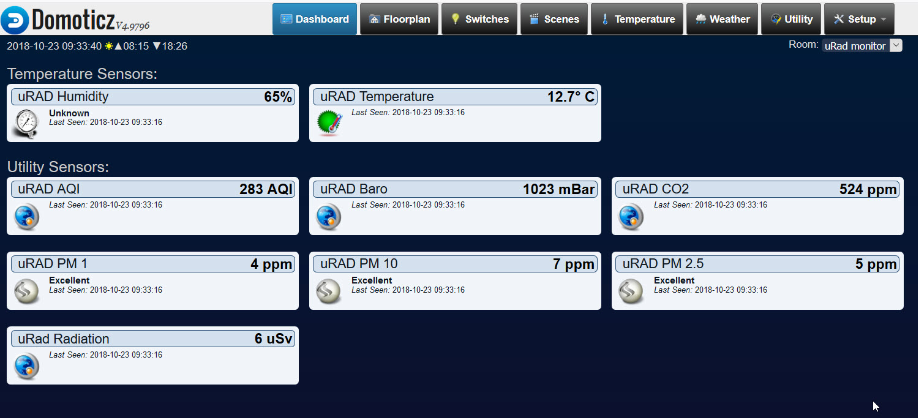
Domoticz — еще одна система управления умными домами. На данный момент тоже активно развивается и можно установить на любую ОС, но система, на сегодняшний день, не является идеальной. Начиная со страшненького дизайна и заканчивая довольно медленным развитием, относительно конкурентов. Именно поэтому в нашем сообществе она не сильно пользуется популярностью.

OpenHab
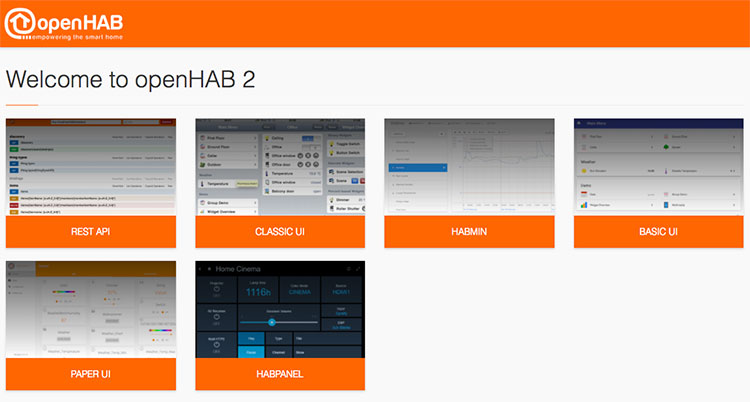
openHAB — это специальный сервер, который может работать на любом компьютере под управлением любой ОС (вы даже можете использовать RaspberryPi). Вся установка заключается в распаковывании дистрибутива сервера и установке Java машины. Далее начинается процесс настройки и созидания.
OpenHAB, по сравнению с предыдущим участником нашего рейтинга — ioBroker, имеет более современный интерфейс и насчитывает поддержку более 50 протоколов и типов устройств.
У системы есть свои плюсы и минусы, для описания которых понадобилось написать отдельную статью.
Но в целом — это довольно популярная система, которой многие с удовольствием пользуются.
Выбор железа
Эта тема достойна отдельной статьи, так как вариантов, куда установить систему для вашего умного дома, существует огромное множество. И мы ее таки напишем. Но в контексте данной статьи, было бы кощунственно не упомянуть самые популярные варианты, которые используют наши участники в качестве ядра для своего умного дома.
Различные модели Raspberry Pi

Дешевые неттопы
NAS от Synology
Выбор железа ограничен только вашей фантазией, но народ руководствуется прагматичными критериями.
Например, Raspberry Pi — это не очень дорого, потребляет мало электричества и обладает миниатюрным размером. Но производительность, для некоторых задач, может быть недостаточна. Да и флешка — достаточно ненадежное устройство для установки системы с постоянно обновляющимися базами данных. А решения с покупкой б/у-шного неттопа, за смешные деньги, имеют место быть. Причем с производительностью не возникает вообще никаких проблем. И хранение на SSD вполне себе оправдывает все. Ну а тем, кто владеет NAS от Synology — вообще повезло. Туда можно поставить все что угодно в Docker.
Но как я раньше и говорил, все это достойно отдельной статьи, ибо вариантов огромное количество, а плюсы и минусы есть у каждого из них.
Выводы
Основной вывод — вам придется подтягивать свои навыки программирования. Придется читать много на английском языке, так как оказывается даже самые «безумные», на первый взгляд, автоматизации для вашего дома, кто-то уже придумывал и задача так или иначе была решена. Но придется продираться через обсуждения различных вариантов решений задачи, и они будут содержать значительные куски кода, которые вам надо будет переписывать под себя. Это не так сложно, как может показаться, но занимает много времени. Хотя это, скорее, полезный навык в сегодняшних реалиях, когда даже для простейших автоматизаций в HomeKit уже необходимо понимание машинной логики. Иначе никак.
Второй основной вывод — бесплатность. С одной стороны — вам не придется покупать программное обеспечение. С другой — вы будете тратить свое время, а оно тоже стоит денег. Поэтому все подобные решения можно считать условно-бесплатными. К тому же, на железо все равно придется тратиться. Просто выбор намного богаче. И это несомненный плюс.
Третий основной вывод — установленная система без датчиков и исполнительных устройств вам ничего не даст. Вам все равно нужно покупать устройства. Плюс в том, что вы теперь не ограничены одним производителем и вольны выбирать любые подходящие вам решения. И подключать устройства вы сможете как через купленные ранее шлюзы (если они поддерживают эту функцию), так и через USB стики для соответствующих протоколов. Полная свобода.
Поэтому если вы все-таки решили остановить свой выбор на OpenSource решениях, то на данный момент, среди нашего сообщества, наибольшей популярностью пользуются 3 системы: Home Assistant, Homebridge и MajorDoMo.
Если вы хотите немного покодить, хотите хорошую поддержку большинства устройств, продаваемых на рынке, большое и дружное сообщество, которое вам всегда поможет, то ваш выбор — это Home Assistant.
Если перед вами стоит задача только сделать доступными ваши устройства в приложении Дом на вашем iPhone или iPad, то ваш выбор очевиден — HomeBridge. Возиться с кодом все равно придется, но намного меньше, чем в других вариантах.
Если вам нравится веб интерфейс, вы придерживаетесь классических подходов к визуализации, немного знаете язык программирования PHP и обладаете временем и терпением, то ваш выбор — MajorDomo.
Если хотите более функциональную систему с красивым дизайном, но с плохой русскоязычной поддержкой, то это openHAB.
Хотите систему функциональную, но более менее поддерживаемую русскоязычным сообществом, но с убогим дизайном, Domoticz — ваше все. Хотя, сомнительный выбор.
Ну и если вы хотите программировать визуально, то для вас подходит NodeRed.
А вот если для вас определяющим выбором является голосовой ассистент, с помощью которого вы хотите управлять своим умным домом, то в принципе Open Source системы как раз являются лучшим выбором для интеграции, так как у них, обычно, есть поддержка нескольких ассистентов одновременно. И это огромный такой плюс для тех, у кого члены семьи пользуются, например, и Android и iPhone.
Home Assistant интегрируется с Яндекс Алисой, Siri и Google Assistant
HomeBridge — только Siri и Яндекс Алиса
OpenHAB — Яндекс Алиса, Google Assistant и Siri
MajorDomo — Яндекс Алиса, Google Assistant и Siri
ioBroker — Яндекс Алиса, Siri и Google Assistant
Domoticz — Siri и Google Assistant
NodeRED — вообще с чем угодно, зависит от того, как вы его ставите и с чем он взаимодействует.
Так что выбор за вами. Удачи!
Sci-Fi movies from even 10 or 20 years ago have envisioned what the future would be like in terms of technology. They didn’t get a lot of things right but they did touch on a very important subject: home automation.
Even in those old movies, you could see that people were aspiring to build homes full of tech that allows for maximum comfort and convenience.
Today’s various gadgets and devices have made that vision true for the most part and people who want to fully automate their homes can finally do so. Of course, devices won’t just magically run and see to people’s every command, so they need software.
In this article, we are going to take a look at the best home automation software for Windows and your best bets for when you want to bring your home “into the future”.
There are quite a few solutions and many of the top picks share some core functionalities that are absolutely necessary for smooth and functional home automation.
However, smaller and less obvious features in some cases compile the bulk of differences.
Between the various automation software solutions that currently dominate the market, and the long list of needs that some homeowners encumber themselves with the hope of creating the perfect automation platform, there are some really nice options out there.
What are the best smart home software for Windows 10?
HomeSeer HS4-Pi
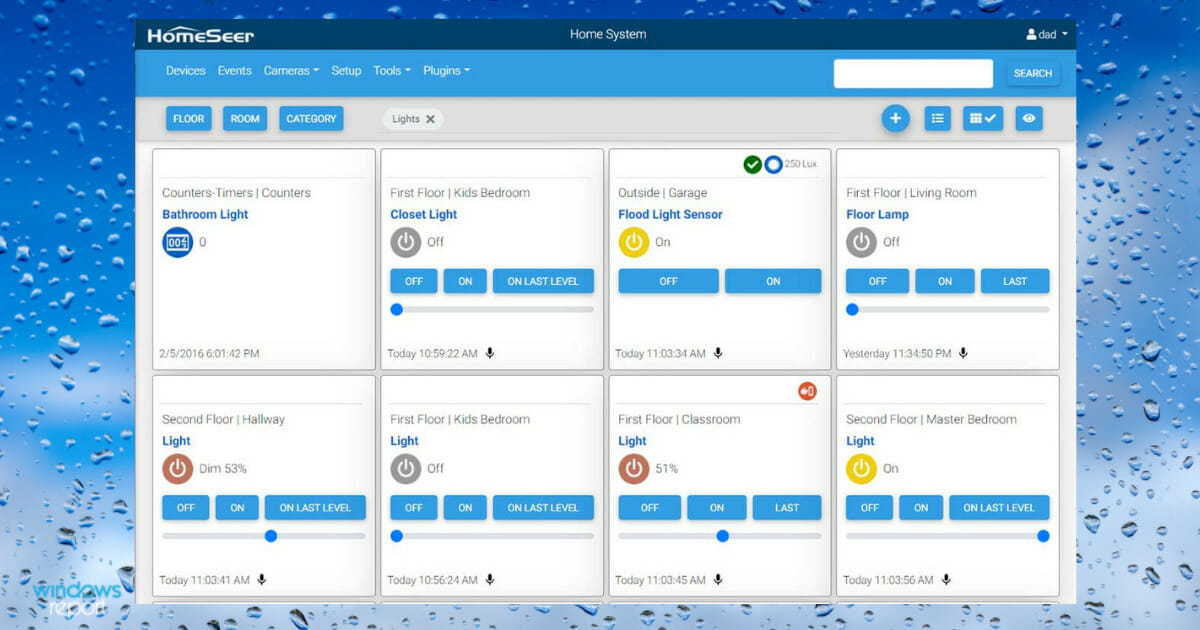
HomeSeer HS4-Pi Smart Home Software is a very popular choice because it is compatible with hundreds of manufacturers and can be integrated with over 300 web products, apps, and services.
This home automation software is designed to run on Raspberry Pi computers, but it can be managed from other devices as well, as it includes a remote access service.
Users of HomeSeer Software can manage their home devices remotely if they install the dedicated mobile app.
It supports full voice control directly from the application or from one of its integrations.
This smart home management system has tons of free integrations of products and services such as Z-Wave, Harmony Hub, MyQ, Tuya, Chromecast, and more.
We should also note that it works with Amazon Alexa and Google Home Assistant Devices.
The tool gives users full control over devices such as door locks and sensors, smart switches, or thermostats.
It also offers support for security camera recordings. These can be accessed from anywhere via the mobile application or web GUI.
Note that Raspberry Pi machines generally use their own operating systems, but users can also install Windows 10 or Windows 11 on them.
Other key features of HomeSeer HS4-Pi include:
- Works even without an Internet connection
- Privacy and security-oriented
- Automatic backups of data on all connected devices
- Customizable email and text alerts
To use this automation software you are required to purchase a license. There are a few different packages available, some including additional benefits or integrations.
HomeSeer HS4-Pi
Maintain your home with this advanced smart house software that can work with various smart technologies.
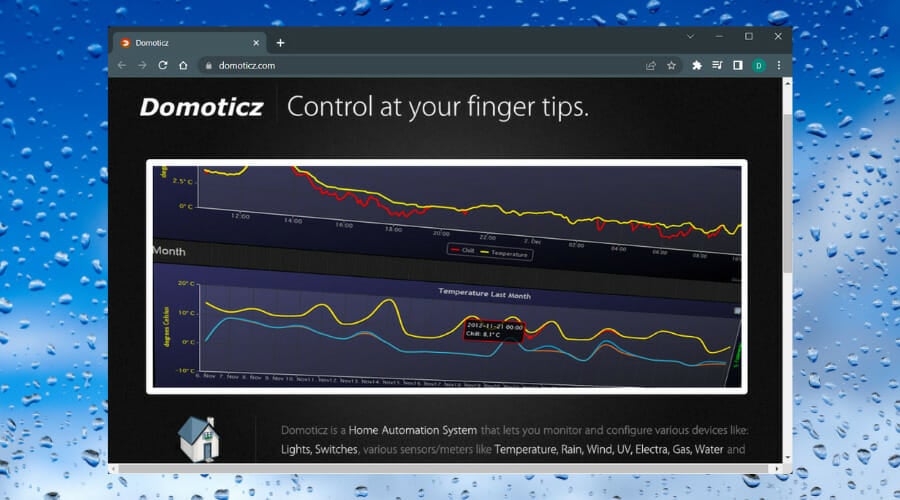
Domoticz
One of the things people are most concerned about when it comes to pairing their devices with software is compatibility.
It can be very frustrating when you implement software that is not fully compatible with all of your machines and gadgets. Luckily, there are solutions such as Domoticz that cover a wide array of home automation devices.
Since Domoticz features support a fairly large range of device families, spreading from the likes of remote controls to sensors and detectors and everything in between, users usually feel safe using this software.
The fact that they can count on a platform that supports all their devices is great and it’s one of the most important things you can look for in automation software.
All the other features aren’t really that great if you can’t get it to communicate with the brand new smart devices you bought.
One of the biggest perks for Domoticz is that it is accessible on a wide range of platforms ranging from your typical computer to smaller things like smartphones and even the ultra-low-cost power solution Raspberry Pi.
On top of the standard software, you also get access to a bunch of additional optional implementations coming from third-party developers.
The software developer features a list of all the third-party perks on their website so it’s easy to see exactly what is available and what you can benefit from personally.
When you put all features together you quickly realize that Demoticz has been developed not just for standard home automation but also the incorporation of much more than that through capabilities such as extensive sharing with both local and external devices.
Being able to use external devices is a great perk in itself, let alone when you integrate them into the overall system.
Speaking of playing with the system, users that go for Demoticz are able to create their own switch codes which can really come in handy in diverse situations.
Other key features of Domoticz include:
- Browser-based UI
- Compatible with all major operating systems
- Auto learning sensors
Another important aspect of this app is that it is open source and free to use, so you will not have to invest anything and get started as soon as you install it.
⇒ Get Domoticz
Calaos
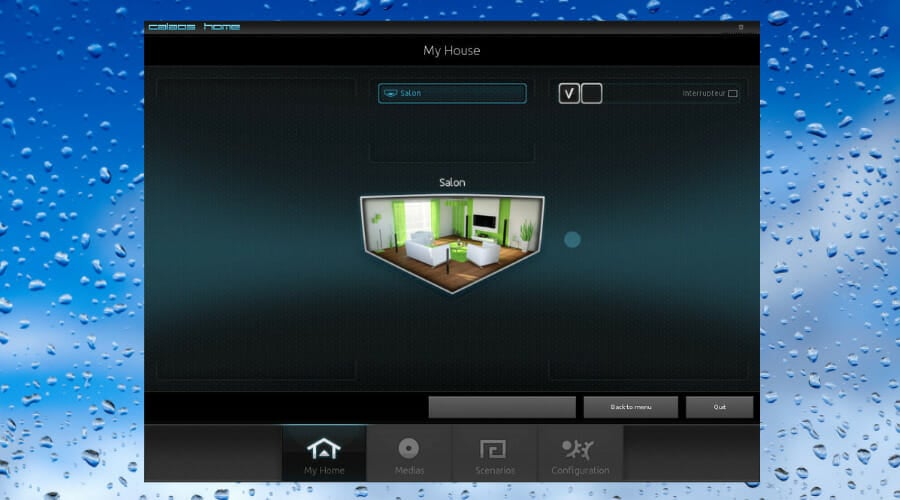
You definitely can’t talk about home automation without including Calaos into the mix. Home automation has definitely been marked by Calaos, or The Calaos Project as it is also referred to in some circles.
Its intricately designed UIs and strong build with multiple layers make this automation solution a treat. That’s especially true if you’re in need of something you can rely on in terms of community support.
That part has been proven when the community took over from the main development team in rehabilitating and bringing Calao up to speed after being closed in 2013.
If you’re looking for a full-stack platform that serves your every automation need, Calaos might be just what you’re looking for.
Mobility is the key element in the connection between automated homes and the owners that means that you absolutely need a mobile application.
Calaos comes with native software for mobile and caters to both Android and iOS users alike.
The operating system infrastructure is much more complex and developed than that, however, as Calaos provides an additional support software solution through the Linux OS running underneath the mainframe.
The Linux OS is preconfigured and can be of tremendous help when it comes to dabbling with settings and configurations.
The only thing that needs to be noted on the not-so-great side is the fact that a lot of the documentation for Calaos is in French. It’s not universally French however and you’ll still be able to find some English documentation.
However, a big part of the support material is in French including the support forums and a chunk of the instructions included for the software.
Other key features of Calaos include:
- Server application
- Touchscreen UI support
- Web application
If you’re interested in Calaos you should also know that you can find the source files on GitHub. In terms of licensing, it’s featured under GPL v.3.
⇒ Get Calaos
OpenHAB
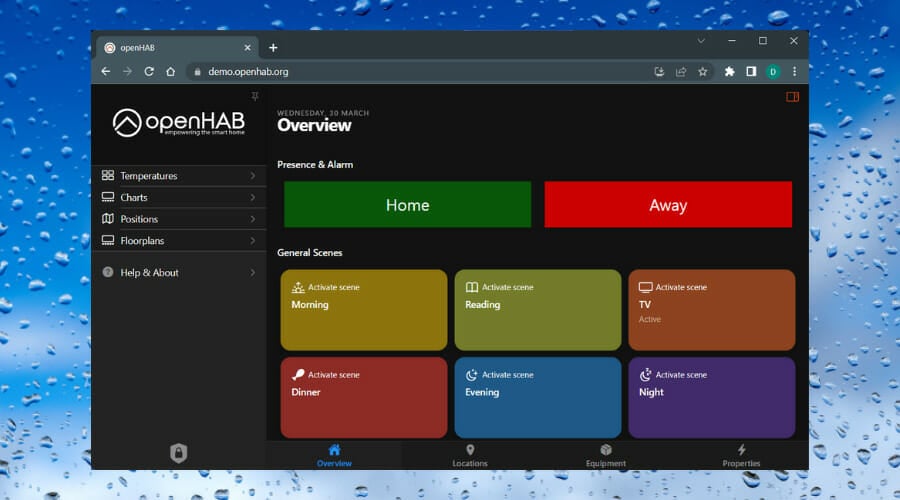
OpenHAB is the preferred name that this software goes under, but the full name is Open Home Automation Bus.
You can pretty much guess why people are going for the former. That being said, OpenHAB caters to the needs and desires of home automation explorers that have a thing for open source.
This software is supported not just by the developer but also by a thriving community. OpenHAB has quite a large following and it is a well-known home automation solution in specialty circles.
If you’re looking to find a stable and supported platform for your entire array of devices, you can securely give OpenHAB a try as this Java-powered software features many integrations that make your job a lot easier.
Some open-source software tends to cater to more obscure device solutions but that’s not the case with OpenHAB which is going to have no issues with the biggest and most popular tech solutions. In fact, the list of supported devices reaches deep into the hundreds.
However, the thing to know about OpenHAB is that despite its huge compatibility list, it doesn’t strive to cater to any particular device as it is meant to stay clear of “taking sides” if you will.
What that means is that developers have a lot more freedom for adding their own tech into the mix as well as their own plugins.
Device control through OpenHAB can also be done through the associated iOS and Android apps. OpenHAB also comes with design tools that let you play around and come up with your own interface and user experience.
When it comes to making your smart home system truly “yours”, it doesn’t get much more customizable than that.
As you would expect to see from an open-source solution, you can find the source code for OpenHAB on GitHub. More specifically, it’s featured under EPL (Eclipse Public License).
Other key features of OpenHAB include:
- Pluggable architecture
- Supports 200 technologies and systems
- Design rules with time or event-based triggers
- Runs the server on Windows, macOS, Linux, Raspberry Pi, Docker
⇒ Get OpenHAB
Home Assistant
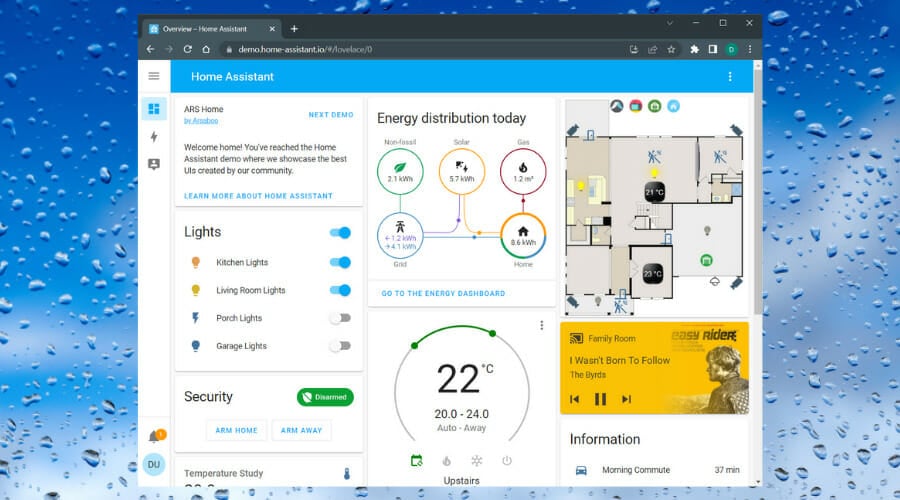
There are multiple things that you should know about this specific software. For starters, this is an open-source meaning that it is highly accessible and it makes for a very easy time on the configuration side of things.
Getting Home Assistant set up on your machines is also going to be a breeze thanks to the special care its developers have put into that specific part of the implementation – the actual deployment.
Home Assistant doesn’t come with a lot of requirements but it does need a device that can run Python 3.
On top of the software, you also get a Docker for getting Home Assistant, which only makes things better considering the fact that you will probably want to hook Home Assistant up to more than just one device.
Some might think that Home Assistant is limited to open source products since Home Assistant itself is open source.
However, that’s not the case as it is compatible with both open source and commercial property, making it the perfect bridge for getting the best of both worlds.
Once again, Raspberry Pi is a viable option in combination with Home Assistant, just like the previously presented software.
If that’s just not in your circle of interest, there are plenty more technologies able to link up with Home Assistant ranging from weather information-related tech to full-blown home assistants like Amazon Echo.
This means that you are able to control a long list of types of technologies and device functions. Another thing that might get you intrigued about Home Assistant is the fact that it features an MIT license and you can find the source code on GitHub as was to be expected.
Other key features of Home Assistant include:
- Integrates with over 1000 devices or services
- Strong automation engine
- System add-ons
- Home energy management
⇒ Get Home Assistant
OpenMotics
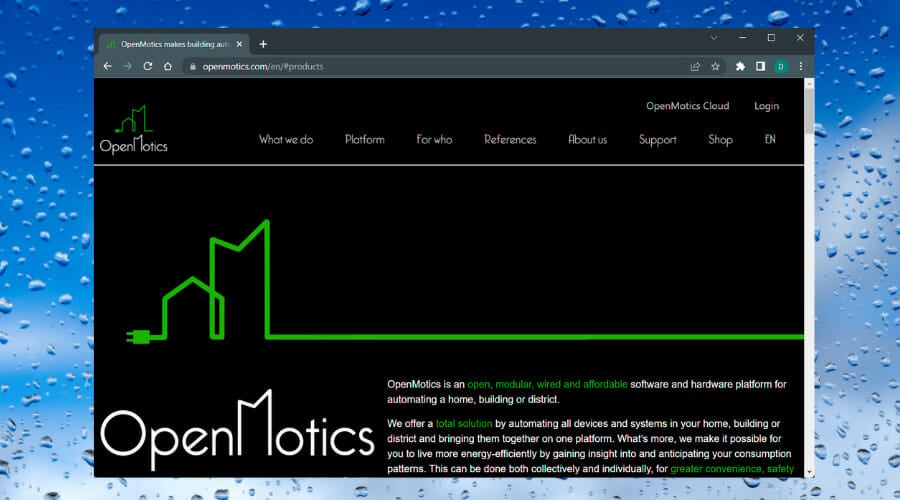
If you’re still looking for a solution that would cater to your specific home automation needs, you can also take a look at OpenMotics.
OpenMotics comes with some really nice features and one of them is the fact that you can use it for more than just hardware.
This automation system works perfectly fine with hardware and software and it excels at controlling devices in the true sense of the word rather than creating a thin glue layer of sorts around all the involved devices.
You might be wondering what exactly OpenMotics does differently in terms of automation and the answer is simple: it provides a hardwired solution for creating a unified platform. If you’re looking for a retrofitting solution, OpenMotics might not be what you need as this is quite the opposite of that.
OpenMotics however might be the solution you need if you’re looking to get away from some of the usual concerns that come with the task of creating a compatible and unified home automation platform.
OpenMotics does not differ from the other presented solutions in terms of accessibility, but it can be useful if you want to use it for increased convenience, safety, and sustainability, both collectively and individually.
Other key features of OpenMotics include:
- Affordable hardware modules
- Free cloud service
- Local interface without internet
- OpenMotics store integrations
⇒ Get OpenMotics
Ago Control
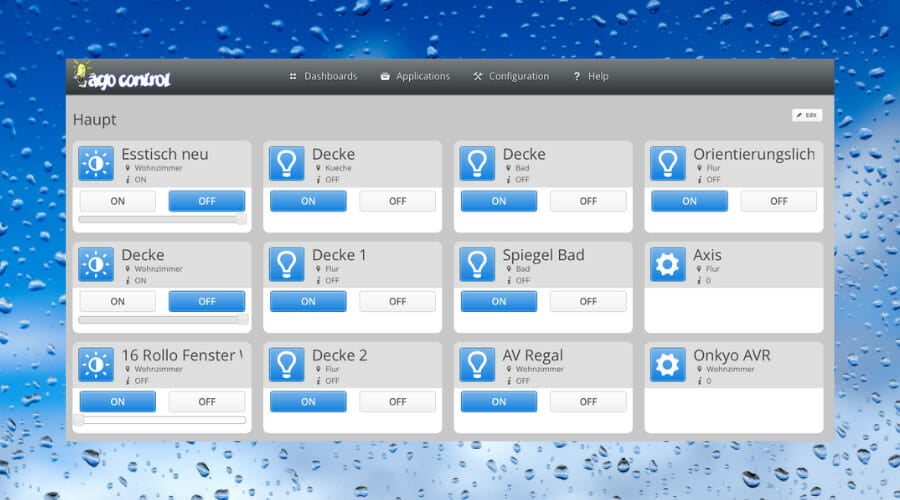
Last but definitely not least, we have ago control. This software comes with some features you might recognize and some that you might be so familiar with.
One of the first things that users pick up when they start using ago control is the fact that even though it provides great support for sustaining a device control framework, it can also be used in other device spectrums than just home automation.
For instance, ago control is acknowledged as a useful solution for agriculture. The ago control backend for communication is supplied by AMQP Enterprise Message Bus which definitely gives it a nice boost right from the get-go.
Another important perk that you get with ago control is definitely the fact that it comes with the lightweight protocol.
What this means is that it’s easy to read regardless of whether a person or machine is doing the reading. This can speed things up considerably throughout the deployment and management process.
Those that want to secure their ability to expand for the future could definitely make use of ago control thanks to its various features that encourage expansion.
For example, it comes with cloud features as well as a modular architecture. It’s also important to mention that ago control makes use of YAML for its device scheme and offers a really nice performance output for the various embedded tech it takes under its wing.
Some examples of this include Raspberry Pi, of course, but also the likes of Guruplug or Sheevaplug, which fall under the plug computer umbrella.
There are a lot of supported protocols for various devices. Some examples of this are KNX, EnOcean, Z-WAVE, 1wire, and of course Asterisk PBX.
Not all of them are going to be featured in your standard home automation setup but you can rest on the thought of having those options in your back pocket.
Other key features of Ago Control include:
- Full automation of your home
- Control the devices like KNX
- Supports Raspberry Pi system
- Cloud feature
- Modern and modular interface
⇒ Get Ago Control
Conclusion
Home automation is definitely something that will pick up traction in a massive way in the following years and those who want to get a step up on everyone else surely have some enticing solutions at their disposal right now.
While it’s hard to say how the market will evolve, it’s pretty safe to assume that it will bring even more solutions for a better, more robust ecosystem. The core tech is already there. The area in which developers can make the most astounding advancements is that of device connection.
More compatibility and vendor neutrality on top of the already promising list of such existing features will play a big role in bringing complete and true home automation to the average consumer.
Install Home Assistant Operating System
Download the appropriate image
-
VirtualBox (.vdi)
-
VMware Workstation (.vmdk)
-
Hyper-V (.vhdx)
After downloading, decompress the image. If the image comes in a ZIP file, for example, unzip it.
Follow this guide if you already are running a supported virtual machine hypervisor. If you are not familiar with virtual machines, install Home Assistant OS directly on a Home Assistant Yellow, a Raspberry Pi, or an ODROID.
Create the virtual machine
Load the appliance image into your virtual machine hypervisor. (Note: You are free to assign as much resources as you wish to the VM, please assign enough based on your add-on needs).
Minimum recommended assignments:
- 2 GB RAM
- 32 GB Storage
- 2vCPU
All these can be extended if your usage calls for more resources.
Hypervisor specific configuration
VirtualBox
Unraid
KVM (virt-manager)
KVM (virt-install)
VMware Workstation
Hyper-V
- Create a new virtual machine.
- Select type Linux and version Linux 2.6 / 3.x / 4.x (64-bit).
- Under Hardware, select the amount of memory and number of CPUs. Then, select Enable EFI.
- Make sure EFI is enabled. If EFI is not enabled, HAOS won’t boot.
- Under Hard Disk, select Use an existing virtual hard disk file, select the unzipped VDI file from above.
- Then go to Network > Adapter 1. Choose Bridged Adapter and choose your network adapter.
Please keep in mind that the bridged
adapter only functions over a hardwired Ethernet connection.
Using Wi-Fi on your VirtualBox host is unsupported. - Then go to Audio and choose Intel HD Audio as audio controller.
By default, VirtualBox does not
free up unused disk space. To automatically shrink the vdi disk image the discard option must
be enabled using your host machine’s terminal:
VBoxManage storageattach <VM name> --storagectl "SATA" --port 0 --device 0 --nonrotational on --discard on
More details can be found about the command can be found here.
- Download the .qcow2 image above and decompress it. (Extract all in Windows)
- Store the image in the isos share on your server.
- Make sure under Settings > VM manager, Enable VMs is enabled.
- Create a new virtual machine: VMS > Add VM.
- Select type Linux and give the VM a name and a description.
- Select the CPU cores you want to let the VM use and give it some memory.
- Under Primary vDisk Location, select Manual and then select the qcow2 image.
- Select your keyboard language under VM Console Keyboard.
- Select br0 under Network Source.
- Select virtio under Network model.
- Select any USB-devices that you want to pass through to Home Assistant, such as Zigbee- or Z-Wave controllers.
- Deselect Start VM after creation.
- Select Create.
- Select the name of your new VM and select the capacity number for your disk. Here, you can expand the disk to whatever your needs are. The default is 32 GB.
- Select the icon of your new VM and select start with console (VNC).
- Create a new virtual machine in
virt-manager. - Select Import existing disk image, provide the path to the QCOW2 image above.
- Choose Generic Default for the operating system.
- Check the box for Customize configuration before install.
- Under Network Selection, select your bridge.
- Under customization select Overview > Firmware > UEFI x86_64: …. Make sure to select a non-secureboot version of OVMF (does not contain the word
secure,secboot, etc.), e.g.,/usr/share/edk2/ovmf/OVMF_CODE.fd. - Click Add Hardware (bottom left), and select Channel.
- Select device type: unix.
- Select name: org.qemu.guest_agent.0.
- Finally, select Begin Installation (upper left corner).
virt-install --name haos --description "Home Assistant OS" --os-variant=generic --ram=4096 --vcpus=2 --disk <PATH TO QCOW2 FILE>,bus=scsi --controller type=scsi,model=virtio-scsi --import --graphics none --boot uefi
If you have a USB
dongle to attach, you need to add the option --hostdev busID.deviceId. You can
discover these IDs via the lsusb command. As example, if lsusb output is:
   Bus 004 Device 001: ID 1d6b:0003 Linux Foundation 3.0 root hub
   Bus 003 Device 004: ID 30c9:0052 Luxvisions Innotech Limited Integrated RGB Camera
   Bus 003 Device 003: ID 1a86:55d4 QinHeng Electronics SONOFF Zigbee 3.0 USB Dongle Plus V2
   Bus 003 Device 002: ID 06cb:00fc Synaptics, Inc.
   Bus 003 Device 005: ID 8087:0033 Intel Corp.
   Bus 003 Device 001: ID 1d6b:0002 Linux Foundation 2.0 root hub
   Bus 002 Device 001: ID 1d6b:0003 Linux Foundation 3.0 root hub
   Bus 001 Device 001: ID 1d6b:0002 Linux Foundation 2.0 root hub
You can recognize the Sonoff dongle at Bus 003 Device 003. So the command to install the VM will become:
virt-install --name haos --description "Home Assistant OS" --os-variant=generic --ram=4096 --vcpus=2 --disk <PATH TO QCOW2 FILE>,bus=scsi --controller type=scsi,model=virtio-scsi --import --graphics none --boot uefi --hostdev 003.003
Note that this configuration (bus 003, device 003) is just an example, your dongle could be on another bus and/or with another device ID.
Please check the correct IDs of your USB dongle with lsusb.
- Start VMware Workstation and select Create a New Virtual Machine.
- Note: the exact name and location of the settings below depend on the VMware version. This procedure is based on version 17.
- Select I will install the operating system later, then select Linux > Other Linux 5.x kernel 64-bit.
- Give the VM a name,
home-assistant, and define an easy to reach storage location, such asC:\home-assistant. - Specify the disk size and select Store virtual disk as a single file.
- Select Customize Hardware.
- Define the amount of memory and the number of cores the VM is allowed to use.
- Remove the New CD/DVD entry. It will not be used.
- Connect an Ethernet cable and make sure it is connected to your network.
- Under Network adapter, select Bridged: Connected directly to the physical network.
- Make sure Replicate physical network connection state is not selected.
- Select Configure Adapters.
- Make sure all virtual adapters and Bluetooth devices are deselected.
- Select your host network adapter. Most likely, this is one of the first 2 checkboxes in the list:
- Select the one for Ethernet.
- The exact names of these adapters depend on your hardware.
- At the end of the wizard, select Finish.
Edit the VM settings
- In Windows Explorer, navigate to the storage location of your newly created VM, for example under
C:\home-assistant. - Delete the
home-assistant.vmdkfile. - In the
Downloadsfolder, find thehaos_ova_xx.x.vmdkfile.- If you haven’t unzipped the archive, unzip it.
- Within the folder, find the
.vmdkfile and rename it tohome-assistant.vmdk. - Paste the file (not the unzipped folder) into the
C:\home-assistantfolder.
- Right-click the
.vmxfile and select Open with > Notepad. - Under
.encoding, add a line. Enterfirmware = "efi". - Now continue with the next step to start your VM.
- If you see a message about side channel mitigations, select OK.
- If you see a message stating that the
.vmdkfile could not be found, in step 3, you likely pasted the folder, not the file. Repeat step 3.
⚠️ Hyper-V does not have USB support
- Create a new virtual machine.
- Select Generation 2.
- Select Connection > Your Virtual Switch that is bridged.
- Select Use an existing virtual hard disk and select the VHDX file from above.
After creation, go to Settings > Security and deselect Enable Secure Boot.
Start up your virtual machine
- Start the virtual machine.
- Observe the boot process of the Home Assistant Operating System.
- Once completed, you will be able to reach Home Assistant on homeassistant.local:8123. If you are running an older Windows version or have a stricter network configuration, you might need to access Home Assistant at homeassistant:8123 or
http://X.X.X.X:8123(replace X.X.X.X with your virtual machine’s IP address).
Help us improve Home Assistant
Have you just installed Home Assistant? The Home Assistant team is looking
to talk to you to understand how the installation went.
Help now
With the Home Assistant Operating System installed and accessible, you can continue with onboarding.
Install Home Assistant Core
Install WSL
To install Home Assistant CoreHome Assistant Core is the heart of Home Assistant itself. It is a Python program that powers every installation type, but can be installed standalone. [Learn more] on Windows, you will need to use the Windows Subsystem for Linux (WSL). Follow the WSL installation instructions and install Ubuntu from the Windows Store.
As an alternative, Home Assistant OS can be installed in a Linux guest VM. Running Home Assistant CoreHome Assistant Core is the heart of Home Assistant itself. It is a Python program that powers every installation type, but can be installed standalone. [Learn more] directly on Windows is not supported.
Caution
This is an advanced installation process, and some steps might differ on your system. Considering the nature of this installation type, we assume you can handle subtle differences between this document and the system configuration you are using. When in doubt, please consider one of the other installation methods, as they might be a better fit instead.
Prerequisites
This guide assumes that you already have an operating system setup and have installed Python 3.13 (including the package python3-dev) or newer.
Install dependencies
Before you start, make sure your system is fully updated, all packages in this guide are installed with apt, if your OS does not have that, look for alternatives.
sudo apt-get update
sudo apt-get upgrade -y
Install the dependencies:
sudo apt-get install -y python3 python3-dev python3-venv python3-pip bluez libffi-dev libssl-dev libjpeg-dev zlib1g-dev autoconf build-essential libopenjp2-7 libtiff6 libturbojpeg0-dev tzdata ffmpeg liblapack3 liblapack-dev libatlas-base-dev
The above-listed dependencies might differ or missing, depending on your system or personal use of Home Assistant.
Create an account
Add an account for Home Assistant Core called homeassistant.
Since this account is only for running Home Assistant Core the extra arguments of -rm is added to create a system account and create a home directory.
sudo useradd -rm homeassistant
Create the virtual environment
First we will create a directory for the installation of Home Assistant Core and change the owner to the homeassistant account.
sudo mkdir /srv/homeassistant
sudo chown homeassistant:homeassistant /srv/homeassistant
Next up is to create and change to a virtual environment for Home Assistant Core. This will be done as the homeassistant account.
sudo -u homeassistant -H -s
cd /srv/homeassistant
python3 -m venv .
source bin/activate
Once you have activated the virtual environment (notice the prompt change to (homeassistant) homeassistant@raspberrypi:/srv/homeassistant $) you will need to run the following command to install a required Python package.
python3 -m pip install wheel
Once you have installed the required Python package, it is now time to install Home Assistant Core!
pip3 install homeassistant==2025.4.4
Troubleshooting: If you do not see the above version of Home Assistant package in your environment, make sure you have the correct Python version installed, as defined under the Prerequisites.
Start Home Assistant Core for the first time. This will complete the installation for you, automatically creating the .homeassistant configuration directory in the /home/homeassistant directory, and installing any basic dependencies.
You can now reach your installation via the web interface on http://homeassistant.local:8123.
If this address doesn’t work you may also try http://localhost:8123 or http://X.X.X.X:8123 (replace X.X.X.X with your machines’ IP address).
Note
When you run the hass command for the first time, it will download, install and cache the necessary libraries/dependencies. This procedure may take anywhere between 5 to 10 minutes. During that time, you may get a site cannot be reached error when accessing the web interface. This will only happen the first time. Subsequent restarts will be much faster.
Help us improve our documentation
Suggest an edit to this page, or provide/view feedback for this page.
Edit
Provide feedback
View given feedback
— бесплатный интерфейс под все ОС (Windows, Android, iOS)
— легкое редактирование дизайна «на лету»
— посмотрите Демо Интерфейсы EasyHome
— бесплатная SCADA протокола ModbusTCP для Диспетчеризации и АСУТПДля стационарной установки разработаны следующие варианты:
| На базе iOS
Размер 9.7″..12.9″ |
На базе Android
Размер 7«… 21» |
IP видеодомофон (только на базе OC Android) Размер 7«… 10» |
На базе Windows Размеры 15″-32″ |
|||
| Накладная рамка iPort $553 + iPad |
Встраиваемая рамка $100 + плашет Android 7″ |
Монитор IP домофона от $250 |
Тач-ПК в сборе 17″ |
|||
|
— Высокое качество экрана и |
— Позволяет базовые функции |
Подходят IP-видеодомофоны: — Akuvox (видео работы ) — Bas-IP (фото) — TrueIP (видео монитора 7″ 10″) |
— Удобное удалённое обслуживание всех систем через TightVNC, AmmyAdmin, LiteManager, AnyDesk |
Галерея
kissolovo_17-2.jpg
kissolovo_17-1.jpg
kissolovo_17-3.jpg
kissolovo_17-4.jpg
kissolovo_17-5.jpg
kissolovo_17-7.jpg
peredovik1_15-1.JPG
peredovik1_15-2.JPG
kissolovo_17-6.jpg
peredovik1_15-4.JPG
peredovik1_15-3.JPG
peredovik3_15-1.JPG
peredovik3_15-2.JPG
peredovik3_15-4.JPG
Primor_14-1.jpg
Primor_14-2.jpg
Primor_14-3.jpg
Primor_14-5.jpg
peredovik3_15-3.JPG
Primor_14-6.jpg
Primor_14-7.jpg
Primor_14-8.jpg
Primor_14-9.jpg
Primor_14-4.jpg
Primor_14-10.jpg
Primor_14-11.jpg
Primor_14-12.jpg
Primor_14-14.JPG
Primor_14-13.jpg
Primor_14-15.JPG
Primor_14-16.JPG
Primor_14-17.JPG
zdan_19-1.jpg
zdan_19-3.jpg
zdan_19-2.jpg
zdan_19-4.jpg
zdan_19-5.jpg
zdan_19-6.jpg
Lenin_15-1.JPG
Lenin_15-2.JPG
Lenin_15-3.JPG
Lenin_15-4.JPG
Lenin_15-5.JPG
osinki_17-1.JPG
osinki_17-2.JPG
osinki_17-3.JPG
osinki_17-4.JPG
sport_18-1.JPG
sport_18-2.JPG
sport_18-3.JPG
sport_18-4.JPG
sport_18-6.jpg
sport_18-5.JPG
sport_18-7.jpg
sport_18-8.jpg
sport_18-9.jpg
sport_18-10.jpg
zdan_19-1.jpg
zdan_19-3.jpg
zdan_19-4.jpg
zdan_19-5.jpg
zdan_19-2.jpg
All-in-one_HP-2.jpg
gorki_14-1.JPG
All-in-one_HP-1.jpg
gorki_14-2.JPG
gorki_14-3.JPG
gorki_14-4.JPG
gorki_14-5.JPG
gorki_14-6.JPG
gorki_14-7.jpg
kamen_15-1.JPG
kamen_15-2.JPG
kamen_15-4.JPG
kamen_15-5.JPG
kamen_15-6.JPG
kamen_15-7.JPG
kirpol_13-1.JPG
kirpol_13-2.JPG
leninskiy_12-1.JPG
leninskiy_12-2.JPG
leninskiy_12-3.JPG
leninskiy_12-4.JPG
leninskiy_12-5.JPG
leninskiy_12-6.JPG
pipo-x9-1.jpg
pipo-x9-2.jpg
pushkun3_13-1.JPG
pushkun3_13-2.JPG
pushkun7_14-2.JPG
pushkun7_14-3.JPG
pushkun9_15-1.JPG
pushkun9_15-2.JPG
pushkun9_15-3.JPG
sadovaja_13-1.JPG
sadovaja_13-4.JPG
sadovaja_13-5.JPG
sadovaja_13-6.JPG
sertolovo_12-1.JPG
sertolovo_12-2.JPG
sertolovo_12-3.JPG
sertolovo_12-4.JPG
sertolovo_12-5.JPG
zdan_stend_19-1.jpg
zdan_stend_19-2.jpg
zdan_stend_19-3.jpg
zdan_stend_19-4.jpg
zdan_stend_19-5.jpg
zdan_stend_19-7.jpg
zhemchuzh_13-2.JPG
zhemchuzh_13-1.JPG
zhemchuzh_13-3.JPG
zhemchuzh_13-4.JPG
zhemchuzh_13-7.JPG
zhemchuzh_13-8.JPG
zhemchuzh_13-5.JPG
EasyHome on BasIP-1.jpg
EasyHome on BasIP-2.jpg
IMG_20210120_115802.jpg
IMG_20210120_115843.jpg
IMG_20210120_120208.jpg
IMG_20210120_134313.jpg
IMG_20210120_133556.jpg
IMG_20210120_195736.jpg
IMG_20210120_195748.jpg
photo_2020-10-26_15-58-48.jpg
photo_2020-10-26_15-58-46.jpg
IMG_20220531_151108.jpg
IMG_20220531_150909.jpg
IMG_20220531_151521.jpg
IMG_20220531_151553.jpg
IMG_20220903_162002.jpg
IMG_20220903_162039.jpg
IMG_20220903_160454.jpg