
POCO, ACE, Loki и другие продвинутые C++ библиотеки
NullReferenced 13.05.2025
В C++ разработки существует такое обилие библиотек, что порой кажется, будто ты заблудился в дремучем лесу. И среди этого многообразия POCO (Portable Components) – как маяк для тех, кто ищет. . .
Паттерны проектирования GoF на C#
UnmanagedCoder 13.05.2025
Вы наверняка сталкивались с ситуациями, когда код разрастается до неприличных размеров, а его поддержка становится настоящим испытанием. Именно в такие моменты на помощь приходят паттерны Gang of. . .
Создаем CLI приложение на Python с Prompt Toolkit
py-thonny 13.05.2025
Современные командные интерфейсы давно перестали быть черно-белыми текстовыми программами, которые многие помнят по старым операционным системам. CLI сегодня – это мощные, интуитивные и даже. . .
Конвейеры ETL с Apache Airflow и Python
AI_Generated 13.05.2025
ETL-конвейеры – это набор процессов, отвечающих за извлечение данных из различных источников (Extract), их преобразование в нужный формат (Transform) и загрузку в целевое хранилище (Load). . . .
Выполнение асинхронных задач в Python с asyncio
py-thonny 12.05.2025
Современный мир программирования похож на оживлённый мегаполис – тысячи процессов одновременно требуют внимания, ресурсов и времени. В этих джунглях операций возникают ситуации, когда программа. . .
Работа с gRPC сервисами на C#
UnmanagedCoder 12.05.2025
gRPC (Google Remote Procedure Call) — открытый высокопроизводительный RPC-фреймворк, изначально разработанный компанией Google. Он отличается от традиционых REST-сервисов как минимум тем, что. . .
CQRS (Command Query Responsibility Segregation) на Java
Javaican 12.05.2025
CQRS — Command Query Responsibility Segregation, или разделение ответственности команд и запросов. Суть этого архитектурного паттерна проста: операции чтения данных (запросы) отделяются от операций. . .
Шаблоны и приёмы реализации DDD на C#
stackOverflow 12.05.2025
Когда я впервые погрузился в мир Domain-Driven Design, мне показалось, что это очередная модная методология, которая скоро канет в лету. Однако годы практики убедили меня в обратном. DDD — не просто. . .
Исследование рантаймов контейнеров Docker, containerd и rkt
Mr. Docker 11.05.2025
Когда мы говорим о контейнерных рантаймах, мы обсуждаем программные компоненты, отвечающие за исполнение контейнеризованных приложений. Это тот слой, который берет образ контейнера и превращает его в. . .
Micronaut и GraalVM — будущее микросервисов на Java?
Javaican 11.05.2025
Облачные вычисления безжалостно обнажили ахиллесову пяту Java — прожорливость к ресурсам и медлительный старт приложений. Традиционные фреймворки, годами радовавшие корпоративных разработчиков своей. . .
In this article I will explain with an example, how to dynamically add and remove TextBox in Windows Forms (WinForms) Application using C# and VB.Net.
The TextBox and its associated Delete Button will be dynamically created on Button click. When the Delete Button for a TextBox is clicked, the TextBox and the Button will be removed.
Form Design
The Form consists of a Button and a Panel control.
Dynamically adding TextBox in Windows Forms Application
When the Add Button is clicked, the TextBox and the Button control is dynamically created and added to the Panel control.
C#
private void btnAdd_Click(object sender, EventArgs e)
{
//Create the dynamic TextBox.
TextBox textbox = new TextBox();
int count = panel1.Controls.OfType<TextBox>().ToList().Count;
textbox.Location = new System.Drawing.Point(10, 25 * count);
textbox.Size = new System.Drawing.Size(80, 20);
textbox.Name = «txt_» + (count + 1);
panel1.Controls.Add(textbox);
//Create the dynamic Button to remove the TextBox.
Button button = new Button();
button.Location = new System.Drawing.Point(95, 25 * count);
button.Size = new System.Drawing.Size(60, 20);
button.Name = «btnDelete_» + (count + 1);
button.Text = «Delete»;
button.Click += new System.EventHandler(this.btnDelete_Click);
panel1.Controls.Add(button);
}
VB.Net
Private Sub btnAdd_Click(sender As System.Object, e As System.EventArgs) Handles btnAdd.Click
‘Create the dynamic TextBox.
Dim textbox As TextBox = New TextBox
Dim count As Integer = panel1.Controls.OfType(Of TextBox).ToList.Count
textbox.Location = New System.Drawing.Point(10, (25 * count))
textbox.Size = New System.Drawing.Size(80, 20)
textbox.Name = «txt_» & (count + 1)
panel1.Controls.Add(textbox)
‘Create the dynamic Button to remove the TextBox.
Dim button As Button = New Button
button.Location = New System.Drawing.Point(95, (25 * count))
button.Size = New System.Drawing.Size(60, 20)
button.Name = «btnDelete_» & (count + 1)
button.Text = «Delete»
AddHandler button.Click, AddressOf Me.btnDelete_Click
panel1.Controls.Add(button)
End Sub
Dynamically removing TextBox in Windows Forms Application
When the Delete Button is clicked, the first the Button which was clicked is referenced and its Index is determined.
Then using the Index, the TextBox is referenced from the Panel control and both the TextBox and Button are removed.
Finally, the location of other TextBoxes and Buttons are arranged to fill the gap created.
C#
private void btnDelete_Click(object sender, EventArgs e)
{
//Reference the Button which was clicked.
Button button = (sender as Button);
//Determine the Index of the Button.
int index = int.Parse(button.Name.Split(‘_’)[1]);
//Find the TextBox using Index and remove it.
panel1.Controls.Remove(panel1.Controls.Find(«txt_» + index, true)[0]);
//Remove the Button.
panel1.Controls.Remove(button);
//Rearranging the Location controls.
foreach (Button btn in panel1.Controls.OfType<Button>())
{
int controlIndex = int.Parse(btn.Name.Split(‘_’)[1]);
if (controlIndex > index)
{
TextBox txt = (TextBox)panel1.Controls.Find(«txt_» + controlIndex, true)[0];
btn.Top = btn.Top — 25;
txt.Top = txt.Top — 25;
}
}
}
VB.Net
Private Sub btnDelete_Click(ByVal sender As Object, ByVal e As EventArgs)
‘Reference the Button which was clicked.
Dim button As Button = CType(sender, Button)
‘Determine the Index of the Button.
Dim index As Integer = Integer.Parse(button.Name.Split(«_»)(1))
‘Find the TextBox using Index and remove it.
panel1.Controls.Remove(panel1.Controls.Find((«txt_» & index), True)(0))
‘Remove the Button.
panel1.Controls.Remove(button)
‘Rearranging the Location controls.
For Each btn As Button In panel1.Controls.OfType(Of Button)()
Dim controlIndex As Integer = Integer.Parse(btn.Name.Split(«_»)(1))
If (controlIndex > index) Then
Dim txt As TextBox = CType(panel1.Controls.Find((«txt_» & controlIndex), True)(0), TextBox)
btn.Top = (btn.Top — 25)
txt.Top = (txt.Top — 25)
End If
Next
End Sub
Screenshot
Downloads
Здравствуйте, подскажите как очистить все TextBoх-ы на форме если некоторые из них находятся на GroupBox-ах
Пробовал это
foreach(Control c in Controls)
    if(c is TextBox)
        ((TextBox)c).Text = null;
И это
foreach (Control c in this.Controls)
            {
                if (c.GetType() == typeof(TextBox))
                    c.Text = string.Empty;
            }
Но чистит только те текстовые поля которые находятся просто на форме, а не на GroupBox-ах
-
Вопрос задан
-
11752 просмотра
Надо заходить внутрь же. Вот простейший вариант модификации вашего кода:
foreach (Control c in Controls)
{
    if (c.GetType() == typeof (GroupBox))
        foreach (Control d in c.Controls)
            if (d.GetType() == typeof(TextBox))
                d.Text = string.Empty;

    if (c.GetType() == typeof(TextBox))
        c.Text = string.Empty;
}
А вот как (примерно, на самом деле я бы сделал extension method) бы сделал я:
private static void CleanAllTextBoxesIn(Control parent)
{
    foreach (Control c in parent.Controls)
    {
        if (c.GetType() == typeof(TextBox))
            c.Text = string.Empty;

        if (c.GetType() == typeof (GroupBox))
            CleanAllTextBoxesIn(c);
    }
}

private void CleanAllTextBoxesButton_Click(object sender, EventArgs e)
{
    CleanAllTextBoxesIn(this);
}
Пригласить эксперта
Может я ошибаюсь, но Controls — это ведь все поле целиком?
Не пользовался GroupBox, но подозреваю, что надо что-то типаforeach (Control c in groupBox) {...}
или, может фигню скажу, но так:if (c is TextBox && c in groupBox)
Войдите, чтобы написать ответ
-
Показать ещё
Загружается…
Минуточку внимания
Last Updated :
25 Mar, 2025
In Windows forms, TextBox plays an important role. With the help of TextBox, the user can enter data in the application, it can be of a single line or multiple lines. The TextBox is a class and it is defined under System.Windows.Forms namespace.
Ways to Create a TextBox In Windows Forms
There are mainly two ways to create a TextBox in Windows forms which are mentioned below.
- Drag and drop (Design-Time)
- Custom TextBox (Run-Time)
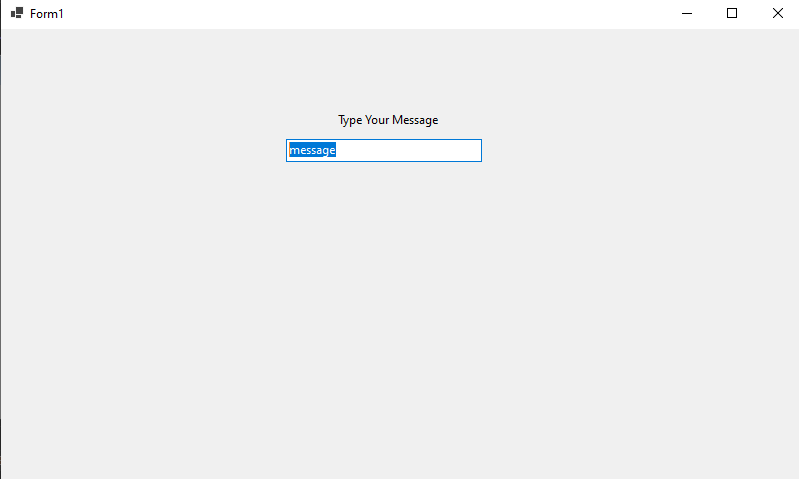
Drag and drop (Design-Time)
This is the easiest way to create a TextBox in Windows Forms using Visual Studio we just have to open the toolbox and drag and drop the text box on the form in the designer and further we can change the appearance of the TextBox using the properties. Follow these steps to create a TextBox.
Step 1: Now locate the project with the name here we are using the default name which is Form1 and it will open a form in the editor that we can further modify.
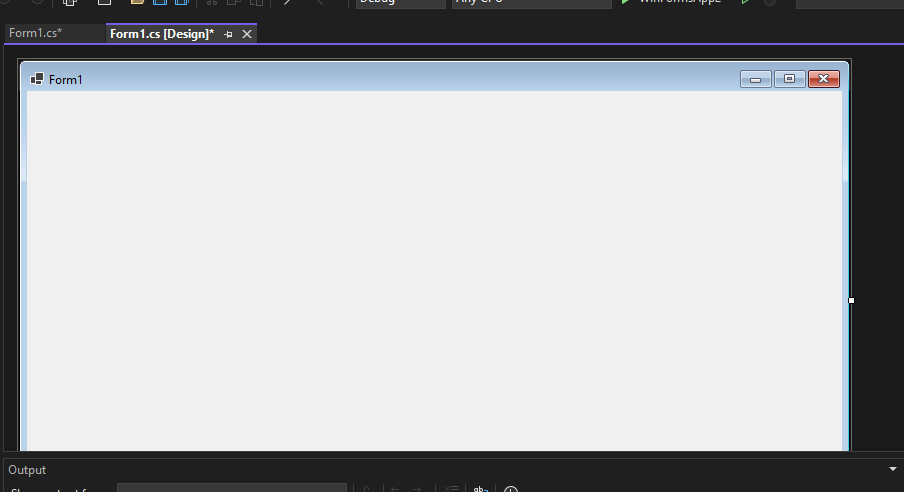
In the image, we have two files that are open one Design and there is Form1.cs these two play a major role. We use the Form 1.cs file for the custom logic.
Step 2: Now open a Toolbox go to the view > Toolbox or ctrl + alt + x.
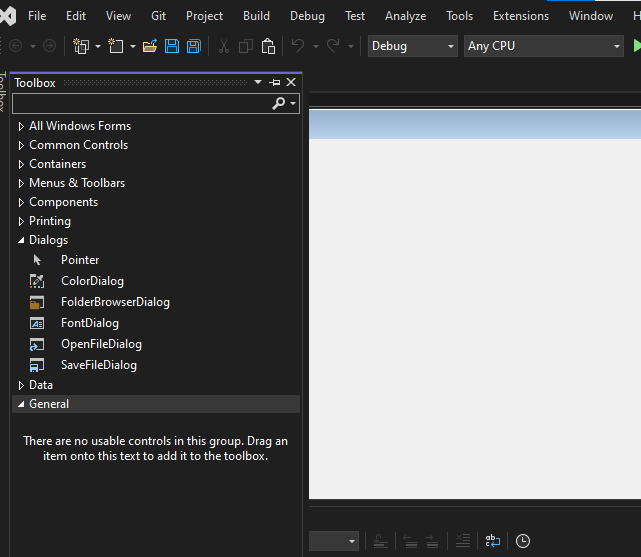
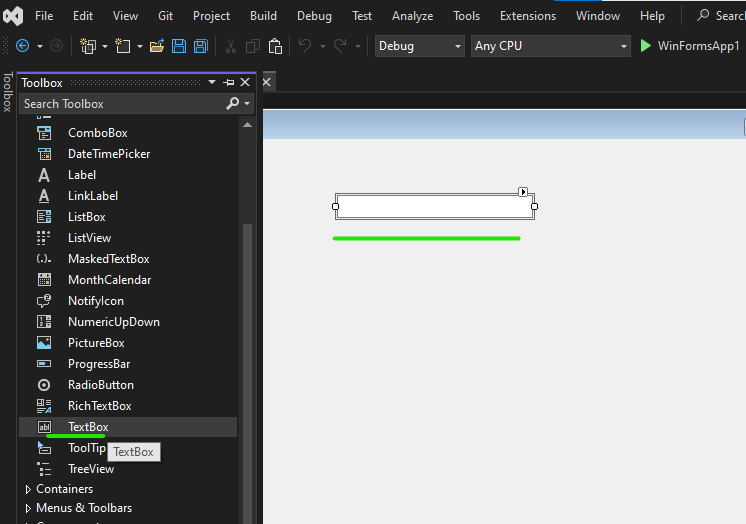
Step 3. Now open the common controls and drag and drop the TextBox on the form where we want to it be placed.
Step 4. Now open the properties of the TextBox press right-click on the TextBox and it will open the properties solution explorer now we can change the button appearance of the textbox and also add different properties like default text.
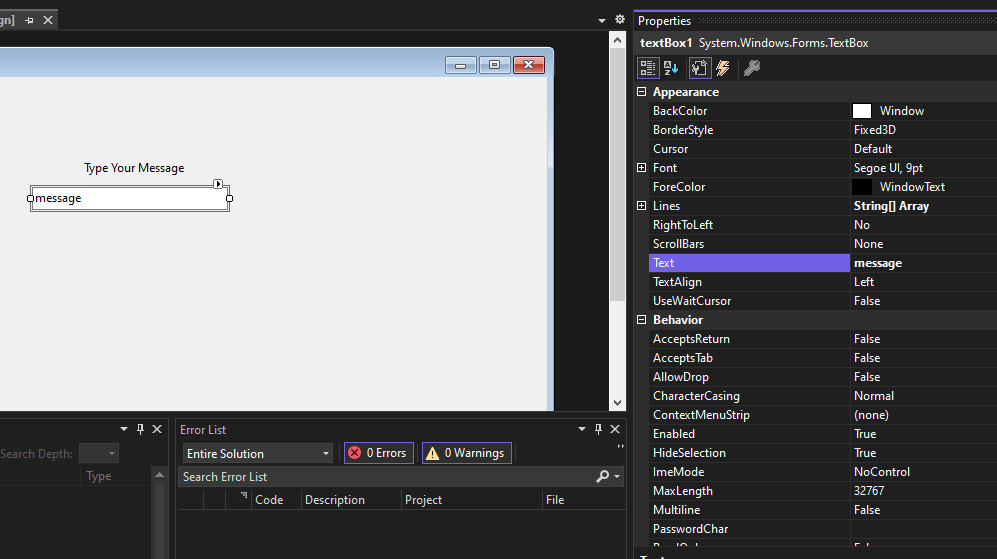
Output:
Custom TextBox (Run Time)
In this method, we are going to modify the Form1.cs file and add custom code modification in C# with the help of the TextBox class. The following steps show how to create a TextBox dynamically:
Step 1: Create a textbox using the TextBox() constructor provided by the TextBox class.
// Creating textbox
TextBox Mytextbox = new TextBox();
Step 2: After creating TextBox, set the properties of the TextBox provided by the TextBox class.
// Set location of the textbox
Mytextbox.Location = new Point(187, 51);
// Set background color of the textbox
Mytextbox.BackColor = Color.LightGray;
// Set the foreground color of the textbox
Mytextbox.ForeColor = Color.DarkOliveGreen;
// Set the size of the textbox
Mytextbox.AutoSize = true;
// Set the name of the textbox
Mytextbox.Name = “text_box1”;
Step 3: And last add this textbox control to form using Add() method.
// Add this textbox to form
this.Controls.Add(Mytextbox);
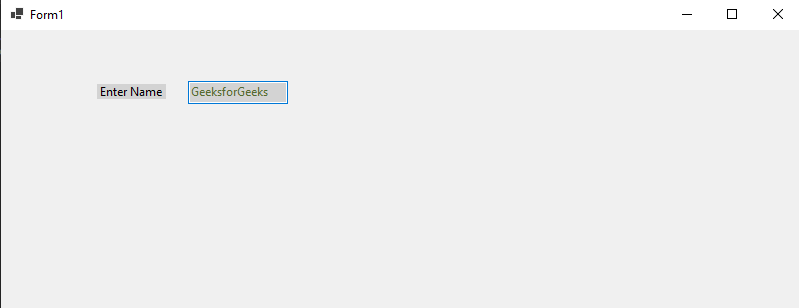
Step 4: Now double-click on the form in Design and it will open the Form1.cs file where code is written in C#. Here the program file is Form 1.cs Now write this code in Form1.cs file
Form1.cs file:
C#
namespace WinFormsApp1
{
    public partial class Form1 : Form
    {
        public Form1()
        {
            InitializeComponent();
        }

        private void Form1_Load(object sender, EventArgs e)
        {
            // Creating and setting the properties of Label
            Label myLabel = new Label();
            myLabel.Location = new Point(96, 54);
            myLabel.Text = "Enter Your Name";
            myLabel.AutoSize = true;
            myLabel.BackColor = Color.LightGray;

            // Add this label to form
            this.Controls.Add(myLabel);

            // Creating and setting the properties of TextBox
            TextBox myTextBox = new TextBox();
            myTextBox.Location = new Point(187, 51);
            myTextBox.BackColor = Color.LightGray;
            myTextBox.ForeColor = Color.DarkOliveGreen;
            myTextBox.AutoSize = true;
            myTextBox.Name = "textBox1";

            // Add this textbox to form
            this.Controls.Add(myTextBox);
        }
    }
}
Output:
Properties
| Property | Description |
|---|---|
| Text | This property is used to set the text inside the TextBox. |
| TextAlign | It is used to Set or get the alignment of the text inside the TextBox for example left, centre, and right. |
| MaxLength | Used to set or get the maximum number of characters the user can type into the TextBox. |
| Multiline | This is used to set or determine whether the TextBox allows multiple lines of text. If press enter it allows you to write in the next line. |
| PasswordChar | It is used to set or get the character used to hide text used where showing the password characters. |
| ReadOnly | This property is used to set or get whether the TextBox is read-only (users can’t edit the text). |
| WordWrap | Sets or gets whether the text automatically moves to the next line when it’s too long for the box (only for multiline). |
| ScrollBars | Sets or gets which type of scroll bars (horizontal, vertical, both, or none) appear in the TextBox. |
| Dock | Sets or gets how the TextBox is positioned in its container (e.g., fill, top, left). |
| Anchor | Sets or gets which edges of the parent container the TextBox should stay anchored to when resized. |
| BorderStyle | Sets or gets the style of the border around the TextBox (e.g., solid line, 3D, no border). |
| Enabled | Sets or gets whether the TextBox is enabled (if false, users can’t interact with it). |
| Focused | This is the commonly used property to check if the TextBox currently has focus if it is selected. |
| Font | Sets or gets the font used for the text (like size and style). |
| ForeColor | Sets or gets the colour of the text inside the TextBox. |
| BackColor | Sets or gets the background colour of the TextBox. |
| AcceptsReturn | Sets whether pressing the Enter key adds a new line (used for multi-line TextBox). |
| HideSelection | Sets whether selected text is hidden when the TextBox loses focus. |
| SelectionStart | It is used to set from where the selected text starts in the TextBox. |
| SelectionLength | This property gets or sets the length of the selected text. |
| ShortcutsEnabled | It sets the keyboard shortcuts such as copy (Ctrl + C) or paste (Ctrl + P). |
| Clear() | This property is used to clear the text inside the TextBox. |
| SelectAll() | We can use this property to select all the text inside the TextBox. |