
-
Выключение функции Xbox DVR
-
Удаление программы
Microsoft постоянно совершенствует свое детище, раз за разом внедряя в него новые функции. Относительно недавно, разработчики предоставили возможность пользователям Windows 10, автоматически записывать игры с помощью функции Xbox DVR, через подключенный аккаунт Xbox. В целом, задумка неплохая, но отнюдь не для тех, у кого слабые характеристики ПК.
В рамках этой статьи вы узнаете, как удалить Xbox в Windows 10 полностью и отключить Xbox DVR.
Отключение функции записи игр поможет повысить FPS в играх. Выключить его можно в самом приложении:
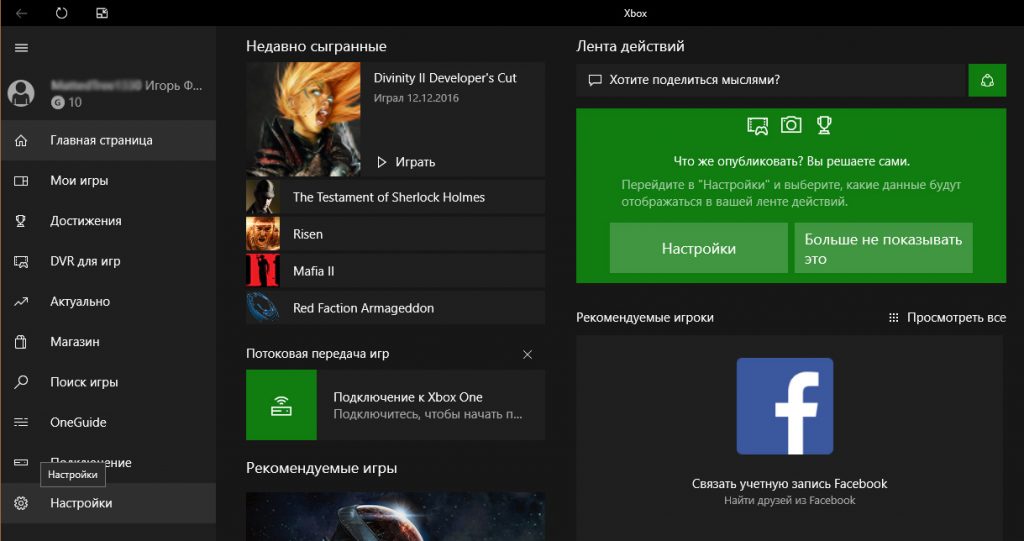
- В поиске Windows введите запрос “Xbox”.

- В открывшейся программе выберите “Настройки”.

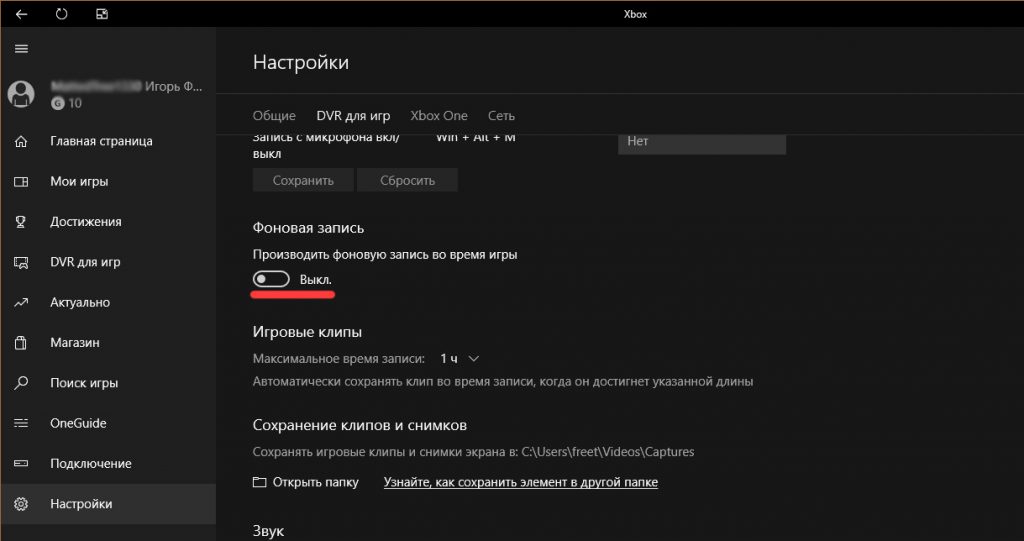
- Переместите ползунок “Фоновая запись” в состояние “Выключить”.
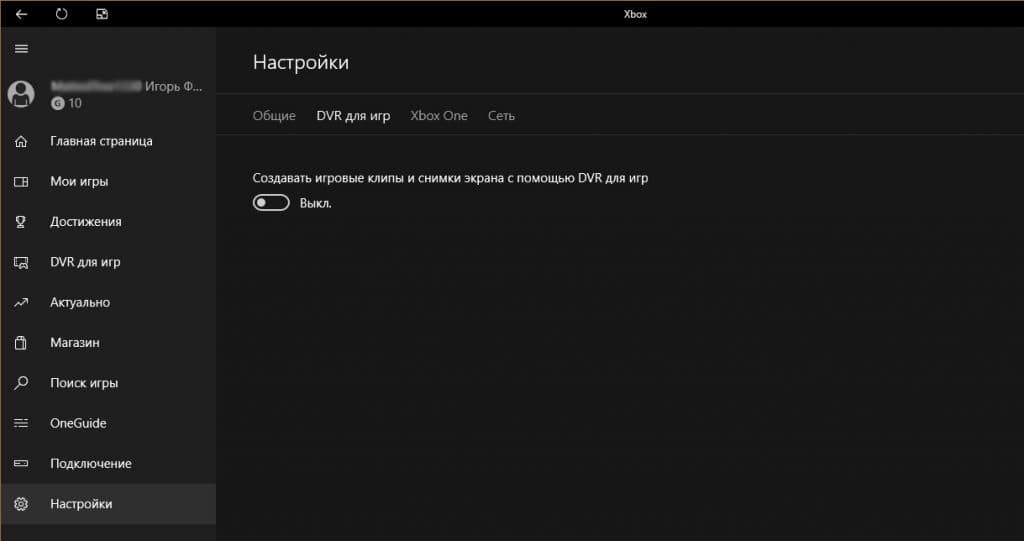
- Если вы совсем не пользуетесь данной программой, можете выключить Xbox DVR полностью.
Совет! Программа Overwolf – помощник для любителей компьютерных игр. Она поможет провести мониторинг FPS до и после отключения DVR.
Удаление программы
Xbox входит в состав стандартных приложений Windows 10, которые стандартным способом удалить не получится. Для удаления вам понадобятся права администратора:
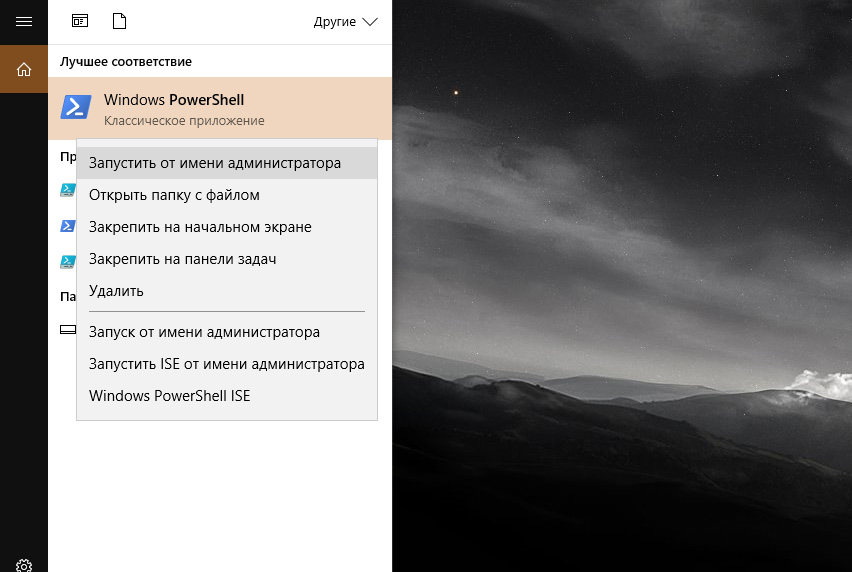
- В поиске Windows введите PowerShell и запустите консоль от имени администратора.

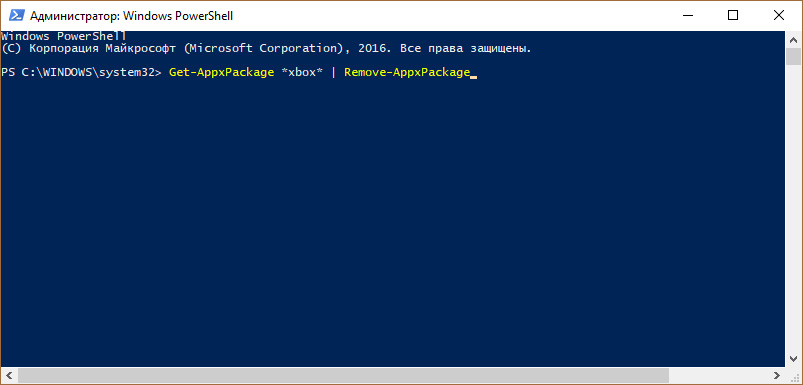
- Введите команду удаления
Get-AppxPackage *xbox* | Remove-AppxPackage

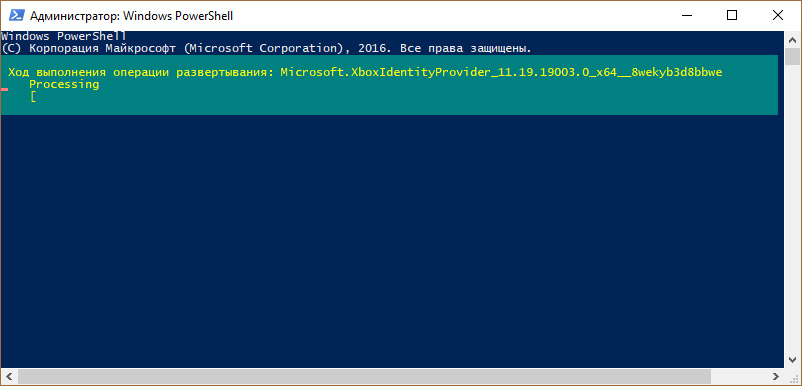
- Дождитесь окончание процедуры и перезагрузите ПК.

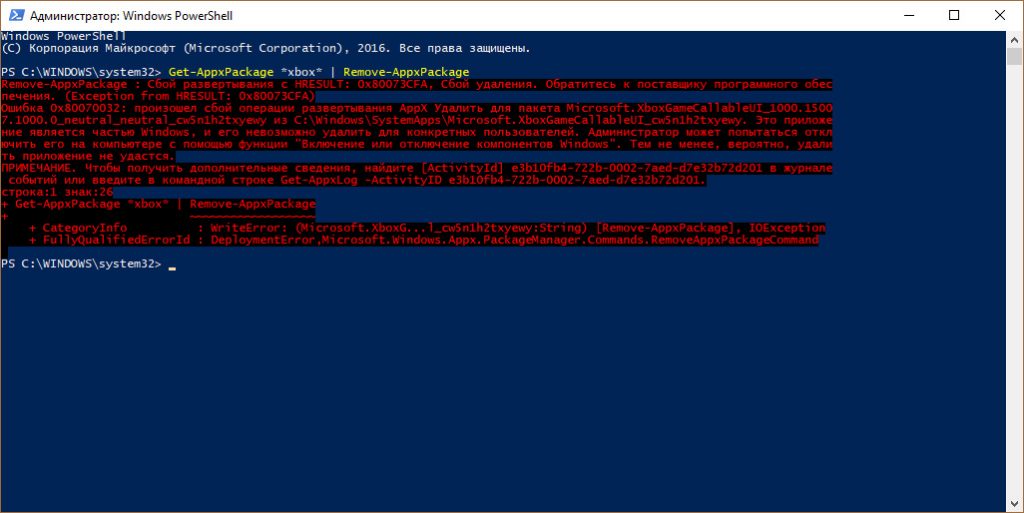
Важно! Вы можете получить уведомление в PowerShell, что произошел сбой удаления и его невозможно удалить для конкретных пользователей. Перезагрузите ПК и проверьте наличие программы в Windows 10. Она должна удалится, несмотря на подобное сообщение.
Not a gamer? Remove an app you don’t need from your Windows 10 PC
Updated on November 3, 2021
What to Know
- Run Windows Powershell as an administrator and select Yes to let it make changes to your device.
- Type the command Get-AppxPackage *xboxapp* | Remove-AppxPackage and press Enter.
- You can download and reinstall the Xbox app at any time from the Microsoft Store.
The integrated Xbox app for Windows 10 connects your PC to your Xbox One. The app allows you to see what games your friends are playing, share live in-game clips, and launch cross-device games from Windows 10. This is great if you’re a gamer. If you’re not, uninstall the Xbox app to free up space and resources on your computer.
How to Uninstall the Xbox App on Windows 10
You need administrator privileges for your PC to remove the Xbox Console Companion from Windows 10 using the PowerShell command line:
-
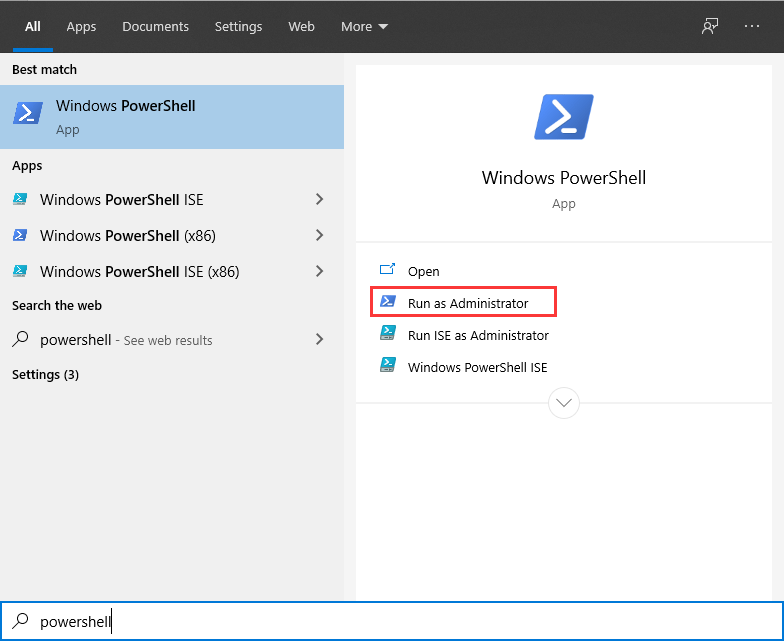
Type powershell in the Windows search box, then select Run as administrator under the Windows PowerShell heading.
-
Select Yes when asked if you want to allow the app to make changes to your device.
-
Type the following in the PowerShell command prompt, then press the Enter key:
Get-AppxPackage *xboxapp* | Remove-AppxPackage
-
A message appears in the PowerShell window, noting that the operation is in progress. Once complete, close PowerShell by select the X icon in the upper-right corner.
Thanks for letting us know!
Get the Latest Tech News Delivered Every Day
Subscribe
-
Home
-
News
- How Can You Remove Xbox from Your Windows 10 Computer?
By Stella | Follow |
Last Updated
The Xbox app is a pre-installed application on your Windows computer. If you don’t need to use it or Xbox encounters some issues, you can remove Xbox from Windows 10. But, uninstalling a pre-installed app in Windows 10 is different from other situations. In this MiniTool post, we will show you how to uninstall the Xbox app successfully from your Windows 10 computer.
Microsoft has introduced many new features to Windows 10 like Cortana and some other pre-installed universal apps. Microsoft is still developing more new features and adding them to Windows 10. The Xbox app is just such a pre-installed app on your Windows computer.
With this Xbox app, you will be able to pair your computer with the Xbox One console to remotely play games. Besides, you can even use it to chat with your friends and access game capture.
Although Xbox is very popular, not all users need to use this app. Perhaps, you are the one who wants to remove Xbox from Windows 10 to release some space for new data.
On the other hand, when you use Xbox, you may encounter different kinds of issues like Xbox green screen of death, Xbox One black screen of death, Xbox One won’t update, and more. You need to uninstall and re-install Xbox to solve the issue.
All in all, you need to uninstall Xbox in Windows 10. But, when you use the traditional uninstallation method to uninstall Xbox game bar, you will find it is unavailable. This is because Xbox is a pre-installed app on your Windows and you can’t uninstall it using the general way. However, you can uninstall the Xbox app from your Windows 10 computer using PowerShell.
How to Uninstall Xbox App from Windows 10?
For some reason, you need to remove the Xbox app from your Windows 10. You should not use the traditional method to do this job because it doesn’t work. You can use PowerShell to do the job.
Here is a guide on how to remove Xbox from Windows 10:
1. Click Search that is at the bottom-left side of the desktop.
2. Type PowerShell into the search bar. And then select Run as administrator from the pop-out panel.
3. Click Yes if you receive the User Account Control window to continue.
4. The Windows PowerShell window will pop up. You need to type the following command and then press the Enter key to continue.
Get-AppxPackage Microsoft.XboxApp | Remove-AppxPackage
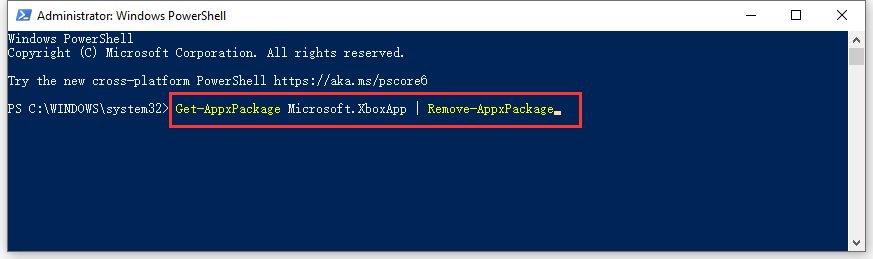
5. The uninstallation process will begin and it will take a few seconds to finish the whole process. You need to wait patiently until the whole process ends.
6. After the uninstallation, you can type exit into the window and press Enter to close Windows PowerShell.
After these steps, you will find that the Xbox app is disappeared from your Windows 10 computer. However, the major Windows upgrades may bring this app back. If so, you can repeat the above steps to remove Xbox from your computer again.
When you want to use Xbox to play games again, you can install it on your computer. You can just go to the Microsoft Store to search for it and then re-install it on your computer.
Bottom Line
After reading this post, you must know how to remove Xbox from Windows 10. However, when you choose to keep Xbox and use it to play games or do other things, you may encounter different issues. MiniTool has introduced some Xbox issues on its website. You can go to check whether you can find useful solutions. Or you can let us know your issues in the comments.
About The Author
Position: Columnist
Stella has been working in MiniTool Software as an English Editor for more than 8 years. Her articles mainly cover the fields of data recovery including storage media data recovery, phone data recovery, and photo recovery, videos download, partition management, and video & audio format conversions.
Microsoft includes tons of In-Built Apps in Windows 10 and one of them is Xbox. If you are looking to Permanently Remove Xbox From Windows 10 then this Article is for you as today I’m going to Share How to Remove Xbox From Windows 10?
Removing In-Built Apps from Android Phones is not a difficult task as there are many methods for that but, when it comes to Remove Xbox App From Windows 10, it becomes a bit difficult.
Though it’s not difficult to remove Inbuilt Apps from Windows, still, for some people it’s the toughest part. Not only Xbox, but you can remove many other Inbuilt Apps using this method.
Xbox App in Windows 10 allows you to track your Xbox Social Activity, Achievements. Game Play, Recorded Games and Stream Games from Xbox One to PC.
The Xbox Apps also lets you connect to the Xbox Live Community where you can chat with your friends, Share Gameplay, Share Screenshots, etc.
If you love Playing Xbox Games, then this App might be helpful for you but for others, it’s just a bloatware. So, if you want to get rid of this App and want to Uninstall it, here is the guide for you.
Before we begin, if you don’t know about Xbox, here is a quick guide for you.
Also Read : PS3 Emulator For Android | Play PS3 Games On Android
Contents
- 0.1 What Is Xbox App?
- 0.2 Why do you need to Uninstall Xbox App?
- 1 How to Remove Xbox From Windows 10?
- 1.1 Method 1: How to Remove Xbox From Windows 10 Using Windows Powershell?
- 1.1.1 How to Reinstall Xbox On Windows 10?
- 1.2 Method 2: How to Uninstall Default Apps On Windows 10 With Simple Uninstall?
- 1.3 Method 3: How to Turn Off Xbox On Windows 10?
- 1.1 Method 1: How to Remove Xbox From Windows 10 Using Windows Powershell?
- 2 Final Words
What Is Xbox App?
If you are using Windows 10, you can find tons of Pre-Installed Apps in it and Xbox App is one of them. It is basically an App where you can share Screenshots, Chat with your Friends, Remote Control Feature or you can also Manage your Account if you have an Xbox Live Account.
Though the App is very useful for Xbox Users, it’s just a bloatware for many peoples. So, if you wanna get rid of this Xbox App, you can follow this Guide.
Why do you need to Uninstall Xbox App?
If you don’t have an Xbox Live Account, then it’s just an unnecessary App for you. Keeping it installed on your Windows PC don’t make any sense and will also consume your memory. Here are a few reasons to Why Uninstall Xbox App.
- If you don’t have Xbox
- Running Out of Storage
- Windows 10 Running Slow
- It consumes Space & Memory on your PC
- If you don’t have an Xbox Account
- You Never use Xbox App
These were few reasons to Remove Xbox App Windows 10. So, if you are looking to Remove Default Apps in Windows 10, here is the Guide for you. Let’s proceed further and check out 3 Working Methods On How to Remove Xbox From Windows 10?
Also Read : 7 Best Dreamcast Emulator | Emulators For Dreamcast
How to Remove Xbox From Windows 10?
When it comes to Removing Xbox From Windows 10, there are many different ways for that but here I’m going to share 3 Working Methods to Remove Pre-Installed Apps On Windows. Also, there are many Pre-Installed App Removing Softwares available in the market that you can use. So, let’s move further and check the step by step guide on How to Delete Xbox App Windows 10?
Method 1: How to Remove Xbox From Windows 10 Using Windows Powershell?
In this method, you’ll need to remove Xbox from Windows 10 using Windows Powershell. You’ll need to type few commands for that which you can find in below guide.
- First, Click On Start Menu or Press Windows Key.
- Search for Powershell.
- Now, Right Click On Windows Powershell and select Run as administrator.
- Now, Type the following command to Remove the Xbox App On Windows 10.
Get-AppxPackage *xboxapp* | Remove-AppxPackage

- Finally, Press Enter & wait for the process to finish.
Done! This was the Guide On How to Remove Windows 10 Bloatware using Powershell. With this simple method, you can easily remove the default Xbox App from Windows 10. You just have to enter this code and Xbox will be removed automatically.
In future, if you decide to Reinstall Xbox App On Windows, then here is the Guide on How to Reinstall Xbox App On Windows 10.
How to Reinstall Xbox On Windows 10?
Reinstall the App again is very simple. You just have to enter a single line code and you will get your Deleted Apps back on Windows 10. Here is step by step guide.
- Click On Start & Search for Windows Powershell.
- Right Click On Windows Powershell & Run as administrator.
- Now, Enter the following code.
Get-AppxPackage -AllUsers| Foreach {Add-AppxPackage -DisableDevelopmentMode -Register "$($_.InstallLocation)\AppXManifest.xml"} - Finally, Press Enter.
Done! With this Command, you can Recover Deleted Apps On Windows 10 Laptop. Simply, enter this one line command and press enter.
Also Read : 5 Best Nintendo DS Emulator For Android
Method 2: How to Uninstall Default Apps On Windows 10 With Simple Uninstall?
This method is very simple. You just have to Uninstall the App like you uninstall it on your Smartphone. This method will not work on every Windows 10 PC. If you have an older version of Windows 10, then you can Uninstall Pre-Installed Apps using this method else you cannot.
- Click On Start Menu.
- Search For Xbox.
- Now, Right Click On the Xbox App and then Click On Uninstall.
- Finally, Click On Yes and Xbox App will be uninstalled from your Device.
This method won’t work on all Windows 10 PC. It will only work on the older version of Microsoft Windows 10. If it didn’t work for you, you can either try 1st method or try the 3rd method.
Method 3: How to Turn Off Xbox On Windows 10?
This method is basically turning off the Xbox App. To Uninstall the Inbuilt Apps on Windows 10, you can try the above methods. If you want to uninstall the App just because it’s consuming memory and data, then you can simply turn off it by below method.
- Go to Settings.
- Click On Privacy.
- Now, Click On Background Apps and then Turn Off Xbox App.

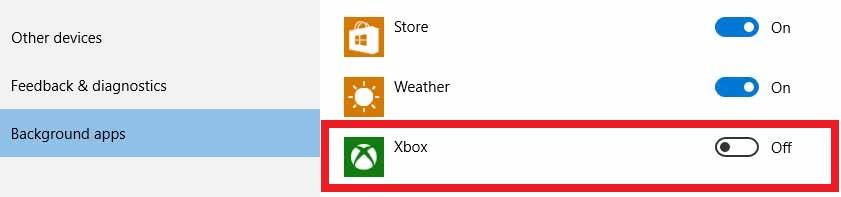
Done! With this simple steps, you can easily Turn Off the Xbox App. Though you cannot uninstall the Xbox App with this method, still, you can Stop it running in Background and Consuming Data and Memory.
Suggested Read:
- How to Change Computer Name In Windows 10 (3 Methods)
- How To Password Protect Excel File (3 Methods)
- How To Enable Blue Light Filter Windows 10
- How to Disable Laptop Keyboard (Lock Laptop Keyboard)
- How to Direct Message On Instagram PC (2 Methods)
Final Words
This was the 3 Working Methods On How to Delete Xbox App From Windows 10. Apart from this, you can also Remove Xbox Game Speech Windows From Windows 10 and many other inbuilt Apps like Calendar, Maps, Clock, Weather, etc. Also, there are few other methods as well that you can use to Remove Inbuilt Software or Apps.
Hope you liked this Article On Remove Xbox From Windows 10. Do Comment below if you have any query. Stay tuned with us for more latest Tricks & Updates.
We saw the introduction of many new features in Windows 10. The reintroduction of the start menu and of many new apps that came preloaded on the operating system. One such app was the Xbox App, the app allows PC users to pair with their Xbox one consoles remotely in order to play games, access gameplay capture and much more. Although it can be of use to some people the app is quite useless for the majority of PC gamers who want to squeeze the most out of their CPU and internet connection.

In this article, we will guide you on the path to completely disable or uninstall the app from Windows 10 so that it does not take up useful resources that might otherwise be used in the background while you use your computer.
Uninstalling Xbox App
In this step, we will be completely uninstalling the app from windows 10 using PowerShell commands as an administrator.
- Click on the search bar and type “Powershell”
Opening the windows search bar and typing Powershell - Right-Click on the Powershell icon and Click on “Run as Administrator”
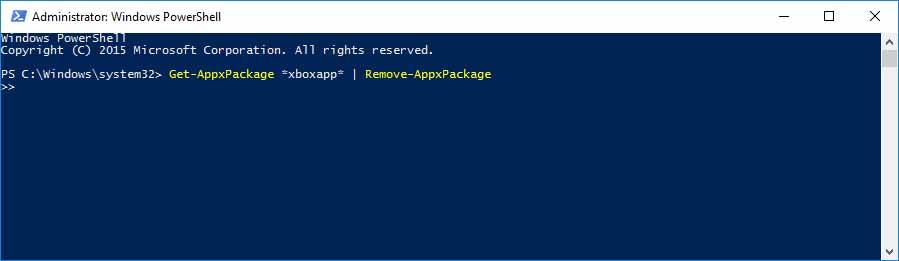
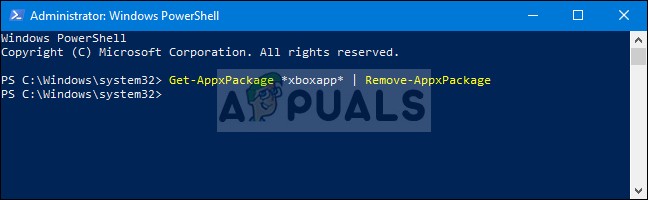
Right-Clicking on Powershell and clicking Run as administrator option - Type in the Following command.
Get-AppxPackage *xboxapp* | Remove-AppxPackage
After typing in this command press the Enter key on your keyboard
- Wait until the process is finished and close the PowerShell

Uninstalling the Xbox app
This process will completely uninstall the Xbox App from your computer however if you don’t want to completely uninstall it in the next method we will show you how to disable it.
Disabling Xbox App
If you don’t want to completely uninstall the Xbox app from windows in this step we will be disabling it until you choose to manually enable it
- Open the search bar and type in “Services”
Typing in Services in the search bar - Right-Click on the services icon and select the “Run as Administrator” option.
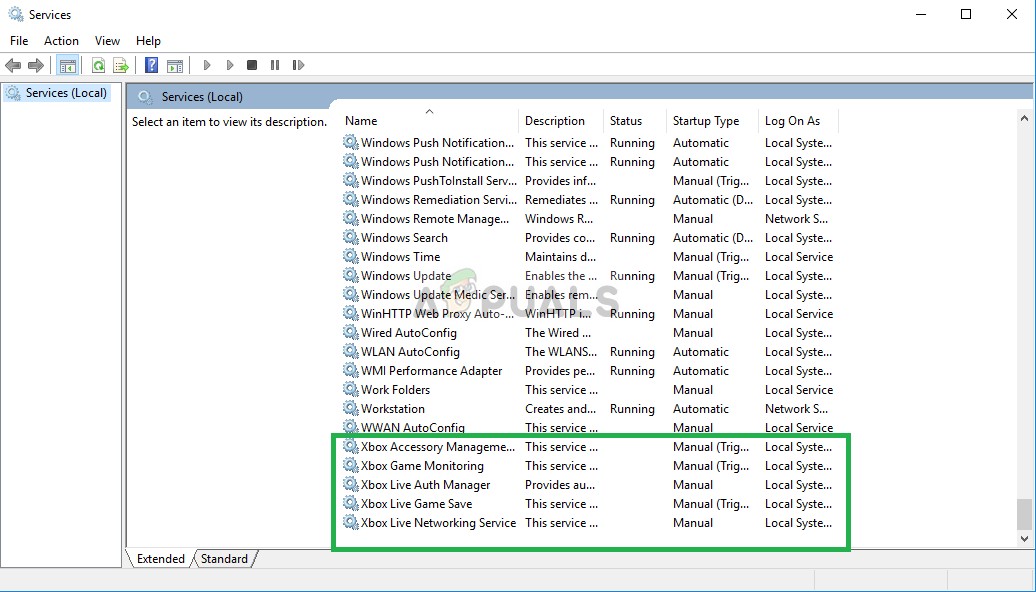
Right-Clicking on Services and selecting the Run as Administrator Option - Once in there, Scroll down to the bottom of the list and you will see options related to Xbox Live.

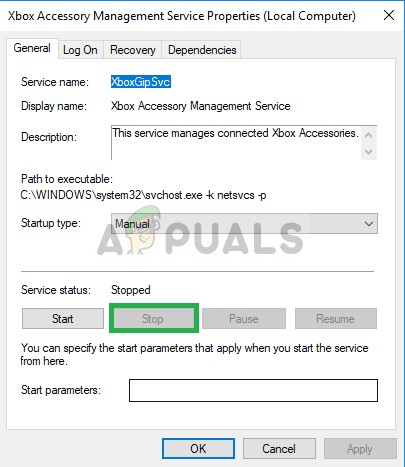
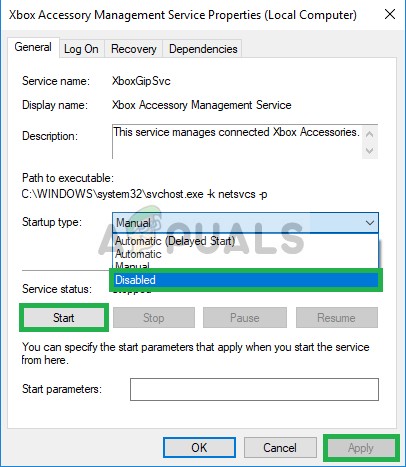
The options related to Xbox Live on the bottom of the list - Double Click on the “Xbox Accessory Management Service“
- In the popup click on the “Stop” button

Selecting stop in the popup - After this Click on the Startup type option and in the dropdown select Disabled and apply the settings

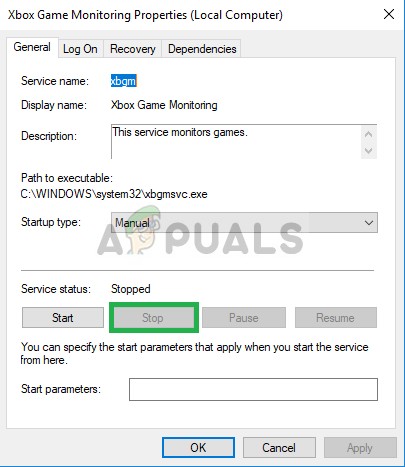
Selecting Disabled in the Dropdown - Similarly, double click on the “Xbox Game monitoring” option.
- Click on “Stop” in the popup
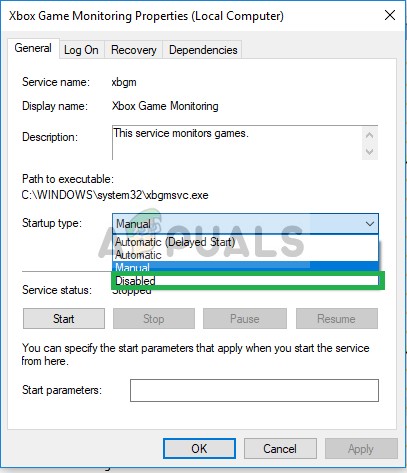
Clicking on Stop in the popup - Click on the Dropdown by the Startup type and select Disabled

Selecting Disabled in the Dropdown - Similarly, double click on the “Xbox Live Auth Manager” and click on Stop in the popup
- After that in the Dropdown select Disabled and Apply the settings
- Also, double click on the “Xbox Live Game Save” option and click on Stop in the popup
- After that in the Dropdown select Disabled and Apply the settings
- Lastly, double click on the “Xbox Live Networking Service” option and click on Stop in the popup
- After that in the Dropdown select Disabled and Apply the settings
This method will completely prohibit the Xbox app from using any kind of resource (except storage) on your computer.
Kevin Arrows
Kevin Arrows is a highly experienced and knowledgeable technology specialist with over a decade of industry experience. He holds a Microsoft Certified Technology Specialist (MCTS) certification and has a deep passion for staying up-to-date on the latest tech developments. Kevin has written extensively on a wide range of tech-related topics, showcasing his expertise and knowledge in areas such as software development, cybersecurity, and cloud computing. His contributions to the tech field have been widely recognized and respected by his peers, and he is highly regarded for his ability to explain complex technical concepts in a clear and concise manner.