
Все способы:
- Методы деинсталляции виртуального диска
- Способ 1: «Управление дисками»
- Способ 2: «Командная строка»
- Вопросы и ответы: 0
Создать виртуальный накопитель при желании может каждый пользователь. Но что делать, если он вам больше не нужен? Именно о том, как корректно удалить такой накопитель в ОС Windows 10 мы и расскажем далее.
Методы деинсталляции виртуального диска
Всего стоит выделить два способа, которые позволят правильно удалить накопитель. Вам необходимо выбрать тот из них, что соответствует предварительному процессу создания виртуального жесткого диска. На практике все выглядит не так сложно, как кажется на первый взгляд.
Способ 1: «Управление дисками»
Данный способ подойдет вам в том случае, если виртуальный накопитель создавался именно через указанный инструмент.
Помните, что перед выполнением описанных ниже действий следует скопировать с удаляемого диска всю нужную информацию, так как после окончательной деинсталляции вы не сможете ее восстановить.
Для того чтобы удалить диск, нужно сделать следующее:
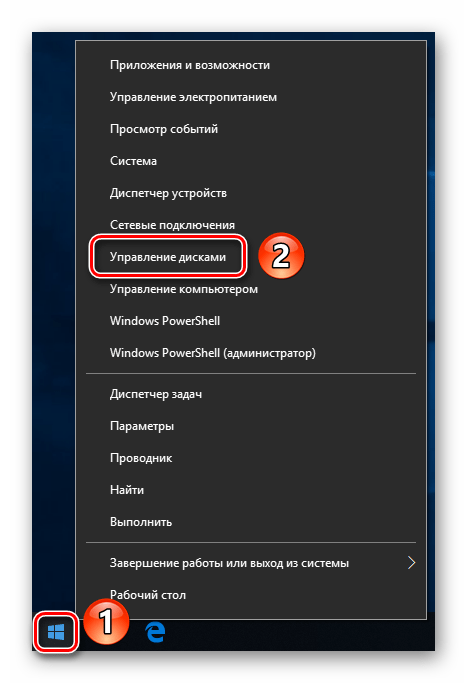
- Кликните по кнопке «Пуск» правой кнопкой мышки (ПКМ), после чего выберите из контекстного меню графу «Управление дисками».
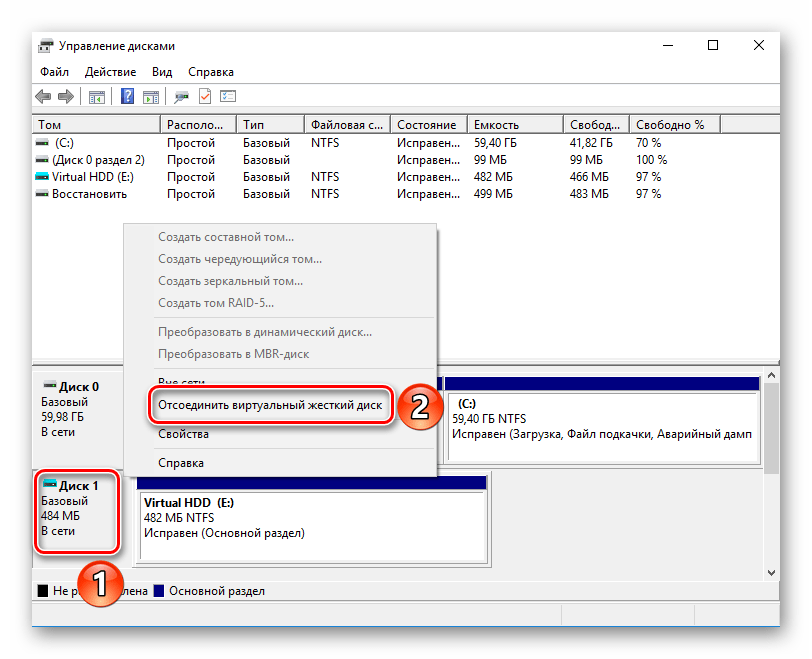
- В появившемся окне необходимо найти искомый виртуальный диск. Обратите внимание, что сделать это нужно в нижней части, а не в верхнем списке. После того как нашли накопитель, нажмите на его названии ПКМ (нужная область указана на скриншоте ниже) и в контекстном меню кликните по строчке «Отсоединить виртуальный жесткий диск».
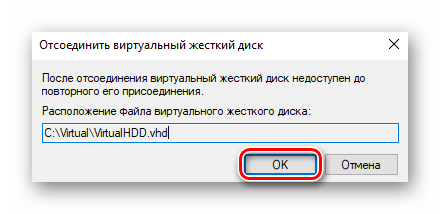
- После этого появится небольшое окно. В нем будет указан путь к файлу диска. Запомните данный путь, так как в будущем он понадобится. Его лучше не редактировать. Достаточно нажать кнопку «OK».
- Вы увидите, что из перечня носителей жесткий диск исчез. Остается лишь удалить файл, на котором хранится вся информация с него. Для этого зайдите в папку, путь к которой запомнили ранее. Нужный файл носит расширение «VHD». Найдите его и удалите любым удобным способом (через клавишу «Del» или контекстное меню).
- В завершение можете очистить «Корзину», чтобы освободить место на основном диске.

На этом данный способ завершен.
Способ 2: «Командная строка»
Если создание виртуального накопителя вы осуществляли через «Командную строку», тогда стоит использовать описанный ниже метод. Необходимо выполнить следующие операции:
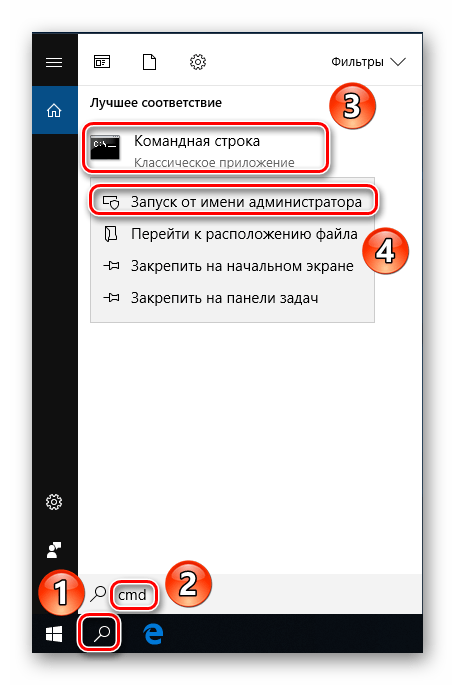
- Откройте окно поиска Windows. Для этого достаточно активировать строку на панели задач или нажать на кнопку с изображением лупы. Затем введите в поисковое поле команду «cmd». На экране появится результат запроса. Нажмите по его названию правой кнопкой мыши, после чего выберите из контекстного меню параметр «Запуск от имени администратора».
- Если у вас активирован «Контроль учетных записей», тогда на экране появится запрос на запуск обработчика команд. Нажмите кнопку «Да».
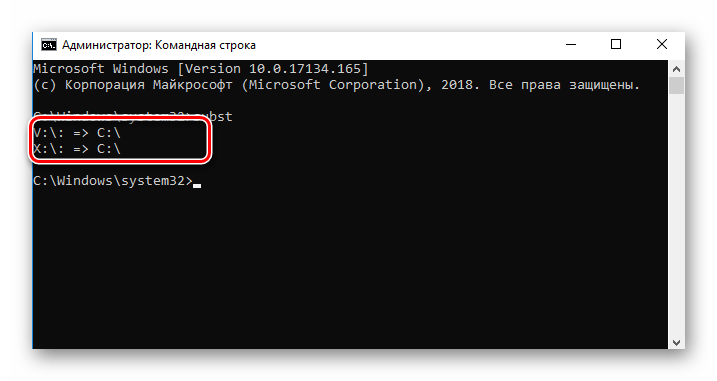
- Теперь введите в командную строку запрос «subst», а после этого нажмите «Enter». Это отобразит список всех созданных ранее виртуальных жестких дисков, а также покажет путь к ним.
- Запомните букву, которой обозначен нужный накопитель. На скриншоте выше такими буквами являются «X» и «V». Для удаления диска введите следующую команду и нажмите «Enter»:
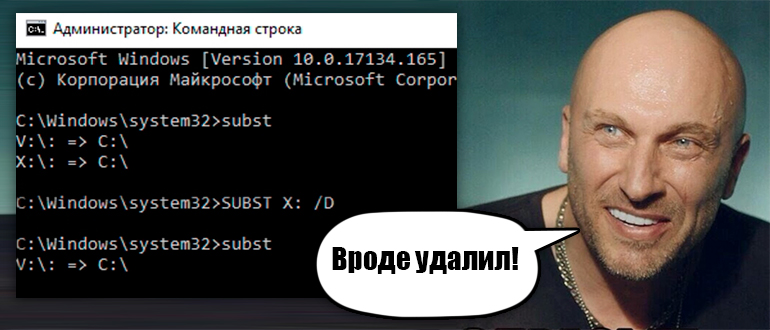
subst X: /DВместо буквы «X» следует поставить ту, которой обозначен нужный виртуальный накопитель. В результате вы не увидите на экране никаких дополнительных окон с прогрессом выполнения. Все будет сделано моментально. Для проверки можете снова ввести команду «subst» и убедиться, что диск удалился из списка.
- После этого окно «Командной строки» можно закрыть, так как процесс удаления завершен.

Прибегнув к одному из описанных выше методов, вы без особых усилий сможете удалить виртуальный жесткий диск. Помните, что данные действия не позволяют удалить физические разделы винчестера. Для этого лучше воспользоваться другими способами, о которых мы рассказывали ранее в отдельном уроке.
Подробнее: Способы удаления разделов жесткого диска
Наша группа в TelegramПолезные советы и помощь
-
Home
-
News
- How to Delete a Virtual Drive Windows 10 – 3 Ways
By Tina |
Last Updated
When you don’t want to use a virtual drive, you may want to remove it Windows 10. But do you know how to delete a virtual drive? This post shows you 3 ways. In addition, you can visit MiniTool to know more about disk tips and solutions.
If you have a lot of files to save, you may need an external hard drive to save them. However, in Windows 10, there is a function that enables you to create a virtual disk. The virtual disk has various functions, such as saving files. If you don’t know how to create a virtual disk, click here to know more.
However, if you don’t need the virtual drive again, you may wonder there is a way to remove virtual drive Windows 10. The answer is positive. In this post, we will show you how to delete a virtual drive in 3 different ways. So, just keep on your reading.
3 Ways to Delete Virtual Drive Windows 10
In this section, we will show you how to delete a virtual drive.
Way 1. Delete Virtual Drive via This PC
First of all, we will show you how to delete a virtual drive via This PC.
Now, here is the tutorial.
Step 1: Open File Explorer, go to This PC, select the virtual drive and choose Properties from the context menu.

Step 2: In the pop-up window, go to the Hardware tab, select the virtual disk on your computer, and choose Properties to continue.
Step 3: In the pop-up window, go to the Driver tab, and then choose Uninstall Device to continue.
Tip: If you found that the Uninstall Device button is grayed out, navigate to the following solution.
When all steps are finished, reboot your computer and the virtual drive would have been removed.
Way 2. Delete Virtual Drive via Disk Management
The second way to delete virtual drive Windows 10 is to remove it in Disk Management. Now, here is the tutorial.
Step 1: Open File Explorer, right-click This PC and choose Manage to continue.
Step 2: In the Disk Management window, select the virtual disk and choose Delete volume… to continue.

Step 3: Then you will receive a warning message which tells you all data on the virtual disk will be deleted. So back up them first. Then confirm it.
Step 4: Then it will become unallocated space. Right-click the unallocated space and choose Detach VHD.

Step 5: Then confirm the changes.
When all steps are finished, you have successfully removed the virtual drive Windows 10.
Way 3. Delete Virtual Volume via Diskpart
The third solution to delete virtual volume Windows 10 is through the diskpart. Now, here is the tutorial.
Step 1: Type the Command Prompt in the search box of Windows and choose the best-matched one. Right-click it to choose Run as administrator to continue.
Step 2: In the pop-up window, type the following commands and hit Enter after each command.
diskpart
select vdisk file=“f:\virtual disk.vhd” <h represents the drive which has the virtual disk file, the virtual disk represents the title of the virtual disk.>
detach vdisk

When all steps are finished, you can successfully remove virtual disk Windows 10.
Besides the methods we mentioned in the above part, you can also delete virtual volume via the third-party software, such as MiniTool Partition Wizard. Then you can click here to know how to delete virtual disk Windows 10.
Final Words
To sum up, this post has introduced 3 ways to delete virtual disk Windows 10. If you want to do so, try these solutions.
About The Author
Position: Columnist
Tina is a technology enthusiast and joined MiniTool in 2018. As an editor of MiniTool, she is keeping on sharing computer tips and providing reliable solutions, especially specializing in Windows and files backup and restore. Besides, she is expanding her knowledge and skills in data recovery, disk space optimizations, etc. On her spare time, Tina likes to watch movies, go shopping or chat with friends and enjoy her life.
Readers help support Windows Report. We may get a commission if you buy through our links.
Read our disclosure page to find out how can you help Windows Report sustain the editorial team. Read more
Virtual drives are virtualized hard drives that operate much the same as additional external hard disk drives with their partitions. Although they can be useful for virtual machines, some users remove virtual drives in Windows 10 when no longer needed.
The process of deleting a virtual drive is different from creating it. And to free up storage space if the virtual drive is not required, deleting it is the best way to proceed. So, let’s find out all about it.
What is a virtual drive?
A Virtual Drive is similar to a regular one and can be created on a connected storage drive. It usually has two extensions, .vhdx and .vhd, with distinct features and individual sets of pros and cons.
To any program or application on the PC, the virtual drive appears as a real/physical device and is used as such. Here are some of the key features of a virtual drive:
- Easy to create: Virtual drives are easy to create and can be built on an existing storage drive, all in a matter of minutes.
- Can be quickly moved: A major benefit of virtual drives is the enhanced portability, meaning they can be moved quickly and easily from one system to another.
- Used by Virtual Machines: Virtual Drives are mostly employed by Virtual Machines to store the OS, programs, and data. So, once done with the latter, you can remove the virtual drive in Windows 10.
- Slower than regular drives: One of the aspects users often complain about is the slow speed of drives that were created virtually. And there’s ain’t much you can do because that’s how the way it works.
How can I remove the virtual drive on Windows 10?
Tip
Many recommend removing the Virtual Drive via the Uninstall Device option in the Drivers tab in its Properties. But, the method wouldn’t work. As soon you restart the computer, the virtual drive will reappear, given that Windows automatically installs the missing driver.
1. Using Disk Management
- Press Windows + X to open the Power User menu, and select Disk Management from the list.
- In Disk Management, locate the Virtual Drive, right-click on it, and choose Detach VHD.

- Click OK in the confirmation prompt to remove the Virtual Disk in Windows 10.


This is the simplest method to remove the virtual drive in Windows 10, and it shouldn’t take more than a few seconds. But, if you prefer the command line over GUI, we have a solution for that as well.
2. With Diskpart
- Press Windows + R to open Run, type cmd, and hit Ctrl + Shift + Enter.

- Click Yes in the UAC prompt.
- Paste the following command and hit Enter:
diskpart
- Next, execute this command while replacing Path of the VHD file with the actual one on your PC:
select vdisk file=”Path of the VHD file”
- Finally, run this command to delete Virtual Drive in Windows 10:
detach vdisk


The Virtual Drive has now been removed from Windows 10. Also, you could head over to the file path and delete the .vhd or .vhdx file to free up storage space in case there’s no data on the Virtual Drive.
Besides, if there’s critical data on the virtual drive, we recommend you use a reliable backup tool to store it and only then remove the drive.
- May 2025 Patch Tuesday finally brings Recall & other AI features to Copilot+ PCs
- Microsoft releases Windows 10 (KB5058379/ KB5058392 / KB5058383/ KB5058387) May 2025 Patch Tuesday
- Microsoft extends Microsoft 365 apps support on Windows 10 to 2028
- Microsoft pushes Windows 11, but this project wants you to switch to Linux instead
- Microsoft addresses Windows 10 broken jump lists and says it’s now fixed
How to delete a virtual hard disk on VirtualBox?
- Launch VirtualBox, right-click on the Virtual Machine, and select Settings.
- Now go to the Storage tab.

- Right-click on the virtual drive and select Remove Attachment from the context menu.

- Once done, click OK to save the changes.


If you were wondering how to remove the virtual CD drive, it could be done via the VirtualMachine settings in no time.
These are all the ways you can remove a Virtual Drive in Windows 10 and even on VirtualBox. And while we are on the subject, check our curated list of the best Virtual Machines in Windows.
If you have any queries or want to share additional information on the subject, comment below.
Matthew Adams
Windows Hardware Expert
Matthew is a freelancer who has produced a variety of articles on various topics related to technology. His main focus is the Windows OS and all the things surrounding it.
He is passionate about the tech world, always staying up-to-date with the latest and greatest. With an analytical view, he likes problem-solving, focusing on errors and their causes.
In his free time, he likes to read and write about history and tries to always develop new skills.
Всем привет! Сегодня мы поговорим про то, как же нам удалить виртуальный диск в Windows 10, 11, 7 или 8. И тут сразу нужно уточнить несколько нюансов. Дело в том, что виртуальных приводов может быть несколько видов:
- Виртуальный жесткий диск – отображается так же, как и любой жесткий носитель в виде дополнительного раздела.
- Виртуальный DVD привод – данное устройство, отображается в том случае, если вы смонтировали ISO или любой другой образ.
ПРИМЕЧАНИЕ! Если у вас на жестком диске есть несколько разделов «C:\», «D:\», «E:\» и т.д. И вы хотите убрать лишние, сделав объединение – читаем эту инструкцию.
В статье я расскажу про «извлечение», отключение или удаления данного виртуального диска. Чтобы не бродить по всей статье в поисках нужного способа, советую ознакомиться с оглавлением и выбрать тот вариант, который вам нужен.
Содержание
- У меня виртуальный дисковод (привод)
- Способ 1: Через проводник
- Способ 2: Сторонние программы
- У меня виртуальный жесткий диск
- Способ 1: Через проводник
- Способ 2: Управление дисками
- Способ 3: Командная строка
- Задать вопрос автору статьи
У меня виртуальный дисковод (привод)
В этой главе мы посмотрим, как удалить DVD дисковод в Windows 10. Но я говорю именно про виртуальный привод, если вам нужно убрать физическое устройство, то у вас есть два варианта. Первый – отключить его физически. Второй – зайти в «Диспетчер устройств», найти там привод, кликнуть ПКМ и выбрать «Отключить устройство».
Читаем – как смонтировать виртуальный привод.
Способ 1: Через проводник
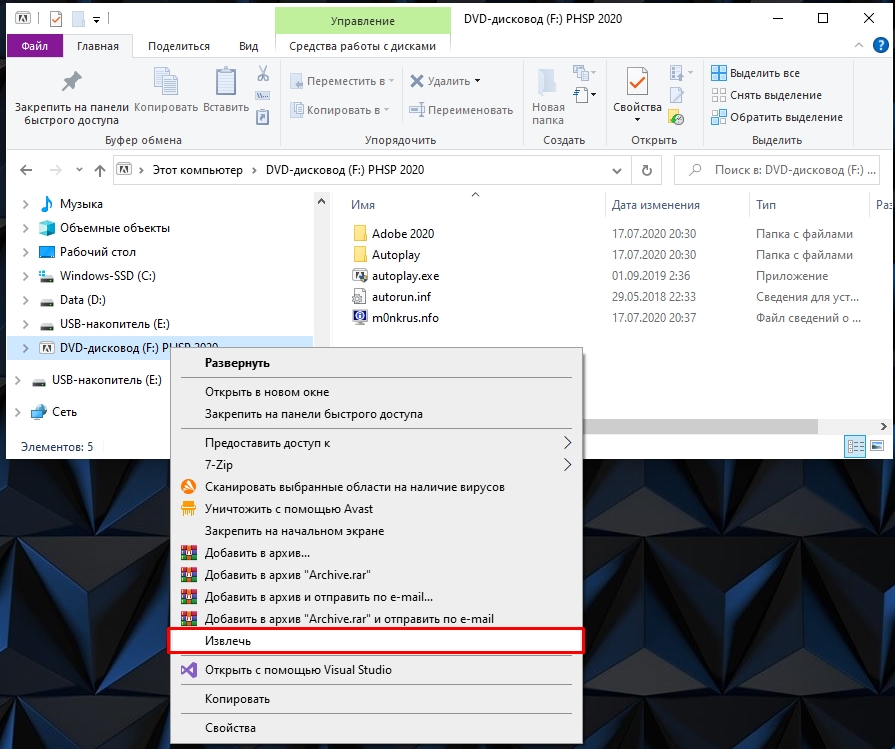
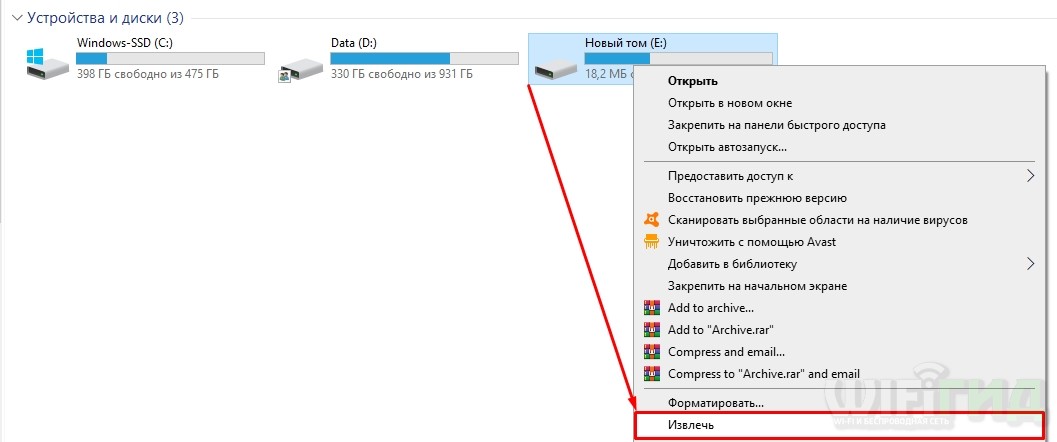
Если для создания виртуального привода вы использовали стандартную функцию Виндовс, то отключается он очень просто – кликните по нему правой кнопкой мыши и из меню выберите команду «Извлечь».
Способ 2: Сторонние программы
Если для создания дисковода вы использовали какие-то сторонние приложения, тогда для извлечения и удаления виртуального устройства, у нас есть несколько методов. Первый – вы можете просто закрыть программу. Нужно найти её в «Трее» в правом нижнем углу экрана, кликнуть ПКМ и выбрать команду «Выйти» (или «Закрыть»). Второй способ – это в самой программе найти образ или привод, кликнуть по нему ПКМ – далее выбираем «Демонтировать» или «Извлечь».
У меня виртуальный жесткий диск
Удалить виртуальный диск можно несколькими способами. Давайте ознакомимся со всеми.
Читаем – как создать виртуальный диск.
Способ 1: Через проводник
Обычно при создании подобного носителя он свободно отображается в виде диска в проводнике. Чтобы зайти в «Проводник» откройте «Компьютер».
Теперь вам останется просто кликнуть правой кнопкой мыши по виртуальному диску. Далее из выпадающего контекстного меню кликаем по команде «Извлечь».
Способ 2: Управление дисками
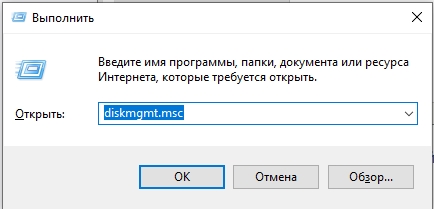
- Чтобы попасть во встроенную утилиту «Управление дисками» – одновременно зажмите две клавиши:
+ R
- Далее вводим запрос:
diskmgmt.msc
- В списке в самом низу, где отображается графическое представление дисков – кликните правой кнопкой по нужному разделу и выберите команду отсоединения.
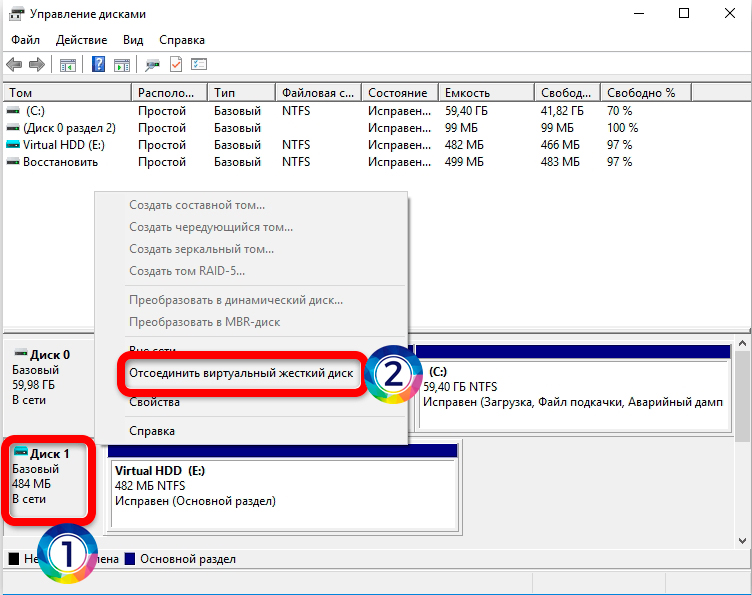
- В конце нужно подтвердить действие, нажав «ОК».
Способ 3: Командная строка
Запускаем консоль с правами администратора. Теперь вводим команду:
subst
Далее вы увидите список всех виртуальных носителей. Например:
V:\: => C:\
V – это буква виртуального диска. C – физический раздел, на котором виртуальный носитель и располагается. Чтобы удалить «устройство» используем команду:
subst v: /D (Вместо D введите букву вашего диска)