
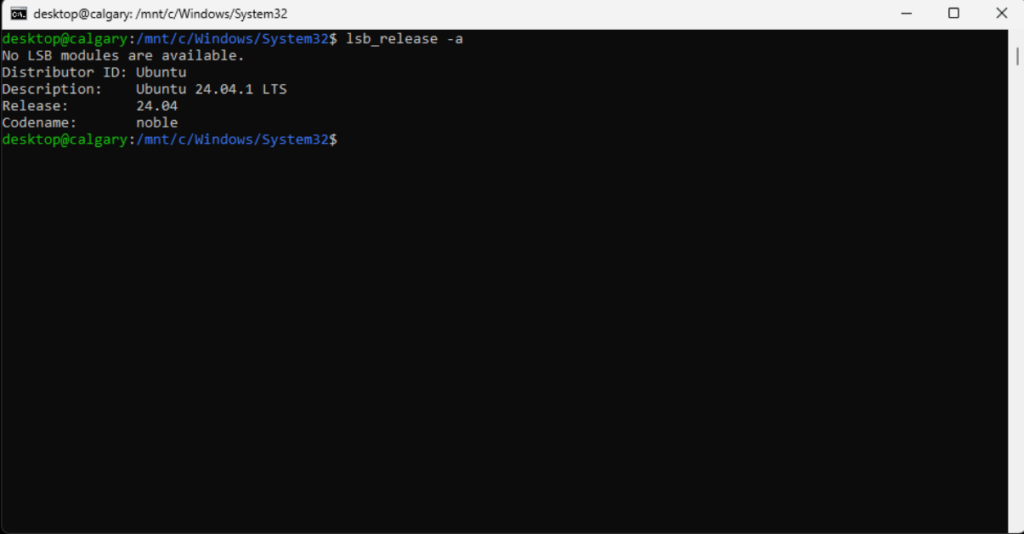
In this post we install and configure an instance of Ubuntu Server under WSL2 for Linux. Many developers are going to choose to use WSL2, so we guide them to install the Ubuntu Server version of WSL2. This provides a more standard environment referenced by many howto procedures on the Internet.
WSL2 enables a computer running Windows 11 Pro to host a guest instance of Ubuntu Server:
WSL2 offers some advantages for a developer experience
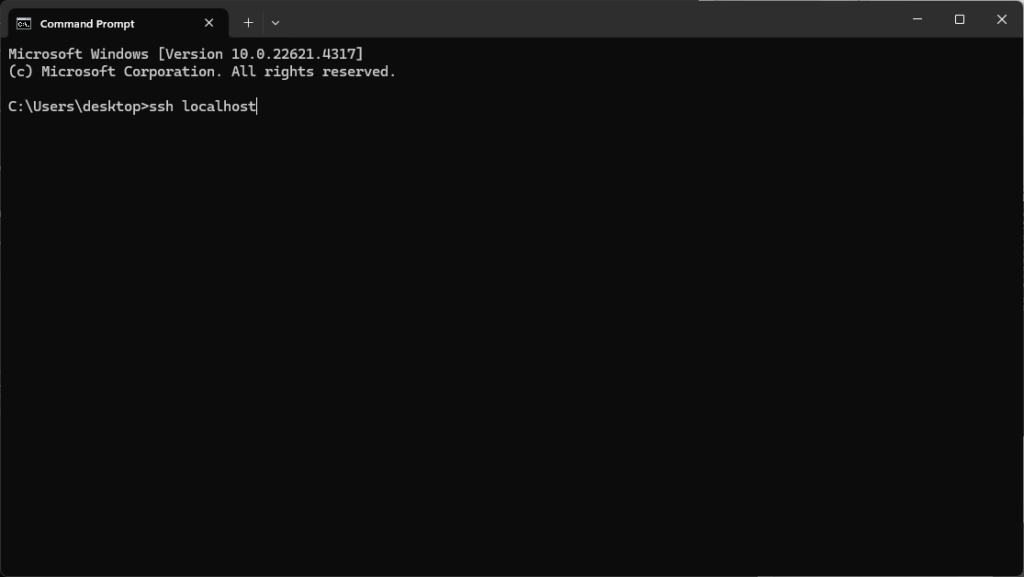
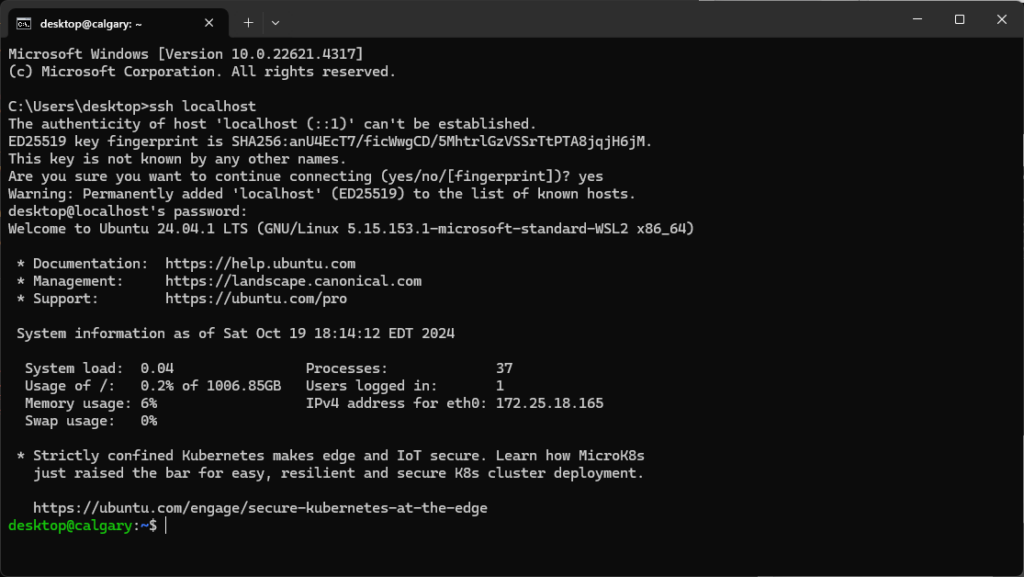
WSL2 offers some advantages for a local developer in terms of networking: if they install a service that opens a port, like port 22/tcp for SSH, that same port is opened on localhost of the Windows machine hosting the WSL2 Ubuntu Server instance. A developer can SSH to port 22 on localhost, without configuring a static IP address or port forwarding. This eliminates the need to configure virtual switches, static IP addresses, and port forwarding. In addition, WSL2 provides a file mounts of the Windows file system within Linux, and a file mount of the Linux filesystem within Windows.
Other ways to install Ubuntu Server on a Windows 11 Pro computer
There are other ways to install Ubuntu Server on a Windows 11 Pro computer, including Windows Hyper-V. If you need to host multiple instances of Ubuntu Server with static IP addresses and subnet routing, consider using Hyper-V instead.
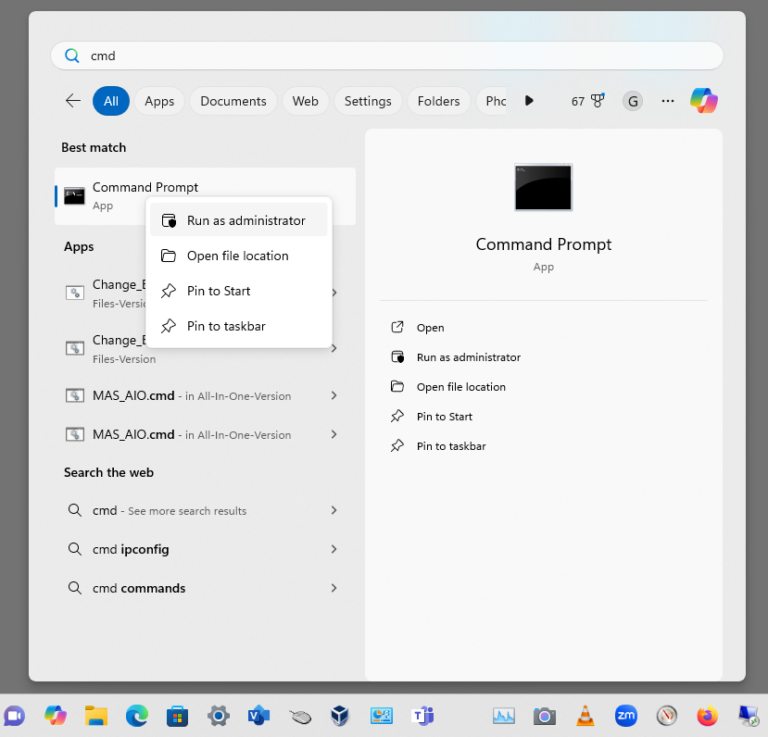
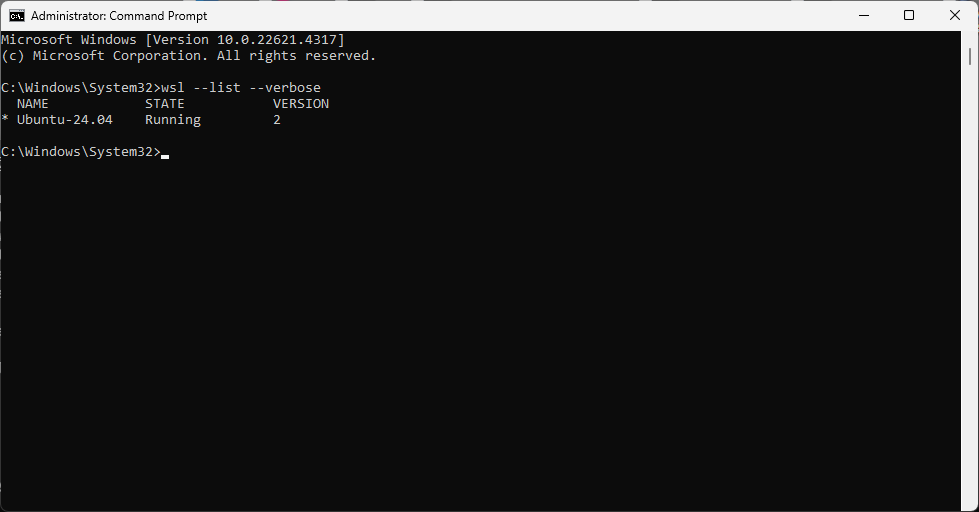
Start a CMD window as Administrator. At the Start menu, type the letters “cmd” then right-click on the app icon to run the command prompt as root:
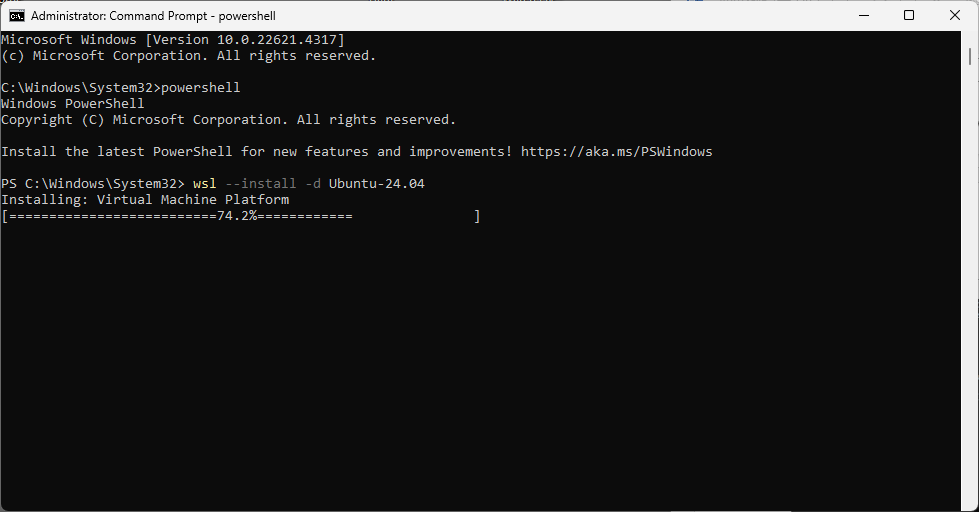
Enter the following command:
Enter the following command:
wsl --install -d Ubuntu-24.04
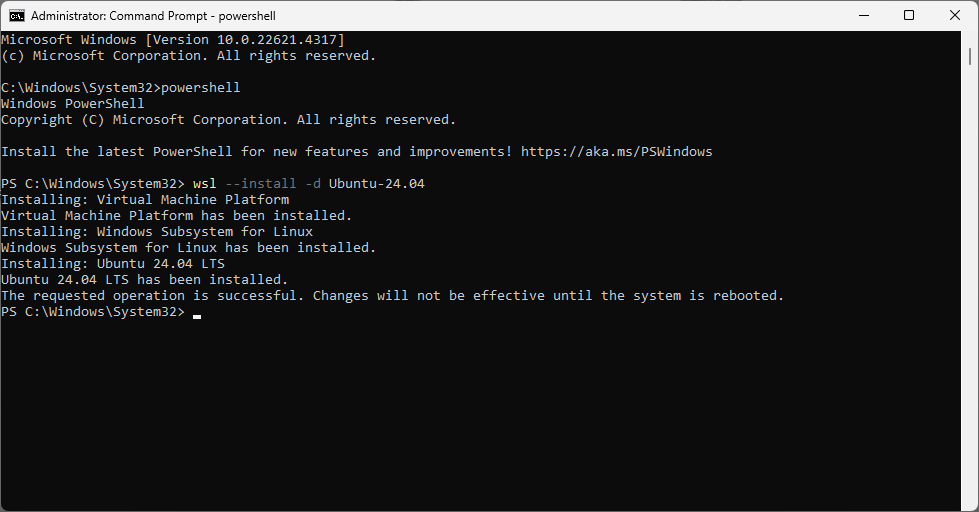
Reboot your computer.
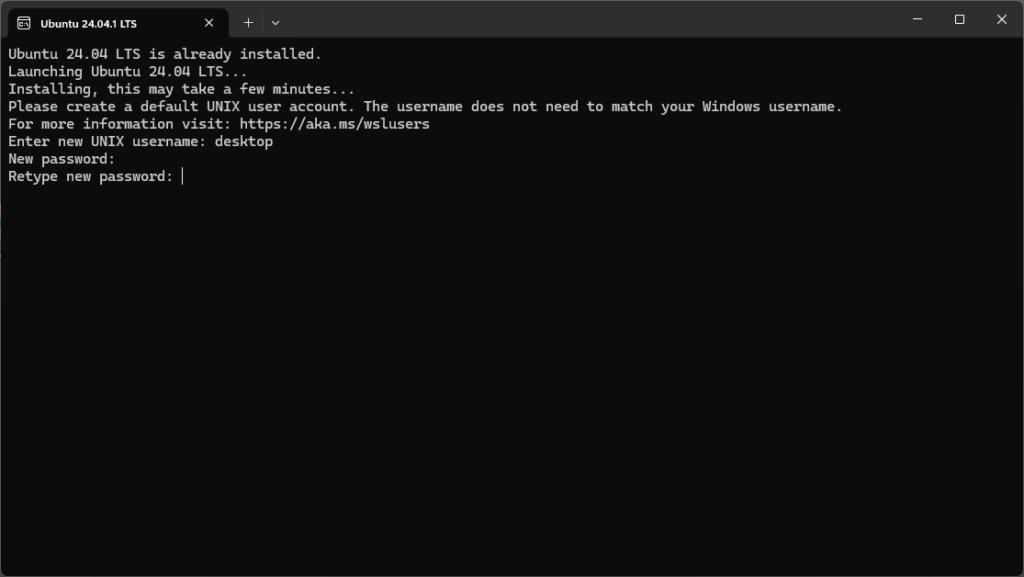
Enter values for username and password:
Enter the following command from a CMD window running as Administrator:
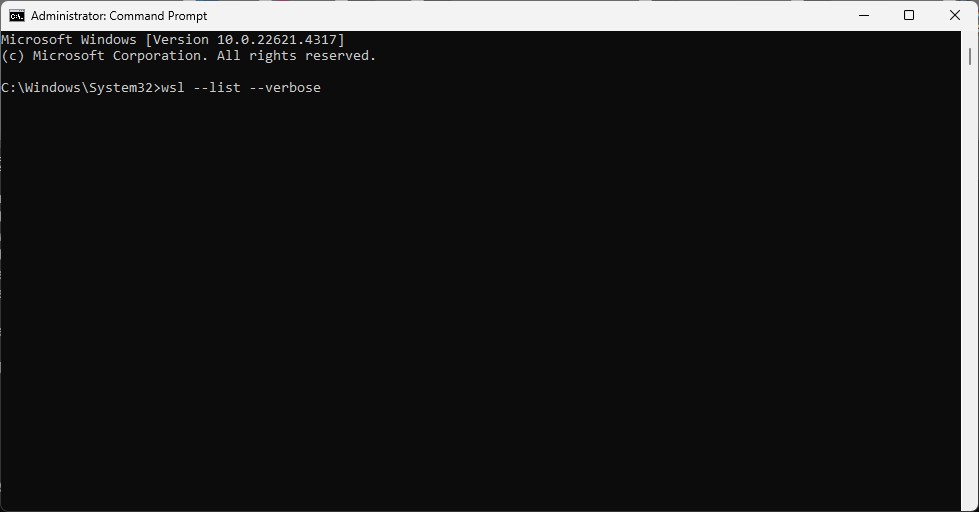
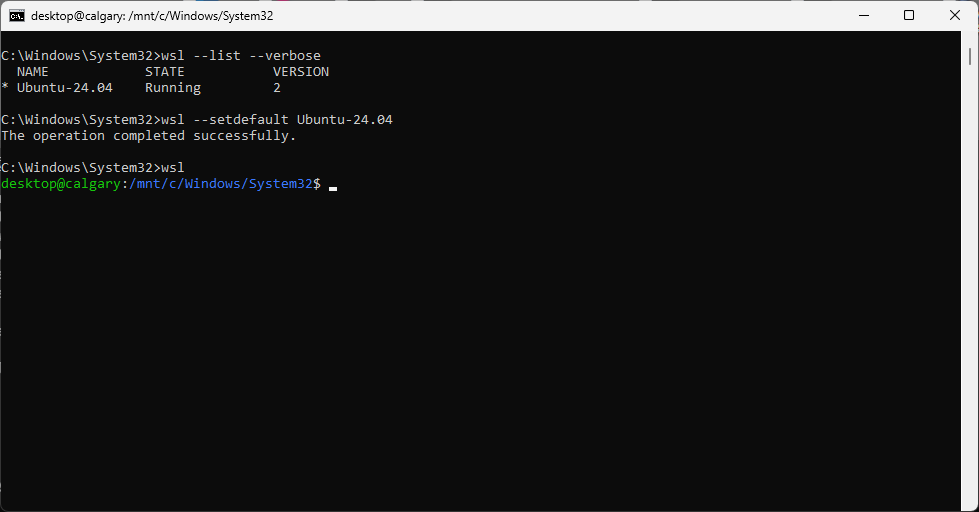
Enter the following command:
wsl --setdefault Ubuntu-24.04

Enter the following command:
Enter the following command:

Enter the following command:
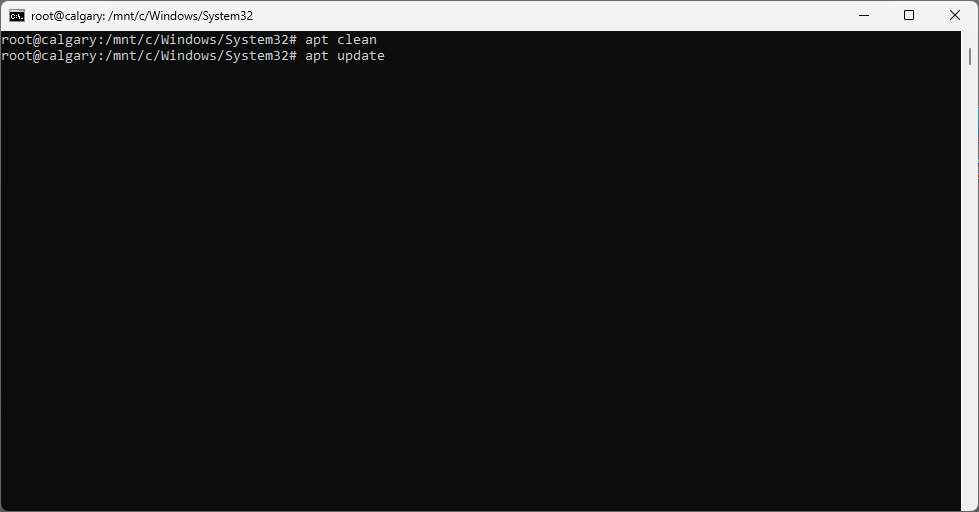
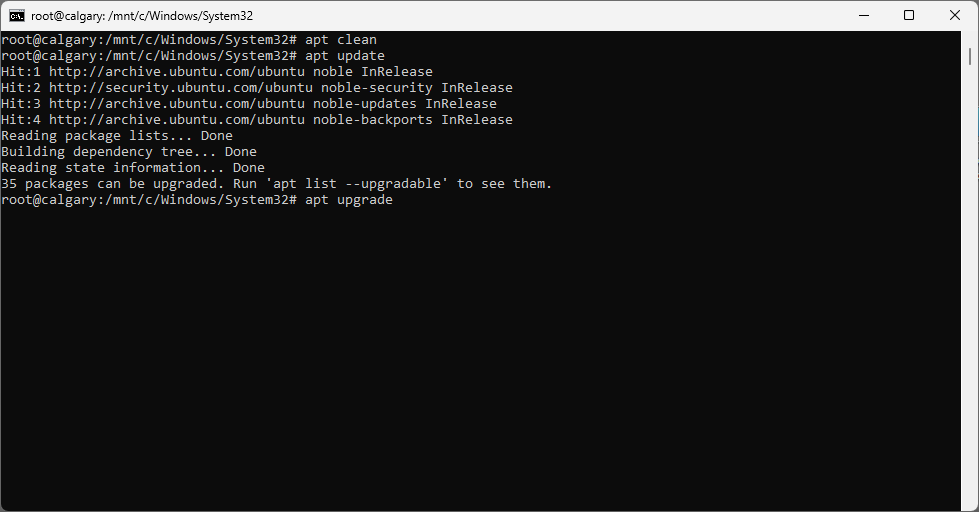
Updating apt packages on the Linux system
Enter the following commands:
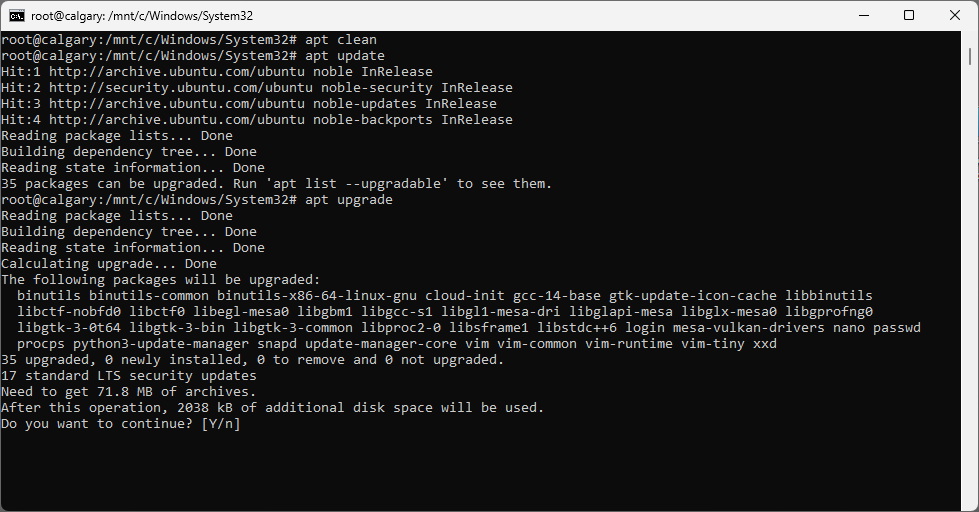
Enter the following command:
Enter y for yes:
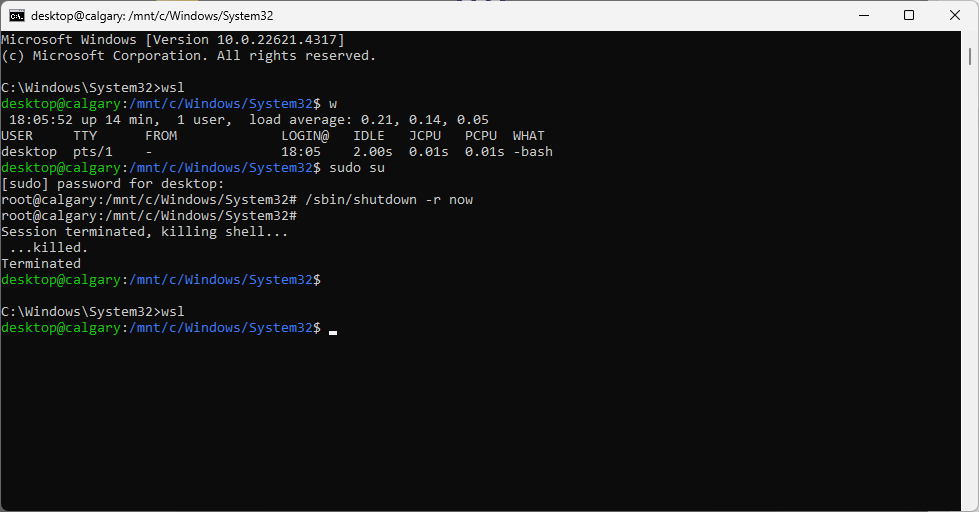
Enter the following command:
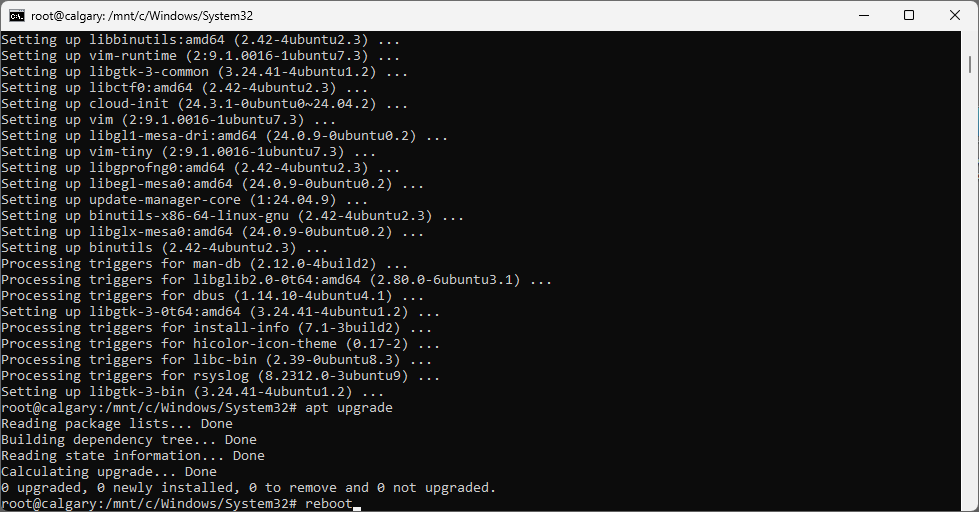
from a CMD window running as Administrator, enter the following command:
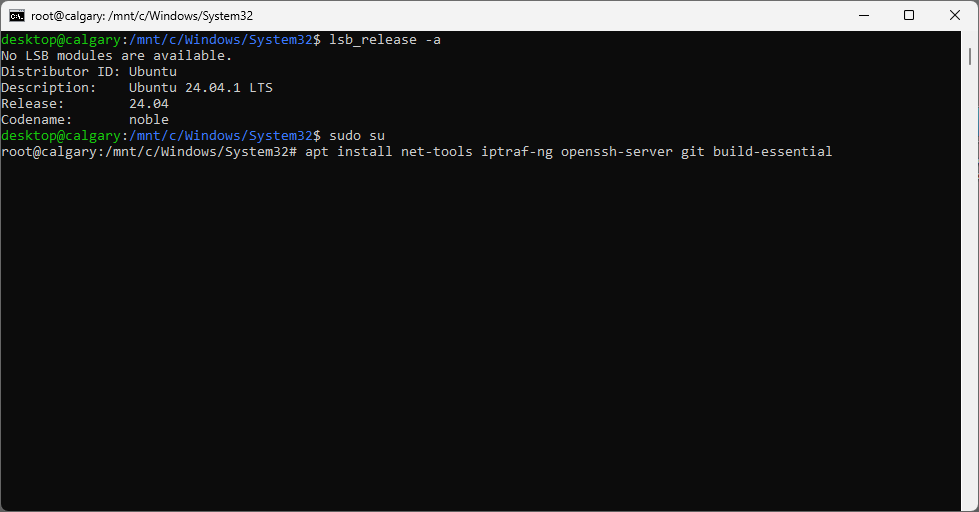
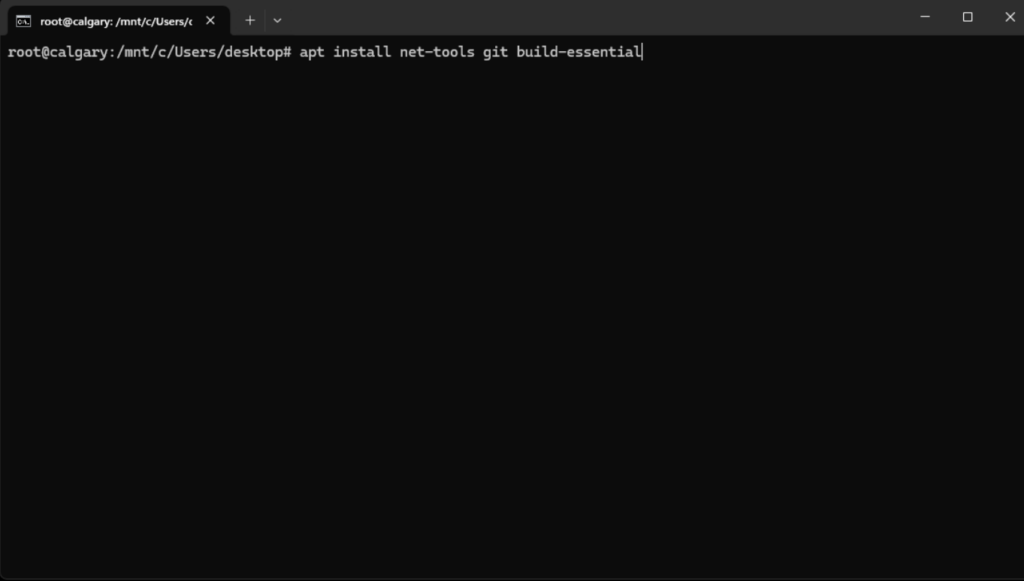
Installing some utilities
Enter the following commands:
sudo su
apt install net-tools git build-essential
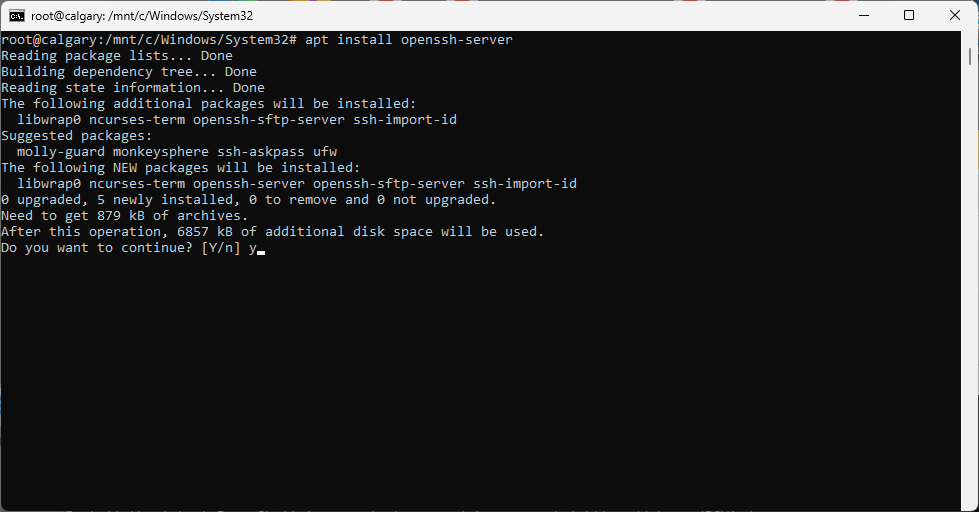
Installing openssh-server
Enter the following command:
apt install openssh-server
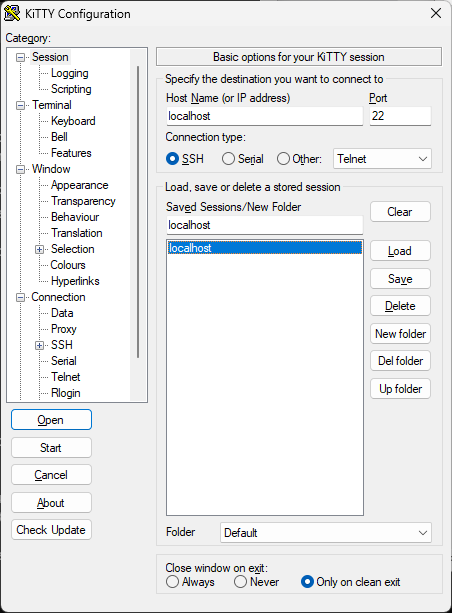
From a CMD window running as Administrator, enter the following command:
From KiTTY SSH terminal:
Create and save a session called localhost pointing to the host localhost:
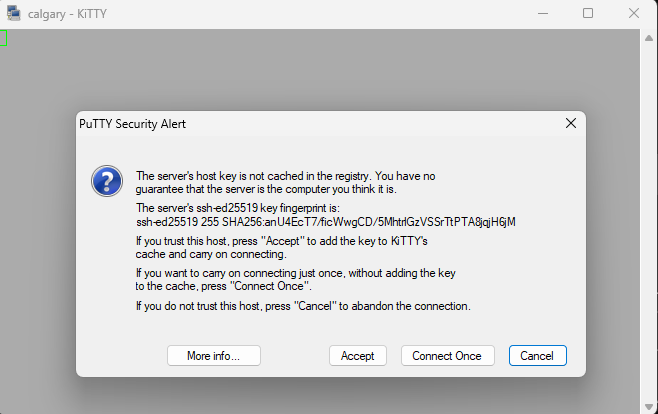
Click on “Accept”:
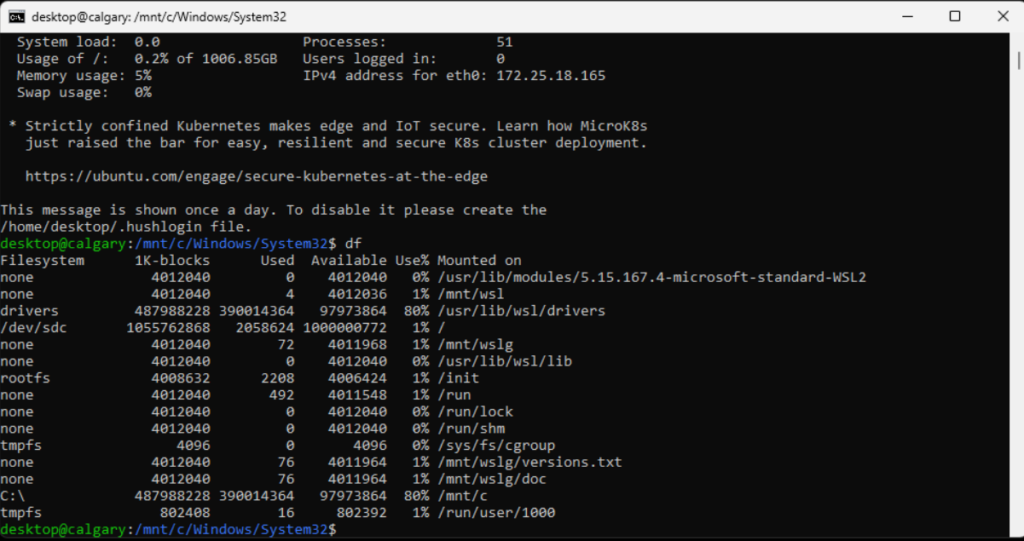
Accessing the Windows file system within Linux
Look at the mountpoint:
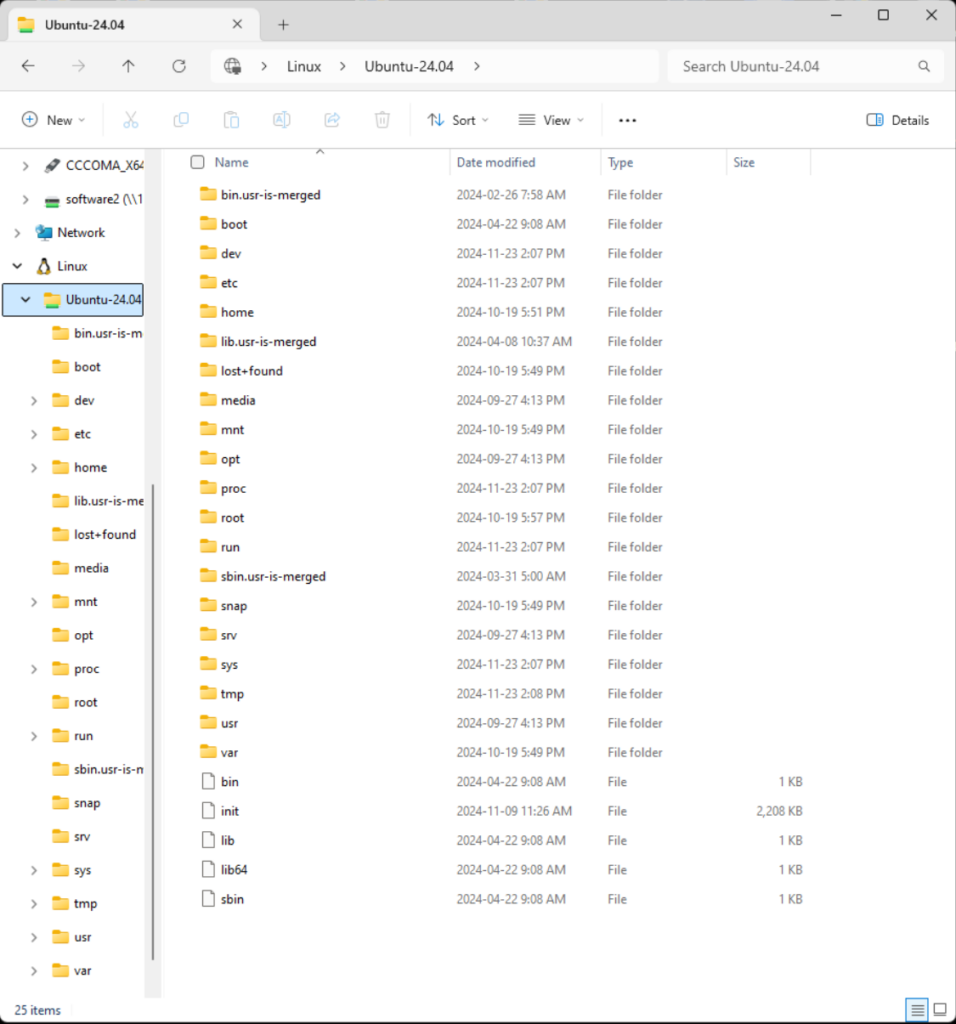
Accessing the Linux file system within Windows
From File Explore on Windows, look for the Linux device icon:
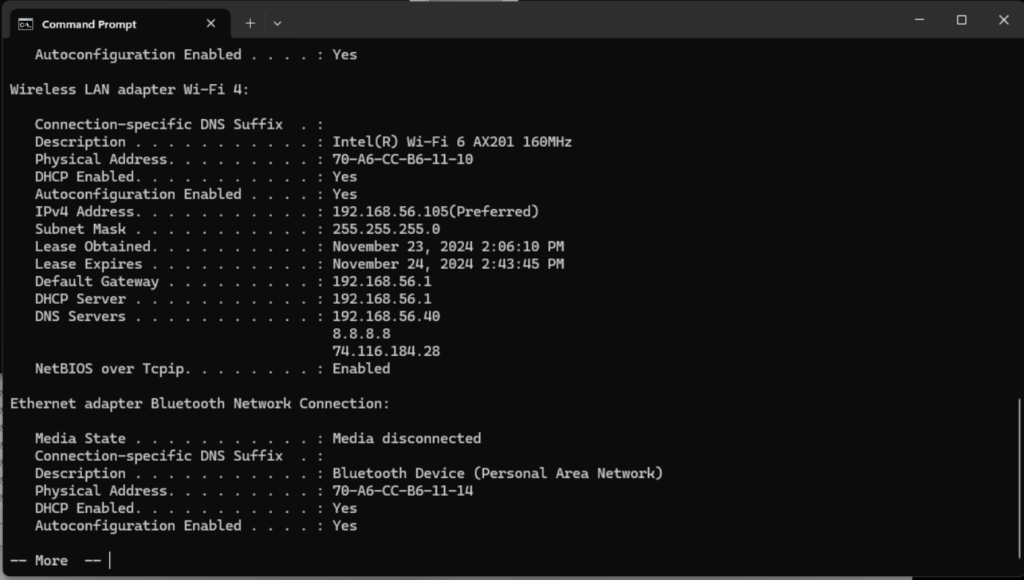
Exposing the SSH port on the public IP address of the Windows computer
From a CMD window run as Administrator, enter the following command:
Look through the listing to find the public IP address of the Windows computer:
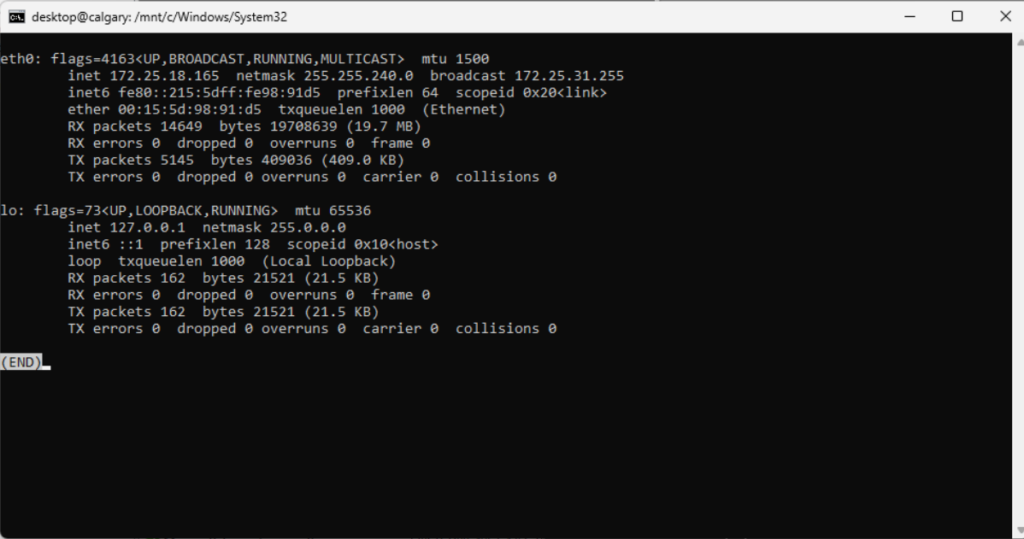
From a shell on the Linux instance, enter the following command:
Look through the listing to find the public IP address of the Linux instance:
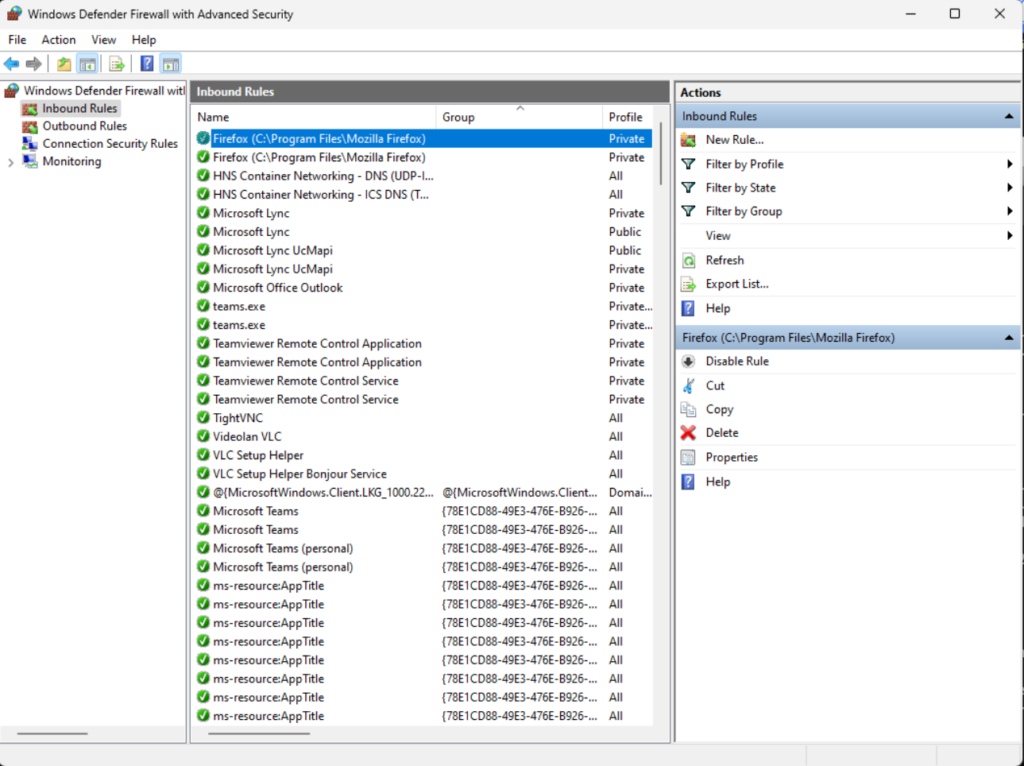
Opening a firewall exception for port 22/tcp (SSH) inbound on the Windows computer
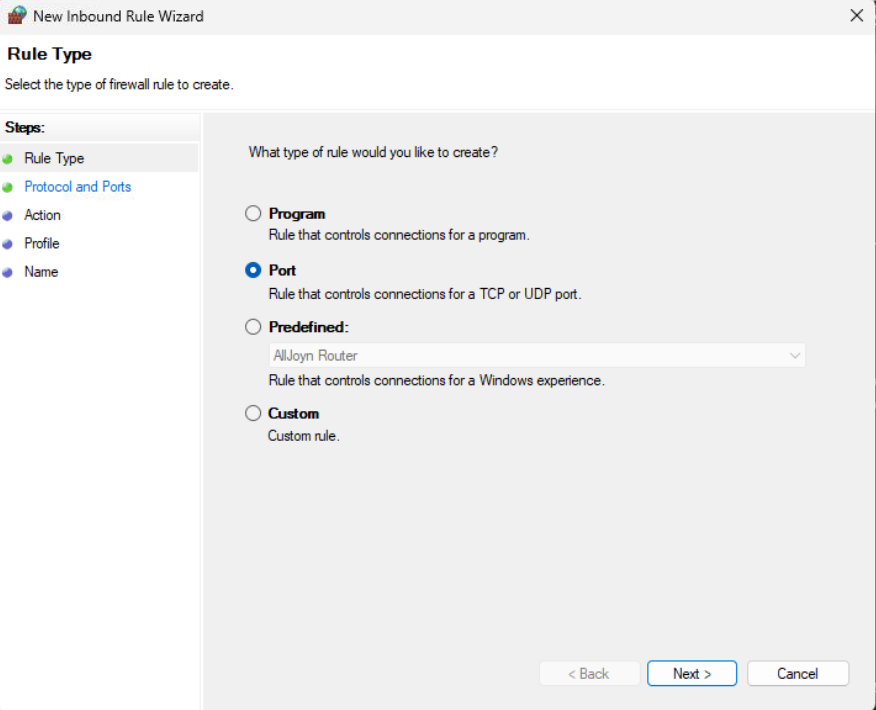
Click on “New Rule…”:
Select “Port”, click on “Next”:
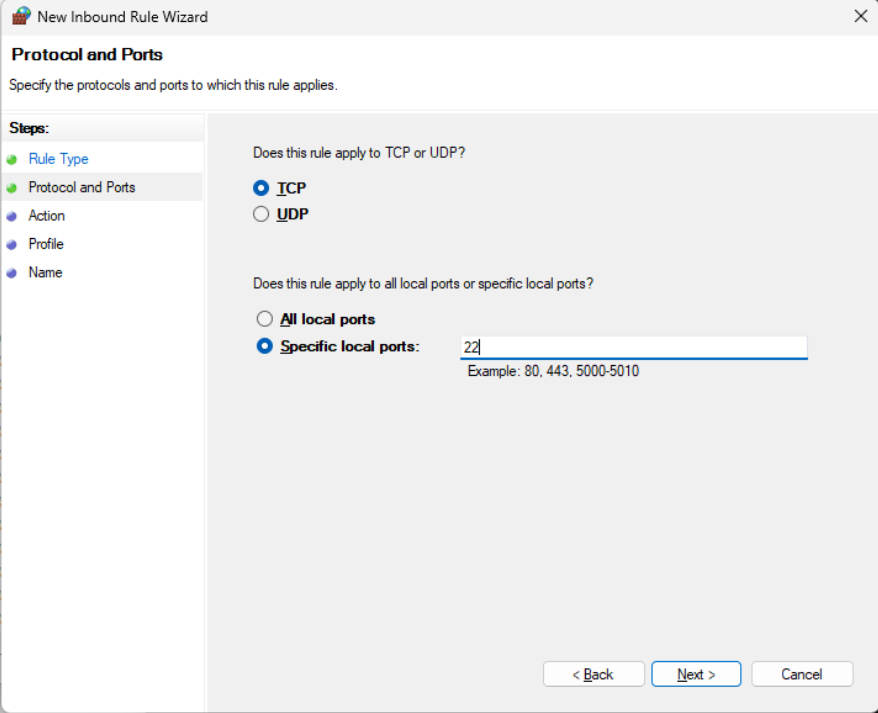
Select “TCP”. Select “Specify local ports”, enter the value 22. Click Next:
Select “Allow the connection”, click “Next”:

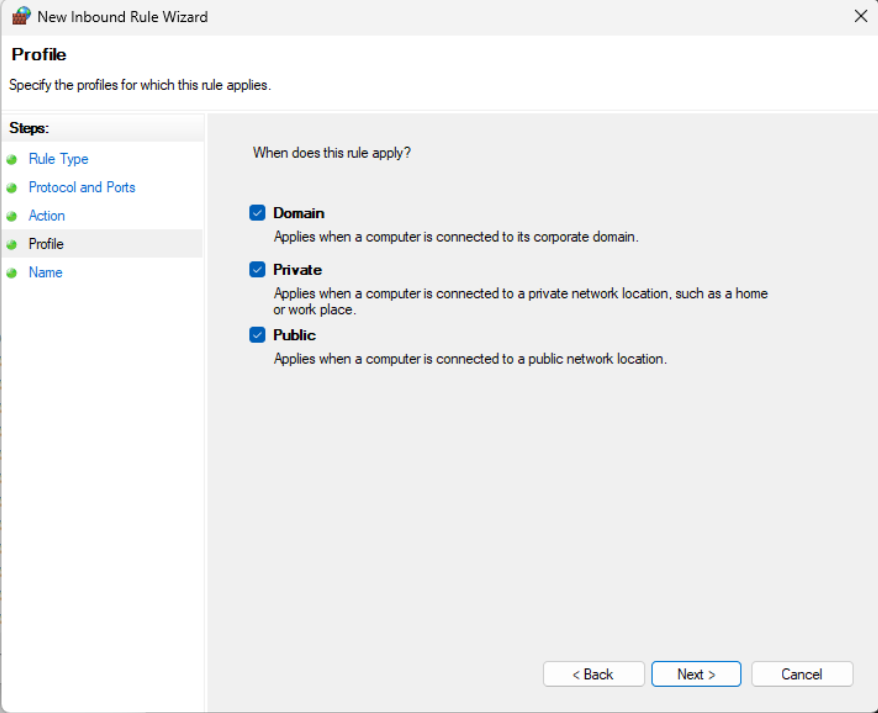
Ensure that “Domain”,”Private”,”Public” are selected. Click “Next”:
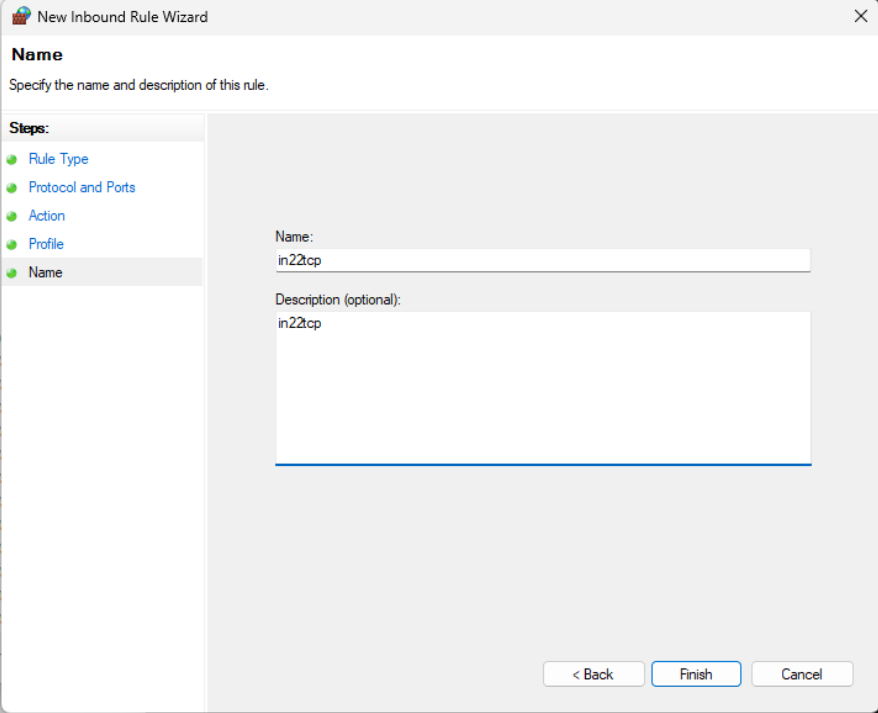
For “Name” enter the value: in22tcp
For “Description (Optional):” enter the value: in22tcp
Click “Finish”:
Allowing connections to port 22/tcp of the Linux instance via the public IP address of the Windows Computer
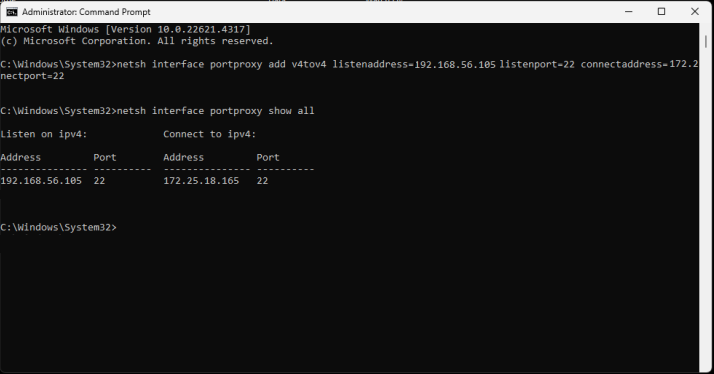
From a CMD window running as Administrator, enter the following commands (subtitute appropriate values for windowsip and wsl2ip:
netsh interface portproxy add v4tov4 listenaddress=windowsip listenport=22 connectaddress=wsl2ip connectport=22
netsh interface portproxy show all
Оглавление
- Системные требования
- Установка
- Использование
- Полезные команды
Привет. В этой статье мы настроим рабочее окружение для разработки веб-проектов на основе Windows Subsystem for Linux (WSL2). Данный подход намного
более гибкий, чем установка готовых пакетов, например WAMP или Open Server. Он также проще и не так сильно нагружает систему, как Docker или создание отдельных
виртуальных машин. Вообщем, одни плюсы. Давайте приступать.
Системные требования
Для корректной работы WSL2 необходимо, чтобы ваша система отвечала некоторым требованиям:
1. На устройстве должна быть установлена Windows 10 (сборки не ниже 19041) или Windows 11.
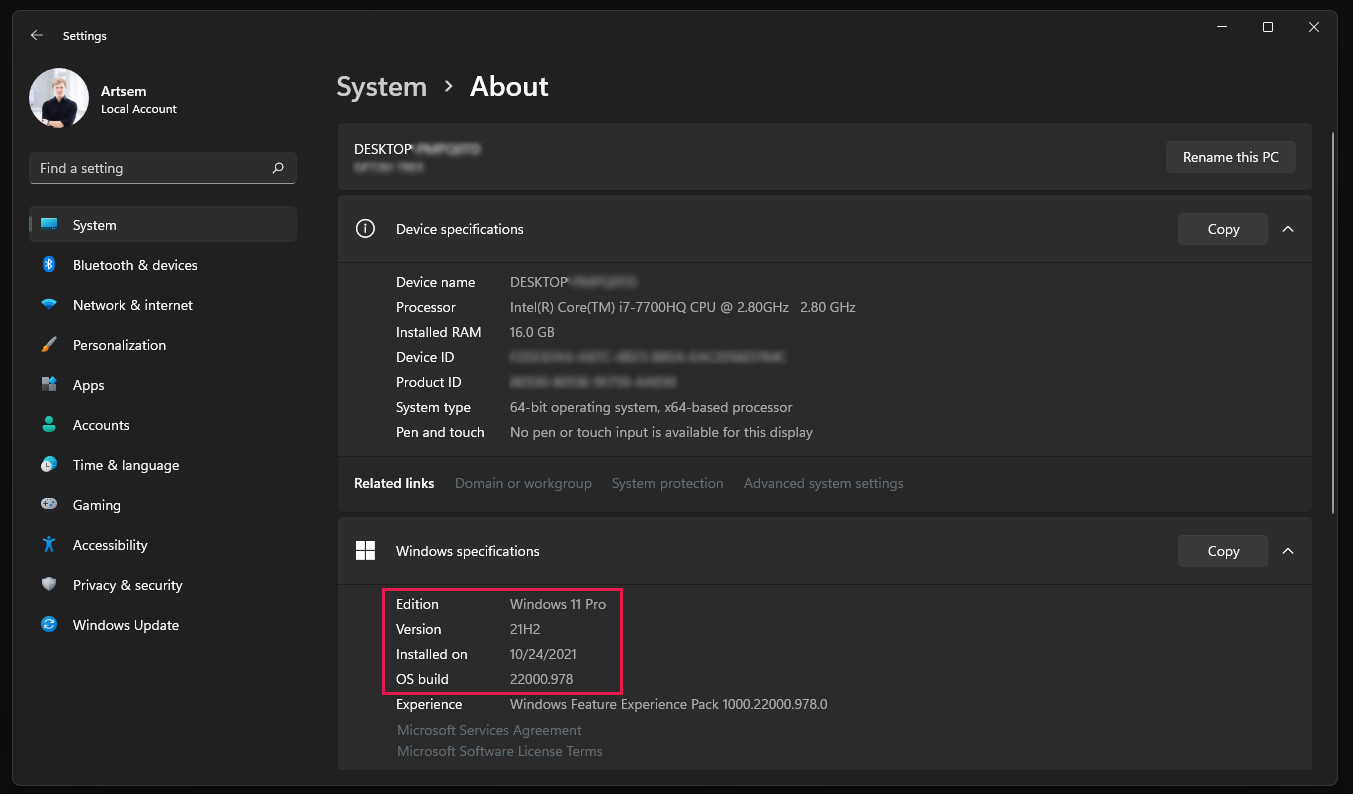
Версию системы можно посмотреть по пути:
en: Start > Settings > System > About
ru: Пуск > Параметры > Система > О системе
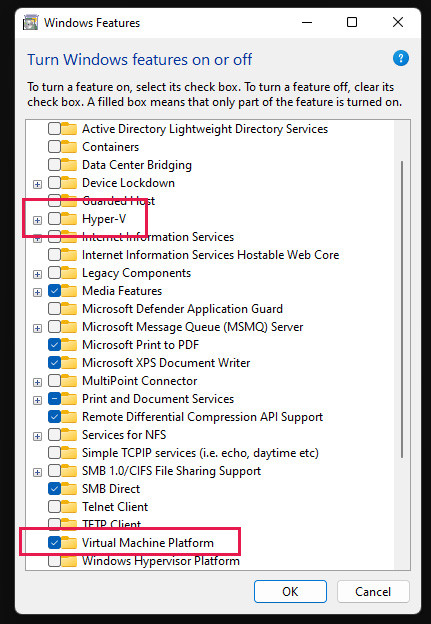
2. Устройство должно поддерживать виртуализацию Hyper-V и функция должна быть включена. Для
того,
чтобы проверить, есть ли в системе Hyper-V и включена ли эта функция, найдите в Пуск следующий пункт:
en: Turn windows features on or off
ru: Включение или отключение компонентов Windows
3. Должны быть включены компоненты WSL. Активировать их нужно также в этой панели.
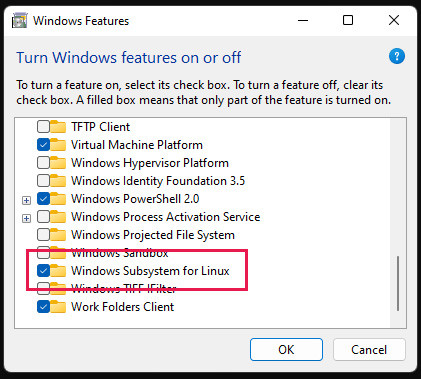
Если вы включали какие-либо компоненты, стоит перезагрузить компьютер. Если все требования выполнены мы можем приступать к
установке.
Установка
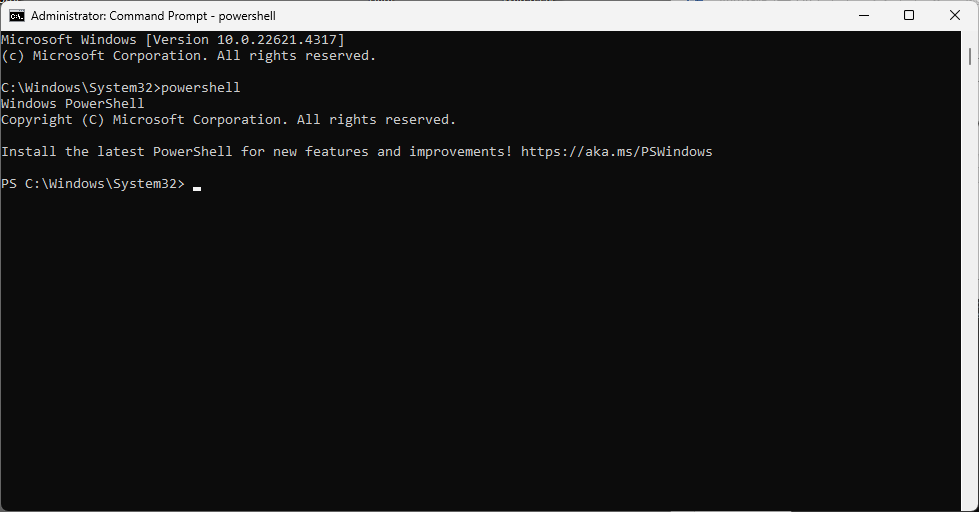
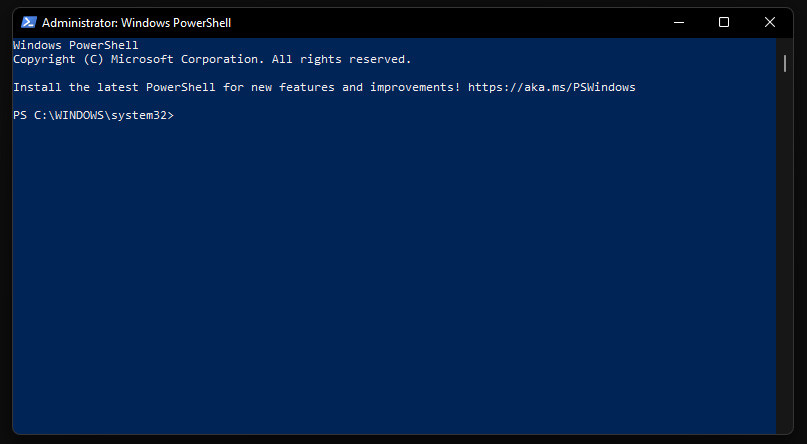
Для установки и настройки компонентов мы будем использовать Windows PowerShell. Найдите программу в меню Пуск и запустите от имени
Администратора.
Команда для установки следующая:
wsl —install — пока не выполняйте эту команду
Команда включит функционал для запуска WSL и установки дистрибутива Ubuntu. Дистрибутив по умолчанию можно изменить, в таком случае команда будет
выглядеть так:
wsl —install -d Distribution_Name
Чтобы узнать список возможных дистрибутивов, выполните команду
wsl —list —online
И уже после этого установите WSL для необходимой версии. Мы как правило устанавливаем Ubuntu 20.04 LTS
wsl —install -d Ubuntu-20.04
После завершения установки вам будет необходимо перезагрузить компьютер.
Использование
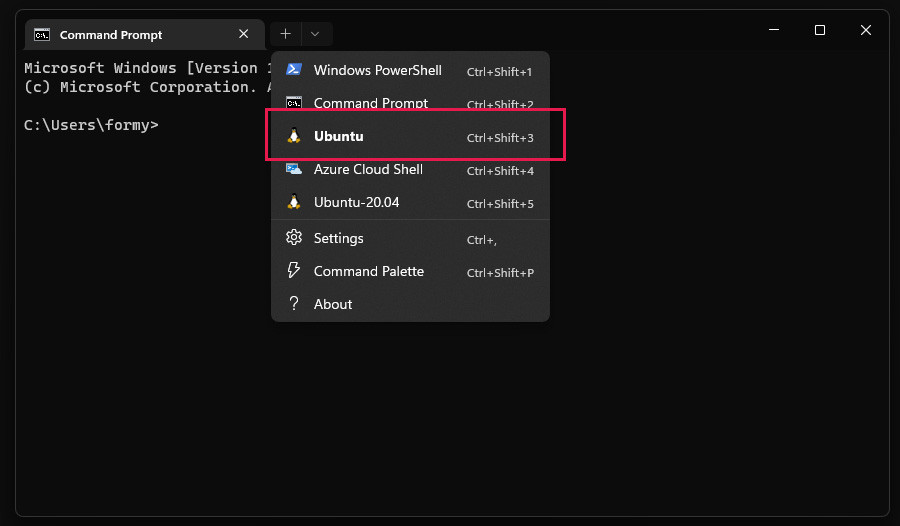
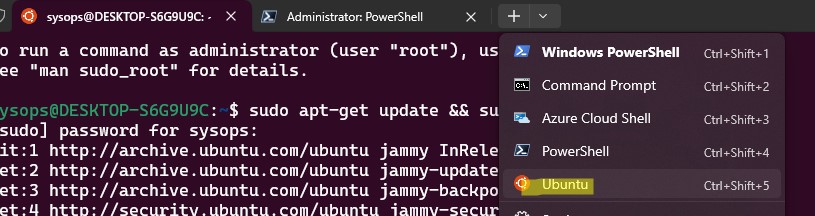
Для запуска и взаимодействия с образом на повседневной основе удобнее всего пользоваться программой
Windows Terminal. Для запуска компонентов WSL2 и работы с
образом после установки в выпадающем списке возможных программ выберите установленный вами образ:
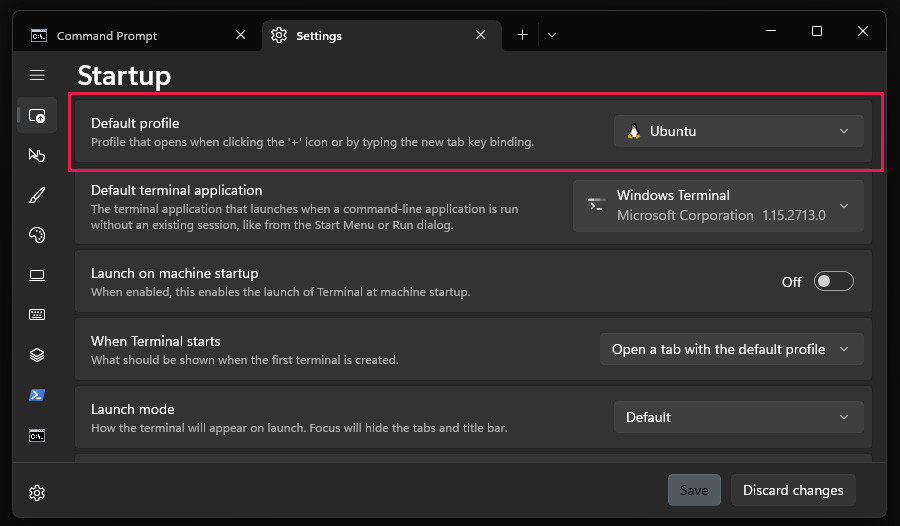
Также в настройках программы можно выставить программу, которая будет запускаться по умолчанию при запуске Windows Terminal:
Далее нам необходимо установить все компоненты, необходимые нам для локальной разработки. Сделать это можно, руководствуясь нашей статьей
Развертывание Laravel проекта на сервере Ubuntu 20.04.
Здесь нужно сделать несколько важных замечаний:
1. WSL образ не запускает установленные пакеты после установки. Например, после установки mysql вам нужно запустить этот пакет
командой sudo service mysql start. И так с любым другим пакетом.
2. WSL не запускает установленные пакеты при запуске системы.. После перезагрузки компьютера и старта WSL образа вам нужно запустить
все необходимые для вас пакеты. Чтобы не писать каждый раз все эти команды, проще в корневой папке (папке ~), откуда стартует ваш образ, создать
файл start.sh:
#!/bin/bash
service nginx start
service mysql start
service php8.0-fpm start
service php8.1-fpm start
service php7.4-fpm start
service redis-server start
service cron start
Далее сохраняем этот файл. Теперь после старта WSL для того, чтобы выполнить все команды из этого файла, нам нужно выполнить команду:
sudo sh start.sh
Все, мы готовы к работе.
Последнее, что нам осталось — прописать нужный нам домен (домены) в файле
C:\Windows\System32\drivers\etc\hosts (не забывайте открывать от имени Администратора) следующим образом:
127.0.0.1 ilavista.test
::1 ilavista.test
После этого домен ilavista.test будет вести на локальную машину, таким образом его можно будет обработать Nginx (или Apache) вашего WSL образа.
Полезные команды
Немедленно завершает работу всех запущенных дистрибутивов и утилиты виртуальной машины WSL 2. Эта команда может потребоваться в случаях, когда
требуется перезапустить среду виртуальной машины WSL 2, например, для изменения ограничений использования памяти или внесения изменений в ваш файл
.wslconfig.
wsl —shutdown
Завершить указанный дистрибутив или остановить его запуск.
wsl —terminate Distribution_Name
Экспортирует дистрибутив в tar-файл.
wsl —export Distribution_Name FileName
Импортирует указанный tar-файл в качестве нового дистрибутива.
wsl —import Distribution_Name Install_Location FileName
Список дистрибутивов Linux, установленных на вашем компьютере с Windows, включая состояние (запущен дистрибутив или остановлен) и версию WSL, на
которой запущен дистрибутив (WSL 1 или WSL 2).
wsl —list —verbose
Общая информация о вашей конфигурации WSL, такую как тип дистрибутива по умолчанию, дистрибутив по умолчанию и версия ядра.
wsl —status
Вручную обновите версию вашего ядра WSL Linux. Вы также можете использовать команду: wsl —update rollback для отката к предыдущей версии ядра WSL Linux.
wsl —update
Среда Windows Subsystem for Linux (WSL) позволяет запускать нативные приложения, писать скрипты, выполнять команды и скрипты Linux непосредственно из Windows без использования эмуляторов или развертывания выделенных виртуальных машин. Актуальной версией среды является WSL 2, в которой используется полноценное ядро Linux (версия ядра 5.15) и обеспечивает полную совместимость с системными вызовами. Образ ядра Linux в WSL представляет собой легкую виртуальную машину, для запуска которой не нужно устанавливать полноценную роль Hyper-V.
Содержание:
- Как установить Windows Subsystem for Linux (WSL2)?
- WSL: Установка дистрибутива Linux в Windows
- Команды для управления WSL в Windows
- Использование Linux в среде WSL
Вы можете запустить WSL 2:
- Во всех версиях Windows 10, начиная с 1903, а также в Windows 11 и Windows Server 2022;
- В настройка BIOS/UEFI компьютера должна быть включена поддержка аппаратной виртуализации: Intel VT (Intel Virtualization Technology) или AMD-V (SVM Mode).
Как установить Windows Subsystem for Linux (WSL2)?
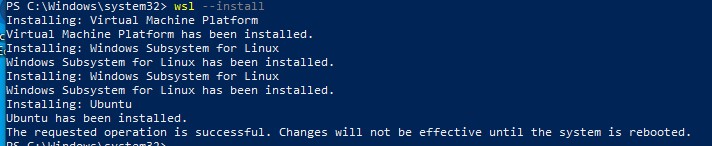
Компонент WSL по умолчанию отключен в Windows. Современных дистрибутивах Windows 10 и Windows 11 для установки среды WSL достаточно выполнить команду:
wsl --install
Этак команда автоматически включит все необходимые компоненты Windows, необходимые для работы WSL, установить обновление ядра Linux для WSL2, загрузит дистрибутив Ubuntu (по-умолчанию) и установит его в WSL.
Осталось перезагрузить компьютер, и вы можете запускать среду WSL!
Вы можете установить для WSL другой дистрибутив Linux. Выведите список доступных дистрибутивов:
wsl --list --online
Укажите имя дистрибутива Linux, который установить в WSL. Например:
wsl --install -d kali-linux

Если в BIOS/UEFI компьютера не включена виртуализация, при установке WSL вы получите ошибку:
Installation failed with error 0x80070003 or error 0x80370102” it means that Bios Level Virtualization is not enabled on your computer.
Вы можете установить WSL2 в Windows вручную. Для этого придется вручную последовательно выполнить все этапы, который команда wsl —install запускала автоматически:
- Установить WSL
- Включить компонент виртуалзации VirtualMachinePlatform
- Установить ядро WSL 2
- Скачать и установить дистрибутив Linux для WSL
Сначала установите следующие компоненты Windows:
Enable-WindowsOptionalFeature -Online -FeatureName Microsoft-Windows-Subsystem-Linux
Enable-WindowsOptionalFeature -Online -FeatureName VirtualMachinePlatform
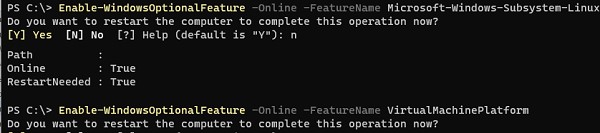
Перезагрузите компьютер.
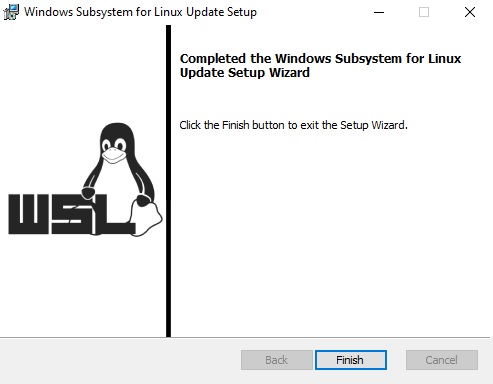
Скачаем и установим обновление ядра Linux для WSL2 (WSL2 Linux kernel update package for x64 machines — https://wslstorestorage.blob.core.windows.net/wslblob/wsl_update_x64.msi). Можете скачать пакет вручную или с помощью PowerShell:
Invoke-WebRequest -Uri https://wslstorestorage.blob.core.windows.net/wslblob/wsl_update_x64.msi -OutFile "$($env:userprofile)\Downloads\wsl_update_x64.msi" -UseBasicParsing
Invoke-Item "$($env:userprofile)\Downloads\wsl_update_x64.msi"
rm "$($env:userprofile)\Downloads\wsl_update_x64.msi"
Еще раз перезагрузите компьютер и назначьте версию WSL 2 в качестве среды по-умолчанию:
wsl --set-default-version 2

WSL: Установка дистрибутива Linux в Windows
После того, как ядро WSL установлено в Windows, вы можете установить один или несколько дистрибутивов Linux на компьютер.
Можно установить пакет с дистрибутивом Linux через Microsoft Store. Доступны следующие дистрибутивы:
- Ubuntu
- Debian
- Kali Linux
- OpenSUSE
- Oracle Linux
- SUSE Linux Enterprise Server
- Fedora
Найдите нужную версию дистрибутива в Store и установите ее, нажав кнопку Получить (Get).

Если у вас отключен Windows Store, вы хотите установить дистрибутив WSL в Core редакции Windows Server или вам нужно установить WSL на Изолированном от интернета компьютере (оффлайн), вы можете скачать дистрибутив Ubuntu с помощью PowerShell командлета Invoke-WebRequest:
Invoke-WebRequest https://aka.ms/wslubuntu2204 -OutFile ubuntu-2204.appx –UseBasicParsing
Установите пакет для WSL с помощью:
Add-AppxPackage .\ubuntu-2204.appx
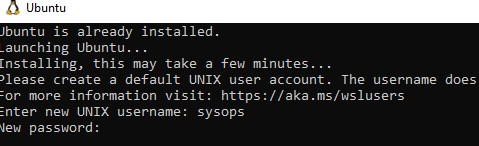
После окончания установки появится окно, в котором вам будет предложено указать имя пользователя и пароль для вашего дистрибутива.
После установки вы можете в меню Пуск появится отдельная программа для запуска Linux.
Также вы можете запустить ваш Linux из отдельной вкладки Windows Terminal или с помощью команды
wsl
.
Команды для управления WSL в Windows
Рассмотрим основные команды для управления ядром и дистрибутивами Linux в WSL.
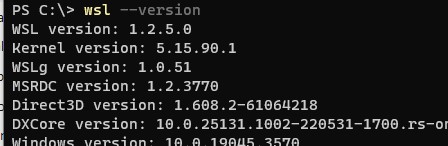
Проверить текущую версию ядра WSL:
wsl --version
Обновить ядро WSL вручную:
wsl --update
Откатится к предыдущему ядру WSL:
wsl --update rollback
Вывести список установленных версий Linux:
wsl --list
Вывести дистрибутив Linux, который используется по-умолчанию:
wsl --status
Дистрибутив Linux по-умолчанию в WSL можно изменить:
wsl --setdefault Ubuntu
Запустить определенный дистрибутив в WSL:
wsl -d kali-linux
Завершить среду WSL:
wsl --shutdown
Можно войти в WSL Ubuntu под root и сбросить пароль:
ubuntu config --default-user root
Passwd
Вернуть пользователя по умолчанию
ubuntu config --default-user your_username
Для настройки параметров WSL и дистрибутивов Linux используются конфиг файлы:
- wsl.conf – файл с настройками конкретного дистрибутива Linux (находится в директории /etc)
- .wslconfig – глобальные настройки WSL, которые применяются ко всем дистрибутовам (находится в профиле пользователя в
%UserProfile%
)
Например, если вы хотите ограничить использование оперативной памяти и CPU компьютера дистрибутивами Linux в WSL, создайте такой файл
%UserProfile%\.wslconfig
:
[wsl2]
memory=2GB
processors=2
Использование Linux в среде WSL
Дистрибутив Linux, установленный в WSL является полноценной операционной системой. Поэтому после установки рекомендуется выполнить обновление пакетов. Для Ubuntu выполните команду:
$ sudo apt-get update && sudo apt-get upgrade -y
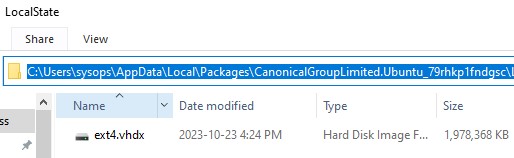
Файловая система вашего дистрибутива Linux хранится в профиле пользователя в виде VHDX файла. Например, виртуальный диск Ubuntu хранится в папке
%USERPROFILE%\AppData\Local\Packages\CanonicalGroupLimited.Ubuntu_79rhkp1fndgsc\LocalState
Файловая система Linux в WSL монтируется в виде сетевой папки прямо в проводник Windows.
Также для прямого доступа к файлам WSL из Windows можно использовать UNC путь. Например:
notepad \\wsl$\Ubuntu\sysops\home\1122.txt
В свою очередь локальные диски Windows монтируются в WSL в папку mnt. Вывести список файлов папок на диске C:
wsl
ls /mnt
ls/mnt/c

Другие примеры запуска Linux команд из Windows:
dir | wsl grep Sa
wsl ls ‑la > 123.txt
wsl ls ‑la /proc/cpuinfo
wsl ls ‑la “/mnt/c/Program Files”
Вы можете установить любые пакеты в Linux. Например, установите файловый менеджер Midnight Commander:
$ sudo apt-get install mc
В современной версии WSL 2 вы можете запускать из Windows любые приложения Linux с графическим интерфейсом (X11 и Wayland). Например, установите графический редактор:
$ sudo apt install gimp -y
Чтобы запустить его из Windows просто выполните команду:
wsl gimp
In this blog post, I will show you how to install and setup Ubuntu Server 2018.04 LTS in Hyper-V. Since Hyper V comes shipped with Windows OS (Except Home Edition), chances are that you already have Hyper V available in your system, ready to be used.
Please note that you can install only LTS version on Hyper-V. I tried to install non LTS version and it did not work.
Download Ubuntu Server
You can download Ubuntu Server from here. Download LTS version.
What is Hyper-V
Hyper V is a virtualization software from Microsoft which allows you to run multiple Operating system on your Windows Machine. Hyper V is exactly like VMware Workstation or Oracle VirtualBox, except that Hyper V is from Microsoft and is available for free for almost all the versions of Windows except Home version.
Which Windows Version Supports Hyper V and how to Enable it
Since Hyper V is a part of Windows OS, separate installation is not required. But Hyper-V is not enabled by default and to use it, it needs to be enabled. To enable Hyper V, the following requirements must be met.
- Windows 10 Enterprise, Professional, or Education
- 64-bit Processor with Second Level Address Translation (SLAT)
- CPU support for VM Monitor Mode Extension (VT-c on Intel CPU’s)
- Minimum of 4 GB memory.
- The Hyper-V role cannot be installed on Windows 10 Home.
For detailed discussion please go through my blog on how to enable Hyper V in Windows.
Enable Virtualization Technology either Intel VT-x or AMD-V
To enable Hyper V, system must have Virtualization Technology Enabled in BIOS. For AMD processors, Virtualization is enabled by default, but in the case of Intel, VT-x may not be enabled by default. So, there are steps to be followed to enabled Intel VT in BIOS or UEFI. Please follow my post on Step by step guide to enable Intel VT-x or AMD-V in BIOS or UEFI in Windows 10 and Windows 8.
Before you start installing Ubuntu Linux, we will have to create network connection switch first. Please follow the steps below
- Open Hyper-V Manager
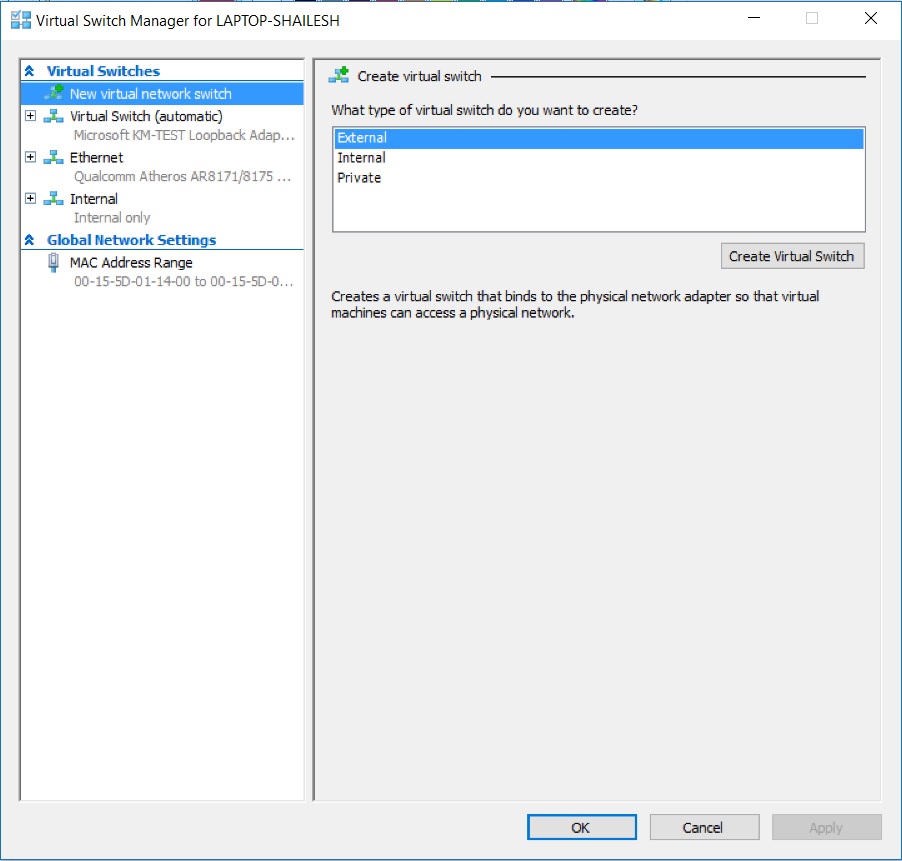
- Click Virtual Switch Manager under action on the right pane in Hyper-V Manger screen
Hyper V- Virtual Switch Manager
- Select External and click on create virtual switch.

Hyper V Manager – Create New Virtual switch
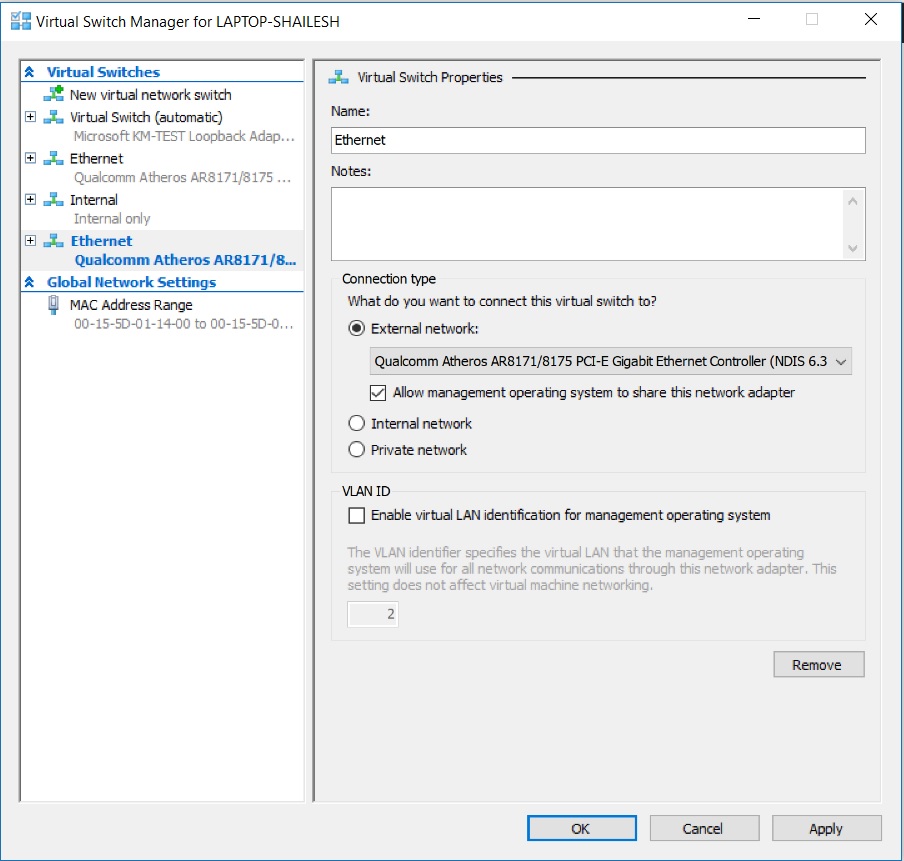
- In the Virtual Switch properties dialog box, specify the name of your choice of the virtual switch and under Connection Type -> External Network, select your system Ethernet card and not your WiFi card. Click on OK to complete the process.

Hyper V Manger – Virtual Switch Properties
Once you have Hyper V setup successfully, Please follow the below steps to Install Ubuntu Server
Step 1 – Open Hyper V Manager
First step is to open Hyper V manager. If you have setup everything correctly, you can search for Hyper-V Manager in Taskbar or you can find the shortcut in Start Menu under Windows Administrative tools.
On the right hand side you will see New-> Virtual Machine. Click on Virtual Machine to launch New Virtual Machine Wizard and click Next.
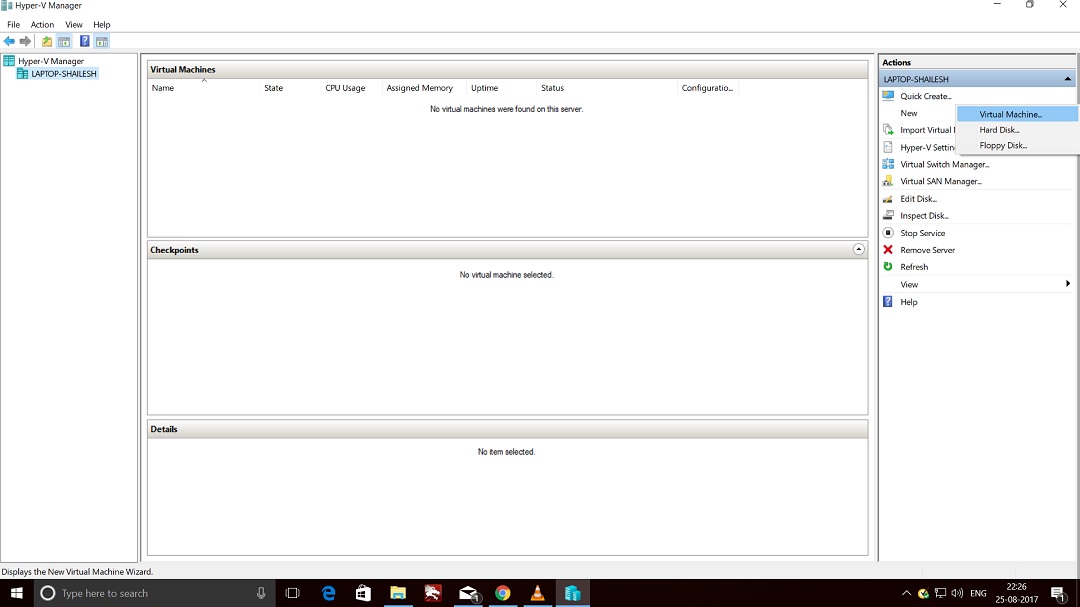
Hyper-V Manager Screenshot
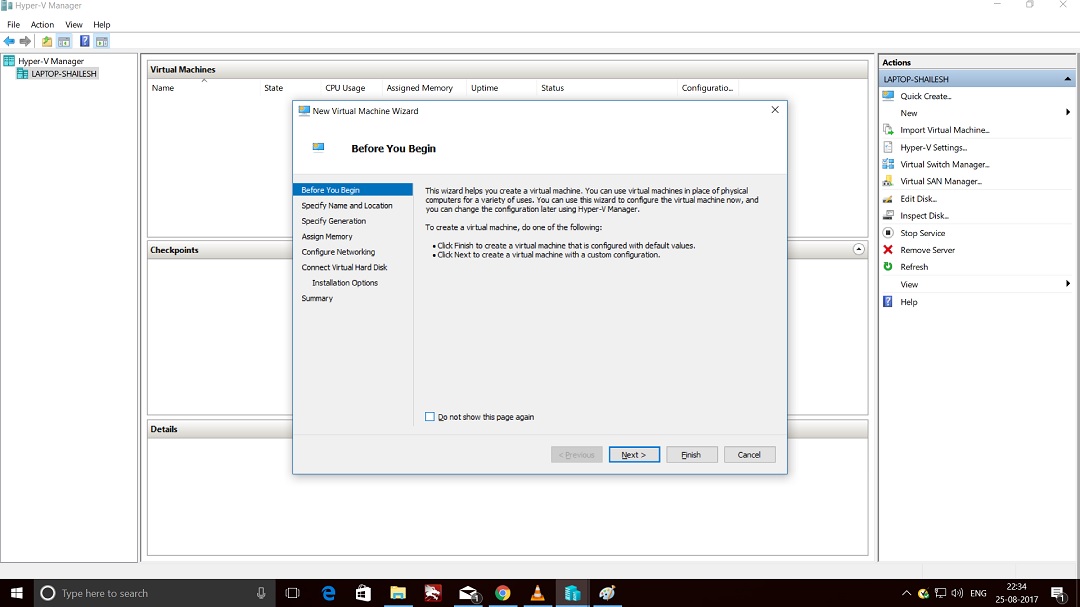
Hyper-V Manager – New Virtual Machine Wizard Screenshot
Step 2 – New Virtual Machine Wizard – Specify Name and Location
In this dialog box, please enter the name of the Virtual Machine. In Our case, we can name our Virtual machine as Ubuntu Server. But you can specify anything according to your preference. There is a checkbox to chnage the location where the Virtual Machine Files will be created. If you leave this unchecked, default location will be used. Else Check the box to change the location. I normally leave it as default. But if you have disk space constraints, it better to specify the location in a different disk drive.
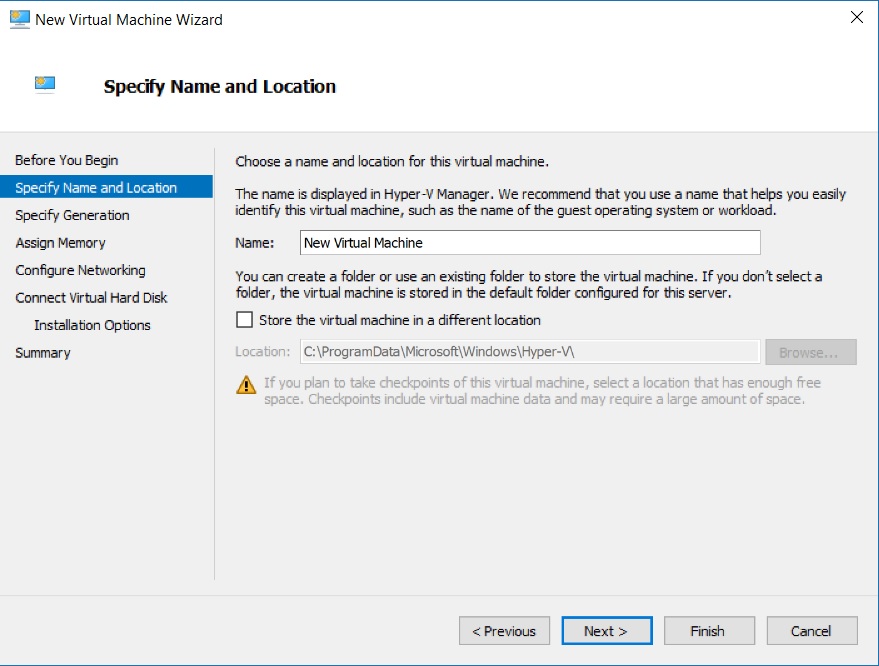
Hyper-V Manager – New Virtual Machine Wizard – Specify Name and Location Screenshot
Step 3 – New Virtual Machine Wizard – Specify Generation
These days you can create two versions(Generation) of Virtual Machines. The latest one is Generation 2. Before generation 2 type virtual machines came into existence, there was nothing like generation 1 virtual machines. All virtual machines were the same. But from generation 2 virtual machines, older virtual machines were called generation one virtual machines. Generation one virtual machines supports legacy hardware. Generation 2 Provides the following new functionality on a virtual machine:
- PXE boot by using a standard network adapter
- Boot from a SCSI virtual hard disk
- Boot from a SCSI virtual DVD
- Secure Boot (enabled by default)
- UEFI firmware support
But lets not complicate things for ourselves and choose Generation 1 and click next.
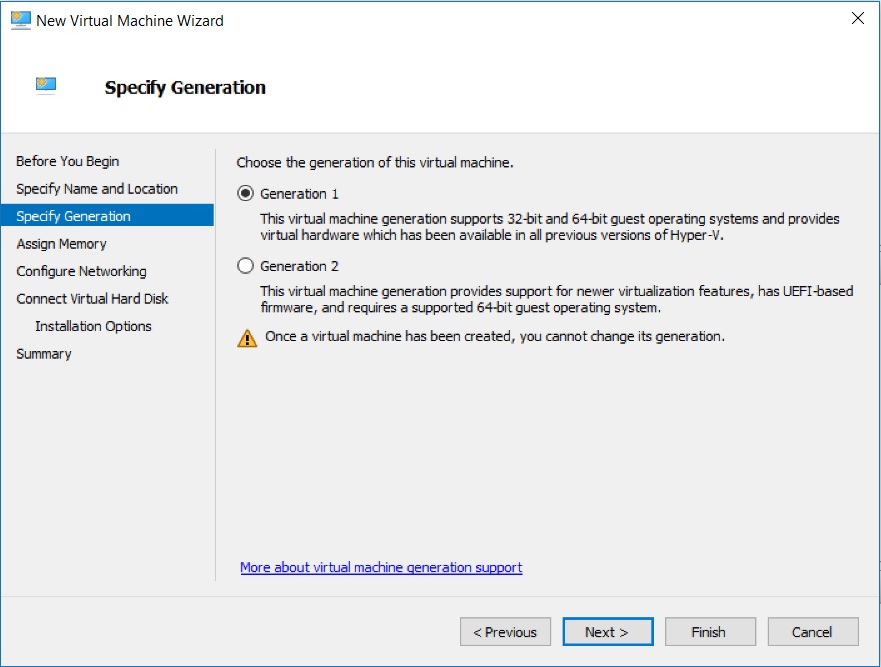
Hyper-V Manager – New Virtual Machine Wizard – Specify Generation dialog box Screenshot
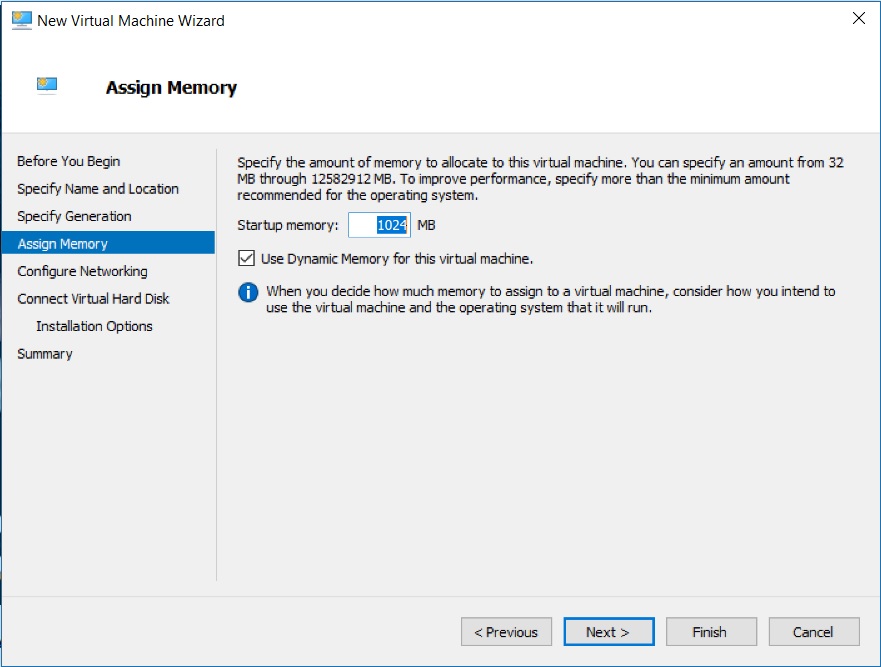
Step 4 – New Virtual Machine Wizard – Assign Memory
In this dialog box you will have to specify the amount of RAM you want to allocate to the virtual machine once the virtual machine is turned on. By default it is 1GB(1024 MB), but I normally prefer 2GB(2048 MB). Also, check Use Dynamic Memory for this Virtual Machine. This will allow Hyper V to adjust RAM according to the requirement of the Virtual machine.
Hyper V Manager – New Virtual machine Wizard – Assign Memory dialog box screenshot
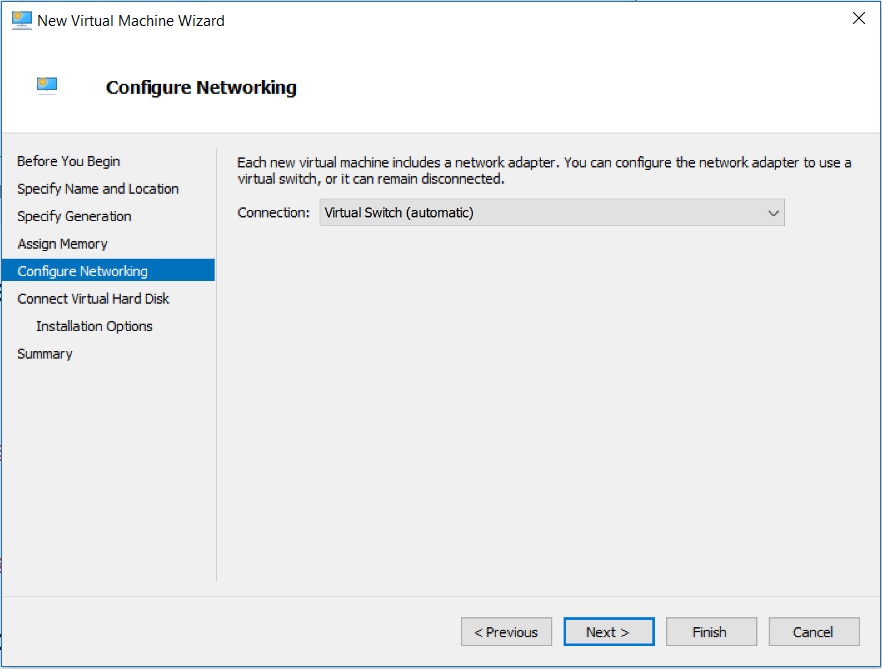
Step 5 – New Virtual Machine Wizard – Configure Network
For virtual machines to be be able to communicate with other virtual machines or internet, it should have a network adapter. In this dialog box you will have to specify the network adapter. Please choose connection(external virtual virtual switch) from the drop down menu and click on next.
Hyper V Manager – New Virtual machine Wizard – Configure Network dialog box screenshot
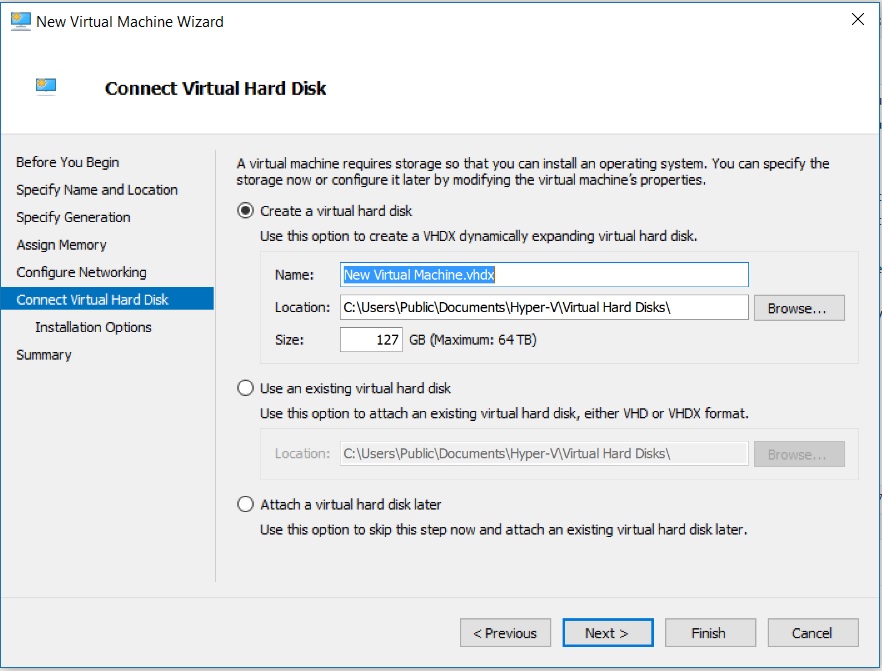
Step 6 – New Virtual Machine Wizard – Connect Virtual Hard Disk
Virtual Machines require hard disk space. This is the place where you decide how much disk space you want to allocate to the virtual machine. For Ubuntu, its recommended to select around 60 GB of disk space. Give Virtual disk a name of your choice. Please note that, not all of the allocated disk space will be used during the installation process. It is dynamically created, that is it will expand as the usage grows with the maximum limit of what you specify as the virtual disk size. Give the name of the virtual hard disk, specify the disk space and click next.
Hyper V Manager – New Virtual machine Wizard – Connect Virtual hard Disk dialog box screenshot
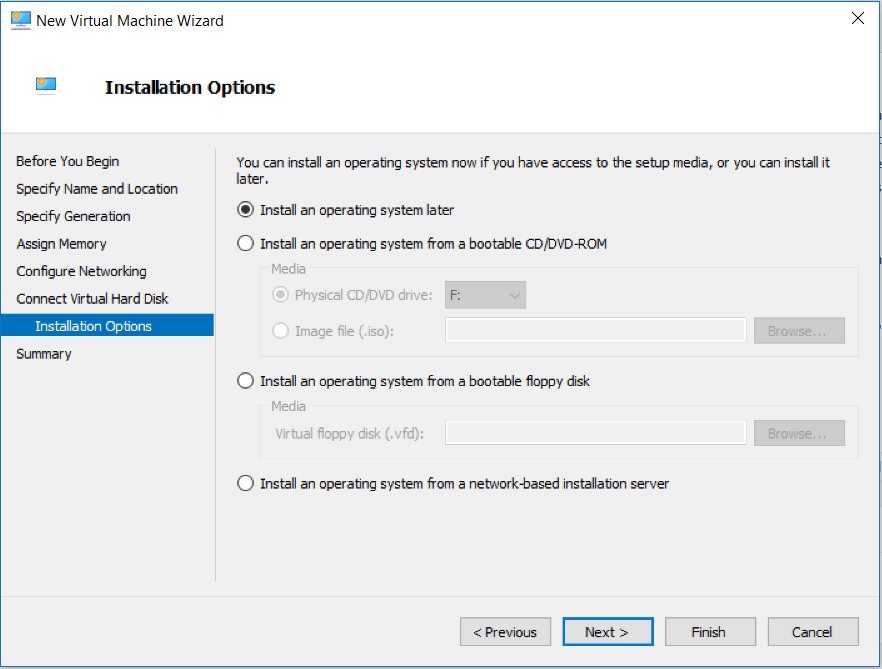
Step 7 – New Virtual Machine Wizard – Installation Option
In this dialog box you will be asked to specify the setup media. Check Install an operating system from bootable CD/DVD-ROM -> Image File. Browse to the downloaded ISO image file and click next.
Hyper V Manager – New Virtual machine Wizard – Installation Options dialog box screenshot
Step 8 – New Virtual Machine Wizard – Completing the New Virtual Machine Wizard
This dialog box will show you the summary of the options you have selected. Click Finish to create the Virtual Machine. You will see the process for creating new virtual machine will begin. At the end end you will see Hyper-V Manager with the newly created virtual machine under Virtual Machine Box.
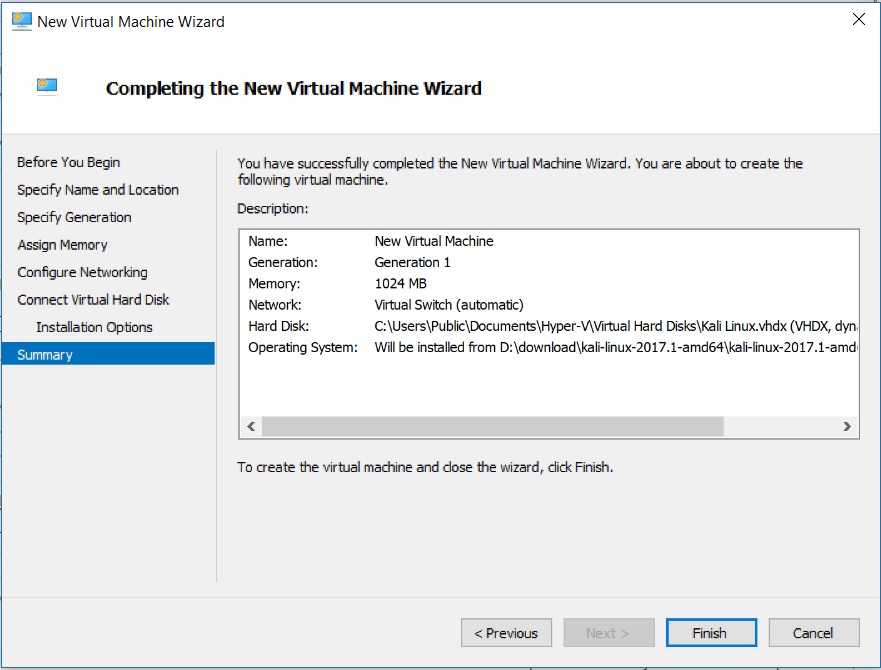
Hyper V Manager – New Virtual machine Wizard – Completing the New Virtual Machine Wizard dialog box screenshot
Step 9 – Hyper-V Manager- Virtual Machine Settings
After the virtual machine is created, you will see the name of the virtual machine listed under Virtual Machines.
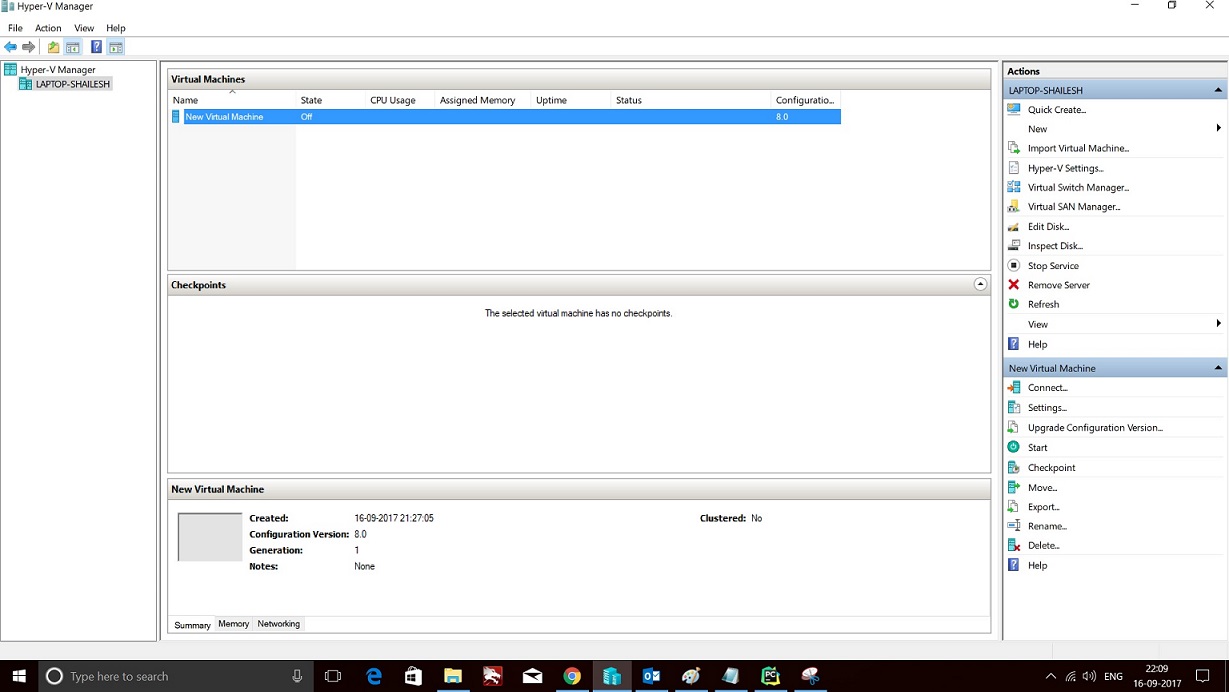
Hyper V manager
Right click on the name of the virtual manager and click on settings to change Virtual machine Options. You will also see settings option on the right hand side, as shown in the screenshot below.
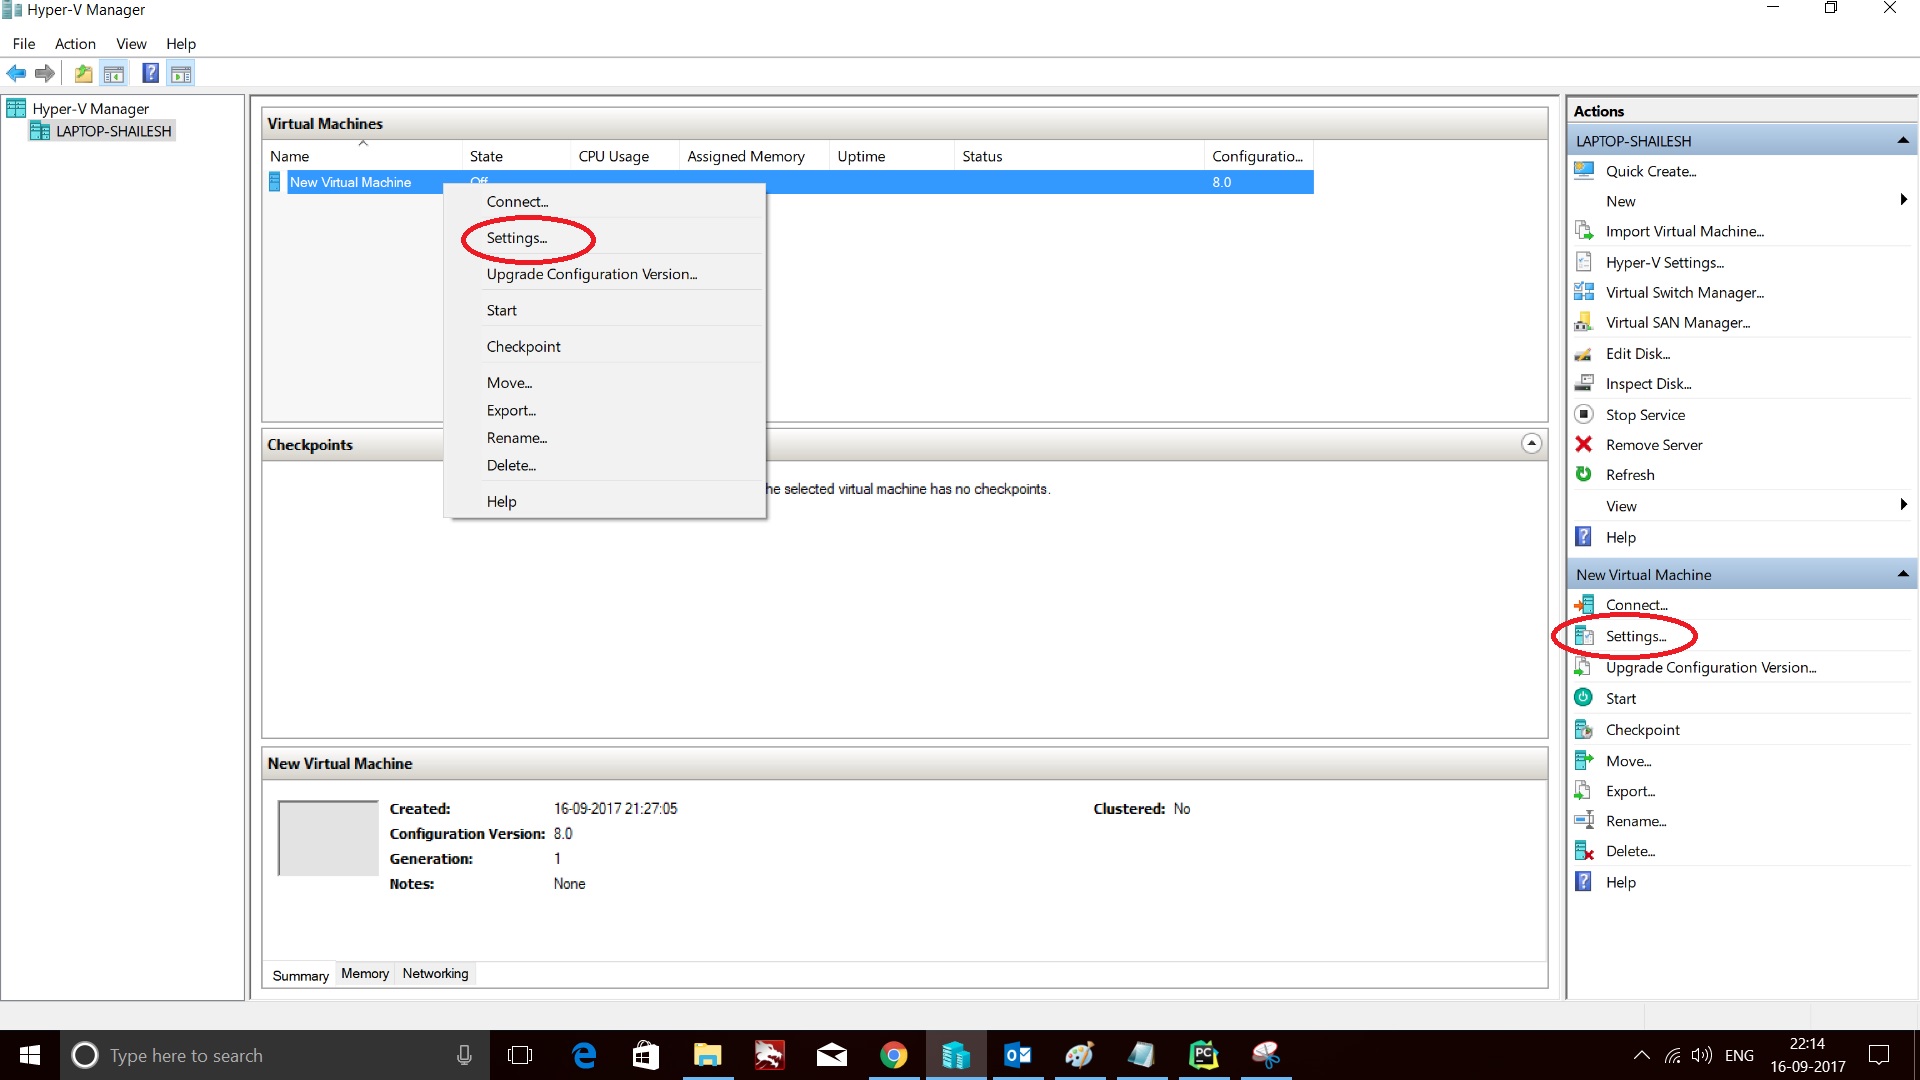
Hyper V_manager – Virtual Machine settings
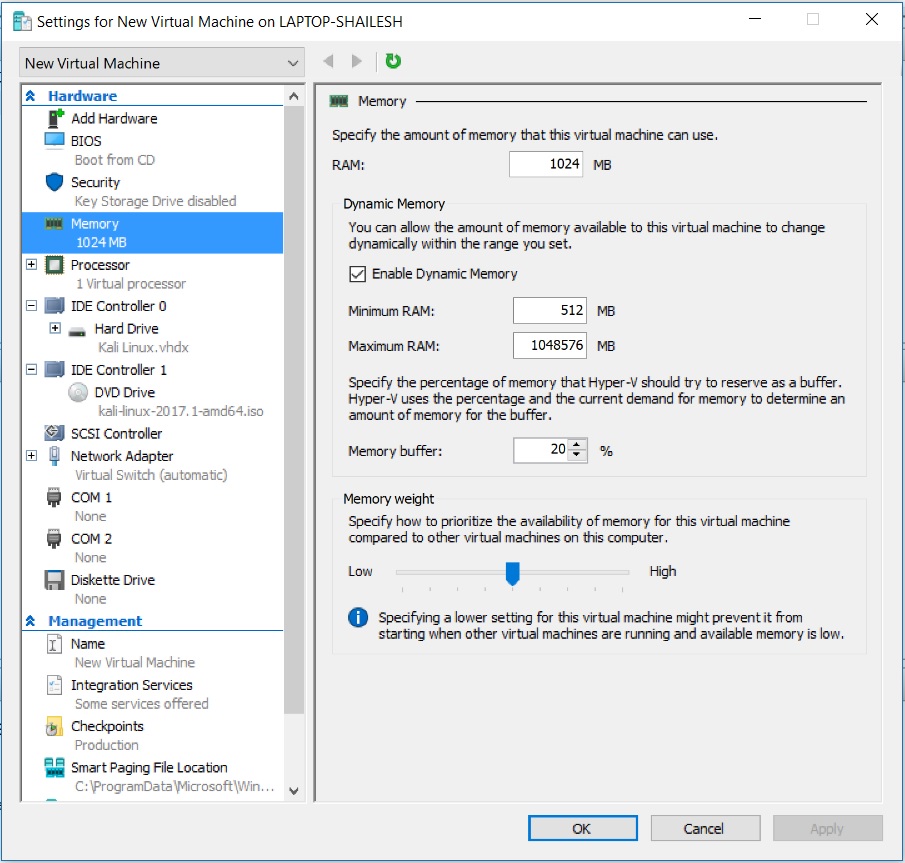
You can change the following most common virtual machine startup settings such as memory, network, CPU and so on…
-
Change Allocated Memory
here you can specify the memory with which the Virtual machine will start or boot. I normally choose 2048 MB(2 GB) and always check Enable Dynamic Memory.

Hyper V – Virtual Machine – Memory Settings
-
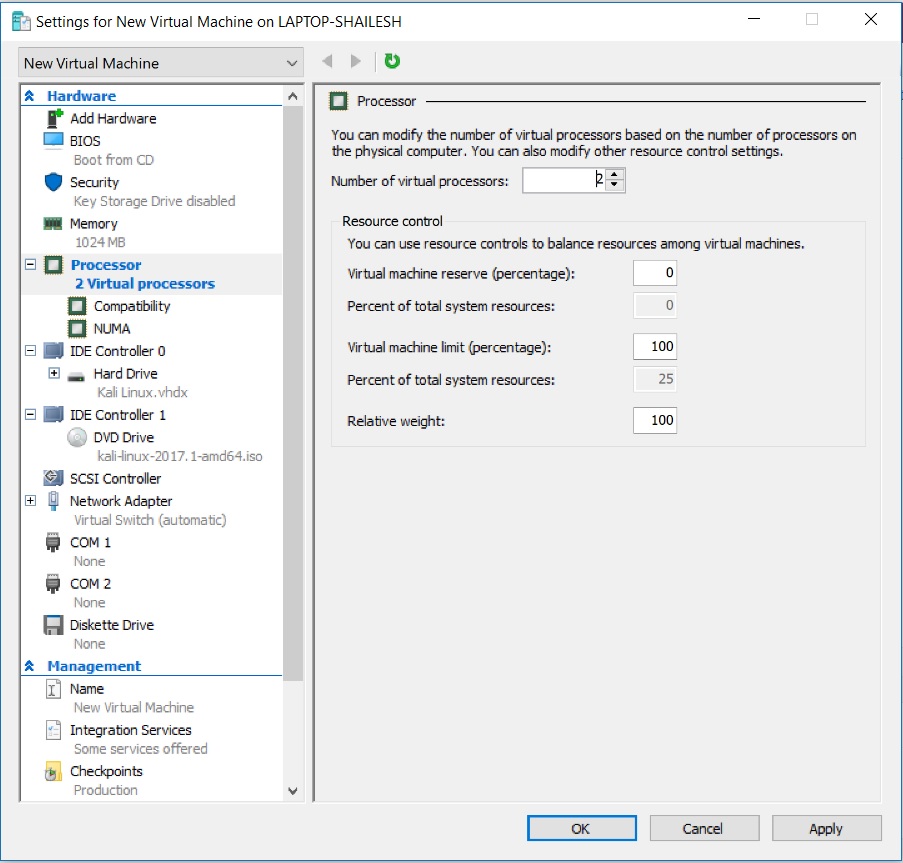
Change the number of Virtual processor
Here you can specify the number of Virtual processors. Normally I set it to 2. It depends on the actual CPU your system has. Since I have i7 CPU (Which has 8 cores), I Normally allocate 2 core to the Virtual Machine.

Hyper V Manager – Specify Processors for Virtual machine
-
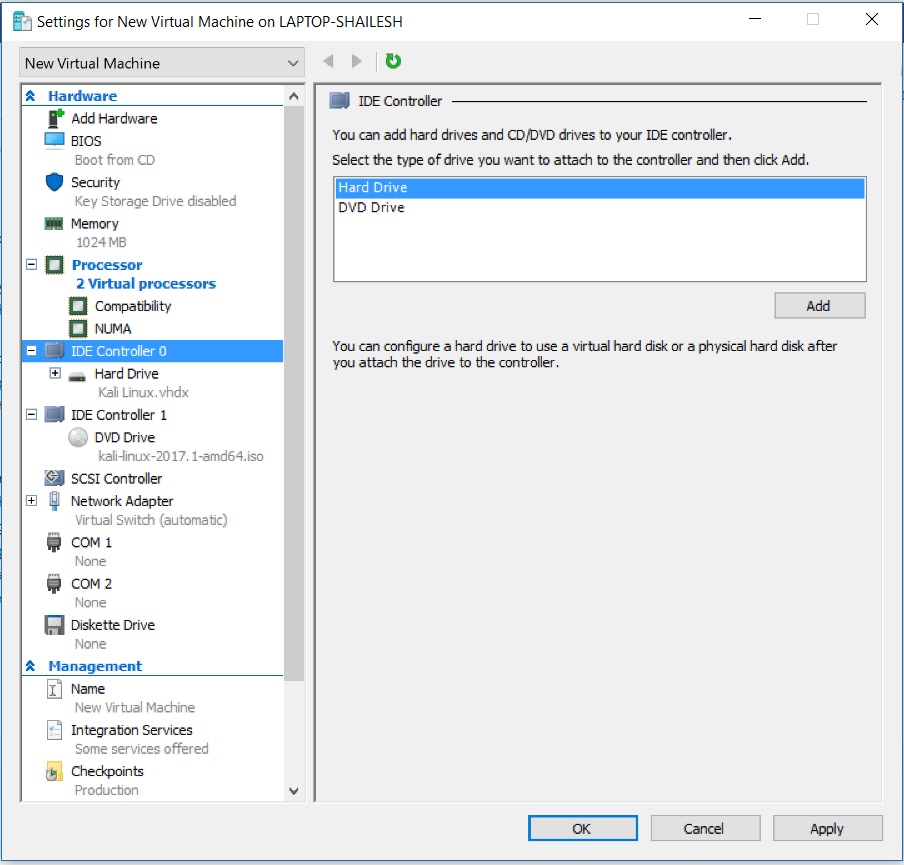
IDE Controller
Here you can create virtual Hard drives and DVD drives. By default, one Hard Disk and one DVD drive is created. If you want additional ones, you can create it here.

Hyper V Manager – Virtual Machine Settings – IDE Controller
-
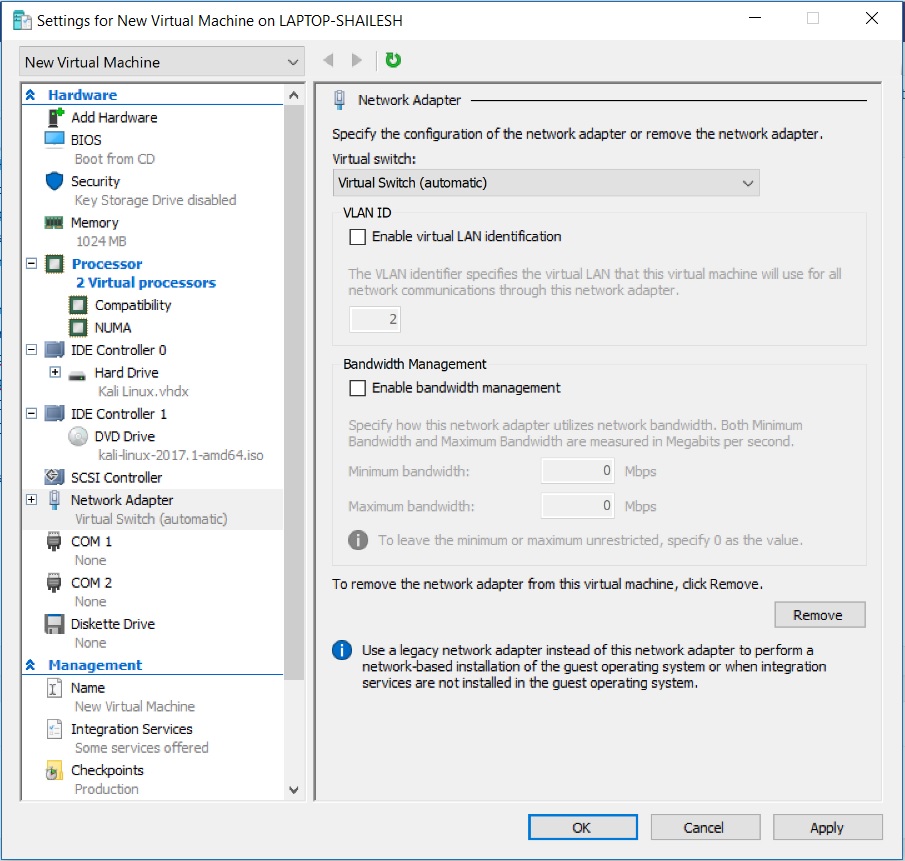
Network Adapter
Here you can specify the network adapter to use for the Virtual machine.

Hyper V Manager – Virtual machine Network Adapter settings
-
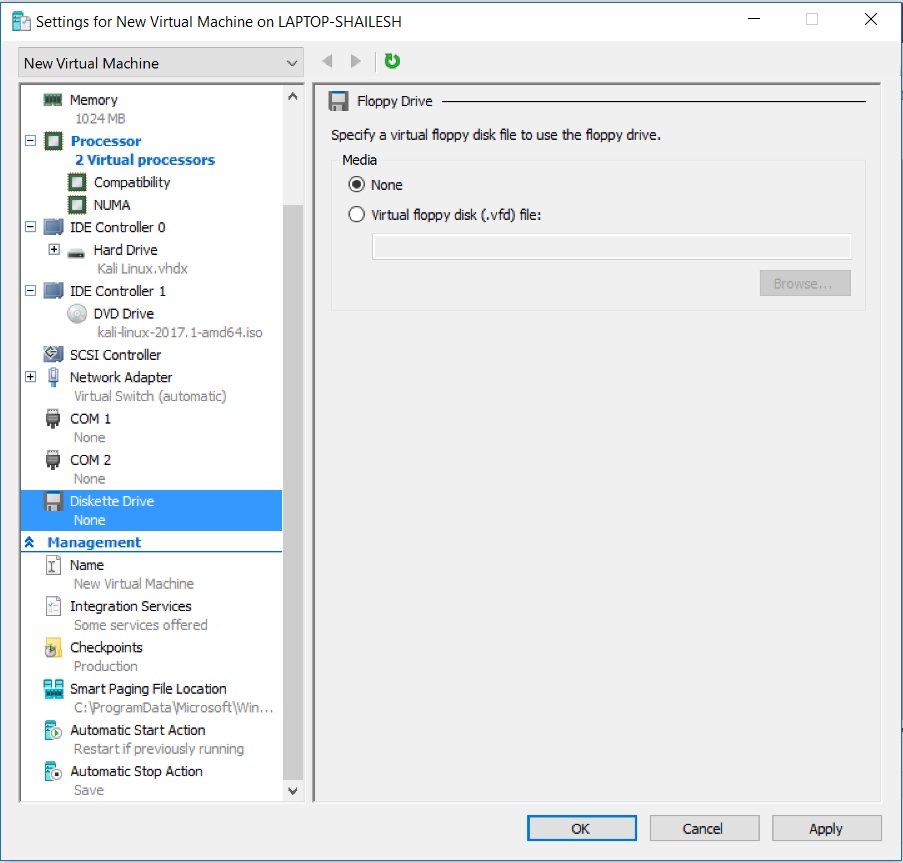
Floppy Drive
Here you can specify the floppy drive. Floppy drives and things of the the past and almost extinct. You can leave it as default which is none.
Hyper V Manager – Virtual machine Floppy Drive settings
-
Enable RemoteFX 3D Video Adapter
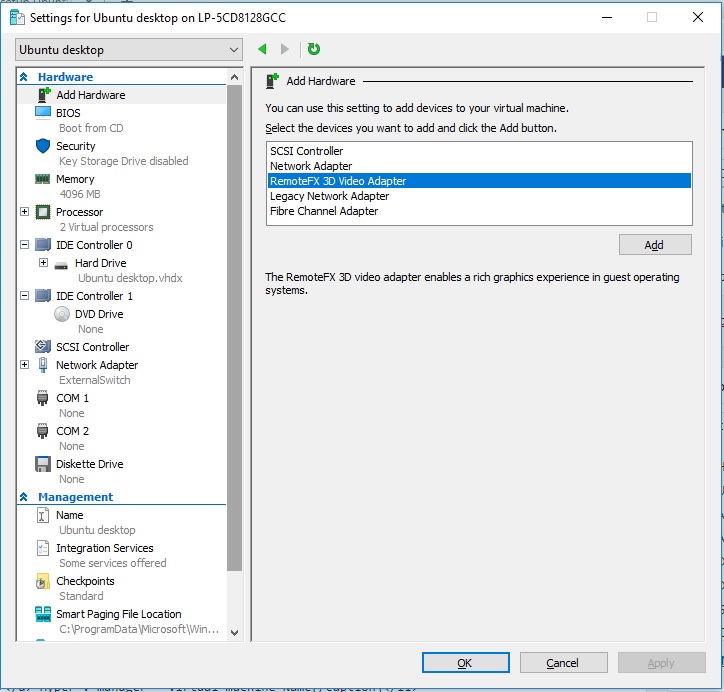
Enabling RemoteFX 3D Video Adapter give you access to rich graphics such as enabling full screen mode. This step is optional, but recommended.
Go to settings and click on Add hardware. You will see RemoveFX 3D Video Adapter. Click on that and click Add.
Hyper-V Settings – Add hardware
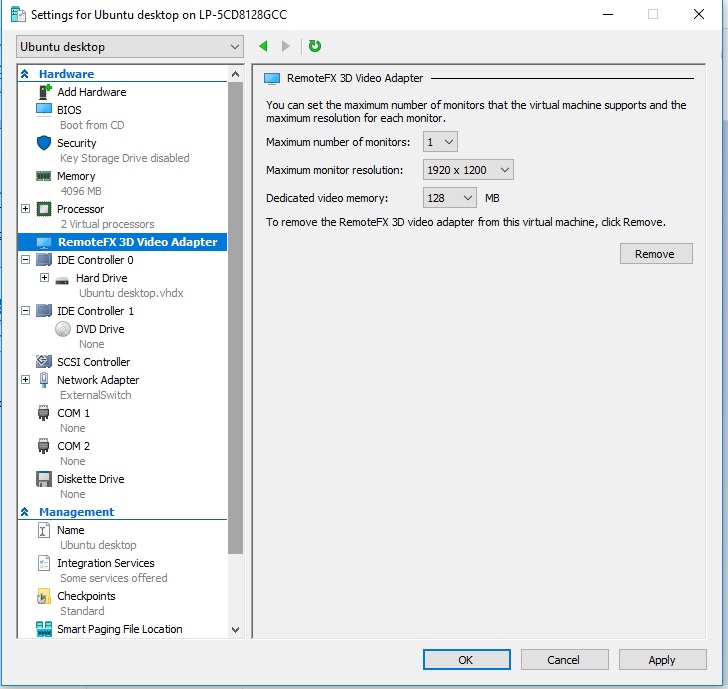
Make your selection from the drop down boxes and click OK.

Hyper-V settings – RemoteFX 3D Video Adapter settings
-
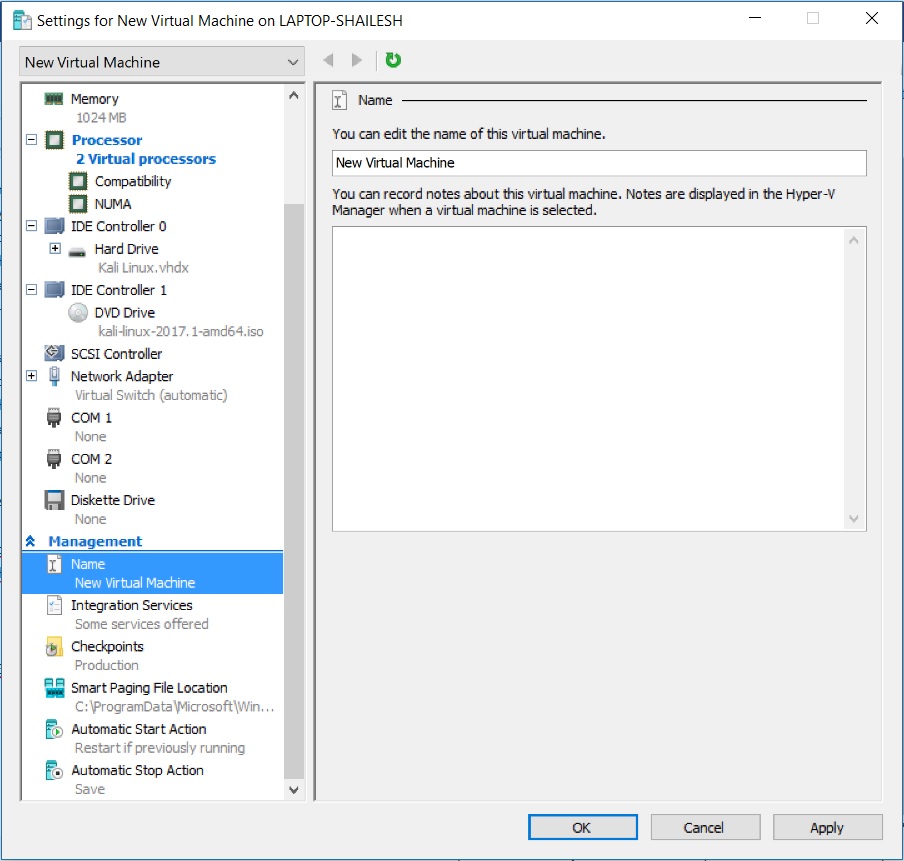
Change Virtual machine name
If you wish to change the name of the virtual machine, you can do it here.
Hyper V manager – Virtual machine Name
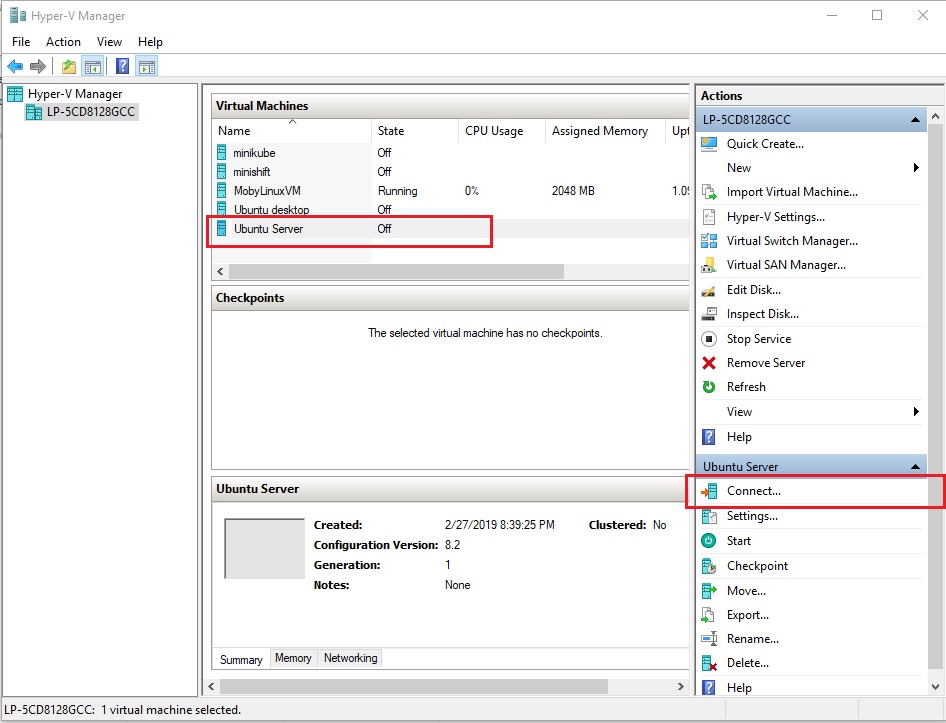
Step 10 – Connect to virtual machine
Now lets get started with the installation process. Click on the Virtual machine name you have created and click on start. This will start the Ubuntu VM. If you don’t see a new window popup, select click on connect. You will see the Virtual Machine window.
Hyper-V – Install Ubuntu Server
Step 11 – Start virtual machine
If you have clicked on Connect, you will see the screen below. You will have to click start to start the VM. If you have clicked start first, VM will start but you will not see the below window. In that case you will have to click on Connect.
Click on Start to start VM.
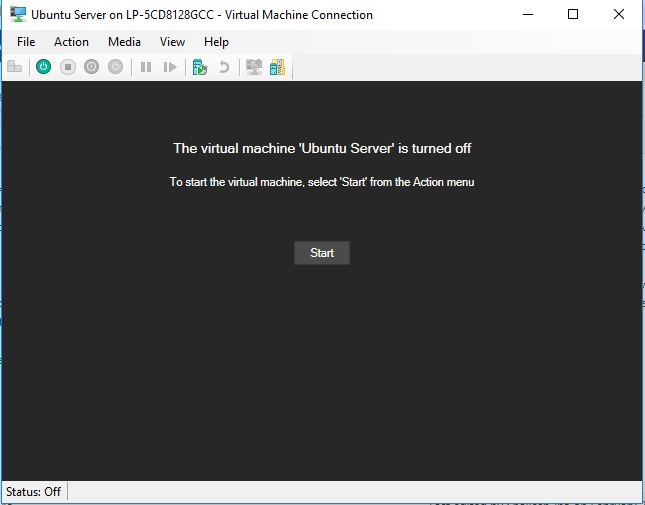
Hyper-V – Install Ubuntu Server – Start VM
Ubuntu installation process should start.
You will see a lot of activity such as the below screenshot before the Ubuntu Server Installer window shows up. Please be patient.
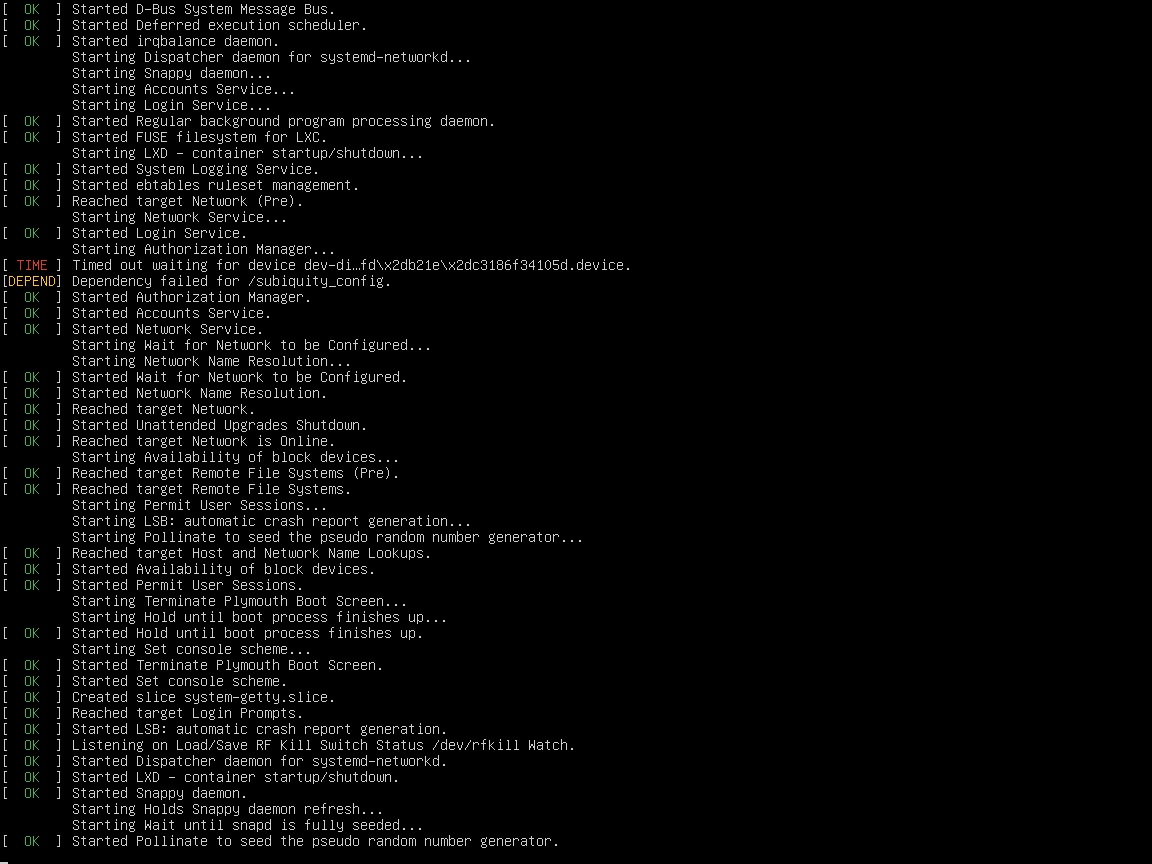
Hyper-V – Ubuntu Server starting up
Step 12 – Select Language preference
After sometime you will see a windows asking for your language preference. Make your choice by up and down arrow and press enter.
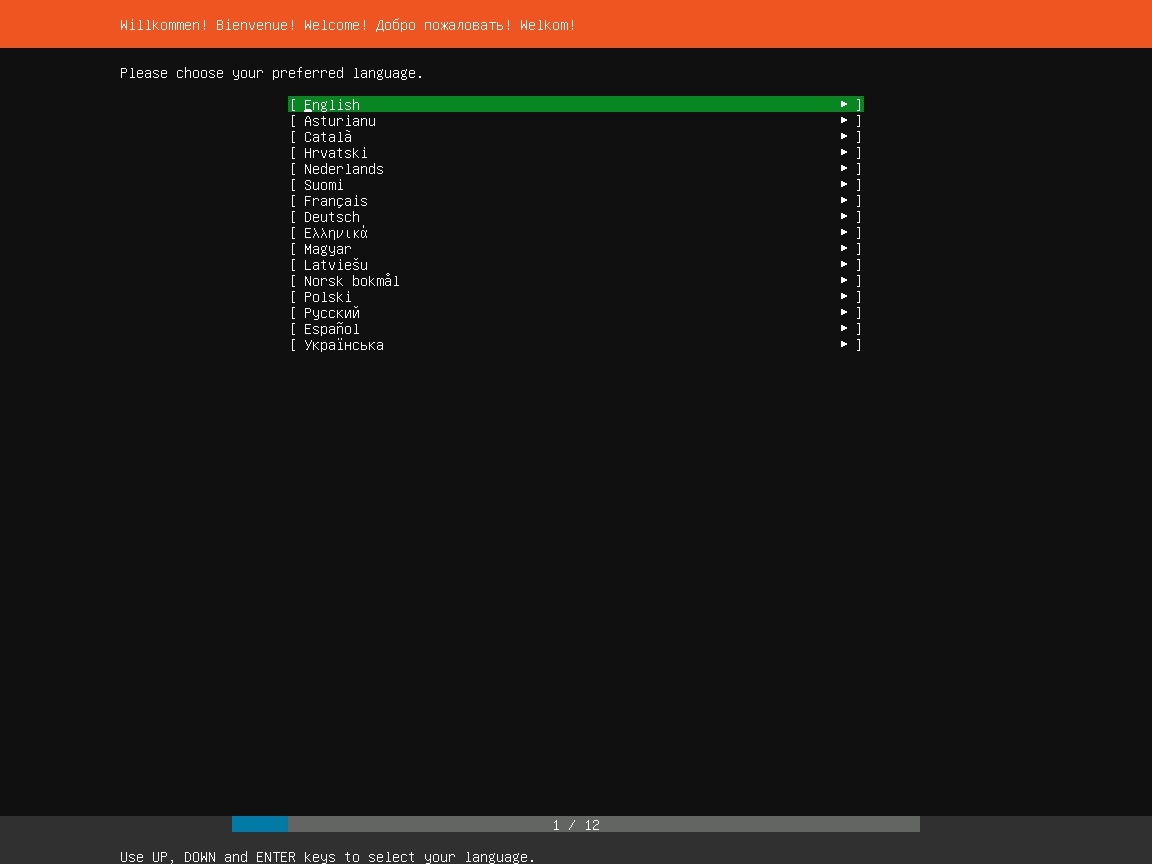
Ubuntu Server Installation – Language Selection
Step 13 – Select Keyboard preference
Here you will be asked to set your keyboard preference. I normally leave it as default. If you want to change it, use the up and down arrow key and press enter to see the list of available options. Once done press the enter key to select and use the up and down arrow key to go to done square box at the bottom of the screen and press enter.
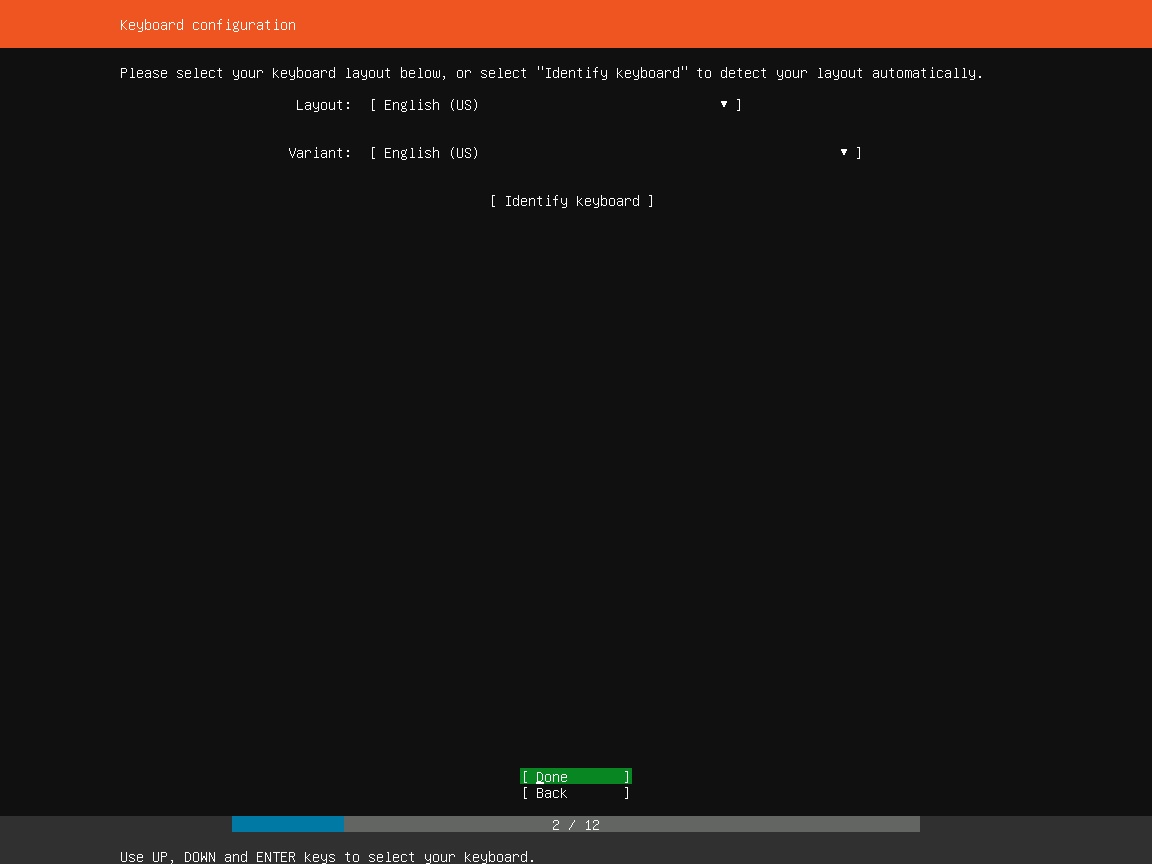
Ubuntu Server Installation – Set Keyboard preference
Step 14 – Select how you want to install Ubuntu Server
Here you will see the option to install Ubuntu using MAAS, which stands for Metal as a Service. Since we are installing Ubuntu Server on Hyper-V, We wont go into the details of it. If you are interested, please visit the official MAAS site.
Select the default option Install Ubuntu and hit enter.
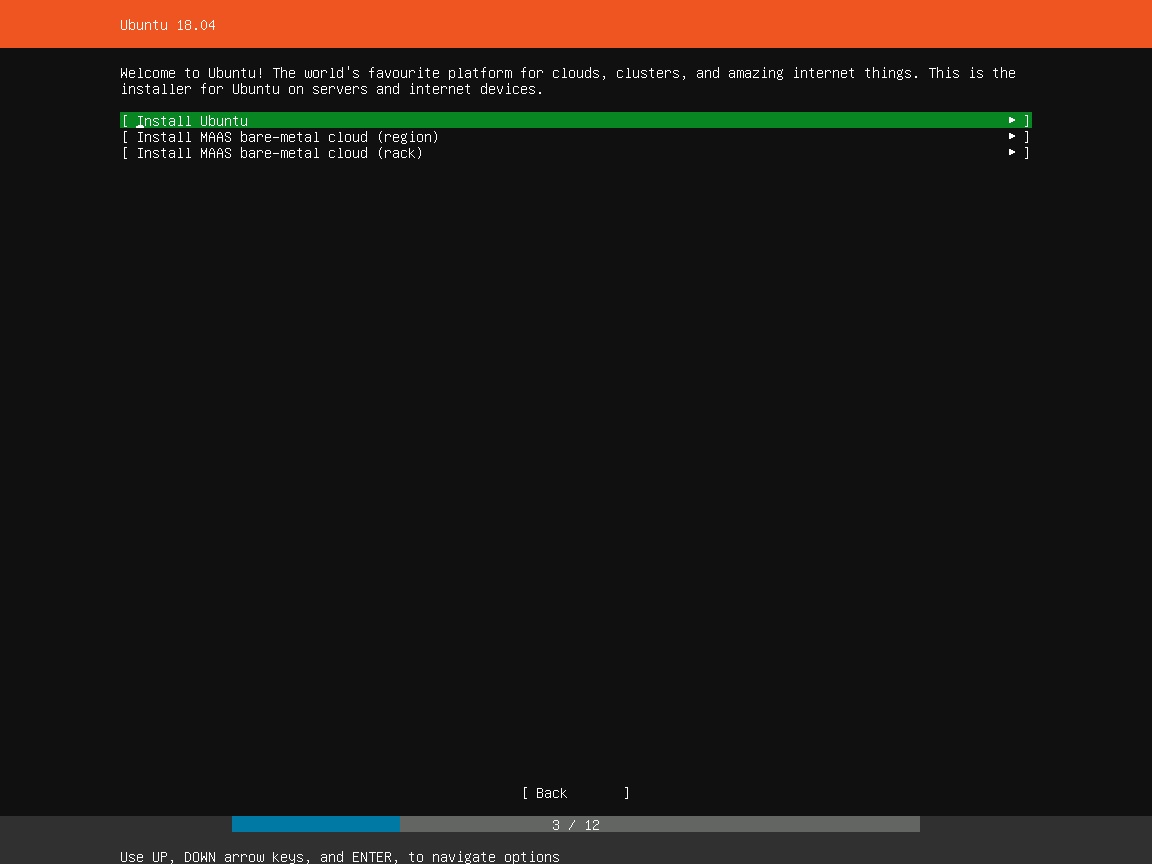
Ubuntu Server Installation
Step 15 – Select Network Connections
Here you will be asked to specify the network connection. You can use the arrow keys to move up and down and hit enter to change the configuration. Press ESC key to go back to the previous screen.
I normally leave these as the default. Use the arrow key to go to the Done at the bottom of the screen and hit enter.
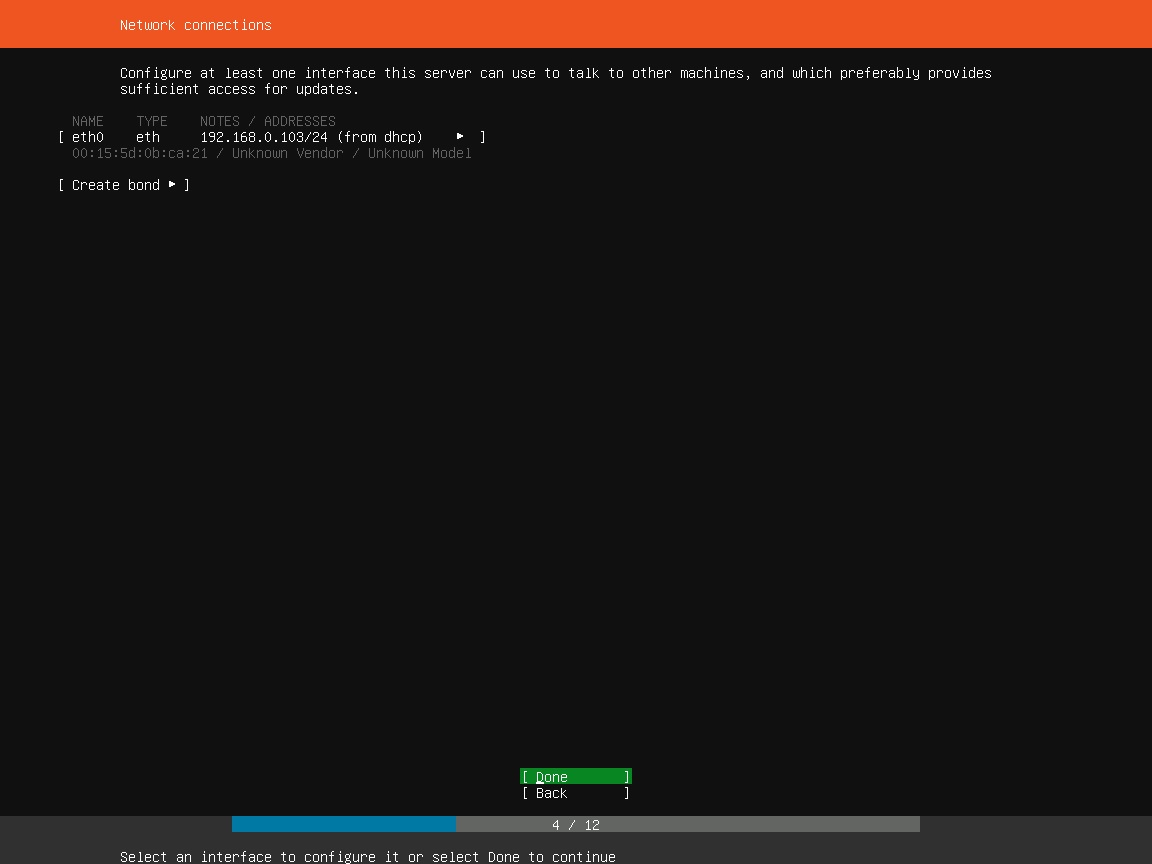
Ubuntu Server Installation – Network Connections
Step 16 – Configure Proxy
If you use Proxy to connect to the internet, you can provide the details here. This normally happens in restricted environments such as Office. I leave it as blank and go to Done at the bottom of the screen and hit enter.
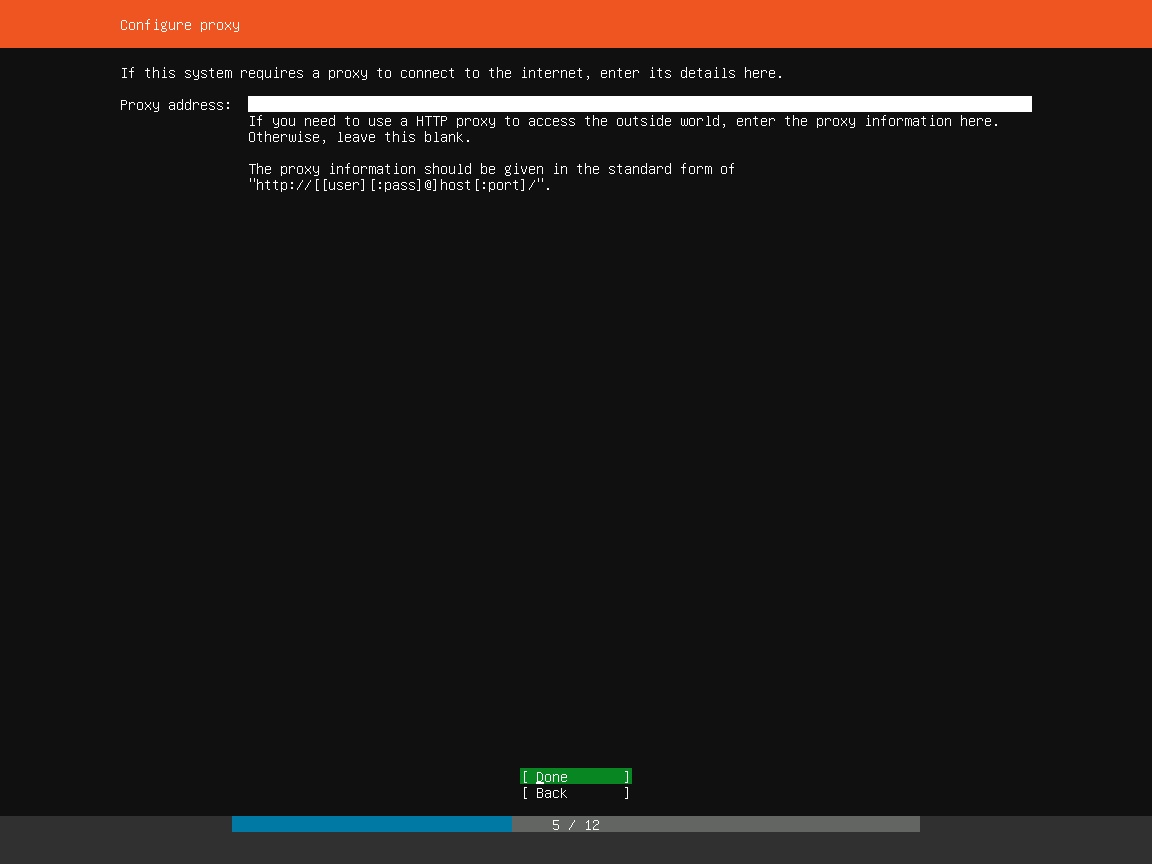
Ubuntu Server Installation – Configure Proxy
Step 17 – Configure Ubuntu Archive Mirror
Here you can enter the alternate Ubuntu Archive Mirror. I leave it as it is, that is the default Ubuntu Mirror.
Hit enter to continue.
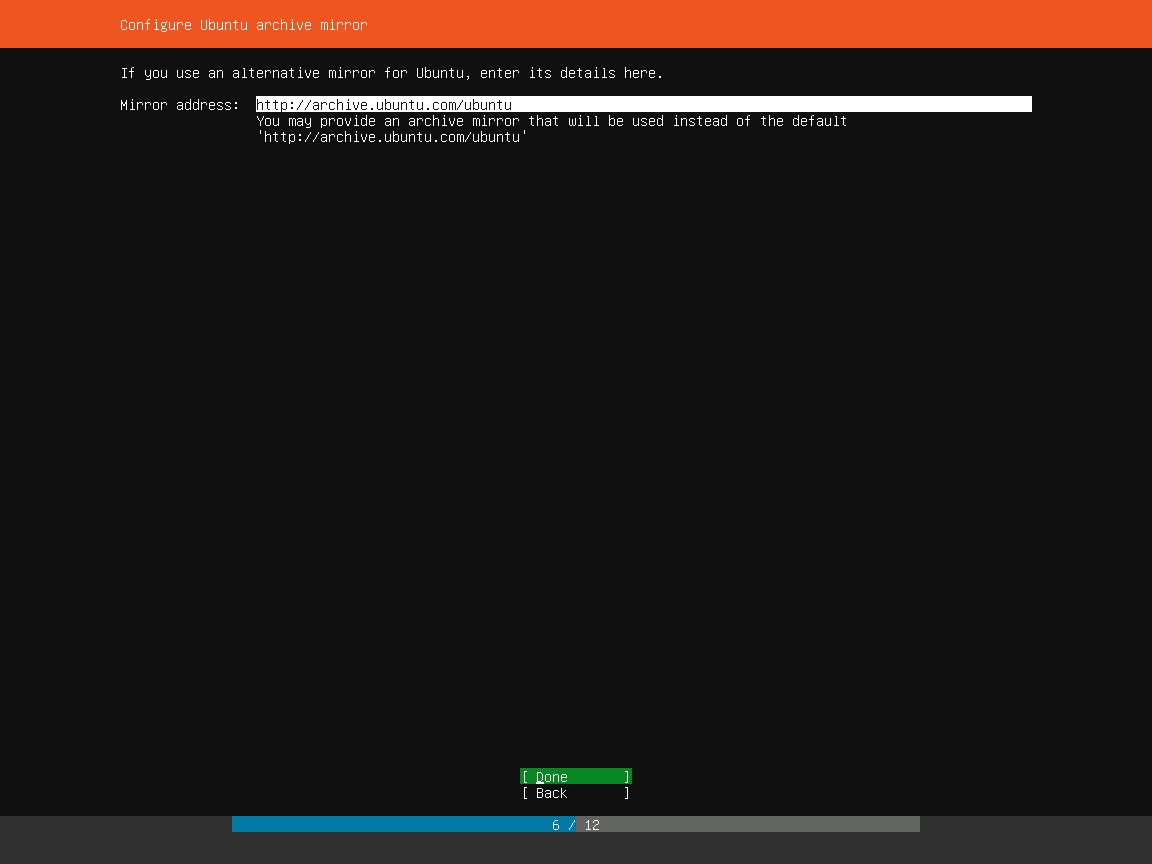
Ubuntu Installation – Configure Ubuntu Archive Mirror
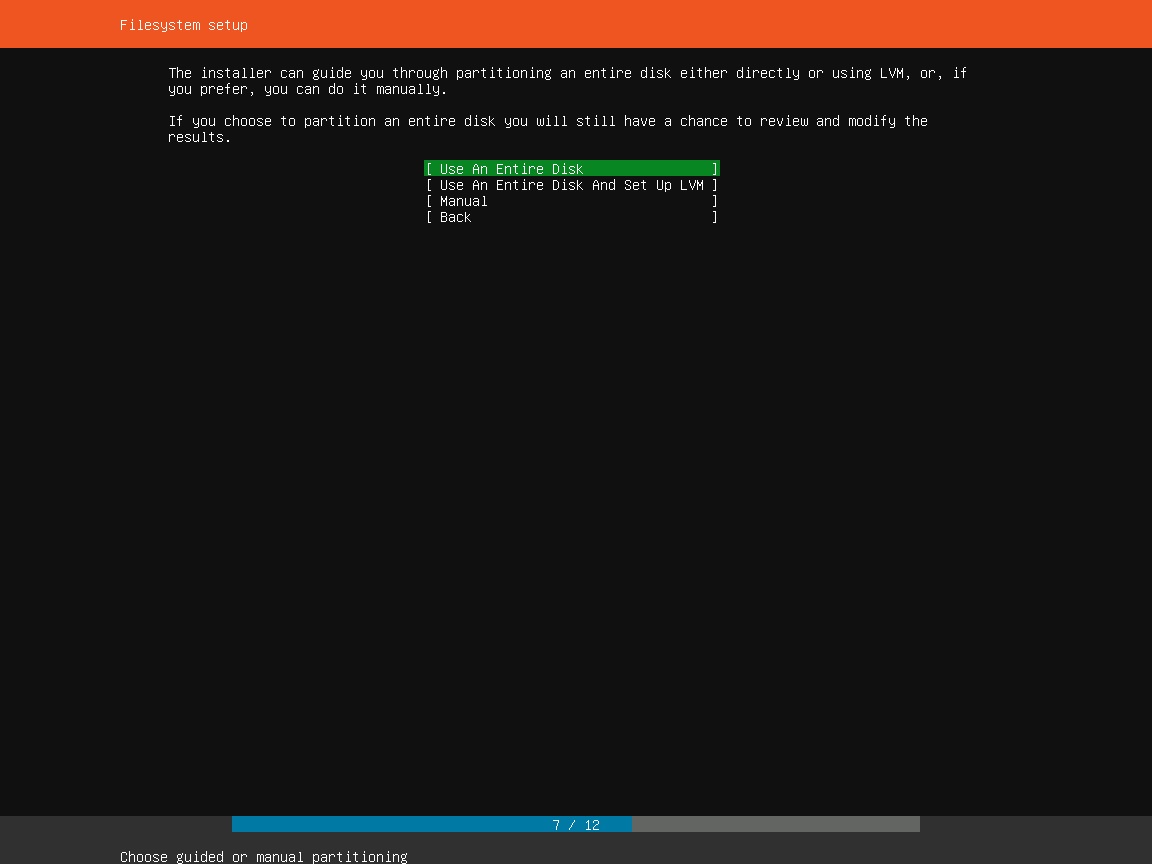
Step 18 – File System setup
Here you will have to specify how the file system should be used. I use the default option which is Use the Entire disk. I suggest you should use this also. Hit enter to continue.
Ubuntu Server Installation – File System Setup
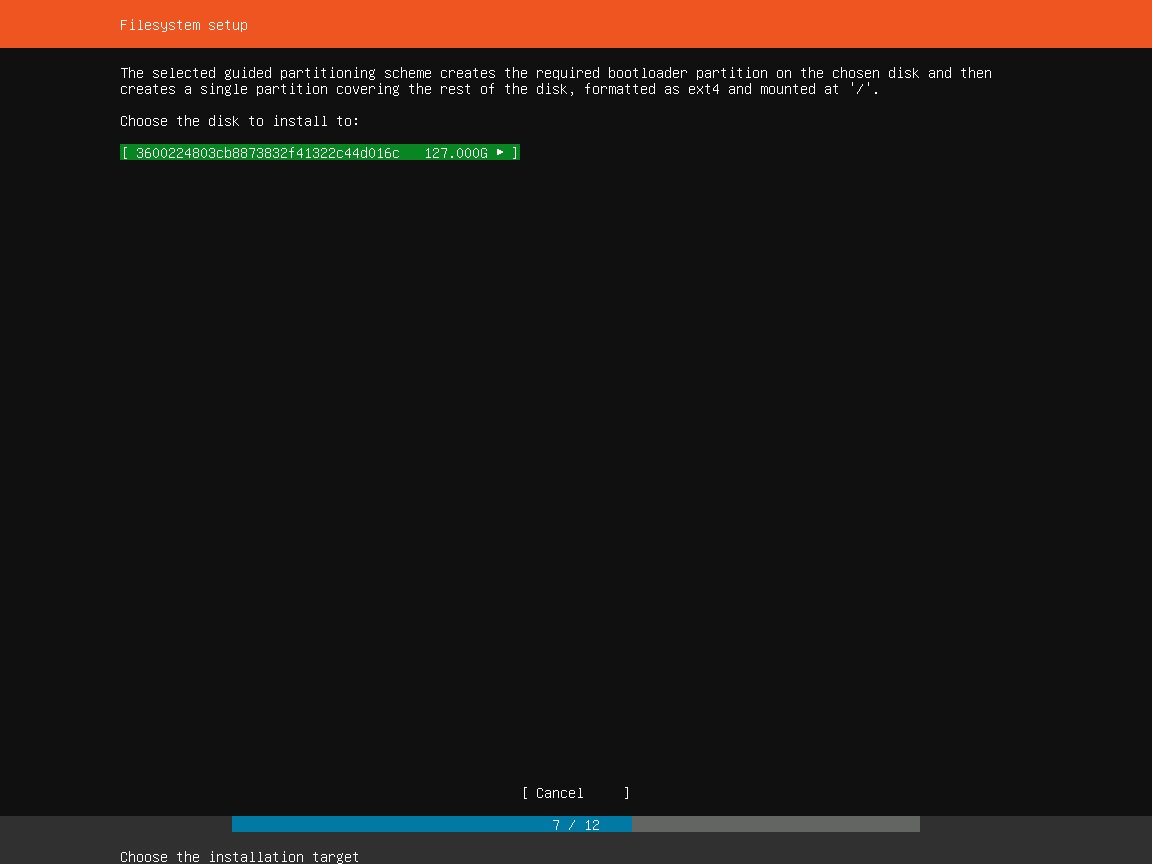
Step 19 – File System setup – Choose disk to install
Now you will be asked to choose the disk to install Ubuntu Server. Choose the default and hit enter.
Ubuntu Server Installation – Filesystem setup – choose disk
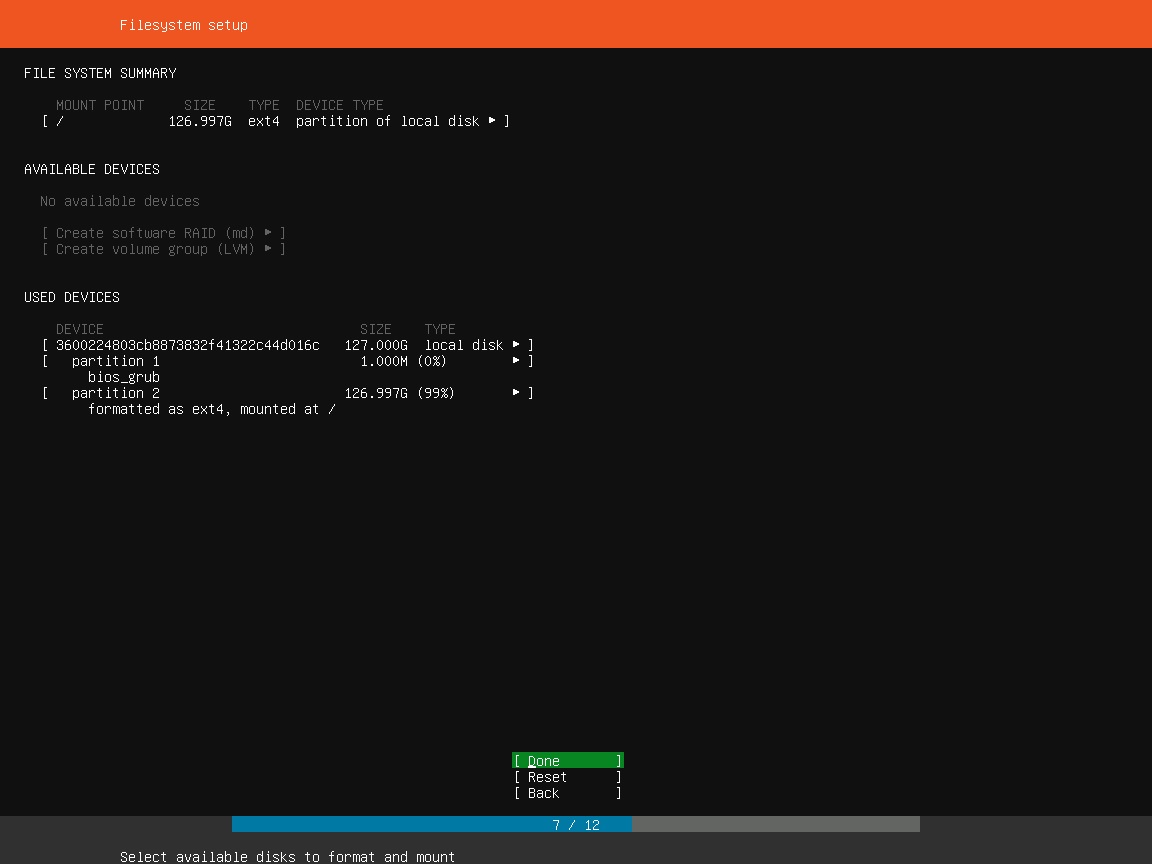
Step 20 – File System setup – Verify File system information
Here you will see the summary of file system information that we can setup in previous steps. Leave it as it is and hit enter to continue.
Ubuntu Server Installation – Filesystem installation summary
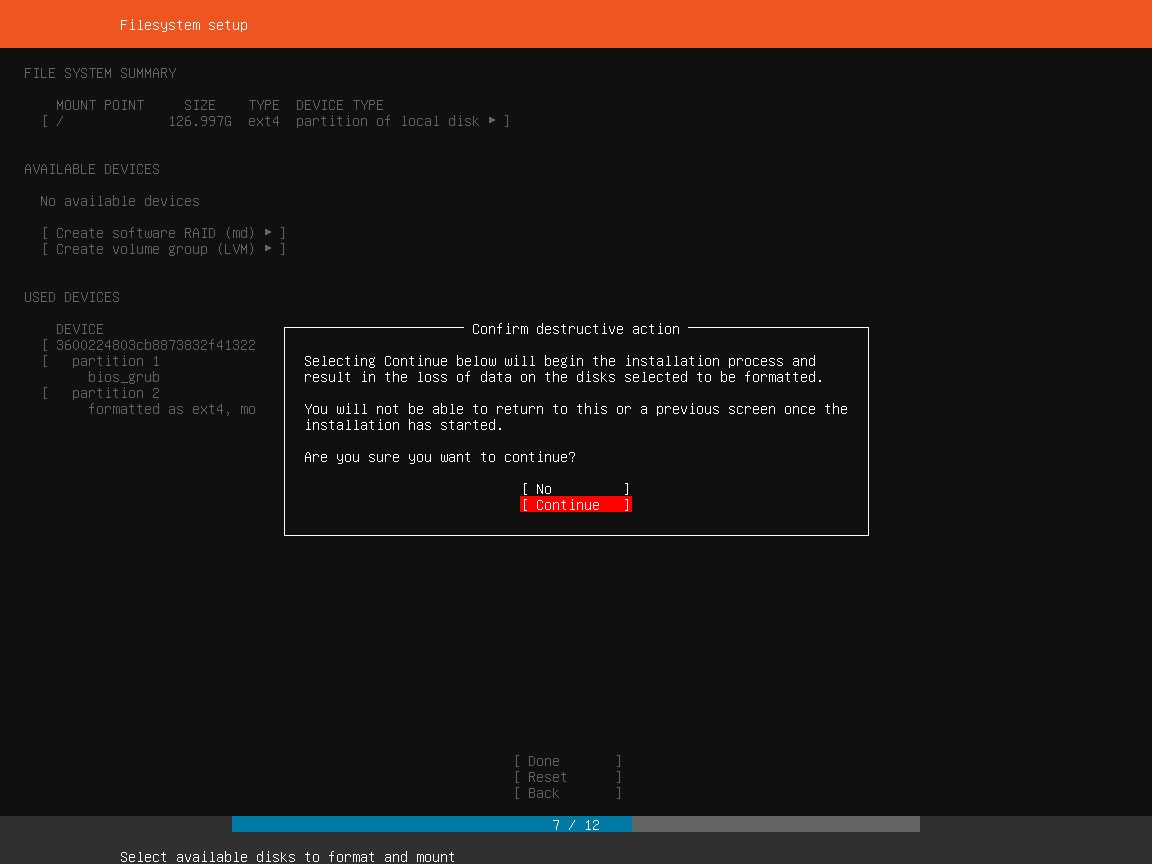
Step 21 – Confirm to continue with installation
Now you will see a warning, asked to confirm if you want to proceed with the installation. Use the arrow key to select confirm and hit enter to begin the installation process. Installation progress you can see at the bottom. Installation will progress from here but you will have to configure profiles etc. in the next steps. So lets continue.
Ubuntu Server Installation – Confirm to start installation
Step 22 – Setup profile
Here you will be asked to enter your profile details such as password, username, server name and so on. Use the up and down arrow key to enter the values and hit enter.
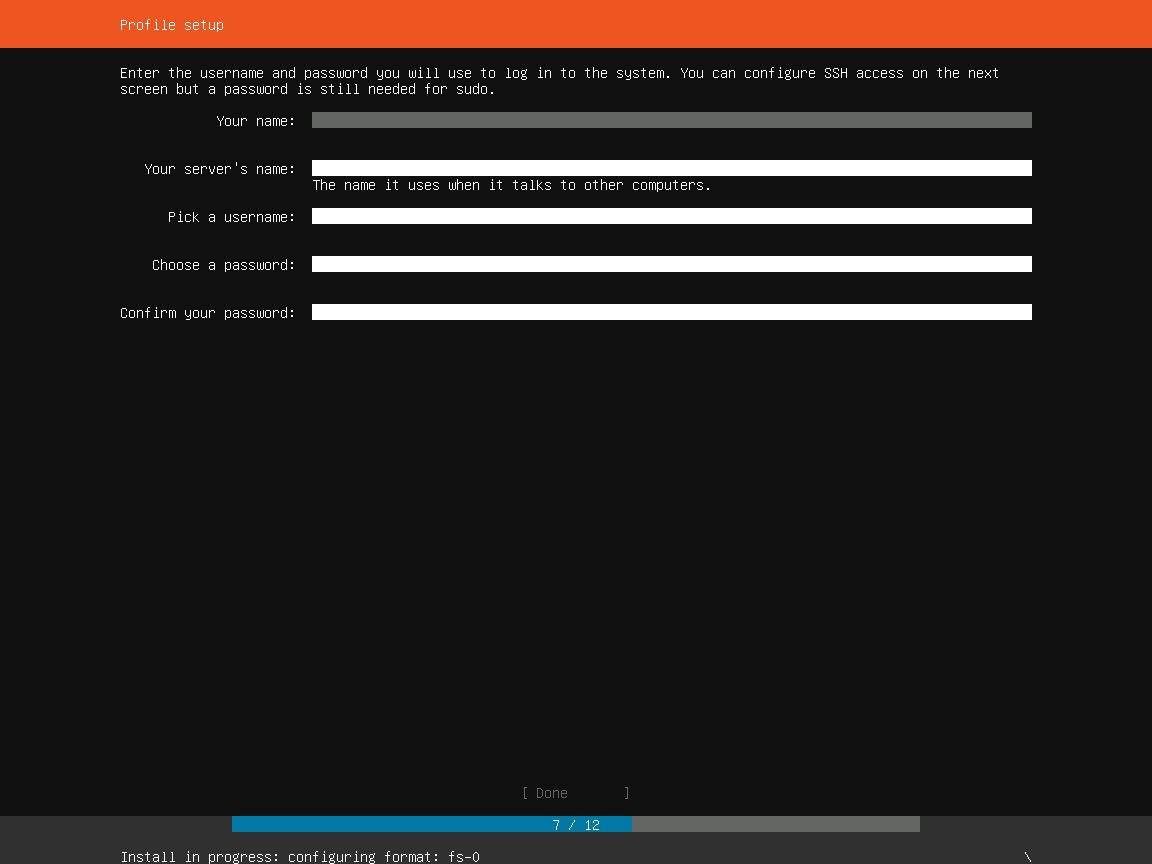
Ubuntu Server Installation – Profile setup
Step 23 – Setup OpenSSH server
Here you will be asked if you want to setup openSSH server. This will allow you to access your server from SSH client such as Putty. It is recommended that you install OpenSSH server. Hit enter to select install OpenSSH server. Import SSH identity, leave it as no and hit enter to continue.
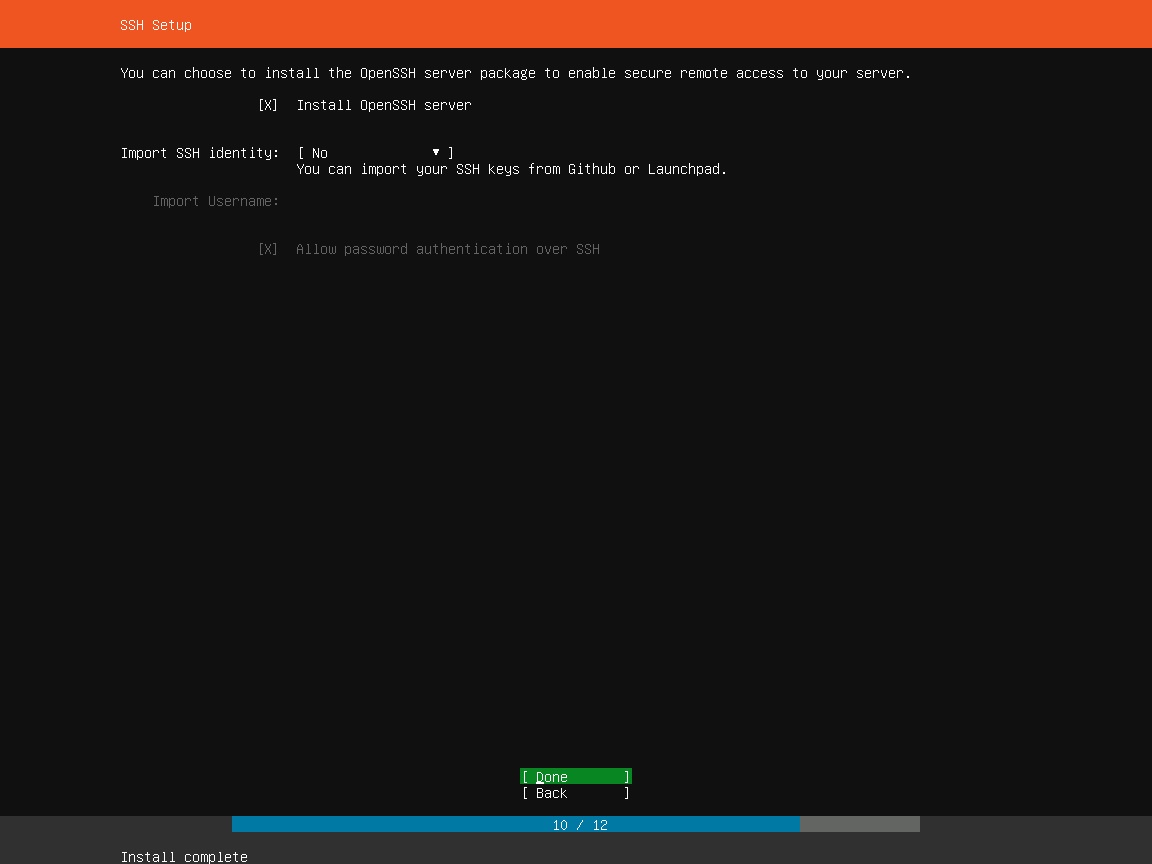
Ubuntu Server Installation – OpenSSH server setup
Step 24 – Feature and Server Snaps
here you will asked to select what server features or software you want to install. Hit spacebar to select/deselect and up and down arrow key to go up and down. Once done go to done at the bottom and hit enter to continue.
Make sure that you provide sufficient memory(at least 8 GB) if you wish to install Docker and Kubernetes. Else the performance will be too bad.
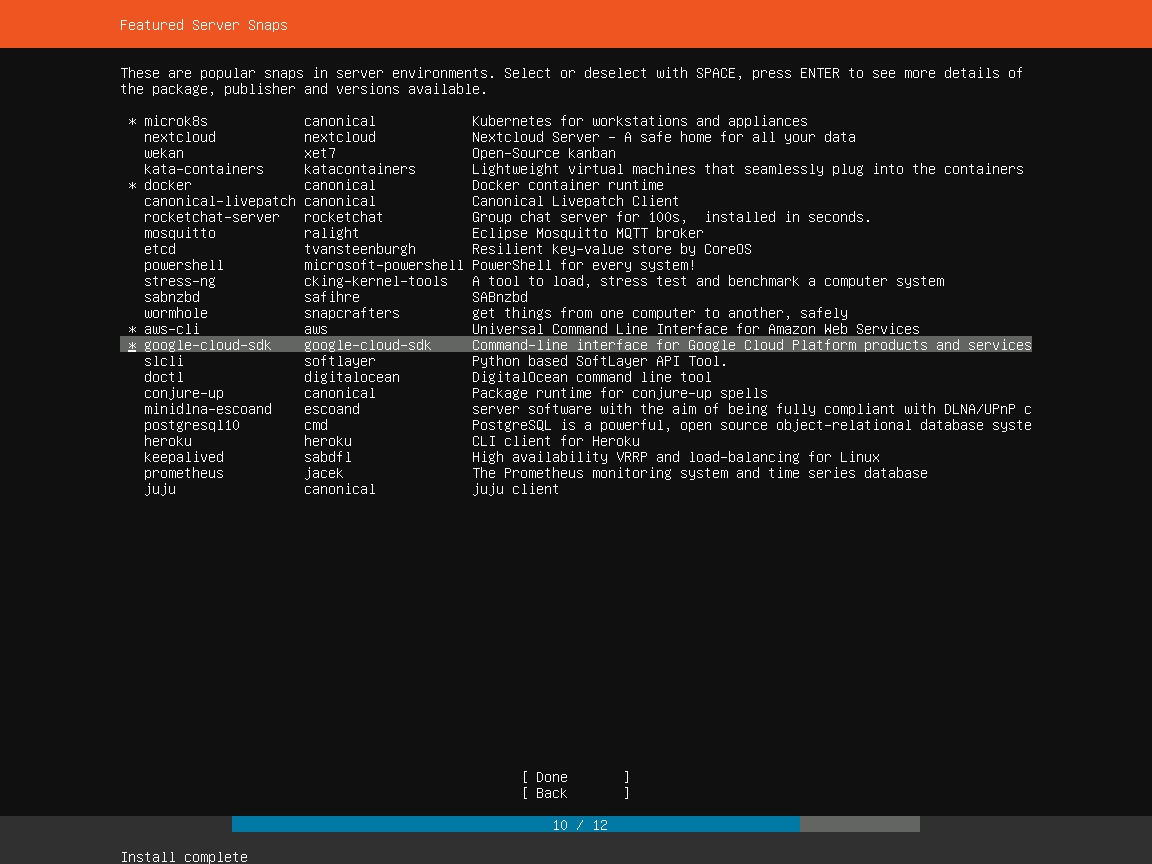
Ubuntu Server Installation – Featured Server snaps
Step 25 – Installation Complete
Installation will continue and you will see installation complete window. You are done.
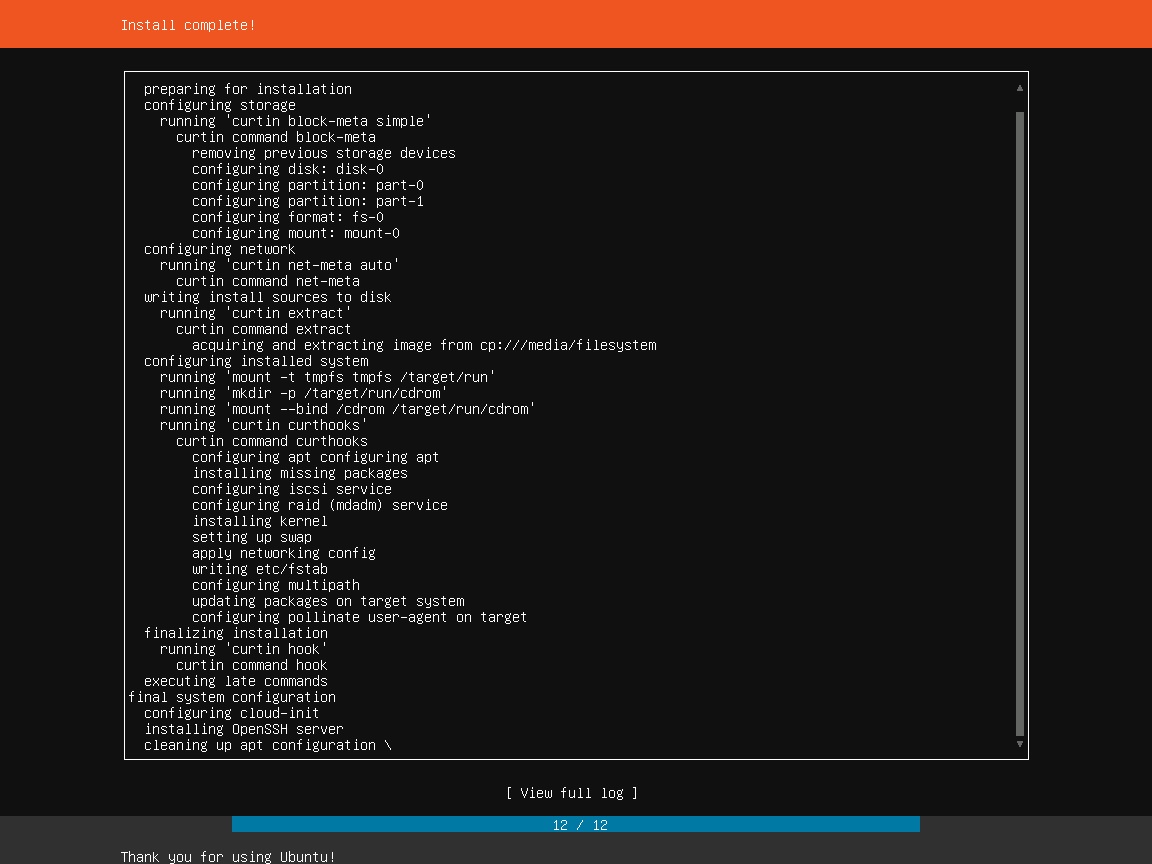
Ubuntu Server – Installation Complete
Scroll down using down arrow key and you will see Reboot now option. Select that and hit enter to complete the process.
The VM will restart and you will be asked to remove media. You can double check if there any installation ISO by going to Media->DVD drive.
In y case there was not media after reboot. Hit enter to continue.
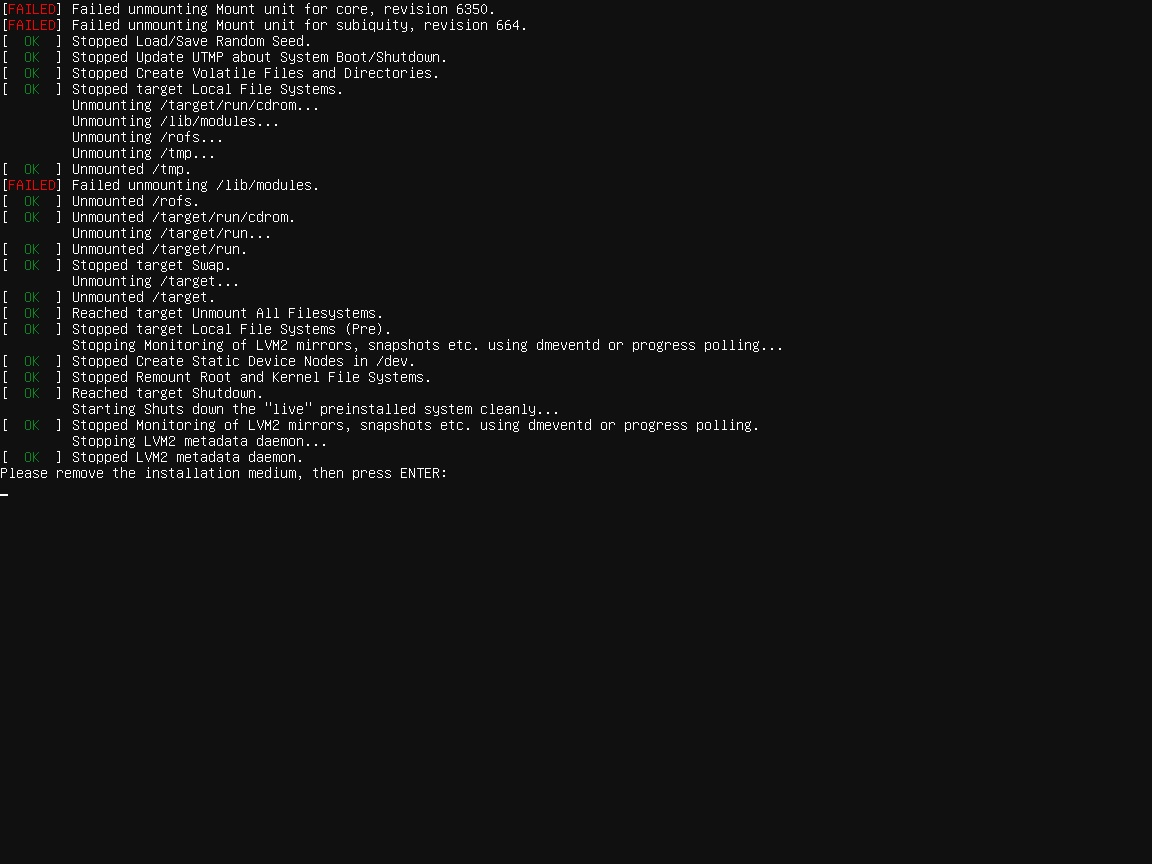
Ubuntu Server installation – Reboot – Remove installation media
Wait for VM to restart.
You will see login screen, enter username and password you setup during installation in the previous steps to login.

Ubuntu Server login screen
That’s it you are done.


