
|
Вышел обновленный дистрибутив Linuxfx, в новой версии 10.3 получивший интерфейс, в точности повторяющий оболочку Windows 10. визуальное сходство практически 100-процентное, и даже есть штатная возможность установки и запуска программ, изначально написанных под Windows.
Бразильский клон Windows 10
Бразильские разработчики из Linuxfx Software выпустили одноименный дистрибутив, интерфейс которого как две капли воды похож на оболочку OC Microsoft Windows 10. Сходство практически 100-процентное – авторы проекта постарались скопировать каждую иконку и каждый элемент интерфейса, влияющий на общее его восприятие, включая стартовое меню, таскбар и вид окон файлового менеджера.
Новая оболочка доступна в составе дистрибутива Linuxfx 10.3, распространяемого на бесплатной основе. На момент публикации материала он был доступен для скачивания для настольных ПК и ноутбуков на базе чипов Intel и AMD, а также для одноплатных ПК Raspberry Pi второго, третьего и четвертого поколений.
Ubuntu со «вкусом » Windows
Linuxfx представляет собой сильно модифицированный дистрибутив Ubuntu Linux версии 20.04 LTS, который вышел в апреле 2020 г. Ubuntu 20.04 поставляется с расширенной пятилетней поддержкой, что в полной мере касается и Linuxfx – обновления на него будут приходить через официальные каналы Canonical, разработчика Ubuntu.
Windows-подобная оболочка – это глубокого кастомизированная среда Cinnamon, и визуально отличить ее от оболочки, разработанной Microsoft, будет трудно, поскольку даже при загрузке ОС на экране отображается логотип Windows 10. Девелоперы скопировали «Пуск», панель задач, окна календаря и часов, системный трей, «Проводник» и даже меню виртуальных рабочих столов, как и окно переключения между запущенными программами.
Все функции Linuxfx
В Linuxfx даже есть поддержка «гаджетов» — мини-программ, расширяющих штатные возможности рабочего стола, а также окно «Параметры» и «Панель управления» – классический компонент ОС Microsoft, появившийся еще в 1985 г. в Windows 1.0, и от которого компания планирует избавиться в одном из ближайших обновлений.
Штатные программы
Дистрибутив Linuxfx весит около 3,7 ГБ и включает ряд встроенных программ, в том числе офисный пакет LibreOffice. В данной ОС он маскируется под Microsoft Office путем подмены пиктограмм.
Стартовое меню Linuxfx тоже идеально скопировано
Для выхода в интернет есть браузеры Firefox и Chrome, для работы с графикой – редактор GIMP, для просмотра фильмов – плеер VLC. Для онлайн-общения есть Skype и Microsoft Teams, для удаленного управления – Anydesk и TeamViewer, для игр – клиент Steam, игрового сервиса компании Valve.
Разработчики даже встроили в Linuxfx голосовой помощник, разумеется, с иконкой Cortana – фирменным ассистентом Microsoft. В данном случае он носит название Helloa и воспринимает команды на португальском, испанском и английском языках.
«Панель управления» в Linux-стиле
В составе Linuxfx предустановлена WINE (система API Windows), позволяющая запускать на Linux программы, написанные для Windows, а также устанавливать их из дистрибутивов с расширениями .exe и .msi. Разработчики постарались скопировать даже «Блокнот», самый простой текстовый редактор.
Целевая аудитория
Разработчики Linuxfx не уточняют, что побудило их сделать Linux-клона самой популярной настольной ОС в мире (доля Windows 10 на мировом рынке ОС, по статистике StatCounter, на июнь 2020 г. составляла 77,7% против 1,7% у всех дистрибутивов Linux). Как пишет портал Liliputing, их идея может понравиться Windows-пользователям.
Установка Windows-программы под Linuxfx
Linuxfx может пригодиться владельцам Windows-компьютеров в качестве инструмента для безболезненного перехода на Linux. Внимание к деталям, проявленное разработчиками в процессе копирования интерфейса Windows 10, позволит таким пользователям чувствовать себя «как дома», работая за новой для них ОС. Быстрой адаптации будет способствовать и наличие WINE, дающего возможность запуска привычных Windows-программ.
Linuxfx, как и Windows 10, можно запустить практически на любом компьютере. Системные требования версии для десктопов включают наличие в ПК хотя бы 2 ГБ оперативной памяти и всего лишь двух вычислительных ядер в составе центрального процессора.
Как китайцы Windows XP клонировали
В мире существует еще как минимум один пример интеграции графической оболочки Microsoft в состав дистрибутива Windows – национальная операционная система Китая NeoKylin. Но, если в Linuxfx используется интерфейс современной Windows 10, то NeoKylin, показанной в 2015 г., имеет дизайн, схожий с Windows XP образца 2001 г.
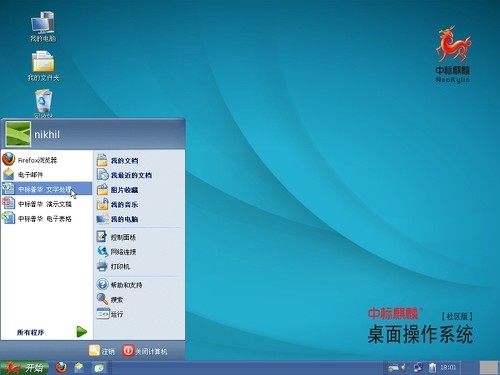
Интерфейс китайского дистрибутива NeoKylin
Святослав Кульгавый, «Колан»: Псевдороссийские технологии растут как грибы после дождя
Импортонезависимость

Как сообщал CNews, NeoKylin разработана компанией China Standard Software, и за ее основу взят дистрибутив Fedora.
NeoKylin тоже поставляется с небольшим количеством приложений: веб-браузером Firefox, музыкальным плеером, редактором изображений GIMP, калькулятором и т. д. В системе даже есть игра, напоминающая «Сапера» в Windows. Однако, в отличие от Linuxfx, установка сторонних приложений в NeoKylin не поддерживается.
- Первый в России ИТ-маркетплейс Market.CNews для Вашего бизнеса. С ценами на ИТ-услуги от сотен поставщиков
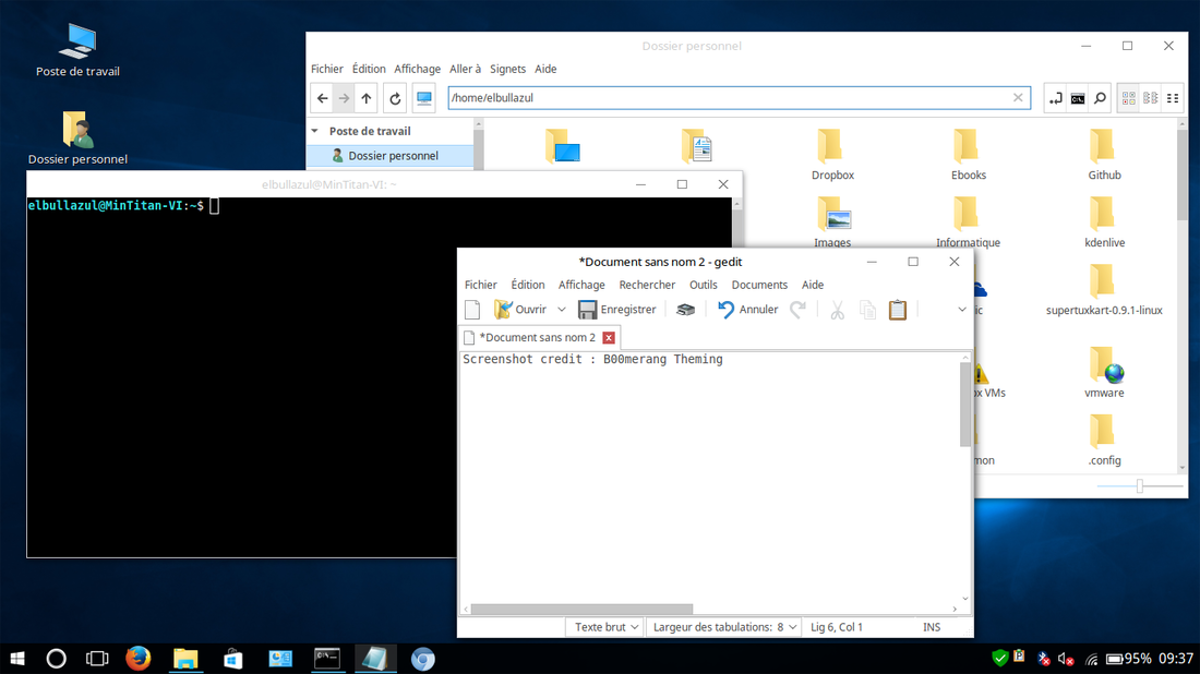
If you’ve just moved to Linux from a Windows 10 machine, it will take some time getting used to how everything works. A great way to get used to the Linux platform is to make Linux look like Windows 10. Customizing a Linux desktop environment takes a lot of work especially if you want one that closely resembles Microsoft’s Windows 10. The single most important part of this is the GTK theme which is responsible for how programs, user interfaces, window manager titlebars and etc look on your Linux desktop. A good theme goes a long way, and changing themes can make your operating system look radically different.
SPOILER ALERT: Scroll down and watch the video tutorial at the end of this article.
Windows 10 GTK Themes
There are many different Windows 10 themes for the Linux platform, as a lot of people tend to switch away from Windows to Linux and want to keep a familiar look. The single best, most complete Windows 10 themes for Linux is developed by the Boomerang Project.
Boomerang doesn’t just have one Windows 10 theme, it has three. Installing these themes require installing the “git” package. Find the “git” package by opening the Gnome Software app/Software center, search for “git” and install it. Alternatively, open up a terminal, and search for git using your Linux distribution’s package manager. Then, choose one of the three themes below, and grab the theme with git.
Windows 10 Light
git clone https://github.com/B00merang-Project/Windows-10.git
After downloading the theme, install it to the system directory with:
sudo mv Windows-10 /usr/share/themes/
Alternatively, install it for a single user.
mkdir ~/.themes

mv Windows-10 ~/.themes
Windows 10 Dark
git clone https://github.com/B00merang-Project/Windows-10-Dark.git

sudo mv Windows-10-Dark /usr/share/themes
or
mkdir ~/.themes
mv Windows-10-Dark ~/.themes
Windows 10 Universal
git clone https://github.com/B00merang-Project/Windows-10-Metro.git

sudo mv Windows-10-Metro /usr/share/themes/
or
mkdir ~/.themes
mv Windows-10-Metro ~/.themes
Setting these themes on your Linux desktop will be different depending on the desktop environment. Currently, all three Windows 10 Linux themes from Boomerang have official desktop environment support for Xfce4, Cinnamon, Gnome Shell, Openbox, Fluxbox, LXDE, MATE and the Qt-based KDE Plasma 5.
Setting The Icons
After grabbing one of the three Windows 10 themes for Linux, the next step is to install the icon theme on the system. Much like the GTK themes, the Windows 10 icon theme is on Github, and you’ll need a terminal window open to download it.
First, grab the latest version of the icon theme directly from the developer’s page with:
wget https://github.com/Elbullazul/Windows-10/releases/download/v0.9.6/Windows.10.Icons.v0.4.1.zip
Unlike the other themes, there is no “git clone” option, so wget is used. After grabbing the icons, the next step is to unpack everything. This is done with the unzip command. If your Linux distribution doesn’t support unzip, or you have issues using the command, use the file manager to extract it.
unzip Windows.10.Icons.v0.4.1.zip
When everything finishes extracting, install the theme. Like the GTK theme, the Windows Icon theme can be install to the system level, or on a per user basis. For a system wide installation, move the extracted icon folder from its download location to /usr/share/icons/. For individual users, move them to ~/.icons.
Note: you may need to create ~/.icons
sudo mv Windows.10.Icons.v04.1 /usr/share/icons
or
mkdir ~/.icons
mv Windows.10.Icons.v04.1 ~/.icons
Set The Wallpaper
A Windows 10-like Linux desktop isn’t complete without the famous Windows 10 Hero wallpaper. Luckily, the Windows 10 GTK theme comes with that exact Windows 10 wallpaper. To apply it, you’ll first need to move it from the theme directory in /usr/share/themes/, to the ~/Pictures directory in /home/.
First, use the CD command to enter the theme directory.
cd /usr/share/themes/Windows*
Once there, use the LS command to reveal all of the files inside of the theme directory.
ls
Find the wallpaper filename, and use the CP command to copy it to pictures.
cp wallpaper.jpg ~/Pictures
Alternatively, move the wallpaper from the theme directory entirely with the mv command.
mv wallpaper.jpg ~/Pictures
When the wallpaper is in the correct place, feel free to set it with your desktop environment. Not sure how to change the wallpaper? Refer to our list of “how to customize” guides for each of the Linux desktop environments that support the Windows 10 theme.
- Cinnamon
- Gnome Shell
- LXDE
- Mate
- Budgie
- XFCE4
Other Windows 10 Modifications
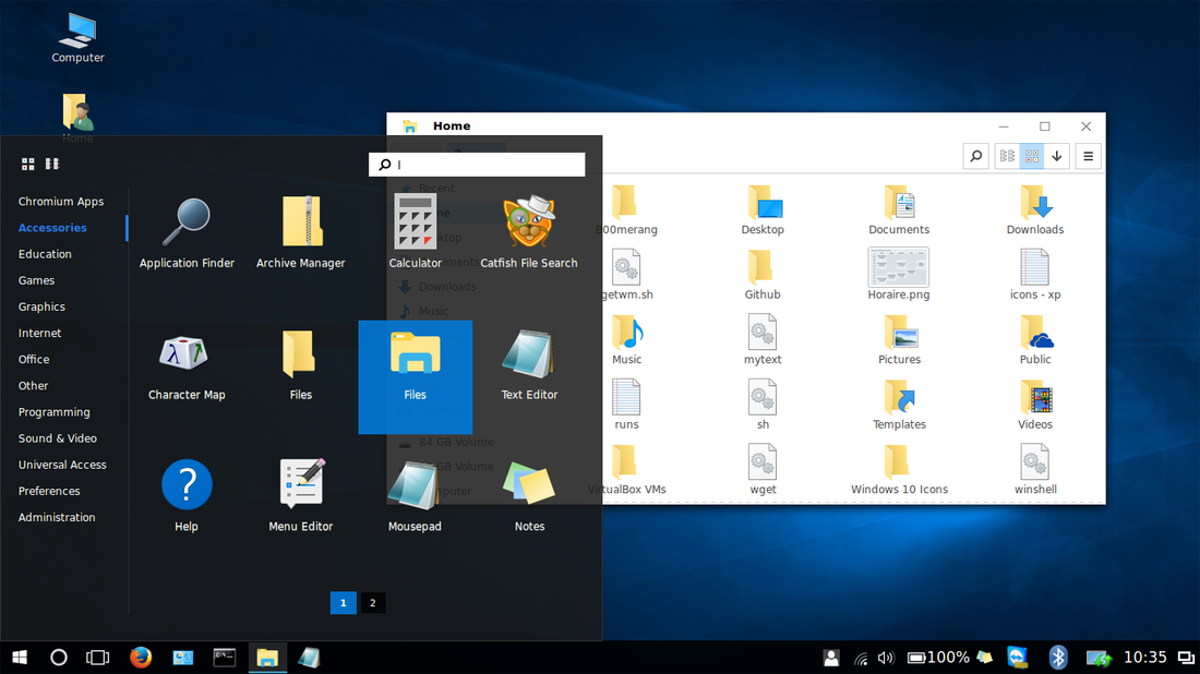
After installing the theme and icons everything should mostly look like Windows 10 (if you can overlook the obvious differences between Linux and Windows). Consider also installing a search tool like Synapse, Catfish or Albert to mimic the powerful search offered up in Windows 10.
Do keep in mind that there isn’t currently a way to directly integrate any of these apps into any Linux desktop environment’s taskbar. This can be solved by adding a shortcut to the app on your panel.
Conversion Pack
The themes used in this guide were taken from a total Windows 10 conversion pack. If you’d like to make your Linux desktop look even more Windows like, go to this page here, scroll down and read the instructions on the page. It goes over how to get the most out of the themes.

Do you want to change the interface of Ubuntu 20.04 or 18.04 LTS Linux Distros to make it look like Windows 10 or 7, then here are the steps to follow.
What is UKUI- Ubuntu Kylin?Open command terminalAdd UKUI PPA RepositoryUpdate and Upgrade PackagesInstall Windows-like UI on Ubuntu 20.04Logout and Login to UKUI- Windows 10 like interface on UbuntuUninstall UKUI- Ubuntu Kylin Desktop environment
Ubuntu 20.04, 18.03, 19.04, 17.04, or 16.04 out of the box come with GNOME graphical user interface or environment. Although it is very intuitive and easy to use, the users are shifting from Windows 10 or 7 yet find it difficult to operate. Because of the unfamiliar user interface and arrangements of options.
Therefore, if you want to have the benefits of Ubuntu Linux and its packages but with a Windows-like interface then here in this tutorial, we will show some quick commands to install the UKUI Desktop environment on Ubuntu.
What is UKUI- Ubuntu Kylin?
UKUI is a desktop environment for Linux distributions available on Github, it meant to provide a simple and easy to use Windows similar graphical user interface.
So, let’s see its installation on Ubuntu 20.04 LTS, however, the steps will be the same for the previous versions such as 18.04 and 16.04 including Linux Mint and Debian. However, if you don’t want to do the installation of Kylin on Ubuntu 20.04 then go for the official Ubuntu 20.04 Kylin Linux Distro available to download on the official website.
Open command terminal
To install Windows 10 interface UI for Linux we need to use the Command line on Ubuntu, to access that either click on “Show Applications” and search for Terminal or simply press Ctrl + Alt + T (shortcut key to open the Command terminal).
Add UKUI PPA Repository
This Linux desktop environment’s packages may not available in the default official repository of Ubuntu Linux, thus we need to add it manually. Therefore, copy-paste the below command in the terminal and press the Enter key.
sudo add-apt-repository ppa:ubuntukylin-members/ukui3.0
When it asks for your User password then provide that and then hit the Enter button.
Update and Upgrade Packages
To make sure the added repository get recognized by the system, rebuild the cache and then upgrade the existing packages using below two commands:
sudo apt update

sudo apt upgrade
Install Windows-like UI on Ubuntu 20.04
Finally, run a single command as given in this step. It will fetch all the required packages and tools to create a Windows 10 or 7 like the Desktop environment on Ubuntu 20.04 or earlier versions. Hence, here is it.
sudo apt install ukui-desktop-environment

or
sudo apt install ubuntukylin-desktop
The output shows, it will take around 559 MB of space on your disk:
The following NEW packages will be installed:
attr desktop-base fonts-quicksand ibverbs-providers kactivities-bin kactivitymanagerd kde-config-screenlocker kio
kpackagelauncherqml kpackagetool5 kwayland-data kwayland-integration libcephfs2 libdbusmenu-qt5-2 libgsettings-qt1
libhfstospell10 lib ui-kwin-x11 ukui-media ukui-media-common ukui-menu ukui-panel ukui-polkit....
.......ukui-power-manager ukui-power-manager-common ukui-screensaver ukui-session-manager ukui-settings-daemon
ukui-settings-daemon-common ukui-sidebar
0 upgraded, 207 newly installed, 0 to remove and 50 not upgraded.
Need to get 183 MB of archives.
After this operation, 559 MB of additional disk space will be used.
Do you want to continue? [Y/n]
Logout and Login to UKUI- Windows 10 like interface on Ubuntu
Once the installation gets completed, go to the Ubuntu Taskbar and at the right end, you will see an arrow icon pointed downwards, click that select “power off/log out” and select the Log out option.
Now, click on your user name, and before entering the password, click on the gear icon available at the left bottom side of the screen. Select UKUI and then enter your user password to log in again.
Note: After installing Ubuntu Kylin UI you will have a dual desktop environment on your OS, thus if you want the default one back then again log out and select Ubuntu instead UKUI.


Uninstall UKUI- Ubuntu Kylin Desktop environment
In case you are facing some problem with UKUI- Windows 10 like interface then we can uninstall it completely. To remove the UKUI, log out the system and again click on the Gear icon available on the right bottom side. This time instead of selecting UKUI, select Ubuntu, the default UI.
Now, open the command terminal and run the below command to fully purge and remove this desktop environment, we have installed in this tutorial.
sudo apt purge ukui-desktop-environment ubuntukylin-default-settings peony-common
Restart, the system and you will see it would not be available to access any more on your Linux.
One of the many strengths of Linux is that you can make it look exactly like you want. If you’re not a fan of something about the default setup, you can change bits and pieces. While you can dive deep and tweak your own custom distro, there are easier theming tools for novices or those who don’t want to invest the time.
Now, there’s an easy way to apply a Windows-styled theme to Ubuntu. Longtime Linux users may scoff at this, wondering why anyone would want to poison the Linux interface with a dose of Windows. But it’s a great way for recent Linux converts to have a more familiar working space, or to provide an introduction to Linux for less tech-savvy family member.
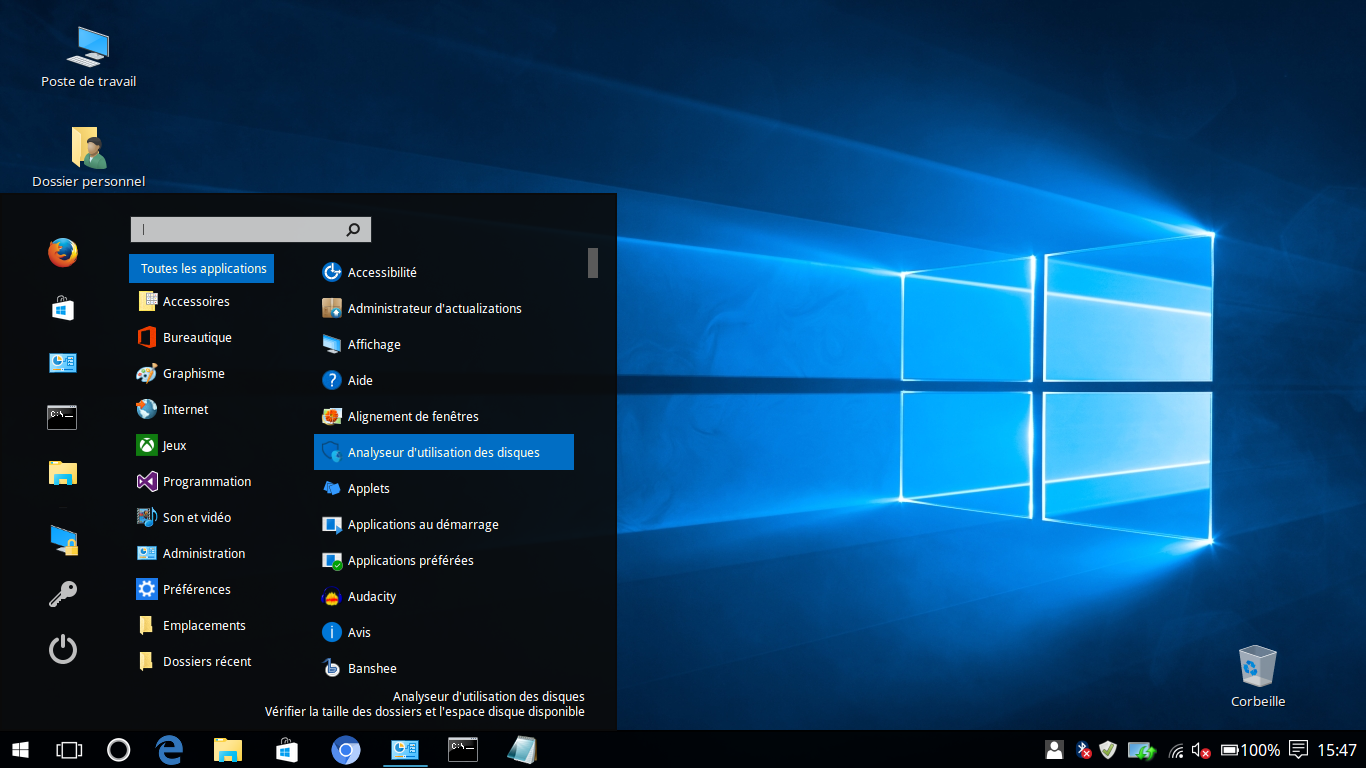
And it’s not exclusively based on Windows 10 — the Taskbar is reminiscent of Windows XP while the Start Menu looks like Windows 7.
On Ubuntu 17.04, UKUI is a free tool that provides many Windows-styled visual tweaks. The Peony file manager looks a lot like the File Explorer from Windows, while it also contains a Start Menu reminiscent of Microsoft’s OS. You’ll also find a familiar System Tray corner with a volume slider and date/time info.
You don’t need to mess with any theme applications or replace system apps to get this theme working. It’s available from Ubuntu Software, or by using the direct download command:
apt://ukui-desktop-environment
If you try this out and decide you don’t like it, just open a Terminal window and run this command to remove the theme:
sudo apt purge ukui-desktop-environment ubuntukylin-default-settings peony-common
Would you rather make your Linux desktop look like macOS? Check out the easy tweaks to get you there.
What’s your current Linux theme? Would you ever want to make Ubuntu look like Windows? Let us know in the comments below!
Image Credit: Kuprevich via Shutterstock
Give this cool GTK theme a try!
We try so many themes always, Flat themes, Transparent themes, Dark themes, Mac OS look-a-like themes. Then why not a Windows 10 GTK theme for a change with fluent design.
This Windows 10 GTK (3.26+) theme is created by b00merang with a icon theme pack which can give your Ubuntu installation a complete makeover like Windows 10’s fluent design. It comes with both light and a dark version of the theme.
This theme supports below list of desktop environments :
- Gnome
- Cinnamon
- Unity
- Openbox
- Mate
- Xfce
Windows 10 Theme
Here is a look with default GNOME Shell running in Ubuntu 18.10 with light version of theme. It looks so good and feels very productive.

If you are a fan of GNOME Flashback Metacity (classic version of GNOME), here is a look of both light and dark version of this theme with its own icon pack:

Dark Version

How to download and install
Below instructions applies for Ubuntu, Mint, elementary and all Linux distributions.
- Download the Windows 10 theme pack via below link:
Windows 10 Theme Light
Windows 10 Theme Dark
- Download the Windows 10 icon pack from below link:
Windows 10 – Icon Pack
After downloading, extract the themes and icons. Rename the extracted folders as “Windows-10-theme”, “Windows-10-theme-dark”, “windows-10-icons”.
- Copy the entire theme folder to
/usr/share/themes
- Copy the entire icon folder to
/usr/share/icons
Apply
After copying, open Gnome Tweaks tool and apply the themes and icons. Enjoy!
Also do let us know whether you like this theme or not.
Resources
- Home Page
- GitHub