
На экране входа в Windows (welcome screen, экран приветствия) по-умолчанию отображается учетная запись последнего пользователя, который выполнял вход на этот компьютер и список всех локальных пользователей. В Windows есть несколько настроек, которые позволяют показать или скрыть имена пользователей на экране входа, или даже вывести список всех локальных или активных доменных пользователей компьютера (сервера).
Содержание:
- Как скрыть имя последнего пользователя на экране приветствия Windows?
- Показать список локальных пользователей на экране входа в Windows
- Вывести список доменных пользователей на экране входа в Windows
- Как скрыть определенного пользователя на экране входа?
Как скрыть имя последнего пользователя на экране приветствия Windows?
Конечным пользователям удобно, когда на экране входа в Windows отображается имя учетной записи и его не нужно набирать вручную. В целях безопасности на публичных компьютерах (в небезопасных локациях) вы можете запретить показывать имя последнего пользователя на экране входа Windows через GPO.
- Откройте редактор доменных GPO
(gpmc.msc
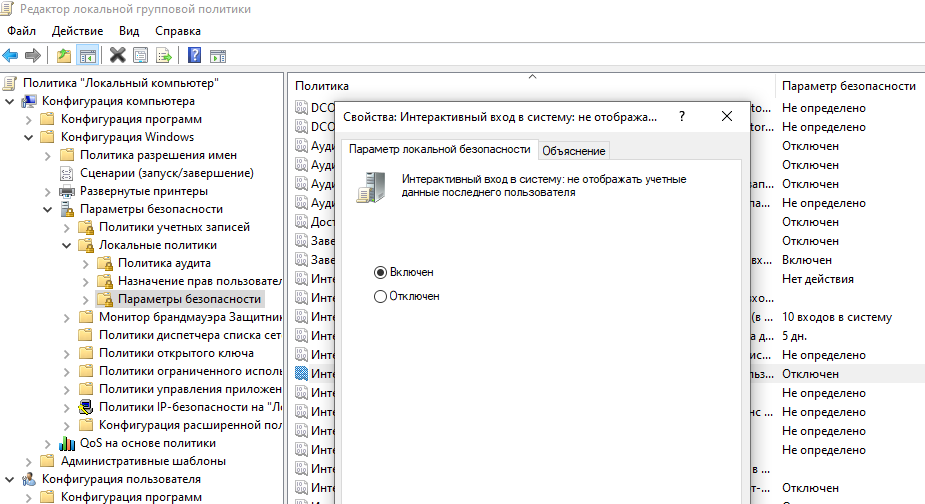
) или локальных политик (gpedit.msc) и перейдите в раздел Конфигурация компьютера -> Конфигурация Windows -> Параметры безопасности -> Локальные политики -> Параметры безопасности (Computer Configuration -> Windows Settings -> Security Settings -> Local Policies -> Security Options); - Включите политику “Интерактивный вход в систему: Не отображать учетные данные последнего пользователя” (Interactive logon: Don’t display last signed-in). По умолчанию эта политика отключена;

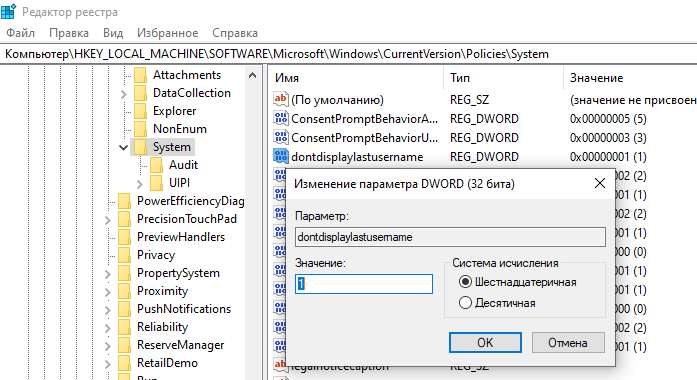
Вы можете скрыть имя последнего пользователя на экране входа через реестр. Для этого в ветке HKEY_LOCAL_MACHINE\SOFTWARE\Microsoft\Windows\CurrentVersion\Policies\System создайте параметр dontdisplaylastusername типа DWORD и значением 1.

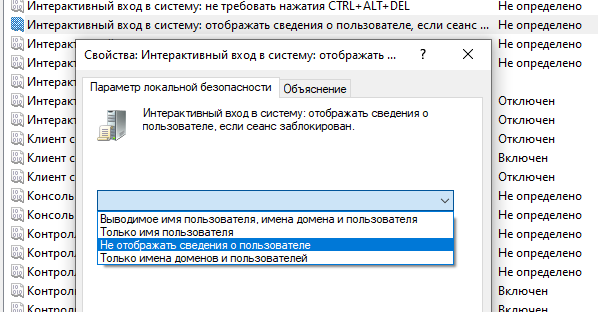
- Чтобы скрыть имя пользователя на экране блокировки (когда компьютер блокируется нажатием Win+L или через GPO блокировки экрана), включите в этом же разделе GPO нужно включить политику “Интерактивный вход в систему: отображать сведения о пользователе, если сеанс заблокирован” (Interactive logon: Display user information when the session is locked) и выбрать значение “Не отображать сведения о пользователе” (Do not display user information).

Этой политике соответствует параметр реестра DontDisplayLockedUserId в той же ветке со значением 3.
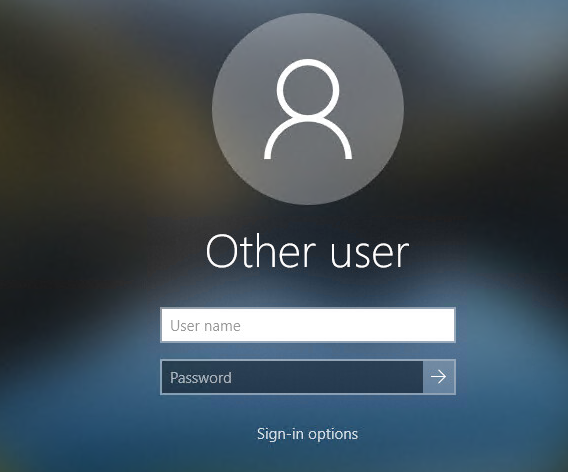
Теперь вместо имени последнего пользователя, на экране входа в компьютер и на экране блокировки Windows, отображаются пустые поля для ввода имени пользователя и пароля.
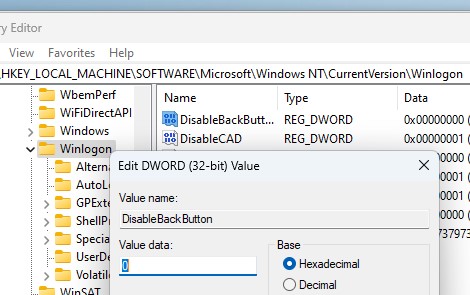
С помощью параметра DisableBackButton реестра можно скрыть список пользователей на экране блокировки:
reg add "HKLM\SOFTWARE\Microsoft\Windows NT\CurrentVersion\Winlogon" /t REG_DWORD /f /d 0 /v DisableBackButton
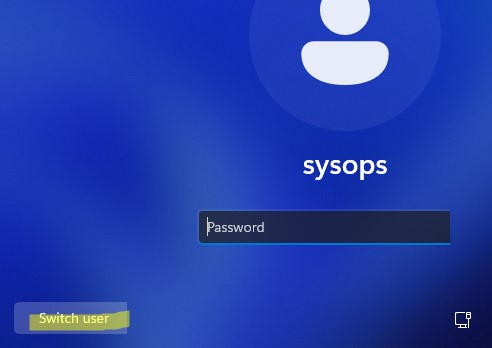
Теперь для разблокировки экрана пользователю нужно просто набрать пароль, а чтобы отобразить список всех пользователей, нужно сначала нажать кнопку Switch User на экране блокировки.
Показать список локальных пользователей на экране входа в Windows
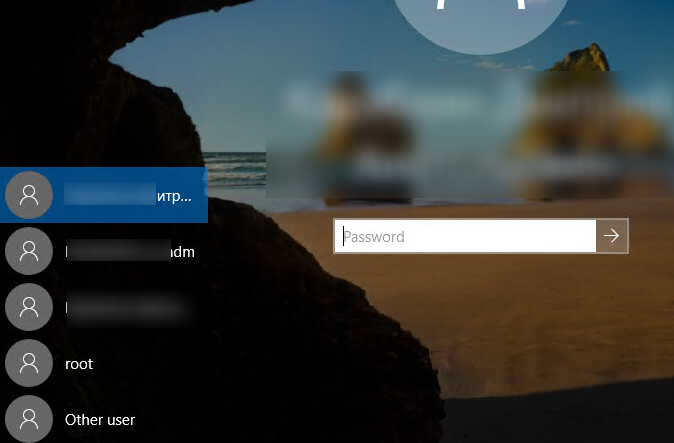
По умолчанию современные версии Windows (проверено на Windows 11 23H2 и Windows 10 22H2) всегда показывают список включенных локальных пользователей в левом нижнем углу (это работает только на компьютерах, не включенных в домен Active Directory). Скрытые (см ниже) и отключенные учетные записи пользователи здесь не отображаются.
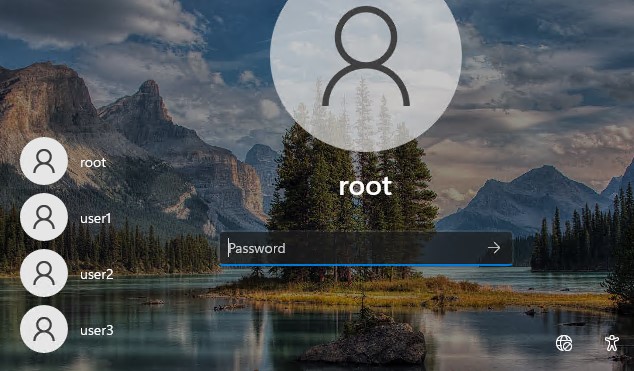
Чтобы войти на компьютере, пользователю достаточно щелкнуть по нужной учетной записи и ввести пароль.
Если список локальных пользователей не отображается на экране входа Windows, проверьте настройки следующих параметров в редакторе локальной GPO
gpedit.msc
:
- Interactive Logon: Don’t display last signed-in =
Disabled
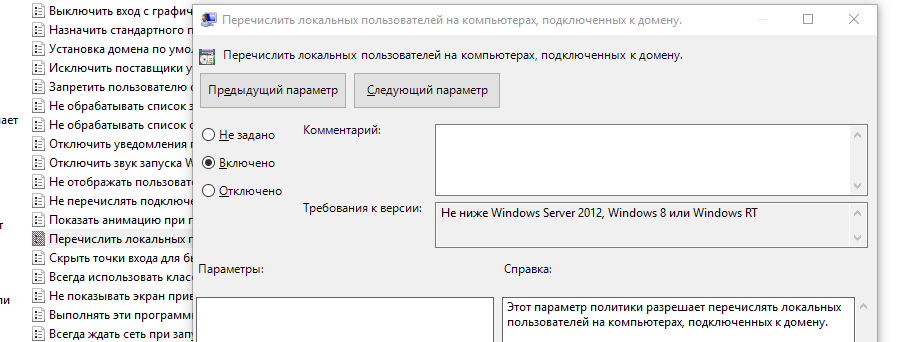
(Computer Configuration -> Windows Settings -> Security Settings -> Local Policies -> Security Options); - Enumerate local users on domain-joined computers (Перечислить локальных пользователей на компьютерах, подключенных к домену) =
Enabled
(Computer Configuration -> Administrative Templates -> System -> Logon /Конфигурация компьютера -> Административные шаблоны -> Вход в систему) – политика позволяет вывести список локальных пользователей на доменных компьютерах.
Перезагрузите компьютер, чтобы применить новые настройки групповых политик.
Вывести список доменных пользователей на экране входа в Windows
Если одним компьютером пользуется несколько пользователей, вы можете отобразить на экране приветствия список пользователей с активными сессиями. Активная сессия подразумевает, что пользователь выполнил вход на компьютер. Это может быть общий компьютер (работает в режиме переключения пользователей), касса, киоск, хосты Windows Server с ролью RDS (или его аналоги с поддержкой мультсессий на десктопных версия Windows).
Проверьте, что в разделе GPO Computer Configuration -> Windows Settings -> Security Settings -> Local Policies -> Security Options отключены политики:
- Interactive logon: Don’t display last signed-in: Disabled
- Interactive logon: Don’t display username at sign in: Disabled
Затем отключите политики в разделе Computer Configuration -> Administrative Templates -> System -> Logon:
- Block user from showing account details on sign-in: Disabled
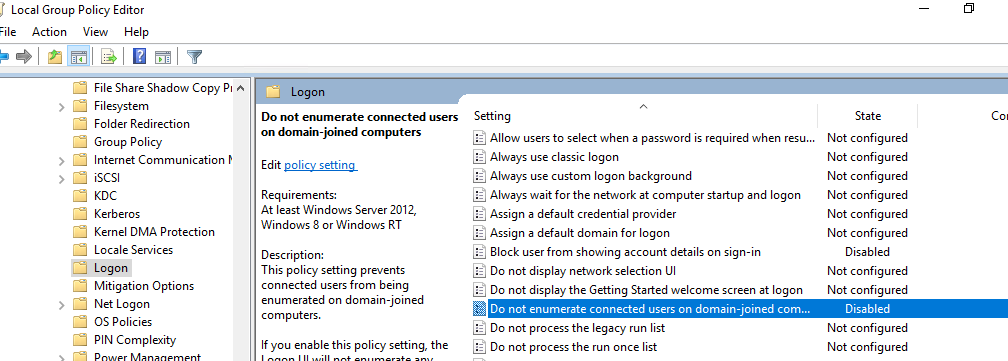
- Do not enumerate connected users on domain-joined computer: Disabled
На доменном компьютере вы можете проверить результирующие настройки этих параметров GPO с помощью текущие
rsop.msc
или gpresult.
После этого на экране приветствия будет отображаться список пользователей, которые выполнили вход в систему. Здесь будут отображаться как активные сессии, так и сессии пользователей со статусом disconnected (например, по RDP таймауту).
Как скрыть определенного пользователя на экране входа?
На экране входа в Windows всегда отображаются пользователи, которые входят в одну из следующих локальных групп: Администраторы, Пользователи, Опытные пользователи, Гости.
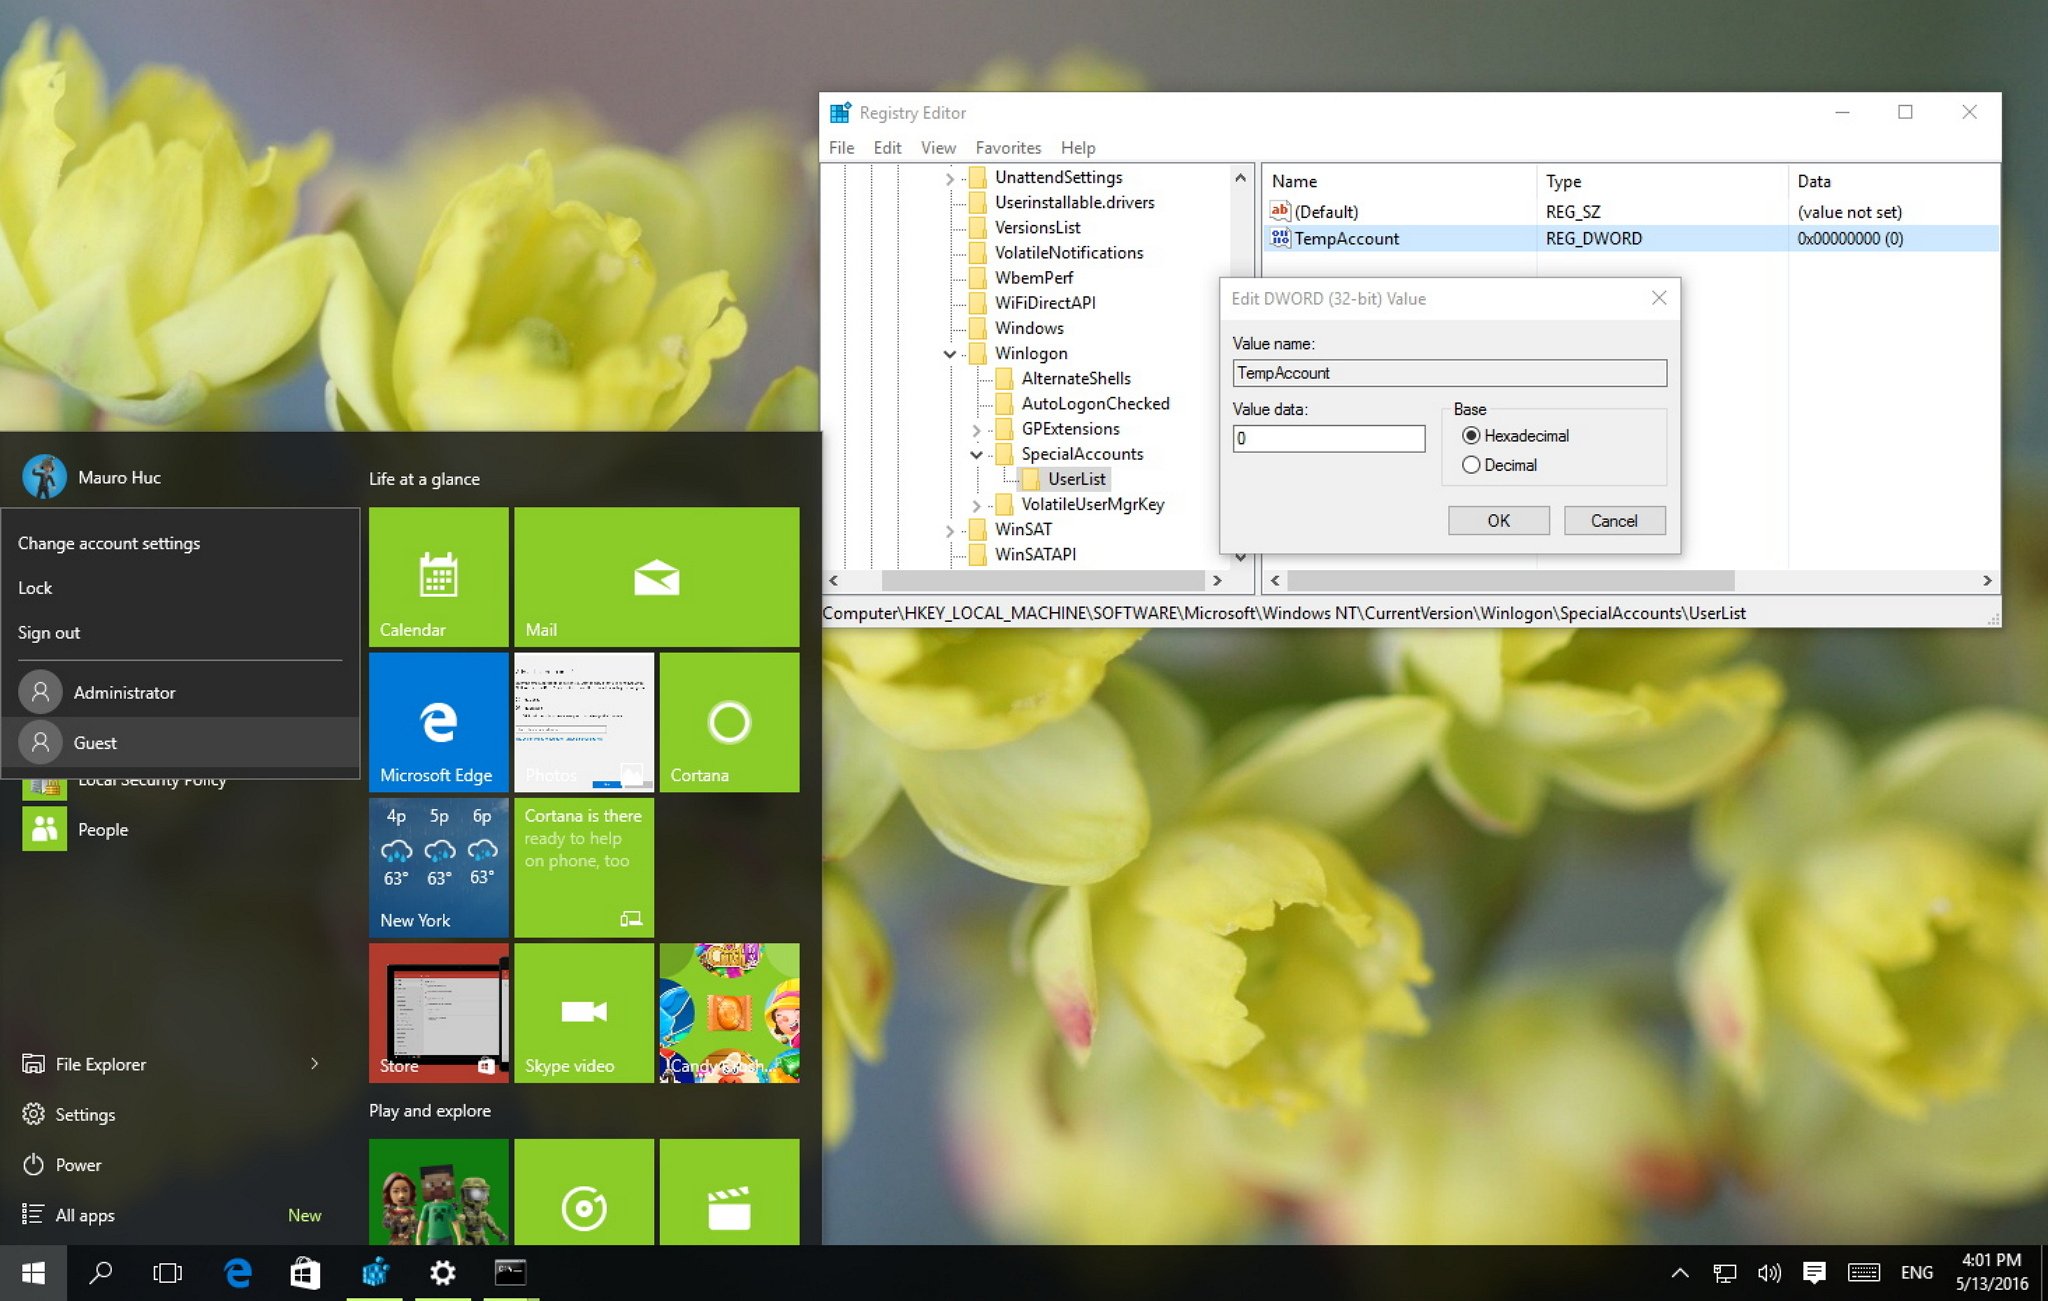
Можно скрыть определенных пользователей в списке на экране входа в систему через реестр. Для этого нужно создать ветку реестра
HKLM\SOFTWARE\Microsoft\Windows NT\CurrentVersion\Winlogon\SpecialAccounts\UserList
. Для каждого пользователя, которого вы хотите скрыть нужно создать DWORD параметр с именем пользователя и значением 0.
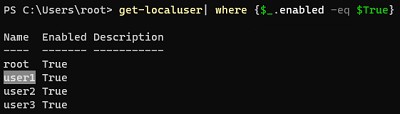
Список локальных пользователей можно вывести в PowerShell или cmd:
Net user
Или:
Get-LocalUser | where {$_.enabled –eq $true}
Чтобы скрыть определенного пользователя на экране входа Windows (например, user1), выполните команду:
reg add "HKLM\SOFTWARE\Microsoft\Windows NT\CurrentVersion\Winlogon\SpecialAccounts\UserList" /t REG_DWORD /f /d 0 /v user1
Если нужно опять показать пользователя на экране входа, нужно удалить это параметр реестра или изменить его значение на 1.
Если на компьютере включен аккаунт встроенного администратора Windows, и это не единственный аккаунт с правами локального администратора на компьютере (!!!), вы можете скрыть и его:
reg add "HKLM\SOFTWARE\Microsoft\Windows NT\CurrentVersion\Winlogon\SpecialAccounts\UserList" /t REG_DWORD /f /d 0 /v administrator
Если вы хотите скрыть всех пользователи, кроме последнего вошедшего, настройте следующие параметры GPO в разделе Computer Configuration -> Administrative Templates -> System -> Logon:
- Enumerate local users on domain—joined computers =
Disabled
(Computer Configuration -> Administrative Templates -> System -> Logon /Конфигурация компьютера -> Административные шаблоны -> Вход в систему) – политика позволяет вывести список локальных пользователей на доменных компьютерах - Do not enumerate connected users on domain-joined computer =
Enabled

Теперь понятно. Сергей всё правильно объяснил, но раз галочки нет, придётся её поставить. Система затребует ввести пароль. Сделайте: «применить и ОК». Появится окна вввода пароля

Они должны оставаться пустыми, как у меня. Снова жмём «Применить и ОК».
Перезагружаем компьютер. Окно не должно появляться. Если появится. Нажмите пуск, «выполнить», снова вбейте «netplwiz», и тогда снимите галочку и повторите все шаги с применить и ОК.
Но это ещё не всё. Ведь выходя из спящего режима с вас требуют пароль. Тогда делаем по шагам.
Идём в «пуск», находим и запускаем панель управления, там находим апплет «Электропитание». Он в самом низу. Кликаем по нему появляется окно настроек.


Выбираете «Настройку электропитания», — у той схемы на которой стоит точка у вас.
У меня всё не так. Экран постоянно включен, а у вас должно быть здесь. Находите типа: «Требовать пароль при выходе из спящего режима», — и снимаете галочку.
Если что-то ещё непонятно — в личку.

The Windows login screen is the gateway to your computer, and it often displays the last user who logged in by default. However, this can pose security risks and may not always be ideal for shared or public computers. In this comprehensive guide, we will explore various methods to customize the user display on the Windows login screen to suit your needs. Please see Display logon banners for Windows PCs via Windows Registry, How to make a screenshot of Windows 10 Screen / Login Screen, How to prevent the on-screen keyboard from starting automatically and from appearing at login, and Windows sign-in options and account protection on Windows 11.
Hiding the Last Username on Windows Logon Screen
Displaying the last logged-in username on the Windows login screen can be convenient but risky, as it can make it easier for unauthorized users to access your computer. To hide the last username, follow these steps:
Using Group Policy Editor (GPO):
Press Win + R, type gpedit.msc, and hit Enter to open the Group Policy Management Console.

Navigate to the following path:
Computer Configuration -> Windows Settings -> Security Settings -> Local Policies -> Security Options
Enable the policy “Interactive logon: Don’t display last signed-in” (this policy is disabled by default).
Using Registry Editor:
Press Windows key and type regedit, to open the Registry Editor in the Start menu.

Navigate to the following registry path:
HKEY_LOCAL_MACHINE\SOFTWARE\Microsoft\Windows\CurrentVersion\Policies\System
Create a new DWORD parameter named dontdisplaylastusername with a value of 1.

Hiding Username on Computer Lock Screen
To hide the username on the computer lock screen (triggered by Win+L or lock screen GPO), follow these steps:
Using Group Policy Editor (GPO):
Press Win + R, type gpedit.msc, and hit Enter to open the Group Policy Management Console.
Navigate to the following path:
Computer Configuration -> Windows Settings -> Security Settings -> Local Policies -> Security Options
Enable the policy “Interactive logon: Display user information when the session is locked” and set the value to “Do not display user information.”
Using Registry Editor:
In the Registry Editor, find the key:
HKEY_LOCAL_MACHINE\SOFTWARE\Microsoft\Windows\CurrentVersion\Policies\System
Locate or create a DWORD parameter named DontDisplayLockedUserId and set its value to 3.

Now, both the computer login screen and lock screen will display blank username and password fields.
Showing All Users on Windows 10/11 Sign-in Screen
By default, Windows 10 and 11 display a list of enabled local users on the login screen. To ensure this list is visible, follow these steps:
Using Group Policy Editor (GPO):
Press Win + R, type gpedit.msc, and hit Enter to open the Group Policy Management Console.
Confirm that “Interactive Logon: Do not display last signed-in” is set to Disabled in Computer Configuration -> Windows Settings -> Security Settings -> Local Policies -> Security Options.
Navigate to the following path:
Computer Configuration -> Administrative Templates -> System -> Logon
Enable “Enumerate local users on domain-joined computers“

Ensure “Do not enumerate connected users on domain-joined computer” is Disabled or Not Configured in the same GPO section.

Restart your computer to apply the new Group Policy settings. This should display the list of local users on the login screen.
Showing Logged In Domain Users on Windows Login Screen
If your computer is used by multiple domain users, you can display a list of users with active sessions on the welcome screen. To achieve this, follow these steps:
Using Group Policy Editor (GPO):
Press Win + R, type gpedit.msc, and hit Enter to open the Group Policy Management Console.
Ensure the following policies under Computer Configuration -> Windows Settings -> Security Settings -> Local Policies -> Security Options are set to Disabled:
- Interactive logon: Don’t display last signed-in
- Interactive logon: Don’t display username at sign-in

Also, disable the policies in Computer Configuration -> Administrative Templates -> System -> Logon:
- Block user from showing account details on sign-in
- Do not enumerate connected users on domain-joined computer

After applying these changes, the welcome screen will display a list of logged-on users, including those with active sessions.
Please note that Group Policy settings on domain computers may be managed by domain administrators, so ensure that local GPO settings are not overridden by domain GPOs using tools like rsop.msc or gpresult.
Hiding Specific User Accounts from the Sign-in Screen
If you want to hide specific user accounts from the Windows login screen, you can do so through the registry. Follow these steps:
Using Registry Editor:
Open the Registry Editor (regedit), and navigate to:
HKEY_LOCAL_MACHINE\SOFTWARE\Microsoft\WindowsNT\CurrentVersion\WinlogonRight-click on the Winlogon key and select New > Key name the SpecialAccounts. Right-click the SpecialAccount key and create a New > Key named UserList.

Create a new DWORD32 parameter for each user you want to hide. Set the username as the parameter name and its value as 0.

To show a hidden user on the login screen again, either delete the registry parameter or change its value to 1.
Conclusion on how to Hide or Show User Accounts from Login Screen
Customizing the Windows login screen can enhance security and user experience based on your specific requirements. Follow these steps carefully to tailor the login screen to your needs while maintaining the desired level of security.
FAQs Relating Hiding or Showing Windows User Accounts from the Login Screen
How can I hide the last username displayed on the Windows login screen to enhance security?
You can hide the last logged-in username on the Windows login screen by using either the Group Policy Editor (GPO) or the Registry Editor. To achieve this through GPO, open the Group Policy Management Console (gpmc.msc), navigate to Computer Configuration -> Windows Settings -> Security Settings -> Local Policies -> Security Options, and enable the policy “Interactive logon: Do not display last user name.” Alternatively, using the Registry Editor, go to HKEY_LOCAL_MACHINE\SOFTWARE\Microsoft\Windows\CurrentVersion\Policies\System, and create a new DWORD parameter named dontdisplaylastusername with a value of 1.
Can I display a list of all enabled local users on the Windows login screen?
Yes, by default, modern versions of Windows display a list of all enabled local users on the login screen. However, to ensure this list is visible, you may need to confirm certain Group Policy settings. Open the Group Policy Management Console (gpmc.msc), ensure that “Interactive Logon: Do not display last signed-in” is set to Disabled under Computer Configuration -> Windows Settings -> Security Settings -> Local Policies -> Security Options. Also, enable “Enumerate local users on domain-joined computers” in Computer Configuration -> Administrative Templates -> System -> Logon.
How can I hide specific user accounts from the Windows login screen?
To hide specific user accounts from the Windows login screen, you can make changes in the Registry Editor. Navigate to HKEY_LOCAL_MACHINE\SOFTWARE\Microsoft\Windows NT\CurrentVersion\Winlogon\SpecialAccounts\UserList, and create a new DWORD parameter for each user you want to hide. Set the username as the parameter name and its value as 0. This will hide those specific user accounts. To reverse this and show a hidden user on the login screen again, either delete the registry parameter or change its value back to 1.
I hope you found this article useful on how to Hide or Show User Accounts from Login Screen on Windows. Please let me know in the comment section if you have any questions.
When you share your computer with family members or friends, Windows 10 by default will list every user account on the sign-in screen. However, there could be times when you may have some additional accounts that you don’t want listed. For example, accounts for users who only login remotely to their PCs, or an account that you want to keep secret from regular users.
While the operating system doesn’t offer an option to pick which user accounts appear on the sign-in screen, you can easily hide any user from being listed by modifying the registry.
In this Windows 10 guide, we’ll walk you through the steps to hide user accounts from the sign-in screen on your computer.
Important: Before you make any changes, make sure to understand that you’ll be modifying the Windows registry, which could be a dangerous game that can cause irreversible damage to your computer when changes are not done properly. It’s recommended that you do a full backup of your system before proceeding. You’ve been warned!
How to hide user accounts from the sign-in screen
Windows 10 by default displays the full name on a user on the sign-in screen, but to make this work you’ll need the name of the account. You can find this information by opening Local Users and Groups. However, this option is only available for Pro users, as such we’ll be using the old User Accounts manager that is available on Windows 10 Pro as well as on Windows 10 Home.
- Use the Windows key + R keyboard shortcut to open the Run command, type netplwiz, and click OK to open User Accounts.
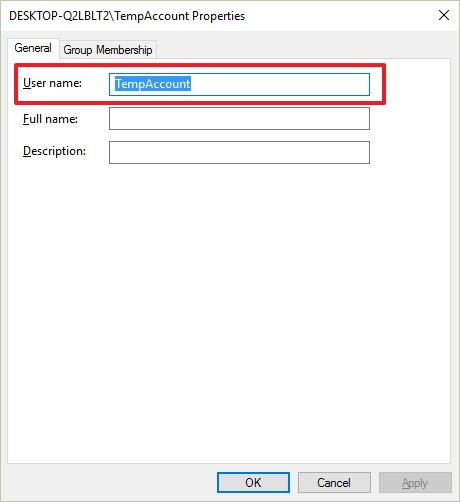
- Select the account you want to hide and click Properties.
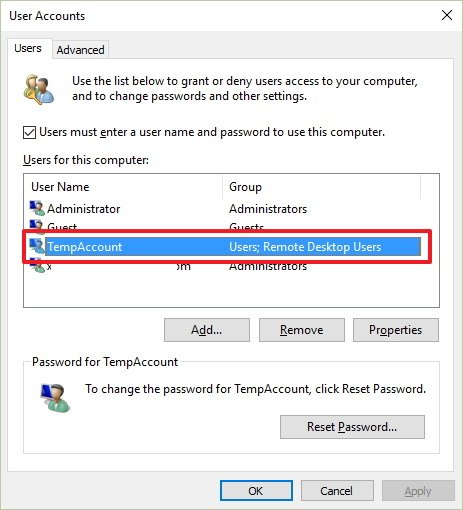
- Make note of the User name for the account.
Use the following steps to hide an account from sign-in screen on Windows 10:
- Use the Windows key + R keyboard shortcut to open the Run command, type regedit, and click OK to open the Windows Registry.
- Browse the following path:
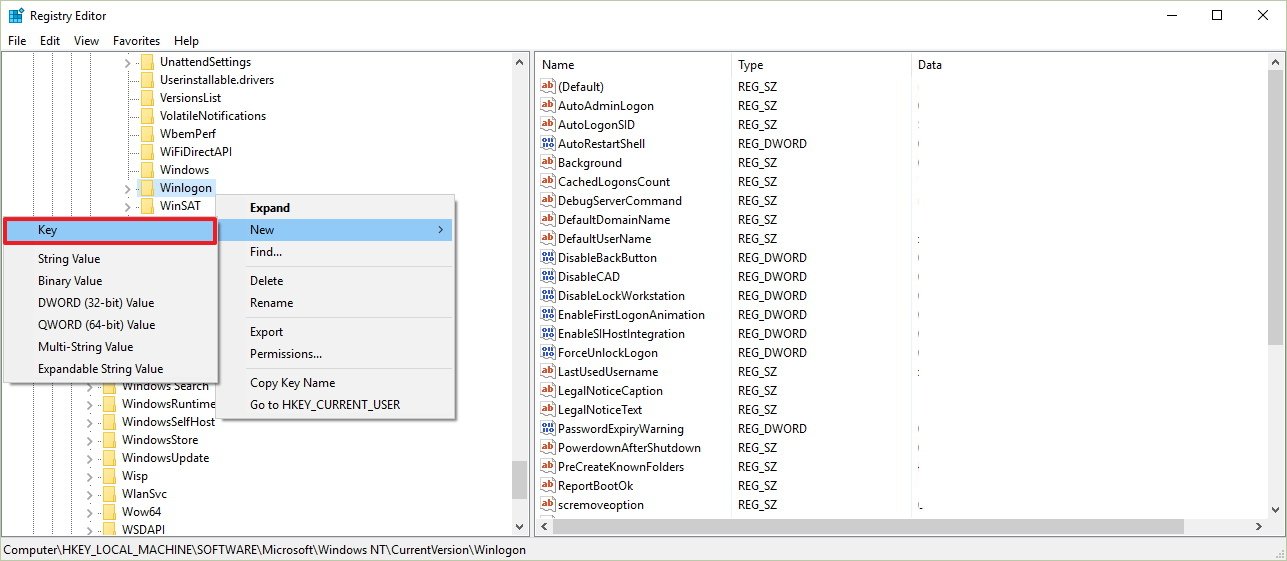
HKEY_LOCAL_MACHINE\SOFTWARE\Microsoft\Windows NT\CurrentVersion\Winlogon - Right-click the Winlogon, select New, and click Key.
- Name the new key SpecialAccounts.
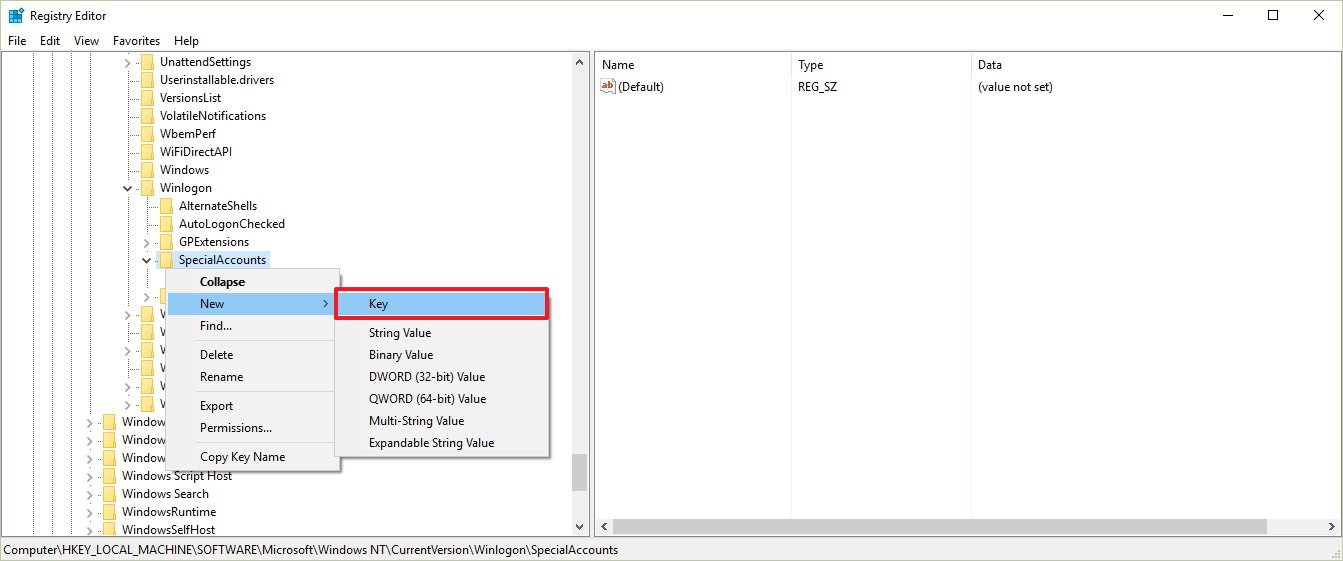
- Right-click the SpecialAccounts key, select new, and click Key.
- Name the new key UserList.
- Inside of UserList, right-click, select New, and click DWORD (32-bit) Value.
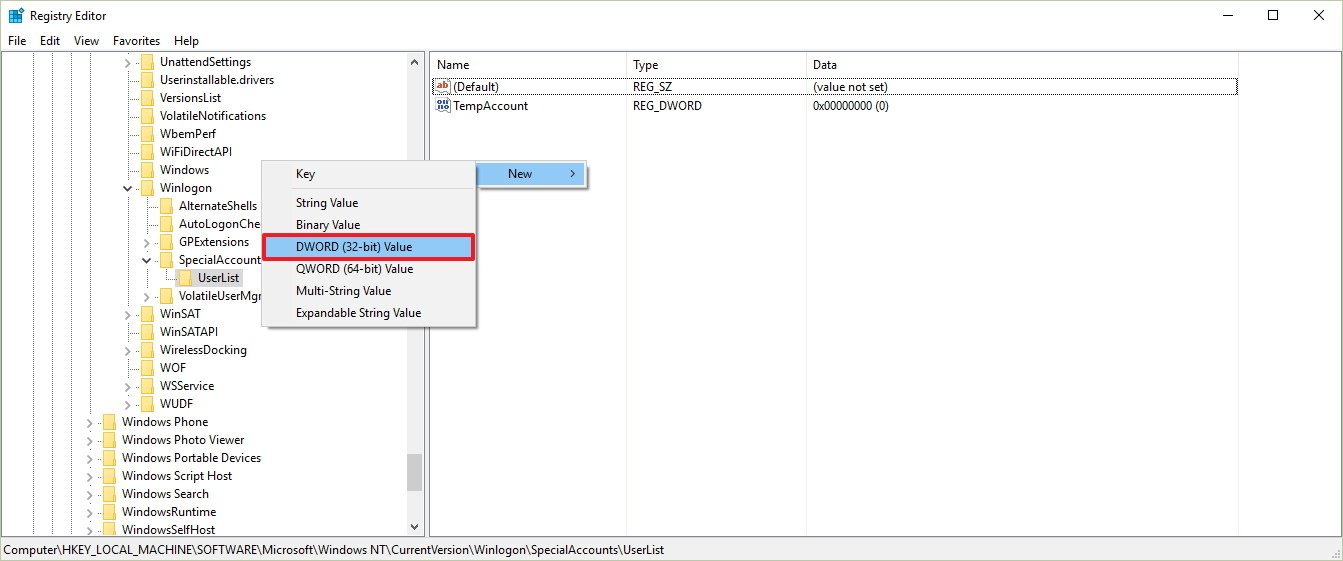
- Name the new DWORD key with the name of the account you’re trying to hide.
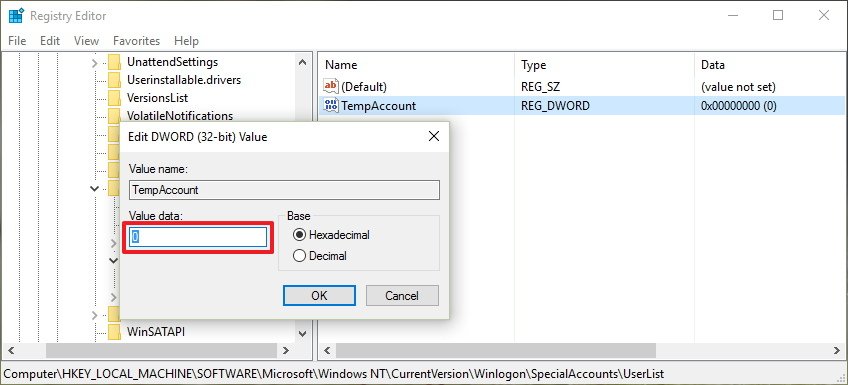
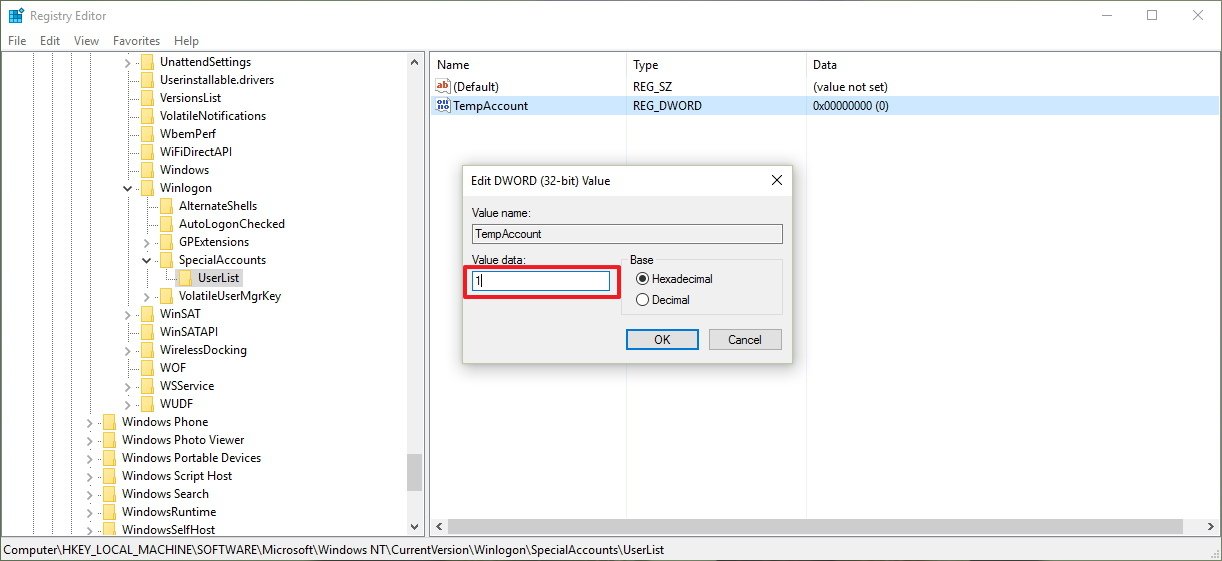
- Double-click the new DWORD key and make sure its data value is set to 0.
Sign-out and you’ll now notice that the account will no longer be available on the sign-in screen. In fact by doing this, you’re also hiding the account from virtually everywhere in the operating system, including the from the switch user menu in the Start menu, from Control Panel, and even from the Settings app.
All the latest news, reviews, and guides for Windows and Xbox diehards.
In order to make a hidden account visible again, you’ll have to go back to the registry UserList key using the steps mentioned above, and making sure to change the user name data key value from 0 to 1.
If you’re only hiding a remote user account, you don’t need to do anything else, as the user can login remotely without any issues.
Keep in mind that while this guide will help you to remove user accounts from the sign-in screen, it’s not recommended to remove all the accounts, including your own, as you may find tough to get back in.
These steps work on Windows 10, and it should also work on Windows 8.1 and Windows 7.
More Windows 10 resources
For more help articles, coverage, and answers on Windows 10, you can visit the following resources:
- Windows 10 on Windows Central – All you need to know
- Windows 10 help, tips, and tricks
- Windows 10 forums on Windows Central
Mauro Huculak has been a Windows How-To Expert contributor for WindowsCentral.com for nearly a decade and has over 15 years of experience writing comprehensive guides. He also has an IT background and has achieved different professional certifications from Microsoft, Cisco, VMware, and CompTIA. He has been recognized as a Microsoft MVP for many years.
,
In some cases and mainly for security reasons there is a need to hide an account on Login Screen on Windows 10/11.
When you share your computer with others, you may not want all of their accounts to appear on the login screen, or you may want to hide the account used to manage the computer from the login screen (e.g. the «Administrator»). If you’re in a such a case, read the instructions below to learn how to hide specific users on login screen on Windows 10/11.

How to Hide User Accounts from Login Screen on Windows 10/11.
Method 1. Disable User Account in Windows 10/11.
The first method to hide a particular account from appearing on the login screen is to disable that account. This method is recommended in cases where you do not want a specific user to have access to the computer’s resources, or you want to disable the Administrator account (if it is active) for security reasons.
Important: Use this method only if you want to completely disable the account and prevent it from connecting to the computer. If you want to keep a user account active, but hide its user name so that it does not appear on the login screen, see the instructions in methods 2 & 3 below.
1. At the Search box type cmd and then open Command Prompt as Administrator.
2. Inside the Command Prompt window, give the following command to list all the users in Windows.
- net user
3. Locate the account that you want to disable and prevent it to login to Windows and give the following command:
- net user username /active:no
e.g. To disable the «Administrator account give this command:
- net user administrator /active:no

4. That’s it! After disabling the user account, their username will not appear in the login screen and they will not be able to login in Windows. If you change your decision in the future, and you want to re-enable the disabled account, give the following command in command prompt admin.
-
net user username /active:yes
e.g. net user administrator /active:yes

Method 2. Hide a Specific User Account from Login Screen using Registry.
If you want to hide a user account from appearing in login screen, but to keep the account active in order to perform other tasks in Windows 10/11 if needed, proceed and hide that specific account using registry.
* Note: After an account is hidden by this method, the user of that account will not be able to log on to Windows, unless you unhide it.
1. Open Registry Editor. To do that:
1. Simultaneously press the Win + R keys to open the run command box.
2. Type regedit and press Enter to open Registry Editor.
2. Navigate to this key at left pane:
- HKEY_LOCAL_MACHINE\SOFTWARE\Microsoft\Windows NT\CurrentVersion\Winlogon
3a. Right-click at Winlogon key and select New -> Key

3b. Name the new key SpecialAccounts and press Enter.
3c. Now, right-click at SpecialAccounts key and create a new key with name UserList
4a. When done, right-click at an empty space at the right pane and select New -> DWORD (32-bit) Value.

4b. Name the new value with the username of the account that you want to hide (e.g. the «Administrator» account in this example), and press Enter.
* Note: Leave the value data to 0 (zero) to hide the account. If you want to unhide the account in the future set the value data to 1 (one), or delete the DWROD value you created here.

5. Close Registry Editor and restart your PC to apply the change. With these steps, you have successfully hidden this particular account from appearing on the logon screen.

Method 3. Hide all User Accounts on Login Screen in Windows 10/11.
If you want to hide all usernames (all user accounts), so that each user needs to type their username and password each time to log into Windows, then apply these steps:
1. Open the Registry Editor and navigate to:
-
HKEY_LOCAL_MACHINE\SOFTWARE\Microsoft\Windows\CurrentVersion\Policies\System
2. At the right pane open the dontdisplaylastusername DWORD, set the Value data to 1 and click OK.

5. Close Registry Editor and restart your PC to apply the change. From now on, every user on the computer will have to type their username and password to log in to Windows.

That’s it! Which method worked for you?
Let me know if this guide has helped you by leaving your comment about your experience. Please like and share this guide to help others.
If this article was useful for you, please consider supporting us by making a donation. Even $1 can a make a huge difference for us in our effort to continue to help others while keeping this site free:
- Author
- Recent Posts
Konstantinos is the founder and administrator of Wintips.org. Since 1995 he works and provides IT support as a computer and network expert to individuals and large companies. He is specialized in solving problems related to Windows or other Microsoft products (Windows Server, Office, Microsoft 365, etc.).