
Все способы:
- Способ 1: Поиск в «Пуске»
- Способ 2: Окно «Выполнить»
- Способ 3: Консоль
- Способ 4: «Панель управления»
- Способ 5: «Параметры»
- Способ 6: «Проводник»
- Способ 7: Создание ярлыка
- Решение проблем
- Вопросы и ответы: 0
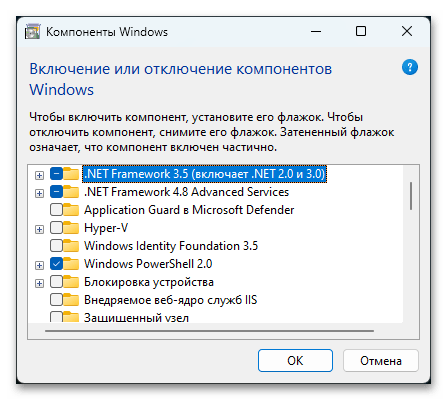
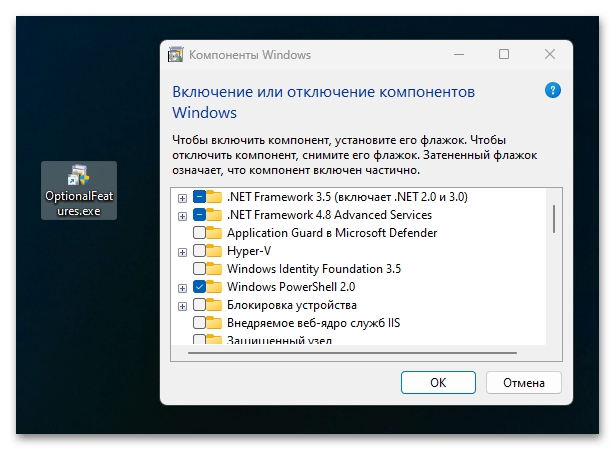
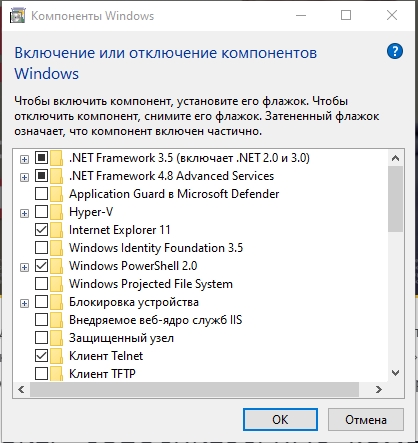
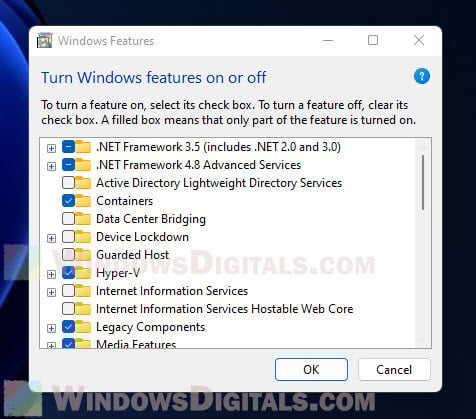
Окно «Windows Features» в русскоязычной версии Виндовс называется «Компоненты Windows». Оно позволяет управлять состоянием разных приложений и программных сервисов, отвечающих за работу тех или иных функций операционной системы.
Способ 1: Поиск в «Пуске»
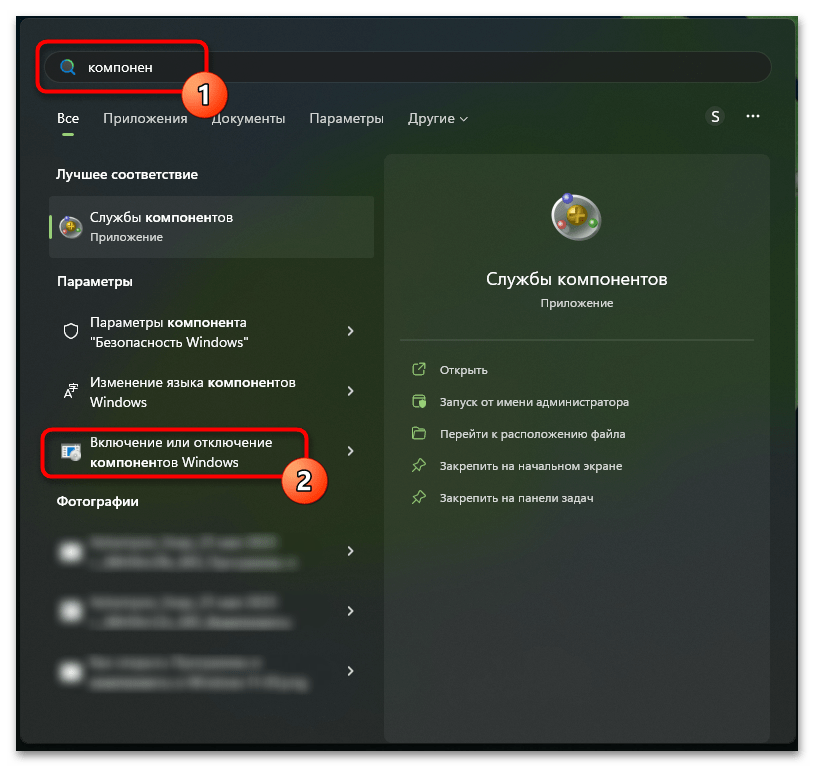
Быстрее и удобнее всего отыскать нужное приложение в поиске «Пуска», а затем прямо оттуда и запустить.
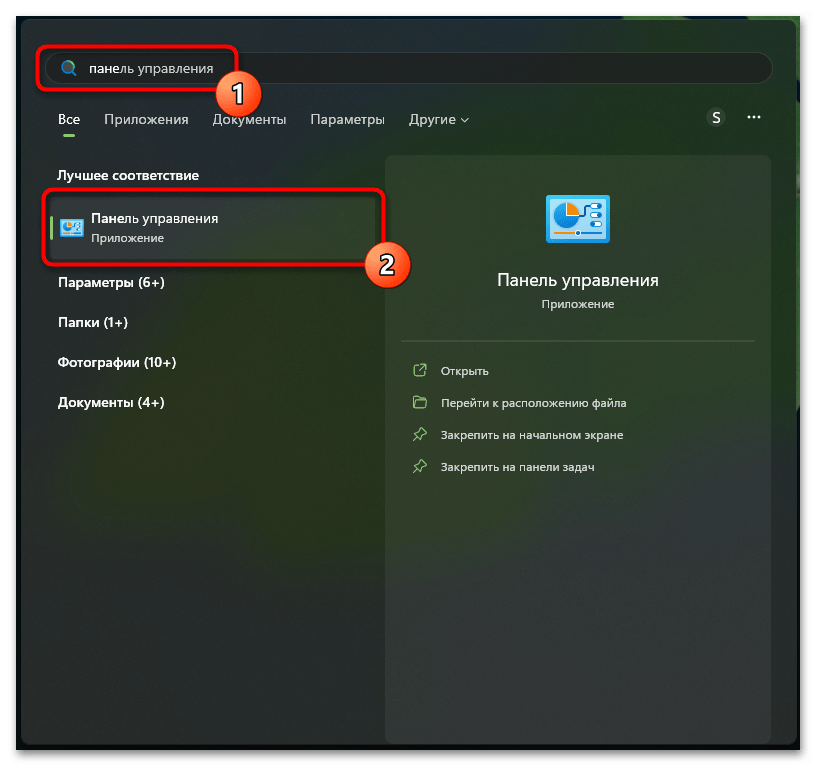
- Вызовите «Пуск» и начните набирать слово «компонентов» или «windows features», если Windows англоязычная. В списке совпадений найдите «Включение или отключение компонентов Windows» либо «Windows Features» и нажмите по результату.
- Откроется нужное вам окно.
Способ 2: Окно «Выполнить»
Еще один способ заключается в использовании окна быстрого выполнения команд.
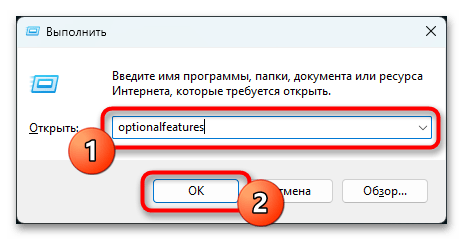
- Нажмите клавиши Win + R для запуска окна «Выполнить». Оно также может быть открыто из меню быстрых ссылок (нажатием правой кнопкой мыши по кнопке «Пуск» и выбором пункта «Выполнить»).
- Напишите команду
optionalfeaturesи нажмите «ОК» или Enter для запуска приложения.
Способ 3: Консоль
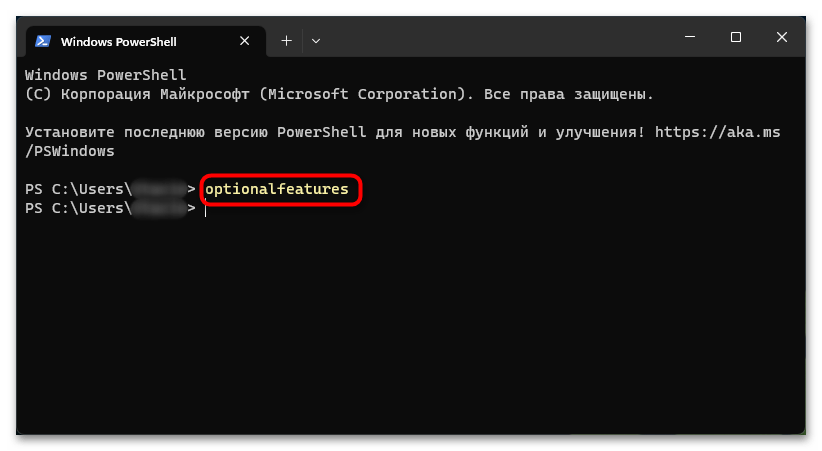
Способ, практически идентичный предыдущему, и для его реализации вам понадобится любая удобная консоль.
- Запустите наиболее привычную для вас консоль. Обычно быстрее всего кликнуть правой кнопкой мыши по «Пуску» и из списка ссылок выбрать «Терминал».
- Напишите команду
optionalfeaturesи нажмите Enter для ее выполнения. В результате будет запущено окно «Компоненты Windows».
Способ 4: «Панель управления»
Привычный и знакомый еще с прошлых ОС Windows, метод заключается в использовании классического приложения «Панель управления».
- Через «Пуск» или любым удобным для вас методом откройте «Панель управления».
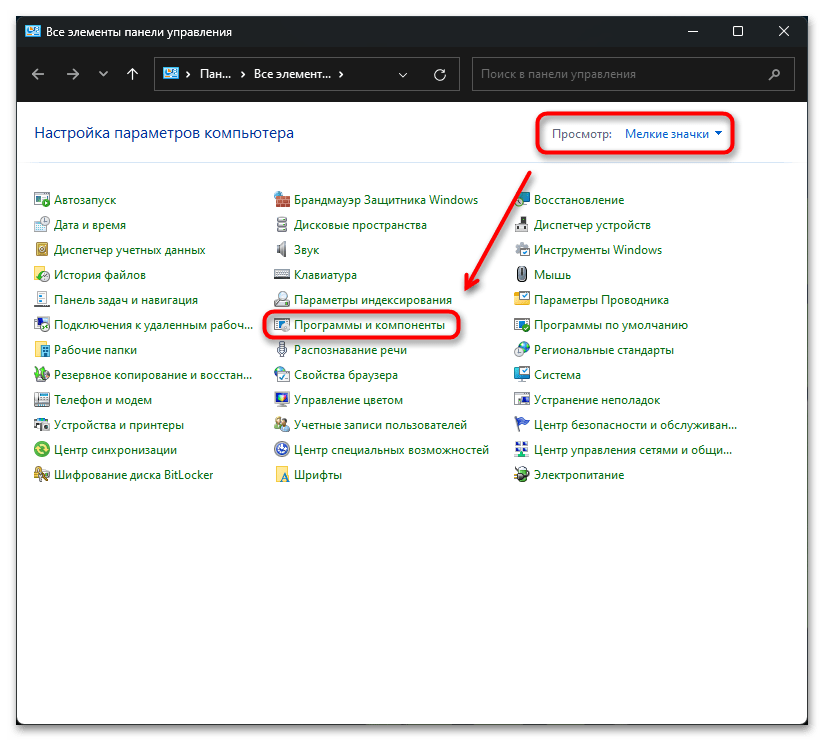
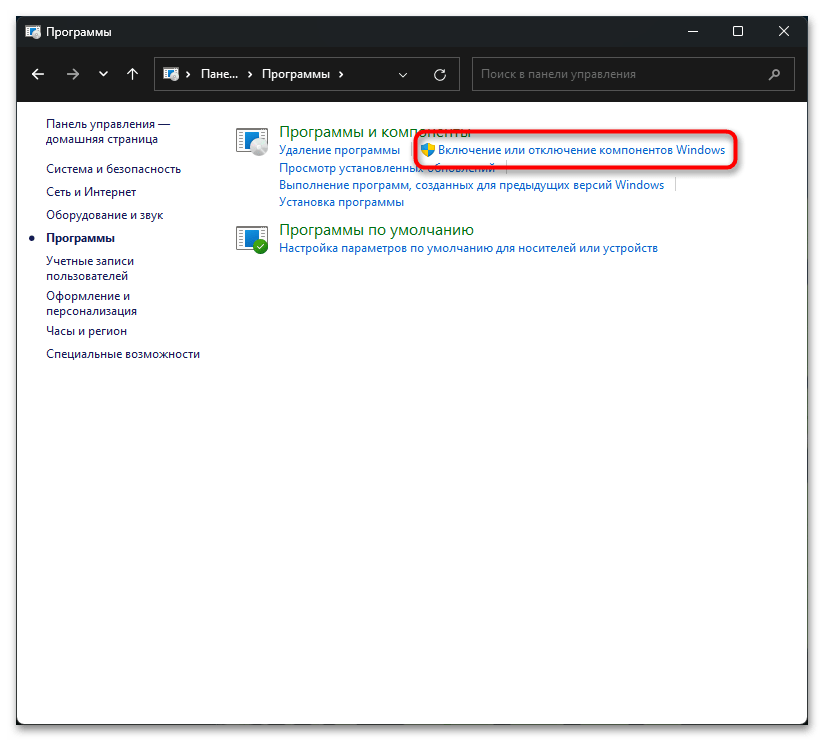
- При условии, что тип просмотра выставлен как «Значки», нажмите на ссылку «Программы и компоненты».
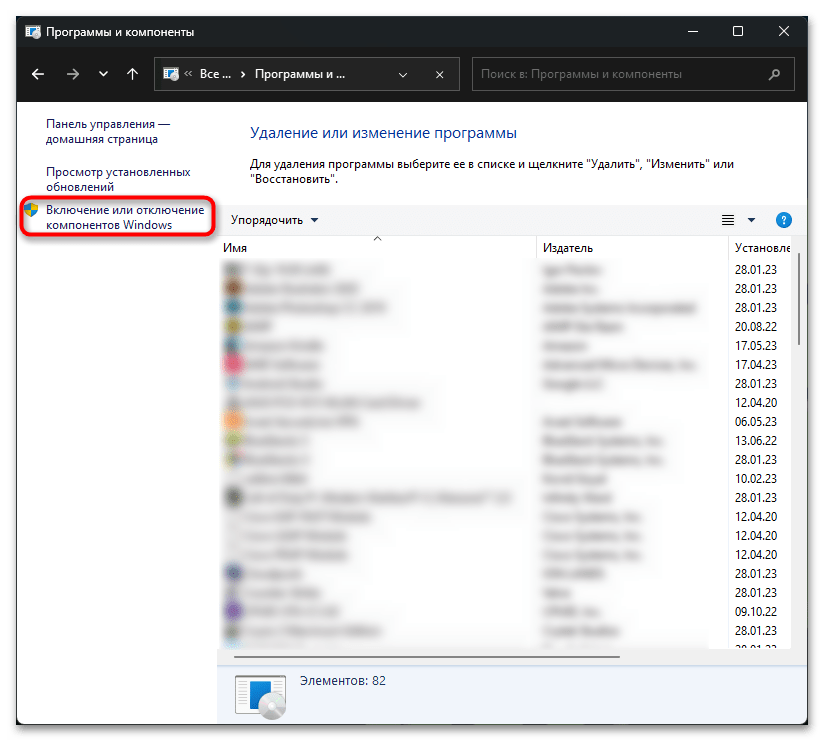
- В новом окне на левой панели кликните по «Включение или отключение компонентов Windows».
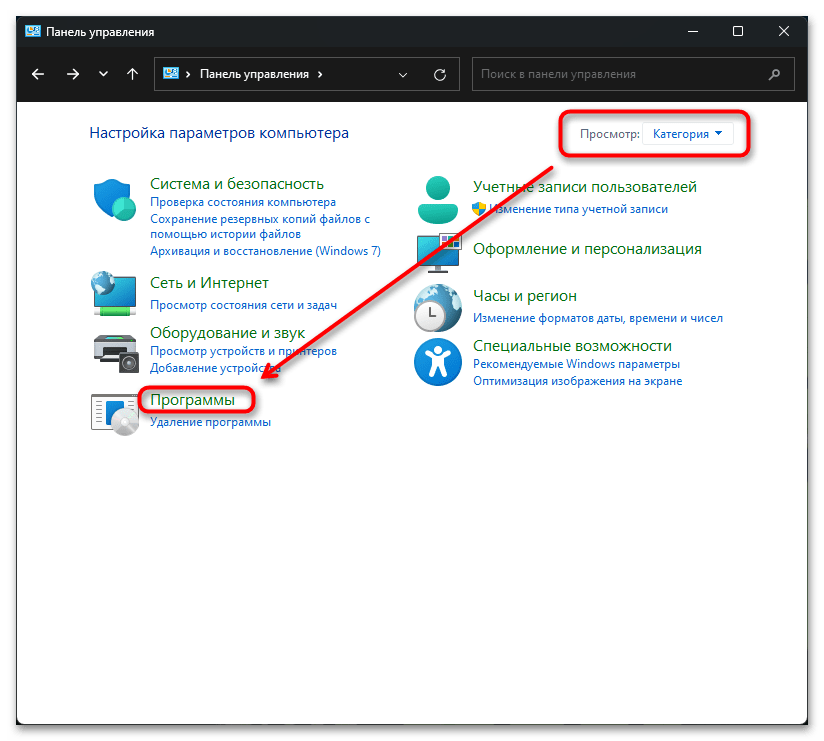
- Если включен просмотр как «Категория», щелкните по слову «Программы».
- Откроется список со ссылками на или иные подразделы, среди которых вас интересует «Включение или отключение компонентов Windows».
Способ 5: «Параметры»
Через замену «Панели управления» — приложению «Параметры» — можно как открыть окно с классическими компонентами, так и просмотреть список другого рода компонентов, недоступных при использовании других способов этой статьи.
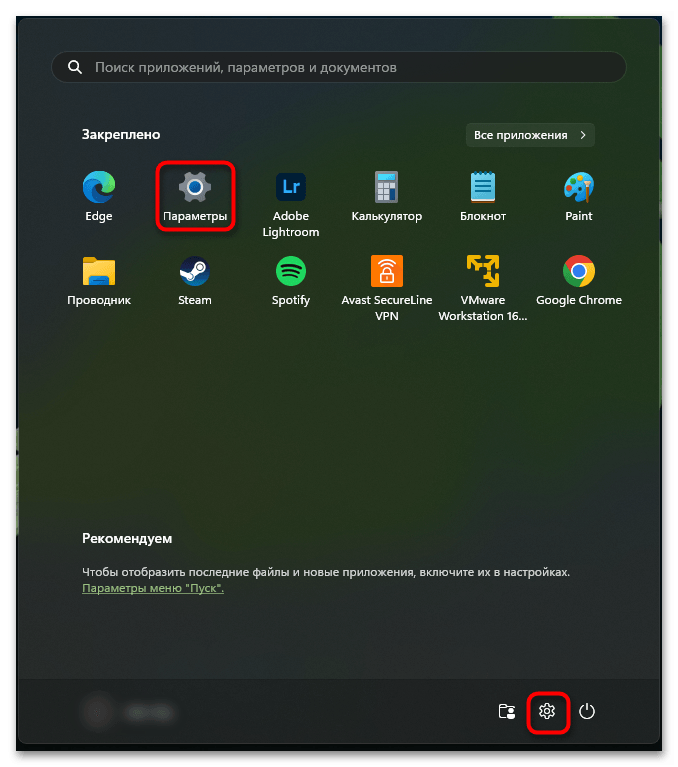
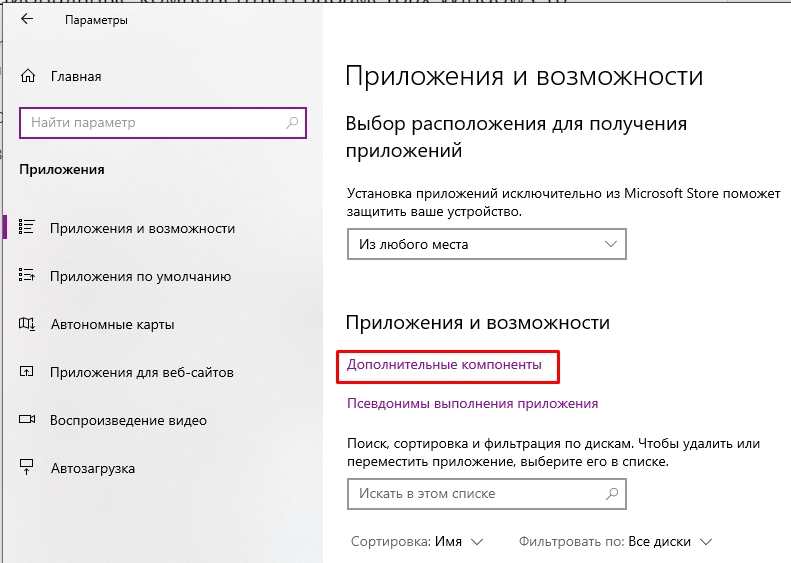
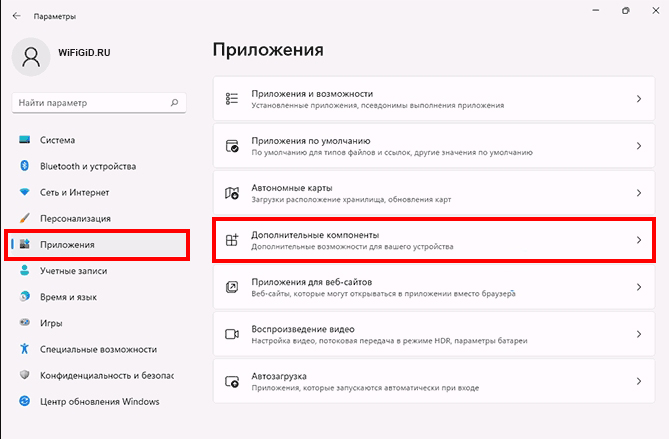
- Запустите «Параметры» из меню «Пуск».
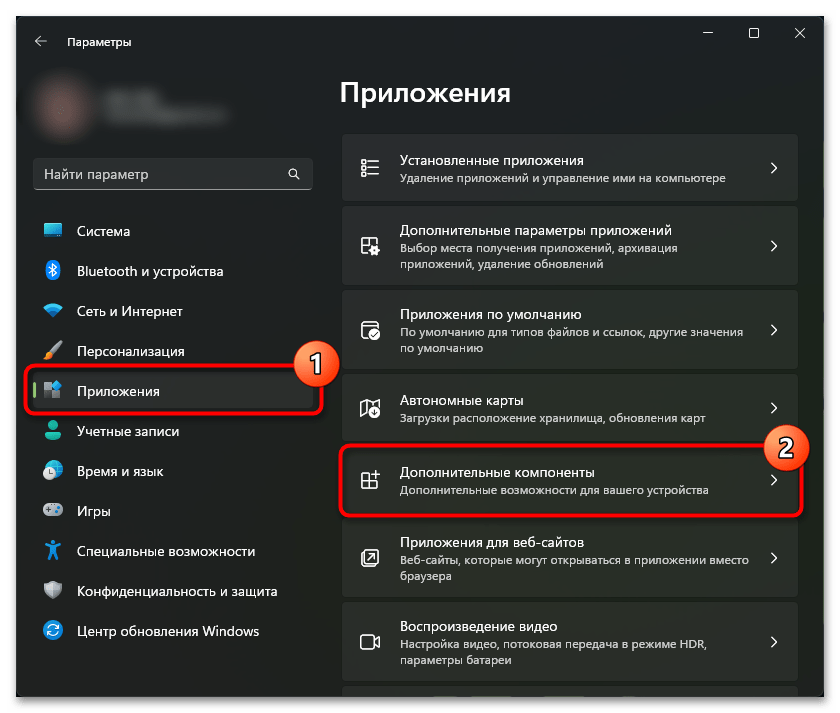
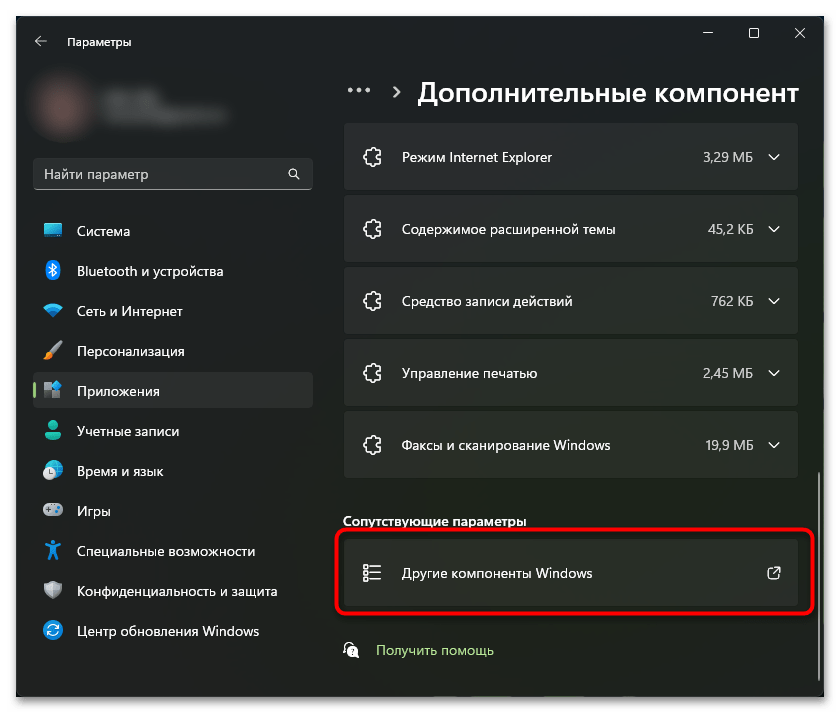
- Переключитесь в раздел «Приложения» при помощи левой панели, а в основной части найдите и нажмите на «Дополнительные компоненты».
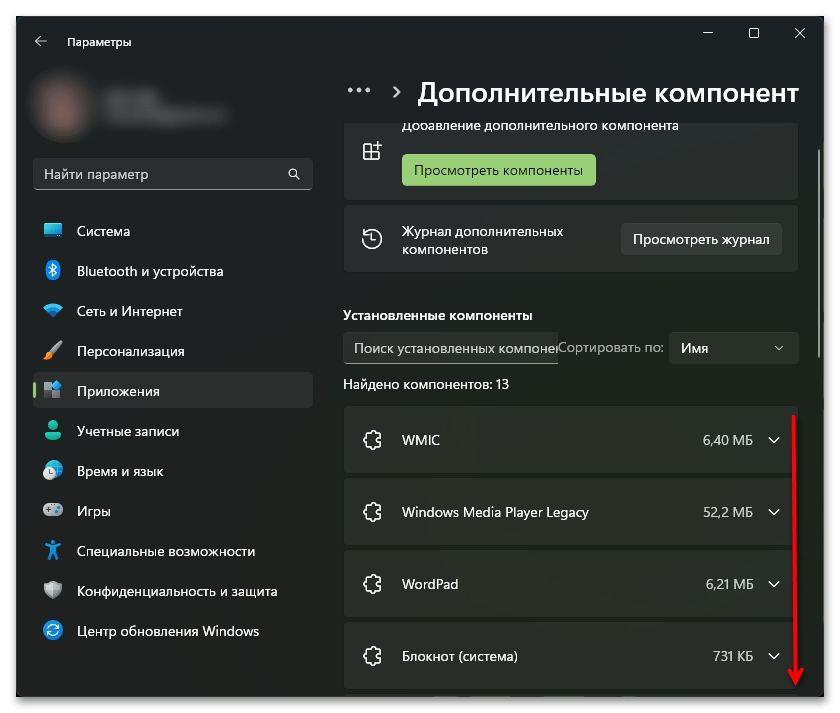
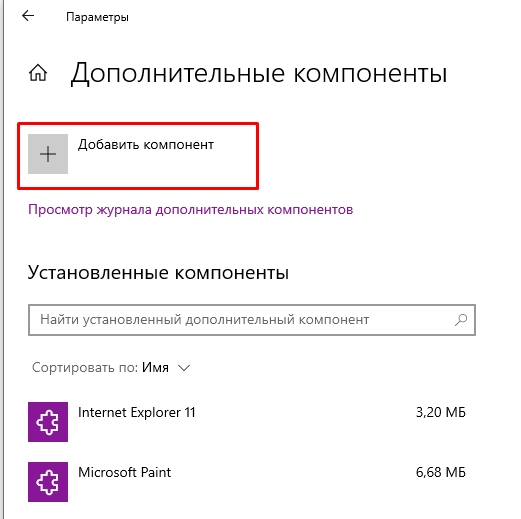
- Тут вы увидите различные установленные системные приложения в виде компонентов и сможете удалить ненужные вам. Если же ищете классическое окно с компонентами, прокрутите список ниже.
- Щелкните по строке «Другие компоненты Windows», после чего откроется стандартное приложение.
Способ 6: «Проводник»
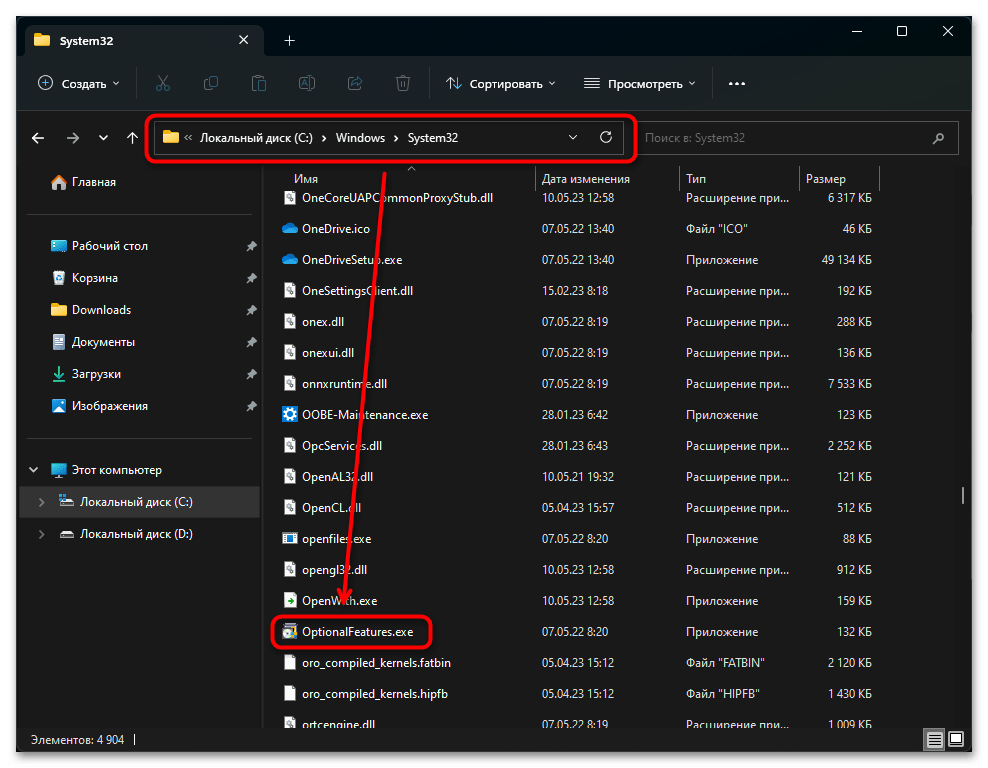
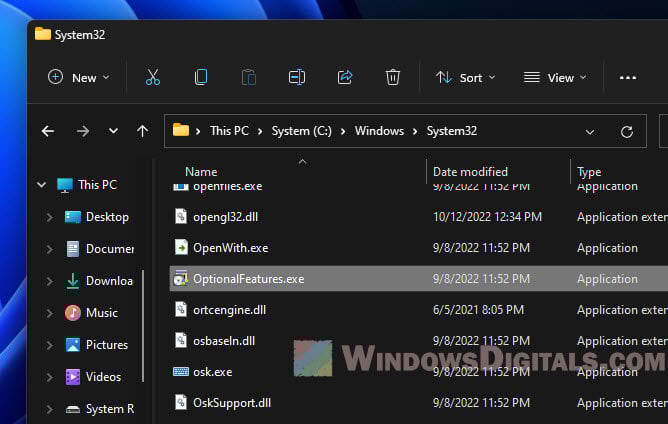
Через «Проводник» вы сможете найти «Компоненты Windows», поскольку это обычное системное приложение, хранящееся в одной из соответствующих папок. Запустите «Проводник» и перейдите по пути C:\Windows\System32. Найдите здесь приложение с названием «OptionalFeatures.exe» и откройте его.
Способ 7: Создание ярлыка
Эта рекомендация пригодится лишь тем, кто планирует часто вызывать данное окно для быстрого переключения состояния какой-либо функции. Ярлык можно создать и добавить в любое удобное место: на рабочий стол, в какую-либо папку, закрепить в меню «Пуск» или на панели задач.
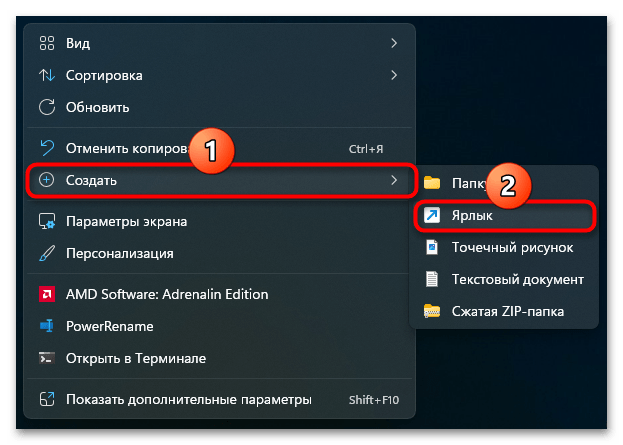
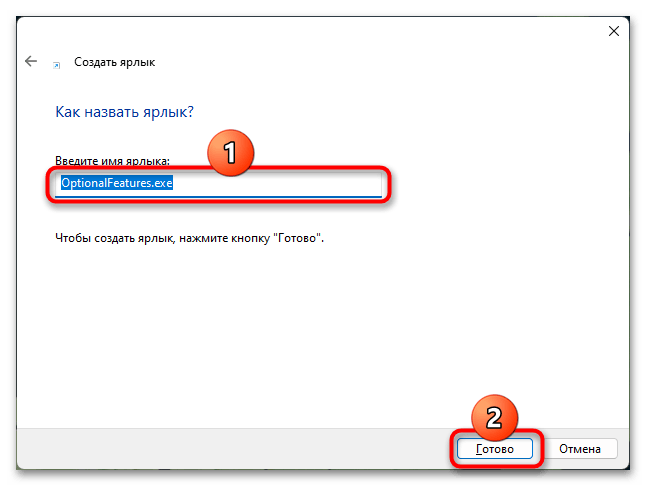
- Нажмите по пустому месту на рабочем столе или в папке правой кнопкой мыши и выберите «Создать» > «Ярлык».
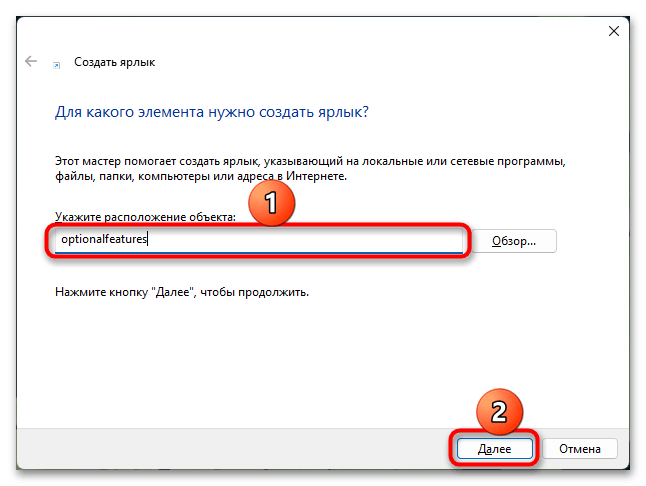
- В поле «Укажите расположение объекта» впишите
optionalfeaturesи нажмите кнопку «Далее». - Оставьте автоматически заданное имя ярлыка или введите свое и кликните по «Готово».
- Теперь при нажатии по ярлыку будет открываться необходимое вам окно. Теперь вы можете поменять для него ярлык (через ПКМ по ярлыку > «Свойства» > «Ярлык» > «Сменить значок»).
Решение проблем
Если по каким-то причинам вам не удается открыть окно «Компоненты Windows» («Windows Features»), просканируйте систему на наличие повреждений системных файлов и хранилища компонентов. Эта операция выполняется автоматически, вам достаточно запустить консольную утилиту и подождать, пока она проверит и при необходимости восстановит файлы. Более развернуто о том, как это сделать, рассказано в материале по ссылке ниже.
Подробнее: Использование и восстановление проверки целостности системных файлов в Windows
В вызванном вами окне может не оказаться компонента «Hyper-V». Если вы ищете именно его, прочитайте другую статью, помогающую устранить такого рода неполадку.
Подробнее: Включение компонента Hyper-V в состав Windows 11
Возможно, у вас возникла другая проблема при попытке открыть само приложение или неудача при включении/отключении какого-либо компонента. Или вы просто не знаете, какие из компонентов за что отвечают и что из них можно отключать. В таких ситуациях советуем обратиться к руководству по следующей ссылке, где предоставлена вся необходимая информация о компонентах и есть информация об исправлении возможных ошибок, связанных с окном «Компоненты Windows».
Подробнее: Включение или отключение компонентов в Windows 11
Наша группа в TelegramПолезные советы и помощь
Всем привет! Сегодня мы поговорим про включение и отключение компонентов в системе. Мы посмотрим, как их открыть в любой из существующих версий Windows (10, 11, 7 или 8). Я расскажу вам, как установить или наоборот выключить дополнительные пакеты, которые система использует для работы с определенными программами или протоколами.
Содержание
- Способ 1: Панель управления
- Способ 2: Параметры Windows 10
- Способ 3: Параметры Windows 11
- Способ 4: Командная строка
- Задать вопрос автору статьи
Способ 1: Панель управления

Давайте посмотрим, как же нам открыть раздел Windows Features на любой версии Windows (10, 11, 8, 8.1, 7, XP и т.д.). Для этого мы можем воспользоваться «Панелью управления». Хорошо, что её пока не выпилили на свежих версиях «Окон».
ВНИМАНИЕ! Еще один важный момент – через «Панель управления» можно включить и отключить компоненты, которые уже установлены в системе. Если же вам нужно установить какие-то компоненты, которых еще нет в ОС, то используем вариант с использованием параметров системы (две следующие главы).
- Одновременно зажимаем клавиши:
+ R
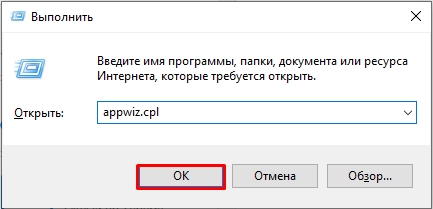
- Теперь открываем пункт:
appwiz.cpl
- Слева выберите ту же ссылку, как на картинке ниже.
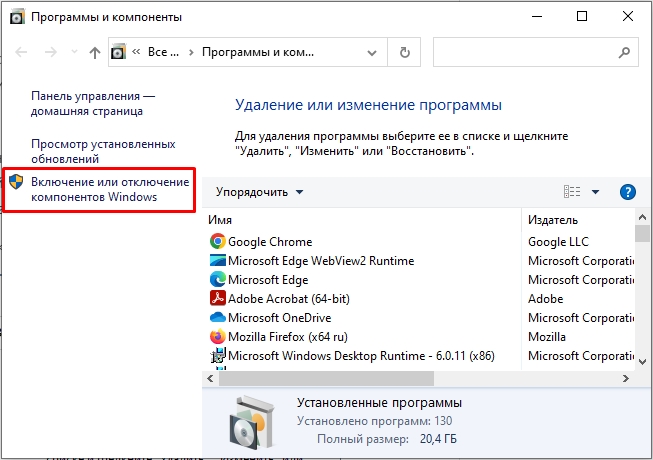
- Теперь включаем или отключаем нужные компоненты и жмем «ОК». Если вас попросят перезапустить систему – сделайте это, чтобы изменения вступили в силу.
Открыть и установить компоненты в Windows 10 можно через стандартное меню системы.
- Откройте «Пуск» и зайдите в «Параметры».
- Среди всего многообразия найдите раздел «Приложения».
- В правой области окошка найдите ссылку «Дополнительные параметры».
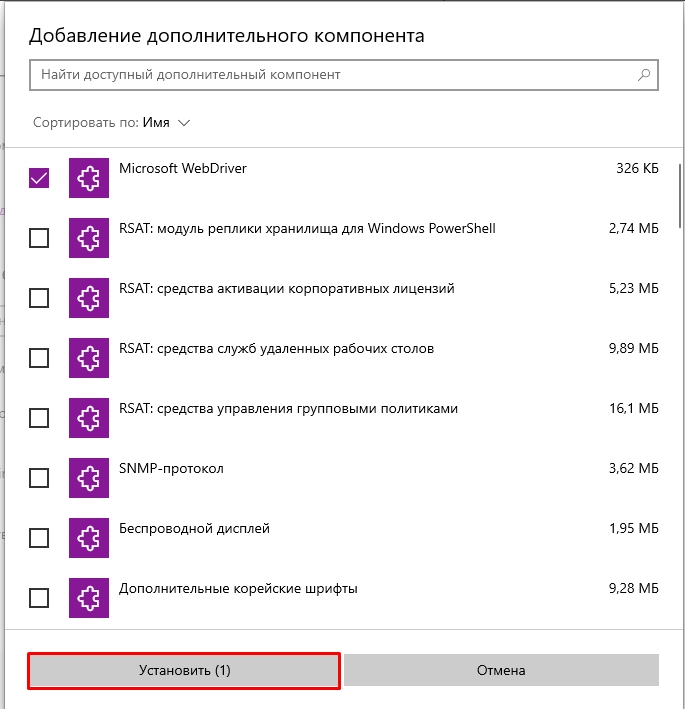
- Если вам нужно добавить пакет, в самом верху нажмите по значку плюсика.
- Выделяем нужный и жмем по кнопке установки. Вы также можете воспользоваться строкой поиска. Компонент будет загружен с сервера и установлен к вам на компьютер.
- Если же вам нужно наоборот удалить пакет – просто выберите его из списка ниже, кликните по нему левой кнопкой мыши и выберите команду «Удалить».
Способ 3: Параметры Windows 11
- Чтобы быстро открыть параметры системы одновременно зажмите две клавиши:
+ I
- В левом блоке выберите раздел «Приложения».
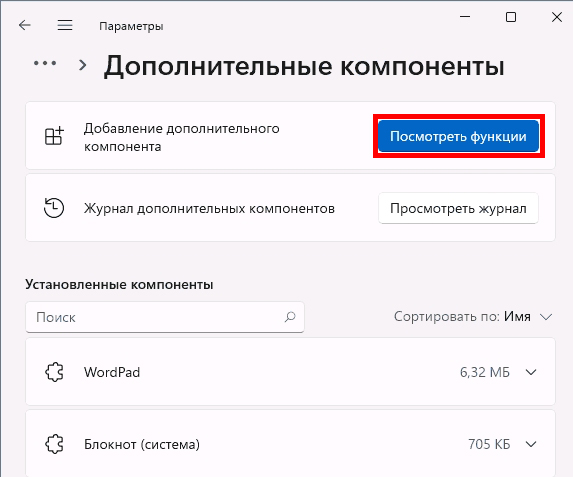
- Далее справа находим пункт «Дополнительные компоненты».
- Внизу вы увидите список уже установленных пакетов, если вам нужно что-то выключить, находим нужный, выделяем и деактивируем. Если же вам нужно что-то установить – в самом верху нажмите по кнопке «Посмотреть функции».
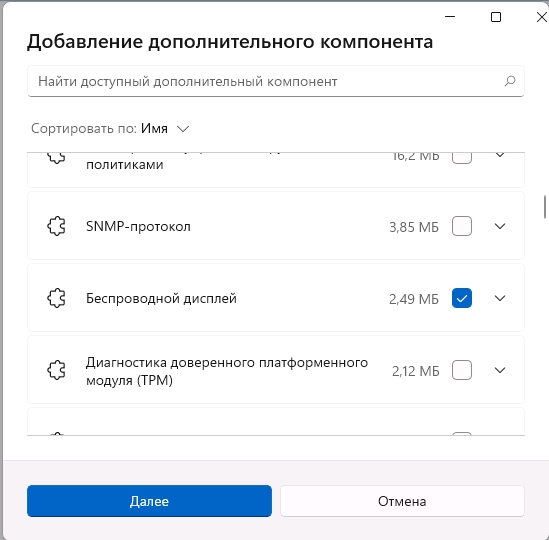
- Все аналогично как и в десятой версии «Окон», находим нужный компонент, выделяем и жмем «Далее». После этого устанавливаем к себе в операционную систему.
Способ 4: Командная строка
Инсталлировать дополнительный пакет можно с помощью консоли. Для этого запускаем командную строку с правами администратора. Сначала нам нужно узнать список всех доступных компонентов. Также вы увидите, что уже установлено. Вводим:
Dism /online /Get-Features
Как только вы нашли нужный пакет, используем команду установки:
Dism /online /Enable-Feature /FeatureName:ИМЯ_КОМПОНЕНТА /All
После этого он будет установлен. Напомню, что таким же образом можно использовать команды для скриптов, которые запускаются из-под Windows. На этом все, дорогие друзья портала WiFiGiD.RU. Если что-то осталось неясным – пишите в комментариях.
Managing Windows Features: A Guide for Windows 10/11
Published
5 min read
Turn Windows Features On or Off; Manage Windows Optional Features in Windows 11/10
Managing Windows features effectively can significantly enhance your computing experience, optimize performance, and customize your system to meet your specific needs. Windows 10 and Windows 11 come with a plethora of optional features that can be accessed and managed easily. This article aims to provide a comprehensive guide on turning features on or off and managing optional features in these operating systems.
Understanding Windows Features and Optional Features
Windows Features refer to built-in components of the operating system that provide additional capabilities. From Windows Media Player to Hyper-V, these features are not always enabled by default. Optional Features, on the other hand, are components and applications that can be installed or removed based on user preference. Understanding the difference between them is crucial for effective system management.
Why Manage Windows Features?
- Performance Optimization: Disabling unnecessary features can improve your system’s performance, particularly on older machines with limited resources.
- Security: Some features may introduce vulnerabilities if not actively used. Turning off unused features can reduce your attack surface.
- Storage Management: Optional features can consume storage space. Managing and disabling unused features can free up valuable disk space.
- Customization: Everyone has unique needs. Managing Windows features allows users to tailor their systems to fit their lifestyles and workflows.
Accessing Windows Features
Windows 10
-
Open the Settings Application:
- Click the Start menu (Windows icon) on your taskbar.
- Select Settings (the gear icon).
-
Navigate to Apps:
- In the Settings app, click on Apps.
-
Access Optional Features:
- In the Apps & Features section, click on Optional features at the top.
-
View Installed Features:
- You will now see a list of features installed on your system. From here, you can also add, remove, or manage these optional features.
Windows 11
-
Open Settings:
- Click on the Start menu or press the Windows key, then select Settings from the app list.
-
Go to Apps:
- In the Settings window, click on Apps in the left sidebar.
-
Select Optional Features:
- Click on Optional Features.
-
View and Manage Features:
- A list of installed optional features will be visible. You can add more by clicking on Add a feature.
Turning Windows Features On or Off
Turning features on or off can be done quickly through the ‘Turn Windows features on or off’ panel.
Accessing Windows Features Panel
-
Open Control Panel:
- Press
Windows Key + Rto open the Run dialog. - Type in
controland press Enter to open Control Panel.
- Press
-
Navigate to Programs:
- Click on Programs.
-
Turn Windows Features On or Off:
- Under the Programs and Features section, click on Turn Windows features on or off.
Manage Features
A window will pop up displaying a list of Windows Features. Here’s what you can do:
-
Enable a Feature: Check the box next to the feature you want to enable, then click OK. Windows will make the necessary changes and may require a restart.
-
Disable a Feature: Uncheck the box next to the feature you wish to turn off and click OK. Confirm any prompts that appear. Again, a restart may be necessary.
Important Windows Features to Manage
-
Windows Media Features: Enabling this allows you to play and manage digital media. If you don’t use Windows Media Player, you might want to disable it.
-
.NET Framework: Many applications require certain versions of the .NET Framework. Even if you don’t use it directly, you might want to keep it enabled for app compatibility.
-
Hyper-V: If you need to run virtual machines, enabling Hyper-V is essential. Turning it off can free up resources if you don’t use virtualization.
-
Windows Subsystem for Linux: This is valuable for developers who need to run Linux applications on their Windows machines.
-
Print and Document Services: If you don’t use printers or document services, you can turn this feature off to free up resources.
Adding Optional Features
Sometimes, you may want specific features that aren’t installed by default. Adding optional features is straightforward.
How to Add Optional Features
-
Open Optional Features:
- Follow the earlier instructions to open Optional Features in Settings.
-
Add a Feature:
- Click on Add a feature. You will see a list of the optional features available for installation.
-
Select a Feature:
- Scroll through the list or use the search bar to find a specific feature. Check the box next to the feature(s) you want to add.
-
Install the Feature:
- Click the Install button. Windows will download and install the features. You may not need to restart your computer, depending on the feature.
Notable Optional Features
-
OpenSSH Client: This feature allows you to securely connect to remote servers. Ideal for developers or IT professionals.
-
Windows PowerShell ISE: A useful feature if you’re working with PowerShell scripts.
-
Supplemental Fonts: If your work involves design, enabling supplemental fonts can be beneficial.
-
Media Features: Useful for those who utilize media applications and services.
-
XPS Viewer: If you regularly work with XPS files, consider enabling this viewer.
Removing Optional Features
Just as it is essential to add features, it’s equally important to remove those that you do not use.
Steps to Remove Optional Features
-
Access Optional Features:
- Navigate to the Optional Features as detailed previously.
-
Find the Feature:
- Scroll until you find the feature you want to remove.
-
Uninstall the Feature:
- Click on the feature, and select Uninstall. Confirm any prompts that appear.
Caution While Uninstalling
Always ensure that the features you opt to remove are not in use. Some features may be integral to system performance and functionality.
Troubleshooting Windows Features
Occasionally, you may run into issues while managing Windows features. Here are common troubleshooting steps:
-
Windows Update: Ensure your system is updated. Sometimes, certain features cannot be modified unless system updates are installed.
-
Check for Corrupted Files: Run the System File Checker (SFC) scan by opening Command Prompt as an administrator and typing
sfc /scannow. This can fix any corrupted system files that might be causing issues. -
Use DISM Tool: If SFC doesn’t solve your issue, use the DISM tool: type
DISM /Online /Cleanup-image /RestoreHealthin the Command Prompt. -
Check Permissions: Ensure you have the necessary administrative permissions to modify Windows features.
-
Restart Your Computer: Sometimes, a simple restart can resolve any lingering issues after you make changes.
Conclusion
Managing Windows features is an essential skill for every Windows user, whether on Windows 10 or 11. By understanding how to turn features on or off, add or remove optional features, and troubleshoot issues, you can greatly enhance your user experience and system performance. Tailoring your system to your preferences not only makes your computing environment more enjoyable but also efficient and secure. Regularly revisiting these settings can ensure that you’re making the most of your operating system and keeping your computer optimized.
You can read this article to learn the ways to enable or disable Windows features effortlessly.
Windows is an operating system rich in features. It offers a plethora of features that you may or may not need. However, only some of these optional tools are necessary for all users. You can turn these Windows features on or off depending on your requirements.
Turning off the unneeded features helps save resources and improve the computer’s performance. However, deactivating a Windows feature does not uninstall it, you can reactivate it whenever you want.
However, many users need clarification about how to activate or deactivate Windows features. You may find this article helpful if you are also one of those users.
This article guides you through quick and simple ways to turn Windows features on/off. Let us begin with them without wasting your precious time.
Easy Methods to Turn Windows Features On or Off
You can follow any of these approaches to turn Windows features on/off according to your needs.
Method 1: Use the Control Panel to turn Windows features on or off
The Control Panel in Windows allows you to change various settings on your computer, including adding or removing the optional features. Hence, here are the steps you can follow to turn the Windows on/off using the Control Panel.
Also Read: How to Get Help in Windows 10
Method 2: Use Powershell to turn on/off Windows features
Powershell is an extremely useful tool in Windows to perform various tasks, such as enabling a Windows feature if it is not installed already or disabling it. Here are the steps you can follow to get the required information about a Windows feature to activate or deactivate it.
- Firstly, right-click the Windows icon and select Windows PowerShell (Admin) from the on-screen options.
- Now, input the command Get-WindowsOptionalFeature -Online in the on-screen window and press the Enter key to get information about various features.
- If you wish to know about a particular feature, enter the command Get-WindowsOptionalFeature -Online -FeatureName *Type feature name*.
- To enable a Windows feature, input the command Enable-WindowsOptionalFeature -Online -FeatureName “Type feature name” -all.
- To disable a Windows feature, enter the command Disable-WindowsOptionalFeature -Online -FeatureName “Type feature name”.
Method 3: Turn Windows features on or off using Command Prompt
Command Prompt is another command line utility that lets you perform tasks like adding or removing Windows features. The difference between Command Prompt and Windows Powershell is that the latter does not perform feature installation if the feature is already active on your computer, saving system resources. Hence, Powershell is preferred over the Command Prompt. Still, here is how you can turn a feature on/off through the Windows Command Prompt.
Note: Above are the steps to enable a Windows feature through Command Prompt. The steps to disable Windows features slightly differ from the steps to enable a feature. We share them below.
- After opening the Command Prompt as an administrator, input the command DISM /online /get-features /format:table | find “Enabled” | more to get a list of enabled features.
- Now, copy the name of the feature you want to disable.
- Input the command DISM /online /disable-feature /featurename:[Enter the name of the feature here] -All and press the Enter key.
Also Read: Windows 11 22h2 Update: New 10 Features You Should Use
Method 4: Use Windows settings to enable/disable Windows features
You can manage your computer’s features through settings. Here is how to turn Windows features on or off through settings on Windows 10 and 11.
Enabling/disabling Windows features via settings on Windows 10
Adding/removing Windows features via settings on Windows 11
- Firstly, launch the settings app using the Windows+I shortcut.
- Now, choose Apps from the left pane and Optional features from the right section of the on-screen window.

- Now, you can remove the feature you do not want by clicking on the arrow next to it and selecting the Uninstall option.
- If you want to enable an optional feature, you can follow the path Apps>Optional features>View features>Select the feature you need to enable>Next>Install.

Summing Up
This article discussed various methods you can follow to turn Windows features on or off. You can try any of these approaches depending on your convenience. If you have any confusion, questions, or suggestions about this article, please leave us a comment.
Also Read: Windows 10 ‘News and Interests’ Taskbar Feature Rolling Out
We hope you found this article helpful. If you did find it useful, please share it with your peers who may be interested in turning Windows features on/off. We will see you in some time with another interesting article. Meanwhile, you can go through our other posts to gain more technology knowledge.
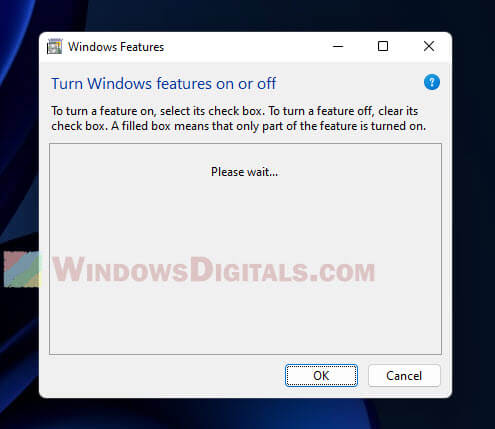
The “Turn Windows Features On or Off” window is a very useful tool in Windows that allows you to turn on or off different parts of the operating system (because some features are not turned on by default). But sometimes, you might open it and just see a “Please wait…” message (if you’re on Windows 11) or a blank screen (if you’re on Windows 10) and none of the features show up.
This can be quite annoying, especially if you’re in a hurry to change some settings. In this guide, we’ll show you different ways to solve the “Please wait…” problem in Windows Features so the features can show up again.
How to fix Windows Features showing “Please wait” or blank issue
Here are some steps you can try if your “Turn Windows Features On or Off” window is stuck on “Please wait” or shows nothing at all in Windows 11 or Windows 10. Start with the first one and keep trying until you fix the problem.
Useful tip: 30+ Windows 11 services you can disable for better gaming performance
Wait it out
Before messing with other settings and possibly causing more issues, it might be a good idea to just wait a bit. Sometimes, the window takes more time than usual to finish loading everything. This is especially true if your computer isn’t fast enough (slow HDD or weak CPU). So, try to give it 5-10 minutes and check back again to see if the features have shown up.
Run System File Check
System File Check (SFC) is this cool tool built into Windows that looks for and fixes messed-up system files, automatically. Running SFC can help get rid of the “Please wait…” issue by fixing any files that may be causing issues.
To use SFC in Windows 11 or 10, do this:
- Open Command Prompt as an administrator.

- Type “
sfc /scannow” and hit Enter. - Wait until it’s done.

- Restart your computer.

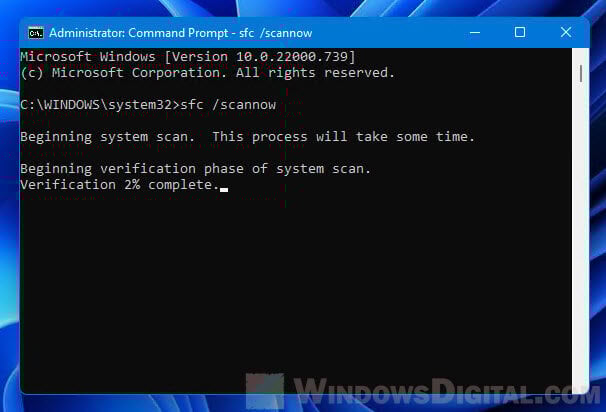
After it’s finished, SFC will tell you if it found and fixed any problems. If it did find some, they should be fixed now. Restart your computer and see if the Windows Features window is working right.
Run Deployment Image Servicing and Management
Deployment Image Servicing and Management (DISM) is another go-to tool in Windows that can repair and restore bad system files. There is a chance that using DISM might solve the “Turn Windows Features on or off; please wait” problem if there are truly any broken system files.
To use DISM in Windows 11/10, follow these steps:
- Open Command Prompt as an administrator.
- Type “
dism /online /cleanup-image /scanhealth” and hit Enter. - Hang tight until it finishes.
- Type “
dism /online /cleanup-image /restorehealth” and hit Enter.
- Wait again for it to finish.
- Restart your computer.
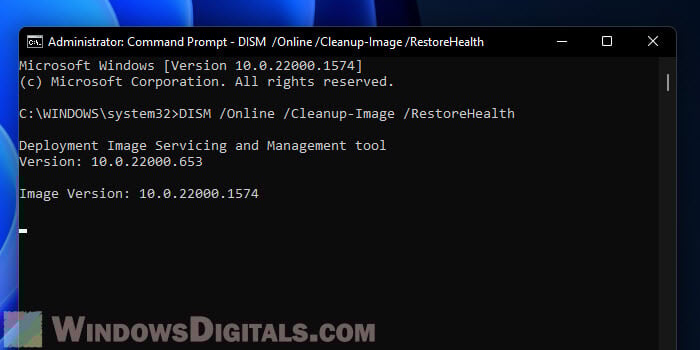
DISM will first check the Windows image for any corruption and then try to fix it using the Windows image. This might take a while, but once it’s done, restart your computer and see if the Windows Features window is showing everything properly.
Copy “optionalfeatures.exe” from another computer
The problem can sometimes be due to a corrupted “optionalfeatures.exe” file itself. You can try to copy this file from another computer (that doesn’t have the same issue) that’s running the same Windows version and build as yours, and paste it onto your computer. This might solve the problem if that file is truly bad.
- On the working computer, go to “C:\Windows\System32.”
- Copy the “optionalfeatures.exe” file to a USB drive.
- Paste it into “C:\Windows\System32” on the computer with the issue.

- Restart your computer.
Make sure to only get the file from a trusted computer, not from the internet, to avoid security risks.
Check if Windows Modules Installer service is running
Windows Modules Installer is a service in Windows that takes care of updates and adding or removing parts of Windows. If it’s not working, you might not see anything when you try to turn Windows features on or off. You’ll just get a blank screen or a “please wait” message.
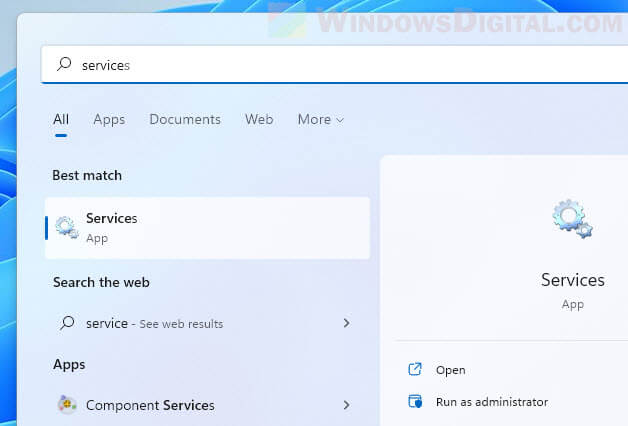
- Hit the Start button and look for “Services.msc“.
- Open “Services” from what pops up.

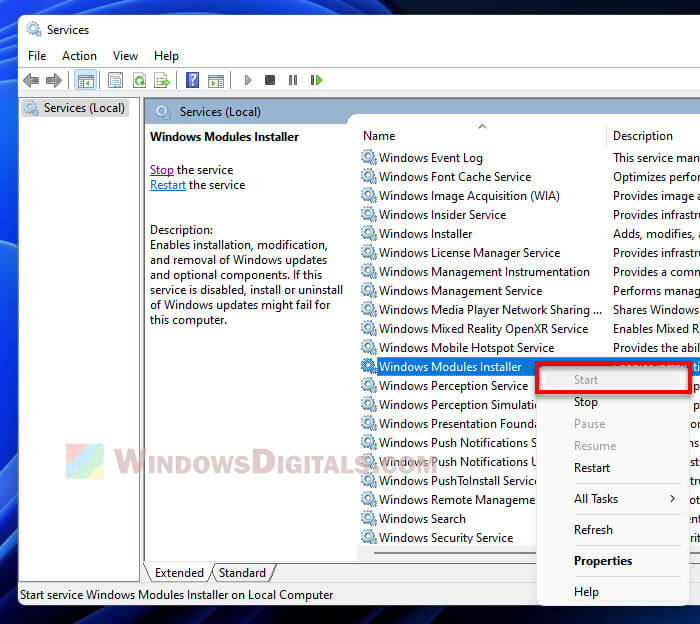
- Find the “Windows Modules Installer” service and see if it says “Running.”
- If it’s not running, right-click on it and hit “Start.”

- Then, restart your computer.
After your computer comes back on, check if you can see the Windows features correctly. If not, there might be other things to try.
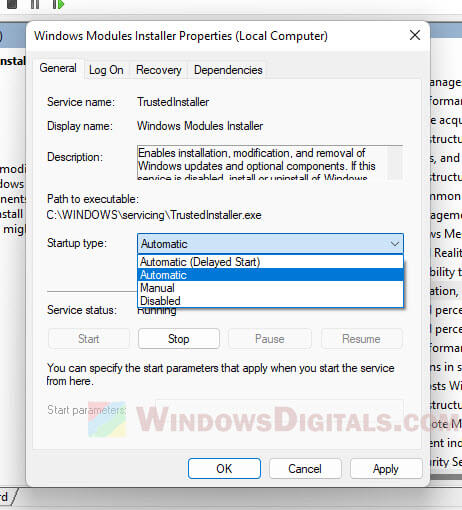
Keep in mind, if the service is on “Manual” or “Disabled,” it might not start by itself. You might want to set it to “Automatic” so it always starts with your computer. Just right-click the service, go to “Properties,” and set “Startup type” to “Automatic.”
Try to temporarily disable your antivirus software
Your antivirus program can sometimes affect how Windows features work. It might be the reason that is causing the “Please wait…” message or a blank window. To see if that’s what’s causing the problem, you can try turning off your antivirus software for a bit and see.
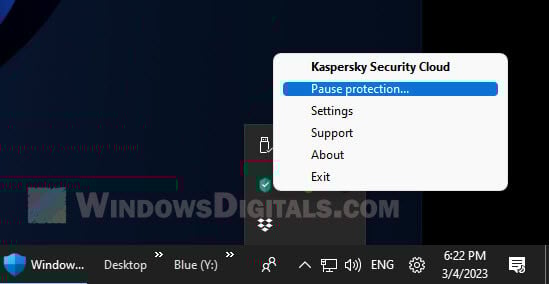
- Find your antivirus icon on the bottom right of your screen.
- Right-click it and choose “Disable” or “Turn off” from the menu that appears.

- Select to turn it off for a little while.
- Now, try opening the Windows features window again to see if it’s working.
- Don’t forget to turn your antivirus back on when you’re done checking.
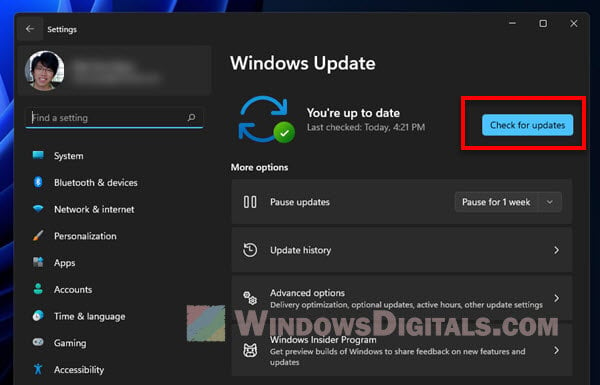
Run Windows Update
Missing updates or old files might also cause trouble with the Windows Features window. Running Windows Update makes sure you have the latest fixes and updates, which might solve the problem.
Here’s how to run Windows Update:
- Press Windows + i to open Settings.
- Choose “Windows Update” from the menu on the left.
- Click “Check for updates.”

- Download and install any updates it finds.
- Restart your computer.
Reset or Reinstall Windows 11 or 10
If nothing else works and you really need the feature that’s missing, you might have to reset or reinstall Windows.
When resetting your Windows, you will get to choose whether to keep your files or delete them. But even so, you should back up your stuff just in case.
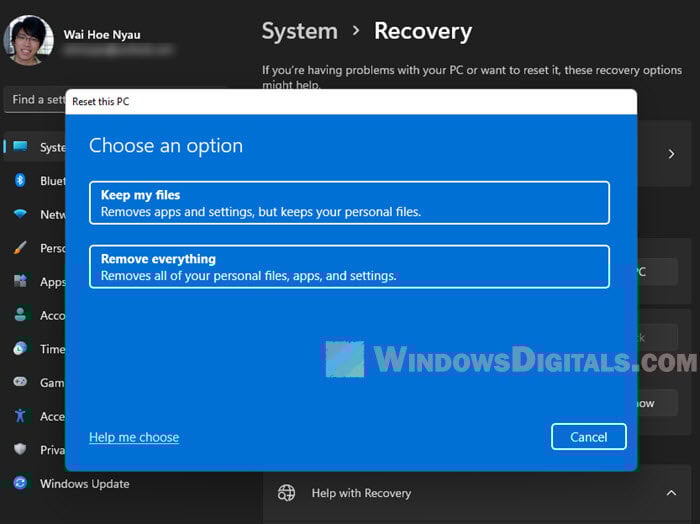
If resetting doesn’t do the trick, reinstalling Windows starts you off with a clean slate. This means wiping your hard drive and putting a new version of Windows on it. Backing up is even more important here.
Some final notes
These steps might help with the “Turn Windows Features on or off please wait” problem, but they might not work for everyone. Sometimes, the issue is beyond what these tips can fix, like software conflicts or compatibility problems.
If you’re not sure about any steps, especially ones that involve doing things you’re not familiar with, getting help from someone who knows what they’re doing is a good idea. A tech expert can find and fix the problem safely and quickly.