
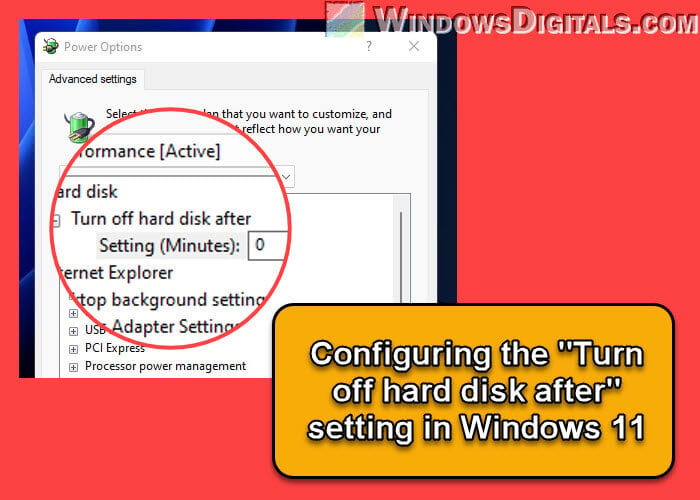
When talking about saving energy, making sure your computer doesn’t waste unnecessary power is quite important. If you’re using Windows, there is a handy option called “Turn off hard disk after” that you can use to tell your PC to turn off your hard disk after a set period of time if your PC is in idle state. This only saves you some energy and battery life, it also prolongs the lifespan of your hard disk drives. This guide will talk about this particular setting and how to configure it in Windows 11.
Also see: How to Stop Windows 11 From Turning Off Screen or Sleeping
What’s the “Turn off hard disk after” setting?
The “Turn off hard disk after” setting lets you choose how long your computer waits during a period of inactivity before it puts the hard disk to sleep. This little adjustment is all about cutting down on power use, making your hard disk last longer, and maybe even keeping your computer cooler.
Linked issue: Second Monitor Keeps Going to Sleep (Fix)
Why should you care?
There are a bunch of reasons this setting is worth a look:
- It’s good for the planet and your wallet because it saves energy.
- Your hard disk might last longer since it’s not working non-stop.
- A quieter computer, because a sleeping hard disk doesn’t make noise.
- It might help keep your computer running cooler.
Useful tip: How to Turn On/Off or Change Screen Saver in Windows 11
Changing the setting in Windows 11
Want to adjust this setting? Here’s how you do it:
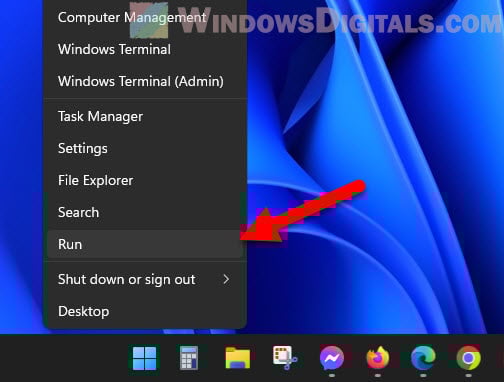
- Give the Start button a right-click and choose Run.

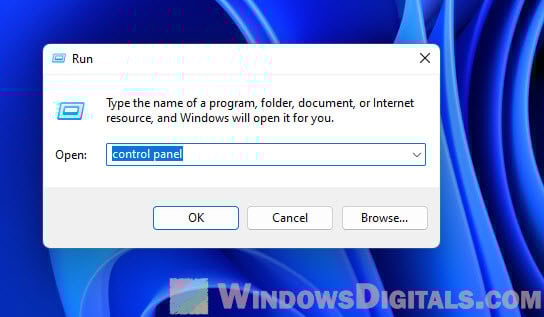
- Type
control panelin the Run box and press Enter.
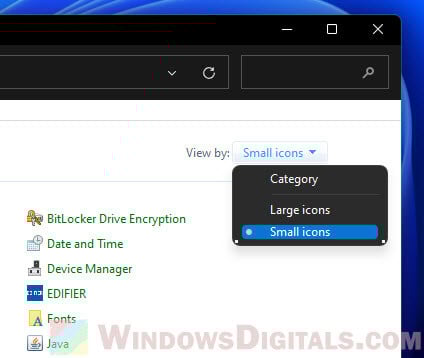
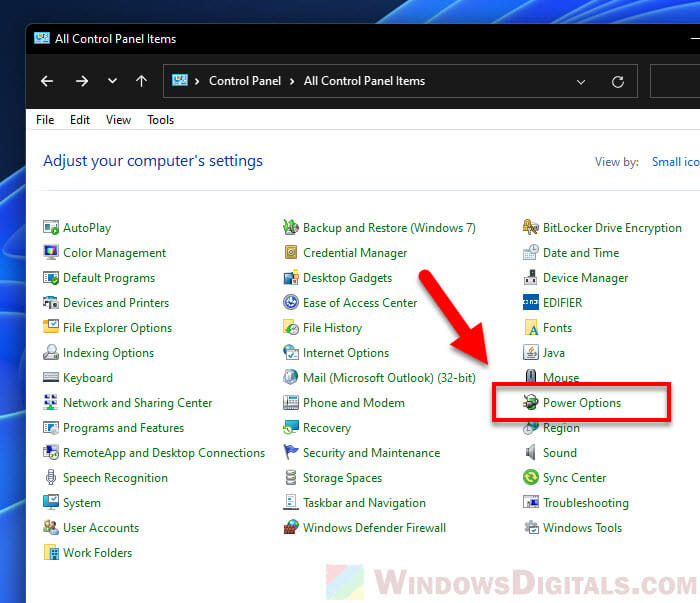
- Switch the Control Panel view to either Large icons or Small icons.

- Hit Power Options.

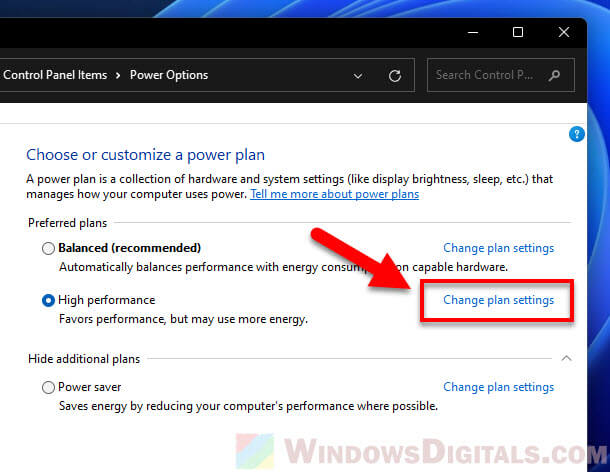
- Click on Change plan settings next to your active plan.

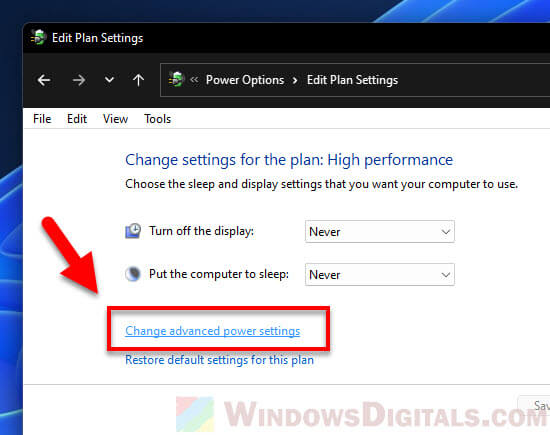
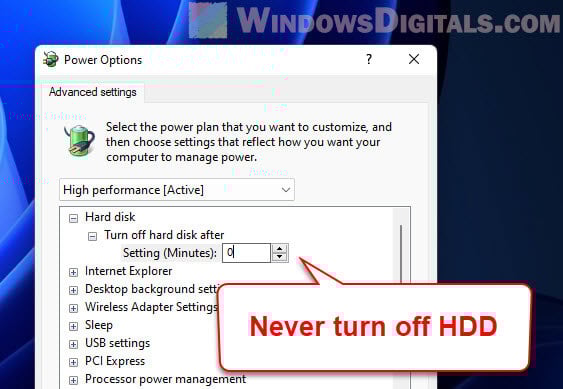
- Open Change advanced power settings.

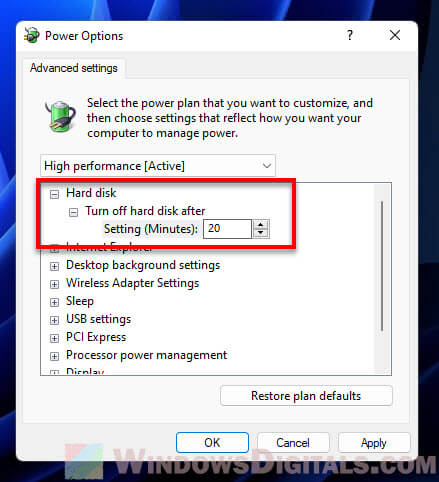
- Find the Hard disk section, then the Turn off hard disk after option.

- Adjust the minutes for when you’re on battery and when plugged in, or type “0” to never turn it off.
- Hit Apply and then OK to save your settings.
Related resource: How to Add Hibernate Option in Windows 11
How many minutes is the best setting for “Turn off hard disk after”?
Finding the best time to set your hard disk to turn off really depends on how you use your computer and what’s actually important to you, like saving power, having a quick-to-respond PC, or making your hardware last longer. But, let me give you a few tips to start with.
If you’re like most casual users, setting it to turn off after 15 to 20 minutes is probably the nicest middle ground. It saves energy and still keeps your computer ready to jump back into action without waiting too long. With this setting, if you step away for a coffee break, your disk gets a little rest, too.
Now, if you’re someone who’s always using their PC restlessly or using apps that need to access the disk a lot, you might want to change that time to 30 minutes or more. This makes sure your disk is always ready to go, though it does use a bit more power.
And if your main concern is about saving energy or you really can’t stand the sound of your hard disk spinning non-stop, you might want to go for a quicker snooze time of 5 to 10 minutes. This means it’ll shut down sooner when you’re not using it, saving energy and giving you some peace and quiet.
At the end of the day, the “best” setting is whatever fits your needs and how you use your PC. Don’t be afraid to experiment to find that sweet spot for yourself.
Suggested read: Allow Keyboard or Mouse to Wake Computer in Windows 11
What if you set it to 0 minutes (Never)?
If you don’t want your hard disk to ever take a break, you can set this to 0 minutes. It means your disk will keep spinning no matter what. Just know that this might use more electricity and wear out your disk faster, so it’s not the best idea for everyday use.
See also: How to Keep Laptop On When Closed in Windows 11
Any downsides?
Yes, there are a few things to watch out for:
- If your hard disk goes to sleep, it’ll need a moment to wake up again. This means waiting a bit longer when you want to open files or apps.
- Some programs might not like it if the hard disk takes a nap while they’re running. Make sure everything works okay after you change this setting.
- On the off chance your computer crashes or loses power as the disk is shutting down, you might lose data. It’s rare, but it can happen.
Some final advice
The “Turn off hard disk after” setting in Windows 11 can really help manage how much power your computer uses and might even keep it running healthier and for longer (lifespan). But it’s not all sunshine and rainbows. You’ve got to think about the possible downsides like longer wait times and making sure your apps are okay with it.
Consider how you use your computer, how often you need to access your hard disk, and what you value most—like saving power or having a quick, responsive system. If you’re not sure, play around with the settings to see what feels right. Also, if you’ve moved on to using a Solid State Drive (SSD), this setting might not make as much of a difference, but it’s still worth trying out.
Отключение внутреннего жесткого диска с помощью средств Windows
Самое разумное — после определенного периода бездействия перевести жесткий диск в спящий режим. В этом случае он почти не потребляет энергию, но при необходимости быстро возобновляет работу.
- Откройте панель управления и выберите там категорию «Система и безопасность».
- В ней выберите «Электропитание» и слева нажмите «Настройка перехода в спящий режим».
- Нажмите «Изменить дополнительные параметры питания», откроется небольшое окно.
- В категории «Жесткий диск» теперь вы можете выбрать, через сколько минут оборудование перейдет в режим ожидания.
- Кликните по кнопке ОК, чтобы сохранить ваши настройки.
Через BIOS и специальные программы
Отключать внутренний жесткий диск стоит только в том случае, если на нем сохранены только личные данные, а не программы или другая важная информация. Если Windows захочет получить доступ к отключенному жесткому диску, вы получите сообщение об ошибке. Кроме того, постоянное включение и выключение винта более вредно, чем работа «на холостом ходу».
BIOS: в некоторых версиях BIOS вы можете отключить питание жесткого диска после определенного периода бездействия. Однако это работает не в каждой модификации BIOS.
Программное обеспечение: гораздо удобнее включать и выключать жесткий диск с помощью определенных программ. Например, инструмент HotSwap! интегрируется в панель задач и позволяет выключать и снова включать жесткие диски одним щелчком мыши. Аналогично работает программа revoSleep.
Если вы хотите отключить один жесткий диск, потому что на другом достаточно места, все равно стоит разбить рабочий диск на разделы, чтобы отделить программы и данные друг от друга. Как это сделать, мы рассказывали здесь.
Читайте также:
- Почему SIM-карта не распознается и что с этим делать
- Как выключать компьютер в заданное время: 2 способа
Readers help support Windows Report. We may get a commission if you buy through our links.
Read our disclosure page to find out how can you help Windows Report sustain the editorial team. Read more
Recently, some users have reportedly made inquiries as to know what it means to turn off the hard disk in Windows power.
Getting familiar with what the option brings to bear the fact that an opportunity in Windows 11 enables the user to turn off hard disk drives for a specified period.
What does turning off the hard disk mean?
Turning off the hard disk is a part of power management options that enable users to conserve their system’s energy.
Depending on the selected power plan, the user can decide to enable or disable it out of the box. For instance, it can be enabled in the Balanced and Power Saver power profiles and disabled in the Performance power plan.
Moreover, when enabled, your hard disk drive will be turned off after your PC is idle during the specified period. Turning off the hard disk is similar to enabling the Sleep Mode in a system.
Although, when next your software accesses the drive, it will take a few seconds before the drive starts spinning and give access to files.
How do I turn off the hard disk in Windows power options?
1. Use Control Panel
- Click the Start button and type Control Panel and launch it.
- Change the View by from Category to Small icons and open Windows 11 Power Options.

- Click on Change plan settings.
- Choose Change advanced power settings to access the disable hard drive feature.

- To access the Turn off hard disk after setting if it’s greyed out, click on Change settings that are currently unavailable.
- Edit the Turn off hard disk time for the On battery field and also for the Plugged in field.

- Once done, press Apply and OK to save the changes and exit.


This should be an easy way to turn off hard disk in Windows power options. However, you can also learn how to tweak other system settings in Control Panel.
2. Use Command Prompt
- Press the Windows key, input the cmd in the search space, and select Run as administrator.

- Type the following command in the space and press Enter:
powercfg -change -disk-timeout-dc 0
- Replace 0 with the number of minutes you want your hard disk to turn off after idle for the On battery option.
- Next, run the below command in the space and press Enter:
powercfg -change -disk-timeout-ac 0
- Now, replace 0 with the number of minutes you want your hard disk to turn off after idle on the Plugged in option.
- Restart your PC for all the changes to take effect.


- Recent Windows 11 update lets you disable profanity filter in voice typing
- Microsoft wants Windows 10 users to upgrade to Windows 11 or Copilot + PCs
- Windows 11 KB5055627 update makes File Explorer more fluid
Make sure not to set the idle period to a few minutes. It can wear out your HDD and trash its head.
For users who can’t access Command Prompt as administrator, you should check this guide for a quick fix.
Many of our readers asked: Does turning off the hard disk affect SSDs? No, it doesn’t, since it has no moving parts, unlike the HDD.
For users willing to know how safe it is to turn off a hard disk on HDD, it is recommended to keep the disk spinning than to make it stop and start all the time. This will help prevent HDD wear out.
Further, you can learn how to fix any Windows 11 disk error by following the solutions provided in this guide.
If you have further questions or suggestions, do not hesitate to use the comments below.
Loredana Harsana
Windows Software Expert
Loredana is a passionate writer with a keen interest in PC software and technology. She started off writing about mobile phones back when Samsung Galaxy S II was on top of the world and she fell in love with tech of all sorts.
Whenever she’s not at her work desk, you’ll find her enjoying refreshing tea flavors, spilling stories on paper, and listening to the radio.
Содержание статьи:
- Способы откл. диск
- Вариант 1
- Вариант 2
- Вариант 3
- Вариант 4
- Вариант 5
- Вопросы и ответы: 3
Вопрос от пользователя
Здравствуйте.
Подскажите, как лучше временно отключить жесткий диск. Дело в том, что я хочу переустановить систему, но боюсь, что она затронет какие-нибудь файлы на моем основном диске.
Заранее спасибо.
Здравствуйте.
Позволю себе в самом начале дать добрый совет — если в чем-то не уверены (и делаете это впервые), сделайте бэкап важных файлов!
Теперь что касается темы…
Я не знаю, что вы будете устанавливать (и как), поэтому ниже приведу несколько способов решения вопроса. Предпочтительный и самый надежный — это первый (когда диск откл. от ПК физически…). В этом случае вам будет сложно что-то на нем испортить…
*
Способы откл. диск
Вариант 1
Итак…
Физическое отключение диска — это наиболее надежный и безопасный вариант перед любыми «мало-прогнозируемыми» работами с накопителями.
👉 Напоминание: имейте ввиду, что если ваш ПК/ноутбук на гарантии — вскрытие корпуса может стать причиной ее аннулирования!
*
В общем виде последовательность работ следующая:
- сначала выключаете компьютер и отсоединяете от системного блока все провода и кабели (системный блок должен быть обесточен!);
- далее открываете боковую крышку (прим.: зависит от конфигурации. У большинства корпусов крышка открывается как раз сбоку);
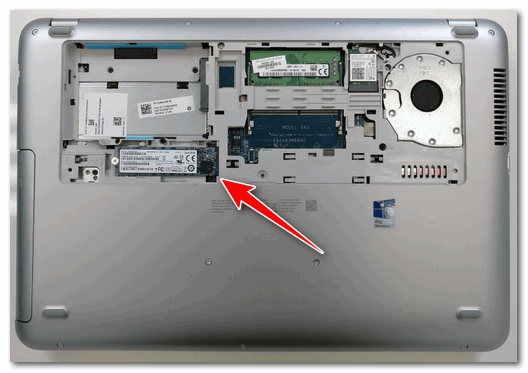
- находите диск (напоминает небольшую прямоугольную коробку, см. фото ниже 👇);
- отключаете от диска SATA-шлейф и кабель питания (если после проведения работ планируете дальше пользоваться диском — вынимать сам диск из корпуса не обязательно);
- затем можно установить боковую крышку назад, и подкл. к системному блоку все ранее отсоединенные кабели.
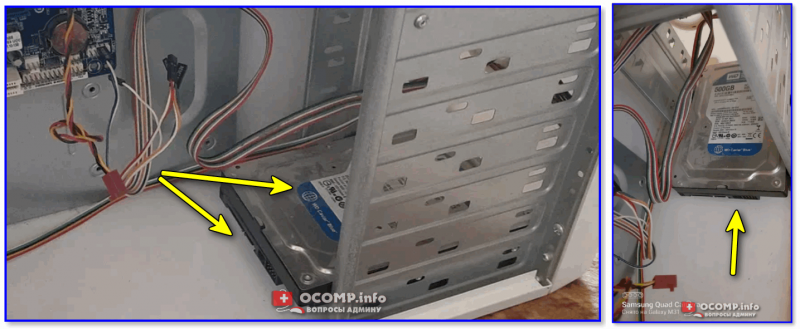
Отключаем от HDD все шлейфы
После проведения всех необходимых работ («опасных» для диска) — в такой же последовательности шлейфы можно подкл. назад. 👇
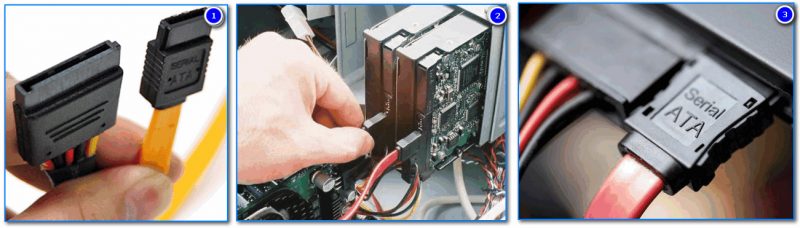
Подключение SATA и кабеля питания к диску
Что касается ноутбуков — то здесь всё аналогично. Правда, некоторые модели достаточно сложно разобрать — перед тем, как это делать, заранее просмотрите инструкцию к своей модели аппарата.
Ну и само собой, жесткие диски у них несколько меньше по размеру 👇 (у ноутбуков: 2,5″, у ПК: 3,5″).
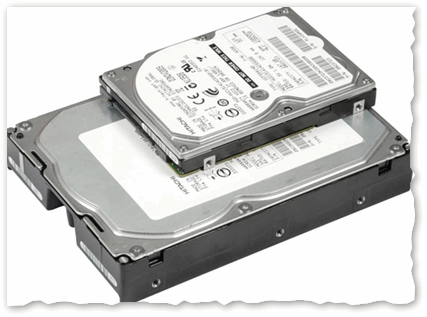
Сравнение габаритов дисков 2,5″ и 3,5″
Сняв крышку, можно установить ОЗУ, диски и накопители, почистить систему охлаждения
*
Вариант 2
При работе в Windows можно относительно легко отключить диск — достаточно зайти 👉 в диспетчер устройств, кликнуть правой кнопкой мыши по нужному накопителю и выбрать опцию «Отключить устройство». См. скриншот ниже. 👇
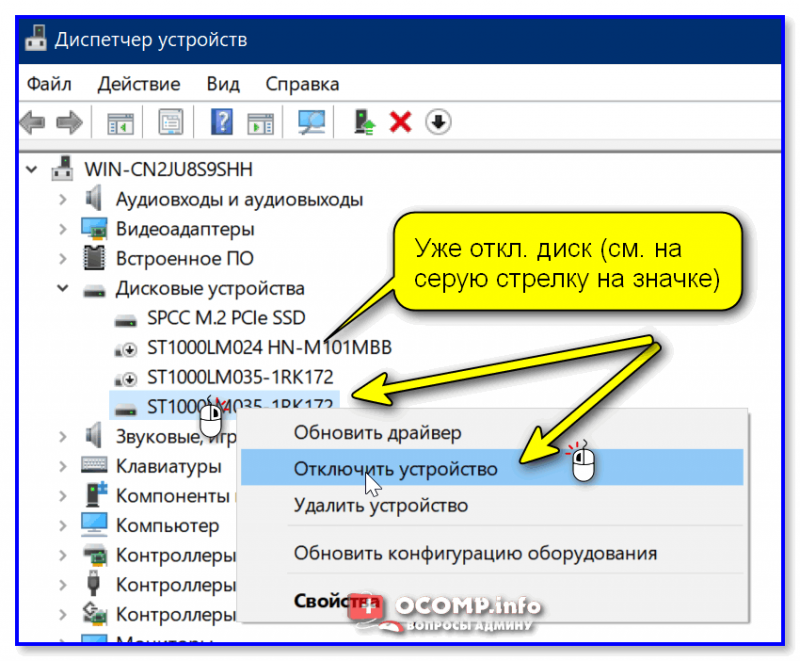
Диспетчер устройств — откл. устройство
После этой операции — диск станет недоступен для любых программ в Windows (даже для ее системных утилит: управление дисками, скажем).
Правда, стоит отметить два нюанса:
- таким образом нельзя отключить системный диск (с которого загружена ваша Windows, в которой вы работаете);
- диск будет не виден только в текущей версии Windows. Если вы перезагрузите компьютер и используете LiveCD (/ или какую-то установочную флешку) — диск для этого ПО станет видимым!
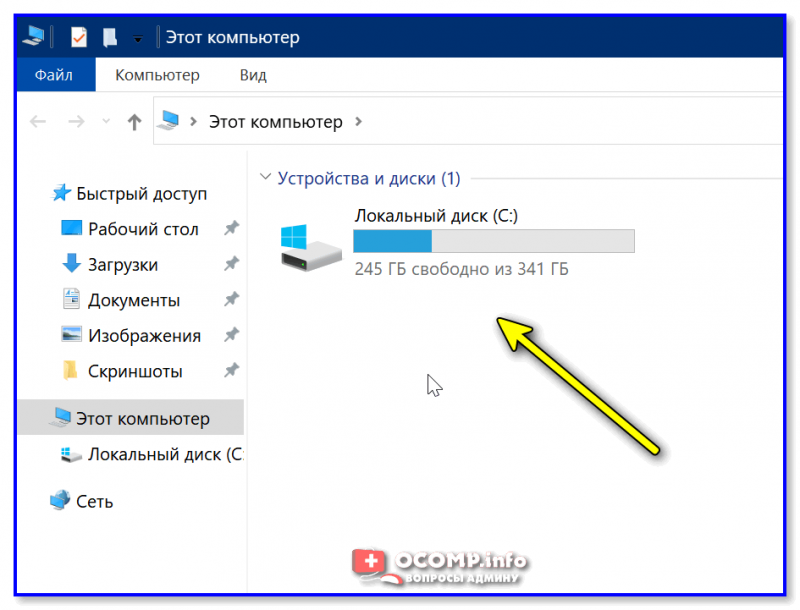
Остался только системный диск с Windows
Примечание: чтобы снова «включить» диск — нужно будет зайти в диспетчер устройств и «провернуть» обратную операцию. Если Windows автоматически не назначит букву диску и не отобразит его в «Моем компьютере» — то см. эту заметку.
*
Вариант 3
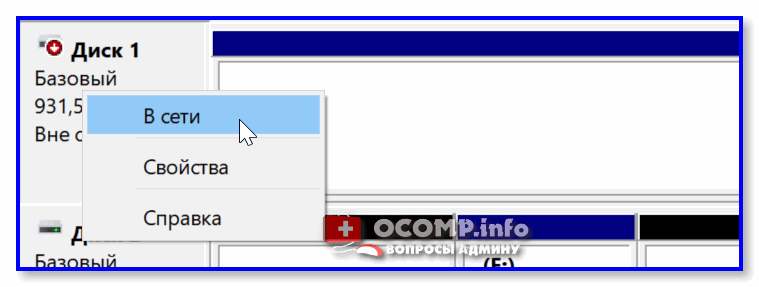
Также откл. и скрыть накопитель в Windows можно через управление дисками (эта утилита встроена в ОС).
Достаточно кликнуть по нужному диску правой кнопкой мышки, а затем в меню выбрать «Вне сети» (примечание: при этой операции данные на диске не пострадают).
Примечание: если у вас в меню нет пункта «Вне сети» или он не активный (и его нельзя нажать) — воспользуйтесь командной строкой.
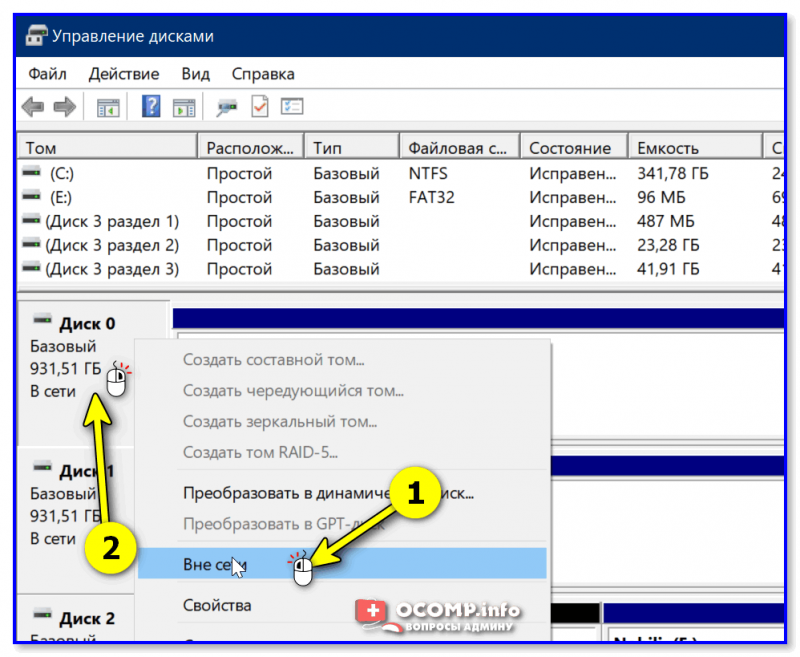
Кликаем ПКМ по нужному диску (Управление дисками)
Теперь этот накопитель будет виден в «Управление дисками», но проводник и др. программы знать о его существовании не будут!

Диск 1 вне сети
Для того, чтобы снова поработать с диском — проделайте обратную операцию: кликните по откл. диску ПКМ и выберите опцию «В сети».
Диск 1 — в сети

С диском снова можно работать
*
Вариант 4
Это аналог варианту 3 (описанному чуть выше), только выполняется через командную строку. Рассмотрю все действия по порядку:
- сначала нужно запустить командную строку от имени администратора;
- далее ввести команду diskpart и нажать Enter (этим мы запустим системную утилиту Diskpart — она нужна для работы с дисками);
- затем просмотрим список всех дисков при помощи команды list disk (пример ниже 👇);
- после нужно выбрать тот диск, который вы хотите откл. (скрыть) — для этого используется команда select disk 1 (вместо «1» — укажите свой номер диска);
- ну и последняя команда offline disk — делает выбранный диск не активным (данные останутся на месте). Всё!
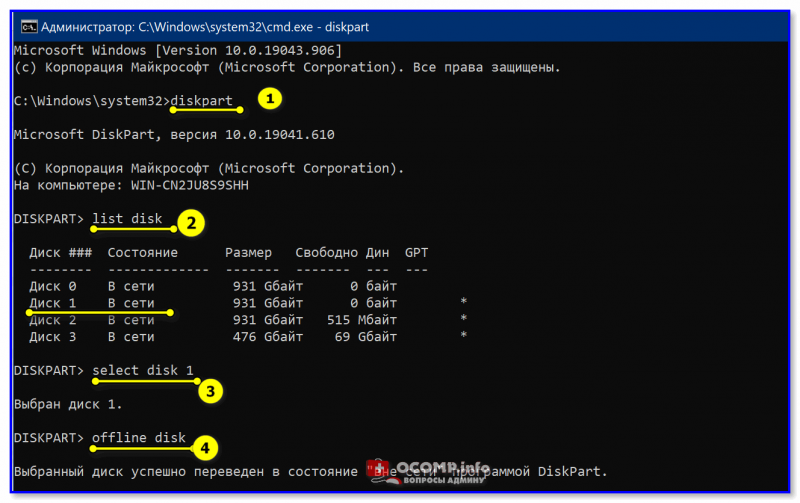
Команды по порядку (Offline disk)
Примечание: чтобы диск снова стал отображаться в нормальном режиме — зайдите в управлении дисками, кликните по нему ПКМ и выберите опцию «В сети».
*
Вариант 5
В определенных версиях BIOS/UEFI (не во всех!) есть возможность отключения конкретного диска. Однако, работает она далеко не всегда идеально, и Windows в некоторых случаях диск всё равно «видит» (что подразумевает возможность неосторожного удаления информации с якобы «откл.» накопителя!).
Будьте внимательны!
👉 В помощь!
Как войти в BIOS (UEFI) на компьютере или ноутбуке [инструкция]
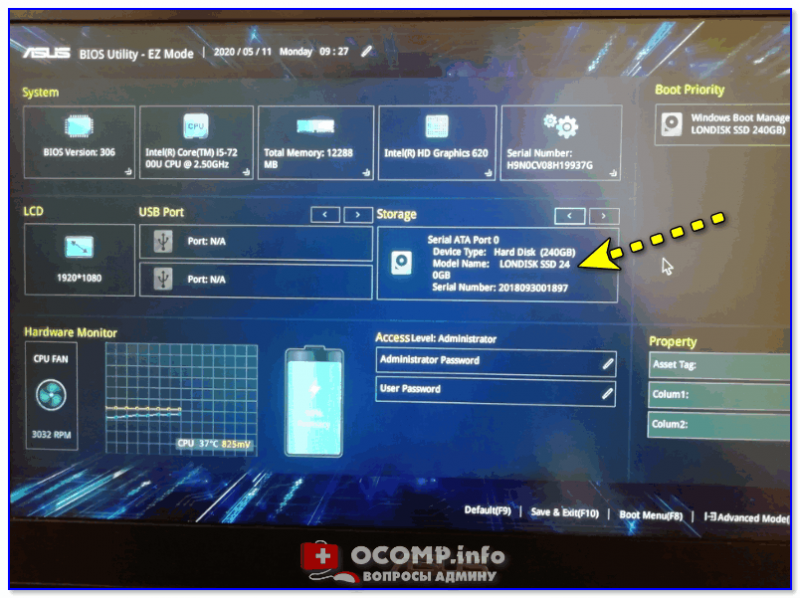
UEFI (BIOS) ноутбука ASUS — установлен SSD
*
Дополнения в комментариях — лишними не будут!
Успехов!
👌
In this article, we will talk about how to turn off a hard disk after a particular period of idle time to save power in Windows 11/10. HDD or Hard Disk Drives have moving parts called spinning platters and a read/write head. These moving parts on an HDD play a significant role when it comes to reading or writing data on a hard disk.

The continuous movement of these parts consumes power. Therefore, if you are not using your hard disk (reading data from it and writing data on it), these moving parts can be stopped to save power. Fortunately, Windows 11/10 has a built-in feature to turn off hard disks when idle to save power. This is a useful feature for laptop users because it helps them lower their battery consumption.
We have seen how we can use the PowerCFG tool to find out the health and status of a laptop’s battery. In its Error Report, you may see many causes of errors, some of which can be easily rectified by you, so as to improve your laptop battery.
We have already seen many tips on how to conserve Battery Power and Extend Battery Life. Some of you may have even read the Laptop Battery Usage & Optimization Guide.
Again, some of you may have even tried this Power Automated Troubleshooting Solution that helps you adjust power settings to help improve battery life and reduce power usage.
Here, we will show you the following two ways to turn off a hard disk after a particular period of idle time to save power in Windows 11/10.
- Via the Control panel
- Via the Command Prompt
There is one more thing you can do and that is to turn off the hard disk after a particular period of complete inactivity. If you are plugged in, well, there is no question of extending battery life – but you can save power. If you are on battery, this will help save power usage and extend your battery life. As mentioned earlier, you can run ‘Powercfg’, to get the Power Efficiency Diagnostic Report for your laptop.

When our Windows computer is idle, it is designed to perform some common maintenance tasks to improve performance, like defragmentation, search indexing, paging operations, logging of events, checking for Windows Updates, creating automatic restoration points, scheduled tasks performance, Superfetching, 3rd party activities like that on antivirus software, loading of drives or services, DHCP or Autonet or Network detection and so on. These are usually run the first time your computer is idle and may take a couple of minutes.
Once all these are done, and your computer is completely idle, you may set it to turn off disk activity. Turning off the hard disk will help extend your battery and be useful when running on a low battery.
There is nothing to worry about here, actually. Even if you have set your hard disk to turn off after, say, 5 minutes, if there is some background maintenance task being carried out, it will not shut down—instead, the system will reset the hard disk’s idle timer.
1] Turn off the hard disk after a particular period of idle time via the Control Panel
To turn off the hard disk after a particular period of idle time via the Control panel, use the steps provided below:

- Open the Control Panel.
- Go to Hardware and Sound > Power Options. Alternatively, you can type power options in the Control Panel search bar and select the best match from the search results.
- You will see different power plans there. Click on the Change plan settings link next to your current power plan.
- Now, click on the Change advanced power settings link.
Here, under Hard Disk, you can set it to turn off after a particular period of idle time. Click on both options and set them to what you want. I double-clicked on ‘Never’ and changed it to 30 minutes in my case. Thus, I have set mine to 10 minutes while on battery and 30 minutes while the battery is plugged in. You may decide and set a figure for yourself.

Do note that in such cases, when you wake your computer back, it may take a few extra seconds, since the hard disk requires time to turn on.
2] Turn off the hard disk after a particular period of inactivity via the Command Prompt
You can also use the Command Prompt to turn off your hard disk when Windows detects inactivity for a particular period of time. Open the Command Prompt as an administrator.
Execute the following commands one by one and press Enter after typing each command.
powercfg -change -disk-timeout-dc <minutes>
powercfg -change -disk-timeout-ac <minutes>
Replace <minutes> with the actual minutes after which you want Windows to turn off your hard disk. In these two commands, the first command is for On battery and the second command is for Plugged in.

For instance, if you want to turn off your hard disk after 5 minutes when your laptop is on battery and after 10 minutes when your laptop is plugged in, the commands will be:
powercfg -change -disk-timeout-dc 5
powercfg -change -disk-timeout-ac 10
Alternatively, you can also use the following two commands:
powercfg /SETDCVALUEINDEX SCHEME_CURRENT 0012ee47-9041-4b5d-9b77-535fba8b1442 6738e2c4-e8a5-4a42-b16a-e040e769756e <seconds>
powercfg /SETACVALUEINDEX SCHEME_CURRENT 0012ee47-9041-4b5d-9b77-535fba8b1442 6738e2c4-e8a5-4a42-b16a-e040e769756e <seconds>

The first command changes the time to turn off the hard disk for On battery and the second command changes the time for Plugged in. In these two commands, you have to enter the time in seconds instead of minutes. Replace <seconds> with the actual time in seconds in the above two commands.
Read: How to set Hard Disk Timeout using PowerCFG command line in Windows
If you are looking to learn more about Disk Idle Detection, Configuring Disk Idle Detection Policies and Using PwrTest to Observe Disk Idle Detection, and generally about the infrastructure supporting disk idle detection in the Windows operating system, you can visit MSDN.
That’s it. I hope this helps.
Should I turn off hard disk after 20 minutes?
It depends on you whether you want to turn off your hard disk after 20 minutes or not. If you are a laptop user, turning off your hard disk after a particular time of inactivity will save your laptop battery consumption. This feature is useful when your hard disk is not in use.
Which is better, SSD or HDD?
HDD has moving parts, whereas, SSD has no moving parts.Therefore, in terms of power consumption, SSD is a better option. Moreover, an SSD also has a faster data transfer speed than an HDD. Therefore, installing the operating system on an SSD instead of an HDD results in better computer performance.
Pros and cons of the different Power Plans available in Windows may also interest you.