
Applies ToWindows 10
Support for Windows 10 will end in October 2025
After October 14, 2025, Microsoft will no longer provide free software updates from Windows Update, technical assistance, or security fixes for Windows 10. Your PC will still work, but we recommend moving to Windows 11.
Learn more
Instead of fix-it tools, Windows 10 uses troubleshooters to help you solve problems. To run a troubleshooter, use the following steps:
-
Select Start > Settings > Update & Security > Troubleshoot > Additional troubleshooters, and then select Additional troubleshooters.
Note: The following shortcut button directly opens Settings to the Troubleshoot page.Find troubleshooters

-
Select the type of troubleshooting you want to do, then select Run the troubleshooter.
-
Allow the troubleshooter to run and then answer any questions on the screen.
If you see a message that no changes or updates were necessary, and are still having issues, you can try recovery options.
Need more help?
Want more options?
Explore subscription benefits, browse training courses, learn how to secure your device, and more.
В Windows 10 предусмотрено значительное количество инструментов для автоматического устранения неполадок, многие из которых уже рассматривались в инструкциях на этом сайте в контексте решения конкретных проблем с системой.
В этом материале — обзор встроенных возможностей устранения неполадок Windows 10 и о том, в каких расположениях ОС их можно найти (поскольку таких мест более одного). На эту же тему может быть полезной статья: Программы для автоматического исправления ошибок Windows (включая средства устранения неполадок от Майкрософт).
Устранение неполадок в параметрах Windows 10
Начиная с Windows 10 версии 1703 (Creators Update), запуск устранения неполадок стал доступен не только в панели управления (о чем также написано далее в статье), но и в интерфейсе параметров системы.
При этом, средства устранения неполадок, представленные в параметрах — те же, что и в панели управления (т.е. дублируют их), однако более полный набор утилит доступен именно в панели управления.
Для использования устранение неполадок в «Параметры» Windows 10 выполните следующие шаги:
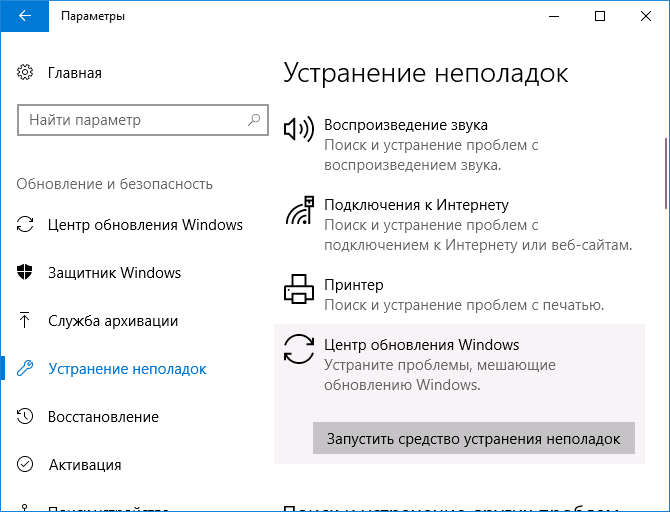
- Зайдите в Пуск — Параметры (значок шестеренки, или просто нажмите клавиши Win+I) — Обновление и безопасность и в списке слева выберите пункт «Устранение неполадок».
- Выберите пункт, соответствующий имеющейся проблеме с Windows 10 из списка и нажмите «Запустить средство устранения неполадок».

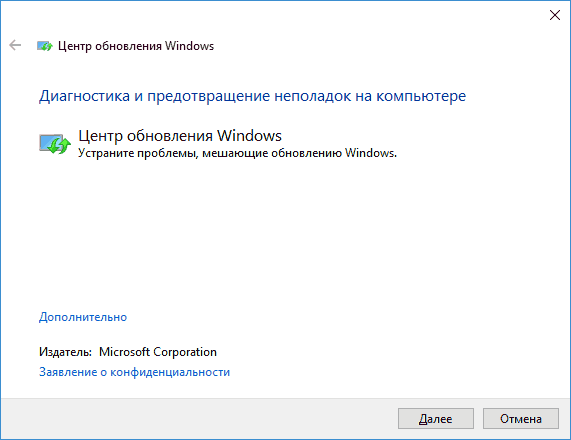
- Далее следуйте указаниям в конкретном средстве (они могут отличаться, но обычно почти все выполняется автоматически.

Проблемы и ошибки, для которых предусмотрен запуск устранения неполадок из параметров Windows 10 включают в себя (по типу проблемы, в скобках приведена отдельная подробная инструкция по ручному исправлению таких проблем):
- Воспроизведение звука (отдельная инструкция — Не работает звук Windows 10)
- Подключение к Интернету (см. Не работает Интернет в Windows 10). При недоступности Интернета, запуск этого же средства устранения неполадок доступен в «Параметры» — «Сеть и интернет» — «Состояние» — «Устранение неполадок).
- Работа принтера (Не работает принтер в Windows 10)
- Центр обновления Windows (Не скачиваются обновления Windows 10)
- Bluetooth (Не работает Bluetooth на ноутбуке)
- Воспроизведение видео
- Питание (Не заряжается ноутбук, Windows 10 не выключается)
- Приложения из Магазина Windows 10 (Не запускаются приложения Windows 10, Не скачиваются приложения Windows 10)
- Синий экран
- Устранение проблем с совместимостью (Режим совместимости Windows 10)
Отдельно отмечу, что при проблемах с Интернетом и при других неполадках сети, в параметрах Windows 10, но в ином расположении вы можете использовать инструмент для сброса сетевых настроек и параметров сетевых адаптеров, подробнее об этом — Как сбросить сетевые настройки Windows 10.
Средства устранения неполадок в панели управления Windows 10
Второе расположение утилит для исправления ошибок в работе Windows 10 и оборудования — панель управления (там же они располагаются и в предыдущих версиях Windows).
- Начните набирать «Панель управления» в поиске на панели задач и откройте нужный элемент, когда он найдется.
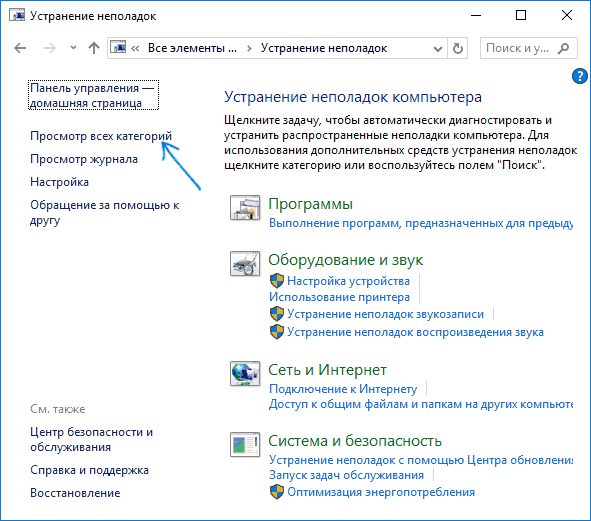
- В панели управления вверху справа в поле «Просмотр» установите крупные или мелкие значки и откройте пункт «Устранение неполадок».

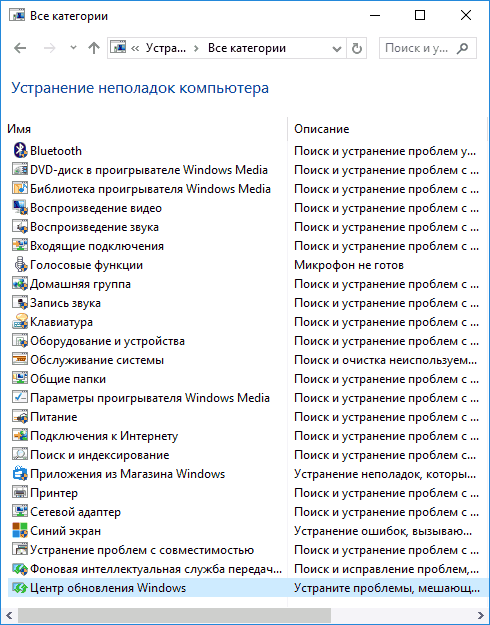
- По умолчанию отображаются не все средства устранения неполадок, если требуется полный список — нажмите «Просмотр всех категорий» в меню слева.

- Вы получите доступ ко всем имеющимся средствам устранения неполадок Windows 10.


Использование утилит ничем не отличается от их использования в первом случае (почти все действия по исправлению выполняются автоматически).
Дополнительная информация
Средства устранения неполадок доступны для загрузки и на сайте Майкрософт, в виде отдельных утилит в разделах справки с описанием возникших проблем или как средства Microsoft Easy Fix, которые можно скачать здесь https://support.microsoft.com/ru-ru/help/2970908/how-to-use-microsoft-easy-fix-solutions
Также, Майкрософт выпустила отдельную программу для исправления проблем с самой Windows 10 и запуском программ в ней — Software Repair Tool для Windows 10.
If Windows 10 fails to start several times in succession, you’re eventually taken to the Troubleshoot menu where there are multiple options/tools at your disposal to fix the problem. If you’re on your desktop, you can go to the Settings app and under the recovery options, you can access the troubleshoot menu. If you’d like to boot to the Troubleshoot menu without a failed start up, and without going through the Settings app, you can. It’s really a matter of tapping the right key at the right time.
There are multiple ways to boot to the Troubleshoot menu but we’re going to cover methods that you can use if you are unable to access the desktop. From the desktop, it’s easy to access the menu but from a clean/fresh boot, it’s not as simple.
Tap F11 key
The first and easiest method to boot to the Troubleshoot menu is to turn on your PC, and tap the F11 key. Make sure you tap it repeatedly and that you start doing so right away. If your system tends to boot quickly, you might have to make a few attempts at booting to the troubleshoot menu.
In the event that the F11 key doesn’t work, try the F8 or Shift+F8. It may or may not work but it’s worth trying if the F11 key doesn’t.
Installation media
Installation media i.e. a USB that you can use to install Windows 10 can also be used to fix problems with Windows 10. The trick is getting your hands on installation media when you’re unable to boot to your desktop. You will need to use another system but once you have access to one, creating installation media is easy. You can download it from Microsoft’s website for free. There’s no need to enter a license key.
Connect the USB to your system, and make sure it is set to boot from the USB device. The installation media will give you options to either install Windows 10 or to fix problems with the current installation.
Force shut down on start
If all else fails, this method will work. Turn on your system and before it can boot to the desktop, force shut it down by holding down the power button. Repeat this at least 3-5 times and eventually, you will get the Troubleshoot menu. This method should not have any side effects nor should it damage files on your system.

Fatima Wahab
Fatima has been writing for AddictiveTips for six years. She began as a junior writer and has been working as the Editor in Chief since 2014.
Fatima gets an adrenaline rush from figuring out how technology works, and how to manipulate it. A well-designed app, something that solves a common everyday problem and looks
6 Procedures to Open Troubleshooting In Windows 10. – When you confront an issue on Windows 10, a universal solution Troubleshoot is always ready. Whether the Network, Brightness, Blue screen, Audio, Printer, Update or any other problem occurs you think to run troubleshooter first. So it’s relevant to learn how you would open this trouble reliever tool on your Windows 10.
Windows 10 renders the troubleshooting tool for almost all the components. All the tools are kept a single location and you can access them quite easily. See the guide –
Open Troubleshooting In Windows 10
In pursuance of accessing the Troubleshooting, Control panel, Start search, Settings search, and Folder location help.
From Control Panel
Step 1 – Click on Start button, type control, and then press Enter. Instantly you will find the control panel which will be used to open troubleshooting.
Step 2 – Locate Troubleshooting on the applet and double click on it.
Step 3 – In the left pane of the appearing Window, click View all. Now you can see a list of Troubleshooters, so double click on either one in order to open.
Step 4 – You see the list of Various Troubleshooting tools in the below screenshot. Simply double click on the Troubleshooter from the list that you need to start.
Open Troubleshooting In Windows 10 from Start
Step 1 -Click on the Start button and type troubleshooting and press “Enter”.
Step 2 – Once the Troubleshooting Window comes on the screen, click “View all” in the Left pane.
Via Settings app
Step 1 – Click Win and I all together, type troubleshooting, and then press Enter.
Follow Step 2 of Method 2 to open the Troubleshooting list.
Using System Configuration
Step 1 – Click Win+R, type msconfig, and press Enter. Consequently, you will notice that a System configuration window is appearing on your computer’s Screen.
Step 2 – On System configuration window on the screen, click on Tools to switch the tab.
Step 3 – Various tools list appears here, so select Windows Troubleshooting. Finally, click on Launch to open Troubleshooting window.
Once more follow Step 2 in the 2nd method and navigate to the list of troubleshooting tools.
Open Troubleshooting In Windows 10 through Folder Location
Step 1 – Press the shortcuts pair Win and R keys side by side and launch the run dialog box.
Step 2 – Copy the path from below, paste into the stipulated space in the run command and press Enter.
C:\Users\YOURUSERNAME\AppData\Local\Packages\windows.immersivecontrolpanel_cw5n1h2txyewy\LocalState\Indexed\Settings\en-USImportant – replace YOURUSERNAME with your original username on the computer before clicking the Enter button.
Step 3 – You notice a list of elements that help you to open different pages of Settings. Locate the element that accesses Troubleshooter. Commonly the element is
Classic_{08EB53B7-3384-473A-8D2C-6C0E71F3BF34}
Step 4 – Double click on the above element and Press “View all” located in the right pane. Once you see the list, select the troubleshooter that you need.
Using Another Folder location
#Step 1 – Click Win and R keys jointly. You will experience the run box on the desktop.
Step 2 – copy
C:\WINDOWS\System32\control.exe /name Microsoft.Troubleshooting
paste into the provided location next to Open in the run box and press “Enter”.
Step 3 – Click View all in the left section.
Conclusion
So, these are the 6 easy ways to Open Troubleshooting In Windows 10. The first 3 methods are very simple even a beginner can follow without any trouble and the last 2 are helpful to experienced Windows 10 users. If you know extra ways kindly share with us through a comment.
Windows 11/10 has a built-in troubleshooter tool that helps you automatically find and fix various Windows errors. Check how to access Windows 11/10 troubleshooter page to diagnose and fix problems in your computer. MiniTool Software not only helps you solve computer issues but also provides useful computer software like MiniTool Power Data Recovery, MiniTool Partition Wizard, etc.
This post mainly introduces Windows 11/10 troubleshooter. Check how to open and use the troubleshooter tools in Windows 11/10 to troubleshoot various Windows errors. Check the details below.
Also read: Discover expert tips and tricks for hard drive recovery service that could potentially save you from losing irreplaceable memories.
How to Open Windows 11/10 Troubleshooter – 2 Ways
Microsoft now contains Windows Troubleshooter in Windows Settings app. You can access the troubleshooter tool from Settings.
Way 1. Access Troubleshooter in Windows 11/10 from Settings
For Windows 11:
You can click Start -> Settings -> System. Click Troubleshoot in the right window. Then you can click Other troubleshooters to open the troubleshooter tools in Windows 11.
For Windows 10:
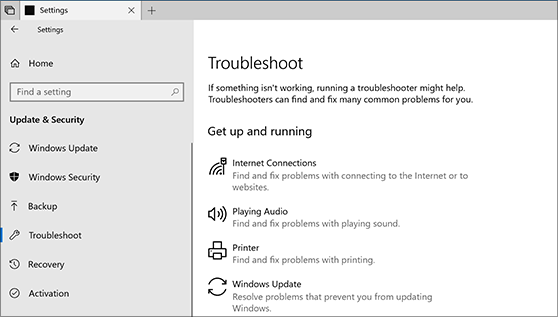
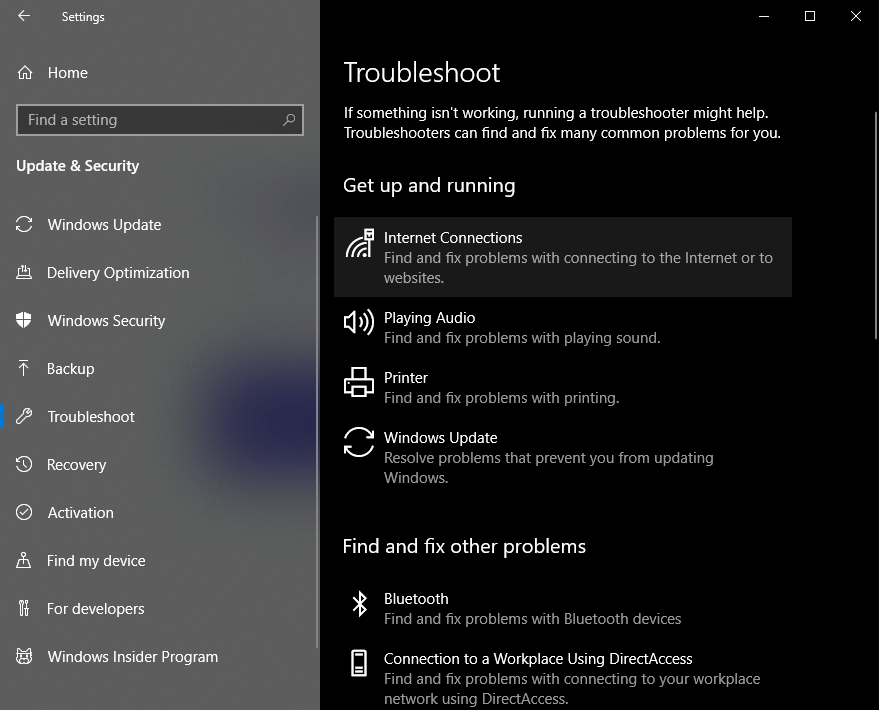
You can click Start -> Settings -> Update & Security -> Troubleshoot to get to the Windows 10 Troubleshoot page. You can see two sections: Get up and running, Find and fix other problems, and they include different troubleshooters to help you fix different computer problems.
Way 2. Open Windows Troubleshooter from Control Panel
- Press Windows + R, type control panel, and press Enter to open Control Panel.
- Click System and Security.
- Click Troubleshoot common computer problems under Security and Maintenance to open the Troubleshoot page.
Quick Video Guide:
Use Windows 11/10 Troubleshooters to Fix Windows Errors
On the Troubleshoot page in Windows 11/10, you can access and run various Windows Troubleshooters to solve different Windows issues. You can click the Run button next to the target troubleshooter to instantly run the troubleshooter with one click. Check the functions of the different troubleshooters in Windows 11/10 below.
1. Bluetooth Troubleshooter
If you are unable to connect a Bluetooth device to your computer or have other issues with the Bluetooth devices, you can run this Bluetooth troubleshooter to fix the issue.
2. Hardware Troubleshooter
If any of your computer hardware has problems, you can run the hardware troubleshooter to fix hardware-related issues on your Windows 11/10 computer.
3. Windows Update Troubleshooter
If Windows 11 won’t update or you have other Windows update issues, you can run Windows Update Troubleshooter to see if it can help fix the problem.
4. Network Adapter Troubleshooter
This Windows troubleshooter helps you fix problems with the Ethernet/WiFi connections.
5. Internet Connections Troubleshooter
If your internet connection has problems, you can run this troubleshooter to fix errors you’re your internet connection.
6. Keyboard Troubleshooter
If your computer keyboard doesn’t work properly, you may try this troubleshooter to fix keyboard-related problems.
7. Playing Audio Troubleshooter
When you have audio issues when playing audio tracks, playing movies, etc. on your computer, you can use this option to troubleshoot audio issues on Windows 10/11.
8. Printer Troubleshooter
If your Windows 11/10 computer doesn’t recognize your printer, the printer can’t print PDF, Word, Excel, etc. you can run the printer troubleshooter to fix problems with your printer.
9. Power Troubleshooter
This Windows 11 troubleshooter helps you solve issues with your computer power and battery.
10. Program Compatibility Troubleshooter
If a program isn’t running properly on your computer, you can use this Windows troubleshooter to fix program incompatibility issues.
11. Recording Audio Troubleshooter
This troubleshooter tool in Windows helps you fix problems with audio recording on your PC.
12. Search and Indexing Troubleshooter
In Windows, you can use the Windows Search tool to find a system setting, app, file, etc. on your computer. If you have problems with using windows search, you can run this Windows troubleshooter to fix the issue.
13. Video Playback Troubleshooter
If you have problems when playing a movie, TV show, or video, this troubleshooter may help fix the problem.
14. Windows Store Apps Troubleshooter
You may download and install some apps from Microsoft Store. If you have issues with any of the apps, you can see if this troubleshooter helps fix the issue.
15. Speech Troubleshooter
If you have problems with your microphone, you can try this Windows troubleshooter.
16. Shared Folders Troubleshooter
If other computers can’t recognize your shared folder, this option may help fix the problem.
17. Incoming Connections Troubleshooter
This option in Troubleshoot page helps you fix problems with Windows Firewall settings.
18. HomeGroup Troubleshooter
If you create a HomeGroup but you can’t add your computer to the HomeGroup or you have other problems with the HomeGroup, you can run this troubleshooter.
The built-in Windows 11/10 troubleshooters can conduct an effective diagnosis of the problems. They can fix the issues in your Windows computer to some extent. Besides, it is very easy to use for users and you can run the troubleshooter with one click.
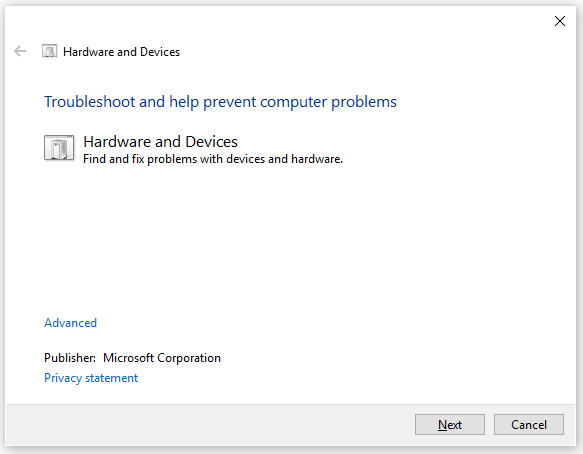
If you don’t find a troubleshooter in Windows Settings, you can use the general Hardware and Devices troubleshooter in Windows to fix some Windows issues.
To open and run the built-in Hardware and Devices troubleshooter, you can press Windows + R, type msdt.exe -id DeviceDiagnostic, and press Enter to open the tool. It can also help diagnose and fix the hardware and devices issues in Windows.
Free Data Recovery Software for Windows 11/10
If your computer has problems and you lost some data in your Windows computer, you can use MiniTool Power Data Recovery to recover lost data.
MiniTool Power Data Recovery is a professional data recovery program for Windows. You can use it to recover any deleted or lost files from Windows computer.
It can even help you recover data when the PC won’t boot thanks to its built-in bootable media builder. The bootable media builder lets you create a bootable USB or disk to boot your Windows computer into WinPE. You can launch MiniTool Power Data Recovery in WinPE and use it to recover data on your computer.
Aside from recovering data from Windows PC or laptop, you can also use MiniTool Power Data Recovery to recover data from USB flash drive, external hard drive, memory card, SSD, etc.
It helps you recover data from various data loss situations. Its interface is extremely intuitive and even novice users can easily operate it.
Download and install MiniTool Power Data Recovery on your Windows computer. And check below for how to recover data from your Windows computer.
MiniTool Power Data Recovery TrialClick to Download100%Clean & Safe
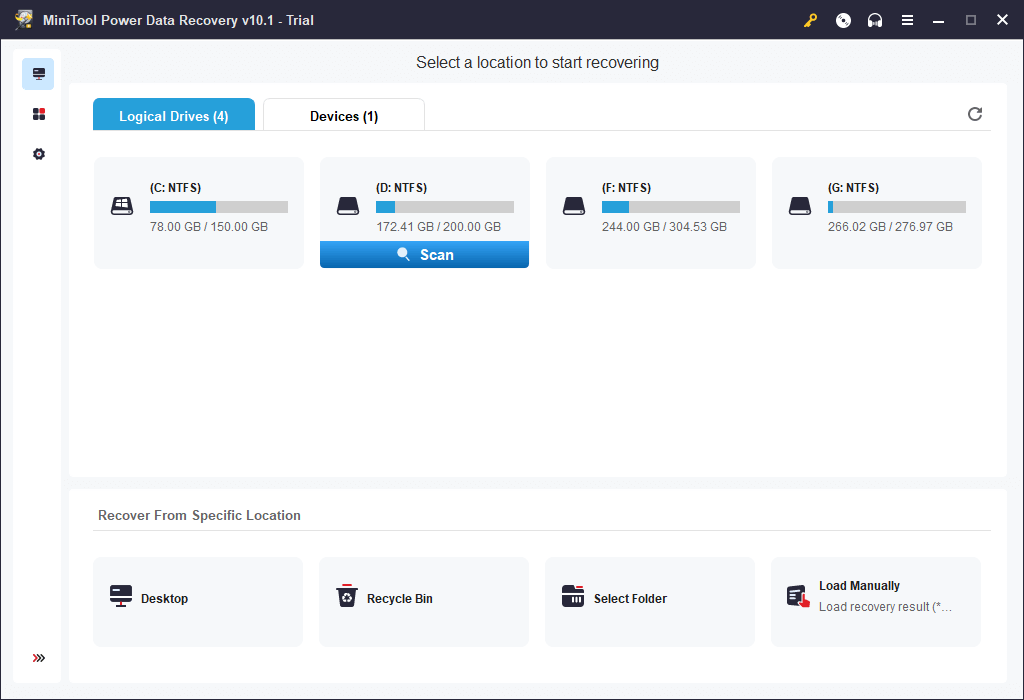
- Launch MiniTool Power Data Recovery. On the main UI, you can see Logical Drives tab and Devices You can select the target drive under Logical Drives and click Scan. Or if you want to select the whole disk or device to scan, you can click Devices tab and choose the device.
- Wait for the software to finish the scan. Then you can check the scan result to find wanted files, check needed files and click Save Choose a new destination or device to store the recovered files.
If your computer has crashed and can’t boot, you can check this post: How to recover data when PC won’t boot.
Free Disk Partition Manager for Windows 11/10
For Windows users, you might like an easy-to-use disk partition manager to help you manage hard drive partitions.
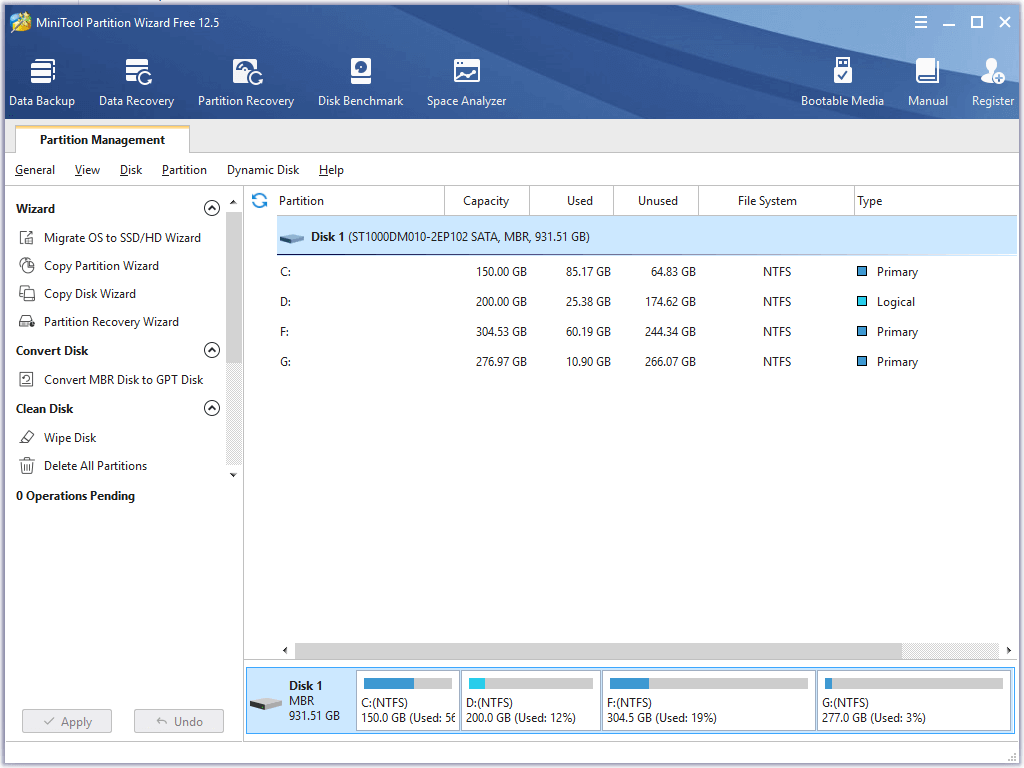
MiniTool Partition Wizard is a professional disk partition manager for Windows. You can use this program to create, delete, extend, resize, format, wipe partition, etc. It also lets you convert partition between FAT and NTFS format, convert disk between MBR and GPT format, check and fix disk errors, test hard drive speed, analyze hard drive space, and more.
Download and install this all-in-one disk partition manager on your Windows PC or laptop and use it to manage your hard drive partitions by yourself.
MiniTool Partition Wizard FreeClick to Download100%Clean & Safe
Free PC Backup Software for Windows 11/10
In case your computer has problems and you lost some important data, you can frequently back up your important files to a safe place.
MiniTool ShadowMaker is a professional PC backup software for Windows 11/10/8/7. You can use it to back up Windows system and data with ease.
You can select files and folders to back up or select the partitions or the whole disk content to back up. You can back up data to an external hard drive, USB flash drive, network drive, etc. It also lets you backup and restore Windows system. It supports file sync, automatic backup, incremental backup, disk clone, etc. Download and install MiniTool ShadowMaker to back up your data and system now.
MiniTool ShadowMaker TrialClick to Download100%Clean & Safe
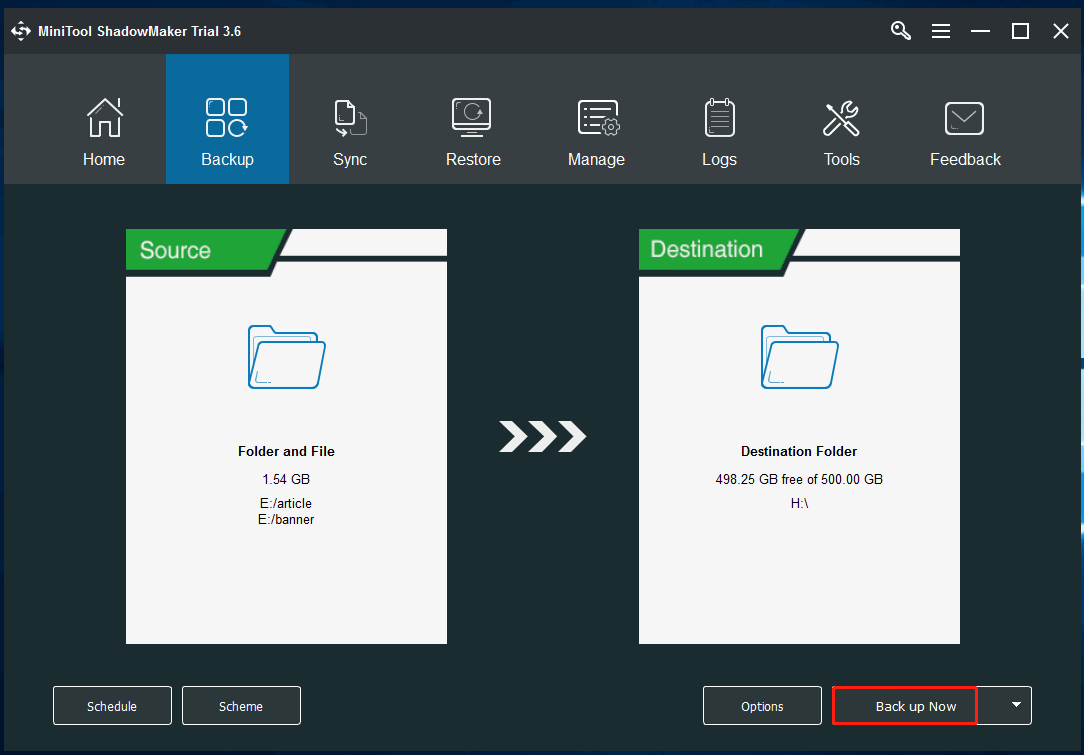
- Launch MiniTool ShadowMaker on your computer. Click Backup module.
- Next, you can click Source section to choose what you want to back up. You can choose files, folders, partitions, or the whole disk.
- Then click Destination section to select a place or drive to store the backups.
- At last, click Back up Now button to start backing up the selected data to the target place.
Click to Tweet
MiniTool Software is a top software developing company and it also provides some other free programs.
MiniTool Video Repair is a 100% clean and free video repair tool that lets you repair corrupted MP4, MOV, M4V, F4V videos.
MiniTool MovieMaker is a popular movie maker and video editor for PC. You can use this program to edit video clips and export the output as MP4. You can use it to trim/split video, add effects/transitions/titles/music to video, etc. You can also add photos to this program and use it to create a photo slideshow.
MiniTool Video Converter is a video converter, video downloader, and screen recorder. You can use it to convert any video or audio format to the desired format, download YouTube videos for offline playback, record any area on your computer screen (with audio), etc.
Conclusion
This post introduces Windows 11/10 troubleshooter and explains what each of the Windows troubleshooters can do. You can use the Windows troubleshooters to fix Windows errors on your computer. Some useful programs from MiniTool Software are also provided. If you have any issues with using MiniTool Software products, you can contact [email protected].