
Docker on Windows is a little bit different than on Linux. Because Docker runs using features of the Linux operating system which not supported by Microsoft Windows. To run Docker on windows 10, Docker Toolbox will create a Linux virtual machine in VirtualBox and all containers will be created inside the virtual machine.
In this tutorial we will learn How to Install Docker on Windows 10 using the Docker Toolbox. You can also use following guide to install docker for Windows 7 and Windows Server 2016.
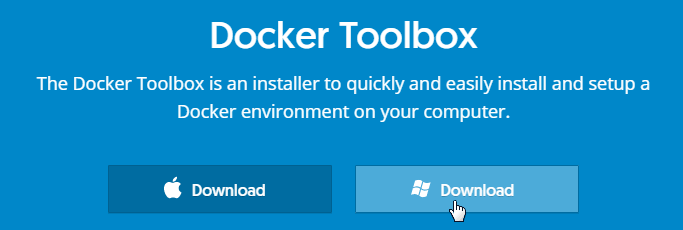
Download Docker Toolbox for Windows 10 / 7 / Server 2016
Go to following URL docker.com/toolbox and download the Docker Toolbox for Windows 10.
Install Docker Toolbox on Windows 10
After download is finished, run the setup file and install the docker toolbox with default options.
Open Docker Quickstart Terminal
From Windows 10 start menu launch the Docker Quickstart Terminal. The First time, it will run the initial configuration and will create the default virtual machine for the Docker Engine.
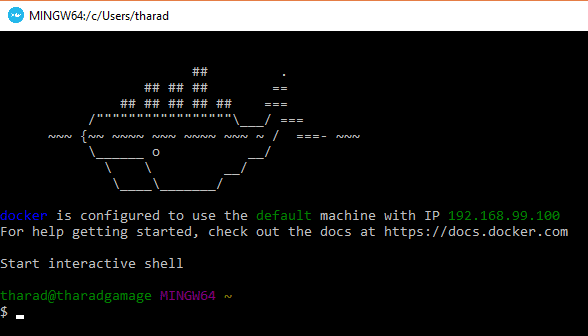
Once it is done, you can manage docker from Windows using Quickstart Terminal, Windows CMD, or PowerShell.
To check the Docker version Type:
docker versionNote that Docker Engine is running inside a Virtual Machine also called as ‘Docker Host’ in Windows. If you open VirtualBox you will see a Virtual Machine called ‘default’.
We can manage the Virtual Machine with docker-machine command.
To get information about machines, Type:
docker-machine lsTo Stop default machine, Type:
docker-machine stop defaultTo start default machine, Type:
docker-machine start defaultRun Hello World Docker container on Windows 10
To test Windows Docker Engine, let’s run a simple hello-world container on docker.
docker run hello-worldDocker will download the hello-world Docker Image and start a new container using the hello-world image. If successful you should see the «Hello from Docker» message as shown in the following image.
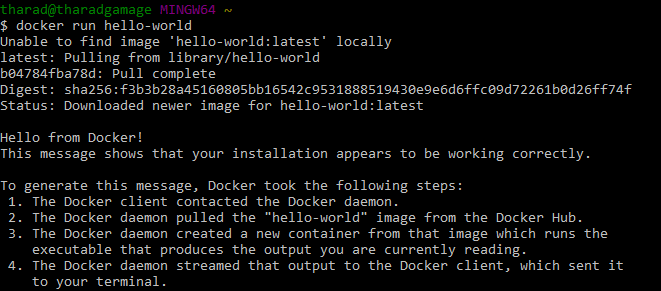
This confirms that your Docker installation on Windows 10 / 7 / Server 2016 is successful.
In this quick article we are going to review the steps to install Windows Server 2016 VMware tools. In particular this one refers to a manual setup on a single virtual machine. It is possible to execute the VMware tools setup on multiple virtual machines as well. By running an unattended setup using the command line or during the SysPrep for Windows Operating Systems. We’ll cover these steps with a separate article.
So the question would be: why install VMware Tools?
VMware Tools enhance the performances of the operating system also adding extra features that otherwise would not be available until their installation. For example the ability to drag and drop files between the Guest OS and the Host. to name one. And the Windows Server 2016 VMware tools in this respect make no difference.
The VMware tools for Guest OSes include lots of components categorized in Drivers and Toolbox components.
So in the list of Drivers we can find:
- Audio
- LSI
- MemCtl
- Mouse
- PVSCSI
- SVGA
- Sync
- VMCI
- Hgfs
- VMXNet
- VMXNet3
- FileIntrospection
- NetworkIntrospection
- VSS
In the list of Toolbox features we find:
- Unity
- Perfmon
It is possible to dictate which drivers or component we want to install using either Manual or Unattended setup. In this case this article refers to a simple manual install for Windows Server 2016 VMware tools.
Install Windows Server 2016 VMware tools
From the Virtual Machine Actions menu and then under Guest OS we have the option to manually install the VMware tools. As soon as we select this option the vSphere Hypervisor in this case will automatically unmount any CD/DVD and mount the Windows.ISO file which include the VMware tools. From here we can start the wizard. the same wizard will automatically detect the version of the operating system.

In this step we can choose the type of installation to perform. The Typical option applies to the large majority of cases. Of course it is possible to use a complete or even a Custom one. Custom setup allows to choose which components the wizard will install. Very useful in situations where drivers might conflict with current components. Very unlikely to happen but there might be situations for example where 3rd parties require exclusive access to specific functions like VSS.

As soon as the selection is chosen now the wizard is ready to install the selected components.

The installation takes only a few minutes if not seconds. Let’s click Finish to complete the installation.

To make the new changes effective we need to reboot the virtual machine. Of course this operation can be deferred allowing to save all work before rebooting.

As a best practice all virtual machines should have VMware tools installed as aside from performances enhancements also greatly helps to interact with the operating system residing in the virtual machine Guest OS. A few examples include:
- when running Backups and Restore operations is helping freezing access to the file system achieving crash and application consistent backups.
- better Memory management including memory ballooning features
- better access to the file system inside the virtual disks (in particular with SCSI disks)
- enhanced network performances including the support of plenty of enterprise features including the ones for security
As a next step we are now ready to use this Windows Server 2016 virtual machine as a template to start building or upgrading our home lab. In the next article we’ll review the options about deploying custom Windows Server 2016 virtual machines.
https://store-images.s-microsoft.com/image/apps.39362.ff08b276-2a72-4253-8260-56dcb1d50bfb.6f4e9730-1f79-49f9-8608-f6c02ab25412.60929cd0-49bd-4e64-9889-20dec4eee767
HandBrake is a open-source tool, built by volunteers, for converting video from nearly any format.
HandBrake is a open-source tool, built by volunteers, for converting video from nearly any format to a selection of modern, widely supported codecs. Most of HandBrake’s source code is covered by the GNU General Public License, version 2. A copy of which is included with every release in the COPYING file. Portions are covered under BSD 3 Clause.
Launch HandBrake by quickly clicking twice (double-clicking) on the cocktail & pineapple icon.
HandBrake takes videos you already have and makes new ones that work on your mobile, tablet, media player, computer, or web browser—nearly anything that supports modern video formats.
Features :
Disclaimer : This Virtual machine offer contains free and open source software. All the software, trademarks used in the Virtual machine offer are the exclusive property of their respective owners. Askforcloud LLC does not offer commercial license of the product mentioned above.
Outline
(Optional) Quick Utility Toolbox is the software for launching supported utilities, setting or controlling the product settings, or accessing to the manual site.
Update History
[Ver.2.6.3]
— The supported models have been added.
[Ver.2.6.2]
— The supported models have been added.
[Ver.2.6.1]
— The modules for supporting the language have been updated.
— The supported models have been added.
[Ver.2.6.0]
— The supported models have been added.
[Ver.2.5.0]
— The supported models have been added.
[Ver.2.4.5]
— The supported models have been added.
[Ver.2.4.0a]
— Windows 11 has been added as a supported OS.
— Windows Server 2022 has been added as a supported OS.
— The supported models have been added.
[Ver.2.3.6]
— The supported models have been added.
[Ver.2.3.5]
— The supported models have been added.
[Ver.2.3.0]
— Windows Server 2019 has been added as a supported OS.
— The supported models have been added.
[Ver.2.2.0]
— The supported models have been added.
[Ver.2.1.5]
— The supported models have been added.
[Ver.2.1.2]
— Windows Server 2016 has been added as a supported OS.
— The supported models have been added.
— Internal failure of Calibration Tool contained in Quick Utility Toolbox was modified.
[Ver.2.1.1]
— The supported models have been added.
[Ver.2.0.0]
1.The supported models have been added.
2.The following supported OS have been added:
— Windows Server 2012 R2(64bit)
— Windows Server 2012(64bit)
— Windows Server 2008 R2(64bit)
— Windows Server 2008(32bit)
— Windows Server 2008(64bit)
[Ver.1.1.0]
— Windows 10 has been added as a supported OS.
— Service area of [Cloud] function has been added.
System requirements
Windows 11
Windows 10(32bit)
Windows 10(64bit)
Windows 8.1(32bit)
Windows 8.1(64bit)
Windows 7 SP1 or later(32bit)
Windows 7 SP1 or later(64bit)
Windows Server 2025
Windows Server 2022
Windows Server 2019(64bit)
Windows Server 2016(64bit)
Windows Server 2012 R2(64bit)
Windows Server 2012(64bit)
Windows Server 2008 R2(64bit)
Setup instruction
Download / Installation Procedures
1. Download the file. For the location where the file is saved, check the computer settings.
2. Double-click the downloaded EXE file to decompress it, then installation will start automatically.
Disclaimer
All software, programs (including but not limited to drivers), files, documents, manuals, instructions or any other materials (collectively, “Content”) are made available on this site on an «as is» basis.
Canon Hongkong Company Limited., and its affiliate companies (“Canon”) make no guarantee of any kind with regard to the Content, expressly disclaims all warranties, expressed or implied (including, without limitation, implied warranties of merchantability, fitness for a particular purpose and non-infringement) and shall not be responsible for updating, correcting or supporting the Content.
Canon reserves all relevant title, ownership and intellectual property rights in the Content. You may download and use the Content solely for your personal, non-commercial use and at your own risks. Canon shall not be held liable for any damages whatsoever in connection with the Content, (including, without limitation, indirect, consequential, exemplary or incidental damages).
You shall not distribute, assign, license, sell, rent, broadcast, transmit, publish or transfer the Content to any other party. You shall also not (and shall not let others) reproduce, modify, reformat, disassemble, decompile or otherwise reverse engineer or create derivative works from the Content, in whole or in part.
You agree not to send or bring the Content out of the country/region where you originally obtained it to other countries/regions without any required authorization of the applicable governments and/or in violation of any laws, restrictions and regulations.
By proceeding to downloading the Content, you agree to be bound by the above as well as all laws and regulations applicable to your download and use of the Content.
This is how to easily install ADK and MDT in Windows Server 2016 for Windows Deployment. The current version of Microsoft Deployment Toolkit is MDT 2013 update 1. MDT is a solution accelerator for operating system and application deployment. MDT supports the deployment of client operating systems and server operating systems. In this post, we are going to show you how to install and configure MDT and ADK for Windows 10 in Windows Server 2016 which works the same as Windows Server 2012 R2.
The methods of installation and configuration of all Microsoft Deployment Tool kits are the same. So don’t worry, just download the MDT required components ADK for Windows 10 or for older Windows and start installing.
You might need to read for Windows deployment Services:
- How to install Windows Deployment Service WDS In Windows Server 2012 R2?
- Configure Windows Deployment Services on Server 2012 R2
- Deploying Windows 10 Using WDS Server 2012 R2
Download and Install ADK and MDT
The first kit we need to download is the Windows ADK for Windows 10. The second one is the latest update of the Microsoft deployment tool kit. Download the Microsoft deployment tool kit update 1 files from the Microsoft website. Always try to download the latest version of MDT.
In our practicing lab, we are using MDT 2013 update 1 which supports Windows 10 and Windows Server Server 2016. You can download Windows ADK for Windows 10 with two methods. Download and Install at the same time or download all components in a separate Windows and move it to Windows Server. So I have selected the second one. First, download all Windows ADK for Windows 10 and now try to install it.
1. Let’s download all components of Windows ADK for Windows 10 and then install it.
-
- Download the Windows ADK for Windows 10 and run the setup.
2. Select the Download the Windows Assessment and Deployment Kit – Windows 10 for installation on a separate computer and Browns to specify the path then click Next.
3. It’s a test lab so select No and click Next. On the license terms and agreement page click Accept to accept the Windows Kits privacy.
4. It is almost 3 and a half GB in size. When the download is complete successfully, move or copy files to Windows Server 2016 then run the adksetup file to install it.
5. Specify a location or click Next to select the default location. Then on the Windows Kits privacy page select No and on the license terms and agreement page Accept.
6. Now select the features you want to install. Don’t select unnecessary features. Click Next to install it.
7. It will take a few minutes to complete. When it is finished, close the page.
Now the Windows ADK for Windows 10 is installed successfully in Windows Server 2016. The next step is to install the Microsoft Deployment tool kit.
How to Download and Install MDT?
So the installation of Windows ADK for Windows 10 has finished successfully. Now try to download and install Microsoft Deployment tool kit update 1.
- Microsoft Deployment Toolkit (MDT) 2013 Update 1 and run the setup.
1. Run the downloaded Microsoft deployment tool kit setup file and click Next.
2. Select I accept the terms in the license agreement and click Next.
3. Click Next and do nothing on this page because we need tools and documents.
4. For testing lab select I don’t want to join the program at this time and click Next.
5. Click Install to start the installation. Let the installation will be finished. Finally, click Finish to close the page.
Yes, that’s it. The Microsoft deployment tool kit was also installed successfully. If you are faced with some errors or problems during the installation, try to search for the title on Google or comment to us through this post.
6. Now go to Windows Server 2016 start menu and run the Deployment Workbench.
Here is the Windows deployment Workbench. It is ready for Windows Deployment and Application Deployment.
Now the Microsoft Deployment Toolkit is ready for configuration and deploying new operating systems and Applications.
It’s time to configure the MDT and start deploying Windows 10 with MDT. Continue the article about deploying Windows 10 using MDT in Windows Server 2016. So that’s all you need to install ADK and MDT for your Windows Deployment Server in Windows Server 2016.