
If you’ve recently updated to Windows 11 and are worried about Toolbars missing from Taskbar. Then, this article will help you to enable and add Toolbars on the Windows 11 Taskbar.
Undoubtedly, Microsoft has completly redesigned Windows 11 and introduced some new features. But, Microsoft also removed some useful features, which was earlier available on Windows 10. Like, now in Windows 11, you cannot add Toolbars on the Taskbar. You now only get TaskBar settings and Task Manager options when you right-click on the Taskbar.

Earlier, there was an option to add new Toolbars. With Toolbars, you can add frequently used Programs, Files, Folders, Desktop, links, etc. Yes, in Windows 11, you can manage Taskbar and system tray icons. However, some Internet Speed Meter programs still require a Toolbars option. So, here’s how to quickly enable Toolbars on Windows 11.
Enable Toolbars on Windows 11 Taskbar
1. ExplorerPatcher
ExplorerPatcher is a free and open-source program designed to enhance the working environment on Windows 11. It allows you to enable/disable File Explorer features. It adds all features to the Explorer, which is removed on the latest Windows. Yes, it also does add a Toolbars option. You can access it by right-clicking on the Windows Taskbar. So that, you can easily add Toolbars on the Windows 11 Taskbar. However, it moves taskbar items to the left, just like Windows 10 Taskbar. With Explorer Patcher, you can also Change the Weather Widget Position on Windows 11 Taskbar.
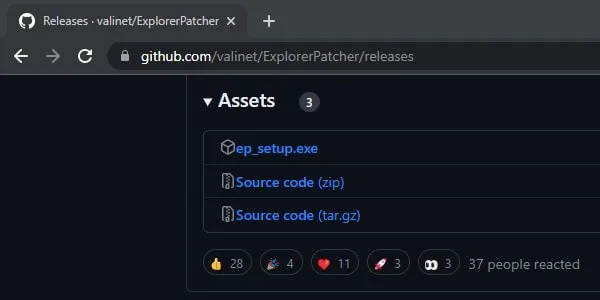
1. First, do download the latest version of Explorer Patcher from GitHub.
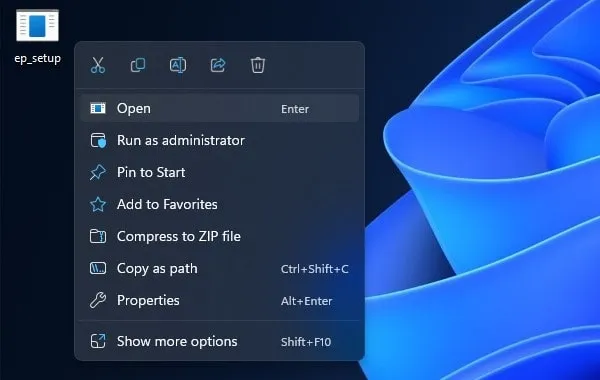
2. Once the Explorer Patcher gets set up gets downloaded. Do right-click on the “ep_setup” and after that click on Open.
3. Windows Protected your PC window might appear, click on More info > Run anyway.
4. UAC window might appear, click on Yes.
5. Gray/Black screen might appear for a few seconds or a minute.
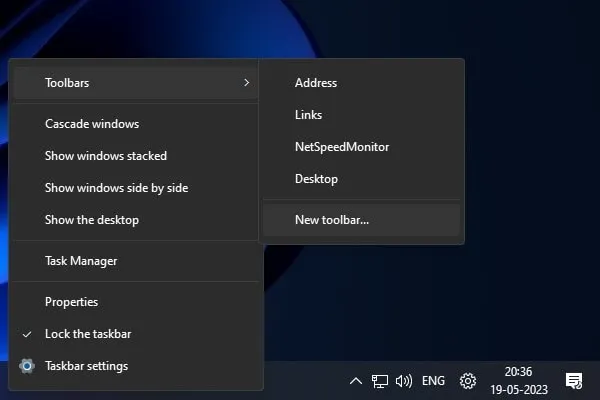
6. After that, the Desktop will appear. Now, right-click on the Taskbar anywhere, and you will find the Toolbars option.
7. Go to Toolbars > New Toolbar.
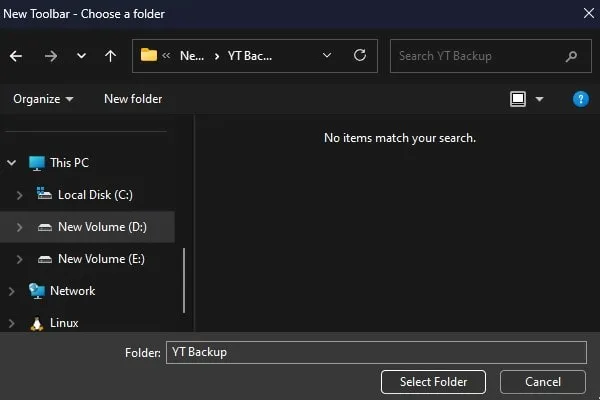
8. New Toolbar – Choose a folder screen will appear. Do select any folder that you want to add to Taskbar. Click on Select Folder.
9. That’s it, a new toolbar will get added to the selected folder.
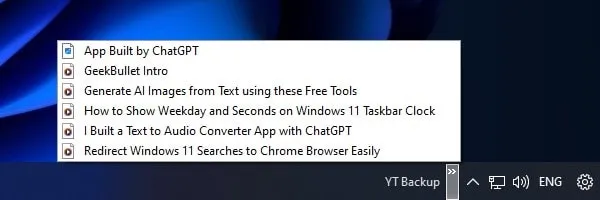
10. You will see a >> icon next to the folder name. Click on it and you will find all folder items. From it, you can quickly open any file.
11. Yes, you can also add custom programs to Windows 11 Taskbar using Toolbars Feature.
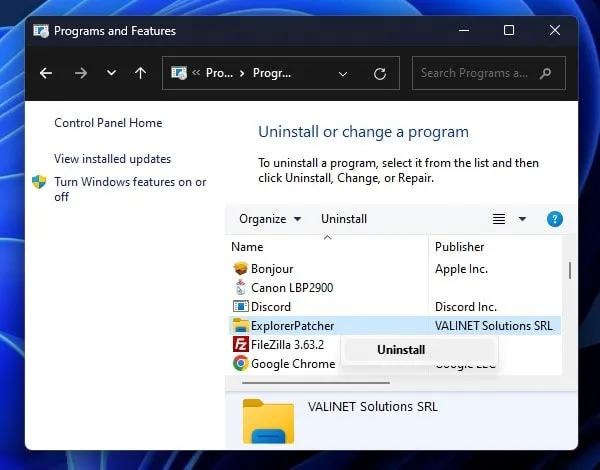
12. And, if you want to get back your old Windows 11 Taskbar. Then from Control Panel, you can uninstall Explorer Patcher. Yes, your screen will go black again for a few seconds. And, you will get uninstall complete message.
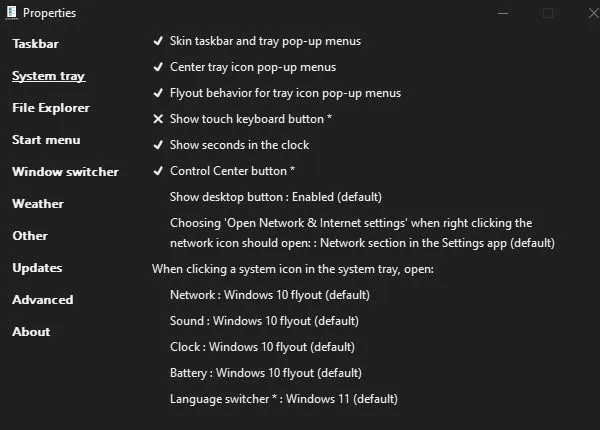
13. Do right-click on the Windows 11 Taskbar and then Click on Properties, to open Explorer Patcher Settings.
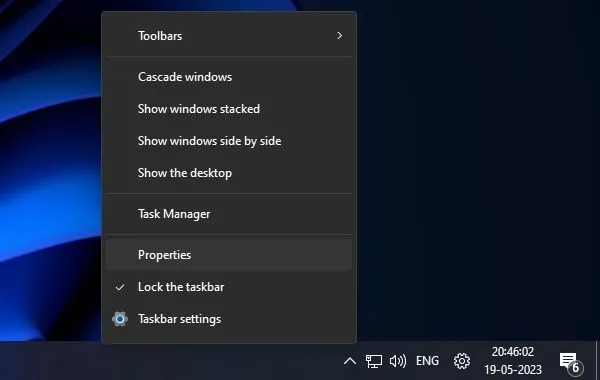
14. Since Explorer Patcher is an advanced version of File Explorer. And, it adds more features. So, you can enable/disable explorer features using App Properties.
2. Tray Toolbar
The TrayToolbar app allows adding any folder to the custom menu. However, it doesn’t add options to Right-Click Taskbar menu. The app adds a folder icon to Windows 11 system tray. You can add a path to the Tray Toolbar App icon. And, the app icon will show you all items in that folder. So that, you can quickly access all items.
1. First, go to the following link and do download Tray Toolbar and Windows Desktop Runtime Setup.
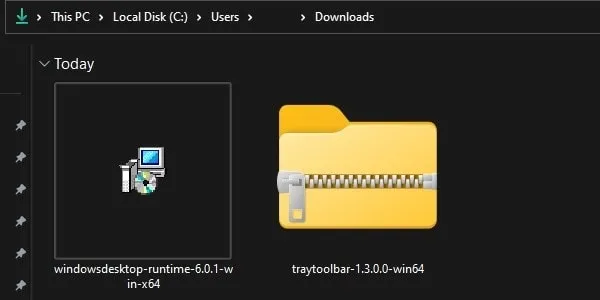
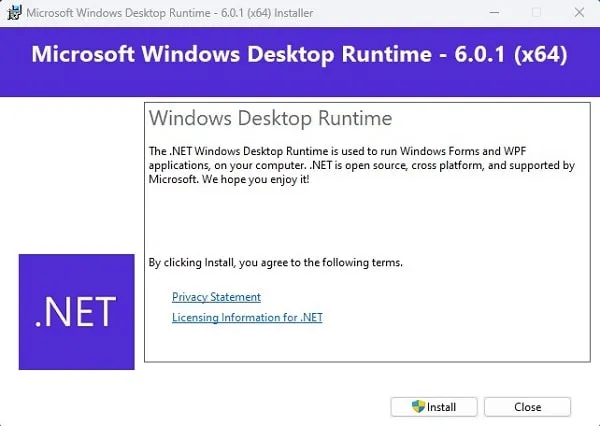
2. First, do run the “windowsdesktop-runtime-6.0.1-win-x64” setup file and install it on your Windows 11 Computer.
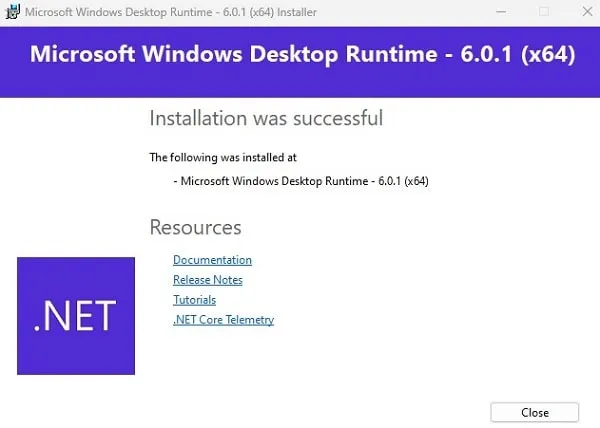
3. Once, Windows Desktop runtime gets installed. You will get the installation successful message.
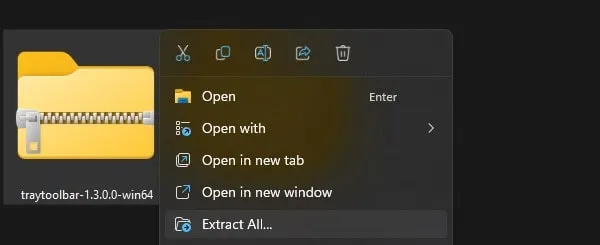
4. After that, do right-click on the TrayToolbar Compressed folder and then click on Extract All > Extract.
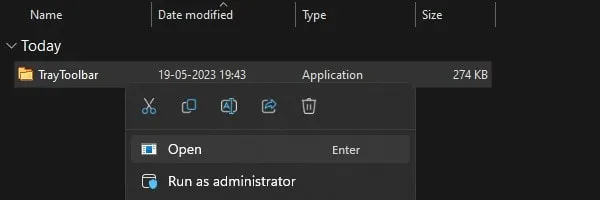
5. Open the Extracted Folder and you will find the TrayToolbar application.
6. Right-click on it and then click on Open.
7. “Windows protected your PC” screen will appear. Click on More info > Run anyway.
8. Now, in System Tray, you will find a folder icon. Do right-click on it and then click on Options.

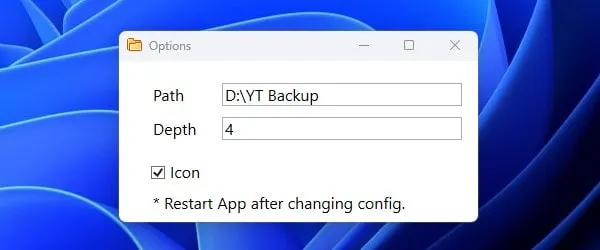
9. An options window will get open.
- Path: Enter the path of the folder, to which you want to be a menu.
- Depth: You can enter 5 in it.
- Icon: Keep it enable.
10. After entering all details, simply close the Options window. And, after that, do right-click on the Tray Toolbar icon and then click on Refresh.

11. That’s it, now click on the TrayToolbar icon. And, you will see all items in the added folder.
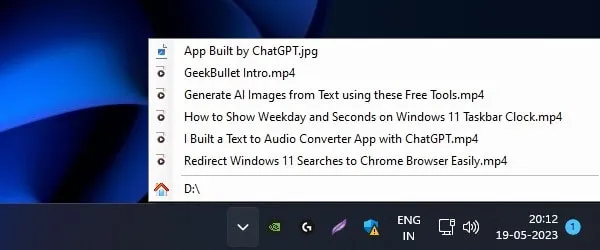
12. Now, you can quickly launch any item by clicking on it.
Windows 11 has made several significant changes to the user interface compared to its predecessors. With the introduction of a more streamlined design and a focus on productivity, users may find that they need to adapt their workflow to this new environment. One frequently asked question is about adding toolbars in Windows 11, which can help users access their preferred applications and functionalities quickly.
This comprehensive article will delve into what toolbars are, why they are useful, and provide an in-depth guide on how to add toolbars in Windows 11. This guide aims to keep things simple, informative, and actionable, ensuring that every user, whether a novice or more advanced, can navigate the process with ease.
What are Toolbars?
Toolbars are usually a row of icons or buttons located at the top or sides of a graphical user interface (GUI) that provide quick access to various functionalities. Toolbars can minimize the time required to perform tasks by providing shortcuts to frequently-used applications, files, or settings. In Windows, toolbars were traditionally incorporated into the taskbar, which allows users to access them effortlessly.
In Windows 11, the concept of toolbars has evolved, but they still serve the same vital functions — enabling faster workflow and organization.
Why Use Toolbars in Windows 11?
Using toolbars in Windows 11 can enhance productivity significantly. Here are a few reasons why toolbars are beneficial:
-
Quick Access: With a toolbar, you can access applications and files without navigating through various menus or folders.
-
Customization: Toolbars allow for personalization according to your preferences. You can add, remove, or rearrange items in a toolbar, creating a workspace that suits your workflow.
-
Organization: By categorizing applications and files into toolbars, you can keep your taskbar and desktop less cluttered and more organized.
-
Efficiency: Spending less time searching for applications and information means more time focused on getting work done.
With these benefits in mind, let’s dive into how you can add a toolbar in Windows 11.
Steps to Add a Toolbar in Windows 11
Step 1: Access the Taskbar Settings
The first thing you need to do is access the Taskbar settings, as this is where you will manage most of your toolbars.
- Right-click on the taskbar (the bar at the bottom of your screen) to open a context menu.
- Select “Taskbar settings.” This action will direct you to the settings page dedicated to the taskbar features.
Step 2: Enable Toolbars
While Windows 11 restricts certain features visible in previous versions, the functionality of adding toolbars remains intact, albeit with a slightly different approach.
- In the Taskbar settings window, scroll down to the section titled “Toolbars.”
- You will typically see options to enable toolbars like the “Address” toolbar and “Links” toolbar.
- Toggle them on by clicking the switch next to the desired toolbar.
Step 3: Adding a New Toolbar
To create a new toolbar, you’ll need to utilize the desktop instead. Unlike in previous versions where the functionality could be fully managed from the taskbar settings, Windows 11 offers you a different approach.
-
Create a Folder: You can create a folder on your desktop or in File Explorer where you can add shortcuts for the applications or files you want to include in your toolbar. (Right-click on the desktop, select “New,” and then “Folder.”)
-
Add Shortcuts: Drag and drop shortcuts of the applications, documents, or folders you want quick access to into this new folder.
Step 4: Add the Folder as a Toolbar
With your shortcuts in place, you can now turn that folder into a toolbar.
-
Right-Click on the Taskbar: Once again, right-click on the taskbar.
-
Select Toolbars: Hover over or select the option to add a toolbar.
-
New Toolbar: You will see an option for “New toolbar…” Click on it.
-
Select Your Folder: A dialog box titled «New Toolbar» will pop up. Navigate to your desktop or wherever you created the shortcut folder and select that folder.
-
Click Select Folder: After selecting the folder, click the “Select Folder” button. Your folder will be incorporated as a new toolbar on your taskbar.
Step 5: Use Your New Toolbar
Your new toolbar is now visible alongside other taskbar items. You can either click on the arrow next to the toolbar name or hover over it to display the shortcuts you added inside. Clicking on an icon will directly open the corresponding application or file.
Step 6: Customize Your Toolbar
One significant advantage of toolbars is customizability. Here are some tips for customization:
-
Resizing the Toolbar: If you want to change the size of your toolbar, right-click on the taskbar and click on “Taskbar settings.” Here, you can adjust the size of your icons, thereby affecting the toolbar’s appearance.
-
Rearranging Toolbars: You can rearrange toolbars by clicking and dragging them. For instance, you might want your new toolbar to be on the left or right side of the taskbar rather than the default position. Simply click and hold the name of the toolbar and drag it to your desired location.
-
Remove a Toolbar: If you find that you no longer need a particular toolbar, right-click on the taskbar again, hover over “Toolbars,” and you can uncheck the toolbar you wish to remove.
Step 7: Adding Functionality with Third-Party Applications
While Windows 11’s built-in tools are beneficial, consider augmenting your capabilities using third-party applications that provide enhanced toolbar functionalities. Some popular options include:
-
Classic Shell: This software allows users to bring back the Start menu and customize toolbars even further.
-
7+ Taskbar Tweaker: This app provides a slew of customization options, including toolbar management.
Before downloading third-party applications, ensure they are from reliable sources and check their compatibility with Windows 11.
Understanding the Limitations
While adding toolbars can significantly enhance usability, it is essential to be aware of certain limitations within Windows 11’s current framework:
-
Lack of Traditional Toolbars: Unlike older versions of Windows, in Windows 11, you do not get traditional menu bar toolbars you could once find directly on File Explorer windows.
-
Limited Third-Party Support: The evolution of Windows has shifted a lot of focus towards modern apps, and some third-party toolbars may not integrate seamlessly or may lack support.
-
User Interface Changes: As Microsoft continues to evolve Windows 11, users should keep abreast of potential changes that can affect functionality.
Conclusion
Adding toolbars in Windows 11 can be a powerful way to streamline your workflow, granting faster access to applications and files that you frequently use. By following the steps above, you’ll be capable of customizing your toolbar to fit your preferences seamlessly.
Remember that toolbars are just one of numerous functionalities within Windows that can enhance your productivity. Whether you’re managing important documents, requiring rapid application access, or structuring your desktop more efficiently, toolbars can serve as a valuable component of your workspace.
Always ensure to stay updated with any changes Microsoft implements to the operating system, as new features and enhancements can continuously improve user experience and functionality.
Adding the Quick Launch Toolbar in Windows 11
Adding the Quick Launch Toolbar in Windows 11 brings back a classic feature from earlier Windows versions. This guide will show you how to do it step by step. By the end, you’ll have easy access to your favorite apps and folders right from your taskbar.
In this section, you’ll learn how to add the Quick Launch Toolbar to your Windows 11 taskbar. This will help you quickly access your frequently used programs, files, and folders. Follow these steps carefully, and you’ll be all set.
Step 1: Right-click the Taskbar
Right-click an empty space on your taskbar to open the context menu.
When you right-click the taskbar, a menu appears with various options. Here, you’ll find the «Toolbars» option that we’ll use in the following steps.
Step 2: Select Toolbars and Choose «New Toolbar»
Navigate to «Toolbars» from the context menu and then click on «New Toolbar.»
The «New Toolbar» option allows you to choose a specific folder to create a custom toolbar. We’re going to point it to the Quick Launch folder.
Step 3: Enter Quick Launch Path
In the folder selection window, type C:Users[YourUserName]AppDataRoamingMicrosoftInternet ExplorerQuick Launch and press Enter.
Make sure to replace [YourUserName] with your actual Windows username. This path directs Windows to the specific folder that acts as your Quick Launch Toolbar.
Step 4: Click Select Folder
After entering the path, click «Select Folder» at the bottom of the window.
When you click «Select Folder,» Windows will add the Quick Launch Toolbar to your taskbar. You’ll see a small section on your taskbar with the Quick Launch items.
Step 5: Adjust Toolbar Settings
Right-click on the newly added Quick Launch Toolbar to customize it as you wish.
You can adjust the size, move it around, or hide the text and titles by right-clicking on it and selecting the appropriate options. This helps you make the toolbar fit your needs perfectly.
After completing these steps, the Quick Launch Toolbar will appear on your taskbar. You can now drag and drop shortcuts to it, making it easier to access your favorite applications and files quickly.
Tips for Adding the Quick Launch Toolbar in Windows 11
- Tip 1: Double-check the file path while typing; even a small typo can prevent the toolbar from being added.
- Tip 2: Customize the toolbar to hide text and titles for a cleaner look.
- Tip 3: Use drag and drop to quickly add or remove items from the Quick Launch Toolbar.
- Tip 4: You can resize the toolbar by dragging the separator lines next to it.
- Tip 5: Consider backing up your Quick Launch settings if you plan to make major changes to your system.
Frequently Asked Questions
Why can’t I find the Quick Launch Toolbar option?
You need to ensure that the Taskbar is unlocked before you can add the Quick Launch Toolbar. Right-click the taskbar and uncheck «Lock the Taskbar» if it’s currently locked.
Can I add custom shortcuts to the Quick Launch Toolbar?
Yes, you can drag and drop any shortcuts, files, or folders directly onto the Quick Launch Toolbar.
How do I remove the Quick Launch Toolbar if I no longer want it?
Right-click the Quick Launch Toolbar and click «Close Toolbar» to remove it from your taskbar.
Is the Quick Launch Toolbar available in all versions of Windows?
While the Quick Launch Toolbar is a feature from older Windows versions, it can still be added manually in Windows 10 and 11.
Can I rename the items in the Quick Launch Toolbar?
Yes, you can right-click any item in the Quick Launch Toolbar and select «Rename» to change its name.
Summary
- Right-click the Taskbar.
- Select Toolbars and choose «New Toolbar.»
- Enter Quick Launch path.
- Click Select Folder.
- Adjust Toolbar settings.
Conclusion
Adding the Quick Launch Toolbar in Windows 11 can significantly boost your productivity by giving you quick access to the programs and files you use most often. This classic feature, though not immediately visible in the latest Windows version, is still accessible with a few simple steps. By following the guide above, you’ll have the Quick Launch Toolbar at your fingertips in no time.
If you find yourself constantly hunting for your favorite shortcuts, it’s worth spending a few minutes setting up this handy tool. Not only does it save time, but it also declutters your desktop and taskbar. Imagine it like having a digital Swiss Army knife—everything you need is just a click away.
Feel free to explore other customization options in Windows 11 to make your user experience even more efficient. Whether you’re a power user or just looking to simplify your daily tasks, the Quick Launch Toolbar is a valuable addition to your toolkit.
Matt Jacobs has been working as an IT consultant for small businesses since receiving his Master’s degree in 2003. While he still does some consulting work, his primary focus now is on creating technology support content for SupportYourTech.com.
His work can be found on many websites and focuses on topics such as Microsoft Office, Apple devices, Android devices, Photoshop, and more.
**Disclosure: This post contains affiliate links. If you make a purchase through these links, we may earn a small commission at no extra cost to you.
As Windows progresses with newer versions, Microsoft tends to add and remove features as they see fit in an effort to keep things fresh. But for many Windows power users, these changes often leave us asking why a certain feature was removed. In Windows 7, we had the Quick Launch Toolbar and were able to add it to Windows 10 as well. But when Windows 11 came out we found this was not an easy thing to do. In this article, we will be showing you how to add the Quick Launch Toolbar in Windows 11.
In order to get the Quick Launch Toolbar back in Windows 11, you are going to need to install some additional software first. Fortunately, this software is free and easy to install. And unfortunately, you need to install this software in the first place!
Installing the Explorer Patcher for Windows 11 Software
The first step in getting the Quick Launch Toolbar back is to install the ExplorerPatcher software that you can download here. When you are on the Github website, look for a line that says Download the latest version of the setup program under the How to section. You will then download a file named ep_setup.exe
Now you will run the executable file that you have downloaded to install the ExplorerPatcher software. You won’t be prompted with any questions about installation paths etc. and the software will simply install itself silently.
You will know its complete when you see your start button and other taskbar icons on the left side of the taskbar. You will also see a different looking Start button.
Before taking the next step, you will need to make sure your taskbar is not locked by right clicking on it and unchecking Lock the taskbar if it is in fact checked.
The next step is to right click the taskbar again and then go to Toolbars > New toolbar and paste the following text into the address bar and press enter on the keyboard.
%SystemDrive%\Users\%username%\AppData\Roaming\Microsoft\Internet Explorer
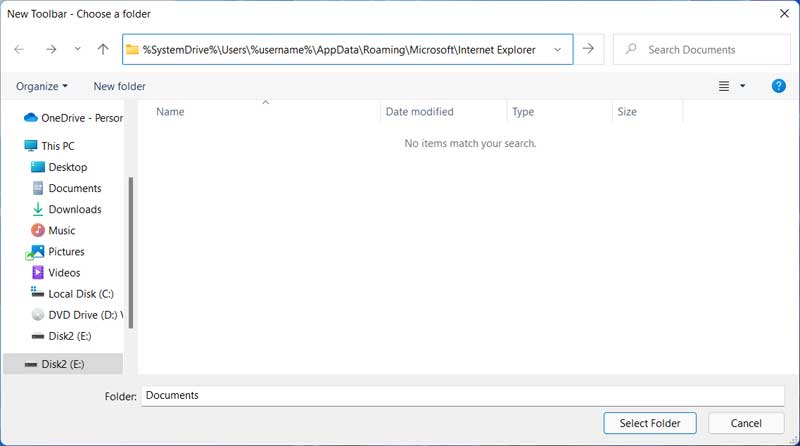
Now you will see a folder named Quick Launch which you will then select and click on the Select Folder button.
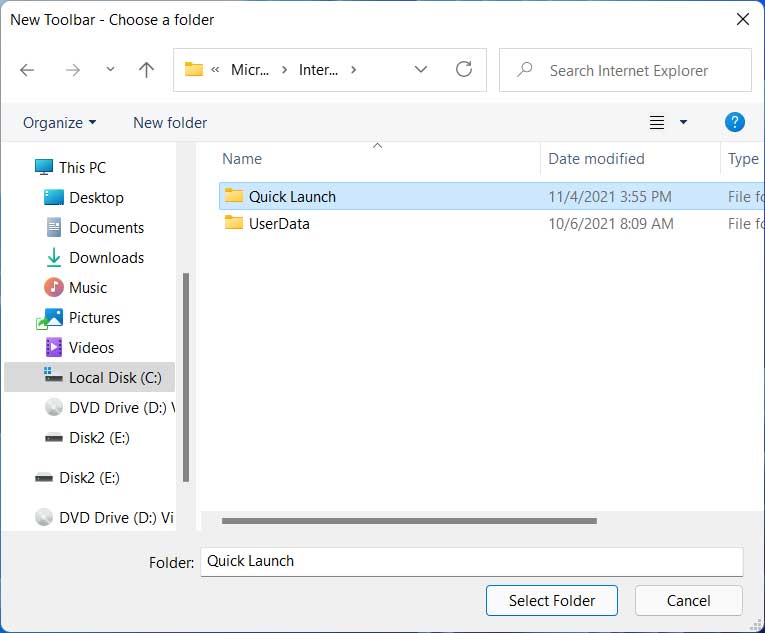
You will then see a Quick Launch section on the right side of your toolbar.
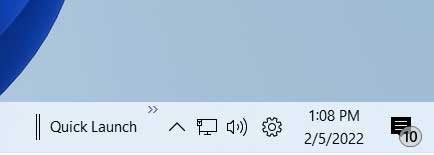
You can then right click on the word Quick Launch and uncheck Show Text and Show Title since they just get in the way.
The next step involves clicking on the double vertical bars and drag them to the left side of the toolbar. You might need to play with this a little to get things in the right place. After that you will end up with your small Quick Launch icons with your larger original icons next to them.
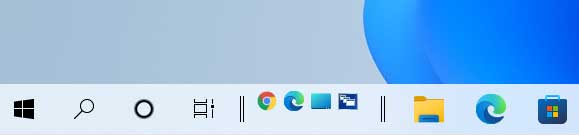
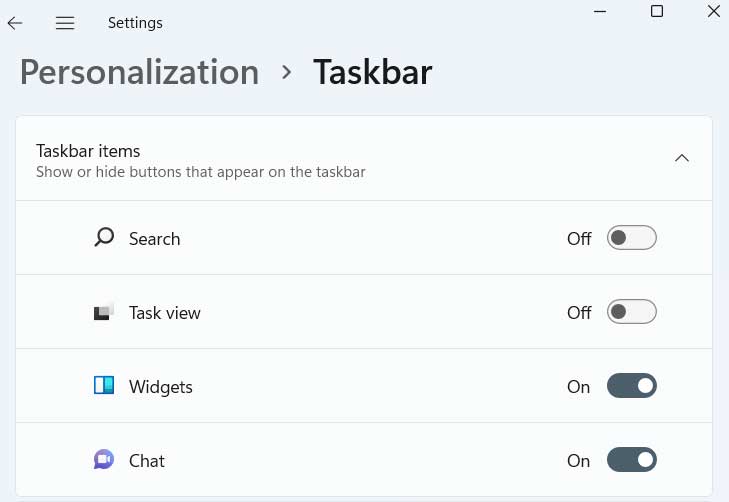
For the larger icons, you can right click them and choose Unpin from taskbar to remove them. For the Task view and Search icons, you can go to the Windows settings and then to Personalization > Taskbar to turn them off.
For the Cortana search icon, you can right click the taskbar again and uncheck Show Cortana button.
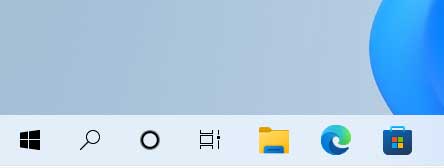
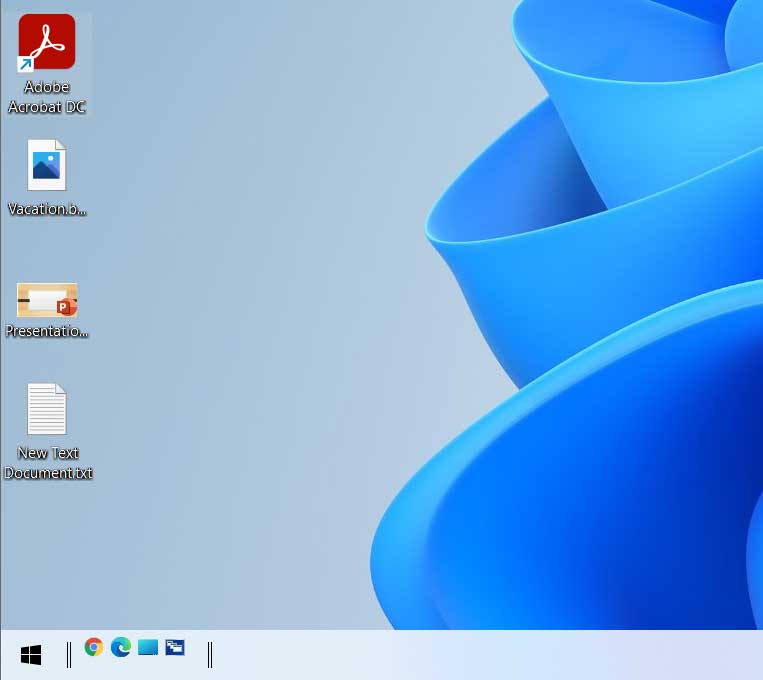
Once you have made all of these changes, your taskbar should look like the image below.
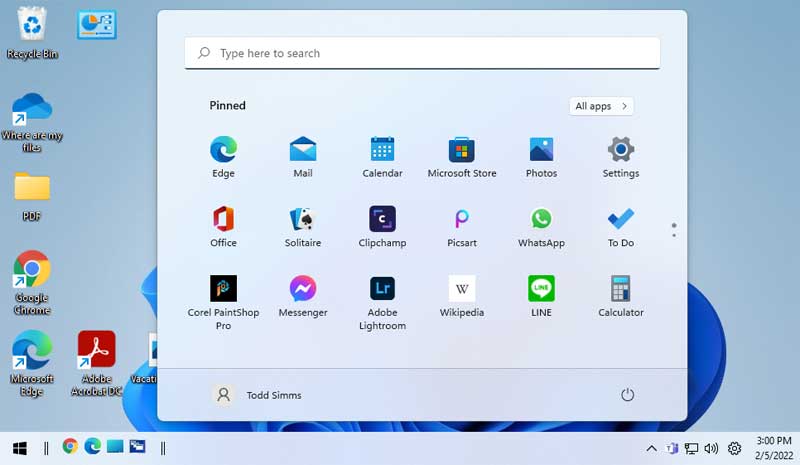
One thing you will notice though is that when you click on the Start button, your Start menu will appear in the middle of the screen.
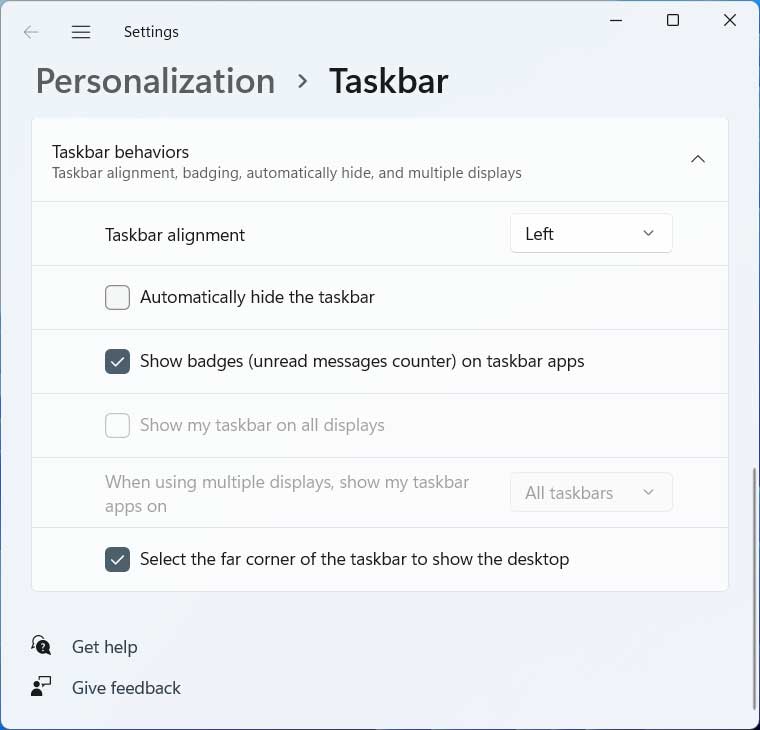
This can be changed by setting the taskbar alignment to the left from the Personalization > Taskbar settings from the Taskbar behaviors settings.
Another thing you can do is install Classic Shell to get a Windows 7 style Start menu for your Windows 11 (or Windows 10) computer. So as you can see, it only takes a few steps to add the Quick Launch Toolbar to the taskbar in Windows 11.
If you want to revert back to the default Windows 11 taskbar without the Quick Launch toolbar, you can go to Programs and Features in Control Panel or Apps and Features in the Windows settings app and uninstall ExplorerPatcher. After doing so, everything will be back to the way it was before you started.
For additional training resources, check out our online IT training courses.
Check out our extensive IT book series.
Windows 11 introduced many exciting features, enhancements, and a more visually appealing interface than its predecessor, Windows 10. As users acclimate to the new experience, many are finding that customizing their interface can significantly improve productivity and streamline everyday tasks. One such customization that many users seek is the addition of a new toolbar. Toolbars can house shortcuts to your most-used applications, files, folders, and settings, effectively allowing you to personalize your workflow.
While Windows 11 doesn’t seem to allow for the same degree of toolbar customization directly on the taskbar as earlier versions, there are still effective ways to create and utilize a new toolbar. In this extensive guide, we will delve into the steps required to achieve this, including the creation of toolbars that can hold various shortcuts while enhancing your computing experience.
Understanding Toolbars in Windows
Before diving into how to add a new toolbar, it is essential to understand what a toolbar is and why it can be beneficial. Toolbars in Windows serve as a convenient way to access applications and files quickly. They allow users to create lists of frequently accessed items, providing instant access without sifting through myriad files, folders, or applications. Toolbars save time, improve efficiency, and streamline the user experience.
Step 1: Create a Specific Folder for Your Toolbar
The first step in creating a new toolbar is to designate a folder that will contain the shortcuts you want on your toolbar. This folder will serve as the basis for the toolbar, housing the links to your frequently-used programs, files, or directories.
-
Navigate to Your Desired Location: Choose a location on your system where you would like to create this new folder. It could be on your desktop or within your Documents folder.
-
Create a New Folder: Right-click in the chosen location and select
New>Folder. Name this folder something intuitive, such as “My Toolbar” or “Quick Access.” -
Add Shortcuts:
- Now, you can populate this folder with the items you want quick access to.
- Locate applications or files that you want in the toolbar.
- Right-click on them and select
Create Shortcut, then drag that shortcut into your new folder. - Repeat this step until your folder holds all the relevant shortcuts for your workflow.
Step 2: Adding the Toolbar to the Taskbar
Once you have created a folder and added your desired shortcuts, it’s time to turn that folder into a toolbar.
-
Unlock the Taskbar: Ensure that your taskbar isn’t locked. Right-click on an empty space on the taskbar. If you see a check mark next to “Lock the taskbar,” it is locked. Click it to unlock.
-
Add the Toolbar:
- Right-click on an empty space in the taskbar once again.
- Hover over or select
Toolbars, and then chooseNew Toolbar. - A window will pop up, allowing you to browse your files. Navigate to the folder you created in the first step and select it.
- Click
Select Folder.
-
Check Your Toolbar: Once you have completed the above steps, you will notice a new toolbar appear on your taskbar at the edge. If you move your mouse over it, you should see the name of your new toolbar.
Step 3: Customizing the Toolbar Appearance
Windows 11 offers certain customization options to make your toolbar fit seamlessly into your workspace.
-
Rearranging the Toolbars: If you have multiple toolbars, you can easily rearrange them per your preference. Simply click and drag the new toolbar to your desired position.
-
Change the View: Right-click the new toolbar and check or uncheck “Show Text” or “Show Title” according to your preference. When the text or title is hidden, the toolbar will only display the icons, saving screen space.
Step 4: Using Your New Toolbar
Now that the new toolbar is set up, you can begin using it to enhance your workflow:
-
Access Your Shortcuts: Click on the new toolbar arrow to see all the shortcuts you have saved. Clicking on any of these items will launch the associated program or open the designated file.
-
Organize Shortcuts: You can add or remove shortcuts at any time. To add to your toolbar, simply drag the new shortcuts into your designated folder. To remove a shortcut, delete it directly from the folder or right-click and choose the option to delete.
-
Modify Shortcuts: If you need to tweak the contents of your toolbar, feel free to add new shortcuts or delete existing ones. Any changes you make within the designated folder for the toolbar will be instantly reflected.
Step 5: Managing Your Toolbar Efficiently
To make the most of your new toolbar, consider the following tips and tricks:
-
Group Related Items: If you add many shortcuts, you may find it beneficial to create additional folders within your toolbar folder. For example, if you have numerous games, you can create a “Games” subfolder that houses shortcuts specific to gaming.
-
Using Icons: For faster recognition, consider using clear and recognizable icons for your shortcuts. You can even change the icon of any shortcut by right-clicking the shortcut, selecting
Properties, and then navigating to theShortcuttab. Click onChange Iconto select a new icon. -
Regular Updates: Regularly review your toolbar’s contents and make adjustments as necessary. This ensures that your toolbar remains a relevant and efficient tool for your workflow.
Troubleshooting Common Issues
While adding and using a new toolbar in Windows 11 is designed to be straightforward, users may occasionally encounter issues. Here are some common concerns and solutions:
-
Toolbar Not Visible: If your toolbar does not appear after following the steps, ensure you’ve followed all steps correctly and that the taskbar is not locked.
-
Shortcuts Don’t Work: If you click an item in the toolbar and it doesn’t work, double-check that the shortcut links to the correct path. If the file has been moved or deleted, the shortcut will be invalid.
-
Toolbar Disappears After Restart: If your toolbar disappears after rebooting, ensure your taskbar settings are saved properly. You may have to recreate the toolbar if changes have not been retained.
-
Limited Space on Taskbar: If your screen is low on real estate and your taskbar fills up quickly, consider removing other seldom-used toolbars or applications to make room for the new toolbar.
Conclusion
Adding a new toolbar in Windows 11 can significantly enhance your efficiency and ease of access to important applications and folders. By creating a dedicated folder and adding shortcuts, you are taking advantage of a feature that allows for a personalized computing experience. Following the aforementioned steps will have you set up and customizing your toolbar in no time, making it an essential part of your everyday workflow.
With practice, toolbars can become powerful tools for enhancing productivity and ensuring you have all the necessary resources at your fingertips. Invest time in organizing and customizing your new toolbar, and experience the difference it brings to your Windows 11 environment. Whether you’re using it for personal projects, work, or gaming, having a well-organized toolbar can make all the difference in navigating your digital life. So go ahead, create a new toolbar, and unleash the full potential of your Windows 11 system!