
Network Time Protocol (NTP) is a highly scalable internet protocol that determines the best time information and synchronizes accurate settings on a computer system. This guide explains how to set the time zone and configure NTP on a Windows Server.
This guide uses Windows Server 2019, but these instructions work on any machine with Server 2016 or later.
Prerequisites
Before you begin:
- Deploy a Vultr Windows Server.
- Connect to the server.
Set the Timezone
- Using the Windows Start Menu, open Server Manager.
- Locate Time zone in the local server properties section.
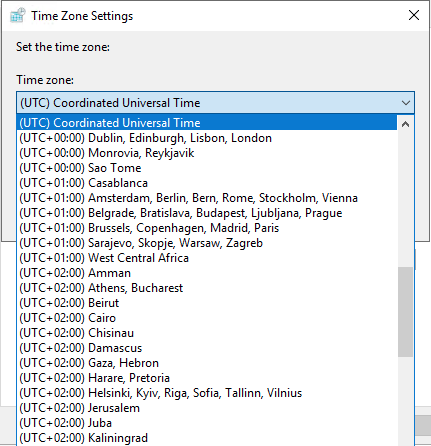
- Click the current timezone, which is UTC Coordinated Universal Timeby default.
- In the Date and Time window, click Change time zone.
- Expand the Time zone drop-down list.
- Select your preferred timezone. It’s recommended to set it to your server location.
- Click OK to save changes.
- Click Apply to load changes on the server.
- Re-open Server Manager, and verify the timezone change.
Optional: Set the Timezone using PowerShell
-
From the start menu, open Windows PowerShell, or open the run dialog (Win key + R), type
powershellin the search bar, and click OK to start PowerShell. -
Run the following command to check the server timezone.
PS > Get-Timezone -
View all available timezones.
PS> Get-Timezone -ListAvailableTo find your target timezone, use the following command to filter by name.
PS> Get-Timezone -ListAvailable | Where-Object {$_.displayname -like "*US*"}> The command above displays all names containing the characters
US. You can use a different string such as London. -
Change your timezone.
PS> Set-Timezone -Name "Central Standard Time"You can also change the timezone by ID.
PS> Set-Timezone -Id "Central Standard Time"
Configure NTP
In addition to setting the timezone, you can also configure Windows to use NTP to synchronize the time.
-
Open the Run dialog window by pressing the Windows key (WIN) + R on your keyboard.
-
In the search bar, enter
regeditand click OK to open Registry Editor. -
Expand the registry navigation tree:
HKEY_LOCAL_MACHINE -> SYSTEM -> CurrentControlSet -> Services
-
Expand W32Time.
-
Click Config.
-
Select AnnounceFlags
-
Enter
5in the Value data field. -
Click OK to save changes.
-
In the left pane, click Parameters.
Optional: Change the NTP Server
By default, Vultr uses the time.constant.com time server, located on our high-speed infrastructure. If you want to use a different time server, you can change the value of the NtpServer parameter by following these steps.
-
Double-click NtpServer
-
Change the value data field to your preferred value. For example, to sync with the United States NTP pool, use:
us.pool.ntp.orgYou can find a list of NTP Pool servers at the official website.
-
Expand TimeProviders.
-
Click NtpServer.
-
Double click Enabled, change the value data from
0to1, and click OK to save changes. -
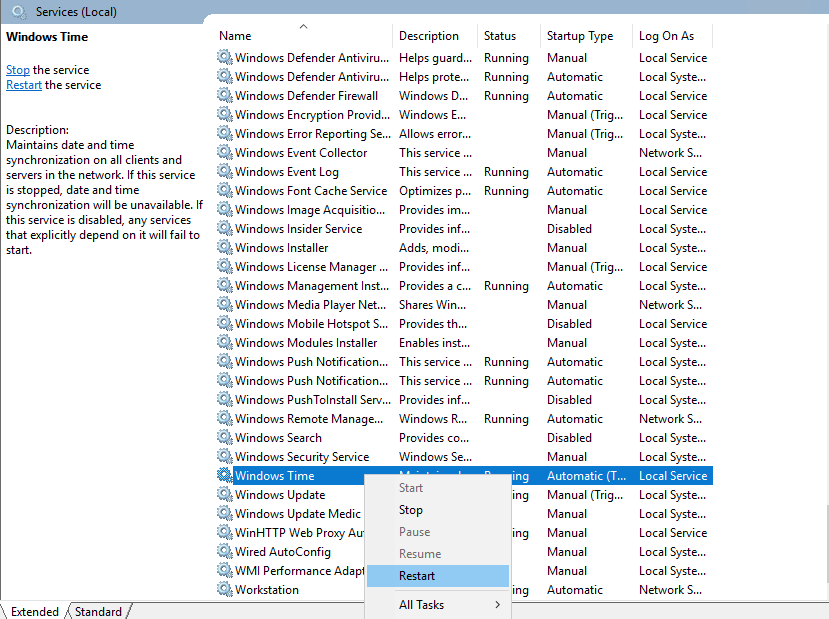
Close the registry editor, open the start menu, and search the keyword
services. -
In the services window, scroll through the list, select Windows Time, right-click, and select Restart to apply NTP changes.

Optional: Configure NTP Using PowerShell
If you prefer to use Powershell, you can use the following commands to configure NTP.
-
Open PowerShell with administrative privileges.
-
Check the NTP time synchronization status.
PS> w32tm /query /status -
Enter the following command to set the time AnnounceFlags to
5.PS> Set-ItemProperty -Path "HKLM:\SYSTEM\CurrentControlSet\services\W32Time\Config" -Name "AnnounceFlags" -Value 5 -
(Optional) If you want to use NTP pool servers instead of Vultr’s NTP server, run the following command.
PS> Set-ItemProperty -Path "HKLM:\SYSTEM\CurrentControlSet\Services\w32time\Parameters" -Name "NtpServer" -Value us.pool.ntp.org -
Enable NTP Server.
PS> Set-ItemProperty -Path "HKLM:\SYSTEM\CurrentControlSet\Services\w32time\TimeProviders\NtpServer" -Name "Enabled" -Value 1 -
Restart the Windows Time service.
PS> Restart-Service w32Time -
Test NTP synchronization.
PS> w32tm /resync
Next Steps
You have successfully set the timezone and configured NTP on Windows Server 2019. If you plan to have other machines on a Vultr VPC use your NTP server, allow port 123 in the Windows Server Firewall. For further information, refer to the following guides.
- Official NTP Documentation
- List of database TimeZones
- Configure the Firewall on Windows Server 2019
- Create A Vultr Virtual Private Cloud (VPC)
Let’s note that the Time Zone, like Date/Time, is one of the significant parameters of a computer that affects the proper functioning of Windows and various applications. It is recommended to set the Time Zone according to the geographical location of the computer.
Granting permissions to change the time zone in Windows.
To restrict users from changing the time zone, you need to open Local Security Policy via the command line using the command: secpol.msc In the opened window, navigate the path: Security Settings -> Local Policy -> User Rights Assignment -> Change the time zone (Change time zone).
To restrict users’ rights to change the time zone, you need to remove ‘Users’ from the list of user accounts. In Windows Server, users in the ‘Local Service’ and ‘Administrators’ groups can change the Time Zone.

Changing Time Zone in Windows / Windows Server.
Changing Time Zone in the graphical interface of Windows
In Windows 10 and Windows Server 2019/2016 operating systems, to configure the time and time zone, you can:
— go to the ‘Settings’ section through the ‘Start’ menu;
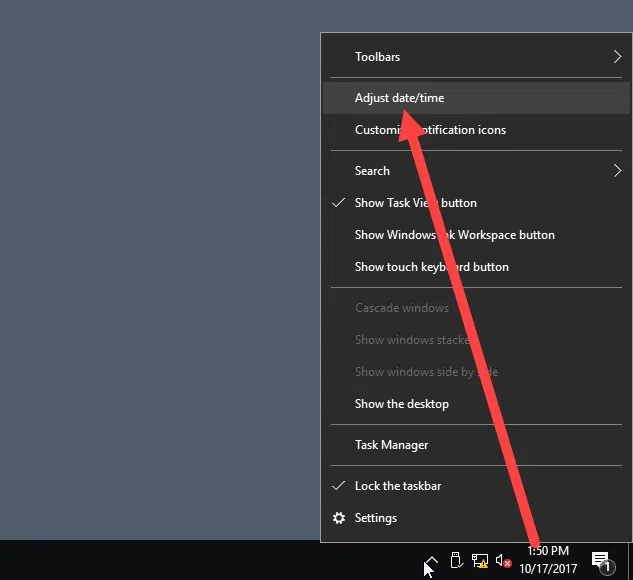
— go to the ‘Settings’ section by right-clicking on the clock icon in the taskbar, where you can select the ‘Adjust date and time’ option;
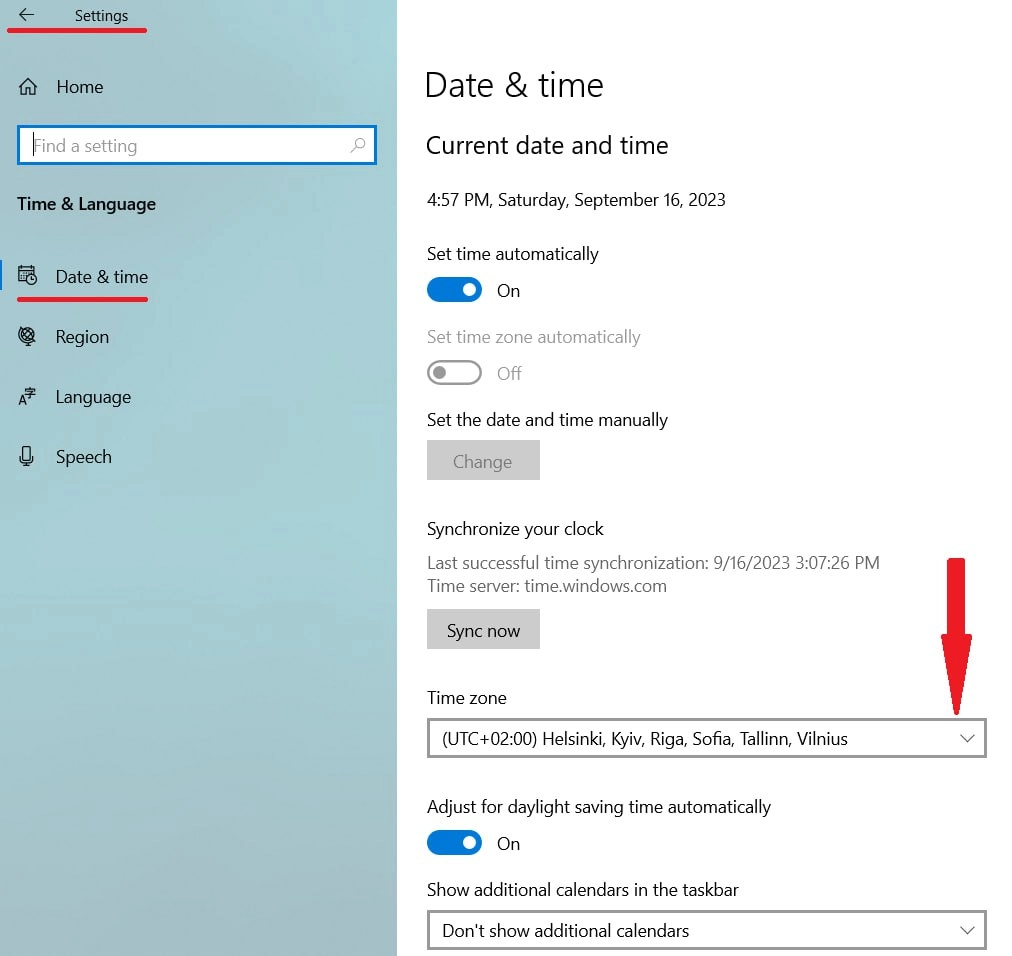
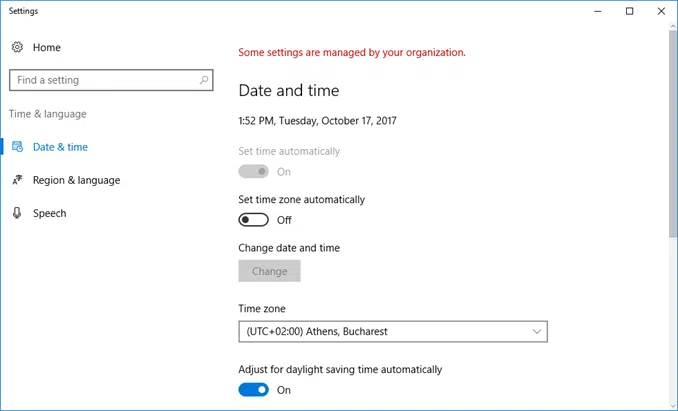
*By default, the ‘Set time automatically’ option will be checked. You can disable this option and manually choose the desired time zone from the drop-down list.
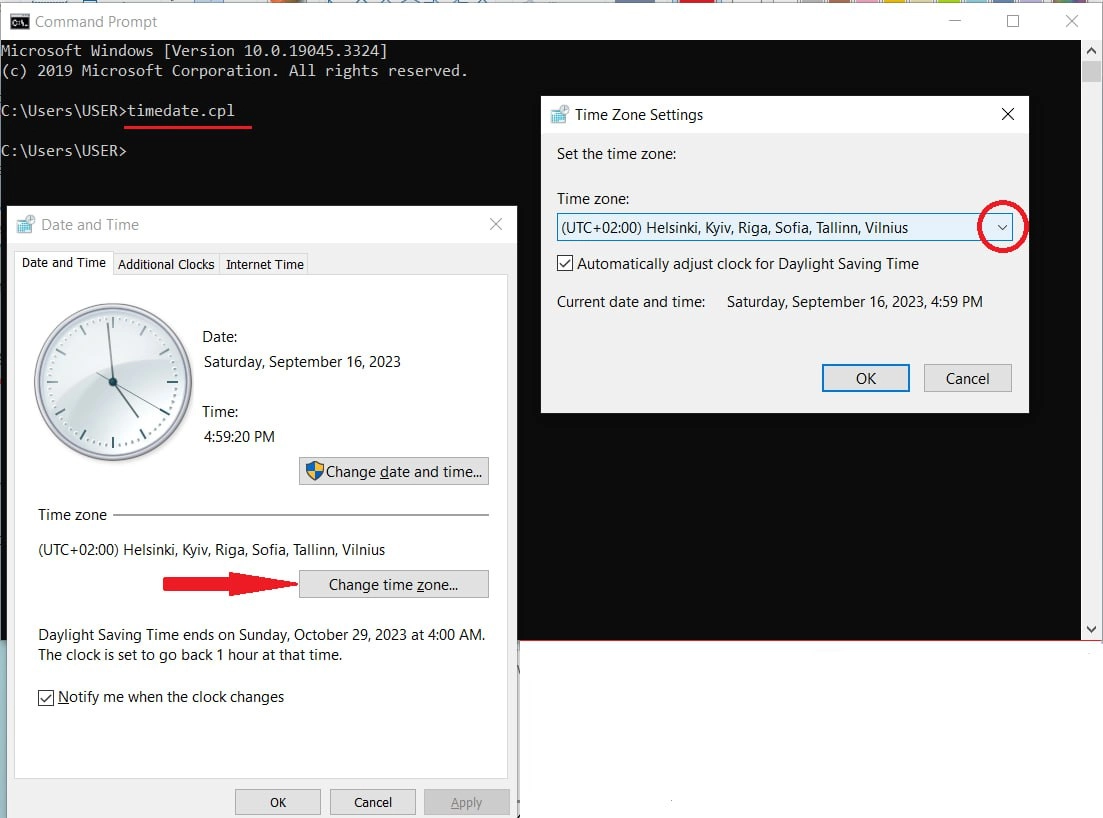
— run timedate.cpl from the cmd , and it will open the Windows time settings window where you can specify the Time Zone through the ‘Change time zone’ button.
Changing Time Zone from the cmd using the TZUtil utility
Open a command line cmd.exe
* we note that the utility tzutil.exe suitable for Windows 10/11, Windows Server 2016/2019/2022
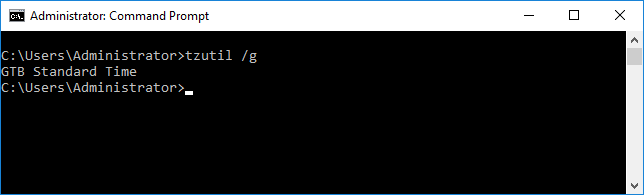
First, determine the current time zone and its identifier (TimeZoneID). To do this, enter the command:
tzutil /g
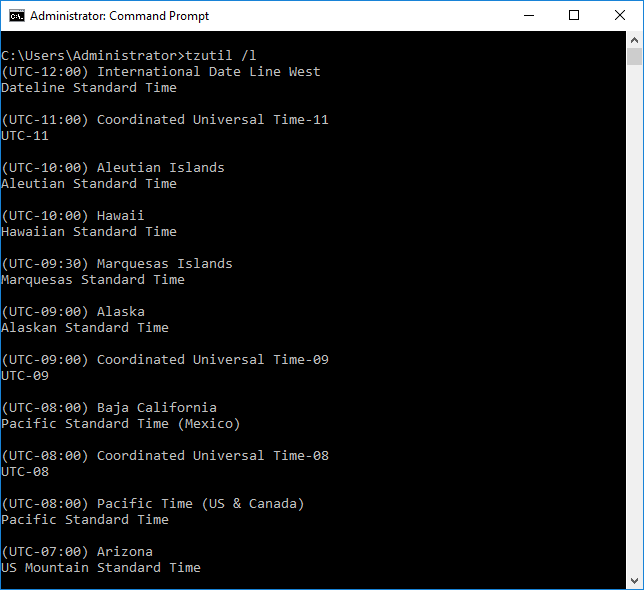
Now, if you are not sure of the exact name of the desired time zone, output a list of all time zones with their names and IDs using the following command:
tzutil /l
You can also find an up-to-date list of time zones Windows from Microsoft
To change the current time zone, specify the identifier of the new time zone in the following format:
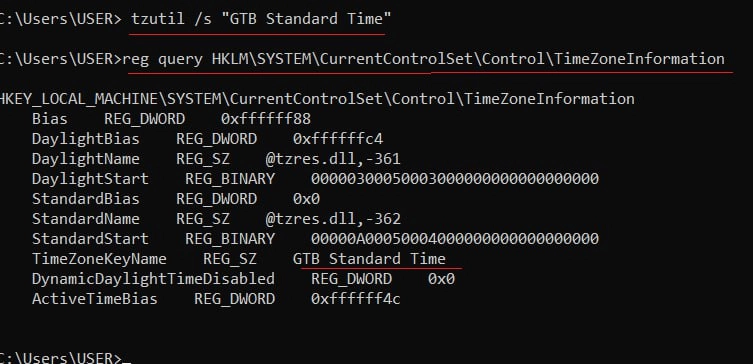
tzutil /s "GTB Standard Time"
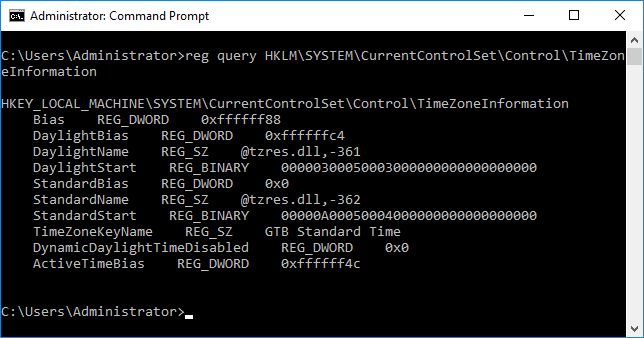
In the Windows registry, you can check the current time zone:
reg query HKLM\SYSTEM\CurrentControlSet\Control\TimeZoneInformation
To disable daylight saving time for a specific zone, you must specify the time zone identifier with the ending: _dstoff
tzutil /s "GTB Standard Time_dstoff"
To display complete time zone information and seasonal clock settings, enter the following command :
w32tm /tz

Changing the time zone using PowerShell
To determine the current time zone in the PowerShell console, use one of the following commands:
[TimeZoneInfo]::Local
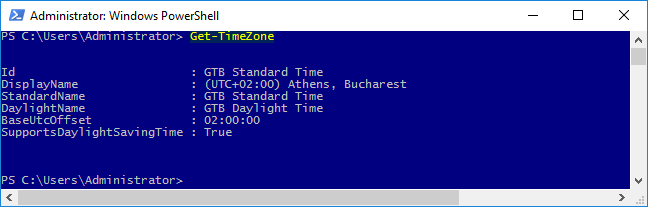
Get-TimeZone

To view a list of all available time zones in the PowerShell console, you can also use one of the following commands:
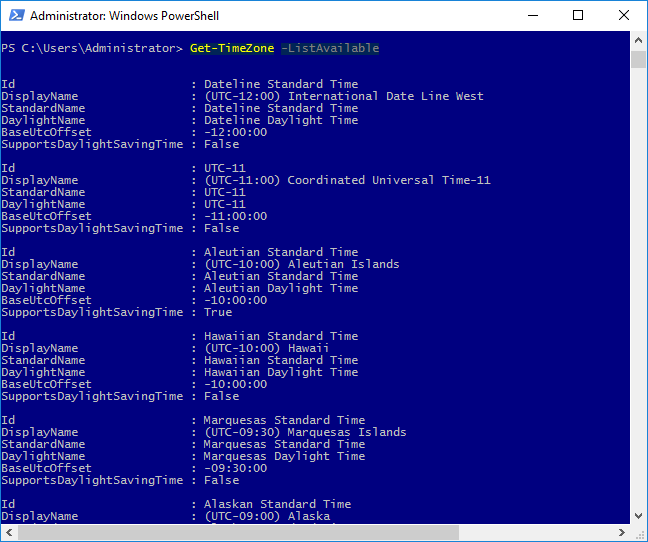
Get-TimeZone -ListAvailable
[System.TimeZoneInfo]::GetSystemTimeZones()
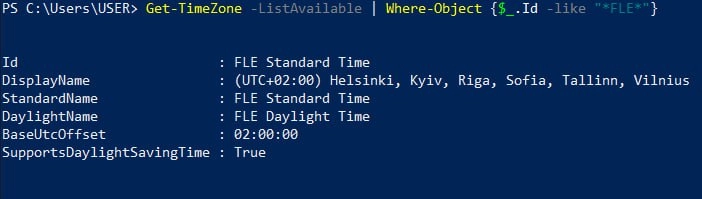
The list of all time zones is quite large, so for convenience we recommend using the filter where you specify part of the name, for example:
Get-TimeZone -ListAvailable | Where-Object {$_.Id -like "*FLE*"}
To change the current time zone from the PowerShell console, type the command:
Set-TimeZone -Name "FLE Standard Time"
*specify the name of the desired time zone in quotes.
Estimated Reading Time: < 1 min read
The timezone in Windows Server can be changed by using one of the following ways:
- Control panel GUI
- Windows command line
- Windows Powershell
In cases where Group Policy is applied (either local group policy or domain group policy), the settings of the time zone in the respective control panel field cannot be edited. In this case, using Powershell can do the trick.
Run the following Powershell cmdlets to change the timezone (example):
Set-Timezone -Name "GTB Standard Time"The Set-TimeZone cmdlet documentation can be found at: https://docs.microsoft.com/en-us/powershell/module/microsoft.powershell.management/set-timezone?view=powershell-6
In order to make use of the appropriate time zone literals, use the following Microsoft article for reference: Default Time Zones.
The correct date, time, and time zone are one of the first settings a Windows Server should have. In today’s article, we’ll see how we can change time, date, and time zone through the graphical environment, command line and Powershell.
Set time, date, and time zone settings from the graphical interface
The process is very simple. Right-click the time field in the lower right corner and then click the Adjust date/time option.
In the settings window, you can change the time, date, and time zones of each Windows Server. I do not think there is a need for further guidance as it is a simple process.
Alternatively, you can open the time and date settings window by clicking on the corresponding field in the Local Server section of the Server Manager.
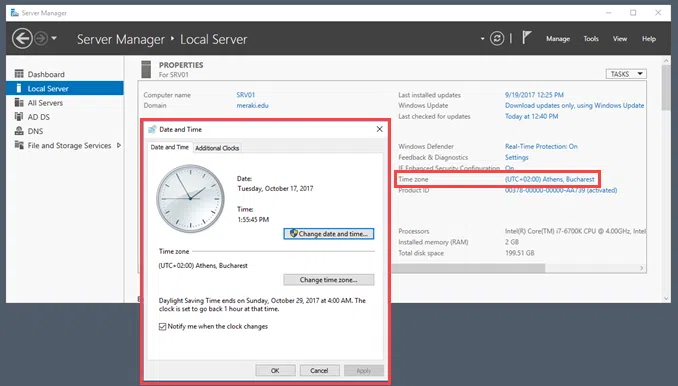
As you will see, in this case, opens the “old” management window through which you can set the time, date and time zone.
Set time, date, and time zone settings on command prompt
By typing the following command will open the time and date setting window, even in a Server Core installation.
To display the current date and time, enter the following commands.
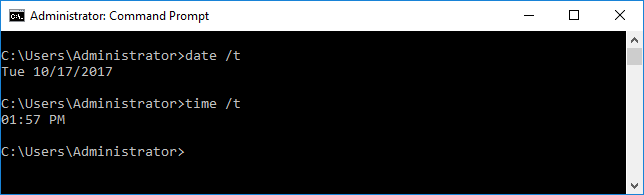
To set time and date, you can use the corresponding Time and Date commands at the command line.
In Windows Server 2012 have been added the Timezone Utility (tzutil) tool that allows us to display and set a time zone through the Windows command line.
First, open the command line with administrator privileges and make sure you are in the System32 folder.
To display the current Windows Server Time Zone, type the following command.
To display all available time zones, type the following command.
To change the current time zone in Windows Server, type the following command, between the doubles, enter the time zone as it appears in the list of the previous command. For example, for the Greek time zone type:
tzutil /s "GTB Standard Time"
To confirm that the time zone has changed, you can see the corresponding registry entry by using the following command from within the same command-line window.
reg query HKLM\SYSTEM\CurrentControlSet\Control\TimeZoneInformation
[pro_ad_display_adzone id=”1683″]
Set time, date and time zone settings on Powershell
To view the current date and time, type the following command.

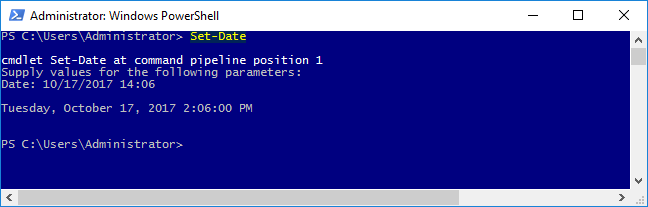
To set the time and date through Powershell the process is very easy. Use the following command as an example by changing the date and time values.
Set-Date -Date "06/06/2017 14:45"
Alternatively, you can simply type the Set-Date command and promptly you will be prompted to enter the server’s date and time.
To view the current time zone through Powershell, type the following command.
Before changing the time zone, you will need to know the right name. Type the following command to see all available time zones in Windows Server.
Get-TimeZone -ListAvailable
To change the time zone, use the following command along with the corresponding time zone of your server.
Set-TimeZone -Name "GTB Standard Time"