
Вы можете столкнуться с ошибкой синхронизации времени в Windows, когда ваш компьютер не может автоматически синхронизировать свое время с серверами времени time.microsoft.com в Интернете. Из-за некорректного времени на компьютере у вас может возникать ошибка «
Your clock is ahead/ Ваши Часы спешат (отстают)
» при открытии HTTPS сайтов Chrome (и в других браузерах), не корректно работать сторонние программы, и появляться различные другие неприятности.
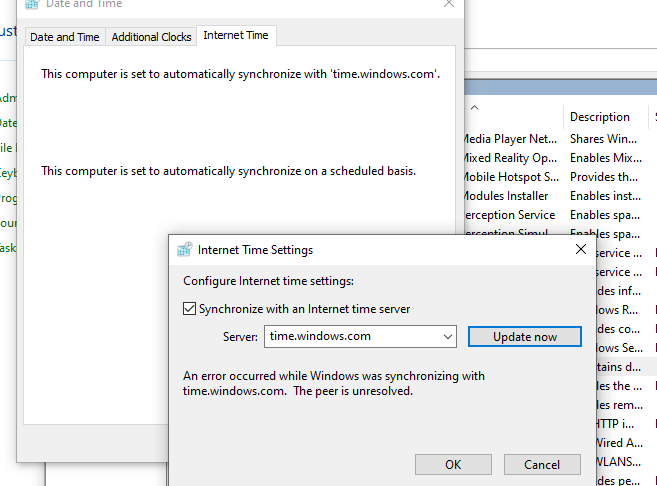
Если попытаться вручную выполнить синхронизацию времени из панели управления Windows (Control Panel -> Date and Time -> Internet Time -> Change Settings -> Update now), появляется ошибка:
An error occurred while windows was synchronizing with time.windows.com. The peer is unreachable.
Также здесь может быть ошибка:
The peer is unresolved.
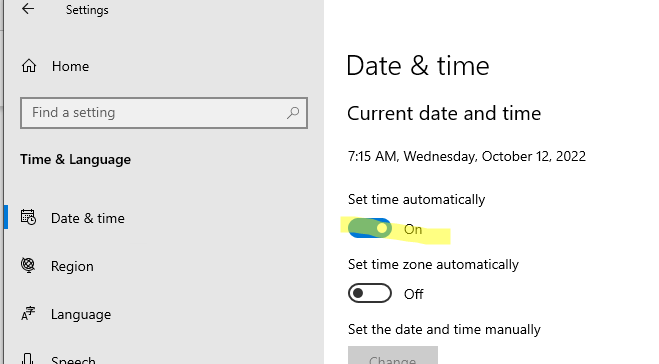
Проверьте, что у вас настроена автоматическая синхронизация времени с NTP серверами в Интернете. Перейдите в раздел Settings -> Time and Language -> Date and Time (можно перейти в этот раздел с помощью команды быстрого доступа по URI:
ms-settings:dateandtime
). Проверьте, что здесь включена опцию Set time automatically и выполните синхронизацию, нажав кнопку Sync now в разделе Additional settings.
Если синхронизация времени с Интернетом не работает, проверьте, с какого внешнего NTP сервера должен получить время ваш компьютер. Выполните команду:
w32tm /query /peers
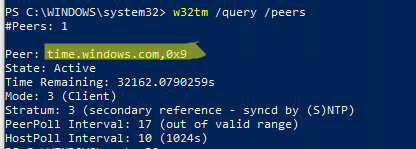
По умолчанию компьютеры в рабочих группах (не присоединенные к домену Active Directory) настроены на получение времени с серверов time.windows.com.
Если при запуске этой команды появилась ошибка “The following error occurred: The service has not been started. (0x80070426)”, проверьте состояние службы Windows Time. Она должна быть настроена на автоматический или ручной запуск. Можете проверить состояние службы с помощью PowerShell или консоли services.msc:
Get-Service w32time| Select DisplayName,Status, ServiceName,StartType
Перезапустите службу:
Restart-Service -Name w32time
Если служба отключена, включите ее.

Проверьте, что с вашего компьютера доступен хост time.microsoft.com.
Сначала проверьте, что ваш компьютер может разрешить это имя в IP адрес:
nslookup time.windows.com
Если ваш компьютер не может отрезолвить это имя в IP адрес (ошибка синхронизации времени The peer is unresolved), значит в настройках сетевого адаптера вашего компьютера указан DNS сервер, который не доступен, или изолирован от интернета. Попробуйте сменить адрес первичного DNS сервера на DNS сервер Google (8.8.8.8). Можно изменить настройки DNS для сетевого адаптера в Windows с помощью PowerShell.
Вывести список сетевых интерфейсов:
Get-NetAdapter

Изменить настройки DNS для сетевого адаптера с ifIndex 10:
Set-DNSClientServerAddress –InterfaceIndex 10 –ServerAddresses 8.8.8.8
Проверьте доступность сервера с помощью ping:
ping time.windows.com
И затем проверьте, что сервер времени Microsoft доступен по порту NTP (UDP 123). Для проверки доступности UDP порта можно использовать утилиту portquery или можно напрямую обратиться к серверу и запросить у него текущее время:
w32tm /stripchart /computer:time.windows.com
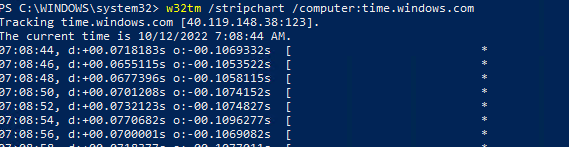
Если команда вернет ошибку error: 0x800705B4, значить указанный NTP сервер не доступен. Проверьте, что в Windows открыт исходящий порт UDP/123 для протокола NTP (по умолчанию порт должен быть открыт). Вы можете принудительно открыть порт в Windows Defender Firewall с помощью PowerShell:
New-NetFirewallRule -DisplayName "AllowOutNTP" -Direction Outbound -Protocol UDP -RemotePort 123 -Action Allow
Enable-NetFirewallRule -DisplayName AllowOutNTP
Также убедитесь, что исходящий NTP трафик не блокируется на сетевом уровне (провайдера, вашего файервола или другими сетевыми устройствами).
Если этот NTP сервер не доступен, вы можете использовать другой NTP сервер.
Можно указать
time.nist.gov
или ближайший к вам NTP сервер, который можно получить на сайте
https://www.ntppool.org
.
Можно изменить адрес вашего NTP сервера с помощью командной строки:
w32tm /config /manualpeerlist:time.nist.gov,0x1 /syncfromflags:manual /reliable:yes /update
Перезапустите службу времени (в данном примере вы запустим несколько команд в одну строку):
net stop w32time && net start w32time
Затем выполните синхронизацию времени:
w32tm /config /update
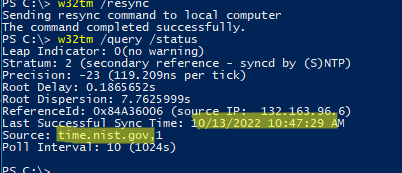
w32tm /resync
Проверьте, что ваш компьютер успешно получил время с нового источника времени (NTP сервера):
w32tm /query /status
Если ничего не помогло, попробуйте полностью сбросить настройки службы Windows Time:
net stop w32time
w32tm /unregister
w32tm /register
net start w32time
Выполните синхронизацию времени:
w32tm /resync
Также вы можете добавить NTP сервер в список серверов времени и выполнить синхронизацию из панели управления Windows. Перейдите в Settings -> Time & language -> Date & time -> Additional clocks –> Internet Time
Убедитесь, что включена опцию Synchronize with an Internet time, добавьте новый сервер time.nist.gov и нажмите кнопку Update Now.
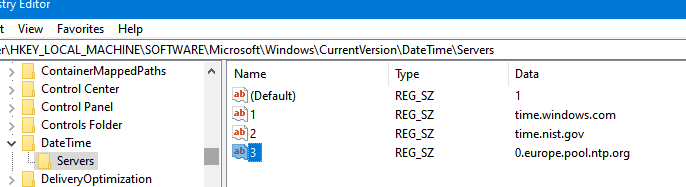
Вы можете добавить NTP сервера в этот список через реестр HKEY_LOCAL_MACHINE\SOFTWARE\Microsoft\Windows\CurrentVersion\DateTime\Servers.
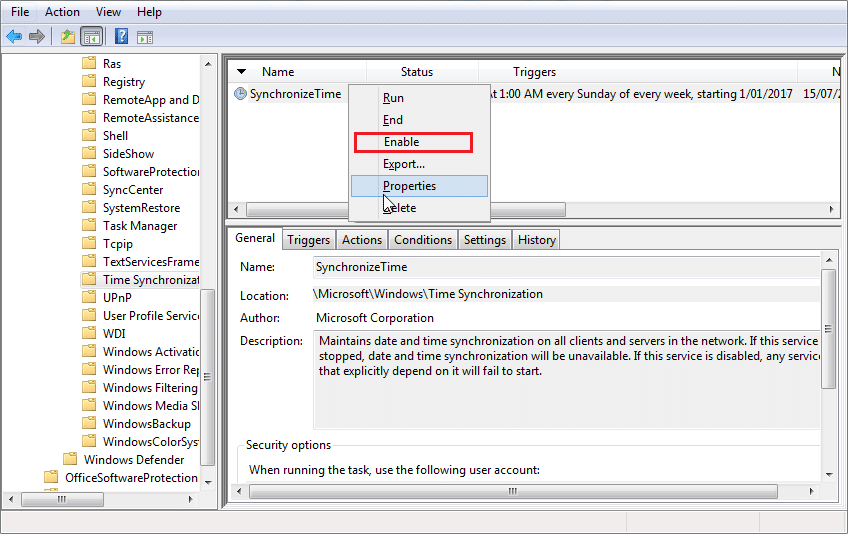
Для автоматической синхронизации времени в Windows используется отдельно задание в планировщике Task Scheduler. Запустите консоль taskschd.msc и перейдите в раздел Task Scheduler (Local) -> Task Scheduler Library -> Microsoft -> Windows -> Time Synchronization. Проверьте, что задание SynchronizeTime включено.
Также вы можете проверить состояние задания Task Scheduler с помощью PowerShell:
Get-ScheduledTask SynchronizeTime
Чтобы включить его:
Get-ScheduledTask SynchronizeTime|Enable-ScheduledTask
Все способы:
- Способ 1: Настройки синхронизации
- Способ 2: Служба синхронизации времени
- Способ 3: Перерегистрация службы
- Способ 4: Отключение сторонних приложений
- Способ 5: Смена сервера времени
- Способ 6: Взаимодействие с десктопом
- Вопросы и ответы: 6
Способ 1: Настройки синхронизации
Самой простой причиной отсутствия автоматической синхронизации времени является банальное отключение отвечающей за нее функции. В этом случае решается проблема элементарно – включением синхронизации времени.
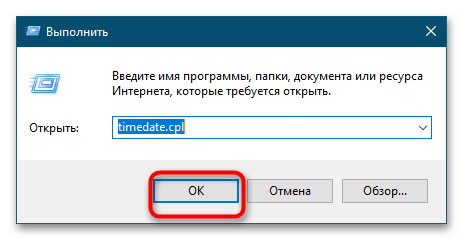
- Запустите апплет «Дата и время» командой
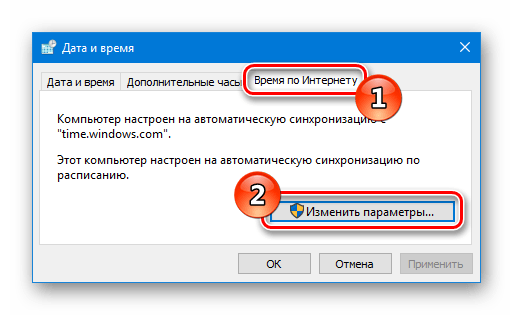
timedate.cpl, выполненной в диалоговом окошке, открытом нажатием комбинации клавиш Win + R. - Переключитесь на вкладку «Время по Интернету» и нажмите кнопку «Изменить параметры».
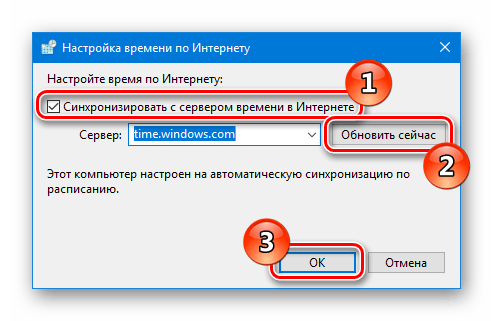
- Убедитесь, что опция «Синхронизировать с сервером времени в Интернете» активна, в противном случае активируйте ее и сохраните настройки.


Рекомендуем попробовать синхронизировать время вручную, нажав в окошке «Настройка времени по Интернету» кнопку «Обновить сейчас».
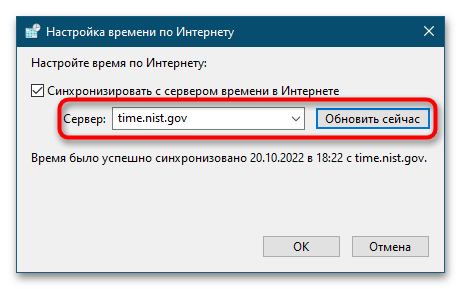
Если при этом вы получите ошибку, выберите в выпадающем списке другой сервер времени и повторите попытку.
Способ 2: Служба синхронизации времени
Часы не смогут синхронизироваться с сервером, если на компьютере будет отключена системная служба синхронизации времени. Проверьте ее статус и включите, если она окажется отключенной.
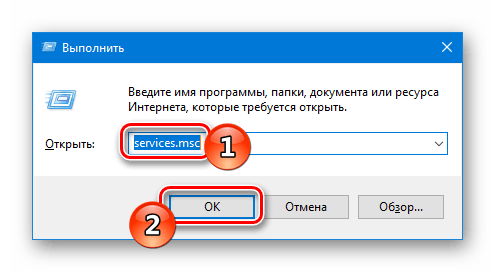
- Откройте оснастку управления службами командой
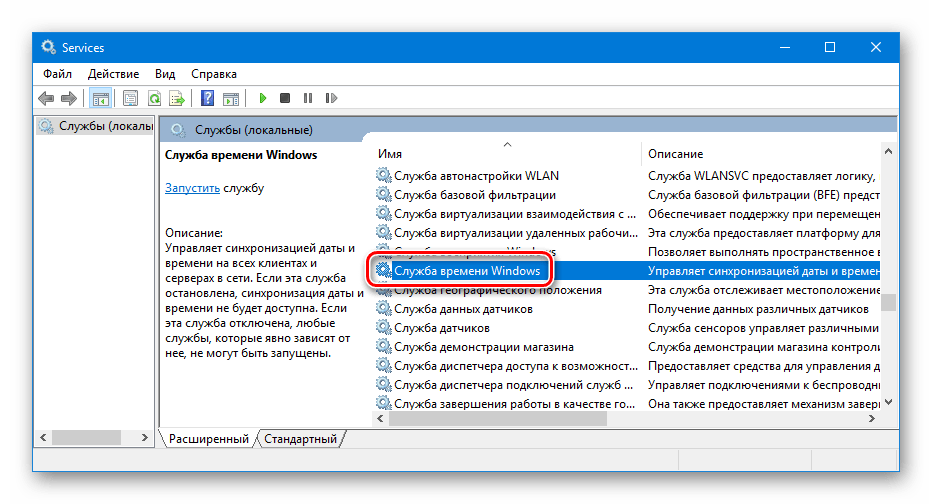
services.mscвыполненной в диалоговом окошке «Выполнить» (Win + R). - Отыщите в списке службу с названием «Служба времени Windows» и откройте ее свойства двойным по ней кликом.
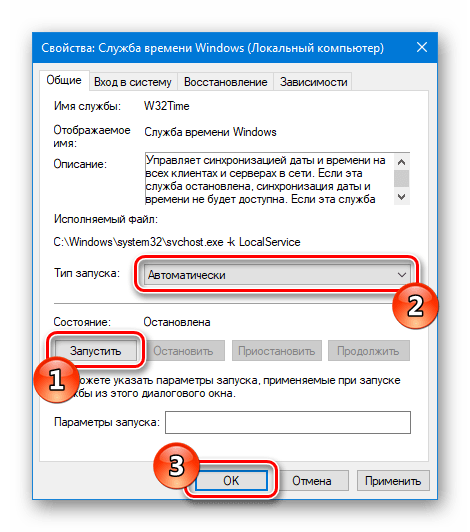
- Если служба отключена, установите для нее тип запуска «Автоматически», запустите ее и сохраните настройки.
Способ 3: Перерегистрация службы
Попробуйте перерегистрировать службу синхронизации — это может помочь, если неполадка вызвана незначительными сбоями в ее работе.
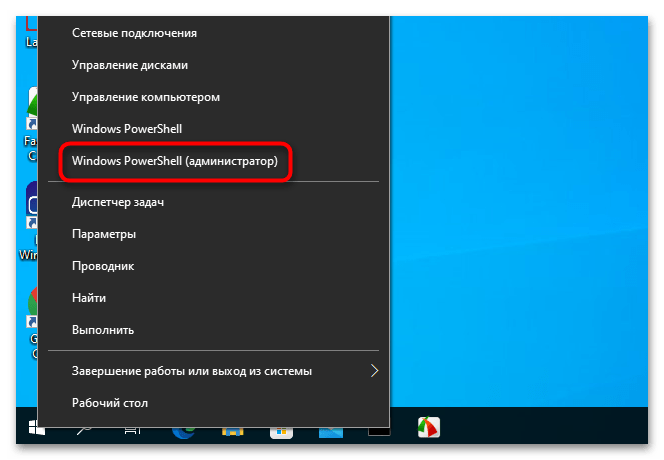
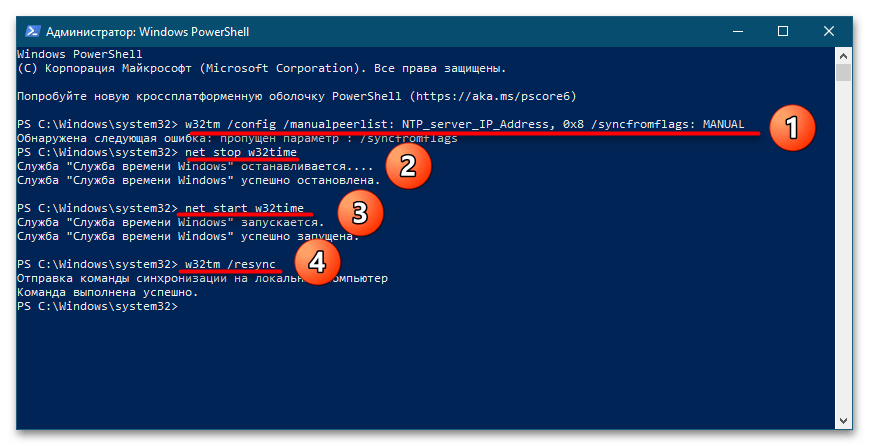
- Откройте от имени администратора консоль «PowerShell» из контекстного меню кнопки «Пуск».
- Выполните в консоли одну за другой эти четыре команды, разделяя ввод каждой нажатием клавиши Enter:
w32tm /config /manualpeerlist: NTP_server_IP_Address, 0x8 /syncfromflags:MANUAL- net stop w32time
- net start w32time
w32tm /resync

- Перезагрузите компьютер и проверьте работу функции синхронизации времени.
Способ 4: Отключение сторонних приложений
Если на компьютере у вас работают изменяющие конфигурацию сети сторонние приложения, попробуйте их отключить. Речь в первую очередь идет о брандмауэрах. Если после отключения синхронизация будет восстановлена, добавьте используемый службой синхронизации времени сервер в исключение вашего стороннего сетевого приложения.
Способ 5: Смена сервера времени
Проблема также может быть связана с некорректной работой доступных в Windows 10 серверов времени. В этом случае можно использовать альтернативные серверы.
- Откройте настройки времени по Интернету как было показано в Способе 1.
- Вставьте в поле «Сервер» один из этих доменов и нажмите «Обновить сейчас»:
- time-b-wwv.nist.gov
- time-e-wwv.nist.gov
- time-e-g.nist.gov
- time-a-g.nist.gov
- utcnist.colorado.edu
- ntp-d.nist.gov
- ntp-b.nist.gov

- Если синхронизация будет выполнена успешно, сохраните настройки.

Способ 6: Взаимодействие с десктопом
Некоторым пользователям удалось решить проблему отсутствия синхронизации времени путем предоставления соответствующей службе доступа к рабочему столу.
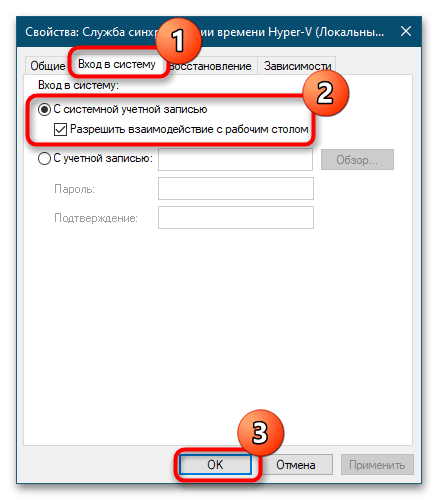
- Откройте свойства службы времени Windows, как было показано в Способе 2.
- Переключитесь на вкладку «Вход в систему», активируйте опцию «С системной учетной записью» и установите флажок в пункте «Разрешить взаимодействие с рабочим столом».
- Сохраните настройки службы.
Чтобы новые настройки вступили в силу, перезайдите в свою учетную запись либо перезагрузите компьютер.
Наша группа в TelegramПолезные советы и помощь
Иногда пользователи операционной системы Windows 10 могут столкнуться с проблемой неработающей синхронизации времени. В нашей короткой статье мы опишем несколько методов, при помощи которых можно устранить такую неполадку.
- Способ 1 – Ручная синхронизация с изменением сервера
- Способ 2 – Включение службы синхронизации
- Способ 3 – Проверка системных файлов
Варианты исправления ошибки
Чтобы восстановить нормальную работу синхронизации времени, можно прибегнуть к нескольким вариантам исправления неполадки. В первую очередь следует попробовать вручную провести эту процедуру, при надобности изменив сервер синхронизации, а также проверить, работает ли системная служба, отвечающая за эту функцию.
Нужный нам сервис также можно перезапустить с использованием специальных команд. Если такие действия не приведут к положительному результату, то воспользоваться программой, которая проверит целостность системных файлов.
Ручная синхронизация с изменением сервера
Синхронизировать время можно вручную, проделав следующие операции:
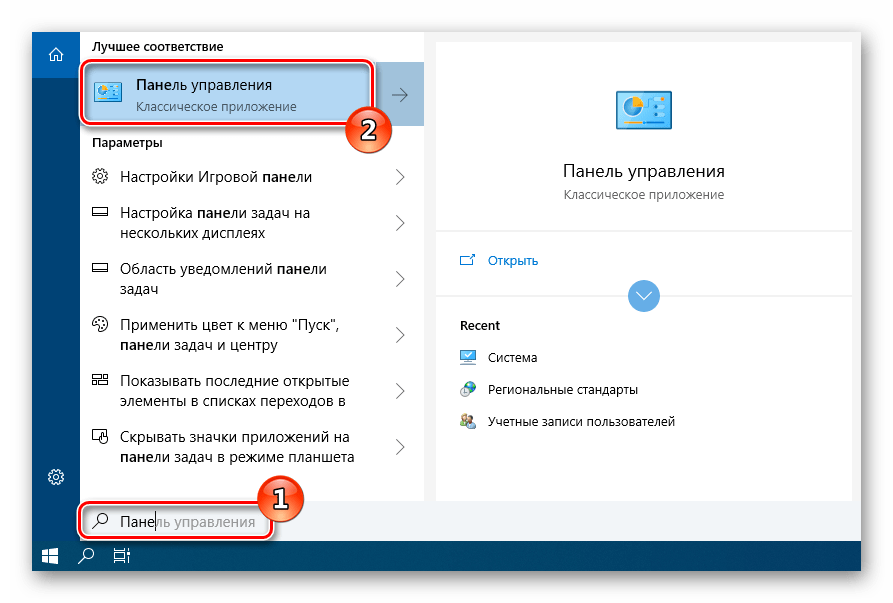
- Открываем «Панель управления» воспользовавшись поиском системы.

Открываем «Панель управления» из поисковых результатов
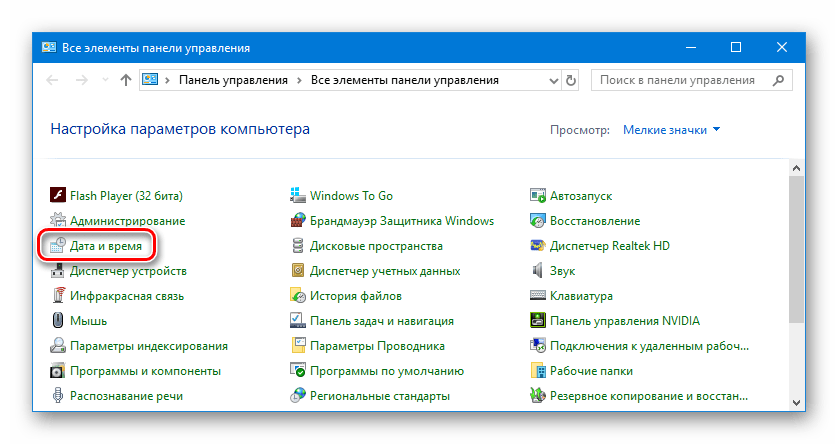
- Далее кликаем по иконке «Дата и время».

Переходим в раздел «Дата и время»
- В новом окне переходим на вкладку «Время по Интернету» и нажимаем «Изменить параметры».

Открываем окно для изменения настроек
- Отмечаем пункт синхронизации и кликаем «Обновить сейчас».

Запускаем синхронизацию вручную
Если синхронизировать время не удастся, то можно попробовать изменить сервер подключения в списке.
Загрузка …
Включение службы синхронизации
В некоторых случаях дата и время не синхронизируются из-за отключенной службы в системе. Чтобы её активировать, нам потребуется сделать следующее:
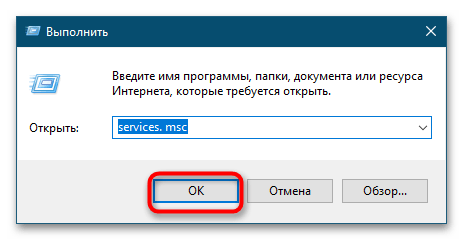
- Запускаем диалоговое окно «Выполнить», нажав на клавиатуре клавиши «Win+R».
- Далее в появившееся окно вводим команду services.msc и нажимаем «OK».

Открываем сервисы системы при помощи команды
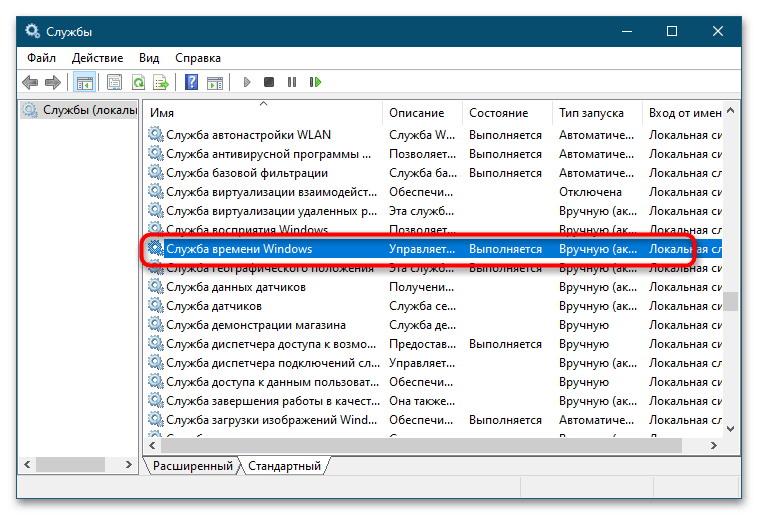
- На экране появится список, в котором потребуется отыскать строку «Служба времени Windows» и кликнуть по ней дважды.

Открываем настройки службы времени
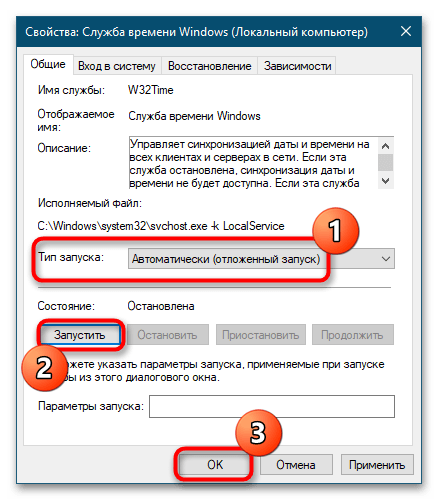
- В новом окне нажимаем на кнопку «Запустить» и устанавливаем тип запуска «Автоматически».
- Кликаем по кнопке «ОК».

Запускаем службу и устанавливаем её автозапуск
Так мы запустим деактивированный сервис синхронизации.
Кроме этого метода также можно попробовать включить службу при помощи специальных команд. Для этого сделаем следующее:
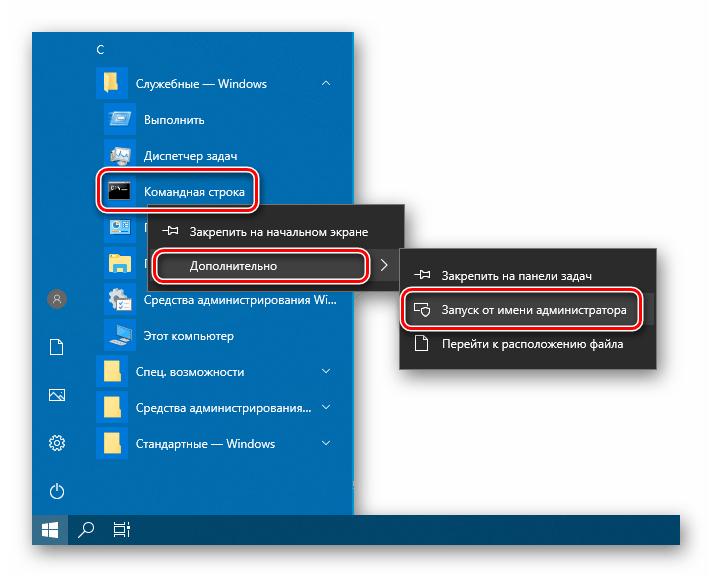
- Запускаем «Командную строку» от имени администратора из стартового меню системы.

Запускаем «Командную строку» из стартового меню
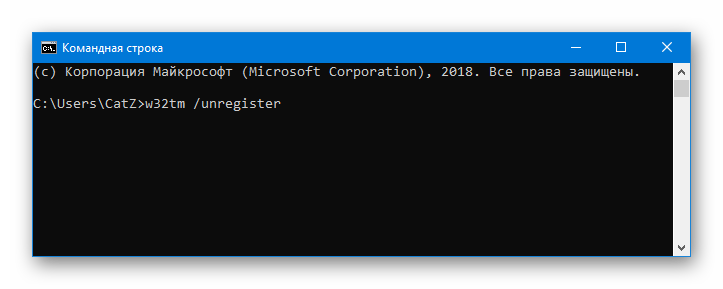
- В появившееся окно вводим команду w32tm /unregister, которая отключит синхронизацию.

Вводим команду для отключения сервиса синхронизации
- После этого включаем её обратно с использованием команды w32tm /register
Вводим команду для перезапуска сервиса синхронизации

Загрузка …
Проверка системных файлов
Если ни один из способов не помог решить проблему с синхронизацией времени, то можно проверить целостность системных файлов Windows. Для этого проделаем следующие шаги:
- Запускаем «Командную строку» от имени администратора из стартового меню.
- В появившееся окно вводим команду sfc /scannow и нажимаем «Enter».
Запускаем проверку системных файлов

Загрузка …
Начнется проверка файлов, по окончании которой перезагружаем компьютер и проверяем, заработала ли синхронизация.
На этом все. Теперь вы знаете, как устранить неполадки с синхронизацией времени в Windows 10.
Загрузка …
Post Views: 25 534
Do you keep receiving a “Time synchronization failed” error while syncing the clock with a time server in Windows 11 or 10? There are several reasons why that happens.
It could be a problem with the Windows Time service, an overloaded time server, or an issue with your internet connection. This troubleshooting guide will teach you multiple ways to fix that on a Windows computer.

Restart the Windows Time Service
Windows Time is the background service that manages time synchronization in Windows operating systems. It’s susceptible to unexpected glitches, so restart it via the Services console and check if that helps.
- Press the Windows + R keys to open Run.
- Type “services.msc” into the Open field and select OK.

- Right-click the Windows Time service and select Restart. If the context menu item appears grayed out, choose Start.

- Exit Services.
Modify the Windows Time Service Properties
If the “Time synchronization failed” error in Windows persists, make the following adjustments to the Windows Time service properties. To do that:
- Relaunch the Services console and double-click Windows Time.

- Set Startup type to Automatic. Set Service status to Running.

- Switch to the Log On tab.
- Select Local System account and the Allow service to interact with desktop option under it.

- Select Apply > OK and exit Services.
Toggle Automatic Time-Keeping On/Off
Disabling and re-enabling the automatic time-keeping functionality in Windows fixes time-syncing errors a lot of the time. To do that:
- Right-click the Clock on the right end of the taskbar and select Adjust date and time.

- Disable the toggles next to Set time automatically and Set time zone automatically.

- Scroll down to the Additional settings section and select Sync now.

- Re-activate the Set time automatically and Set time zone automatically options.
Restart Your Computer
Core Windows functionalities malfunction if you don’t restart your computer often. If the “Time synchronization error” persists, open the Start menu and select Power > Restart. If you see an Update and restart option, choose that instead.

Troubleshoot Your Network Connection
If you see an extended error message reading something like “Time synchronization failed. Please check network connectivity and retry,” it’s likely something to do with your internet.

Here are several things you can try to fix the problem:
- Force the router to release and renew the IP address for your PC.
- Turn the router off and on. Or soft-reset the router.
- Flush the DNS (Domain Name System) cache in Windows.
- Connect to a different Wi-Fi network.
- Reset the network settings in Windows.
Pick a Different Time Server
By default, Windows 10 and 11 syncs with Microsoft’s time server at time.windows.com. Switching to the alternative time.nist.gov server could resolve the “Time synchronization failed” error. You must use the Control Panel‘s Date and Time applet for that.
- Type timedate.cpl into a Run box and press Enter.
- Switch to the Internet Time tab.
- Select Change settings.

- Select Server and choose time.nist.gov. Enable Synchronize with an internet time server if the drop-down menu appears grayed out.

- Select Update now, and then OK.
Add a Different Time Server
It’s possible to add additional time servers to Windows via the Registry Editor. Popular NTP (Network Time Protocol) servers include:
- time.google.com
- time.cloudflare.com
- ntp.gsu.edu
- pool.ntp.org
- isc.org
Back up the Windows system registry, and then:
- Type regedit into a Run box and select OK.
- Copy the following path into the address field at the top of the Registry Editor window and press Enter:
HKEY_LOCAL_MACHINE\SOFTWARE\Microsoft\Windows\CurrentVersion\DateTime\Servers

- Right-click an empty area on the right pane and select New > String Value.

- Name the string value as 3 (or 4, 5, and so on if there are more than two string values present by default).

- Double-click the string value and enter a time server URL into the Value data field—e.g., time.google.com.

- Select OK.
- Exit the Registry Editor.
- Revisit the Internet Time settings (repeat the steps from the section above) and switch to the new time server.
Sync Time Through the Command Prompt
Next, unregister and re-register the Windows Time service, then sync the time via the Command Prompt console. To do that:
- Type “cmd” into the Windows Search box and select Run as administrator.

- Run the following commands one after the other:
- net stop w32time
- w32tm /unregister
- w32tm /register
- net start w32time
- w32tm /config /manualpeerlist:time.google.com /syncfromflags:manual /update
- w32tm /config /update
- w32tm /resync /rediscover

- Exit the Command Prompt console.
Allow Time Syncing on Firewall
If you use a third-party network firewall on your computer, uninstall it and switch back to the Windows Firewall or allow UDP port 123 (needed to sync the time). Refer to the firewall’s online documentation or FAQ on how to do that.
If the problem occurs over the Windows Firewall, here’s how to create inbound and outbound rules to ensure there are no network restrictions on the flow of NTP packets:
- Type firewall.cpl into a Run box and select OK.
- Select Advanced settings on the left menu.

- Right-click Inbound rule on the left pane and select New Rule.

- Set Rule Type to Port and select Next.

- Select UDP and set Specific local ports to 123. Select Next to continue.

- Keep the default selections in the remaining steps and select Next. In the final screen, set a name (e.g., NTP Inbound), and select Finish.

- Right-click Outbound rule, select New rule and repeat steps 4-6 above.
Disable VPNs and Proxies
VPNs (virtual private networks) and proxy servers are another reason Windows could struggle to sync the time with a time server. Try disabling them.
- Open the Settings app in Windows and select Network & internet.
- Dive into the VPN and Proxy categories.

- Turn off any active VPNs and proxies.
Run an SFC Scan
Run the System File Checker (SFC) in Windows to fix time synchronization errors that stem from corrupt system files. To do that:
- Open an elevated Command Prompt console.
- Type sfc /scannow.

- Press Enter.
Scan for Malware On Your Computer
Malicious software often hijacks critical Windows features. If the “Time synchronization failed” error persists or you have trouble performing any of the fixes above, you must run a thorough scan for malware.
- Right-click Windows Security on the system tray and select View security dashboard.

- Select Virus & threat protection on the left menu.
- Select Scan options.

- Choose the Full scan option and select Scan Now.

It’s best to run an additional scan with a third-party malware removal utility. For example, the free version of Malwarebytes is more than adequate at detecting and removing stubborn malware.
Time Synchronization Is a Success
Fixing the “Time synchronization failed” error in Windows is crucial since an incorrect time often leads to complications with Windows Update and other network-reliant functionalities and programs. It also adversely impacts system security.
Just work your way through the fixes above, and you should be able to get rid of it. If the problem persists, consider resetting your Windows 11 or 10 installation to factory defaults.
Related Posts
- How to Fix a “This file does not have an app associated with it” Error on Windows
- How to Fix an Update Error 0x800705b4 on Windows
- How to Resolve “A JavaScript error occured in the main process” Error on Windows
- How to Fix the Network Discovery Is Turned Off Error on Windows
- How to Change Folder Icons in Windows
Fix Windows Time Service not working: If you’re facing issues with your clock then it’s possible that Windows Time service might not be working correctly which is why you’re facing this issue but don’t worry as today we are going to discuss how to fix this issue. The main cause seems to be Windows time service which doesn’t start automatically which is causing the delay in date and time. This issue can be fixed by enabling Time Synchronization in Task Scheduler but this fix may or may not work for everyone as every user have different system configuration.

Users have also reported that while manually synchronizing time they face the error message “An error occurred while windows was synchronizing with time.windows.com” but don’t worry as we have got this covered. So without wasting any time let’s see how to Fix Windows Time Service not working with the help of below-listed troubleshooting guide.
Table of Contents
Make sure to create a restore point just in case something goes wrong.
Method 1: Start Windows Time service
1.Press Windows Key + R then type services.msc and hit Enter.
2.Find Windows Time Service in the list then right-click and select Properties.

3.Make sure the Startup type is set to Automatic (Delayed Start) and the service is running, if not then click on start.

4.Click Apply followed by OK.
Method 2: Run SFC and DISM
1.Press Windows Key + X then click on Command Prompt(Admin).
2.Now type the following in the cmd and hit enter:
Sfc /scannow
sfc /scannow /offbootdir=c:\ /offwindir=c:\windows (If above fails then try this one)

3.Wait for the above process to finish and once done restart your PC.
4.Again open cmd and type the following command and hit enter after each one:
a) Dism /Online /Cleanup-Image /CheckHealth
b) Dism /Online /Cleanup-Image /ScanHealth
c) Dism /Online /Cleanup-Image /RestoreHealth

5.Let the DISM command run and wait for it to finish.
6. If the above command doesn’t work then try on the below:
Dism /Image:C:\offline /Cleanup-Image /RestoreHealth /Source:c:\test\mount\windows
Dism /Online /Cleanup-Image /RestoreHealth /Source:c:\test\mount\windows /LimitAccess
Note: Replace the C:\RepairSource\Windows with the location of your repair source (Windows Installation or Recovery Disc).
7.Reboot your PC to save changes and see if you’re able to Fix Windows Time Service not working issue.
Method 3: Use a different synchronization server
1.Press Windows Key + Q to bring up Windows Search then type control and click on Control Panel.
2.Now type date in the Control Panel search and click on Date and Time.
3. On the next window switch to Internet Time tab and click on “Change settings“.

4.Make sure to checkmark “Synchronize with an Internet time server” then from the server dropdown select time.nist.gov.

5.Click Update now button then click OK and see if you’re able to Fix Windows Time Service not working issue.
Method 4: Unregister and then again Register Time Service
1.Press Windows Key + X then select Command Prompt (Admin).
2.Type the following command into cmd and hit Enter after each one:
net stop w32time
w32tm /unregister
w32tm /register
net start w32time
w32tm /resync

3.Wait for the above commands to finish then again follow the method 3.
4.Restart your PC and see if you’re able Fix Windows Time Service not working issue.
Method 5: Temporarily Disable Firewall
1.Type control in Windows Search then click on Control Panel from the search result.
2.Next, click on System and Security and then click on Windows Firewall.

3.Now from the left window pane click on Turn Windows Firewall on or off.
4.Select Turn off Windows Firewall and restart your PC.
If the above method doesn’t work make sure to follow the exact same steps to turn on your Firewall again.
Method 6: Enable Time Synchronization in Task Scheduler
1.Press Windows Key + X then select Control Panel.
2.Click System and Security and then click Administrative Tools.

3.Double click on Task Scheduler and navigate to the following path:
Task Scheduler Library / Microsoft / Windows / Time Synchronization
4.Under Time Synchronization, right-click on Synchronize Time and select Enable.
5.Reboot your PC to save changes.
Method 7: Change the default update interval
1.Press Windows Key + R then type regedit and hit Enter to open Registry Editor.
2.Navigate to the following registry key:
HKEY_LOCAL_MACHINE\SYSTEM\CurrentControlSet\Services\W32Time\TimeProviders\NtpClient
3.Select NtpClient then in the right window pane double-click on SpecialPollInterval key.

4.Select Decimal from the Base section then in the value data field type 604800 and click OK.

5.Reboot your PC to save your changes and see if you’re able to Fix Windows Time Service not working issue.
Method 8: Add more Time servers
1.Press Windows Key + R then type regedit and hit Enter to open Registry Editor.
2.Navigate to the following registry key:
HKEY_LOCAL_MACHINE\SOFTWARE\Microsoft\Windows\CurrentVersion\DateTime\Servers
3.Right-click on Servers then select New > String value than name this string as 3.

Note: Check if you already have 3 keys then you need to name this key as 4. Similarly, if you have already have 4 keys then you need to start from 5.
4.Double-click this newly created key then type tick.usno.navy.mil in the value data field and click OK.

5.Now you could add more servers by following the above steps, just use the following in value data field:
time-a.nist.gov
time-b.nist.gov
clock.isc.org
pool.ntp.org
6.Reboot your PC to save changes then again follow the method 2 to change to these time servers.
Recommended:
- Fix Windows 10 Stuck at Preparing Security Options
- Fix If playback doesn’t begin shortly try restarting your device
- How to Schedule Windows 10 Automatic Shutdown
- Fix CD or DVD Drive Not Reading Discs in Windows 10
That’s it you have successfully Fix Windows Time Service not working in Windows 10 but if you still have any questions regarding this post then feel free to ask them in the comment’s section.