
Привет, друзья. Ниже рассмотрим ошибку, возникающую при установке видеодрайвера Nvidia в операционную систему Виндовс 10, и это ошибка программы установки Nvidia с формулировкой «Этот графический драйвер Nvidia несовместим с данной версией Windows 10». Ошибку обуславливает факт существования разных разрядностей системы – 32-битных и 64-битных, а также различных версий Windows 10 – тех, что появляются после внедрения полугодичных функциональных обновлений. Появляющиеся новые версии драйверов видеокарт Nvidia поддерживают не все версии Windows 10, а лишь актуальные или относительно таковые. Также причиной ошибки могут быть глюки программы установки Nvidia. Давайте детально разберёмся в сути проблемы и поговорим о способах её решения.
Итак, ошибка «Этот графический драйвер Nvidia несовместим с данной версией Windows 10». Возникает в программе установки Nvidia при установке и обновлении драйверов видеокарт Nvidia.
Что может быть её причиной, и как устранить причину?
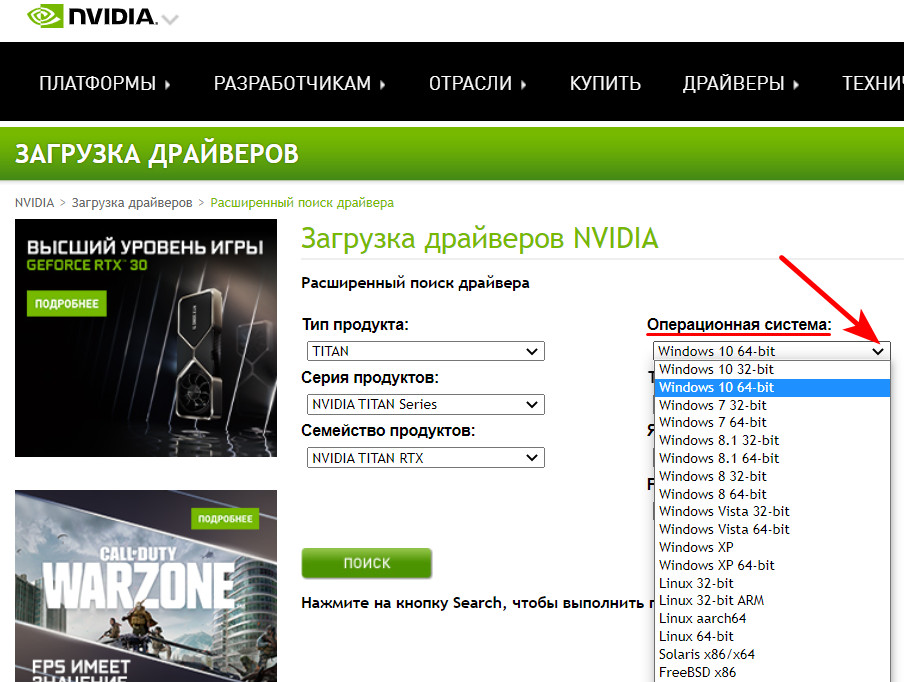
Видеодрайвер Nvidia должен соответствовать разрядности Windows 10 – 32- или 64-битной. Скачивая драйвер с сайта Nvidia, будьте внимательны при выборе характеристик продукта и правильно укажите разрядность своей операционной системы.
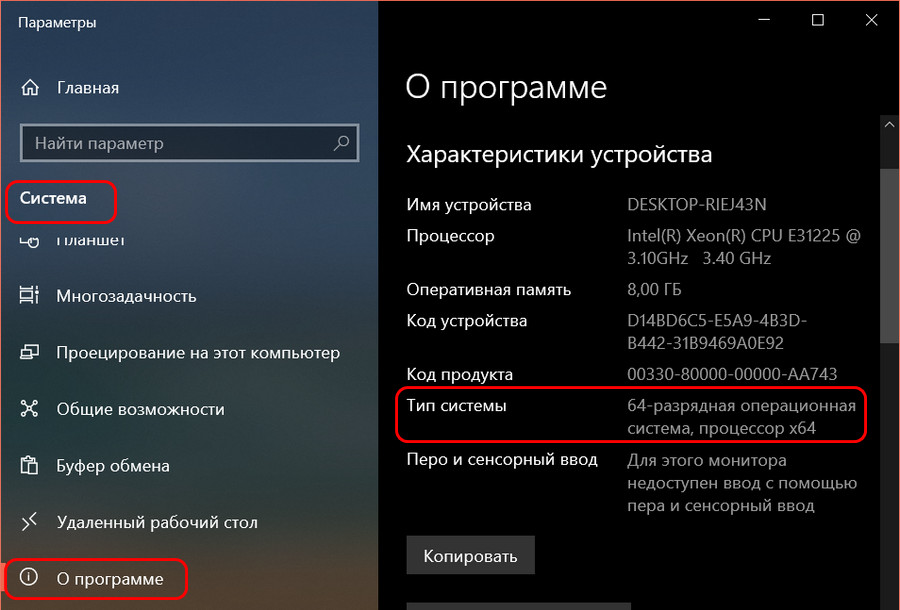
Узнать разрядность установленной на компьютере Windows 10 можно в системном приложении «Параметры», в нём следуем по пути «Система – О программе».
Друзья, Windows 10 разорвала шаблон выпуска версий операционных систем Windows, существовавший по версию 8.1 включительно. Windows 10 – это десятая версия Windows, но у неё есть свои версии. Это функционально обновляемая операционная система, эволюционирующая наряду с её использованием массами, и каждые полгода в неё внедряются функциональные обновления, меняющие версию «Десятки». Версии системы имеют свои номера, в которых закодирован месяц или полугодие и год поставки полугодичного обновления. Ещё версии Windows 10 могут значится по названиям самих полугодичных обновлений. С момента выхода «Десятки» в 2015 году по момент написания статьи её версий скопилось множество:
- 1507 и 1511 от 2015 года;
- 1607 от 2016 года;
- 1703 и 1709 от 2017 года;
- 1803 и 1809 от 2018 года;
- 1903 и 1909 от 2019 года;
- 20H1 и 20H2 от 2020 года;
- 21H1 от 2021 года.
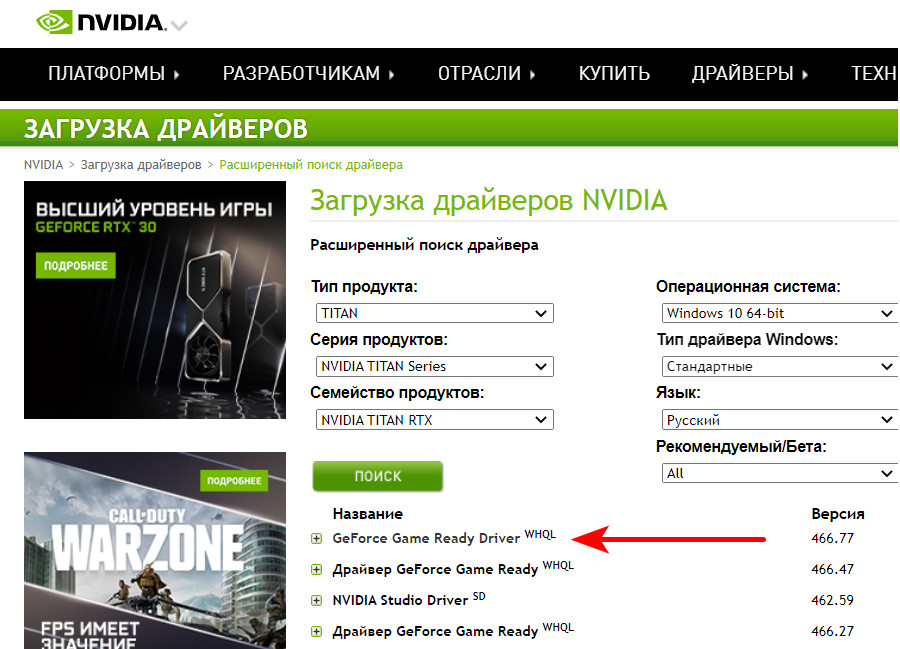
У каждой из версий «Десятки» есть свой срок поддержки компанией Microsoft, который в большей части случаев исчисляется 18-ю месяцами с момента выпуска. Подробно о версиях Windows 10 и сроках их поддержки смотрим здесь. По завершении срока поддержки старых версий Windows 10 разработчики софта и драйверов могут, но не обязаны поддерживать работу своих продуктов в этих версиях. Nvidia не видит резона тратить силы на адаптацию новых драйверов своих видеокарт под старые неактуальные версии Windows 10. Так, если мы на сайте Nvidia запустим поиск драйвера своей видеокарты,
на страничке его скачивания зайдём в раздел дополнительной информации о драйвере и почитаем примечания о драйвере,
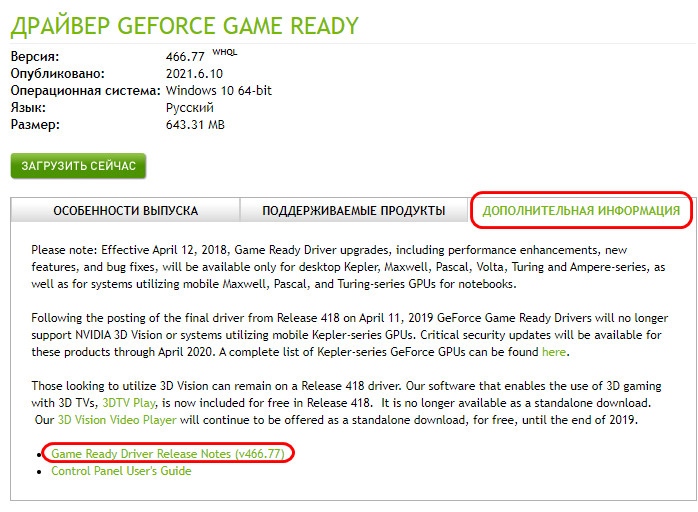
увидим там сведения о поддержке версий Windows 10. В числе сведений будет указана минимальная поддерживаемая версия системы, как, например, в этом случае 1803, версия от 2018 года, т.е. трёхлетней давности на момент написания статьи.
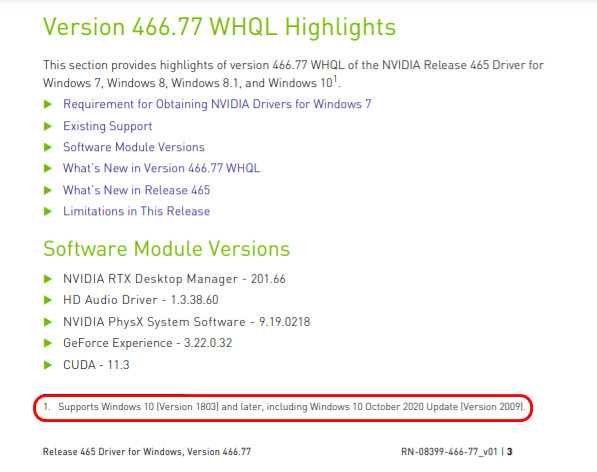
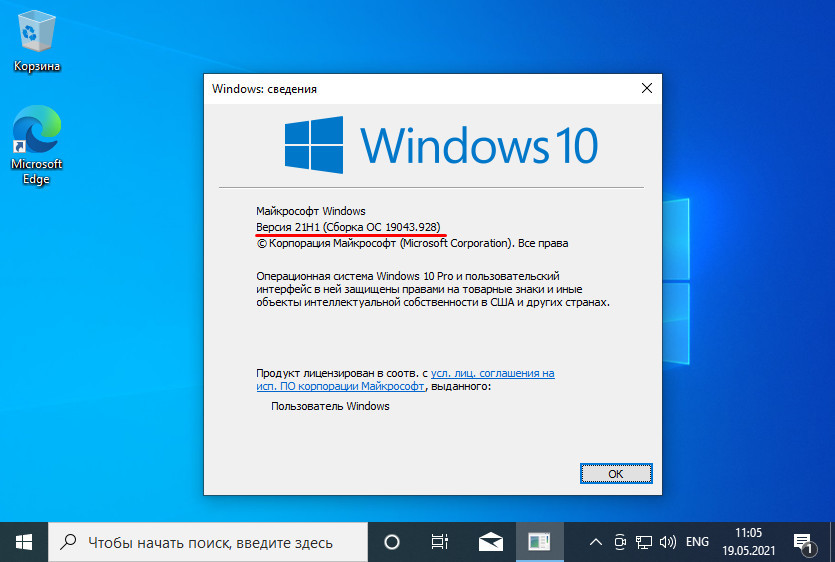
И если у нас компьютере будет стоять версия Windows 10 от 2017 года и более ранняя, то при установке этого драйвера мы и получим ошибку его установки с формулировкой «Этот графический драйвер Nvidia несовместим с данной версией Windows 10». Узнать же, что за версия «Десятки» стоит у нас на компьютере, можем либо в системном приложении «Параметры» по тому же пути «Система – О программе», либо введя в системный поиск или команду «Выполнить»:
winver
Откроется окошке сведений о системе, где будет указана используемая версия Windows 10.
Если у вас старая неподдерживаемая актуальными видеодрайверами Nvidia версия Windows 10, обновитесь до актуальной версии.
Выдавая ошибку «Этот графический драйвер Nvidia несовместим с данной версией Windows 10», программа установки Nvidia может попросту глючить, так, увы, бывает с ней в «Десятке». Вот что может помочь в таком случае:
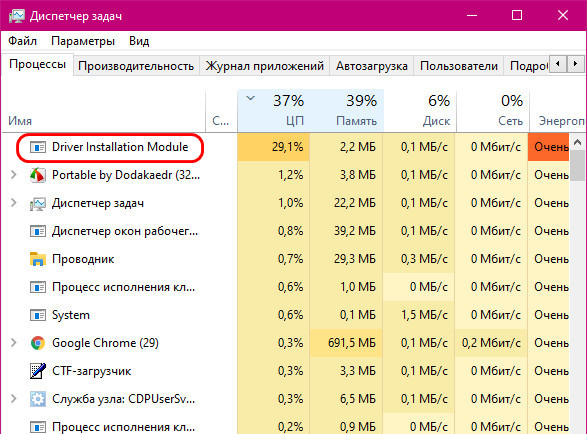
- Попробуйте отключить на время Интернет, возможно, проблему создаёт Windows 10, пытаясь установить видеодрайвер. Если у вас в диспетчере задач активен процесс Driver Installation Module, очень вероятно, что это операционная система пытается сама установить видеодрайвер и, возможно, сталкивается с какими-то проблемами. Либо подождите, пока Windows 10 не разрешит свои вопросы.
- Попробуйте установить другую версию драйвера;
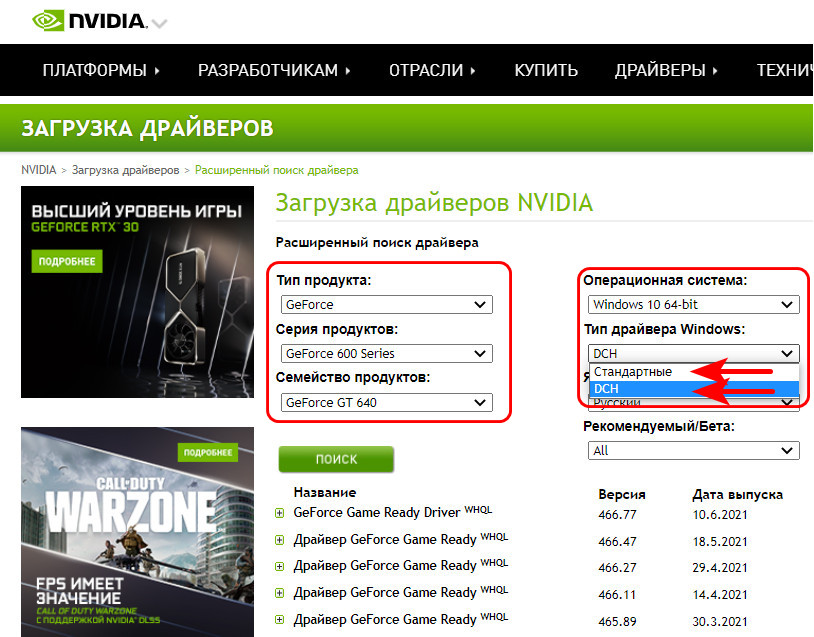
- Ищите драйверы на сайте Nvidia с помощью не обычного, а расширенного поиска. В таком случае у вас для 64-битной Windows 10 будет возможность выбрать тип драйвера – стандартный или DCH. Первый – это обычный видеодрайвер, второй — это видеодрайвер на базе UWP. Они совершенно идентичные по функционалу, но если у вас будет глючить установка одного, возможно, установка другого отработает без проблем;
- Если у вас видеодрайвер установлен, но не хочет обновляться, сделайте на всякий случай точку восстановления Windows 10. Выполните чистую установку нового драйвера, либо удалите имеющийся в системе драйвер в безопасном режиме с помощью программы Driver Uninstaller, как описано в статье «Как удалить драйвера видеокарты Nvidia». После удаления при загрузке системы в обычном режиме сразу же отключите Интернет, чтобы Windows 10 автоматически не установила устаревшую версию драйвера. И устанавливайте ту версию драйвера, что вам надо, сами.
- Если ничто не помогает, остаётся только вариант использования иных механизмов установки или обновления драйверов. Детальнее о них смотрите в статье «Как обновить драйвера на Windows 10».
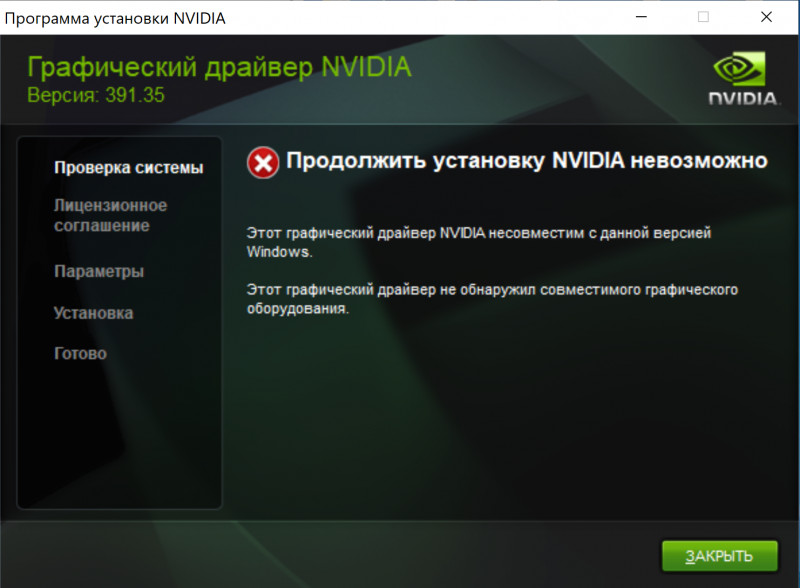
При установке драйвера видеокарты NVIDIA GeForce в Windows 11 и Windows 10, 8.1 или Windows 7 вы можете получить сообщение об ошибке: Продолжить установку NVIDIA невозможно, с поясняющим текстом, который может отличаться в зависимости от сценария появления проблемы.
В этой инструкции подробно о том, почему может не устанавливаться драйвер NVIDIA на компьютере или ноутбуке и как исправить проблему в различных ситуациях.
Содержание
Решение проблемы продолжения установки NVIDIA
При возникновении ошибки Продолжить установку NVIDIA невозможно, обычно отображается пояснение, которое может иметь следующее содержание, в зависимости от ошибки:
- Этот графический драйвер NVIDIA несовместим с данной версией Windows
- Этот графический драйвер не обнаружил совместимого графического оборудования
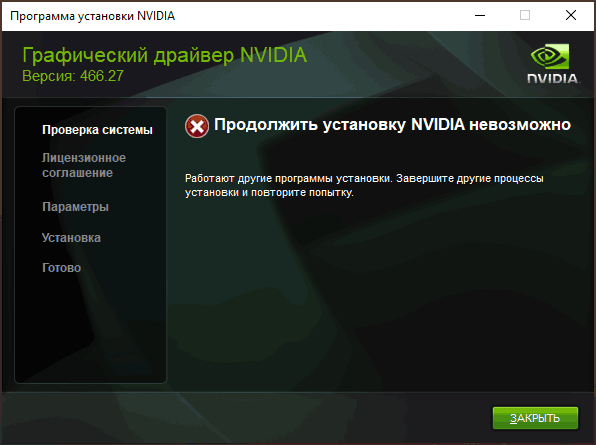
- Работают другие программы установки. Завершите другие процессы и повторите попытку
- Дополнительно вы можете увидеть сообщения на тему «This DCH driver package is not compatible with this version of Windows» или «This Standard NVIDIA graphics driver is not compatible with this version of Windows»
В некоторых случаях эта информация помогает разобраться с сутью проблемы, но не всегда.
Далее рассмотрим нюансы установки драйверов NVIDIA, поговорим о некоторых особенностях разных версий драйверов и разберёмся, как можно исправить ошибку при их установке.
Стандартные и DCH драйверы NVIDIA
Примечание: если драйвер был установлен, но сменился на Базовый видеоадаптер Майкрософт после апгрейда RAM, обновления БИОС или подобных действий, имеющих отношение к оборудованию, прежде чем продолжать, обратите внимание на 2-й пункт в разделе «Дополнительные решения».

Драйверы современных видеокарт NVIDIA GeForce поставляются в двух вариантах — DCH драйверы, которые не установятся на старые версии Windows 10 и предыдущие версии системы, и стандартные драйверы, которые в некоторых случаях не устанавливаются на системы с уже установленными драйверами DCH — часто от производителя ноутбука или автоматически установленные Windows 10.
В этом случае, кроме сообщения о том, что продолжить установку NVIDIA невозможно вы получите упомянутые выше сообщения: «This DCH driver package is not compatible with this version of Windows» или «This Standard NVIDIA graphics driver is not compatible with this version of Windows».
Определить текущий установленный драйвер (при условии, что он установлен) можно следующим способом:
- Открыть панель управления NVIDIA, например, нажав правой кнопкой мыши по рабочему столу и выбрав соответствующий пункт контекстного меню.
- В меню панели управления NVIDIA открыть пункт «Справка» — «Информация о системе».
- Просмотреть информацию в поле «Тип драйвера».


Простое решение для такого случая, которое обычно (но не всегда) работает — скачать драйвер того же типа, который уже установлен. Сделать это можно следующим способом:
- Зайдите на страницу расширенного поиска драйверов NVIDIA https://www.nvidia.com/Download/Find.aspx (она может работать не очень быстро, но знайте: ничего не зависло и должно загрузиться через какое-то время).
- Укажите, для какой видеокарты вам нужен драйвер и для какой операционной системы.
- В поле Windows Driver Type укажите тип драйвера и нажмите кнопку Search (поиск).

- Загрузите нужный вам драйвер нужного типа и попробуйте его установить.

Установка драйверов видеокарты после полного удаления
В простых случаях приведённый выше метод срабатывает, но не всегда. В такой ситуации помимо загрузки желаемых и подходящих драйверов (помним, что не следует скачивать драйверы DCH для старых версий Windows), следует попробовать удалить уже установленные драйверы NVIDIA и лишь после этого попробовать выполнить установку. Удалить можно двумя способами:
- Средствами Windows 11, 10, 8.1 или Windows 7
- С помощью стороннего ПО — Display Driver Uninstaller (DDU)
Первый способ часто срабатывает исправно, поэтому, если вы не хотите обращаться к стороннему софту, можно начать с него (внимание: изображение может пропасть — в этом случае и почти гарантированно будет установлено низкое разрешение):
- Заранее скачайте нужную версию драйвера видеокарты NVIDIA.
- Отключите Интернет на вашем компьютере или ноутбуке для того, чтобы Windows сама не установила драйверы после удаления.
- Откройте диспетчер устройств, для этого можно нажать клавиши Win+R на клавиатуре, ввести devmgmt.msc и нажать Enter, а в Windows 11 или 10 — нажать правой кнопкой мыши по кнопке «Пуск» и выбрать нужный пункт контекстного меню.
- В разделе «Видеоадаптеры» нажмите правой кнопкой мыши по видеокарте NVIDIA, выберите пункт «Удалить устройство», а в следующем окне отметьте пункт «Удалить программы драйверов для этого устройства» и нажмите кнопку «Удалить».
- После этого желательно перезагрузить компьютер и, если у вас автоматически подключается Интернет, не дать ему этого сделать.
- Запустите установку скачанного на 1-м шаге драйвера.
Если предложенный подход не сработал, следующий вариант — использовать Display Driver Uninstaller, лучше — в безопасном режиме, но обычно срабатывает и без этого:
- Скачайте установщик нужного драйвера NVIDIA, чтобы он был на компьютере.
- Скачайте DDU с официальной страницы https://www.guru3d.com/files-details/display-driver-uninstaller-download.html и распакуйте архив.
- Отключитесь от Интернета.
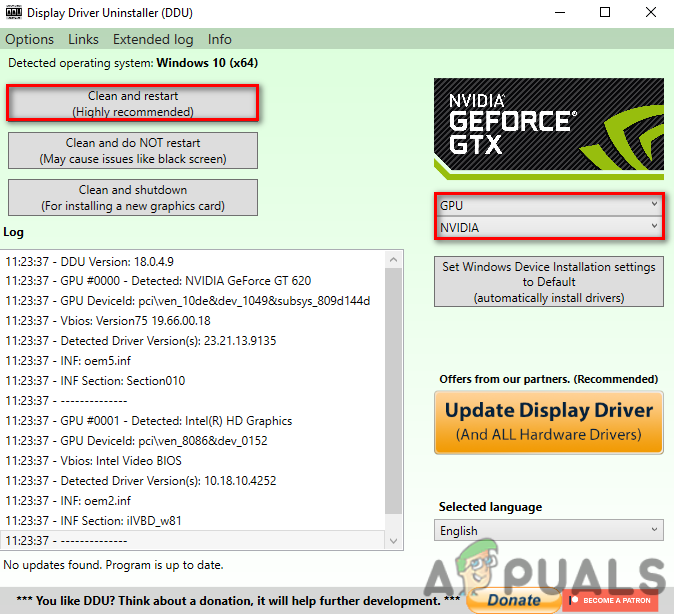
- Запустите DDU и установите параметры как на скриншоте ниже — удаляем драйвер видеокарты, NVIDIA, остальные настройки, как правило, менять не требуется.

- Нажмите «Удалить и перезагрузить».
- После перезагрузки, не подключаясь к Интернету, запустите установку ранее скачанного драйвера NVIDIA.

Если предложенные выше решения не помогли, можно попробовать следующие варианты для различных сценариев появления проблемы «Продолжить установку NVIDIA невозможно», иногда — с указанием на несовместимость с текущей версией Windows, иногда — с другими сообщениями:
- Если это ноутбук или фирменный компьютер, а наличие последней версии драйвера не критично, проверьте, установится ли драйвер видеокарты, доступный на сайте производителя именно для вашей модели ноутбука или ПК (на официальном сайте он может называться VGA Driver).
- Если драйвер «слетел» после обновления оборудования или БИОС, отображается как стандартный видеоадаптер (Базовый видеоадаптер Майкрософт) и драйвер не устанавливается что бы вы не делали, попробуйте такой вариант: откройте диспетчер устройств, нажмите правой кнопкой мыши по видеоадаптеру и выберите «Обновить драйвер». Затем нажмите «Найти драйверы на этом компьютере» — «Выбрать драйвер из списка доступных драйверов на компьютере». Снимите отметку «Только совместимые устройства» и посмотрите, есть ли в списке NVIDIA и драйвер вашей видеокарты. Если есть — попробуйте его установить несмотря на предупреждения.

- Если драйвера в списке нет, попробуйте следующий метод: распакуйте .exe установщик драйвера NVIDIA с помощью архиватора: это точно умеет 7-Zip и, не исключено, что WinRAR. После распаковки, как и в предыдущем случае дойдите до этапа «Выбрать драйвер из списка доступных драйверов на компьютере», нажмите «Установить с диска» и укажите путь к файлу nv_dispi.inf (находится в папке Display.Driver с распакованными драйверами), подтвердите установку драйвера.

- Перед установкой драйвера NVIDIA установите остальные драйверы, в частности: интегрированной графики и, вручную, оригинальные драйверы чипсета и, при наличии — управления электропитанием от производителя устройства. Например, сталкивался с ситуацией, когда драйвер NVIDIA не устанавливался до тех пор, пока не были решены проблемы с устройствами Intel Serial IO в диспетчере устройств.
- Сообщение «Работают другие программы установки» обычно говорит о том, что вы действительно запустили установщик несколько раз, возможно, не дождавшись реакции после первого запуска». Решение — закрыть все процессы NVIDIA Install Application в диспетчере задач, запустить установку заново.

- Случается, что пользователь скачал с сайта NVIDIA драйвер, который действительно разработан не для его видеокарты или операционной системы. Если не уверены — перепроверьте и, при необходимости, загрузите драйвер снова, используя приведённую выше ссылку расширенного поиска драйверов на официальном сайте.


Если один из предложенных вариантов помог исправить проблему и успешно установить драйверы, буду благодарен комментарию с описанием как самой ситуации так и того, какой именно подход оказался работоспособным: возможно, это поможет кому-то ещё.
The error “This Nvidia Graphics Driver Is Not Compatible with This Version of Windows” usually stops users from installing or updating their Nvidia graphics drivers. This issue often occurs after Windows updates, system reinstalls, or when using an old version of Windows.

The error indicates that the Nvidia driver version you are trying to install does not match your current Windows version or type (32-bit vs 64-bit). The most common reason is an outdated Windows version, but it can also happen due to wrong driver versions (DCH vs Standard) or system misconfiguration.
Lets discuss different fixes to solve this error.
1. Reinstall Drivers Using DDU.
Display Driver Uninstaller (DDU) is a tool that completely removes all Nvidia driver files from your system, preventing leftover files or settings from causing problems with a new install.
1.1 Uninstall Using DDU
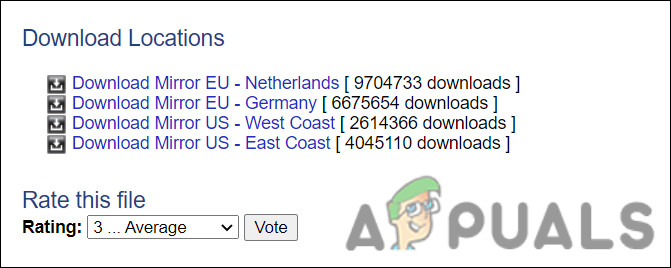
- Go to the DDU download page in your browser.
- Select a download location and download the tool.

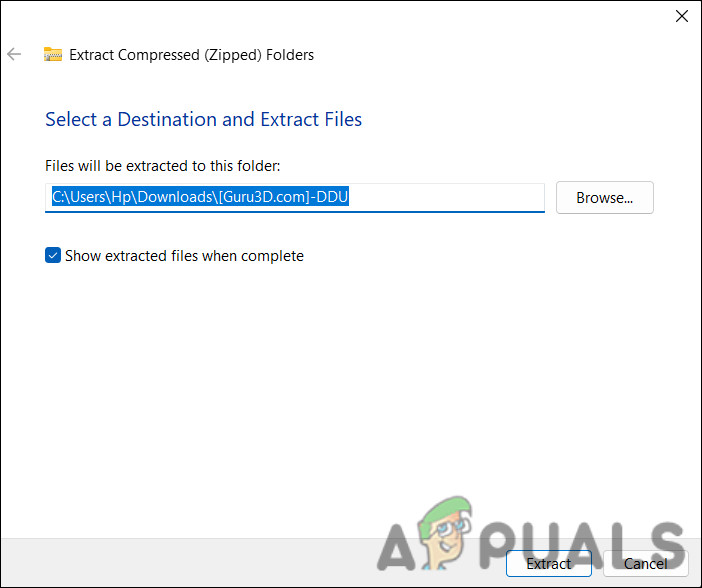
Choose a download location and download the tool - Once the file is downloaded, right-click on it and choose Extract All > Extract.

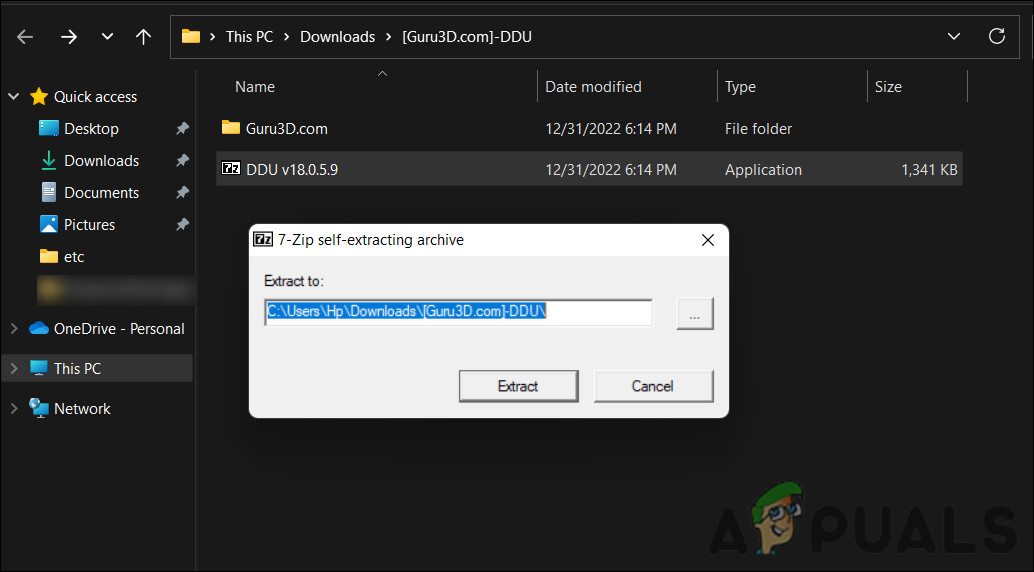
Click on the Extract button - Double-click on DDU.exe and choose Extract.

Click on the Extract button - Press Win + I to open Windows Settings.
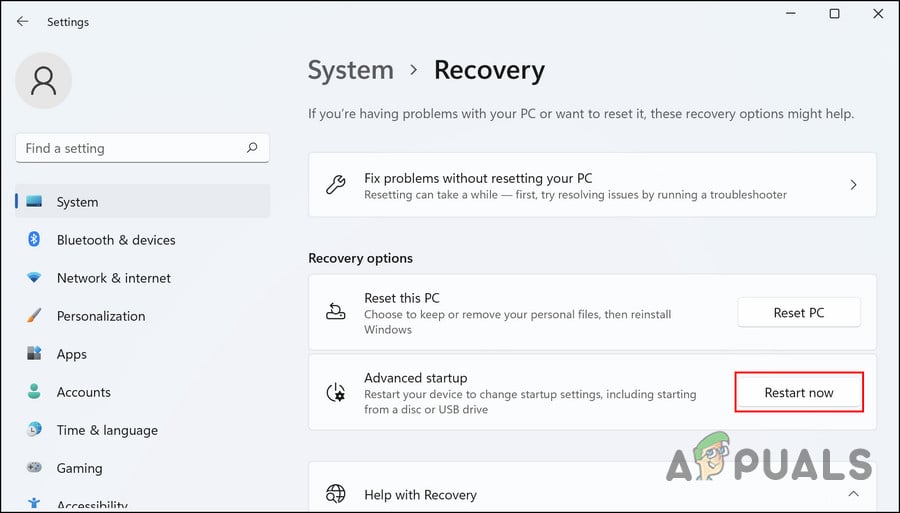
- Navigate to System > Recovery.
- Click the Restart now button under Advanced Startup.

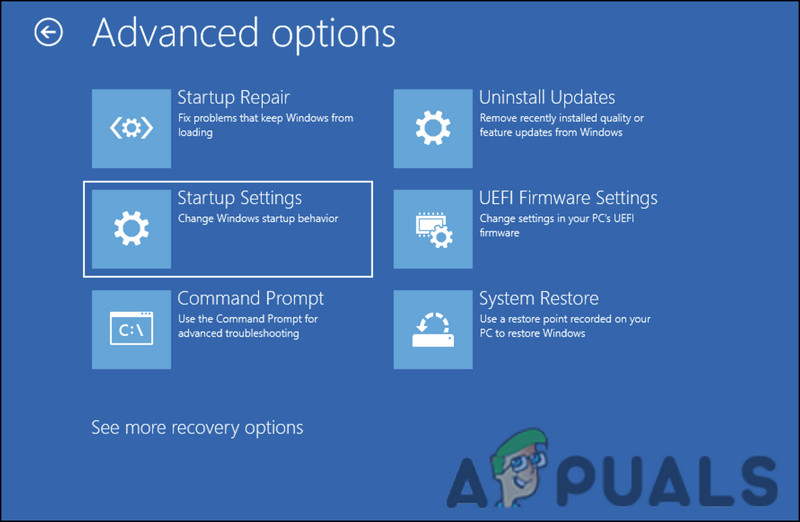
Click on the Restart now button - Once the system boots in WinRE, select Troubleshoot > Advanced options.
- Click on Startup Settings and hit the Restart button.

Launch the Startup settings - Press 4 or F4 on your keyboard to enter Safe Mode.
- In Safe Mode, launch DDU (exe file) and select your preferences.
- Select your GPU manufacturer on the right, then click on Clean and restart.

Click Clean and Restart - After the computer restarts, the problem should be resolved.
1.2. Install Drivers From Nvidia Website.
- Download the latest drivers from Nvidia’s Official Driver Webpage.
- Select the specific model of your Nvidia graphics card and download the latest driver version.


2. Update or Upgrade Your Version of Windows.
Sometimes, ensuring your system is running the latest version of Windows is key to solving compatibility issues. Updating or upgrading Windows is important because some Nvidia drivers only work with newer Windows versions, which support the latest driver standards like DCH.
- Press Windows + I to open Settings.
- Click on Update & Security.

- In the Windows Update tab, click on ‘Check for updates‘.
- Accept the installation of all updates.

- Your PC might restart several times during these updates; do not interrupt it.


3. Use GeForce Experience to Download Your NVIDIA Driver
If manually picking drivers seems difficult, GeForce Experience simplifies the process by automatically finding the right driver for your system. It reduces the risk of installing a driver that doesn’t fit by checking your Windows version and GPU details before downloading the correct one. Using it helps you avoid mistakes like picking the wrong driver version, making installation smoother and preventing compatibility problems.
- Visit the GeForce website here.
- Download and install the GeForce Experience application.

- Make sure your monitor is connected via the NVIDIA GPU if you are using a desktop computer.
- Start GeForce Experience. If prompted, accept the update to prevent issues.
- Click on the “Drivers” tab. Any available driver updates will be shown. You can also manually search by clicking “Check for Updates”.

- When the latest drivers are found, they will be listed. Click on “Custom Install” to open the file. You can choose express installation if you prefer, but this won’t allow you to select installation options.
- The driver file will launch. Make sure to perform a clean install by checking ‘Perform clean install’ in the NVIDIA installation window. Complete the installation.

- Restart your PC.


Kevin Arrows
Kevin Arrows is a highly experienced and knowledgeable technology specialist with over a decade of industry experience. He holds a Microsoft Certified Technology Specialist (MCTS) certification and has a deep passion for staying up-to-date on the latest tech developments. Kevin has written extensively on a wide range of tech-related topics, showcasing his expertise and knowledge in areas such as software development, cybersecurity, and cloud computing. His contributions to the tech field have been widely recognized and respected by his peers, and he is highly regarded for his ability to explain complex technical concepts in a clear and concise manner.
Howdy friends, in this article we will share how to fix the issue “Nvidia Driver Not Compatible With This Version of Windows”. So let’s start…
NVIDIA Graphics is an application that functions so that NVIDIA VGA can run properly.
This application is a driver type. We can install it on all versions of Windows, from Windows XP to Windows 10, although it also depends on the type of VGA you are using.

For how to install it yourself is very easy. I have also discussed this in the article How to Enable NVIDIA VGA some time ago.
So, on this occasion, I want to discuss a little about one of the error messages that usually appear in the NVIDIA Graphics application.
Yup, the message in question is ” not compatible with this version of Windows “.
Table of Contents

Basically, this software already supports all versions of Windows, but why does the not-compatible message appear?
Well, the causes themselves are twofold:
- It is not compatible (does not support the OS).
- There is a big problem.
This error message itself usually appears more often on the new NVIDIA VGA. For example the 1000 series or later.
For older series, it might appear as well. It’s just that it doesn’t happen that often.
Read Also:
- Fix: NVIDIA Control Panel Missing Options On Windows 10
- Fixed: Nvidia Geforce Experience Error Code 0x0001
How to Fix NVIDIA Graphics Not Compatible With This Version of Windows
This error message will certainly make us troublesome. Because VGA can’t run normally. Especially for gaming. 😀
But take it easy, fortunately, there are several solutions we can do to overcome it. Guaranteed we can remove the error message.
Here’s the discussion:
1. Check Windows Version Used (32-bit or 64-bit)
One of the causes of the not-compatible message on the NVIDIA Graphics application is the result of an error in installing the Windows version.
The version in question is the bit. Because as we know, there are two types of Windows, namely 32-bit and 64-bit.
Simply put, if we install the NVIDIA Graphics application on the wrong bit version of Windows, then the impact will result in this not-compatible error message appearing.
How to check this:
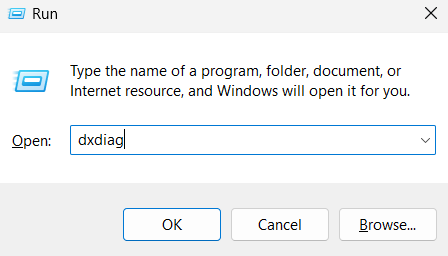
- Click Windows + R.
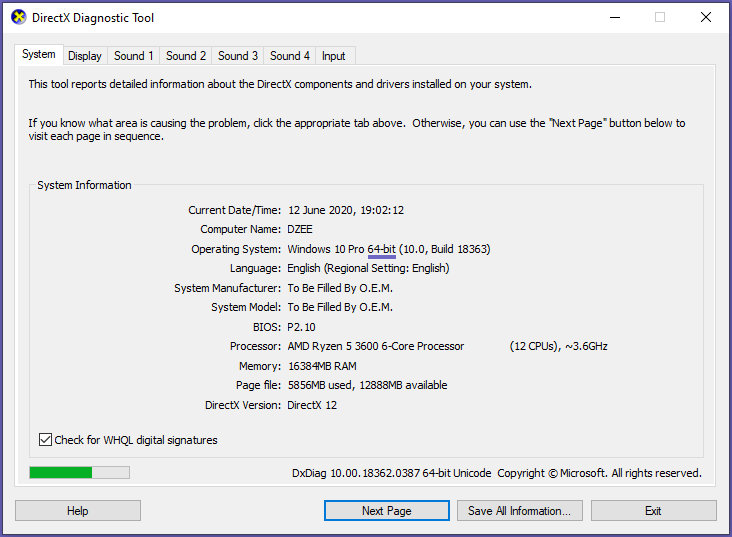
- Type ” DxDiag “, then press Enter.
- If so, check the Windows version.
Next, now also check the NVIDIA application again. If the version is wrong, try downloading again with the correct version of Windows.
2. Check the Windows Build
Maybe most NVIDIA users are also Windows 10 users, huh? Including myself, though. Hehe.
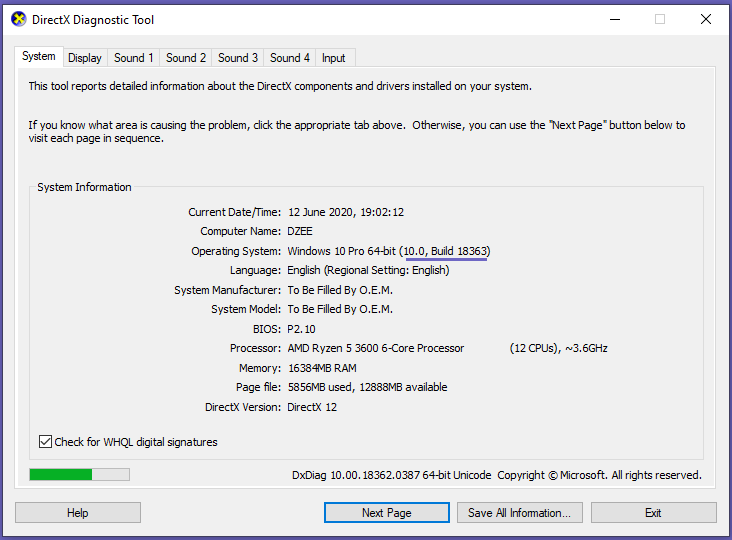
For information, in Windows 10 there is a build. Simply put, this build is an updated version.
To solve the message not compatible NVIDIA on Windows 10, then we have to make sure we build Windows 10 version 1607 (or later is better).
Try checking the version via DxDiag again.
The method is exactly the same as I explained in the previous point.
3. Update Windows to the Latest Version
This method is intended if the Windows build on our computer does not match the recommendations from the NVIDIA application.
Now, for the update itself, it will automatically go directly to the latest version. That way, it’s guaranteed, later this compatible problem can be resolved.
Follow these steps:
- In the search field, type ” Windows Update “.
- Then open the program that appears in the search results.
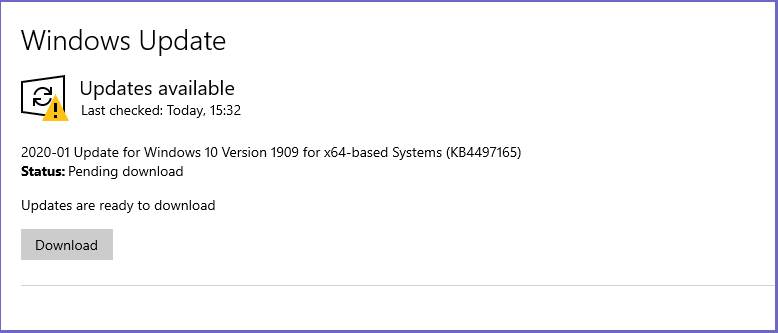
- In the new window, try clicking Check for Updates.
- Wait for the process to complete.
If so, a restart button will appear. Here, please press the button and wait for the reboot to complete.
Read Also:
- How to Fix Nvidia Geforce Experience Error Code 0x0003
4. Hardware Troubleshooting
The source of the problem could also be a hardware incompatibility: as an example, a specific video card model doesn’t work on a specific motherboard model.
These nuances often become public quickly, so information about them can be found on the Internet; just enter a query of the type in any search service:
Needless to say, for this, you must first determine the exact parameters of both teams. You can find the instructions for graphics cards in method 1 above and for the motherboard in the material at the link below.
Compatibility issues can usually be fixed by installing updated BIOS firmware on the board, the GPU, or both components at the same time.
In exceptional cases, not even a firmware update can fix the error. This means that one of the devices is defective.
In this situation, it may be helpful to contact a service center or replace the problem component.
We have the following advice for your future: try to buy components from reputable manufacturers, as this guarantees official and user support.
The Final Word
Now, with the three steps above, the problem with Nvidia Driver Not Compatible With This Version of Windows can be resolved.
But it should be noted, maybe the error conditions will vary on each PC. If it doesn’t work, try sending a more detailed comment about the error you’re experiencing, so I can help later.
May be useful.

Nvidia is considered to be the best available graphics card you can get. Still, there are a few things that you need help with, like the Nvidia graphics driver is not compatible with this version of Windows error. Usually, it appears when you have accidentally downloaded the wrong driver file, or the current driver needs to be updated.
In this post, let us look at how you can fix the Nvidia graphics driver not compatible with this version of Windows error.
All the ways listed below are going to be DIY so make sure you complete all the steps, as this blog is enough to guide you through!
Reasons Behind Nvidia Graphics Driver not Compatible Error
Most users need help to fix the error because they do not know why. Generally, there are three common errors –
1.Error – This graphics driver could not find compatible graphics hardware.
Reason – Your current Windows build platform does not support the downloaded driver.
2. Error – Nvidia installer cannot continue
Reason- You have unknowingly downloaded the wrong driver files.
3. Error – Nvidia graphics driver is not compatible with this version of Windows.
Reason – You are using the obsolete version of Windows.
The best way to fix these errors is to identify which of these three errors has bugged your PC and find an appropriate solution. Let’s look at the solutions you can apply to resolve these errors.
How to Fix the Nvidia graphics driver not compatible with this version of Windows Error?
Fix 1 – Download the Drivers According to Your Windows Architecture
One of the users’ most common mistakes when downloading Nvidia Graphics drivers is not checking the Windows architecture (32-bit or 64-bit). Due to this, incorrect and incompatible drivers are downloaded, thus causing the error – this graphics driver could not find compatible hardware.
When downloading the drivers manually, you need to ensure you know the PC configuration and architecture. The best way to find out more about your PC is to follow the instructions.
- Press Windows + R to bring up the Run search box.
- In the Run Search, use the command dxdiag and hit enter.

- This will open the DirectX diagnostic tool containing all the information about your PC.

- In the opened dialog box, you can find the operating system information and its architecture.
- Once you have figured out whether the system is 64-bit or 32-bit, download the files accordingly.

Once you have done that, find the drivers online for the same and try installing them. This technique should resolve Nvidia driver issues if you have downloaded the wrong drivers for the architecture. In case the error persists, check out the next fix.
Fix 2 – Download the Drivers for Your PC Using Nvidia Experience
If you are unaware of the graphic card model, Nvidia has a tool called Geforce Experience that handles your entire graphic card smoothly. It scans the system for the available graphic card, helps tweak it, and can help find drivers.
Here are the steps you need to follow –
- Go to the official website for Geforce Experience to find the tool.

- Run the tool on your system and navigate to the driver tab.

- This will help update and download the drivers as per the status of your system.
- Follow the installation instructions on the screen, and you will be good to go.


This tool is helpful as it is the official solution for updates. However, the software could be more refined. You may experience a few lags. It works only when you initiate the tool.
If the issue lies in updating your Nvidia graphics, the ideal way is to use an automated driver updater tool like Advanced Driver Updater.

It finishes the job for you and makes it super easy to update your Nvidia graphics drivers as soon as the updates are available. The tool also offers scheduled scanning for outdated drivers.
Read this Advanced Driver Updater Review to learn more!
Fix 3 – Update Windows to Latest Version
Last but not least, many Nvidia drivers have stopped supporting older Windows versions like 7, 8, 8.1, *, and even 10 (earlier editions). If you are using a PC that is configured with a new generation of Nvidia Graphics card but still using the obsolete version of Windows, chances are that the error lies there.
The best way to handle this situation is to look for updates on your Windows PC. To do that, follow the given steps –
- Press Windows + I to open Windows settings.
- Navigate to updates and security options given in the left panel.

- There, you can find the option for Windows Update. Click on Check for updates to find out whether or not new updates are available.

- If there are any updates, download and install them.


Once the updates are made, simply restart your PC and try installing the drivers again. Only this time, there will be no error related to driver compatibility.
Nvidia Graphics Driver Issues FIXED!
These are a few fixes that can help with your Nvidia graphics not compatible with this version of Windows PC error. Use these fixes, and you will indeed find better results. Don’t forget to install Advanced Driver Updater, as it can help keep your drivers functional and helps you stay free of any missing out on driver updates.
That’s all for this post; I hope you found the solution to your problem. Feel free to use the comments section to share your experience. Good luck!
Recommended :
Top Features to Look For in Driver Updater Software
Solved – Driver Power State Failure Error in Windows 10 and 11